
UNIVERSAL PRINT DRIVER
System Administrator’s Guide

HP Universal Print Driver
System Administrator's Guide
Copyright and license
©2009 Copyright Hewlett-Packard
Development Company, L.P.
Reproduction, adaptation or translation
without prior written permission is prohibited,
except as allowed under the copyright laws.
The information contained herein is subject
to change without notice.
The only warranties for HP products and
services are set forth in the express warranty
statements accompanying such products
and services. Nothing herein should be
construed as constituting an additional
warranty. HP shall not be liable for technical
or editorial errors or omissions contained
herein.
Edition 7, 7/2009
Trademark credits
Adobe®, Acrobat®, PostScript®, and the
Acrobat logo® are trademarks of Adobe
Systems Incorporated.
Java™ is a trademark of Sun Microsystems,
Incorporated.
Linux® is a U.S. registered trademark of
Linus Torvalds.
Microsoft®, Windows®, Windows NT®,
Windows® XP, and Windows® Vista are
U.S. registered trademarks of Microsoft
Corporation.
Pentium® is a trademark or registered
trademark of Intel Corporation or its
subsidiaries in the United States and other
countries.
UNIX® is a registered trademark of The
Open Group.

Table of contents
1 Purpose and scope
Introduction ........................................................................................................................................... 1
Conventions used in this guide ............................................................................................................ 3
HP UPD Supported products ............................................................................................................... 4
2 Software description
Introduction ........................................................................................................................................... 9
System requirements ......................................................................................................................... 11
Software availability ............................................................................................................................ 12
Select the best PDL ............................................................................................................................ 12
PCL 6 UPD ........................................................................................................................ 13
PCL 5 UPD ........................................................................................................................ 13
HP PS UPD ....................................................................................................................... 13
3 Plan an HP UPD deployment
The five steps to a successful deployment ......................................................................................... 16
Initiation and planning ........................................................................................................................ 17
Understand your printing requirements and environment .................................................. 17
Determine deployment objectives ..................................................................... 17
Print servers or Direct IP ................................................................................... 17
Identify stakeholders ......................................................................................... 17
Make an inventory ............................................................................................. 17
Consider PDL needs ......................................................................................... 17
Driver considerations ........................................................................................ 18
Pre-configuration, policy and access requirements .......................................... 18
Environment and network compatibility ............................................................. 18
Baseline the system .......................................................................................... 18
Risk management ............................................................................................. 18
Key deployment decisions ................................................................................................. 19
Create a list of required drivers ......................................................................... 19
Choose an installation method .......................................................................... 19
Driver Pre-Configuration ................................................................................... 19
Traditional and dynamic Mode .......................................................................... 20
Manage the HP UPD with MPA or Active Directory Group Policy .................... 20
ENWW iii
Estimate time requirements .............................................................................. 20
Communication and training ............................................................................................................... 22
Training .............................................................................................................................. 22
Conducting a pilot ............................................................................................................................... 22
Testing and Evaluation ....................................................................................................................... 22
Deploy to production .......................................................................................................................... 22
4 Preconfigure the HP UPD
Pre-configure the HP UPD using Install.exe ...................................................................................... 24
Pre-configure the HP UPD using the HP Managed Printing Administrator (MPA) ............................. 24
Pre-configure the HP UPD using the Group Policy Objects in Active Directory ................................. 25
Pre-configure the HP UPD using HP Driver Configuration Utility ....................................................... 27
Pre-configure the HP UPD using HP Driver Deployment Utility (DDU) .............................................. 28
Pre-configuration utilities and configurable functions ......................................................................... 28
5 Install and Uninstall of the HP UPD
Install .................................................................................................................................................. 32
Download and unzip the HP UPD ...................................................................................... 32
Windows client/server: Use the Add Printer Wizard .......................................................... 32
Windows client/server: Use Install.exe .............................................................................. 33
Windows client/server: Use the command prompt ............................................................ 34
Configure default print settings while installing by command prompt
install ................................................................................................................. 34
Duplex .............................................................................................. 35
Economode ...................................................................................... 35
Private printing .................................................................................. 35
Private printing with Pin .................................................................... 36
Edgeline QAC ................................................................................... 36
Available command options .............................................................................. 37
Windows client/server: Use Point and Print ....................................................................... 40
Windows client/server: Use the HP Web Jetadmin Print Queue Creation ......................... 40
Windows Cluster server environment ................................................................................ 40
Alternative install with printer automatic configuration disabled ........................ 41
Windows Terminal Server/Citrix environment .................................................................... 42
Versions of Terminal Server and Citrix supported by HP .................................. 42
Known limitations of the HP UPD when used for auto– created printers or
redirected printers with client printers that are directly attached ....................... 42
Novell ................................................................................................................................. 43
Install the HP UPD in a Novell environment ...................................................... 43
NDPS ................................................................................................................ 44
Plug and play installation ................................................................................................... 44
Hardware first installation .................................................................................. 45
Software first (unattended) installation .............................................................. 45
iv ENWW
Uninstall the HP UPD ......................................................................................................................... 45
6 HP UPD Administrative features
HP UPD 5.0 Features ......................................................................................................................... 48
Printing to unsupported products enabled by default ........................................................ 48
Installation to allow HP UPD version control ..................................................................... 48
Create and edit shortcuts with the HP Driver Configuration Utility ................................... 48
Custom media types recognized by the HP UPD .............................................................. 49
Username added to watermark selections ........................................................................ 49
HP EasyColor .................................................................................................................... 49
Global per machine policy management ........................................................................... 49
HP UPD 4.7 Features ......................................................................................................................... 50
Manually configure product settings .................................................................................. 50
Pinless private printing ....................................................................................................... 50
Job separator page ............................................................................................................ 51
Web Jetadmin language monitor support .......................................................................... 51
Eco-Print (Two-sided printing) shortcut ............................................................................. 52
Cache printer settings ........................................................................................................ 52
Job storage and PIN printing .............................................................................................................. 52
How the HP UPD works with job storage .......................................................................... 52
Access and configure the job storage feature. .................................................................. 52
Pre-configure job storage capabilities ................................................................................ 53
Modify HP UPD using Install.exe ....................................................................................................... 54
Printer Automatic Configuration ......................................................................................................... 55
Device Automatic Configuration defined ............................................................................ 55
Automatic Printer Configuration status .............................................................. 55
User Interface .................................................................................................... 56
Command line interface .................................................................................... 58
Disabling Printer Automatic Configuration ......................................................................... 59
Benefits Comparison ......................................................................................................... 59
Automatic configuration enabled ....................................................................... 60
Automatic configuration disabled ...................................................................... 60
Default capabilities without automatic configuration ......................................... 60
Steps to disable the Printer Automatic Configuration ........................................ 61
Communication protocols .................................................................................................. 62
Printer Automatic Configuration services ........................................................................... 62
Steps to Disable ................................................................................................ 62
Steps to Remove ............................................................................................... 62
Symptoms when Printer Automatic Configuration fails ...................................................... 63
Troubleshooting ................................................................................................................. 63
1. Can the HP UPD print to the target device? ................................................. 63
2. Is the HP UPD printer defined with Printer Auto Configuration enabled? ..... 63
3. After running "Update Now" were expected results returned? ...................... 64
ENWW v
4. What is the physical connection method between the HP UPD installed
printer and the target printing device? ............................................................... 64
5. Troubleshoot network connection/port .......................................................... 64
6. Distinguish if target product is communicating bidirectional for printer auto
configuration via HTTP or SNMP? .................................................................... 65
7. Install and test a new print queue? ............................................................... 65
FAQ ................................................................................................................................... 66
7 Use HP Universal print drivers
Introduction ......................................................................................................................................... 69
Use the HP UPD ................................................................................................................................ 70
Universal print driver modes .............................................................................................. 70
Traditional mode ............................................................................................... 70
Dynamic mode .................................................................................................. 70
Configure HP UPD dynamic mode settings ....................................................................... 70
Change the settings for the HP UPD ................................................................................. 71
Change General HP UPD settings .................................................................... 71
Change Device Verification settings (number 5 on ) ......................................... 72
Change driver properties (print job preferences) ............................................................... 72
Change driver properties while printing ............................................................. 72
Change driver properties from the Printers and Faxes folder ........................... 73
Help ................................................................................................................................... 73
Print using the HP UPD ...................................................................................................................... 73
Print using the HP UPD in dynamic mode ......................................................................... 74
Dynamic mode options – Default configuration ................................................. 74
Use dynamic mode ........................................................................................... 75
Select a recently used printer (number 1 on ) ................................................... 75
Find a printer (number 3 on ) ............................................................................ 75
Enter a print address ........................................................................ 76
Search for network printers .............................................................. 76
Search for print shares ..................................................................... 77
Print using the HP UPD in traditional mode ....................................................................... 77
Add a printer to the Printers and Faxes folder .................................................................................... 77
Add a printer to the Printers folder using the dynamic mode user interface. ..................... 78
Add a printer to Printers and Faxes folder from within Printers and Faxes folder ............. 78
Organize the Recently Used Printers list ........................................................................... 78
8 Manage the HP UPD using HP Managed Print Administration (MPA) and Active Directory Group Policy
Manage the HP UPD using HP MPA ................................................................................................. 82
Introduction ........................................................................................................................ 82
MPA version information .................................................................................................... 82
Supported HP MPA versions ............................................................................ 82
Supported environments for managing the HP UPD ......................................................... 82
vi ENWW
Install and uninstall the HP MPA software ......................................................................... 83
HP MPA software requirements ........................................................................ 83
Software availability .......................................................................................... 83
Install the HP MPA software ............................................................................. 84
Back up the HP MPA software .......................................................................... 84
Uninstall the HP MPA software ......................................................................... 84
Uninstall HP MPA using HP Managed Printing Admin Setup
Wizard .............................................................................................. 84
Uninstall HP MPA using Add/Remove Programs ............................. 85
Access HP MPA ................................................................................................................ 85
Classic interface ................................................................................................ 85
Graphic interface ............................................................................................... 86
Use Managed Printer Policies (MPPs) .............................................................................. 89
Create a new MPP ............................................................................................ 90
UseMode settings ............................................................................. 91
Default Print settings ........................................................................ 93
Color Access settings ....................................................................... 95
User Search capabilities ................................................................... 97
Status & Supplies Notification settings ............................................. 98
Basic MPP settings ......................................................................... 100
Update an MPP .............................................................................. 101
Edit an existing MPP ....................................................................................... 102
Duplicate an existing MPP .............................................................................. 102
Associate MPLs with an MPP ......................................................................... 102
Associate user groups with an MPP ............................................................... 103
Remove an existing MPP ................................................................................ 104
Use Managed Printer Lists (MPLs) .................................................................................. 104
Create a new MPL .......................................................................................... 105
Auto printer discovery ..................................................................... 106
Manual printer entry ........................................................................ 109
Edit an existing MPL ....................................................................................... 112
Associate an MPL with an MPP ...................................................................... 112
Duplicate an existing MPL ............................................................................... 112
Manage the MPL view ..................................................................................... 113
Select a view .................................................................................. 113
Advanced view settings .................................................................. 118
Manage virtual printers .................................................................................... 119
Create a new virtual printer ............................................................ 120
Edit existing virtual printer .............................................................. 120
Remove an existing MPL ................................................................................ 120
Remove printers from an MPL ........................................................................ 121
Use User Groups ............................................................................................................. 121
Create a new user group ................................................................................. 121
Edit an existing user group .............................................................................. 122
ENWW vii
Associate a user group with a MPP ................................................................ 122
Remove a user group ...................................................................................... 122
Manage Active Directory Group Policy with the HP UPD using HP Active Directory
Templates ......................................................................................................................................... 123
Supported HP UPD versions ........................................................................................... 123
Use HP Active Directory Group Policy versus HP MPA to manage HP UPD
policies ............................................................................................................................. 123
Install the HP UPD Active Directory Administrative template .......................................... 123
Install template on Windows Server 2003 and Server 2008 using Microsoft
Group Policy Management Console (GPMC) ................................................. 123
Remove the HP UPD Administrative template ................................................ 124
Upgrade the HP UPD Administrative template ............................................... 124
Enable Active Directory Group Policy for HP UPD Active Directory
Administrator Template for a new or existing HP UPD installation ................. 124
For new installations of the HP UPD when an HP Active Directory
Template is installed ....................................................................... 125
For existing installations of the HP UPD ......................................... 125
Configure policies with the HP UPD Active Directory Administrative
template .......................................................................................................... 125
UseMode settings ........................................................................... 125
Default Print Settings ...................................................................... 128
Color access control ....................................................................... 129
User Search Capabilities ................................................................ 130
Status Notification Pop-ups ............................................................ 130
Job Accounting ............................................................................... 131
Job Delivery .................................................................................... 131
MPP Information Settings ............................................................... 132
Managed Printer List settings ......................................................... 133
Implement Managed Printer Lists (MPLs) within the HP UPD Active Directory
template file ..................................................................................................... 133
Verification and troubleshooting ...................................................................... 134
Functional test ................................................................................ 134
Registry population ......................................................................... 134
Final test ......................................................................................... 135
Appendix A Manage Status Notification Pop–ups
Description and benefits ................................................................................................................... 138
How the SNP works ......................................................................................................................... 138
SNP default behavior ....................................................................................................................... 138
HP Special Offers Program .............................................................................................................. 138
Use Device Settings tab in the property page to enable or disable SNP ......................................... 140
Use the pop-up window to enable/disable SNP ............................................................................... 141
Manage the SNP with the HP Driver Configuration Utility ................................................................ 141
Manage SNP with HP Managed Printing Administration (MPA) ...................................................... 142
viii ENWW
Manage SNP through the command prompt install (Install.exe) ...................................................... 142
Manage SNP through registry settings ............................................................................................. 142
Appendix B Frequently Asked Questions
Driver installation and configuration ................................................................................................. 146
Driver Policy ..................................................................................................................................... 149
Operating system ............................................................................................................................. 150
Versioning ........................................................................................................................................ 151
Appendix C HP UPD Deployment Worksheet
General Information .......................................................................................................................... 154
Port and protocol information ........................................................................................... 154
Print server environment .................................................................................................................. 155
Print server information .................................................................................................... 155
Goal ................................................................................................................................. 156
Set up new server that has new queue names ............................................... 156
Point and Print Client Information .................................................................................... 157
Direct IP printing ............................................................................................................................... 158
General client information ................................................................................................ 158
Goal ................................................................................................................................. 158
Upgrade-Drivers: ............................................................................................................. 159
Upgrade-Settings configuration ....................................................................................... 159
HP UPD/MPA/AD Customized Options ........................................................................... 159
Appendix D HP UPD Deployment Flowcharts
Start .................................................................................................................................................. 162
Choose PDL: (PCL 5, PCL 6 or PS) ................................................................................ 162
Citrix environment ............................................................................................................ 163
Novell environment .......................................................................................................... 163
Microsoft Windows Print Server ....................................................................................... 163
Direct IP Printing .............................................................................................................. 163
Client Driver deployment and Software Distribution Systems ......................................... 164
Update server/replace server ........................................................................................................... 165
Client printing ................................................................................................................................... 167
Policy ................................................................................................................................................ 169
Add/new queues ............................................................................................................................... 171
Create queues .................................................................................................................................. 173
Ports and protocols .......................................................................................................................... 176
Replace drivers ................................................................................................................................ 178
Versioning of printer driver shared files ............................................................................................ 179
Automating the process through scripting ........................................................................................ 182
Appendix E Glossary of terms
ENWW ix
Appendix F Support information to collect
1) Symptoms .................................................................................................................................... 187
2) Printer driver ................................................................................................................................. 187
3) Environment specifications .......................................................................................................... 188
4) Printer information ........................................................................................................................ 190
5) Application .................................................................................................................................... 191
6) Files to collect .............................................................................................................................. 191
Index ................................................................................................................................................................. 193
x ENWW

1 Purpose and scope
Introduction
This system administrator's guide provides information about the HP Universal Print Driver (HP UPD)
software.
This guide is distributed in an electronic format to serve as a quick-reference tool for information
technology (IT) administrators, Customer Care Center (CCC) agents, support engineers, system
administrators, management information systems (MIS) personnel, and printer users.
This guide includes the following information:
●
Procedures for installing and uninstalling software components, including command line
configuration and installation of the HP UPD.
●
Descriptions of the HP Universal Print Driver (HP UPD), and the features, benefits, use and
management of the HP UPD.
●
Descriptions of the HP Managed Print Administration (MPA) software, including Managed Printer
Policies (MPPs) and Managed Printer Lists (MPLs). Used by administrators to configure and
manage the HP UPD.
●
Descriptions of the HP Active Directory Template used to manage the HP UPD.
The following table describes the structure of this System Administrator's Guide.
Table 1-1 HP Universal Print Driver System Administrator's Guide overview
Chapter Content
Chapter 1, Purpose and scope This chapter describes the focus and intent of this system administrator's guide,
including the conventions in this description, and the hardware to which this guide
pertains.
Chapter 2, Software description This chapter describes the HP UPD software, including the software requirements
for installing the HP UPD and software availability. This chapter also describes the
different driver versions (HP PCL 6, HP PCL 5, and HP PS emulation), their
specific purposes, and the modes for installing these HP UPD versions.
Chapter 3, Plan an HP UPD deployment This chapter provides information for planning and deploying the HP UPD in your
environment.
Chapter 4, Preconfigure the HP UPD This chapter includes information about the methods for preconfiguring the
HP UPD.
●
Preconfigure the HP UPD.
◦
Using Install.exe
◦
Using the HP Managed Printing Administrator (MPA)
ENWW Introduction 1

Chapter Content
◦
Using Group Policy Objects in Active Directory
◦
Using Driver Configuration Utility (DCU)
◦
Using HP Driver Deployment Utility (DDU)
●
Pre-configuration utilities and configurable functions
Chapter 5, Install and uninstall of the HP
UPD
This chapter provides instructions for installing and uninstalling of the HP UPD in
dynamic and traditional mode.
Chapter 6, HP UPD Administrative features This chapter describes configuration features for the HP UPD.
●
HP UPD 5.0 Features
●
HP UPD 4.7 Features
●
Job storage and PIN printing
●
Modify HP UPD using Install.exe
●
Printer Automatic Configuration
Chapter 7, Use HP Universal print drivers This chapter includes information about using the HP UPD
●
Use the HP UPD
●
Print using the HP UPD
●
Add a printer to the Printers and Faxes folder
Chapter 8, Manage the HP UPD using
HP Managed Print Administration (MPA)
and Active Directory Group Policy
●
Manage the HP UPD using HP MPA
●
Manage Active Directory Group Policy with the HP UPD using HP Active
Directory Templates
Appendix A–Manage SNP Pop-ups This appendix provides information for managing Status Notification Pop–ups.
Appendix B–Frequently Asked Questions This appendix provides answers to common questions regarding the HP UPD.
Appendix C–HP UPD Deployment
Worksheet
This appendix provides an worksheet containing HP UPD deployment line items.
Appendix D–HP UPD Deployment
Flowcharts
This appendix contains flowcharts describing deployment of the HP UPD.
Appendix E–Glossary of terms This appendix contains explanations of commonly used terms in reference to the
HP UPD.
Appendix F–Support information to collect This appendix contains a list of support related questions for troubleshooting HP
UPD issues.
For more information about the location of information within these chapters, see the table of contents.
An index is provided in the back of this guide.
Table 1-1 HP Universal Print Driver System Administrator's Guide overview (continued)
2 Chapter 1 Purpose and scope ENWW

Conventions used in this guide
This guide uses the following conventions:
●
Keyboard keys appear in colored font. For example, Press the Shift key.
●
Directory paths, file names, and file extensions appear in user-interface (UI)-specific font. File
names and file extensions appear in uppercase.
For example, Find the SAMPLE.TXT file in the C:\Temp directory
●
Menu names, field names, and options to select display in bold type.
For example, On the File menu, click New.
●
Windows©, screens, and panels display in bold type.
For example, The Job Manager window displays.
●
References to other sections in this guide are underlined.
For example, For more information, see
Software description on page 9.
ENWW Conventions used in this guide 3

HP UPD Supported products
For an updated list of supported products, see the following Web site.
www.hp.com/go/upd
Table 1-2 products supported by HP UPD and HP MPA
HP printer/MFP Plug and play HP UPD PDL Support
HP LaserJet/Color LaserJet (network
and direct-connect)
CM1015 MFP Yes PCL5, PCL6, PS
1200 series No PCL5, PCL6, PS
1300 series No PCL5 ONLY
CM1312 MFP series Yes PCL5, PCL6, PS
1320 series Yes PCL5 ONLY
CP1510 series Yes PCL5, PCL6, PS
M1522 MFP series Yes PCL5, PCL6, PS
P2015 series Yes PCL5, PCL6, PS
CP2020 series Yes PCL5, PCL6, PS
P2030 series Yes PCL5 ONLY
P2050 series Yes PCL5, PCL6, PS
2100 series No PCL5 ONLY
2200 series No PCL5, PCL6, PS
2300 series No PCL5, PCL6, PS
CM2320 MFP series Yes PCL5, PCL6, PS
2400 series Yes PCL5, PCL6, PS
2500 series No PCL5, PCL6, PS
2550 series Yes PCL5, PCL6, PS
2605 series Yes PCL6, PS ONLY
2700 series Yes PCL6, PS ONLY
M2727 MFP series Yes PCL5, PCL6, PS
P3005 series Yes PCL5, PCL6, PS
3015 AiO No PCL5 ONLY
3020 AiO series No PCL5, PCL6, PS
M3027 MFP series Yes PCL5, PCL6, PS
3030 AiO series No PCL5, PCL6, PS
M3035 MFP series Yes PCL5, PCL6, PS
3050 AiO Yes PCL5, PCL6, PS
4 Chapter 1 Purpose and scope ENWW

HP printer/MFP Plug and play HP UPD PDL Support
3052 AiO No PCL5, PCL6, PS
3055 AiO No PCL5, PCL6, PS
3200 AiO series No PCL5, PCL6, PS
3300 MFP series No PCL5, PCL6, PS
3390 AiO Yes PCL5, PCL6, PS
3392 AiO Yes PCL5, PCL6, PS
CP3505 series Yes PCL5, PCL6, PS
CP3520 series Yes PCL5, PCL6, PS
CM3530 MFP series Yes PCL5, PCL6, PS
3700 series No PCL5, PCL6, PS
3800 series No PCL5, PCL6, PS
4000 series No PCL5, PCL6, PS
CP4005 series Yes PCL5, PCL6, PS
P4014 series Yes PCL5, PCL6, PS
P4015 series Yes PCL5, PCL6, PS
4050 series No PCL5, PCL6, PS
4100 series No PCL5, PCL6, PS
4100mfp No PCL5, PCL6, PS
4200 series No PCL5, PCL6, PS
4240 series No PCL5, PCL6, PS
4250 series No PCL5, PCL6, PS
4300 series No PCL5, PCL6, PS
4345mfp series No PCL5, PCL6, PS
M4345 MFP series Yes PCL5, PCL6, PS
M4349 MFP series Yes PCL5, PCL6, PS
4350 series No PCL5, PCL6, PS
4500 series No PCL5, PCL6, PS
P4510 series Yes PCL5, PCL6, PS
4550 series No PCL5, PCL6, PS
4600 series No PCL5, PCL6, PS
4610 series No PCL5, PCL6, PS
4650 series No PCL5, PCL6, PS
4700 series Yes PCL5, PCL6, PS
4730 MFP series Yes PCL5, PCL6, PS
Table 1-2 products supported by HP UPD and HP MPA (continued)
ENWW HP UPD Supported products 5

HP printer/MFP Plug and play HP UPD PDL Support
CM4730 MFP series Yes PCL5, PCL6, PS
5000 series No PCL5, PCL6, PS
M5025 MFP series Yes PCL5, PCL6, PS
M5035 MFP series Yes PCL5, PCL6, PS
5100 series No PCL5, PCL6, PS
5200 series Yes PCL5, PCL6, PS
5500 series No PCL5, PCL6, PS
5550 series Yes PCL5, PCL6, PS
CP6015 series Yes PCL5, PCL6, PS
CM6030 MFP series Yes PCL5, PCL6, PS
CM6040 MFP series Yes PCL5, PCL6, PS
CM6049 MFP series Yes PCL5, PCL6, PS
8000 series No PCL5, PCL6, PS
CM8050 Color MFP with Edgeline
Technology
Yes PCL5, PCL6, PS
CM8060 Color MFP with Edgeline
Technology
Yes PCL5, PCL6, PS
8100 series No PCL5, PCL6, PS
8150 series No PCL5, PCL6, PS
8150mfp series No PCL5, PCL6, PS
9000 series No PCL5, PCL6, PS
9000mfp series No PCL5, PCL6, PS
9040 series Yes PCL5, PCL6, PS
9040mfp series Yes PCL5, PCL6, PS
M9040 MFP series Yes PCL5, PCL6, PS
9050 series Yes PCL5, PCL6, PS
9050mfp series Yes PCL5, PCL6, PS
M9050 MFP series Yes PCL5, PCL6, PS
M9059 MFP series Yes PCL5, PCL6, PS
9055mfp No PCL5, PCL6, PS
9065mfp No PCL5, PCL6, PS
9500 series No PCL5, PCL6, PS
9500mfp series No PCL5, PCL6, PS
HP Business Inkjet/Officejet (network
only)
Table 1-2 products supported by HP UPD and HP MPA (continued)
6 Chapter 1 Purpose and scope ENWW

HP printer/MFP Plug and play HP UPD PDL Support
2250 series No PCL5, PS ONLY
2280 series No PCL5, PS ONLY
2300 series No PCL5, PS ONLY
2600 series No PCL5, PS ONLY
2800 series No PCL5, PS ONLY
3000 series No PCL5, PS ONLY
9100 series all-in-one No PCL5, PS ONLY
Table 1-2 products supported by HP UPD and HP MPA (continued)
ENWW HP UPD Supported products 7
8 Chapter 1 Purpose and scope ENWW

2 Software description
Introduction
The HP Universal Print Driver helps eliminate driver chaos in your print environment by dramatically
reducing the number of drivers needed. Broad compatibility ensures it works with many HP print
products, often reducing driver use to a single driver.
●
The HP Universal Print Driver works well with a broad range of networked and direct-connected
HP LaserJet and Edgeline print products using PCL 5, PCL 6 or postscript emulation. HP products
share state-of-the-art technology, allowing the HP Universal Print Driver to support complex
capabilities across many HP products, making them easier to use, support, certify and deploy.
●
The HP Universal Print Driver offers optional dynamic mode, in addition to traditional mode, to
enhance mobile printing. Dynamic mode locates network printers where you are, or you can enter
a printer name or address and print anywhere on your network. It's great when you're on the road
or want to print to a new product. Traditional mode is just like a traditional driver. Both modes can
be used on the same PC to allow you to print what you want no matter where you are.
●
Local language drivers available in 35 spoken languages.
●
You can rely on the HP Universal Print Driver to perform because it's built on the same technology
we've been using in our product-specific drivers for years.
Easy management tools help meet your unique needs.
HP provides tools and services to customize and manage drivers and printers, so you choose driver
capabilities that best suit your unique environment, from managing print queues and color use, to
ensuring secure printing for sensitive documents.
●
Create print queues and update drivers on remote systems from one location via HP Web Jetadmin.
●
Color access control allows you to determine who uses color and when.
●
Print private documents securely with or without a PIN.
●
Help make your printing environment and your printers more secure.
●
Create, import and modify Managed Printer Lists for mobile users in remote offices or on the road.
Helps reduce paper use and save money.
●
The HP Universal Print Driver's new Eco Print short cut has two-sided printing enabled, making it
easier to reduce paper use.
●
The HP Managed Printing Administration and Active Directory templates support a variety of policy
controls that can help your company lessen its impact on the environment and save money via
ENWW Introduction 9
your HP LaserJet and Edgeline print products. The Duplex Default setting reduces paper use and
Edgeline Quality Modes Control ensures the right print quality is pre-set for HP Edgeline MFPs.
Helps increase productivity, reduce support calls.
●
The HP Universal Print Driver enables advanced functions on all the printers it supports--from two-
sided printing and stapling to Private (PIN) Printing and color themes--so users are not held up or
held back by a lack of advanced print features.
●
The HP Universal Print Driver supports PCL 5, PCL 6 and postscript emulation printer languages.
●
By providing real-time print job and print product information, the HP Universal Print Driver
empowers you to resolve common problems yourself and place fewer calls to the help desk. This
can mean faster problem resolution, improved printer uptime, and increased productivity.
New Features
The following are the new features of the HP UPD 5.0.
●
HP EasyColor technology
●
HP UPD version control using an Install.exe switch
●
Ability to create/delete/modify shortcuts in the driver using driver preconfiguration tools.
●
Recognizes user-defined media types
●
Choose "username" as a default watermark
●
Enable printing to HP UPD unsupported products
The following were new features of the HP UPD 4.7.2. (Off-cycle limited release. Refer to driver release
table.)
●
Tower Tray support added
●
Form-to-tray assignments are retained in upgrades
●
Removed "User Guide" printing shortcut
●
Performance improvements for PCL6 through Delta Row Compression and JPEG "pass through”
The following were the new features of the HP UPD version 4.7.
●
Ability to turn off automatic configuration ("printer auto-configuration")
●
Pinless private printing
●
Support for job separator pages
●
Support for HP Web Jetadmin local product status
●
New Eco-print shortcut added to Printing Shortcuts tab (enables two-sided printing)
●
Status Notification Pop-ups can be enabled/disabled from the Device Settings tab
●
Status Notification Pop-ups are disabled by default for enterprise environments
10 Chapter 2 Software description ENWW

●
HP UPD version control using the Add Printer Wizard
●
Users who do not have administrator rights on their workstation can add printers to their
Printers folder in dynamic mode
Available PDLs
The HP UPD is available in three Page Description Languages (PDLs).
●
HP PCL 6
●
HP PCL 5
●
HP postscript level 2 and level 3 emulation
Topics:
●
System requirements
●
Software availability
●
Select the best PDL
System requirements
The following are the minimum system requirements for HP UPD 5.0.
Client operating systems supported:
●
Microsoft Windows Vista Business, Enterprise, Home Basic, Home Premium, and Ultimate; x86
and x64
●
Microsoft Windows XP (SP2 and later) Home Edition, and Professional; x86 and x64
●
Microsoft Windows 7 Starter, Home Premium, Professional, Enterprise, and Ultimate; x86 and x64
(Windows 7 Logo Program tested, Windows 7 Release Candidate 1, build 7100)
Server operating systems supported:
●
Microsoft Windows Server 2008 Datacenter (SP1), Enterprise and Standard Editions
◦
Architectures: x86 and x64
◦
Services: Terminal Server, Cluster Server
●
Microsoft Windows Server 2003 (SP1 and later) Datacenter, Enterprise, and Standard Editions
◦
Architectures: x86 and x64
◦
Services: Terminal Server, Cluster Server
●
Citrix Presentation Server 4.0 and 4.5
●
Citrix XenApp 5.0
●
Novell NetWare 6.5 SP7
●
Novell iPrint Client for Windows 5.12
ENWW System requirements 11

●
Novell iPrint Client for Windows Vista 5.08
●
Novell iManager 2.7
HP UPD can be used independently of the HP MPA software. For network administrators,
HP recommends HP MPA software.
Requirements for MPA Software
●
Supported Operating Systems
◦
Microsoft Windows XP
◦
Microsoft Windows XP x64
◦
Microsoft Windows Server 2003 (32-bit and 64-bit)
●
Supported Internet Browsers
◦
Internet Explorer 6.0
●
IIS Internet Information Systems. Versions provided by the following OSs.
◦
Windows XP
◦
Windoes Server 2003
●
Java JRE (Runtime Environment, required for graphical views) version 1_5_0_9 and newer. The
latest version is available at the following website:
www.java.com/en/download/index.jsp.
Software availability
The HP Universal Print Driver version 5.0 is available in the following languages:
Table 2-1 HP UPD supported languages
Arabic Bulgarian Catalan Croatian
Czech Danish Dutch English
Estonian Finnish French German
Greek Hebrew Hungarian Italian
Japanese Korean Latvian Lithuanian
Norwegian Polish Portuguese (Brazilian) Romanian
Russian Serbian (Latin) Simplified Chinese Slovak
Slovenian Spanish Swedish Thai
Traditional Chinese Turkish Ukrainian
Select the best PDL
HP recommends the HP UPD when printing to multiple printer models or from a mobile Microsoft
Windows computer. In an enterprise or managed print server environment, the HP UPD is the preferred
driver to multiple printer models in either a traditional or dynamic print environment.
12 Chapter 2 Software description ENWW

The HP UPD is available in three page description languages (PDLs). See the following topics for more
information about choosing the best PDL for your printing needs.
Topics:
●
PCL 6 UPD
●
PCL 5 UPD
●
HP PS UPD
PCL 6 UPD
The PCL 6 Universal Print Driver provides the best overall performance, print quality, and printer-feature
support for most users. The driver aligns with Microsoft Windows graphic device interface (GDI) for the
best performance in Microsoft Windows environments.
NOTE: Third party solutions are integrated products that are designed, developed, and sold by
companies that target specific business printing needs. Environments with third party solutions in place
or under consideration should contact their providers for advice and guidance about their driver
selection.
For more information about third party solutions, see
www.hp.com/go/gsc.
PCL 5 UPD
HP recommends the PCL 5 Universal Print Driver for general office monochrome printing in Microsoft
Windows environments. The driver is compatible with previous versions of PCL and legacy HP LaserJet
printers.
The PCL 5 Universal Print Driver is the best choice for any third party or home-grown custom solutions
that use forms, fonts, and SAP programs.
HP PS UPD
HP recommends the HP PS UPD for printing from Adobe or other graphics-rich software programs. The
driver is compatible with postscript level 2 and level 3, and supports Adobe PostScript interpreter DIMM.
Use the HP PS UPD in primarily postscript-specific software programs, such as Adobe and Corel.
NOTE: If the HP UPD is used to print to an unsupported product, HP recommends using the HP PS
UPD for best print results.
ENWW Select the best PDL 13
14 Chapter 2 Software description ENWW

3 Plan an HP UPD deployment
This chapter is designed to help you make strategic deployment decisions as you transform your printing
environment to a HP Universal Print Driver environment. The deployment of the HP UPD in your printing
environment will be unique based upon your specific objectives and current IT infrastructure. This
chapter assumes that you have a basic understanding of the functionality of print drivers and the
Windows printing architecture.
This chapter provides you with the options and recommendations to customize your deployment
experience based on your current printing environment and your printing goals and objectives. Although
your environment will vary slightly from the installation models below, you should be able to use the
recommendations in this document so your HP UPD deployment will be smooth and have the least
impact to your printing environment. In some cases you will use more than one solution provided in the
information below.
ENWW 15
The five steps to a successful deployment
1. Initiation and planning
●
Fully understand your printing requirements and environment
●
Make decisions
2. Communication and training
●
Executive sponsorship
●
Training
3. Conducting a pilot
4. Test and evaluation
5. Roll out to production
16 Chapter 3 Plan an HP UPD deployment ENWW

Initiation and planning
To gain the maximum benefit from the HP UPD, it is important to:
●
Fully understand your printing requirements and environment.
●
Develop an HP UPD deployment strategy.
An HP UPD deployment needs to be considered similar to any other major change to your IT
environment and should be treated accordingly. Make sure you back up your print servers and print
queues before beginning any installation.
Understand your printing requirements and environment
Determine deployment objectives
This is a description of the objectives of the deployment. The intent is to get a clear and detailed picture
of what the end result will be after the migration or upgrade. See
HP UPD Deployment Worksheet
on page 153 for details
Print servers or Direct IP
With improvements in desktop computing power, available printing management tools, and the growing
concerns about reducing printing management costs, some enterprise customers are starting to
question whether they should move to Direct IP printing or continue with client-server printing.
For additional information on whether direct IP printing is right for you please refer to Direct IP Printing
with the HP Universal Print Driver available on
www.hp.com. HP UPD supports either environment.
Identify stakeholders
The stakeholders are anyone impacted by the plan. Stakeholders can include, but are not limited to the
following groups.
●
End users – Will there be downtime, what will change?
●
IT staff – How much time and resources?
●
Help Desk – What do they need to know?
Make an inventory
You must inventory all printing products, print servers, print queue names, printer drivers, IP Addresses,
and page description languages (PDLs) that you are using. If you have print servers, you also need to
determine if all of the print queues are still active.
Consider PDL needs
Some business applications rely on a specific version of Printer Command Language (PCL) or require
Adobe® PostScript®. As a result, test that the applications you are using are compatible with the
HP UPD versions of PCL and postscript emulation. If your testing proves that some applications are not
compatible with the HP UPD versions of PCL and postscript emulation, you should retain the current
ENWW Initiation and planning 17

drivers and queues for the non-compatible applications. See Select the best PDL on page 12 for more
information.
●
Specialty products
●
Specific business applications, such as ERP
●
The use of certified drivers, such as SAP
●
Line printers
●
Large format printing products
●
HP products that feature edge-to-edge printing, which require product-specific drivers
Driver considerations
Please consider the following to determine if the HP UPD is the correct solution for your printing
environment.
●
The HP UPD is supported and tested on HP printers only. For non-HP products, HP recommends
using the driver supplied by the product manufacturer.
●
Not all HP printers are supported by the HP UPD. The HP UPD supports most workgroup class
HP LaserJet printers and MFPs, and a number of business inkjet printers. Some personal
HP LaserJet and inkjet printers are not supported. For the most current list of HP UPD supported
products, see the following website
www.hp.com/go/upd.
Pre-configuration, policy and access requirements
If you have a goal of setting up custom default settings, or restricting access to printers or printer
capabilities like color printing, now is the time to make a list of all those requirements.
Environment and network compatibility
Validate that the HP UPD is compatible with your current environment and network communication
protocols. Make sure that the SNMP and mDNS protocols are not being filtered or blocked. The HP UPD
requires these protocols for discovery and communication with products. See
HP UPD Deployment
Worksheet on page 153 to make sure the HP UPD will work in your environment
Baseline the system
Test that all your applications (shrink wrapped and home-grown) are compatible with the HP UPD. Run
performance and printing tests using “typical” documents.
Risk management
As is true of all projects, there are risks involved. Spend some time identifying the risks and making
plans on how to mitigate serious risks. Some suggestions are:
●
Make a backup of all systems before making any modifications.
●
Thoroughly test before going into production.
●
Plan your activities for a time of low print server usage to minimize user impact.
●
When migrating to a new server, keep the old server operational for a period of time just in case
you need to fall back to it.
18 Chapter 3 Plan an HP UPD deployment ENWW

Key deployment decisions
●
Create a list of required drivers
●
Choose an installation method
●
Driver Pre-Configuration
●
Traditional and dynamic Mode
●
Manage the HP UPD with MPA or Active Directory Group Policy
●
Estimate time requirements
Create a list of required drivers
●
HP UPD PDLs
●
Product specific drivers
●
Non-HP products
Choose an installation method
HP UPD can be installed using multiple methods including:
●
Add Printer Wizard
●
Install.exe
●
Web JetAdmin
●
Microsoft Print Management Console
●
Custom scripts
Note that there are pre-configuration implications.
See
HP UPD Deployment Flowcharts on page 161 for additional guidance on which installation option
is best for your environment..
Driver Pre-Configuration
The default settings of the HP UPD can be changed to suit specific needs. For example, the administrator
may want to set duplex printing, and print in grayscale as the defaults. This can be done on a per-
installation, per user, per group, or per site basis. For more information, see
Manage the HP UPD using
HP MPA on page 82, Manage Active Directory Group Policy with the HP UPD using HP Active
Directory Templates on page 123, the HP Driver Configuration Utility documentation, or by referring to
the list of installation options in
Install on page 32.
ENWW Initiation and planning 19

Traditional and dynamic Mode
The HP Universal Print Driver (UPD) can operate in two different modes, traditional or dynamic.
●
Traditional mode functions like the product-specific drivers. When installed in traditional mode, the
HP UPD is associated with a specific printing product, which can then be selected from the
application print menu. Once selected, the HP UPD user interface is similar in appearance to a
traditional, product-specific driver.
●
Dynamic mode allows the user to find printers on a network. This is ideal when traveling or printing
to a new product in the office. An easy-to-use interface helps users connect to HP printing products
on their own. There are four methods for finding printers in dynamic mode: manually enter printer
address, recently used printers, managed printer lists, or search options.
Dynamic mode and traditional mode are not mutually-exclusive. You can deploy print queues using
traditional mode and also deploy the HP UPD using dynamic mode for mobile users.
For more information about traditional and dynamic mode, see
Install on page 32.
Manage the HP UPD with MPA or Active Directory Group Policy
HP MPA and Active Directory provide options for managing the HP UPD in your environment. The
HP UPD has the capabilities and features that can be managed and controlled on a per-user or group
level. This means that the features like Use Mode settings, Color Access Control, Search Capabilities,
SNP Pop-ups, and more can be managed down to the user level, or at a group level.
For more information about Managed Print Administration and the Active Directory Administrative
Templates, see the chapters on
Manage the HP UPD using HP MPA on page 82 and Manage Active
Directory Group Policy with the HP UPD using HP Active Directory Templates on page 123.
Estimate time requirements
Make sure that you allow sufficient time to complete all the steps. The following are some things to
consider.
●
Planning
●
Performing System Backups
●
Gathering tools and/or write scripts
●
Server Installation
●
Client Installation
●
Testing
The amount of time it will take to install the HP UPD depends on a number of factors including the
number of drivers, the number of print queues on the server, and the number of host clients receiving
the installation either PnP vended or through UPD install / apw. Typically, the installation of the HP UPD
driver itself only takes a minute or two, but this can be significantly slower if there are other printer drivers
on the system.
See the
http://support.microsoft.com/kb/832219 - Users cannot print after you install a service pack,
update rollup, or printer hot fix on a server.
20 Chapter 3 Plan an HP UPD deployment ENWW
Creating a print queue using an existing driver typically takes only 30-60 seconds depending on
processor speed, etc. However, if you have 1000 print queues to create, this could easily add up to
between 8 and 16 hours.
ENWW Initiation and planning 21
Communication and training
HP strongly suggests having a communication plan in place prior to beginning your deployment of the
HP UPD. This helps overcome objections and ease the fears of end-users who might be worried about
losing some of their printing functionality. Make sure your end-users and the IT staff members
understand the benefits gained by using the HP UPD.
Training
Develop training reference materials and identify resources to help your end-users successfully
transition to the HP UPD from standard product drivers. For example, a change from traditional mode
printing user interface to the dynamic mode interface requires planning and in some cases simple
training. Include information about how to identify products through the HP UPD. Employ a survey to
gauge customer satisfaction.
Conducting a pilot
HP recommends that you create a test-environment during your HP UPD implementation. Select a part
of your printing environment that will not affect many users to test the implementation prior to deploying
to the entire printing environment. Make sure this test environment (applications and printers) is
representative of the overall printing environment.
Testing and Evaluation
●
Measure against the performance baselines.
●
Determine variances and if they warrant corrective action or a change.
●
Make any necessary entries into the configuration management log.
Deploy to production
HP strongly recommends a phased approach to deploying the HP UPD.
Deploying in a phased manner across the IT environments helps to:
●
Minimize issues and provide valuable information about each type of environment.
●
Uncover issues that could be documented and considered prior to the next phase.
●
Increase the confidence of end-users and sponsors in the project.
Closing
●
Confirm work is done to requirements
●
Gain formal acceptance of the product
●
Hand off completed product
22 Chapter 3 Plan an HP UPD deployment ENWW

4 Preconfigure the HP UPD
This chapter outlines several options for configuring the default behavior of the HP UPD. The options
vary based on the installation method selected. Please review each option to determine which method
is right for your environment.
The table at the end of this chapter,
Pre-configuration utilities and configurable functions
on page 28, lists the available settings for each pre-configuration utility and installation method. This
chapter provides some representative examples, but is not a comprehensive list of available settings.
The information in this chapter will help you select an option that best meets your needs.
The following methods are available for pre-configuring the HP UPD default settings.
●
Pre-configure the HP UPD using Install.exe
●
Pre-configure the HP UPD using the HP Managed Printing Administrator (MPA)
●
Pre-configure the HP UPD using the Group Policy Objects in Active Directory
●
Pre-configure the HP UPD using HP Driver Configuration Utility
●
Pre-configure the HP UPD using HP Driver Deployment Utility (DDU)
●
Pre-configuration utilities and configurable functions
ENWW 23

Pre-configure the HP UPD using Install.exe
The HP UPD installer allows some driver default settings to be modified via command line switches.
Some of these switches will change the system-wide behavior of the HP UPD, while other changes are
specific to a single print queue.
A list of the available options for the Install.exe utility can be listed by entering install /? from the
command prompt in the HP UPD driver folder.
The screen that appears is a comprehensive list of the available configuration options that are available
during installation of the HP UPD. Some of the more popular install switches include the following:
●
/pfduplex – Allows an administrator to enable duplex by default
●
/gdssnp – Disables the Status Notification Pop–ups for all queues
●
/pfpjob – Enables job storage capabilities
●
/q – Quite mode, no prompts
●
/h – Hides the install dialogue
Multiple switches can be used to create a command-line installation that is customized to meet your
requirements.
The default settings are changed to reflect the chosen options in each of the printers installed in this
manner.
Pre-configure the HP UPD using the HP Managed Printing
Administrator (MPA)
The MPA utility pre-configures some driver default settings in a managed HP UPD environment. Settings
made within the MPA environment control the HP UPD at a user level. The resulting policies are
maintained for every printer attached to the HP UPD. They are global user policies that affect HP UPD
users. For more information about MPA software, see
Manage the HP UPD using HP MPA
on page 82.
NOTE: Policy management for the HP UPD is disabled by default, and must be enabled to use the
MPA software to manage the HP UPD capabilities. Enabling policy management for the HP UPD is only
available through the Install.exe method. See step two below in
Process Flow for HP UPD management
with MPA on page 25 to enable policy management for the HP UPD. An example of a command line
instruction for enabling policy management is install /sm1.1.1.1 /
policy"mpaservername" /h /q /n"HP Color LaserJet CP3525".
MPA settings that can be pre-configured include:
●
Duplex
●
Economode
●
Private Printing
●
Edgeline QAC (Quality Access Control)
●
Services tab
●
Status Notification Pop–ups
24 Chapter 4 Preconfigure the HP UPD ENWW

Each of these settings can be locked down to prevent users from making modifications to the settings.
Process Flow for HP UPD management with MPA
1. Administrator installs and configures MPA User Groups, Policies, and Printer Lists.
2. To enable MPA policy management, the HP UPD is installed or upgraded using Install.exe with
one of the following switches:
●
/empa - Installs the HP UPD and enables policy management for the MPA server named
“managed-Print”.
●
/policy”MPAservername”–Enables the HP UPD to be managed by MPA and allows the
administrator to enter the name of the server running MPA.
●
/gpolicy”servername” – Globally enables policy management for all users who log onto a PC
and uses the MPA server defined in the servername field.
Pre-configure the HP UPD using the Group Policy Objects
in Active Directory
Like MPA settings, the changes made within the Group Policy Objects control the global HP UPD user
capabilities. Available for download at
www.hp.com/go/mpa, an HP UPD Administrative Template can
be added to an existing Group Policy Object to manage the user UPD capabilities. The settings apply
to any queue that uses the HP UPD. Care should be used when locking configuration settings as the
user is unable to change a locked setting. As an example, if duplex is enabled and locked, the user will
be unable to override this to print transparencies.
NOTE: See Manage Active Directory Group Policy with the HP UPD using HP Active Directory
Templates on page 123for detailed information on installing and using the Active Directory template.
Using these templates will also require that the HP UPD be installed with the management option
enabled. See the following list for the installation switches to enable policy management for the HP UPD.
The following settings are available for preconfiguration and are located in the Default Print Settings
section of the HP UPD AD Admin Templates:
●
Duplex
●
Economode
●
Private Printing with PIN
●
Edgeline QAC
●
Services tab
●
Status Notification Pop–ups
HP UPD management capabilities are disabled by default. To take advantage of the management
capabilities through the Group Policy Objects on new and existing queues, the HP UPD management
capabilities must be enabled. Please see the example below for steps on enabling policy management
for existing queues.
ENWW Pre-configure the HP UPD using the Group Policy Objects in Active Directory 25
The following switches are used in conjunction with the Install.exe utility to enable policy management
using the Active Directory template.
●
/eads–Enables policy management for the active user only on the PC.
●
/geads–globally enables policy management for all users who log onto the PC.
To enable policy management for an existing UPD based print queue use the following example as a
guide.
Install /ni /eads /n"existing print queue" (plus any other install switches used during
the original installation. This command will modify the print queue to enable policy management for
Active Directory.
26 Chapter 4 Preconfigure the HP UPD ENWW

Pre-configure the HP UPD using HP Driver Configuration
Utility
The HP Driver Configuration Utility (DCU) is a small Windows application used to edit the configuration
file associated with a particular driver. The configuration file controls the print driver settings and takes
effect when the driver is installed.
The HP Driver Configuration Utility does not handle any part of the deployment or installation of the
driver. Rather, the default configuration file is modified and saved back to the same driver directory in
which it was opened. The HP Driver Configuration Editor is intended for use in environments where
there is an established process for deploying drivers or where the server platform is not Windows-based
(i.e.- Novell).
The DCU utility provides the most comprehensive list of configurable options and settings, but it does
not include all of the available options. In some cases, DCU is the only method to configure a specific
driver setting. It may become necessary to combine some of the pre-configuration tools to get a
completely configured driver for your environment. Please refer to the readme notes for additional
information on using the DCU utility.
Usage
Use DCU to pre-configure printer drivers before installing the drivers on a client or server. Follow these
steps to pre-configure.
1. Launch the driver configuration utility. From the File menu, select Open, and then browse to the
directory that contains the cf file of the driver you wish to configure. These files have a ".cf_"
extension.
2. Choose a printer bundle from the list.
3. Choose any desired changes on the Printer Preferences tab.
4. Choose any desired changes on the Device Settings tab.
NOTE: Depending on how you save the configuration file, you could affect the digital signature of the
driver. For more details, please see the support guide for the DCU at
www.hp.com/go/dcu. Click on the
Manuals link.
Sample list of the features available within the DCU.
●
Print on both sides (duplex)
●
Paper Size
●
Create Shortcuts
●
Watermarks with user name
ENWW Pre-configure the HP UPD using HP Driver Configuration Utility 27
Pre-configure the HP UPD using HP Driver Deployment
Utility (DDU)
The DDU simplifies the deployment of printer drivers onto a client computer. DDU enables print
administrators to create driver packages that include the printer driver files and the code needed for
deployment. The custom package is then run on a client computer to copy the printer driver files to the
Windows driver store, and for network packages to install the product.
The DDU works with HP printer drivers that can be installed by an .INF file.
The DDU is used to pre-configure a printer driver for deployment. When the package is run on the client
computer, the new configuration file configures the printer driver after it is installed, and does not interfere
with WHQL certification. The DDU contains the standalone DCU utility inside the package and is
launched when Pre-configure driver is selected from the DDU tool.
For more information about the HP Driver Deployment Utility, go to
www.hp.com/go/ddu. Select
Manuals from the left navigation bar.
Pre-configuration utilities and configurable functions
Table 4-1 Pre-configuration utilities and configurable functions on page 28 shows which utility, or
utilities, can be used to configure several commonly-used driver features. In some cases, more than
one method will need to be used depending on the combination of settings that are to be changed. For
example, to enable policy management and set the Watermarks to Username, use the Install.exe utility
to enable policy management and the DCU tool to set the default Watermark option.
Table 4-1 Pre-configuration utilities and configurable functions
Function Install.exe MPA/AD DCU DDU
Duplex (lock) X X X X
Economode X X X X
Job Storage (lock) X X X X
90Edgeline QAC X X X X
Color Access Control X X X
Enable Policy mgmt X
Status Notification
Pop-up
X X X X
Disable Printer
Automatic
Configuration
X X
Gray scale (lock) X X
Paper size X X
Shortcuts X X
Watermarks X X
Orientation X X
Print quality X X
28 Chapter 4 Preconfigure the HP UPD ENWW

Function Install.exe MPA/AD DCU DDU
Memory X X
Hard disk X X
Media type (lock) X X
Paper source (lock) X X
Services X X X X
Collate X X
Table 4-1 Pre-configuration utilities and configurable functions (continued)
ENWW Pre-configuration utilities and configurable functions 29
30 Chapter 4 Preconfigure the HP UPD ENWW

5 Install and Uninstall of the HP UPD
Install the HP UPD in either traditional or dynamic mode. The mode determines the HP UPD user
experience and also influences the extent of HP UPD management.
●
Traditional mode
An HP UPD installed in Traditional mode behaves like a product specific driver. During installation,
the driver is associated to a specific printer, creating a permanent instance of the driver.
●
Dynamic mode
An HP UPD installed in Dynamic mode allows the most flexibility. A user can find and print to any
supported HP product within any network or print environment without downloading a product-
specific driver. The HP UPD discovers the product capabilities so that users can print using most
product capabilities, including advanced printing options such as watermarks and booklet printing.
Creating a permanent instance makes the printer appear (in the UI) more like a traditional printer
driver but its features can still be updated dynamically. This also reduces the number of mouse
clicks a user goes through when selecting a printer that is used often.
The following information provides detailed instructions for installing the HP UPD in either traditional or
dynamic mode, along with instructions on how to remove the HP UPD.
●
Install
●
Uninstall the HP UPD
ENWW 31

Install
Install the HP UPD by using one of the following methods.
●
Download and unzip the HP UPD
●
Windows client/server: Use the Add Printer Wizard
●
Windows client/server: Use Install.exe
●
Windows client/server: Use the command prompt
●
Windows client/server: Use Point and Print
●
Windows client/server: Use the HP Web Jetadmin Print Queue Creation
●
Windows Cluster server environment
●
Windows Terminal Server/Citrix environment
●
Novell
●
Plug and play installation
Download and unzip the HP UPD
1. Go to the following Web site:
www.hp.com/go/upd
2. Download and save the HP UPD that is specific to your operating system, and printing needs.
3. Navigate to the HP UPD download file.
4. Unzip the HP UPD download file.
a. Double-click the downloaded file.
b. Deselect the When done unzipping open install.exe option.
c. Click the Unzip button.
Windows client/server: Use the Add Printer Wizard
Follow these steps to install the HP UPD in Traditional mode with the Windows Add Printer
Wizard.
NOTE: The Windows Add Printer Wizard does not provide any customization options. If you install
the HP UPD by using this method, the driver installs so that the user has common printing functionality.
1. From the Control Panel, navigate to the Printers folder..
2. The Add Printer Wizard opens. Click Next.
3. Select Local printer attached to this computer, deselect Automatically detect and install my
Plug and Play printer, and then click Next.
NOTE: If you are using an existing port, or if you are specifying the Port Name instead of using
the default, make sure that the name you use does not contain the colon ‘:’ character. This character
is not allowed, and will cause configuration and status communication problems with the printer.
32 Chapter 5 Install and Uninstall of the HP UPD ENWW

4. Select Create a new port, and then select Standard TCP/IP Port. Click Next.
5. The Add Standard TCP/IP Printer Port Wizard opens. Click Next.
6. The Add Port window opens. In the Host Name or IP Address field, type the DNS or WINS host
name or IP Address. Click Next.
NOTE: If the DNS host name is used for the port, click the Always print to device, even if its
ID address changes check box.
NOTE: If the Additional Port Information Required window opens, it means the printer is not
connected. Under these circumstances it is best to cancel out of the installation, connect and turn
on the product, and then start over. If you must continue the installation, then under Device
Type, select Standard, and then select Hewlett Packard JetDirect from the menu. Click Next.
NOTE: Installing the HP UPD with the product disconnected or off line prevents the HP UPD from
receiving the product configuration, which results in the used default settings (monochrome, no job
storage, etc). Following complete install of the HP UPD, to update the HP UPD product
configuration, right-click on the printer, select Properties, select the Device Settings tab, scroll
down to Automatic Configuration and select Update Now.
7. The Completing the Add Standard TCP/IP Port Wizard window opens. Click Finish.
8. The Install Printer Software window opens. Click Have Disk.
9. Browse to the folder in which the unzipped HP UPD download file is saved.
10. In the unzipped HP UPD file, select any .inf file, and then click Open. You will be prompted to select
a driver name, either the generic name or a version specific name. See
Versioning of printer driver
shared files on page 179.
If an HP UPD is currently installed, select Replace existing driver.
11. Click OK.
12. The Install Printer Software window lists the driver under the Printers box. Select the
HP Universal Printing driver and then click Next.
13. The Name Your Printer window opens.
The name specified In the Printer name: field is the name of the installed printer and displays in
the Printers and Faxes folder. The default printer name is “HP Universal Printing PCL6” for the
first installation. However, this increments to “HP Universal Printing PCL6 (copy1)” and so on for
subsequent installs.
Rename the printer to better identify the printer.
14. Under Do you want to use this printer as the default printer?, select Yes or No. Click Next.
15. The Printer Sharing window opens. Select Do not share this printer, or enter a Share name: to
share the printer. Click Next.
16. The Print Test Page window opens. Select Yes or No, and then click Next.
17. The Completing the Add Printer Wizard opens. Click Finish.
Windows client/server: Use Install.exe
NOTE: Use the Install.exe command to create traditional mode queues (only) on your print server.
ENWW Install 33

Follow these steps to install the HP UPD by using the HP Universal Printing Installer Wizard.
1. Download and unzip the HP UPD.
2. Navigate to and open the unzipped HP UPD folder. (See
Select the best PDL on page 12 for more
information.)
3. Double-click Install.exe.
4. The Universal Printing Installer Wizard opens. Read the software license agreement, and then
click Yes to continue.
5. Double-click Install.exe.
6. The Universal Printing Installer Wizard opens. Read the software license agreement, and then
click Yes to continue.
7. The Installation Mode window opens. Select Traditional mode and click Install.
NOTE: Only traditional mode queues are supported on print servers. Do not create and share
dynamic mode queues on any print server.
8. The Finish window opens. Click Finish.
Windows client/server: Use the command prompt
At the command prompt, type C:\Folder\Install /option, where Folder is the location of the
INSTALL.EXE file, / is a forward slash, and option is the command option. For a list of available command
options, see
Available command options on page 37. Use the command options to control the
installation and the behavior of the HP UPD after installation.
NOTE: In an enterprise environment, a login script may be used to install the HP UPD on a client.
NOTE: To view a complete list of installer options, type the following at the command prompt:
c:\folder\install /?
For example, to make the installation completely silent by making it available through an .EXE-based
administration tool (such as SMS), type the following syntax:
C:\folder\Install /q /h
Or, to install the driver in dynamic mode, type the following:
C:\folder\Install /dm
Topics:
●
Configure default print settings while installing by command prompt install
●
Available command options
Configure default print settings while installing by command prompt install
The HP UPD 4.5 and later provides a means of preconfiguring default settings within the printing
environment. The following settings can be reconfigured on the HP UPD before deployment. When the
settings are configured and not locked, users see these default settings which can be changed by the
user. If the Lock feature is selected, the users do not have the ability to change the settings.
34 Chapter 5 Install and Uninstall of the HP UPD ENWW

NOTE: See Pre-configure the HP UPD using Install.exe on page 24 for more information on
preconfiguring the HP UPD.
In addition to managing these default settings through the HP Managed Printing Administrator and the
HP Active Directory Templates, default settings can be configured when installing the HP UPD through
the Install.exe utility.
Use the following information as a guideline when configuring the default settings.
Duplex
Table 5-1 Duplex default configuration
Main switch Description Code
/pfduplex=
DEFAULT_DUPLEX_SETTING =0
DUPLEX_ON =1
DUPLEX_FLIP_PAGES_UP_ON =2
DUPLEX_ON_AND_LOCKED =101
DUPLEX_FLIP_PAGES_UP_ON_AND
_LOCKED
=102
Example: /pfduplex=2
Economode
Table 5-2 Economode default configuration
Main switch Description Code
/pfecono=
ECONOM0DE_DEFAULT_SETTINGS =0
ECONOMODE_ON =1
ECONOMODE_ON_AND_LOCKED =101
Example: /pfecono=101
Private printing
Table 5-3 Private printing default configuration
Main switch Description Code
/pfpjob=
PRIVATE_PRINTING_DEFAULT_SET
TING
=0
PRIVATE_PRINTING_PROOF_AND_H
OLD
=1
ENWW Install 35

Main switch Description Code
PRIVATE_PRINTING_PERSONAL_JO
B
=2
PRIVATE_PRINTING_QUICK_COPY =3
PRIVATE_PRINTING_STORED_JOB_
REQUIRE_PIN
=5
PRIVATE_PRINTING_PROOF_AND_H
OLD_LOCKED
=101
PRIVATE_PRINTING_PERSONAL_JO
B_LOCKED
=102
PRIVATE_PRINTING_QUICK_COPY_
LOCKED
=103
PRIVATE_PRINTING_STORED_JOB_
REQUIRE_PIN_LOCKED
=105
Example: /pfpjob=3
Private printing with Pin
Table 5-4 Private printing with Pin default configuration
Main switch Description Code
/pfpjpin=
(4 numeric characters only)
Example: /pfpjpin=8574
Edgeline QAC
Table 5-5 Edgeline QAC default configuration
Main switch Description Code
/pfelqac
EDGELINE_QAC_DEFAULT_SETTIN
GS
=0
EDGELINE_QAC_PROFESSIONAL =1
EDGELINE_QAC_GENERAL_OFFICE =2
EDGELINE_QAC_MONOCHROME =3
EDGELINE_QAC_PROFESSIONAL_L
OCKED
=101
EDGELINE_QAC_GENERAL_OFFICE
_LOCKED
=102
Table 5-3 Private printing default configuration (continued)
36 Chapter 5 Install and Uninstall of the HP UPD ENWW

Main switch Description Code
EDGELINE_QAC_MONOCHROME_L
OCKED
=103
Example: /pfelqac=3
Available command options
To view the available command options, enter the following at the command prompt:
C:\Folder\Install /?
where
●
Folder is the location of the INSTALL.EXE file.
●
/ is a forward slash.
The command options are explained in the following table.
Table 5-6 Command options
Command option Definition Description
/q
Quiet mode, no prompts Use this option to install the driver and
present only a single progress dialog box
to the user. All other warnings and
confirmations are hidden, and default
actions occur in cases where user input
would otherwise be expected.
/npf
Do not open the Printers folder on
completion.
The default behavior of the installer is to
open the Printers folder on completion.
This option disables that functionality.
/ru
Restricted user mode only displays
HP Managed Printer Lists
Use this option to configure the driver so
that users can only print to the products
that you specified in the managed printer
lists. The Printer Selection dialog box is
replaced with a dialog box that lists the
printers in the managed printer list. For
more information, see
Use Managed
Printer Lists (MPLs) on page 104.
/sc
Simple confirmation Use this option to install the driver so that
location profiles are disabled in the
Printer Selection dialog box in dynamic
mode.
/h
Hides the install dialog box; must be
used with Quiet mode (/q)
Use this option to hide the primary
installation dialog box and produce a
completely silent installation.
Table 5-5 Edgeline QAC default configuration (continued)
ENWW Install 37

Command option Definition Description
/sm<port>
Creates a static printer instance bound
to a specific <port>, for example,. /sm\
\server\printer, /smhostname, /
sm15.65.98.111
Use this option to create a statically
bound printer that points to the specified
port (local, TCP/IP, IPX/SPX, Hostname,
UNC). The printer operates as a normal
queue.
When installed in traditional mode, the
HP Universal Print Driver behaves as a
standard printer driver but can also be
installed from non-Windows servers as a
Point and Print driver.
NOTE: If the HP Universal Print Driver
is installed in traditional mode, the static
mode printer does not allow the user to
use the universal printing functionality or
change the destination address of the
static mode printer.
/n”Printer Name”
Uses the specified name as the name of
the printer, for example, /n”HP LaserJet
P4515”
This option uses the specified name as
the name of the printer (for example,
HP LaserJet P4515).
This option is helpful when using the
traditional mode (/sm) option, but can be
used for common printing as well.
/ni
Does not perform the printer install, only
processes other install options
Use this option to process the specified
install options without creating a printer in
the Printers folder.
You can then create subsequent
instances of the HP UPD that show only
the configured options that are not
queue-specific.
/aml<”NAME”, URL>
Adds a new managed printer list name
using the specified URL, for example, /
aml”MyServer, http://
mywebserver or /
aml”MyPrinters”, \\myprinters
\printerlist\printerlist.xml
Use this option to specify a location
where the target system can look for the
managed printer list.
/rml”<Managed List Name>”
Removes a previously added managed
list
Use this option to delete the specified
managed printer list.
/nd
Does not set the printer as the default. This option does not change the current
default printer on the client system. By
default, the installer sets the newly
installed or updated common printer as
the default printer.
/dst
Disables the Services tab in the HP
UPD
Use this option to completely disable and
hide the Services tab when accessing
the printer property pages.
/dod
Disables the Online Diagnostic option
on the Services tab in the HP UPD
Use this option to remove the Online
Diagnostic Tools choice from the
Services menu.
/dos
Disables the Online Support option on
the Services tab in the HP UPD
Use this option to remove the Support
and Troubleshooting choice from the
Services tab.
Table 5-6 Command options (continued)
38 Chapter 5 Install and Uninstall of the HP UPD ENWW

Command option Definition Description
/dpm
Disables the Online Product Manual
option on the Services tab in the HP
UPD
Use this option to remove the Product
Manuals choice from the Services tab.
/ddu
Disables the Online Driver Updates
option on the Services tab in the HP
UPD
Use this option to remove the Check for
Driver Updates choice from the
Services tab.
/dso
Disables the Online Supplies
Ordering option on the Services tab in
the HP UPD
Use this option to remove the Order
Supplies choice from the Services tab.
/dssnp
Disables the Status Notification Pop-ups
for the selected printer
When used with /sm or /tm, this option
disables the SNPs for the selected
printer.
/gdssnp
Disables the Status Notification Pop-ups
for all printers
Use this option to turn off SNPs for all
printers.
/snptm=0 Disables the Special Offers program
pop–ups.
/tm
Installs the printer in traditional mode Use this option to force the HP UPD to
install in traditional mode. This routine
launches the Add Printer Wizard, and
prompts the user to select a printer port
to complete the process. Do not use this
option when using the /sm option.
/dm
Installs the printer in dynamic mode Use this option to force the HP UPD to
install in dynamic mode.
/u
Use the existing printer driver if it is
already installed
Use this option to remove the dialog box
asking the user to “Use existing driver” or
to “Replace existing driver.”
/qcomname”name”
Specifies a queue-specific SNMP
community name
/gcomname”name”
Specifies a system-global SNMP
community name
/m
Provides the ability to specify the driver
version name allowing multiple versions
of UPD to be installed onto one system.
The /sm is required. Cannot be used
with /sm\server\printer. The /n is optional.
Syntax example
/m"HP Universal Printing PCL
5 (v5.0)" /sm10.1.3.2
If a syntax error exists in the command
line switch, installation proceeds without
implementing the /m version specific
installation of the HP UPD.
Table 5-7 Command options for policy management
Command option Description
/Policy“MPA server name” Enables HP MPA policy checking for all users using current policy settings
(default is to use managed-print). Using the /gpolicy”your_mpa_server”
command line option is the equivalent of enabling MPA policy checking and
forcing the MPA server to query the http server “your_mpa_server”.
Table 5-6 Command options (continued)
ENWW Install 39

/empa
Enables HP MPA policy checking for current user using current policy settings
(default is to use managed-print). Using the /policy”your_mpa_server”
command line option is the equivalent of enabling MPA policy checking and
forcing the MPA server to query the http server “your_mpa_server”.
/gempa
Enables HP MPA policy checking for all users using current policy settings
(default is to use managed-print). Using the /policy”your_mpa_server”
command line option is the equivalent of enabling MPA policy checking and
forcing the MPA server to query the http server “your_mpa_server”.
/dmpa
Disables HP MPA policy checking for current user.
/eads
Enables ADS policy checking for current user using current policy settings.
/geads
Enables ADS policy checking for all users using current policy settings.
/dads
Disables ADS policy checking for current user.
/pqdmpa
Disables MPA policy checking for the current print queue (logical windows
printer) no matter who uses it.
/pqdads
Disables ADS policy checking for the current print queue (logical windows
printer) no matter who uses it.
/gpolicy
See the /Policy example above. The difference between these switches is
that /gpolicy specifies the MPA Policy URL for all users of a system. /
Policy specifies this information on a per user basis.
Windows client/server: Use Point and Print
To use the HP UPD and Point and Print, install the driver on a server in Traditional mode. After the
driver installs on the server workstation from a Windows server system it behaves as it behaves as any
other installed driver. The user prints to a statically bound port established on the server.
When a client PC connects to a shared printer, the HP UPD automatically downloads to the client PC
through Point and Print.
Vending of 32-bit drivers is supported from all 64-bit server OSs. Vending of 64-bit drivers is supported
from all 32-bit OSs that support 64-bit alternate drivers.
Windows client/server: Use the HP Web Jetadmin Print Queue Creation
The HP UPD can also be installed via HP Web Jetadmin Print Queue Creation. For more information,
go to the following Web site.
www.hp.com/go/webjetadmin
Windows Cluster server environment
The HP UPD installs with automatic configuration enabled by default and requires a specific installation
procedure. The HP UPD requires that certain COM objects be registered and initialized in order to
perform the automatic configuration of the products during setup. Please follow the instructions below
to install the HP UPD in a Windows Cluster server environment.
NOTE: HP UPD 4.7 introduced the capability to disable Printer Automatic Configuration
communications. This capability is useful if HP UPD cannot be installed on each physical node, as
recommended by HP. See
Manually configure product settings on page 50 for more details on
disabling bidirectional communication, and manually configuring the driver.
Table 5-7 Command options for policy management (continued)
40 Chapter 5 Install and Uninstall of the HP UPD ENWW

The HP UPD must be installed and initialized on every physical node that makes up the cluster
environment before creating queues on the virtual servers. HP recommends installing the HP UPD in
traditional mode and creating an LPT1 port on the nodes. After the printer is created, it can be deleted
from the Node’s Printers and Faxes folder if desired. This will leave the HP UPD driver intact and
properly initialized.
Only traditional mode printer queues can be shared from any of the Microsoft based print servers.
Sharing of dynamic mode queues is not supported on any print servers using the HP UPD.
Repeat Step 1 on each physical node before proceeding.
1. Install the driver on each physical node in the cluster, using the Add Printer Driver Wizard.
a. Download the latest version of the HP UPD from the following Web site:
www.hp.com/go/upd
b. Log into or remotely connect to one of the nodes.
c. Open the Printers folder.
d. Click Add Printer.
e. Select Local printer attached to this computer. Click Next.
f. Click Use the following port and select LPT1: (Recommended) Printer Port.
g. Click Next.
h. Browse to your HP UPD Installation files and click Next.
i. Follow the rest of the Add Printer Wizard procedure to complete the installation. See
Windows
client/server: Use the Add Printer Wizard on page 32 for more information.
2. Install the HP UPD on the virtual print server.
Installing the HP UPD on the virtual server is similar to installing the HP UPD on any print server.
Install the traditional Mode of the driver, using the Add Printer Wizard.
a. Log into the active node of the cluster. You can log in while at the machine or remotely.
b. Access the virtual print server by clicking Start, then Run, and then typing the
\\virtualservername
c. Open the Printers folder.
d. Run the Add Printer Wizard and install the driver in traditional mode.
Alternative install with printer automatic configuration disabled
If the HP UPD cannot be installed on every physical node in your cluster, you can follow the steps below
to disable Printer automatic configuration and install HP UPD.
Please refer to the section in this guide for disabling bidirectional communications. These steps assume
that you will be using the DCU utility to disable the bidirectional communication functionality as well as
save the configuration file as CFM in order to retain the digital signature driver files.
Use the DCU (Driver Configuration Utility) tool to disable the bidirectional setting as well and preset
other default settings as you wish. Once the cfm file has been created, it resides in the HP UPD driver
folder where the files are located. Copy this cfm file to the virtual server w32x86\3 folder before installing
printer queues using HP UPD.
ENWW Install 41

Use the following steps to copy the cfm file to the proper folder prior to creating printer queues on the
virtual server.
1. Browse to the print$ share of the virtual server. Enter \\virtualserver\print$ You have accessed the
Printers folder for the Physical node that is hosting the virtual server. You will see a few folders
here representing both the printing environment for the Physical Node as well as the GUID folder
which represents the virtual server printing environment. The print$ folder will appear with the
following folders:
●
\BIDI
●
\color
●
\e7776de2-fbd9-4644-9jdt-0jsy —Virtual Server printing folder
●
\w32x86–Physical node printing folder
2. Browse to the folder with the long GUID as the file name. Your GUID name will be different. This
is the print environment for the virtual server.
3. Browse to the \Drivers\w32x86\3 directory of the GUID folder
4. Copy the cfm file previously created by the DCU utility here.
5. Use the Microsoft recommended method to create printers using the Add Printer Wizard.
Windows Terminal Server/Citrix environment
HP supports the HP UPD 4.5 and later in Citrix and Terminal Server environments. HP has tested the
HP Universal Printing PCL6, HP Universal Printing PCL5, and the HP Universal Printing PS drivers in
Citrix environments.
For network printers, the HP UPD can be installed in dynamic mode on the Citrix server for all clients
to access as a universal driver.
When the HP UPD is installed on the Terminal Server or Citrix server in traditional mode, it can be used
as the printer driver of choice for the fallback or auto-created printers.
For auto created printers, the HP Universal Print PCL 5 driver can be mapped to all PCL 5-capable
HP client printers or the HP Universal Print postscript emulation driver to all postscript-capable HP client
printers through driver mapping in the Citrix management tools.
For further information see the HP white paper "HP Printers Supported in Citrix Presentation Server
Environments" on
www.hp.com/go/upd.
Versions of Terminal Server and Citrix supported by HP
See System requirements on page 11.
Known limitations of the HP UPD when used for auto– created printers or redirected
printers with client printers that are directly attached
The HP UPD, outside a Citrix environment, has the ability to configure itself according to the
configuration of the printer by communicating directly with the printer.
HP UPD 4.5 and higher is limited when installed on the Citrix Presentation Server and mapped for auto
created printers. It cannot communicate with directly attached printers, such as by USB.
42 Chapter 5 Install and Uninstall of the HP UPD ENWW

If the printer is connected to a network, automatic configuration is supported. For full feature support of
locally connected printers, HP recommends the Citrix UPD be mapped to the HP UPD on the client.
For directly attached printers on the client, the HP UPD PCL driver defaults to black and white, no extra
trays, no product-specific paper handling, etc.
NOTE: Printers attached to the client by network ports are unaffected. The HP UPD, installed on the
server, can communicate with client printers that are available on the network.
Novell
HP UPD in a traditional Mode installation, not in dynamic mode, is supported. This includes use of the
HP UPD's Enterprise Auto Configuration capabilities (bidirectional communication between printer
product and HP UPD enables the driver user interface to change showing the functionality provided by
the product). In addition, preconfiguration of the driver using the HP Driver Configuration Utility is
supported so administrators can define defaults before driver installation.
Since Novell does not provide a way for the HP UPD to query the product configuration from the printer,
the HP UPD only makes the default settings available. No trays, output bins, or other printer specific
features are visible in the driver user interface.
iPrint cannot present the correct printer driver options to the administrator to configure the PDP when
the driver is universal.
For additional details on using iPrint's Print Driver Profile, see
www.novell.com/support/viewContent.do?
externalId=7001400.
Enterprise Auto Configuration (bidirectional communciation) can be turned off through the HP Driver
Configuration Utility.
Install the HP UPD in a Novell environment
NOTE: Use Novell's most current iPrint client. It is critical to have the client installed even if all you are
doing is uploading the driver to the Novell server. Novell has posted the iPrint client at the iPrint: Novell
Open Enterprise Server 2 website. Click here to go to the iPrint: Novell Open Enterprise Server 2 website
(http://www.novell.com/iprint).
NOTE: UPD for Novell only supports static mode and not dynamic mode.
NOTE: This has been tested with both User and Workstation printer setups.
To add the HP UPD driver and create the printer on the server, go to a computer that has the iPrint client
installed.
1. Unpack the UPD installer but do not run the installer. Just have it unpack itself to the local PC.
2. Upload the driver to the Novell server by using the Novell iManager web page.
a. Select the Manage Broker task.
b. Click the RMS Drivers tab.
c. Click the Add from file button.
d. Select the HP UPD inf file, and click OK.
ENWW Install 43

The driver will begin to upload to the server. This process can take several minutes. Do not
touch the Internet Explorer (IE) window while it is doing this.
e. When it is done, you should see the HP UPD driver in the driver list.
3. Create an HP UPD printer on the server by using the Novell iManager web page.
a. Select the Create Printer task.
b. Type a printer name and click Next.
c. Type an IP address and click Next.
d. Select the HP UPD driver in the Microsoft Windows XP driver dropdown.
e. Click Next or OK to create the printer.
To use the newly created printer on a PC.
1. Close any browser windows that you have open.
2. Install the iPrint client on the PC.
3. Go to the IPP printer page on the Novell server, that is, http://foo.example.com/ipp.
4. Click the newly created printer.
You will get a message stating that the printer needs to be installed.
5. Click OK .
The driver will download and install. This will take a few minutes.
The printer is now installed on the local PC and will route print jobs to the Novell server.
NDPS
The HP UPD will function with limited capabilities in the Novell NDPS environment. This is due to the
HP UPD not being able to communicate with the product directly, therefore loosing the ability to gather
product-specific information back from the printers.
The HP UPD can only be used in traditional mode in the NDPS environment. In this mode, the HP UPD
operates the same as a product-specific driver.
Since Novell does not provide a way for the UPD to query the product configuration from the printer, the
HP UPD will only make the default settings available. No trays, no output bins, or other printer specific
features will be visible in the driver user interface.
The latest patches for iPrint and Winspool must be applied to get the advanced printing features
supported (such as N-up and Watermarks). URLs related to this information will be forthcoming.
Plug and play installation
The HP UPD can be installed for use with plug and play products as either a hardware first or a software
first installation.
●
Hardware first installation
●
Software first (unattended) installation
44 Chapter 5 Install and Uninstall of the HP UPD ENWW

Hardware first installation
In a hardware first installation, a USB cable is connected to the PC first and then the HP UPD is installed.
When the operating system detects that no driver is installed for the connected product, it will prompt
for a disk or a location from which to install the driver. This method requires that the user be logged on
to an account with administrator privileges.
●
Download and unzip the HP UPD from
www.hp.com/go/upd.
●
Plug in the product USB cable.
●
When prompted, browse to the location where the HP UPD was downloaded and unzipped.
Software first (unattended) installation
In a software first installation, the HP UPD has already been pre-loaded on the PC, and will be found
and used by the operating system when the new product is connected. This method does not require
any interaction by the current user, and does not require the user to have administrator privileges.
Pre-configure the HP UPD for use with software first installation
To pre-configure the HP UPD for a Software first, plug and play installation, use the HP Driver
Distribution Utility (DDU), and select the Preload the Driver option. This method creates a package
with a setup.exe utility that is easy to deploy interactively or via scripting. See
Pre-configure the HP UPD
using HP Driver Deployment Utility (DDU) on page 28 for more information.
Uninstall the HP UPD
The recommend, and safest, method to remove installed instances of the UPD is the following steps.
To fully remove the HP UPD involves additional steps that, if done incorrectly, can result in unintended
consequences to the printing system and therefore is not recommended.
1. Select the HP UPD PDL instance from the Printers folder.
2. Stop and restart the Print Spooler using one of the following methods.
●
From a command line, type net stop spooler && net start spooler.
●
Open the Services applet in Control Panel (Start-Run-services.msc), select Print Spooler,
select Stop then Start.
3. In the Printers folder, open the File menu, and click Server Properties. Identify, in the list of
installed printer drivers, the HP UPD driver PDL and HP UPD version to be removed. Click the
Drivers tab, select HP Universal Printing… and then click Remove.
ENWW Uninstall the HP UPD 45
46 Chapter 5 Install and Uninstall of the HP UPD ENWW


HP UPD 5.0 Features
This section lists the features available in HP UPD 5.0.
Printing to unsupported products enabled by default
HP UPD 5.0 allows for printing to unsupported or non-HP products by default. The list of supported
printers for the HP UPD is located on the Specifications tab at
www.hp.com/go/upd. Printers on this
list are tested, verified, and supported by HP to work with the HP UPD. The HP UPD may also provide
basic printing functionality to products not listed on the Supported printers list. The following list applies
to all installation methods.
●
All available features and capabilities of the non-HP or unsupported target product may not be
present, may not work, or may not provide a consistent user experience. HP recommends that
customers test and validate the printing experience before adopting.
●
HP is unable to add additional new features for non-HP products into the HP UPD.
●
Technical support is available for HP UPD printing to products on the HP UPD supported printers
list only.
●
When printing to a non-HP printer, using postscript emulation 2 and 3 may provide more consistent
results than PCL5 or PCL6.
Installation to allow HP UPD version control
HP UPD version specific installation allows multiple versions of the UPD to be installed on the same
system (i.e- UPD v4.5, UPD v4.7 and UPD v5.0). Beginning with UPD v4.7 a traditional mode installation
of the UPD driver using the Add Printer Wizard allowed two different installation paths, each installing
the same version of the driver. Selecting generic "HP Universal Printing" upgrades all queues utilizing
the UPD to the version being installed. Selecting "HP Universal Printing PCL 6 (vX.Y)" creates a version
specific instance of the UPD without upgrading existing UPD queues. Beginning with UPD v5.0, version
specific UPD installation is added to the INSTALL.EXE options command line. The /m switch only applies
to traditional mode driver installation, therefore the /sm switch is required and supports only IP address
or hostname.
Example: install /m"HP Universal Printing PCL 6 (v5.0)" /sm10.1.1.200
Additional details on the use and purpose of version specific installation can be found in the installation
chapter of this document
Install and Uninstall of the HP UPD on page 31
NOTE: You must use the exact name and syntax of the driver when using this feature. For example,
"HP Universal Printing PCL 6 (v5.0)". Failure to provide proper command line syntax will
result in the UPD installing using the generic UPD install.
Create and edit shortcuts with the HP Driver Configuration Utility
Using the DCU, administrators can pre-configure the driver before installation to customize the shortcuts
presented to the client in the driver user interface. This includes removing HP product default shortcuts
(all except the Factory Default) and creation of administrator defined shortcuts. Shortcuts defined
through pre-configuration will become the defaults.
For more details on using the HP Driver Configuration Utility, please refer to
www.hp.com/go/DCU and
click Manuals.
48 Chapter 6 HP UPD Administrative features ENWW

Custom media types recognized by the HP UPD
The HP UPD can now recognize up to five custom media types. Administrators can define these five
media types by using Web Jetadmin.
1. Obtain the most current version Web Jetadmin from
www.hp.com/go/webjetadmin.
2. Change all five paper types through Web Jetadmin. This functionality is dependent upon product
support.
3. Install HP UPD in traditional mode and perform Update Now from Advanced tab
4. View the Paper Type from the Paper Quality tab.
Username added to watermark selections
This feature adds a new pre defined watermark called [User Name]. The user's name is retrieved from
the computer and becomes the text for the watermark. This feature is available by default in the Printer
Property pages under the Effects tab, or pre-configurable using the updated version of the HP Driver
Pre-configuration Utility.
To configure a watermark to contain a username from the printer property pages, follow these steps.
1. In the property page of the product, click on Printing Preferences.
2. Click the Effects tab.
3. Select [User Name] from the menu for watermarks.
To pre-configure the watermark feature in DCU, follow these steps.
1. Load the driver's .cf_ file in DCU.
NOTE: DCU can be downloaded from www.hp.com/go/dcu.
2. Select Advanced Features from the Printing Preferences tab
3. Select [User Name] from the Watermarks pull down menu.
HP EasyColor
For PCL6 installations, HP EasyColor automatically selects settings in the driver to optimize the print
experience and printed quality (color theme, color options, image enhancements) of images.
HP EasyColor is enabled by default but can be turned off on the driver's Color tab so the selection of
features becomes the user's decision.
The HP EasyColor feature will behave differently depending on whether or not HP UPD Bidirectional
communications is enabled.
HP Easy color takes advantage of applications that support PNG and JPEG pass through. Examples
of these applications are Microsoft Office applications. HP Easy Color will have no effect on PDF,
Illustrator or Photoshop images as the technology differs from Microsoft Office applications.
Global per machine policy management
Prior to HP UPD 5.0, policy management was enabled for the user that installed the driver. Other users
who logged onto the machine were not managed. With the release of the HP UPD 5.0, new Install.exe
ENWW HP UPD 5.0 Features 49

switches allow the administrator to enable MPA or AD policy for all users logging onto the PC. See
Available command options on page 37 for the specific install switches.
HP UPD 4.7 Features
This section lists the features available in HP UPD 4.7. These new features are also available in UPD
5.0.
Manually configure product settings
The HP UPD 4.7 supports turning off the automatic configuration forcing the manual configuration of
product settings.
In previous versions of the HP UPD, the driver queried the product to request the product capabilities,
including the presence of installed trays, output bins, duplexer, and so on. If turned on and connected
to the network, the product returned its capabilities to the driver. The product capabilities were displayed
in the driver user interface.
The following scenarios might be reasons for disabling bidirectional communications, otherwise HP
recommends the default behavior.
●
Hardware capabilities can be managed for defined queues or user groups. Administrators can
disable bidirectional communication and control specific product capabilities made available
through the driver user interface.
●
The queue is created before the product is available and the administrator wants it ready to go with
no further intervention.
●
The product is connected over an NDPS queue on a Novell Server.
●
Security concerns around having services running or SNMP V2 traffic on the network.
●
Any of these produce the need to manually configure the queue to get access to product
capabilities.
HP recommends that unless you have a specific reason for disabling Printer Automatic Configuration,
you should leave it enabled. Using the HP Driver Configuration Utility to manually configure the products
does not allow for configuring a product as color, or setting the trays or envelope feeders. These items
must be configured manually and must be done for every queue through the product properties. Also,
Update Now is disabled and the update process cannot be automated. Dynamic mode will not work in
this configuration.
The HP UPD provide a generic list of basic capabilities when bidirectional communication is set to
Off. The same basic capabilities are presented as when bidirectional communication is enabled and the
product cannot be queried by the HP UPD over the network.
If a feature is defined for a product that does not support the feature, the product behaves the same as
an improperly configured traditional mode driver.
Status Notification Pop-ups do not work when bidirectional communication is set to Off.
Pinless private printing
The HP UPD 4.7 can store personal print jobs on the product and does not require a PIN to print. This
functionality is similar to Pinless Private Printing with product-specific drivers.
50 Chapter 6 HP UPD Administrative features ENWW
Follow these steps to perform Pinless Private Printing:
●
An HP UPD driver with Pinless private printing
●
An HP product that supports Job Storage
●
An HP product with the firmware that supports Pinless Private Printing
To perform Pinless Private Printing, do the following:
1. Open the software program that you want to print from. Select File File>Print, and then click the
Properties button.
2. Select the Job Storage tab, and then click Personal Job. Leave the Make Job Private area blank.
3. Click OK to start the print job, and then go to the printer.
4. Select the job from the list on the printer control panel and print.
Job separator page
A job separator page can be added to print jobs with the HP UPD. Job separator pages are useful for
separating print jobs in the output tray printed by different users. Each job is accompanied by a separator
page which provides information on which user has printed the job.
To enable the job separator page feature, follow these steps.
1. Open the Printers folder, right-click the printer, and select Properties.
2. Click the Device Settings tab.
3. Click Job Separator:, under Installable Options, and then select Enabled.
4. Click OK.
At least one feature for Output Bins should be selected to show up on the Output tab. A button displays
on the Output tab when the job separator feature is enabled. Click this button to open a dialog box to
configure the separator page. Select the Separator Page Details option in the separator page dialog
box to enable all controls on the dialog box. The default value for Source Is is Automatically Select
and for Media Type the default value is Plain. The other four check boxes are unchecked by default.
Once the job separator page feature is enabled, follow these steps to select it.
1. Open the Printers folder, right-click the printer, and select Printing Preferences.
2. Select the Finishing tab.
3. Click the Job Separator button.
Web Jetadmin language monitor support
The Web Jetadmin language monitor can be integrated into an HP UPD installation package. Doing so
enables Web Jetadmin to support products that use direct connect over USB for status and monitoring
proper Web Jetadmin client dependencies. This feature is only available as PCL6, PS, and PCL5 in
dynamic mode (not added for XPS or traditional mode).
ENWW HP UPD 4.7 Features 51

Eco-Print (Two-sided printing) shortcut
A new printing shortcut named Eco-print (Two-sided printing) is available on the Printing
Shortcuts tab with the HP UPD 4.7. Eco-print (Two-sided printing) allows duplex printing to be
enabled by default.
Cache printer settings
Printer settings can be cached to allow switching of physical products while maintaining the same TCP/
IP address.
The (<Policy>node member) element can be used to control how often the current MPP refreshes.
What this means is that downloaded MPP content is cached for the specified (or default) amount of time,
and any future requests for retrieval of the MPP result in using the cached content.
Job storage and PIN printing
Job storage is the capability of a printer to store a print job on the target product's hard drive or in its
memory. Job storage allows a print job to be stored and printed at the user's convenience. Job storage
also provides features for making a print job a personal job with a personal identification number (PIN)
and proofing a print job.
How the HP UPD works with job storage
During installation, the HP UPD queries the products for installed options and additional equipment using
Printer Automatic Configuartion. When job storage capabilities are detected, the HP UPD enables the
job storage feature and mopier function. To override these product derived settings, set Mopier
mode to Disabled in Device Settings. This disables job storage as well as product based collation.
Since printer drivers do not perform capacity checks before attempting to store print jobs, the job storage
area may become full. If this occurs, an Unable to store job at printer error message will display.
Access and configure the job storage feature.
To access the job storage features open the printer Properties and then select Printing
Preferences. Click on the Job Storage tab.
NOTE: If the HP UPD detects the presence of a hard drive or RAM disk on a printer, the Job
Storage tab is displayed and job storage is enabled by default.
52 Chapter 6 HP UPD Administrative features ENWW

Table 6-1 Job Storage tab features
Feature Function
Job Storage Mode Proof and Hold–Proof and Hold allows users to print the first
page of a multi-page print job and verify their print appears as
designed. After the first page is proofed, users print the
remaining pages at the printer control panel.
Personal Job–A user's print job is stored on the printer, but
not printed, until the print job is printed at the control panel.
After the job is printed, it is automatically removed from the
printer’s job storage. Personal jobs can be secured with a PIN.
Quick Copy–Quick Copy allows users to print a job through
the print driver and to then store the print job on the printer’s
hard drive for printing at a later time, without the need to re-
access the print job at their PC.
Stored Job–This feature allows users to send a print job to a
printer's hard drive or RAM disk and store the print job
indefinitely. The stored job can be printed at any time from the
printer’s control panel, eliminating the need to send commonly
printed jobs or forms from a user PC each time they are printed.
Stored jobs can be secured with a PIN.
User Name The User Name section defines how a job is stored and
identified on the printer. By default, a job is stored under a user
name. Selecting the Custom option allows a user to create a
new identifier for stored jobs.
Make Job Private Personal jobs and stored jobs can be made private by selecting
PIN to print and entering a 4-digit PIN. The PIN must be
entered at the control panel to print the personal or stored job.
This setting can be preconfigured using Install.exe, MPA, AD
group policy, DCU, or DDU.
NOTE: If a print job is made private and no PIN is entered,
the PIN defaults to “0000”.
Job Name This feature allows a user to identify the stored job by a custom
name. The default settings are increased in numerical value
as they are stored on the printers.
If job name exists: This setting allows the user to make a decision regarding same
name print jobs that are being stored on the printer.
Job Notification Options This option allows the user to decide if the job storage message
and job name are displayed on the user's screen when the job
is sent to the printer.
Pre-configure job storage capabilities
The job storage feature can be preconfigured and, if desired, locked down during printing. For security
purposes a company may decide to force every print job to be stored on the printer and retrieved by a
user, so no documents reside on the output tray unattended. The following section describes the
different methods for pre-configuring the job storage feature.
ENWW Job storage and PIN printing 53

Pre-configuration method Notes
HP UPD Install.exe utility The HP UPD Install.exe utility includes switches that allow the
job storage feature to be pre-configured.
●
/pfpjob–This switch enables the job storage capabilities
for the HP UPD. Refer to
Available command options
on page 37 in this manual for the arguments available with
this switch
●
/pfpjpin–This switch allows an administrator to pre-set a
unique 4 digit code to be used with the Pin printing or
personal job feature. Only numeric values are permitted,
and 4 digits must be used. The default value is 0000 if a
PIN is not selected.
HP Driver Configuration Utility The HP Driver Configuration Utility, DCU allows for job
storage, in this case known as Job Retention Mode, to be
enabled and locked prior to driver deployment. Use the pull
down menu to select the proper method of job storage desired.
Put a check mark in the Lock section if you want to force the
Job retention mode.
If Personal Job or Stored Job is selected an additional pull
down menu is created to allow for the setting of custom PIN
numbers. Click on the (+) Plus icon to enable require a PIN
setting and click on the next + icon to enter a unique PIN.
Please refer to the DCU release notes for additional
information.
Managed Printing Administrator MPA allows an administrator to pre-set the job storage
settings. The job storage settings are configured inside the
Managed Print Policies in the Default Print Settings. Create a
new template in the Default Print Settings and use the Private
Printing option to choose the storage option and lock option.
See
Manage the HP UPD using HP MPA on page 82 for more
information.
HP UPD Active Directory Template The Default Print Settings section is used to enable and
configure the job storage feature. Enable the feature and
choose the Private Printing option. Enter a custom 4-digit PIN
or use the default PIN of 0000. See
Manage Active Directory
Group Policy with the HP UPD using HP Active Directory
Templates on page 123 for more details.
Driver Deployment Utility The DDU tool utilizes the Driver Pre-configure Utility to allow
an administrator to preconfigure the driver settings prior to
creating the driver package. Please refer to the Readme notes
accompanying the DDU tool for additional details.
Modify HP UPD using Install.exe
Method 1: Upgrade queues on a print server.
When upgrading queues on the print server, the new version of the HP UPD is automatically installed
on to the client PCs at the next use of the printer. HP recommends that client PCs delete their connection
and then re-establish their connection to the printer queue on the server to make sure the new version
of the HP UPD installs on the client.
Method 2: Upgrade queues on a client.
54 Chapter 6 HP UPD Administrative features ENWW

This method upgrades the queues, using the same driver as the printer mentioned above to the latest
version of the HP UPD. The HP UPD installs in traditional mode.
install /ni /n”existing-queue-name” /tm /eads
Table 6-2 Install.exe command line switches
/ni
no install; does not install a new printer
/n”existing-queue-name”
point to an existing queue
/tm
select traditional mode
/eads
Enables HP UPD policy management via Group Policy
Objects.
Printer Automatic Configuration
This chapter contains information on using printer automatic configuration.
Device Automatic Configuration defined
Within the Universal Print Driver's (UPD) core functionality is Automatic Configuration enabling the UPD
driver user interface to change to reflect the supported capabilities of the target print device. Automatic
configuration occurs through bidirectional communication between the device and a UPD. This
communication can occur over the network or to a USB direct connect device. When the user installs
the driver the default printer model options will be base model. Successful implementation requires the
UPD installed bidirectional services are loaded, the correct port settings, and the target device is
available direct connect to the host or over the network. If the communication is successful, the printer
options will be updated in the driver user interface. This process of the UPD sending request and
accepting responses directly between the driver the device is referred as 'bidi' for bidirectional
communication. The UPD driver user interface options will change to enable features of the target device
based on the result of the response query (installable trays, Duplexer, Accessory Output Bin, HP Easy
Color, etc). If the communication is unsuccessful, the driver will still have base model functionality
presented in the UPD driver user interface and extended options will not be displayed or available for
use during FILE-PRINT.
The benefit of Printer Auto-Configuration is enabling the driver to query the printer and recognize the
device’s capabilities with a level of automation and accuracy.
Printer Automatic Configuration can only be launched in the following methods.
1. UPD driver installation (automatic update to all queues utilizing the UPD driver)
2. Dynamic mode- each time PRINT is selected from the UPD client.
3. Update Now GUI: Traditional mode installations can manually launch through the UPD driver User
Interface: Printer Properties-Device Settings tab-Installable Options-Automatic Configuration-
Update Now.
4. UPDATE COMMAND LINE: Traditional mode installations can execute a command line using
Microsoft's Rundll32.dll allowing change updates to occur through scripting (reference table A).
Automatic Printer Configuration status
Dynamic mode: invoke Printer Automatic Configuration each time the HP UPD user interface is invoked
(ie- print properties for FILE-PRINT from the application).
ENWW Printer Automatic Configuration 55

Traditional mode: Printer Automatic Configuration status can be determined by checking the About
tab of the HP UPD available through the HP UPD Printer Properties.
Figure 6-1 Printer Automatic Configuration status
Traditional Mode About status.
●
Auto-Configured MM/DD/YYYY: Automatic configuration through the Printer Automatic
Configuration has successfully executed and updated the printer's configuration. Status of "Last
Configured xx/yy/zzzz" displays date of the last attempted automatic configuration.
●
Not Auto-Configured: will apply if the driver is Printer Automatic Configuration enabled, and
PRINTER AUTOMATIC CONFIGURATION runs, but could not update the configuration (i.e.,
unable to communicate with the printer). Status of Last Configured xx/yy/zzzz displays the date
of the last attempted automatic configuration.
●
Auto-Configuration Not Attempted: will apply when the driver is Printer Automatic Configuration
enabled, but Printer Automatic Configuration did not run. This would be a case such as when the
driver is Printer Automatic Configuration enabled, but the registering of the services fail loading a
DLL.
NOTE: If the Printer Auto-Configuration options has been disable via driver pre-configuration the
Configuration Status box will show
Administrator Preferences Not Applied
Last Configured xx/yy/zzzz (which is the date of install)
Default Configuration
User Interface
Traditional Mode installations: the Printer Auto-Configuration is automatically executed at the end of the
installation routine. When the printer’s capabilities have changed the ‘Update Now’ process can be
56 Chapter 6 HP UPD Administrative features ENWW

launched from the driver user interface to allow the UPD to query the target device: Printer Properties-
Device Settings tab-Installable Options-Automatic Configuration-Update Now.
Figure 6-2 Setting Automatic Configuration through the user interface
Automatic configuration selectable options
●
Automatic Configuration:= Off: The update now bidirectional communication is not currently in
progress
●
Automatic Configuration:= Update Now: The driver is in process of communicating with the target
product; this process can take minutes dependent upon environment and configuration. When
finished, the status will change to Off.
Dynamic mode installations: The Printer Automatic Configuration is happen automatic using the
following methods:
a. Hitting Print.
b. After Enter a Printer Address.
c. Selecting Check Status... of an existing printer.
d. Searching for products on the network subnet.
The configuration is automatically updated each time the client connects to the printer via Dynamic mode
connection.
ENWW Printer Automatic Configuration 57

Command line interface
Starting with HP UPD 4.0, administrators can script the Update Now process from a command line for
traditional mode installations of the HP UPD driver. This applies only to HP UPD traditional mode
installation. The files used and file location required for configuration entry point are different with Printer
Automatic Configuration release and therefore Microsoft platform UPD version specific.
Table 6-3 Platform specific commands for scripting the Update Now process
HP UPD version Platform Example command line
HP UPD 4.5 x86 rundll32
%systemroot%\system32\spool\drivers\w32x86\3
\hpmux081.dll,UpdateStaticModePrinter "printer
name here" /q
x64 rundll32
%systemroot%\system32\spool\drivers\x64\3
\hpmux081.dll,UpdateStaticModePrinter "printer
name here" /q
HP UPD 4.7 x86 rundll32
%systemroot%\system32\spool\drivers\w32x86\3
\hpmux083.dll,UpdateStaticModePrinter "printer
name here" /q
x64 rundll32
%systemroot%\system32\spool\drivers\x64\3
\hpmux083.dll,UpdateStaticModePrinter "printer
name here" /q
HP UPD 4.7.2 x86 rundll32
%systemroot%\system32\spool\drivers\w32x86\3
\hpmux084.dll,UpdateStaticModePrinter "printer
name here" /q
x64 rundll32
%systemroot%\system32\spool\drivers\x64\3
\hpmux084.dll,UpdateStaticModePrinter "printer
name here" /q
HP UPD 5.0 x86 rundll32
%systemroot%\system32\spool\drivers\w32x86\3
\hpmux091.dll,UpdateStaticModePrinter "printer
name here" /q
x64 rundll32
%systemroot%\system32\spool\drivers\x64\3
\hpmux091.dll,UpdateStaticModePrinter "printer
name here" /q
58 Chapter 6 HP UPD Administrative features ENWW

Example steps to initiate Printer Automatic Configuration via command line
1. Note the Printer Name and Platform Specific DLL of the installed HP UPD. From the system's
Printers and Fax folder, right mouse on the printer name and select Properties, About to locate
the HPMUX*.DLL and the installed driver name instance.
Figure 6-3 Locate the platform specific DLL
2. Open a command prompt: START-RUN-CMD.EXE [enter]
C:\> rundll32 %systemroot%\system32\spool\drivers\w32x86\3
\hpmux091.dll,UpdateStaticModePrinter "HP Universal Printing PCL 5
(v5.0)" /q
User dialogue box opens stating, “Getting printer information… Establishing Communication with
printer… Finishing printer validation”
3. Open the HP UPD Printer Properties-About tab and check the Configuration Status box. The
status should display the current system date for Last configured xx/yy/zzzz and default options
for the printer or HP UPD preconfigurations of the driver display in the HP UPD user interface.
Disabling Printer Automatic Configuration
UPD installed services provide bi-directional I/O capability outside the context of the user, application,
or print job. Most printing functions will work without the driver to device communication, and print quality
and speed are not affected by the services enablement. UPD 4.7 added support for manual configuration
of the driver to both enable and configure device capabilities without requiring Automatic Update to be
enabled. The Installable Options section of the UPD’s Device Settings tab can be manually defined
using Driver Configuration Utility or the Driver Deployment Utility.
Benefits Comparison
NOTE: Using bi-directional communication is strongly recommended.
ENWW Printer Automatic Configuration 59

Automatic configuration enabled
1. Accuracy in Device capabilities: capabilities of the target device can change without end user
awareness. Automatic configuration allows the UPD to accurately reflect the capabilities of the
target device.
2. Staged deployment: If the printers are not yet available printer automatic configuration is a good
option. The install.exe utility will still create the port. The only consequence of not having the printer
connected is that they would get the defaults for the printers, but a simple update now (user
interface or command line) after the device is added to the host or network synchronizes the UPD
driver to device capabilities.
3. Manual configuration of every setting for every device connection introduces additional
management overhead defining settings or correcting misconfigurations.
4. Manual configuration requires managing multiple Driver Configuration Utility settings files (*.cf_ or
*.cfm).
Automatic configuration disabled
1. Administrator’s can disable printer automatic configuration to control which device capabilities are
presented through the print user interface. For example, if a device supports a particular feature
that does not comply with standard fleet deployment, the features enablement can be centrally
controlled.
2. Pre-Installed queues: administrators can manually configure device capabilities regardless of the
device’s status on the network. For example, an administrator could define duplex printing in the
driver without the device having to be on the network at the time of pre-configuration (the driver
does not have to confirm the targeted device capabilities).
3. The device is hooked up over an NDPS queue on a Novell Server.
Default capabilities without automatic configuration
Printer Automatic Configuration can be disabled through pre-configuration of the UPD driver. If the
Automatic Update feature is disabled using the Driver Configuration Utility tool prior to the UPD’s
installation standard printing defaults or cached settings will be utilized by the UPD and Status
Notification Pop-ups (SNP) will not work.
If a capability is enabled though pre-configuration of the driver that the target device does not support,
printing failures or unexpected results will occur. For example, setting duplex for a device that only prints
simplex will output simplex.
Table 6-4 Defaults applied when the Printer Automatic Configuration fails attempted communication.
PLC5, PLC6 Post Script
Trays 1,2 1,2
Manual Feed Tray 1 Tray 1
Envelope Feeder Not installed Not installed
Duplex Installed Installed
Accessory output bin Not installed Not installed
Hard disk Installed Installed
Device type Monochrome (1) Color (2)
60 Chapter 6 HP UPD Administrative features ENWW

NOTE: Device type can be changed to Color by reconfiguring the Device Type on the Properties ->
Device Settings tab. Monochrome PCL 5 and PCL 6 devices cannot handle color data. If color data is
sent, the device will either generate an error or unexpected print output.
NOTE: Postscript driver always sends color regardless of device type. Monochrome devices are able
to handle the color data properly. However, the driver color tab may not display.
Steps to disable the Printer Automatic Configuration
Disabling the Printer Automatic Configuration is accomplished through pre-configuration of the UPD
driver before installation onto the client or server. The HP Driver Configuration Utility available for
download from the HP public website:
www.hp.com/go/dcu
1. Using the Driver Configuration Utility, path out to the UPD driver files and open the *.cf_ file or the
*.cfm if modifying pre-configuration setting file of UPD already installed onto a system.
2. From the Device Settings tab, select "Printer Auto-Configuration" drop down menu.
a. Disabled
1. Printer Automatic Configuration will not run at install time
2. Auto Configuration will be grayed out/disabled in the Device Settings tab
3. Feature will not apply to dynamic Mode
4. The Auto-Configuration UI control on the Device Settings tab will remain ENABLED
allowing Administrators to manually invoke the Printer Automatic Configuration from the
driver itself.
5. The SNP Pop–ups will not be displayed if bidirectional communication is disabled. SNP
requires the ability to communicate to the devices via SNMP.
b. Enabled (Auto Configuration Takes Priority)
c. Enabled (Driver Pre-Configuration Takes Priority)
1. Is the current Processing order for DMC /PRINTER AUTOMATIC CONFIGURATION
2. Is the default for PRINTER AUTOMATIC CONFIGURATION.
d. Help About in the Configuration Status box will display
◦
Administrator Preferences Not Applied
◦
Last Configured xx/yy/zzzz
◦
Default Configuration
If bidirectional communication is successful followed by bidirectional communication failing on
successive attempts, the driver user interface options will utilize cached settings of the last successful
Printer Automatic Configuration.
ENWW Printer Automatic Configuration 61

Communication protocols
Bidirectional communication between the UPD driver and the target device occur direct or over the
network:
●
SNMP over the network: UDP ports 120 (general request/response messages) and 121 (traps).
●
HTTP over the network (Job Capabilities Ticket): a compressed file that can be sent to the UPD
over http that defines specifications for the target device. JCT implementation in UPD v5 only
includes media types, paper type and HP Easy Color. Device supporting JCT will also communicate
SNMP information during bidirectional communication, therefore JCT supported devices may
display more capabilities compared to non JCT supported devices.
●
PML over DOT4: DOT4 is based on the IEEE 1284.4 protocol. For direct connect, DOT4 over USB
or DOT4 over LPT is used for most devices. Many composite devices do not support DOT4 and
may support an alternate directional mechanism.
●
Low end device model (LEDM) over Composite USB: Beginning with UPD v4.7 the UPD can
query low end laser models direct to get device configuration, status and alerts over composite
USB. If the low end device is also networked, UPD printer automatic configuration will use the
network.
Printer Automatic Configuration services
HP UPD installs two services that enable Printer Automatic Configuration to function. In combination
these services allow the HP UPD to retrieve device configuration after installation, using UPDATE NOW,
or via command line using RUNDLL32.
●
Net Driver HPZ12: Provides channelized data transfers over the network for scan and fax
●
Pml Driver HPZ12: For USB connected devices that support PML or for network SNMP, provides
the ability to determine what features a device has using printer automatic configuration and device
status.
Steps to Disable
By default two UPD installed services are set to load Automatic. If the UPD is preconfigured prior to
installation to disable Printer Automatic Configuration using the Driver Configuration Utility or Driver
Deployment Utility, and the system installing UPD does not already have the UPD or other HP driver
utilizing bidirectional communications, the UPD services will not be registered to the system.
If the “PML Driver HPZ12” is stopped and set to Manual the service will restart when UPD Update
Process is launched; if set to Disable when the UPD Update Process is launched an error may be
generated.
Steps to Remove
See Uninstall the HP UPD on page 45
62 Chapter 6 HP UPD Administrative features ENWW

Symptoms when Printer Automatic Configuration fails
When the HP UPD Printer Automatic Configuration services have not or can communicate direct to the
target printing device the exact capabilities of the target device will be unknown to the installed HP UPD
printer. Symptoms or observable changes to the HP UPD installed driver can include the following.
●
Error message displays, This command could not be completed because a printer
communication error occurred.
●
No special device features or device attachments available for selection.
●
Black and white printing only (even to color devices).
●
No color tab.
●
No duplex unit.
●
No hard drive (no Job Storage tab).
●
No Status Notification Pop-ups during FILE-PRINT (this feature may also be disabled through
administrator settings at time of HP UPD install).
Troubleshooting
Printer Automatic Configuration can fail communication with the device because of issues in the
communication path, the client or network configuration may prevent communication, or the feature has
been disabled by the print administrator at install via driver preconfiguration. Take the following steps
to isolate issues when Auto–Configuration is not successful.
1. Can the HP UPD print to the target device?
No, then bidirectional communication may also fail because of connection issues between the HP UPD
and the target print device.
2. Is the HP UPD printer defined with Printer Auto Configuration enabled?
Check the Printer properties-Device Settings tab. Under Installable Options, is Automatic-Configuration
grayed out?
a. Yes, run "Update Now" to check bidirectional communication
b. b) No, then Auto-Configuration has been disabled either through driver configuration or disabling
the bidirectional communication services. Suggested steps.
◦
Are the Net Driver HPZ12 and PML Driver HPZ12 services installed (My Computer- Manage-
Services or by NET START at the command line)?
◦
Reinstall the driver after confirming the source *.cf_ file or *.cfm file has not been preconfigured
to disable Printer Auto Configuration. If unsure, download the source driver package from
www.hp.com/go/upd and perform a default installation without using HP Driver
Preconfiguration Utility.
ENWW Printer Automatic Configuration 63
3. After running "Update Now" were expected results returned?
a. Check the Printer Properties-About tab and verify "Last Configured xx/yy/zzzz" date matches the
Microsoft OS system date (confirmed typing START-RUN-cmd /k date). If not then Auto
Configuration did not succeed.
b. Was an error message returned?
"This command could not be completed because a printer communication error occurred" Check
for the correct port, port address, physical and logical connection to the target device.
c. Paper types supported by the target device are not in the UPD driver user interface?
1. For some older device the UPD may not retrieve the device's full list of supported paper types.
Instead, the UPD driver presents a subset of paper types, a generic list believed to be
supported by most all printers. Presenting a generic list supported by most all printers prevents
selecting a paper type through that perhaps the device would not support. For a small class
of devices the penalty for this level of protection is not displaying a paper type that the device
might support. If the paper type is not part of the generic list of paper types it will not be
presented through the UPD driver UI.
2. ii. Changes to media such as paper size or paper types settings made via the device’s
embedded web server, HP Web Jetadmin to the device, or the device’s control panel would
not change or update the UPD driver display options. To administrate these types of change
to appear in the UPD drive user interface:
(a) The end user would need to go to PROPERTIES-ADVANCE-Printing Defaults and
manually change.
(b) Point and Print vended client would see the defined setting under Printing Preferences
(c) Pre-configuration of the UPD driver with the HP Driver Configuration Utility or the HP Driver
Deployment Utility prior to install or reinstallation of the driver.
4. What is the physical connection method between the HP UPD installed printer and the
target printing device?
Bidirectional communication between the HP UPD driver and the target device is possible through direct
connection to the device or over the network by means of TCPIP. To confirm your connection method,
select the HP UPD in Printers folder, Print Properties, and check the Port tab. Is the selected port
defined correctly?
●
No, set to the correct port type or port address (tcpip address or DNS name)
●
Yes, proceed to next steps, either Troubleshoot Network connected or Troubleshoot Direct
connected.
5. Troubleshoot network connection/port
a. Can you ping the target print product by the TCPIP address? By host name?
b. Can you ping the print server by the TCPIP address? By host name?
c. Is the UPD’s target port defined by hostname or IP address?
d. If by host name fails, is the hostname registered in DNS? nslookup dns_name_of_device
64 Chapter 6 HP UPD Administrative features ENWW

e. Is the UPD installed client traversing network subnets to the target print server or printing device?
Is yes, is http and snmp traffic allowed through these connection paths? To define the segments
in the network path run the following from the UPD install client: tracert print_device_ipaddress
f. Is the localhost or the target print server running an internet firewall? Are ports 120, 121, and/or
80 open?
g. Can the UPD client host access the device's embedded web server? http://device_ip_address or
https://device_ip_address
h. Network issues such as denial-of-service at the print server or printing device, network service
interruption, or unauthorized and privileged access to the target print device or print server
i. TCP filter enabled: TCPIP-ADVANCED-Options Tab-PROPERTIES (types of traffic allowed to
pass to the TCP protocol)
6. Distinguish if target product is communicating bidirectional for printer auto
configuration via HTTP or SNMP?
Bidirectional communication over the network could occur via HTTP and SNMP dependent upon target
device. Errors specific to the protocol:
HTTP
a. Does the device support hp job capabilities ticket? To determine,
http://device_ip_address/hp/device/JobCapabilities/
JobCapabilitiesTicket.zip
b. HTTP port 80/tcp is enabled in the \ % SystemRoot %\System32\Drivers\Etc\services file?
c. Does the HP UPD installed host firewall allow HTTP traffic?
d. If the target product is on a separate subnet, does the network route HTTP traffic?
SNMP
a. Do community names of the installed HP UPD host match the community name of target print
product?
b. Does the HP UPD installed host firewall allow SNMP traffic?
c. If the HP UPD installed host is on a separate subnet, does the network route SNMP traffic?
d. Wireless network security often disable SNMP routing as a security measure.
e. SNMP ports 161/upd and 162/upd are enabled in the \ % SystemRoot %\System32\Drivers
\Etc\services file are enabled?
7. Install and test a new print queue?
Reducing complexity to isolate variables. A simple test is to install the UPD driver taken from
www.hp.com/go/upd using the default installation options onto a clean system. This insures the driver
has not been pre-configured before installation, that upgrade from one version to the next in a
contaminated environment is reduced, and the print queue itself is new and self managed. During
installation, create a new print queue targeted to a device with an address on the test machine’s subnet.
ENWW Printer Automatic Configuration 65

FAQ
1. For non permanent instance installations of the UPD will the printer be queried every
time? For cases where a user has chosen to create a permanent instance of a printer, settings are
permanently saved to the local registry (like any other printer driver) and the user would continue
to print to that permanently created instance. For cases where a user has not chosen to create a
permanent instance of a driver, registry entries are saved in a .CREG file (cached registry). Initially
the driver will attempt to save the CREG files to the "C:\Program Files\Hewlett-Packard\HP
Universal Printing" directory. If that directory is not available or is locked, the driver will attempt to
cache settings in the %TEMP% then %TMP% directories. If neither of these directories are
available then the HP Universal Print Driver will query the printer every time for non-permanent
instances.
2. How does enabling or disabling the Microsoft port Enable bidirectional support impact the
HP UPD's bidirectional communication? The HP UPD uses the MS port’s bidirectional
communication for basic status level related to print spooler operations such as ‘Printer Online’ and
‘Paper Out.’ However, for product configuration and capabilities the HP UPD uses its own installed
services for bidirectional communication between the HP UPD and the target product (NET
DRIVER HPZ12 and PML DRIVER HPZ12).
Figure 6-4 Enabling bidirectional support
3. Does HP UPD Printer Autoconfiguration bidirectional communication cause slow print
performance? No, the traffic send/receive response is very small (SNMP around 65 kilobytes) and
infrequent. For traditional mode installation the UPD only queries for printer information at time of
installation, when executed through Update Now or RUNDLL32 at the UPD installed client, and for
a simple change id at the beginning of Printer Automatic Configuration job to verify that the
configuration has not changed.
4. After the PRINTER AUTOMATIC CONFIGURATION has completed a successful bidirectional
update several device features appear in the UPD driver user interface that my device does
not support. For example, why does the DEVICE SETTINGS tab show "Tray 3: Not Installed"
for several trays? The settings are place holders for the UPD. Because the UPD does not know
before an Automatic or Preconfiguration of the driver's exact configuration the UPD driver UI
66 Chapter 6 HP UPD Administrative features ENWW

structure must remain capable of displaying settings beyond the standard default settings in the
UDP drivers UI design. By preserving the setting locations, after completing Printer Automatic
Configuration update the user interface can dynamically update the "Not Installed" settings to the
current configuration when a change has occurred to configuration of the device.
5. Print Properties-Device Settings-Installable Options, the Automatic Configuration option is
grayed out and unavailable for selection. What could be the cause?
Two possibilities dependent upon how the driver was installed onto the host.
a. Point and Print connection the driver is a printing client to print server connection. Updates
would be centrally controlled from the print server and not the client, therefore the print client
would not initiate the Printer Auto Configuration between the print queue and the target printing
product. However, printing clients can check their Printer Properties-About tab to display the
server's last update status between the print server and printing target product:
Auto-Configured MM/DD/YYYY
Not Auto-Configured
Auto-Configuration Not Attempted
b. Printing Automatic Configuration may have been disabled by pre-configuration of the driver
before the HP UPD was installed. This can be confirmed by checking the About tab; the
following will display if disabled by your Administrator:
Auto-Configured MM/DD/YYYY
Not Auto-Configured
Auto-Configuration Not Attempted
6. Is there a good method for testing Printer Automatic Configuration?
a. a) Install UPD with default options (do not utilize switches on the INSTALL.EXE command
line) using an HP default driver package downloaded from
www.hp.com/go/upd. This step
ensures the driver has not been pre-configured.
b. During installation, create a new printer port with an invalid TCPIP address. During the UPD
installation the Automatic Configuration will attempt to communicate to the invalid device IP
address. Install will complete without error and provide default options. For example, the Color
tab will not display because automatic configuration could not validate a color printer at the
defined TCPIP address.
c. For the newly install UPD printer check Printer Automatic Configuration is enabled (Printer
Properties-Device Settings tab-Installable Options-Automatic Configuration-Update Now)
d. Check the ABOUT tab and note the "Last Configured xx/yy/zzzz" which identifies if Printer
Automatic Configuration has communicated with the target device.
e. Optional: Note the date of the MS system clock
START-RUN, cmd.exe /k date
Change the Microsoft OS system date forward (make sure the system is not set to synchronize
with a time server).
f. Change the UPD install printer TCPIP port address to a valid device IP address.
ENWW Printer Automatic Configuration 67

g. Run UPD's Printer Automatic Configuration through the UPD driver user interface or the
command line specific to the installed UPD version (see
Command line interface
on page 58).
h. Check the device capabilities updated from the default settings.
i. Optional: If you forced the date change in the previous step, check the ABOUT tab and note
the "Last Configured xx/yy/zzzz." The date should change to the system’s date.
7. Does the following message, "Windows Security Alert: Spooler Subsystem App" generated
during the installation relate the UPD's installed bidirectional communication services over
the network? UPD installation can make calls over the network utilizing different ports and
communication protocols for configuration, device capabilities and status. For example, ports 120,
121, and 80 might all be utilized in the Printer Automatic Configuration process when the UPD
communicates bidirectional over the network to the target device. If the ports used by the print
spooler are not open, the firewall may need to be configured.
8. Is there a tool or steps to test SNMP port access required by UPD printer automatic
configuration? The SNMP port utilization by UPD will not be active until traffic is being sent or
received during the Update Now process. Full diagnosis involves checking port access at all
connection points of the network between the UPD printing client and target device (gateway/
routers/switches/server and host firewalls). Utilities to help troubleshoot connection path access
can include Net Print, netstat, tracert, and pathping to identify network device access. SNMP port
utilization by UPD will not be active until traffic is being sent or received during the Update Now
process making a network sniffer one of the best tools for diagnostics during the update process.
68 Chapter 6 HP UPD Administrative features ENWW

7 Use HP Universal print drivers
Introduction
The HP Universal Print Driver (HP UPD) combines a general-purpose print driver with additional
functionality allowing users to print to:
●
Devices on a local port
●
Devices on a network
●
Devices on a managed printer list
The following sections describe how to use the HP UPD and its features.
●
Use the HP UPD
●
Print using the HP UPD
●
Add a printer to the Printers and Faxes folder
ENWW Introduction 69

Use the HP UPD
●
Universal print driver modes
●
Configure HP UPD dynamic mode settings
●
Change the settings for the HP UPD
●
Change driver properties (print job preferences)
●
Help
Universal print driver modes
The look and feel of the HP UPD varies depending on whether it has been installed in dynamic or
traditional mode.
For more information about installing the HP UPD in these modes, see
Install and Uninstall of the
HP UPD on page 31.
Traditional mode
When installed in traditional mode, the HP UPD behaves as a product-specific driver, associated to a
specific printer with a permanent instance of the driver in the Printers folder. Traditional mode installs
using the Add Printer Wizard in the Printers folder or by using Install.exe.
Dynamic mode
An HP UPD installed in Dynamic mode allows the most flexibility for the users to locate and connect
to products.
A user can print to a wide variety of supported HP products using the HP UPD without having to download
a product-specific driver.
When printing in a mobile environment, the user also has the ability to search for printers through any
of the three search features enabled by default.
Dynamic mode offers a unique, easy to use user interface that steps the user through the printer
discovery and selection process. Dynamic mode requires user interaction because it presents the user
with a dialog box for entry of the printer's IP address or the printer's host name. This interaction can be
minimized by adjusting the dynamic mode settings mentioned in this section.
Advanced features available for the HP UPD allow an administrator to offer additional printer discovery
options and management control via HP Managed Printing Administrator and the HP UPD Active
Directory Administrative Template.
The following information describes the driver in Dynamic mode unless otherwise stated.
Configure HP UPD dynamic mode settings
The processes for entering the Dynamic mode UI and changing the default behavior is outlined below.
70 Chapter 7 Use HP Universal print drivers ENWW

To access the Printing Preferences and Properties, do the following:
1. Click Start, Settings, then Printers.
2. In the Printers window, right-click the driver.
3. Click Properties or Printing Preferences.
Change the settings for the HP UPD
Access the settings of the HP UPD in one of the following ways:
●
When printing: In the Print dialog box, select HP Universal Printing and click Properties.
●
From the Printers folder: Right-click HP Universal Printing and select Properties or Printing
Preferences.
Change General HP UPD settings
To specify the prompt you receive for destination printers when you are printing, follow these steps:
1. Do one of the following:
●
When printing: In the Print dialog box, select HP Universal Printing and click Properties.
●
From the Printers folder: Right-click HP Universal Printing and select Properties or
Printing Preferences.
2. Click Settings (number 5 on
Figure 7-1 HP UPD dialog box on page 74) and click the General
tab.
3. Select one of the following options:
●
Always prompt for the printer when printing a job.
The HP Universal Printing dialog box displays every time HP Universal Printing is the selected
printer. You can select a destination printer in this dialog box.
●
Only prompt the first time a job is printed from an application.
The HP Universal Printing dialog box displays the first time HP Universal Printing is selected
as the printer from an application. This option is helpful if other print jobs from that application
are sent to the same printer by reducing the number of key clicks required by the user.
●
Only prompt if the last known printer is no longer available.
The HP Universal Printing dialog box displays if the last used printer is no longer available.
4. Click OK.
ENWW Use the HP UPD 71

Change Device Verification settings (number 5 on Figure 7-1 HP UPD dialog box
on page 74)
To set the level of verification required to allow printing, follow these steps:
1. Do one of the following:
●
When printing: In the Print dialog box, select HP Universal Printing and click Properties.
●
From the Printers folder: Right-click HP Universal Printing and select Properties or
Printing Preferences.
2. Click Settings and the Device Verification tab.
NOTE: See Figure 7-1 HP UPD dialog box on page 74 for a picture of the dynamic mode screen.
3. Set the level of verification required to allow printing:
●
Verify bidirectional communication with device and language compatibility with driver
(High) to block printing if bidirectional communication and language compatibility cannot be
verified.
●
Verify device ID and Model Name can be obtained from port (Medium) to block printing
if the product ID and Model Name cannot be verified. Medium is the default setting.
●
Verify port can be opened for printing (Low) to allow printing (but issue a warning message)
if the port can be opened for printing.
4. Click OK.
Change driver properties (print job preferences)
Access HP UPD properties in one of the following ways:
●
When printing from an application—Recommended to change print settings for a single print
job, or for print jobs during a single session in an application.
●
From the Printers and Faxes folder—Recommended to change default print settings for all
applications that use this driver.
Change driver properties while printing
NOTE: The changed settings apply only to the current print job or only to print jobs sent within the
same session in that application.
1. From an application, click File and Print.
2. Select the Printer representing the dynamic mode use and click Properties. The HP Universal
Printing dialog box opens.
3. Select a printer from the Recently Used Printers list, or find a printer, and click OK. The
HP Universal Printing Properties window opens.
4. After making changes to the driver settings, click OK. The Print window returns.
5. Click OK to print the job according to the changed settings.
72 Chapter 7 Use HP Universal print drivers ENWW

Change driver properties from the Printers and Faxes folder
NOTE: The changed settings apply as default settings for all print jobs in any application that uses
this driver.
1. In the Printers folder, right-click on the printer representing HP UPD dynamic mode use and select
Properties or Printing Preferences. The HP Universal Printing dialog opens.
2. Select a printer from the Recently Used Printers list, or find a printer, and click OK. The
HP Universal Printing Properties window opens.
3. After making changes to the driver settings, click OK.
Help
Click the Help button in the HP Universal Print Driver software to open the HP Universal Print Driver for
Windows User Guide.
Print using the HP UPD
Printing using the HP UPD depends on the installation mode of the HP UPD.
An HP UPD installed in dynamic mode functions within the constraints established by the administrator
to manage the printer. If a feature does not behave normally, the administrator might have limited the
functionality.
An HP UPD installed in traditional mode behaves like a product-specific driver. The HP UPD behaves
according to the driver features available for the product to which the driver is attached.
See the following sections for more information. This section is divided according to the installation
method, as the installation method dictates how the HP UPD behaves.
●
Print using the HP UPD in dynamic mode
●
Print using the HP UPD in traditional mode
ENWW Print using the HP UPD 73

Print using the HP UPD in dynamic mode
Figure 7-1 HP UPD dialog box
6
1
2
3
4
5
When the HP UPD is installed in dynamic mode, it appears as a typical printer in the user's Printers
folder. Dynamic mode provides a unique interface to the users allowing them to instantly locate and
connect to printers on the fly.
Search for printers using any of these methods:
●
Enter a printer address.
●
Search the local subnet for printers.
●
Enter the name of a print server.
The next section details each of the dynamic mode options. Printers found via dynamic mode are
temporary connections and do not appear individually in the Printers folder. Dynamic mode installation
of the HP UPD does not require the user to have any elevated rights or printing permissions, allowing
the existing user permissions to remain intact. Dynamic mode is supported in Direct IP and local printing
only and is not supported as shared printers on print servers at any time.
See the following for more information.
●
Dynamic mode options – Default configuration
●
Use dynamic mode
●
Select a recently used printer (number 1 on )
●
Find a printer (number 3 on )
Dynamic mode options – Default configuration
By default the name of the dynamic mode printer created is the same as the name of the driver. In the
case of PCL6, the default queue name is HP Universal Printing PCL6. This name can be changed during
installation, or renamed to something more descriptive like “Search for a Printer”.
74 Chapter 7 Use HP Universal print drivers ENWW

NOTE: The printer name is changed in the printers folder after the driver is installed.
Use dynamic mode
1. From an application, click File and Print.
2. Select HP Universal Printing as the printer, and click OK. The HP Universal Printing dialog box
(
Figure 7-1 HP UPD dialog box on page 74) opens.
3. For the quickest way to print, select a printer from the Recently Used Printers list, and then click
Print.
If no printer is available in the Recently Used Printers list, or if you prefer to find a different printer,
you can find a printer immediately by using one of the options under Find a printer.
Select a recently used printer (number 1 on Figure 7-1 HP UPD dialog box on page 74)
The Recently Used Printers list contains all the products to which the HP Universal Print driver has
recently printed. After you have determined which recently used printer to use, click Print.
Additional options:
To verify whether or not this printer contains the necessary supplies for the print job before printing, click
the Check Status button.
To add a recently used printer to the Printers folder, select the Add this printer to my Printers
folder option. This option allows you to print directly to this printer rather than accessing it through the
HP Universal Printing dialog box.
NOTE: Recent changes to the HP UPD (Version 4.5 and newer) no longer require that the user have
elevated rights to create a permanent instance of the selected printer. Restricted or “locked down” users
can now create traditional mode queues from within the dynamic mode routine.
Find a printer (number 3 on Figure 7-1 HP UPD dialog box on page 74)
From the HP Universal Printing dialog box, you can find a printer (number 3 on Figure 7-1 HP UPD
dialog box on page 74) locally or on the network and print to it immediately.
The following methods for locating and connecting to a printer are available:
●
Enter a printer address—Recommended if the IP address, host name or UNC path is known or
if you want to use a printer that is outside your local subnet.
NOTE: To determine the printer address, print a configuration page from the printer.
●
Search for network printers—Recommended if you do not have the printer address for a printer
or you want to see what products are available on your subnet. This feature uses a local subnet
broadcast known as Multicast DNS (mDNS) and is similar to the Bonjour or Rendezvous protocol.
For Devices to show up in the Network Printers list, the following requirements must be met:
◦
The printer must be on the same subnet as the PC running dynamic mode.
◦
mDNS, TCP/IP V4 protocol, port 9100 printing must be enabled.
ENWW Print using the HP UPD 75

NOTE: The printer list returned represents the list of printers available on the local subnet. The
information for each printer by default represents the mDNS service name and is a text field that
can be changed to provide more descriptive information for the users.
●
Search for print shares—Recommended if you want to view shared printers on the network or
products that use a print server.
NOTE: The above are all default options. Other options might be available depending on the print
policies created by your system administrator. Contact your system administrator for more information
about these options.
See the following for more information.
●
Enter a print address
●
Search for network printers
●
Search for print shares
Enter a print address
NOTE: To determine the printer address, print a configuration page from the printer.
1. Click Enter a printer address.
2. Type the printer address (IP address, host name, or UNC path) and click OK. If the printer address
is found, the printer is displayed under the Printer Information pane on the right side of the window.
3. Click Print.
Check Status
To verify the status of the product or whether the printer contains the necessary supplies for the print
job before printing, click the Check Status button.
Add this printer to my Printers folder
To add the currently selected printer to the Printers folder as a traditional mode print queue, select the
Add this printer to my Printers folder option (number 6 on
Figure 7-1 HP UPD dialog box
on page 74). This option allows you to print directly to this printer rather than accessing it through the
HP Universal Printing dialog box. Adding a traditional mode printer via dynamic mode no longer requires
that the user have elevated rights.
Search for network printers
When selecting Search for Network Printers, the HP UPD will use the mDNS protocol to discover
products on the local subnet only. This means that only products on the same subnet as the HP UPD
will be displayed in the list. mDNS, or Multicast DNS is also known as Bonjour protocol.
1. Click Search for network printers. The available printers appear under Printers in the Search
for network printers dialog box.
If necessary, click Refresh to update the list.
2. Select the desired printer and click OK. The selected printer is displayed under the Printer
Information window. Click OK to return to the main dynamic mode window. The selected printer
also appears on the right side of the pane under Printer Information.
3. Click OK to proceed.
76 Chapter 7 Use HP Universal print drivers ENWW

More options:
To verify whether or not this printer contains the necessary supplies for the print job before printing, click
the Check Status button, number 4 on
Figure 7-1 HP UPD dialog box on page 74 .
To add a recently used printer to the Printers folder, select the Add this printer to my Printers
folder option. This option allows you to print directly to this printer rather than accessing it through the
HP Universal Printing dialog box.
Search for print shares
1. Click Search for print shares.
2. Enter the network printer address, example \\servername\sharename or click Browse to
browse the network for shared printer resources, a print share, or a shared printer.
3. Click OK. The printer displays under the Search for print shares option.
4. Click Print.
More options:
To verify whether or not this printer contains the necessary supplies for the print job before printing, click
the Check Status button.
To add a recently used printer to the Printers folder, select the Add this printer to my Printers
folder option, number 6 on
Figure 7-1 HP UPD dialog box on page 74. This option allows you to print
directly to this printer rather than accessing it through the HP Universal Printing dialog box.
Print using the HP UPD in traditional mode
When a printer is installed using the HP UPD in traditional mode, it behaves just like the product specific
drivers.
1. In the program, click File, and then click Print.
2. The Print dialog box opens. Select the printer from the list of available printers.
3. Click Properties and modify the driver features as needed. (For example, select the Finishing
tab, and select Print on both sides.)
Click OK when complete.
4. Click Print.
Add a printer to the Printers and Faxes folder
Use the HP Universal Printing dialog box to add a printer to the Printers folder while printing from a
program or from within the Printers folder.
NOTE: When a printer is created using the Add Printer Wizard, or from within the dynamic mode UI
screen, a traditional mode version of the HP UPD is created for the printer. This means that both
traditional mode and dynamic mode queues can be used on the same system. Also, when a printer is
created from dynamic mode, the new traditional mode printer takes on the same driver PDL: version as
the dynamic mode queue. This means that if PCL6 is used for the dynamic mode queue, then the
traditional mode printers created from this will also be using the PCL6 version of the driver.
See the following for more information:
ENWW Add a printer to the Printers and Faxes folder 77

●
Add a printer to the Printers folder using the dynamic mode user interface.
●
Add a printer to Printers and Faxes folder from within Printers and Faxes folder
●
Organize the Recently Used Printers list
Add a printer to the Printers folder using the dynamic mode user interface.
1. In the software program, click File and Print.
2. Select HP Universal Printing and click Print. The HP Universal Printing dialog box opens.
3. To add a previously used printer, select one of the printers in the Recently Used Printers list.
4. To discover a printer to add, select one of the following options under Find a printer:
●
Enter a printer address. Type the IP address, host name, or UNC path, and click OK.
NOTE: To find the printer address of a printer, print a configuration page.
●
Search for network printers. Select one of the printers listed and click OK.
●
Search for print shares. Type the network printer address or click Browse to browse to the
printer. Click OK.
5. Select Add this printer to my Printers folder, number 6 on
Figure 7-1 HP UPD dialog box
on page 74.
6. Click OK.
Add a printer to Printers and Faxes folder from within Printers and Faxes
folder
1. In the Printers folder, right-click HP Universal Printing and select Properties or Printing
Preferences. The HP Universal Printing dialog box opens.
2. To add a previously used printer, select one of the printers from the Recently Used Printers list.
3. To discover a printer to add, select one of the following options under Find a printer:
●
Enter a printer address. Type the IP address, host name, or UNC path, and then click OK.
NOTE: To find the printer address of a printer, print a configuration page.
●
Search for network printers. Select one of the printers listed and click OK.
●
Search for print shares. Type the network printer address or click Browse to browse to the
printer. Click OK.
4. Select Add this printer to my Printers folder.
5. Click OK.
Organize the Recently Used Printers list
The products listed under the Recently Used Printers list can be organized by deleting products,
moving products into folders, and creating new folders.
NOTE: By default, no folders are listed under the Recently Used Printers list.
78 Chapter 7 Use HP Universal print drivers ENWW
Add a new folder
1. Right-click Recently Used Printers, and select New Folder.
2. In the New Folder dialog box, type a name for the folder, and click OK. The folder displays under
Recently Used Printers.
Move devices into folders
●
Drag and drop the products you want to move into the desired folder.
●
Right-click the product to move, select Move to Folder, and select the desired folder.
To delete a product or a folder, right-click the product or folder and click Delete.
ENWW Add a printer to the Printers and Faxes folder 79
80 Chapter 7 Use HP Universal print drivers ENWW


Manage the HP UPD using HP MPA
Introduction
The HP Managed Print Administration (MPA) software enables the HP UPD to create a controlled and
customized print environment.
The HP MPA software consists of three main components.
●
Managed Printer Policies (MPPs)
●
Managed Printer Lists (MPLs)
●
User Groups
For more information, see the HP MPA website
www.hp.com/go/mpa
●
MPA version information
●
Supported environments for managing the HP UPD
●
Install and uninstall the HP MPA software
●
Access HP MPA
●
Use Managed Printer Policies (MPPs)
●
Use Managed Printer Lists (MPLs)
●
Use User Groups
MPA version information
Each HP MPA version represents a new release that describes updates and feature enhancements.
The table below identifies these changes. For more information about each release, review the HP MPA
release notes.
Supported HP MPA versions
Table 8-1 HP MPA supported version information
HP MPA version Release date New features Required HP UPD version
2.5.7 July, 2009 Added new printer images for
Printer lists
Requires HP UPD 4.5 or
newer to use this feature
2.5.2 Jan, 2009 Added support for Personal
Job Pin-Less Printing
Added support for WJA 10.1
printer list creation via XML
lists
All HP UPD versions apply
Supported environments for managing the HP UPD
To enable policy management with HP MPA, install the HP UPD locally on each PC by using Install.exe
and the appropriate policy enablement switch. This includes print server environments where Point and
Print is normally used to vend drivers to the client PCs. Installing the HP UPD on the print server and
82 Chapter 8 Manage the HP UPD using HP Managed Print Administration (MPA) and Active
Directory Group Policy
ENWW

enabling policy management is not sufficient to manage the client-based printing, the policy information
is not propagated to the client PCs during Point and Print driver vending.
Install and uninstall the HP MPA software
By default, the HP UPD assumes that the HP MPA is installed on a server named managed-print. As
a result, the HP UPD searches the network for http://managed-print for Managed Printer Policies or
Managed Printer Lists. If you install the HP MPA on a computer with a name other than managed-
print, you must change the HP UPD default settings. To change the HP UPD default settings, install
the HP UPD with the following switch options.
Install/Policy”<computername>” or Install/Policy”<IPaddress>” where the computer
name or IP address represents the name of the computer with HP MPA installed.
For example, to install the HP MPA on a server named mgmt-srvr, the complete command line switch
for the install would be.
Install /Policy”mgmt-srvr” /sm192.168.1.10 /n”print queue name” /h /q
●
HP MPA software requirements
●
Software availability
●
Install the HP MPA software
●
Back up the HP MPA software
●
Uninstall the HP MPA software
HP MPA software requirements
Requirements for MPA Software
●
Supported Operating Systems
◦
Microsoft Windows XP
◦
Microsoft Windows XP x64
◦
Microsoft Windows Server 2003 (32-bit and 64-bit)
●
Supported Internet Browsers
◦
Internet Explorer 6.0
●
IIS Internet Information Systems. Versions provided by the following OSs.
◦
Windows XP
◦
Windoes Server 2003
●
Java JRE (Runtime Environment, required for graphical views) version 1_5_0_9 and newer. The
latest version is available at the following website:
www.java.com/en/download/index.jsp.
Software availability
The HP MPA is available in the following languages.
●
English
ENWW Manage the HP UPD using HP MPA 83

Install the HP MPA software
Follow these steps to install to install the HP MPA software.
1. Go to the following website.
www.hp.com/go/mpa
2. Download the HP MPA software and save the HPMPAInstall.msi file to a chosen location.
3. Browse to the HPMPAInstall.msi file on your computer.
4. Double-click HPMPAInstall.msi.
5. The HP Managed Printing Admin Setup Wizard opens. Click Next.
6. The Confirm Installation window opens. Click Next.
7. The Installing HP Managed Printing Admin window opens. A progress bar indicates the
progression of the install. Wait until the next window opens.
8. The Installation Complete window opens. Click Close.
Back up the HP MPA software
HP MPA stores information about users, groups, policy, and printer lists in a Microsoft Access database
file. HP recommends periodic back ups of this database in case the database becomes corrupted. Back
up the database before performing an upgrade.
1. Browse to C:\Inetpub\HPManagedPrintAdmin\Database.
2. Copy the file hpmpa.mdb to your backup location.
Uninstall the HP MPA software
When uninstalling the HP MPA, the hpmpa.mdb database file created during installation is not removed.
An older version HP MPA must be uninstalled before a newer version can be installed and this database
file is left behind to accommodate the updating of HP MPA versions without losing any data.
There are two ways to uninstall the HP MPA software from the computer.
●
HP Managed Printing Admin Setup Wizard
●
Add/Remove Programs
Uninstall HP MPA using HP Managed Printing Admin Setup Wizard
1. Double-click the HPMPAInstall.msi file used to install HP MPA. The HP Managed Printing Admin
Setup Wizard opens.
2. Two options are available in the HP Managed Printing Admin Setup Wizard window.
●
Repair HP Managed Printing Admin
●
Remove HP Managed Printing Admin
Select Remove HP Managed Printing Admin.
84 Chapter 8 Manage the HP UPD using HP Managed Print Administration (MPA) and Active
Directory Group Policy
ENWW

3. Click Finish. The Removing HP Managed Printing Admin window opens.
4. The Installation Complete window opens, indicating the HP MPA is successfully removed. Click
Close to exit.
Uninstall HP MPA using Add/Remove Programs
1. Click Start, Settings, Control Panel, and then Add or Remove Programs.
2. Select HP Managed Printing Admin.
3. Click Remove.
4. A confirmation dialog box displays, Are you sure you want to remove HP Managed Printing
Admin from your computer? Click Yes.
The software is removed from the computer.
Access HP MPA
The HP MPA opens in one of the following two views.
●
Classic interface: Uses typical Windows format to facilitate management of the HP MPA through
text.
●
Graphic interface: Uses Java to facilitate management of the HP MPA through images.
Follow these steps to open the to open the HP MPA software.
1. Double-click the HP Managed Printing Admin icon on the desktop.
2. The Welcome to the HP Managed Printing Administrator control panel screen displays. Click
Classic interface or Graph interface.
For more information about the feature layout of each interface, see the following sections.
●
Classic interface
●
Graphic interface
Classic interface
The classic interface screen briefly describes the main components of the program and shows the
relationship between Users, Groups, Policies, and Printer Lists.
In the classic interface, a navigation bar located in the upper left of the main screen provides links to all
features and tasks within the HP MPA software and is used to manage printer use.
Table 8-2 HP MPA classic interface options on page 86 lists the options provided in the leftmost
navigation bar. The left-side of the table lists the main headings, and the right-side of the table lists the
corresponding task-oriented subheadings available.
ENWW Manage the HP UPD using HP MPA 85

Table 8-2 HP MPA classic interface options
Option Item
Managed Printer Lists Create a new list
Edit an existing list
Associate with a policy
Duplicate an existing list
Manage MPL view
Manage virtual printers
Remove an existing list
Managed Printer Policies Create a new policy
Edit an existing policy
Duplicate an existing policy
Associate printer lists
Associate user groups
Remove an existing policy
User Groups Create a new user group
Edit an existing user group
Associate with a policy
Remove a user group
Help Service Administration Guide
Graphic interface
The graphic interface screen displays a real-time mapping of Users, Groups, Policies, and Printer Lists.
86 Chapter 8 Manage the HP UPD using HP Managed Print Administration (MPA) and Active
Directory Group Policy
ENWW

Figure 8-1 HP MPA—Graphic interface view on page 87 shows the main screen of the graphic
interface.
Figure 8-1 HP MPA—Graphic interface view
To manage printer use, a navigation bar located on the top of the screen provides links to all features
and tasks within the HP MPA software.
Follow these steps to browse through the possible settings and features available in the HP MPA
software.
1. Use the toolbar menus at the top of the screen to customize any of the following options.
●
Graph Size
●
Color Scheme
●
Show associations
●
Font Size
Settings for each of these options are identified in
Table 8-3 HP MPA graphic interface options
on page 87.
2. Right-click an entry that you want to modify in the Users, Groups, Policies (MPPs), or Printer
Lists (MPLs) column and select one of the options shown in the following table.
Table 8-3 HP MPA graphic interface options
Column Option
Users Remove 'user name'
Rename 'user name'
Show policy XML for 'user name': The user name policy
displays in XML format.
Change association to: Select a group name.
ENWW Manage the HP UPD using HP MPA 87

Column Option
Groups Remove 'group name': Opens the Confirm Object
Removal dialog box. Click Yes to confirm the removal.
Remove all users from this group
Edit 'group name': See Edit an existing user group
on page 122 for more information.
Rename 'group name': Opens the Edit Groups Name dialog
box. Enter a new name and click OK.
Show policy XML for 'group name': The group-name policy
displays in XML format.
Change association to: Select a group name.
Remove association from: Select the MPP from which to
remove the association.
Add a user to this group: Enter a new user name in the New
user dialog box.
Create a new user group: Enter a new user-group name in
the Add new user to group dialog box.
Policies (MPPs) Remove policy 'policy name': The Confirm Removal dialog
box displays. Click Yes to confirm the removal.
Edit 'policy name': For more information, see Edit an existing
MPP on page 102.
Rename 'policy name': Opens Edit Policies (MPPs) name
dialog box. Enter a new name and click OK.
Show policy 'policy name': The policy displays in XML
format.
Export policy 'policy name' to XML file: The policy displays
in XML format. You can save this file as an XML file and edit it
later.
Add user group association: For more information, see
Associate user groups with an MPP on page 103.
Edit user group associations: For more information, see
Associate user groups with an MPP on page 103.
Add printer list association: For more information, see
Associate MPLs with an MPP on page 102.
Edit printer list association: Select a policy name. For more
information, see
Associate MPLs with an MPP on page 102.
Remove user group association from: Select a user-group
name from which to remove the association.
Remove printer list association from: Select a printer-list
name from which to remove the association.
Create a new policy (MPP): The Add a new Managed
Printer Policy (MPP) dialog box displays. Enter a new name
and click OK.
Table 8-3 HP MPA graphic interface options (continued)
88 Chapter 8 Manage the HP UPD using HP Managed Print Administration (MPA) and Active
Directory Group Policy
ENWW

Column Option
Printer Lists (MPLs) Remove 'printer list name'
Edit 'printer list name': For more information, see Edit an
existing MPL on page 112.
Rename 'printer list name' settings...: The Edit Printer
Lists (MPL) Name dialog box displays. Modify the name and
click OK.
Show XML for 'printer list name'...: The printer lists name
displays in XML format.
Manage MPL view: The Manage MPL view dialog box
displays. For more information, see
Manage the MPL view
on page 113.
Manage virtual printers: The Manage virtual printers dialog
box displays.
Show MPL Preview: Shows information according to the
option selected in the Manage MPL view dialog box.
Export printer list 'printer list name' to XML file...: Displays
the printer list in XML format. You can save this file as an .XML
file for later editing.
Add association to: Select a policy name to which you want
to add the association.
Remove association from: Select a policy name from which
you want to remove the association.
Create a new printer list (MPL): The Add a new Managed
Printer List (MPL) dialog box displays. Enter a new name and
click OK.
Use Managed Printer Policies (MPPs)
Use Managed Printer Policies (MPPs) to control the driver operation mode, customize the print
environment for the user, and limit user network access to certain printers or features. When enabled,
MPPs prevent users from overriding or circumventing settings by downloading a new version of the
driver.
A Managed Printer Policy (MPP) is an XML document that controls the driver operation mode in a
particular printing environment. For example, users in one environment could search or discover printers
using any available search option. In turn, the same user running the same driver in another environment
could be limited to printing a select few products, as defined by the restricted mode use settings.
One benefit of an MPP is that IT administrators have extended control over the printer environment,
ultimately reducing support costs, supplies costs, and productivity costs. Another benefit is that the IT
Administrator can use a policy ticket to define how the HP UPD behaves when operating in a specific
environment. Every user printing through the HP UPD in the specific environment is limited or controlled
by the defined policy, if they download the driver from an IT specified location or from the HP website,
the first time or the 100th time. That control also extends to laptop computers that have HP UPD installed
and are used at a site that defines an MPP. The printing is controlled by the defined policy.
Table 8-3 HP MPA graphic interface options (continued)
ENWW Manage the HP UPD using HP MPA 89

The MPP contains the following features.
●
UseMode settings. Controls the mode users use to access the printing environment; and, controls
printing attributes, detection of HP printers, product-verification level, and availability of services.
(See
UseMode settings on page 91 for detailed instructions.)
●
Default print settings. Controls basic user experience of the print driver.
●
Color access. Controls user access to printing color on a color-capable product. (See
Color
Access settings on page 95 for detailed instructions.)
●
User search capabilities. Controls user searches based on local ports, network print shares, and
network printers (in dynamic mode). (See
User Search capabilities on page 97 capabilities for
detailed instructions.)
●
Status and supplies notifications. Controls what status and supplies notifications (if any) appear
when the user opens the HP UPD dialog box. (See
Status & Supplies Notification settings
on page 98 for detailed instructions.)
●
Job accounting. Controls what job accounting information to submit to an external program or
post to a web server.
●
Job delivery. Controls what print-job data to submit to an external program. For example, the job
data can be used in a pay-for-print environment.
●
Basic MPP settings. Controls basic features such as refresh rate, name, and a default MPP for
users not associated to a specific MPP.
This section contains more information on the following topics.
Topics
●
Create a new MPP
●
Edit an existing MPP
●
Duplicate an existing MPP
●
Associate MPLs with an MPP
●
Associate user groups with an MPP
●
Remove an existing MPP
Create a new MPP
Follow these steps to create a new MPP.
1. On the Managed Print Policies menu, select Create a new policy. The Create a new MPP screen
displays.
2. In the Name field, enter a unique name for the new MPP.
3. Click Next. The Properties screen displays.
4. Modify the settings as necessary.
5. In the Update Policy group box, click Apply (to apply selected options and leave the
Properties screen open) or Done (to apply selected options and close the screen). Until you have
clicked Apply or Done, any settings that have changed are not saved in the MPP.
90 Chapter 8 Manage the HP UPD using HP Managed Print Administration (MPA) and Active
Directory Group Policy
ENWW

See the following topics for information about configuring specific properties for a new MPP.
Topics
●
UseMode settings
●
Default Print settings
●
Color Access settings
●
User Search capabilities
●
Status & Supplies Notification settings
●
Basic MPP settings
●
Update an MPP
UseMode settings
1. In the UseMode Settings section of the Properties screen, click Configure. The UseMode
Settings panel displays.
2. From the Template menu, select one of the following options from
Table 8-4 UseMode Settings
panel–Template menu options on page 91.
Table 8-4 UseMode Settings panel–Template menu options
Options Description
(None) Select this option to remove all UseMode setting from the selected MPP.
NOTE: Selecting this option prevents the change of any settings.
(Create a new template) Select this option to create a new UseMode template. When you select this
option, all fields can be modified. Name the template in a way that is meaningful
to your organization. You might also determine whether a naming convention
exists for your organization.
HP Default When this option is selected, HP default UseMode values are applied to this
MPP.
Existing template name Select a previously defined UseMode template to apply to the selected MPP.
3. In the New template field, enter a name for the new template of UseMode settings.
4. Then, select options to apply to all users assigned to this policy, based on the descriptions in
Table
8-5 UseMode Settings—Properties panel options on page 91.
Table 8-5 UseMode Settings—Properties panel options
Option Description
Show device address Select this option to provide the product address to users associated with this
MPP. (Selected by default.)
ENWW Manage the HP UPD using HP MPA 91

Option Description
Restricted mode Select this option to restrict the selection of destination printers not selected
through a defined MPL or normal mode. In Restricted mode, only those printers
defined in the MPL are available for printing. When this box is not selected
(clear), the default is to operate in Normal mode. (Not selected by default.)
When this option is not selected (clear), the following additional options can be
selected.
●
Show HP UPD dialog settings window.
Select this option to display the link to the HP UPD dialog settings window.
If this option is enabled, a note at the bottom of the HP Universal Printing
dialog box displays the HP Universal Printer Setting link.
●
Allow user to add printers to OS Printers folder.
Select this option to allow users to create a permanent instance of the
selected printer in the OS printers folder. If this option is disabled, the Make
a permanent instance of this printer in my Printers folder check box
does not appear in the HP Universal Printing dialog box. To add a printer,
use the Add Printer Wizard. (See
Windows client/server: Use the Add
Printer Wizard on page 32.)
Device verify level The device verify level controls the HP UPD behavior when the HP UPD is
unable to get model name and PDLs information from the printer. The device
verification level determines if the user is allowed to use the product and the
strictness of compatibility checking. Select one of the following options from the
menu to determine the device-verification level.
●
(Do not specify).
●
Verify communication and compatibility with driver (High).
Select this option to check for the highest level of positive identification.
This option validates that the user has access to the printer and there is
PDL support from a network-connected product or direct-connected
product. If verification fails, you cannot use the address or product. An error
message conveys that the product is unsupported.
●
Verify device ID and Model Name can be obtained (Medium).
Select this option to validate the printer model name, product ID, and PDL
support from a network-connected product or direct-connected product. If
verification fails because the product can not be verified, but the model is
recognized, you are prompted that a driver incompatibility might exist. At
this point, you can cancel out, or continue using the product at your own
risk.
●
Verify port can be opened for printing (Low).
Select this option to verify that the port can be opened before the product
is available for printing. The model name and PDL are verified, but not
validated. This setting assumes that the printer is available and there are
no driver compatibility problems. Use this option in the following situations.
◦
The product is directly connected, but bidirectional communication is
not configured for the local port connection (USB, LPT, COM).
◦
A network print queue exists when the network printer server is non-
Windows based and the HP UPD cannot communicate directly with
the product.
Table 8-5 UseMode Settings—Properties panel options (continued)
92 Chapter 8 Manage the HP UPD using HP Managed Print Administration (MPA) and Active
Directory Group Policy
ENWW

Option Description
When printing This list controls how the HP UPD prompts users who are associated to this
MPP when they select a destination printer based on the selection of one of the
following options.
NOTE: Selecting one of these options (with the exception of (Do not
specify)) overrides the local configuration.
●
(Do not specify).
Select this option to maintain local configuration.
●
Always prompt for the destination when printing a job.
Select this option to prompt users to select a destination printer each time
a job is sent.
●
Only prompt the first time a job is printed from an application.
Select this option to prompt users to select a destination printer only the
first time a job is printed from an application.
●
Only prompt if the last known destination is no longer available.
Select this option to prompt users to select a destination printer only if the
last known destination is no longer available.
Enable services tab Select this option to enable the Services tab for users associated to this MPP.
When this option is selected, the following check boxes are automatically
selected and can be cleared, if necessary. (Selected by default.)
●
Enable online diagnostics
●
Enable online support
●
Enable product manuals
●
Enable driver updates
●
Enable supply ordering
5. Click Apply to save your changes, or click Hide to close the UseMode settings panel without
saving your the changes.
NOTE: You receive a prompt with an error message at the top of the screen if you click Apply
without providing enough information in the UseMode settings panel.
The following is an example of such an error message. Please review the following errors: You
specified creation of a new template for UseMode settings, but did not give a name.
6. Optionally, if no more properties have to be applied to the selected MPP, select one of the options
in the Update policy panel. For more information, see
Update an MPP on page 101.
Default Print settings
1. In the Default Print Settings panel of the Properties screen, click Configure. The Default Print
Settings panel expands.
2. From the Template: menu, select one of the following.
Table 8-6 Default Print Settings panel–Template: menu options
Options Descriptions
Table 8-5 UseMode Settings—Properties panel options (continued)
ENWW Manage the HP UPD using HP MPA 93

(None) Select this option to remove all Default Print settings from
the selected MPP.
NOTE: Selecting this option prevents the change of more
settings.
(Create a new template) Select this option to create a new Default Print Settings
template. When you select this option, all fields can be
modified. Choose a name for the new template that is
meaningful to your organization. You might also determine
whether a naming convention exists for your organization.
HP Default When this option is selected, HP default values are applied
to this MPP.
“Existing template name” Select a previously defined Default Print Settings template
to apply to the selected MPP.
3. In the New Template: field, enter a name for the new template.
4. Then, select the settings for the users assigned to this policy. See
Table 8-7 Default Print Settings
option on page 94 for more information.
Table 8-7 Default Print Settings option
Option Description
Duplex
●
(Do not specify)
●
Driver Default
●
Print on both sides
●
Lock Duplex check box
Economode
●
(Do not specify)
●
Driver Default
●
Economode on
●
Economode off
●
Lock Economode check box
Table 8-6 Default Print Settings panel–Template: menu options (continued)
94 Chapter 8 Manage the HP UPD using HP Managed Print Administration (MPA) and Active
Directory Group Policy
ENWW

Private Printing
●
(Do not specify)
●
Driver Default (Off)
●
Proof and hold
●
Private Job (require pin)
●
Private Job (no pin)
●
Quick Copy
●
Stored Jobs (no pin)
●
Stored Jobs (require pin)
●
Lock Private Printing check box
Edgeline QAC
●
(Do not specify)
●
Driver Default
●
Professional
●
General Office
●
Black and White
●
Lock Edgeline check box
5. Click Apply to save your changes, or click Hide to close the Default Print Settings panel without
saving changes.
NOTE: A prompt with an error message displays at the top of the screen if you click Apply without
providing enough information in the Default Print Settings panel.
The following is an example of such an error message. Please review the following errors: You
specified creation of a new template for Default Print Settings, but did not give a name.
6. If no more properties are applied to the selected MPP, select one of the options in the Update
policy panel. For more information, see
Update an MPP on page 101.
Color Access settings
Control color printing by setting up templates that define how and when color can be used. This is useful
when restricting color printing to a specific time of day (for example, only during work hours) or a specific
application (for example, only photo application software).
1. In the Color Access panel of the Properties screen, click Configure. The Color Access panel
expands.
2. From the Template: menu, select one of the following options listed in
Table 8-8 Color Access
panel–Template menu options on page 95.
Table 8-8 Color Access panel–Template menu options
Options Description
(None) Select this option to remove all color access restrictions from the selected MPP.
NOTE: Selecting this option prevents the change of any more settings.
Table 8-7 Default Print Settings option (continued)
ENWW Manage the HP UPD using HP MPA 95

(Create a new template) Select this option to create a new color access template. When you select this
option, all fields can be modified. Use a template name that is meaningful to
your organization. You might also determine whether a naming convention
exists for your organization.
HP Default When this option is selected, HP default color access values are applied to this
MPP.
Existing template name Select a previously defined color access template to apply to the selected MPP.
3. In the New Template: field, enter a name for the new template.
4. Then, select the settings for the users assigned to this policy.
See
Table 8-9 Color-printing user access on page 96 for more information.
Table 8-9 Color-printing user access
Setting Description
Allow color printing controls
●
If this setting is unchecked, no color printing is allowed.
●
If this setting is checked, color printing is allowed, and can be further
controlled by more specific settings of Day/Time and Application.
NOTE: Times ranges specified must be in military time. For example, 9
am to 5 pm would be noted as the following.
From: 09:00 To: 17:00
The following Day controls are available.
◦
Allow color printing on Sunday
◦
Allow color printing on Monday
◦
Allow color printing on Tuesday
◦
Allow color printing on Wednesday
◦
Allow color printing on Thursday
◦
Allow color printing on Friday
◦
Allow color printing on Saturday
Applications controls The following controls are available.
●
Do not control color printing by application.
●
Allow color printing for only the applications listed below.
Color printing can be limited to a specified set of applications. Specify to
which applications this applies by typing the applications in the
Applications filenames: field.
●
Allow color printing for all applications except those listed below.
Color printing can also be allowed for all applications except a specified
set. Specify to which applications this applies by typing the applications in
the Applications filenames: field.
5. Click Apply to save your changes, or click Hide to close the Color Access panel without saving
changes.
Table 8-8 Color Access panel–Template menu options (continued)
96 Chapter 8 Manage the HP UPD using HP Managed Print Administration (MPA) and Active
Directory Group Policy
ENWW

NOTE: A prompt with an error message displays at the top of the screen if you click Apply without
providing enough information in the Color Access panel.
The following is an example of such an error message. Please review the following errors: You
specified creation of a new template for Color Access, but did not give a name.
6. If no more properties are applied to the selected MPP, select one of the options in the Update
policy panel. For more information, see
Update an MPP on page 101.
User Search capabilities
1. In the User Search Capabilities section of the Properties screen, click Configure. The User
Search Capabilities panel displays.
2. In the Template menu, select one of the options listed in
Table 8-10 User Search Capabilities
panel–Template menu options on page 97.
Table 8-10 User Search Capabilities panel–Template menu options
Options Description
(None) Select this option to remove all user search restrictions from the selected MPP.
NOTE: Selecting this option prevents the changing of any more settings.
(Create a new template) Select this option to create a new user search template. When you select this
option, all fields can be modified. Name the template in a way that is meaningful
to your organization. You might also determine whether a naming convention
exists for your organization.
HP Default When this option is selected, HP default user search values are applied to this
MPP.
Existing template name Select a previously defined user search template to apply to the selected MPP.
3. Modify the user search settings for all users associated with this MPP using the options described
in
Table 8-11 User search capabilities on page 97.
NOTE: Clearing the settings provided in Table 8-11 User search capabilities on page 97
prevents users from printing to an address of the search type that you cleared. For example, if the
Network printers option is cleared, users cannot locate printers with an address type of TCP/IP
or host name.
Table 8-11 User search capabilities
Options Description
Network print shares Select this option to allow users to browse for and use printer shares on the
network. (Selected by default.)
Network printers Select this option to allow users to search for and use TCP/IP printers connected
to the network. (Selected by default.)
4. In the New template field, enter a name for the new user-search template.
ENWW Manage the HP UPD using HP MPA 97
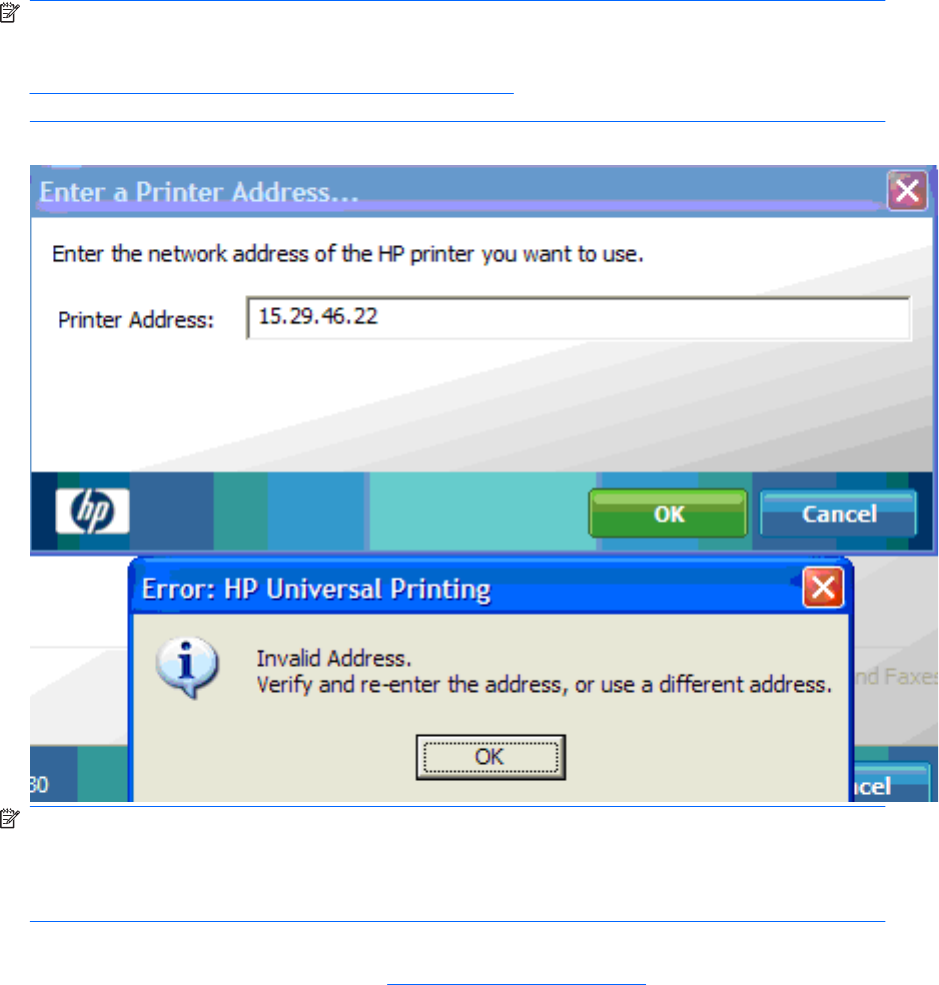
5. Click Apply to save your changes, or click Hide to close the User search capabilities panel
without saving your the changes.
NOTE: Do not disable Network Printing. The Network Printers option is required to be enabled
at all times. When a user searches for printers in dynamic mode, the code contains internal links
that require this feature be continually enabled. A solution is available in a future release of MPA.
Figure 8-2 Network Printing error message on page 98 figure represents the error message that
is displayed when Network Printers is disabled.
Figure 8-2 Network Printing error message
NOTE: An error message displays at the top of the screen if you click Apply without providing
enough information in the User search capabilities panel.
The following is an example of such an error message. Please review the following errors: You
specified creation of a new template for user search capabilities, but did not give a name.
6. If no more properties must be applied to the selected MPP, select one of the options in the Update
policy panel. For more information, see
Update an MPP on page 101.
Status & Supplies Notification settings
This section provides instructions to configure status and supplies notifications settings. The settings
on the Status & Supplies Notification panel control the information that displays in the pop-up window
when an end user opens the HP Universal Printing dialog box.
1. In the Status & Supplies Notifications section of the Properties screen, click Configure. The
Status & Supplies Notifications panel expands.
98 Chapter 8 Manage the HP UPD using HP Managed Print Administration (MPA) and Active
Directory Group Policy
ENWW

2. From the Template menu, select one of the following options listed in Table 8-12 Supplies Status
Notifications panel–Template menu options on page 99.
Table 8-12 Supplies Status Notifications panel–Template menu options
Options Description
(None) Select this option to remove all status and supplies notifications restrictions from
the selected MPP.
NOTE: Selecting this option prevents the change of any more settings.
(Create a new template) Select this option to create a new status-and-supplies notification template.
When you select this option, all status-and-supplies notification options are
modifiable. Name the new template in a way that is meaningful to your
organization. You might also determine whether a naming convention exists for
your organization.
HP Default When this option is selected, HP default status-and-supplies notification values
are applied to this MPP.
Existing template name Select a previously defined supplies status notifications template to apply to the
selected MPP.
3. In the New template field, enter a name for the new Status & Supplies notifications template.
4. In the Printer Alert Notification Settings menu, select one of the following options.
Table 8-13 Status & Supplies Notifications panel—Printer Alert Notification Settings menu options
Options Descriptions
(Do not specify) No policy applies. The client or user policy determines these settings.
Disabled Select this option to disable the Status and Supplies Notifications pop-up
window so that it does not appear in the HP Universal Print Driver dialog box.
Show for Every Print job Opens the Status & Supplies Notifications pop-up window in the HP
Universal Print Driver dialog box for every printed job or when the product
detects a warning or error. This option shows the print-job status. Show for
every print job is the default value unless another setting is specified.
Show for Device Errors and
Warnings
Opens the Status & Status and Supplies Notifications pop-up window only
when a warning or error is detected on the product. This setting does not show
print-job status.
Show for Device Errors (printing
stops)
Displays the Status & Supplies Notifications pop-up window only when an
error is active that prevents the product from printing. This setting does not show
print-job status.
5. In the Device Query Interval menu, select one of the following options.
Table 8-14 Status & Supplies Notifications panel—Device Query Interval menu options
Options Description
(Do not specify) No policy applies. The client or user policy determines these settings.
Normal The client computer sends out queries to the product about every 10 seconds.
This is the default value unless another setting is specified.
Minimize Network Traffic The client computer sends out queries to the product about every 20 seconds.
6. Modify the user search settings for all users associated with this MPP, using the options described
in
Table 8-15 Status and supplies notification options on page 100.
ENWW Manage the HP UPD using HP MPA 99

Table 8-15 Status and supplies notification options
Option Description
Supplies Details Select this option to allow users to click the Supplies Details link in the Status
& Supplies Notifications pop-up window. (Selected by default.)
Shop for Supplies Select this option to allow users to click the Shop for Supplies link in the Status
& Supplies Notifications pop-up window. (Selected by default.)
Allow special device information
offers to be displayed
Select this option to enable the driver to provide valuable information about your
HP product for things such as supplies, warranty, and support status.
Access HP Online Product Support Select this option to allow users to click an HP Online Product Support link that
displays on the Status & Supplies Notifications pop-up window. (Selected by
default.)
Alternate Online HP Support URL Enter a URL to show an alternative HP Online Product Support link specified by
the system administrator instead of the HP default URL. This link displays on
the Status & Supplies Notifications pop-up window. Use an alternate URL
that is meaningful and valid. (Not selected by default.)
7. Click Apply to apply the changes, or click Hide to close the Status & Supplies Notifications panel
without saving your the changes.
NOTE: If you click Apply without providing the required information, an error message displays
at the top of the screen in the Status & Supplies Notification window.
The following is an example of such an error message. You specified creation of a new template
for status & supplies notification, but did not give a name.
Basic MPP settings
The Basic MPP settings panel is shown in the following figure.
In the Basic MPP settings panel of the Properties screen, select the following settings to apply for all
users assigned to this MPP.
Options Description
Save as XML This field is automatically populated with the path to save the XML file for the selected
MPP. This path is an active link that opens the File Download dialog box. Click
Save to save the XML file to a local directory, or click Open to view the XML file in
a browser window.
100 Chapter 8 Manage the HP UPD using HP Managed Print Administration (MPA) and Active
Directory Group Policy
ENWW

Refresh rate Select one of the following values from the Refresh rate menu to determine how
often the MPL refreshes.
●
Once per week
●
Once per 24 hours
●
Once per 18 hours
●
Once per 12 hours (HP default value)
●
Once per 6 hours
●
Once per hour
●
Once per 30 minutes
●
Once per minute
●
Once per 30 seconds
●
Once per second
●
Every UPD Query
Select this option to refresh the MPL every time the HP UPD executes a query
for printer products.
NOTE: Determine the Refresh rate setting by the frequency of MPP and MPL
content changes. For example, during initial setup and testing/validation, set
this value to Every UPD query or Once per minute. If an administrator plans
to change MPP and MPL content settings multiple times each day, set the
Refresh rate to be more frequent so the new settings are applied to each client
computer. A typical setting might be Once per 24 hours so that new settings
are applied daily.
Info link name Enter a name for the selected MPP to display as an active link in the HP UPD dialog
box. This link allows administrators to provide policy-specific printing information to
users. An example might be a link to a Printing Help and FAQs. This link displays in
orange on the lower-left corner of the HP Universal Printing dialog box.
Info link URL Enter the Internet address of the web server for the location of the file to include
policy-specific printing information to users.
MPP name This field is optional. Enter a new name to save the modified MPP.
Make this the default policy for
unassociated users
Select this option to apply the selected MPP to user groups not associated with an
MPP.
NOTE: A parenthetical message follows this option and indicates the current MPP
association for unassociated users. For example, “MPP_Demo” is currently the
default policy or There is currently no default policy specified.
Optionally, if no more properties are applied to the selected MPP, select one of the options in the Update
policy panel. For more information, see
Update an MPP on page 101.
Update an MPP
In the Update policy section located at the bottom of the Properties screen, select one of the following
options listed in
Table 8-16 Managed Print Policy–Update policy panel options on page 101.
Table 8-16 Managed Print Policy–Update policy panel options
Option Description
ENWW Manage the HP UPD using HP MPA 101

Back Select this option to return to the Select an MPP screen without saving any changes.
Apply Select this option to apply the changes to the selected MPP. Use this option to remain
in the Properties screen and make more changes.
Associate MPL(s) Select this option to save your changes to the selected MPP, and then browse to the
Associate MPLs with an MPP screen to establish an association with MPLs. For
more information, see
Associate an MPL with an MPP on page 112.
Associate User Group(s) Select this option to save your changes to the selected MPP, and then browse to the
Associate User Groups with an MPP screen to establish an association with user
groups. For more information, see
Associate a user group with a MPP
on page 122.
Done Select this option to apply your changes to the MPP. The Done screen displays,
providing a confirmation of successful change to the MPP and a list of possible next
steps.
Edit an existing MPP
1. On the Managed Printer Policies menu, select Edit an existing policy. The Select an MPP
screen displays.
2. In the Name drop-down menu, select the MPP to edit.
3. Click Next. The Properties screen displays.
4. Modify the settings for the selected MPP, as necessary. For more information, see
Create a new
MPP on page 90.
Duplicate an existing MPP
1. On the Managed Print Policies menu, select Duplicate an existing policy.
The Select an MPP to duplicate screen displays.
2. From the Copy from menu, select the name of an existing MPP.
3. In the New name field, enter a name for the new MPP.
4. Click Next. The Properties screen displays.
5. Modify the settings for the selected MPP, as necessary. For more information, see
Create a new
MPP on page 90.
Associate MPLs with an MPP
1. On the Managed Printer Policies menu, select Associate printer lists.
The Associate MPLs with an MPP screen displays.
2. From the Name drop-down menu, select the name of an existing MPP that you want to associate
with an existing user group.
3. Click Refresh. The Manage MPL associations window populates automatically with the names
of all existing MPLs and their current associations.
4. Select the check box next to any MPL that displays in the two panels listed in
Table 8-17 Managed
Printer Policy—Manage MPL associations panel options on page 103.
Table 8-16 Managed Print Policy–Update policy panel options (continued)
102 Chapter 8 Manage the HP UPD using HP Managed Print Administration (MPA) and Active
Directory Group Policy
ENWW

Table 8-17 Managed Printer Policy—Manage MPL associations panel options
Option Descriptions
Associated with other MPP(s) To establish an association with the selected MPP, select the check box next
to any MPL listed in this panel, as necessary.
Not associated with any MPP To establish an association with the selected MPP, select the check box next
to any MPL listed in this panel, as necessary.
5. Select one of the options listed in Table 8-18 Managed Printer Policy—Associate with an MPP
panel options on page 103.
Table 8-18 Managed Printer Policy—Associate with an MPP panel options
Option Descriptions
Apply Click this button to apply the associations and remain in the Associate MPLs
with an MPL screen to make any more changes. The Associated with this
MPP panel populates automatically with any MPLs selected for association with
the MPP.
View/edit policy settings Click this link to modify the settings for the selected MPP. For more information,
see
Create a new MPP on page 90.
Done Click this button to apply the associations and close the screen.
Associate user groups with an MPP
1. On the Managed Printer Policies menu, select Associate User Groups. The Associate User
Groups with an MPP screen displays.
2. From the Name menu, select the name of the MPP with which you want to establish an association
with existing user groups.
3. Click Refresh. The Manage user group associations populates automatically with the existing
user groups and their current associations.
4. Select the check box next to user groups that appear in the following two panels.
Table 8-19 Managed Printer Policy—Manage MPL associations panel options
Option Descriptions
Associated with other MPP(s) To establish an association with the selected MPP, select the check box next
to user groups listed in this panel, as necessary.
Not associated with any MPP To establish an association with the selected MPP, select the check box next
to the user groups listed in this panel, as necessary.
5. Select one of the following options.
Table 8-20 Managed Printer Policy—Associate with an MPP panel options
Option Descriptions
Apply Click this button to apply the associations and remain in the Associate MPLs
with an MPL screen to make any more changes. The Associated with this
MPP panel populates automatically with any MPLs selected for association with
the MPP.
ENWW Manage the HP UPD using HP MPA 103

View/edit policy settings Click this link to modify the settings for the selected MPP. For more information,
see
Edit an existing MPP on page 102.
Done Click this button to apply the associations and close the screen.
Remove an existing MPP
1. On the Managed Print Policies menu, select Remove an existing policy.
2. From the Name menu, select the MPP name to remove.
3. Click Next. The Confirm screen automatically populates with the MPLs and user groups
associated with the MPP selected for removal.
4. Click Remove to continue with the removal of the selected MPP, or click Back to return to the
Select an MPP screen without removing the MPP.
The confirmation screen provides confirmation of successful removal of the MPP.
Use Managed Printer Lists (MPLs)
Use the HP MPA software to create Managed Printer Lists (MPLs), add printers to existing MPLs, and
establish associations with MPPs and User Groups.
The MPLs provide a simple method for users to find and use HP printing products. The MPL defines
groupings of printers based on various attributes and also controls features at both the group and
individual printer levels.
Administrators can use the HP MPA software to customize HTML views of MPLs to assist users in
locating available printers in their own environments.
Use the HP MPA tool to create, edit, and manage the content available to the HP UPD without having
to worry about the XML syntax and contents for each document type. HP MPA stores policy and printer
settings in a database running on a centrally managed server. When the HP UPD queries for the MPP
or MPL content, scripts convert the stored database settings into the correctly formatted XML content
consumed by the HP UPD. Use the HP MPA tool to manage the MPP and MPL settings and to manage
the associations between them.
What is an MPL?
MPLs are XML documents that provide the information required for print jobs to use printing products.
These centrally managed XML documents contain the printer details in an easy-to-read and modify text
file format. To assist users in finding supported printers for printing with the HP UPD for Windows, the
administrator defines printer details in the XML files. HP UPD MPLs provide administrators with the
ability to specify the products that users can use for printing.
MPLs create a reliable and seamless way of discovering and connecting to products in the office or to
public printing venues.
MPLs allow users to select a printer with a descriptive name from a predefined list. Users do not need
to know about network print shares, TCP/IP addresses, printer host names, user access permissions,
or other printer connection details. Instead, users select a printer from the list dialog box and print.
Create and Edit MPLs
The MPLs can be created and edited through the HP MPA. HP MPA formats and manages the XML
files that contain the printer details such as the addresses, the HP UPD display names, comments, and
other printer settings.
Table 8-20 Managed Printer Policy—Associate with an MPP panel options (continued)
104 Chapter 8 Manage the HP UPD using HP Managed Print Administration (MPA) and Active
Directory Group Policy
ENWW

HP MPA can also customize the view of each MPL so that users can select printers by clicking an image
map or a picture of the printer to help the user find a printer.
Who should use MPLs?
MPLs can simplify printing for users and improve administrator control over the environment. Costs
savings in productivity, security, support, and supplies frequently justify the effort of implementing MPLs.
Any business with a Microsoft Windows printing environment can benefit from the flexibility and ease of
use that MPLs provide. For example,
●
Hotels that offer printing to their guests who log in to their private network can use the HP UPD
with MPLs to quickly connect to in-room or centrally located printers.
●
Restaurants, coffee shops, and other printing hot spots that provide Internet access can also define
HP MPLs to allow guests to quickly connect to printers on their premises.
●
Enterprise environments with large campuses or offices spread across countries/regions can
greatly benefit from MPLs, especially the mobile users who travel from site to site or building to
building.
MPLs support administrative personnel responsible for managing printers and printing within their
environment. Depending on the configuration of the HP UPD on the client machine, MPLs can either
simplify printer discovery for users or restrict printing to a defined set of printers within the environment.
Use the HP MPA software to create, edit, and remove MPLs. MPLs are lists of printers that
administrators can use to manage printer attributes. Manage the view of MPLs through the HP MPA
software.
For more information, see the following topics.
●
Create a new MPL
●
Edit an existing MPL
●
Associate an MPL with an MPP
●
Duplicate an existing MPL
●
Manage the MPL view
●
Manage virtual printers
●
Remove an existing MPL
●
Remove printers from an MPL
Create a new MPL
Follow these steps to create a new MPL.
1. On the Managed Printer Lists menu, select Create a new list. The Create a new MPL screen
displays.
2. In the Name field, enter a unique name for the new MPL.
3. Click Next. The MPL printers panel displays.
4. Select one of the following options listed in
Table 8-21 MPL printers panel–Options
on page 106.
ENWW Manage the HP UPD using HP MPA 105

Table 8-21 MPL printers panel–Options
Option Description
Auto printer discovery Select this option to add printers to the selected MPL through auto discovery
methods.
Manual printer entry Select this option to add printers to the selected MPL manually.
Remove printer(s) Select this option to remove printers from the selected MPL.
See the following topics for information about configuring specific settings for a new MPL.
●
Auto printer discovery
●
Manual printer entry
Auto printer discovery
In the MPL printers screen, click Auto printer discovery to open the Add Automatically screen.
Use Auto printer discovery to create a new MPL or to add printers to an MPL. Three methods of auto
printer discovery are available.
●
Discover locally connected network printers
●
Discover printers on a print server (\\serverName)
●
Import printers from an XML file
After printers have been discovered by using each of these method, all fields can be modified manually,
as necessary. For more information, see
Manual printer entry on page 109.
Discover locally connected network printers
Follow these steps to discover locally connected network printers and add them to an MPL.
1. In the MPL printers window, click Auto printer discovery. The Add automatically screen
displays.
2. On the Discover locally connected network printers panel, click Discover.
During discovery, the HP MPA performs a local mDNS discovery on the local subnet. Printing
products that have the mDNS protocol enabled, and are on the same subnet as the HP MPA
software, show up in the printer list.
The Discovered printers screen displays, and locally connected printers discovered automatically
populate the Printer group box.
3. In the Printer group box, select the check box next to printers that you want to add to the MPL.
(All printers are selected by default.)
4. Modify the settings listed in
Table 8-22 Discovered printers screen options on page 106 as
necessary.
Table 8-22 Discovered printers screen options
Option Description
Select/deselect all printers Select this check box to toggle between selecting all or none of the printers in
the Printer window to include in the selected MPL. (Selected by default.)
106 Chapter 8 Manage the HP UPD using HP Managed Print Administration (MPA) and Active
Directory Group Policy
ENWW

Query device configuration Select this check box to query the printing product to determine the following
information. (Selected by default.)
●
Presence of printer features such as hard disk, duplexer, and color
●
Printer model name
●
Address of the printer (for example, IP address, UNC path, IPX/SPX
protocol, or host name)
Use resolved hostname in place of IP
address
Select this check box to replace the printer IP address in the Address field with
the resolved host name. (Not selected by default.)
Set printer's IP address in the
comments field
Select this check box to include the printer IP address in the Comments field.
(Not selected by default.)
5. Click Add checked printers to add the selected printers to the MPL. The information associated
with the selected printer automatically populates the MPL Printers screen.
Alternatively, click Back to return to the Add automatically screen without saving the changes.
6. Modify any more fields as necessary. For more information, see
Manual printer entry
on page 109.
Discover printers on a print server (\\serverName)
Follow these steps to add any number of printers installed on a known print server.
1. In the MPL printers screen, click Auto printer discovery. The Add automatically screen
displays.
2. In the Discover printers on a print server (\\serverName) section, specify a name in the Print
server field. For example,
●
\\printserver
●
\\winprintserver
●
\\novellServer.tree1
●
\\novellServer.context1.context2
3. Optionally, in the Connect as user field, enter the user name for the server that you provided in
the Print server field, and enter the corresponding password in the Password field.
4. Select the Print server is a non-Windows machine check box if the print server is a non-Windows
computer.
5. Click Discover.
The Discovered printers screen displays. The printers discovered on the specified server
automatically populate the Printers group box.
6. In the Printers panel, select the check box next to the printers that you want to add to the MPL.
(All printers are selected by default.)
7. Modify the settings listed in
Table 8-23 Discovered printers screen options on page 108 as
necessary.
Table 8-22 Discovered printers screen options (continued)
ENWW Manage the HP UPD using HP MPA 107

Table 8-23 Discovered printers screen options
Option Description
Select/deselect all printers Select this check box to toggle between selecting all or none of the printers in
the Printer window include in the selected MPL. (Selected by default.)
Query device configuration Select this check box to query the printing product to determine the following
information. (Selected by default.)
●
Presence of printer features such as hard disk, duplexer, and color
●
Printer model name
●
Address of the printer (for example, IP address, UNC path, IPX/SPX
protocol, or host name)
Use resolved hostname in place of IP
address
Select this check box to replace the printer IP address in the Address field with
the resolved host name. (Not selected by default.)
Set printer's IP address in the
comments field
Select this check box to include the printer IP address in the Comments field.
(Not selected by default.)
8. Click Add checked printers to add the selected printers to the MPL. The information associated
with the selected printer automatically populates the MPL Printers screen.
Alternatively, click Back to return to the Add automatically screen without saving the changes.
9. Modify any more fields as necessary. For more information, see
Manual printer entry
on page 109.
Import printers from an XML file
Administrators can use this method to add static printer information from an XML file. For example, an
XML file from a previous MPL or a web Jetadmin file. When the XML file is imported the data remains
the same; only its format is converted when added to the MPL.
Follow these steps to add static printer information from an XML file.
1. On the MPL printers screen, click Auto printer discovery. The Add automatically screen
displays.
2. In the Import printers from XML file panel, you must provide the URL of the XML file or UNC path
to continue. In the XML URL or UNC field, enter the Internet address that corresponds to the
location of the XML file on a web server or the Universal Naming Convention (UNC) that
corresponds to the location of the XML file on a local-area network.
3. Click Next. The Discovered printers screen displays. The printers discovered from the imported
information automatically populate the Printers panel group box.
4. In the Printer group box, select the check box next to the printers that you want to add to the MPL.
(All printers are selected by default.)
5. Modify the settings listed in
Table 8-24 Discovered printers screen options on page 108 as
necessary.
Table 8-24 Discovered printers screen options
Option Description
Select/deselect all printers Select this check box to toggle between selecting all or none of the printers in
the Printer window in the selected MPL. (Selected by default.)
108 Chapter 8 Manage the HP UPD using HP Managed Print Administration (MPA) and Active
Directory Group Policy
ENWW

Query device configuration Select this check box to query the printing product to determine the following
information. (Selected by default.)
●
Presence of printer features such as hard disk, duplexer, and color
●
Printer model name
●
Address of the printer (for example, IP address, UNC path, IPX/SPX
protocol, or host name)
Use resolved hostname in place of IP
address
Select this check box to replace the printer IP address in the Address field with
the resolved host name. (Not selected by default.)
Set printer's IP address in the
comments field
Select this check box to include the printer IP address in the Comments field.
(Not selected by default.)
6. Click Add checked printers to add the selected printers to the MPL. The information associated
with the selected printer automatically populates the MPL Printers screen.
Alternatively, click Back to return to the Add automatically screen without saving changes.
7. Modify more printer attributes as necessary. For more information, see
Manual printer entry
on page 109.
Manual printer entry
This section provides instructions to add printers to an MPL manually or edit printers previously added.
If you have performed one of the methods for auto printer discovery, many of the fields described here
might automatically populate. For more information, see
Auto printer discovery on page 106.
NOTE: Changes that you make in this section apply only to printers selected in the Printers window.
To select multiple printers, press and hold the Ctrl key and then select printers.
Follow these steps to add printers to an MPL manually, or to modify printer attributes manually.
1. Click Manual printer entry. The MPL printers screen displays with all fields available for
modification.
2. Modify the fields listed in
Table 8-25 MPL printers panel–Manual Printer Entry options
on page 109 as necessary.
Table 8-25 MPL printers panel–Manual Printer Entry options
Option Description
Printers This panel populates automatically with previously retrieved printer information.
Click a specific printer to modify the fields.
Printer name Enter the name of the printer to add to the MPL, replacing the text “Default:
Unnamed printer (current date and time).”
Table 8-24 Discovered printers screen options (continued)
ENWW Manage the HP UPD using HP MPA 109

Address Provide one of the following addresses to define the type of connection and the
printer address for users to connect to the printer.
●
IP address:
Retrieve the IP address of the printer from the configuration page (for
example, 115.22.112.151).
●
UNC path:
The UNC path tag includes any Windows printer share (also known as a
Network print queue) or non-Windows print queues such as a PSA or
Novell (for example, \\serverName\printerName, \\printServer\hplj4000, \
\NovellTree1\Context1 \Context2\OU3.hplj5500, or \\LabTree
\Bldg7.SEMeetingRoom.Printers.hp4100).
●
Hostname:
Retrieve the host name of a product from the configuration page (for
example, NPIBB99EE, testlab.hou.com).
●
IPX/SPX:
The IPX/SPX protocol includes the “NetworkNumber.NodeNumber”
format.
NOTE: To use an IPX/SPX protocol, the IPX/SPX client networking
software must be installed on the computer. Also, the HP IPX port monitor
must be installed, which is supported only in Windows 2000.
Replace address with resolved
hostname on query
After the Address field populates with a valid printer address, select this option
to query the printing product to determine the following information.
●
Presence of printer features such as hard disk, duplexer, and color
●
Printer model name
●
Address of the printer (for example, IP address, UNC path, IPX/SPX
protocol, or host name)
Model name Enter the model name of the printer (for example, HP LaserJet 4100 MFP).
Physical location Enter the physical location of the printer to add to the MPL (for example,
HP LaserJet 4100 in Room 1002).
Comments Enter in any comments (for example, tray 2 contains color paper).
Check boxes The following two check boxes are available. Select as appropriate.
●
Duplex unit installed
●
Hard disk installed
Printer group The following two options are available.
●
(None).
Select this option if this MPL is not associated with a specific printer group.
●
(Create new group).
Select this option to define a new printer group. Enter the name of this
group in the New Printer Group field.
Cost per page Provide a cost value to appear in a pay-for-print environment where a cost is
assigned to print jobs (for example, $1.09).
Table 8-25 MPL printers panel–Manual Printer Entry options (continued)
110 Chapter 8 Manage the HP UPD using HP Managed Print Administration (MPA) and Active
Directory Group Policy
ENWW

3. Another option is to click Advanced to open the Advanced panel. Select one of the options listed
in
Table 8-26 MPL printers–Advanced panel options on page 111 as necessary.
Table 8-26 MPL printers–Advanced panel options
Option Description
Disable color printing Select this check box to disable color printing for the selected printer.
Validate when printing Select this check box to require communication with the printer before it is
available for printing. If the printer is on a print server (for example, Novell) that
does not allow bidirectional communication, this check box should be clear.
Select for job delivery Select this check box to apply the job delivery settings for all the print jobs
submitted to the selected printer.
NOTE: This option is applicable only when the job-delivery settings are
configured in the MPP.
Secure print path Select this check box to indicate to users that the selected printer is on a secure
print path.
Configuration Select the appropriate configuration option.
●
Use the configuration from the address specified:
The configuration will be queried directly from the printer at this address.
●
Use the device from an alternate address:
The configuration will be queried from the printer at this alternate address.
●
Use the device from a virtual printer:
The configuration will be queried from a virtual printer. See
Manage virtual
printers on page 119 for more information about setting up a virtual printer.
4. Click Hide to save the settings to the selected printer, and close the Advanced panel.
5. In the MPL settings panel, select the options listed in
Table 8-27 MPL settings panel
on page 111 as necessary.
Table 8-27 MPL settings panel
Option Description
Direct URL This field populates automatically with the local path to the selected MPL. The
URL provided is an active link to provide direct access to the selected MPL. For
more information, see
Auto printer discovery on page 106.
Save as XML This field populates automatically with the path to the XML file for the selected
MPL. This path is an active link that initiates the File Download dialog box.
ENWW Manage the HP UPD using HP MPA 111

Refresh rate Select the refresh rate from the menu to determine how often the MPL refreshes.
The selected refresh rate applys only to this MPL. The available controls are as
follows.
●
Once per week
●
Once per 24 hours
●
Once per 18 hours
●
Once per 12 hours
●
Once per 6 hours
●
Once per hour
●
Once per 30 minutes
●
Once per minute
●
Once per 30 seconds
●
Once per second
●
Once per UPD query
MPL name Optionally, enter a modified name in the MPL name field to save the MPL with
more printers included.
6. In the MPL settings panel, click Apply (to apply selected options and leave the MPL printers
screen open) or Done (to apply selected options and close the screen). Until you have clicked
Apply or Done, any settings that have changed are not saved in the MPL.
A message displays indicating successful change of the MPL and listing further steps.
Edit an existing MPL
Follow these steps to edit an existing MPL.
1. On the Managed Printer Lists menu, select Edit an existing list. The Select an MPL screen
displays.
2. In the Name menu, select the MPL to modify
3. Click Next. The MPL printers screen displays, automatically populated with the values assigned
to the selected MPL.
4. Modify the settings for the selected MPL as necessary. For more information, see
Auto printer
discovery on page 106 or Manual printer entry on page 109.
Associate an MPL with an MPP
For more information, see Associate MPLs with an MPP on page 102.
Duplicate an existing MPL
Follow these steps to duplicate an existing MPL.
1. In the Managed Printer List menu, select Duplicate an existing list. The Select an MPL to
duplicate screen displays.
2. In the Copy from: drop-down menu, select the MPL to duplicate.
Table 8-27 MPL settings panel (continued)
112 Chapter 8 Manage the HP UPD using HP Managed Print Administration (MPA) and Active
Directory Group Policy
ENWW

3. In the New name: field, enter the name for the new MPL.
4. Click Next. The MPL printer screen displays and automatically populates with the values assigned
to the duplicated MPL.
5. Modify the settings for the selected MPL, as necessary. For more information, see
Auto printer
discovery on page 106 or Manual printer entry on page 109.
6. Click Apply (to apply selected options and leave the MPL printers screen open) or Done (to apply
selected options and close the screen). Until you have clicked Apply or Done, any settings that
have changed are not saved in the MPL.
A message displays indicating successful modification of the MPL and listing further steps.
Manage the MPL view
MPL views can be modified to assist users in selecting printers.
Follow these steps to modify views.
1. On the Managed Printer Lists menu, click Manage MPL view. The Select an MPL screen
displays.
2. From the Name menu, select the name of an existing MPL.
3. Click Next. The Select a view type screen displays.
Modify views from one or both of the following panels.
●
Select a view
●
Advanced view settings
Select a view
1. On the Select a view type panel, click one of the following options to select a view type.
NOTE: The Don’t require user to confirm printer after selection from view check box is
located below the MPL view-type options. Select this box after you create a view if you want to
allow users to select printers from a view without providing more confirmation. This box is the default
selection.
Table 8-28 Select a view type panel—View options
Option Description
Default UPD view Select this option to show a specified MPL in the HP UPD dialog box.
Clickable image map Select this option to create a clickable image map for the selected MPL.
List with printer graphics Select this option to create a list of printers that contains a graphic for the
selected MPL.
Tabular HTML view Select this option to create a table of printers for the selected MPL.
2. Optionally, to view the result in a new window, click the Preview button below the selection.
3. Click Configure to apply the selections.
See the following topics for more information about each view type.
ENWW Manage the HP UPD using HP MPA 113

●
Clickable image map view
●
List with printer graphics view
●
Tabular HTML view
Clickable image map view
The clickable image map view is an interactive image-based map that lists selectable printers associated
with the specified MPL. The clickable image map allows users to drill down from a large-scale image to
a local image that provides links to local printers.
1. From the Select a view type screen, select Clickable image map.
2. Click Configure. The Image map screen displays.
3. On the View settings panel, click Select background image from library to select a background
image. The Select a background image screen displays.
4. Select the option button above the image to apply to image-map background, and then click one
of the options listed in
Table 8-29 Clickable image map view options on page 114.
Table 8-29 Clickable image map view options
Option Description
Back Select this option to return to the Configure image map screen without applying
a new image.
Delete selected image Select this option to remove the selected image from the HP MPA software.
Upload new image Select this option to upload a new image from an external source. The Upload
a new background image screen displays.
When the Upload new image option is selected, you must perform the following
steps.
1. Click Browse to the right of the File field. The Choose file window
displays.
2. Select the file to upload and click Open. The File field populates
automatically with the file name and path.
3. Optionally, in the Description field, enter a description for the selected
background image.
4. Click Upload Image. The image becomes available for selection on the
Select a background image screen.
Select image The selected image displays in the Image map panel with graphics for added
printers on the leftmost side.
5. Select Show legend to include a legend at the bottom of the image map. (This option is not selected
by default.)
6. In the Printer select panel, select a printer to which you want to assign an image.
7. Click Auto match images for all printers to automatically match all the printers with their
corresponding image. The printer image selected in the Printer select drop-down menu displays
in the Printer image panel.
Other automatically matched images appear as icons in the Image map panel
114 Chapter 8 Manage the HP UPD using HP Managed Print Administration (MPA) and Active
Directory Group Policy
ENWW

8. In the Printer image panel, select one of the following options.
Table 8-30 Printer image panel options
Option Description
Replace image Select this option to replace the image automatically assigned to the selected
printer with an image from the library. When you select this option, you must
perform the following steps.
1. Click Browse images to view the list of available images to match with the
selected printer. The Select an image for [ Printer Name ] screen
displays.
2. Click the option button above the image that you want to assign to the
selected printer.
3. Click Select image. The selected printer image displays in the Printer
image section.
Add to map Click this option to place the image on the image map.
Refresh
Reduce to Optionally, select the check box to modify the size of the image selected on the
image map. When this option is selected, the following options are available.
●
(original size)
●
35 pixels
●
50 pixels
●
75 pixels
●
100 pixels
●
150 pixels
●
200 pixels
9. Drag the images in the Image map panel to the chosen location by clicking the image, holding
down the left-mouse button, and then dragging to the appropriate location.
10. In the Labels panel, click Show. The Labels panel displays.
A label can be created for an image already added to the Image map panel, or can be used instead
of an image.
●
To add a label to an image in the Image map panel, select the image and continue with the
following steps.
●
To add a label to the Image map panel not associated with an image, continue with the
following steps.
11. From the Labels drop-down menu, select the name of a label, or select (Create a new text
label).
12. Modify the following settings, as necessary.
NOTE: These settings will be automatically reflected on the Image map panel.
ENWW Manage the HP UPD using HP MPA 115

Table 8-31 Labels panel options
Option Description
Text Enter the text to appear on the label.
Size Select one of the following to apply the appropriate font size. (Medium is the
default.)
●
Large
●
Medium
●
Small
Weight Select one of the following to apply the appropriate font weight. (Normal is the
default.)
●
Normal
●
Bold
Color Select one of the following color options from the menu to apply the color to the
label text. (Black is the default.)
●
Black
●
Red
●
Blue
●
Green
Width Select one of the following options to set the width of the label text box. (The
200 pixels option is the default.)
●
100 pixels
●
200 pixels
●
300 pixels
13. Click Add to map. The new label is automatically added to the image map.
14. To move the label to a location on the image map, click the label text box on the image map and
drag to the location.
15. Click a new printer on the image map to add more labels as necessary, or click Hide to close the
label panel.
NOTE: To remove a label, select the label in the Image map panel or in the Labels drop-down menu.
Then, click Remove label in the Labels panel.
List with printer graphics view
1. Click the option button next to List with printer graphics.
2. Optionally, select the Show device address check box to display the product address in the list
with the printer graphics view. (This box is not selected by default.)
3. Click one of the options listed in
Table 8-32 Graphics view—List format options on page 117 to
specify the list format.
116 Chapter 8 Manage the HP UPD using HP Managed Print Administration (MPA) and Active
Directory Group Policy
ENWW

Table 8-32 Graphics view—List format options
Option Description
All printer groups on one page Click this option to format the table with all printer groups on one page.
Each printer group in its own frame Click this option to format the table with one printer group per frame.
4. Click Preview to view the list with the selected options. A new browser window displays that
contains the list output.
5. Click Configure to make more changes to the list. The Configure list with printer graphics
screen displays.
6. On the Printer select menu, select a printer to include in the list.
7. Click Auto match images for all printers.
8. Optionally, on the Printer image panel, click Replace image to replace the auto match image.
The Printer image panel changes to show the following options. Select one.
Table 8-33 Printer image panel options
Option Description
Auto match image Click this button to automatically search for images that match the product. If
the image is available in the image library, the automatically matched image
displays.
Browse images Click this button to select an image from a library of printer images.
In the select image screen, three options are available.
●
Back.
Select this option to return to the Configure image map screen without
applying a new image.
●
Delete selected image.
Select this option to remove the selected image from the HP MPA software.
●
Upload new image.
Select this option to upload a new image from an external source. The
Upload a new background image screen displays. See the following for
more instructions for uploading a new image.
Select the Upload new image option and perform the following steps.
1. Click Browse to the right of the File field. The Choose file window
displays.
2. Select the file to upload and click Open. The File field populates
automatically with the file name and path.
3. Optionally, in the Description field, enter a description for the selected
background image.
4. Click Upload Image. The image becomes available for selection on the
Select a background image screen.
Select image The selected image displays in the Image map panel with graphics for added
printers on the leftmost side.
ENWW Manage the HP UPD using HP MPA 117

9. In the Complete panel, select one of the options listed in Table 8-34 Complete panel options
on page 118.
Table 8-34 Complete panel options
Option Description
Back Click Back to return to the Select an MPL screen without saving the changes.
Apply Click Apply to apply your changes to the MPL view and remain in the Configure
list with graphics view screen to make any more modifications.
Preview Click Preview to view the applied changes. A new browser window displays with
the list output.
Done Click Done to apply the changes to the MPL view. A confirmation screen
displays and provides a list of suggested next steps.
Tabular HTML view
To create a table of all available printers in the specified MPL, follow these steps.
1. Click the option button next to Tabular HTML view.
2. Optionally, select the Hide empty columns check box to hide any columns that have no values.
3. Optionally, select the Show device address check box to show the product address in the tabular
HTML view.
4. Click one of the option buttons listed in
Table 8-35 Tabular HTML view options on page 118 to
select the list format.
Table 8-35 Tabular HTML view options
Option Description
All printer groups on one page Click this option to format the table with all the printer groups on one page.
Each printer group in its own frame Click this option to format the table with one printer on each frame.
5. Click Preview to preview the tabular HTML output. A new browser window displays that contains
the HTML output.
6. In the Select a view type panel, click one of the options listed in
Table 8-36 Select a view panel
options on page 118.
Table 8-36 Select a view panel options
Option Description
Back Click Back to return to the Select an MPL screen without saving the changes.
Apply Click Apply to apply your changes to the MPL view and remain in the Select a
view type panel to make any more modifications.
Done Click Done to apply the changes to the MPL view. A confirmation screen
displays and provides a list of suggested next steps.
Advanced view settings
Use the advanced view settings to design a custom MPL view to assist users in selecting printing
products from an image map. The URL in this section links directly to the Final URL field that displays.
118 Chapter 8 Manage the HP UPD using HP Managed Print Administration (MPA) and Active
Directory Group Policy
ENWW

With this method, you can allow users to select a printer by drilling down from a high-level image map
to the low-level view within the clickable image map.
In Advanced view, you can point to a starting web page. This web page can be made using standard
web publishing tools with or without images to help ease users through a layer view of MPLs.
For example, the starting web page could show a state with links to individual cites. Each city would
open to a web page with individual buildings linked. Then, each building could be linked to a web page
with the building floors linked, and each floor to individual printers.
1. In the Advanced view settings section of the Select a view screen, click Show. The Advanced
view settings panel displays.
NOTE: The Final URL field populates automatically with the Internet address for the final MPL
view that you selected for this MPL ID.
2. In the Starting URL field, enter the Internet address of the image that provides a starting point for
the clickable image map.
3. Perform one of the following actions.
Option Description
Back Click Back to return to the Select an MPL screen without saving the changes.
Apply Click Apply to apply your changes to the MPL view and remain in the Advanced
view settings panel to make any more modifications.
Done Click Done to apply the changes to the MPL view and return to the Select an
MPL screen.
Hide Click Hide to close the Advanced view settings panel.
Manage virtual printers
In some environments, it is not possible for the HP UPD to communicate with the destination printer.
This might occur because the HP UPD and the printer are not on the same network, there is a firewall,
or communication has been disabled for some other reason. In these environments, the HP UPD is
unable to determine the physical capabilities of the product, and only basic printing options are provided
to the user.
By using the Use the device configuration from a virtual printer option and then selecting one of the
previously defined HP MPA virtual printers, the administrator can enable the HP UPD to act as though
it communicated with the target product. The administrator can also set up the driver features as though
the product detected the specific hardware features. Once a virtual printer is selected, the capabilities
of that virtual printer are displayed for the administrator.
●
Create a new virtual printer
●
Edit existing virtual printer
ENWW Manage the HP UPD using HP MPA 119

Create a new virtual printer
Follow these steps to set up a virtual printer.
1. On the Managed Printer Lists menu, select Manage Virtual Printers. The Create a new virtual
printer screen displays.
2. Enter the address of the printer in TCP/IP or hostname format.
3. Click Add. See
Edit existing virtual printer on page 120 for more information.
Edit existing virtual printer
Follow these steps to edit an existing virtual printer.
1. On the Managed Printer List menu, select Manage Virtual Printers. The Edit existing virtual
printers panel opens.
2. In the Edit existing virtual printers panel, modify the settings listed in
Table 8-37 Edit existing
virtual printers panel options on page 120 as necessary.
Table 8-37 Edit existing virtual printers panel options
Option Description
Name Edit the name.
Re-query this device to update its
capabilities
Select this check box to query the printing product to update the printer's
features (such as hard disk or duplexer).
Select/deselect all printers for
requerying
Select this check box to toggle between selecting all or none of the printers for
requery.
Select/deselect all printers for
removal
Select this check box to toggle between selecting all or none of the printers for
removal.
3. Click Apply (to apply selected options and leave the Edit virtual printers screen open) or Done
(to apply selected options and close the screen). Until you have clicked Apply or Done, any settings
that have changed are not saved in the MPL.
A message displays, stating that the virtual printer has been successfully modified and, listing
further steps.
Remove an existing MPL
Follow these steps to remove an existing MPL.
1. On the Managed Printer Lists menu, select Remove an existing list. The Select an MPL screen
displays.
2. From the Name menu, select the name of an existing MPL.
3. Click Next. A confirmation screen displays and automatically populates with the list of all printers
currently assigned to the selected MPL.
4. Click Remove to confirm the removal of the selected MPL, or click Back to return to the Select a
MPL screen without saving the changes.
120 Chapter 8 Manage the HP UPD using HP Managed Print Administration (MPA) and Active
Directory Group Policy
ENWW

Remove printers from an MPL
Follow these steps to remove printers from an MPL.
1. On the Managed Printer Lists menu, click Edit an existing list. The Select an MPL screen
displays.
2. Select the MPL from which a printer or printers are to be removed and click Next. The Printers
screen display.
3. On the MPL printers screen, select the printers to remove by clicking them in the Printers panel.
(Press and hold the Ctrl key to select more than one printer.)
4. Click Remove printer(s). A confirmation dialog box displays that contains the list of the printers
that you selected for deletion.
5. Click OK to confirm, or click Cancel to return to the Confirm screen to view printer details.
Use User Groups
Use the HP MPA software to create, import, and modify groups of users. The HP MPA software also
establishes associations for existing user groups with available MPPs to manage user group access to
available printers and to control features. Users added to these groups are likely to be domain users,
although users can be added with their local login name.
Use the HP MPA software to create user groups and modify permissions for HP UPD users.
For more information about creating user groups, see the following topics.
●
Create a new user group
●
Edit an existing user group
●
Associate a user group with a MPP
●
Remove a user group
Create a new user group
Follow these steps to create a new user group.
1. On the User Groups menu, select Create a new user group. The Create a new user group
screen displays.
2. In the Name field, enter a name for the new user group.
3. Click Next. The Users screen displays.
4. In the Users field on the Included Users panel, enter the user entries in the format specified on
the screen.
Alternatively, you can paste user entries from an external, semicolon-delimited list.
5. Optionally, in the User group name field on the User Group Settings panel, enter a name for the
new user group.
6. Perform one of the following actions.
Option Description
ENWW Manage the HP UPD using HP MPA 121

Back Click Back to return to the main menu without saving the changes.
Apply Click Apply to update the user entries and remain in the Included users screen
to make more modifications.
Done Click Done to update user entries and return to the main menu.
Edit an existing user group
Follow these steps to edit an existing user group.
1. On the User Groups menu, select Edit an existing user group. The Edit an existing user
group screen displays.
2. From the Name menu, select the name of an existing user group.
3. Click Next. The Included users screen displays and populates automatically with all users in the
selected user group.
4. In the Users: field, enter the user entries in the format specified on the screen.
Alternatively, you can paste user entries from an external, semicolon-delimited list.
5. Optionally, in the User group name: field, enter a name for the new user group.
6. Perform one of the following actions.
Option Description
Back Click Back to return to the main menu without saving the changes.
Apply Click Apply to update the user entries and remain in the Included users screen
to make more modifications.
Done Click Done to update user entries and return to the main menu.
Associate a user group with a MPP
See Associate user groups with an MPP on page 103 for detailed instructions.
Remove a user group
Follow these steps to remove a user group.
1. On the User Groups menu, select Remove a user group. The Remove an existing user
group screen displays.
2. From the Name menu, select the name of the user group to remove.
3. Click Next. A Warning screen displays. The Included users panel populates automatically with
users in the selected user group.
4. Click Remove to continue with the removal of the selected user group, or click Back to return to
the Select a user group screen without removing the user group.
122 Chapter 8 Manage the HP UPD using HP Managed Print Administration (MPA) and Active
Directory Group Policy
ENWW

Manage Active Directory Group Policy with the HP UPD
using HP Active Directory Templates
Active Directory Group Policy and the HP UPD Active Directory Administrative template allow complete
management of the HP UPD printing experience within your Active Directory infrastructure.
You can use the HP UPD Active Directory Administrative Template to add policies to an existing Group
Policy Object or create new, custom HP UPD Group Policy Objects for each user, group, or
Organizational Unit.
In addition to creating policies for the HP UPD, you can also enter the location of managed printer lists
created by the HP MPA or by exporting printer groups from your HP web Jetadmin database in XML
format.
●
Supported HP UPD versions
●
Use HP Active Directory Group Policy versus HP MPA to manage HP UPD policies
●
Install the HP UPD Active Directory Administrative template
Supported HP UPD versions
The HP UPD Active Directory Administrator Template version 4.1 is supported with HP UPD version
5.0 and is available for download at
www.hp.com/go/upd.
Use HP Active Directory Group Policy versus HP MPA to manage HP UPD
policies
The decision to use HP Active Directory Group Policy or HP MPA to manage the HP UPD depends on
the size of your business and the current software infrastructure within your business.
In an enterprise business, use Active Directory Group Policy when your enterprise environment requires
user and Organizational Unit (OU) level HP UPD configuration settings that might be based on how the
users are currently configured in your Active Directory. The HP UPD Active Directory Administrative
template integrates into an existing Active Directory infrastructure and allows for creation of group Policy
Objects to be linked to user groups and OUs. An experienced Active Directory administrator will be able
to easily integrate the HP UPD Group Policy objects in large enterprise environments.
In a smaller business, use the HP Managed Printing Administrator software when a fewer number of
policy variations are necessary or when a smaller number of users actually need the behavior of their
HP UPD managed.
Install the HP UPD Active Directory Administrative template
The HP UPD Active Directory Administrative template can be added to the current Active Directory
infrastructure. How the template is added depends on whether the system has the Microsoft Group
Policy Management Console (GPMC). See the following for more information.
Install template on Windows Server 2003 and Server 2008 using Microsoft Group Policy
Management Console (GPMC)
The following procedure provides details for creating and linking group policy objects using Microsoft
Group Policy Management Console (GPMC). The Microsoft GPMC is available for Microsoft Server
2003 and Windows XP. The following example creates a group policy object and sets it as the default
ENWW Manage Active Directory Group Policy with the HP UPD using HP Active Directory Templates 123

policy for the entire domain, which in this case is named test.local. The procedure is similar for creating
and linking group policy objects for organizational units and groups.
1. Download the HP UPD Active Directory template from the following location.
www.hp.com/go/UPD
2. Copy the template to the \windows\inf directory on the domain server.
3. Open the Microsoft Group Policy Console.
4. Right-click the server name test.local.
5. Click Create and Link a GPO here.
6. Give the new GPO a name and click OK.
7. Right-click the new Group Policy object in the rightmost window pane.
8. Click Edit. The Microsoft Group Policy Object Editor opens.
9. Select User Configuration, click Administrative Templates, and select Add/Remove
Templates.
10. Browse to and select the HP UPD Active Directory template (HP_MPP_3.adm).
The policies configured to manage the HP UPD behaviors are similar to those found in the HP Managed
Printing Administrator tool. See
Manage the HP UPD using HP MPA on page 82 for more information.
Remove the HP UPD Administrative template
1. Open the Microsoft Group Policy Editor.
2. Click User Configuration, select Administrative Templates, and then select HP Managed Print
Policies.
3. Set each of the policies to Not configured.
4. Click Administrative Templates, and select Add/Remove Templates.
NOTE: Failure to set all the template settings to Not configured before removing the template will
leave registry settings that are no longer associated with an administrative template, resulting in errors
when the Group Policy Modeling Wizard is run.
Upgrade the HP UPD Administrative template
To upgrade the HP UPD Administrative template, follow the steps to remove the old template in Remove
the HP UPD Administrative template on page 124, then follow the steps to install the new template in
Install the HP UPD Active Directory Administrative template on page 123.
Enable Active Directory Group Policy for HP UPD Active Directory Administrator
Template for a new or existing HP UPD installation
124 Chapter 8 Manage the HP UPD using HP Managed Print Administration (MPA) and Active
Directory Group Policy
ENWW

For new installations of the HP UPD when an HP Active Directory Template is installed
NOTE: When using HP UPD 5.0 and the latest version of the HP Active Directory Administrative
template (version 4.1), policy can be enabled directly from the template settings, so no special
installation switches are required.
To install a new instance of the HP UPD with HP UPD Active Directory group policy enabled, use any
of the following examples from a command line.
NOTE: These steps are only required if you are currently using policy objects created with AD template
4.0 or earlier.
●
To install in traditional mode.
install /sm<ipaddress-or-hostname> /n”printer name” /eads
●
To install in traditional mode with machine-wide policy.
install /sm<ipaddress-or-hostname> /n”printer name” /geads
●
To install in dynamic mode.
install /dm /n”search for printers” /eads
●
To disable HP UPD Active Directory group policy settings with an HP UPD installation use the
following argument rather than the /eads argument in the examples above.
/dads
For existing installations of the HP UPD
To enable your existing installations of the HP UPD to recognize the Active Directory group policies,
use the following procedure for every UPD GPO that you create.
1. Open the Microsoft Group Policy Editor.
2. Select User Configuration, Administrative Templates, HP Managed Print Policies, UseMode
Settings.
3. Open General Settings, click Enabled, and check Enable Policy for all users.
Configure policies with the HP UPD Active Directory Administrative template
To manage and configure the HP UPD Policies settings, open the Microsoft Group Policy editor and
select User Configuration, Administrative Templates, and then HP Managed Print Policies.
Configuring the policies for the HP UPD is similar to configuring any other Group Policy within the Active
Directory Group Policy environment.
The following are policies that are part of the HP UPD Active Directory template.
UseMode settings
General Settings
ENWW Manage Active Directory Group Policy with the HP UPD using HP Active Directory Templates 125

Table 8-38 UseMode settings–General settings
Option Description
Not Configured
Enabled Select this option button to make the following options
available.
●
Disable Color
●
Show device address
●
Enable Policy for all users. This setting allows the
administrator to configure the HP UPD to enable AD
policy without having to configure every installed instance
of the HP UPD.
Disabled
User Interaction Settings
Table 8-39 User Interaction settings
Option Description
Not Configured
Enabled Select this option button to make the following options
available.
●
Show UPD dialog settings window check box
●
Allow user group printers by location check box
●
Allow user group printers to OS Printers folder check
box
●
Device verify level.
◦
(Do not specify)
◦
Verify communication and compatibility with
driver (High)
◦
Verify device ID and Model Name can be
obtained (Medium)
◦
Verify port can be opened for printing (Low)
●
When printing.
◦
(Do not specify)
◦
Always prompt for the destination when printing
◦
Only prompt if the last known driver is no
◦
Only prompt the first time a job is printed from a
Disabled
126 Chapter 8 Manage the HP UPD using HP Managed Print Administration (MPA) and Active
Directory Group Policy
ENWW

Enabled Services tab
Table 8-40 Enabled Services tab
Option Description
Not Configured
Enabled Select this option button to make the following options
available.
●
Enabled online diagnostics
●
Enabled driver updates
●
Enabled online support
●
Enabled supply ordering
●
Enabled product manuals
Disabled
ENWW Manage Active Directory Group Policy with the HP UPD using HP Active Directory Templates 127

Default Print Settings
NOTE: When the Default Print Settings Properties window is set for Not Configured, the HP UPD
uses the driver defaults for the settings.
Table 8-41 Default Print settings
Option Description
Not Configured
Enabled Select this option button to make the following options available.
●
Duplex.
◦
Driver Default
◦
Print on both sides
◦
Print on both sides–Flip pages up
◦
Print on both sides–Flip pages up–Lock
●
Economode.
◦
Driver Default
◦
Economode On
◦
Economode On–Locked
●
Private Printing.
◦
Driver Default (Off)
◦
Private Job
◦
Private Job–Lock
◦
Proof and Hold
◦
Proof and Hold–Lock
◦
Quick Copy
◦
Quick Copy–Lock
◦
Stored Job (no PIN)
◦
Stored Job (no PIN)–Lock
◦
Stored Job (require PIN)
◦
Stored Job (require PIN)–Lock
●
Private Print Pin
●
Edgeline QAC.
◦
Driver Default
◦
Black and White
◦
Black and White–Lock
◦
General Office
128 Chapter 8 Manage the HP UPD using HP Managed Print Administration (MPA) and Active
Directory Group Policy
ENWW

Option Description
◦
General Office–Lock
◦
Professional
◦
Professional–Lock
●
Allow special device information and offers to be displayed check box
Disabled
Color access control
Application Filtering
Table 8-42 Application Filtering
Option Description
Not Configured
Enabled Select this option button to make the following options
available.
●
Exclude these Applications check box
◦
Name: field
Disabled
Time of Day Restriction
Table 8-43 Time of Day Restriction
Option Description
Not Configured
Enabled Select this option button to make the following options
available.
●
[Day] drop-down menu.
◦
Specify time
◦
Allow Color all day
◦
Restrict Color all day
●
Hour on: field
●
Hour off: field
Disabled
Table 8-41 Default Print settings (continued)
ENWW Manage Active Directory Group Policy with the HP UPD using HP Active Directory Templates 129

User Search Capabilities
Table 8-44 User Search Capabilities
Option Description
Not Configured
Enabled Select this option button to make the following options
available.
●
Network print shares check box–Allow users to browse
for and use printer shares on the network.
●
Network printers check box–Allow users to search for
and use TCP/IP printers connected to the network.
Disabled
Status Notification Pop-ups
Table 8-45 Status Notification Popups
Option Description
Not Configured
Enabled Select this option button to make the following options
available.
●
Printer Alert Notification Settings.
◦
Disabled
◦
Show for Device Errors (printing stops)
◦
Show for Device Errors and Warnings
◦
Show for Every Print Job
●
Device Query Internal.
◦
Normal
◦
Minimize Network Traffic
●
Supplies Details check box–Allow users to select the
Supplies Details link.
●
Shop for Supplies check box–Allow users to select the
Shop for Supplies link.
●
Access HP Online Product Support check box–Allow
users to select the HP Support link for product-specific
online help.
●
Alternate Online HP Support URL: field
Disabled
130 Chapter 8 Manage the HP UPD using HP Managed Print Administration (MPA) and Active
Directory Group Policy
ENWW

Job Accounting
Job accounting information can be passed as xml to a Windows DLL function call or posted to an http
or https server.
Pass the job accounting XML to a Windows DLL function call
Table 8-46 Pass the job accounting XML to a Windows DLL function call
Option Description
Not Configured
Enabled Select this option button to make the following options
available:
●
Module name: field
●
API name: field
Disabled
Post the job accounting XML to an http or https web server
Table 8-47 Post the job accounting XML to an http or https web server
Option Description
Not Configured
Enabled Select this option button to make the following options
available.
●
URL: field
Disabled
Job Delivery
Job delivery information can be passed as xml to a Windows DLL function call or posted to an http or
https server.
Job Delivery
Table 8-48 Job Delivery
Option Description
Not Configured
ENWW Manage Active Directory Group Policy with the HP UPD using HP Active Directory Templates 131

Option Description
Enabled Select this option button to make the following options
available:
●
Job Delivery Mode.
◦
All printers will deliver job according to this
scheme
◦
Only printers that have been selected in the MPL
will deliver jobs
●
Delivery port name: field
●
URL for job completion: field
Disabled
Call a Windows DLL function to handle delivery of the print job data
Table 8-49 Call a Windows DLL function to handle delivery of the print job data
Option Description
Not Configured
Enabled Select this option button to make the following options
available.
●
Module name: field
●
API name: field
Disabled
Post the print job data to an http or https web server
Table 8-50 Post the print job data to an http or https web server
Option Description
Not Configured
Enabled Select this option button to make the following options
available.
●
Job submit URL: field
Disabled
MPP Information Settings
Table 8-51 MPP Information settings
Option Description
Not Configured
Table 8-48 Job Delivery (continued)
132 Chapter 8 Manage the HP UPD using HP Managed Print Administration (MPA) and Active
Directory Group Policy
ENWW

Option Description
Enabled Select this option button to make the following options
available.
●
Info Link Name: field
●
Info Link URL: field
Disabled
Managed Printer List settings
Table 8-52 Managed Printer List settings
Option Description
Not Configured
Enabled Select this option button to make the following options
available.
●
Custom MPL Count: selection box
●
HP MPL Only check box
●
Custom MPL [#]:—(up to 40)
◦
Name: field
◦
Path: field
◦
Enter: drop-down menu –
— Standard HP UPD MPL
— web Jetadmin XML MPL
Disabled
Implement Managed Printer Lists (MPLs) within the HP UPD Active Directory template
file
Printer lists for use in the Active Directory Group Policy environment are created outside the Active
Directory Group Policy object, and linked to the HP UPD Active Directory Administrative template within
each Group Policy Object. Create Managed Printer Lists by using the HP MPA or by exporting printer
lists from web Jetadmin. For each policy created, up to 40 managed printer lists can be selected.
●
Custom MPL Count. This number must match the number of printer lists entered.
●
HP MPL Only. Check this if the printer lists have been created by the HP MPA software tool.
●
Name. This is the name displayed for each group.
●
Path. The information in the Path field depends on the type of MPL and the location of the data.
In these examples the data is on an http web server.
Table 8-51 MPP Information settings (continued)
ENWW Manage Active Directory Group Policy with the HP UPD using HP Active Directory Templates 133

NOTE: The path string consists of a prefix like http, and a folder or subfolders separated by a
colon (‘:’).
◦
If the data is the default MPL view from MPA, the prefix is http.
◦
If the data is XML (exported from web JetAdmin), the prefix is http.
◦
If the data is a graphical view exported from MPA (an Image map, Printer Graphics View, or
Tabular view), the prefix is hpmpl.
●
Type. Choose the correct type of printer list being selected. Standard UPD MPL for printer lists
created by HP MPA, or web JetAdmin MPL XML for printer lists exported by web Jetadmin.
When entering the path for printer lists created by HP MPA, you can cut-and-paste the direct location
of the printer list by entering edit mode for the printer list, and cutting and pasting the Direct URL entry
found at the bottom of the printer list.
Verification and troubleshooting
Use this section to verify that the users are obtaining the HP UPD policies correctly; also, use this section
as a guide to see where to apply settings.
Functional test
1. Use the group Policy Modeling tool to run simulations on specific users or groups and specific
machines.
NOTE: The GPMC is a Microsoft supplied tool (not available on Windows Server 2000) and is
an optional component on later server versions that can be downloaded from the Microsoft website.
2. Run the modeling wizard to verify your settings.
3. Right-click Group Policy Modeling.
4. Click Group Policy Modeling Wizard.
5. Enter the user that you want to model.
6. Select the Skip to the final page check box.
Registry population
Use this test to verify that the settings in the group policy object populate in the registry of the client
computer.
1. Log in as a member of the domain.
2. Verify that the current user is logged into the domain.
3. Run regedit.exe and verify that the registry populates correctly. The registry path is HKCU/
Software/Policies/Hewlett-Packard/HP Print Settings/ADSPrintPolicy.
NOTE: Active Directory does not refresh settings immediately after you make a change to the
Group Policy object. To refresh the settings on the client, you must log out and then log back in,
or you can use the gpupdate utility with the /Force option run from a command window to force
Active Directory to update the settings.
Example: c:/> gpupdate /Force
134 Chapter 8 Manage the HP UPD using HP Managed Print Administration (MPA) and Active
Directory Group Policy
ENWW
Final test
Install the latest version of the HP UPD and verify that the screens and final print result reflect the policy
settings entered in the Group Policy Editor (gpedit.msc).
ENWW Manage Active Directory Group Policy with the HP UPD using HP Active Directory Templates 135
136 Chapter 8 Manage the HP UPD using HP Managed Print Administration (MPA) and Active
Directory Group Policy
ENWW

A Manage Status Notification Pop–ups
The HP UPD provides a feature named Status Notification Pop-ups (SNPs). SNPs provide immediate
job information and printer status information by a small pop-up window on the client PC. SNPs also
provide current information about printer consumables, such as toner levels and links to HP SureSupply
ordering system and HP Instant Support page. The SNP feature, which displays during the submittal of
a print job, is fully configurable through a variety of tools available to print administrators.
●
Description and benefits
●
How the SNP works
●
SNP default behavior
●
HP Special Offers Program
●
Use Device Settings tab in the property page to enable or disable SNP
●
Use the pop-up window to enable/disable SNP
●
Manage the SNP with the HP Driver Configuration Utility
●
Manage SNP with HP Managed Printing Administration (MPA)
●
Manage SNP through the command prompt install (Install.exe)
●
Manage SNP through registry settings
ENWW 137

Description and benefits
Available with all PDLs, a Status Notification Pop-up (SNP) provides HP UPD users with the following
information:
●
Print status and error messages. Provides users with printer status information so they can
respond to and resolve many minor printer problems such as an open cover or paper jams, reducing
the number of Help Desk calls.
●
Dashboard view of supply levels. Dashboard view allows users to plan ahead to ensure that
sufficient supplies exist in the printer before printing large print jobs.
●
Links to the HP SureSupply ordering system. This makes it convenient to order genuine
HP supplies. Click the SNP Windows option, “Shop for Supplies,” to access the HP SureSupply
ordering system.
●
Links to HP Support pages. Get instant support for many printer problems by clicking on
“HP Support” for detailed information on printer status and printer error messages.
How the SNP works
When selected for printing, the HP UPD attempts to communicate directly with the printer to gather
status and job information during printing. By querying the printer through SNMP get commands,
network traffic is kept to a minimum and is only present during printing. If the HP UPD is unable to
communicate with the printer, possibly due to security settings, or SNMP community names set on the
printing products, then the pop-ups do not appear on the client PCs. Normal printing is unaffected.
SNP default behavior
In small to medium business environments, defined as having fewer than 100 users or when domain
names end in .local, the supplies and support links at the bottom of the pop-up window are active.
Individual users also have the opportunity to enable the HP Special Offers Program for their product.
In larger enterprise environments, defined as having 100 users or more, and where domain names do
not end in .local, the HP UPD programmatically disables the following:
●
SNP
●
HP Support and Shop for Supplies links
●
HP Special Offers Program features
In most enterprise environments, internal centralized ordering personnel handle the ordering of supplies,
and internal Help Desks assist users with daily solutions. Administrators can alter the default SNP
behavior through methods defined in this chapter.
Administrators can alter the default SNP behavior through methods defined in this chapter.
HP Special Offers Program
NOTE: The HP Special Offers Program is automatically disabled in an enterprise environment of 100
or more users, or if SNP runs on a print server queue. In these situations, the HP Special Offers Program
cannot be enabled.
138 Appendix A Manage Status Notification Pop–ups ENWW
The HP Special Offers Program enables HP to present HP customers with 'targeted' offers to buy HP and
HP partner products, use HP and HP partner services, and learn more about HP and HP partner
offerings. For example, a printer with low toner 'triggers' a toner offer to the customer.
The HP Special Offers Program includes various methods for specifying offers to present to customers;
offers are dependent on the information collected from the product, application, print driver, and
operating system. There are four categories of offers, including:
●
Consumables—toner, media.
●
Support—paper jams, troubleshooting.
●
Entitlement—care packs (1 or 11 months past the purchase date); the product may be eligible for
care packs.
●
Timed—various special offers every three days for such things as the following: (accessories,
duplexer, informational (recycling)
The HP Special Offers Program is configured and managed. There are two main ways to enable/disable
The HP Special Offers Program: the Privacy Settings window and the SNP Notification Settings window.
The Privacy Settings window displays soon after installing the HP UPD. In this window, the user can
opt-in to the HP Special Offers Program program. The following options appear in Privacy Settings
window:
●
Yes, allow this info to be sent to HP
●
No, do not send this info to HP
●
I'm not sure, ask me again later
If Yes, allow this info to be sent to HP is selected, the HP Special Offers Program feature is enabled.
If No, do not send this info to HP is selected, the HP Special Offers Program feature is disabled.
To modify whether or not the HP Special Offers Program feature is enabled, use the settings available
in the SNP Notification Settings window.
To enable or disable HP Special Offers Program, select or deselect Allow special device information
and offers to be displayed in the SNP Notification Settings window.
ENWW HP Special Offers Program 139

Use Device Settings tab in the property page to enable or
disable SNP
SNP can be enabled or disabled from the Device Settings tab of the driver with HP UPD 4.7. Before
HP UPD 4.7, SNP could only be disabled from the SNP window. When SNP was disabled, it could not
be enabled through the SNP window.
Enabling or disabling SNP requires the following items:
●
Bidirectional communication is enabled and functional. Bidirectional communication can be
disabled in the HP UPD version 4.7. See
Manage the HP UPD using HP Managed Print
Administration (MPA) and Active Directory Group Policy on page 81 for more information.
●
The product supports SNP functionality
●
The product is not a PCL3 product
Follow these steps to enable or disable SNP from the Device Settings tab:
1. Open the Printers and Faxes folder, right-click the HP UPD, and then select Properties.
2. Click the Device Settings tab.
3. In the Installable Options section, set Printer Status Notification to either Enable or Disable.
4. Click OK.
Figure A-1 Enable or disable Printer Status Notifications
140 Appendix A Manage Status Notification Pop–ups ENWW

The following conditions describe the possible situations that can enable or disable the Printer Status
Notification setting in the driver's Device Settings properties.
●
When no HP MPA or AD policy is defined for SNP and SNP is enabled, the Printer Status
Notification combo box in the Device Settings user interface is set to Enable. The user can modify
this setting.
●
If SNP is disabled through the SNP pop-up or through the Device Settings user interface, then no
SNP pop-up is visible for that queue and the Printer Status Notification combo box is set to
Disable. The user can re-enable SNP pop-up by selecting Enable in the Printer Status
Notification combo box.
●
If SNP is disabled through Install.exe, DCU or any of the policies (HP MPA , AD), the Printer Status
Notification combo box in the Device Settings user interface is set to Disable. In addition, the
Device Settings user interface combo box appears dimmed so that the user cannot overwrite the
policy settings
Use the pop-up window to enable/disable SNP
It is possible to alter the behavior of the SNPs within the pop-up window by using the Notifications
Settings tab. To view the Notification settings, click the Notifications Settings link any time the pop-
up is visible.
NOTE: The Notification Settings tab only displays in the pop-up window in an environment where no
Managed Print Policies appear on the network.
The options available for configuration are as follows:
●
Enabled. Allows the user to select whether the pop-ups appear based on the condition of the printer
status. Choose from three levels of severity as to when you wish the pop-ups to appear.
●
Disabled. Allows the user to permanently disable the pop-up window for any printer condition.
Manage the SNP with the HP Driver Configuration Utility
The HP Driver Configuration utility is a software program that Information Technology (IT) administrators
can use to pre-configure the HP UPD before deploying and installing on an operating system. It is most
beneficial when configuring the HP UPD for multiple workstations or printer servers for print queues that
share the same configuration.
Follow these steps to pre-configure the SNP behavior of the HP UPD:
1. Open www.hp.com. Download and open the Driver Configuration utility.
www.hp.com/go/hpdriverpre-config
NOTE: Depending on how the HP UPD driver is installed, a message may open indicating that
changes made to the HP UPD may invalidate the digital signature and Microsoft might display a
warning message. The warning message is normal behavior. Click OK to continue.
2. Click File, then Open and browse to the directory where the HP UPD is located.
3. Select the .INF file for the HP UPD and click Open.
4. Click Device settings and expand the SSNP_Level listing by clicking the +.
ENWW Use the pop-up window to enable/disable SNP 141

5. Select the desired pop-up options.
6. Click File and Save to complete.
A file (.CFG) is created in the same folder as the HP UPD. This configuration file follows all installations
of the HP UPD and controls the SNP behavior for each installation. For more information about the
HP Driver Configuration Utility, see the HP Driver Pre-Configuration Support Guide.
Manage SNP with HP Managed Printing Administration
(MPA)
Unlike any other print driver, the HP UPD can be controlled by a Managed Printer Policy (MPP). A MPP
is an XML document that controls the driver operation mode in a particular printing environment. In
addition, the MPPs can also manage the behavior of the SNP each printer user experiences. The new
HP Managed Print Administration tool (MPA) allows print administrators to create MPP to attain the
desired SNP experience. The HP MPA tool is available at:
www.hp.com/go/mpa.
Edit a policy, or create a new policy and use this screen to make the desired changes to affect the printer
client behavior of the SNP.
See
User Search capabilities on page 97 for more information.
Manage SNP through the command prompt install
(Install.exe)
The HP UPD includes an installer that allows administrators to install the HP UPD from the command
prompt, or as part of other install batch files. Optional command line switches available to the Install.exe
program allow the administrator to modify the HP UPD install experience. From the command prompt,
type install /? to view the complete list of install printer options.
The two installation switches that enable you to manage the behavior of the SNP during the HP UPD
installation include:
●
install /dssnp—disables the SNP for a specified printer.
●
install /gdssnp—disables the SNP for all printers installed.
Manage SNP through registry settings
Changes are made to specific registry settings by all previous methods for changing SNP behavior. It
is also possible to change the SNP settings by editing the registry directly.
The registry location below contains the entries that modify the SNP behavior for each installed printer
on the client PC or server. Modify the SNP behavior by making changes to each of the installed printers.
HKEY_LOCAL_MACHINE\SYSTEM\CurrentControlSet\Control\Print\Printers
\<PrinterName>\PrinterDriverData
Where <PrinterName> represents the names of each of your installed printers.
142 Appendix A Manage Status Notification Pop–ups ENWW

Table A-1 SNP settings
Setting Type Value
SSNPDeviceUpdateInterval REG_DWORD 0x00000000 (0)
0 = Normal, 1 = Minimize
SSNPDisableAll REG_DWORD 1 = SNP turned off for all queues on the
system
SSNPDriverUISetting REG_DWORD 0 = SNP Enable/Disable feature is
disabled. The UI feature is NOT dimmed
so the user can re-enable this feature
later on.
1 = SNP Enable/Disable feature is
enabled. The UI feature is NOT dimmed
and the user can disable this feature later
on.
NOTE: SSNPDriverUISetting registry
setting does NOT have precedence over
policy settings. This registry value is also
located in printerdriverdata for the
queue.
SSNPNotifyEventSetting REG_DWORD 0x00000001 (1)
0 = Disabled, 1 = When Printing, 2 = On
Warnings or Errors 3 = On Errors only
SSNPShowAlertLink REG_DWORD 0x00000001 (1)
0 = Hide, 1 = Show
SSNPShowShopLink REG_DWORD 0x00000000 (0)
0 = Hide, 1 = Show
SSNPShowSSNSettings REG_DWORD 0x00000000 (0)
0 = Hide, 1 = Show
SSNPShowSupportLink REG_DWORD 0x00000000 (0)
0 = Hide, 1 = Show
ENWW Manage SNP through registry settings 143
144 Appendix A Manage Status Notification Pop–ups ENWW

B Frequently Asked Questions
ENWW 145

Driver installation and configuration
Use this section to find answers to common installation and configuration questions.
1. Can I pre-configure the HP UPD using HP Web Jetadmin and the HP Driver Configuration Utility?
Yes. The HP UPD supports pre-configuration through HP Web Jetadmin and the HP Driver
Configuration Utility.
2. Is the printer queried every time it is printed to?
For traditional mode queues, no, in general, settings are cached. For cases where a user chooses
to create a permanent instance of a printer, settings are permanently saved to the local registry
(as with any other printer driver), and the user can continue to print to that permanently created
instance.
For dynamic mode queues, for cases where a user has not chosen to create a permanent instance
of a driver, registry entries are saved in a .CREG (cached registry) file. Initially the driver attempts
to save the CREG files to the “C:\Program Files\Hewlett-Packard\HP Universal Printing” directory.
If that directory is not available, or is locked, the driver attempts to cache settings in the %TEMP
% and then %TMP% directories. If neither of these directories is available, the HP UPD will query
the printer every time for non-permanent instances.
When the Status Notification Pop-ups (SNP) are enabled, the HP UPD sends a few packets to the
printer to gather printer status information.
3. Are traditional mode queues updated with new driver too?
Yes. The Microsoft operating system will update all instances because the driver name is the same
(with different registry entries) for permanent instances. All queues sharing the same driver name
will update.
4. How can I have permanent instances re-query a product?
As with other HP drivers, there is the ability to select an Update Now button or use the command
line option. See
Printer Automatic Configuration on page 55.
5. Which port monitor is used with the HP UPD?
By default, the HP UPD uses the standard TCP/IP port monitor. The HP Standard TCP/IP port
monitor is no longer used by default due to conflicts with earlier versions of the HP UPD. The
HP Standard TCP/IP port monitor, as of version 7.x.3.5, can be used but it is not the default.
HP has its own version of the TCP/IP port monitor for communicating with network products. It is
not part of the installer package of the HP UPD.
For cases where the HP UPD is pointed to an existing print queue shared out from a print server
instead of a printer itself, the “HP UNC Port” monitor is used.
For cases where locally installed products are selected, the LPTX, USB00X, or Dot4 port will be
used. This depends on the USB protocol that is negotiated between the HP UPD, and the product.
6. Is it possible to suppress the HP UPD Status Notification Pop-ups (SNPs) on the client machine
installed from a print server?
Yes, see
Manage Status Notification Pop–ups on page 137 for more information about managing
SNPs.
146 Appendix B Frequently Asked Questions ENWW

7. How do I set defaults for the driver on the server so all installs have the same defaults?
Configure the driver using the HP Driver Pre-configuration Utility.
8. Does the currently installed version of the HP UPD need to be removed from the PC before
upgrading to the newest version?
If upgrading from versions prior to HP UPD 4.5, the queue should be deleted. If upgrading from
HP UPD 4.5 or newer the queue can be upgraded using Install.exe or the Add Printer Wizard.
9. How does the static mode install command line switch work?
The static mode install command line switch, in versions 3.0 and newer, uses the port name
specified by the /sm switch if the specified port exists. If that port does not exists, the HP UPD
install creates a new port. In the normal operation of printing with the HP UPD, once the printer
binds to a port, the job is delivered to that port (and associated port monitor) no matter what the
port is named.
10. If my product can be discovered by the HP UPD via mDNS but cannot communicate via SNMP,
what is the issue?
If the product can be discovered by way of mDNS but cannot communicate by way of SNMP, it is
possible that Jetdirect is configured so that SNMP is disabled. It is also possible that SNMP is
disabled or may be using a non-default SNMP community name.
11. Can the HP UPD installation change the target port's SNMP community name (i.e. can it replace
the current name and with a different SNMP community name)?
Yes. You can set or change the community name in the port using Install.exe. The installer switch
was put there to set the community name at the time the port is created. Example: /
gcomname”name”.
12. What version did the HP UPD begin using unique file names?
Starting with HP UPD 4.5 driver file names for each release are uniquely named to prevent
overwriting existing files that may have shared dependency. Beginning with HP UPD 4.7, more
than one HP UPD version can be installed onto the host if during the installation process the model
specific version of the HP UPD was selected through the Add Printer Wizard and, beginning with
HP UPD 5.0, using the /m switch with Install.exe.
13. Any tips for using Microsoft's PrintMig?
Testing has found limitations using the PrintMig tool with both HP and non HP drivers. For the
HP UPD, install the HP UPD first on the target host to register all files and COM objects, then
perform the PrintMig restore onto the host. PrintMig tool has been placed end of life by Microsoft.
14. What is our first step during upgrade?
Avoiding unintended issues resulting in change to UniDrv and postscript has been an issue.
Updates to these files come unannounced and unplanned through update services, installation of
service packs, etc that may negatively impact driver upgrades dependent upon Unidrv and Pscript
version.
Upgrade has several steps that should be followed. Specific to this issue, check Server
Properties, Drivers to see what version of UniDrv and postscript are on the system and compare
against the version you are about to install. If they are different this may increase the scope of
testing required for an uneventful upgrade. Refer to
Install and Uninstall of the HP UPD
on page 31 for HP recommended steps.
ENWW Driver installation and configuration 147
15. Is there a tool or method available to force clients to disconnect their print connection to the print
server and re-establish the connection?
No.
16. HP UPD displays "HP Universal Printing PDL**" in the Printers folder. How can I make the HP UPD
display the printer model instead?
Non-universal print drivers display the model hardware name "HP Laserjet 4000" found at the end
of the print path which is a beneficial indicator of product capabilities of the selected target print
destination. The field labeled "model" was never actually the model name, but was always the
driver name. The Microsoft operating system works on the assumption there would always be a
one to one relationship between drivers and products. This was never the case, as there were
always "series" drivers. The driver name is used all over the place in the registry, in Point and Print,
etc, and to try and make changes would cause a nightmare ripple effect. The model name which
appears in the HP UPD's GPD/PPD (or INF) displays as “HP Universal Printing [PDL]” (e.g. “HP
Universal Printing PCL6”). Beginning with HP UPD 4.7 it can be installed to display the HP UPD
version number in the INF as “HP Universal Printing [PDL] ([VERSION])”.
Model name in the Comments field: One HP UPD workaround is to use the Comments field to
populate with the product model in the UPD's print path. This can be manually inserted or populated
in batch running using an HP provided script available by contacting HP Technical
Support. Customers may also want to investigate the use of Microsoft tools lie PRINTUI.DLL and
PRNCONFG.VBS to alter the comment field.
17. Are there threshholds or guidance limiters to scaling the HP UPD on a single print server?
HP UPD does not have a bounded limit to scale of installation. The recommendation of how many
queues to install on a single server is entirely site dependent. Questions such as this are best
answered by IT administrative policy placing criteria on status and monitoring, server disk/CPU/
network IO utilization rates, print job throughput, peak load times etc. Some very well managed
sites with resources can run 1000 print queues on the right server with redundancy and high
availability requirements satisfied.
18. What does WHQL look at when it breaks: file byte size, date of file, etc?
When the driver is signed, part of the process is creating a hash of the contents of all the files that
are part of the driver, including the .cfg or .cf_ file. If you alter even one bit in any file, the hash
breaks.
19. Why am I unable to delete the HP UPD print driver?
The print spooler must be stopped to release the HP UPD print driver. Perform the following on the
command line: C:\NET STOP SPOOLER && NET START SPOOLER.
148 Appendix B Frequently Asked Questions ENWW

Driver Policy
Use this section to find answers to common questions regarding use of the HP UPD with HP MPA and
Active Directory.
1. What are managed printer lists and policies?
Managed Printer Lists (MPLs) and Managed Printer Policies (MPPs) are features of HP Managed
Printer Administration software which allows administrators to manage and control printing
environments. See
Manage the HP UPD using HP MPA on page 82 for more information.
2. Does HP MPA support products not found on the HP UPD Supported Device list?
The HP UPD can print to unsupported products, but the MPA will not provide managed print control
of products not found on the HP UPD supported printer list.
3. If I have the HP MPA and the HP UPD Active Directory Group Policy running simultaneously, which
set of policies take priority?
The HP UPD Active Directory Group Policy takes precedence over both HP MPA defined policies
and default settings.
4. How can I set up printer lists for each user?
Printer lists can be created within the HP MPA software tool, or by exporting printer lists from Web
Jetadmin into XML format.
5. Are both modes of the HP UPD (traditional and dynamic) managed through Active Directory
templates and HP MPA?
Both operating modes of the HP UPD are manageable through the Active Directory Group Policy
and the HP MPA application.
6. What versions of the HP UPD support the Active Directory Group Policy?
HP UPD version 4.0 and newer.
7. How much does the HP UPD Active Directory Template cost?
The HP UPD Active Directory Administrator Template file is available for download at no charge
from
www.hp.com/go/upd
ENWW Driver Policy 149
Operating system
Use this section to find answers to common questions regarding use of the HP UPD with various
operating systems.
1. What about use in an Apple Macintosh Environment?
There are no plans for a Macintosh version of the driver. HP drivers can be used, however, with
the Apple Bonjour™ (formerly Rendezvous™) discovery mechanism. Bonjour behaves the same
way the HP UPD does when looking for products on the local subnet (using mDNS).
2. Does the HP UPD support XPS print paths?
XPS print path requires a product that consumes native XPS, an application that sends native XPS
and an XPS print driver to send XPS data to the an XPS print product. If each step in the path is
not native XPS requires conversion of the print content. HP UPD does offer an HP XPS print driver.
Please contact HP support for download location and documentation.
3. What is the HP Port Monitor?
The port monitor that the HP UPD uses is the standard TCP/IP port monitor that is part of the
operating system. There is an HP UPD Port monitor that is installed, but it is used only to provide
a print path to UNCpaths or shares, send print settings to a local printer, and send jobs to a defined
HTTP location for job tracking.
150 Appendix B Frequently Asked Questions ENWW
Versioning
This section provides answers to common HP UPD versioning questions.
1. How do interim version releases display (Major.Minor.MinorMinor)?
Only Major.Minor version numbers display in the MODEL field. For example, “HP Universal Printing
PCL6 (v4.7)” displays in the MODEL field for version 4.7.x of the HP UPD. If version 4.7.0 is
installed followed by an installation of version 4.7.2, all queues using version 4.7.0 would upgrade
to version 4.7.2. HP targets releasing a Major.Minor UPD version upgrade two times per year
(Spring and Fall).
2. Is one key value of the HP UPD to not manage multiple print driver versions?
This feature allows choice in the upgrade experience. Customers can upgrade at their discretion.
The number of drivers will still be small (we expect 2 or 3 coexisting versions at any time for most
customers) to support all HP’s commercial LaserJet fleet.
3. If a system has two or more versions of the HP UPD installed, are there any shared files?
The Windows printer system files—unidrv.dll, unidrvui.dll and unires.dll—are shared among
versions of the HP UPD.
4. Assuming my system has two versions of the HP UPD installed, what is the process for upgrading
all the queues to one version of the UPD?
Upgrade each of the old queues using the Add Printer Wizard (manually or using a scripting tool).
5. What displays to the user during FILE-PRINT using this new MODEL field enhancement?
The name of the printers are displayed.
6. How is Plug and Play impacted?
Plug and Play uses the GENERIC MODEL NAME ONLY. More naming capabilities primarily benefit
print server environments.
ENWW Versioning 151
152 Appendix B Frequently Asked Questions ENWW

C HP UPD Deployment Worksheet
Use this worksheet to guide your HP UPD deployment.
ENWW 153
General Information
Do you primarily print in color or black and white?
●
Would your company prefer that all users to print in grayscale, with the option to manually select
color?
Are users defaulted to print in simplex (single-sided) or duplex (double-sided)?
●
Would your company prefer that all users or user groups to print in simplex or duplex?
Are all users in your Windows environment Local Administrators to their PC?
●
If not, please specify the default capabilities for the user.
Are there any SEC regulations or restrictions regarding the process of print jobs?
●
Are all printer log files retained? What is your process for retaining printer log files?
Is there a default driver language (PCL5, PCL 6, or PS) for printing?
Do users have any special production or operational environments (non-application print) which require
specialized drivers or non-standard printer drivers?
Do any groups or users use PIN printing? If so, please specify the groups or users that use PIN printing.
Port and protocol information
Port Monitor
●
Standard TCP/IP Port?
●
HP Standard Port Monitor?
RAW or LPR?
How are IP addresses distributed to your printers?
●
If static IP addresses are distributed, how are they reserved (DNS, DHCP reservation, BOOTP)?
●
Are printers set to DHCP, BOOTP, or Manual when configuring the IP address?
Ports and protocols
●
Is SNMP enabled in your environment across all subnets?
◦
If not, please describe the subnets where SNMP is disabled and if it is possible to enable
SNMP.
●
What versions of SNMP (SNMPv1, v2, v3, other) are enabled in your network infrastructure?
●
Verify that "Get Community" names values are consistent.
●
Bi-directional communication – between the HP UPD and printer – is required to gather product-
specific configuration information.
154 Appendix C HP UPD Deployment Worksheet ENWW

●
Make sure mDNS broadcasts and IP multicast services are allowed on the network for the HP UPD
to discover products.
◦
In dynamic mode, the HP UPD will only discover products within the same subnet when
Search for network printers is selected.
●
Activate the mDNS protocol on the printer/product using the HP Embedded Web Server (EWS).
●
Make sure a firewall or router is properly configured to allow the HP UPD to communicate over the
necessary network ports.
Table C-1 Network Ports used by the HP UPD
Port Type Service Used by
161 udp SNMP HP UPD
162 udp SNMPTRAP HP UPD
53 tcp DNS query HP UPD
5353, 5354 udp Multicast DNS HP UPD
80 tcp HTTP HP UPD, HP MPA server,
HP EWS
9100 tcp Print Data HP UPD, Printer
Print server environment
Please fill out this section for each server to be migrated.
Print server information
How many current print servers are in production in your current environment?
Is there a print server for each location or are there regional print servers?
●
If the answer is more than one, a checklist needs to be filled out for each of the servers that are to
be created or migrated.
Server Name____________________________________
Operating system
●
Version______________________
●
32 or 64 bit?______________________
Cluster environment? _______________
●
Active-Active or Active-Passive?_______
●
Names of Physical Nodes_______
Is this print server dedicated, or does this server have other server roles (file/printer, DNS/print, etc)?
Total number of print queues on the server? ____________
ENWW Print server environment 155
Print queue settings
●
Pre-configuration settings
◦
______________________
◦
______________________
◦
______________________
●
Are any security settings such as Access Control Lists (ACLs) that you want configured for products
at the printer or queue level?
Goal
●
New-Set up new server that has new queue names?
●
Replace-Set up new server to replace an existing server that has the same queue names as the
existing server?
●
Upgrade-Upgrading print queues on an existing server to the HP UPD?
Set up new server that has new queue names
Print queues and drivers:
●
Prepare a list of list of the following information.
◦
Queue name
◦
HP printer model
◦
Port name and/or IP address
Driver List
●
Not all HP printer models are supported by HP UPD. Compare this newly created list to the list of
products supported by HP UPD.
●
Mark the list to indicate which queues will use HP UPD, and which queues will require a native
driver.
Setting up a new server that has the same queue names as the old server
Upgrading print queues on an existing server to the HP UPD?
Upgrade-How will be server be backed up before the migration begins?
●
Use the Microsoft Print Migrator 3.1 tool or the Server 2008/Vista PrintBrm.exe utility to back up
the print servers.
●
Will the backup be verified? _____
Upgrade-Test server available? ____________
●
Attempting to upgrade drivers to the HP UPD on a running production server is NOT
RECOMMENDED.
●
Will the test server become the new production server, or will the production server need to also
be updated? __________
156 Appendix C HP UPD Deployment Worksheet ENWW
Upgrade-Microsoft file version information
●
UNIDRV.DLL File Version? ________________
●
PSCRIPT5.DLL File Version? ________________
Print queues and drivers:
●
Prepare a list of list of the following information.
◦
Queue name
◦
HP Driver name or HP printer model
◦
Driver version
◦
Port name and IP address
◦
Kernel or user mode driver?
●
You can create this list automatically by running the prnmngr.vbs script on the server.
Driver Mapping
●
Not all of the hp drivers on the existing system can be migrated to the HP UPD. Compare this newly
created list to the list of products supported by HP UPD to develop a list of potential migration
candidates.
●
Decide what you want to migrate?
◦
Everything that is supported by the HP UPD to the HP UPD
◦
Only HP kernel mode drivers
◦
Install the HP UPD for new products only
●
Mark the list to indicate which queues will use the HP UPD, and which queues will require a “native”
driver.
Print queue settings
●
Pre-configuration settings
◦
______________________
◦
______________________
◦
______________________
●
Are any security settings such as Access Control Lists (ACLs) that you want configured for products
at the printer or queue level?
Point and Print Client Information
Citrix, or Terminal Services? _______
How many clients?
●
Windows XP 32 bit _______
●
Windows XP 64 bit _______
ENWW Print server environment 157
●
Vista 32 bit _______
●
Vista 64 bit _______
Does the capability exist to run software or adjust client settings via login scripts or AD Group Policy?
____________
Direct IP printing
General client information
Citrix, or Terminal Services? _______
How many clients?
●
Windows XP 32 bit _______
●
Windows XP 64 bit _______
●
Vista 32 bit _______
●
Vista 64 bit _______
Does the capability exist to run software or adjust client settings via login scripts or AD Group Policy?
____________
Are the client PC’s typically used exclusively by one user or shared by many users?
How many current drivers are stored in the printer driver repository/library (if applicable)?
Is there a default driver language (PCL5, PCL 6 or PS) for end-user printing?
●
Can users request an alternate Driver language from the default (i.e., prefers PS over PCL5 for .pdf
files?)
Total number of printers on a typical client? ____________
Printer settings
●
Pre-configuration settings
◦
______________________
◦
______________________
◦
______________________
Goal
●
New-Set up new printers on a client using the HP UPD in traditional mode.
●
Dynamic-Install the HP UPD in dynamic mode.
●
Upgrade-Upgrade existing printers on the client to the HP UPD traditional mode.
158 Appendix C HP UPD Deployment Worksheet ENWW
Upgrade-Drivers:
●
Run the prnmngr.vbs script on the client to create a list of the hp drivers currently on the client.
●
If you create this list yourself, please include the following information.
◦
Driver name or printer model supported
◦
Version
◦
Kernel or user mode?
●
Not all of the hp drivers on the client can be upgraded to the HP UPD. Compare the newly created
list with the list of products supported by the HP UPD to develop a list of potential migration
candidates.
Upgrade-Settings configuration
Existing printer settings. Do you want to:
●
Keep current queue settings? __________
●
Pre-configure settings in addition to migrating current settings? __________
●
Pre-configuration settings
◦
______________________
◦
______________________
◦
______________________
●
Pre-configure the queues that cannot have settings migrated? __________
●
Pre-configuration settings
◦
______________________
◦
______________________
◦
______________________
Are any security settings such as Access Control Lists (ACLs) configured for products at the printer or
queue level?
HP UPD/MPA/AD Customized Options
Would you like policy or access control restrictions to be set based on user ID?
Would you like Color access control to be set configured with Time of Day restrictions (days/hours)?
Is there a preference to allow or disable specific applications (winword.exe, excel.exe, etc) to print in
Color?
Is there a preference as to how users can search for printers (see below)?
●
On the user’s local subnet
●
Using Managed printer lists
ENWW Direct IP printing 159
How would you prefer users view the list of printers (see below)
●
A default view (list of printer names)
●
Through a list showing customized groups (i.e., MFP, Color, B/W)
●
A clickable image (possibly a floor layout in .jpg, .bmp or html format) that may be uploaded
Would you like for your users to receive a pop-up status message of their job?
●
Which message pop-ups are preferred? Select to show all, some, or none from the following:
◦
Job Completion
◦
Supplies Details link
◦
Shop for Supplies link
◦
HP Support link for product specific online help
◦
Other
160 Appendix C HP UPD Deployment Worksheet ENWW

D HP UPD Deployment Flowcharts
The HP UPD can be installed and configured many ways. The following flowcharts contain green lines
which outline the recommended deployment paths. These configurations allow for the simplest
deployment and implement the full functionality of the HP UPD. All of the paths outlined on the flowcharts
are supported, but following some of the paths may involve extra steps or limit the functionality of the
HP UPD. There are valid technical and business reasons for using the alternate paths, but when in
doubt, follow the green line.
ENWW 161

Start
Figure D-1 HP UPD deployment start
Start
Microsoft
Windows Print
Server?
Direct IP print
New Server
with new queue
Names?
New Server
replacing old
server?
Upgrade
drivers on
existing
server?
Yes
`
No
Yes
Yes
Replace
Server
Update
Server
End
No
Choose PDL
(PCL 5, PCL 6 or PS)
New
Queues
New client with
new printer
names?
New client
replacing old
client?
Upgrade
drivers on
existing client?
No
No
Yes
Yes
End
No
Add new
queues to
existing
server?
No
Yes
Add
Queues
Update
Client
Citrix
environment?
Novell
environment?
End
Refer to Citrix
specific
instructions and
white papers
Refer to Novell
specific
instructions and
white papers
Yes
Yes
Replace
Client
Moving from
print servers to
direct IP?
Yes
No
Move to
direct IP
Policy
Choose PDL: (PCL 5, PCL 6 or PS)
The first step is to decide which HP UPD PDLs (Page Description Language) to install. The HP UPD
offers a choice of postscript, PCL 5, and PCL 6. See
Select the best PDL on page 12 for more
information.
162 Appendix D HP UPD Deployment Flowcharts ENWW

Citrix environment
See the HP white paper HP Printers Supported in Citrix Presentation Server Environments at
www.hp.com/go/upd for more information.
Novell environment
See Novell on page 43 for more information.
Microsoft Windows Print Server
In a print server environment there are four possible ways to deploy the HP UPD.
1. New server with new queue names.
In this scenario the administrator sets up a new print server and assigns new names to all the print
queues.
2. Add new queues to existing server.
In this scenario the administrator adds the HP UPD to an existing print server and creates additional
queues using the HP UPD.
3. A new server replacing an old server.
In this scenario the administrator sets up a new print server that replaces an existing print server.
This scenario differs from scenario #1 because the administrator wants this server to have the
same queue names as the server it replaces to minimize impact on existing traditional mode
installed client connections.
4. Upgrade drivers on existing server
In this scenario the administrator upgrades the existing HP drivers on an existing print server to
the latest version of the HP UPD.
Direct IP Printing
Direct IP printing is an environment where the Windows client prints directly to the product, either
network connected or directly connected with an HP UPD or LPT port. In the Direct IP Printing
environment there are four possible ways to deploy the HP UPD.
1. Moving from print servers to direct IP printing.
In this scenario the administrator moves from a print server environment to direct IP printing.
2. New client with new printer names
In this scenario the administrator installs new client PC’s and uses the HP UPD.
3. New client replacing old client.
In this scenario the administrator replaces or upgrades client PC hardware or operating systems
and uses the HP UPD. The administrator wants the new PC to have the same list of printers with
the same names as the old PC to minimize impact on the users, or the users may not have
administrator rights and can’t add printers.
4. Upgrade drivers on existing client.
ENWW Start 163
In this scenario the administrator upgrades the existing HP drivers on an existing client to the latest
version of the HP UPD.
Client Driver deployment and Software Distribution Systems
Printer driver installation must be done through an account that has administrator rights on the client
PC. This is how the Windows operating system is designed, and it is for good security reasons.
If all the client users have administrator rights, the HP UPD can be deployed with the following methods.
●
Create a login script that will perform the installation.
●
Put the HP UPD on local file system or a file share that is accessible to all users.
If the client users do not have administrative rights, then the installations need to be done either by
someone that has administrator rights, or by a software distribution system.
Details about specific software distribution systems (SDS) are beyond the scope of this document,
however some general guidelines can be offered. The steps in this document should be compatible with
any SDS that has the following capabilities.
●
Create a package that contains a program (Install.exe) and the driver.
●
Deploy the package to the client(s).
●
Log on as an administrator, and run the program (Install.exe) with HP UPD's command line options.
164 Appendix D HP UPD Deployment Flowcharts ENWW

Update server/replace server
This section applies to print server deployments only.
Update server
When considering an update to a operating production server, it is strongly advised to set up a test
server and perform the initial upgrade and testing on the test server.
Create a test server?
The procedure for a clean start is similar to replacing an existing server.
Replace server–clean start
Get queue and port information from the old server.
ENWW Update server/replace server 165

The Microsoft tools prnmngr.vbs and prnport.vbs simplify the task of gathering information such as
queue names, driver names, port names, and IP addresses from the old server. This information can
be used later to create the new queues manually, or to automate the process by scripting. See
Automating the process through scripting on page 182 for more information about automation and
scripting.
Replace server–import drivers and queues from old server
Run PrintMig.exe or PrintBrm.exe on old server.
Restore Print-Migrator image on new server.
If the test server requires the same configuration as the old server, the Microsoft tools PrintMig.exe or
PrintBrm.exe can be used to import the configuration from the old server to the test server.
NOTE: Not all drivers are compatible with PintMig.exe, so the error log must be inspected after the
restore. The PrintBrm.exe tool is only available on later version Microsoft operating systems such as
Vista and Server 2008. PrintBrm.exe can import from a down level OS, but may not be able to restore
to a down level OS.
Verify existing driver compatibility with the latest UNIDRV and PSCRIPT versions.
HP does not recommend updating drivers on an operating production server. Besides the obvious
interruption of printing while the drivers are being replaced, there are other unforeseen problems that
can occur due to incompatibilities between versions of shared files currently on the system and the
versions of the shared files about to be installed. See
Versioning of printer driver shared files
on page 179. If this is the only option, then HP recommends that a full backup of the server be made
before any changes are done, so that in the event of a problem there is a fallback plan.
166 Appendix D HP UPD Deployment Flowcharts ENWW

Client printing
This section applies to direct IP print deployments only.
Update
Client
Backup client
Verify client
Clean Start?No Yes
Get queue and
port information
from old client
Restore Print-
Migrator image on
new client
Run PrintMig.exe
or PrintBrm.exe on
old client
Verify existing
driver compatibility
with latest
UNIDRV and
PSCRIPT versions
Replace
Drivers
Policy
Replace
Client
Move to
direct IP
Get connection
and port
information from
old server
Policy
Replace client–clean start
Get queue and port information from old client.
The Microsoft tools prnmngr.vbs and prnport.vbs simplify the task of gathering information such as
queue names, driver names, port names, and IP addresses from the old server. This information can
be used later to create the new queues manually, or to automate the process by scripting. See
Automating the process through scripting on page 182 for more information about automation and
scripting.
Proceed to the section on
Policy on page 169.
Replace client–import drivers and queues from old client
Run PrintMig.exe or PrintBrm.exe on old client.
Restore Print-Migrator image on new client.
The Microsoft tools PrintMig.exe or PrintBrm.exe can be used to import the configuration from the old
client to the test client.
ENWW Client printing 167

NOTE: Not all drivers are compatible with PintMig.exe, so the error log must be inspected after the
restore. Also, the PrintBrm.exe tool is only available on later version Microsoft operating systems such
as Vista and Server 2008. PrintBrm.exe can import from a down level OS, but may not be able to restore
to a down level OS.
Update client
When updating a client, it is strongly advised to set up a test client and perform the initial upgrade and
testing on the test client. See
Versioning of printer driver shared files on page 179 for more information
on versioning printer driver shared files.
Verify existing driver compatibility with latest UNIDRV and PSCRIPT versions.
HP does not recommend updating drivers on an operating production server. Besides the obvious
interruption of printing while the drivers are being replaced, there are other unforeseen problems that
can occur due to incompatibles between versions of shared files currently on the system and the
versions of the shared files about to be installed. See
Versioning of printer driver shared files
on page 179 for more information on versioning printer driver shared files. If this is the only option, then
HP recommends that a full backup of the server be made before any changes are done, so that in the
event of a problem there is a fallback plan.
168 Appendix D HP UPD Deployment Flowcharts ENWW

Policy
This section applies to direct IP print deployments only.
Policy means choosing settings other than the HP UPD defaults and applying them during or after the
deployment. These settings can include who can print in color, setting grayscale or duplex to be the
default setting, or assigning printers to users, based on department, floor, etc.
Policy/MPLs per machine?
If an administrator wants to assign settings to one or more computers and wants the settings to apply
to anyone that uses those computers, then the best way to set up those policies is to configure them at
the time the driver is installed. If this is the case, refer to
Create queues on page 173.
Policy/MPLs per user or group?
ENWW Policy 169

If the administrator wants to assign settings or printers based on who is using the computer, the choice
is whether to use Active Directory (AD) or Managed Print Administration (MPA).
Use Active Directory?
The decision to use Active Directory versus MPA depends first on whether there is an Active Directory
domain available, and the granularity of policy desired.
To set up Active Directory Policy, the administrator defines the policy settings in a Group Policy Object,
(GPO) and then assigns that GPO to the domain, site, one or more Organizational Units (OU) or users.
Group Policy Objects cannot be assigned to security groups. If the administrator wants to set up domain
wide or site wide policy with overrides for specific individuals, then AD is a viable choice. On the other
hand, if the administrator wants finer grained policy than the OU structure can provide, the options are
to restructure the AD structure or use MPA.
Managed Print Administration allows the administrator to set up arbitrary groups and to assign users to
those groups. MPA also provides the means to set up a default policy, which is the policy that a user
will receive if there is no specific user or group policy assigned to them. This way only exceptions to the
general policy need to be managed, instead of adding all the users to the MPA database.
See
Manage the HP UPD using HP MPA on page 82 for more information on Managed Printer Lists
and AD templates.
170 Appendix D HP UPD Deployment Flowcharts ENWW

Add/new queues
This section applies to both server deployments and direct IP print deployments.
Prepare list of
printers, queue
and port names
Prepare list of
drivers required for
printer models
Backup server
Verify backup
Verify existing
driver compatibility
with latest
UNIDRV and
PSCRIPT versions
Print server?
Create
queues
Yes
Policy
No
New
queue
Add
queue
New
Queues
Add queues
When you add a new driver (HP UPD) and new print queues to an existing server, you may encounter
change management issues similar to upgrading drivers. Besides the problems that can occur from
increasing the load on an existing server, there can be unforeseen problems that occur due to
incompatibles between versions of shared files currently on the system and the versions of the shared
files about to be installed. See
Versioning of printer driver shared files on page 179 for more information
on versioning printer driver shared files. If this is the only option, then HP recommends that a full backup
of the server be made before any changes are done, so that in the event of a problem there is a fallback
plan.
ENWW Add/new queues 171

New queues
Prepare list of printers, queue and port names and port settings.
To create new queues on a new server or client, make a list of all the printers that are to be connected.
Include the printer the IP address or hostname. You may want to also decide on a printer naming
convention, location information, and port name convention if you decide not to use default port naming.
Prepare list of drivers required for printer models.
Once you have a list of all the printers, the next step is to decide what drivers to use. Refer to the list of
printers supported by the HP UPD, in
HP UPD Supported products on page 4. For those products that
are not supported by the HP UPD, download the appropriate driver(s) from the manufacture’s web site.
Print server?
The HP UPD in the Direct IP print mode supports the application of policy in a user by user basis. If this
type of configuration is desired, proceed to
Policy on page 169 section.
If no per-user policy is desired, or if the HP UPD deployment is on a print server, proceed to
Create
queues on page 173.
172 Appendix D HP UPD Deployment Flowcharts ENWW

Create queues
This section applies to both server deployments and direct IP print deployments.
Will drivers other than the HP UPD be installed?
The HP UPD ships with a current version of the Microsoft UNIDRV and PSCRIPT5 files. If drivers other
than the HP UPD will be installed, follow these steps to verify all drivers you plan to install are compatible.
1. Verify the other drivers are compatible with the HP UPD provided unidrv/postcript version.
2. Verify the other drivers are compatible with Microsoft's latest unidrv/postcript version.
3. Verify the HP UPD is compatable with with Microsoft's latest unidrv/postcript version.
Cluster Server?
In a Microsoft Cluster server environment there are significant restrictions placed on the installation and
configuration of the HP UPD. Refer to
Windows Cluster server environment on page 40 for more
information.
ENWW Create queues 173

DCU only settings?
Install.exe setting only?
DCU and Install.exe settings?
The DCU is available at
www.hp.com/go/dcu and allows an administrator to preconfigure the HP UPD
before installation. All of the queues created from this preconfigured driver have the same default
settings. The HP UPD Install.exe utility also offers the administrator a number of configuration options.
To get the list, run Install.exe /? However, some of the options that are available from Install.exe
are not available from DCU, and vice versa. Refer to
Table D-1 DCU options on page 174 for specific
details. If all the options you want are available from DCU, you can use DCU to preconfigure the driver
and then use Install.exe, or the Add Printer Wizard, to install the driver and create print queues. Or you
can use Install.exe alone if it has all the desired options.
Table D-1 DCU options
Features Install APW APW
cluster
DCU MPA AD
Alternate driver name Y Y Y
Alternate Job Delivery Y Y
Color Access Control (CAC) Y Y
Bidi enable and disable Y
Duplex Y 1 Y Y Y
Dynamic mode Y
Economode Y 1 Y Y Y
Edgeline Quality Access Control
(QAC)
Y Y Y
Enable MPA or AD policy Y
Grayscale as default 1 Y
Job tracking Y Y
Private Printing / Job storage Y 1 Y Y Y
Private Print default PIN Y Y Y
Restricted mode, MPL display only Y Y Y
Services Tab Y 1 Y Y Y
SNP options (3) Yg 1 2 Y Y Y
SNP HP Special Offers Program Yg 2 Y Y
SNMP Community Name Yg 2 Y
Managed Printer List Y Y Y
Non-HP products Y
1
DCU can be used with Install.exe, or APW, and must be run on driver first.
2
Option must be specified when Install.exe is run on all physical nodes.
3
See Manage Status Notification Pop–ups on page 137 for more information about turning off SNP Pop-ups.
g
These Install.exe options apply to all queues and all users. Otherwise, the settings apply only to the current user.
174 Appendix D HP UPD Deployment Flowcharts ENWW
Notes
●
DCU options apply to the driver and all print queues created with that driver.
●
AD and MPA configurations apply only to Direct IP printing, not server printing.
●
Only Install.exe and the Add Printer Wizard actually install the driver and create print queues. DCU
is used to configure the driver prior to installation; AD and MPA configure the driver at print time.
ENWW Create queues 175

Ports and protocols
This section applies to both server deployments and direct IP print deployments.
Port Monitor?
176 Appendix D HP UPD Deployment Flowcharts ENWW
By default, the HP UPD uses, and HP recommends the use of, the Microsoft supplied Standard TCP/
IP port monitor for all network communications. If it is necessary to use the HP Standard Port Monitor,
create and configure all the network ports before HP UPD print queue creation, or reconfigure the ports
after installation.
ENWW Ports and protocols 177

Replace drivers
178 Appendix D HP UPD Deployment Flowcharts ENWW
Versioning of printer driver shared files
All the files for all the printer drivers on Windows operating systems are located in one folder: %WINDIR
%\system32\spool\drivers\, where <environment> can be W32X86 for 32 bit processors, IA64
for 64 bit processors, etc.
The HP UPD consists of HP specific files and shared Microsoft files. The shared files are part of the
UNIDRV or postscript architectures. These files are shared by other HP drivers, and printer drivers from
other manufacturers. They can be upgraded at any time by installing a new printer driver from HP, or
other manufacturer, or by installing a service pack, .NET framework, or hot fix from Microsoft. For that
reason, it is important to know the current version of these files on your system, and if the installations
of a driver, service pack, etc, will cause an upgrade. When an upgrade takes place, all drivers that use
those shared files will be impacted, so steps must be taken to verify that all the drivers that use these
shared files work with the latest versions. HP does not support upgrading from .5 to .6 versioning
To determine the current version of these shared files, use the following methods.
1. Right-click in the Printers folder, select Server Properties, and then select the Drivers tab.
2. To get the currently installed version of UNIDRV.DLL or PSCRIPT5.DLL, select an HP PS, PCL 5
or PCL 6 driver.
3. Select Properties.
4. Scroll down until you see driver file UNIDRV.DLL, or Driver File PSCRIPT5.DLL and click
Properties.
5. If UNIDRV.DLL or PSCRIPT5.DLL do not appear in the list, the driver you selected is an old,
“monolithic” driver that does not use the shared Microsoft components. Select another driver and
try again.
6. Select the Version tab.
7. Select Item name: File Version. The Value: is the version of the file.
The problem described in this section is not unique to the HP UPD. It applies to all print drivers, including
Product Specific drivers and drivers from out competitors. It applies to both monolithic and Unidrv/
postscript based drivers. The HP UPD, however, is the only driver that has the capability to efficiently
address this problem.
In the enterprise, the goal is to standardize on a particular version of driver, deploy it throughout the
enterprise, and stay with that version until business need dictates the need to upgrade. However, due
to many legitimate reasons, different versions of a particular driver will be deployed at any given time.
ENWW Versioning of printer driver shared files 179

It is in these situations that care must be taken in how the different versions are deployed to avoid
potential problems and unwanted side effects.
Figure D-2 Basic Printing
HP Universal Printing
`
HP Universal Printing
`
HP Universal Printing
USB or TCP/IP
TCP/IP
In both of the two topologies described in the diagram above, the version of the driver does not matter
as long as it is compatible with the printing products. On the left, only one driver needs to be installed
on the client in order to print to one or more products. On the right there is depicted a simple point and
print configuration, in which only one driver needs to be vended down from the server to the client for
printing.
Figure D-3 Complex print environments
Server B
Driver Version 2.0
`
Driver Version ?
Printer B
Printer C
USB or TCP/IP
TCP/IP
Server A
Driver Version 1.0
Printer A
TCP/IP
180 Appendix D HP UPD Deployment Flowcharts ENWW

The diagram above depicts a more typical enterprise printing environment, where a client may be
connected to more than one print server, and may also have directly connected products. It is in these
situations that careful driver version management is critical.
Consider the following scenario: The client first Plugs and Plays with printer C, causing the pre-loaded
printer driver version 3.0 to be installed. Next, the client connects and prints to server A. Microsoft Point
and Print recognizes that the driver version on the client (3.0) does not match the driver version on the
server (1.0), so the server installs driver version 1.0 on the client.
Then the client connects to and prints to server B. Again Point and Print recognizes the driver version
difference and installs driver version 2.0 onto the client.
The net result is that every time the client switches from one print server to another, a driver installation
takes place. And as for the client Plug and Play connection to printer C, the driver is also changed from
the original version 3.0 to either version 1.0 or version 2.0.
Figure D-4 Solution
Server B
HP Universal Printing (v5.0)
`
HP Universal Printing
HP Universal Printing (v4.7)
HP Universal Printing (v5.0)
Printer B
Printer C
USB or TCP/IP
TCP/IP
Server A
HP Universal Printing (v4.7)
Printer A
TCP/IP
There are two solutions to this problem: One is to make sure that every client and every server in the
enterprise is using the same version of driver. However, given the size of most networks this solution is
impractical. The other is to use the version management feature of the HP UPD.
Starting with version 4.7, HP UPD has the ability to be installed either using a generic name, (HP
Universal Printing), or a version specific name, (HP Universal Printing (v4.7)). The recommended
practice is to install HP UPD on clients using the generic name, and to install it on servers using the
version specific name. The diagram above describes this. Printer C Plugs and Plays with the driver
named HP Universal Printing. This driver can be version 4.7, 5.0, or even 4.5. Server A downloads HP
Universal Printing (v4.7) and Server B downloads HP Universal Printing (v5.0). The net result is that
there are now 3 drivers installed on the client, and no unintended driver upgrades/downgrades taking
place.
When Server A is upgraded to HP UPD 5.0, it will see that HP UPD 5.0 is already installed on the client
(from the connection to Server B) and use it.
ENWW Versioning of printer driver shared files 181

Automating the process through scripting
Get queue and port information from old server or client
The Microsoft tools prnmngr.vbs and prnport.vbs can simplify the task of gathering information such as
queue names, driver names, port names, IP addresses, etc, from the old server. This information can
be used later to create the new queues either manually or to automate the process by scripting.
Creating print queues and ports
The Microsoft tools prnport.vbs, prnmngr.vbs and printUI.dll can simplify the task of creating print
queues.
The
Microsoft Windows 2003 Resource Kit contains the prnadmin.dll which can be used to automate
many printing tasks.
Other scripting examples
There is a wealth of information and scripting examples available on the Microsoft web site at
Microsoft
Script Repository: Printing.
182 Appendix D HP UPD Deployment Flowcharts ENWW

E Glossary of terms
Term Definition as related to the HP UPD
Bidirectional Communication (bidi) See printer automatic configuration
hpcpuXXX.cf_ file Driver Configuration Utility file used for pre-configuration of the
HP UPD driver
hpcpuXXX.cfm file Driver Configuration Utility file used for pre-configuration of the
UPD driver
Driver Deployment Utility (DDU) Enables print administrators to create driver packages that
include the printer driver files and code needed for deployment
to run on a client computer.
Product–specific driver The driver is specific to a particular model of print product and
not universal.
Driver Configuration Utility (DCU) Now referred to as HP Driver Configuration Utility.
DOT4 DOT4 is based on the IEEE 1284.4 protocol that allows a
multicommunication through single port; often associated with
USB ports.
Duplex Printing on both sides of a single sheet; opposite of the terms
Simplex or Single Side.
Dynamic mode Selected during installation of HP UPD and opposite of
traditional mode. Dynamic mode locates network printers
within your subnet or by providing the printer name or address
on any subnet of the network. Dynamic mode is not directly
tied to one product connection.
Enterprise Auto Configuration (EAC) See printer automatic configuration.
Embedded Web Server (EWS) Embedded Web Server in the HP printing product accessable
by browser over HTTPS that allows status and configuration
access to the product.
Graphics Device Interface (GDI) The Microsoft® Windows® graphics device interface (GDI)
enables applications to use graphics and formatted text on
both the video display and the printer. Windows-based
applications do not access the graphics hardware directly.
Instead, GDI interacts with device drivers on behalf of
applications.
http://msdn.microsoft.com/en-us/library/
dd145203(VS.85).aspx
Generic Printer Discription (GPD) Microsoft's Generic Printer Description that uses Microsoft
Unidrv architecture to present printer features in the user
interface allowing configuration of the printer. The GPD also
contains the commands that allow Unidrv to generate printer
data for output from Windows based applications.
ENWW 183

Term Definition as related to the HP UPD
Group Policy Management Console (GPMC) Microsoft tool used for management of group policy objects in
an Active Directory.
In Box Driver HP provided print drivers distributed with the Microsoft
operating system.
[filename].inf Driver information file designed within required Microsoft
operating sytem specification used during installation of the
Windows print driver.
http://msdn.microsoft.com/en-us/library/
aa506024.aspx
Job Capability Ticket (JCT)
LEDM Low End Device Model
Multicast Domain Name Service (mDNS) Multicast DNS (aka Zeroconf, aka Apple Rendezvous, aka
Apple Bonjour), effectively allowing name resolution by
common Unix/Linux programs in the ad-hoc mDNS
domain.local. Used by the HP UPD to discover printers in
dynamic mode and by the Managed Print Administrator tool.
Managed Print Administrator (MPA) Separate stand alone utility used for managing HP UPD
policies and created printer lists.
Managed Printer List (MPL) Printer list created within MPA for printer discovery in HP UPD
dynamic mode.
Manage Print Policy (MPP) Created in MPA, user based policies that control HP UPD
functionality.
Net Driver HPZ12 service HP UPD installed service that provides bi-directional I/O for the
HP UPD, outside the context of the user, application, or print
job.
PCL Printer Control Language
PML Driver HPZ12 service HP UPD installed service that provides bi-directional I/O for the
HP UPD, outside the context of the user, application, or print
job.
PNG Portable Network Graphics
PnP Point and Print. Context dependent, sometimes used to refer
to as Plug and Play.
Port Monitor
PPD Postcript Printer Description
Printer automatic configuration Executed at installation or using the feature Update Now within
the HP UPD driver user interface from the Device Settings tab,
the HP UPD will communicate with the device to retrieve
device capabilities directly from the device. Information passed
to the device can be in the form of a Job Capability Ticket over
HTTP, SNMP response over the HP UPD, Dot4 or LEDM.
PSCRIPT5.DLL Microsoft postscript specific printer driver file used for Microsoft
Universal Print driver functionality.
SAG System Administrator Guide
Scrubber HP internal test tool that removes all print drivers from the
Windows system.
Simplex Single sided printing, opposite of the term duplex.
184 Appendix E Glossary of terms ENWW

Term Definition as related to the HP UPD
SNP Status Notification Pop-up.
Traditional Mode/Static Mode Selected at the time of HP UPD installation and opposite of
dynamice mode method, traditional mode (sometimes referred
Static mode) behaves like a product-specific driver. During
installation, the driver is associated to a specific printer,
creating a permanent instance of the driver.
HP Special Offers Program Displayed via the driver user interface Status Notification Pop–
ups, the HP Special Offers Program allows HP to present HP
customers with targeted offers to buy HP and HP partner
products, use HP and HP partner services, and learn more
about HP and HP partner offerings. For example, a printer with
low toner 'triggers' a toner offer to the customer.
Unidrv The Universal Printer Driver (Unidrv) is the Microsoft
Corporation's standard printer driver for non-PostScript
printers
Update Now See EAC
WHQL Windows Hardware Quality Lab is a testing process required
to receive the "Certified for Windows" logotype. This certifies
the HP UPD driver has completed testing by Microsoft before
HP released the driver. Drivers that do not have WHQL
certification at time of installtion will prompt The software you
are installing for this hardware [DEVICE] has not passed
Windows Logo testing... Continue Anyway / Stop
Installation.
WJA HP Web Jetadmin software is a print and imaging peripheral
management software tool that helps optimize product
utilization, control color costs, secure products, and streamline
supplies management by enabling remote configuration,
proactive monitoring, security, troubleshooting, and reporting
of printing and imaging products.
ENWW 185
186 Appendix E Glossary of terms ENWW

F Support information to collect
Efficient troubleshooting leading to issue resolution requires collection of basic and extended information
related to the reported incident. Use this worksheet as the first step to contacting technical support.
1) Symptoms
a. What is the reported issue?
b. What are the symptoms?
c. Location of the issue (client, server, printer)?
d. Provide error messages and location source?
e. How often does problem occur?
f. Exact steps that produced the reported issue?
2) Printer driver
a. Determine the HP UPD driver version
1. In the Printers folder, right-click on the HP UPD driver/queue and then select Properties.
●
For a traditional mode installation, select the About tab. The version displays at the top.
●
For a dynamic mode installation, the version displays on the lower left.
2. Test the latest version of the HP UPD available from
www.hp.com/go/upd
Does the error occur with the latest version of the driver from hp.com?
b. Determine the installation details
1. What is the printer description language, PS, PCL5, PCL6, or XPS?
2. Is this a new installation of the HP UPD, or an upgrade of an existing HP UPD installation?
3. Is the installation HP UPD onto the server, the print client, or vended from print server to client
(PnP)?
ENWW 1) Symptoms 187
4. What is the method of installation? Does each method produce the same result?
1. Add Printer Wizard
2. Install.exe
a. Dynamic mode or traditional mode?
b. Optional switches?
3. Point and Print vended from Microsoft Print Server
4. Other
a. Printers folder- Properties - Advanced - New Driver
b. Printers folder- Server Properties- Drivers tab - Add or Reinstall
c. Custom printUI.dll.
5. Determine which port is in use (TCP, LPT1 etc). Open the Printers folder, right-click the printer
name, select Properties and then click the Ports tab. Which Port is selected? What settings are
defined for the port (select Configure Port)?
6. Determine which print processor is in use. Open the Printers folder, right-click the printer name,
select Properties, select the Advanced tab, and then click Print Processor button. Which Print
processor is highlighted/selected?
7. Was the driver pre-configured before the HP UPD installation?
1. Device Configuration Utility. What settings were altered compared to the HP default *.cf_.
2. Driver Deployment Utility. What settings were altered compared to the HP default.
c. Is Printer Automatic Configuration enabled (default)? Printer Properties-Device Settings tab-
Installable Options-Automatic Configuration-Update Now.
d. What is the “Configuration Status” provided on the About tab? Printer Properties-About, see
“Configuration Status”.
e. Management Tools
1. Driver Configuration Utility version? Select file hpbcfgre.dll, Properties-Details tab-
Product Version.
2. MPA version?
3. AD Template? Version is part of the template’s file name.
4. DDU ve
rsion? Select the About button.
3) Environment specifications
a. Version of Microsoft operating system (print server and print client)
188 Appendix F Support information to collect ENWW
To obtain system information, use any of the following methods.
1. Brief–click Start, click Run, and then type WINVER.EXE
2. Extended–click Start, click Run, and then type cmd.exe to open the command prompt window.
Type /k systeminfo.exe at the command prompt.
3. Complete–click Start, click Run, and then type MSINFO32.
b. Microsoft Event log (spooler errors, etc)?
Click Start, click Run, and then type Eventvwr.msc.
c. Printer connectivity
1. Is the printer USB direct connected?
2. Network and connectivity settings
1. IP addresses
a. Printer server
b. Print client
c. Print product
2. Print path network availability (client/server/printer)
a. ping ip_address
b. telnet ip_address
c. Tracert ip_address
d. http://device_ip_address
https://device_ip_address
3. Is SNMP enabled?
a. Is it routable in your network?
b. SNMP Community Name. prnport -l
d. Citrix
1. Server–Citrix server version
2. Client–operating system and Citrix client version
3. Auto created printers configuration
1. Client printers or session printers?
2. If client printers, what driver is mapped to the client for autocreation (Citrix UPD; HP UPD; HP
model specific driver)?
ENWW 3) Environment specifications 189
e. Microsoft Terminal Services
1. Version of the Terminal Server.
2. RDP client version.
3. Operating system version of client.
4. What driver is mapped to be redirected to the printer?
5. Does the same issue exist outside of a Terminal Server session?
f. Novell
1. Version of Novell print server.
2. Installation method of print queue on server (i.e.- iManager).
3. Version of iPrint client.
4. Does same issue exist printing to a non-Novell print queue?
4) Printer information
a. Printer model name
b. Printer model firmware. Methods to obtain:
1. Printer control panel (print a configuration page).
2. Embedded Web Server (http://ip_of_print_device). See Device Configuration “Firmware
Datecode”.
3. Web Jetadmin.
c. Error information displayed or printed out from the product
1. Error message content
2. Event log
◦
Displayed from the control panel or Embedded Web Server.
◦
Printed on the configuration page (last 3 items).
◦
Printed from the control panel or Embedded Web Server (entire log).
d. Device configuration page. The product configuration can be obtained with either of the following
methods.
●
Printing at the printer control panel.
●
By printing a test page. Open the Printers folder, right-click the printer name, select Properties,
and then click the Print Test Page button.
190 Appendix F Support information to collect ENWW

5) Application
●
Application(s) affected and application version number. Open the Help menu in the application and
select About to find the application version number.
●
Test documents specific to reproducing the issue.
6) Files to collect
The following list contains information that may be requested to continue troubleshooting for the purpose
of debugging, analyzing and creating reproducible test cases.
a. MSINFO32: Click Start, click Run, and then type MSINFO32.exe. Save the*. NFO file to disk.
b. System Information: From a command prompt, pipe the output to file: C:\>systeminfo.exe
>systeminfo.txt.
c. Microsoft Product Support Reports: For details and information refer to
Microsoft Product
Support Reports
d. Microsoft Event Viewer Logs: Click Start, click Run, and then type “Eventvwr.msc”. Select the
tree node, and from the Action menu select Save Log File As... to save the log file.
e. PRN file: Application dependent. Example: START-RUN-WRITE.EXE, select FILE-PRINT and
select Print To File to save FILENAME.PRN
f. Application file: Provide a sample file from the application which created the reported issue.
g. Print a test page: Open the Printers folder, right-click the printer name, select Properties, and
then click the Print Test Page button. Scan the output page to a distributable computer file format.
Options to create the page include the following.
1. Device Configuration Page: Print from the printer control panel.
2. Printers folder- Properties - Print Test Page.
h. Scan of printed document: After printing a page, use a colored pen to mark up and identify the
issue with the printed output. Scan the marked up page back to a distributable computer file format.
i. Driver Configuration Utility (DCU): Provide the pre-configuration files *.cf_ or *.cfm
j. Device Network Settings: Methods available to capture information
1. Telnet to the product, output all information to console, select upper left icon and right mouse,
EDIT-SELECT-ALL. Repeat right mouse, EDIT-COPY. Paste into file and save.
2. Use Web Jetadmin views to create an export file
3. Embedded web server to printer: http://ip_of_printdevice
k. Screen shots: Error dialogs, user interface, etc.
ENWW 5) Application 191

l. Microsoft crash dump file
1. XP/Server 2000, 2003 and 2008:
http://support.microsoft.com/kb/254649 (dump files, when
enabled, are stored by default in %SystemRoot%\Minidump folder).
2. VISTA:
http://support.microsoft.com/kb/931673 (dump files, when enabled, are stored by
default in Drive:\Users\UserName\AppData\Local\Temp)
m. Directory file listing:
C:\>DIR %SYSTEMROOT\system32\spool\drivers /s >C:\w32x86.tx
n. SetupAPI.log: Located in %SYSTEMROOT%
o. Screen shots: Error dialogs, user interface, etc.
p. Registry exports (three targets)
regedit.exe /e c:\updreg1.txt
"HKEY_LOCAL_MACHINE\SOFTWARE\Hewlett-Packard\HP Print Settings"
“HKEY_LOCAL_MACHINE\SOFTWARE\Hewlett-Packard\HP SSNP”
“HKEY_CURRENT_USER\Software\Hewlett-Packard\HP Print Settings”
192 Appendix F Support information to collect ENWW

Index
A
Active Directory Policy
management, enable 54
Active Directory template
Application Filtering 129
Color Access Control 129
Default Print Settings 128
Enabled services tab 127
General settings 125
HP Managed Print
Policites 125
Job Accounting 131
Job Delivery 131
Managed Printer List
settings 133
Managed Printer Lists
(MPLs) 133
MPP Information Settings 132
Status Notification Pop-ups
(SNPs) 130
Time of Day Restriction 129
UseMode settings 125
User configuration 125
User Interaction Settings 126
User Search Capabilities 130
Active Directory template, install
Microsoft Group Policy
Management Console
(GPMC) 123
Add Printer Wizard 32
C
Citrix environment
HP UPD, install 42
classic interface, HP MPA
options 85
cluster server
HP UPD, install 40
command prompt
command options 34
custom install 34
D
dynamic mode
about 31
description 70
HP Universal Printing Installer
Wizard 33
Install.exe 33
print 74
G
graphic interface, HP MPA
options 86
H
HP Managed Print Policies (MPPs)
Active Directory template 125
HP Managed Printing Administrator
(MPA). See HP MPA
HP MPA
access 85
Add/Remove Programs 85
classic interface 85
control panel 85
graphic interface 86
HP MPA Setup Wizard 84
HP UPD, SNPs 142
languages available 83
Managed Printer Lists
(MPLs) 37
Managed Printer Policies
(MPPs) 89
software availability 83
software requirements 83
uninstall 84
User Groups 121
HP MPA Setup Wizard 84
HP MPA, install
HP MPA Setup Wizard 84
HP MPA, uninstall
Add/Remove Programs 85
HP MPA Setup Wizard 84
HP postscript emulation driver
about 13
HP Universal Print Driver
(HP UPD). See HP UPD
HP Universal Print Driver System
Administrator Guide. See HP UPD
SAG
HP Universal Printing Installer
Wizard 33
HP UPD
Cache printer settings 52
description of software 3
Device Verification settings 72
driver properties 72
driver versions, selection 12
dynamic mode, about 31
Dynamic mode, configure 70
dynamic mode, description 70
Dynamic modes, settings 70
General settings, modify 71
Help features 73
install 19
languages available 12
new features 10
PCL 5, about 13
print 73
print driver modes,
description 70
print job preferences 72
PS emulation driver, about 13
software availability 12
system requirements 11
traditional mode 31
EN
WW Index 193
traditional mode,
description 70
uninstall 45
versions 11
HP UPD Active Directory
Administrative template 123
See also Active Directory
template
HP UPD SAG
conventions 3
overview 1
HP UPD, install
Add Printer Wizard 32
Citrix environment 42
cluster server 40
command prompt 34
HP Universal Printing Installer
Wizard 33
HP Web Jetadmin Print Queue
Creation 40
Install.exe 33
Novell 43
point and print 40
Terminal server 42
HP UPD, manage
Cache printer settings 52
HP MPA, SNPs 142
Registry settings, SNPs 142
HP UPD, print
dynamic mode 74
traditional mode 77
HP UPD, uninstall 45
HP UPD, upgrade
printers on printer server 54
HP Web Jetadmin Print Queue
Creation
HP UPD, install 40
M
Managed Print Policies (MPPs)
Associate printer lists 88
Associate user groups 88
Basic MPP settings 100
Color Access settings 90
Create a new MPP 90
Default Print settings 93
Duplicate an existing
policy 102
Edit an existing MPP 88
Remove an existing
policy 104
Status & Supplies Notification
settings 90
Status Notification Popups
(SNPs) 90
Update an MPP 93
UseMode settings 90
User Search capabilities 90
Managed Printer Lists (MPLs)
Advanced View settings 118
Associate an existing list 102
Auto printer discover 106
Clickable image map
view 114
Create a new list 105
Duplicate an existing list 112
Edit an existing list 89
HP UPD Active Directory
template 133
Manage MPL view 89
Manual printer entry 106
Printer graphics view 116
Remove an existing list 120
Remove printers from list 121
Select a MPL view 113
Tabular HTML view 118
View, Clickable image
map 114
View, options 113
View, Tabular HTML 118
virtual printers 111
Managed Printer Policies
(MPPs) 89
Microsoft Group Policy
Management Console
(GPMC) 123
N
Novell
HP UPD, install 43
P
PCL 5 driver
about 13
PCL 6 driver
about 13
point and print
HP UPD, install 40
S
software availability
HP MPA 83
HP UPD 12
software requirements
HP MPA 83
Status Notification Pop-ups (SNPs)
Active Directory template 130
HP MPA 142
Registry settings 142
Status Notification Popups (SNPs)
HP MPA 90
Managed Print Policies
(MPPs) 90
supported products 4
system requirements
HP UPD 11
T
Terminal server
HP UPD, install 42
traditional mode
abou
t 31
Add Printer Wizard 32
description 70
HP Universal Printing Installer
Wizard 33
Install.exe 33
print 77
U
User Groups
Associate with a policy 102
Create a new user group 121
Edit an existing user group 88
Remove a user group 122
V
virtual printers 111
194 Index ENWW

© 2009 Hewlett-Packard Development Company, L.P.
www.hp.com
