
User Guide
AWS Direct Connect
Copyright © 2024 Amazon Web Services, Inc. and/or its affiliates. All rights reserved.

AWS Direct Connect User Guide
AWS Direct Connect: User Guide
Copyright © 2024 Amazon Web Services, Inc. and/or its affiliates. All rights reserved.
Amazon's trademarks and trade dress may not be used in connection with any product or service
that is not Amazon's, in any manner that is likely to cause confusion among customers, or in any
manner that disparages or discredits Amazon. All other trademarks not owned by Amazon are
the property of their respective owners, who may or may not be affiliated with, connected to, or
sponsored by Amazon.

AWS Direct Connect User Guide
Table of Contents
What is AWS Direct Connect? ......................................................................................................... 1
Direct Connect components ....................................................................................................................... 2
Network requirements ................................................................................................................................. 2
Supported Direct Connect virtual interface types ................................................................................. 3
Pricing for Direct Connect .......................................................................................................................... 4
Direct Connect maintenance ...................................................................................................................... 4
Access to remote AWS Regions ................................................................................................................. 6
Access to public services in a remote Region ................................................................................... 6
Access to VPCs in a remote Region .................................................................................................... 6
Network-to-Amazon VPC Connectivity Options ............................................................................... 7
Routing policies and BGP communities ................................................................................................... 7
Public virtual interface routing policies ............................................................................................. 7
Public virtual interface BGP communities ......................................................................................... 8
Private virtual interface and transit virtual interface routing policies ....................................... 10
Private virtual interface routing example ........................................................................................ 12
AWS Direct Connect Resiliency Toolkit ........................................................................................ 14
Prerequisites ................................................................................................................................................ 15
Maximum resiliency ................................................................................................................................... 17
High resiliency ............................................................................................................................................. 18
Development and test .............................................................................................................................. 19
Classic ........................................................................................................................................................... 20
Prerequisites ........................................................................................................................................... 20
Failover test ................................................................................................................................................. 21
Configure maximum resiliency ................................................................................................................ 21
Step 1: Sign up for AWS ..................................................................................................................... 22
Step 2: Configure the resiliency model ............................................................................................ 24
Step 3: Create your virtual interfaces .............................................................................................. 25
Step 4: Verify your virtual interface resiliency configuration ...................................................... 33
Step 5: Verify your virtual interfaces connectivity ........................................................................ 33
Configure high resiliency .......................................................................................................................... 34
Step 1: Sign up for AWS ..................................................................................................................... 34
Step 2: Configure the resiliency model ............................................................................................ 36
Step 3: Create your virtual interfaces .............................................................................................. 37
Step 4: Verify your virtual interface resiliency configuration ...................................................... 45
iii

AWS Direct Connect User Guide
Step 5: Verify your virtual interfaces connectivity ........................................................................ 45
Configure development and test resiliency .......................................................................................... 45
Step 1: Sign up for AWS ..................................................................................................................... 46
Step 2: Configure the resiliency model ............................................................................................ 48
Step 3: Create a virtual interface ...................................................................................................... 49
Step 4: Verify your virtual interface resiliency configuration ...................................................... 57
Step 5: Verify your virtual interface ................................................................................................. 57
Configure a Classic connection ............................................................................................................... 58
Step 1: Sign up for AWS ..................................................................................................................... 58
Step 2: Request an AWS Direct Connect dedicated connection .................................................. 60
(Dedicated connection) Step 3: Download the LOA-CFA .............................................................. 62
Step 4: Create a virtual interface ...................................................................................................... 63
Step 5: Download the router configuration .................................................................................... 72
Step 6: Verify your virtual interface ................................................................................................. 72
(Recommended) Step 7: Configure redundant connections ........................................................ 73
Failover Test ................................................................................................................................................ 75
Test History ............................................................................................................................................ 76
Validation Permissions ......................................................................................................................... 76
Start a virtual interface failover test ................................................................................................ 76
View a virtual interface failover test history .................................................................................. 77
Stop a virtual interface failover test ................................................................................................ 78
MAC security (MACsec) .................................................................................................................. 79
MACsec concepts ....................................................................................................................................... 79
MACsec key rotation .................................................................................................................................. 80
Supported connections ............................................................................................................................. 80
MACsec on dedicated connections ......................................................................................................... 80
MACsec prerequisites for dedicated connections ........................................................................... 81
Service-Linked roles ............................................................................................................................. 81
MACsec pre-shared CKN/CAK key considerations .......................................................................... 82
Get started with MACsec on a dedicated connection ......................................................................... 82
Create a connection ............................................................................................................................. 82
(Optional)Create a LAG ........................................................................................................................ 82
Associate the CKN/CAK with the connection or LAG .................................................................... 83
Configure your on-premises router ................................................................................................... 83
Remove the association between the CKN/CAK and the connection or LAG ........................... 83
Dedicated and hosted connections .............................................................................................. 84
iv

AWS Direct Connect User Guide
Dedicated connections .............................................................................................................................. 84
Letter of Authorization and Connecting Facility Assignment (LOA-CFA) ................................... 86
Create a connection using the Connection wizard ........................................................................ 87
Create a Classic connection ................................................................................................................ 88
Download the LOA-CFA ....................................................................................................................... 90
Associate a MACsec CKN/CAK with a connection .......................................................................... 91
Remove the association between a MACsec secret key and a connection ................................ 92
Hosted connections ................................................................................................................................... 92
Accept a hosted connection ............................................................................................................... 94
Delete a connection ................................................................................................................................... 94
Update a connection ................................................................................................................................. 95
View connection details ............................................................................................................................ 96
Cross connects ............................................................................................................................... 98
US East (Ohio) ............................................................................................................................................. 99
US East (N. Virginia) ................................................................................................................................ 100
US West (N. California) ........................................................................................................................... 101
US West (Oregon) .................................................................................................................................... 102
Africa (Cape Town) .................................................................................................................................. 103
Asia Pacific (Jakarta) ............................................................................................................................... 103
Asia Pacific (Mumbai) .............................................................................................................................. 103
Asia Pacific (Seoul) .................................................................................................................................. 104
Asia Pacific (Singapore) .......................................................................................................................... 104
Asia Pacific (Sydney) ................................................................................................................................ 105
Asia Pacific (Tokyo) .................................................................................................................................. 105
Canada (Central) ....................................................................................................................................... 106
China (Beijing) ........................................................................................................................................... 106
China (Ningxia) ......................................................................................................................................... 107
Europe (Frankfurt) ................................................................................................................................... 107
Europe (Ireland) ........................................................................................................................................ 108
Europe (Milan) .......................................................................................................................................... 108
Europe (London) ....................................................................................................................................... 109
Europe (Paris) ............................................................................................................................................ 109
Europe (Stockholm) ................................................................................................................................. 109
Europe (Zurich) ......................................................................................................................................... 110
Israel (Tel Aviv) ......................................................................................................................................... 110
Middle East (Bahrain) .............................................................................................................................. 110
v

AWS Direct Connect User Guide
Middle East (UAE) .................................................................................................................................... 111
South America (São Paulo) .................................................................................................................... 111
AWS GovCloud (US-East) ....................................................................................................................... 111
AWS GovCloud (US-West) ...................................................................................................................... 111
Virtual interfaces and hosted virtual interfaces ....................................................................... 112
Public virtual interface prefix advertisement rules .......................................................................... 112
SiteLink ....................................................................................................................................................... 113
Prerequisites for virtual interfaces ....................................................................................................... 114
MTUs for private virtual interfaces or transit virtual interfaces .................................................... 119
Virtual interfaces ...................................................................................................................................... 120
Prerequisites for transit virtual interfaces to a Direct Connect gateway ................................ 121
Create a public virtual interface ...................................................................................................... 122
Create a private virtual interface .................................................................................................... 123
Create a transit virtual interface to the Direct Connect gateway ............................................. 126
Download the router configuration file ......................................................................................... 128
Hosted virtual interfaces ........................................................................................................................ 129
Create a hosted private virtual interface ...................................................................................... 133
Create a hosted public virtual interface ........................................................................................ 135
Create a hosted transit virtual interface ....................................................................................... 137
View virtual interface details ................................................................................................................ 139
Add a BGP peer ........................................................................................................................................ 140
Delete a BGP peer ................................................................................................................................... 141
Set the MTU of a private virtual interface ......................................................................................... 142
Add or remove virtual interface tags .................................................................................................. 143
Delete a virtual interface ....................................................................................................................... 143
Accept a hosted virtual interface ......................................................................................................... 144
Migrate a virtual interface ..................................................................................................................... 145
Link aggregation groups (LAGs) ................................................................................................. 147
MACsec considerations ............................................................................................................................ 149
Create a LAG ............................................................................................................................................. 149
View LAG details ...................................................................................................................................... 152
Update a LAG ........................................................................................................................................... 152
Associate a connection with a LAG ...................................................................................................... 154
Disassociate a connection from a LAG ................................................................................................ 155
Associate a MACsec CKN/CAK with a LAG .......................................................................................... 155
Remove the association between a MACsec secret key and a LAG ................................................ 157
vi

AWS Direct Connect User Guide
Delete a LAG ............................................................................................................................................. 157
Gateways ...................................................................................................................................... 159
Direct Connect gateways ........................................................................................................................ 159
Scenarios ............................................................................................................................................... 161
Create a Direct Connect gateway ................................................................................................... 164
Migrate from a virtual private gateway to a Direct Connect gateway ..................................... 165
Delete a Direct Connect gateway ................................................................................................... 165
Virtual private gateway associations ................................................................................................... 166
Create a virtual private gateway ..................................................................................................... 168
Associate or disassociate virtual private gateways ...................................................................... 169
Create a private virtual interface to the Direct Connect gateway ............................................ 170
Associate a virtual private gateway across accounts .................................................................. 173
Transit gateway associations ................................................................................................................. 174
Associating a transit gateway across accounts ............................................................................. 174
Associate or disassociate a transit gateway with Direct Connect. ............................................ 175
Create a transit virtual interface to the Direct Connect gateway ............................................. 177
Create a transit gateway association proposal ............................................................................. 180
Accept or reject a transit gateway association proposal ............................................................ 181
Update the allowed prefixes for a transit gateway association ................................................ 182
Delete a transit gateway association proposal ............................................................................. 182
Allowed prefixes interactions ................................................................................................................ 183
Virtual private gateway associations .............................................................................................. 183
Transit gateway associations ............................................................................................................ 184
Example: Allowed to prefixes in a transit gateway configuration ............................................ 185
Tag resources ............................................................................................................................... 187
Tag restrictions ......................................................................................................................................... 188
Working with tags using the CLI or API .............................................................................................. 189
Examples ............................................................................................................................................... 189
Security ........................................................................................................................................ 190
Data protection ........................................................................................................................................ 190
Internetwork traffic privacy .............................................................................................................. 192
Encryption ............................................................................................................................................ 192
Identity and Access Management ........................................................................................................ 193
Audience ............................................................................................................................................... 193
Authenticating with identities ......................................................................................................... 194
Managing access using policies ....................................................................................................... 197
vii

AWS Direct Connect User Guide
How Direct Connect works with IAM ............................................................................................. 199
Identity-based policy examples for Direct Connect .................................................................... 206
Service-linked roles ............................................................................................................................ 215
AWS managed policies ...................................................................................................................... 219
Troubleshooting .................................................................................................................................. 220
Logging and monitoring ........................................................................................................................ 222
Compliance validation ............................................................................................................................ 223
Resilience in Direct Connect .................................................................................................................. 224
Failover .................................................................................................................................................. 224
Infrastructure security ............................................................................................................................. 225
Border Gateway Protocol .................................................................................................................. 225
Use the AWS CLI .......................................................................................................................... 226
Step 1: Create a connection .................................................................................................................. 226
Step 2: Download the LOA-CFA ............................................................................................................ 227
Step 3: Create a virtual interface and get the router configuration .............................................. 228
Log API calls ................................................................................................................................ 234
AWS Direct Connect information in CloudTrail ................................................................................. 234
Understand AWS Direct Connect log file entries .............................................................................. 235
Monitor Direct Connect resources .............................................................................................. 240
Monitoring tools ....................................................................................................................................... 240
Automated monitoring tools ........................................................................................................... 241
Manual monitoring tools .................................................................................................................. 241
Monitor with Amazon CloudWatch ...................................................................................................... 242
AWS Direct Connect metrics and dimensions .............................................................................. 242
View Direct Connect CloudWatch metrics ..................................................................................... 248
Create alarms to monitor connections .......................................................................................... 249
Direct Connect quotas ................................................................................................................. 251
BGP quotas ................................................................................................................................................ 254
Load balance considerations ................................................................................................................. 254
Troubleshooting ........................................................................................................................... 255
Layer 1 (physical) issues ......................................................................................................................... 255
Layer 2 (data link) issues ........................................................................................................................ 258
Layer 3/4 (Network/Transport) issues ................................................................................................. 259
Routing issues ........................................................................................................................................... 262
Document history ........................................................................................................................ 264
viii

AWS Direct Connect User Guide
What is AWS Direct Connect?
AWS Direct Connect links your internal network to an AWS Direct Connect location over a standard
Ethernet fiber-optic cable. One end of the cable is connected to your router, the other to an AWS
Direct Connect router. With this connection, you can create virtual interfaces directly to public AWS
services (for example, to Amazon S3) or to Amazon VPC, bypassing internet service providers in
your network path. An AWS Direct Connect location provides access to AWS in the Region with
which it is associated. You can use a single connection in a public Region or AWS GovCloud (US) to
access public AWS services in all other public Regions.
• For a list of Direct Connect locations you can connect to, see AWS Direct Connect Locations.
• For answers to questions about Direct Connect, see the Direct Connect FAQ.
The following diagram shows a high-level overview of how AWS Direct Connect interfaces with
your network.
Contents
• AWS Direct Connect components
• Network requirements
• Supported Direct Connect virtual interface types
• Pricing for Direct Connect
• AWS Direct Connect maintenance
• Access to remote AWS Regions
• AWS Direct Connect routing policies and BGP communities
1

AWS Direct Connect User Guide
AWS Direct Connect components
The following are the key components that you use for Direct Connect:
Connections
Create a connection in an AWS Direct Connect location to establish a network connection from
your premises to an AWS Region. For more information, see AWS Direct Connect dedicated and
hosted connections.
Virtual interfaces
Create a virtual interface to enable access to AWS services. A public virtual interface enables
access to public services, such as Amazon S3. A private virtual interface enables access to your
VPC. The types of supported interfaces are described below in the section called “Supported
Direct Connect virtual interface types”. For more details about the supported interfaces, see
AWS Direct Connect virtual interfaces and hosted virtual interfaces and Prerequisites for virtual
interfaces.
Network requirements
To use AWS Direct Connect in an AWS Direct Connect location, your network must meet one of the
following conditions:
• Your network is colocated with an existing AWS Direct Connect location. For more information
about available AWS Direct Connect locations, see AWS Direct Connect Product Details.
• You are working with an AWS Direct Connect partner who is a member of the AWS Partner
Network (APN). For information, see APN Partners Supporting AWS Direct Connect.
• You are working with an independent service provider to connect to AWS Direct Connect.
In addition, your network must meet the following conditions:
• Your network must use single-mode fiber with a 1000BASE-LX (1310 nm) transceiver for 1
gigabit Ethernet, a 10GBASE-LR (1310 nm) transceiver for 10 gigabit, a 100GBASE-LR4 for 100
gigabit Ethernet, or a 400GBASE-LR4 for 400 Gbps Ethernet.
• Auto-negotiation for a port must be disabled for a connection with a port speed of more than
1 Gbps. However, depending on the AWS Direct Connect endpoint serving your connection,
Direct Connect components 2

AWS Direct Connect User Guide
auto-negotiation might need to be enabled or disabled for 1 Gbps connections. If your virtual
interface remains down, see Troubleshooting layer 2 (data link) issues.
• 802.1Q VLAN encapsulation must be supported across the entire connection, including
intermediate devices.
• Your device must support Border Gateway Protocol (BGP) and BGP MD5 authentication.
• (Optional) You can configure Bidirectional Forwarding Detection (BFD) on your network.
Asynchronous BFD is automatically enabled for each AWS Direct Connect virtual interface.
It's automatically enabled for Direct Connect virtual interfaces, but does not take effect until
you configure it on your router. For more information, see Enable BFD for a Direct Connect
connection.
AWS Direct Connect supports both the IPv4 and IPv6 communication protocols. IPv6 addresses
provided by public AWS services are accessible through AWS Direct Connect public virtual
interfaces.
AWS Direct Connect supports an Ethernet frame size of 1522 or 9023 bytes (14 bytes Ethernet
header + 4 bytes VLAN tag + bytes for the IP datagram + 4 bytes FCS) at the link layer. You can
set the MTU of your private virtual interfaces. For more information, see MTUs for private virtual
interfaces or transit virtual interfaces.
Supported Direct Connect virtual interface types
AWS Direct Connect supports the following three virtual interface (VIF) types:
• Private virtual interface
This type of interface is used to access an Amazon Virtual Private Cloud (VPC) using private IP
addresses. With a private virtual interface you can
• Connect directly to a single VPC per private virtual interface to access those resources using
private IPs in the same Region.
• Connect a private virtual interface to a Direct Connect gateway to access multiple virtual
private gateways across any account and AWS Region (except the AWS China Regions).
• Public virtual interface
This type of virtual interface is used to access all AWS public services using public IP addresses.
With a public virtual interface you can connect to all AWS public IP addresses and services
globally.
Supported Direct Connect virtual interface types 3

AWS Direct Connect User Guide
• Transit virtual interface
This type of interface is used to access one or more Amazon VPC Transit Gateways associated
with Direct Connect gateways. With a transit virtual interface you connect multiple Amazon VPC
Transit Gateways across multiple accounts and AWS Regions (except the AWS China Regions).
Note
There are limits to the number of different types of associations between a Direct
Connect gateway and a virtual interface. For more information about specific limits, see
the Direct Connect quotas page.
For more information about virtual interfaces, see Virtual interfaces and hosted virtual interfaces.
Pricing for Direct Connect
AWS Direct Connect has two billing elements: port hours and outbound data transfer. Port
hour pricing is determined by capacity and connection type (dedicated connection or hosted
connection).
Data Transfer Out charges for private interfaces and transit virtual interfaces are allocated to the
AWS account responsible for the Data Transfer. There are no additional charges to use a multi-
account AWS Direct Connect gateway.
For publicly addressable AWS resources (for example, Amazon S3 buckets, Classic EC2 instances,
or EC2 traffic that goes through an internet gateway), if the outbound traffic is destined for public
prefixes owned by the same AWS payer account and actively advertised to AWS through an AWS
Direct Connect public virtual Interface, the Data Transfer Out (DTO) usage is metered toward the
resource owner at AWS Direct Connect data transfer rate.
For more information, see AWS Direct Connect Pricing.
AWS Direct Connect maintenance
AWS Direct Connect is a fully managed service where periodically, Direct Connect performs
maintenance activities on a hardware fleet that supports the service. Direct Connect connections
are provisioned on standalone hardware devices that enables you to create highly resilient network
Pricing for Direct Connect 4

AWS Direct Connect User Guide
connections between Amazon Virtual Private Cloud and your on-premises infrastructure. This
capability enables you to access your AWS resources in a reliable, scalable, and cost-effective way.
For more information, see AWS Direct Connect Resiliency Recommendations.
There are two types of Direct Connect maintenance: planned and emergency maintenance:
• Planned maintenance. Planned maintenance is scheduled in advance to improve availability and
deliver new features. This type of maintenance is scheduled during a maintenance window where
we provide three notifications: 14-calendar-day, 7-calendar day, and 1-calendar day.
Note
Calendar days include non-business days and local holidays.
• Emergency maintenance. Emergency maintenance is initiated on critical basis due to a service
impacting failure that requires immediate action from AWS to restore services. This type
of maintenance isn't planned in advance. Impacted customers are notified of emergency
maintenance up to 60-minutes prior to the maintenance.
We recommend that you follow the AWS Direct Connect Resiliency Recommendations so that you
can gracefully and proactively shift traffic to your redundant Direct connect connection during
maintenance. We also recommend that you proactively test the resiliency of your redundant
connections on a regular basis to validate that failover works as intended. Using the the section
called “Failover Test” functionality, you can verify that your traffic routes through one of your
redundant virtual interfaces.
For guidance around eligibility criteria to initiate a request for planned maintenance cancellation,
see How do I cancel a Direct Connect maintenance event?.
Note
Emergency maintenance requests can't be canceled as AWS must act immediately to
restore service.
For more information about maintenance events, see Maintenance events in the AWS Direct
Connect FAQs.
Direct Connect maintenance 5

AWS Direct Connect User Guide
Access to remote AWS Regions
AWS Direct Connect locations in public Regions or AWS GovCloud (US) can access public services
in any other public Region (excluding China (Beijing and Ningxia)). In addition, AWS Direct Connect
connections in public Regions or AWS GovCloud (US) can be configured to access a VPC in your
account in any other public Region (excluding China (Beijing and Ningxia). You can therefore use a
single AWS Direct Connect connection to build multi-Region services. All networking traffic remains
on the AWS global network backbone, regardless of whether you access public AWS services or a
VPC in another Region.
Any data transfer out of a remote Region is billed at the remote Region data transfer rate. For
more information about data transfer pricing, see the Pricing section on the AWS Direct Connect
detail page.
For more information about the routing policies and supported BGP communities for an AWS
Direct Connect connection, see Routing policies and BGP communities.
Access to public services in a remote Region
To access public resources in a remote Region, you must set up a public virtual interface and
establish a Border Gateway Protocol (BGP) session. For more information, see Virtual interfaces and
hosted virtual interfaces.
After you have created a public virtual interface and established a BGP session to it, your router
learns the routes of the other public AWS Regions. For more information about prefixes currently
advertised by AWS, see AWS IP Address Ranges in the Amazon Web Services General Reference.
Access to VPCs in a remote Region
You can create a Direct Connect gateway in any public Region. Use it to connect your AWS Direct
Connect connection over a private virtual interface to VPCs in your account that are located in
different Regions or to a transit gateway. For more information, see AWS Direct Connect gateways.
Alternatively, you can create a public virtual interface for your AWS Direct Connect connection and
then establish a VPN connection to your VPC in the remote Region. For more information about
configuring VPN connectivity to a VPC, see Scenarios for Using Amazon Virtual Private Cloud in the
Amazon VPC User Guide.
Access to remote AWS Regions 6

AWS Direct Connect User Guide
Network-to-Amazon VPC Connectivity Options
The following configuration can be used to connect remote networks with your Amazon VPC
environment. These options are useful for integrating AWS resources with your existing on-site
services:
• Amazon Virtual Private Cloud Connectivity Options
AWS Direct Connect routing policies and BGP communities
AWS Direct Connect applies inbound (from your on-premises data center) and outbound (from
your AWS Region) routing policies for a public AWS Direct Connect connection. You can also use
Border Gateway Protocol (BGP) community tags on routes advertised by Amazon and apply BGP
community tags on the routes you advertise to Amazon.
Public virtual interface routing policies
If you're using AWS Direct Connect to access public AWS services, you must specify the public IPv4
prefixes or IPv6 prefixes to advertise over BGP.
The following inbound routing policies apply:
• You must own the public prefixes and they must be registered as such in the appropriate regional
internet registry.
• Traffic must be destined to Amazon public prefixes. Transitive routing between connections is
not supported.
• AWS Direct Connect performs inbound packet filtering to validate that the source of the traffic
originated from your advertised prefix.
The following outbound routing policies apply:
• AS_PATH and Longest Prefix Match are used to determine the routing path. AWS recommends
advertising more specific routes using AWS Direct Connect if the same prefix is being advertised
to both the Internet and to a public virtual interface.
• AWS Direct Connect advertises all local and remote AWS Region prefixes where available and
includes on-net prefixes from other AWS non-Region points of presence (PoP) where available;
for example, CloudFront and Route53.
Network-to-Amazon VPC Connectivity Options 7

AWS Direct Connect User Guide
Note
• Prefixes listed in the AWS IP address ranges JSON file, ip-ranges.json, for the AWS
China Regions are only advertised in the AWS China Regions.
• Prefixes listed in the AWS IP address ranges JSON file, ip-ranges.json, for the AWS
Commercial Regions are only advertised in the AWS Commercial Regions.
For more information about the ip-ranges.json file, see AWS IP address ranges in the
AWS General Reference.
• AWS Direct Connect advertises prefixes with a minimum path length of 3.
•
AWS Direct Connect advertises all public prefixes with the well-known NO_EXPORT BGP
community.
• If you advertise the same prefixes from two different Regions using two different public virtual
interfaces, and both have the same BGP attributes and longest prefix length, AWS will prioritize
the home Region for outbound traffic.
• If you have multiple AWS Direct Connect connections, you can adjust the load-sharing of
inbound traffic by advertising prefixes with the same path attributes.
• The prefixes advertised by AWS Direct Connect must not be advertised beyond the network
boundaries of your connection. For example, these prefixes must not be included in any public
internet routing table.
• AWS Direct Connect keeps prefixes advertised by customers within the Amazon network. We do
not re-advertise customer prefixes learned from a public VIF to any of the following:
• Other AWS Direct Connect customers
• Networks that peer with the AWS Global Network
• Amazon's transit providers
Public virtual interface BGP communities
AWS Direct Connect supports scope BGP community tags to help control the scope (Regional or
global) and route preference of traffic on public virtual interfaces. AWS treats all routes received
from a public VIF as if they were tagged with the NO_EXPORT BGP community tag, meaning only
the AWS network will use that routing information.
Public virtual interface BGP communities 8

AWS Direct Connect User Guide
Scope BGP communities
You can apply BGP community tags on the public prefixes that you advertise to Amazon to indicate
how far to propagate your prefixes in the Amazon network, for the local AWS Region only, all
Regions within a continent, or all public Regions.
AWS Region communities
For inbound routing policies, you can use the following BGP communities for your prefixes:
•
7224:9100—Local AWS Regions
•
7224:9200—All AWS Regions for a continent:
• North America-wide
• Asia Pacific
• Europe, the Middle East and Africa
•
7224:9300—Global (all public AWS Regions)
Note
If you do not apply any community tags, prefixes are advertised to all public AWS Regions
(global) by default.
Prefixes that are marked with the same communities, and have identical AS_PATH
attributes are candidates for multi-pathing.
The communities 7224:1 – 7224:65535 are reserved by AWS Direct Connect.
For outbound routing policies, AWS Direct Connect applies the following BGP communities to its
advertised routes:
•
7224:8100—Routes that originate from the same AWS Region in which the AWS Direct Connect
point of presence is associated.
•
7224:8200—Routes that originate from the same continent with which the AWS Direct Connect
point of presence is associated.
• No tag—Routes that originate from other continents.
Public virtual interface BGP communities 9

AWS Direct Connect User Guide
Note
To receive all AWS public prefixes do not apply any filter.
Communities that are not supported for an AWS Direct Connect public connection are removed.
NO_EXPORT BGP community
For outbound routing policies, the NO_EXPORT BGP community tag is supported for public virtual
interfaces.
AWS Direct Connect also provides BGP community tags on advertised Amazon routes. If you use
AWS Direct Connect to access public AWS services, you can create filters based on these community
tags.
For public virtual interfaces, all routes that AWS Direct Connect advertises to customers are tagged
with the NO_EXPORT community tag.
Private virtual interface and transit virtual interface routing policies
If you're using AWS Direct Connect to access your private AWS resources, you must specify the IPv4
or IPv6 prefixes to advertise over BGP. These prefixes can be public or private.
The following outbound routing rules apply based on the prefixes advertised:
• AWS evaluates the longest prefix length first. AWS recommends advertising more specific routes
using multiple Direct Connect virtual interfaces if the desired routing paths are meant for active/
passive connections. See Influencing Traffic over Hybrid Networks using Longest Prefix Match for
more information.
• Local preference is the BGP attribute recommended to use when desired routing paths are meant
for active/passive connections and the prefix lengths advertised are the same. This value is set
per Region to prefer AWS Direct Connect Locations that have the same associated AWS Region
using the 7224:7200—Medium local preference community value. Where the local Region is not
associated with the Direct Connect location, it is set to a lower value. This applies only if no local
preference community tags are assigned.
• AS_PATH length can be used to determine the routing path when the prefix length and local
preference are the same.
Private virtual interface and transit virtual interface routing policies 10

AWS Direct Connect User Guide
• Multi-Exit Discriminator (MED) can be used to determine the routing path when prefix length,
local preference, and AS_PATH are the same. AWS does not recommend using MED values given
their lower priority in evaluation.
• AWS will load-share across multiple transit or private virtual interfaces when prefixes have the
same length and BGP attributes.
Private virtual interface and transit virtual interface BGP communities
When an AWS Region routes traffic to on-premises locations via Direct Connect private or transit
virtual interfaces, the associated AWS Region of the Direct Connect location influences the ability
to use equal-cost multi-path routing (ECMP). AWS Regions prefer Direct Connect locations in
the same associated AWS Region by default. See AWS Direct Connect Locations to identify the
associated AWS Region of any Direct Connect location.
When there are no local preference community tags applied, Direct Connect supports ECMP over
private or transit virtual interfaces for prefixes with the same length, AS_PATH length, and MED
value over two or more paths in the following scenarios:
• The AWS Region sending traffic has two or more virtual interface paths from locations in the
same associated AWS Region, whether in the same or different colocation facilities.
• The AWS Region sending traffic has two or more virtual interface paths from locations not in the
same Region.
Fore more information, see How do I set up an Active/Active or Active/Passive Direct Connect
connection to AWS from a private or transit virtual interface?
Note
This has no effect on ECMP to an AWS Region from on-premises locations.
To control route preferences, Direct Connect supports local preference BGP community tags for
private virtual interfaces and transit virtual interfaces.
Private virtual interface and transit virtual interface routing policies 11

AWS Direct Connect User Guide
Local preference BGP communities
You can use local preference BGP community tags to achieve load balancing and route preference
for incoming traffic to your network. For each prefix that you advertise over a BGP session, you can
apply a community tag to indicate the priority of the associated path for returning traffic.
The following local preference BGP community tags are supported:
•
7224:7100—Low preference
•
7224:7200—Medium preference
•
7224:7300—High preference
Local preference BGP community tags are mutually exclusive. To load balance traffic across
multiple AWS Direct Connect connections (active/active) homed to the same or different AWS
Regions, apply the same community tag; for example, 7224:7200 (medium preference) across
the prefixes for the connections. If one of the connections fails, traffic will be then load balance
using ECMP across the remaining active connections regardless of their home Region associations .
To support failover across multiple AWS Direct Connect connections (active/passive), apply a
community tag with a higher preference to the prefixes for the primary or active virtual interface
and a lower preference to the prefixes for the backup or passive virtual interface. For example,
set the BGP community tags for your primary or active virtual interfaces to 7224:7300 (high
preference) and 7224:7100 (low preference) for your passive virtual interfaces.
Local preference BGP community tags are evaluated before any AS_PATH attribute, and are
evaluated in order from lowest to highest preference (where highest preference is preferred).
AWS Direct Connect private virtual interface routing example
Consider the configuration where the AWS Direct Connect location 1 home Region is the same
as the VPC home Region. There is a redundant AWS Direct Connect location in a different Region
There are two private VIFs (VIF A and VIF B) from AWS Direct Connect location 1 (us-east-1) to the
Direct Connect gateway. There is one private VIF (VIF C) from AWS Direct Connect location (us-
west-1) to the Direct Connect gateway. To have AWS route traffic over VIF B before VIF A, set the
AS_PATH attribute of VIF B to be shorter than the VIF A AS_PATH attribute.
The VIFs have the following configurations:
• VIF A (in us-east-1) advertises 172.16.0.0/16 and has an AS_PATH attribute of 65001, 65001,
65001
Private virtual interface routing example 12

AWS Direct Connect User Guide
• VIF B (in us-east-1) advertises 172.16.0.0/16 and has an AS_PATH attribute of 65001, 65001
• VIF C (in us-west-1) advertises 172.16.0.0/16 and has an AS_PATH attribute of 65001
If you change the CIDR range configuration of VIF C, routes that fall in to the VIF C CIDR range use
VIF C because it has the longest prefix length.
• VIF C (in us-west-1) advertises 172.16.0.0/24 and has an AS_PATH attribute of 65001
Private virtual interface routing example 13

AWS Direct Connect User Guide
AWS Direct Connect Resiliency Toolkit
AWS offers customers the ability to achieve highly resilient network connections between Amazon
Virtual Private Cloud (Amazon VPC) and their on-premises infrastructure. The AWS Direct Connect
Resiliency Toolkit provides a connection wizard with multiple resiliency models. These models help
you to determine, and then place an order for the number of dedicated connections to achieve
your SLA objective. You select a resiliency model, and then the AWS Direct Connect Resiliency
Toolkit guides you through the dedicated connection ordering process. The resiliency models are
designed to ensure that you have the appropriate number of dedicated connections in multiple
locations.
The AWS Direct Connect Resiliency Toolkit has the following benefits:
• Provides guidance on how you determine and then order the appropriate redundant AWS Direct
Connect dedicated connections.
• Ensures that the redundant dedicated connections have the same speed.
• Automatically configures the dedicated connection names.
• Automatically approves your dedicated connections when you have an existing AWS account and
you select a known AWS Direct Connect Partner. The Letter of Authority (LOA) is available for
immediate download.
• Automatically creates a support ticket for the dedicated connection approval when you are a
new AWS customer, or you select an unknown (Other) partner.
• Provides an order summary for your dedicated connections, with the SLA that you can achieve
and the port-hour cost for the ordered dedicated connections.
• Creates link aggregation groups (LAGs), and adds the appropriate number of dedicated
connections to the LAGs when you choose a speed other than 1 Gbps, 10 Gbps, 100 Gbps, or 400
Gbps.
• Provides a LAG summary with the dedicated connection SLA that you can achieve, and the total
port-hour cost for each ordered dedicated connection as part of the LAG.
• Prevents you from terminating the dedicated connections on the same AWS Direct Connect
device.
• Provides a way for you to test your configuration for resiliency. You work with AWS to bring
down the BGP peering session in order to verify that traffic routes to one of your redundant
virtual interfaces. For more information, see the section called “Failover Test”.
14

AWS Direct Connect User Guide
• Provides Amazon CloudWatch metrics for connections and virtual interfaces. For more
information, see Monitor Direct Connect resources.
The following resiliency models are available in the AWS Direct Connect Resiliency Toolkit:
• Maximum Resiliency: This model provides you a way to order dedicated connections to achieve
an SLA of 99.99%. It requires you to meet all of the requirements for achieving the SLA that are
specified in the AWS Direct Connect Service Level Agreement.
• High Resiliency: This model provides you a way to order dedicated connections to achieve an
SLA of 99.9%. It requires you to meet all of the requirements for achieving the SLA that are
specified in the AWS Direct Connect Service Level Agreement.
• Development and Test: This model provides you a way to achieve development and test
resiliency for non-critical workloads, by using separate connections that terminate on separate
devices in one location.
• Classic. This model is intended for users that have existing connections and want to add
additional connections. This model does not provide an SLA.
The best practice is to use the Connection wizard in the AWS Direct Connect Resiliency Toolkit to
order the dedicated connections to achieve your SLA objective.
After you select the resiliency model, the AWS Direct Connect Resiliency Toolkit steps you through
the following procedures:
• Selecting the number of dedicated connections
• Selecting the connection capacity, and the dedicated connection location
• Ordering the dedicated connections
• Verifying that the dedicated connections are ready to use
• Downloading your Letter of Authority (LOA-CFA) for each dedicated connection
• Verifying that your configuration meets your resiliency requirements
Prerequisites
AWS Direct Connect supports the following port speeds over single-mode fiber: 1000BASE-LX
(1310 nm) transceiver for 1 gigabit Ethernet, a 10GBASE-LR (1310 nm) transceiver for 10 gigabit, a
100GBASE-LR4 for 100 gigabit Ethernet, or a 400GBASE-LR4 for 400 Gbps Ethernet.
Prerequisites 15

AWS Direct Connect User Guide
You can set up an AWS Direct Connect connection in one of the following ways:
Model Bandwidth Method
Dedicated connection 1 Gbps, 10 Gbps, 100 Gbps,
and 400 Gbps
Work with an AWS Direct
Connect Partner or a network
provider to connect a router
from your data center, office,
or colocation environment
to an AWS Direct Connect
location. The network
provider does not have to
be an AWS Direct Connect
Partner to connect you to a
dedicated connection. AWS
Direct Connect dedicated
connections support these
port speeds over single-mo
de fiber: 1 Gbps: 1000BASE-
LX (1310 nm), 10 Gbps:
10GBASE-LR (1310 nm),
100Gbps: 100GBASE-LR4, or
400GBASE-LR4 for 400 Gbps
Ethernet.
Hosted connection 50 Mbps, 100 Mbps, 200
Mbps, 300 Mbps, 400 Mbps,
500 Mbps, 1 Gbps, 2 Gbps, 5
Gbps, 10 Gbps, and 25 Gbps.
Work with a partner in the
AWS Direct Connect Partner
Program to connect a router
from your data center, office,
or colocation environment
to an AWS Direct Connect
location.
Only certain partners provide
higher capacity connections.
Prerequisites 16

AWS Direct Connect User Guide
For connections to AWS Direct Connect with bandwidths of 1 Gbps or higher, ensure that your
network meets the following requirements:
• Your network must use single-mode fiber with a 1000BASE-LX (1310 nm) transceiver for 1
gigabit Ethernet, a 10GBASE-LR (1310 nm) transceiver for 10 gigabit, a 100GBASE-LR4 for 100
gigabit Ethernet, or a 400GBASE-LR4 for 400 Gbps Ethernet.
• Auto-negotiation for a port must be disabled for a connection with a port speed of more than
1 Gbps. However, depending on the AWS Direct Connect endpoint serving your connection,
auto-negotiation might need to be enabled or disabled for 1 Gbps connections. If your virtual
interface remains down, see Troubleshooting layer 2 (data link) issues.
• 802.1Q VLAN encapsulation must be supported across the entire connection, including
intermediate devices.
• Your device must support Border Gateway Protocol (BGP) and BGP MD5 authentication.
• (Optional) You can configure Bidirectional Forwarding Detection (BFD) on your network.
Asynchronous BFD is automatically enabled for each AWS Direct Connect virtual interface.
It's automatically enabled for Direct Connect virtual interfaces, but does not take effect until
you configure it on your router. For more information, see Enable BFD for a Direct Connect
connection.
Make sure you have the following information before you begin your configuration:
• The resiliency model that you want to use.
• The speed, location, and partner for all of your connections.
You only need the speed for one connection.
Maximum resiliency
You can achieve maximum resiliency for critical workloads by using separate connections that
terminate on separate devices in more than one location (as shown in the following figure).
This model provides resiliency against device, connectivity, and complete location failures. The
following figure shows both connections from each customer data center going to the same AWS
Direct Connect locations. You can optionally have each connection from a customer data center
going to different locations.
Maximum resiliency 17

AWS Direct Connect User Guide
For the procedure for using the AWS Direct Connect Resiliency Toolkit to configure a maximum
resiliency model, see Configure maximum resiliency.
High resiliency
You can achieve high resiliency for critical workloads by using two single connections to multiple
locations (as shown in the following figure). This model provides resiliency against connectivity
failures caused by a fiber cut or a device failure. It also helps prevent a complete location failure.
High resiliency 18

AWS Direct Connect User Guide
For the procedure for using the AWS Direct Connect Resiliency Toolkit to configure a high resiliency
model, see Configure high resiliency.
Development and test
You can achieve development and test resiliency for non-critical workloads by using separate
connections that terminate on separate devices in one location (as shown in the following figure).
This model provides resiliency against device failure, but does not provide resiliency against
location failure.
Development and test 19

AWS Direct Connect User Guide
For the procedure for using the AWS Direct Connect Resiliency Toolkit to configure a maximum
resiliency model, see Configure development and test resiliency.
Classic
Select Classic when you have existing connections.
The following procedures demonstrate the common scenarios to get set up with an AWS Direct
Connect connection.
Prerequisites
For connections to AWS Direct Connect with port speeds of 1 Gbps or higher, ensure that your
network meets the following requirements:
Classic 20

AWS Direct Connect User Guide
• Your network must use single-mode fiber with a 1000BASE-LX (1310 nm) transceiver for 1
gigabit Ethernet, a 10GBASE-LR (1310 nm) transceiver for 10 gigabit, a 100GBASE-LR4 for 100
gigabit Ethernet, or a 400GBASE-LR4 for 400 Gbps Ethernet.
• Auto-negotiation for a port must be disabled for a connection with a port speed of more than
1 Gbps. However, depending on the AWS Direct Connect endpoint serving your connection,
auto-negotiation might need to be enabled or disabled for 1 Gbps connections. If your virtual
interface remains down, see Troubleshooting layer 2 (data link) issues.
• 802.1Q VLAN encapsulation must be supported across the entire connection, including
intermediate devices.
• Your device must support Border Gateway Protocol (BGP) and BGP MD5 authentication.
• (Optional) You can configure Bidirectional Forwarding Detection (BFD) on your network.
Asynchronous BFD is automatically enabled for each AWS Direct Connect virtual interface.
It's automatically enabled for Direct Connect virtual interfaces, but does not take effect until
you configure it on your router. For more information, see Enable BFD for a Direct Connect
connection.
For the procedure for using the AWS Direct Connect Resiliency Toolkit to configure a Classic
connection, see Configure a Classic connection.
AWS Direct Connect FailoverTest
Use the AWS Direct Connect Resiliency Toolkit to verify traffic routes and that those routes meet
your resiliency requirements.
For the procedures for using the AWS Direct Connect Resiliency Toolkit to perform failover tests,
see Failover Test.
Use the AWS Direct Connect Resiliency Toolkit to configure
AWS Direct Connect for maximum resiliency
In this example, the AWS Direct Connect Resiliency Toolkit is used to configure a maximum
resiliency model
Tasks
• Step 1: Sign up for AWS
Failover test 21

AWS Direct Connect User Guide
• Step 2: Configure the resiliency model
• Step 3: Create your virtual interfaces
• Step 4: Verify your virtual interface resiliency configuration
• Step 5: Verify your virtual interfaces connectivity
Step 1: Sign up for AWS
To use AWS Direct Connect, you need an AWS account if you don't already have one.
Sign up for an AWS account
If you do not have an AWS account, complete the following steps to create one.
To sign up for an AWS account
1. Open https://portal.aws.amazon.com/billing/signup.
2. Follow the online instructions.
Part of the sign-up procedure involves receiving a phone call and entering a verification code
on the phone keypad.
When you sign up for an AWS account, an AWS account root user is created. The root user
has access to all AWS services and resources in the account. As a security best practice, assign
administrative access to a user, and use only the root user to perform tasks that require root
user access.
AWS sends you a confirmation email after the sign-up process is complete. At any time, you can
view your current account activity and manage your account by going to https://aws.amazon.com/
and choosing My Account.
Create a user with administrative access
After you sign up for an AWS account, secure your AWS account root user, enable AWS IAM Identity
Center, and create an administrative user so that you don't use the root user for everyday tasks.
Secure your AWS account root user
1. Sign in to the AWS Management Console as the account owner by choosing Root user and
entering your AWS account email address. On the next page, enter your password.
Step 1: Sign up for AWS 22

AWS Direct Connect User Guide
For help signing in by using root user, see Signing in as the root user in the AWS Sign-In User
Guide.
2. Turn on multi-factor authentication (MFA) for your root user.
For instructions, see Enable a virtual MFA device for your AWS account root user (console) in
the IAM User Guide.
Create a user with administrative access
1. Enable IAM Identity Center.
For instructions, see Enabling AWS IAM Identity Center in the AWS IAM Identity Center User
Guide.
2. In IAM Identity Center, grant administrative access to a user.
For a tutorial about using the IAM Identity Center directory as your identity source, see
Configure user access with the default IAM Identity Center directory in the AWS IAM Identity
Center User Guide.
Sign in as the user with administrative access
• To sign in with your IAM Identity Center user, use the sign-in URL that was sent to your email
address when you created the IAM Identity Center user.
For help signing in using an IAM Identity Center user, see Signing in to the AWS access portal in
the AWS Sign-In User Guide.
Assign access to additional users
1. In IAM Identity Center, create a permission set that follows the best practice of applying least-
privilege permissions.
For instructions, see Create a permission set in the AWS IAM Identity Center User Guide.
2. Assign users to a group, and then assign single sign-on access to the group.
For instructions, see Add groups in the AWS IAM Identity Center User Guide.
Step 1: Sign up for AWS 23

AWS Direct Connect User Guide
Step 2: Configure the resiliency model
To configure a maximum resiliency model
1. Open the AWS Direct Connect console at https://console.aws.amazon.com/directconnect/v2/
home.
2. In the navigation pane, choose Connections, and then choose Create a connection.
3. Under Connection ordering type, choose Connection wizard.
4. Under Resiliency level, choose Maximum Resiliency, and then choose Next.
5. On the Configure connections pane, under Connection settings, do the following:
a. For Bandwidth, choose the dedicated connection bandwidth.
This bandwidth applies to all of the created connections.
b. For First location service provider, select the appropriate AWS Direct Connect location for
the dedicated connection.
c. If applicable, for First Sub location, choose the floor closest to you or your network
provider. This option is only available if the location has meet-me rooms (MMRs) on multiple
floors of the building.
d. If you selected Other for First location service provider, for Name of other provider, enter
the name of the partner that you use.
e. For Second location service provider, select the appropriate AWS Direct Connect location.
f. If applicable, for Second Sub location, choose the floor closest to you or your network
provider. This option is only available if the location has meet-me rooms (MMRs) on multiple
floors of the building.
g. If you selected Other for Second location service provider, for Name of other provider,
enter the name of the partner that you use.
h. (Optional) Add or remove a tag.
[Add a tag] Choose Add tag and do the following:
• For Key, enter the key name.
• For Value, enter the key value.
[Remove a tag] Next to the tag, choose Remove tag.
6. Choose Next.
Step 2: Configure the resiliency model 24

AWS Direct Connect User Guide
7. Review your connections, and then choose Continue.
If your LOAs are ready, you can choose Download LOA, and then click Continue.
It can take up to 72 hours for AWS to review your request and provision a port for your
connection. During this time, you might receive an email with a request for more information
about your use case or the specified location. The email is sent to the email address that
you used when you signed up for AWS. You must respond within 7 days or the connection is
deleted.
Step 3: Create your virtual interfaces
You can create a private virtual interface to connect to your VPC. Or, you can create a public virtual
interface to connect to public AWS services that aren't in a VPC. When you create a private virtual
interface to a VPC, you need a private virtual interface for each VPC that you're connecting to. For
example, you need three private virtual interfaces to connect to three VPCs.
Before you begin, ensure that you have the following information:
Resource Required information
Connection The AWS Direct Connect connection or link aggregation group (LAG) for
which you are creating the virtual interface.
Virtual
interface name
A name for the virtual interface.
Virtual
interface owner
If you're creating the virtual interface for another account, you need the
AWS account ID of the other account.
(Private virtual
interface only)
Connection
For connecting to a VPC in the same AWS Region, you need the virtual
private gateway for your VPC. The ASN for the Amazon side of the BGP
session is inherited from the virtual private gateway. When you create a
virtual private gateway, you can specify your own private ASN. Otherwise,
Amazon provides a default ASN. For more information, see Create a Virtual
Private Gateway in the Amazon VPC User Guide. For connecting to a VPC
through a Direct Connect gateway, you need the Direct Connect gateway.
For more information, see Direct Connect Gateways.
Step 3: Create your virtual interfaces 25

AWS Direct Connect User Guide
Resource Required information
VLAN A unique virtual local area network (VLAN) tag that's not already in use on
your connection. The value must be between 1 and 4094 and must comply
with the Ethernet 802.1Q standard. This tag is required for any traffic
traversing the AWS Direct Connect connection.
If you have a hosted connection, your AWS Direct Connect Partner provides
this value. You can’t modify the value after you have created the virtual
interface.
Step 3: Create your virtual interfaces 26

AWS Direct Connect User Guide
Resource Required information
Peer IP
addresses
A virtual interface can support a BGP peering session for IPv4, IPv6, or
one of each (dual-stack). Do not use Elastic IPs (EIPs) or Bring your own IP
addresses (BYOIP) from the Amazon Pool to create a public virtual interface
. You cannot create multiple BGP sessions for the same IP addressing family
on the same virtual interface. The IP address ranges are assigned to each
end of the virtual interface for the BGP peering session.
• IPv4:
• (Public virtual interface only) You must specify unique public IPv4
addresses that you own. The value can be one of the following:
• A customer-owned IPv4 CIDR
These can be any public IPs (customer-owned or provided by AWS),
but the same subnet mask must be used for both your peer IP and
the AWS router peer IP. For example, if you allocate a /31 range, such
as 203.0.113.0/31 , you could use 203.0.113.0 for your peer
IP and 203.0.113.1 for the AWS peer IP. Or, if you allocate a /24
range, such as 198.51.100.0/24 , you could use 198.51.100.10
for your peer IP and 198.51.100.20 for the AWS peer IP.
• An IP range owned by your AWS Direct Connect Partner or ISP, along
with an LOA-CFA authorization
• An AWS-provided /31 CIDR. Contact AWS Support to request a public
IPv4 CIDR (and provide a use case in your request)
Note
We cannot guarantee that we will be able to fulfill all requests
for AWS-provided public IPv4 addresses.
• (Private virtual interface only) Amazon can generate private IPv4
addresses for you. If you specify your own, ensure that you specify
private CIDRs for your router interface and the AWS Direct Connect
interface only. For example, do not specify other IP addresses from your
local network. Similar to a public virtual interface, the same subnet
mask must be used for both your peer IP and the AWS router peer IP.
Step 3: Create your virtual interfaces 27

AWS Direct Connect User Guide
Resource Required information
For example, if you allocate a /30 range, such as 192.168.0.0/30 ,
you could use 192.168.0.1 for your peer IP and 192.168.0.2 for
the AWS peer IP.
• IPv6: Amazon automatically allocates you a /125 IPv6 CIDR. You cannot
specify your own peer IPv6 addresses.
Address family Whether the BGP peering session will be over IPv4 or IPv6.
BGP informati
on
• A public or private Border Gateway Protocol (BGP) Autonomous System
Number (ASN) for your side of the BGP session. If you are using a public
ASN, you must own it. If you are using a private ASN, you can set a custom
ASN value. For a 16-bit ASN, the value must be in the 64512 to 65534
range. For a 32-bit ASN, the value must be in the 1 to 2147483647 range.
Autonomous System (AS) prepending does not work if you use a private
ASN for a public virtual interface.
• AWS enables MD5 by default. You cannot modify this option.
• An MD5 BGP authentication key. You can provide your own, or you can let
Amazon generate one for you.
Step 3: Create your virtual interfaces 28

AWS Direct Connect User Guide
Resource Required information
(Public virtual
interface
only) Prefixes
you want to
advertise
Public IPv4 routes or IPv6 routes to advertise over BGP. You must advertise
at least one prefix using BGP, up to a maximum of 1,000 prefixes.
• IPv4: The IPv4 CIDR can overlap with another public IPv4 CIDR announced
using AWS Direct Connect when either of the following is true:
• The CIDRs are from different AWS Regions. Make sure that you apply
BGP community tags on the public prefixes.
• You use AS_PATH when you have a public ASN in an active/passive
configuration.
For more information, see Routing policies and BGP communities.
• IPv6: Specify a prefix length of /64 or shorter.
• You may add additional prefixes to an existing public VIF and advertise
those by contacting AWS support. In your support case, provide a list of
additional CIDR prefixes you want to add to the public VIF and advertise.
• You can specify any prefix length over a Direct Connect public virtual
interface. IPv4 should support anything from /1 - /32, and IPv6 should
support anything from /1 - /64.
(Private virtual
interface only)
Jumbo frames
The maximum transmission unit (MTU) of packets over AWS Direct Connect.
The default is 1500. Setting the MTU of a virtual interface to 9001 (jumbo
frames) can cause an update to the underlying physical connection if it
wasn't updated to support jumbo frames. Updating the connection disrupts
network connectivity for all virtual interfaces associated with the connectio
n for up to 30 seconds. Jumbo frames apply only to propagated routes from
AWS Direct Connect. If you add static routes to a route table that point to
your virtual private gateway, then traffic routed through the static routes
is sent using 1500 MTU. To check whether a connection or virtual interface
supports jumbo frames, select it in the AWS Direct Connect console and find
Jumbo frame capable on the virtual interface General configuration page.
Step 3: Create your virtual interfaces 29

AWS Direct Connect User Guide
Resource Required information
(Transit virtual
interface only)
Jumbo frames
The maximum transmission unit (MTU) of packets over AWS Direct Connect.
The default is 1500. Setting the MTU of a virtual interface to 8500 (jumbo
frames) can cause an update to the underlying physical connection if it
wasn't updated to support jumbo frames. Updating the connection disrupts
network connectivity for all virtual interfaces associated with the connectio
n for up to 30 seconds. Jumbo frames are supported up to 8500 MTU for
Direct Connect. Static routes and propagated routes configured in the
Transit Gateway Route Table will support Jumbo Frames, including from
EC2 instances with VPC static route table entries to the Transit Gateway
Attachment. To check whether a connection or virtual interface supports
jumbo frames, select it in the AWS Direct Connect console and find Jumbo
frame capable on the virtual interface General configuration page.
If your public prefixes or ASNs belong to an ISP or network carrier, we request additional
information from you. This can be a document using an official company letterhead, or an email
from the company's domain name verifying that the network prefix/ASN can be used by you.
When you create a public virtual interface, it can take up to 72 hours for AWS to review and
approve your request.
To provision a public virtual interface to non-VPC services
1. Open the AWS Direct Connect console at https://console.aws.amazon.com/directconnect/v2/
home.
2. In the navigation pane, choose Virtual Interfaces.
3. Choose Create virtual interface.
4. Under Virtual interface type, for Type, choose Public.
5. Under Public virtual interface settings, do the following:
a. For Virtual interface name, enter a name for the virtual interface.
b. For Connection, choose the Direct Connect connection that you want to use for this
interface.
c. For VLAN, enter the ID number for your virtual local area network (VLAN).
Step 3: Create your virtual interfaces 30

AWS Direct Connect User Guide
d. For BGP ASN, enter the Border Gateway Protocol (BGP) Autonomous System Number (ASN)
of your gateway.
The valid values are 1-2147483647.
6. Under Additional settings, do the following:
a. To configure an IPv4 BGP or an IPv6 peer, do the following:
[IPv4] To configure an IPv4 BGP peer, choose IPv4 and do one of the following:
• To specify these IP addresses yourself, for Your router peer ip, enter the destination IPv4
CIDR address to which Amazon should send traffic.
• For Amazon router peer IP, enter the IPv4 CIDR address to use to send traffic to AWS.
[IPv6] To configure an IPv6 BGP peer, choose IPv6. The peer IPv6 addresses are
automatically assigned from Amazon's pool of IPv6 addresses. You cannot specify custom
IPv6 addresses.
b. To provide your own BGP key, enter your BGP MD5 key.
If you do not enter a value, we generate a BGP key.
c. To advertise prefixes to Amazon, for Prefixes you want to advertise, enter the IPv4 CIDR
destination addresses (separated by commas) to which traffic should be routed over the
virtual interface.
d. (Optional) Add or remove a tag.
[Add a tag] Choose Add tag and do the following:
• For Key, enter the key name.
• For Value, enter the key value.
[Remove a tag] Next to the tag, choose Remove tag.
7. Choose Create virtual interface.
To provision a private virtual interface to a VPC
1. Open the AWS Direct Connect console at https://console.aws.amazon.com/directconnect/v2/
home.
2. In the navigation pane, choose Virtual Interfaces.
Step 3: Create your virtual interfaces 31

AWS Direct Connect User Guide
3. Choose Create virtual interface.
4. Under Virtual interface type, for Type, choose Private.
5. Under Private virtual interface settings, do the following:
a. For Virtual interface name, enter a name for the virtual interface.
b. For Connection, choose the Direct Connect connection that you want to use for this
interface.
c. For Gateway type, choose Virtual private gateway, or Direct Connect gateway.
d. For Virtual interface owner, choose Another AWS account, and then enter the AWS
account.
e. For Virtual private gateway, choose the virtual private gateway to use for this interface.
f. For VLAN, enter the ID number for your virtual local area network (VLAN).
g. For BGP ASN, enter the Border Gateway Protocol Autonomous System Number of your on-
premises peer router for the new virtual interface.
The valid values are 1 to 2147483647.
6. Under Additional Settings, do the following:
a. To configure an IPv4 BGP or an IPv6 peer, do the following:
[IPv4] To configure an IPv4 BGP peer, choose IPv4 and do one of the following:
• To specify these IP addresses yourself, for Your router peer ip, enter the destination IPv4
CIDR address to which Amazon should send traffic.
• For Amazon router peer ip, enter the IPv4 CIDR address to use to send traffic to AWS.
Important
If you let AWS auto-assign IPv4 addresses, a /29 CIDR will be allocated from
169.254.0.0/16 IPv4 Link-Local according to RFC 3927 for point-to-point
connectivity. AWS does not recommend this option if you intend to use the
customer router peer IP address as the source and/or destination for VPC traffic.
Instead you should use RFC 1918 or other addressing, and specify the address
yourself.
• For more information about RFC 1918, see Address Allocation for Private
Internets.
Step 3: Create your virtual interfaces 32

AWS Direct Connect User Guide
• For more information about RFC 3927, see Dynamic Configuration of IPv4 Link-
Local Addresses.
[IPv6] To configure an IPv6 BGP peer, choose IPv6. The peer IPv6 addresses are
automatically assigned from Amazon's pool of IPv6 addresses. You cannot specify custom
IPv6 addresses.
b. To change the maximum transmission unit (MTU) from 1500 (default) to 9001 (jumbo
frames), select Jumbo MTU (MTU size 9001).
c. (Optional) Under Enable SiteLink, choose Enabled to enable direct connectivity between
Direct Connect points of presence.
d. (Optional) Add or remove a tag.
[Add a tag] Choose Add tag and do the following:
• For Key, enter the key name.
• For Value, enter the key value.
[Remove a tag] Next to the tag, choose Remove tag.
7. Choose Create virtual interface.
Step 4: Verify your virtual interface resiliency configuration
After you have established virtual interfaces to the AWS Cloud or to Amazon VPC, perform a virtual
interface failover test to verify that your configuration meets your resiliency requirements. For
more information, see the section called “Failover Test”.
Step 5: Verify your virtual interfaces connectivity
After you have established virtual interfaces to the AWS Cloud or to Amazon VPC, you can verify
your AWS Direct Connect connection using the following procedures.
To verify your virtual interface connection to the AWS Cloud
•
Run traceroute and verify that the AWS Direct Connect identifier is in the network trace.
Step 4: Verify your virtual interface resiliency configuration 33

AWS Direct Connect User Guide
To verify your virtual interface connection to Amazon VPC
1. Using a pingable AMI, such as an Amazon Linux AMI, launch an EC2 instance into the VPC that
is attached to your virtual private gateway. The Amazon Linux AMIs are available in the Quick
Start tab when you use the instance launch wizard in the Amazon EC2 console. For more
information, see Launch an Instance in the Amazon EC2 User Guide. Ensure that the security
group that's associated with the instance includes a rule permitting inbound ICMP traffic (for
the ping request).
2. After the instance is running, get its private IPv4 address (for example, 10.0.0.4). The Amazon
EC2 console displays the address as part of the instance details.
3. Ping the private IPv4 address and get a response.
Use the AWS Direct Connect Resiliency Toolkit to configure
AWS Direct Connect for high resiliency
In this example, the AWS Direct Connect Resiliency Toolkit is used to configure a high resiliency
model
Tasks
• Step 1: Sign up for AWS
• Step 2: Configure the resiliency model
• Step 3: Create your virtual interfaces
• Step 4: Verify your virtual interface resiliency configuration
• Step 5: Verify your virtual interfaces connectivity
Step 1: Sign up for AWS
To use AWS Direct Connect, you need an AWS account if you don't already have one.
Sign up for an AWS account
If you do not have an AWS account, complete the following steps to create one.
To sign up for an AWS account
1. Open https://portal.aws.amazon.com/billing/signup.
Configure high resiliency 34

AWS Direct Connect User Guide
2. Follow the online instructions.
Part of the sign-up procedure involves receiving a phone call and entering a verification code
on the phone keypad.
When you sign up for an AWS account, an AWS account root user is created. The root user
has access to all AWS services and resources in the account. As a security best practice, assign
administrative access to a user, and use only the root user to perform tasks that require root
user access.
AWS sends you a confirmation email after the sign-up process is complete. At any time, you can
view your current account activity and manage your account by going to https://aws.amazon.com/
and choosing My Account.
Create a user with administrative access
After you sign up for an AWS account, secure your AWS account root user, enable AWS IAM Identity
Center, and create an administrative user so that you don't use the root user for everyday tasks.
Secure your AWS account root user
1. Sign in to the AWS Management Console as the account owner by choosing Root user and
entering your AWS account email address. On the next page, enter your password.
For help signing in by using root user, see Signing in as the root user in the AWS Sign-In User
Guide.
2. Turn on multi-factor authentication (MFA) for your root user.
For instructions, see Enable a virtual MFA device for your AWS account root user (console) in
the IAM User Guide.
Create a user with administrative access
1. Enable IAM Identity Center.
For instructions, see Enabling AWS IAM Identity Center in the AWS IAM Identity Center User
Guide.
2. In IAM Identity Center, grant administrative access to a user.
Step 1: Sign up for AWS 35

AWS Direct Connect User Guide
For a tutorial about using the IAM Identity Center directory as your identity source, see
Configure user access with the default IAM Identity Center directory in the AWS IAM Identity
Center User Guide.
Sign in as the user with administrative access
• To sign in with your IAM Identity Center user, use the sign-in URL that was sent to your email
address when you created the IAM Identity Center user.
For help signing in using an IAM Identity Center user, see Signing in to the AWS access portal in
the AWS Sign-In User Guide.
Assign access to additional users
1. In IAM Identity Center, create a permission set that follows the best practice of applying least-
privilege permissions.
For instructions, see Create a permission set in the AWS IAM Identity Center User Guide.
2. Assign users to a group, and then assign single sign-on access to the group.
For instructions, see Add groups in the AWS IAM Identity Center User Guide.
Step 2: Configure the resiliency model
To configure a high resiliency model
1. Open the AWS Direct Connect console at https://console.aws.amazon.com/directconnect/v2/
home.
2. In the navigation pane, choose Connections, and then choose Create a connection.
3. Under Connection ordering type, choose Connection wizard.
4. Under Resiliency level, choose High Resiliency, and then choose Next.
5. On the Configure connections pane, under Connection settings, do the following:
a. For bandwidth, choose the connection bandwidth.
This bandwidth applies to all of the created connections.
Step 2: Configure the resiliency model 36

AWS Direct Connect User Guide
b. For First location service provider, select the appropriate AWS Direct Connect location.
c. If applicable, for First Sub location, choose the floor closest to you or your network
provider. This option is only available if the location has meet-me rooms (MMRs) on multiple
floors of the building.
d. If you selected Other for First location service provider, for Name of other provider, enter
the name of the partner that you use.
e. For Second location service provider, select the appropriate AWS Direct Connect location.
f. If applicable, for Second Sub location, choose the floor closest to you or your network
provider. This option is only available if the location has meet-me rooms (MMRs) on multiple
floors of the building.
g. If you selected Other for Second location service provider, for Name of other provider,
enter the name of the partner that you use.
h. (Optional) Add or remove a tag.
[Add a tag] Choose Add tag and do the following:
• For Key, enter the key name.
• For Value, enter the key value.
[Remove a tag] Next to the tag, choose Remove tag.
6. Choose Next.
7. Review your connections, and then choose Continue.
If your LOAs are ready, you can choose Download LOA, and then click Continue.
It can take up to 72 hours for AWS to review your request and provision a port for your
connection. During this time, you might receive an email with a request for more information
about your use case or the specified location. The email is sent to the email address that
you used when you signed up for AWS. You must respond within 7 days or the connection is
deleted.
Step 3: Create your virtual interfaces
You can create a private virtual interface to connect to your VPC. Or, you can create a public virtual
interface to connect to public AWS services that aren't in a VPC. When you create a private virtual
Step 3: Create your virtual interfaces 37

AWS Direct Connect User Guide
interface to a VPC, you need a private virtual interface for each VPC that you're connecting to. For
example, you need three private virtual interfaces to connect to three VPCs.
Before you begin, ensure that you have the following information:
Resource Required information
Connection The AWS Direct Connect connection or link aggregation group (LAG) for
which you are creating the virtual interface.
Virtual
interface name
A name for the virtual interface.
Virtual
interface owner
If you're creating the virtual interface for another account, you need the
AWS account ID of the other account.
(Private virtual
interface only)
Connection
For connecting to a VPC in the same AWS Region, you need the virtual
private gateway for your VPC. The ASN for the Amazon side of the BGP
session is inherited from the virtual private gateway. When you create a
virtual private gateway, you can specify your own private ASN. Otherwise,
Amazon provides a default ASN. For more information, see Create a Virtual
Private Gateway in the Amazon VPC User Guide. For connecting to a VPC
through a Direct Connect gateway, you need the Direct Connect gateway.
For more information, see Direct Connect Gateways.
VLAN A unique virtual local area network (VLAN) tag that's not already in use on
your connection. The value must be between 1 and 4094 and must comply
with the Ethernet 802.1Q standard. This tag is required for any traffic
traversing the AWS Direct Connect connection.
If you have a hosted connection, your AWS Direct Connect Partner provides
this value. You can’t modify the value after you have created the virtual
interface.
Peer IP
addresses
A virtual interface can support a BGP peering session for IPv4, IPv6, or
one of each (dual-stack). Do not use Elastic IPs (EIPs) or Bring your own IP
addresses (BYOIP) from the Amazon Pool to create a public virtual interface
. You cannot create multiple BGP sessions for the same IP addressing family
Step 3: Create your virtual interfaces 38
AWS Direct Connect User Guide
Resource Required information
on the same virtual interface. The IP address ranges are assigned to each
end of the virtual interface for the BGP peering session.
• IPv4:
• (Public virtual interface only) You must specify unique public IPv4
addresses that you own. The value can be one of the following:
• A customer-owned IPv4 CIDR
These can be any public IPs (customer-owned or provided by AWS),
but the same subnet mask must be used for both your peer IP and
the AWS router peer IP. For example, if you allocate a /31 range, such
as 203.0.113.0/31 , you could use 203.0.113.0 for your peer
IP and 203.0.113.1 for the AWS peer IP. Or, if you allocate a /24
range, such as 198.51.100.0/24 , you could use 198.51.100.10
for your peer IP and 198.51.100.20 for the AWS peer IP.
• An IP range owned by your AWS Direct Connect Partner or ISP, along
with an LOA-CFA authorization
• An AWS-provided /31 CIDR. Contact AWS Support to request a public
IPv4 CIDR (and provide a use case in your request)
Note
We cannot guarantee that we will be able to fulfill all requests
for AWS-provided public IPv4 addresses.
• (Private virtual interface only) Amazon can generate private IPv4
addresses for you. If you specify your own, ensure that you specify
private CIDRs for your router interface and the AWS Direct Connect
interface only. For example, do not specify other IP addresses from your
local network. Similar to a public virtual interface, the same subnet
mask must be used for both your peer IP and the AWS router peer IP.
For example, if you allocate a /30 range, such as 192.168.0.0/30 ,
you could use 192.168.0.1 for your peer IP and 192.168.0.2 for
the AWS peer IP.
Step 3: Create your virtual interfaces 39

AWS Direct Connect User Guide
Resource Required information
• IPv6: Amazon automatically allocates you a /125 IPv6 CIDR. You cannot
specify your own peer IPv6 addresses.
Address family Whether the BGP peering session will be over IPv4 or IPv6.
BGP informati
on
• A public or private Border Gateway Protocol (BGP) Autonomous System
Number (ASN) for your side of the BGP session. If you are using a public
ASN, you must own it. If you are using a private ASN, you can set a custom
ASN value. For a 16-bit ASN, the value must be in the 64512 to 65534
range. For a 32-bit ASN, the value must be in the 1 to 2147483647 range.
Autonomous System (AS) prepending does not work if you use a private
ASN for a public virtual interface.
• AWS enables MD5 by default. You cannot modify this option.
• An MD5 BGP authentication key. You can provide your own, or you can let
Amazon generate one for you.
(Public virtual
interface
only) Prefixes
you want to
advertise
Public IPv4 routes or IPv6 routes to advertise over BGP. You must advertise
at least one prefix using BGP, up to a maximum of 1,000 prefixes.
• IPv4: The IPv4 CIDR can overlap with another public IPv4 CIDR announced
using AWS Direct Connect when either of the following is true:
• The CIDRs are from different AWS Regions. Make sure that you apply
BGP community tags on the public prefixes.
• You use AS_PATH when you have a public ASN in an active/passive
configuration.
For more information, see Routing policies and BGP communities.
• IPv6: Specify a prefix length of /64 or shorter.
• You may add additional prefixes to an existing public VIF and advertise
those by contacting AWS support. In your support case, provide a list of
additional CIDR prefixes you want to add to the public VIF and advertise.
• You can specify any prefix length over a Direct Connect public virtual
interface. IPv4 should support anything from /1 - /32, and IPv6 should
support anything from /1 - /64.
Step 3: Create your virtual interfaces 40

AWS Direct Connect User Guide
Resource Required information
(Private virtual
interface only)
Jumbo frames
The maximum transmission unit (MTU) of packets over AWS Direct Connect.
The default is 1500. Setting the MTU of a virtual interface to 9001 (jumbo
frames) can cause an update to the underlying physical connection if it
wasn't updated to support jumbo frames. Updating the connection disrupts
network connectivity for all virtual interfaces associated with the connectio
n for up to 30 seconds. Jumbo frames apply only to propagated routes from
AWS Direct Connect. If you add static routes to a route table that point to
your virtual private gateway, then traffic routed through the static routes
is sent using 1500 MTU. To check whether a connection or virtual interface
supports jumbo frames, select it in the AWS Direct Connect console and find
Jumbo frame capable on the virtual interface General configuration page.
(Transit virtual
interface only)
Jumbo frames
The maximum transmission unit (MTU) of packets over AWS Direct Connect.
The default is 1500. Setting the MTU of a virtual interface to 8500 (jumbo
frames) can cause an update to the underlying physical connection if it
wasn't updated to support jumbo frames. Updating the connection disrupts
network connectivity for all virtual interfaces associated with the connectio
n for up to 30 seconds. Jumbo frames are supported up to 8500 MTU for
Direct Connect. Static routes and propagated routes configured in the
Transit Gateway Route Table will support Jumbo Frames, including from
EC2 instances with VPC static route table entries to the Transit Gateway
Attachment. To check whether a connection or virtual interface supports
jumbo frames, select it in the AWS Direct Connect console and find Jumbo
frame capable on the virtual interface General configuration page.
If your public prefixes or ASNs belong to an ISP or network carrier, AWS requests additional
information from you. This can be a document using an official company letterhead, or an email
from the company's domain name verifying that the network prefix/ASN can be used by you.
When you create a public virtual interface, it can take up to 72 hours for AWS to review and
approve your request.
Step 3: Create your virtual interfaces 41

AWS Direct Connect User Guide
To provision a public virtual interface to non-VPC services
1. Open the AWS Direct Connect console at https://console.aws.amazon.com/directconnect/v2/
home.
2. In the navigation pane, choose Virtual Interfaces.
3. Choose Create virtual interface.
4. Under Virtual interface type, for Type, choose Public.
5. Under Public virtual interface settings, do the following:
a. For Virtual interface name, enter a name for the virtual interface.
b. For Connection, choose the Direct Connect connection that you want to use for this
interface.
c. For VLAN, enter the ID number for your virtual local area network (VLAN).
d. For BGP ASN, enter the Border Gateway Protocol (BGP) Autonomous System Number (ASN)
of your gateway.
The valid values are 1-2147483647.
6. Under Additional settings, do the following:
a. To configure an IPv4 BGP or an IPv6 peer, do the following:
[IPv4] To configure an IPv4 BGP peer, choose IPv4 and do one of the following:
• To specify these IP addresses yourself, for Your router peer ip, enter the destination IPv4
CIDR address to which Amazon should send traffic.
• For Amazon router peer IP, enter the IPv4 CIDR address to use to send traffic to AWS.
[IPv6] To configure an IPv6 BGP peer, choose IPv6. The peer IPv6 addresses are
automatically assigned from Amazon's pool of IPv6 addresses. You cannot specify custom
IPv6 addresses.
b. To provide your own BGP key, enter your BGP MD5 key.
If you do not enter a value, we generate a BGP key.
c. To advertise prefixes to Amazon, for Prefixes you want to advertise, enter the IPv4 CIDR
destination addresses (separated by commas) to which traffic should be routed over the
virtual interface.
d. (Optional) Add or remove a tag.
Step 3: Create your virtual interfaces 42

AWS Direct Connect User Guide
[Add a tag] Choose Add tag and do the following:
• For Key, enter the key name.
• For Value, enter the key value.
[Remove a tag] Next to the tag, choose Remove tag.
7. Choose Create virtual interface.
To provision a private virtual interface to a VPC
1. Open the AWS Direct Connect console at https://console.aws.amazon.com/directconnect/v2/
home.
2. In the navigation pane, choose Virtual Interfaces.
3. Choose Create virtual interface.
4. Under Virtual interface type, for Type, choose Private.
5. Under Private virtual interface settings, do the following:
a. For Virtual interface name, enter a name for the virtual interface.
b. For Connection, choose the Direct Connect connection that you want to use for this
interface.
c. For Gateway type, choose Virtual private gateway, or Direct Connect gateway.
d. For Virtual interface owner, choose Another AWS account, and then enter the AWS
account.
e. For Virtual private gateway, choose the virtual private gateway to use for this interface.
f. For VLAN, enter the ID number for your virtual local area network (VLAN).
g. For BGP ASN, enter the Border Gateway Protocol Autonomous System Number of your on-
premises peer router for the new virtual interface.
The valid values are 1 to 2147483647.
6. Under Additional Settings, do the following:
a. To configure an IPv4 BGP or an IPv6 peer, do the following:
[IPv4] To configure an IPv4 BGP peer, choose IPv4 and do one of the following:
Step 3: Create your virtual interfaces 43

AWS Direct Connect User Guide
• To specify these IP addresses yourself, for Your router peer ip, enter the destination IPv4
CIDR address to which Amazon should send traffic.
• For Amazon router peer ip, enter the IPv4 CIDR address to use to send traffic to AWS.
Important
If you let AWS auto-assign IPv4 addresses, a /29 CIDR will be allocated from
169.254.0.0/16 IPv4 Link-Local according to RFC 3927 for point-to-point
connectivity. AWS does not recommend this option if you intend to use the
customer router peer IP address as the source and/or destination for VPC traffic.
Instead you should use RFC 1918 or other addressing, and specify the address
yourself.
• For more information about RFC 1918, see Address Allocation for Private
Internets.
• For more information about RFC 3927, see Dynamic Configuration of IPv4 Link-
Local Addresses.
[IPv6] To configure an IPv6 BGP peer, choose IPv6. The peer IPv6 addresses are
automatically assigned from Amazon's pool of IPv6 addresses. You cannot specify custom
IPv6 addresses.
b. To change the maximum transmission unit (MTU) from 1500 (default) to 9001 (jumbo
frames), select Jumbo MTU (MTU size 9001).
c. (Optional) Under Enable SiteLink, choose Enabled to enable direct connectivity between
Direct Connect points of presence.
d. (Optional) Add or remove a tag.
[Add a tag] Choose Add tag and do the following:
• For Key, enter the key name.
• For Value, enter the key value.
[Remove a tag] Next to the tag, choose Remove tag.
7. Choose Create virtual interface.
Step 3: Create your virtual interfaces 44

AWS Direct Connect User Guide
Step 4: Verify your virtual interface resiliency configuration
After you have established virtual interfaces to the AWS Cloud or to Amazon VPC, perform a virtual
interface failover test to verify that your configuration meets your resiliency requirements. For
more information, see the section called “Failover Test”.
Step 5: Verify your virtual interfaces connectivity
After you have established virtual interfaces to the AWS Cloud or to Amazon VPC, you can verify
your AWS Direct Connect connection using the following procedures.
To verify your virtual interface connection to the AWS Cloud
•
Run traceroute and verify that the AWS Direct Connect identifier is in the network trace.
To verify your virtual interface connection to Amazon VPC
1. Using a pingable AMI, such as an Amazon Linux AMI, launch an EC2 instance into the VPC that
is attached to your virtual private gateway. The Amazon Linux AMIs are available in the Quick
Start tab when you use the instance launch wizard in the Amazon EC2 console. For more
information, see Launch an Instance in the Amazon EC2 User Guide. Ensure that the security
group that's associated with the instance includes a rule permitting inbound ICMP traffic (for
the ping request).
2. After the instance is running, get its private IPv4 address (for example, 10.0.0.4). The Amazon
EC2 console displays the address as part of the instance details.
3. Ping the private IPv4 address and get a response.
Use the AWS Direct Connect Resiliency Toolkit to configure
AWS Direct Connect for development and test resiliency
In this example, the AWS Direct Connect Resiliency Toolkit is used to configure a development and
test resiliency model
Tasks
• Step 1: Sign up for AWS
• Step 2: Configure the resiliency model
Step 4: Verify your virtual interface resiliency configuration 45

AWS Direct Connect User Guide
• Step 3: Create a virtual interface
• Step 4: Verify your virtual interface resiliency configuration
• Step 5: Verify your virtual interface
Step 1: Sign up for AWS
To use AWS Direct Connect, you need an AWS account if you don't already have one.
Sign up for an AWS account
If you do not have an AWS account, complete the following steps to create one.
To sign up for an AWS account
1. Open https://portal.aws.amazon.com/billing/signup.
2. Follow the online instructions.
Part of the sign-up procedure involves receiving a phone call and entering a verification code
on the phone keypad.
When you sign up for an AWS account, an AWS account root user is created. The root user
has access to all AWS services and resources in the account. As a security best practice, assign
administrative access to a user, and use only the root user to perform tasks that require root
user access.
AWS sends you a confirmation email after the sign-up process is complete. At any time, you can
view your current account activity and manage your account by going to https://aws.amazon.com/
and choosing My Account.
Create a user with administrative access
After you sign up for an AWS account, secure your AWS account root user, enable AWS IAM Identity
Center, and create an administrative user so that you don't use the root user for everyday tasks.
Secure your AWS account root user
1. Sign in to the AWS Management Console as the account owner by choosing Root user and
entering your AWS account email address. On the next page, enter your password.
Step 1: Sign up for AWS 46

AWS Direct Connect User Guide
For help signing in by using root user, see Signing in as the root user in the AWS Sign-In User
Guide.
2. Turn on multi-factor authentication (MFA) for your root user.
For instructions, see Enable a virtual MFA device for your AWS account root user (console) in
the IAM User Guide.
Create a user with administrative access
1. Enable IAM Identity Center.
For instructions, see Enabling AWS IAM Identity Center in the AWS IAM Identity Center User
Guide.
2. In IAM Identity Center, grant administrative access to a user.
For a tutorial about using the IAM Identity Center directory as your identity source, see
Configure user access with the default IAM Identity Center directory in the AWS IAM Identity
Center User Guide.
Sign in as the user with administrative access
• To sign in with your IAM Identity Center user, use the sign-in URL that was sent to your email
address when you created the IAM Identity Center user.
For help signing in using an IAM Identity Center user, see Signing in to the AWS access portal in
the AWS Sign-In User Guide.
Assign access to additional users
1. In IAM Identity Center, create a permission set that follows the best practice of applying least-
privilege permissions.
For instructions, see Create a permission set in the AWS IAM Identity Center User Guide.
2. Assign users to a group, and then assign single sign-on access to the group.
For instructions, see Add groups in the AWS IAM Identity Center User Guide.
Step 1: Sign up for AWS 47

AWS Direct Connect User Guide
Step 2: Configure the resiliency model
To configure the resiliency model
1. Open the AWS Direct Connect console at https://console.aws.amazon.com/directconnect/v2/
home.
2. In the navigation pane, choose Connections, and then choose Create a connection.
3. Under Connection ordering type, choose Connection wizard.
4. Under Resiliency level, choose Development and test, and then choose Next.
5. On the Configure connections pane, under Connection settings, do the following:
a. For bandwidth, choose the connection bandwidth.
This bandwidth applies to all of the created connections.
b. For First location service provider, select the appropriate AWS Direct Connect location.
c. If applicable, for First Sub location, choose the floor closest to you or your network
provider. This option is only available if the location has meet-me rooms (MMRs) on multiple
floors of the building.
d. If you selected Other for First location service provider, for Name of other provider, enter
the name of the partner that you use.
e. (Optional) Add or remove a tag.
[Add a tag] Choose Add tag and do the following:
• For Key, enter the key name.
• For Value, enter the key value.
[Remove a tag] Next to the tag, choose Remove tag.
6. Choose Next.
7. Review your connections, and then choose Continue.
If your LOAs are ready, you can choose Download LOA, and then click Continue.
It can take up to 72 hours for AWS to review your request and provision a port for your
connection. During this time, you might receive an email with a request for more information
about your use case or the specified location. The email is sent to the email address that
Step 2: Configure the resiliency model 48

AWS Direct Connect User Guide
you used when you signed up for AWS. You must respond within 7 days or the connection is
deleted.
Step 3: Create a virtual interface
To begin using your AWS Direct Connect connection, you must create a virtual interface. You
can create a private virtual interface to connect to your VPC. Or, you can create a public virtual
interface to connect to public AWS services that aren't in a VPC. When you create a private virtual
interface to a VPC, you need a private virtual interface for each VPC that you're connecting to. For
example, you need three private virtual interfaces to connect to three VPCs.
Before you begin, ensure that you have the following information:
Resource Required information
Connection The AWS Direct Connect connection or link aggregation group (LAG) for
which you are creating the virtual interface.
Virtual
interface name
A name for the virtual interface.
Virtual
interface owner
If you're creating the virtual interface for another account, you need the
AWS account ID of the other account.
(Private virtual
interface only)
Connection
For connecting to a VPC in the same AWS Region, you need the virtual
private gateway for your VPC. The ASN for the Amazon side of the BGP
session is inherited from the virtual private gateway. When you create a
virtual private gateway, you can specify your own private ASN. Otherwise,
Amazon provides a default ASN. For more information, see Create a Virtual
Private Gateway in the Amazon VPC User Guide. For connecting to a VPC
through a Direct Connect gateway, you need the Direct Connect gateway.
For more information, see Direct Connect Gateways.
VLAN A unique virtual local area network (VLAN) tag that's not already in use on
your connection. The value must be between 1 and 4094 and must comply
with the Ethernet 802.1Q standard. This tag is required for any traffic
traversing the AWS Direct Connect connection.
Step 3: Create a virtual interface 49

AWS Direct Connect User Guide
Resource Required information
If you have a hosted connection, your AWS Direct Connect Partner provides
this value. You can’t modify the value after you have created the virtual
interface.
Step 3: Create a virtual interface 50

AWS Direct Connect User Guide
Resource Required information
Peer IP
addresses
A virtual interface can support a BGP peering session for IPv4, IPv6, or
one of each (dual-stack). Do not use Elastic IPs (EIPs) or Bring your own IP
addresses (BYOIP) from the Amazon Pool to create a public virtual interface
. You cannot create multiple BGP sessions for the same IP addressing family
on the same virtual interface. The IP address ranges are assigned to each
end of the virtual interface for the BGP peering session.
• IPv4:
• (Public virtual interface only) You must specify unique public IPv4
addresses that you own. The value can be one of the following:
• A customer-owned IPv4 CIDR
These can be any public IPs (customer-owned or provided by AWS),
but the same subnet mask must be used for both your peer IP and
the AWS router peer IP. For example, if you allocate a /31 range, such
as 203.0.113.0/31 , you could use 203.0.113.0 for your peer
IP and 203.0.113.1 for the AWS peer IP. Or, if you allocate a /24
range, such as 198.51.100.0/24 , you could use 198.51.100.10
for your peer IP and 198.51.100.20 for the AWS peer IP.
• An IP range owned by your AWS Direct Connect Partner or ISP, along
with an LOA-CFA authorization
• An AWS-provided /31 CIDR. Contact AWS Support to request a public
IPv4 CIDR (and provide a use case in your request)
Note
We cannot guarantee that we will be able to fulfill all requests
for AWS-provided public IPv4 addresses.
• (Private virtual interface only) Amazon can generate private IPv4
addresses for you. If you specify your own, ensure that you specify
private CIDRs for your router interface and the AWS Direct Connect
interface only. For example, do not specify other IP addresses from your
local network. Similar to a public virtual interface, the same subnet
mask must be used for both your peer IP and the AWS router peer IP.
Step 3: Create a virtual interface 51

AWS Direct Connect User Guide
Resource Required information
For example, if you allocate a /30 range, such as 192.168.0.0/30 ,
you could use 192.168.0.1 for your peer IP and 192.168.0.2 for
the AWS peer IP.
• IPv6: Amazon automatically allocates you a /125 IPv6 CIDR. You cannot
specify your own peer IPv6 addresses.
Address family Whether the BGP peering session will be over IPv4 or IPv6.
BGP informati
on
• A public or private Border Gateway Protocol (BGP) Autonomous System
Number (ASN) for your side of the BGP session. If you are using a public
ASN, you must own it. If you are using a private ASN, you can set a custom
ASN value. For a 16-bit ASN, the value must be in the 64512 to 65534
range. For a 32-bit ASN, the value must be in the 1 to 2147483647 range.
Autonomous System (AS) prepending does not work if you use a private
ASN for a public virtual interface.
• AWS enables MD5 by default. You cannot modify this option.
• An MD5 BGP authentication key. You can provide your own, or you can let
Amazon generate one for you.
Step 3: Create a virtual interface 52

AWS Direct Connect User Guide
Resource Required information
(Public virtual
interface
only) Prefixes
you want to
advertise
Public IPv4 routes or IPv6 routes to advertise over BGP. You must advertise
at least one prefix using BGP, up to a maximum of 1,000 prefixes.
• IPv4: The IPv4 CIDR can overlap with another public IPv4 CIDR announced
using AWS Direct Connect when either of the following is true:
• The CIDRs are from different AWS Regions. Make sure that you apply
BGP community tags on the public prefixes.
• You use AS_PATH when you have a public ASN in an active/passive
configuration.
For more information, see Routing policies and BGP communities.
• IPv6: Specify a prefix length of /64 or shorter.
• You may add additional prefixes to an existing public VIF and advertise
those by contacting AWS support. In your support case, provide a list of
additional CIDR prefixes you want to add to the public VIF and advertise.
• You can specify any prefix length over a Direct Connect public virtual
interface. IPv4 should support anything from /1 - /32, and IPv6 should
support anything from /1 - /64.
(Private virtual
interface only)
Jumbo frames
The maximum transmission unit (MTU) of packets over AWS Direct Connect.
The default is 1500. Setting the MTU of a virtual interface to 9001 (jumbo
frames) can cause an update to the underlying physical connection if it
wasn't updated to support jumbo frames. Updating the connection disrupts
network connectivity for all virtual interfaces associated with the connectio
n for up to 30 seconds. Jumbo frames apply only to propagated routes from
AWS Direct Connect. If you add static routes to a route table that point to
your virtual private gateway, then traffic routed through the static routes
is sent using 1500 MTU. To check whether a connection or virtual interface
supports jumbo frames, select it in the AWS Direct Connect console and find
Jumbo frame capable on the virtual interface General configuration page.
Step 3: Create a virtual interface 53

AWS Direct Connect User Guide
Resource Required information
(Transit virtual
interface only)
Jumbo frames
The maximum transmission unit (MTU) of packets over AWS Direct Connect.
The default is 1500. Setting the MTU of a virtual interface to 8500 (jumbo
frames) can cause an update to the underlying physical connection if it
wasn't updated to support jumbo frames. Updating the connection disrupts
network connectivity for all virtual interfaces associated with the connectio
n for up to 30 seconds. Jumbo frames are supported up to 8500 MTU for
Direct Connect. Static routes and propagated routes configured in the
Transit Gateway Route Table will support Jumbo Frames, including from
EC2 instances with VPC static route table entries to the Transit Gateway
Attachment. To check whether a connection or virtual interface supports
jumbo frames, select it in the AWS Direct Connect console and find Jumbo
frame capable on the virtual interface General configuration page.
If your public prefixes or ASNs belong to an ISP or network carrier, we request additional
information from you. This can be a document using an official company letterhead, or an email
from the company's domain name verifying that the network prefix/ASN can be used by you.
When you create a public virtual interface, it can take up to 72 hours for AWS to review and
approve your request.
To provision a public virtual interface to non-VPC services
1. Open the AWS Direct Connect console at https://console.aws.amazon.com/directconnect/v2/
home.
2. In the navigation pane, choose Virtual Interfaces.
3. Choose Create virtual interface.
4. Under Virtual interface type, for Type, choose Public.
5. Under Public virtual interface settings, do the following:
a. For Virtual interface name, enter a name for the virtual interface.
b. For Connection, choose the Direct Connect connection that you want to use for this
interface.
c. For VLAN, enter the ID number for your virtual local area network (VLAN).
Step 3: Create a virtual interface 54

AWS Direct Connect User Guide
d. For BGP ASN, enter the Border Gateway Protocol (BGP) Autonomous System Number (ASN)
of your gateway.
The valid values are 1-2147483647.
6. Under Additional settings, do the following:
a. To configure an IPv4 BGP or an IPv6 peer, do the following:
[IPv4] To configure an IPv4 BGP peer, choose IPv4 and do one of the following:
• To specify these IP addresses yourself, for Your router peer ip, enter the destination IPv4
CIDR address to which Amazon should send traffic.
• For Amazon router peer IP, enter the IPv4 CIDR address to use to send traffic to AWS.
[IPv6] To configure an IPv6 BGP peer, choose IPv6. The peer IPv6 addresses are
automatically assigned from Amazon's pool of IPv6 addresses. You cannot specify custom
IPv6 addresses.
b. To provide your own BGP key, enter your BGP MD5 key.
If you do not enter a value, we generate a BGP key.
c. To advertise prefixes to Amazon, for Prefixes you want to advertise, enter the IPv4 CIDR
destination addresses (separated by commas) to which traffic should be routed over the
virtual interface.
d. (Optional) Add or remove a tag.
[Add a tag] Choose Add tag and do the following:
• For Key, enter the key name.
• For Value, enter the key value.
[Remove a tag] Next to the tag, choose Remove tag.
7. Choose Create virtual interface.
To provision a private virtual interface to a VPC
1. Open the AWS Direct Connect console at https://console.aws.amazon.com/directconnect/v2/
home.
2. In the navigation pane, choose Virtual Interfaces.
Step 3: Create a virtual interface 55

AWS Direct Connect User Guide
3. Choose Create virtual interface.
4. Under Virtual interface type, for Type, choose Private.
5. Under Private virtual interface settings, do the following:
a. For Virtual interface name, enter a name for the virtual interface.
b. For Connection, choose the Direct Connect connection that you want to use for this
interface.
c. For Gateway type, choose Virtual private gateway, or Direct Connect gateway.
d. For Virtual interface owner, choose Another AWS account, and then enter the AWS
account.
e. For Virtual private gateway, choose the virtual private gateway to use for this interface.
f. For VLAN, enter the ID number for your virtual local area network (VLAN).
g. For BGP ASN, enter the Border Gateway Protocol Autonomous System Number of your on-
premises peer router for the new virtual interface.
The valid values are 1 to 2147483647.
6. Under Additional Settings, do the following:
a. To configure an IPv4 BGP or an IPv6 peer, do the following:
[IPv4] To configure an IPv4 BGP peer, choose IPv4 and do one of the following:
• To specify these IP addresses yourself, for Your router peer ip, enter the destination IPv4
CIDR address to which Amazon should send traffic.
• For Amazon router peer ip, enter the IPv4 CIDR address to use to send traffic to AWS.
Important
If you let AWS auto-assign IPv4 addresses, a /29 CIDR will be allocated from
169.254.0.0/16 IPv4 Link-Local according to RFC 3927 for point-to-point
connectivity. AWS does not recommend this option if you intend to use the
customer router peer IP address as the source and/or destination for VPC traffic.
Instead you should use RFC 1918 or other addressing, and specify the address
yourself.
• For more information about RFC 1918, see Address Allocation for Private
Internets.
Step 3: Create a virtual interface 56

AWS Direct Connect User Guide
• For more information about RFC 3927, see Dynamic Configuration of IPv4 Link-
Local Addresses.
[IPv6] To configure an IPv6 BGP peer, choose IPv6. The peer IPv6 addresses are
automatically assigned from Amazon's pool of IPv6 addresses. You cannot specify custom
IPv6 addresses.
b. To change the maximum transmission unit (MTU) from 1500 (default) to 9001 (jumbo
frames), select Jumbo MTU (MTU size 9001).
c. (Optional) Under Enable SiteLink, choose Enabled to enable direct connectivity between
Direct Connect points of presence.
d. (Optional) Add or remove a tag.
[Add a tag] Choose Add tag and do the following:
• For Key, enter the key name.
• For Value, enter the key value.
[Remove a tag] Next to the tag, choose Remove tag.
7. Choose Create virtual interface.
Step 4: Verify your virtual interface resiliency configuration
After you have established virtual interfaces to the AWS Cloud or to Amazon VPC, perform a virtual
interface failover test to verify that your configuration meets your resiliency requirements. For
more information, see the section called “Failover Test”.
Step 5: Verify your virtual interface
After you have established virtual interfaces to the AWS Cloud or to Amazon VPC, you can verify
your AWS Direct Connect connection using the following procedures.
To verify your virtual interface connection to the AWS Cloud
•
Run traceroute and verify that the AWS Direct Connect identifier is in the network trace.
Step 4: Verify your virtual interface resiliency configuration 57

AWS Direct Connect User Guide
To verify your virtual interface connection to Amazon VPC
1. Using a pingable AMI, such as an Amazon Linux AMI, launch an EC2 instance into the VPC that
is attached to your virtual private gateway. The Amazon Linux AMIs are available in the Quick
Start tab when you use the instance launch wizard in the Amazon EC2 console. For more
information, see Launch an Instance in the Amazon EC2 User Guide. Ensure that the security
group that's associated with the instance includes a rule permitting inbound ICMP traffic (for
the ping request).
2. After the instance is running, get its private IPv4 address (for example, 10.0.0.4). The Amazon
EC2 console displays the address as part of the instance details.
3. Ping the private IPv4 address and get a response.
Configure a Classic connection
Configure a Classic connection when you have existing Direct Connect connections.
Step 1: Sign up for AWS
To use AWS Direct Connect, you need an account if you don't already have one.
Sign up for an AWS account
If you do not have an AWS account, complete the following steps to create one.
To sign up for an AWS account
1. Open https://portal.aws.amazon.com/billing/signup.
2. Follow the online instructions.
Part of the sign-up procedure involves receiving a phone call and entering a verification code
on the phone keypad.
When you sign up for an AWS account, an AWS account root user is created. The root user
has access to all AWS services and resources in the account. As a security best practice, assign
administrative access to a user, and use only the root user to perform tasks that require root
user access.
Configure a Classic connection 58

AWS Direct Connect User Guide
AWS sends you a confirmation email after the sign-up process is complete. At any time, you can
view your current account activity and manage your account by going to https://aws.amazon.com/
and choosing My Account.
Create a user with administrative access
After you sign up for an AWS account, secure your AWS account root user, enable AWS IAM Identity
Center, and create an administrative user so that you don't use the root user for everyday tasks.
Secure your AWS account root user
1. Sign in to the AWS Management Console as the account owner by choosing Root user and
entering your AWS account email address. On the next page, enter your password.
For help signing in by using root user, see Signing in as the root user in the AWS Sign-In User
Guide.
2. Turn on multi-factor authentication (MFA) for your root user.
For instructions, see Enable a virtual MFA device for your AWS account root user (console) in
the IAM User Guide.
Create a user with administrative access
1. Enable IAM Identity Center.
For instructions, see Enabling AWS IAM Identity Center in the AWS IAM Identity Center User
Guide.
2. In IAM Identity Center, grant administrative access to a user.
For a tutorial about using the IAM Identity Center directory as your identity source, see
Configure user access with the default IAM Identity Center directory in the AWS IAM Identity
Center User Guide.
Sign in as the user with administrative access
• To sign in with your IAM Identity Center user, use the sign-in URL that was sent to your email
address when you created the IAM Identity Center user.
Step 1: Sign up for AWS 59

AWS Direct Connect User Guide
For help signing in using an IAM Identity Center user, see Signing in to the AWS access portal in
the AWS Sign-In User Guide.
Assign access to additional users
1. In IAM Identity Center, create a permission set that follows the best practice of applying least-
privilege permissions.
For instructions, see Create a permission set in the AWS IAM Identity Center User Guide.
2. Assign users to a group, and then assign single sign-on access to the group.
For instructions, see Add groups in the AWS IAM Identity Center User Guide.
Step 2: Request an AWS Direct Connect dedicated connection
For dedicated connections, you can submit a connection request using the AWS Direct Connect
console. For hosted connections, work with an AWS Direct Connect Partner to request a hosted
connection. Ensure that you have the following information:
• The port speed that you require. You cannot change the port speed after you create the
connection request.
• The AWS Direct Connect location at which the connection is to be terminated.
Note
You cannot use the AWS Direct Connect console to request a hosted connection. Instead,
contact an AWS Direct Connect Partner, who can create a hosted connection for you, which
you then accept. Skip the following procedure and go to Accept your hosted connection.
To create a new AWS Direct Connect connection
1. Open the AWS Direct Connect console at https://console.aws.amazon.com/directconnect/v2/
home.
2. In the navigation pane choose Connections, and then choose Create a connection.
3. Choose Classic.
Step 2: Request an AWS Direct Connect dedicated connection 60

AWS Direct Connect User Guide
4. On the Create Connection pane, under Connection settings, do the following:
a. For Name, enter a name for the connection.
b. For Location, select the appropriate AWS Direct Connect location.
c. If applicable, for Sub Location, choose the floor closest to you or your network provider.
This option is only available if the location has meet-me rooms (MMRs) in multiple floors of
the building.
d. For Port Speed, choose the connection bandwidth.
e. For On-premises, select Connect through an AWS Direct Connect partner when you use
this connection to connect to your data center.
f. For Service provider, select the AWS Direct Connect Partner. If you use a partner that is not
in the list, select Other.
g. If you selected Other for Service provider, for Name of other provider, enter the name of
the partner that you use.
h. (Optional) Add or remove a tag.
[Add a tag] Choose Add tag and do the following:
• For Key, enter the key name.
• For Value, enter the key value.
[Remove a tag] Next to the tag, choose Remove tag.
5. Choose Create Connection.
It can take up to 72 hours for AWS to review your request and provision a port for your connection.
During this time, you might receive an email with a request for more information about your use
case or the specified location. The email is sent to the email address that you used when you
signed up for AWS. You must respond within 7 days or the connection is deleted.
For more information, see AWS Direct Connect dedicated and hosted connections.
Accept your hosted connection
You must accept the hosted connection in the AWS Direct Connect console before you can create a
virtual interface. This step only applies to hosted connections.
Step 2: Request an AWS Direct Connect dedicated connection 61

AWS Direct Connect User Guide
To accept a hosted virtual interface
1. Open the AWS Direct Connect console at https://console.aws.amazon.com/directconnect/v2/
home.
2. In the navigation pane, choose Connections.
3. Select the hosted connection, and then choose Accept.
Choose Accept.
(Dedicated connection) Step 3: Download the LOA-CFA
After you request a connection, we make a Letter of Authorization and Connecting Facility
Assignment (LOA-CFA) available to you to download, or emails you with a request for more
information. The LOA-CFA is the authorization to connect to AWS, and is required by the colocation
provider or your network provider to establish the cross-network connection (cross-connect).
To download the LOA-CFA
1. Open the AWS Direct Connect console at https://console.aws.amazon.com/directconnect/v2/
home.
2. In the navigation pane, choose Connections.
3. Select the connection and choose View Details.
4. Choose Download LOA-CFA.
The LOA-CFA is downloaded to your computer as a PDF file.
Note
If the link is not enabled, the LOA-CFA is not yet available for you to download. Check
your email for a request for more information. If it's still unavailable, or you haven't
received an email after 72 hours, contact AWS Support.
5. After you download the LOA-CFA, do one of the following:
• If you're working with an AWS Direct Connect Partner or network provider, send them the
LOA-CFA so that they can order a cross-connect for you at the AWS Direct Connect location.
If they cannot order the cross-connect for you, you can contact the colocation provider
directly.
(Dedicated connection) Step 3: Download the LOA-CFA 62
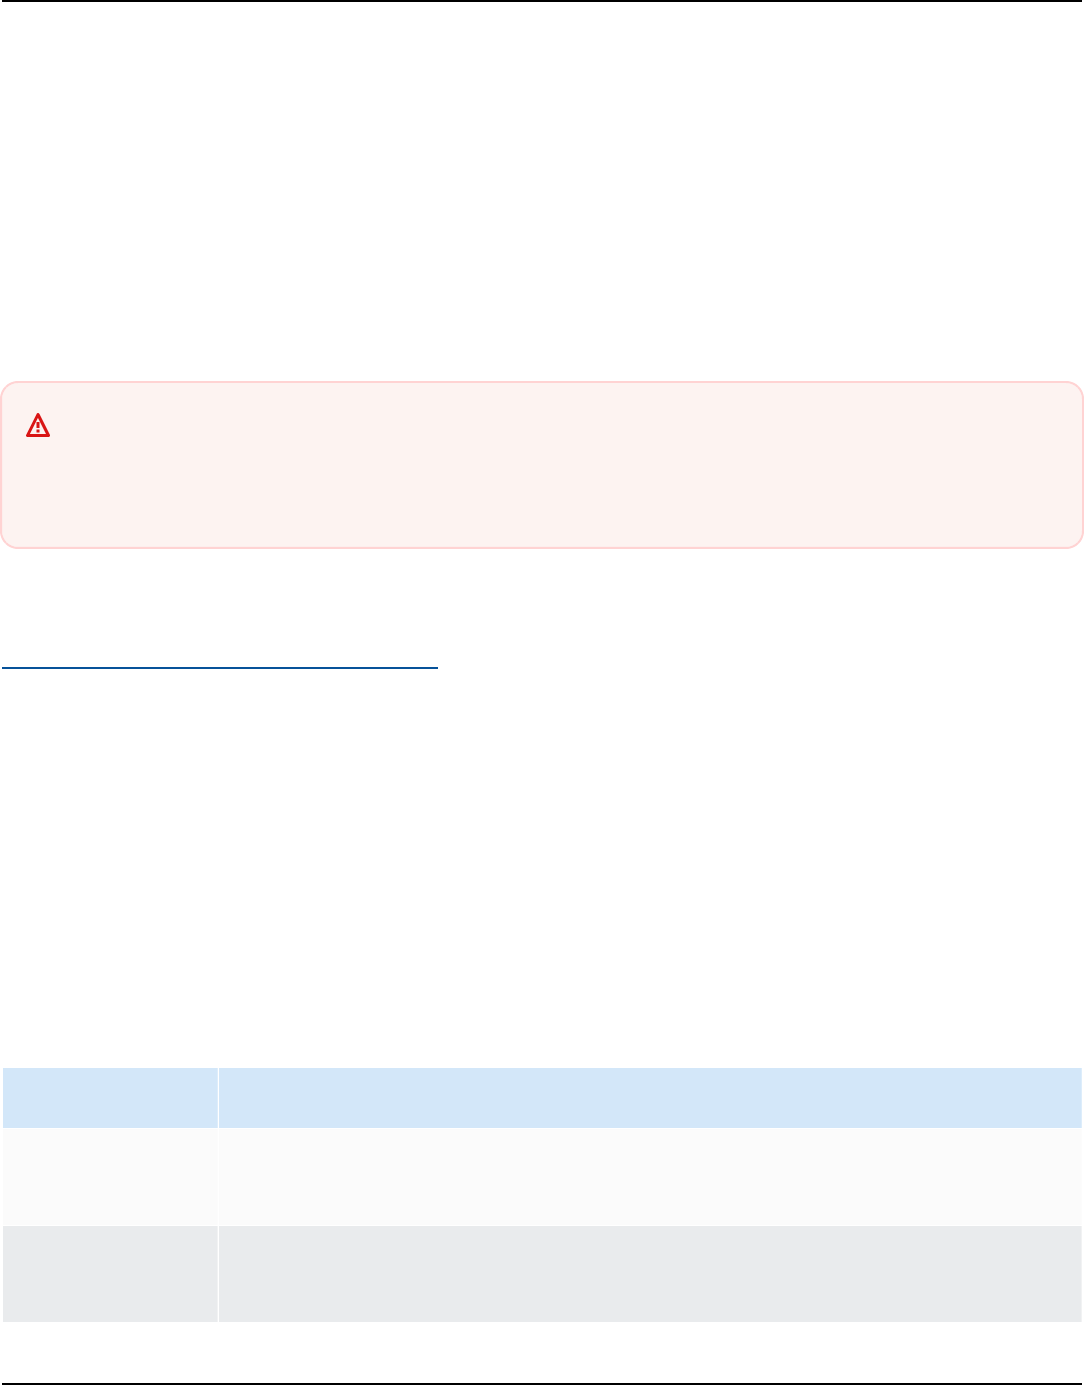
AWS Direct Connect User Guide
• If you have equipment at the AWS Direct Connect location, contact the colocation provider
to request a cross-network connection. You must be a customer of the colocation provider.
You must also present them with the LOA-CFA that authorizes the connection to the AWS
router, and the necessary information to connect to your network.
AWS Direct Connect locations that are listed as multiple sites (for example, Equinix DC1-DC6 &
DC10-DC11) are set up as a campus. If your or your network provider’s equipment is located in any
of these sites, you can request a cross-connect to your assigned port even if it resides in a different
campus building.
Important
A campus is treated as a single AWS Direct Connect location. To achieve high availability,
configure connections to different AWS Direct Connect locations.
If you or your network provider experience issues establishing a physical connection, see
Troubleshooting layer 1 (physical) issues.
Step 4: Create a virtual interface
To begin using your AWS Direct Connect connection, you must create a virtual interface. You
can create a private virtual interface to connect to your VPC. Or, you can create a public virtual
interface to connect to public AWS services that aren't in a VPC. When you create a private virtual
interface to a VPC, you need a private virtual interface for each VPC to which to connect. For
example, you need three private virtual interfaces to connect to three VPCs.
Before you begin, ensure that you have the following information:
Resource Required information
Connection The AWS Direct Connect connection or link aggregation group (LAG) for
which you are creating the virtual interface.
Virtual
interface name
A name for the virtual interface.
Step 4: Create a virtual interface 63

AWS Direct Connect User Guide
Resource Required information
Virtual
interface owner
If you're creating the virtual interface for another account, you need the
AWS account ID of the other account.
(Private virtual
interface only)
Connection
For connecting to a VPC in the same AWS Region, you need the virtual
private gateway for your VPC. The ASN for the Amazon side of the BGP
session is inherited from the virtual private gateway. When you create a
virtual private gateway, you can specify your own private ASN. Otherwise,
Amazon provides a default ASN. For more information, see Create a Virtual
Private Gateway in the Amazon VPC User Guide. For connecting to a VPC
through a Direct Connect gateway, you need the Direct Connect gateway.
For more information, see Direct Connect Gateways.
VLAN A unique virtual local area network (VLAN) tag that's not already in use on
your connection. The value must be between 1 and 4094 and must comply
with the Ethernet 802.1Q standard. This tag is required for any traffic
traversing the AWS Direct Connect connection.
If you have a hosted connection, your AWS Direct Connect Partner provides
this value. You can’t modify the value after you have created the virtual
interface.
Step 4: Create a virtual interface 64

AWS Direct Connect User Guide
Resource Required information
Peer IP
addresses
A virtual interface can support a BGP peering session for IPv4, IPv6, or
one of each (dual-stack). Do not use Elastic IPs (EIPs) or Bring your own IP
addresses (BYOIP) from the Amazon Pool to create a public virtual interface
. You cannot create multiple BGP sessions for the same IP addressing family
on the same virtual interface. The IP address ranges are assigned to each
end of the virtual interface for the BGP peering session.
• IPv4:
• (Public virtual interface only) You must specify unique public IPv4
addresses that you own. The value can be one of the following:
• A customer-owned IPv4 CIDR
These can be any public IPs (customer-owned or provided by AWS),
but the same subnet mask must be used for both your peer IP and
the AWS router peer IP. For example, if you allocate a /31 range, such
as 203.0.113.0/31 , you could use 203.0.113.0 for your peer
IP and 203.0.113.1 for the AWS peer IP. Or, if you allocate a /24
range, such as 198.51.100.0/24 , you could use 198.51.100.10
for your peer IP and 198.51.100.20 for the AWS peer IP.
• An IP range owned by your AWS Direct Connect Partner or ISP, along
with an LOA-CFA authorization
• An AWS-provided /31 CIDR. Contact AWS Support to request a public
IPv4 CIDR (and provide a use case in your request)
Note
We cannot guarantee that we will be able to fulfill all requests
for AWS-provided public IPv4 addresses.
• (Private virtual interface only) Amazon can generate private IPv4
addresses for you. If you specify your own, ensure that you specify
private CIDRs for your router interface and the AWS Direct Connect
interface only. For example, do not specify other IP addresses from your
local network. Similar to a public virtual interface, the same subnet
mask must be used for both your peer IP and the AWS router peer IP.
Step 4: Create a virtual interface 65

AWS Direct Connect User Guide
Resource Required information
For example, if you allocate a /30 range, such as 192.168.0.0/30 ,
you could use 192.168.0.1 for your peer IP and 192.168.0.2 for
the AWS peer IP.
• IPv6: Amazon automatically allocates you a /125 IPv6 CIDR. You cannot
specify your own peer IPv6 addresses.
Address family Whether the BGP peering session will be over IPv4 or IPv6.
BGP informati
on
• A public or private Border Gateway Protocol (BGP) Autonomous System
Number (ASN) for your side of the BGP session. If you are using a public
ASN, you must own it. If you are using a private ASN, you can set a custom
ASN value. For a 16-bit ASN, the value must be in the 64512 to 65534
range. For a 32-bit ASN, the value must be in the 1 to 2147483647 range.
Autonomous System (AS) prepending does not work if you use a private
ASN for a public virtual interface.
• AWS enables MD5 by default. You cannot modify this option.
• An MD5 BGP authentication key. You can provide your own, or you can let
Amazon generate one for you.
Step 4: Create a virtual interface 66

AWS Direct Connect User Guide
Resource Required information
(Public virtual
interface
only) Prefixes
you want to
advertise
Public IPv4 routes or IPv6 routes to advertise over BGP. You must advertise
at least one prefix using BGP, up to a maximum of 1,000 prefixes.
• IPv4: The IPv4 CIDR can overlap with another public IPv4 CIDR announced
using AWS Direct Connect when either of the following is true:
• The CIDRs are from different AWS Regions. Make sure that you apply
BGP community tags on the public prefixes.
• You use AS_PATH when you have a public ASN in an active/passive
configuration.
For more information, see Routing policies and BGP communities.
• IPv6: Specify a prefix length of /64 or shorter.
• You may add additional prefixes to an existing public VIF and advertise
those by contacting AWS support. In your support case, provide a list of
additional CIDR prefixes you want to add to the public VIF and advertise.
• You can specify any prefix length over a Direct Connect public virtual
interface. IPv4 should support anything from /1 - /32, and IPv6 should
support anything from /1 - /64.
(Private virtual
interface only)
Jumbo frames
The maximum transmission unit (MTU) of packets over AWS Direct Connect.
The default is 1500. Setting the MTU of a virtual interface to 9001 (jumbo
frames) can cause an update to the underlying physical connection if it
wasn't updated to support jumbo frames. Updating the connection disrupts
network connectivity for all virtual interfaces associated with the connectio
n for up to 30 seconds. Jumbo frames apply only to propagated routes from
AWS Direct Connect. If you add static routes to a route table that point to
your virtual private gateway, then traffic routed through the static routes
is sent using 1500 MTU. To check whether a connection or virtual interface
supports jumbo frames, select it in the AWS Direct Connect console and find
Jumbo frame capable on the virtual interface General configuration page.
Step 4: Create a virtual interface 67

AWS Direct Connect User Guide
Resource Required information
(Transit virtual
interface only)
Jumbo frames
The maximum transmission unit (MTU) of packets over AWS Direct Connect.
The default is 1500. Setting the MTU of a virtual interface to 8500 (jumbo
frames) can cause an update to the underlying physical connection if it
wasn't updated to support jumbo frames. Updating the connection disrupts
network connectivity for all virtual interfaces associated with the connectio
n for up to 30 seconds. Jumbo frames are supported up to 8500 MTU for
Direct Connect. Static routes and propagated routes configured in the
Transit Gateway Route Table will support Jumbo Frames, including from
EC2 instances with VPC static route table entries to the Transit Gateway
Attachment. To check whether a connection or virtual interface supports
jumbo frames, select it in the AWS Direct Connect console and find Jumbo
frame capable on the virtual interface General configuration page.
We request additional information from you if your public prefixes or ASNs belong to an ISP or
network carrier. This can be a document using an official company letterhead or an email from the
company's domain name verifying that the network prefix/ASN may be used by you.
For private virtual interface and public virtual interfaces, the maximum transmission unit (MTU)
of a network connection is the size, in bytes, of the largest permissible packet that can be passed
over the connection. The MTU of a virtual private interface can be either 1500 or 9001 (jumbo
frames). The MTU of a transit virtual interface can be either 1500 or 8500 (jumbo frames). You
can specify the MTU when you create the interface or update it after you create it. Setting the
MTU of a virtual interface to 8500 (jumbo frames) or 9001 (jumbo frames) can cause an update
to the underlying physical connection if it wasn't updated to support jumbo frames. Updating the
connection disrupts network connectivity for all virtual interfaces associated with the connection
for up to 30 seconds. To check whether a connection or virtual interface supports jumbo frames,
select it in the AWS Direct Connect console and find Jumbo Frame Capable on the Summary tab.
When you create a public virtual interface, it can take up to 72 hours for AWS to review and
approve your request.
To provision a public virtual interface to non-VPC services
1. Open the AWS Direct Connect console at https://console.aws.amazon.com/directconnect/v2/
home.
Step 4: Create a virtual interface 68

AWS Direct Connect User Guide
2. In the navigation pane, choose Virtual Interfaces.
3. Choose Create virtual interface.
4. Under Virtual interface type, for Type, choose Public.
5. Under Public virtual interface settings, do the following:
a. For Virtual interface name, enter a name for the virtual interface.
b. For Connection, choose the Direct Connect connection that you want to use for this
interface.
c. For VLAN, enter the ID number for your virtual local area network (VLAN).
d. For BGP ASN, enter the The Border Gateway Protocol Autonomous System Number of your
on-premises peer router for the new virtual interface.
The valid values are 1-2147483647.
6. Under Additional settings, do the following:
a. To configure an IPv4 BGP or an IPv6 peer, do the following:
[IPv4] To configure an IPv4 BGP peer, choose IPv4 and do one of the following:
• To specify these IP addresses yourself, for Your router peer ip, enter the destination IPv4
CIDR address to which Amazon should send traffic.
• For Amazon router peer IP, enter the IPv4 CIDR address to use to send traffic to AWS.
[IPv6] To configure an IPv6 BGP peer, choose IPv6. The peer IPv6 addresses are
automatically assigned from Amazon's pool of IPv6 addresses. You cannot specify custom
IPv6 addresses.
b. To provide your own BGP key, enter your BGP MD5 key.
If you do not enter a value, we generate a BGP key.
c. To advertise prefixes to Amazon, for Prefixes you want to advertise, enter the IPv4 CIDR
destination addresses (separated by commas) to which traffic should be routed over the
virtual interface.
d. (Optional) Add or remove a tag.
[Add a tag] Choose Add tag and do the following:
• For Key, enter the key name.
• For Value, enter the key value.
Step 4: Create a virtual interface 69

AWS Direct Connect User Guide
[Remove a tag] Next to the tag, choose Remove tag.
7. Choose Create virtual interface.
To provision a private virtual interface to a VPC
1. Open the AWS Direct Connect console at https://console.aws.amazon.com/directconnect/v2/
home.
2. In the navigation pane, choose Virtual Interfaces.
3. Choose Create virtual interface.
4. Under Virtual interface type, for Type, choose Private.
5. Under Private virtual interface settings, do the following:
a. For Virtual interface name, enter a name for the virtual interface.
b. For Connection, choose the Direct Connect connection that you want to use for this
interface.
c. For Gateway type, choose Virtual private gateway, or Direct Connect gateway.
d. For Virtual interface owner, choose Another AWS account, and then enter the AWS
account.
e. For Virtual private gateway, choose the virtual private gateway to use for this interface.
f. For VLAN, enter the ID number for your virtual local area network (VLAN).
g. For BGP ASN, enter the Border Gateway Protocol Autonomous System Number of your on-
premises peer router for the new virtual interface.
The valid values are 1 to 2147483647.
6. Under Additional Settings, do the following:
a. To configure an IPv4 BGP or an IPv6 peer, do the following:
[IPv4] To configure an IPv4 BGP peer, choose IPv4 and do one of the following:
• To specify these IP addresses yourself, for Your router peer ip, enter the destination IPv4
CIDR address to which Amazon should send traffic.
• For Amazon router peer ip, enter the IPv4 CIDR address to use to send traffic to AWS.
Step 4: Create a virtual interface 70

AWS Direct Connect User Guide
Important
If you let AWS auto-assign IPv4 addresses, a /29 CIDR will be allocated from
169.254.0.0/16 IPv4 Link-Local according to RFC 3927 for point-to-point
connectivity. AWS does not recommend this option if you intend to use the
customer router peer IP address as the source and/or destination for VPC traffic.
Instead you should use RFC 1918 or other addressing, and specify the address
yourself.
• For more information about RFC 1918, see Address Allocation for Private
Internets.
• For more information about RFC 3927, see Dynamic Configuration of IPv4 Link-
Local Addresses.
[IPv6] To configure an IPv6 BGP peer, choose IPv6. The peer IPv6 addresses are
automatically assigned from Amazon's pool of IPv6 addresses. You cannot specify custom
IPv6 addresses.
b. To change the maximum transmission unit (MTU) from 1500 (default) to 9001 (jumbo
frames), select Jumbo MTU (MTU size 9001).
c. (Optional) Under Enable SiteLink, choose Enabled to enable direct connectivity between
Direct Connect points of presence.
d. (Optional) Add or remove a tag.
[Add a tag] Choose Add tag and do the following:
• For Key, enter the key name.
• For Value, enter the key value.
[Remove a tag] Next to the tag, choose Remove tag.
7. Choose Create virtual interface.
8. You need to use your BGP device to advertise the network that you use for the public VIF
connection.
Step 4: Create a virtual interface 71

AWS Direct Connect User Guide
Step 5: Download the router configuration
After you have created a virtual interface for your AWS Direct Connect connection, you can
download the router configuration file. The file contains the necessary commands to configure
your router for use with your private or public virtual interface.
To download a router configuration
1. Open the AWS Direct Connect console at https://console.aws.amazon.com/directconnect/v2/
home.
2. In the navigation pane, choose Virtual Interfaces.
3. Select the connection and choose View Details.
4. Choose Download router configuration.
5. For Download router configuration, do the following:
a. For Vendor, select the manufacturer of your router.
b. For Platform, select the model of your router.
c. For Software, select the software version for your router.
6. Choose Download, and then use the appropriate configuration for your router to ensure that
you can connect to AWS Direct Connect.
For example configuration files, see Example Router Configuration Files.
After you configure your router, the status of the virtual interface goes to UP. If the virtual
interface remains down and you cannot ping the AWS Direct Connect device's peer IP address, see
Troubleshooting layer 2 (data link) issues. If you can ping the peer IP address, see Troubleshooting
layer 3/4 (Network/Transport) issues. If the BGP peering session is established but you cannot
route traffic, see Troubleshooting routing issues.
Step 6: Verify your virtual interface
After you have established virtual interfaces to the AWS Cloud or to Amazon VPC, you can verify
your AWS Direct Connect connection using the following procedures.
To verify your virtual interface connection to the AWS Cloud
•
Run traceroute and verify that the AWS Direct Connect identifier is in the network trace.
Step 5: Download the router configuration 72

AWS Direct Connect User Guide
To verify your virtual interface connection to Amazon VPC
1. Using a pingable AMI, such as an Amazon Linux AMI, launch an EC2 instance into the VPC that
is attached to your virtual private gateway. The Amazon Linux AMIs are available in the Quick
Start tab when you use the instance launch wizard in the Amazon EC2 console. For more
information, see Launch an Instance in the Amazon EC2 User Guide. Ensure that the security
group that's associated with the instance includes a rule permitting inbound ICMP traffic (for
the ping request).
2. After the instance is running, get its private IPv4 address (for example, 10.0.0.4). The Amazon
EC2 console displays the address as part of the instance details.
3. Ping the private IPv4 address and get a response.
(Recommended) Step 7: Configure redundant connections
To provide for failover, we recommend that you request and configure two dedicated connections
to AWS, as shown in the following figure. These connections can terminate on one or two routers in
your network.
(Recommended) Step 7: Configure redundant connections 73

AWS Direct Connect User Guide
There are different configuration choices available when you provision two dedicated connections:
• Active/Active (BGP multipath). This is the default configuration, where both connections are
active. AWS Direct Connect supports multipathing to multiple virtual interfaces within the same
location, and traffic is load-shared between interfaces based on flow. If one connection becomes
unavailable, all traffic is routed through the other connection.
(Recommended) Step 7: Configure redundant connections 74

AWS Direct Connect User Guide
• Active/Passive (failover). One connection is handling traffic, and the other is on standby. If the
active connection becomes unavailable, all traffic is routed through the passive connection. You
need to prepend the AS path to the routes on one of your links for that to be the passive link.
How you configure the connections doesn't affect redundancy, but it does affect the policies that
determine how your data is routed over both connections. We recommend that you configure both
connections as active.
If you use a VPN connection for redundancy, ensure that you implement a health check and failover
mechanism. If you use either of the following configurations, then you need to check your route
table routing to route to the new network interface.
• You use your own instances for routing, for example the instance is the firewall.
• You use your own instance that terminates a VPN connection.
To achieve high availability, we strongly recommend that you configure connections to different
AWS Direct Connect locations.
For more information about AWS Direct Connect resiliency, see AWS Direct Connect Resiliency
Recommendations.
AWS Direct Connect Failover Test
The AWS Direct Connect Resiliency Toolkit resiliency models are designed to ensure that you have
the appropriate number of virtual interface connections in multiple locations. After you complete
the wizard, use the AWS Direct Connect Resiliency Toolkit failover test to bring down the BGP
peering session in order to verify that traffic routes to one of your redundant virtual interfaces, and
meets your resiliency requirements.
Use the test to make sure that traffic routes over redundant virtual interfaces when a virtual
interface is out of service. You start the test by selecting a virtual interface, BGP peering session,
and how long to run the test. AWS places the selected virtual interface BGP peering session in the
down state. When the interface is in this state, traffic should go over a redundant virtual interface.
If your configuration does not contain the appropriate redundant connections, the BGP peering
session fails, and traffic does not get routed. When the test completes, or you manually stop the
test, AWS restores the BGP session. After the test is complete, you can use the AWS Direct Connect
Resiliency Toolkit to adjust your configuration.
Failover Test 75

AWS Direct Connect User Guide
Note
Do not use this feature during a Direct Connect maintenance period as the BGP session
might be restored prematurely either during or after the maintenance.
Test History
AWS deletes the test history after 365 days. The test history includes the status for tests that were
run on all BGP peers. The history includes which BGP peering sessions were tested, the start and
end times, and the test status, which can be any of the following values:
• In progress - The test is currently running.
• Completed - The test ran for the time that you specified.
• Cancelled - The test was cancelled before the specified time.
• Failed - The test did not run for the time that you specified. This can happen when there is an
issue with the router.
For more information, see the section called “View a virtual interface failover test history”.
Validation Permissions
The only account that has permission to run the failover test is the account that owns the virtual
interface. The account owner receives an indication through AWS CloudTrail that a test ran on a
virtual interface.
Topics
• Start an AWS Direct Connect Resiliency Toolkit virtual interface failover test
• View AWS Direct Connect Resiliency Toolkit virtual interface failover test history
• Stop an AWS Direct Connect Resiliency Toolkit virtual interface failover test
Start an AWS Direct Connect Resiliency Toolkit virtual interface failover
test
You can start the virtual interface failover test using the AWS Direct Connect console, or the AWS
CLI.
Test History 76

AWS Direct Connect User Guide
To start the virtual interface failover test from the AWS Direct Connect console
1. Open the AWS Direct Connect console at https://console.aws.amazon.com/directconnect/v2/
home.
2. Choose Virtual interfaces.
3. Select the virtual interfaces and then choose Actions, Bring down BGP.
You can run the test on a public, private, or transit virtual interface.
4. In the Start failure test dialog box, do the following:
a. For Peerings to bring down to test, choose which peering sessions to test, for example
IPv4.
b. For Test maximum time, enter the number of minutes that the test will last.
The maximum value is 4,320 minutes (72 hours).
The default value is 180 minutes (3 hours).
c. For To confirm test, enter Confirm.
d. Choose Confirm.
The BGP peering session is placed in the DOWN state. You can send traffic to verify that there
are no outages. If needed, you can stop the test immediately.
To start the virtual interface failover test using the AWS CLI
Use StartBgpFailoverTest.
View AWS Direct Connect Resiliency Toolkit virtual interface failover
test history
You can view the virtual interface failover test history using the AWS Direct Connect console, or the
AWS CLI.
To view the virtual interface failover test history from the AWS Direct Connect console
1. Open the AWS Direct Connect console at https://console.aws.amazon.com/directconnect/v2/
home.
View a virtual interface failover test history 77

AWS Direct Connect User Guide
2. Choose Virtual interfaces.
3. Select the virtual interface and then choose View details.
4. Choose Test history.
The console displays the virtual interface tests that you performed for the virtual interface.
5. To view the details for a specific test, select the test id.
To view the virtual interface failover test history using the AWS CLI
Use ListVirtualInterfaceTestHistory.
Stop an AWS Direct Connect Resiliency Toolkit virtual interface failover
test
You can stop the virtual interface failover test using the AWS Direct Connect console, or the AWS
CLI.
To stop the virtual interface failover test from the AWS Direct Connect console
1. Open the AWS Direct Connect console at https://console.aws.amazon.com/directconnect/v2/
home.
2. Choose Virtual interfaces.
3. Select the virtual interface, and then choose Actions, Cancel test.
4. Choose Confirm.
AWS restores the BGP peering session. The testing history displays "cancelled" for the test.
To stop the virtual interface failover test using the AWS CLI
Use StopBgpFailoverTest.
Stop a virtual interface failover test 78

AWS Direct Connect User Guide
MAC Security
MAC Security (MACsec) is an IEEE standard that provides data confidentiality, data integrity, and
data origin authenticity. MACSec provides Layer 2 point-to-point encryption over the cross-connect
to AWS. MACSec operates at Layer 2 between two Layer 3 routers and provides encryption on
the Layer 2 domain. All data flowing across the AWS global network that interconnects with
datacenters and Regions is automatically encrypted at the physical layer before it leaves the data
center.
In the following diagram, both the dedicated connection and your on-premises resources must
support MACsec. Layer 2 traffic that travels over the dedicated connection to or from the data
center is encrypted.
MACsec concepts
The following are the key concepts for MACsec:
• MAC Security (MACsec) — An IEEE 802.1 Layer 2 standard that provides data confidentiality,
data integrity, and data origin authenticity. For more information about the protocol, see
802.1AE: MAC Security (MACsec).
• MACsec secret key — A pre-shared key that establishes the MACsec connectivity between the
customer on-premises router and the connection port at the AWS Direct Connect location. The
key is generated by the devices at the ends of the connection using the CKN/CAK pair that you
provide to AWS and have also provisioned on your device.
MACsec concepts 79

AWS Direct Connect User Guide
• Connection Key Name (CKN) and Connectivity Association Key (CAK) — The values in this pair
are used to generate the MACsec secret key. You generate the pair values, associate them with an
AWS Direct Connect connection, and provision them on your edge device at your end of the AWS
Direct Connect connection.
MACsec key rotation
When rotating keys, key rollover is supported with MACsec keychains. Direct Connect MACsec
supports MACsec keychains with capacity for storing up to three CKN/CAK pairs. You use the
associate-mac-sec-key command to associate the CKN/CAK pair with the existing MACsec
enabled connection. You then configure the same CKN/CAK pair on the device on your end of the
AWS Direct Connect connection. The Direct Connect device will attempt to use the last stored
key for the connection. If that key does not coincide with the key on your device, Direct Connect
continues to use the previous working key.
For information on using associate-mac-sec-key, see associate-mac-sec-key.
Supported connections
MACsec is available on dedicated connections. For information about how to order connections
that support MACsec, see AWS Direct Connect.
MACsec on dedicated connections
The following helps you become familiar with MACsec on AWS Direct Connect dedicated
connections. There are no additional charges for using MACsec.
The steps to configure MACsec on a dedicated connection can be found in Get started with MACsec
on a dedicated connection. Before configuring MACsec on a dedicated connection, note the
following:
• MACsec is supported on 10 Gbps , 100 Gbps, and 400 Gbps dedicated Direct Connect
connections at selected points of presence. For these connections, the following MACsec cipher
suites are supported:
• For 10Gbps connections, GCM-AES-256 and GCM-AES-XPN-256.
• For 100 Gbps and 400 Gbps connections, GCM-AES-XPN-256.
MACsec key rotation 80

AWS Direct Connect User Guide
• Only 256-bit MACsec keys are supported.
• Extended Packet Numbering (XPN) is required for 100Gbps and 400 Gbps connections. For
10Gbps connections Direct Connect supports both GCM-AES-256 and GCM-AES-XPN-256. High-
speed connections, such as 100 Gbps and 400 Gbps dedicated connections, can quickly exhaust
MACsec’s original 32-bit packet numbering space, which would require you to rotate your
encryption keys every few minutes to establish a new Connectivity Association. To avoid this
situation, the IEEE Std 802.1AEbw-2013 amendment introduced extended packet numbering,
increasing the numbering space to 64-bits, easing the timeliness requirement for key rotation.
• Secure Channel Identifier (SCI) is required and must be turned on. This setting can't be adjusted.
• IEEE 802.1Q (Dot1q/VLAN) tag offset/dot1q-in-clear is not supported for moving a VLAN tag
outside of an encrypted payload.
For additional information about Direct Connect and MACsec, see the MACsec section of the AWS
Direct Connect FAQs.
MACsec prerequisites for dedicated connections
Complete the following tasks before you configure MACsec on a dedicated connection.
• Create a CKN/CAK pair for the MACsec secret key.
You can create the pair using an open standard tool. The pair must meet the requirements
specified in the section called “Configure your on-premises router”.
• Make sure that you have a device on your end of the connection that supports MACsec.
• Secure Channel Identifier (SCI) must be turned on.
• Only 256-bit MACsec keys are supported, providing the latest advanced data protection.
Service-Linked roles
AWS Direct Connect uses AWS Identity and Access Management (IAM) service-linked roles. A
service-linked role is a unique type of IAM role that is linked directly to AWS Direct Connect.
Service-linked roles are predefined by AWS Direct Connect and include all of the permissions
that the service requires to call other AWS services on your behalf. A service-linked role makes
setting up AWS Direct Connect easier because you don’t have to manually add the necessary
permissions. AWS Direct Connect defines the permissions of its service-linked roles, and unless
defined otherwise, only AWS Direct Connect can assume its roles. The defined permissions include
MACsec prerequisites for dedicated connections 81

AWS Direct Connect User Guide
the trust policy and the permissions policy, and that permissions policy cannot be attached to any
other IAM entity. For more information, see the section called “Service-linked roles”.
MACsec pre-shared CKN/CAK key considerations
AWS Direct Connect uses AWS managed CMKs for the pre-shared keys that you associate with
connections or LAGs. Secrets Manager stores your pre-shared CKN and CAK pairs as a secret that
the Secrets Manager’s root key encrypts. For more information, see AWS managed CMKs in the
AWS Key Management Service Developer Guide.
The stored key is read-only by design, but you can schedule a seven- to thirty-day deletion using
the AWS Secrets Manager console or API. When you schedule a deletion, the CKN cannot be read,
and this might affect your network connectivity. We apply the following rules when this happens:
• If the connection is in a pending state, we disassociate the CKN from the connection.
• If the connection is in an available state, we notify the connection owner by email. If you do not
take any action within 30 days, we disassociate the CKN from your connection.
When we disassociate the last CKN from your connection and the connection encryption mode is
set to "must encrypt", we set the mode to "should_encrypt" to prevent sudden packet loss.
Get started using MACsec on a dedicated AWS Direct Connect
connection
The following task gets you started setting up MACsec to use on a Direct Connect dedicated
connection
Step 1: Create a connection
To start using MACsec, you must turn the feature on when you create a dedicated connection.
(Optional) Step 2: Create a link aggregation group (LAG)
If you use multiple connections for redundancy, you can create a LAG that supports MACsec. For
more information, see MACsec considerations and Create a LAG.
MACsec pre-shared CKN/CAK key considerations 82

AWS Direct Connect User Guide
Step 3: Associate the CKN/CAK with the connection or LAG
After you create the connection or LAG that supports MACsec, you need to associate a CKN/CAK
with the connection. For more information, see one of the following:
• Associate a MACsec CKN/CAK with a connection
• Associate a MACsec CKN/CAK with a LAG
Step 4: Configure your on-premises router
Update your on-premises router with the MACsec secret key. The MACsec secret key on the on-
premises router and in the AWS Direct Connect location must match. For more information, see
Download the router configuration file.
Step 5: (Optional) Remove the association between the CKN/CAK and
the connection or LAG
You can optionally remove the association between the CKN/CAK and the connection or LAG. f you
need to remove the association, see one of the following:
• Remove the association between a MACsec secret key and a connection
• Remove the association between a MACsec secret key and a LAG
Associate the CKN/CAK with the connection or LAG 83

AWS Direct Connect User Guide
AWS Direct Connect dedicated and hosted connections
AWS Direct Connect enables you to establish a dedicated network connection between your
network and one of the AWS Direct Connect locations.
There are two types of connections:
• Dedicated Connection: A physical Ethernet connection associated with a single customer.
Customers can request a dedicated connection through the AWS Direct Connect console, the CLI,
or the API. For more information, see Dedicated connections.
• Hosted Connection: A physical Ethernet connection that an AWS Direct Connect Partner
provisions on behalf of a customer. Customers request a hosted connection by contacting a
partner in the AWS Direct Connect Partner Program, who provisions the connection. For more
information, see Hosted connections.
Topics
• Dedicated AWS Direct Connect connections
• Hosted AWS Direct Connect connections
• Delete an AWS Direct Connect connection
• Update an AWS Direct Connect connection
• View AWS Direct Connect connection details
Dedicated AWS Direct Connect connections
To create an AWS Direct Connect dedicated connection, you need the following information:
AWS Direct Connect location
Work with a partner in the AWS Direct Connect Partner Program to help you establish network
circuits between an AWS Direct Connect location and your data center, office, or colocation
environment. They can also help provide colocation space within the same facility as the
location. For more information, see APN Partners Supporting AWS Direct Connect.
Port speed
The possible values are 1 Gbps, 10 Gbps, 100 Gbps, and 400 Gbps.
Dedicated connections 84

AWS Direct Connect User Guide
You can't change the port speed after you create the connection request. To change the port
speed, you must create and configure a new connection.
You can create a connection using either the Connection wizard or create a Classic connection.
Using the Connection wizard you can set up connections using resiliency recommendations. The
wizard is recommended if you're setting up connections for the first time. If you prefer, you can
use Classic to create connections one-at-a-time. Classic is recommended if you've already got an
existing setup that you want to add connections to. You can create a standalone connection, or you
can create a connection to associate with a LAG in your account. If you associate a connection with
a LAG, it's created with the same port speed and location that is specified in the LAG.
After you request the connection, we make a Letter of Authorization and Connecting Facility
Assignment (LOA-CFA) available to you to download or email you with a request for more
information. If you receive a request for more information, you must respond within 7 days or the
connection is deleted. The LOA-CFA is the authorization to connect to AWS, and is required by your
network provider to order a cross connect for you. If you do not have equipment in the AWS Direct
Connect location, you cannot order a cross connect for yourself there.
The following operations are available for dedicated connections:
• Create a connection using the Connection wizard
• Create a Classic connection
• the section called “View connection details”
• the section called “Update a connection”
• Associate a MACsec CKN/CAK with a connection
• the section called “Remove the association between a MACsec secret key and a connection”
• the section called “Delete a connection”
You can add a dedicated connection to a link aggregation group (LAG) allowing you to treat
multiple connections as a single one. For information, see Associate a connection with a LAG.
After you create a connection, create a virtual interface to connect to public and private AWS
resources. For more information, see Virtual interfaces and hosted virtual interfaces.
If you do not have equipment at an AWS Direct Connect location, first contact an AWS Direct
Connect Partner at the AWS Direct Connect Partner Program. For more information, see APN
Partners Supporting AWS Direct Connect.
Dedicated connections 85

AWS Direct Connect User Guide
If you want to create a connection that uses MAC Security (MACsec), review the prerequisites before
you create the connection. For more information, see the section called “MACsec prerequisites for
dedicated connections”.
Letter of Authorization and Connecting Facility Assignment (LOA-CFA)
After we have processed your connection request, you can download the LOA-CFA. If the link is not
enabled, the LOA-CFA is not yet available for you to download. Check your email for a request for
information.
The downloaded LoA is digitally signed and watermarked to validate the authenticity of the LoA
issued by AWS. The digital signature and watermark in the LoA .The PDF document prevents a
modified or potentially fraudulent LoA from being acted upon by the facilities provider at Direct
Connect sites. The digital signature can be authenticated by opening the PDF and reviewing the
signature panel. A valid document will show the "Signature is valid" and "Document has not been
modified since the signature was applied". The watermark repeats the patch panel and strands
assigned across the body of the LoA as a visual, but non-secure, indicator of authenticity.
Billing automatically starts when the port is active or 90 days after the LOA has been issued,
whichever comes first. You can avoid billing charges by deleting the port prior to activation or
within 90 days of the LOA being issued.
If your connection is not up after 90 days, and the LOA-CFA has not been issued, we will send you
an email alerting you that the port will be deleted in 10 days. If you fail to activate the port within
the additional 10 day period, the port will automatically be deleted and you'll need to restart the
port creation process.
For the steps to download the LoA-CFA, see Download the LOA-CFA.
Note
For more information about pricing, see AWS Direct Connect Pricing. If you no longer
want the connection after you have reissued the LOA-CFA, you must delete the connection
yourself. For more information, see Delete an AWS Direct Connect connection.
Topics
• Create an AWS Direct Connect dedicated connection using the Connection wizard
Letter of Authorization and Connecting Facility Assignment (LOA-CFA) 86

AWS Direct Connect User Guide
• Create an AWS Direct Connect Classic connection
• Download the AWS Direct Connect LOA-CFA
• Associate a MACsec CKN/CAK with an AWS Direct Connect connection
• Remove the association between a MACsec secret key and an AWS Direct Connect connection
Create an AWS Direct Connect dedicated connection using the
Connection wizard
This section describes creating a connection using the Connection wizard. If you prefer to create
a Classic connection, see the steps at the section called “Step 2: Request an AWS Direct Connect
dedicated connection”.
To create a Connection wizard connection
1. Open the AWS Direct Connect console at https://console.aws.amazon.com/directconnect/v2/
home.
2. In the navigation pane, choose Connections, and then choose Create connection.
3. On the Create Connection page, under Connection ordering type, choose Connection wizard.
4. Choose a Resiliency Level for your network connections. A resiliency level can be one of the
following:
• Maximum Resiliency
• High Resiliency
• Development and Test
For descriptions and more detailed information about these resiliency levels, see AWS Direct
Connect Resiliency Toolkit.
5. Choose Next.
6. On the Configure connections page, provide the following details.
a. From the Bandwidth drop-down list, choose the bandwidth required for the connection.
This can be anywhere from 1Gbps to 400 Gbps.
b. For Location, choose the appropriate AWS Direct Connect location, and then choose the
First location service provider, select the service provider providing connectivity for the
connection at this location.
Create a connection using the Connection wizard 87

AWS Direct Connect User Guide
c. For Second location, choose the appropriate AWS Direct Connect at the second location,
and then choose the Second location service provider, select the service provider providing
connectivity for the connection at this second location.
d. (Optional) Configure MAC security (MACsec) for the connection. Under Additional Settings,
select Request a MACsec capable port.
MACsec is only available on dedicated connections.
e. (Optional) Choose Add tag to add key/value pairs to further help identify this connection.
• For Key, enter the key name.
• For Value, enter the key value.
To remove an existing tag, choose the tag and then choose Remove tag. You can't have
empty tags.
7. Choose Next.
8. On the Review and create page, verify the connection. This page also displays estimated costs
for port usage and additional data transfer charges.
9. Choose Create.
10. Download your Letter of Authorization and Connecting Facility Assignment (LOA-CFA), For
more information, see the section called “Letter of Authorization and Connecting Facility
Assignment (LOA-CFA)”.
Use one of the following commands.
• create-connection (AWS CLI)
• CreateConnection (AWS Direct Connect API)
Create an AWS Direct Connect Classic connection
For dedicated connections, you can submit a connection request using the AWS Direct Connect
console. For hosted connections, work with an AWS Direct Connect Partner to request a hosted
connection. Ensure that you have the following information:
• The port speed that you require. For dedicated connections, you can't change the port speed
after you create the connection request. For hosted connections, your AWS Direct Connect
Partner can change the speed.
Create a Classic connection 88

AWS Direct Connect User Guide
• The AWS Direct Connect location at which the connection is to be terminated.
Note
You cannot use the AWS Direct Connect console to request a hosted connection. Instead,
contact an AWS Direct Connect Partner, who can create a hosted connection for you, which
you then accept. Skip the following procedure and go to Accept your hosted connection.
To create a new AWS Direct Connect connection
1. Open the AWS Direct Connect console at https://console.aws.amazon.com/directconnect/v2/
home.
2. On the AWS Direct Connect screen, under Get started, choose Create a connection.
3. Choose Classic.
4. For Name, enter a name for the connection.
5. For Location, select the appropriate AWS Direct Connect location.
6. If applicable, for Sub Location, choose the floor closest to you or your network provider. This
option is only available if the location has meet-me rooms (MMRs) in multiple floors of the
building.
7. For Port Speed, choose the connection bandwidth.
8. For On-premises, select Connect through an AWS Direct Connect partner when you use this
connection to connect to your data center.
9. For Service provider, select the AWS Direct Connect Partner. If you use a partner that is not in
the list, select Other.
10. If you selected Other for Service provider, for Name of other provider, enter the name of the
partner that you use.
11. (Optional) Choose Add tag to add key/value pairs to further help identify this connection.
• For Key, enter the key name.
• For Value, enter the key value.
To remove an existing tag, choose the tag and then choose Remove tag. You can't have empty
tags.
Create a Classic connection 89

AWS Direct Connect User Guide
12. Choose Create Connection.
It can take up to 72 hours for AWS to review your request and provision a port for your connection.
During this time, you might receive an email with a request for more information about your use
case or the specified location. The email is sent to the email address that you used when you
signed up for AWS. You must respond within 7 days or the connection is deleted.
For more information, see Dedicated and hosted connections.
Download the AWS Direct Connect LOA-CFA
You can download the LOA-CFA using either the AWS Direct Connect console or through the
command line. Once you've downloadeded the LOA-CFA and provided that to your network or
colocation provider, that provider can order the cross-connect for you.
To download the LOA-CFA
1. Open the AWS Direct Connect console at https://console.aws.amazon.com/directconnect/v2/
home.
2. In the navigation pane, choose Connections.
3. Select the connection, and then choose View details.
4. Choose Download LOA-CFA.
Note
If the link is not enabled, the LOA-CFA is not yet available for you to download. A
Support case will be created requesting additional information. Once you've responded
to the request, and the request processed, the LOA-CFA will be available for download.
If it's still unavailable, contact AWS Support.
5. Send the LOA-CFA to your network provider or colocation provider so that they can order a
cross connect for you. The contact process can vary for each colocation provider. For more
information, see Requesting cross connects at AWS Direct Connect locations.
To download the LOA-CFA using the command line or API
• describe-loa (AWS CLI)
• DescribeLoa (AWS Direct Connect API)
Download the LOA-CFA 90

AWS Direct Connect User Guide
Associate a MACsec CKN/CAK with an AWS Direct Connect connection
After you create the connection that supports MACsec, you can associate a CKN/CAK with the
connection. You can create the association using either the AWS Direct Connect console or through
the command-line or API.
Note
You cannot modify a MACsec secret key after you associate it with a connection. If you
need to modify the key, disassociate the key from the connection, and then associate a new
key with the connection. For information about removing an association, see Remove the
association between a MACsec secret key and a connection.
To associate a MACsec key with a connection
1. Open the AWS Direct Connect console at https://console.aws.amazon.com/directconnect/v2/
home.
2. In the left pane, choose Connections.
3. Select a connection, and then choose View details.
4. Choose Associate key.
5. Enter the MACsec key.
[Use the CAK/CKN pair] Choose Key Pair, and then do the following:
• For Connectivity Association Key (CAK), enter the CAK.
• For Connectivity Association Key Name (CKN), enter the CKN.
[Use the secret] Choose Existing Secret Manager secret, and then for Secret, select the
MACsec secret key.
6. Choose Associate key.
To associate a MACsec key with a connection using the command line or API
• associate-mac-sec-key (AWS CLI)
• AssociateMacSecKey (AWS Direct Connect API)
Associate a MACsec CKN/CAK with a connection 91

AWS Direct Connect User Guide
Remove the association between a MACsec secret key and an AWS
Direct Connect connection
You can remove the association between the connection and the MACsec key using either the AWS
Direct Connect console or through the command-line or API.
To remove an association between a connection and a MACsec key
1. Open the AWS Direct Connect console at https://console.aws.amazon.com/directconnect/v2/
home.
2.
3. In the left pane, choose Connections.
4. Select a connection, and then choose View details.
5. Select the MACsec secret to remove, and then choose Disassociate key.
6. In the confirmation dialog box, enter disassociate, and then choose Disassociate.
To remove an association between a connection and a MACsec key using the command line or
API
• disassociate-mac-sec-key (AWS CLI)
• DisassociateMacSecKey (AWS Direct Connect API)
Hosted AWS Direct Connect connections
To create an AWS Direct Connect hosted connection, you need the following information:
AWS Direct Connect location
Work with an AWS Direct Connect Partner in the AWS Direct Connect Partner Program to help
you establish network circuits between an AWS Direct Connect location and your data center,
office, or colocation environment. They can also help provide colocation space within the same
facility as the location. For more information, see AWS Direct Connect Delivery Partners.
Note
You can't request a hosted connection through the AWS Direct Connect console.
However, an AWS Direct Connect Partner can create and configure a hosted connection
Remove the association between a MACsec secret key and a connection 92

AWS Direct Connect User Guide
for you. Once configured, the connection appears in the Connections pane in the
console.
You must accept the hosted connection before you can use it. For more information, see
Accept a hosted connection.
Port speed
For hosted connections, the possible values are 50 Mbps, 100 Mbps, 200 Mbps, 300 Mbps, 400
Mbps, 500 Mbps, 1 Gbps, 2 Gbps, 5 Gbps, 10 Gbps, and 25 Gbps. Note that only those AWS
Direct Connect partners who have met specific requirements may create a 1 Gbps, 2 Gbps, 5
Gbps, 10 Gbps, or 25 Gbps hosted connection. 25 Gbps connections are available only in Direct
Connect locations where 100 Gbps port speeds are available.
Note the following:
• Connection port speeds can only be changed by your AWS Direct Connect Partner. You are no
longer required to delete and then recreate a connection in order to upgrade or downgrade an
existing hosted connection's bandwidth. In order to change your port speed, please reach out to
the AWS Direct Connect Partner who manages your hosted connection.
• AWS uses traffic policing on hosted connections, which means that when the traffic rate reaches
the configured maximum rate, excess traffic is dropped. This might result in bursty traffic having
a lower throughput than non-bursty traffic.
• Jumbo frames can be enabled on connections only if originally enabled on the AWS Direct
Connect hosted parent connection. If Jumbo frames isn't enabled on that parent connection,
then it can't be enabled on any connection.
The following console operations are available after you've requested a hosted connection and
accepted it:
• Delete a connection
• Update a connection
• View connection details
After you accept a connection, create a virtual interface to connect to public and private AWS
resources. For more information, see Virtual interfaces and hosted virtual interfaces.
Hosted connections 93

AWS Direct Connect User Guide
Accept an AWS Direct Connect hosted connection
If you are interested in purchasing a hosted connection, you must contact an AWS Direct Connect
Partner in the AWS Direct Connect Partner Program. The partner provisions the connection for you.
After the connection is configured, it appears in the Connections pane in the AWS Direct Connect
console.
Before you can begin using a hosted connection, you must accept the connection. You can accept a
hosted connection using either the AWS Direct Connect console or using the command line or API.
1. Open the AWS Direct Connect console at https://console.aws.amazon.com/directconnect/v2/
home.
2. In the navigation pane, choose Connections.
3. Select the hosted connection and choose View details.
4. Select the confirmation check box and choose Accept.
To accept a hosted connection using the command line or API
• confirm-connection (AWS CLI)
• ConfirmConnection (AWS Direct Connect API)
Delete an AWS Direct Connect connection
You can delete a connection as long as there are no virtual interfaces attached to it. Deleting your
connection stops all port hour charges for this connection, but you may still incur cross-connect or
network circuit charges (see below). AWS Direct Connectdata transfer charges are associated with
virtual interfaces. For more information about how to delete a virtual interface, see Delete a virtual
interface.
Before deleting a connection, download the LOA for the connection containing the cross-account
information so you have the relevant information about the circuits being disconnected. For
the steps to download the connection LOA, see Letter of Authorization and Connecting Facility
Assignment (LOA-CFA).
When you delete a connection, AWS will instruct the colocation provider to disconnect your
network device from the Direct Connect router by removing the fiber-optic cross-connect cable
from the applicable AWS patch panel. However, your colocation or circuit provider may still
Accept a hosted connection 94

AWS Direct Connect User Guide
charge you cross-connect or network circuit charges because the cross-connect cable may still be
connected to your network device. These charges for the cross-connect are independent of Direct
Connect, and must be cancelled with the colocation or circuit provider using information from the
LOA.
If the connection is part of a link aggregation group (LAG), you cannot delete the connection
if doing so causes the LAG to fall below its setting for the minimum number of operational
connections.
You can delete a connection using either the AWS Direct Connect console or using the command
line or API.
To delete a connection
1. Open the AWS Direct Connect console at https://console.aws.amazon.com/directconnect/v2/
home.
2. In the navigation pane, choose Connections.
3. Select the connections and choose Delete.
4. In the Delete confirmation dialog box, choose Delete.
To delete a connection using the command line or API
• delete-connection (AWS CLI)
• DeleteConnection (AWS Direct Connect API)
Update an AWS Direct Connect connection
You can update the following connection attribute using either the AWS Direct Connect console or
using the command line or API.
• The name of the connection.
• The connection's MACsec encryption mode.
Note
MACsec is only available on dedicated connections.
Update a connection 95

AWS Direct Connect User Guide
The valid values are:
•
should_encrypt
•
must_encrypt
When you set the encryption mode to this value, the connection goes down when the
encryption is down.
•
no_encrypt
To update a connection
1. Open the AWS Direct Connect console at https://console.aws.amazon.com/directconnect/v2/
home.
2. In the navigation pane, choose Connections.
3. Select the connection, and then choose Edit.
4. Modify the connection:
[Change the name] For Name, enter a new connection name.
[Add a tag] Choose Add tag and do the following:
• For Key, enter the key name.
• For Value, enter the key value.
[Remove a tag] Next to the tag, choose Remove tag.
5. Choose Edit connection.
To update a connection using the command line or API
• update-connection (AWS CLI)
• UpdateConnection (AWS Direct Connect API)
View AWS Direct Connect connection details
You can view the current status of your connection using either the AWS Direct Connect
console or using the command line or API. You can also view your connection ID (for example,
View connection details 96

AWS Direct Connect User Guide
dxcon-12nikabc) and verify that it matches the connection ID on the LOA-CFA that you received
or downloaded.
For information on monitoring connections, see Monitor Direct Connect resources.
To view details about a connection
1. Open the AWS Direct Connect console at https://console.aws.amazon.com/directconnect/v2/
home.
2. In the left pane, choose Connections.
3. Select a connection, and then choose View details.
To describe a connection using the command line or API
• describe-connections (AWS CLI)
• DescribeConnections (AWS Direct Connect API)
View connection details 97

AWS Direct Connect User Guide
Requesting cross connects at AWS Direct Connect
locations
After you have downloaded your Letter of Authorization and Connecting Facility Assignment
(LOA-CFA), you must complete your cross-network connection, also known as a cross connect. If
you already have equipment located in an AWS Direct Connect location, contact the appropriate
provider to complete the cross connect. For specific instructions for each provider, see the table
below. Contact your provider for cross connect pricing. After the cross connect is established, you
can create the virtual interfaces using the AWS Direct Connect console.
Some locations are set up as a campus. For more information, including available speeds available
at each location, see AWS Direct Connect Locations.
If you do not already have equipment located in an AWS Direct Connect location, you can work
with one of the partners in the AWS Partner Network (APN). They help you to connect to an AWS
Direct Connect location. For more information, see APN Partners supporting AWS Direct Connect.
You must share the LOA-CFA with your selected provider to facilitate your cross connect request.
An AWS Direct Connect connection can provide access to resources in other Regions. For more
information, see Access to remote AWS Regions.
Note
If the cross connect is not completed within 90 days, the authority granted by the LOA-
CFA expires. To renew a LOA-CFA that has expired, you can download it again from the AWS
Direct Connect console. For more information, see Letter of Authorization and Connecting
Facility Assignment (LOA-CFA).
Colocations
• US East (Ohio)
• US East (N. Virginia)
• US West (N. California)
• US West (Oregon)
• Africa (Cape Town)
98

AWS Direct Connect User Guide
• Asia Pacific (Jakarta)
• Asia Pacific (Mumbai)
• Asia Pacific (Seoul)
• Asia Pacific (Singapore)
• Asia Pacific (Sydney)
• Asia Pacific (Tokyo)
• Canada (Central)
• China (Beijing)
• China (Ningxia)
• Europe (Frankfurt)
• Europe (Ireland)
• Europe (Milan)
• Europe (London)
• Europe (Paris)
• Europe (Stockholm)
• Europe (Zurich)
• Israel (Tel Aviv)
• Middle East (Bahrain)
• Middle East (UAE)
• South America (São Paulo)
• AWS GovCloud (US-East)
• AWS GovCloud (US-West)
US East (Ohio)
Location How to request a connection
Cologix COL2, Columbus Contact Cologix at [email protected].
Cologix MIN3, Minneapolis Contact Cologix at [email protected].
CyrusOne West III, Houston Submit a request using customer portal.
US East (Ohio) 99

AWS Direct Connect User Guide
Location How to request a connection
Equinix CH2, Chicago Contact Equinix at awsdealr[email protected].
QTS, Chicago Contact QTS at A[email protected]om.
Netrality Data Centers, 1102
Grand, Kansas City
Contact Netrality Data Centers at support@netrality.com.
US East (N. Virginia)
Location How to request a connection
165 Halsey Street, Newark Contact operations@165halsey.com.
CoreSite 32k, New York Place an order using the CoreSite Customer Portal. After you
complete the form, review the order for accuracy, and then
approve it using the website.
CoreSite VA1-VA2, Reston Place an order at the CoreSite Customer Portal. After you
complete the form, review the order for accuracy, and then
approve it using the website.
Digital Realty ATL1 &ATL2,
Atlanta
Contact Digital Realty at [email protected].
Digital Realty IAD38, Ashburn Contact Digital Realty at [email protected].
Equinix DC1-DC6 & DC10-
D12, Ashburn
Contact Equinix at awsdealr[email protected].
Equinix DAA1-DC3 & DC6,
Dallas
Contact Equinix at awsdealr[email protected].
Equinix MI1, Miami Contact Equinix at awsdealr[email protected].
Equinix NY5, Seacaucus Contact Equinix at awsdealr[email protected].
US East (N. Virginia) 100

AWS Direct Connect User Guide
Location How to request a connection
KIO Networks QRO1,
Queretaro, MX
Contact KIO Networks".
Markley, One Summer Street,
Boston
For current customers, create a request using the customer
portal. For new queries, contact sales@markleygroup.com.
Netrality Data Centers, 2nd
floor MMR, Philadelphia
Contact Netrality Data Centers at support@netrality.com.
QTS ATL1, Atlanta Contact QTS at A[email protected]om.
US West (N. California)
Location How to request a connection
CoreSite, LA1, Los Angeles Place an order using the CoreSite Customer Portal. After you
complete the form, review the order for accuracy, and then
approve it using the website.
CoreSite SV2, Milpitas Place an order using the CoreSite Customer Portal. After you
complete the form, review the order for accuracy, and then
approve it using the website.
CoreSite SV4, Santa Clara Place an order using the CoreSite Customer Portal. After you
complete the form, review the order for accuracy, and then
approve it using the MyCoreSite website.
EdgeConneX, Phoenix Place an order using the EdgeOS Customer Portal. After you
have submitted the form, EdgeConneX will provide a service
order form for approval. You can send questions to cloudacce
Equinix LA3, El Segundo Contact Equinix at awsdealr[email protected].
Equinix SV1 & SV5, San Jose Contact Equinix at awsdealr[email protected].
US West (N. California) 101

AWS Direct Connect User Guide
Location How to request a connection
PhoenixNAP, Phoenix Contact phoenixNAP Provisioning at provisioning@phoen
ixnap.com.
US West (Oregon)
Location How to request a connection
CoreSite DE1, Denver Place an order using the CoreSite Customer Portal. After you
complete the form, review the order for accuracy, and then
approve it using the website.
Digital Realty SEA10, Westin
Building, Seattle
Contact Digital Realty at [email protected].
EdgeConneX, Portland Place an order using the EdgeOS Customer Portal. After you
have submitted the form, EdgeConneX will provide a service
order form for approval. You can send questions to cloudacce
Equinix SE2, Seattle Contact Equinix at suppor[email protected]om.
Pittock Block, Portland Send requests by email to cr[email protected] or by
phone at +1 503 226 6777.
Switch SUPERNAP 8, Las
Vegas
Contact Switch SUPERNAP at [email protected]om.
TierPoint Seattle Contact TierPoint at [email protected].
US West (Oregon) 102

AWS Direct Connect User Guide
Africa (Cape Town)
Location How to request a connection
Cape Town Internet
Exchange/ Teraco Data
Centres
Contact Teraco at support@teraco.co.za for existing Teraco
customers or [email protected]o.za for new customers.
Teraco JB1, Johannesburg,
South Africa
Contact Teraco at support@teraco.co.za for existing Teraco
customers or [email protected]o.za for new customers.
Asia Pacific (Jakarta)
Location How to request a connection
DCI JK3, Jakarta Contact DCI Indonesia at jessie.w@dci-indonesia.com.com.
NTT 2 Data Center, Jakarta Contact NTT at [email protected].
Asia Pacific (Mumbai)
Location How to request a connection
Equinix, Mumbai Contact Equinix at awsdealr[email protected].
NetMagic DC2, Bangalore Contact NetMagic Sales and Marketing toll-free at 180010331
30 or at mark[email protected].
Sify Rabale, Mumbai Contact Sify at aws.directconnect@sifycorp.com.
STT Delhi DC2, Delhi Contact STT at enquiry.AWSD[email protected].
STT GDC Pvt. Ltd. VSB,
Chennai
Contact STT at enquiry.AWSD[email protected].
Africa (Cape Town) 103

AWS Direct Connect User Guide
Location How to request a connection
STT Hyderabad DC1,
Hyderabad
Contact STT at enquiry.AWSD[email protected].
Asia Pacific (Seoul)
Location How to request a connection
Digital Realty ICN1, Seoul Contact Digital Realty at [email protected].
KINX Gasan Data Center,
Seoul
Contact KINX at [email protected].
LG U+ Pyeong-Chon Mega
Center, Seoul
Submit the LOA document to [email protected]o.kr and
Asia Pacific (Singapore)
Location How to request a connection
Equinix HK1, Tsuen Wan N.T.,
Hong Kong SAR
Contact Equinix at awsdealr[email protected].
Equinix SG2, Singapore Contact Equinix at awsdealr[email protected].
Global Switch, Singapore Contact Global Switch at salessingapor[email protected].
GPX, Mumbai Contact GPX (Equinix) at [email protected]om.
iAdvantage Mega-i, Hong
Kong
Contact iAdvantage at [email protected] or place an order
using iAdvantage Cabling Order e-Form.
Menara AIMS, Kuala Lumpur Existing AIMS custom ers can request an X-Connect order using
the Customer Service portal by filling out the Engineering
Asia Pacific (Seoul) 104

AWS Direct Connect User Guide
Location How to request a connection
Work Order Request Form. Contacting service.delivery@a
ims.com.my if there are any problems submitting the request.
TCC Data Center, Bangkok Contact TCC Technology Co., Ltd at gateway.ne@tcc-tec
hnology.com.
Asia Pacific (Sydney)
Location How to request a connection
CDC Hume 2, Canberra Log in to the customer portal at CDC Customer Portal.
Datacom DH6, Auckland Contact Datacom at Datacom Orbit –Auckland.
Equinix ME2, Melbourne Contact Equinix at a[email protected].
Equinix SY3, Sydney Contact Equinix at awsdealr[email protected].
Global Switch, Sydney Contact Global Switch at [email protected].
NEXTDC C1, Canberra Contact NEXTDC at nx[email protected].
NEXTDC M1, Melbourne Contact NEXTDC at nx[email protected].
NEXTDC P1, Perth Contact NEXTDC at nx[email protected].
NEXTDC S2, Sydney Contact NEXTDC at nx[email protected].
Asia Pacific (Tokyo)
Location How to request a connection
AT Tokyo Chuo Data Center,
Tokyo
Contact AT TOKYO at at-sales@attokyo.co.jp.
Asia Pacific (Sydney) 105

AWS Direct Connect User Guide
Location How to request a connection
Chief Telecom LY, Taipei Contact Chief Telecom at vicky_chan@chief.com.tw.
Chunghwa Telecom, Taipei Contact CHT Taipei IDC NOC at [email protected].tw.
Equinix OS1, Osaka Contact Equinix at awsdealr[email protected].
Equinix TY2, Tokyo Contact Equinix at [email protected].
NEC Inzai, Inzai Contact NEC Inzai at connec[email protected] .
Canada (Central)
Location How to request a connection
Allied 250 Front St W,
Toronto
Contact [email protected].
Cologix MTL3, Montreal Contact Cologix at [email protected].
Cologix VAN2, Vancouver Contact Cologix at [email protected].
eStruxture, Montreal Contact eStruxture at [email protected].
China (Beijing)
Location How to request a connection
CIDS Jiachuang IDC, Beijing Contact [email protected].
Sinnet Jiuxianqiao IDC, Beijing Contact [email protected].
GDS No. 3 Data Center,
Shanghai
Contact dx@nwcdcloud.cn.
Canada (Central) 106

AWS Direct Connect User Guide
Location How to request a connection
GDS No. 3 Data Center,
Shenzhen
Contact dx@nwcdcloud.cn.
China (Ningxia)
Location How to request a connection
Industrial Park IDC, Ningxia Contact dx@nwcdcloud.cn.
Shapotou IDC, Ningxia Contact dx@nwcdcloud.cn.
Europe (Frankfurt)
Location How to request a connection
CE Colo, Prague, Czech
Republic
Contact CE Colo at [email protected]om.
DigiPlex Ulven, Oslo, Norway Contact DigiPlex at [email protected].
Equinix AM3, Amsterdam,
Netherlands
Contact Equinix at awsdealr[email protected].
Equinix FR5, Frankfurt Contact Equinix at awsdealr[email protected].
Equinix HE6, Helsinki Contact Equinix at awsdealr[email protected].
Equinix MU1, Munich Contact Equinix at [email protected]om.
Equinix WA1, Warsaw Contact Equinix at awsdealr[email protected].
Interxion AMS7, Amsterdam Contact Interxion at customer.ser[email protected].
Interxion CPH2, Copenhagen Contact Interxion at customer.ser[email protected].
China (Ningxia) 107

AWS Direct Connect User Guide
Location How to request a connection
Interxion FRA6, Frankfurt Contact Interxion at customer.ser[email protected].
Interxion MAD2, Madrid Contact Interxion at customer.services@interxion.com.
Interxion VIE2, Vienna Contact Interxion at customer.services@interxion.com.
Interxion ZUR1, Zurich Contact Interxion at customer.ser[email protected].
IPB, Berlin Contact IPB at [email protected].
Equinix ITConic MD2, Madrid Contact Equinix at awsdealr[email protected].
Europe (Ireland)
Location How to request a connection
Digital Realty (UK), Docklands Contact Digital Realty (UK) at amazon.orders@digitalrealty
.com.
Eircom Clonshaugh Contact Eircom at datac[email protected].
Equinix DX1, Dublin Contact Equinix at awsdealr[email protected].
Equinix LD5, London (Slough) Contact Equinix at awsdealr[email protected].
Interxion DUB2, Dublin Contact Interxion at customer.ser[email protected].
Interxion MRS1, Marseille Contact Interxion at customer.ser[email protected].
Europe (Milan)
Location How to request a connection
CDLAN srl Via Caldera 21,
Milano
Contact CDLAN at [email protected].
Europe (Ireland) 108
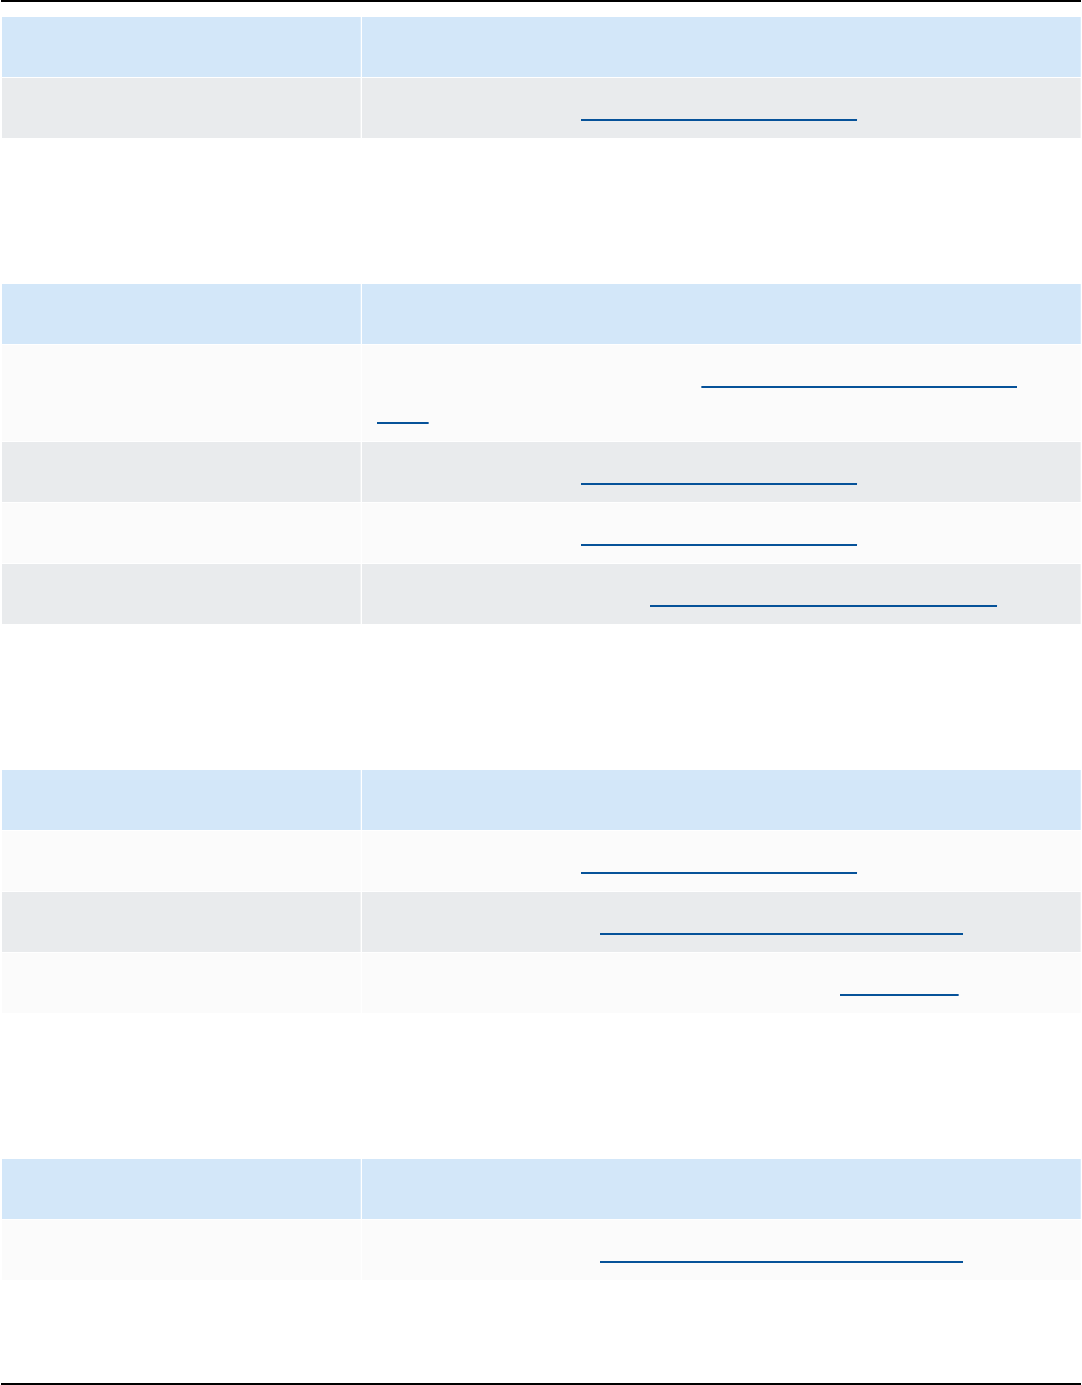
AWS Direct Connect User Guide
Location How to request a connection
Equinix, ML2, Milano, Italy Contact Equinix at awsdealr[email protected].
Europe (London)
Location How to request a connection
Digital Realty (UK), Docklands Contact Digital Realty (UK) at amazon.orders@digitalrealty
.com.
Equinix LD5, London (Slough) Contact Equinix at awsdealr[email protected].
Equinix MA3, Manchester Contact Equinix at [email protected].
Telehouse West, London Contact Telehouse UK at [email protected].
Europe (Paris)
Location How to request a connection
Equinix PA3, Paris Contact Equinix at awsdealr[email protected].
Interxion PAR7, Paris Contact Interxion at customer.ser[email protected].
Telehouse Voltaire, Paris Contact Telehouse Paris Voltaire using the Contact Us page.
Europe (Stockholm)
Location How to request a connection
Interxion STO1, Stockholm Contact Interxion at customer.services@interxion.com.
Europe (London) 109
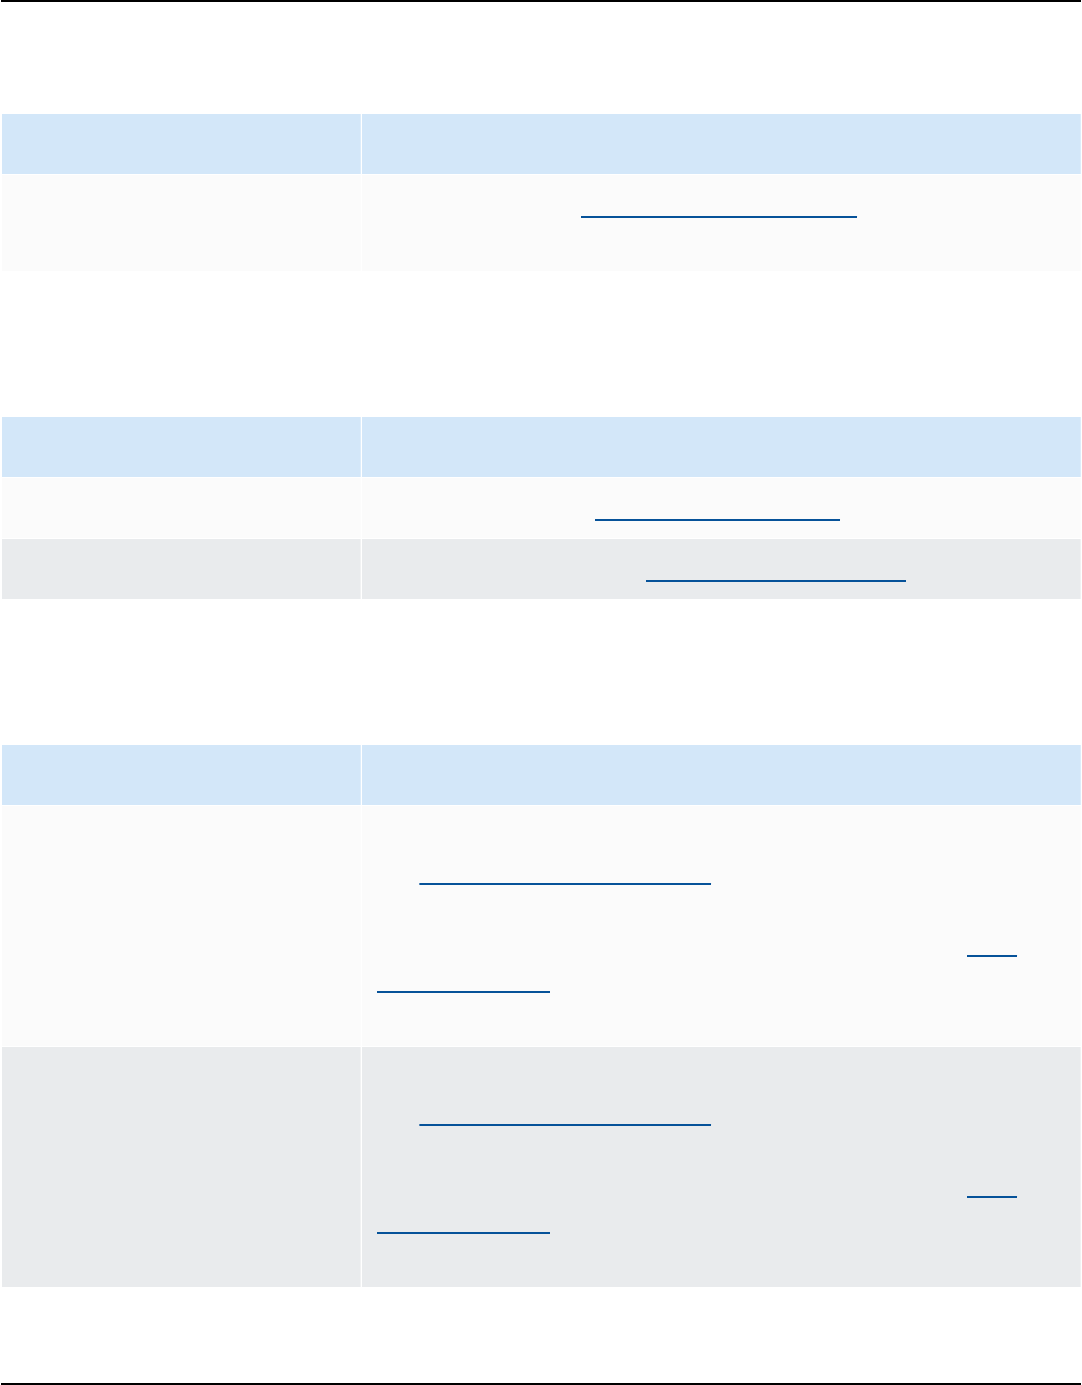
AWS Direct Connect User Guide
Europe (Zurich)
Location How to request a connection
Equinix ZRH51, Oberengst
ringen, Switzerland
Contact Equinix at awsdealr[email protected].
Israel (Tel Aviv)
Location How to request a connection
MedOne, Haifa Contact MedOne at suppor[email protected]
EdgeConnex, Herzliya Contact EdgeConnect at info@edgeconnecx.com
Middle East (Bahrain)
Location How to request a connection
AWS Bahrain DC53, Manama To complete the connection, you can work with one of
our network provider partners at the location to establish
connectivity. You will then provide a Letter of Authorization
(LOA) from the network provider to AWS through the AWS
Support Center. AWS completes the cross-connect at this
location.
AWS Bahrain DC52, Manama To complete the connection, you can work with one of
our network provider partners at the location to establish
connectivity. You will then provide a Letter of Authorization
(LOA) from the network provider to AWS through the AWS
Support Center. AWS completes the cross-connect at this
location.
Europe (Zurich) 110

AWS Direct Connect User Guide
Middle East (UAE)
Location How to request a connection
Equinix DX1, Dubai, UAE Contact Equinix at [email protected]om.
Etisalat SmartHub Data
Centre, Fujairah, UAE
Contact Etisalat SmartHub Data Centre at IntlSales-C&WS@eti
salat.ae.
South America (São Paulo)
Location How to request a connection
Cirion BNARAGMS, Buenos
Aires
Contact Cirion at [email protected].
Equinix RJ2, Rio de Janeiro Contact Equinix at awsdealr[email protected].
Equinix SP4, São Paulo Contact Equinix at awsdealr[email protected].
Tivit Contact Tivit at [email protected].
AWS GovCloud (US-East)
You can't order connections in this Region.
AWS GovCloud (US-West)
Location How to request a connection
Equinix SV5, San Jose Contact Equinix at awsdealr[email protected].
Middle East (UAE) 111

AWS Direct Connect User Guide
AWS Direct Connect virtual interfaces and hosted virtual
interfaces
You must create one of the following virtual interfaces (VIFs) to begin using your AWS Direct
Connect connection.
• Private virtual interface: A private virtual interface should be used to access an Amazon VPC
using private IP addresses.
• Public virtual interface: A public virtual interface can access all AWS public services using public
IP addresses.
• Transit virtual interface: A transit virtual interface should be used to access one or more Amazon
VPC Transit Gateways associated with Direct Connect gateways. You can use transit virtual
interfaces with any AWS Direct Connect dedicated or hosted connection of any speed. For
information about Direct Connect gateway configurations, see Direct Connect gateways.
To connect to other AWS services using IPv6 addresses, check the service documentation to verify
that IPv6 addressing is supported.
Public virtual interface prefix advertisement rules
We advertise appropriate Amazon prefixes to you so that you can reach either your VPCs or other
AWS services. You can access all AWS prefixes through this connection; for example, Amazon EC2,
Amazon S3, and Amazon.com. You do not have access to non-Amazon prefixes. For a current list
of prefixes advertised by AWS, see AWS IP Address Ranges in the Amazon Web Services General
Reference. AWS does not re-advertise customer prefixes that were received over AWS Direct
Connect public virtual interfaces to other customers. For more information about public virtual
interfaces and routing policies, see the section called “Public virtual interface routing policies”.
Note
We recommend that you use a firewall filter (based on the source/destination address of
packets) to control traffic to and from some prefixes. If you're using a prefix filter (route
map), ensure that it accepts prefixes with an exact match or longer. Prefixes advertised
from AWS Direct Connect may be aggregated and may differ from the prefixes defined in
your prefix filter.
Public virtual interface prefix advertisement rules 112

AWS Direct Connect User Guide
SiteLink
If you're creating a private or transit virtual interface, you can use SiteLink.
SiteLink is an optional Direct Connect feature for virtual private interfaces that enables
connectivity between any two Direct Connect points of presence (PoPs) in the same AWS partition
using the shortest available path over the AWS network. This allows you to connect your on-
premises network through the AWS global network without needing to route your traffic through a
Region. For more information about SiteLink see Introducing AWS Direct Connect SiteLink.
Note
SiteLink is not available in AWS GovCloud (US) and the China Regions.
There's a separate pricing fee for using SiteLink. For more information, see AWS Direct Connect
Pricing.
SiteLink doesn't support all virtual interface types. The following table shows the interface type
and whether it's supported.
Virtual interface type Supported/Not supported
Transit virtual interface Supported
Private virtual interface
attached to a Direct Connect
gateway with a virtual
gateway
Supported
Private virtual interface
attached to a Direct Connect
gateway not associated with
a virtual gateway or transit
gateway
Supported
Private virtual interface
attached to a virtual gateway
Not supported
SiteLink 113

AWS Direct Connect User Guide
Virtual interface type Supported/Not supported
Public virtual interface Not supported
Traffic routing behavior for traffic from AWS Regions (virtual or transit gateways) to on-premises
locations over a SiteLink enabled virtual interface varies slightly from the default Direct Connect
virtual interface behavior with an AWS path prepend. When SiteLink is enabled, virtual interfaces
from an AWS Region prefer a BGP path with a lower AS path length from a Direct Connect location,
regardless of the associated Region. For example , an associated Region is advertised for each
Direct Connect location. If SiteLink is disabled, by default traffic coming from a virtual or transit
gateway prefers a Direct Connect location that is associated with that AWS Region, even if the
router from Direct Connect locations associated with different Regions advertises a path with a
shorter AS path length. The virtual or transit gateway still prefers the path from Direct Connect
locations local to the associated AWS Region.
SiteLink supports a maximum jumbo frame MTU size of either 8500 or 9001, depending on the
virtual interface type. For more information, see MTUs for private virtual interfaces or transit
virtual interfaces.
Prerequisites for virtual interfaces
Before you create a virtual interface, do the following:
• Create a connection. For more information, see Create a connection using the Connection wizard.
• Create a link aggregation group (LAG) when you have multiple connections that you want to
treat as a single one. For information, see Associate a connection with a LAG.
To create a virtual interface, you need the following information:
Resource Required information
Connection The AWS Direct Connect connection or link aggregation group (LAG) for
which you are creating the virtual interface.
Virtual
interface name
A name for the virtual interface.
Prerequisites for virtual interfaces 114

AWS Direct Connect User Guide
Resource Required information
Virtual
interface owner
If you're creating the virtual interface for another account, you need the
AWS account ID of the other account.
(Private virtual
interface only)
Connection
For connecting to a VPC in the same AWS Region, you need the virtual
private gateway for your VPC. The ASN for the Amazon side of the BGP
session is inherited from the virtual private gateway. When you create a
virtual private gateway, you can specify your own private ASN. Otherwise,
Amazon provides a default ASN. For more information, see Create a Virtual
Private Gateway in the Amazon VPC User Guide. For connecting to a VPC
through a Direct Connect gateway, you need the Direct Connect gateway.
For more information, see Direct Connect Gateways.
VLAN A unique virtual local area network (VLAN) tag that's not already in use on
your connection. The value must be between 1 and 4094 and must comply
with the Ethernet 802.1Q standard. This tag is required for any traffic
traversing the AWS Direct Connect connection.
If you have a hosted connection, your AWS Direct Connect Partner provides
this value. You can’t modify the value after you have created the virtual
interface.
Prerequisites for virtual interfaces 115

AWS Direct Connect User Guide
Resource Required information
Peer IP
addresses
A virtual interface can support a BGP peering session for IPv4, IPv6, or
one of each (dual-stack). Do not use Elastic IPs (EIPs) or Bring your own IP
addresses (BYOIP) from the Amazon Pool to create a public virtual interface
. You cannot create multiple BGP sessions for the same IP addressing family
on the same virtual interface. The IP address ranges are assigned to each
end of the virtual interface for the BGP peering session.
• IPv4:
• (Public virtual interface only) You must specify unique public IPv4
addresses that you own. The value can be one of the following:
• A customer-owned IPv4 CIDR
These can be any public IPs (customer-owned or provided by AWS),
but the same subnet mask must be used for both your peer IP and
the AWS router peer IP. For example, if you allocate a /31 range, such
as 203.0.113.0/31 , you could use 203.0.113.0 for your peer
IP and 203.0.113.1 for the AWS peer IP. Or, if you allocate a /24
range, such as 198.51.100.0/24 , you could use 198.51.100.10
for your peer IP and 198.51.100.20 for the AWS peer IP.
• An IP range owned by your AWS Direct Connect Partner or ISP, along
with an LOA-CFA authorization
• An AWS-provided /31 CIDR. Contact AWS Support to request a public
IPv4 CIDR (and provide a use case in your request)
Note
We cannot guarantee that we will be able to fulfill all requests
for AWS-provided public IPv4 addresses.
• (Private virtual interface only) Amazon can generate private IPv4
addresses for you. If you specify your own, ensure that you specify
private CIDRs for your router interface and the AWS Direct Connect
interface only. For example, do not specify other IP addresses from your
local network. Similar to a public virtual interface, the same subnet
mask must be used for both your peer IP and the AWS router peer IP.
Prerequisites for virtual interfaces 116

AWS Direct Connect User Guide
Resource Required information
For example, if you allocate a /30 range, such as 192.168.0.0/30 ,
you could use 192.168.0.1 for your peer IP and 192.168.0.2 for
the AWS peer IP.
• IPv6: Amazon automatically allocates you a /125 IPv6 CIDR. You cannot
specify your own peer IPv6 addresses.
Address family Whether the BGP peering session will be over IPv4 or IPv6.
BGP informati
on
• A public or private Border Gateway Protocol (BGP) Autonomous System
Number (ASN) for your side of the BGP session. If you are using a public
ASN, you must own it. If you are using a private ASN, you can set a custom
ASN value. For a 16-bit ASN, the value must be in the 64512 to 65534
range. For a 32-bit ASN, the value must be in the 1 to 2147483647 range.
Autonomous System (AS) prepending does not work if you use a private
ASN for a public virtual interface.
• AWS enables MD5 by default. You cannot modify this option.
• An MD5 BGP authentication key. You can provide your own, or you can let
Amazon generate one for you.
Prerequisites for virtual interfaces 117

AWS Direct Connect User Guide
Resource Required information
(Public virtual
interface
only) Prefixes
you want to
advertise
Public IPv4 routes or IPv6 routes to advertise over BGP. You must advertise
at least one prefix using BGP, up to a maximum of 1,000 prefixes.
• IPv4: The IPv4 CIDR can overlap with another public IPv4 CIDR announced
using AWS Direct Connect when either of the following is true:
• The CIDRs are from different AWS Regions. Make sure that you apply
BGP community tags on the public prefixes.
• You use AS_PATH when you have a public ASN in an active/passive
configuration.
For more information, see Routing policies and BGP communities.
• IPv6: Specify a prefix length of /64 or shorter.
• You may add additional prefixes to an existing public VIF and advertise
those by contacting AWS support. In your support case, provide a list of
additional CIDR prefixes you want to add to the public VIF and advertise.
• You can specify any prefix length over a Direct Connect public virtual
interface. IPv4 should support anything from /1 - /32, and IPv6 should
support anything from /1 - /64.
(Private virtual
interface only)
Jumbo frames
The maximum transmission unit (MTU) of packets over AWS Direct Connect.
The default is 1500. Setting the MTU of a virtual interface to 9001 (jumbo
frames) can cause an update to the underlying physical connection if it
wasn't updated to support jumbo frames. Updating the connection disrupts
network connectivity for all virtual interfaces associated with the connectio
n for up to 30 seconds. Jumbo frames apply only to propagated routes from
AWS Direct Connect. If you add static routes to a route table that point to
your virtual private gateway, then traffic routed through the static routes
is sent using 1500 MTU. To check whether a connection or virtual interface
supports jumbo frames, select it in the AWS Direct Connect console and find
Jumbo frame capable on the virtual interface General configuration page.
Prerequisites for virtual interfaces 118

AWS Direct Connect User Guide
Resource Required information
(Transit virtual
interface only)
Jumbo frames
The maximum transmission unit (MTU) of packets over AWS Direct Connect.
The default is 1500. Setting the MTU of a virtual interface to 8500 (jumbo
frames) can cause an update to the underlying physical connection if it
wasn't updated to support jumbo frames. Updating the connection disrupts
network connectivity for all virtual interfaces associated with the connectio
n for up to 30 seconds. Jumbo frames are supported up to 8500 MTU for
Direct Connect. Static routes and propagated routes configured in the
Transit Gateway Route Table will support Jumbo Frames, including from
EC2 instances with VPC static route table entries to the Transit Gateway
Attachment. To check whether a connection or virtual interface supports
jumbo frames, select it in the AWS Direct Connect console and find Jumbo
frame capable on the virtual interface General configuration page.
When you create a virtual interface, you can specify the account that owns the virtual interface.
When you choose an AWS account that is not your account, the following rules apply:
• For private VIFs and transit VIFs, the account applies to the virtual interface and the virtual
private gateway/Direct Connect gateway destination.
• For public VIFs, the account is used for virtual interface billing. The Data Transfer Out (DTO)
usage is metered toward the resource owner at AWS Direct Connect data transfer rate.
Note
31-Bit prefixes are supported on all Direct Connect virtual interface types. See RFC 3021:
Using 31-Bit Prefixes on IPv4 Point-to-Point Links for more information.
MTUs for private virtual interfaces or transit virtual interfaces
AWS Direct Connect supports an Ethernet frame size of 1522 or 9023 bytes (14 bytes Ethernet
header + 4 bytes VLAN tag + bytes for the IP datagram + 4 bytes FCS) at the link layer.
The maximum transmission unit (MTU) of a network connection is the size, in bytes, of the largest
permissible packet that can be passed over the connection. The MTU of a virtual private interface
MTUs for private virtual interfaces or transit virtual interfaces 119

AWS Direct Connect User Guide
can be either 1500 or 9001 (jumbo frames). The MTU of a transit virtual interface can be either
1500 or 8500 (jumbo frames). You can specify the MTU when you create the interface or update it
after you create it. Setting the MTU of a virtual interface to 8500 (jumbo frames) or 9001 (jumbo
frames) can cause an update to the underlying physical connection if it wasn't updated to support
jumbo frames. Updating the connection disrupts network connectivity for all virtual interfaces
associated with the connection for up to 30 seconds. To check whether a connection or virtual
interface supports jumbo frames, select it in the AWS Direct Connect console and find Jumbo
Frame Capable on the Summary tab.
After you enable jumbo frames for your private virtual interface or transit virtual interface, you
can only associate it with a connection or LAG that is jumbo frame capable. Jumbo frames are
supported on a private virtual interface attached to either a virtual private gateway or a Direct
Connect gateway, or on a transit virtual interface attached to a Direct Connect gateway. If you have
two private virtual interfaces that advertise the same route but use different MTU values, or if you
have a Site-to-Site VPN that advertise the same route, 1500 MTU is used.
Important
Jumbo frames will apply only to propagated routes via AWS Direct Connect and static
routes via transit gateways. Jumbo frames on transit gateways support only 8500 bytes.
If an EC2 instance doesn't support jumbo frames, it drops jumbo frames from Direct
Connect. All EC2 instance types support jumbo frames except for C1, CC1, T1, and M1. For
more information, see Network Maximum Transmission Unit (MTU) for Your EC2 Instance in
the Amazon EC2 User Guide.
For hosted connections, Jumbo frames can be enabled only if originally enabled on the
Direct Connect hosted parent connection. If Jumbo frames isn't enabled on that parent
connection, then it can't be enabled on any connection.
For the steps to set the MTU for a private virtual interface, see Set the MTU of a private virtual
interface.
AWS Direct Connect virtual interfaces
You can create a transit virtual interface to connect to a transit gateway, a public virtual interface
to connect to public resources (non-VPC services), or a private virtual interface to connect to a VPC.
Virtual interfaces 120

AWS Direct Connect User Guide
To create a virtual interface for accounts within your AWS Organizations, or AWS Organizations
that are different from yours, create a hosted virtual interface.
See the following to create a virtual interface:
• Create a public virtual interface
• Create a private virtual interface
• Create a transit virtual interface to the Direct Connect gateway
Prerequisites
Before you begin, ensure that you have read the information in Prerequisites for virtual interfaces.
Prerequisites for transit virtual interfaces to a Direct Connect gateway
To connect your AWS Direct Connect connection to the transit gateway, you must create a transit
interface for your connection. Specify the Direct Connect gateway to which to connect.
The maximum transmission unit (MTU) of a network connection is the size, in bytes, of the largest
permissible packet that can be passed over the connection. The MTU of a virtual private interface
can be either 1500 or 9001 (jumbo frames). The MTU of a transit virtual interface can be either
1500 or 8500 (jumbo frames). You can specify the MTU when you create the interface or update it
after you create it. Setting the MTU of a virtual interface to 8500 (jumbo frames) or 9001 (jumbo
frames) can cause an update to the underlying physical connection if it wasn't updated to support
jumbo frames. Updating the connection disrupts network connectivity for all virtual interfaces
associated with the connection for up to 30 seconds. To check whether a connection or virtual
interface supports jumbo frames, select it in the AWS Direct Connect console and find Jumbo
Frame Capable on the Summary tab.
Important
If you associate your transit gateway with one or more Direct Connect gateways, the
Autonomous System Number (ASN) used by the transit gateway and the Direct Connect
gateway must be different. For example, if you use the default ASN 64512 for both the
transit gateway and the Direct Connect gateway, the association request fails.
Prerequisites for transit virtual interfaces to a Direct Connect gateway 121

AWS Direct Connect User Guide
Create an AWS Direct Connect public virtual interface
When you create a public virtual interface, it can take up to 72 hours for us to review and approve
your request.
To provision a public virtual interface
1. Open the AWS Direct Connect console at https://console.aws.amazon.com/directconnect/v2/
home.
2. In the navigation pane, choose Virtual Interfaces.
3. Choose Create virtual interface.
4. Under Virtual interface type, for Type, choose Public.
5. Under Public virtual interface settings, do the following:
a. For Virtual interface name, enter a name for the virtual interface.
b. For Connection, choose the Direct Connect connection that you want to use for this
interface.
c. For VLAN, enter the ID number for your virtual local area network (VLAN).
d. For BGP ASN, enter the Border Gateway Protocol Autonomous System Number of your on-
premises peer router for the new virtual interface.
The valid values are 1-2147483647.
6. Under Additional settings, do the following:
a. To configure an IPv4 BGP or an IPv6 peer, do the following:
[IPv4] To configure an IPv4 BGP peer, choose IPv4 and do one of the following:
• To specify these IP addresses yourself, for Your router peer ip, enter the destination IPv4
CIDR address to which Amazon should send traffic.
• For Amazon router peer IP, enter the IPv4 CIDR address to use to send traffic to AWS.
[IPv6] To configure an IPv6 BGP peer, choose IPv6. The peer IPv6 addresses are
automatically assigned from Amazon's pool of IPv6 addresses. You cannot specify custom
IPv6 addresses.
b. To provide your own BGP key, enter your BGP MD5 key.
Create a public virtual interface 122

AWS Direct Connect User Guide
If you do not enter a value, we generate a BGP key. If you provided your own key, or if we
generated the key for you, that value displays in the BGP authentication key column on the
virtual interface details page of Virtual interfaces.
c. To advertise prefixes to Amazon, for Prefixes you want to advertise, enter the IPv4 CIDR
destination addresses (separated by commas) to which traffic should be routed over the
virtual interface.
Important
You may add additional prefixes to an existing public VIF and advertise those by
contacting AWS support. In your support case, provide a list of additional CIDR
prefixes you want to add to the public VIF and advertise.
d. (Optional) Add or remove a tag.
[Add a tag] Choose Add tag and do the following:
• For Key, enter the key name.
• For Value, enter the key value.
[Remove a tag] Next to the tag, choose Remove tag.
7. Choose Create virtual interface.
8. Download the router configuration for your device. For more information, see Download the
router configuration file.
To create a public virtual interface using the command line or API
• create-public-virtual-interface (AWS CLI)
• CreatePublicVirtualInterface (AWS Direct Connect API)
Create an AWS Direct Connect private virtual interface
You can provision a private virtual interface to a virtual private gateway in the same Region as
your AWS Direct Connect connection. For more information about provisioning a private virtual
interface to an AWS Direct Connect gateway, see AWS Direct Connect gateways.
Create a private virtual interface 123

AWS Direct Connect User Guide
If you use the VPC wizard to create a VPC, route propagation is automatically enabled for you.
With route propagation, routes are automatically populated to the route tables in your VPC. If you
choose, you can disable route propagation. For more information, see Enable Route Propagation in
Your Route Table in the Amazon VPC User Guide.
The maximum transmission unit (MTU) of a network connection is the size, in bytes, of the largest
permissible packet that can be passed over the connection. The MTU of a virtual private interface
can be either 1500 or 9001 (jumbo frames). The MTU of a transit virtual interface can be either
1500 or 8500 (jumbo frames). You can specify the MTU when you create the interface or update it
after you create it. Setting the MTU of a virtual interface to 8500 (jumbo frames) or 9001 (jumbo
frames) can cause an update to the underlying physical connection if it wasn't updated to support
jumbo frames. Updating the connection disrupts network connectivity for all virtual interfaces
associated with the connection for up to 30 seconds. To check whether a connection or virtual
interface supports jumbo frames, select it in the AWS Direct Connect console and find Jumbo
Frame Capable on the Summary tab.
To provision a private virtual interface to a VPC
1. Open the AWS Direct Connect console at https://console.aws.amazon.com/directconnect/v2/
home.
2. In the navigation pane, choose Virtual Interfaces.
3. Choose Create virtual interface.
4. Under Virtual interface type, choose Private.
5. Under Private virtual interface settings, do the following:
a. For Virtual interface name, enter a name for the virtual interface.
b. For Connection, choose the Direct Connect connection that you want to use for this
interface.
c. For Virtual interface owner, choose My AWS account if the virtual interface is for your AWS
account.
d. For Direct Connect gateway, select the Direct Connect gateway.
e. For VLAN, enter the ID number for your virtual local area network (VLAN).
f. For BGP ASN, enter the Border Gateway Protocol Autonomous System Number of your on-
premises peer router for the new virtual interface.
The valid values are 1 to 2147483647.
Create a private virtual interface 124

AWS Direct Connect User Guide
6. Under Additional Settings, do the following:
a. To configure an IPv4 BGP or an IPv6 peer, do the following:
[IPv4] To configure an IPv4 BGP peer, choose IPv4 and do one of the following:
• To specify these IP addresses yourself, for Your router peer ip, enter the destination IPv4
CIDR address to which Amazon should send traffic.
• For Amazon router peer ip, enter the IPv4 CIDR address to use to send traffic to AWS.
Important
If you let AWS auto-assign IPv4 addresses, a /29 CIDR will be allocated from
169.254.0.0/16 IPv4 Link-Local according to RFC 3927 for point-to-point
connectivity. AWS does not recommend this option if you intend to use the
customer router peer IP address as the source and/or destination for VPC traffic.
Instead you should use RFC 1918 or other addressing (non-RFC 1918), and specify
the address yourself.
• For more information about RFC 1918, see Address Allocation for Private
Internets.
• For more information about RFC 3927, see Dynamic Configuration of IPv4 Link-
Local Addresses.
[IPv6] To configure an IPv6 BGP peer, choose IPv6. The peer IPv6 addresses are
automatically assigned from Amazon's pool of IPv6 addresses. You cannot specify custom
IPv6 addresses.
b. To change the maximum transmission unit (MTU) from 1500 (default) to 9001 (jumbo
frames), select Jumbo MTU (MTU size 9001).
c. (Optional) Under Enable SiteLink, choose Enabled to enable direct connectivity between
Direct Connect points of presence.
d. (Optional) Add or remove a tag.
[Add a tag] Choose Add tag and do the following:
• For Key, enter the key name.
• For Value, enter the key value.
[Remove a tag] Next to the tag, choose Remove tag.
Create a private virtual interface 125

AWS Direct Connect User Guide
7. Choose Create virtual interface.
8. Download the router configuration for your device. For more information, see Download the
router configuration file.
To create a private virtual interface using the command line or API
• create-private-virtual-interface (AWS CLI)
• CreatePrivateVirtualInterface (AWS Direct Connect API)
Create a transit virtual interface to the AWS Direct Connect gateway
Before connecting a transit virtual interface to the Direct Connect gateway, familiarize yourself
with the text.
To provision a transit virtual interface to a Direct Connect gateway
1. Open the AWS Direct Connect console at https://console.aws.amazon.com/directconnect/v2/
home.
2. In the navigation pane, choose Virtual Interfaces.
3. Choose Create virtual interface.
4. Under Virtual interface type, for Type, choose Transit.
5. Under Transit virtual interface settings, do the following:
a. For Virtual interface name, enter a name for the virtual interface.
b. For Connection, choose the Direct Connect connection that you want to use for this
interface.
c. For Virtual interface owner, choose My AWS account if the virtual interface is for your AWS
account.
d. For Direct Connect gateway, select the Direct Connect gateway.
e. For VLAN, enter the ID number for your virtual local area network (VLAN).
f. For BGP ASN, enter the Border Gateway Protocol Autonomous System Number of your on-
premises peer router for the new virtual interface.
The valid values are 1 to 2147483647.
6. Under Additional Settings, do the following:
Create a transit virtual interface to the Direct Connect gateway 126

AWS Direct Connect User Guide
a. To configure an IPv4 BGP or an IPv6 peer, do the following:
[IPv4] To configure an IPv4 BGP peer, choose IPv4 and do one of the following:
• To specify these IP addresses yourself, for Your router peer ip, enter the destination IPv4
CIDR address to which Amazon should send traffic.
• For Amazon router peer ip, enter the IPv4 CIDR address to use to send traffic to AWS.
Important
If you let AWS auto-assign IPv4 addresses, a /29 CIDR will be allocated from
169.254.0.0/16 IPv4 Link-Local according to RFC 3927 for point-to-point
connectivity. AWS does not recommend this option if you intend to use the
customer router peer IP address as the source and/or destination for VPC traffic.
Instead you should use RFC 1918 or other addressing (non-RFC 1918), and specify
the address yourself.
• For more information about RFC 1918, see Address Allocation for Private
Internets.
• For more information about RFC 3927, see Dynamic Configuration of IPv4 Link-
Local Addresses.
[IPv6] To configure an IPv6 BGP peer, choose IPv6. The peer IPv6 addresses are
automatically assigned from Amazon's pool of IPv6 addresses. You cannot specify custom
IPv6 addresses.
b. To change the maximum transmission unit (MTU) from 1500 (default) to 8500 (jumbo
frames), select Jumbo MTU (MTU size 8500).
c. (Optional) Under Enable SiteLink, choose Enabled to enable direct connectivity between
Direct Connect points of presence.
d. (Optional) Add or remove a tag.
[Add a tag] Choose Add tag and do the following:
• For Key, enter the key name.
• For Value, enter the key value.
[Remove a tag] Next to the tag, choose Remove tag.
7. Choose Create virtual interface.
Create a transit virtual interface to the Direct Connect gateway 127

AWS Direct Connect User Guide
After you create the virtual interface, you can download the router configuration for your device.
For more information, see Download the router configuration file.
To create a transit virtual interface using the command line or API
• create-transit-virtual-interface (AWS CLI)
• CreateTransitVirtualInterface (AWS Direct Connect API)
To view the virtual interfaces that are attached to a Direct Connect gateway using the
command line or API
• describe-direct-connect-gateway-attachments (AWS CLI)
• DescribeDirectConnectGatewayAttachments (AWS Direct Connect API)
Download the AWS Direct Connect router configuration file
After you create the virtual interface and the interface state is up, you can download the router
configuration file for your router.
If you use any of the following routers for virtual interfaces that have MACsec turned on, we
automatically create the configuration file for your router:
• Cisco Nexus 9K+ Series switches running NX-OS 9.3 or later software
• Juniper Networks M/MX Series Routers running JunOS 9.5 or later software
1. Open the AWS Direct Connect console at https://console.aws.amazon.com/directconnect/v2/
home.
2. In the navigation pane, choose Virtual Interfaces.
3. Select the virtual interface and then choose View details.
4. Choose Download router configuration.
5. For Download router configuration, do the following:
a. For Vendor, select the manufacturer of your router.
b. For Platform, select the model of your router.
c. For Software, select the software version for your router.
Download the router configuration file 128

AWS Direct Connect User Guide
6. Choose Download, and then use the appropriate configuration for your router to ensure that
you can connect to AWS Direct Connect.
7. If you need to manually configure your router for MACsec, use the following table as a
guideline.
Parameter Description
CKN length This is a 64 hexadecimal character (0–9, A–E) string. Use the full length
to maximize cross-platform compatibility.
CAK length This is a 64 hexadecimal character (0–9, A–E) string. Use the full length
to maximize cross-platform compatibility.
Cryptographic
algorithm
AES_256_CMAC
SAK Cipher
Suite
• For 100 Gbps connections: GCM_AES_XPN_256
• For 10 Gbps connections: GCM_AES_XPN_256 or GCM_AES _256
Key Cipher
Suite
16
Confidentiality
Offset
0
ICV Indicator No
SAK Rekey Time PN Rollover>
Hosted AWS Direct Connect virtual interfaces
To use your AWS Direct Connect connection with another account, you can create a hosted virtual
interface for that account. The owner of the other account must accept the hosted virtual interface
to begin using it. A hosted virtual interface works the same as a standard virtual interface and can
connect to public resources or a VPC.
You can use transit virtual interfaces with Direct Connect dedicated or hosted connections of any
speed. Hosted connections support only one virtual interface.
Hosted virtual interfaces 129

AWS Direct Connect User Guide
To create a virtual interface, you need the following information:
Resource Required information
Connection The AWS Direct Connect connection or link aggregation group (LAG) for
which you are creating the virtual interface.
Virtual
interface name
A name for the virtual interface.
Virtual
interface owner
If you're creating the virtual interface for another account, you need the
AWS account ID of the other account.
(Private virtual
interface only)
Connection
For connecting to a VPC in the same AWS Region, you need the virtual
private gateway for your VPC. The ASN for the Amazon side of the BGP
session is inherited from the virtual private gateway. When you create a
virtual private gateway, you can specify your own private ASN. Otherwise,
Amazon provides a default ASN. For more information, see Create a Virtual
Private Gateway in the Amazon VPC User Guide. For connecting to a VPC
through a Direct Connect gateway, you need the Direct Connect gateway.
For more information, see Direct Connect Gateways.
VLAN A unique virtual local area network (VLAN) tag that's not already in use on
your connection. The value must be between 1 and 4094 and must comply
with the Ethernet 802.1Q standard. This tag is required for any traffic
traversing the AWS Direct Connect connection.
If you have a hosted connection, your AWS Direct Connect Partner provides
this value. You can’t modify the value after you have created the virtual
interface.
Peer IP
addresses
A virtual interface can support a BGP peering session for IPv4, IPv6, or
one of each (dual-stack). Do not use Elastic IPs (EIPs) or Bring your own IP
addresses (BYOIP) from the Amazon Pool to create a public virtual interface
. You cannot create multiple BGP sessions for the same IP addressing family
on the same virtual interface. The IP address ranges are assigned to each
end of the virtual interface for the BGP peering session.
• IPv4:
Hosted virtual interfaces 130

AWS Direct Connect User Guide
Resource Required information
• (Public virtual interface only) You must specify unique public IPv4
addresses that you own. The value can be one of the following:
• A customer-owned IPv4 CIDR
These can be any public IPs (customer-owned or provided by AWS),
but the same subnet mask must be used for both your peer IP and
the AWS router peer IP. For example, if you allocate a /31 range, such
as 203.0.113.0/31 , you could use 203.0.113.0 for your peer
IP and 203.0.113.1 for the AWS peer IP. Or, if you allocate a /24
range, such as 198.51.100.0/24 , you could use 198.51.100.10
for your peer IP and 198.51.100.20 for the AWS peer IP.
• An IP range owned by your AWS Direct Connect Partner or ISP, along
with an LOA-CFA authorization
• An AWS-provided /31 CIDR. Contact AWS Support to request a public
IPv4 CIDR (and provide a use case in your request)
Note
We cannot guarantee that we will be able to fulfill all requests
for AWS-provided public IPv4 addresses.
• (Private virtual interface only) Amazon can generate private IPv4
addresses for you. If you specify your own, ensure that you specify
private CIDRs for your router interface and the AWS Direct Connect
interface only. For example, do not specify other IP addresses from your
local network. Similar to a public virtual interface, the same subnet
mask must be used for both your peer IP and the AWS router peer IP.
For example, if you allocate a /30 range, such as 192.168.0.0/30 ,
you could use 192.168.0.1 for your peer IP and 192.168.0.2 for
the AWS peer IP.
• IPv6: Amazon automatically allocates you a /125 IPv6 CIDR. You cannot
specify your own peer IPv6 addresses.
Address family Whether the BGP peering session will be over IPv4 or IPv6.
Hosted virtual interfaces 131

AWS Direct Connect User Guide
Resource Required information
BGP informati
on
• A public or private Border Gateway Protocol (BGP) Autonomous System
Number (ASN) for your side of the BGP session. If you are using a public
ASN, you must own it. If you are using a private ASN, you can set a custom
ASN value. For a 16-bit ASN, the value must be in the 64512 to 65534
range. For a 32-bit ASN, the value must be in the 1 to 2147483647 range.
Autonomous System (AS) prepending does not work if you use a private
ASN for a public virtual interface.
• AWS enables MD5 by default. You cannot modify this option.
• An MD5 BGP authentication key. You can provide your own, or you can let
Amazon generate one for you.
(Public virtual
interface
only) Prefixes
you want to
advertise
Public IPv4 routes or IPv6 routes to advertise over BGP. You must advertise
at least one prefix using BGP, up to a maximum of 1,000 prefixes.
• IPv4: The IPv4 CIDR can overlap with another public IPv4 CIDR announced
using AWS Direct Connect when either of the following is true:
• The CIDRs are from different AWS Regions. Make sure that you apply
BGP community tags on the public prefixes.
• You use AS_PATH when you have a public ASN in an active/passive
configuration.
For more information, see Routing policies and BGP communities.
• IPv6: Specify a prefix length of /64 or shorter.
• You may add additional prefixes to an existing public VIF and advertise
those by contacting AWS support. In your support case, provide a list of
additional CIDR prefixes you want to add to the public VIF and advertise.
• You can specify any prefix length over a Direct Connect public virtual
interface. IPv4 should support anything from /1 - /32, and IPv6 should
support anything from /1 - /64.
Hosted virtual interfaces 132

AWS Direct Connect User Guide
Resource Required information
(Private virtual
interface only)
Jumbo frames
The maximum transmission unit (MTU) of packets over AWS Direct Connect.
The default is 1500. Setting the MTU of a virtual interface to 9001 (jumbo
frames) can cause an update to the underlying physical connection if it
wasn't updated to support jumbo frames. Updating the connection disrupts
network connectivity for all virtual interfaces associated with the connectio
n for up to 30 seconds. Jumbo frames apply only to propagated routes from
AWS Direct Connect. If you add static routes to a route table that point to
your virtual private gateway, then traffic routed through the static routes
is sent using 1500 MTU. To check whether a connection or virtual interface
supports jumbo frames, select it in the AWS Direct Connect console and find
Jumbo frame capable on the virtual interface General configuration page.
(Transit virtual
interface only)
Jumbo frames
The maximum transmission unit (MTU) of packets over AWS Direct Connect.
The default is 1500. Setting the MTU of a virtual interface to 8500 (jumbo
frames) can cause an update to the underlying physical connection if it
wasn't updated to support jumbo frames. Updating the connection disrupts
network connectivity for all virtual interfaces associated with the connectio
n for up to 30 seconds. Jumbo frames are supported up to 8500 MTU for
Direct Connect. Static routes and propagated routes configured in the
Transit Gateway Route Table will support Jumbo Frames, including from
EC2 instances with VPC static route table entries to the Transit Gateway
Attachment. To check whether a connection or virtual interface supports
jumbo frames, select it in the AWS Direct Connect console and find Jumbo
frame capable on the virtual interface General configuration page.
Create a hosted private virtual interface in AWS Direct Connect
Before you begin, ensure that you have read the information in Prerequisites for virtual interfaces.
To create a hosted private virtual interface
1. Open the AWS Direct Connect console at https://console.aws.amazon.com/directconnect/v2/
home.
2. In the navigation pane, choose Virtual Interfaces.
Create a hosted private virtual interface 133

AWS Direct Connect User Guide
3. Choose Create virtual interface.
4. Under Virtual interface type, for Type, choose Private.
5. Under Private virtual interface settings, do the following:
a. For Virtual interface name, enter a name for the virtual interface.
b. For Connection, choose the Direct Connect connection that you want to use for this
interface.
c. For Virtual interface owner, choose Another AWS account, and then for Virtual interface
owner, enter the ID of the account to own this virtual interface.
d. For VLAN, enter the ID number for your virtual local area network (VLAN).
e. For BGP ASN, enter the Border Gateway Protocol Autonomous System Number of your on-
premises peer router for the new virtual interface.
The valid values are 1-2147483647.
6. Under Additional Settings, do the following:
a. To configure an IPv4 BGP or an IPv6 peer, do the following:
[IPv4] To configure an IPv4 BGP peer, choose IPv4 and do one of the following:
• To specify these IP addresses yourself, for Your router peer ip, enter the destination IPv4
CIDR address to which Amazon should send traffic.
• For Amazon router peer ip, enter the IPv4 CIDR address to use to send traffic to AWS.
Important
If you let AWS auto-assign IP addresses, a /29 CIDR will be allocated from
169.254.0.0/16. AWS does not recommend this option if you intend to use the
customer router peer IP address as the source and destination for traffic. Instead
you should use RFC 1918 or other addressing (non-RFC 1918), and specify the
address yourself. For more information about RFC 1918 see Address Allocation
for Private Internets.
[IPv6] To configure an IPv6 BGP peer, choose IPv6. The peer IPv6 addresses are
automatically assigned from Amazon's pool of IPv6 addresses. You cannot specify custom
IPv6 addresses.
Create a hosted private virtual interface 134

AWS Direct Connect User Guide
b. To change the maximum transmission unit (MTU) from 1500 (default) to 9001 (jumbo
frames), select Jumbo MTU (MTU size 9001).
c. (Optional) Add or remove a tag.
[Add a tag] Choose Add tag and do the following:
• For Key, enter the key name.
• For Value, enter the key value.
[Remove a tag] Next to the tag, choose Remove tag.
7. After the hosted virtual interface is accepted by the owner of the other AWS account, you can
download the configuration file. For more information, see Download the router configuration
file.
To create a hosted private virtual interface using the command line or API
• allocate-private-virtual-interface (AWS CLI)
• AllocatePrivateVirtualInterface (AWS Direct Connect API)
Create a hosted public virtual interface in AWS Direct Connect
Before you begin, ensure that you have read the information in Prerequisites for virtual interfaces.
To create a hosted public virtual interface
1. Open the AWS Direct Connect console at https://console.aws.amazon.com/directconnect/v2/
home.
2. In the navigation pane, choose Virtual Interfaces.
3. Choose Create virtual interface.
4. Under Virtual interface type, for Type, choose Public.
5. Under Public Virtual Interface Settings, do the following:
a. For Virtual interface name, enter a name for the virtual interface.
b. For Connection, choose the Direct Connect connection that you want to use for this
interface.
c. For Virtual interface owner, choose Another AWS account, and then for Virtual interface
owner, enter the ID of the account to own this virtual interface.
Create a hosted public virtual interface 135

AWS Direct Connect User Guide
d. For VLAN, enter the ID number for your virtual local area network (VLAN).
e. For BGP ASN, enter the Border Gateway Protocol Autonomous System Number of your on-
premises peer router for the new virtual interface.
The valid values are 1-2147483647.
6. To configure an IPv4 BGP or an IPv6 peer, do the following:
[IPv4] To configure an IPv4 BGP peer, choose IPv4 and do one of the following:
• To specify these IP addresses yourself, for Your router peer ip, enter the destination IPv4
CIDR address to which Amazon should send traffic.
• For Amazon router peer ip, enter the IPv4 CIDR address to use to send traffic to AWS.
Important
If you let AWS auto-assign IP addresses, a /29 CIDR will be allocated from
169.254.0.0/16. AWS does not recommend this option if you intend to use the
customer router peer IP address as the source and destination for traffic. Instead you
should use RFC 1918 or other addressing, and specify the address yourself. For more
information about RFC 1918 see Address Allocation for Private Internets.
[IPv6] To configure an IPv6 BGP peer, choose IPv6. The peer IPv6 addresses are automatically
assigned from Amazon's pool of IPv6 addresses. You cannot specify custom IPv6 addresses.
7. To advertise prefixes to Amazon, for Prefixes you want to advertise, enter the IPv4 CIDR
destination addresses (separated by commas) to which traffic should be routed over the virtual
interface.
8. To provide your own key to authenticate the BGP session, under Additional Settings, for BGP
authentication key, enter the key.
If you do not enter a value, then we generate a BGP key.
9. (Optional) Add or remove a tag.
[Add a tag] Choose Add tag and do the following:
• For Key, enter the key name.
• For Value, enter the key value.
Create a hosted public virtual interface 136

AWS Direct Connect User Guide
[Remove a tag] Next to the tag, choose Remove tag.
10. Choose Create virtual interface.
11. After the hosted virtual interface is accepted by the owner of the other AWS account, you can
download the configuration file. For more information, see Download the router configuration
file.
To create a hosted public virtual interface using the command line or API
• allocate-public-virtual-interface (AWS CLI)
• AllocatePublicVirtualInterface (AWS Direct Connect API)
Create an AWS Direct Connect hosted transit virtual interface
To create a hosted transit virtual interface
Important
If you associate your transit gateway with one or more Direct Connect gateways, the
Autonomous System Number (ASN) used by the transit gateway and the Direct Connect
gateway must be different. For example, if you use the default ASN 64512 for both the
transit gateway and the Direct Connect gateway, the association request fails.
1. Open the AWS Direct Connect console at https://console.aws.amazon.com/directconnect/v2/
home.
2. In the navigation pane, choose Virtual Interfaces.
3. Choose Create virtual interface.
4. Under Virtual interface type, for Type, choose Transit.
5. Under Transit virtual interface settings, do the following:
a. For Virtual interface name, enter a name for the virtual interface.
b. For Connection, choose the Direct Connect connection that you want to use for this
interface.
c. For Virtual interface owner, choose Another AWS account, and then for Virtual interface
owner, enter the ID of the account to own this virtual interface.
Create a hosted transit virtual interface 137

AWS Direct Connect User Guide
d. For VLAN, enter the ID number for your virtual local area network (VLAN).
e. For BGP ASN, enter the Border Gateway Protocol Autonomous System Number of your on-
premises peer router for the new virtual interface.
The valid values are 1-2147483647.
6. Under Additional Settings, do the following:
a. To configure an IPv4 BGP or an IPv6 peer, do the following:
[IPv4] To configure an IPv4 BGP peer, choose IPv4 and do one of the following:
• To specify these IP addresses yourself, for Your router peer ip, enter the destination IPv4
CIDR address to which Amazon should send traffic.
• For Amazon router peer ip, enter the IPv4 CIDR address to use to send traffic to AWS.
Important
If you let AWS auto-assign IP addresses, a /29 CIDR will be allocated from
169.254.0.0/16. AWS does not recommend this option if you intend to use
the customer router peer IP address as the source and destination for traffic.
Instead you should use RFC 1918 or other addressing, and specify the address
yourself. For more information about RFC 1918 see Address Allocation for Private
Internets.
[IPv6] To configure an IPv6 BGP peer, choose IPv6. The peer IPv6 addresses are
automatically assigned from Amazon's pool of IPv6 addresses. You cannot specify custom
IPv6 addresses.
b. To change the maximum transmission unit (MTU) from 1500 (default) to 8500 (jumbo
frames), select Jumbo MTU (MTU size 8500).
c. [Optional] Add a tag. Do the following:
[Add a tag] Choose Add tag and do the following:
• For Key, enter the key name.
• For Value, enter the key value.
[Remove a tag] Next to the tag, choose Remove tag.
7. Choose Create virtual interface.
Create a hosted transit virtual interface 138

AWS Direct Connect User Guide
8. After the hosted virtual interface is accepted by the owner of the other AWS account, you can
download the router configuration file for your device. For more information, see Download
the router configuration file.
To create a hosted transit virtual interface using the command line or API
• allocate-transit-virtual-interface (AWS CLI)
• AllocateTransitVirtualInterface (AWS Direct Connect API)
View AWS Direct Connect virtual interface details
You can view the current status of your virtual interface using either the AWS Direct Connect
console or using the command line or API. Details include:
• Connection state
• Name
• Location
• VLAN
• BGP details
• Peer IP addresses
To view details about a virtual interface
1. Open the AWS Direct Connect console at https://console.aws.amazon.com/directconnect/v2/
home.
2. In the left pane, choose Virtual Interfaces.
3. Select the virtual interface and then choose View details.
To describe virtual interfaces using the command line or API
• describe-virtual-interfaces (AWS CLI)
• DescribeVirtualInterfaces (AWS Direct Connect API)
View virtual interface details 139

AWS Direct Connect User Guide
Add a BGP peer to an AWS Direct Connect virtual interface
Add or delete an IPv4 or IPv6 BGP peering session to your virtual interface using either the AWS
Direct Connect console or using the command line or API.
A virtual interface can support a single IPv4 BGP peering session and a single IPv6 BGP peering
session. You cannot specify your own peer IPv6 addresses for an IPv6 BGP peering session. Amazon
automatically allocates you a /125 IPv6 CIDR.
Multi-protocol BGP is not supported. IPv4 and IPv6 operate in dual-stack mode for the virtual
interface.
AWS enables MD5 by default. You cannot modify this option.
Use the following procedure to add a BGP peer.
To add a BGP peer
1. Open the AWS Direct Connect console at https://console.aws.amazon.com/directconnect/v2/
home.
2. In the navigation pane, choose Virtual Interfaces.
3. Select the virtual interface and then choose View details.
4. Choose Add peering.
5. (Private virtual interface) To add IPv4 BGP peers, do the following:
• Choose IPv4.
• To specify these IP addresses yourself, for Your router peer ip, enter the destination IPv4
CIDR address to which Amazon should send traffic. For Amazon router peer ip, enter the
IPv4 CIDR address to use to send traffic to AWS.
6. (Public virtual interface) To add IPv4 BGP peers, do the following:
• For Your router peer ip, enter the IPv4 CIDR destination address where traffic should be
sent.
• For Amazon router peer IP, enter the IPv4 CIDR address to use to send traffic to AWS.
Important
If you let AWS auto-assign IP addresses, a /29 CIDR will be allocated from
169.254.0.0/16. AWS does not recommend this option if you intend to use the
Add a BGP peer 140

AWS Direct Connect User Guide
customer router peer IP address as the source and destination for traffic. Instead you
should use RFC 1918 or other addressing, and specify the address yourself. For more
information about RFC 1918 see Address Allocation for Private Internets.
7. (Private or public virtual interface) To add IPv6 BGP peers, choose IPv6. The peer IPv6
addresses are automatically assigned from Amazon's pool of IPv6 addresses; you cannot
specify custom IPv6 addresses.
8. For BGP ASN, enter the Border Gateway Protocol Autonomous System Number of your on-
premises peer router for the new virtual interface.
For a public virtual interface, the ASN must be private or already on the allow list for the
virtual interface.
The valid values are 1-2147483647.
Note that if you do not enter a value, we automatically assign one.
9. To provide your own BGP key, for BGP Authentication Key, enter your BGP MD5 key.
10. Choose Add peering.
To create a BGP peer using the command line or API
• create-bgp-peer (AWS CLI)
• CreateBGPPeer (AWS Direct Connect API)
Delete an AWS Direct Connect virtual interface BGP peer
If your virtual interface has both an IPv4 and IPv6 BGP peering session, you can delete one of the
BGP peering sessions (but not both). You can delete a virtual interface BGP peer using either the
AWS Direct Connect console or using the command line or API.
To delete a BGP peer
1. Open the AWS Direct Connect console at https://console.aws.amazon.com/directconnect/v2/
home.
2. In the navigation pane, choose Virtual Interfaces.
3. Select the virtual interface and then choose View details.
Delete a BGP peer 141

AWS Direct Connect User Guide
4. Under Peerings, select the peering that you want to delete and then choose Delete.
5. In the Remove peering from virtual interface dialog box, choose Delete.
To delete a BGP peer using the command line or API
• delete-bgp-peer (AWS CLI)
• DeleteBGPPeer (AWS Direct Connect API)
Set the MTU of an AWS Direct Connect private virtual interface
If your virtual interface has both an IPv4 and IPv6 BGP peering session, you can delete one of
the BGP peering sessions (but not both). For more information about MTUs and private virtual
interfaces, see MTUs for private virtual interfaces or transit virtual interfaces.
You can set the MTU of a private virtual interface using either the AWS Direct Connect console or
using the command line or API.
To set the MTU of a private virtual interface
1. Open the AWS Direct Connect console at https://console.aws.amazon.com/directconnect/v2/
home.
2. In the navigation pane, choose Virtual Interfaces.
3. Select the virtual interface and then choose Edit.
4. Under Jumbo MTU (MTU size 9001) or Jumbo MTU (MTU size 8500), select Enabled.
5. Under Acknowledge, select I understand the selected connection(s) will go down for a brief
period. The state of the virtual interface is pending until the update is complete.
To set the MTU of a private virtual interface using the command line or API
• update-virtual-interface-attributes (AWS CLI)
• UpdateVirtualInterfaceAttributes (AWS Direct Connect API)
Set the MTU of a private virtual interface 142

AWS Direct Connect User Guide
Add or remove AWS Direct Connect virtual interface tags
Tags provide a way to identify the virtual interface. You can add or remove a tag using either the
AWS Direct Connect console or using the command line or API if you are the account owner for the
virtual interface.
To add or remove a virtual interface tag
1. Open the AWS Direct Connect console at https://console.aws.amazon.com/directconnect/v2/
home.
2. In the navigation pane, choose Virtual Interfaces.
3. Select the virtual interface and then choose Edit.
4. Add or remove a tag.
[Add a tag] Choose Add tag and do the following:
• For Key, enter the key name.
• For Value, enter the key value.
[Remove a tag] Next to the tag, choose Remove tag.
5. Choose Edit virtual interface.
To add a tag or remove a tag using the command line
• tag-resource (AWS CLI)
• untag-resource (AWS CLI)
Delete an AWS Direct Connect virtual interface
Delete one or more virtual interfaces. Before you can delete a connection, you must delete its
virtual interface. Deleting a virtual interface stops AWS Direct Connect data transfer charges
associated with the virtual interface.
You can delete a virtual interface using either the AWS Direct Connect console or the command
line or API.
Add or remove virtual interface tags 143

AWS Direct Connect User Guide
To delete a virtual interface
1. Open the AWS Direct Connect console at https://console.aws.amazon.com/directconnect/v2/
home.
2. In the left pane, choose Virtual Interfaces.
3. Select the virtual interfaces and then choose Delete.
4. In the Delete confirmation dialog box, choose Delete.
To delete a virtual interface using the command line or API
• delete-virtual-interface (AWS CLI)
• DeleteVirtualInterface (AWS Direct Connect API)
Accept a hosted AWS Direct Connect virtual interface
Before you can begin using a hosted virtual interface, you must accept the virtual interface. For a
private virtual interface, you must also have an existing virtual private gateway or Direct Connect
gateway. For a transit virtual interface, you must have an existing transit gateway or Direct Connect
gateway.
You can accept a hosted virtual interface using either the AWS Direct Connect console or the
command line or API.
To accept a hosted virtual interface
1. Open the AWS Direct Connect console at https://console.aws.amazon.com/directconnect/v2/
home.
2. In the navigation pane, choose Virtual Interfaces.
3. Select the virtual interface and then choose View details.
4. Choose Accept.
5. This applies to private virtual interfaces and transit virtual interfaces.
(Transit virtual interface) In the Accept virtual interface dialog box, select a Direct Connect
gateway, and then choose Accept virtual interface.
(Private virtual interface) In the Accept virtual interface dialog box, select a virtual private
gateway or Direct Connect gateway, and then choose Accept virtual interface.
Accept a hosted virtual interface 144
AWS Direct Connect User Guide
6. After you accept the hosted virtual interface, the owner of the AWS Direct Connect connection
can download the router configuration file. The Download router configuration option is not
available for the account that accepts the hosted virtual interface.
To accept a hosted private virtual interface using the command line or API
• confirm-private-virtual-interface (AWS CLI)
• ConfirmPrivateVirtualInterface (AWS Direct Connect API)
To accept a hosted public virtual interface using the command line or API
• confirm-public-virtual-interface (AWS CLI)
• ConfirmPublicVirtualInterface (AWS Direct Connect API)
To accept a hosted transit virtual interface using the command line or API
• confirm-transit-virtual-interface (AWS CLI)
• ConfirmTransitVirtualInterface (AWS Direct Connect API)
Migrate an AWS Direct Connect virtual interface
Use this procedure when you want to perform any of the following virtual interface migration
operations:
• Migrate an existing virtual interface associated with a connection to another LAG.
• Migrate an existing virtual interface associated with an existing LAG to a new LAG.
• Migrate an existing virtual interface associated with a connection to another connection.
Note
• You can migrate a virtual interface to a new connection within the same Region, but you
can't migrate it from one Region to another. When you migrate or associate an existing
virtual interface to a new connection, the configuration parameters associated with those
virtual interfaces are the same. To work around this, you can pre-stage the configuration
on the connection, and then update the BGP configuration.
Migrate a virtual interface 145

AWS Direct Connect User Guide
• You can't migrate a VIF from one hosted connection to another hosted connection.
VLAN IDs are unique; therefore, migrating a VIF in this way would mean the VLANs don't
match. You either need to delete the connection or VIF, and then recreate that using a
VLAN that's the same for both the connection and the VIF.
Important
The virtual interface will go down for a brief period. We recommend you perform this
procedure during a maintenance window.
To migrate a virtual interface
1. Open the AWS Direct Connect console at https://console.aws.amazon.com/directconnect/v2/
home.
2. In the navigation pane, choose Virtual Interfaces.
3. Select the virtual interface, and then choose Edit.
4. For Connection, select the LAG or connection.
5. Choose Edit virtual interface.
To migrate a virtual interface using the command line or API
• associate-virtual-interface (AWS CLI)
• AssociateVirtualInterface (AWS Direct Connect API)
Migrate a virtual interface 146

AWS Direct Connect User Guide
Link aggregation groups (LAGs)
You can use multiple connections to increase available bandwidth. A link aggregation group (LAG)
is a logical interface that uses the Link Aggregation Control Protocol (LACP) to aggregate multiple
connections at a single AWS Direct Connect endpoint, allowing you to treat them as a single,
managed connection. LAGs streamline configuration because the LAG configuration applies to all
connections in the group.
Note
Multi-chassis LAG (MLAG) is not supported by AWS.
In the following diagram, you have four connections, with two connections to each location. You
can create a LAG for connections that terminate on the same AWS device and in the same location,
and then use the two LAGs instead of the four connections for configuration and management.
You can create a LAG from existing connections, or you can provision new connections. After you've
created the LAG, you can associate existing connections (whether standalone or part of another
LAG) with the LAG.
The following rules apply:
147

AWS Direct Connect User Guide
• All connections must be dedicated connections and have a port speed of 1 Gbps, 10 Gbps, 100
Gbps, or 400 Gbps.
• All connections in the LAG must use the same bandwidth.
• You can have a maximum of two 100 Gbps or 400 Gbps connections, or four connections with a
port speed less than 100 Gbps in a LAG. Each connection in the LAG counts towards your overall
connection limit for the Region.
• All connections in the LAG must terminate at the same AWS Direct Connect endpoint.
• LAGs are supported for all virtual interface types—public, private, and transit.
When you create a LAG, you can download the Letter of Authorization and Connecting Facility
Assignment (LOA-CFA) for eanew physical connection individually from the AWS Direct Connect
console. For more information, see Letter of Authorization and Connecting Facility Assignment
(LOA-CFA).
All LAGs have an attribute that determines the minimum number of connections in the LAG that
must be operational for the LAG itself to be operational. By default, new LAGs have this attribute
set to 0. You can update your LAG to specify a different value—doing so means that your entire
LAG becomes non-operational if the number of operational connections falls below this threshold.
This attribute can be used to prevent over-utilization of the remaining connections.
All connections in a LAG operate in Active/Active mode.
Note
When you create a LAG or associate more connections with the LAG, we may not be able to
guarantee enough available ports on a given AWS Direct Connect endpoint.
Topics
• MACsec considerations for AWS Direct Connect
• Create a LAG at an AWS Direct Connect endpoint
• View LAG details at an AWS Direct Connect endpoint
• Update a LAG at an AWS Direct Connect endpoint
• Associate a connection with a LAG at an AWS Direct Connect endpoint
• Disassociate a connection from a LAG at an AWS Direct Connect endpoint
148

AWS Direct Connect User Guide
• Associate a MACsec CKN/CAK with an AWS Direct Connect endpoint LAG
• Remove the association between a MACsec secret key and an AWS Direct Connect endpoint LAG
• Delete an AWS Direct Connect endpoint LAG
MACsec considerations for AWS Direct Connect
Take the following into consideration when you want to configure MACsec on LAGs:
• When you create a LAG from existing connections, we disassociate all of the MACsec keys from
the connections. Then we add the connections to the LAG, and associate the LAG MACsec key
with the connections.
• When you associate an existing connection to a LAG, the MACsec keys that are currently
associated with the LAG are associated with the connection. Therefore, we disassociate the
MACsec keys from the connection, add the connection to the LAG, and then associate the LAG
MACsec key with the connection.
Create a LAG at an AWS Direct Connect endpoint
You can create a LAG by provisioning new connections, or aggregating existing connections.
You cannot create a LAG with new connections if this results in you exceeding the overall
connections limit for the Region.
To create a LAG from existing connections, the connections must be on the same AWS device
(terminate at the same AWS Direct Connect endpoint). They must also use the same bandwidth.
You cannot migrate a connection from an existing LAG if removing the connection causes the
original LAG to fall below its setting for the minimum number of operational connections.
Important
For existing connections, connectivity to AWS is interrupted during the creation of the LAG.
To create a LAG with new connections
1. Open the AWS Direct Connect console at https://console.aws.amazon.com/directconnect/v2/
home.
MACsec considerations 149

AWS Direct Connect User Guide
2. In the navigation pane, choose LAGs.
3. Choose Create LAG.
4. Under Lag creation type, choose Request new connections, and provide the following
information:
• LAG name: A name for the LAG.
• Location: The location for the LAG.
• Port speed: The port speed for the connections.
• Number of new connections: The number of new connections to create. You can have a
maximum of four connections when the port speed is 1G or 10G, or two when the port
speed is 100 Gbps or 400 Gbps.
• (Optional) Configure MAC security (MACsec) for the connection. Under Additional Settings,
select Request a MACsec capable port.
MACsec is only available on dedicated connections.
• (Optional) Add or remove a tag.
[Add a tag] Choose Add tag and do the following:
• For Key, enter the key name.
• For Value, enter the key value.
[Remove a tag] Next to the tag, choose Remove tag.
5. Choose Create LAG.
To create a LAG from existing connections
1. Open the AWS Direct Connect console at https://console.aws.amazon.com/directconnect/v2/
home.
2. In the navigation pane, choose LAGs.
3. Choose Create LAG.
4. Under Lag creation type, choose Use existing connections, and provide the following
information:
• LAG name: A name for the LAG.
• Existing connections: The Direct Connect connection to use for the LAG.
Create a LAG 150

AWS Direct Connect User Guide
• (Optional) Number of new connections: The number of new connections to create. You can
have a maximum of four connections when the port speed is 1G or 10G, or two when the
port speed 100 Gbps or 400 Gbps.
• Minimum links: The minimum number of connections that must be operational for the LAG
itself to be operational. If you do not specify a value, we assign a default value of 0.
5. (Optional) Add or remove a tag.
[Add a tag] Choose Add tag and do the following:
• For Key, enter the key name.
• For Value, enter the key value.
[Remove a tag] Next to the tag, choose Remove tag.
6. Choose Create LAG.
To create a LAG using the command line or API
• create-lag (AWS CLI)
• CreateLag (AWS Direct Connect API)
To describe your LAGs using the command line or API
• describe-lags (AWS CLI)
• DescribeLags (AWS Direct Connect API)
To download the LOA-CFA using the command line or API
• describe-loa (AWS CLI)
• DescribeLoa (AWS Direct Connect API)
After you create a LAG, you can associate or disassociate connections from it. For more
information, see Associate a connection with a LAG and Disassociate a connection from a LAG.
Create a LAG 151

AWS Direct Connect User Guide
View LAG details at an AWS Direct Connect endpoint
After you create a LAG, you can view its details using either the AWS Direct Connect console or
using the command line or API.
To view information about your LAG
1. Open the AWS Direct Connect console at https://console.aws.amazon.com/directconnect/v2/
home.
2. In the navigation pane, choose LAGs.
3. Select the LAG and choose View details.
4. You can view information about the LAG, including its ID, and the AWS Direct Connect
endpoint on which the connections terminate.
To view information about your LAG using the command line or API
• describe-lags (AWS CLI)
• DescribeLags (AWS Direct Connect API)
Update a LAG at an AWS Direct Connect endpoint
You can update the following link aggregation group (LAG) attributes using either the AWS Direct
Connect console or using the command line or API:
• The name of the LAG.
• The value for the minimum number of connections that must be operational for the LAG itself to
be operational.
• The LAG's MACsec encryption mode.
MACsec is only available on dedicated connections.
AWS assigns this value to each connection that is part of the LAG.
The valid values are:
•
should_encrypt
•
must_encrypt
View LAG details 152

AWS Direct Connect User Guide
When you set the encryption mode to this value, the connections go down when the
encryption is down.
•
no_encrypt
• The tags.
Note
If you adjust the threshold value for the minimum number of operational connections,
ensure that the new value does not cause the LAG to fall below the threshold and become
non-operational.
To update a LAG
1. Open the AWS Direct Connect console at https://console.aws.amazon.com/directconnect/v2/
home.
2. In the navigation pane, choose LAGs.
3. Select the LAG, and then choose Edit.
4. Modify the LAG
[Change the name] For LAG Name, enter a new LAG name.
[Adjust the minimum number of connections] For Minimum Links, enter minimum number of
operational connections.
[Add a tag] Choose Add tag and do the following:
• For Key, enter the key name.
• For Value, enter the key value.
[Remove a tag] Next to the tag, choose Remove tag.
5. Choose Edit LAG.
To update a LAG using the command line or API
• update-lag (AWS CLI)
Update a LAG 153

AWS Direct Connect User Guide
• UpdateLag (AWS Direct Connect API)
Associate a connection with a LAG at an AWS Direct Connect
endpoint
You can associate an existing connection with a LAG using either the AWS Direct Connect console
or using the command line or API. The connection can be standalone, or it can be part of another
LAG. The connection must be on the same AWS device and must use the same bandwidth as
the LAG. If the connection is already associated with another LAG, you cannot re-associate it if
removing the connection causes the original LAG to fall below its threshold for the minimum
number of operational connections.
Associating a connection to a LAG automatically re-associates its virtual interfaces to the LAG.
Important
Connectivity to AWS over the connection is interrupted during association.
To associate a connection with a LAG
1. Open the AWS Direct Connect console at https://console.aws.amazon.com/directconnect/v2/
home.
2. In the navigation pane, choose LAGs.
3. Select the LAG, and then choose View details.
4. Under Connections, choose Associate connection.
5. For Connection, choose the Direct Connect connection to use for the LAG.
6. Choose Associate Connection.
To associate a connection using the command line or API
• associate-connection-with-lag (AWS CLI)
• AssociateConnectionWithLag (AWS Direct Connect API)
Associate a connection with a LAG 154

AWS Direct Connect User Guide
Disassociate a connection from a LAG at an AWS Direct Connect
endpoint
Convert a connection to standalone by disassociating it from a LAG using either the AWS Direct
Connect console or using the command line or API. You can't disassociate a connection if it causes
the LAG to fall below its threshold for the minimum number of operational connections.
Disassociating a connection from a LAG does not automatically disassociate any virtual interfaces.
Important
Your connection to AWS is broken off during disassociation.
To disassociate a connection from a LAG
1. Open the AWS Direct Connect console at https://console.aws.amazon.com/directconnect/v2/
home.
2. In the left pane, choose LAGs.
3. Select the LAG, and then choose View details.
4. Under Connections, select the connection from the list of available connections and choose
Disassociate.
5. In the confirmation dialog box, choose Disassociate.
To disassociate a connection using the command line or API
• disassociate-connection-from-lag (AWS CLI)
• DisassociateConnectionFromLag (AWS Direct Connect API)
Associate a MACsec CKN/CAK with an AWS Direct Connect
endpoint LAG
After you create the LAG that supports MACsec, you can associate a CKN/CAK with the connection
using either the AWS Direct Connect console or using the command line or API.
Disassociate a connection from a LAG 155

AWS Direct Connect User Guide
Note
You cannot modify a MACsec secret key after you associate it with a LAG. If you need to
modify the key, disassociate the key from the connection, and then associate a new key
with the connection. For information about removing an association, see the section called
“Remove the association between a MACsec secret key and a LAG”.
To associate a MACsec key with a LAG
1. Open the AWS Direct Connect console at https://console.aws.amazon.com/directconnect/v2/
home.
2. In the navigation pane, choose LAGs.
3. Select the LAG and choose View details.
4. Choose Associate key.
5. Enter the MACsec key.
[Use the CAK/CKN pair] Choose Key Pair, and then do the following:
• For Connectivity Association Key (CAK), enter the CAK.
• For Connectivity Association Key Name (CKN), enter the CKN.
[Use the secret] Choose Existing Secret Manager secret, and then for Secret, select the
MACsec secret key.
6. Choose Associate key.
To associate a MACsec key with a LAG using the command line or API
• associate-mac-sec-key (AWS CLI)
• AssociateMacSecKey (AWS Direct Connect API)
Associate a MACsec CKN/CAK with a LAG 156

AWS Direct Connect User Guide
Remove the association between a MACsec secret key and an
AWS Direct Connect endpoint LAG
You can remove the association between the LAG and the MACsec key using either the AWS Direct
Connect console or using the command line or API.
To remove an association between a LAG and a MACsec key
1. Open the AWS Direct Connect console at https://console.aws.amazon.com/directconnect/v2/
home.
2. In the navigation pane, choose LAGs.
3. Select the LAG and choose View details.
4. Select the MACsec secret to remove, and then choose Disassociate key.
5. In the confirmation dialog box, enter disassociate, and then choose Disassociate.
To remove an association between a LAG and a MACsec key using the command line or API
• disassociate-mac-sec-key (AWS CLI)
• DisassociateMacSecKey (AWS Direct Connect API)
Delete an AWS Direct Connect endpoint LAG
If you no longer need LAGs, you can delete them. You cannot delete a LAG if it has virtual
interfaces associated with it. You must first delete the virtual interfaces, or associate them with a
different LAG or connection. Deleting a LAG does not delete the connections in the LAG; you must
delete the connections yourself. For more information, see Delete a connection.
You can delete a LAG using either the AWS Direct Connect console or using the command line or
API.
To delete a LAG
1. Open the AWS Direct Connect console at https://console.aws.amazon.com/directconnect/v2/
home.
2. In the navigation pane, choose LAGs.
3. Select the LAGs, and then choose Delete.
Remove the association between a MACsec secret key and a LAG 157


AWS Direct Connect User Guide
AWS Direct Connect gateways
You can work with AWS Direct Connect gateways using the Amazon VPC console or the AWS CLI.
• Direct Connect gateways
Using a Direct Connect gateway, you can associate the Direct Connect gateway with either a
transit gateway with multiple VPCs, or a virtual private gateway.
• Virtual private gateway associations
Using a virtual private gateway, you can associate the Direct Connect gateway over a private
virtual interface to one or more VPCs in any account located in the same or different Regions.
• Transit gateway associations
Use a Direct Connect gateway to connect your Direct Connectconnection over a transit virtual
interface to the VPCs or VPNs that are attached to your transit gateway.
• Allowed prefixes interactions
Use allowed prefixes to interact with transit gateways and virtual private gateways.
AWS Direct Connect gateways
Use AWS Direct Connect gateway to connect your VPCs. You associate an AWS Direct Connect
gateway with either of the following gateways:
• A transit gateway when you have multiple VPCs in the same Region
• A virtual private gateway
You can also use a virtual private gateway to extend your Local Zone. This configuration allows the
VPC associated with the Local Zone to connect to a Direct Connect gateway. The Direct Connect
gateway connects to a Direct Connect location in a Region. The on-premises data center has a
Direct Connect connection to the Direct Connect location. For more information, see Accessing
Local Zones using a Direct Connect gateway in the Amazon VPC User Guide.
A Direct Connect gateway is a globally available resource. You can connect to any Region globally
using a Direct Connect gateway. This includes AWS GovCloud (US) but does not include the AWS
China Regions.
Direct Connect gateways 159

AWS Direct Connect User Guide
Customers using Direct Connect with VPCs that currently bypass a parent Availability Zone will not
be able to migrate their Direct Connect connections or virtual interfaces.
The following describe scenarios where you can use a Direct Connect gateway.
A Direct Connect gateway does not allow gateway associations that are on the same Direct Connect
gateway to send traffic to each other (for example, a virtual private gateway to another virtual
private gateway). An exception to this rule, implemented in November 2021, is when a supernet
is advertised across two or more VPCs, which have their attached virtual private gateways (VGWs)
associated to the same Direct Connect gateway and on the same virtual interface. In this case, VPCs
can communicate with each other via the Direct Connect endpoint. For example, if you advertise
a supernet (for example, 10.0.0.0/8 or 0.0.0.0/0) that overlaps with the VPCs attached to a Direct
Connect gateway (for example, 10.0.0.0/24 and 10.0.1.0/24), and on the same virtual interface,
then from your on-premises network, the VPCs can communicate with each other.
If you want to block VPC-to-VPC communication within a Direct Connect gateway, do the
following:
1. Set up security groups on the instances and other resources in the VPC to block traffic between
VPCs, also using this as part of the default security group in the VPC.
2. Avoid advertising a supernet from your on- premises network that overlaps with your VPCs.
Instead you can advertise more specific routes from your on-premises network that do not
overlap with your VPCs.
3. Provision a single Direct Connect Gateway for each VPC that you want to connect to your on-
premises network instead of using the same Direct Connect Gateway for multiple VPCs. For
example, instead of using a single Direct Connect Gateway for your development and production
VPCs, use separate Direct Connect Gateways for each of these VPCs.
A Direct Connect gateway does not prevent traffic from being sent from one gateway association
back to the gateway association itself (for example when you have an on-premises supernet route
that contains the prefixes from the gateway association). If you have a configuration with multiple
VPCs connected to transit gateways associated to same Direct Connect gateway, the VPCs could
communicate. To prevent the VPCs from communicating, associate a route table with the VPC
attachments that have the blackhole option set.
Topics
• Scenarios
Direct Connect gateways 160

AWS Direct Connect User Guide
• Create an AWS Direct Connect gateway
• Migrate from a virtual private gateway to an AWS Direct Connect gateway
• Delete an AWS Direct Connect gateway
Scenarios
The following describe just a few scenarios for using Direct Connect gateways.
Scenario: Virtual private gateway associations
In the following diagram, the Direct Connect gateway enables you to use your AWS Direct Connect
connection in the US East (N. Virginia) Region to access VPCs in your account in both the US East
(N. Virginia) and US West (N. California) Regions.
Each VPC has a virtual private gateway that connects to the Direct Connect gateway using a virtual
private gateway association. The Direct Connect gateway uses a private virtual interface for the
connection to the AWS Direct Connect location. There is an AWS Direct Connect connection from
the location to the customer data center.
Scenario: Virtual private gateway associations across accounts
Consider this scenario of a Direct Connect gateway owner (Account Z) who owns the Direct Connect
gateway. Account A and Account B want to use the Direct Connect gateway. Account A and Account
B each send an association proposal to Account Z. Account Z accepts the association proposals and
Scenarios 161
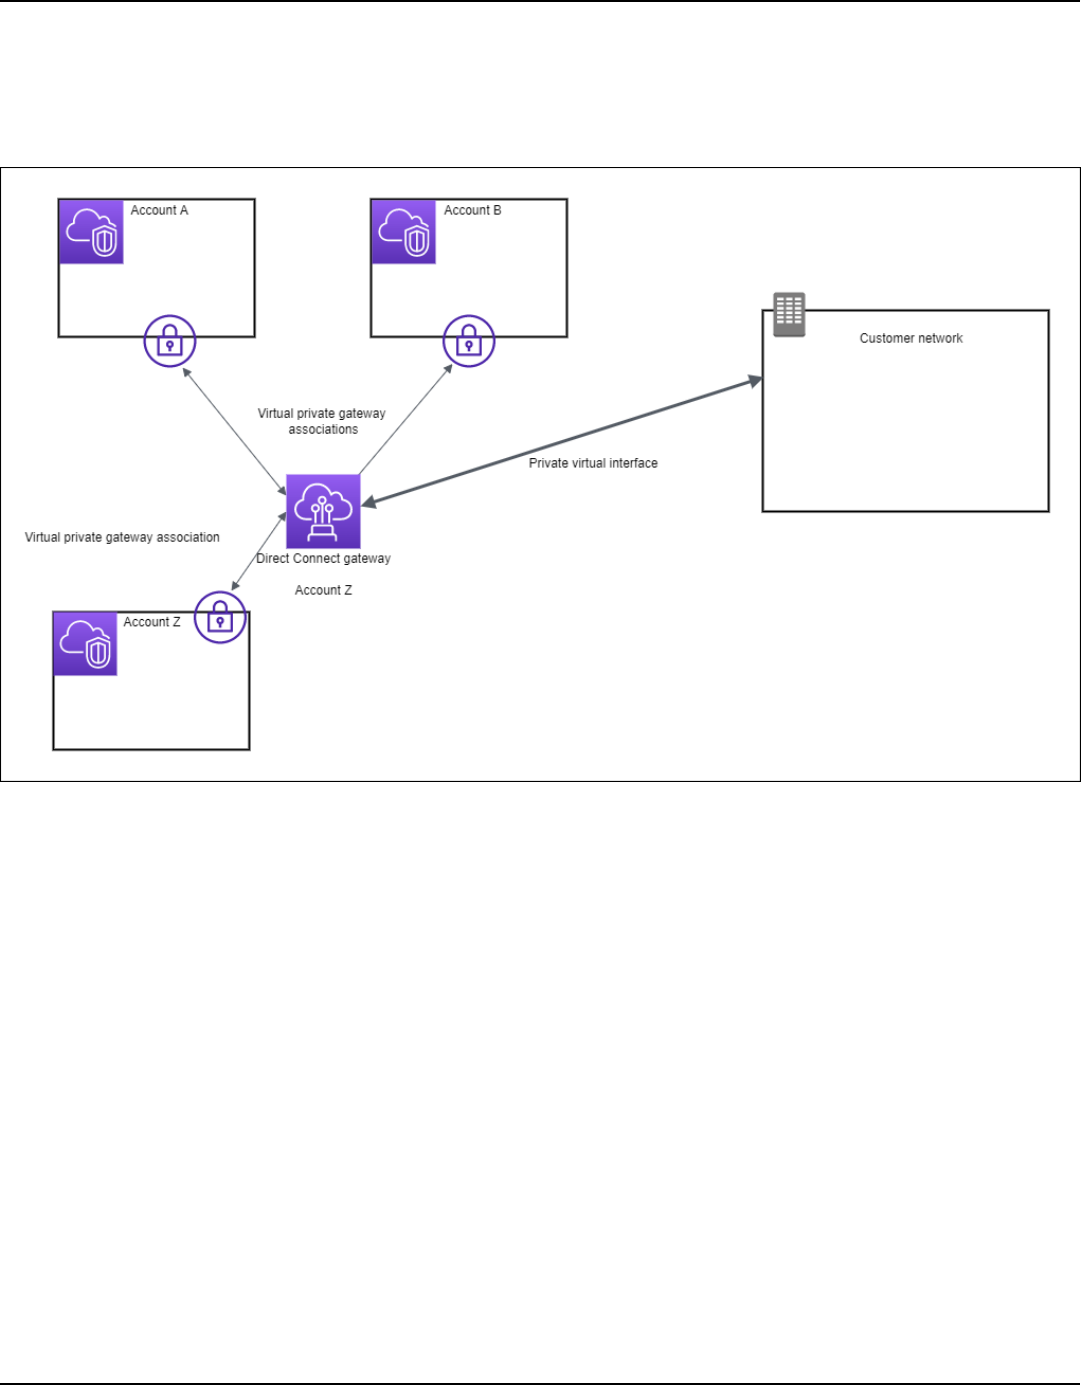
AWS Direct Connect User Guide
can optionally update the prefixes that are allowed from Account A's virtual private gateway or
Account B's virtual private gateway. After Account Z accepts the proposals, Account A and Account
B can route traffic from their virtual private gateway to the Direct Connect gateway. Account Z also
owns the routing to the customers because Account Z owns the gateway.
Scenario: Transit gateway associations
The following diagram illustrates how the Direct Connect gateway enables you to create a single
connection to your Direct Connect connection that all of your VPCs can use.
Scenarios 162

AWS Direct Connect User Guide
The solution involves the following components:
• A transit gateway that has VPC attachments.
• A Direct Connect gateway.
• An association between the Direct Connect gateway and the transit gateway.
• A transit virtual interface that is attached to the Direct Connect gateway.
This configuration offers the following benefits. You can:
• Manage a single connection for multiple VPCs or VPNs that are in the same Region.
• Advertise prefixes from on-premises to AWS and from AWS to on-premises.
For information about configuring transit gateways, see Working with Transit Gateways in the
Amazon VPC Transit Gateways Guide.
Scenario: Transit gateway associations across accounts
Consider this scenario of a Direct Connect gateway owner (Account Z) who owns the Direct
Connect gateway. Account A owns the transit gateway and wants to use the Direct Connect
gateway. Account Z accepts the association proposals and can optionally update the prefixes that
are allowed from Account A's transit gateway. After Account Z accepts the proposals, the VPCs
Scenarios 163

AWS Direct Connect User Guide
attached to the transit gateway can route traffic from the transit gateway to the Direct Connect
gateway. Account Z also owns the routing to the customers because Account Z owns the gateway.
Create an AWS Direct Connect gateway
You can create a Direct Connect gateway in any supported Region using either the AWS Direct
Connect console or using the command line or API.
To create a Direct Connect gateway
1. Open the AWS Direct Connect console at https://console.aws.amazon.com/directconnect/v2/
home.
2. In the navigation pane, choose Direct Connect Gateways.
3. Choose Create Direct Connect gateway.
4. Specify the following information, and choose Create Direct Connect gateway.
• Name: Enter a name to help you identify the Direct Connect gateway.
• Amazon side ASN: Specify the ASN for the Amazon side of the BGP session. The ASN must
be in the 64,512 to 65,534 range or 4,200,000,000 to 4,294,967,294 range.
• Virtual private gateway: To associate a virtual private gateway, choose the virtual private
gateway.
Create a Direct Connect gateway 164

AWS Direct Connect User Guide
To create a Direct Connect gateway using the command line or API
• create-direct-connect-gateway (AWS CLI)
• CreateDirectConnectGateway (AWS Direct Connect API)
Migrate from a virtual private gateway to an AWS Direct Connect
gateway
You can migrate a virtual private gateway attached to a virtual interface to a Direct Connect
gateway.
If you're using Direct Connect with VPCs that currently bypass a parent Availability Zone you won't
be able to migrate your Direct Connect connections or virtual interfaces.
The following steps describe the steps you need to take to migrate a virtual private gateway to a
Direct Connect gateway.
To migrate to a Direct Connect gateway
1. Create a Direct Connect gateway.
If the Direct Connect gateway does not yetexist, you'll need to create it. For the steps to create
a Direct Connect gateway, see Create a Direct Connect gateway.
2. Create a virtual interface for the Direct Connect gateway.
A virtual interface is required for migration. If the interface does not exist, you'll need to create
it. For the steps to create the virtual interface, see Virtual interfaces.
3. Associate the virtual private gateway with the Direct Connect gateway.
Both the Direct Connect gateway and a virtual private gateway need to be associated. For the
steps to create the association, see Associate or disassociate virtual private gateways.
4. Delete the virtual interface that was associated with the virtual private gateway. For more
information, see Delete a virtual interface.
Delete an AWS Direct Connect gateway
If you no longer require a Direct Connect gateway, you can delete it. You must first disassociate all
associated virtual private gateways and delete the attached private virtual interface. Once you've
Migrate from a virtual private gateway to a Direct Connect gateway 165

AWS Direct Connect User Guide
disassociated any associated virtual private gateways and deleted any attached virtual private
interfaces, you can delete the Direct Connect gateway using either the AWS Direct Connect console
or using the command line or API.
• For the steps to disassociate a virutal private gateway, see Associate or disassociate virtual
private gateways.
• For the steps to delete a virtual interface, see Delete a virtual interface.
To delete a Direct Connect gateway
1. Open the AWS Direct Connect console at https://console.aws.amazon.com/directconnect/v2/
home.
2. In the navigation pane, choose Direct Connect Gateways.
3. Select the gateways and choose Delete.
To delete a Direct Connect gateway using the command line or API
• delete-direct-connect-gateway (AWS CLI)
• DeleteDirectConnectGateway (AWS Direct Connect API)
AWS Direct Connect virtual private gateway associations
You can use an AWS Direct Connect gateway to connect your AWS Direct Connect connection
over a private virtual interface to one or more VPCs in any account that are located in the same or
different Regions. You associate a Direct Connect gateway with the virtual private gateway for the
VPC. Then, you create a private virtual interface for your AWS Direct Connect connection to the
Direct Connect gateway. You can attach multiple private virtual interfaces to your Direct Connect
gateway.
The following rules apply to virtual private gateway associations:
• Do not enable route propagation until after you've associated a virtual gateway with a Direct
Connect gateway. If you enable route propagation before associating the gateways, routes might
be propagated incorrectly.
• There are limits for creating and using Direct Connect gateways. For more information, see Direct
Connect quotas.
Virtual private gateway associations 166

AWS Direct Connect User Guide
• You cannot attach a Direct Connect gateway to a virtual private gateway when the Direct
Connect gateway is already associated with a transit gateway.
• The VPCs to which you connect through a Direct Connect gateway cannot have overlapping CIDR
blocks. If you add an IPv4 CIDR block to a VPC that's associated with a Direct Connect gateway,
ensure that the CIDR block does not overlap with an existing CIDR block for any other associated
VPC. For more information, see Adding IPv4 CIDR Blocks to a VPC in the Amazon VPC User Guide.
• You cannot create a public virtual interface to a Direct Connect gateway.
• A Direct Connect gateway supports communication between attached private virtual interfaces
and associated virtual private gateways only, and may enable a virtual private gateway to
another private gateway. The following traffic flows are not supported:
• Direct communication between the VPCs that are associated with a single Direct Connect
gateway. This includes traffic from one VPC to another by using a hairpin through an on-
premises network through a single Direct Connect gateway.
• Direct communication between the virtual interfaces that are attached to a single Direct
Connect gateway.
• Direct communication between the virtual interfaces that are attached to a single Direct
Connect gateway and a VPN connection on a virtual private gateway that's associated with the
same Direct Connect gateway.
• You cannot associate a virtual private gateway with more than one Direct Connect gateway and
you cannot attach a private virtual interface to more than one Direct Connect gateway.
• A virtual private gateway that you associate with a Direct Connect gateway must be attached to
a VPC.
• A virtual private gateway association proposal expires 7 days after it is created.
• An accepted virtual private gateway proposal, or a deleted virtual private gateway proposal
remains visible for 3 days.
• A virtual private gateway can be associated with a Direct Connect gateway and also attached to a
virtual interface.
• Detaching a virtual private gateway from a VPC also disassociates the virtual private gateway
from a Direct Connect gateway.
To connect your AWS Direct Connect connection to a VPC in the same Region only, you can create
a Direct Connect gateway. Or, you can create a private virtual interface and attach it to the virtual
private gateway for the VPC. For more information, see Create a private virtual interface and VPN
CloudHub.
Virtual private gateway associations 167

AWS Direct Connect User Guide
To use your AWS Direct Connect connection with a VPC in another account, you can create a hosted
private virtual interface for that account. When the owner of the other account accepts the hosted
virtual interface, they can choose to attach it either to a virtual private gateway or to a Direct
Connect gateway in their account. For more information, see Virtual interfaces and hosted virtual
interfaces.
Topics
• Create an AWS Direct Connect virtual private gateway
• Associate or disassociate AWS Direct Connect virtual private gateways
• Create a private virtual interface to the AWS Direct Connect gateway
• Associate an AWS Direct Connect virtual private gateway across accounts
Create an AWS Direct Connect virtual private gateway
The virtual private gateway must be attached to the VPC to which you want to connect. You can
create a virtual private gateway and attach it to a VPC using either the AWS Direct Connect console
or using the command line or API.
Note
If you are planning to use the virtual private gateway for a Direct Connect gateway and a
dynamic VPN connection, set the ASN on the virtual private gateway to the value that you
require for the VPN connection. Otherwise, the ASN on the virtual private gateway can be
set to any permitted value. The Direct Connect gateway advertises all connected VPCs over
the ASN assigned to it.
After you create a virtual private gateway, you must attach it to your VPC.
To create a virtual private gateway and attach it to your VPC
1. Open the AWS Direct Connect console at https://console.aws.amazon.com/directconnect/v2/
home.
2. In the navigation pane, choose Virtual Private Gateways, and then choose Create Virtual
Private Gateway.
3. (Optional) Enter a name for your virtual private gateway. Doing so creates a tag with a key of
Name and the value that you specify.
Create a virtual private gateway 168

AWS Direct Connect User Guide
4. For ASN, leave the default selection to use the default Amazon ASN. Otherwise, choose
Custom ASN and enter a value. For a 16-bit ASN, the value must be in the 64512 to 65534
range. For a 32-bit ASN, the value must be in the 4200000000 to 4294967294 range.
5. Choose Create Virtual Private Gateway.
6. Select the virtual private gateway that you created, and then choose Actions, Attach to VPC.
7. Select your VPC from the list and choose Yes, Attach.
To create a virtual private gateway using the command line or API
• CreateVpnGateway (Amazon EC2 Query API)
• create-vpn-gateway (AWS CLI)
• New-EC2VpnGateway (AWS Tools for Windows PowerShell)
To attach a virtual private gateway to a VPC using the command line or API
• AttachVpnGateway (Amazon EC2 Query API)
• attach-vpn-gateway (AWS CLI)
• Add-EC2VpnGateway (AWS Tools for Windows PowerShell)
Associate or disassociate AWS Direct Connect virtual private gateways
You can associate or disassociate a virtual private gateway and Direct Connect gateway using
either the AWS Direct Connect console or using the command line or API. The account owner of the
virtual private gateway performs these operations.
To associate a virtual private gateway
1. Open the AWS Direct Connect console at https://console.aws.amazon.com/directconnect/v2/
home.
2. In the navigation pane, choose Direct Connect gateways and then choose the Direct Connect
gateway.
3. Choose View details.
4. Choose Gateway associations, and then choose Associate gateway.
5. For Gateways, choose the virtual private gateways to associate, and then choose Associate
gateway.
Associate or disassociate virtual private gateways 169

AWS Direct Connect User Guide
You can view all of the virtual private gateways that are associated with the Direct Connect
gateway by choosing Gateway associations.
To disassociate a virtual private gateway
1. Open the AWS Direct Connect console at https://console.aws.amazon.com/directconnect/v2/
home.
2. In the navigation pane, choose Direct Connect Gateways and then select the Direct Connect
gateway.
3. Choose View details.
4. Choose Gateway associations and then select the virtual private gateway.
5. Choose Disassociate.
To associate a virtual private gateway using the command line or API
• create-direct-connect-gateway-association (AWS CLI)
• CreateDirectConnectGatewayAssociation (AWS Direct Connect API)
To view the virtual private gateways associated with a Direct Connect gateway using the
command line or API
• describe-direct-connect-gateway-associations (AWS CLI)
• DescribeDirectConnectGatewayAssociations (AWS Direct Connect API)
To disassociate a virtual private gateway using the command line or API
• delete-direct-connect-gateway-association (AWS CLI)
• DeleteDirectConnectGatewayAssociation (AWS Direct Connect API)
Create a private virtual interface to the AWS Direct Connect gateway
To connect your AWS Direct Connect connection to the remote VPC, you must create a private
virtual interface for your connection. Specify the Direct Connect gateway to which to connect.
You can create a private virtual interface using either the AWS Direct Connect console or using the
command line or API.
Create a private virtual interface to the Direct Connect gateway 170

AWS Direct Connect User Guide
Note
If you're accepting a hosted private virtual interface, you can associate it with a Direct
Connect gateway in your account. For more information, see Accept a hosted virtual
interface.
To provision a private virtual interface to a Direct Connect gateway
1. Open the AWS Direct Connect console at https://console.aws.amazon.com/directconnect/v2/
home.
2. In the navigation pane, choose Virtual Interfaces.
3. Choose Create virtual interface.
4. Under Virtual interface type, choose Private.
5. Under Private virtual interface settings, do the following:
a. For Virtual interface name, enter a name for the virtual interface.
b. For Connection, choose the Direct Connect connection that you want to use for this
interface.
c. For Virtual interface owner, choose My AWS account if the virtual interface is for your AWS
account.
d. For Direct Connect gateway, select the Direct Connect gateway.
e. For VLAN, enter the ID number for your virtual local area network (VLAN).
f. For BGP ASN, enter the Border Gateway Protocol Autonomous System Number of your on-
premises peer router for the new virtual interface.
The valid values are 1 to 2147483647.
6. Under Additional Settings, do the following:
a. To configure an IPv4 BGP or an IPv6 peer, do the following:
[IPv4] To configure an IPv4 BGP peer, choose IPv4 and do one of the following:
• To specify these IP addresses yourself, for Your router peer ip, enter the destination IPv4
CIDR address to which Amazon should send traffic.
• For Amazon router peer ip, enter the IPv4 CIDR address to use to send traffic to AWS.
Create a private virtual interface to the Direct Connect gateway 171

AWS Direct Connect User Guide
Important
If you let AWS auto-assign IPv4 addresses, a /29 CIDR will be allocated from
169.254.0.0/16 IPv4 Link-Local according to RFC 3927 for point-to-point
connectivity. AWS does not recommend this option if you intend to use the
customer router peer IP address as the source and/or destination for VPC traffic.
Instead you should use RFC 1918 or other addressing (non-RFC 1918), and specify
the address yourself.
• For more information about RFC 1918, see Address Allocation for Private
Internets.
• For more information about RFC 3927, see Dynamic Configuration of IPv4 Link-
Local Addresses.
[IPv6] To configure an IPv6 BGP peer, choose IPv6. The peer IPv6 addresses are
automatically assigned from Amazon's pool of IPv6 addresses. You cannot specify custom
IPv6 addresses.
b. To change the maximum transmission unit (MTU) from 1500 (default) to 9001 (jumbo
frames), select Jumbo MTU (MTU size 9001).
c. (Optional) Under Enable SiteLink, choose Enabled to enable direct connectivity between
Direct Connect points of presence.
d. (Optional) Add or remove a tag.
[Add a tag] Choose Add tag and do the following:
• For Key, enter the key name.
• For Value, enter the key value.
[Remove a tag] Next to the tag, choose Remove tag.
7. Choose Create virtual interface.
After you've created the virtual interface, you can download the router configuration for your
device. For more information, see Download the router configuration file.
To create a private virtual interface using the command line or API
• create-private-virtual-interface (AWS CLI)
Create a private virtual interface to the Direct Connect gateway 172

AWS Direct Connect User Guide
• CreatePrivateVirtualInterface (AWS Direct Connect API)
To view the virtual interfaces that are attached to a Direct Connect gateway using the
command line or API
• describe-direct-connect-gateway-attachments (AWS CLI)
• DescribeDirectConnectGatewayAttachments (AWS Direct Connect API)
Associate an AWS Direct Connect virtual private gateway across
accounts
You can associate a Direct Connect gateway with a virtual private gateway that is owned by any
AWS account. The Direct Connect gateway can be an existing gateway, or you can create a new
gateway. The owner of the virtual private gateway creates an association proposal and the owner of
the Direct Connect gateway must accept the association proposal.
An association proposal can contain prefixes that will be allowed from the virtual private gateway.
The owner of the Direct Connect gateway can optionally override any requested prefixes in the
association proposal.
Allowed prefixes
When you associate a virtual private gateway with a Direct Connect gateway, you specify a list
of Amazon VPC prefixes to advertise to the Direct Connect gateway. The prefix list acts as a filter
that allows the same CIDRs, or smaller CIDRs to be advertised to the Direct Connect gateway. You
must set the Allowed prefixes to a range that is the same or wider than the VPC CIDR because we
provision entire VPC CIDR on the virtual private gateway.
Consider the case where the VPC CIDR is 10.0.0.0/16. You can set the Allowed prefixes to
10.0.0.0/16 (the VPC CIDR value), or 10.0.0.0/15 ( a value that is wider than the VPC CIDR).
Any virtual interface inside network prefixes advertised over Direct Connect are only propagated
to transit gateways across Regions, not within the same Region. For more information on how
allowed prefixes interact with virtual private gateways and transit gateways, see Allowed prefixes
interactions.
Associate a virtual private gateway across accounts 173

AWS Direct Connect User Guide
AWS Direct Connect gateways and transit gateway associations
You can use AWS Direct Connect gateway to connect your Direct Connect connection over a transit
virtual interface to the VPCs or VPNs that are attached to your transit gateway. You associate a
Direct Connect gateway with the transit gateway. Then, create a transit virtual interface for your
AWS Direct Connect connection to the Direct Connect gateway.
The following rules apply to transit gateway associations:
• You cannot attach a Direct Connect gateway to a transit gateway when the Direct Connect
gateway is already associated with a virtual private gateway or is attached to a private virtual
interface.
• There are limits for creating and using Direct Connect gateways. For more information, see Direct
Connect quotas.
• A Direct Connect gateway supports communication between attached transit virtual interfaces
and associated transit gateways.
• If you connect to multiple transit gateways that are in different Regions, use unique ASNs for
each transit gateway.
• Any virtual interface inside network prefixes advertised over Direct Connect are only propagated
to transit gateways across Regions, but not within the same Region
Associating a transit gateway across accounts
You can associate an existing Direct Connect gateway or a new Direct Connect gateway with a
transit gateway that is owned by any AWS account. The owner of the transit gateway creates an
association proposal and the owner of the Direct Connect gateway must accept the association
proposal.
An association proposal can contain prefixes that will be allowed from the transit gateway.
The owner of the Direct Connect gateway can optionally override any requested prefixes in the
association proposal.
Allowed prefixes
For a transit gateway association, you provision the allowed prefixes list on the Direct Connect
gateway. The list is used to route traffic from on-premises to AWS into the transit gateway even
Transit gateway associations 174

AWS Direct Connect User Guide
if the VPCs attached to the transit gateway do not have assigned CIDRs. Prefixes in the Direct
Connect gateway allowed prefix list originate on the Direct Connect gateway and are advertised
to the on-premises network. For more information on how allowed prefixes interact with transit
gateway and virtual private gateways, see Allowed prefixes interactions.
Topics
• Associate or disassociate AWS Direct Connect with a transit gateway
• Create a transit virtual interface to the AWS Direct Connect gateway
• Create a transit gateway and AWS Direct Connect association proposal
• Accept or reject a transit gateway and AWS Direct Connect association proposal
• Update the allowed prefixes for a transit gateway and AWS Direct Connect association
• Delete a transit gateway and AWS Direct Connect association proposal
Associate or disassociate AWS Direct Connect with a transit gateway
Associate or disassociate a transit gateway using either the AWS Direct Connect console or using
the command line or API.
To associate a transit gateway
1. Open the AWS Direct Connect console at https://console.aws.amazon.com/directconnect/v2/
home.
2. In the navigation pane, choose Direct Connect Gateways and then select the Direct Connect
gateway.
3. Choose View details.
4. Choose Gateway associations and then choose Associate gateway.
5. For Gateways, choose the transit gateway to associate.
6. In Allowed prefixes, enter the prefixes (separated by a comma, or on a new line) which the
Direct Connect gateway advertises to the on-premises data center. For more information on
allowed prefixes, see Allowed prefixes interactions.
7. Choose Associate gateway
You can view all of the gateways that are associated with the Direct Connect gateway by choosing
Gateway associations.
Associate or disassociate a transit gateway with Direct Connect. 175

AWS Direct Connect User Guide
To disassociate a transit gateway
1. Open the AWS Direct Connect console at https://console.aws.amazon.com/directconnect/v2/
home.
2. In the navigation pane, choose Direct Connect gateways and then select the Direct Connect
gateway.
3. Choose View details.
4. Choose Gateway associations and then select the transit gateway.
5. Choose Disassociate.
To update allowed prefixes for a transit gateway
You can add or remove allowed prefixes to the transit gateway.
1. Open the AWS Direct Connect console at https://console.aws.amazon.com/directconnect/v2/
home.
2. In the navigation pane, choose Direct Connect gateways and then choose the Direct Connect
gateway you want to add or remove allowed prefixes for.
3. Choose the Gateway associations tab.
4. Choose the gateway you want to modify and then choose Edit.
5. In Allowed prefixes, enter the prefixes which the Direct Connect gateway advertises to the on-
premises data center. For multiple prefixes, separate each prefix by a comma or put each prefix
on a new line. The prefixes you add should match the Amazon VPC CIDRs for all virtual private
gateways. For more information on allowed prefixes, see Allowed prefixes interactions.
6. Choose Edit association.
In the Gateway association section the State displays updating. When complete, the State
changes to associated.
7. Choose Disassociate.
8. Choose Disassociate again to confirm that you want to disassociate the gateway.
In the Gateway association section the State displays disassociating. When complete, a
confirmation message displays and the gateway is removed from the section. This might take
several minutes or longer to complete.
Associate or disassociate a transit gateway with Direct Connect. 176

AWS Direct Connect User Guide
To associate a transit gateway using the command line or API
• create-direct-connect-gateway-association (AWS CLI)
• CreateDirectConnectGatewayAssociation (AWS Direct Connect API)
To view the transit gateways associated with a Direct Connect gateway using the command line
or API
• describe-direct-connect-gateway-associations (AWS CLI)
• DescribeDirectConnectGatewayAssociations (AWS Direct Connect API)
To disassociate a transit gateway using the command line or API
• delete-direct-connect-gateway-association (AWS CLI)
• DeleteDirectConnectGatewayAssociation (AWS Direct Connect API)
To update allowed prefixes for a transit gateway using the command line or API
• update-direct-connect-gateway-association (AWS CLI)
• UpdateDirectConnectGatewayAssociation (AWS Direct Connect API)
Create a transit virtual interface to the AWS Direct Connect gateway
To connect your AWS Direct Connect connection to the transit gateway, you must create a transit
interface for your connection. Specify the Direct Connect gateway to which to connect. You can use
either the AWS Direct Connect console or use the command line or API.
Important
If you associate your transit gateway with one or more Direct Connect gateways, the
Autonomous System Number (ASN) used by the transit gateway and the Direct Connect
gateway must be different. For example, if you use the default ASN 64512 for both the
transit gateway and the Direct Connect gateway, the association request fails.
Create a transit virtual interface to the Direct Connect gateway 177

AWS Direct Connect User Guide
To provision a transit virtual interface to a Direct Connect gateway
1. Open the AWS Direct Connect console at https://console.aws.amazon.com/directconnect/v2/
home.
2. In the navigation pane, choose Virtual Interfaces.
3. Choose Create virtual interface.
4. Under Virtual interface type, for Type, choose Transit.
5. Under Transit virtual interface settings, do the following:
a. For Virtual interface name, enter a name for the virtual interface.
b. For Connection, choose the Direct Connect connection that you want to use for this
interface.
c. For Virtual interface owner, choose My AWS account if the virtual interface is for your AWS
account.
d. For Direct Connect gateway, select the Direct Connect gateway.
e. For VLAN, enter the ID number for your virtual local area network (VLAN).
f. For BGP ASN, enter the Border Gateway Protocol Autonomous System Number of your on-
premises peer router for the new virtual interface.
The valid values are 1 to 2147483647.
6. Under Additional Settings, do the following:
a. To configure an IPv4 BGP or an IPv6 peer, do the following:
[IPv4] To configure an IPv4 BGP peer, choose IPv4 and do one of the following:
• To specify these IP addresses yourself, for Your router peer ip, enter the destination IPv4
CIDR address to which Amazon should send traffic.
• For Amazon router peer ip, enter the IPv4 CIDR address to use to send traffic to AWS.
Important
If you let AWS auto-assign IPv4 addresses, a /29 CIDR will be allocated from
169.254.0.0/16 IPv4 Link-Local according to RFC 3927 for point-to-point
connectivity. AWS does not recommend this option if you intend to use the
customer router peer IP address as the source and/or destination for VPC traffic.
Create a transit virtual interface to the Direct Connect gateway 178

AWS Direct Connect User Guide
Instead you should use RFC 1918 or other addressing (non-RFC 1918), and specify
the address yourself.
• For more information about RFC 1918, see Address Allocation for Private
Internets.
• For more information about RFC 3927, see Dynamic Configuration of IPv4 Link-
Local Addresses.
[IPv6] To configure an IPv6 BGP peer, choose IPv6. The peer IPv6 addresses are
automatically assigned from Amazon's pool of IPv6 addresses. You cannot specify custom
IPv6 addresses.
b. To change the maximum transmission unit (MTU) from 1500 (default) to 8500 (jumbo
frames), select Jumbo MTU (MTU size 8500).
c. (Optional) Under Enable SiteLink, choose Enabled to enable direct connectivity between
Direct Connect points of presence.
d. (Optional) Add or remove a tag.
[Add a tag] Choose Add tag and do the following:
• For Key, enter the key name.
• For Value, enter the key value.
[Remove a tag] Next to the tag, choose Remove tag.
7. Choose Create virtual interface.
After you've created the virtual interface, you can download the router configuration for your
device. For more information, see Download the router configuration file.
To create a transit virtual interface using the command line or API
• create-transit-virtual-interface (AWS CLI)
• CreateTransitVirtualInterface (AWS Direct Connect API)
To view the virtual interfaces that are attached to a Direct Connect gateway using the
command line or API
• describe-direct-connect-gateway-attachments (AWS CLI)
Create a transit virtual interface to the Direct Connect gateway 179

AWS Direct Connect User Guide
• DescribeDirectConnectGatewayAttachments (AWS Direct Connect API)
Create a transit gateway and AWS Direct Connect association proposal
If you own the transit gateway, you must create the association proposal. The transit gateway must
be attached to a VPC or VPN in your AWS account. The owner of the Direct Connect gateway must
share the ID of the Direct Connect gateway and the ID of its AWS account. After you create the
proposal, the owner of the Direct Connect gateway must accept it in order for you to gain access to
the on-premises network over AWS Direct Connect. You can create an association proposal using
either the AWS Direct Connect console or using the command line or API.
To create an association proposal
1. Open the AWS Direct Connect console at https://console.aws.amazon.com/directconnect/v2/
home.
2. In the navigation pane, choose Transit gateways and then select the transit gateway.
3. Choose View details.
4. Choose Direct Connect gateway associations and then choose Associate Direct Connect
gateway.
5. Under Association account type, for Account owner, choose Another account.
6. For Direct Connect gateway owner, enter the ID of the account that owns the Direct Connect
gateway.
7. Under Association settings, do the following:
a. For Direct Connect gateway ID, enter the ID of the Direct Connect gateway.
b. For Virtual interface owner, enter the ID of the account that owns the virtual interface for
the association.
c. (Optional) To specify a list of prefixes to be allowed from the transit gateway, add the
prefixes to Allowed prefixes, separating them using commas, or entering them on separate
lines.
8. Choose Associate Direct Connect gateway.
To create an association proposal using the command line or API
• create-direct-connect-gateway-association-proposal (AWS CLI)
Create a transit gateway association proposal 180

AWS Direct Connect User Guide
• CreateDirectConnectGatewayAssociationProposal (AWS Direct Connect API)
Accept or reject a transit gateway and AWS Direct Connect association
proposal
If you own the Direct Connect gateway, you must accept the association proposal in order to create
the association. You also have the option of rejecting the association proposal. You can accept or
reject the association proposal using either the AWS Direct Connect console or using the command
line or API.
To accept an association proposal
1. Open the AWS Direct Connect console at https://console.aws.amazon.com/directconnect/v2/
home.
2. In the navigation pane, choose Direct Connect gateways.
3. Select the Direct Connect gateway with pending proposals and then choose View details.
4. On the Pending proposals tab, select the proposal and then choose Accept proposal.
5. ((Optional) To specify a list of prefixes to be allowed from the transit gateway, add the prefixes
to Allowed prefixes, separating them using commas, or entering them on separate lines.
6. Choose Accept proposal.
To reject an association proposal
1. Open the AWS Direct Connect console at https://console.aws.amazon.com/directconnect/v2/
home.
2. In the navigation pane, choose Direct Connect gateways.
3. Select the Direct Connect gateway with pending proposals and then choose View details.
4. On the Pending proposals tab, select the transit gateway and then choose Reject proposal.
5. In the Reject proposal dialog box, enter Delete and then choose Reject proposal.
To view association proposals using the command line or API
• describe-direct-connect-gateway-association-proposals (AWS CLI)
• DescribeDirectConnectGatewayAssociationProposals (AWS Direct Connect API)
Accept or reject a transit gateway association proposal 181

AWS Direct Connect User Guide
To accept an association proposal using the command line or API
• accept-direct-connect-gateway-association-proposal (AWS CLI)
• AcceptDirectConnectGatewayAssociationProposal (AWS Direct Connect API)
To reject an association proposal using the command line or API
• delete-direct-connect-gateway-association-proposal (AWS CLI)
• DeleteDirectConnectGatewayAssociationProposal (AWS Direct Connect API)
Update the allowed prefixes for a transit gateway and AWS Direct
Connect association
You can update the prefixes that are allowed from the transit gateway over the Direct Connect
gateway using either the AWS Direct Connect console or using the command line or API. To update
the allowed prefixes for a transit gateway and Direct Connect association using the AWS Direct
Connect console,
• If you're the owner of the transit gateway. you'll need to create a new association proposal for
that Direct Connect gateway, specifying the prefixes to allow. For the steps to create a new
association proposal, see Create a transit gateway association proposal.
• If you're the owner of the Direct Connect gateway you can update the allowed prefixes when you
accept the association proposal, or if you update the allowed prefixes for an existing association.
For the steps to update the allowed prefixes when you accept the association, see Accept or
reject a transit gateway association proposal.
To update the allowed prefixes for an existing association using the command line or API
• update-direct-connect-gateway-association (AWS CLI)
• UpdateDirectConnectGatewayAssociation (AWS Direct Connect API)
Delete a transit gateway and AWS Direct Connect association proposal
The owner of the transit gateway can delete the Direct Connect gateway association proposal if it
is still pending acceptance. After an association proposal is accepted, you can't delete it, but you
Update the allowed prefixes for a transit gateway association 182

AWS Direct Connect User Guide
can disassociate the transit gateway from the Direct Connect gateway. For more information, see
Create a transit gateway association proposal.
You can delete a transit gateway and Direct Connect association proposal using either the AWS
Direct Connect console or using the command line or API.
To delete an association proposal
1. Open the AWS Direct Connect console at https://console.aws.amazon.com/directconnect/v2/
home.
2. In the navigation pane, choose Transit gateways and then select the transit gateway.
3. Choose View details.
4. Choose Pending gateway associations, select the association and then choose Delete
association.
5. In the Delete association proposal dialog box, enter Delete and then choose Delete.
To delete a pending association proposal using the command line or API
• delete-direct-connect-gateway-association-proposal (AWS CLI)
• DeleteDirectConnectGatewayAssociationProposal (AWS Direct Connect API)
Allowed prefixes interactions for AWS Direct Connect gateways
Learn how allowed prefixes interact with transit gatewaysand virtual private gateways. For more
information, see Routing policies and BGP communities.
Virtual private gateway associations
The prefix list (IPv4 and IPv6) acts as a filter that allows the same CIDRs, or a smaller range of
CIDRs to be advertised to the Direct Connect gateway. You must set the prefixes to a range that is
the same or wider than the VPC CIDR block.
Note
The allowed list only functions as a filter, and only the associated VPC CIDR will be
advertised to the customer gateway.
Allowed prefixes interactions 183

AWS Direct Connect User Guide
Consider the scenario where you have a VPC with CIDR 10.0.0.0/16 is attached to a virtual private
gateway.
• When the allowed prefixes list is set to 22.0.0.0/24, you do not receive any route because
22.0.0.0/24 is not the same as, or wider than 10.0.0.0/16.
• When the allowed prefixes list is set to 10.0.0.0/24, you do not receive any route because
10.0.0.0/24 is not the same as 10.0.0.0/16.
• When the allowed prefixes list is set to 10.0.0.0/15, you do receive 10.0.0.0/16, because the IP
address is wider than 10.0.0.0/16.
When you remove or add an allowed prefix, traffic which doesn't use that prefix is not impacted.
During updates the status changes from associated to updating. Modifying an existing prefix
can delay only that traffic which uses that prefix.
Transit gateway associations
For a transit gateway association, you provision the allowed prefixes list on the Direct Connect
gateway. The list routes on-premises traffic to or from a Direct Connect gateway to the transit
gateway, even when the VPCs attached to the transit gateway do not have assigned CIDRs. Allowed
prefixes work differently, depending on the gateway type:
• For transit gateway associations, only the allowed prefixes entered will be advertised to on-
premises. These will show as originating from the Direct Connect gateway ASN.
• For virtual private gateways, the allowed prefixes entered act as a filter to allow the same or
smaller CIDRs.
Consider the scenario where you have a VPC with CIDR 10.0.0.0/16 attached to a transit gateway.
• When the allowed prefixes list is set to 22.0.0.0/24, you receive 22.0.0.0/24 through BGP on your
transit virtual interface. You do not receive 10.0.0.0/16 because we directly provision the prefixes
that are in the allowed prefix list.
• When the allowed prefixes list is set to 10.0.0.0/24, you receive 10.0.0.0/24 through BGP on your
transit virtual interface. You do not receive 10.0.0.0/16 because we directly provision the prefixes
that are in the allowed prefix list.
• When the allowed prefixes list is set to 10.0.0.0/8, you receive 10.0.0.0/8 through BGP on your
transit virtual interface.
Transit gateway associations 184

AWS Direct Connect User Guide
Allowed prefix overlaps are not allowed when multiple transit gateways are associated with a
Direct Connect gateway. For example, if you have a transit gateway with an allowed prefix list
that includes 10.1.0.0/16, and a second transit gateway with an allowed prefix list that includes
10.2.0.0/16 and 0.0.0.0/0, you can't set the associations from the second transit gateway to
0.0.0.0/0. Since 0.0.0.0/0 includes all IPv4 networks, you can't configure 0.0.0.0/0 if multiple
transit gateways are associated with a Direct Connect gateway. An error is returned indicating that
the allowed routes overlap one or more existing allowed routes on the Direct Connect gateway.
When you remove or add an allowed prefix, traffic which doesn't use that prefix is not impacted.
During updates the status changes from associated to updating. Modifying an existing prefix
can delay only that traffic which uses that prefix.
Example: Allowed to prefixes in a transit gateway configuration
Consider the configuration where you have instances in two different AWS Regions which need to
access the corporate data center. You can use the following resources for this configuration:
• A transit gateway in each Region.
• A transit gateway peering connection.
• A Direct connect gateway.
• A transit gateway association between one of the transit gateways (the one in us-east-1) to the
Direct Connect gateway.
• A transit virtual interface from the on-premises location and the AWS Direct Connect location.
Example: Allowed to prefixes in a transit gateway configuration 185

AWS Direct Connect User Guide
Configure the following options for the resources.
• Direct Connect gateway: Set the ASN for to 65030. For more information, see Create a Direct
Connect gateway.
• Transit virtual interface: Set the VLAN to 899, and the ASN to 65020. For more information, see
Create a transit virtual interface to the Direct Connect gateway.
• Direct Connect gateway association with the transit gateway: Set the allowed to prefixes to
10.0.0.0/8.
This CIDR block covers both VPC CIDR blocks. For more information, see Associate or disassociate
a transit gateway with Direct Connect..
• VPC route: To route traffic from the 10.2.0.0 VPC, create a route in the VPC route table which has
a Destination of 0.0.0.0/0 and the transit gateway ID as the Target. For more information about
routing to a transit gateway, see Routing for a transit gateway in the Amazon VPC User Guide.
Example: Allowed to prefixes in a transit gateway configuration 186

AWS Direct Connect User Guide
Tag AWS Direct Connect resources
A tag is a label that a resource owner assigns to their AWS Direct Connect resources. Each tag
consists of a key and an optional value, both of which you define. Tags enable the resource owner
to categorize your AWS Direct Connect resources in different ways, for example, by purpose, or
environment. This is useful when you have many resources of the same type—you can quickly
identify a specific resource based on the tags you've assigned to it.
For example, you have two AWS Direct Connect connections in a Region, each in different locations.
Connection dxcon-11aa22bb is a connection serving production traffic, and is associated with
virtual interface dxvif-33cc44dd. Connection dxcon-abcabcab is a redundant (backup)
connection, and is associated with virtual interface dxvif-12312312. You might choose to tag
your connections and virtual interfaces as follows, to help distinguish them:
Resource ID Tag key Tag value
Purpose Production
dxcon-11aa22bb
Location Amsterdam
dxvif-33cc44dd
Purpose Production
Purpose Backup
dxcon-abcabcab
Location Frankfurt
dxvif-12312312
Purpose Backup
We recommend that you devise a set of tag keys that meets your needs for each resource type.
Using a consistent set of tag keys makes it easier for you to manage your resources. Tags don't
have any semantic meaning to AWS Direct Connect and are interpreted strictly as a string of
characters. Also, tags are not automatically assigned to your resources. You can edit tag keys and
values, and you can remove tags from a resource at any time. You can set the value of a tag to an
empty string, but you can't set the value of a tag to null. If you add a tag that has the same key as
an existing tag on that resource, the new value overwrites the old value. If you delete a resource,
any tags for the resource are also deleted.
187

AWS Direct Connect User Guide
You can tag the following AWS Direct Connect resources using the AWS Direct Connect console,
the AWS Direct Connect API, the AWS CLI, the AWS Tools for Windows PowerShell, or an AWS SDK.
When you use these tools to manage tags, you must specify the Amazon Resource Name (ARN)
for the resource. For more information about ARNs, see Amazon Resource Names (ARNs) in the
Amazon Web Services General Reference.
Resource Supports tags Supports tags
on creation
Supports
tags controlli
ng access
and resource
allocation
Supports cost
allocation
Connections Yes Yes Yes Yes
Virtual interface
s
Yes Yes Yes No
Link aggregation
groups (LAG)
Yes Yes Yes Yes
Interconnects Yes Yes Yes Yes
Direct Connect
gateways
No No No No
Tag restrictions
The following rules and restrictions apply to tags:
• Maximum number of tags per resource: 50
• Maximum key length: 128 Unicode characters
• Maximum value length: 265 Unicode characters
• Tag keys and values are case-sensitive.
•
The aws: prefix is reserved for AWS use. You can’t edit or delete a tag’s key or value when the
tag has a tag key with the aws: prefix. Tags with a tag key with the aws: prefix do not count
against your tags per resource limit.
Tag restrictions 188

AWS Direct Connect User Guide
• Allowed characters are letters, spaces, and numbers representable in UTF-8, plus the following
special characters: + - = . _ : / @
• Only the resource owner can add or remove tags. For example, if there is a hosted connection,
the partner will not be able to add, remove, or view the tags.
• Cost allocation tags are only supported for connections, interconnects, and LAGs. For
information about how to use tags with cost management, see Using Cost Allocation Tags in the
AWS Billing and Cost Management User Guide.
Working with tags using the CLI or API
Use the following to add, update, list, and delete the tags for your resources.
Task API CLI
Add or overwrite one or more
tags.
TagResource tag-resource
Delete one or more tags. UntagResource untag-resource
Describe one or more tags. DescribeTags describe-tags
Examples
Use the tag-resource command to tag the Connection dxcon-11aa22bb.
aws directconnect tag-resource --resource-arn arn:aws:directconnect:us-
east-1:123456789012:dxcon/dxcon-11aa22bb --tags "key=Purpose,value=Production"
Use the describe-tags command to describe the Connection dxcon-11aa22bb tags.
aws directconnect describe-tags --resource-arn arn:aws:directconnect:us-
east-1:123456789012:dxcon/dxcon-11aa22bb
Use the untag-resource command to remove a tag from Connection dxcon-11aa22bb.
aws directconnect untag-resource --resource-arn arn:aws:directconnect:us-
east-1:123456789012:dxcon/dxcon-11aa22bb --tag-keys Purpose
Working with tags using the CLI or API 189

AWS Direct Connect User Guide
Security in AWS Direct Connect
Cloud security at AWS is the highest priority. As an AWS customer, you benefit from a data center
and network architecture that is built to meet the requirements of the most security-sensitive
organizations.
Security is a shared responsibility between AWS and you. The shared responsibility model describes
this as security of the cloud and security in the cloud:
• Security of the cloud – AWS is responsible for protecting the infrastructure that runs AWS
services in the AWS Cloud. AWS also provides you with services that you can use securely.
Third-party auditors regularly test and verify the effectiveness of our security as part of the
AWS compliance programs. To learn about the compliance programs that apply to AWS Direct
Connect, see AWS Services in Scope by Compliance Program.
• Security in the cloud – Your responsibility is determined by the AWS service that you use. You
are also responsible for other factors including the sensitivity of your data, your company’s
requirements, and applicable laws and regulations.
This documentation helps you understand how to apply the shared responsibility model when
using AWS Direct Connect. The following topics show you how to configure AWS Direct Connect to
meet your security and compliance objectives. You also learn how to use other AWS services that
help you to monitor and secure your AWS Direct Connect resources.
Topics
• Data protection in AWS Direct Connect
• Identity and Access Management for Direct Connect
• Logging and monitoring in AWS Direct Connect
• Compliance validation for AWS Direct Connect
• Resilience in AWS Direct Connect
• Infrastructure security in AWS Direct Connect
Data protection in AWS Direct Connect
The AWS shared responsibility model applies to data protection in AWS Direct Connect. As
described in this model, AWS is responsible for protecting the global infrastructure that runs all
Data protection 190

AWS Direct Connect User Guide
of the AWS Cloud. You are responsible for maintaining control over your content that is hosted on
this infrastructure. You are also responsible for the security configuration and management tasks
for the AWS services that you use. For more information about data privacy, see the Data Privacy
FAQ. For information about data protection in Europe, see the AWS Shared Responsibility Model
and GDPR blog post on the AWS Security Blog.
For data protection purposes, we recommend that you protect AWS account credentials and set
up individual users with AWS IAM Identity Center or AWS Identity and Access Management (IAM).
That way, each user is given only the permissions necessary to fulfill their job duties. We also
recommend that you secure your data in the following ways:
• Use multi-factor authentication (MFA) with each account.
• Use SSL/TLS to communicate with AWS resources. We require TLS 1.2 and recommend TLS 1.3.
• Set up API and user activity logging with AWS CloudTrail.
• Use AWS encryption solutions, along with all default security controls within AWS services.
• Use advanced managed security services such as Amazon Macie, which assists in discovering and
securing sensitive data that is stored in Amazon S3.
• If you require FIPS 140-3 validated cryptographic modules when accessing AWS through a
command line interface or an API, use a FIPS endpoint. For more information about the available
FIPS endpoints, see Federal Information Processing Standard (FIPS) 140-3.
We strongly recommend that you never put confidential or sensitive information, such as your
customers' email addresses, into tags or free-form text fields such as a Name field. This includes
when you work with AWS Direct Connect or other AWS services using the console, API, AWS CLI, or
AWS SDKs. Any data that you enter into tags or free-form text fields used for names may be used
for billing or diagnostic logs. If you provide a URL to an external server, we strongly recommend
that you do not include credentials information in the URL to validate your request to that server.
For more information about data protection, see the AWS Shared Responsibility Model and GDPR
blog post on the AWS Security Blog.
Topics
• Internetwork traffic privacy in AWS Direct Connect
• Encryption in AWS Direct Connect
Data protection 191

AWS Direct Connect User Guide
Internetwork traffic privacy in AWS Direct Connect
Traffic between service and on-premises clients and applications
You have two connectivity options between your private network and AWS:
• An association to an AWS Site-to-Site VPN. For more information, see Infrastructure security.
• An association to VPCs. For more information, see Virtual private gateway associations and
Transit gateway associations.
Traffic between AWS resources in the same Region
You have two connectivity options:
• An association to an AWS Site-to-Site VPN. For more information, see Infrastructure security.
• An association to VPCs. For more information, see Virtual private gateway associations and
Transit gateway associations.
Encryption in AWS Direct Connect
AWS Direct Connect does not encrypt your traffic that is in transit by default. To encrypt the data
in transit that traverses AWS Direct Connect, you must use the transit encryption options for that
service. To learn about EC2 instance traffic encryption, see Encryption in Transit in the Amazon EC2
User Guide.
With AWS Direct Connect and AWS Site-to-Site VPN, you can combine one or more AWS Direct
Connect dedicated network connections with the Amazon VPC VPN. This combination provides
an IPsec-encrypted private connection that also reduces network costs, increases bandwidth
throughput, and provides a more consistent network experience than internet-based VPN
connections. For more information, see Amazon VPC-to-Amazon VPC Connectivity Options.
MAC Security (MACsec) is an IEEE standard that provides data confidentiality, data integrity, and
data origin authenticity. You can use AWS Direct Connect connections that support MACsec to
encrypt your data from your corporate data center to the AWS Direct Connect location. For more
information, see MAC security (MACsec).
Internetwork traffic privacy 192

AWS Direct Connect User Guide
Identity and Access Management for Direct Connect
AWS Identity and Access Management (IAM) is an AWS service that helps an administrator securely
control access to AWS resources. IAM administrators control who can be authenticated (signed in)
and authorized (have permissions) to use Direct Connect resources. IAM is an AWS service that you
can use with no additional charge.
Topics
• Audience
• Authenticating with identities
• Managing access using policies
• How Direct Connect works with IAM
• Identity-based policy examples for Direct Connect
• Service-linked roles for AWS Direct Connect
• AWS managed policies for AWS Direct Connect
• Troubleshooting Direct Connect identity and access
Audience
How you use AWS Identity and Access Management (IAM) differs, depending on the work that you
do in Direct Connect.
Service user – If you use the Direct Connect service to do your job, then your administrator
provides you with the credentials and permissions that you need. As you use more Direct Connect
features to do your work, you might need additional permissions. Understanding how access is
managed can help you request the right permissions from your administrator. If you cannot access
a feature in Direct Connect, see Troubleshooting Direct Connect identity and access.
Service administrator – If you're in charge of Direct Connect resources at your company, you
probably have full access to Direct Connect. It's your job to determine which Direct Connect
features and resources your service users should access. You must then submit requests to your IAM
administrator to change the permissions of your service users. Review the information on this page
to understand the basic concepts of IAM. To learn more about how your company can use IAM with
Direct Connect, see How Direct Connect works with IAM.
Identity and Access Management 193

AWS Direct Connect User Guide
IAM administrator – If you're an IAM administrator, you might want to learn details about how you
can write policies to manage access to Direct Connect. To view example Direct Connect identity-
based policies that you can use in IAM, see Identity-based policy examples for Direct Connect.
Authenticating with identities
Authentication is how you sign in to AWS using your identity credentials. You must be
authenticated (signed in to AWS) as the AWS account root user, as an IAM user, or by assuming an
IAM role.
You can sign in to AWS as a federated identity by using credentials provided through an identity
source. AWS IAM Identity Center (IAM Identity Center) users, your company's single sign-on
authentication, and your Google or Facebook credentials are examples of federated identities.
When you sign in as a federated identity, your administrator previously set up identity federation
using IAM roles. When you access AWS by using federation, you are indirectly assuming a role.
Depending on the type of user you are, you can sign in to the AWS Management Console or the
AWS access portal. For more information about signing in to AWS, see How to sign in to your AWS
account in the AWS Sign-In User Guide.
If you access AWS programmatically, AWS provides a software development kit (SDK) and a
command line interface (CLI) to cryptographically sign your requests by using your credentials. If
you don't use AWS tools, you must sign requests yourself. For more information about using the
recommended method to sign requests yourself, see Signing AWS API requests in the IAM User
Guide.
Regardless of the authentication method that you use, you might be required to provide additional
security information. For example, AWS recommends that you use multi-factor authentication
(MFA) to increase the security of your account. To learn more, see Multi-factor authentication in the
AWS IAM Identity Center User Guide and Using multi-factor authentication (MFA) in AWS in the IAM
User Guide.
AWS account root user
When you create an AWS account, you begin with one sign-in identity that has complete access to
all AWS services and resources in the account. This identity is called the AWS account root user and
is accessed by signing in with the email address and password that you used to create the account.
We strongly recommend that you don't use the root user for your everyday tasks. Safeguard your
root user credentials and use them to perform the tasks that only the root user can perform. For
Authenticating with identities 194

AWS Direct Connect User Guide
the complete list of tasks that require you to sign in as the root user, see Tasks that require root
user credentials in the IAM User Guide.
Federated identity
As a best practice, require human users, including users that require administrator access, to use
federation with an identity provider to access AWS services by using temporary credentials.
A federated identity is a user from your enterprise user directory, a web identity provider, the AWS
Directory Service, the Identity Center directory, or any user that accesses AWS services by using
credentials provided through an identity source. When federated identities access AWS accounts,
they assume roles, and the roles provide temporary credentials.
For centralized access management, we recommend that you use AWS IAM Identity Center. You can
create users and groups in IAM Identity Center, or you can connect and synchronize to a set of users
and groups in your own identity source for use across all your AWS accounts and applications. For
information about IAM Identity Center, see What is IAM Identity Center? in the AWS IAM Identity
Center User Guide.
IAM users and groups
An IAM user is an identity within your AWS account that has specific permissions for a single person
or application. Where possible, we recommend relying on temporary credentials instead of creating
IAM users who have long-term credentials such as passwords and access keys. However, if you have
specific use cases that require long-term credentials with IAM users, we recommend that you rotate
access keys. For more information, see Rotate access keys regularly for use cases that require long-
term credentials in the IAM User Guide.
An IAM group is an identity that specifies a collection of IAM users. You can't sign in as a group. You
can use groups to specify permissions for multiple users at a time. Groups make permissions easier
to manage for large sets of users. For example, you could have a group named IAMAdmins and give
that group permissions to administer IAM resources.
Users are different from roles. A user is uniquely associated with one person or application, but
a role is intended to be assumable by anyone who needs it. Users have permanent long-term
credentials, but roles provide temporary credentials. To learn more, see When to create an IAM user
(instead of a role) in the IAM User Guide.
Authenticating with identities 195

AWS Direct Connect User Guide
IAM roles
An IAM role is an identity within your AWS account that has specific permissions. It is similar to an
IAM user, but is not associated with a specific person. You can temporarily assume an IAM role in
the AWS Management Console by switching roles. You can assume a role by calling an AWS CLI or
AWS API operation or by using a custom URL. For more information about methods for using roles,
see Using IAM roles in the IAM User Guide.
IAM roles with temporary credentials are useful in the following situations:
• Federated user access – To assign permissions to a federated identity, you create a role
and define permissions for the role. When a federated identity authenticates, the identity
is associated with the role and is granted the permissions that are defined by the role. For
information about roles for federation, see Creating a role for a third-party Identity Provider
in the IAM User Guide. If you use IAM Identity Center, you configure a permission set. To control
what your identities can access after they authenticate, IAM Identity Center correlates the
permission set to a role in IAM. For information about permissions sets, see Permission sets in
the AWS IAM Identity Center User Guide.
• Temporary IAM user permissions – An IAM user or role can assume an IAM role to temporarily
take on different permissions for a specific task.
• Cross-account access – You can use an IAM role to allow someone (a trusted principal) in a
different account to access resources in your account. Roles are the primary way to grant cross-
account access. However, with some AWS services, you can attach a policy directly to a resource
(instead of using a role as a proxy). To learn the difference between roles and resource-based
policies for cross-account access, see Cross account resource access in IAM in the IAM User Guide.
• Cross-service access – Some AWS services use features in other AWS services. For example, when
you make a call in a service, it's common for that service to run applications in Amazon EC2 or
store objects in Amazon S3. A service might do this using the calling principal's permissions,
using a service role, or using a service-linked role.
• Forward access sessions (FAS) – When you use an IAM user or role to perform actions in
AWS, you are considered a principal. When you use some services, you might perform an
action that then initiates another action in a different service. FAS uses the permissions of the
principal calling an AWS service, combined with the requesting AWS service to make requests
to downstream services. FAS requests are only made when a service receives a request that
requires interactions with other AWS services or resources to complete. In this case, you must
have permissions to perform both actions. For policy details when making FAS requests, see
Forward access sessions.
Authenticating with identities 196

AWS Direct Connect User Guide
• Service role – A service role is an IAM role that a service assumes to perform actions on your
behalf. An IAM administrator can create, modify, and delete a service role from within IAM. For
more information, see Creating a role to delegate permissions to an AWS service in the IAM
User Guide.
• Service-linked role – A service-linked role is a type of service role that is linked to an AWS
service. The service can assume the role to perform an action on your behalf. Service-linked
roles appear in your AWS account and are owned by the service. An IAM administrator can
view, but not edit the permissions for service-linked roles.
• Applications running on Amazon EC2 – You can use an IAM role to manage temporary
credentials for applications that are running on an EC2 instance and making AWS CLI or AWS API
requests. This is preferable to storing access keys within the EC2 instance. To assign an AWS role
to an EC2 instance and make it available to all of its applications, you create an instance profile
that is attached to the instance. An instance profile contains the role and enables programs that
are running on the EC2 instance to get temporary credentials. For more information, see Using
an IAM role to grant permissions to applications running on Amazon EC2 instances in the IAM
User Guide.
To learn whether to use IAM roles or IAM users, see When to create an IAM role (instead of a user)
in the IAM User Guide.
Managing access using policies
You control access in AWS by creating policies and attaching them to AWS identities or resources.
A policy is an object in AWS that, when associated with an identity or resource, defines their
permissions. AWS evaluates these policies when a principal (user, root user, or role session) makes
a request. Permissions in the policies determine whether the request is allowed or denied. Most
policies are stored in AWS as JSON documents. For more information about the structure and
contents of JSON policy documents, see Overview of JSON policies in the IAM User Guide.
Administrators can use AWS JSON policies to specify who has access to what. That is, which
principal can perform actions on what resources, and under what conditions.
By default, users and roles have no permissions. To grant users permission to perform actions on
the resources that they need, an IAM administrator can create IAM policies. The administrator can
then add the IAM policies to roles, and users can assume the roles.
IAM policies define permissions for an action regardless of the method that you use to perform the
operation. For example, suppose that you have a policy that allows the iam:GetRole action. A
Managing access using policies 197

AWS Direct Connect User Guide
user with that policy can get role information from the AWS Management Console, the AWS CLI, or
the AWS API.
Identity-based policies
Identity-based policies are JSON permissions policy documents that you can attach to an identity,
such as an IAM user, group of users, or role. These policies control what actions users and roles can
perform, on which resources, and under what conditions. To learn how to create an identity-based
policy, see Creating IAM policies in the IAM User Guide.
Identity-based policies can be further categorized as inline policies or managed policies. Inline
policies are embedded directly into a single user, group, or role. Managed policies are standalone
policies that you can attach to multiple users, groups, and roles in your AWS account. Managed
policies include AWS managed policies and customer managed policies. To learn how to choose
between a managed policy or an inline policy, see Choosing between managed policies and inline
policies in the IAM User Guide.
Resource-based policies
Resource-based policies are JSON policy documents that you attach to a resource. Examples of
resource-based policies are IAM role trust policies and Amazon S3 bucket policies. In services that
support resource-based policies, service administrators can use them to control access to a specific
resource. For the resource where the policy is attached, the policy defines what actions a specified
principal can perform on that resource and under what conditions. You must specify a principal
in a resource-based policy. Principals can include accounts, users, roles, federated users, or AWS
services.
Resource-based policies are inline policies that are located in that service. You can't use AWS
managed policies from IAM in a resource-based policy.
Access control lists (ACLs)
Access control lists (ACLs) control which principals (account members, users, or roles) have
permissions to access a resource. ACLs are similar to resource-based policies, although they do not
use the JSON policy document format.
Amazon S3, AWS WAF, and Amazon VPC are examples of services that support ACLs. To learn more
about ACLs, see Access control list (ACL) overview in the Amazon Simple Storage Service Developer
Guide.
Managing access using policies 198

AWS Direct Connect User Guide
Other policy types
AWS supports additional, less-common policy types. These policy types can set the maximum
permissions granted to you by the more common policy types.
• Permissions boundaries – A permissions boundary is an advanced feature in which you set
the maximum permissions that an identity-based policy can grant to an IAM entity (IAM user
or role). You can set a permissions boundary for an entity. The resulting permissions are the
intersection of an entity's identity-based policies and its permissions boundaries. Resource-based
policies that specify the user or role in the Principal field are not limited by the permissions
boundary. An explicit deny in any of these policies overrides the allow. For more information
about permissions boundaries, see Permissions boundaries for IAM entities in the IAM User Guide.
• Service control policies (SCPs) – SCPs are JSON policies that specify the maximum permissions
for an organization or organizational unit (OU) in AWS Organizations. AWS Organizations is a
service for grouping and centrally managing multiple AWS accounts that your business owns. If
you enable all features in an organization, then you can apply service control policies (SCPs) to
any or all of your accounts. The SCP limits permissions for entities in member accounts, including
each AWS account root user. For more information about Organizations and SCPs, see Service
control policies in the AWS Organizations User Guide.
• Session policies – Session policies are advanced policies that you pass as a parameter when you
programmatically create a temporary session for a role or federated user. The resulting session's
permissions are the intersection of the user or role's identity-based policies and the session
policies. Permissions can also come from a resource-based policy. An explicit deny in any of these
policies overrides the allow. For more information, see Session policies in the IAM User Guide.
Multiple policy types
When multiple types of policies apply to a request, the resulting permissions are more complicated
to understand. To learn how AWS determines whether to allow a request when multiple policy
types are involved, see Policy evaluation logic in the IAM User Guide.
How Direct Connect works with IAM
Before you use IAM to manage access to Direct Connect, learn what IAM features are available to
use with Direct Connect.
How Direct Connect works with IAM 199

AWS Direct Connect User Guide
IAM features you can use with Direct Connect
IAM feature Direct Connect support
Identity-based policies Yes
Resource-based policies No
Policy actions Yes
Policy resources Yes
Policy condition keys (service-specific) Yes
ACLs No
ABAC (tags in policies) Partial
Temporary credentials Yes
Principal permissions Yes
Service roles Yes
Service-linked roles No
To get a high-level view of how Direct Connect and other AWS services work with most IAM
features, see AWS services that work with IAM in the IAM User Guide.
Identity-based policies for Direct Connect
Supports identity-based policies: Yes
Identity-based policies are JSON permissions policy documents that you can attach to an identity,
such as an IAM user, group of users, or role. These policies control what actions users and roles can
perform, on which resources, and under what conditions. To learn how to create an identity-based
policy, see Creating IAM policies in the IAM User Guide.
With IAM identity-based policies, you can specify allowed or denied actions and resources as well
as the conditions under which actions are allowed or denied. You can't specify the principal in an
identity-based policy because it applies to the user or role to which it is attached. To learn about all
How Direct Connect works with IAM 200

AWS Direct Connect User Guide
of the elements that you can use in a JSON policy, see IAM JSON policy elements reference in the
IAM User Guide.
Identity-based policy examples for Direct Connect
To view examples of Direct Connect identity-based policies, see Identity-based policy examples for
Direct Connect.
Resource-based policies within Direct Connect
Supports resource-based policies: No
Resource-based policies are JSON policy documents that you attach to a resource. Examples of
resource-based policies are IAM role trust policies and Amazon S3 bucket policies. In services that
support resource-based policies, service administrators can use them to control access to a specific
resource. For the resource where the policy is attached, the policy defines what actions a specified
principal can perform on that resource and under what conditions. You must specify a principal
in a resource-based policy. Principals can include accounts, users, roles, federated users, or AWS
services.
To enable cross-account access, you can specify an entire account or IAM entities in another
account as the principal in a resource-based policy. Adding a cross-account principal to a resource-
based policy is only half of establishing the trust relationship. When the principal and the resource
are in different AWS accounts, an IAM administrator in the trusted account must also grant
the principal entity (user or role) permission to access the resource. They grant permission by
attaching an identity-based policy to the entity. However, if a resource-based policy grants access
to a principal in the same account, no additional identity-based policy is required. For more
information, see Cross account resource access in IAM in the IAM User Guide.
Policy actions for Direct Connect
Supports policy actions: Yes
Administrators can use AWS JSON policies to specify who has access to what. That is, which
principal can perform actions on what resources, and under what conditions.
The Action element of a JSON policy describes the actions that you can use to allow or deny
access in a policy. Policy actions usually have the same name as the associated AWS API operation.
There are some exceptions, such as permission-only actions that don't have a matching API
operation. There are also some operations that require multiple actions in a policy. These
additional actions are called dependent actions.
How Direct Connect works with IAM 201

AWS Direct Connect User Guide
Include actions in a policy to grant permissions to perform the associated operation.
To see a list of Direct Connect actions, see Actions Defined by Direct Connect in the Service
Authorization Reference.
Policy actions in Direct Connect use the following prefix before the action:
Direct Connect
To specify multiple actions in a single statement, separate them with commas.
"Action": [
"directconnect:action1",
"directconnectaction2"
]
Policy resources for Direct Connect
Supports policy resources: Yes
Administrators can use AWS JSON policies to specify who has access to what. That is, which
principal can perform actions on what resources, and under what conditions.
The Resource JSON policy element specifies the object or objects to which the action applies.
Statements must include either a Resource or a NotResource element. As a best practice,
specify a resource using its Amazon Resource Name (ARN). You can do this for actions that support
a specific resource type, known as resource-level permissions.
For actions that don't support resource-level permissions, such as listing operations, use a wildcard
(*) to indicate that the statement applies to all resources.
"Resource": "*"
To see a list of Direct Connect resource types and their ARNs, see Resources Defined by Direct
Connect in the AWS Direct Connect API Reference. To learn with which actions you can specify the
ARN of each resource, see Actions Defined by Direct Connect.
To view examples of Direct Connect identity-based policies, see Identity-based policy examples for
Direct Connect.
How Direct Connect works with IAM 202

AWS Direct Connect User Guide
To view examples of Direct Connect resource-based policies, see Direct Connect identity-based
policy examples using tag-based conditions.
Policy condition keys for Direct Connect
Supports service-specific policy condition keys: Yes
Administrators can use AWS JSON policies to specify who has access to what. That is, which
principal can perform actions on what resources, and under what conditions.
The Condition element (or Condition block) lets you specify conditions in which a statement
is in effect. The Condition element is optional. You can create conditional expressions that use
condition operators, such as equals or less than, to match the condition in the policy with values in
the request.
If you specify multiple Condition elements in a statement, or multiple keys in a single
Condition element, AWS evaluates them using a logical AND operation. If you specify multiple
values for a single condition key, AWS evaluates the condition using a logical OR operation. All of
the conditions must be met before the statement's permissions are granted.
You can also use placeholder variables when you specify conditions. For example, you can grant
an IAM user permission to access a resource only if it is tagged with their IAM user name. For more
information, see IAM policy elements: variables and tags in the IAM User Guide.
AWS supports global condition keys and service-specific condition keys. To see all AWS global
condition keys, see AWS global condition context keys in the IAM User Guide.
To see a list of Direct Connect condition keys, see Condition Keys for Direct Connect in the AWS
Direct Connect API Reference. To learn with which actions and resources you can use a condition
key, see Actions, Resources, and Condition Keys for Direct Connect in the Service Authorization
Reference.
To view examples of Direct Connect identity-based policies, see Identity-based policy examples for
Direct Connect.
ACLs in Direct Connect
Supports ACLs: No
Access control lists (ACLs) control which principals (account members, users, or roles) have
permissions to access a resource. ACLs are similar to resource-based policies, although they do not
use the JSON policy document format.
How Direct Connect works with IAM 203

AWS Direct Connect User Guide
ABAC with Direct Connect
Supports ABAC (tags in policies): Partial
Attribute-based access control (ABAC) is an authorization strategy that defines permissions based
on attributes. In AWS, these attributes are called tags. You can attach tags to IAM entities (users or
roles) and to many AWS resources. Tagging entities and resources is the first step of ABAC. Then
you design ABAC policies to allow operations when the principal's tag matches the tag on the
resource that they are trying to access.
ABAC is helpful in environments that are growing rapidly and helps with situations where policy
management becomes cumbersome.
To control access based on tags, you provide tag information in the condition element of a policy
using the aws:ResourceTag/key-name, aws:RequestTag/key-name, or aws:TagKeys
condition keys.
If a service supports all three condition keys for every resource type, then the value is Yes for the
service. If a service supports all three condition keys for only some resource types, then the value is
Partial.
For more information about ABAC, see What is ABAC? in the IAM User Guide. To view a tutorial with
steps for setting up ABAC, see Use attribute-based access control (ABAC) in the IAM User Guide.
Using temporary credentials with Direct Connect
Supports temporary credentials: Yes
Some AWS services don't work when you sign in using temporary credentials. For additional
information, including which AWS services work with temporary credentials, see AWS services that
work with IAM in the IAM User Guide.
You are using temporary credentials if you sign in to the AWS Management Console using
any method except a user name and password. For example, when you access AWS using your
company's single sign-on (SSO) link, that process automatically creates temporary credentials. You
also automatically create temporary credentials when you sign in to the console as a user and then
switch roles. For more information about switching roles, see Switching to a role (console) in the
IAM User Guide.
You can manually create temporary credentials using the AWS CLI or AWS API. You can then use
those temporary credentials to access AWS. AWS recommends that you dynamically generate
How Direct Connect works with IAM 204

AWS Direct Connect User Guide
temporary credentials instead of using long-term access keys. For more information, see
Temporary security credentials in IAM.
Cross-service principal permissions for Direct Connect
Supports forward access sessions (FAS): Yes
When you use an IAM user or role to perform actions in AWS, you are considered a principal.
When you use some services, you might perform an action that then initiates another action in a
different service. FAS uses the permissions of the principal calling an AWS service, combined with
the requesting AWS service to make requests to downstream services. FAS requests are only made
when a service receives a request that requires interactions with other AWS services or resources to
complete. In this case, you must have permissions to perform both actions. For policy details when
making FAS requests, see Forward access sessions.
Service roles for Direct Connect
Supports service roles: Yes
A service role is an IAM role that a service assumes to perform actions on your behalf. An IAM
administrator can create, modify, and delete a service role from within IAM. For more information,
see Creating a role to delegate permissions to an AWS service in the IAM User Guide.
Warning
Changing the permissions for a service role might break Direct Connect functionality. Edit
service roles only when Direct Connect provides guidance to do so.
Service-linked roles for Direct Connect
Supports service-linked roles: No
A service-linked role is a type of service role that is linked to an AWS service. The service can
assume the role to perform an action on your behalf. Service-linked roles appear in your AWS
account and are owned by the service. An IAM administrator can view, but not edit the permissions
for service-linked roles.
For details about creating or managing service-linked roles, see AWS services that work with IAM.
Find a service in the table that includes a Yes in the Service-linked role column. Choose the Yes
link to view the service-linked role documentation for that service.
How Direct Connect works with IAM 205

AWS Direct Connect User Guide
Identity-based policy examples for Direct Connect
By default, users and roles don't have permission to create or modify Direct Connect resources.
They also can't perform tasks by using the AWS Management Console, AWS Command Line
Interface (AWS CLI), or AWS API. To grant users permission to perform actions on the resources
that they need, an IAM administrator can create IAM policies. The administrator can then add the
IAM policies to roles, and users can assume the roles.
To learn how to create an IAM identity-based policy by using these example JSON policy
documents, see Creating IAM policies in the IAM User Guide.
For details about actions and resource types defined by Direct Connect, including the format of the
ARNs for each of the resource types, see Actions, Resources, and Condition Keys for Direct Connect
in the Service Authorization Reference.
Topics
• Policy best practices
• Direct Connect actions, resources, and conditions
• Using the Direct Connect console
• Allow users to view their own permissions
• Read-only access to AWS Direct Connect
• Full access to AWS Direct Connect
• Direct Connect identity-based policy examples using tag-based conditions
Policy best practices
Identity-based policies determine whether someone can create, access, or delete Direct Connect
resources in your account. These actions can incur costs for your AWS account. When you create or
edit identity-based policies, follow these guidelines and recommendations:
• Get started with AWS managed policies and move toward least-privilege permissions – To
get started granting permissions to your users and workloads, use the AWS managed policies
that grant permissions for many common use cases. They are available in your AWS account. We
recommend that you reduce permissions further by defining AWS customer managed policies
that are specific to your use cases. For more information, see AWS managed policies or AWS
managed policies for job functions in the IAM User Guide.
Identity-based policy examples for Direct Connect 206

AWS Direct Connect User Guide
• Apply least-privilege permissions – When you set permissions with IAM policies, grant only the
permissions required to perform a task. You do this by defining the actions that can be taken on
specific resources under specific conditions, also known as least-privilege permissions. For more
information about using IAM to apply permissions, see Policies and permissions in IAM in the
IAM User Guide.
• Use conditions in IAM policies to further restrict access – You can add a condition to your
policies to limit access to actions and resources. For example, you can write a policy condition to
specify that all requests must be sent using SSL. You can also use conditions to grant access to
service actions if they are used through a specific AWS service, such as AWS CloudFormation. For
more information, see IAM JSON policy elements: Condition in the IAM User Guide.
• Use IAM Access Analyzer to validate your IAM policies to ensure secure and functional
permissions – IAM Access Analyzer validates new and existing policies so that the policies
adhere to the IAM policy language (JSON) and IAM best practices. IAM Access Analyzer provides
more than 100 policy checks and actionable recommendations to help you author secure and
functional policies. For more information, see IAM Access Analyzer policy validation in the IAM
User Guide.
• Require multi-factor authentication (MFA) – If you have a scenario that requires IAM users
or a root user in your AWS account, turn on MFA for additional security. To require MFA when
API operations are called, add MFA conditions to your policies. For more information, see
Configuring MFA-protected API access in the IAM User Guide.
For more information about best practices in IAM, see Security best practices in IAM in the IAM User
Guide.
Direct Connect actions, resources, and conditions
With IAM identity-based policies, you can specify allowed or denied actions and resources as well
as the conditions under which actions are allowed or denied. Direct Connect supports specific
actions, resources, and condition keys. To learn about all of the elements that you use in a JSON
policy, see IAM JSON Policy Elements Reference in the IAM User Guide.
Actions
Administrators can use AWS JSON policies to specify who has access to what. That is, which
principal can perform actions on what resources, and under what conditions.
The Action element of a JSON policy describes the actions that you can use to allow or deny
access in a policy. Policy actions usually have the same name as the associated AWS API operation.
Identity-based policy examples for Direct Connect 207

AWS Direct Connect User Guide
There are some exceptions, such as permission-only actions that don't have a matching API
operation. There are also some operations that require multiple actions in a policy. These
additional actions are called dependent actions.
Include actions in a policy to grant permissions to perform the associated operation.
Policy actions in Direct Connect use the following prefix before the action: directconnect:.
For example, to grant someone permission to run an Amazon EC2 instance with the Amazon EC2
DescribeVpnGateways API operation, you include the ec2:DescribeVpnGateways action
in their policy. Policy statements must include either an Action or NotAction element. Direct
Connect defines its own set of actions that describe tasks that you can perform with this service.
The following example policy grants read access to AWS Direct Connect.
{
"Version": "2012-10-17",
"Statement": [
{
"Effect": "Allow",
"Action": [
"directconnect:Describe*",
"ec2:DescribeVpnGateways"
],
"Resource": "*"
}
]
}
The following example policy grants full access to AWS Direct Connect.
{
"Version": "2012-10-17",
"Statement": [
{
"Effect": "Allow",
"Action": [
"directconnect:*",
"ec2:DescribeVpnGateways"
],
"Resource": "*"
}
]
Identity-based policy examples for Direct Connect 208

AWS Direct Connect User Guide
}
To see a list of Direct Connect actions, see Actions Defined by Direct Connect in the IAM User Guide.
Resources
Administrators can use AWS JSON policies to specify who has access to what. That is, which
principal can perform actions on what resources, and under what conditions.
The Resource JSON policy element specifies the object or objects to which the action applies.
Statements must include either a Resource or a NotResource element. As a best practice,
specify a resource using its Amazon Resource Name (ARN). You can do this for actions that support
a specific resource type, known as resource-level permissions.
For actions that don't support resource-level permissions, such as listing operations, use a wildcard
(*) to indicate that the statement applies to all resources.
"Resource": "*"
Direct Connect uses the following ARNs:
Direct connect resource ARNs
Resource Type ARN
dxcon
arn:${Partition}:directconnect:
${Region}:${Account}:dxcon/${Con
nectionId}
dxlag
arn:${Partition}:directconnect:
${Region}:${Account}:dxlag/${Lag
Id}
dx-vif
arn:${Partition}:directconnect:
${Region}:${Account}:dxvif/${Vir
tualInterfaceId}
dx-gateway
arn:${Partition}:directconnect::
${Account}:dx-gateway/${DirectC
onnectGatewayId}
Identity-based policy examples for Direct Connect 209

AWS Direct Connect User Guide
For more information about the format of ARNs, see Amazon Resource Names (ARNs) and AWS
Service Namespaces.
For example, to specify the dxcon-11aa22bb interface in your statement, use the following ARN:
"Resource": "arn:aws:directconnect:us-east-1:123456789012:dxcon/dxcon-11aa22bb
To specify all virtual interfaces that belong to a specific account, use the wildcard (*):
"Resource": "arn:aws:directconnect:*:*:dxvif/*"
Some Direct Connect actions, such as those for creating resources, cannot be performed on a
specific resource. In those cases, you must use the wildcard (*).
"Resource": "*"
To see a list of Direct Connect resource types and their ARNs, see Resource Types Defined by AWS
Direct Connect in the IAM User Guide. To learn with which actions you can specify the ARN of each
resource, see SERVICE-ACTIONS-URL;.
Condition keys
Administrators can use AWS JSON policies to specify who has access to what. That is, which
principal can perform actions on what resources, and under what conditions.
The Condition element (or Condition block) lets you specify conditions in which a statement
is in effect. The Condition element is optional. You can create conditional expressions that use
condition operators, such as equals or less than, to match the condition in the policy with values in
the request.
If you specify multiple Condition elements in a statement, or multiple keys in a single
Condition element, AWS evaluates them using a logical AND operation. If you specify multiple
values for a single condition key, AWS evaluates the condition using a logical OR operation. All of
the conditions must be met before the statement's permissions are granted.
You can also use placeholder variables when you specify conditions. For example, you can grant
an IAM user permission to access a resource only if it is tagged with their IAM user name. For more
information, see IAM policy elements: variables and tags in the IAM User Guide.
Identity-based policy examples for Direct Connect 210

AWS Direct Connect User Guide
AWS supports global condition keys and service-specific condition keys. To see all AWS global
condition keys, see AWS global condition context keys in the IAM User Guide.
Direct Connect defines its own set of condition keys and also supports using some global condition
keys. To see all AWS global condition keys, see AWS Global Condition Context Keys in the IAM User
Guide.
You can use condition keys with the tag resource. For more information, see Example: Restricting
Access to a Specific Region.
To see a list of Direct Connect condition keys, see Condition Keys for Direct Connect in the IAM
User Guide. To learn with which actions and resources you can use a condition key, see SERVICE-
ACTIONS-URL;.
Using the Direct Connect console
To access the Direct Connect console, you must have a minimum set of permissions. These
permissions must allow you to list and view details about the Direct Connect resources in your AWS
account. If you create an identity-based policy that is more restrictive than the minimum required
permissions, the console won't function as intended for entities (s or roles) with that policy.
To ensure that those entities can still use the Direct Connect console, also attach the following
AWS managed policy to the entities. For more information, see Adding Permissions to a User in the
IAM User Guide:
directconnect
You don't need to allow minimum console permissions for users that are making calls only to the
AWS CLI or the AWS API. Instead, allow access to only the actions that match the API operation
that you're trying to perform.
Allow users to view their own permissions
This example shows how you might create a policy that allows IAM users to view the inline and
managed policies that are attached to their user identity. This policy includes permissions to
complete this action on the console or programmatically using the AWS CLI or AWS API.
{
"Version": "2012-10-17",
"Statement": [
{
Identity-based policy examples for Direct Connect 211

AWS Direct Connect User Guide
"Sid": "ViewOwnUserInfo",
"Effect": "Allow",
"Action": [
"iam:GetUserPolicy",
"iam:ListGroupsForUser",
"iam:ListAttachedUserPolicies",
"iam:ListUserPolicies",
"iam:GetUser"
],
"Resource": ["arn:aws:iam::*:user/${aws:username}"]
},
{
"Sid": "NavigateInConsole",
"Effect": "Allow",
"Action": [
"iam:GetGroupPolicy",
"iam:GetPolicyVersion",
"iam:GetPolicy",
"iam:ListAttachedGroupPolicies",
"iam:ListGroupPolicies",
"iam:ListPolicyVersions",
"iam:ListPolicies",
"iam:ListUsers"
],
"Resource": "*"
}
]
}
Read-only access to AWS Direct Connect
The following example policy grants read access to AWS Direct Connect.
{
"Version": "2012-10-17",
"Statement": [
{
"Effect": "Allow",
"Action": [
"directconnect:Describe*",
"ec2:DescribeVpnGateways"
],
"Resource": "*"
Identity-based policy examples for Direct Connect 212

AWS Direct Connect User Guide
}
]
}
Full access to AWS Direct Connect
The following example policy grants full access to AWS Direct Connect.
{
"Version": "2012-10-17",
"Statement": [
{
"Effect": "Allow",
"Action": [
"directconnect:*",
"ec2:DescribeVpnGateways"
],
"Resource": "*"
}
]
}
Direct Connect identity-based policy examples using tag-based conditions
You can control access to resources and requests by using tag key conditions. You can also use a
condition in your IAM policy to control whether specific tag keys can be used on a resource or in a
request.
For information about how to use tags with IAM policies, see Controlling Access Using Tags in the
IAM User Guide.
Associating Direct Connect virtual interfaces based on tags
The following example shows how you might create a policy that allows associating a virtual
interface only if the tag contains the environment key and the preprod or production values.
{
"Version": "2012-10-17",
"Statement": [
{
"Effect": "Allow",
"Action": [
Identity-based policy examples for Direct Connect 213

AWS Direct Connect User Guide
"directconnect:AssociateVirtualInterface"
],
"Resource": "arn:aws:directconnect:*:*:dxvif/*",
"Condition": {
"StringEquals": {
"aws:ResourceTag/environment": [
"preprod",
"production"
]
}
}
},
{
"Effect": "Allow",
"Action": "directconnect:DescribeVirtualInterfaces",
"Resource": "*"
}
]
}
Controlling access to requests based on tags
You can use conditions in your IAM policies to control which tag key–value pairs can be passed
in a request that tags an AWS resource. The following example shows how you might create a
policy that allows using the AWS Direct Connect TagResource action to attach tags to a virtual
interface only if the tag contains the environment key and the preprod or production values. As a
best practice, use the ForAllValues modifier with the aws:TagKeys condition key to indicate
that only the key environment is allowed in the request.
{
"Version": "2012-10-17",
"Statement": {
"Effect": "Allow",
"Action": "directconnect:TagResource",
"Resource": "arn:aws:directconnect:*:*:dxvif/*",
"Condition": {
"StringEquals": {
"aws:RequestTag/environment": [
"preprod",
"production"
]
},
Identity-based policy examples for Direct Connect 214

AWS Direct Connect User Guide
"ForAllValues:StringEquals": {"aws:TagKeys": "environment"}
}
}
}
Controlling tag keys
You can use a condition in your IAM policies to control whether specific tag keys can be used on a
resource or in a request.
The following example shows how you might create a policy that allows you to tag resources, but
only with the tag key environment
{
"Version": "2012-10-17",
"Statement": {
"Effect": "Allow",
"Action": "directconnect:TagResource",
"Resource": "*",
"Condition": {
"ForAllValues:StringEquals": {
"aws:TagKeys": [
"environment"
]
}
}
}
}
Service-linked roles for AWS Direct Connect
AWS Direct Connect uses AWS Identity and Access Management (IAM) service-linked roles. A
service-linked role is a unique type of IAM role that is linked directly to AWS Direct Connect.
Service-linked roles are predefined by AWS Direct Connect and include all the permissions that the
service requires to call other AWS services on your behalf.
A service-linked role makes setting up AWS Direct Connect easier because you don’t have to
manually add the necessary permissions. AWS Direct Connect defines the permissions of its
service-linked roles, and unless defined otherwise, only AWS Direct Connect can assume its roles.
The defined permissions include the trust policy and the permissions policy, and that permissions
policy cannot be attached to any other IAM entity.
Service-linked roles 215

AWS Direct Connect User Guide
You can delete a service-linked role only after first deleting their related resources. This protects
your AWS Direct Connect resources because you can't inadvertently remove permission to access
the resources.
For information about other services that support service-linked roles, see AWS Services That Work
with IAM and look for the services that have Yes in the Service-Linked Role column. Choose a Yes
with a link to view the service-linked role documentation for that service.
Service-linked role permissions for AWS Direct Connect
AWS Direct Connect uses a service-linked role named AWSServiceRoleForDirectConnect. This
allows AWS Direct Connect to retrieve the MACSec secretes stored in AWS Secrets Manager on your
behalf.
The AWSServiceRoleForDirectConnect service-linked role trusts the following services to
assume the role:
•
directconnect.amazonaws.com
The AWSServiceRoleForDirectConnect service-linked role uses the managed policy
AWSDirectConnectServiceRolePolicy.
You must configure permissions to allow an IAM entity (such as a user, group, or role) to create,
edit, or delete a service-linked role. For the AWSServiceRoleForDirectConnect service-linked
role to be created successfully, the IAM identity that you use AWS Direct Connect with must have
the required permissions. To grant the required permissions, attach the following policy to the IAM
identity.
{
"Version": "2012-10-17",
"Statement": [
{
"Action": "iam:CreateServiceLinkedRole",
"Condition": {
"StringLike": {
"iam:AWSServiceName": "directconnect.amazonaws.com"
}
},
"Effect": "Allow",
"Resource": "*"
Service-linked roles 216

AWS Direct Connect User Guide
},
{
"Action": "iam:GetRole",
"Effect": "Allow",
"Resource": "*"
}
]
}
For more information, see Service-linked role permissions in the IAM User Guide.
Creating a service-linked role for AWS Direct Connect
You don't need to manually create a service-linked role. AWS Direct Connect creates the service-
linked role for you. When you run the associate-mac-sec-key command, AWS creates a
service-linked role that allows AWS Direct Connect to retrieve the MACsec secrets that are stored in
AWS Secrets Manager on your behalf in the AWS Management Console, the AWS CLI, or the AWS
API.
Important
This service-linked role can appear in your account if you completed an action in another
service that uses the features supported by this role. To learn more, see A New Role
Appeared in My IAM Account.
If you delete this service-linked role, and then need to create it again, you can use the same process
to recreate the role in your account. AWS Direct Connect creates the service-linked role for you
again.
You can also use the IAM console to create a service-linked role with the AWS Direct
Connect use case. In the AWS CLI or the AWS API, create a service-linked role with the
directconnect.amazonaws.com service name. For more information, see Creating a service-
linked role in the IAM User Guide. If you delete this service-linked role, you can use this same
process to create the role again.
Editing a service-linked role for AWS Direct Connect
AWS Direct Connect does not allow you to edit the AWSServiceRoleForDirectConnect service-
linked role. After you create a service-linked role, you can't change the name of the role because
Service-linked roles 217

AWS Direct Connect User Guide
various entities might reference the role. However, you can edit the description of the role using
IAM. For more information, see Editing a service-linked role in the IAM User Guide.
Deleting a service-linked role for AWS Direct Connect
You don't need to manually delete the AWSServiceRoleForDirectConnect role. When you
delete your service linked role, you must delete all the associated resources that are stored in AWS
Secrets Manager web service. The AWS Management Console, the AWS CLI, or the AWS API, AWS
Direct Connect cleans up the resources and deletes the service-linked role for you.
You can also use the IAM console to delete the service-linked role. To do this, you must first
manually clean up the resources for your service-linked role and then you can delete it.
Note
If the AWS Direct Connect service is using the role when you try to delete the resources,
then deletion might fail. If this happens, wait a few minutes, and then try the operation
again.
To delete AWS Direct Connect resources used by the AWSServiceRoleForDirectConnect
1. Remove the association between all MACsec keys and connections. For more information, see
the section called “Remove the association between a MACsec secret key and a connection”
2. Remove the association between all MACsec keys and LAGs. For more information, see the
section called “Remove the association between a MACsec secret key and a LAG”
To manually delete the service-linked role using IAM
Use the IAM console, the AWS CLI, or the AWS API to delete the
AWSServiceRoleForDirectConnect service-linked role. For more information, see Deleting a
service-linked role in the IAM User Guide.
Supported regions for AWS Direct Connect service-linked roles
AWS Direct Connect supports using service-linked roles in all AWS Regions where the MAC Security
feature is available. For more information, see AWS Direct Connect Locations.
Service-linked roles 218

AWS Direct Connect User Guide
AWS managed policies for AWS Direct Connect
An AWS managed policy is a standalone policy that is created and administered by AWS. AWS
managed policies are designed to provide permissions for many common use cases so that you can
start assigning permissions to users, groups, and roles.
Keep in mind that AWS managed policies might not grant least-privilege permissions for your
specific use cases because they're available for all AWS customers to use. We recommend that you
reduce permissions further by defining customer managed policies that are specific to your use
cases.
You cannot change the permissions defined in AWS managed policies. If AWS updates the
permissions defined in an AWS managed policy, the update affects all principal identities (users,
groups, and roles) that the policy is attached to. AWS is most likely to update an AWS managed
policy when a new AWS service is launched or new API operations become available for existing
services.
For more information, see AWS managed policies in the IAM User Guide.
AWS managed policy: AWSDirectConnectFullAccess
You can attach the AWSDirectConnectFullAccess policy to your IAM identities. This policy
grants permissions that allow full access to AWS Direct Connect.
To view the permissions for this policy, see AWSDirectConnectFullAccess in the AWS Management
Console.
AWS managed policy: AWSDirectConnectReadOnlyAccess
You can attach the AWSDirectConnectReadOnlyAccess policy to your IAM identities. This policy
grants permissions that allow read-only access to AWS Direct Connect.
To view the permissions for this policy, see AWSDirectConnectReadOnlyAccess in the AWS
Management Console.
AWS managed policy: AWSDirectConnectServiceRolePolicy
This policy is attached to the service-linked role named AWSServiceRoleForDirectConnect to allow
AWS Direct Connect to retrieve MAC Security secrets on your behalf. For more information, see the
section called “Service-linked roles”.
AWS managed policies 219

AWS Direct Connect User Guide
To view the permissions for this policy, see AWSDirectConnectServiceRolePolicy in the AWS
Management Console.
AWS Direct Connect updates to AWS managed policies
View details about updates to AWS managed policies for AWS Direct Connect since this service
began tracking these changes. For automatic alerts about changes to this page, subscribe to the
RSS feed on the AWS Direct Connect Document history page.
Change Description Date
AWSDirectConnectSe
rviceRolePolicy - New policy
To support MAC Security,
the AWSServiceRoleForD
irectConnect service-linked
role was added.
March 31, 2021
AWS Direct Connect started
tracking changes
AWS Direct Connect started
tracking changes to its AWS
managed policies.
March 31, 2021
Troubleshooting Direct Connect identity and access
Use the following information to help you diagnose and fix common issues that you might
encounter when working with Direct Connect and IAM.
Topics
• I am not authorized to perform an action in Direct Connect
• I am not authorized to perform iam:PassRole
• I want to allow people outside of my AWS account to access my Direct Connect resources
I am not authorized to perform an action in Direct Connect
If you receive an error that you're not authorized to perform an action, your policies must be
updated to allow you to perform the action.
Troubleshooting 220

AWS Direct Connect User Guide
The following example error occurs when the mateojackson IAM user tries to use the console
to view details about a fictional my-example-widget resource but doesn't have the fictional
directconnect:GetWidget permissions.
User: arn:aws:iam::123456789012:user/mateojackson is not authorized to perform:
directconnect:GetWidget on resource: my-example-widget
In this case, the policy for the mateojackson user must be updated to allow access to the my-
example-widget resource by using the directconnect:GetWidget action.
If you need help, contact your AWS administrator. Your administrator is the person who provided
you with your sign-in credentials.
I am not authorized to perform iam:PassRole
If you receive an error that you're not authorized to perform the iam:PassRole action, your
policies must be updated to allow you to pass a role to Direct Connect.
Some AWS services allow you to pass an existing role to that service instead of creating a new
service role or service-linked role. To do this, you must have permissions to pass the role to the
service.
The following example error occurs when an IAM user named marymajor tries to use the
console to perform an action in Direct Connect. However, the action requires the service to have
permissions that are granted by a service role. Mary does not have permissions to pass the role to
the service.
User: arn:aws:iam::123456789012:user/marymajor is not authorized to perform:
iam:PassRole
In this case, Mary's policies must be updated to allow her to perform the iam:PassRole action.
If you need help, contact your AWS administrator. Your administrator is the person who provided
you with your sign-in credentials.
I want to allow people outside of my AWS account to access my Direct Connect
resources
You can create a role that users in other accounts or people outside of your organization can use to
access your resources. You can specify who is trusted to assume the role. For services that support
Troubleshooting 221

AWS Direct Connect User Guide
resource-based policies or access control lists (ACLs), you can use those policies to grant people
access to your resources.
To learn more, consult the following:
• To learn whether Direct Connect supports these features, see How Direct Connect works with
IAM.
• To learn how to provide access to your resources across AWS accounts that you own, see
Providing access to an IAM user in another AWS account that you own in the IAM User Guide.
• To learn how to provide access to your resources to third-party AWS accounts, see Providing
access to AWS accounts owned by third parties in the IAM User Guide.
• To learn how to provide access through identity federation, see Providing access to externally
authenticated users (identity federation) in the IAM User Guide.
• To learn the difference between using roles and resource-based policies for cross-account access,
see Cross account resource access in IAM in the IAM User Guide.
Logging and monitoring in AWS Direct Connect
You can use the following automated monitoring tools to watch AWS Direct Connect and report
when something is wrong:
• Amazon CloudWatch Alarms – Watch a single metric over a time period that you specify.
Perform one or more actions based on the value of the metric relative to a given threshold over
a number of time periods. The action is a notification sent to an Amazon SNS topic. CloudWatch
alarms do not invoke actions simply because they are in a particular state; the state must have
changed and been maintained for a specified number of periods. For more information, see
Monitor with Amazon CloudWatch.
• AWS CloudTrail Log Monitoring – Share log files between accounts and monitor CloudTrail
log files in real time by sending them to CloudWatch Logs. You can also write log processing
applications in Java and validate that your log files have not changed after delivery by
CloudTrail. For more information, see Log AWS Direct Connect API calls using AWS CloudTrail
and Working with CloudTrail Log Files in the AWS CloudTrail User Guide.
For more information, see Monitor Direct Connect resources.
Logging and monitoring 222

AWS Direct Connect User Guide
Compliance validation for AWS Direct Connect
To learn whether an AWS service is within the scope of specific compliance programs, see AWS
services in Scope by Compliance Program and choose the compliance program that you are
interested in. For general information, see AWS Compliance Programs.
You can download third-party audit reports using AWS Artifact. For more information, see
Downloading Reports in AWS Artifact.
Your compliance responsibility when using AWS services is determined by the sensitivity of your
data, your company's compliance objectives, and applicable laws and regulations. AWS provides the
following resources to help with compliance:
• Security and Compliance Quick Start Guides – These deployment guides discuss architectural
considerations and provide steps for deploying baseline environments on AWS that are security
and compliance focused.
• Architecting for HIPAA Security and Compliance on Amazon Web Services – This whitepaper
describes how companies can use AWS to create HIPAA-eligible applications.
Note
Not all AWS services are HIPAA eligible. For more information, see the HIPAA Eligible
Services Reference.
• AWS Compliance Resources – This collection of workbooks and guides might apply to your
industry and location.
• AWS Customer Compliance Guides – Understand the shared responsibility model through the
lens of compliance. The guides summarize the best practices for securing AWS services and map
the guidance to security controls across multiple frameworks (including National Institute of
Standards and Technology (NIST), Payment Card Industry Security Standards Council (PCI), and
International Organization for Standardization (ISO)).
• Evaluating Resources with Rules in the AWS Config Developer Guide – The AWS Config service
assesses how well your resource configurations comply with internal practices, industry
guidelines, and regulations.
• AWS Security Hub – This AWS service provides a comprehensive view of your security state within
AWS. Security Hub uses security controls to evaluate your AWS resources and to check your
Compliance validation 223

AWS Direct Connect User Guide
compliance against security industry standards and best practices. For a list of supported services
and controls, see Security Hub controls reference.
• Amazon GuardDuty – This AWS service detects potential threats to your AWS accounts,
workloads, containers, and data by monitoring your environment for suspicious and malicious
activities. GuardDuty can help you address various compliance requirements, like PCI DSS, by
meeting intrusion detection requirements mandated by certain compliance frameworks.
• AWS Audit Manager – This AWS service helps you continuously audit your AWS usage to simplify
how you manage risk and compliance with regulations and industry standards.
Resilience in AWS Direct Connect
The AWS global infrastructure is built around AWS Regions and Availability Zones. AWS Regions
provide multiple physically separated and isolated Availability Zones, which are connected with
low-latency, high-throughput, and highly redundant networking. With Availability Zones, you can
design and operate applications and databases that automatically fail over between Availability
Zones without interruption. Availability Zones are more highly available, fault tolerant, and
scalable than traditional single or multiple data center infrastructures.
For more information about AWS Regions and Availability Zones, see AWS Global Infrastructure.
In addition to the AWS global infrastructure, AWS Direct Connect offers several features to help
support your data resiliency and backup needs.
For information about how to use VPN with AWS Direct Connect, see AWS Direct Connect Plus VPN.
Failover
The AWS Direct Connect Resiliency Toolkit provides a connection wizard with multiple resiliency
models that helps you order dedicated connections to achieve your SLA objective. You select a
resiliency model, and then the AWS Direct Connect Resiliency Toolkit guides you through the
dedicated connection ordering process. The resiliency models are designed to ensure that you have
the appropriate number of dedicated connections in multiple locations.
• Maximum Resiliency: You can achieve maximum resiliency for critical workloads by using
separate connections that terminate on separate devices in more than one location. This model
provides resiliency against device, connectivity, and complete location failures.
Resilience in Direct Connect 224

AWS Direct Connect User Guide
• High Resiliency: You can achieve high resiliency for critical workloads by using two single
connections to multiple locations. This model provides resiliency against connectivity failures
caused by a fiber cut or a device failure. It also helps prevent a complete location failure.
• Development and Test: You can achieve development and test resiliency for non-critical
workloads by using separate connections that terminate on separate devices in one location. This
model provides resiliency against device failure, but does not provide resiliency against location
failure.
For more information, see AWS Direct Connect Resiliency Toolkit.
Infrastructure security in AWS Direct Connect
As a managed service, AWS Direct Connect is protected by the AWS global network security
procedures. You use AWS published API calls to access AWS Direct Connect through the network.
Clients must support Transport Layer Security (TLS) 1.2 or later. We recommend TLS 1.3. Clients
must also support cipher suites with perfect forward secrecy (PFS) such as Ephemeral Diffie-
Hellman (DHE) or Elliptic Curve Ephemeral Diffie-Hellman (ECDHE). Most modern systems such as
Java 7 and later support these modes.
Additionally, requests must be signed by using an access key ID and a secret access key that is
associated with an IAM principal. Or you can use the AWS Security Token Service (AWS STS) to
generate temporary security credentials to sign requests.
You can call these API operations from any network location, but AWS Direct Connect supports
resource-based access policies, which can include restrictions based on the source IP address. You
can also use AWS Direct Connect policies to control access from specific Amazon Virtual Private
Cloud (Amazon VPC) endpoints or specific VPCs. Effectively, this isolates network access to a given
AWS Direct Connect resource from only the specific VPC within the AWS network. For example, see
the section called “Identity-based policy examples for Direct Connect”.
Border Gateway Protocol (BGP) security
The internet relies in large part on BGP for routing information between network systems. BGP
routing can some times be susceptible to malicious attacks, or BGP hijacking. To understand how
AWS works to more securely safeguard your network from BGP hijacking, see How AWS is helping
to secure internet routing.
Infrastructure security 225

AWS Direct Connect User Guide
Use the AWS CLI
You can use the AWS CLI to create and work with AWS Direct Connect resources.
The following example uses the AWS CLI commands to create an AWS Direct Connect connection.
You can also download the Letter of Authorization and Connecting Facility Assignment (LOA-CFA)
or provision a private or public virtual interface.
Before you begin, ensure that you have installed and configured the AWS CLI. For more
information, see the AWS Command Line Interface User Guide.
Contents
• Step 1: Create a connection
• Step 2: Download the LOA-CFA
• Step 3: Create a virtual interface and get the router configuration
Step 1: Create a connection
The first step is to submit a connection request. Ensure that you know the port speed that you
require and the AWS Direct Connect location. For more information, see Dedicated and hosted
connections.
To create a connection request
1. Describe the AWS Direct Connect locations for your current Region. In the output that's
returned, take note of the location code for the location in which you want to establish the
connection.
aws directconnect describe-locations
{
"locations": [
{
"locationName": "City 1, United States",
"locationCode": "Example Location 1"
},
{
"locationName": "City 2, United States",
Step 1: Create a connection 226

AWS Direct Connect User Guide
"locationCode": "Example location"
}
]
}
2. Create the connection and specify a name, the port speed, and the location code. In the output
that's returned, take note of the connection ID. You need the ID to get the LOA-CFA in the next
step.
aws directconnect create-connection --location Example location --bandwidth 1Gbps
--connection-name "Connection to AWS"
{
"ownerAccount": "123456789012",
"connectionId": "dxcon-EXAMPLE",
"connectionState": "requested",
"bandwidth": "1Gbps",
"location": "Example location",
"connectionName": "Connection to AWS",
"region": "sa-east-1"
}
Step 2: Download the LOA-CFA
After you've requested a connection, you can get the LOA-CFA using the describe-loa
command. The output is base64-encoded. You must extract the relevant LOA content, decode it,
and create a PDF file.
To get the LOA-CFA using Linux or macOS
In this example, the final part of the command decodes the content using the base64 utility, and
sends the output to a PDF file.
aws directconnect describe-loa --connection-id dxcon-fg31dyv6 --output text --query
loaContent|base64 --decode > myLoaCfa.pdf
To get the LOA-CFA using Windows
In this example, the output is extracted to a file called myLoaCfa.base64. The second command
uses the certutil utility to decode the file and send the output to a PDF file.
Step 2: Download the LOA-CFA 227

AWS Direct Connect User Guide
aws directconneawsct describe-loa --connection-id dxcon-fg31dyv6 --output text --query
loaContent > myLoaCfa.base64
certutil -decode myLoaCfa.base64 myLoaCfa.pdf
After you've downloaded the LOA-CFA, send it to your network provider or colocation provider.
Step 3: Create a virtual interface and get the router
configuration
After you have placed an order for an AWS Direct Connect connection, you must create a virtual
interface to begin using it. You can create a private virtual interface to connect to your VPC. Or, you
can create a public virtual interface to connect to AWS services that aren't in a VPC. You can create
a virtual interface that supports IPv4 or IPv6 traffic.
Before you begin, ensure that you've read the prerequisites in ???.
When you create a virtual interface using the AWS CLI, the output includes generic router
configuration information. To create a router configuration that's specific to your device, use the
AWS Direct Connect console. For more information, see Download the router configuration file.
To create a private virtual interface
1. Get the ID of the virtual private gateway (vgw-xxxxxxxx) that's attached to your VPC. You need
the ID to create the virtual interface in the next step.
aws ec2 describe-vpn-gateways
{
"VpnGateways": [
{
"State": "available",
"Tags": [
{
"Value": "DX_VGW",
"Key": "Name"
}
],
"Type": "ipsec.1",
Step 3: Create a virtual interface and get the router configuration 228

AWS Direct Connect User Guide
"VpnGatewayId": "vgw-ebaa27db",
"VpcAttachments": [
{
"State": "attached",
"VpcId": "vpc-24f33d4d"
}
]
}
]
}
2. Create a private virtual interface. You must specify a name, a VLAN ID, and a BGP Autonomous
System Number (ASN).
For IPv4 traffic, you need private IPv4 addresses for each end of the BGP peering session. You
can specify your own IPv4 addresses, or you can let Amazon generate the addresses for you. In
the following example, the IPv4 addresses are generated for you.
aws directconnect create-private-virtual-interface --
connection-id dxcon-fg31dyv6 --new-private-virtual-interface
virtualInterfaceName=PrivateVirtualInterface,vlan=101,asn=65000,virtualGatewayId=vgw-
ebaa27db,addressFamily=ipv4
{
"virtualInterfaceState": "pending",
"asn": 65000,
"vlan": 101,
"customerAddress": "192.168.1.2/30",
"ownerAccount": "123456789012",
"connectionId": "dxcon-fg31dyv6",
"addressFamily": "ipv4",
"virtualGatewayId": "vgw-ebaa27db",
"virtualInterfaceId": "dxvif-ffhhk74f",
"authKey": "asdf34example",
"routeFilterPrefixes": [],
"location": "Example location",
"bgpPeers": [
{
"bgpStatus": "down",
"customerAddress": "192.168.1.2/30",
"addressFamily": "ipv4",
"authKey": "asdf34example",
Step 3: Create a virtual interface and get the router configuration 229

AWS Direct Connect User Guide
"bgpPeerState": "pending",
"amazonAddress": "192.168.1.1/30",
"asn": 65000
}
"customerRouterConfig": "<?xml version=\"1.0\" encoding=
\"UTF-8\"?>\n<logical_connection id=\"dxvif-ffhhk74f\">\n <vlan>101</
vlan>\n <customer_address>192.168.1.2/30</customer_address>\n
<amazon_address>192.168.1.1/30</amazon_address>\n <bgp_asn>65000</bgp_asn>
\n <bgp_auth_key>asdf34example</bgp_auth_key>\n <amazon_bgp_asn>7224</
amazon_bgp_asn>\n <connection_type>private</connection_type>\n</
logical_connection>\n",
"amazonAddress": "192.168.1.1/30",
"virtualInterfaceType": "private",
"virtualInterfaceName": "PrivateVirtualInterface"
}
To create a private virtual interface that supports IPv6 traffic, use the same command as above
and specify ipv6 for the addressFamily parameter. You cannot specify your own IPv6
addresses for the BGP peering session; Amazon allocates you IPv6 addresses.
3. To view the router configuration information in XML format, describe the virtual interface you
created. Use the --query parameter to extract the customerRouterConfig information,
and the --output parameter to organize the text into tab-delimited lines.
aws directconnect describe-virtual-interfaces --virtual-interface-id dxvif-ffhhk74f
--query virtualInterfaces[*].customerRouterConfig --output text
<?xml version="1.0" encoding="UTF-8"?>
<logical_connection id="dxvif-ffhhk74f">
<vlan>101</vlan>
<customer_address>192.168.1.2/30</customer_address>
<amazon_address>192.168.1.1/30</amazon_address>
<bgp_asn>65000</bgp_asn>
<bgp_auth_key>asdf34example</bgp_auth_key>
<amazon_bgp_asn>7224</amazon_bgp_asn>
<connection_type>private</connection_type>
</logical_connection>
Step 3: Create a virtual interface and get the router configuration 230

AWS Direct Connect User Guide
To create a public virtual interface
1. To create a public virtual interface, you must specify a name, a VLAN ID, and a BGP
Autonomous System Number (ASN).
For IPv4 traffic, you must also specify public IPv4 addresses for each end of the BGP peering
session, and public IPv4 routes that you will advertise over BGP. The following example creates
a public virtual interface for IPv4 traffic.
aws directconnect create-public-virtual-interface --
connection-id dxcon-fg31dyv6 --new-public-virtual-interface
virtualInterfaceName=PublicVirtualInterface,vlan=2000,asn=65000,amazonAddress=203.0.113.1/30,customerAddress=203.0.113.2/30,addressFamily=ipv4,routeFilterPrefixes=[{cidr=203.0.113.0/30},
{cidr=203.0.113.4/30}]
{
"virtualInterfaceState": "verifying",
"asn": 65000,
"vlan": 2000,
"customerAddress": "203.0.113.2/30",
"ownerAccount": "123456789012",
"connectionId": "dxcon-fg31dyv6",
"addressFamily": "ipv4",
"virtualGatewayId": "",
"virtualInterfaceId": "dxvif-fgh0hcrk",
"authKey": "asdf34example",
"routeFilterPrefixes": [
{
"cidr": "203.0.113.0/30"
},
{
"cidr": "203.0.113.4/30"
}
],
"location": "Example location",
"bgpPeers": [
{
"bgpStatus": "down",
"customerAddress": "203.0.113.2/30",
"addressFamily": "ipv4",
"authKey": "asdf34example",
"bgpPeerState": "verifying",
"amazonAddress": "203.0.113.1/30",
Step 3: Create a virtual interface and get the router configuration 231

AWS Direct Connect User Guide
"asn": 65000
}
],
"customerRouterConfig": "<?xml version=\"1.0\" encoding=\"UTF-8\"?
>\n<logical_connection id=\"dxvif-fgh0hcrk\">\n <vlan>2000</
vlan>\n <customer_address>203.0.113.2/30</customer_address>\n
<amazon_address>203.0.113.1/30</amazon_address>\n <bgp_asn>65000</bgp_asn>
\n <bgp_auth_key>asdf34example</bgp_auth_key>\n <amazon_bgp_asn>7224</
amazon_bgp_asn>\n <connection_type>public</connection_type>\n</logical_connection>
\n",
"amazonAddress": "203.0.113.1/30",
"virtualInterfaceType": "public",
"virtualInterfaceName": "PublicVirtualInterface"
}
To create a public virtual interface that supports IPv6 traffic, you can specify IPv6 routes that
you will advertise over BGP. You cannot specify IPv6 addresses for the peering session; Amazon
allocates IPv6 addresses to you. The following example creates a public virtual interface for
IPv6 traffic.
aws directconnect create-public-virtual-interface --
connection-id dxcon-fg31dyv6 --new-public-virtual-interface
virtualInterfaceName=PublicVirtualInterface,vlan=2000,asn=65000,addressFamily=ipv6,routeFilterPrefixes=[{cidr=2001:db8:64ce:ba00::/64},
{cidr=2001:db8:64ce:ba01::/64}]
2. To view the router configuration information in XML format, describe the virtual interface you
created. Use the --query parameter to extract the customerRouterConfig information,
and the --output parameter to organize the text into tab-delimited lines.
aws directconnect describe-virtual-interfaces --virtual-interface-id dxvif-fgh0hcrk
--query virtualInterfaces[*].customerRouterConfig --output text
<?xml version="1.0" encoding="UTF-8"?>
<logical_connection id="dxvif-fgh0hcrk">
<vlan>2000</vlan>
<customer_address>203.0.113.2/30</customer_address>
<amazon_address>203.0.113.1/30</amazon_address>
<bgp_asn>65000</bgp_asn>
<bgp_auth_key>asdf34example</bgp_auth_key>
<amazon_bgp_asn>7224</amazon_bgp_asn>
Step 3: Create a virtual interface and get the router configuration 232

AWS Direct Connect User Guide
<connection_type>public</connection_type>
</logical_connection>
Step 3: Create a virtual interface and get the router configuration 233

AWS Direct Connect User Guide
Log AWS Direct Connect API calls using AWS CloudTrail
AWS Direct Connect is integrated with AWS CloudTrail, a service that provides a record of actions
taken by a user, role, or an AWS service in AWS Direct Connect. CloudTrail captures all API calls
for AWS Direct Connect as events. The calls captured include calls from the AWS Direct Connect
console and code calls to the AWS Direct Connect API operations. If you create a trail, you can
enable continuous delivery of CloudTrail events to an Amazon S3 bucket, including events for
AWS Direct Connect. If you don't configure a trail, you can still view the most recent events in
the CloudTrail console in Event history. Using the information collected by CloudTrail, you can
determine the request that was made to AWS Direct Connect, the IP address from which the
request was made, who made the request, when it was made, and additional details.
For more information, see the AWS CloudTrail User Guide.
AWS Direct Connect information in CloudTrail
CloudTrail is enabled on your AWS account when you create the account. When activity occurs in
AWS Direct Connect, that activity is recorded in a CloudTrail event along with other AWS service
events in Event history. You can view, search, and download recent events in your AWS account.
For more information, see Viewing Events with CloudTrail Event History.
For an ongoing record of events in your AWS account, including events for AWS Direct Connect,
create a trail. A trail enables CloudTrail to deliver log files to an Amazon S3 bucket. By default,
when you create a trail in the console, the trail applies to all AWS Regions. The trail logs events
from all Regions in the AWS partition and delivers the log files to the Amazon S3 bucket that you
specify. Additionally, you can configure other AWS services to further analyze and act upon the
event data collected in CloudTrail logs. For more information, see the following:
• Overview for Creating a Trail
• CloudTrail Supported Services and Integrations
• Configuring Amazon SNS Notifications for CloudTrail
• Receiving CloudTrail Log Files from Multiple Regions and Receiving CloudTrail Log Files from
Multiple Accounts
AWS Direct Connect information in CloudTrail 234

AWS Direct Connect User Guide
All AWS Direct Connect actions are logged by CloudTrail and are documented in the
AWS Direct Connect API Reference. For example, calls to the CreateConnection and
CreatePrivateVirtualInterface actions generate entries in the CloudTrail log files.
Every event or log entry contains information about who generated the request. The identity
information helps you determine the following:
• Whether the request was made with root or AWS Identity and Access Management (IAM user)
credentials.
• Whether the request was made with temporary security credentials for a role or federated user.
• Whether the request was made by another AWS service.
For more information, see the CloudTrail userIdentity Element.
Understand AWS Direct Connect log file entries
A trail is a configuration that enables delivery of events as log files to an Amazon S3 bucket that
you specify. CloudTrail log files contain one or more log entries. An event represents a single
request from any source and includes information about the requested action, the date and time of
the action, request parameters, and so on. CloudTrail log files aren't an ordered stack trace of the
public API calls, so they don't appear in any specific order.
The following are example CloudTrail log records for AWS Direct Connect.
Example Example: CreateConnection
{
"Records": [
{
"eventVersion": "1.0",
"userIdentity": {
"type": "IAMUser",
"principalId": "EX_PRINCIPAL_ID",
"arn": "arn:aws:iam::123456789012:user/Alice",
"accountId": "123456789012",
"accessKeyId": "EXAMPLE_KEY_ID",
"userName": "Alice",
"sessionContext": {
"attributes": {
"mfaAuthenticated": "false",
Understand AWS Direct Connect log file entries 235

AWS Direct Connect User Guide
"creationDate": "2014-04-04T12:23:05Z"
}
}
},
"eventTime": "2014-04-04T17:28:16Z",
"eventSource": "directconnect.amazonaws.com",
"eventName": "CreateConnection",
"awsRegion": "us-west-2",
"sourceIPAddress": "127.0.0.1",
"userAgent": "Coral/Jakarta",
"requestParameters": {
"location": "EqSE2",
"connectionName": "MyExampleConnection",
"bandwidth": "1Gbps"
},
"responseElements": {
"location": "EqSE2",
"region": "us-west-2",
"connectionState": "requested",
"bandwidth": "1Gbps",
"ownerAccount": "123456789012",
"connectionId": "dxcon-fhajolyy",
"connectionName": "MyExampleConnection"
}
},
...
]
}
Example Example: CreatePrivateVirtualInterface
{
"Records": [
{
"eventVersion": "1.0",
"userIdentity": {
"type": "IAMUser",
"principalId": "EX_PRINCIPAL_ID",
"arn": "arn:aws:iam::123456789012:user/Alice",
"accountId": "123456789012",
"accessKeyId": "EXAMPLE_KEY_ID",
"userName": "Alice",
"sessionContext": {
Understand AWS Direct Connect log file entries 236

AWS Direct Connect User Guide
"attributes": {
"mfaAuthenticated": "false",
"creationDate": "2014-04-04T12:23:05Z"
}
}
},
"eventTime": "2014-04-04T17:39:55Z",
"eventSource": "directconnect.amazonaws.com",
"eventName": "CreatePrivateVirtualInterface",
"awsRegion": "us-west-2",
"sourceIPAddress": "127.0.0.1",
"userAgent": "Coral/Jakarta",
"requestParameters": {
"connectionId": "dxcon-fhajolyy",
"newPrivateVirtualInterface": {
"virtualInterfaceName": "MyVirtualInterface",
"customerAddress": "[PROTECTED]",
"authKey": "[PROTECTED]",
"asn": -1,
"virtualGatewayId": "vgw-bb09d4a5",
"amazonAddress": "[PROTECTED]",
"vlan": 123
}
},
"responseElements": {
"virtualInterfaceId": "dxvif-fgq61m6w",
"authKey": "[PROTECTED]",
"virtualGatewayId": "vgw-bb09d4a5",
"customerRouterConfig": "[PROTECTED]",
"virtualInterfaceType": "private",
"asn": -1,
"routeFilterPrefixes": [],
"virtualInterfaceName": "MyVirtualInterface",
"virtualInterfaceState": "pending",
"customerAddress": "[PROTECTED]",
"vlan": 123,
"ownerAccount": "123456789012",
"amazonAddress": "[PROTECTED]",
"connectionId": "dxcon-fhajolyy",
"location": "EqSE2"
}
},
...
]
Understand AWS Direct Connect log file entries 237

AWS Direct Connect User Guide
}
Example Example: DescribeConnections
{
"Records": [
{
"eventVersion": "1.0",
"userIdentity": {
"type": "IAMUser",
"principalId": "EX_PRINCIPAL_ID",
"arn": "arn:aws:iam::123456789012:user/Alice",
"accountId": "123456789012",
"accessKeyId": "EXAMPLE_KEY_ID",
"userName": "Alice",
"sessionContext": {
"attributes": {
"mfaAuthenticated": "false",
"creationDate": "2014-04-04T12:23:05Z"
}
}
},
"eventTime": "2014-04-04T17:27:28Z",
"eventSource": "directconnect.amazonaws.com",
"eventName": "DescribeConnections",
"awsRegion": "us-west-2",
"sourceIPAddress": "127.0.0.1",
"userAgent": "Coral/Jakarta",
"requestParameters": null,
"responseElements": null
},
...
]
}
Example Example: DescribeVirtualInterfaces
{
"Records": [
{
"eventVersion": "1.0",
"userIdentity": {
"type": "IAMUser",
Understand AWS Direct Connect log file entries 238

AWS Direct Connect User Guide
"principalId": "EX_PRINCIPAL_ID",
"arn": "arn:aws:iam::123456789012:user/Alice",
"accountId": "123456789012",
"accessKeyId": "EXAMPLE_KEY_ID",
"userName": "Alice",
"sessionContext": {
"attributes": {
"mfaAuthenticated": "false",
"creationDate": "2014-04-04T12:23:05Z"
}
}
},
"eventTime": "2014-04-04T17:37:53Z",
"eventSource": "directconnect.amazonaws.com",
"eventName": "DescribeVirtualInterfaces",
"awsRegion": "us-west-2",
"sourceIPAddress": "127.0.0.1",
"userAgent": "Coral/Jakarta",
"requestParameters": {
"connectionId": "dxcon-fhajolyy"
},
"responseElements": null
},
...
]
}
Understand AWS Direct Connect log file entries 239

AWS Direct Connect User Guide
Monitor AWS Direct Connect resources
Monitoring is an important part of maintaining the reliability, availability, and performance of your
Direct Connect resources. You should collect monitoring data from all of the parts of your AWS
solution so that you can more easily debug a multi-point failure if one occurs. Before you start
monitoring Direct Connect; however, you should create a monitoring plan that includes answers to
the following questions:
• What are your monitoring goals?
• What resources should be monitored?
• How often should you monitor these resources?
• What monitoring tools can you use?
• Who performs the monitoring tasks?
• Who should be notified when something goes wrong?
The next step is to establish a baseline for normal Direct Connect performance in your
environment, by measuring performance at various times and under different load conditions. As
you monitor Direct Connect, store historical monitoring data. That way, you can compare it with
current performance data, identify normal performance patterns and performance anomalies, and
devise methods to address issues.
To establish a baseline, you should monitor the usage, state, and health of your physical Direct
Connect connections.
Contents
• Monitoring tools
• Monitor with Amazon CloudWatch
Monitoring tools
AWS provides various tools that you can use to monitor an AWS Direct Connect connection. You
can configure some of these tools to do the monitoring for you, while some of the tools require
manual intervention. We recommend that you automate monitoring tasks as much as possible.
Monitoring tools 240

AWS Direct Connect User Guide
Automated monitoring tools
You can use the following automated monitoring tools to watch Direct Connect and report when
something is wrong:
• Amazon CloudWatch Alarms – Watch a single metric over a time period that you specify.
Perform one or more actions based on the value of the metric relative to a given threshold over
a number of time periods. The action is a notification sent to an Amazon SNS topic. CloudWatch
alarms do not invoke actions simply because they are in a particular state; the state must have
changed and been maintained for a specified number of periods. For information about available
metrics and dimensions, see Monitor with Amazon CloudWatch.
• AWS CloudTrail Log Monitoring – Share log files between accounts and monitor CloudTrail
log files in real time by sending them to CloudWatch Logs. You can also write log processing
applications in Java and validate that your log files have not changed after delivery by
CloudTrail. For more information, see Log API calls and Working with CloudTrail Log Files in the
AWS CloudTrail User Guide.
Manual monitoring tools
Another important part of monitoring an AWS Direct Connect connection involves manually
monitoring those items that the CloudWatch alarms don't cover. The Direct Connect and
CloudWatch console dashboards provide an at-a-glance view of the state of your AWS
environment.
• The AWS Direct Connect console shows:
• Connection status (see the State column)
• Virtual interface status (see the State column)
• The CloudWatch home page shows:
• Current alarms and status
• Graphs of alarms and resources
• Service health status
In addition, you can use CloudWatch to do the following:
• Create customized dashboards to monitor the services you care about.
• Graph metric data to troubleshoot issues and discover trends.
Automated monitoring tools 241

AWS Direct Connect User Guide
• Search and browse all your AWS resource metrics.
• Create and edit alarms to be notified of problems.
Monitor with Amazon CloudWatch
You can monitor physical AWS Direct Connect connections, and virtual interfaces, using
CloudWatch. CloudWatch collects raw data from Direct Connect, and processes it into readable
metrics. By default, CloudWatch provides Direct Connect metric data in 5-minute intervals. The
metric data in every interval is an aggregation of at least two samples collected during that
interval.
For detailed information about CloudWatch, see the Amazon CloudWatch User Guide. You can also
monitor your services CloudWatch to see what ones are using resources. For more information, see
AWS services that publish CloudWatch metrics.
Contents
• AWS Direct Connect metrics and dimensions
• View AWS Direct Connect CloudWatch metrics
• Create Amazon CloudWatch alarms to monitor AWS Direct Connect connections
AWS Direct Connect metrics and dimensions
Metrics are available for AWS Direct Connect physical connections, and virtual interfaces.
AWS Direct Connect Connection metrics
The following metrics are available from Direct Connect dedicated connections.
Metric Description
ConnectionState
The state of the connection.1 indicates up and 0
indicates down.
This metric is available for dedicated and hosted
connections.
Monitor with Amazon CloudWatch 242

AWS Direct Connect User Guide
Metric Description
Note
This metric is also available in hosted virtual
interface owner accounts in addition to
connection owner accounts.
Units: Boolean
ConnectionBpsEgress
The bitrate for outbound data from the AWS side of
the connection.
The number reported is the aggregate (average)
over the specified time period (5 minutes by
default, 1 minute minimum). You can change the
default aggregate.
This metric might be unavailable for a new
connection, or when a device reboots. The metric
starts when the connection is used to send or
receive traffic.
Units: Bits per second
ConnectionBpsIngress
The bitrate for inbound data to the AWS side of the
connection.
This metric might be unavailable for a new
connection, or when a device reboots. The metric
starts when the connection is used to send or
receive traffic.
Units: Bits per second
AWS Direct Connect metrics and dimensions 243

AWS Direct Connect User Guide
Metric Description
ConnectionPpsEgress
`
The packet rate for outbound data from the AWS
side of the connection.
The number reported is the aggregate (average)
over the specified time period (5 minutes by
default, 1 minute minimum). You can change the
default aggregate.
This metric might be unavailable for a new
connection, or when a device reboots. The metric
starts when the connection is used to send or
receive traffic.
Units: Packets per second
ConnectionPpsIngress
The packet rate for inbound data to the AWS side of
the connection.
The number reported is the aggregate (average)
over the specified time period (5 minutes by
default, 1 minute minimum). You can change the
default aggregate.
This metric might be unavailable for a new
connection, or when a device reboots. The metric
starts when the connection is used to send or
receive traffic.
Units: Packets per second
ConnectionCRCErrorCount This count is no longer in use. Use Connectio
nErrorCount instead.
AWS Direct Connect metrics and dimensions 244

AWS Direct Connect User Guide
Metric Description
ConnectionErrorCount
The total error count for all types of MAC level
errors on the AWS device. The total includes cyclic
redundancy check (CRC) errors.
This metric is the error count that occurred since the
last reported datapoint. When there are errors on
the interface, the metric reports non-zero values.
To get the total count of all errors for the selected
interval in CloudWatch, for example, 5 minutes,
apply the "sum" statistic.
The metric value is set to 0 when the errors on the
interface stop.
Note
This metric replaces Connectio
nCRCErrorCount , which is no longer in
use.
Units: Count
ConnectionLightLevelTx
Indicates the health of the fiber connection for
outbound (egress) traffic from the AWS side of the
connection.
There are two dimensions for this metric. For more
information, see Direct Connect available dimension
s.
Units: dBm
AWS Direct Connect metrics and dimensions 245

AWS Direct Connect User Guide
Metric Description
ConnectionLightLevelRx
Indicates the health of the fiber connection for
inbound (ingress) traffic to the AWS side of the
connection.
There are two dimensions for this metric. For more
information, see Direct Connect available dimension
s.
Units: dBm
ConnectionEncryptionState
Indicates the connection encryption status. 1
indicates the connection encryption is up, and 0
indicates the connection encryption is down. When
this metric is applied to a LAG, 1 indicates that
all connections in the LAG have encryption up. 0
indicates at least one LAG connection encryption is
down.
AWS Direct Connect virtual interface metrics
The following metrics are available from AWS Direct Connect virtual interfaces.
Metric Description
VirtualInterfaceBpsEgress
The bitrate for outbound data from the AWS side of
the virtual interface.
The number reported is the aggregate (average)
over the specified time period (5 minutes by
default).
Units: Bits per second
VirtualInterfaceBpsIngress
The bitrate for inbound data to the AWS side of the
virtual interface.
AWS Direct Connect metrics and dimensions 246

AWS Direct Connect User Guide
Metric Description
The number reported is the aggregate (average)
over the specified time period (5 minutes by
default).
Units: Bits per second
VirtualInterfacePpsEgress
The packet rate for outbound data from the AWS
side of the virtual interface.
The number reported is the aggregate (average)
over the specified time period (5 minutes by
default).
Units: Packets per second
VirtualInterfacePpsIngress
The packet rate for inbound data to the AWS side of
the virtual interface.
The number reported is the aggregate (average)
over the specified time period (5 minutes by
default).
Units: Packets per second
AWS Direct Connect available dimensions
You can filter the AWS Direct Connect data using the following dimensions.
Dimension Description
ConnectionId
This dimension is available on the metrics for Direct Connect
connection, and virtual interface. This dimension filters the
data by the connection.
OpticalLaneNumber This dimension filters the ConnectionLightLevelTx
data and the ConnectionLightLevelRx data, and filters
AWS Direct Connect metrics and dimensions 247

AWS Direct Connect User Guide
Dimension Description
the data by the optical lane number of the Direct Connect
connection.
VirtualInterfaceId
This dimension is available on the metrics for Direct Connect
virtual interface, and filters the data by the virtual interface.
Topics
• View AWS Direct Connect CloudWatch metrics
• Create Amazon CloudWatch alarms to monitor AWS Direct Connect connections
View AWS Direct Connect CloudWatch metrics
AWS Direct Connect sends the following metrics about your Direct Connect connections. Amazon
CloudWatch then aggregates these data points to 1-minute or 5-minute intervals. By default,
Direct Connect metric data is written to CloudWatch at 5-minute intervals.
Note
If you set a 1-minute interval, Direct Connect will make a best effort to write the metrics to
CloudWatch using this interval, but it can't always be guaranteed.
You can use the following procedures to view the metrics for Direct Connect connections.
To view metrics using the CloudWatch console
Metrics are grouped first by the service namespace, and then by the various dimension
combinations within each namespace. For more information about using Amazon CloudWatch
to view Direct Connect metrics, including adding math functions or prebuilt queries, see Using
Amazon CloudWatch metrics in the Amazon CloudWatch User Guide.
1. Open the CloudWatch console at https://console.aws.amazon.com/cloudwatch/.
2. In the navigation pane, choose Metrics, and then choose All metrics.
3. In the Metrics section, choose DX.
View Direct Connect CloudWatch metrics 248

AWS Direct Connect User Guide
4. Choose a ConnectionId or Metric name, and then choose any of the following to further
define the metric:
• Add to search — Adds this metric to your search results.
• Search for this only — Searches only for this metric.
• Remove from graph — Removes this metric from the graph.
• Graph this metric only — Graphs only this metric.
• Graph all search results — Graphs all metrics.
• Graph with SQL query — Opens Metric Insights -query builder, allowing you to choose
what you want to graph by creating an SQL query. For more information on using
Metric Insights, see Query your metrics with CloudWatch Metrics Insights in the Amazon
CloudWatch User Guide.
To view metrics using the AWS Direct Connect console
1. Open the AWS Direct Connect console at https://console.aws.amazon.com/directconnect/v2/
home.
2. In the navigation pane, choose Connections.
3. Select your connection.
4. Choose the Monitoring tab to display the metrics for your connection.
To view metrics using the AWS CLI
At a command prompt, use the following command.
aws cloudwatch list-metrics --namespace "AWS/DX"
Create Amazon CloudWatch alarms to monitor AWS Direct Connect
connections
You can create a CloudWatch alarm that sends an Amazon SNS message when the alarm changes
state. An alarm watches a single metric over a time period that you specify. It sends a notification
to an Amazon SNS topic based on the value of the metric relative to a given threshold over a
number of time periods.
Create alarms to monitor connections 249

AWS Direct Connect User Guide
For example, you can create an alarm that monitors the state of an AWS Direct Connect
connection. It sends a notification when the connection state is down for five consecutive 1-minute
periods. For details on what to know for creating an alarm and for more information on creating an
alarm, see Using Amazon CloudWatch Alarms in the Amazon CloudWatch User Guide.
To create a CloudWatch alarm.
1. Open the CloudWatch console at https://console.aws.amazon.com/cloudwatch/.
2. In the navigation pane, choose Alarms, and then choose All alarms.
3. Choose Create Alarm.
4. Choose Select metric, and then choose DX .
5. Choose the Connection Metrics metric.
6. Select the AWS Direct Connect connection, and then choose the Select metric metric.
7. On the Specify metric and conditions page, configure the parameters for the alarm. For
more specifying metrics and conditions, see Using Amazon CloudWatch Alarms in the Amazon
CloudWatch User Guide.
8. Choose Next.
9. Configure the alarm actions on the Configure actions page. For more information on
configuring alarm actions, see Alarm actions in the Amazon CloudWatch User Guide.
10. Choose Next.
11. On the Add name and description page, enter a Name and an optional Alarm description to
describe this alarm, and then choose Next.
12. Verify the proposed alarm on the Preview and create page.
13. If needed choose Edit to change any information, and then choose Create alarm.
The Alarms page displays a new row with information about the new alarm. The Actions
status displays Actions enabled, indicating that the alarm is active.
Create alarms to monitor connections 250
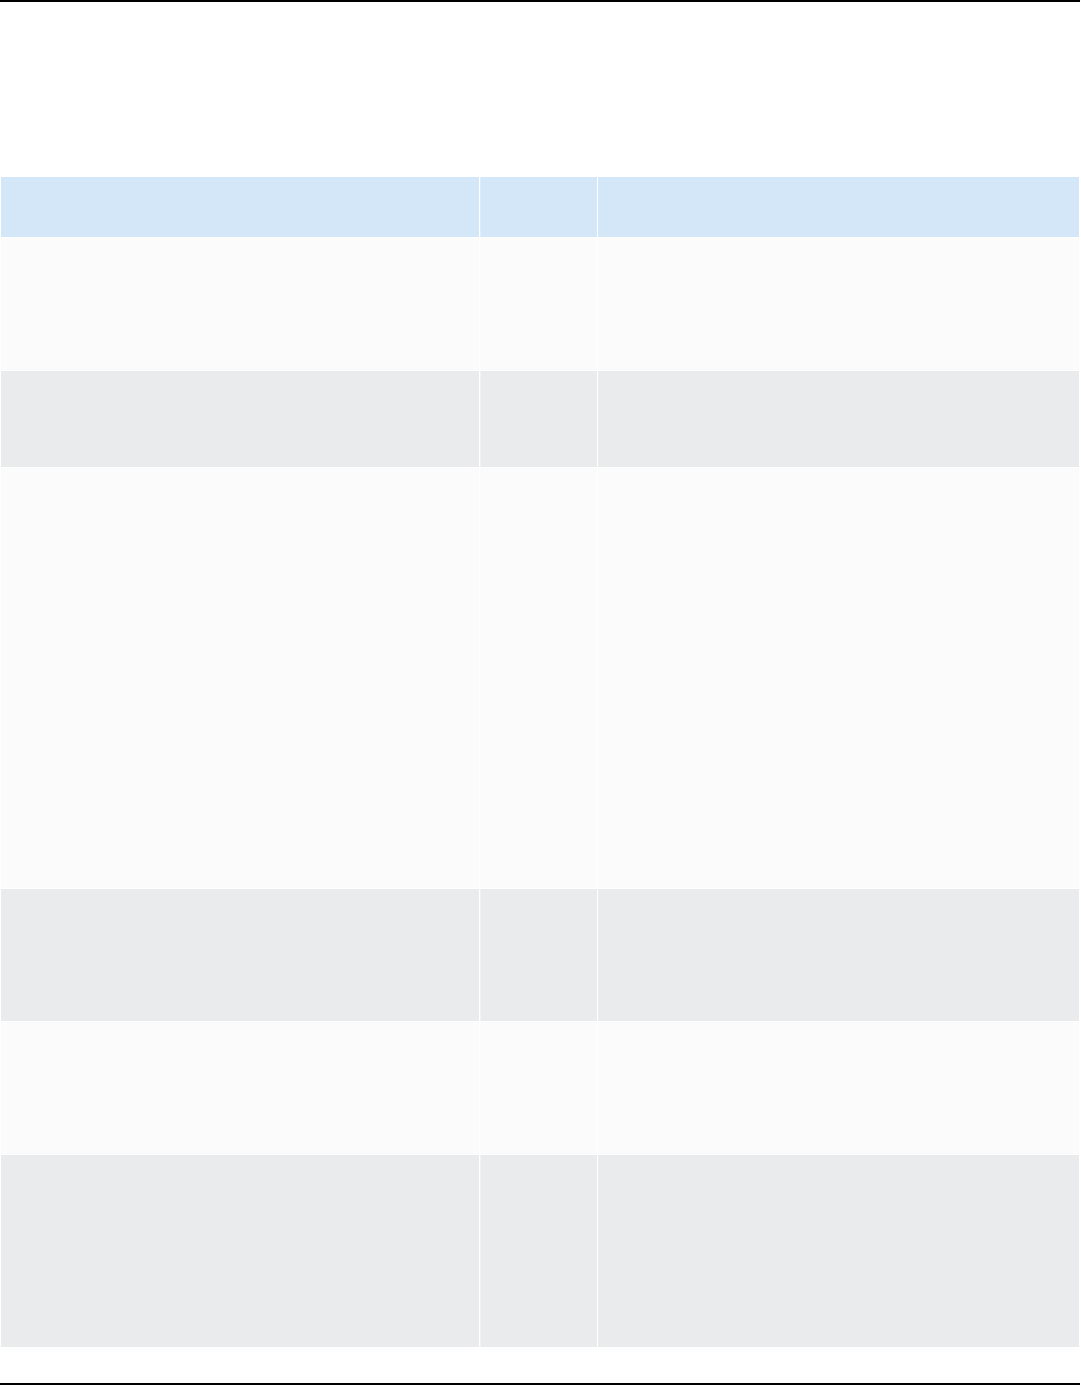
AWS Direct Connect User Guide
AWS Direct Connect quotas
The following table lists the quotas related to AWS Direct Connect.
Component Quota Comments
Private or public virtual interfaces per
AWS Direct Connect dedicated connectio
n
50 This limit cannot be increased.
Transit virtual interfaces per AWS Direct
Connect dedicated connection
4 This limit cannot be increased.
Private or public virtual interfaces per
AWS Direct Connect dedicated connectio
n and transit virtual interfaces per AWS
Direct Connect dedicated connection
51 When AWS Direct Connect support
for Amazon VPC Transit Gateways was
launched, a quota of one (1) transit
virtual interface was added to the quota
of 50 private or public virtual interface
s per dedicated connection. The number
of transit virtual interfaces allowed is
now four (4) and is counted against the
maximum of 51 virtual interfaces per
dedicated connection. This limit cannot
be increased.
Private, public, or transit virtual interface
s per AWS Direct Connect hosted
connection
1 This limit cannot be increased.
Active AWS Direct Connect connections
per Direct Connect location per Region
per account
10 Contact your Solutions Architect (SA) or
Technical Account Manager (TAM) for
further assistance.
Number of virtual interfaces per Link
Aggregation Group (LAG)
51 When AWS Direct Connect support
for Amazon VPC Transit Gateways was
launched, a quota of one (1) transit
virtual interface was added to the quota
of 50 private or public virtual interface
251

AWS Direct Connect User Guide
Component Quota Comments
s per LAG. The number of transit virtual
interfaces allowed is now four (4) and
is counted against the maximum of 51
virtual interfaces per LAG. This limit
cannot be increased.
Routes per Border Gateway Protocol
(BGP) session on a private virtual
interface or transit virtual interface from
on-premises to AWS.
If you advertise more than 100 routes
each for IPv4 and IPv6 over the BGP
session, the BGP session will go into an
idle state with the BGP session DOWN.
100
each
for IPv4
and
IPv6
This limit cannot be increased.
Routes per Border Gateway Protocol
(BGP) session on a public virtual
interface
1,000 This limit cannot be increased.
Dedicated connections per link aggregati
on group (LAG)
4 when
the
port
speed
is less
than
100G
2 when
the
port
speed
is 100G
252

AWS Direct Connect User Guide
Component Quota Comments
Link aggregation groups (LAGs) per
Region
10 Contact your Solutions Architect (SA) or
Technical Account Manager (TAM) for
further assistance.
AWS Direct Connect gateways per
account
200 Contact your Solutions Architect (SA) or
Technical Account Manager (TAM) for
further assistance.
Virtual private gateways per AWS Direct
Connect gateway
20 This limit cannot be increased.
Transit gateways per AWS Direct Connect
gateway
6 This limit cannot be increased.
Virtual interfaces (private or transit) per
AWS Direct Connect gateway
30 This limit cannot be increased.
Number of prefixes per AWS Transit
Gateway from AWS to on-premise on a
transit virtual interface
200
combined
total
for IPv4
and
IPv6
This limit cannot be increased.
Number of virtual interfaces per virtual
private gateway
There
is no
limit.
Number of Direct Connect gateways
associated to a transit gateway
20 This limit cannot be increased.
SiteLink prefix limit 100 Contact your Solutions Architect (SA) or
Technical Account Manager (TAM) for
further assistance.
253

AWS Direct Connect User Guide
AWS Direct Connect supports these port speeds over single-mode fiber: 1 Gbps: 1000BASE-LX
(1310 nm), 10 Gbps: 10GBASE-LR (1310 nm) and 100Gbps: 100GBASE-LR4.
BGP quotas
The following are BGP quotas. The BGP timers negotiate down to the lowest value between the
routers. The BFD intervals are defined by the slowest device.
• Default hold timer: 90 seconds
• Minimum hold timer: 3 seconds
A hold value of 0 is not supported.
• Default keepalive timer: 30 seconds
• Minimum keepalive timer: 1 second
• Graceful restart timer: 120 seconds
We recommend that you do not configure graceful restart and BFD at the same time.
• BFD liveness detection minimum interval: 300 ms
• BFD minimum multiplier: 3
Load balance considerations
If you want to use load balancing with multiple public VIFs, all the VIFs must be in the same
Region.
BGP quotas 254

AWS Direct Connect User Guide
Troubleshooting AWS Direct Connect
The following troubleshooting information can help you diagnose and fix issues with your AWS
Direct Connect connection.
Contents
• Troubleshooting layer 1 (physical) issues
• Troubleshooting layer 2 (data link) issues
• Troubleshooting layer 3/4 (Network/Transport) issues
• Troubleshooting routing issues
Troubleshooting layer 1 (physical) issues
If you or your network provider are having difficulty establishing physical connectivity to an AWS
Direct Connect device, use the following steps to troubleshoot the issue.
1. Verify with the colocation provider that the cross connect is complete. Ask them or your network
provider to provide you with a cross connect completion notice and compare the ports with
those listed on your LOA-CFA.
2. Verify that your router or your provider's router is powered on and that the ports are activated.
3. Ensure that the routers are using the correct optical transceiver. Auto-negotiation for the port
must be disabled if you have a connection with a port speed more than 1 Gbps. However,
depending on the AWS Direct Connect endpoint serving your connection, auto-negotiation
might need to be enabled or disabled for 1 Gbps connections. If auto-negotation needs to be
disabled for your connections, port speed and full-duplex mode must be configured manually. If
your virtual interface remains down, see Troubleshooting layer 2 (data link) issues.
4. Verify that the router is receiving an acceptable optical signal over the cross connect.
5. Try flipping (also known as rolling) the Tx/Rx fiber strands.
6. Check the Amazon CloudWatch metrics for AWS Direct Connect. You can verify the AWS Direct
Connect device's Tx/Rx optical readings (both 1 Gbps and 10 Gbps), physical error count, and
operational status. For more information, see Monitoring with Amazon CloudWatch.
7. Contact the colocation provider and request a written report for the Tx/Rx optical signal across
the cross connect.
Layer 1 (physical) issues 255

AWS Direct Connect User Guide
8. If the above steps do not resolve physical connectivity issues, contact AWS Support and provide
the cross connect completion notice and optical signal report from the colocation provider.
The following flow chart contains the steps to diagnose issues with the physical connection.
Layer 1 (physical) issues 256

AWS Direct Connect User Guide
Layer 1 (physical) issues 257

AWS Direct Connect User Guide
Troubleshooting layer 2 (data link) issues
If your AWS Direct Connect physical connection is up but your virtual interface is down, use the
following steps to troubleshoot the issue.
1. If you cannot ping the Amazon peer IP address, verify that your peer IP address is configured
correctly and in the correct VLAN. Ensure that the IP address is configured in the VLAN
subinterface and not the physical interface (for example, GigabitEthernet0/0.123 instead of
GigabitEthernet0/0).
2. Verify if the router has a MAC address entry from the AWS endpoint in your address resolution
protocol (ARP) table.
3. Ensure that any intermediate devices between endpoints have VLAN trunking enabled for your
802.1Q VLAN tag. ARP cannot be established on the AWS side until AWS receives tagged traffic.
4. Clear your or your provider's ARP table cache.
5. If the above steps do not establish ARP or you still cannot ping the Amazon peer IP, contact AWS
Support.
The following flow chart contains the steps to diagnose issues with the data link.
Layer 2 (data link) issues 258

AWS Direct Connect User Guide
If the BGP session is still not established after verifying these steps, see Troubleshooting layer
3/4 (Network/Transport) issues. If the BGP session is established but you are experiencing routing
issues, see Troubleshooting routing issues.
Troubleshooting layer 3/4 (Network/Transport) issues
Consider a situation where your AWS Direct Connect physical connection is up and you can ping
the Amazon peer IP address. If your virtual interface is up and the BGP peering session cannot be
established, use the following steps to troubleshoot the issue:
1. Ensure that your BGP local Autonomous System Number (ASN) and Amazon's ASN are
configured correctly.
Layer 3/4 (Network/Transport) issues 259

AWS Direct Connect User Guide
2. Ensure that the peer IPs for both sides of the BGP peering session are configured correctly.
3. Ensure that your MD5 authentication key is configured and exactly matches the key in the
downloaded router configuration file. Check that there are no extra spaces or characters.
4. Verify that you or your provider are not advertising more than 100 prefixes for private virtual
interfaces or 1,000 prefixes for public virtual interfaces. These are hard limits and cannot be
exceeded.
5. Ensure that there are no firewall or ACL rules that are blocking TCP port 179 or any high-
numbered ephemeral TCP ports. These ports are necessary for BGP to establish a TCP
connection between the peers.
6. Check your BGP logs for any errors or warning messages.
7. If the above steps do not establish the BGP peering session, contact AWS Support.
The following flow chart contains the steps to diagnose issues with the BGP peering session.
Layer 3/4 (Network/Transport) issues 260


AWS Direct Connect User Guide
Troubleshooting routing issues
Consider a situation where your virtual interface is up and you've established a BGP peering
session. If you cannot route traffic over the virtual interface, use the following steps to
troubleshoot the issue:
1. Ensure that you are advertising a route for your on-premises network prefix over the BGP
session. For a private virtual interface, this can be a private or public network prefix. For a public
virtual interface, this must be your publicly routable network prefix.
2. For a private virtual interface, ensure that your VPC security groups and network ACLs allow
inbound and outbound traffic for your on-premises network prefix. For more information, see
Security Groups and Network ACLs in the Amazon VPC User Guide.
3. For a private virtual interface, ensure that your VPC route tables have prefixes pointing to the
virtual private gateway to which your private virtual interface is connected. For example, if you
prefer to have all your traffic routed towards your on-premises network by default, you can add
the default route (0.0.0.0/0 or ::/0) with the virtual private gateway as the target in your VPC
route tables.
• Alternatively, enable route propagation to automatically update routes in your route tables
based on your dynamic BGP route advertisement. You can have up to 100 propagated routes
per route table. This limit cannot be increased. For more information, see Enabling and
Disabling Route Propagation in the Amazon VPC User Guide.
4. If the above steps do not resolve your routing issues, contact AWS Support.
The following flow chart contains the steps to diagnose routing issues.
Routing issues 262

AWS Direct Connect User Guide
Routing issues 263

AWS Direct Connect User Guide
Document history
The following table describes the releases for AWS Direct Connect.
Feature Description Date
Support for
SiteLink
You can create a virtual private interface that enables
connectivity between two Direct Connect points of presence
(PoPs) in the same AWS Region. For more information see
Hosted AWS Direct Connect virtual interfaces.
2021-12-01
Support MAC
Security
You can use AWS Direct Connect connections that support
MACsec to encrypt your data from your corporate data center
to the AWS Direct Connect location. For more information, see
MAC security (MACsec).
2021-03-31
Support for
100G
Updated topics to include support for 100G dedicated
connections.
2021-02-12
New location
in Italy
Updated topic to include the addition of the new location in
Italy. For more information, see the section called “Europe
(Milan)”.
2021-01-22
New location
in Israel
Updated topic to include the addition of the new location in
Israel. For more information, see the section called “Israel (Tel
Aviv)”.
2020-07-07
Resilienc
y Toolkit
Failover
Testing
support
Use the Resiliency Toolkit Failover Testing feature to test the
resiliency of your connections.. For more information, see the
section called “Failover Test”.
2020-06-03
CloudWatc
h VIF metric
support
You can monitor physical AWS Direct Connect connections, and
virtual interfaces, using CloudWatch. For more information, see
the section called “Monitor with Amazon CloudWatch”.
2020-05-11
264

AWS Direct Connect User Guide
Feature Description Date
AWS Direct
Connect
Resiliency
Toolkit
The AWS Direct Connect Resiliency Toolkit provides a connectio
n wizard with multiple resiliency models that helps you order
dedicated connections to achieve your SLA objective. For more
information, see AWS Direct Connect Resiliency Toolkit.
2019-10-07
Additiona
l Region
support for
Support for
AWS Transit
Gateway
across
accounts
For information, see the section called “Transit gateway
associations”.
2019-09-30
AWS Direct
Connect
Support for
AWS Transit
Gateway
You can use an AWS Direct Connect gateway to connect your
AWS Direct Connect connection over a transit virtual interface
to the VPCs or VPNs attached to your transit gateway You
associate a Direct Connect gateway with the transit gateway
Then, create a transit virtual interface for your AWS Direct
Connect connection to the Direct Connect gateway. For
information, see the section called “Transit gateway associati
ons”.
2019-03-27
Jumbo
frames
support
You can send jumbo frames (9001 MTU) over AWS Direct
Connect. For more information, see MTUs for private virtual
interfaces or transit virtual interfaces.
2018-10-11
Local
preferenc
e BGP
communities
You can use local preference BGP community tags to achieve
load balancing and route preference for incoming traffic to
your network. For more information, see Local preference BGP
communities.
2018-02-06
AWS Direct
Connect
gateway
You can use a Direct Connect gateway to connect your AWS
Direct Connect connection to VPCs in remote Regions. For
more information, see AWS Direct Connect gateways.
2017-11-01
265
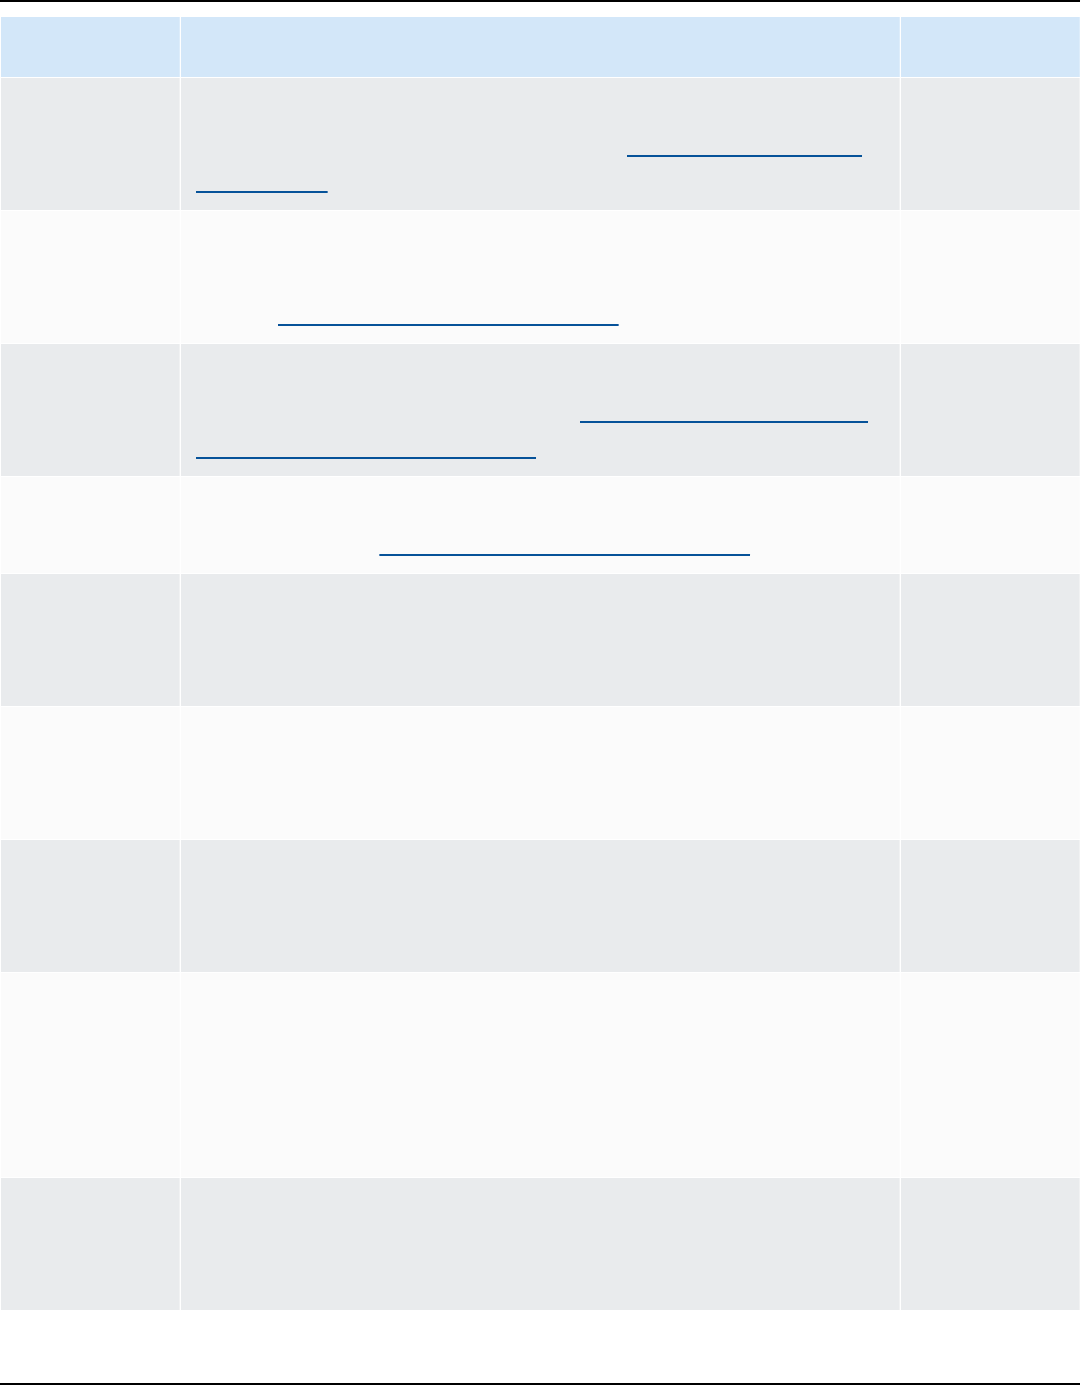
AWS Direct Connect User Guide
Feature Description Date
Amazon
CloudWatch
metrics
You can view CloudWatch metrics for your AWS Direct Connect
connections. For more information, see Monitor with Amazon
CloudWatch.
2017-06-29
Link
aggregation
groups
You can create a link aggregation group (LAG) to aggregate
multiple AWS Direct Connect connections. For more informati
on, see Link aggregation groups (LAGs).
2017-02-13
IPv6 support Your virtual interface can now support an IPv6 BGP peering
session. For more information, see Add a BGP peer to an AWS
Direct Connect virtual interface.
2016-12-01
Tagging
support
You can now tag your AWS Direct Connect resources. For more
information, see Tag AWS Direct Connect resources.
2016-11-04
Self-service
LOA-CFA
You can now download your Letter of Authorization and
Connecting Facility Assignment (LOA-CFA) using the AWS
Direct Connect console or API.
2016-06-22
New location
in Silicon
Valley
Updated topic to include the addition of the new Silicon Valley
location in the US West (N. California) Region.
2016-06-03
New
location in
Amsterdam
Updated topic to include the addition of the new Amsterdam
location in the Europe (Frankfurt) Region.
2016-05-19
New
locations in
Portland,
Oregon, and
Singapore
Updated topic to include the addition of the new Portland,
Oregon, and Singapore locations in the US West (Oregon) and
Asia Pacific (Singapore) Regions.
2016-04-27
New location
in Sao Paulo,
Brasil
Updated topic to include the addition of the new Sao Paulo
location in the South America (São Paulo) Region.
2015-12-09
266
AWS Direct Connect User Guide
Feature Description Date
New
locations
in Dallas,
London,
Silicon Valley,
and Mumbai
Updated topics to include the addition of the new locations in
Dallas (US East (N. Virginia) Region), London (Europe (Ireland)
Region), Silicon Valley (AWS GovCloud (US-West) Region), and
Mumbai (Asia Pacific (Singapore) Region).
2015-11-27
New location
in the China
(Beijing)
Region
Updated topics to include the addition of the new Beijing
location in the China (Beijing) Region.
2015-04-14
New Las
Vegas
location in
the US West
(Oregon)
Region
Updated topics to include the addition of the new AWS Direct
Connect Las Vegas location in the US West (Oregon) Region.
2014-11-10
New EU
(Frankfurt)
Region
Updated topics to include the addition of the new AWS Direct
Connect locations serving the EU (Frankfurt) Region.
2014-10-23
New
locations
in the Asia
Pacific
(Sydney)
Region
Updated topics to include the addition of the new AWS Direct
Connect locations serving the Asia Pacific (Sydney) Region.
2014-07-14
Support
for AWS
CloudTrail
Added a new topic to explain how you can use CloudTrail to log
activity in AWS Direct Connect. For more information, see Log
AWS Direct Connect API calls using AWS CloudTrail.
2014-04-04
267

AWS Direct Connect User Guide
Feature Description Date
Support for
accessing
remote AWS
Regions
Added a new topic to explain how you can access public
resources in a remote Region. For more information, see
Access to remote AWS Regions.
2013-12-19
Support
for hosted
connections
Updated topics to include support for hosted connections. 2013-10-22
New location
in the EU
(Ireland)
Region
Updated topics to include the addition of the new AWS Direct
Connect location serving the EU (Ireland) Region.
2013-06-24
New Seattle
location in
the US West
(Oregon)
Region
Updated topics to include the addition of the new AWS Direct
Connect location in Seattle serving the US West (Oregon)
Region.
2013-05-08
Support
for using
IAM with
AWS Direct
Connect
Added a topic about using AWS Identity and Access
Management with AWS Direct Connect. For more information,
see the section called “Identity and Access Management”.
2012-12-21
New Asia
Pacific
(Sydney)
Region
Updated topics to include the addition of the new AWS Direct
Connect location serving the Asia Pacific (Sydney) Region.
2012-12-14
268

AWS Direct Connect User Guide
Feature Description Date
New AWS
Direct
Connect
console, and
the US East
(N. Virginia)
and South
America
(Sao Paulo)
Regions
Replaced the AWS Direct Connect Getting Started Guide with
the AWS Direct Connect User Guide. Added new topics to
cover the new AWS Direct Connect console, added a billing
topic, added router configuration information, and updated
topics to include the addition of two new AWS Direct Connect
locations serving the US East (N. Virginia) and South America
(Sao Paulo) Regions.
2012-08-13
Support
for the EU
(Ireland),
Asia Pacific
(Singapor
e), and
Asia Pacific
(Tokyo) Regi
ons
Added a new troubleshooting section and updated topics to
include the addition of four new AWS Direct Connect locations
serving the US West (Northern California), EU (Ireland), Asia
Pacific (Singapore), and Asia Pacific (Tokyo) Regions.
2012-01-10
Support for
the US West
(Northern
California)
Region
Updated topics to include the addition of the US West
(Northern California) Region.
2011-09-08
Public
release
The first release of AWS Direct Connect. 2011-08-03
269
