
23
VIRTUAL EXHIBIT
Virtual Exhibit (VE) is the instant Web site creator for PastPerfect Museum Soft-
ware. Virtual Exhibit converts collection records and images stored in PastPerfect
to HTML for posting on the World Wide Web. Point and click on the records you
want to share, and VE will create an entire Web site for your museum. No Web
programming knowledge is required. This chapter will walk you through the
steps of creating your own web site.
Virtual Exhibit automates the work, and allows you to personalize the home page,
color scheme, font size, and image size for your Web site. You also select which
records from PastPerfect’s Object, Photo, Archive, and Library catalogs to include.
To begin, just double-click on an element on the Web Site Designer screen.
A Web site created using Virtual Exhibit may be published on the World Wide
Web, or housed on a local computer in your museum. This computer must be
equipped with Microsoft Internet Explorer 4.0 or higher. Virtual Exhibit 4.0
requires that you have PastPerfect version 4.0 or higher with the Multi-Media
upgrade and you purchase the VE software.
INSTALLING VIRTUAL EXHIBIT
To install the Virtual Exhibit software:
1. Close all other programs.
2. Insert the Virtual Exhibit CD into the computer’s CD-ROM drive.
3. The installation program will start automatically.
361

4. VE must be installed in the same folder as PastPerfect version 4.0. This is usu-
ally c:\pp4. If PastPerfect is in a different folder, please change the default setting,
and then follow the instructions on the screen.
If the installation does not start automatically, click on Start | Settings | Control
Panel | and Add/Remove Programs and follow the instructions on that screen.
Once the program is installed, remove the CD and store it in a safe place.
Virtual Exhibit is a non-networked program. Therefore if you have the network
version of PastPerfect, VE must be installed on each workstation that will be creat-
ing websites. A single VE license allows you to install the program on each work-
station. The sites created at each workstation will be independent.
CREATING A WEB SITE
The steps to create an HTML Web site with Virtual Exhibit are:
1. Launch the Virtual Exhibit Designer.
2. Design a home page and coordinating exhibit pages.
* Set a color scheme.
* Attach your museum logo or image.
* Select PastPerfect records.
* Input text.
* Choose images.
3. Save the Web site.
4. Create the HTML pages.
5. View the site, as it will appear on the Web.
6. Post the Web site on the WWW or a local computer.
Let’s design a Virtual Exhibit Web site. The first step is to start the Virtual Exhibit
Designer program.
362 PastPerfect Museum Software User’s Guide
Virtual Exhibit 363
STARTING VIRTUAL EXHIBIT
To begin, double-click on the Virtual Exhibit icon on the Windows Desk-
top. Or click Start | Programs | PastPerfect Museum Software | Virtual Exhibit.
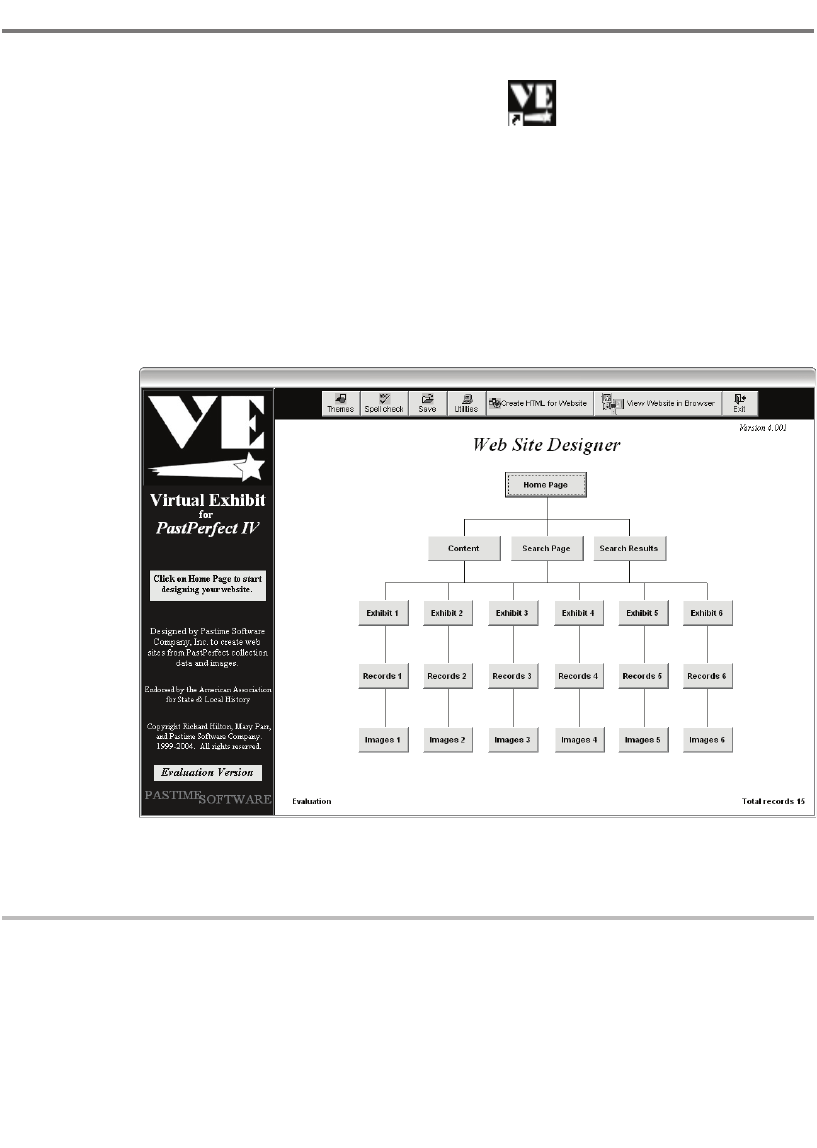
This will open the VE main menu or Web Site Designer screen.
In addition to the toolbar commands at the top of the screen, the Main Menu
includes command buttons for Home Page, Content, Search Page, Search Results,
Exhibit Pages 1-6, Records 1-6, and Images 1-6. Click a command button to access
the Design tabs for the associated web page.
HOME PAGE DESIGN
The home page is the first page visitors see when they come to your Web site. If
you already have a Web site, the Virtual Exhibit home page serves as a sub-page
of your main site and provides access to PastPerfect exhibits.
Press the Home Page command button on the main menu to display the Home
Page Layout screen. The Home Page Layout screen is a worksheet for the final
home page. The colors, logo, text, and captions you designate will display on
Figure 23-1
VE Main
Menu

364 PastPerfect Museum Software User’s Guide
this screen for reference during the design process. Keep in mind that the Home
Page Layout screen is not an active HTML page and does not look exactly like the
resulting HTML page.
Press the Design command button at the top of the Home Page Layout screen to
bring up the Home Page Design screen as seen in Figure 23-3. The Home Page
Design screen has a tab for each of the seven design components: Background and
Logo, Banner, Text Section 1, Text Section 2, Footer, Images, and Hyperlinks. Click
the appropriate tab to specify images, colors, and text for each element.
Background & Logo
To select a background color for your home page, click any one of the 20 colors
or 4 wallpaper designs shown. The current selection is displayed for reference.
To choose from a wider color palette, press Custom.
The check box in the lower left of the Background & Logo screen, labeled Include
Link to Search Page, must be checked if you wish to include the Search Page link
on the home page.
Figure 23-2
Home Page
Layout screen

Virtual Exhibit 365
To add your museum logo or representative image to the home page, press the
Change Image command button at the bottom of the Home Page Design screen.
To obtain an image press the Import Image command and locate an existing image
somewhere on your computer’s hard drive or network. To place the currently dis-
played image on your home page, press Select.
Banner
The home page banner is a word or phrase that displays at the center top of the
Figure 23-3
Home Page
Design screen
Figure 23-4
Home Page
Image screen

366 PastPerfect Museum Software User’s Guide
Virtual Exhibit home page. For example: enter your institution’s name or wel-
come message.
Text Section 1
Section 1 text appears just below the banner. The text may be of any length.
Highlight the default text and replace it with your own information. To change
the font size, style, and color, press the Change font command button at the
bottom of the screen.
Text Section 2
Section 2 text is positioned just below Section 1. The text may be of any length.
Highlight the default text and replace it with your own information. To change
the font size, style, and color, press the Change font command button at the
bottom of the screen.
Figure 23-5
Home Page
Banner screen
To change the banner’s font
size, style, and color, press the
Change font command button
at the bottom of the screen.

Virtual Exhibit 367
Footer
The footer is a good place to provide your institution’s e-mail address so visitors
can send you feedback or request more information. To create a hyperlink to the
Webmaster’s e-mail address, enter the address in the designated box as shown
below.
Images
Virtual Exhibit allows you to create and access up to six separate exhibits from
your home page. Each exhibit has a main page that is hyperlinked to the home
page by a representative image of your choosing. The Images tab is where you
input captions for each representative image, specify exhibit menu color and
placement, and resize image display boxes. In the Exhibit Section you will find
directions on how to use the Exhibit Web Page Editor to select the representa-
tive image for each exhibit.
Figure 23-6
Home Page
Footer screen
To display footer text at the bottom
of the Home page, be sure a check
mark appears in the Include Footer
box.
To change the font size, style,
and color, press the Change
font command.

368 PastPerfect Museum Software User’s Guide
Hyperlinks
The Hyperlinks tab controls the colors for viewed and not-yet-viewed-hyperlink
text on the home page. Be sure the text colors you choose are visible against the
background you selected.
Before proceeding, it is a good idea to build the HTML version of your home
page. To see your home page as it will appear on the World Wide Web, click
Create HTML for Website on the main menu. When VE finishes building the
HTML pages click View Website in Browser.
Figure 23-7
Home Page
Images
Click here to choose the exhibit
menu background color.
Modify the default title for
the exhibit menu and the
captions for the Exhibit page
images
Figure 23-8
Hyperlinks

Virtual Exhibit 369
CONTENT
For security reasons, you should not include sensitive data fields on your Web
site. To choose the display fields, click the Content command button on the
main menu.
Each of the four tabs, labeled Objects, Photos, Archives, and Library, contains a
checklist of the field names used in that catalog. With the mouse, put a check mark
in the box next to each catalog data field that you want to include in the published
Web site. Be sure to review all four lists and remove any sensitive fields like Value
or Storage Location.
SEARCH PAGE DESIGN
Virtual Exhibit comes with its own client-side search engine, written in Java
Script, which allows visitors to search the entire site. It also creates a separate
search page for each exhibit. While there is no limit to the number of catalog
pages that can be included in an exhibit, the Search engine does have some limi-
tations. The speed at which the Search page displays depends on the number of
Figure 23-9
Content

370 PastPerfect Museum Software User’s Guide
records and also the speed of the visitor’s Internet connection. For visitors with-
out high-speed connections, preforming a search on a large number of records
may be slow to load. This problem can be solved by implementing a server-side
search engine. You may want to consult your web host or contact us at support
@museumsoftware.com for more information.
To customize the Search Page, click Search Page on the Virtual Exhibit main
menu, and then click the Design command button.
The first three tabs control the text and colors displayed on the Search Page. The
fourth tab, Keywords, allows you to select the fields that the search engine will
use.
The search engine will search each field listed under the heading “Keyword Field
List.” To add or remove field names, press the Change Keyword Field List com-
mand button.
Every PastPerfect field name is listed on the screen in the five tabs, one for each of
the four catalogs and one tab for fields common to all four catalogs.
Place a check mark in the box next to each field you want to search, and be sure to
clear each box you do not want to search. The checked field names will automati-
cally appear in the Keyword Field List.
Figure 23-10
Search Page
Design
To implement a server-side
search engine, click here and
enter the HTML code or url link
to activate it.

Virtual Exhibit 371
The standard search engine can search a maximum of 1900 characters per cata-
log record page. The more data fields you include in the Keyword Field List, the
longer it will take the search engine to produce results. If your search results are
taking too long, omit long fields like Description or Notes from the Keyword Field
List, or limit the total number of fields searched.
Another option is to implement a custom search engine. For more information on
custom search engines contact your web host provider or our technical support
staff.
SEARCH RESULTS PAGE DESIGN
Click Search Results on the main menu, and then click Design. The Design
menu has three tabs, one each for the Background & Banner, Results, and
Figure 23-11
Search
Keywords

372 PastPerfect Museum Software User’s Guide
Hyperlinks. Click each of the tabs to define the color scheme. There is no text to
modify on this page.
To select a background color for your search results page, click any one of the 20
colors or 4 wallpaper designs shown. The current selection is displayed for refer-
ence. To choose from a wider color palette, press Custom. Click the Change ban-
ner font command button to change the color of the banner text.
Next click the Results tab. Press the buttons labeled Change results background
color or Change results text color to customize the color scheme.
The Hyperlinks tab controls the colors for viewed and not-yet-viewed-hyper-
link text on the search results page. Be sure the text colors you choose are visible
against the background you selected.
EXHIBIT PAGE LAYOUT
A Virtual Exhibit Web site can include up to six exhibits, each with an unlimited
number of associated records. To view an exhibit from the Virtual Exhibit home
page, click the image hyperlink.
Each exhibit also has its own Search page and a Table of Contents page. These
pages can be selected from the menu bar at the top of the exhibit page. Unlike the
search page selected from the home page, which will search the entire web site,
the exhibit search pages allow you to search just one exhibit.
Figure 23-12
Search
Results
Design Page

Virtual Exhibit 373
Figure 23-13
VE Website
Home Page
in Browser
Figure 23-14
VE Website
Exhibit Page
in Browser
Click here to view the first
exhibit, opening page dis-
played below.
Click on menu
bar to start
exhibit
Sample
images for
this exhibit.
Click here to access search page
or table of contents.

374 PastPerfect Museum Software User’s Guide
The Table of Contents is a list of all records included in an exhibit. Click on the
column headers to change the sort order or click on the underlined ID# to jump to
the corresponding catalog record page. The hyperlinks at the bottom of the screen
return to the home page, return to the exhibit page, or access the search page. The
color scheme is the same as the one you chose for the associated exhibit page.
DESIGNING THE EXHIBIT PAGES
Designing the Exhibit Page is similar to designing the home page. To start the
Exhibit Page design, click on one of the Exhibit #1-6 command buttons from the
Virtual Exhibit main menu. Remember that the Exhibit number corresponds to
a position on the home page. Consider which position shows each exhibit to its
best advantage and optimizes the final appearance of your home page.
Figure 23-15
VE Website
Table of
Contents in
Browser
Virtual Exhibit 375
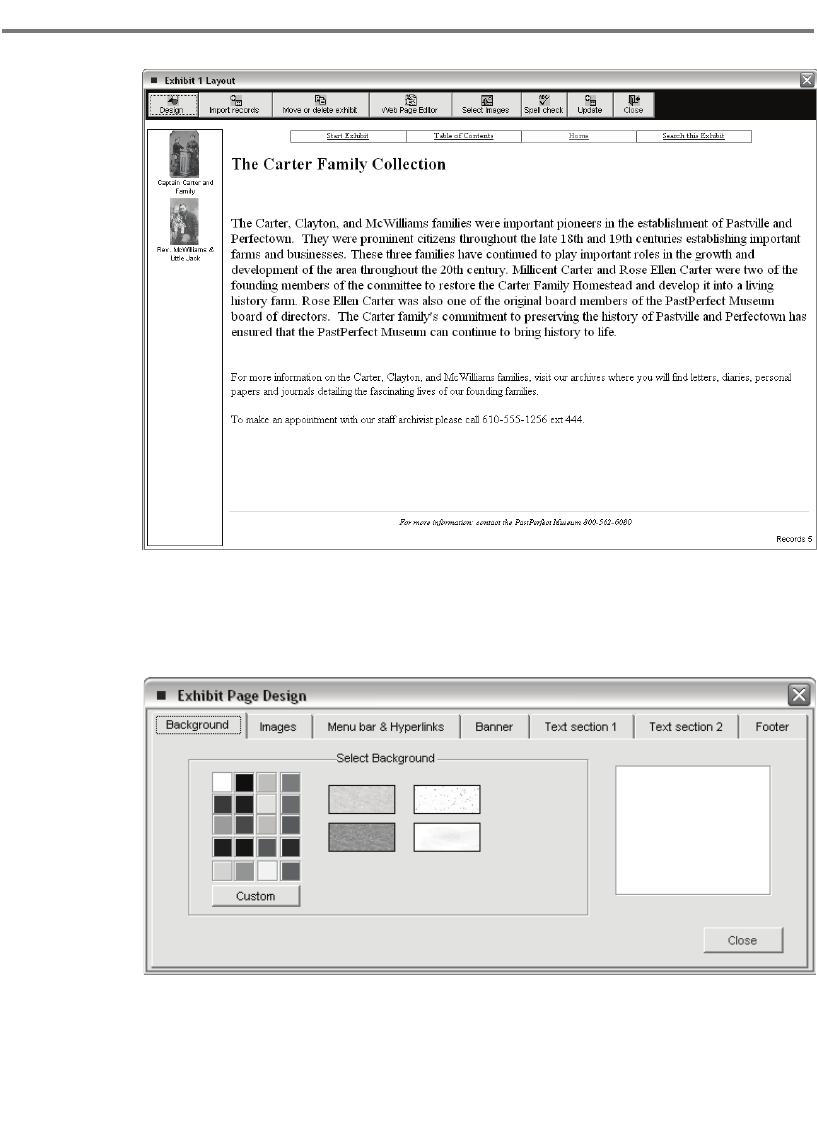
On the Exhibit Layout screen, click the Design command button to access Design
mode. There are tabs for each of the exhibit’s components: background, images,
menu bar & hyperlinks, banner, text section 1, text section 2, and footer.
Background
To select a background color for your exhibit page, click any one of the 20 colors
or 4 wallpaper designs shown. The current selection is displayed for reference.
To choose from a wider color palette, press Custom.
Figure 23-16
Exhibit Layout
Screen
Figure 23-17
Exhibit Page
Design

376 PastPerfect Museum Software User’s Guide
Images
Virtual Exhibit allows you to display up to six sample images from your exhibit
on the exhibit main page. The Images tab is where you input captions for each
sample image, specify background color and image placement, and resize image
display boxes. Use the Exhibit Select Images or Web Page Editor commands to
select the sample images for each exhibit.
Menu bar & Hyperlinks
The Menu bar & Hyperlinks tab controls the colors for viewed and not-yet-
viewed-hyperlink text on the home page. Be sure the text colors you choose are
visible against the background you selected. If you would like to include hyper-
links to the Exhibit Search page or to the Exhibit Table of Contents, be sure to
check the boxes labeled Include Table of Contents and Include Search.
Banner
The exhibit page banner is a word or phrase that displays at the top left of the
exhibit main page. Highlight the default text and replace it with the exhibit
name or welcome message.
Text Section 1
Paragraph 1 text appears just below the banner and to the right of the sample
images. The text may be of any length, but may not include multiple para-
graphs. Highlight the default text and replace it with your own information. To
Figure 23-18
Menu bar &
Hyperlinks

Virtual Exhibit 377
change the font size, style, and color, press the Change font command button at
the bottom of the screen.
Text Section 2
Paragraph 2 is positioned just below Paragraph 1. The text may be of any
length, but may not include multiple paragraphs. Highlight the default text and
replace it with your own information. To change the font size, style, and color,
press the Change font command button at the bottom of the screen.
Footer
The footer text is the same for all pages, and can only be changed from the
Home Page Design screen. To display the footer text on the exhibit page, be
sure a check mark appears in the box marked Include Footer. To change the
font size, style, and color of the footer text to match your exhibit page, press the
Change font command button at the bottom of the screen.
If you like the color scheme you have chosen for Exhibit#1, and you would like to copy
the scheme to all other Exhibits (color only, not text), click Themes on the Main Menu
Toolbar. Then click Save current settings as theme. Name the theme and choose Method#2 to
save. This method applies the color scheme of Exhibit#1 to all other Exhibits. It also applies the color
scheme for Records 1 and Images 1 to all other Records and Images Pages.
Once a theme has been saved, highlight it in the Available Themes list and press the command but-
ton labeled Apply Selected Theme. Click OK.
EXHIBIT LAYOUT SCREEN
After you are satisfied with the color scheme and text on the Exhibit Main Page,
it’s time to select the Exhibit’s content. In addition to the Design command
button used to access the Exhibit Page Design screen, there are seven addi-
tional command buttons on the Exhibit Layout screen: Import Records, Move
or Delete Exhibit, Web Page Editor, Select Images, Spell Check, Update, and
Close.
Tip

378 PastPerfect Museum Software User’s Guide
Import Records
Use the Import Records command to add PastPerfect catalog records and images
to your exhibit. Press Import Records to view the “Add Catalog Records from
PastPerfect” screen.
Adding Records by Catalog
First, let’s add records to the exhibit by browsing the individual catalogs. The
procedure is the same for any of the four catalogs. For this example, click Pho-
tos to open the screen shown in Figure 23-21.
When you click the Photos button, the catalog opens and displays your
PastPerfect catalog records. The only difference between the Virtual Exhibit screen
and the PastPerfect screen is the toolbar that appears at the top. You will notice
that there are no buttons labeled Add, Print, or Accession. To add new records,
print the current record, or view the details on the record’s source, you must be in
PastPerfect.
Figure 23-19
Top of Exhibit
Layout screen
Figure 23-20
Add catalog
records
You may choose to
view any of the four
PastPerfect catalogs by
pressing one of these
buttons.

Virtual Exhibit 379
There are several ways to locate records within a catalog and add them to Virtual
Exhibit. Press the Prior and Next buttons to navigate the records sequentially, one
by one.
Or, press Browse to view the records as a data table. Use the scroll bars at the
right side of the screen to move up and down the list. When you find the record
you want to view, position the mouse over it and click the Right Mouse button or
press Enter. Virtual Exhibit will automatically display the record.
Figure 23-21
PastPerfect
Photo
catalog
Figure 23-22
Browse
PastPerfect
Photo
catalog

380 PastPerfect Museum Software User’s Guide
The third way to locate a particular record is to click the Find button. The Find
screen is the same one used in PastPerfect. It displays the searchable field names
for the current catalog.
Once you have located the record you wish to add to the exhibit, press the Add
to Exhibit button. Repeat the process until you have added all desired records to
your exhibit.
Adding a Group of Records with a Query
The Query command at the top of the PastPerfect catalog page is a powerful
way to find and add groups of items to the exhibit. Pressing the Query com-
mand opens the screen shown in Figure 23-24. This screen is almost identical
to the standard Query screen that in discussed in Chapter 14, Research. The only
difference is that the screen has four additional buttons, Add Found records to
Exhibit, Add all records from this catalog to the exhibit, Add all records from
this catalog with images to the exhibit, and Delete All Exhibit Records.
Select the fields you want to query and the condition statements from the pull
down menu. Up to seven fields can be queried to produce results. Press the Search
Now button to begin the search.
Figure 23-23
Find screen

Virtual Exhibit 381
If your search is successful, you may add the records found to your exhibit all at
once by pressing the button marked Add Found Records to Exhibit.
Repeat the search process for each catalog until you have added all desired
records to your exhibit.
Add all records from this catalog to the exhibit -This command button at the bot-
tom of the Query screen will add ALL the records from the catalog to your exhibit.
Add all records from this catalog with images to the exhibit - This command but-
ton at the bottom of the Query screen will add all the records from the catalog that
have attached images to your exhibit.
Delete All Exhibit Records - Use this command button at the bottom of the Query
screen if you would like to delete all catalog records from an exhibit and start
over. The records will be removed from the exhibit, but not from PastPerfect. To
delete all catalog records, banner text, and paragraph text from an exhibit, use the
Move or Delete Exhibit option on the Exhibit Layout screen. If you choose Delete
Exhibit it will completely erase the exhibit from Virtual Exhibit, but not affect the
PastPerfect records.
Figure 23-24
Query screen

382 PastPerfect Museum Software User’s Guide
Move or Delete Exhibit
The Move or Delete Exhibit command on the Exhibit Layout screen gives you
flexibility in designing your page. Using this command, you can change an
exhibit’s location on the home page, append records from one exhibit to another,
or delete an exhibit altogether.
The first step in moving an exhibit is choosing the destination. Select the destina-
tion Exhibit #1-6 from the list at right by clicking on it. A black dot will appear in
the circle to the left of the selected exhibit.
Next choose whether the data in the destination exhibit is appended to or over-
written by clicking on the command Append or Overwrite. A black dot will
appear in the circle to the left of the selected operation.
The Append option does not alter the destination exhibit’s text, banner, sample
images, records, or color scheme; it merely adds the records from the current
exhibit to the destination exhibit.
The Overwrite option replaces the text, images, records, and color scheme in the
destination exhibit with the text, images, records, and color scheme from the cur-
rent exhibit. The Overwrite command allows you to move an intact exhibit from
one position to another with a few mouse clicks.
Once you have chosen Append or Overwrite, press the Copy to Exhibit (#1-#6)
Now button to complete the transfer.
Figure 23-25
Move\Copy or
Delete Exhibit

Virtual Exhibit 383
The Delete Exhibit button erases images, text, and records from the selected
exhibit in one step. Be sure this is what you want before you click OK. It is a good
idea to confirm that the Overwrite or Append command achieved the desired
results, so please check this before you delete the current exhibit.
The final feature on this screen, Delete All Records, deletes catalog records from
the selected exhibit only. Text and color scheme will remain unchanged.
Web Page Editor
The Web Page Editor allows you to view and modify catalog records before
they are published to the Web site. The screen is very similar to the PastPerfect
catalog screens. If you wish to modify the catalog data for publishing, click
Edit, make changes, and then click Save. Changes you make to catalog records
using Virtual Exhibit will affect only the published Web site, not the record in
PastPerfect.
Even though all catalog data fields are displayed in the Web Page Editor, only the
fields selected on the Content screen will appear on the HTML catalog pages. You
can review the fields that will display on the Web site by selecting Content from
the Virtual Exhibit main menu.
Figure 23-26
Web Page
Editor
The Place Image
command allows you
to place images on
the home page or on
the exhibit page.
Edit this Display
order number to
determine the order
the records appear
on the website

384 PastPerfect Museum Software User’s Guide
Selecting Images - Every catalog record chosen for an exhibit will display its asso-
ciated images on the HTML catalog page. To select which images display, place a
check in the box labeld “Include this image on Web site” on the Image Manage-
ment screen. A maximum of 25 images can display for each catalog record
You may also choose up to six representative, or sample, images to display on the
main exhibit page. You also should choose one sample image from each exhibit to
display on the home page and serve as the hyperlink to access the exhibit.
To select and place the sample images, press the Place Image command button
from the Web Page Editor or press Select Images from the Exhibit Layout page.
Update command - Once catalog records are added to an exhibit, the informa-
tion about each record can be edited with the Web Page Editor described above.
Changes made to the catalog records from the PastPerfect program will not be
automatically applied to the catalog records in VE. However, there is an Update
command on the Web Page Editor screen that you can press to replace all the
information in the VE catalog record with the latest information from PastPerfect.
Their is also and Update command on the Exhibit Layout page the will update all
records in the exhibit with PastPerfect data.
Figure 23-27
Select
Images
Use Browse,
Next, and Previ-
ous commands to
navigate the avail-
able images for the
exhibit.
When you locate an
image you would
like to display on
the home page or
the exhibit main
page, click on the
arrows pointing
to the appropriate
position.
Control the image sizes by selecting the width,
measured in pixels. The resized images will retain
their original proportions.

Virtual Exhibit 385
DESIGNING CATALOG RECORD PAGES
A separate Web page is created for each catalog record included in the Virtual
Exhibit Web site. You can design an individual color scheme for catalog record
pages in each of the six exhibits, or you can apply a color scheme (called a
Theme) to the entire Web site, giving it an overall feeling of unity.
Background
The first tab is for selecting the background color or wallpaper for the catalog
record page. To select a background color for your catalog record page, click
any one of the 20 colors or 4 wallpaper designs shown. To choose from a wider
color palette, press Custom.
Figure 23-28
Catalog
Record Layout
To Enter design
mode, click on
Records 1-6 from
the Virtual Exhibit
main menu, then click
Design.
This will display the
Catalog Record Page
Design screen where
you can define each
of six elements.
Figure 23-29
Catalog
Record Page
Design
The current
selection is
displayed for
reference.

386 PastPerfect Museum Software User’s Guide
Menu Bar
Two title lines appear on the Catalog Record Page. The three options for each
title are the Exhibit’s banner text, the Home Page Caption, or the Item’s Title/
Object name. Select which information you would like to display as a title by
clicking one of the three options. A black dot will appear in the circle to the left
of the selected text.
You can change the Title text color by pressing the command button labeled
Change color. Next, choose Background colors for the titles, images, and menu by
pressing each of the background color command buttons. Note that a copyright
statement is displayed on the sample catalog page. The color of the copyright text
is the same as that of viewed hyperlinks. Go to the hyperlinks tab to change the
color if desired.
Body
Select this tab to choose the colors for the main text on the catalog pages. To
change the font size, style, and color, press the Change titles font and Change
text font buttons.
Copyright
You can include a brief copyright statement as well as complete copyright infor-
mation on each catalog page. To include a copyright statement or information
Figure 23-30
Menu Bar

Virtual Exhibit 387
on your catalog record page, be sure a check mark appears in the boxes marked
Include Copyright Statement and Include Copyright Information. Clear the check
boxes to remove the copyright text from your catalog record page.
The copyright text may be customized for different exhibits. To enter the copyright
statement, highlight the default text and replace it with your own information. The
Copyright Statement will be the same color as the viewed hyperlinks. (Go to the
Hyperlinks tab to change the color.) Change the Copyright Information font size,
style, and color by pressing the Change font command button.
Figure 23-31
Body Tab
Figure 23-32
Copyright Tab

388 PastPerfect Museum Software User’s Guide
Footer
The footer text is the same for all pages, and can only be changed from the
Home Page Design screen. To change the font size, style, and color of the footer
text to match your catalog record page, press the Change font command button
at the bottom of the screen.
Hyperlinks
The Hyperlinks tab controls the colors for viewed and not-yet-viewed-hyperlink
text on the catalog record page. Be sure the text colors you choose are visible
against the background you selected.
Figure 23-33
Footer Tab
Figure 23-34
Hyperlinks Tab
To display the footer
text on the catalog
record page, be sure a
check mark appears in
this box
Put a check mark in
this box if you want
your images to have
a colored frame that
matches the hyperlink.

Virtual Exhibit 389
DESIGNING FULL SIZE IMAGE PAGES
Each catalog record with an associated image also has a Full Size Image page.
You can design an individual color scheme for the Full Size Image pages in each
of the six exhibits.
From the Full Size Image Design page you can define each of five elements by
selecting the following tabs: Background, Menu Bar, Copyright Information,
Footer, and Hyperlinks.
Background
To select a background color for your full-size-image page, click any one of the
20 colors or 4 wallpaper designs shown. To choose from a wider color palette,
press Custom. Also on this tab you can set the maximum image size. This set-
ting applies to the full size image pages in all six exhibits.
Menu Bar
The menu bar includes two titles, navigation hyperlinks, and a copyright state-
Figure 23-35
Full Size
Image Layout
screen
To enter design
mode, click on
Images 1-6 from
the Virtual Exhibit
main menu, then
click on Design.

390 PastPerfect Museum Software User’s Guide
ment. The three options for each title are the Exhibit’s banner text, the Home
Page Caption, or the Item’s Title/Object name. Select which information you
would like to display as a title by clicking on one of the options. A black dot
will appear in the circle to the left of the selected text.
You can change the Title text color by pressing the command button labeled
Change color. Next choose a Description text color and a Menu background color
by pressing the respective command buttons. Note that the copyright statement
text displayed on the menu bar is the same color as that of viewed hyperlinks. Go
to the Hyperlinks tab to change the color if desired.
Copyright
The copyright statement text will be the same color as the viewed hyperlinks.
(Go to the Hyperlinks tab to change the color.)
The copyright text for the Full Size Image page is shared with the copyright text
on the Catalog Record page and can only be edited there. Also the check boxes
Include Copyright Statement and Include Copyright Information that appear on
the Catalog Record page apply to the Full Size Image pages as well.
Footer
The footer text is the same for all pages, and can only be changed from the
Home Page Design screen. To display the footer text on the image page, be sure
Figure 23-36
Menu Bar tab
If you do not wish
to include the titles,
menu bar, and
description on the
image page, clear
this check box.

Virtual Exhibit 391
a check mark appears in the box marked Include Footer. To change the font size,
style, and color of the footer text to match your image page, press the Change
font command button at the bottom of the screen.
Hyperlinks
The Hyperlinks tab controls the colors for unviewed and already viewed hyper-
link text on the image page. Be sure the text colors you choose are visible
against the background you selected.
SAVE YOUR WEB SITE
Once you have created a web site you should be sure to save it. You can name
and save up to 100 different Virtual Exhibit Web sites. To save your current site,
press the Save button on the Virtual Exhibit main menu toolbar.
This will open the Save/Retrieve Sites screen shown in Figure 23-38 listing the
web sites that have been previously saved. Press the Save command and you will
be asked to enter a Site Name, Creator Name, and Notes. Complete the fields, and
press the button labeled Save site. The new site name will be added to your list.
To view the Notes field for any site, double-click on the site name in the list.
To return to the Main Menu, press Close. The name of the currently loaded site
appears in the lower left corner of the Main Menu for your reference. If you want
to rename your site, return to the Save screen and press Save as. To delete a site,
Figure 23-37
Hyperlinks tab
The color of the
copyright state-
ment text, described
above, will be the
same as the viewed
hyperlinks text.
Change the color
here.

392 PastPerfect Museum Software User’s Guide
highlight the site name in the list and press Delete. To load a new site into the
workspace for editing, press Load. Loading a new site onto the desktop will over-
write the current site, so be sure you have saved your changes before loading.
CREATE THE HTML WEB SITE
When your exhibit content and design are complete, creating the HTML Web
site is the final step before posting your Virtual Exhibit on the World Wide
Web. At any point in the design process, you may create the HTML Web site
and view it on your Desktop. By viewing the HTML site periodically during the
design process, you can verify that your color scheme is consistent and legible,
and that your images and text look pleasing on the page.
Creating the HTML Web site requires only the push of a button. Press the Create
Site command button at the top of the main menu.
Twelve functions will be performed to create the Home Page, Exhibit Pages, Cata-
log Pages, Table of Contents, Search Index Files, Search Page, and Image Pages. It
is recommended that you always perform all twelve functions at the same time,
unless very minor changes have been made to one component.
Figure 23-38
Save/Retrieve
Sites

Virtual Exhibit 393
Click on Build HTML to begin the process which converts all image files to JPG
format and optimizes them for display on the Web. A thumbnail and a full-size
image are created for each catalog record. The process will take about 5 minutes
per 100 catalog pages.
Once complete, you can return to the main menu and press View Website in
Browser to see the completed site. View Exhibit in Browser will only work if you
have a Web browser such as Internet Explorer or Netscape Navigator installed
on your computer. If one of these programs is installed, the site is fully navigable
from your desktop.
View Exhibit in Browser is an excellent tool for proofreading your new web site.
The pages appear exactly as they will on the Internet, so now is the time to make
sure hyperlink text is visible, typos are corrected, and selected data fields are dis-
played. If you notice any errors, just close the exhibit and return to the Virtual
Exhibit Designer to make changes. You can edit and recreate the page as many
times as you like before you post it to the World Wide Web.
POSTING THE HTML WEB SITE
To post your exhibit on the WWW, you will need a completed Web site created
Figure 23-39
Create HTML
Web Pages
Click Build HTML to begin.
You will be asked to select the
output directory where you want
to store the HTML web pages.

394 PastPerfect Museum Software User’s Guide
with Virtual Exhibit, access to the Internet, and, unless you have your own Web
server, a Web site host.
Most web site hosts charge a monthly fee, some as little as $10. You can search
the Internet where you will find hundreds of providers. It is not necessary to find
a host located near you, in fact your host can be anywhere in the world. Pastime
Software also offers hosting options. Contact our support office for details.
Uploading the HTML Files to the Web Server
VE has a built-in FTP function that will transfer your files to the Web server.
Before you perform the transfer you must know your web host account name,
user-id and password as well as the folder on the host site that will receive the
files. This information should be provided by your Web host.
To upload the files, press Create HTML for Website on the main menu. Then
select the FTP Upload command to open the following screen.
Enter your web server host name, userid, and password. If the html files are to be
placed in a sub-folder at the site, enter the folder name as well. Then press Upload
Figure 23-40
Upload web
site to host
server

Virtual Exhibit 395
Website Now. You must be already connected to the internet for the FTP function
to work. The process may take several minutes.
Placing your website on a CD
Instead of, or in addition to, posting your site on the World Wide Web, you
may want to distribute it on a CD or DVD. To do this select Create HTML for
Website from the main menu. Then press Burn CD/DVD. The following screen
will open.
Insert a blank CD-R or DVD-R and press Start to begin the process.
Posting to a Local Computer
You may also want to post the website on a computer in your museum for visi-
tors to use. You can use either an IBM PC-compatible or a Macintosh computer
loaded with Web browser software. Virtual Exhibit works best with Microsoft
Internet Explorer, version 4.0 or higher. Follow these steps:
1. Create a new folder on the exhibit computer to store the Virtual Exhibit HTML
files. We recommend that you create the folder on the C: drive and name it
VeWebsite, but you are not required to do so.
2. Copy all files from the C:\VeWebsite directory of the design computer (or the
alternate folder you designated to store your Web site), including sub-directories
Exhibit 1-6 and the files within the exhibit folders. You do not need to upload the
Search sub-folder or the search*.txt files located within.
3. If the computer you used to design and create your Web site is connected to the
exhibit computer via a network, the files can be copied from the design computer
Figure 23-41
Burn Website
onto CD or
DVD
Check this box if you want the CD/
DVD to automatically start the Vir-
tual Exhibit when it is inserted into
a computers drive.
396 PastPerfect Museum Software User’s Guide
to the exhibit computer using Windows Explorer. For details on using Windows
Explorer to copy files, please consult Windows Help.
4. If the design computer is NOT connected to the exhibit computer via a network,
you will need to use a removable medium such as a floppy disk, Zip disk, or CD-
ROM to transfer the files.
To enable visitors to start the exhibit from the Windows desktop, you will need to
create a shortcut. See Windows Help for instructions. Point the shortcut to the file
“index.htm” located in the c:\vewebsite\ folder.
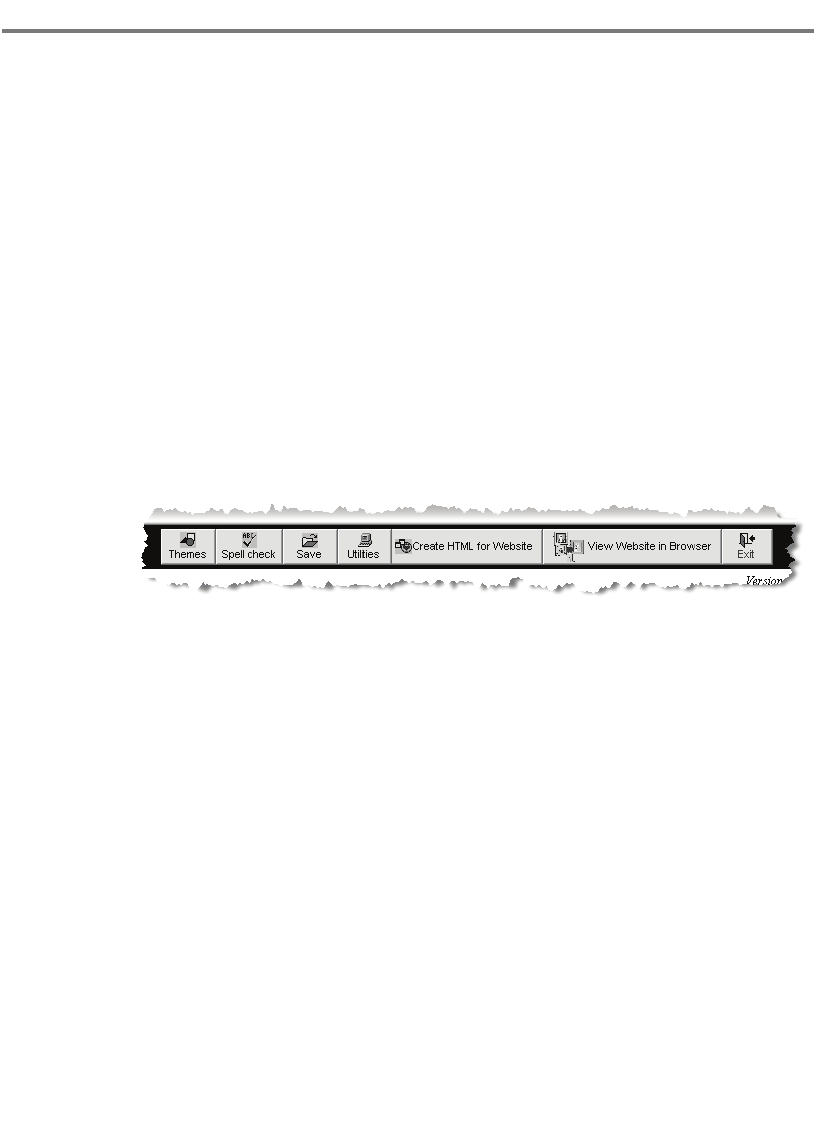
OTHER TOOLBAR COMMANDS
In addition to Save, Create, and View Website, the Toolbar on the Virtual
Exhibit main menu has three other options, Themes, Spell check, and Utilities.
Themes
A theme is a saved group of design settings that you can apply to any exhibit.
The saved settings include all components of design, from background color
and hyperlink colors, to font sizes and styles. Virtual Exhibit comes with several
saved themes, or you can design your own. To view the different themes, click
Themes on the Main Menu toolbar.
Saving Themes - To save the current settings as a Theme, click on the Save Cur-
rent Setting as Theme command. You will be asked to name the theme. Choose
Method #1 to save. Method #1 saves the current settings exactly as they are for
application in future exhibits.
If you like the color scheme you have chosen for Exhibit #1, and you would like
to copy it to your other Exhibits (colors only, not text), select Method #2 to save.
Method #2 applies the color scheme for Exhibit #1 to all other Exhibits. It also
applies the color scheme for Records 1 and Images 1 to all other Records and
Images Pages. This feature may save you a lot of work.
Figure 23-42
Main Menu
Toolbar

Virtual Exhibit 397
Applying Themes - Once a theme is saved, it becomes available for use. To apply
a saved theme to the current web design, click Themes on the main menu Toolbar.
View the saved themes by clicking each name on the list. Once you have high-
lighted your selection, click Apply Selected Theme. Clicking OK to overwrite all
current settings with the selected theme.
Spell Check
You can access Spell Check from any of the Design screens to check a particular
screen for errors. The main menu Spell Check command checks the entire Web
site for errors.
Utilities
Virtual Exhibit offers a Utilities screen with setup and maintenance functions.
To access this screen press Utilities from the main menu Toolbar. This screen
provides nine functions: Backup current site, Reindex data files, Customize text,
Setup Passwords, Import background, Change catalog record display order,
Change catalog record display names, File Test, and Data File Repair.
Backup Current Site - Use this function to save the current website to floppy disks
or a zip disk.
Figure 23-43
Themes
Click here to save
the current settings
as a theme.

398 PastPerfect Museum Software User’s Guide
Reindex data files - Use this function to remove exhibit records marked for dele-
tion and keep VE running smoothly. We recommend that you perform this func-
tion before creating your HTML web pages.
Customize text - This screen allows you to change some of the default words that
appear on the Search, Exhibit, Table of Contents, Record and Image Pages.
Figure 23-44
Utilities menu
Figure 23-45
Customize text

Virtual Exhibit 399
Setup Passwords - This screen allows you to implement password protection
for the Virtual Exhibit designer. Two passwords can be defined, one that allows
access to all functions and the other that allows access to all functions except edit-
ing PastPerfect images.
Import background - You can add a custom wallpaper design for use as back-
ground on any page. Virtual Exhibit can only store four background files, so you
must choose which of the default backgrounds you wish to overwrite with your
custom wallpaper image.
To import a new background, click on the background you wish to over-
write. Then click Locate & import background image file. Locate the image
file on your hard drive or network and click Open. You must exit and restart
the Virtual Exhibit Designer to refresh the list of available backgrounds. You
may restore the default backgrounds at any time by selecting Utilities|Import
Background|Restore Default Backgrounds.
Change catalog field display order - This utilities option allows you to change the
order that data fields are displayed on the Catalog Record page.
Change catalog field display names - This utilities option allows you to change
the names of the catalog fields as they appear on the website catalog pages. The
name of each possible field is listed in the left column. The corresponding names
in the right four columns can be edited.
Figure 23-46
Password
Setup

400 PastPerfect Museum Software User’s Guide
Figure 23-47
Field Display
Order
The right column displays the
names of all possible catalog fields.
Set the display order by typing a
new display order number in the left
column.
Figure 23-48
Change
Field Display
Names

Virtual Exhibit 401
File Test & Data File Repair - These two functions are provided to assist in case
of problems with your VE data files. Unless requested by one of our technical sup-
port personnel, you should not use these functions.
CUSTOM WEB SITE DESIGN
Virtual Exhibit provides you with a great deal of flexibility in designing a Web
site that reflects your institution’s personality. However, we recognize that some
museums may wish to create a truly unique look and feel for their Web site. In
fact, some of you may already have professionally-designed sites. Virtual Exhibit
is still a valuable tool.
For a fee, we can program Virtual Exhibit to use your custom Web site as a tem-
plate. Once your HTML design becomes a Virtual Exhibit template, you are free
to change exhibits and add catalog records as you please. There is still no HTML
Web programming knowledge required!
Please contact our support office if you would like more information.

402 PastPerfect Museum Software User’s Guide
