

N H D W E B C E N T R A L ®
T A B L E O F C O N T E N T S
Questions? Visit nhd.org/nhdwebcentral
A U G U S T 2 0 2 2
1
Starting a New Website in an Existing Account.......................
Registering as an Individual Website..............................................
Registering as a Group Website...........................................................
Navigating the Website Builder............................................................
Using Blocks to Build Your Website....................................................
Adding and Linking Additional Pages..............................................
Creating a Design Theme...........................................................................
Using a Preset Design Theme...................................................................
Using an iPad or Tablet..................................................................................
9
2
4
10
16
23
28
29
30
Click the Play button corresponding to the topic to be taken to the step-by-step instructional
video. To view all of the NHDWebCentral videos, visit the NHD YouTube channel playlists.

Go to www.nhdwebcentral.org.
Click on the Register tab under the NHDWebCentral® header.
Enter your date of birth.
After you enter your parent's or guardian's information and your parent or
guardian consents to you creating an NHDWebCentral® website (only for those
under 13), you will be asked to complete a basic registration form.
Please note that these instructions are for students working individually. If you are
working in a group, please use the instructions for a group website (page 4).
Please note: If you are under 13, you need parental consent to use
NHDWebCentral®. Please complete your parent's or guardian's
information. They will receive an email with a notification that you created
an account. Note: Please speak with your teacher if your parent or
guardian cannot access an email address. They can receive the email and
print a copy for your parent or guardian to read.
STOP: Take a moment to fill out your username and password below.
Username
_______________________________________________
Password
_______________________________________________
R E G I S T E R I N G A S A N
I N D I V I D U A L W E B S I T E
N H D W E B C E N T R A L ®
A green box will appear telling you
that your username is good.
A yellow box will appear, telling you that
you need to choose a new username.
Note about usernames
Click here to follow along with the step-by-step instructional video.
Terms of Service and reCAPTCHA checkboxes are required.
Once you click Register, you must sign into your account. Enter your username and
password, then click the grey Sign in button.
Every student needs a unique username. When you enter your username and
click on the Next box, one of two options will appear in the upper-right corner:
2
Questions? Visit nhd.org/nhdwebcentral
A U G U S T 2 0 2 2

Click the grey and yellow Start Now! button to reach your site's landing page.
STOP: Write down your Site Key. Note: You find the site key location in the image
below.
R E G I S T E R I N G A S A N
I N D I V I D U A L W E B S I T E ( C O N T . )
N H D W E B C E N T R A L ®
3
S T R U C T U R E O F N H D W E B C E N T R A L ®
L A N D I N G P A G E
The Edit Sitebutton is where you will create your website and make changes.
TheView Sitebutton lets you preview the most current work saved on your website (you cannot
make edits here).
TheAllow Linkbutton allows other users (like your teacher) to join your website. Once you click
this, the users have 24 hours to complete their registration and link to the site.
This is your Site Key. Your unique URL is just below it.
This is the size limit of your website. The green will shift depending on the media and files you
upload to your website.
If you wish to delete your website, you can click the Remove Site button and assign a new URL to
your account. THIS CAN NOT BE UNDONE!
1.
2.
3.
4.
5.
6.
1 2
3
4
5
6
Jane Smith
Site Key
_______________________________________________
The red numbers in the above image correspond with the numbers below.
Questions? Visit nhd.org/nhdwebcentral
A U G U S T 2 0 2 2

Choose one student to begin this process (we will call this person "Student One").
Go to www.nhdwebcentral.org.
Click on the Register tab under the NHDWebCentral® header.
Enter your date of birth.
After you enter your parent's or guardian's information and your parent or guardian
consents to you creating an NHDWebCentral® website (only for those under 13), you
will be asked to complete a basic registration form.
Please note that these instructions are for students working in groups. If you are
working individually, please use the instructions for individual websites (page 2).
Please note: If you are under 13, you need parental consent to use
NHDWebCentral®. Please complete your parent's or guardian's information.
They will receive an email with a notification that you created an account.
Note: Please speak with your teacher if your parent or guardian cannot access
an email address. They can receive the email and print a copy for your parent
or guardian to read.
STOP: Take a moment to fill out your username and password below.
R E G I S T E R I N G A S A G R O U P
W E B S I T E
N H D W E B C E N T R A L ®
4
Student One
Username
_______________________________________________
Password
_______________________________________________
Note about usernames
Every student needs a unique username. When you enter your username and
click on the Next box, one of two options will appear in the upper-right corner:
A green box will appear telling you
that your username is good.
A yellow box will appear, telling you that
you need to choose a new username.
Click here to follow along with the step-by-step instructional video.
Questions? Visit nhd.org/nhdwebcentral
A U G U S T 2 0 2 2

Terms of Service and reCAPTCHA checkboxes are required.
Once you click Register, you must sign into your account. Enter your username and
password, then click the grey Sign in button.
Student One should now click the grey and yellow Start Now! button to reach your
site's landing page.
R E G I S T E R I N G A S A G R O U P
W E B S I T E ( C O N T . )
N H D W E B C E N T R A L ®
5
Questions? Visit nhd.org/nhdwebcentral
A U G U S T 2 0 2 2
Write down the 8-digit site key to share with your group members.
Student One needs to do two essential tasks:
Note: You find the site key location in the image below.
Site Key
_______________________________________________
Click the grey Allow Link button to allow other students to join your group.
Once you do this, your group member(s) will have 24 hours to complete
their registration and link to the site. Student One can click the Allow Link
button again to re-open for another 24 hours if someone does not get it done
in that period.
S T R U C T U R E O F N H D W E B C E N T R A L ®
L A N D I N G P A G E
The red numbers in the above image correspond with the numbers on the next page.
1 2
3
4
5
6
Jane Smith

R E G I S T E R I N G A S A G R O U P
W E B S I T E ( C O N T . )
N H D W E B C E N T R A L ®
6
G E T T I N G S T A R T E D - - S T U D E N T S T W O
T H R O U G H F I V E
After Student One registers, other group members can complete the registration
process.
Go to www.nhdwebcentral.org.
Click on the Register tab under the NHDWebCentral® header.
Enter your date of birth.
After you enter your parent's or guardian's information and your parent or guardian
consents to you creating an NHDWebCentral® website (only for those under 13),
you will be asked to complete a basic registration form.
Please note: If you are under 13, you need parental consent to use
NHDWebCentral®. Please fill out your parent's or guardian's information.
They will receive an email with a notification that you created an account.
Note: Please speak with your teacher if your parent or guardian cannot
access an email address. They can receive the email and print a copy for your
parent or guardian to read.
STOP: Take a moment to fill out your username and password below.
Questions? Visit nhd.org/nhdwebcentral
A U G U S T 2 0 2 2
The Edit Site button is where you will create your website and make changes.
The View Site button lets you preview the most current work saved on your website
(you cannot make edits here).
The Allow Link button allows other users to join your website. Once you click this, the
users have 24 hours to complete their registration and link to the site.
This is your Site Key. Your unique URL is just below it.
This is the size limit of your website. The green will shift depending on the media and
files you upload to your website.
If you wish to delete your website, you can click the Remove Site button and assign a
new URL to your account. THIS CAN NOT BE UNDONE!
1.
2.
3.
4.
5.
6.

R E G I S T E R I N G A S A G R O U P
W E B S I T E ( C O N T . )
N H D W E B C E N T R A L ®
7
Student Five
Username
_______________________________________________
Password
_______________________________________________
Student Two
Username
_______________________________________________
Password
_______________________________________________
Student Three
Username
_______________________________________________
Password
_______________________________________________
Student Four
Username
_______________________________________________
Password
_______________________________________________
See page 4, "Note about usernames."
Questions? Visit nhd.org/nhdwebcentral
A U G U S T 2 0 2 2

R E G I S T E R I N G A S A G R O U P
W E B S I T E ( C O N T . )
N H D W E B C E N T R A L ®
8
Terms of Service and reCAPTCHA checkboxes are required.
Once you click Register, you must sign into your account. Enter your
username and password, then click the grey Sign in button.
Students Two through Five will enter the site key carefully into the field under
the Link to an Existing Website heading.
Once the other group members click the Link, they will come to the same
landing page that Student One sees.
You have successfully linked your accounts and can start working on your
group project!
Questions? Visit nhd.org/nhdwebcentral
A U G U S T 2 0 2 2
FAQ: What do I do if I accidentally click the Start Now button instead
of entering my group's existing site key?
Answer: On your landing page, click the red Remove Site button and
confirm the deletion. You will return to the Start Now/Link to an
Existing Website page.
Please note: Be sure you want to remove the site from your account.
This action cannot be undone.

S T A R T I N G A N E W W E B S I T E
I N A N E X I S T I N G A C C O U N T
Questions? Visit nhd.org/nhdwebcentral
A U G U S T 2 0 2 2
N H D W E B C E N T R A L ®
9
If you created a website for the previous contest season, you could use the same
account to create a website for the current contest season.
Go to www.nhdwebcentral.org.
Click on the Sign-in tab under the NHDWebCentral® header.
Insert your username and password.
If you forgot your username and/or password, click on the Forgot Password.
button under the Sign-in tab.
Fill out the Find your Account form to create a new password for your existing
account.
If you receive an Account Not Found error, please click on the Return to
Home button. Select the Help tab and click the Contact button to submit a
ticket to NHDWebCentral® staff.
Once you are logged in, you can create an individual website, group website or
connect to an existing group website for the current contest season.
Click here to follow along with the step-by-step instructional video.

Click here to follow along with the step-by-step instructional video.
NHDWebCentral® has several key features to help you build your website. You are
taken to the website builder when you log in and click the blue Edit Site button. The
editor has three sectionsand four major segments.
Sections:
N A V I G A T I N G T H E W E B S I T E
B U I L D E R
N H D W E B C E N T R A L ®
10
Section 1: Control Bar
Section 2: Toolbox Pane
Section 3: Builder Pane
Section 1:The Control Bar gives you "control" of your website. It contains
Manage Pages, Save, Show/Hide Borders, Preview, Fullscreen Mode, Export,
Undo, Redo, Clear Page, Import, Help, and another Save.
Section 2: The Toolbox Pane is where all blocks and block settings reside.
Section 3: The Builder Pane is where all your elements will reside when you
drag and drop them from the Toolbox Page. This website view shows how all
elements are laid out on your page.
Questions? Visit nhd.org/nhdwebcentral
A U G U S T 2 0 2 2

Segment 1 – View Options
N A V I G A T I N G T H E W E B S I T E
B U I L D E R ( C O N T . )
N H D W E B C E N T R A L ®
11
Segments:
Most of the time, you want to work
with the website in Desktop View.
This shows how your website looks
when viewed on a laptop or desktop.
This is how judges will view your
website.
Tablet View will show you what your
website will look like on a tablet.
Button What it doesWhat it looks like
Desktop View
Tablet View
Mobile View will show you what your
website will look like on a mobile
phone. Remember that you cannot
edit your website on a mobile phone.
Mobile View
Segment 1
Segment 4
Segment 3
Segment 2
Note about Segment 1
The Save and Palette icons will appear twice in your toolbar if you have a large
screen. See Segment 3 for more information on those icons.
Questions? Visit nhd.org/nhdwebcentral
A U G U S T 2 0 2 2

Segment 2– Pages and File Library
N A V I G A T I N G T H E W E B S I T E
B U I L D E R ( C O N T . )
The File Library is where all the
media you upload to your website is
stored. Files must remain in the file
library to be correctly viewed on your
website.
N H D W E B C E N T R A L ®
12
Button What it doesWhat it looks like
File Library
Page Manager
or
You can select which page you want
to edit in the Page drop-down. You
can also select Manage Pages from
the drop-down or the file cabinet
icon to add, remove, or rename
pages.
Segment 3– Controls
Button What it does
Save
When building your website, you will see lines around the borders of
the various elements, such as text boxes. If you click the Border
Guides button, it turns these borders off. Click it again, and it turns
them on. It is easier to work with borders turned on. Viewers will not
see the borders.
Border Guides
If you want to see your website as a viewer, click the Preview button
(eye icon). Your website will open in a new tab. When finished, close
the tab or click back to the editor tab.
Preview
Questions? Visit nhd.org/nhdwebcentral
A U G U S T 2 0 2 2
Segment 3– Controls (Cont.)
N A V I G A T I N G T H E W E B S I T E
B U I L D E R ( C O N T . )
N H D W E B C E N T R A L ®
13
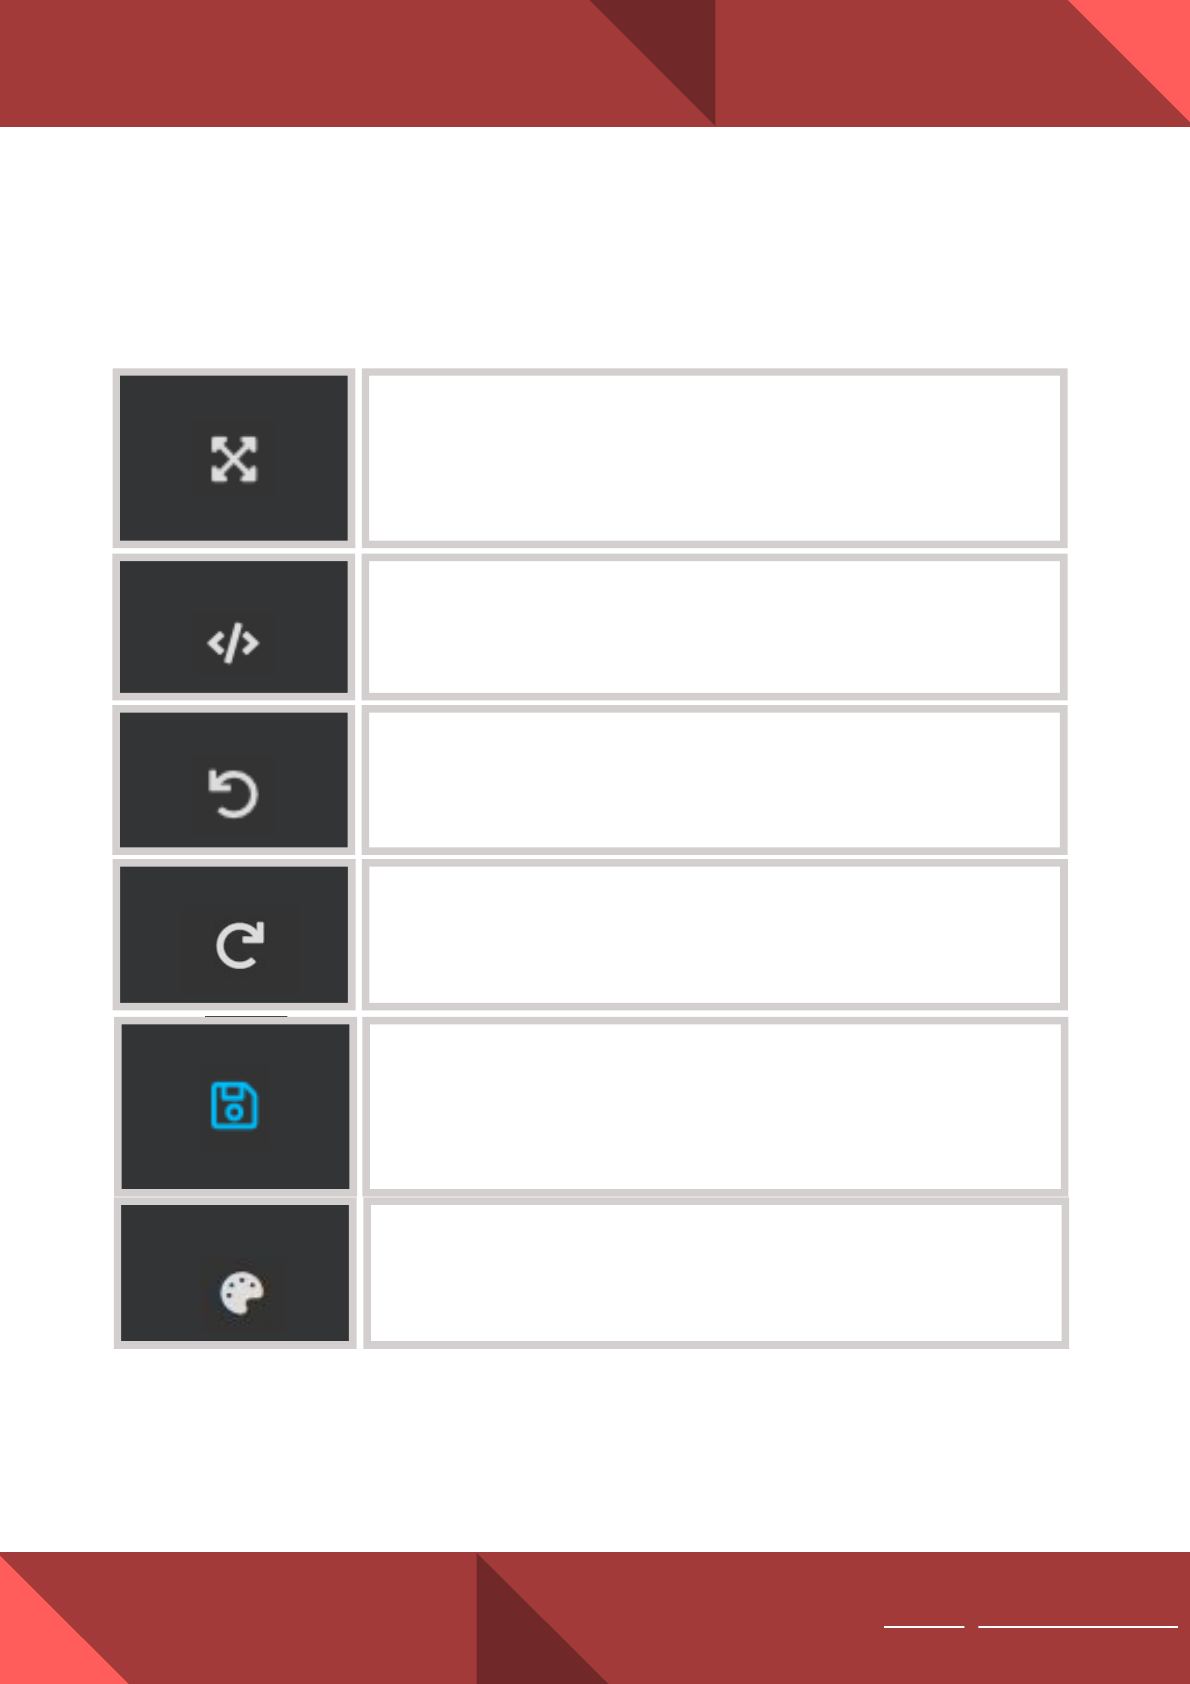
If you want a larger screen while editing, click the Full Screen
button. When you are done, click your keyboard's Escape (ESC) key
to exit.
Full Screen
The Export Code button works per page. You can use this to export
a ZIP file of your HTML and CSS per page. You can also select the
HTML and CSS in each column and copy and paste them to your
chosen destination.
Export Code
If you make a mistake, hit the Undo button to reverse the previous
action.
Undo
Accidentally "undo" too many features? Hitting the Redo button will
bring back the last "undo."
Redo
The website does not automatically save changes. Save frequently.
When you click the blue Save button (floppy disk icon), a green
Saved! pop-up box will appear. This means your work was saved.
Save
If you want to create a design theme across your website pages, click
the Palette icon. This will open the Site Theme Manager.
Palette
Questions? Visit nhd.org/nhdwebcentral
A U G U S T 2 0 2 2

Segment 3– Controls (Cont.)
N A V I G A T I N G T H E W E B S I T E
B U I L D E R ( C O N T . )
N H D W E B C E N T R A L ®
14
The Import Code button allows you to import or write HTML code.
This is not required. You should add coding before building out
a page to avoid corrupt code. Note: JavaScript is not supported and
will be stripped if applied in the editor.
Import Code
The Clear Page button will delete everything on the current page
and revert it to a blank template. You will be prompted with a
warning before the page clears. If you clear your page accidentally,
hit the Undo button to reverse the action. This button does not
delete your entire website.
Clear Page
Click the Help button to navigate between the Getting Started and
Abouttabs (image below). NHD provides guides and video
instructions to help you build your website. The Contact Us form
can also be found on the About tab if your questions are still not
answered. (About tab shown below.)
The yellow Clean CSSbutton under the About tab allows you to
clean up the coding on the current page if you run into styling issues.
Lastly, the Show on Start prompt can be unchecked when you open
the editor under the Getting Started tab.
Help
Your website link and size
limit are at the top,
helpful links and
information are in the
middle, and the button to
clean your styling issues is
at the bottom.
Questions? Visit nhd.org/nhdwebcentral
A U G U S T 2 0 2 2
Button
Segment 4– Design Elements
N A V I G A T I N G T H E W E B S I T E
B U I L D E R ( C O N T . )
N H D W E B C E N T R A L ®
15
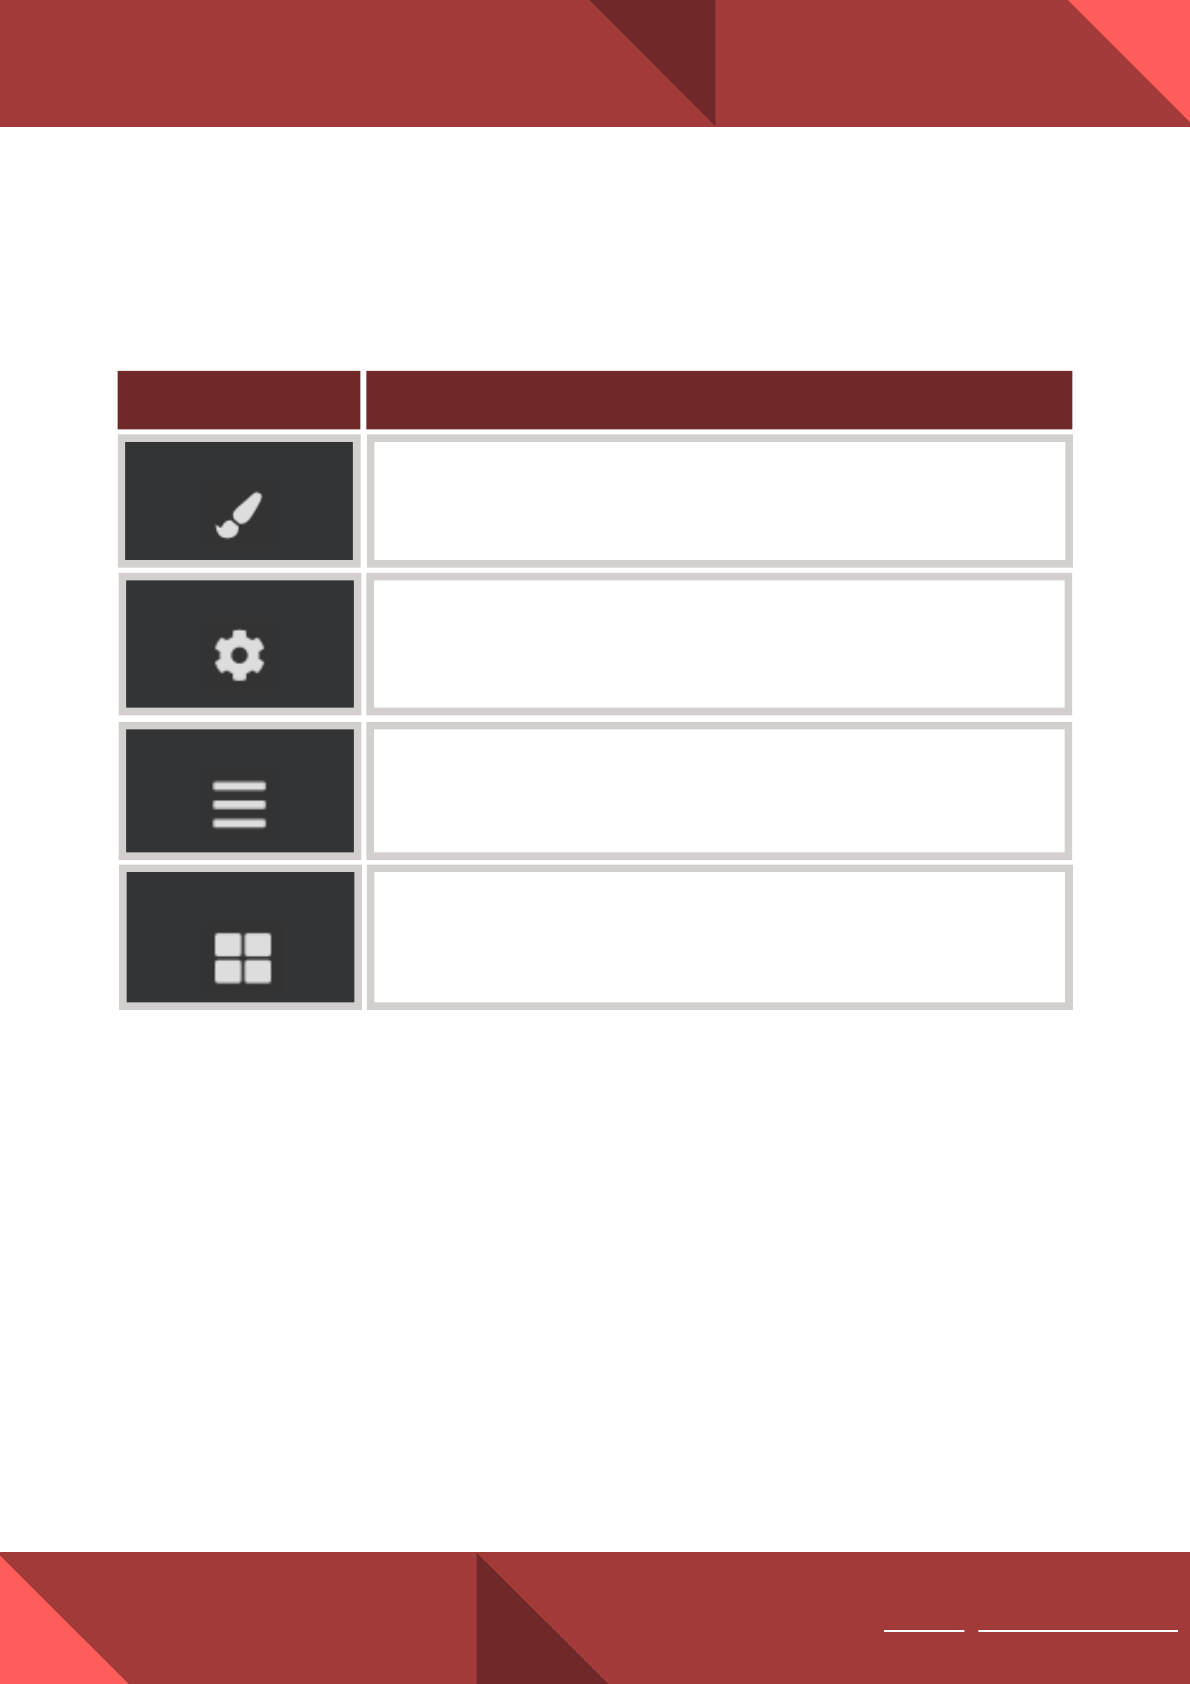
The Block Styling button is used to make changes to font,
formatting, alignment, decorations, dimensions, and other settings.
Block Styling
This button does not function on the user's end. Please ignore it.
Gear
This button does not function on the user's end. Please ignore it.
Layers
The Blocks button will provide all the elements you need to build
your website. All of these Blocks are drag-and-drop.
Blocks
What it does
Questions? Visit nhd.org/nhdwebcentral
A U G U S T 2 0 2 2

Building your website on NHDWebCentral® is like building a tower of blocks. It is
up to you to decide how to organize your blocks for your viewers. Access the
blocks menu by clicking on the Blocks button in the upper right corner of the
editor (the four squares icon).
Basic Blocks
Click here to follow along with the step-by-step instructional video.
U S I N G B L O C K S T O B U I L D
Y O U R W E B S I T E
N H D W E B C E N T R A L ®
16
How do I change the color/font?
Highlight the text, and the Style
Pane will appear in the Toolkit Pane
on the right. Go to the Font section.
Here you have options to change
alignment (left, center, right), font,
color, size, etc.
The Title block places a text box
with a large font to use as the
page's title or a section. You can
then edit the text to whatever text
you prefer.
The Subtitle block places a text
box with the medium font to use as
a subtitle. You can use it to title
sections. The text is smaller than
the Title block. You can then edit
to whatever text you prefer.
The Section block allows you to
organize within containers without
having the same settings and
formatting as the container.
Block Can I... ?What it does
The Header block places a text box
with a medium size font. You can
use it to title sections. The text is
smaller than the Subtitle block.
You can then edit the text to
whatever text you prefer.
Questions? Visit nhd.org/nhdwebcentral
A U G U S T 2 0 2 2
How do I change the color/font?
Highlight the text, and the Style
Pane will appear in the Toolkit
Pane on the right. Go to the Font
section. Here you have options to
change alignment (left, center,
right), font, color, size, etc.
How do I change the color/font?
Highlight the text, and the Style
Pane will appear in the Toolkit
Pane on the right. Go to the Font
section. Here you have options to
change alignment (left, center,
right), font, color, size, etc.

Basic Blocks (Cont.)
U S I N G B L O C K S T O B U I L D
Y O U R W E B S I T E ( C O N T . )
N H D W E B C E N T R A L ®
17
Can I change the font/style after I
enter this quote block?
Yes. Highlight the text, and the Style
Pane will appear in the Toolkit
Pane on the right. Go to the Font
section. Here you have options to
change alignment (left, center, right),
font, color, size, etc.
ABlock Quote is a pre-styled box
that you can use to offset a block
quote from the rest of the page.
The Text block allows you to enter
text on your page.
The Image block allows you to add
an image to your website.
The Text section block is a pre-set
element that includes a header
block and a text block.
Can I change the font/style after I
enter this text block?
Yes. Highlight the text, and the Style
Pane will appear in the Toolkit
Pane on the right. Go to the Font
section. Here you have options to
change alignment (left, center, right),
font, color, size, etc.
Can I change the font/style after I
enter this text block?
Yes. Highlight the text, and the Style
Pane will appear in the Toolkit
Pane on the right. Go to the Font
section. Here you have options to
change alignment (left, center, right),
font, color, size, etc.
Questions? Visit nhd.org/nhdwebcentral
A U G U S T 2 0 2 2
How do I center an image?
Watch this video for tips on adding
images and changing their
justification (right, left, center).

Basic Blocks (Cont.)
U S I N G B L O C K S T O B U I L D
Y O U R W E B S I T E ( C O N T . )
N H D W E B C E N T R A L ®
18
The Image & Citation block is a
pre-set element that allows you to
add an image with a citation text
box right below it.
The Image Slider allows you to
create a slideshow of images. You
will need to drag a Section block
into each slide and then an Image
block into each Section block to
keep your sliders organized.
PDF files for viewing
Audio (MP3) files for listening
Video (MP4, MOV) files for
viewing
The Embed Multimedia block
allows you to upload:
TheLink block allows you to add
an image or text to create a
hyperlink to another part of your
website.
The Link Text block allows you to
hyperlink within your website. By
default, the text will highlight blue
and change to purple when clicked.
How do I change the color/font?
Highlight the text, and the Style
Pane will appear in the Toolkit Pane
on the right. Go to the Font section.
Here you have options to change
alignment (left, center, right), font,
color, size, etc.
How do I add more than three
slides? Select the last slide and
click the duplicate button until you
have the desired number of slides.
Can I use different multimedia
in the slides? Yes.
Can I hyperlink text on my
website? Yes, this block will allow
you specifically to hyperlink text on
your website.
How do I add my process paper
and annotated bibliography?
Drag the embed multimedia button
into your container. Then double-
click to upload the PDF versions of
your process paper and annotated
bibliography.
Questions? Visit nhd.org/nhdwebcentral
A U G U S T 2 0 2 2
How do I add a Link Block?
Watch this video for tips on
adding a link block and linking
pages.

Basic Blocks (Cont.)
Structure Blocks
U S I N G B L O C K S T O B U I L D
Y O U R W E B S I T E ( C O N T . )
N H D W E B C E N T R A L ®
19
The Custom Code block allows
HTML coding to be added or
displayed on the website.
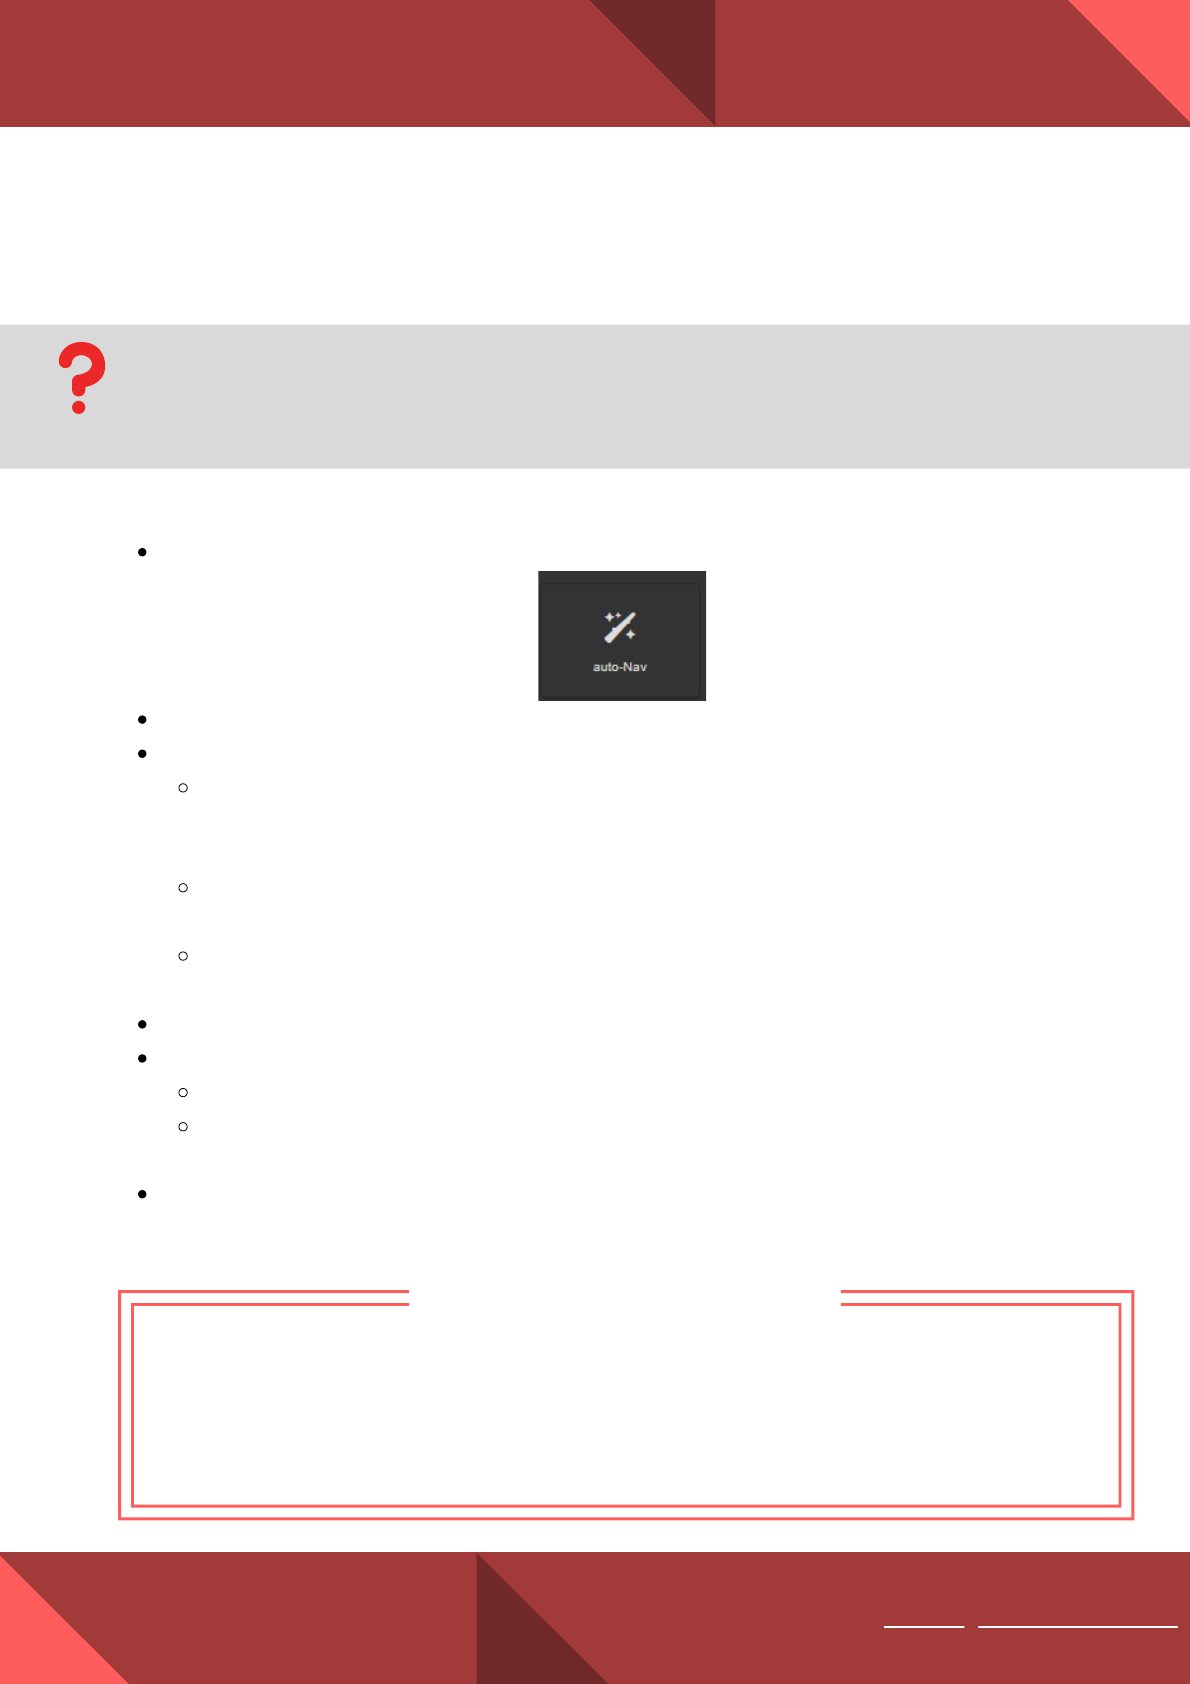
Auto-Navbar populates an
organized, horizontal menu across
your page. This navigation bar also
supports subpages and hiding
pages.
Do I have to rebuild Auto-Nav
on every page? No, once you set
the order in Auto-Nav on one
page and drop Auto-Nav onto
other pages, the order will stay the
same.
The Horizontal Rule block will
place a horizontal line across the
page. These act as dividers within
a page.
How do I change the color of the
line? Click on the line, and then the
Style Pane will appear in the Toolkit
Pane on the right. Click the arrow
next to Decorations, select a
background color, and click Ok.
If you think your blocks are too
close, you can add extra spacing
with the Spacer block.
Block Can I... ?What it does
Questions? Visit nhd.org/nhdwebcentral
A U G U S T 2 0 2 2
Note: JavaScript is not supported and
will be stripped if applied in the editor.

Easy Layout Blocks
Block Can I... ?What it does
U S I N G B L O C K S T O B U I L D
Y O U R W E B S I T E ( C O N T . )
N H D W E B C E N T R A L ®
20
The 2 Columns block creates two
equal columns. You can place
elements side by side in each cell
(e.g., text box, image with captions,
etc.).
Can I create more columns
after placing a Columns block?
Yes, you can duplicate a column,
but if you want them to spread
across the page, you will need to
resize the columns accordingly.
The 4 Columns block creates four
equal columns. You can place
elements side by side in each cell
(e.g., text box, image with captions).
The 3/4/3 Columns block creates
columns across the page. The
middle column is wider than the
outside columns. You can place
elements side by side in each cell
(e.g., text box, image with captions).
The 3/7 Columns block creates
columns across the page. The right
side is wider than the left side. You
can place elements side by side in
each cell (e.g., text box, image with
captions).
The 3 Columns block creates three
equal columns. You can place
elements side by side in each cell
(e.g., text box, image with captions).
Can I create more columns
after placing a Columns block?
Yes, you can duplicate a column,
but if you want them to spread
across the page, you will need to
resize the columns accordingly.
Can I create more columns
after placing a Columns block?
Yes, you can duplicate a column,
but if you want them to spread
across the page, you will need to
resize the columns accordingly.
Can I create more columns
after placing a Columns block?
Yes, you can duplicate a column,
but if you want them to spread
across the page, you will need to
resize the columns accordingly.
Can I create more columns
after placing a Columns block?
Yes, you can duplicate a column,
but if you want them to spread
across the page, you will need to
resize the columns accordingly.
Questions? Visit nhd.org/nhdwebcentral
A U G U S T 2 0 2 2

Easy Layout Blocks (Cont.)
U S I N G B L O C K S T O B U I L D
Y O U R W E B S I T E ( C O N T . )
N H D W E B C E N T R A L ®
21
The 7/3 Columns block creates
columns across the page. The right
side is narrower than the left side.
You can place elements side by
side in each cell (e.g., text box,
image with captions).
The Flexbox creates two equal-
sized columns that can be
manipulated to any size on the
page.
Can I create more columns
after placing a Columns block?
Yes, you can duplicate a column,
but if you want them to spread
across the page, you will need to
resize the columns accordingly.
Questions? Visit nhd.org/nhdwebcentral
A U G U S T 2 0 2 2
Some elements must be uploaded (i.e., multimedia, images, files, etc.). To
upload them, first, drag the desired block onto the screen. Then, the upload box
(for multimedia, it will ask you to double-click the box) will appear. You can
drag the elements you wish to upload onto the screen or directly from your
computer.
Once the file has been uploaded, wait for the File uploaded dialog box to
appear in the top right corner before closing the window. Videos and larger
files can take a while until they are uploaded and rendered into the builder.
Once your file has populated with a thumbnail in the right column, click on
that file to add it to your website. Click the "x" in the top right corner of the
files menu to go back to your page.
FAQ: How do I add these blocks to my website?
Answer: Adding blocks to your website is as easy as dragging and dropping them
onto the page. Watch this video to see how to drag and drop blocks onto your
website.

U S I N G B L O C K S T O B U I L D
Y O U R W E B S I T E ( C O N T . )
TheUp Arrow button moves to the next
element on the page among your blocks.
This is helpful when you have many blocks
within an area.
The Move Arrow button lets you move
the element around your page.
The Pencil button opens the settings
box relevant to the element selected.
ThisPencil button wraps text in a cell if
the text extends past the cell border.
N H D W E B C E N T R A L ®
22
The Duplicate button makes a copy of
the selected element.
The Delete button deletes the selected
element from your page.
The Link button opens the internal link
settings box. This is how you hyperlink
text and images on your website.
Questions? Visit nhd.org/nhdwebcentral
A U G U S T 2 0 2 2
Settings
General
Font
Dimension
Decorations
Extra
Flex
FAQ: How do I edit elements once they are added to a page?
Answer: Each block has its own settings when you select it on your page.
These settings show up in the Toolkit Pane on the right side. Depending on
the block you are editing, the following setting sections might appear:
Watch this video to see how these settings appear on the website builder.

A D D I N G A N D L I N K I N G
A D D I T I O N A L P A G E S
N H D W E B C E N T R A L ®
23
Note about page names
Keep the page names simple and avoid spaces. For example, if I want to build a page about
historical context, call that page "context," "background," or "page2." This will make it easier to
navigate to pages.
In Manage Pages settings, you can do the following:
Create a new page. On the right side of the screen, under Create New Page:
Give your page a Page Name (this is the URL name).
Give your page a Title (how it will appear on the auto-nav menu).
Select a template (or None to start from scratch).
Duplicate an already existing page.
Click the grey Add Page button.
Delete a page. On the left side of the screen, you will see the pages you have
created. Select the trash can next to the page name if you do not want that page.
Edit a page. On the left side of the screen, you will see the pages you have
created. If you want to edit the page name of the title, click the pencil in the
square icon next to the page name.
Duplicate a page. When creating a new page, you have the option to duplicate a
page you already created. Next to Duplicate Page, select the page you wish to
duplicate from the drop-down menu. This feature comes in handy when there are
blocks you would like to duplicate onto other pages.
Click here to follow along with the step-by-step instructional video.
Questions? Visit nhd.org/nhdwebcentral
A U G U S T 2 0 2 2
Drag and drop the Auto-Nav block on your page to a container or cell.
Double-click the Auto-Nav block, select the box and click on the pencil icon.
When the Nav Editor appears, you have several options:
Reorganize the pages by dragging/dropping the pages' titles in the list. You will
see a green line indicating where the page will be moved to and a pink line
indicating the creation of a subpage.
Select a page, and under the Update Menu Item title, you can rename the title
of your page. If you change the title of your page, remember to click Set.
You can hide pages from displaying Auto-Nav by checking the Hide the Menu
Item option under the Update Menu Item screen. Remember to click Set.
When you are happy with your list of organized pages, click Save.
To change the alignment of the Auto-Nav bar:
With Auto-Nav selected, click on Flex settings in the Toolbox Pane to the right.
Enable Flex container and change the alignment under the justify setting (start,
end, space between, space around, or center).
Once you save your Auto-Nav on a page, move to another page and drag and drop
the Auto-Nav block onto the page. The order you created in Nav Editor on the first
page will be the same.
FAQ: How do I link my pages together so that my viewers can see them?
Answer: Adding an Auto-Navallows you to organize your pages and subpages easily. Watch
this video to see how to add an Auto-Nav bar.
Setting up Auto-Nav
A D D I N G A N D L I N K I N G
A D D I T I O N A L P A G E S ( C O N T . )
N H D W E B C E N T R A L ®
24
Notes about Auto-Nav
Pro tip: You could always design your first page with Auto-Nav (style and
appearance setup) and duplicate that page, so the styling and appearance
remain constant across all pages.
You can always come back to the Nav Editor to reorganize your pages.
Questions? Visit nhd.org/nhdwebcentral
A U G U S T 2 0 2 2

FAQ: How do I add Enter Site, Previous, or Next buttons (link blocks) to each
page?
Answer: Decide where you want your button, and then drag in a Link block from the
Toolbox Pane. You can add text or add an image. If you add a photo, make sure it is
clear what to do; a judge might not know to click on a star picture to move to the next
page.
Once you add your text or image, you need to direct the link. Select the block and click
the chain icon to open the Internal Link editor. This will allow you to select the page
you want to link to. Click Save and Close.
Watch this video to help you add Link Blocks.
A D D I N G A N D L I N K I N G
A D D I T I O N A L P A G E S ( C O N T . )
N H D W E B C E N T R A L ®
25
Questions? Visit nhd.org/nhdwebcentral
A U G U S T 2 0 2 2

Example of a Basic Template
This template is preset with headers, images, and text blocks to get you started
building a page.
A D D I N G A N D L I N K I N G
A D D I T I O N A L P A G E S ( C O N T . )
N H D W E B C E N T R A L ®
26
Questions? Visit nhd.org/nhdwebcentral
A U G U S T 2 0 2 2
FAQ: What do the page templates look like?
Answer: See the options below.
Example of a Blank/Empty Template
This template is blank. Start by dragging and dropping blocks into the container or
code/paste code into the Import editor.

Example of a Splash Template
This template is preset with headers, images, and text boxes to get you started
building a page. The picture at the top of the page gives you space to add a
"splash" of a relevant photo to your topic.
A D D I N G A N D L I N K I N G
A D D I T I O N A L P A G E S ( C O N T . )
N H D W E B C E N T R A L ®
27
Questions? Visit nhd.org/nhdwebcentral
A U G U S T 2 0 2 2
Example of a Photo Gallery Template
This template is preset with photo gallery elements. This template can be handy
for creating a timeline or displaying images or documents relevant to your topic.

Go to the Control Bar across the top of the page. Click the Palette icon next to
the Save icon. This will open the Site Theme Manager.
In the Site Theme Manager, you can set your design themes for your website's
font, background, and menu.
Font Family - This sets the font across your website.
Color - This sets the font color across your website.
Color - This sets the color of your background across your website.
Image - If you want an image as your background, this sets your background as
that image across your website.
Image Style - If you select an image of your background, you have several
options on how the image appears: default, cover, no repeat, repeat x, repeat y
Container - This sets the color of your containers across your website.
Font Color - This sets the font color of your Auto-Nav menu.
Background Color - This sets the background color of your Auto-Nav menu.
Menu Item Color - This sets the color of your Auto-Nav menu.
Menu Justification - This sets the justification (right, center, left) of your Auto-
Nav menu.
Follow these instructions to set your website theme across all of your pages:
Font
Background
Menu
Do not forget to click Save after setting your website's design theme!
C R E A T I N G A D E S I G N
T H E M E
N H D W E B C E N T R A L ®
28
Click here to follow along with the step-by-step instructional video.
If you want one of your site's pages to have a different theme, go to the page,
click the element you wish to edit (font, background, menu) and click the Block
Styling icon to make edits to that particular page.
Changing the font, background, and menu settings in the Toolbox Pane will
overwrite the settings in the Site Theme Manager. Leaving the font,
background, and menu settings as "blank" or "none" in the Toolbox Pane will
enable the Site Theme Manager settings.
Important to note
Questions? Visit nhd.org/nhdwebcentral
A U G U S T 2 0 2 2

U S I N G A P R E S E T D E S I G N T H E M E
N H D W E B C E N T R A L ®
29
If you want one of your site's pages to have a different theme, go to the page,
click the element you wish to edit (font, background, menu) and click the Block
Styling icon to make edits to that particular page.
Changing the font, background, and menu settings in the Toolbox Pane will
overwrite the settings in the Site Theme Manager. Leaving the font,
background, and menu settings as "blank" or "none" in the Toolbox Pane will
enable the Site Theme Manager settings.
Important to note
Go to the Control Bar across the top of the page. Click the Palette icon next to the
Save icon. This will open the Site Theme Manager.
In the Site Theme Manager, you will see multiple preset themes. Select which one
you would like to use across your pages. Then click Save.
If you'd like to select a different preset theme, repeat the process until you find one of
the color themes you would like to use.
Follow these instructions to set a preset website theme across all of your pages:
Click here to follow along with the step-by-step instructional video.
Questions? Visit nhd.org/nhdwebcentral
A U G U S T 2 0 2 2

Depending on whether you are starting a new website or logging into an
existing one, you can use a tablet to build your website.
You will open a browser on your tablet and register/log in to begin your
website by going to nhdwebcentral.org.
You can refer to the instructions on pages 2-9 for registering and creating
your website, as the instructions remain the same.
The blue control box that appears with your elements (explained on page 22)
will help you navigate your blocks and edit on a tablet.
Devices that NHDWebCentral® can be created/built on:
iPad
Amazon Fire
Android tablets
On your tablet, you will go to nhdwebcentral.org through your browser to
access your website.
NOTE: While you can build your website on a tablet, refining and testing it on a
laptop or desktop computer would be best. This ensures the functionality works
correctly when a judge or teacher views your website.
U S I N G A N I P A D O R T A B L E T
N H D W E B C E N T R A L ®
30
When working on a tablet, you will want to rely on the tools found in this video.
Notes about tablets
Questions? Visit nhd.org/nhdwebcentral
A U G U S T 2 0 2 2
