
N-central
Installation and Upgrade Guide
Version 2022.5
Last Updated: Wednesday, July 6, 2022

Contents
Contents 2
Network Requirements 6
Agent and probe requirements 11
Windows Agents: 11
N-able N-central System requirements 12
System requirements by number of devices managed 12
Notes 13
Examples of supported servers 14
Support for virtualized environments 15
About virtualization 15
Recommended configuration for the virtualized server 16
Supported Software 16
Browsers 16
Remote Control 17
Report Manager 17
Automation Manager 17
SNMP Community String 17
Supported Operating Systems 17
Windows Agents: 17
Windows Server 2022 18
Windows Server 2019 18
Windows Server 2016 18
Windows Server 2012 18
Windows 11 18
Windows 10 19
Windows 8 and 8.1 19
Windows 7 19
macOS Agents 19
page 2

Linux Agents 19
AV Defender 20
Workstation Operating Systems 20
Tablet And Embedded Operating Systems 20
Server Operating Systems 20
Patch Manager 20
Workstation Operating Systems 20
Server Operating Systems 21
Windows Update Agent 21
Automation Manager 21
Workstation Operating Systems 21
Server Operating Systems 21
Disk Encryption Manager 21
Installing N-able N-central 24
What do you want to do? 24
Prepare installation media 25
DVD Creation 25
USB Flash Drive 25
Linux and MacOS 25
Windows 25
Install N-able N-central on a physical server 27
What's next? 28
Install N-able N-central as a guest on an ESX/ESXi 6.0 or newer server 29
What's next? 30
Install N-able N-central as a guest on Windows Server 2012 R2 or newer Hyper-V server 31
What's next? 33
Install N-able N-central on Microsoft Azure Managed Disks 34
Deployment 34
First run 35
page 3

VMSizing 35
Notes 36
What's next? 37
Deployment script for Microsoft Azure - Managed Disks 38
Azure information 38
Azure Region 38
Resource naming prefix 38
VM size 38
Operating system disk size 39
Operating system disk storage type 39
Data disks sizes 39
Number of data disks 39
Data disks storage type 39
Boot diagnostics storage account 39
Boot diagnostics storage account type 40
Accelerated networking 40
IPv6 Support 40
N-central sizing on Azure Managed Disk deployment 41
Install N-able N-central on Amazon AWS EC2 42
What's next? 42
Upgrading N-able N-central 43
Step 1: Back up the N-able N-central server 44
Step 2: Install the N-able N-central server upgrade 45
Step 3: Post-installation steps 46
Rebuild or Migrate your N-able N-central server 48
The server is not working properly or starting successfully 48
An upgrade has failed but you can still log in 48
Migrating an existing N-able N-central server to another computer 50
Log in to N-able N-central for the first time 52
page 4


Network Requirements
N-able N-central requires access to the following ports for regular operation. For a complete list of all ports
used by N-able N-central, see the N-able N-central
Security White Paper
.
Port
Number
Port Location
Description
N-able N-central
Server
Managed Device
Inbound Outbound Inbound Outbound
20
√
Used for FTP connections, particularly when
configured for backups.
21
√
Used for FTP connections, particularly when
configured for backups.
22
√ √
SSH - used for remote control sessions. The
firewall must be configured to allow access from
the Internet to this port on the N-able N-central
server.
25
√
SMTP - used for sending mail.
53
√
Used for DNS.
80
√ √ √
HTTP - used for communication between the N-
able N-central UI and agents or probes
(including MSPConnect and MSP Anywhere).
The firewall must be configured to allow access
from the Internet to this port on the N-able N-
central server.
This port must also be open for outbound traffic
if the N-able N-central server is monitoring the
HTTP service on a managed device.
Inbound access to port 80 on the N-able N-central server can be blocked provided that all
Agents are configured to use HTTPS and the N-able N-central server is accessed over port
443 using HTTPS.
123
√
Used by the NTP Date service which keeps the
server clock synchronized. Normally using UDP
(although some servers can use TCP).
page 6

Port
Number
Port Location
Description
N-able N-central
Server
Managed Device
Inbound Outbound Inbound Outbound
135
√
Used by Agents and Probes for WMI queries to
monitor various services.
Inbound from the Windows Probe to the
Windows Agent.
139
√
Used by Agents and Probes for WMI queries to
monitor various services.
Inbound from the Windows Probe to the
Windows Agent.
443
√ √ √
HTTPS - used for communication between the N-
able N-central UI and Agents or Probes
(including MSP Connect and MSP Anywhere).
Port 443 is the TCP port needed for SSL (HTTPS)
connections. The firewall must be configured to
allow access from the Internet to this port on the
N-able N-central server.
This port must also be open for outbound traffic
if the N-able N-central server is monitoring the
HTTPS service on a managed device.
Backup Manager relies on Port 443 TCP
outbound. It is almost always open on
workstations but may be closed on servers. This
port must be open for outbound traffic on the N-
able N-central server.
Used by Agents and Probes for XMPP traffic.
Outbound access to port 443 for Managed
Devices is recommended but not required.
To activate EDR the N-able N-central server
needs outbound HTTPS access to port 443 and
the following domains:
n
*.sentinelone.net
n
sis.n-able.com
page 7

Port
Number
Port Location
Description
N-able N-central
Server
Managed Device
Inbound Outbound Inbound Outbound
n
keybox.solarwindsmsp.com
Pendo allows us to provide in-UI messaging and
guides when there are important changes, new
features onboarding, or other critical messages
that we need to tell you about. You can gain
access to these important messages, and help
us make important design decisions from usage
data, by allowing outbound HTTPS/443 access
from your N-central server to the following URLs:
n
cdn.pendo.io
n
data.pendo.io
n
pendo-io-static.storage.googleapis.com
n
pendo-static*.storage.googleapis.com
445
√
Used by Agents and Probes for WMI queries to
monitor various services.
1234
√ √
Used by MSPConnect in UDPmode.
1235
√ √
1433 * * * Outbound on the N-able N-central server, port
1433 is used by Report Manager for data export.
On managed devices, it is also used by Agents
(inbound) and Probes (out- bound) to monitor
Backup Exec jobs.
Inbound from the local LAN and not the
Internet.
* Port access is only required if you have installed the corresponding product. For example,
access to port 1433 is only required if you have installed Report Manager or if you are managing
Backup Exec jobs.
page 8

Port
Number
Port Location
Description
N-able N-central
Server
Managed Device
Inbound Outbound Inbound Outbound
5000
√
Backup Manager will use local port 5000. If this
port is unavailable, Backup Manager will detect a
free port automatically (starting from 5001, 5002
and up).
5280
√ √
Used by Agents and Probes for XMPP traffic.
Outbound access to port 5280 for Managed
Devices is recommended but not required.
8014
√
Backup Manager requires access to port 8014.
This value cannot be modified.
Inbound from the local LAN and not the
Internet.
8443
√ √ √
The default port for the N-central UI.
Port 8443 is the TCP port needed for SSL
(HTTPS) connections. The firewall must be
configured to allow access from the Internet to
this port on the N-able N-central server.
This port must also be open for outbound traffic
if the N-able N-central server is monitoring the
HTTPS service on a managed device.
8800
√
The Feature Flag System in N-able N-central
needs to talk
tomtls.api.featureflags.prd.sharedsvcs.system-
monitor.com.
Used by N-able – generally during Early Access
Preview and Release Candidate testing – to
enable and disable features within N-able N-
central.
page 9

Port
Number
Port Location
Description
N-able N-central
Server
Managed Device
Inbound Outbound Inbound Outbound
10000
√
HTTPS - used for access to the N-able N-central
Administration Console (NAC). The firewall must
be configured to allow access from the Internet
to this port on the N-able N-central server.
N-able recommends excluding all other inbound
traffic to port 10000 except from N-able Ports for
Support section below.
10004
√ √
N-able N-central Agents must be able to
communicate with a Probe on the network over
port 10004 in order for Probe caching of software
updates to function properly.
Inbound from the local LAN and not the
Internet.
15000
√ √
For downloading software patches, port 15000
must be accessible for inbound traffic on the
Probe device while it must be accessible for
outbound traffic on devices with Agents.
Inbound from the local LAN and not the
Internet.
page 10

Agent and probe requirements
To use agents and probes, devices require the following minimum hardware requirements:
n
RAM: 512 MB
n
Disk space: 500 MB
n
Processor: x86 or x64
Windows Agents:
n
Microsoft .NET Framework 4.5.2 (or later)
page 11

N-able N-central System requirements
The following requirements are for typical usage patterns, acknowledging that some patterns may require
greater system resources for a N-able N-central server than others.
If you have any questions about how your needs affect the system requirements of your N-able N-central
Processor Server class x86_64 CPUs manufactured by Intel or AMD (i.e. Xeon or EPYC). Please refer to
the Red Hat Hardware Ecosystem for further details.
Operating
System
You do not need to install a separate Operating System to run N-able N-central. The N-able
N-central ISO includes a modified version of CentOS 7, based on the upstream Red Hat
Enterprise Linux 7.
Physical
Hardware
The physical server used to install N-able N-central in a bare metal environment must be
certified to run Red Hat Enterprise Linux 7.7 (x64) by Red Hat, or the hardware vendor,
without any additional drivers. Please check the Red Hat Hardware Ecosystem for details.
Server Grade hard drives connected to a RAID controller with a Battery/Capacitor Backed
Cache are Required. Examples include 10K+ RPM SCSI or SAS drives, Enterprise Grade SSDs
or NVMes for bare metal and virtualized hosts, or a Fibre Channel connected SAN with
Enterprise Grade hard drives for virtualized hosts
(Fibre Channel cards can be used for bare
metal if they are configured in the pre-boot environment and do NOT require vendor-
provided drivers)
.
Although Desktop Hard Drives will work with the Operating System, they do not meet the
minimum throughput required for the back-end Database of N-able N-central.
For more details, please refer to the Red Hat Hardware Ecosystem to see if your current hardware will work with
our customized version of CentOS 7.
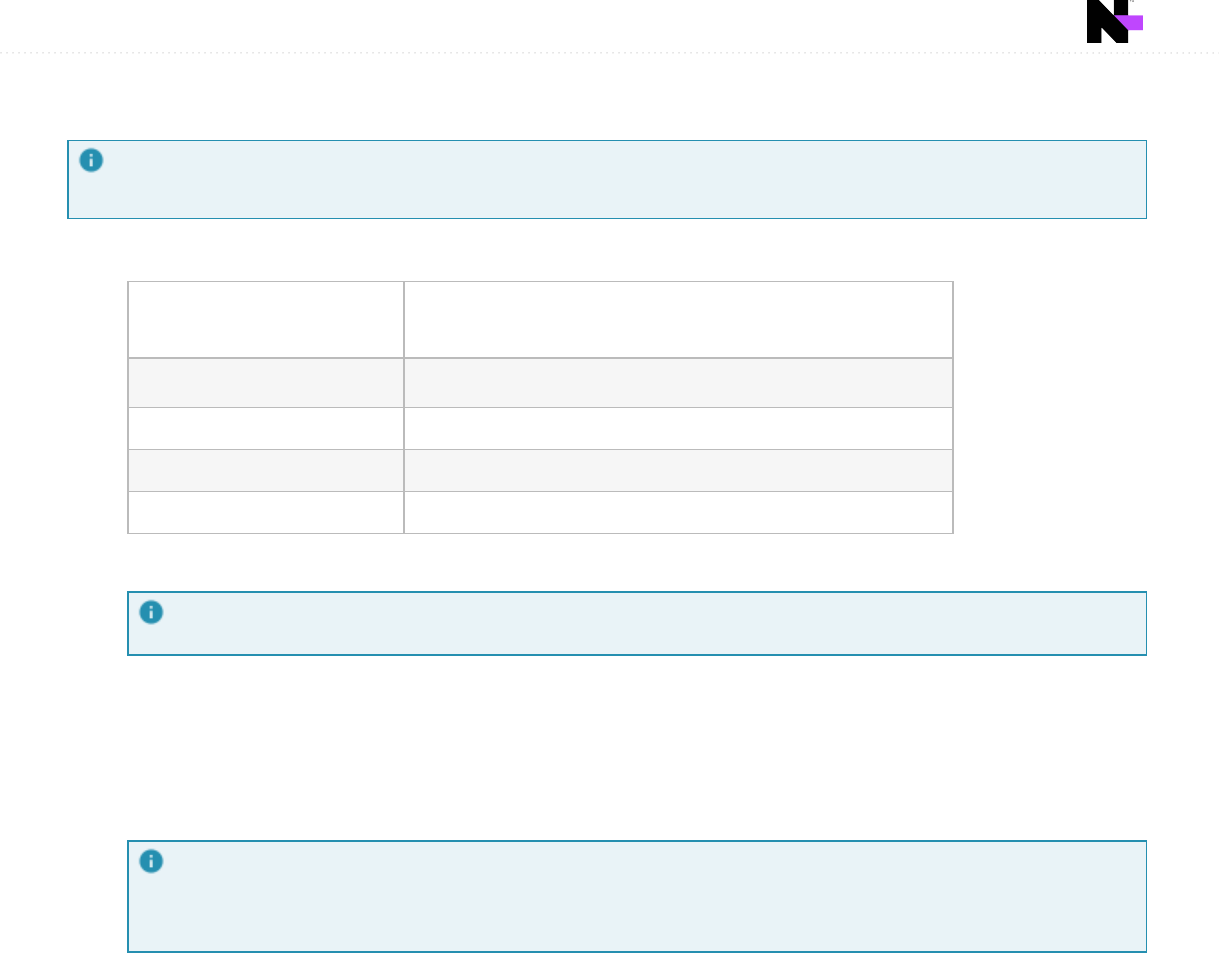
System requirements by number of devices managed
The table below lists the minimum specifications required to manage the number of devices indicated (based
on average usage). Performance can be improved by exceeding these requirements. When determining your
hardware requirements, consider any growth in managed device count that may occur over time.
Number of Devices CPU Cores Memory Storage
Up to 1,000 2 4 GB RAM 80 GB RAID
Up to 3,000 4 8 GB RAM 150 GB RAID
Up to 6,000 8 16 GB RAM 300 GB RAID
page 12

Number of Devices CPU Cores Memory Storage
Up to 9,000 12 24 GB RAM 450 GB RAID
Up to 12,000 16 32 GB RAM 600 GB RAID
Up to 16,000 22 48 GB RAM 800 GB RAID
Up to 20,000 28 64 GB RAM 1 TB RAID
Up to 24,000 34 80 GB RAM 1.2 TB RAID
Notes
1. Server Grade hard drives connected to a RAID controller with a Battery/Capacitor Backed Cache, are
required to ensure performance and unexpected power-loss data protection.
2. In a virtualized environment, hard drives for the N-able N-central server must not be shared with any
other applications or VM guests that have significant I/O workloads. For example, Report Manager, SQL
Databases, E-Mail Servers, Active Directory Domain Controllers, SharePoint, or similar should not be
installed on the same physical hard drive as N-able N-central.
3. N-able recommends two or more hard drives be placed in a redundant RAID configuration. With two
drives, RAID 1 must be used. With more than two drives, RAID 1+0 or RAID 5 are recommended. RAID 6 is
an option on servers with less than 1,000 devices (the additional write latency of RAID 6 becomes an
issue above 1,000 devices).
4. N-able recommends more, smaller disks in a RAID array, as opposed to fewer larger disks. Database-
backed applications, like N-able N-central, have better write performance with an increased number of
parallel writes (hard drives).
5. If using Solid State Drives (SSDs), N-able requires Enterprise Grade, SLC based (or better) SSDs with a
SAS interface, or Enterprise Grade NVMes. SSD and NVMe drives must have an endurance rating of at
least 0.2 DWPD (Drive Writes Per Day), and at least 2 physical disks in a redundant RAID array. On Bare
Metal servers, the RAID array must appear to the operating system as a single Block or NVMe Device.
Currently, many PCIe and NVMe drives do not meet this last requirement and would only work in a
virtualized environment.
6. Configure the RAIDcontroller to use the default stripe size and a Read/Write cache of 50%/50%.
The underlying customized version of CentOS 7 has certain hardware limits that are consistent with the
upstream Red Hat Enterprise Linux 7 distribution. Of note are the following:
Subsystem Limit
Minimum disk space 80GB
Maximum physical disk size (BIOS) 2TB
Maximum physical disk size (UEFI) 50TB
page 13

Subsystem Limit
Required minimum memory 4GB for 4 or fewer logical CPUs
1GB per logical CPU for more than 4 logical CPUs
Maximum memory 12TB
Maximum logical CPUs 768
Examples of supported servers
Due to the ecosystem of different hardware, N-able does not certify specific hardware configurations. Instead
we rely on the upstream Red Hat Enterprise Linux and hardware vendor testing and certification.
Examples of servers that have been Red Hat certified include HPE ProLiant DL360 Gen10 and Dell PowerEdge
R620.
Please consult with your hardware vendor to ensure that any server to be used for a bare metal installation
meets the above requirements, and is Red Hat Enterprise Linux 7.7 certified, without the need for additional
drivers.
N-able recommends that for any Bare Metal server, two or more SAS 10k or faster hard drives be placed in a
RAID array to improve redundancy. RAID 1+0 or RAID 5 are supported (at the hardware RAID BIOS level). RAID 6
is an option on servers with less than 1,000 devices (the additional write latency of RAID 6 becomes an issue
above 1,000 devices).
page 14

Support for virtualized environments
N-able supports VMware ESX Server 6.0 or newer and Windows Server 2012 R2 Hyper-V or newer LTS versions.
N-able recommends use of the latest stable versions of VMware or Hyper-V in order to ensure the best
performance, feature set and compatibility with N-able N-central.
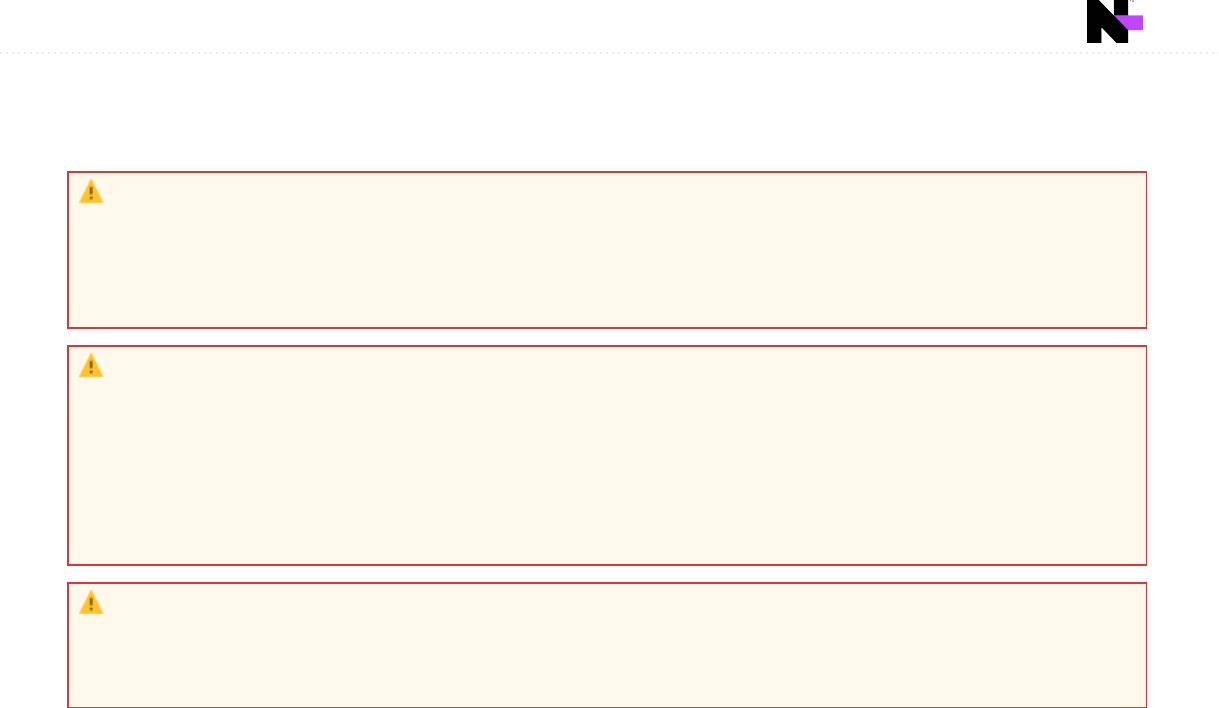
Hyper-V on Windows Desktop Operating Systems not Supported.
N-able N-central installed on a virtual machine running on a Desktop Operating System (such as Hyper-
V on Windows 10, Virtual Box, Parallels, VMWare Fusion or similar) is not a supported configuration. If
you are using Windows Hyper-V, it must be installed on a supported server class Windows Operating
System.
Windows Server Semi-Annual Releases are not Supported.
Only Long-Term Support (LTS) versions of the Windows Server Operating System are supported as a
Hyper-V host for N-able N-central. Microsoft currently releases "Semi-Annual Release" versions of
Windows Server as a technology preview for the next LTS version. Due to their technology preview
status, these "Semi-Annual Release" versions of Windows Server are not supported as Hyper-V hosts
for N-able N-central.
About virtualization
Virtualization provides an abstraction layer between the hardware and the Operating System which permits
the operation of multiple logical systems on one physical server unit. The table below includes considerations
when using this deployment method.
System
Performance
It is impossible to guarantee the scalability or performance of a N-able N-central server
deployed on a Virtual Machine due to:
n
variability in field environments resulting from host server configurations,
n
the number of virtual guests run on the host server, and
n
the performance of the underlying host hardware.
Supportability N-able supports N-able N-central software deployed on VMWare ESX/ESXi 6.0 or newer,
Windows Server 2012 R2 Hyper-V or newer LTS releases, Microsoft Azure and Amazon
AWS EC2 in the same way that we support N-able N-central deployed on Bare Metal.
This support is limited to the components (Software and Operating System) shipped
with N-able N-central and does not include the troubleshooting of virtualization
systems nor of performance issues related to environmental factors.
page 15

N-able recommends reaching out to your hardware or virtualization vendor for support
on the underlying virtualization and hardware components. Any assistance provided by
N-able Support for virtualization or hardware issues is on a best-effort basis only. In the
event of serious performance problems, we might ask you to migrate a virtualized N-
able N-central system to a physical hardware deployment.
Virtual
Hardware
Support
In Windows Server 2016 Hyper-V or newer deployments, it is recommended to create a
new Generation 2 VM. When configuring the VM virtual hardware, if you choose to
enable Secure Boot, please select the Microsoft UEFI Certificate Authority template.
For VMWare ESX/ESXi deployments, it is recommended to select the Red Hat
Enterprise Linux 7 guest OS template, then under the Boot Options, select the UEFI
Firmware.
Network
Adapters
N-able recommends using the VMXNET3 network card in VMWare. When the VM is
configured as Red Hat Enterprise Linux 7, it will use VMXNET3 by default.
Unless you are using Network Interface Bonding, N-able N-central requires only one (1)
network adapter added to the VM configuration. Multiple network adapters that are not
used in a bonding configuration can cause connectivity and licensing issues.
MAC Addresses By default, most virtualization environments use a dynamically assigned MAC address
for each virtual network card. As your N-able N-central license is generated in part by
using the MAC address of its network card, it is required to use a statically assigned
MAC address in order to avoid becoming de-licensed.
Recommended configuration for the virtualized server
Although provisioning virtual disks as "thin" or "thick" results in nearly-identical performance, thick
provisioning is recommended, particularly when more than 1,000 devices will be connected to your N-
able N-central server.
n
Assign the highest resource access priority to N-able N-central, as compared to other guest VMs.
n
Do not over-provision resources (Memory, CPU, Disk) on the virtualization host. Over-provisioning these
resources can causes memory swapping to disk, and other bottlenecks that can impact guest system
performance.
n
Ensure that the system has enough RAM and hard drive space to provide permanently allocated
resources to the N-able N-central guest.
Supported Software
Browsers
N-able N-central supports the latest versions of:
page 16

n
Internet Explorer®
n
Microsoft Edge®
n
Mozilla Firefox®
n
Desktop versions Google Chrome®. Mobile phone browsers are not supported.
Chrome 42.x does not support NPAPI plugins (including Java). When you attempt to launch a remote
control connection in Chrome 42.x, you will be repeatedly prompted to install the Java plugin without
success.
Workaround:
In the Chrome address bar, type chrome://flags.
Under Enable NPAPI, click Enable.
Restart Chrome.
N-able N-central is not supported on Internet Explorer in Compatibility View mode.
Remote Control
Remote control connections require the following software on the computers that initiate connections:
n
.NET Framework 4.5.2 on Windows devices
n
Oracle Java 1.8 versions that include Java Web Start
Report Manager
To use Report Manager with N-able N-central, ensure the you upgrade to the latest version of Report Manager.
Automation Manager
Automation Manager requires .NET Framework 4.5.2 and PowerShell 3.0 to run AMP-based services with N-able
N-central.
SNMP Community String
On HPE ProLiant Generation 9 or older Physical Servers, when monitoring the N-able N-central server using
SNMP, the community string used for SNMP queries to the server must use N-central_SNMP, not public.
SNMP is only enabled on HPE ProLiant Generation 9 or older Physical Servers. All other installs do not enable
SNMP on the N-able N-central server.
Supported Operating Systems
This section describes the supported operating systems for N-able N-central.
Windows Agents:
n
Microsoft .NET Framework 4.5.2 (or later)
page 17

Windows Server 2022
n
Windows Server 2022 Standard
n
Windows Server 2022 Datacenter
n
Windows Server 2022 Datacenter: Azure
Windows Server 2019
n
Windows Server 2019 Datacenter
n
Windows Server 2019 Standard
Windows Server 2016
n
Windows Server 2016 Datacenter
n
Windows Server 2016 Standard
n
Windows Server 2016 Essentials
n
Windows Storage Server 2016
n
Windows Server 2016 MultiPoint Premium Server
n
Microsoft Hyper-V Server 2016
Windows Server 2012
n
R2 Datacenter
n
R2 Essentials
n
R2 Foundation
n
R2 Standard
n
Datacenter 64-bit Edition
n
Essentials 64-bit Edition
n
Foundation 64-bit Edition
n
Standard 64-bit Edition
n
Microsoft Hyper-V Server 2012
n
Microsoft Hyper-V Server 2012 R2
n
Storage Server 2012 Enterprise 64-bit Edition
n
Storage Server 2012 Express 64-bit Edition
n
Storage Server 2012 Standard 64-bit Edition
n
Storage Server 2012 Workgroup 64-bit Edition
Windows 11
n
Microsoft Windows 11 Enterprise & Professional
n
Microsoft Windows 11 Education editions
n
Microsoft Windows 11 Pro for Workstations
page 18

Windows 10
n
Microsoft Windows 10 Enterprise & Professional
n
Microsoft Windows 10 Education editions
n
Windows 10 Pro for Workstations
Windows 8 and 8.1
n
8.1 Enterprise
n
8.1 Professional
n
8 Enterprise
n
8 Professional
Windows 7
n
Microsoft Windows 7 Enterprise & Professional
n
Microsoft Windows 7 Ultimate
macOS Agents
n
12.0 (Monterey)
n
11.0 (Big Sur)
n
10.15 (Catalina)
n
10.14 (Mojave)
n
10.13 (High Sierra)
n
10.12 (Sierra)
Linux Agents
Independent Agents are required for 32-bit and 64-bit Linux OS installations.
The probe performs an SSH connection a Linux device. To discover a Ubuntu/Debian OS device, the
device must have openssh installed.
n
Red Hat Enterprise Linux/CentOS 8 (64-bit)
n
Red Hat Enterprise Linux/CentOS 7 (x86_64 and i686)
n
Red Hat Enterprise Linux/CentOS 6 (x86_64 and i686)
n
Ubuntu 20.04 LTS (64-bit)
n
Ubuntu 18.04 "Bionic Beaver" (x86_64)
n
Ubuntu 16.04 "Xenial Xerus" (x86_64 and i686)
n
Debian 8.7/Ubuntu 14.04 "Trusty Tahr" (x86_64 and i686)
page 19

AV Defender
Workstation Operating Systems
n
Microsoft Windows 11
n
Microsoft Windows 10
n
Microsoft Windows 8, 8.1
Tablet And Embedded Operating Systems
n
Windows 10 IoT Enterprise
n
Windows Embedded 8.1 Industry
n
Windows Embedded 8 Standard
n
Windows Embedded Enterprise 7
n
Windows Embedded POSReady 7
n
Windows Embedded Standard 7
n
Windows Embedded Compact 7
Server Operating Systems
n
Microsoft Windows Server 2022
n
Microsoft Windows Server 2019 Core
n
Microsoft Windows Server 2019
n
Microsoft Windows Server 2016
n
Microsoft Windows Server 2016 Core
n
Microsoft Windows Server 2012 R2
n
Microsoft Windows Server 2012
For Microsoft Windows Embedded Standard 7, TCP/IP, Filter Manager, and Windows Installer must all be
enabled.
Patch Manager
Workstation Operating Systems
n
Microsoft Windows 11
n
Microsoft Windows 10 version 1607 and later
n
Microsoft Windows 8.1
n
Microsoft Windows 8
n
Microsoft Windows 7
page 20

Server Operating Systems
n
Microsoft Windows Server 2022
n
Microsoft Windows Server 2012
n
Microsoft Windows Server 2012 R2
n
Microsoft Windows Server 2016
n
Microsoft Windows Server 2019
The following operating systems are not supported with N-able N-central patch manager:
n
Microsoft Windows XP
n
Microsoft Windows Vista
n
Microsoft Windows 10 Home Edition
n
Microsoft Windows Server 2003
n
Microsoft Windows Server 2008
n
Microsoft Windows 11 Home Edition (Monitoring status is supported)
Windows Update Agent
The minimum version of the Windows Update Agent (WUA) needs to be greater than 7.6.7600.320. The base
NT build version of Windows should be 6.1 or later. Older versions of the base NT build cannot upgrade past
version 7.6.7600.256 of the Windows Update Agent.
Automation Manager
Workstation Operating Systems
n
Microsoft Windows 11
n
Microsoft Windows 10 (32/64-bit)
n
Microsoft Windows 8.1 (32/64-bit)
n
Microsoft Windows 8 (32/64-bit)
n
Microsoft Windows 7 (32/64-bit)
Server Operating Systems
n
Microsoft Windows Server 2022
n
Microsoft Windows Server 2019
n
Microsoft Windows Server 2016 (32/64-bit)
n
Microsoft Windows Server 2012 R2 (32/64-bit)
n
Microsoft Windows Server 2012 (32/64-bit)
Disk Encryption Manager
Hyper-V Server 2012 R2 Hyper-V Server 2016
page 21

Windows 7 Enterprise Windows 7 Home Premium
Windows 7 Professional Windows 7 Ultimate
Windows 8 Enterprise Windows 8 Pro
Windows 8 Pro with Media Center Windows 8.1 Enterprise
Windows 8.1 Pro Windows 8.1 Pro with Media Center
Windows 10 Education Windows 10 Enterprise
Windows 10 Enterprise 2015 LTSB Windows 10 Enterprise 2016 LTSB
Windows 10 Enterprise for Virtual Desktops Windows 10 Enterprise LTSC 2019
Windows 10 Pro Windows 10 Pro Education
Windows 10 Pro for Workstations
Windows Server 2008 R2 Enterprise Windows Server 2008 R2 Datacenter
Windows Server 2008 R2 Standard Windows Server 2008 R2 Foundation
Windows Server 2012 Datacenter Windows Server 2012 Essentials
Windows Server 2012 Foundation Windows Server 2012 R2 Datacenter
Windows Server 2012 R2 Essentials Windows Server 2012 R2 Foundation
Windows Server 2012 R2 Standard Windows Server 2012 R2 Standard Evaluation
Windows Server 2012 Standard
Windows Server 2016 Datacenter Windows Server 2016 Datacenter Evaluation
Windows Server 2016 Essentials Windows Server 2016 Standard
Windows Server 2016 Standard Evaluation
Windows Server 2019 Datacenter Windows Server 2019 Essentials
page 22

Windows Server 2019 Standard Windows Server 2019 Standard Evaluation
Windows Server Datacenter
Windows Small Business Server 2011
Essentials
Windows Small Business Server 2011 Standard
page 23

Installing N-able N-central
You can install N-able N-central on the following platforms:
n
A Bare Metal Server with UEFI Firmware enabled (Preferred)
n
A Bare Metal Server with Legacy BIOS enabled
n
VMWare ESX/ESXi 6.0 or newer with UEFI Firmware enabled (Preferred)
n
VMWare ESX/ESXi 6.0 or newer with Legacy BIOS enabled
n
Windows Server 2016 or newer Hyper-V Generation 2 (Preferred)
n
Windows Server 2012 R2 or newer Hyper-V (Generation 1)
n
Microsoft Azure Resource Manager
n
Amazon AWS Elastic Cloud Compute (EC2)
Windows Server 2012 R2 Hyper-V Virtualization Server is supported for Generation 1 guest VMs only.
During installation on CentOS and Linux systems, the install performs a hardware detection routines. This can
cause error messages to appear on the console at the beginning of the installation. These are normal
messages that you will see on any CentOS and Linux during boot, before the splash screen pops up, and does
not affect the installation of N-able N-central.
What do you want to do?
n
Prepare installation media
n
Install on a physical server
n
Install as a guest on VMWare ESX/ESXi 6.0 or newer
n
Install as a guest on Windows Server 2012 R2 or newer Hyper-V
n
Install on Microsoft Azure Managed Disks
n
Install on Amazon AWS Elastic Cloud Compute (EC2)
page 24

Prepare installation media
To install N-able N-central on a bare metal server, without the option to upload a disk image through iLO, iDRAC
or IMM2, you will need to prepare a DVD, or a USB Flash Drive with the N-able N-central installer image.
DVD Creation
Follow the directions for your DVD creation software to burn the N-able N-central .iso to disk.
USB Flash Drive
For the USB Flash drive to properly install N-able N-central on both BIOS and UEFI systems, you need to write
the .iso image to disk using the “DD” disk writing method. The USB Flash Drive must be at least 2GB in size. You
will not be able to use any extra space on the drive until after N-able N-central is installed and you reformat the
drive.
This process is a destructive process for the USB Flash Drive. All data on the USB Flash Drive will be
erased.
Linux and MacOS
1. Elevate to the root user so you can mount the USB Flash Drive.
sudo su –
2. Identify the USB Flash Drive device name. Be careful to verify the device size so you don’t accidentally
overwrite another device, like you hard disk.
Linux: lsblk
MacOS: diskutil list
3. Write the disk image to the USB Flash Drive. Make sure the device you are writing to is your USB Flash
Drive. This step will overwrite all data on the drive. Be sure to specify the device name, not the partition
name (/dev/sdb, not /dev/sdb1).
dd if=/path/to/N-central.iso of=/dev/device-name bs=512k
Windows
Use a third-party utility, for example, Rufus, to write the disk image to your USB Flash Drive.
When copying the .iso file, ensure you use the following configuration options:
n
Partition scheme: “MBR”
n
Target system: “BIOS or UEFI”
n
Volume label: Leave it as is. Do NOT change the label!
n
File system: FAT32
n
Cluster size: Default
If you are asked to select the mode used to write the image to disk, use DD Image mode. If not
selected, N-able N-central may fail to install on certain devices.
page 25

page 26

Install N-able N-central on a physical server
Before you begin the install, ensure your install media is set up and ready. For more information, see Prepare
installation media.
1. Configure the server RAID array using the following settings:
HP Server
Cache Options Set to 50% Read and 50% Write.
Disk RAID 1+0 Configure the RAID controller to use the default stripe size.
Lenovo Server
Cache Options Use the default settings.
Disk RAID 1+0 Configure the RAID controller to use the default stripe size.
Dell Server
Cache Options Set Write Policy to Write-back and Read Policy to Adaptive.
Disk RAID 1+0 Configure the RAID controller to use the default stripe size.
Intel Server
Cache Options Set Write Policy to Write-back and Read Policy to Adaptive.
Disk RAID 1+0 Configure the RAID controller to use the default stripe size.
2. Enter the Server Hardware Level Configuration Utility (BIOS) and enable the UEFI Firmware booting
(Recommended, but Legacy BIOS is also supported).
3. Insert the installation disc or USBFlash drive and restart the server.
4. If using a USBdrive, use the BIOS/UEFIBoot Menu to select the USBFlash Drive as your boot
device.
5. If the Press the <ENTER> key to install N-central prompt displays, click Enter.
This will not display if you have Secure Boot enabled.
6. Click Enter to Install N-able N-central unless you want to test the physical media or need to install in text
only mode (usually if you are using a serial console). Otherwise select the desired boot option and click
Enter.
After a few moments, you should be prompted to provide the N-able N-central network settings. If
you are not prompted to provide the network settings, N-able N-central was unable to locate a
suitable network card. Turn off the server and verify the network card before re-trying the N-able
N-central installation.
7. Select which IP stack/s you need to enable (IPv4 only, or both IPv4 and IPv6). Click Tab to highlight OK
and click Enter.
8. Select your IPv4 network configuration. N-able recommends using a Static IPv4 Address. Tab to OK and
click Enter.
page 27

9. If you selected to use a dual stack configuration, select your IPv6 network configuration. N-able
recommends using a Static IPv6 Address. Tab to OK and click Enter.
10. If you selected a Static IPv4 Address configuration, enter the IP Address, Netmask, Gateway and
Nameservers (CloudFlare’s 1.1.1.1 has been pre-populated by default). Tab to OK and click Enter.
11. If you selected a Static IPv6 Address configuration, on the next screen enter the IP Address, Prefix
Length (/64 is the most common), Gateway, and Nameservers (CloudFlare’s 1.1.1.1 has been pre-
populated by default). Select OK and click Enter.
12. On the next page, select your desired Time Zone. Tab to OK and click Enter.
Be sure to Adjust the Time Zone to match your desired location. If you are restoring a N-able N-
central Backup, the Time Zone must be an exact match to the server from which you are restoring
the Backup.
If your location is not listed, be sure to select a location that is in the same time zone as you are.
13. The Operating System Installer will now launch. No further input is required on the server console. When
the install completes, please go to the indicated web URL to continue configuring N-able N-central.
Ensure you remove the DVD/USB Flash Drive once the Green complete screen appears to ensure that the
server does not boot from the DVD/USB Flash Drive at a later time.
HPE ProLiant Generation 9 and older servers will have the HPE monitoring drivers installed and SNMP
enabled on the N-able N-central server. You must use the Community String N-CENTRAL_SNMP to
monitor your N-able N-central server.
HPE ProLiant Generation 10 or newer servers no longer use the Operating System drivers to monitor
the hardware. Hardware monitoring is handled through the iLO port.
Dell PowerEdge servers may be monitored through the iDRAC port depending on the server feature set
and licensing.
Lenovo servers may be monitored through the IMM port depending on the server feature set and
licensing.
What's next?
With N-able N-central installed:
n
review the Getting Started help topics
n
setup Service Organizations, Customers and Sites, and configure users.
page 28
Install N-able N-central as a guest on an ESX/ESXi 6.0 or newer server
VMWare Tools are no longer required to be install on the N-able N-central VM. As per VMware
recommendations for Enterprise Linux 7, the OpenVM Tools are included with the Operating System.
1. Create a new virtual machine using the following settings:
OS Version Red Hat Enterprise Linux 7 (64-bit)
Do not enable paravirtualization.
Boot Options Select UEFI Firmware (Legacy BIOS is also supported).
Virtual Disks Thick Provision
CPU/Memory/Storage Size according to tables in the
System Requirements
.
Network Adapter VMXNET3 with a static MAC address.
2. Mount a disk or network file system to access the installation CD .ISO image.
Ensure that the VMware guest is configured to use the mounted disk or network file system as a
boot disk.
3. Start the new VM.
4. If the Press the <ENTER> key to install N-central prompt displays, click Enter.
5. Click Enter to Install N-able N-central unless you want to test the physical media or need to install in text
only mode (usually if you are using a serial console). Otherwise select the desired boot option and click
Enter.
After a few moments, you should be prompted to provide the N-able N-central network settings. If
you are not prompted to provide the network settings, N-able N-central was unable to locate a
suitable network card. Turn off the server and verify the network card before re-trying the N-able
N-central installation.
6. Select which IP stack/s you need to enable (IPv4 only, or both IPv4 and IPv6). Click Tab to highlight OK
and click Enter.
7. Select your IPv4 network configuration. N-able recommends using a Static IPv4 Address. Tab to OK and
click Enter.
8. If you selected to use a dual stack configuration, select your IPv6 network configuration. N-able
recommends using a Static IPv6 Address. Tab to OK and click Enter.
9. If you selected a Static IPv4 Address configuration, enter the IP Address, Netmask, Gateway and
Nameservers (CloudFlare’s 1.1.1.1 has been pre-populated by default). Tab to OK and click Enter.
10. If you selected a Static IPv6 Address configuration, on the next screen enter the IP Address, Prefix
Length (/64 is the most common), Gateway, and Nameservers (CloudFlare’s 1.1.1.1 has been pre-
populated by default). Select OK and click Enter.
page 29

11. On the next page, select your desired Time Zone. Tab to OK and click Enter.
Be sure to Adjust the Time Zone to match your desired location. If you are restoring a N-able N-
central Backup, the Time Zone must be an exact match to the server from which you are restoring
the Backup.
If your location is not listed, be sure to select a location that is in the same time zone as you are.
12. The Operating System Installer will now launch. No further input is required on the server console. When
the install completes, please go to the indicated web URL to continue configuring N-able N-central.
What's next?
With N-able N-central installed:
n
review the Getting Started help topics
n
setup Service Organizations, Customers and Sites, and configure users.
page 30
Install N-able N-central as a guest on Windows Server 2012 R2 or newer Hyper-V
server
Hyper-V on Windows Desktop Operating Systems not Supported.
Desktop versions of Microsoft Windows, with the Hyper-V feature enabled are not supported as a host
for N-able N-central. The Hyper-V feature must be enabled on a supported version of the Windows
Server Operating System.
Windows Server Semi-Annual Releases are not Supported.
Only Long-Term Support (LTS) versions of the Windows Server Operating System are supported as a
Hyper-V host for N-able N-central. Microsoft currently releases "Semi-Annual Release" versions of
Windows Server as a technology preview for the next LTS version. Due to their technology preview
status, these "Semi-Annual Release" versions of Windows Server are not supported as Hyper-V hosts
for N-able N-central.
Dynamic Memory is not supported.
N-able N-central does not support the use of Dynamic Memory under Hyper-V. Enabling Dynamic
Memory can lead to Kernel Panics, Service crashes, and Database corruption.
page 31

1. Create a new virtual machine using the settings below.
Generation Generation 2 (preferred).
Firmware Move the DVD Drive to the top of the boot order.
Security Under the Secure Boot section, select the Microsoft UEFI Certificate Authority
from the Template drop-down menu.
Memory Size according to tables in System Requirements.
Disable “Dynamic Memory”.
Processor Size according to the table in System Requirements. Expand the Processor options
(+). In the NUMA subsection, click Use Hardware Topology.
Hard Drive Size according to table in the System Requirements.
DVD Drive Mount the N-able N-central ISO disk image.
Network
Adapter
Set a static MAC address.
Integration
Services
Enable Guest Services.
Checkpoints Checkpoints should be disabled except for when you create a cold checkpoint
immediately before a N-able N-central upgrade. The Checkpoint should be removed
as soon as the upgrade has been successful in order to reduce the performance
impact of the Checkpoint Differencing Disk.
2. Start the new VM.
3. If the Press the <ENTER> key to install N-central prompt displays, click Enter.
4. Click Enter to Install N-able N-central unless you want to test the physical media or need to install in text
only mode (usually if you are using a serial console). Otherwise select the desired boot option and click
Enter.
After a few moments, you should be prompted to provide the N-able N-central network settings. If
you are not prompted to provide the network settings, N-able N-central was unable to locate a
suitable network card. Turn off the server and verify the network card before re-trying the N-able
N-central installation.
5. Select which IP stack/s you need to enable (IPv4 only, or both IPv4 and IPv6). Click Tab to highlight OK
and click Enter.
6. Select your IPv4 network configuration. N-able recommends using a Static IPv4 Address. Tab to OK and
click Enter.
7. If you selected to use a dual stack configuration, select your IPv6 network configuration. N-able
recommends using a Static IPv6 Address. Tab to OK and click Enter.
page 32

8. If you selected a Static IPv4 Address configuration, enter the IP Address, Netmask, Gateway and
Nameservers (CloudFlare’s 1.1.1.1 has been pre-populated by default). Tab to OK and click Enter.
9. If you selected a Static IPv6 Address configuration, on the next screen enter the IP Address, Prefix
Length (/64 is the most common), Gateway, and Nameservers (CloudFlare’s 1.1.1.1 has been pre-
populated by default). Select OK and click Enter.
10. On the next page, select your desired Time Zone. Tab to OK and click Enter.
Be sure to Adjust the Time Zone to match your desired location. If you are restoring a N-able N-
central Backup, the Time Zone must be an exact match to the server from which you are restoring
the Backup.
If your location is not listed, be sure to select a location that is in the same time zone as you are.
11. The Operating System Installer will now launch. No further input is required on the server console. When
the install completes, please go to the indicated web URL to continue configuring N-able N-central.
What's next?
With N-able N-central installed:
n
review the Getting Started help topics
n
setup Service Organizations, Customers and Sites, and configure users.
page 33

Install N-able N-central on Microsoft Azure Managed Disks
The instructions below walk you through a new installation of N-able N-central in the Microsoft Azure Manage
Disks environment. Microsoft Azure Classic deployment is no longer supported, however, Azure Resource
Manager without Manage Disks is still supported.
While we recommend new deployments use this Azure Managed Disk deployment method, the 100GB, 200GB,
500GB and 1TB VHD images are still available for Azure Resource Manager without Managed Disks, and is
available and supported for reinstalling and restoring N-able N-central from a backup.
Unlike all other N-able N-central deployments, Azure Managed Disks (MD) deployments support/require at
least one Data disk in addition to the Operating System Disk. When you use the deployment script and assign
one Data disk, Azure creates a RAID 0 array of the one disk. If you assign
X
data disks, Azure creates a RAID 0 of
those
X
disks. N-able N-central uses a RAID 0 to combine multiple Data disks into a single mount point, while
writing to all disks in parallel. This increases the IOPS throughput by
X
times.
Additionally, Azure MD deployments have no SWAP Volume, as N-able N-central uses the Resource Disk for the
SWAP Volume. The Azure MD OS Disk image is 8 GB, as the install dynamically expands the image to match the
deployed Managed Disk size on first boot.
Azure MD images are published to each Public Azure Region, so you no longer need to upload the VHD. It is
important to know that there are some Azure Regions that are restricted to certain Azure users. These are a
second, geographically separated Azure Region in the same country, or in the case of the EU, another nearby
country that is reserved for customers needing in-country disaster recovery. For information on Azure regions,
see https://azure.microsoft.com/en-us/global-infrastructure/geographies/#overview.
Deployment
Deploying N-able N-central to Azure with Managed Disks is simplified by using a Deployment PowerShell script.
The script requires PowerShell 7 (formerly PowerShell Core) and the Azure PowerShell Module. You can run the
script on any operating system that supports the cross platform PowerShell 7.
You must have basic knowledge of how to use Microsoft Azure, Windows PowerShell and how to install
and configure N-able N-central.
The script is available for download on the N-able N-central release page of the N-able Partner Success
Center.
After downloading the PowerShell Script, you need to edit the settings at the top of the script to meet your
requirements. Some items are required, while others can be left with the defaults unless they need to use
specific values, such as the virtual network settings. The script contains full documentation explaining all
included options.
Ultra_SSD Data Disks are not supported.
page 34

Before you deploy a dual stack application in Azure, you must configure your subscription for this
preview feature using the following Azure PowerShell.
Register as follows:
Register-AzProviderFeature -FeatureName AllowIPv6VirtualNetwork -
ProviderNamespace Microsoft.Network
It takes up to 30 minutes for feature registration to complete.
You can check your registration status by running the following Azure PowerShell command:
Get-AzProviderFeature -FeatureName AllowIPv6VirtualNetwork -
ProviderNamespace Microsoft.Network
After the registration is complete, run the following command:
Register-AzResourceProvider -ProviderNamespace Microsoft.Network
Once you have modified the PowerShell Install Script with your settings, you only need to launch it in a
PowerShell console and it will complete the deployment for you. If you have not already logged into your Azure
account from PowerShell, the script will prompt you to log in.
If you are using Windows, you may need to complete the following steps to run the script. For more information
see the Microsoft article, Set-Execution Policy.
1. Ensure your PowerShell Execution Policy is set to "Remote-Signed".
Set-ExecutionPolicy -ExecutionPolicy RemoteSigned -Scope LocalMachine
2. Un-Block the Install Script.
Unblock-File -Path .\AzureMD.ps1
First run
After the PowerShell Script has completed successfully, wait a few minutes before logging into the Web UI. On
first run, N-able N-central will expand the OS disk, create a software RAID from the data disks, and move the
database to it, then reset the trial license. This process can take 10 - 15 minutes to complete.
If you try to log in to the web UI right after they VM is deployed, you will be kicked out, and the web UI will
be unresponsive for a few minutes while the first run tasks complete.
If you deploy the VM more than 15 days after the Azure image was generated, you will be able to tell the first
run activities have not been completed by the expired license warning on the login page. Once the first run
tasks complete, the license error will no longer be present.
VMSizing
Always size N-able N-central for your expected number of devices in the future. Try to plan for at least 2
- 3 years in the future.
page 35

The maximum number of supported Data Disks is defined by the Azure VM size. You will need to consult the
Azure Documentation for their VM size before deciding on the number of Data Disks. Azure VM sizing can be a
little tricky, and may require some trial and error to determine the best VM size for any particular deployment.
VM sizing must support Generation 2 VMs.
Rough guidelines are as follows:
Number of
Devices
Recommended Azure
Size CPUCores Memory OSDisk
Data
Disks
(Total)
Up to 1,000 Standard_DS2_v2 2 4 GB 80 GB 20 GB
Up to 3,000 Standard_DS3_v2 4 8 GB 110 GB 60 GB
Up to 6,000 Standard_DS4_v2 8 16 GB 200 GB 125 GB
Up to 9,000 Standard_DS5_v2 12 24 GB 300 GB 200 GB
Up to 12,000 Standard_DS5_v2 16 32 GB 400 GB 275 GB
Up to 16,000 Standard_DS32s_v3 22 48 GB 550 GB 375 GB
Up to 20,000 Standard_F32s_v2 28 64 GB 700 GB 500 GB
Up to 24,000 Standard_F48s_v2 34 80 GB 875 GB 650 GB
Notes
n
The recommendations are based on N-able N-central requirements balanced with Azure Maximum IOPS.
For example, N-able recommends "Standard_DS5_v2" as apposed to the newer generation "Standard_
D16s_v3", because the "Standard_DS5_v2" has a maximum IOPS of 51200 as compared to 25600 for the
"Standard_D16s_v3".
n
For best performance, we recommend using the maximum number of Data disks your VM size permits.
More small disks will provide better IOPS performance than fewer larger disks.
n
The OS disk is still used for temporary storage during the nightly backup to reduce IOPS on the data
disks, as well as for the Backup Volume. Therefore there needs to be at least the size of the Data disk,
plus OS files, Repository and 15% for the Backup Volume. As a result, the total disk utilization is slightly
more than for non-Azure deployments.
n
N-able N-central is only supported on Instance types that provide local SSD storage. For Azure based N-
able N-central deployments, the Local SSD Resource Disk is used for the swap-file, in place of the swap
volume on all other N-able N-central deployments. An example of an unsupported instance type without
local SSD storage would be the Dsv4 Series (not to be confused with the supported Ddsv4 Series).
n
N-able N-central is only currently supported on Instance types that provide Intel Processors. The newer
AMD EPYC Processor instances have not been tested and verified. An example of an unsupported AMD
EPYC instance type would be the Dasv4 Series.
page 36


New: December 7, 2020
Deployment script for Microsoft Azure - Managed Disks
Deploying N-able N-central to Azure with Managed Disks is simplified by using a Deployment PowerShell script.
The script is available for download on the N-able N-central Release page of the N-able Partner Success
Center.
This script requires PowerShell 7.0 or higher. PowerShell 7 is a cross platform version of PowerShell (Formerly
called PowerShell Core) that has installers for Windows, MacOS and Linux. You can download the latest version
of Powershell on GitHub.
The script is pre-populated with the version of N-able N-central you downloaded it for. If you want to install a
different version, replace this value with the full Version number. The version is on the N-central Download
Page for the version you want to deploy.
Note that Azure Managed Disks are only supported for N-able N-central 2020.2 and higher releases.
For more information on the installation process, see Install N-able N-central on Microsoft Azure Managed
Disks.
Azure information
You can retrieve your Azure subscription ID from the Subscriptions Blade in the Azure Portal.
https://portal.azure.com/#blade/Microsoft_Azure_Billing/SubscriptionsBlade
Azure Region
Select the Azure region, for example, eastus where N-able N-central will be located. Not all features are
available in all regions. Check with Microsoft Azure for availability. You can get all the Azure locations using the
Azure PowerShell command:
Get-AzLocation
Resource naming prefix
The script is designed to use a naming prefix for naming all resources it creates. With the default script
configuration, keep this value between 1 - 18 characters, excluding any symbols to avoid exceeding other
resource name length limits.
For more information, see Develop your naming and tagging strategy for Azure resources.
VM size
You will need to define the size of the N-able N-central, Azure, Generation 2, VM Instance, for example,
'Standard_DS3_v2'. You can get all the VM sizes in the US East region using the Azure PowerShell command.
Use the region where you plan to install N-able N-central:
Get-AzVMSize -Location 'eastus'
For more information, see Support for generation 2 VMs on Azure.
page 38

Operating system disk size
You will need to define the size of the new OS Managed Disk in GB. It should be greater than 80GB. For more
information, see What disk types are available in Azure?
Operating system disk storage type
Select the storage type for the Operating System Managed Disk. The valid options are:
n
Premium_LRS,
n
StandardSSD_LRS, and
n
Standard_LRS.
Azure does not support using the UltraSSD_LRS storage type for Operating System Disks. For more
information, see
n
What disk types are available in Azure?
n
Azure Storage redundancy
Data disks sizes
You will need to set the size of the new Data Managed Disks in GB (each). All the Data Disks will be combined
into a software RAID to take advantage of parallel disk writes, spreading the IOPs load across the total number
of disks you select.
Number of data disks
Define the number of Data Managed Disks in the Software RAID array. This value can be between 1 - 99, but the
maximum number of Data Disks is defined by the Azure VM Size.
https://docs.microsoft.com/en-us/azure/virtual-machines/linux/generation-2#generation-2-vm-sizes
Data disks storage type
Select the storage type for the Data Managed Disk. The valid options are:
n
Premium_LRS,
n
StandardSSD_LRS, and
n
Standard_LRS.
UltraSSD_LRS is unsupported at this time, but is planned to be added once the Azure PowerShell Modules
provide better deployment support.
For more information, see
n
What disk types are available in Azure?
n
Azure Storage redundancy
Boot diagnostics storage account
Select the storage type for the Boot Diagnostics Storage Account. The valid options are:
page 39

n
Premium_LRS,
n
StandardSSD_LRS, and
n
Standard_LRS.
This storage account is used for the Azure VM boot diagnostic logs. It is also used during deployment to
temporarily host the VHD image before it is imported to a Managed Disk. This is a seldom used storage
account, so it does not have to be on the fasted storage types.
Boot diagnostics storage account type
Select the type of boot storage account you want to use for the VM Boot Diagnostics storage. N-able N-
central requires either Storage or StorageV2.
n
Storage: General purpose Storage account that supports storage of Blobs, Tables, Queues, Files and
Disks.
n
StorageV2: General Purpose Version 2 (GPv2) Storage account that supports Blobs, Tables, Queues,
Files, and Disks, with advanced features like data tiering.
Accelerated networking
TheN-able N-central image for Azure Managed Disks has been configured to support Accelerated Networking,
if desired. For more information, see Create a Linux virtual machine with Accelerated Networking using Azure
CLI.
IPv6 Support
N-able N-central does not yet support IPv6 for monitoring, however the underlying operating system and
services are ready to support it in the future. To future proof your deployment, you can configure the Azure
deployment with IPv6 support.
Before you deploy a dual stack application in Azure, you must configure your subscription for this preview
feature using the following Azure PowerShell commands:
Register-AzProviderFeature -FeatureName AllowIPv6VirtualNetwork -
ProviderNamespace Microsoft.Network
It takes up to 30 minutes for feature registration to complete. You can check your registration status by
running the following Azure PowerShell command:
Get-AzProviderFeature -FeatureName AllowIPv6VirtualNetwork -ProviderNamespace
Microsoft.Network
After the registration is complete, run the following command:
Register-AzResourceProvider -ProviderNamespace Microsoft.Network
You can generate a random Private IPv6 Network Prefix by going to https://simpledns.com/private-ipv6.
page 40

N-central sizing on Azure Managed Disk deployment
Number of
Devices
Recommended Azure
Size CPUCores Memory OSDisk
Data Disks
(Total)
Up to 1,000 Standard_DS2_v2 2 4 GB 80 GB 20 GB
Up to 3,000 Standard_DS3_v2 4 8 GB 110 GB 60 GB
Up to 6,000 Standard_DS4_v2 8 16 GB 200 GB 125 GB
Up to 9,000 Standard_DS5_v2 12 24 GB 300 GB 200 GB
Up to 12,000 Standard_DS5_v2 16 32 GB 400 GB 275 GB
Up to 16,000 Standard_DS32s_v3 22 48 GB 550 GB 375 GB
Up to 20,000 Standard_F32s_v2 28 64 GB 700 GB 500 GB
Up to 24,000 Standard_F48s_v2 34 80 GB 875 GB 650 GB
page 41

Install N-able N-central on Amazon AWS EC2
1. Login to the Amazon AWS Console and select the EC2 Management Console.
2. Click Instances and click Launch Instance.
3. Click Community AMIs and search for the AMI, or for
N-central
.
4. Click Select.
5. Select a suitably sized General Purpose Instance Type, based on the sizing information table in the
System Requirements.
6. Click Next: Configure Instance Detail, then Click Next: Add Storage.
7. Set the appropriate storage size for your instance based on the sizing information table in the System
Requirements.
N-able N-central AWS EC2 Instances have a maximum useable storage size of 2TB.
8. In the Volume Type drop-down list box, select General Purpose SSD (GP2) (Provisioned IOPS can
provide better disk performance, but at a higher cost).
9. Click Review and Launch.
10. On the Review Page, click Edit security groups.
11. Create a security group, and open the inbound TCP ports 22, 80, 443, 5280, and 10000.
12. Click Review and Launch, then click Launch.
13. Select Proceed without keypair from the drop-down list box and click to select the acknowledgement
check box (If you provide a keypair, it will be ignored and not installed).
14. Click Launch Instances.
The new instance launches, and you are returned to the Instances page to view the new instance.
Be sure to Adjust the Time Zone to match your desired location. If you are restoring a N-able N-central
Backup, the Time Zone must be an exact match to the server you are restoring the Backup from.
What's next?
With N-able N-central installed:
n
review the Getting Started help topics
n
setup Service Organizations, Customers and Sites, and configure users.
page 42
Upgrading N-able N-central
This document includes the following upgrade procedures:
n
Step 1: Back up the N-able N-central server
n
Step 2: Install the N-able N-central server upgrade
n
Step 3: Post-installation steps
There may also be circumstances when you want to rebuild or migrate your server.
See Rebuild or Migrate your N-able N-central server.
Refer to the release notes for compatible upgrade paths before you upgrade from one version to
another.
page 43

Step 1: Back up the N-able N-central server
Before you upgrade, back up the N-able N-central server in the event of an upgrade failure. Back up the server
to a destination FTPserver or, if N-able N-central has been installed as a guest on an ESX or Hyper-V server,
record a snapshot of the guest.
Pre-Backup Snapshot.
If you are running N-able N-central as a virtual machine, before upgrading, you may wish to create a
Snapshot of the virtual machine. In order to avoid corruption of the Snapshot due to database tables
being cached in memory, you will need to shut down the N-able N-central virtual machine before
creating the Snapshot.
N-able recommends shutting down the virtual machine and deleting the Snapshot after the upgrade
has completed successfully. Deleting the Snapshot will prevent increased disk write latency associated
with the differencing disks used by Snapshot technologies.
1. Click Administration > System Backup and Restore > Configure Backups and configure the backup
properties.
2. Click Save and Run Backup.
During the backup, a backup file and a backup digest file are created. The backup file contains all
of the information needed to restore the system. The SHA1 file contains a SHA1 checksum of the
backup file and verifies that the backup file is not corrupted.
3. Wait for the system to send you a notification about the backup success or failure.
4. If the backup succeeded and you have not configured it to be uploaded to an FTP server, download the
backup image from the N-able N-central server to a safe location:
a. Click Administration > System Backup and Restore > Download Backups.
b. Click Download Backup beside the name of the backup file you want to download and save it to a
known location.
c. (Optional) Click Download Digest beside the name of the backup file and save the digest file to a
known location.
The downloaded files can now be used to restore the database. To continue the upgrade, proceed to Step 2:
Install the N-able N-central server upgrade.
page 44

Step 2: Install the N-able N-central server upgrade
You can upgrade to N-able N-central 2022.5by installing the upgrade file downloaded to your N-able N-central
server or from the N-able Resource Center.
1. Log into the N-able N-central Administration Console using one of the following URLs:
n
https://
<Your Server Address>
/admin
n
https://
<Your Server Address>
:10000/
2. On the Administrator Console under the Setup section, click Version Management.
3. Choose one of the following:
N-central Direct upgrade Remote upgrade from download location
a. Select Install upgrade from local
repository.
b. Select an upgrade version from the
list of available options.
a. Select Install upgrade remotely.
b. Click Browse and navigate to the .nsp file in the
N-able Resource Center.
4. Enter an e-mail address in the Notify this email address when complete field.
5. Click Install.
If you selected the Remote Upgrade option, the .nsp file will now be uploaded to the N-able N-
central server.
Please upload the .nsp upgrade file from a machine local to the N-able N-central server in order to
avoid a file upload timeout on a slow internet connection.
Once the .nsp file is uploaded, or if you are installing from the local repository, the upgrade file will
now be extracted to the N-able N-central server. This can take a few moments.
6. Click Confirm to begin the install.
The N-able N-central Web UI and services will be stopped and the upgrade will be applied.
You can monitor the progress of the N-able N-central upgrade from the server console.
Do not reboot the N-able N-central server during the upgrade process even if it appears unresponsive.
To continue, proceed to Step 3: Post-installation steps.
page 45

Step 3: Post-installation steps
After you have installed N-able N-central, complete the following post-installation checklist.
Check items as they are completed
Verify the version of N-able N-central by signing in and click Help > Version Information. The
Associated Upgrades displayed must read Applied-update-2022.5.0.xxx-b1_0_xxx, where
xxx
is a number.
Verify the network settings and default settings by clicking Administration > Mail Network
Settings > Network Setup.
Verify that the user accounts exist and are accessible.
Verify that the customer profiles are complete and accurate.
Verify that the devices are present.
Verify that the services for each device are reporting correctly.
Verify that all of the notification profiles are present.
Verify that the reports generate and display the accurate historical data.
At the SO level, perform the following to automatically upgrade all Probes and Agents on your
customers' remote computers.
1. Click Administration > Defaults > Appliance Settings.
2. Select the Upgrade Windows Probes option as either Never (the Probe software will not
ever be upgraded) or Always (the Probe software is always upgraded).
3. Click Propagate to distribute this configuration setting to existing devices.
4. Click Reboot device if necessary to automatically restart devices after the Probe software
has been upgraded.
5. Click the Upgrade Agents option as either Never (the Agent software will not ever be
upgraded) or Always (the Agent software is always upgraded).
6. Click Propagate to distribute this configuration setting to existing devices.
7. Click Reboot device if necessary to automatically restart devices after the Agent software
has been upgraded.
You can perform the above procedure for specific Customers/Sites by navigating to the
Customer/Site level first. You will have to repeat the procedure for each Customer/Site that
you want to automatically upgrade their Windows Probes and Windows Agents.
page 46

Check items as they are completed
Once the upgrade procedure has been completed, generate an Agent/Probe Overview report by
clicking Reports >Administrative > Agent/Probe Overview in the navigation pane. This will allow
you to verify that all probes have been updated.
After upgrading an agent that monitors the Asigra Backup service, you will need to stop the
Windows agent services, place the Asigra .DLL files to the agent's bin directory and re-start
the Windows agent services.
Upgrade your monitoring software automatically for specific SOs, Customers or Sites:
Upgrade your monitoring software automatically for specific Customers or Sites:
Upgrade your monitoring software automatically for specific devices:
1. In the navigation pane, click All Devices.
2. Select the Service Organizations, Customers or Sites, or devices to upgrade.
3. Click Update Monitoring Software.
4. In the Upgrade Monitoring Software dialog box, select Now for the monitoring software you
want to upgrade from the following:
n
Upgrade Agent
n
Upgrade Backup Manager
Upgrading Endpoint Security on devices will cause them to reboot twice: once after the
existing software is removed and again when the new software is installed.
Once the upgrade procedure has been completed, generate a report by clicking:
n
Reports >Status > AV Defender Status
page 47

Rebuild or Migrate your N-able N-central server
There may be circumstances when you want to rebuild or migrate your server. For example:
n
Your N-able N-central server is not functioning properly or starting successfully;
n
An upgrade has failed but you can still log in to N-able N-central;
n
You are migrating an existing N-able N-central server to another computer.
The following scenarios describe the best way to rebuild or migrate your N-able N-central server.
The server is not working properly or starting successfully
1. Verify the version of your N-able N-central server. Technical Support can confirm the version of N-able N-
central that last communicated with N-able if your server is not working properly or cannot be restarted.
2. Locate the last valid backup of your N-able N-central server. Your N-able N-central server software will
automatically record backups but these will be saved to the same local hard drive as the server software,
which may make retrieval more difficult. You can retrieve a backup from a:
a. previously downloaded backup file in .TAR or .SHA1 format,
b. pre-configured N-able N-central that automatically sent backups to an FTP server, or
c. snapshot of your N-able N-central server recorded by a virtualized host (Hyper-V or VMWare).
Possible incomplete restore from backup.
Before recording a snapshot on an ESX or Hyper-V server, shut down the virtual machine
upon which N-able N-central is installed.
3. Install the version of N-able N-central that you were previously running.
You can re-install N-able N-central by downloading the ISO for that build (in an ISO file, not NSP). This
image should only be used for new installations, not to upgrade an existing N-able N-central server.
a. Login to the N-able Partners Success Center.
b. Click Downloads.
c. Click the release you want to re-install.
d. Select the checkbox to agree to having reviewed the known issues.
e. Click Enable Download.
f. Click the ISO for the release.
Here is an example of an ISO file available for download:
File: N-able N-central 2021.3 (2021.3.0.83) ISO
MD5: 5bdcc8a6e4e9a11323400061e2ff1fc2
Size: 934 MB
4. Restore the backup that you located inStep #2.
5. When the system restore is completed, contact N-able to have your N-able N-central server activated.
An upgrade has failed but you can still log in
Verify the version of your N-able N-central server by clicking Help > Version Information.
page 48

1. Locate the last valid backup of your N-able N-central server. Your N-able N-central server software will
automatically record backups but these will be saved to the same local hard drive as the server software
itself which may make retrieval more difficult. Some options that may be used to retrieve a backup in this
situation are:
a. Download the most recent backup that was made prior to the upgrade attempt.
a. Click Administration > System Backup and Restore > Download Backups.
b. Click Download Backup beside the name of the backup file that you would like to download.
c. Click Download Digest beside the name of the backup file.
b. You had configured N-able N-central to automatically send backups to an FTP server from which
they can be obtained.
c. You have a snapshot of your N-able N-central server recorded by a virtualized host (Hyper-V or
VMWare). If this is the case, the following steps will not apply as you can restore your server using
the snapshot.
Possible incomplete restore from backup.
Before recording a snapshot on an ESX or Hyper-V server, shut down the virtual machine
upon which N-able N-central is installed.
It is strongly recommended that snapshots of the N-able N-central server should not be
taken on a short-term schedule as this can affect system performance (and N-able N-
central records its own backups).
2. Install the version of N-able N-central that you were previously running.
You can quickly re-install N-able N-central to the exact version that you were using previously by
downloading the ISO for that build (in an ISO file, not NSP). This lets you install the ISO and then restore
your backup.
a. Login to the N-able Resource Center.
b. Click Downloads.
c. Click the release you want to re-install.
d. Select the checkbox to agree to having reviewed the known issues.
e. Click Enable Download.
f. Click the ISO for the release.
Here is an example of an ISO file available for download:
File: N-able N-central 2021.3 (2021.3.0.83) ISO
MD5: 5bdcc8a6e4e9a11323400061e2ff1fc2
Size: 934 MB
This image should only be used for new installations of N-able N-central. It is not intended for
upgrading an existing N-able N-central server.
3. Restore the backup that you located inStep #2.
4. When the system restore is completed, please contact N-able to have your N-able N-central server
activated.
page 49

Migrating an existing N-able N-central server to another computer
1. Verify the version of your N-able N-central server by clicking Help > Version Information.
2. Locate the last valid backup of your N-able N-central server. Your N-able N-central server software will
automatically record backups but these will be saved to the same local hard drive as the server software
itself which may make retrieval more difficult. Some options that may be used to retrieve a backup
include:
a. Create a new backup in order to minimize data loss.
a. Click Administration > System Backup and Restore > Configure Backups.
b. Click Save and Run Backup.
Backing up the N-able N-central database will typically take several minutes to an
hour.
b. Download the most recent backup.
a. Click Administration > System Backup and Restore > Download Backups.
b. Click Download Backup beside the name of the backup file that you would like to download.
c. Click Download Digest beside the name of the backup file.
c. You had configured N-able N-central to automatically send backups to an FTP server from which
they can be obtained.
d. You have a snapshot of your N-able N-central server recorded by a virtualized host (Hyper-V or
VMWare). If this is the case, the following steps will not apply as you can restore your server using
the snapshot.
Possible incomplete restore from backup.
Before recording a snapshot on an ESX or Hyper-V server, shut down the virtual machine
upon which is installed.
It is strongly recommended that snapshots of the N-able N-central server should not be
taken on a short-term schedule. This can affect system performance.
page 50

3. Install the version of N-able N-central that you were previously running.
For your convenience, you can quickly re-install N-able N-central to the exact version that you were
using previously by downloading the ISO for that build (in an ISO file, not NSP). This lets you install the
ISO and then restore your backup.
a. Login to the N-able Resource Center.
b. Click Downloads.
c. Click the release you want to re-install.
d. Select the checkbox to agree to having reviewed the known issues.
e. Click Enable Download.
f. Click the ISO for the release.
Here is an example of an ISO file available for download:
File: N-able N-central 2021.3 (2021.3.0.83) ISO
MD5: 5bdcc8a6e4e9a11323400061e2ff1fc2
Size: 934 MB
This image should only be used for new installations of N-able N-central. This image is not
intended for upgrading an existing N-able N-central server.
4. Restore the backup that you located inStep #2.
5. When the system restore is completed, please contact N-able to activate your N-able N-central.
page 51

Log in to N-able N-central for the first time
You can log in to N-able N-central activating N-able N-central for a 30-day trial period. During the trial period,
N-able N-central will not display the RSS feed or the What's New list. Both are available after activation.
1. From the N-able N-central homepage, log in to https://192.168.1.1.
2. Login using the following credentials:
n
Email: [email protected]
n
Password: ManageAllTheThings0!
page 52

3. The first time you log in, you will be prompted to submit information for the following fields:
Category Field Name Description
Security
Warning
Your N-able N-
central server
does not have
a valid SSL
certificate!
This is not a field that needs to be completed but is a warning
that may appear.
If this warning is displayed, and you want to properly secure your
N-able N-central server, N-able recommends that you purchase a
valid, signed SSL certificate and upload it to your N-able N-central
server. SSL certificates can be obtained from security vendors
such as RapidSSL, Verisign, and Entrust.
Login Name Login Name
The Login Name must be a valid email address. N-able N-central
will prompt you to change the Login Name to an email address
important to change the Login Name so that you can receive e-
mail notifications when an upgrade to N-able N-central is
available, and so that you can reset your password should you
forget it.
Change Login
Password
New Password Enter a new password that will be used from now on to sign in to
N-able N-central.
The password must be at least eight (8) characters in length and
contain the following:
n
at least one number
n
at least one uppercase character
n
at least one lowercase character
n
at least one special character
You can not repeat any of your previous two passwords.
Confirm New
Password
Re-enter the password.
Company
Information
Company
Name
Name of your company.
Activation ID The Activation ID number is a code required to use N-able N-
central. This should be sent to you in the initial welcome email.
If your Activation ID number is unavailable:
a. Log in to the NRC.
b. Click My Account.
c. Copy the N-able N-central Activation ID on the My
Account screen.
page 53

Category Field Name Description
Email
Information
What email
address
should
notifications
go to?
Enter the email address that will receive notifications.
What email
address
should
notifications
come from?
Enter the address that will be used as the "sender" for email
notifications.
Mail Relay
Server
A mail relay server is required to route email to destination
addresses for notifications.
The default setting for the mail relay server is the N-able N-
central (localhost.localdomain) but you may wish to
modify this to conform to your own firewall and mail server
configurations.
If you modify the mail relay server address, it must be in the
format of a valid IPaddress or a resolvable fully qualified domain
name (FQDN).
4. Click Save and Continue.
In the Getting Started Wizard, review the instructional videos to learn more before proceeding.
Until you activate N-able N-central, the Getting Started Wizard is available in the navigation pane
under the Actions menu and the Help menu. After activation, you can find it under the Help menu.
5. Click Add Customer/Site to start the Customer/Site Wizard.
6. Under Company Information, enter the Customer/Site Name.
7. Select the License Type to use for the devices in this Customer/Site.
8. If necessary, provide the default domain or network credentials that Windows Agents and Windows
Probes will use when running scripts, pushing software, and performing other administrative tasks.
9. If Default Credentials are provided, select Show Password to reveal the password as it is typed.
10. Click Save and Continue.
11. On the Add Devices page, select the method for adding devices to the Customer/Site. Install a
Windows Probe to Search for Devices is the default and is recommended. Click More Options to
select alternate methods.
page 54

12. Perform the selected process for adding devices.
a. ClickFinish to launch N-able N-central.
b. In the Introduction page, review the instructional videos as required and click Next Step.
c. In the Discovery Options page, configure the network discovery properties to discover all the
devices on your network.
d. In the Service Templates page, configure the templates to manage devices and
applications. Click Next Step.
e. In the Dashboards page, configure how to display the devices in your network. Click Next Step.
f. In the Notifications page, configure how to notify you about network issues. Click Next Step.
g. In the Rules page, configure the Rules to group devices together and apply settings to them.
Click Finish.
page 55

Activating N-able N-central
Your N-able N-central server includes an initial 30-day activation period. Perform the activation process as
soon as possible to take full advantage of your purchased licensing.
During the initial 30-day period, the following limits apply until N-able N-central is activated:
n
Branding cannot be customized,
n
Custom services cannot be uploaded, and
n
The server cannot be integrated with Report Manager
Also note the following limits for licenses and configuration settings:
n
500 Essential licenses
n
500 Professional licenses
n
20 Customers/Sites
n
5 Mobile Devices
n
1 Service Organization
n
50 Probes
n
100 Essential Mode Patch Management licenses
n
100 Third Party Patch Management licenses
Before activating N-able N-central, TCP ports 22, 80, 443, and, 10000 must be accessible to the N-able N-
central server over the Internet, and the server has a publicly-accessible IP address. See Port access
requirements for details.
Support
Contact N-able to activate your N-able N-central server.
Web Page: http://www.n-able.com
Technical Support Self-
Service Portal:
https://success.n-able.com/
Phone: Toll Free (U.S./CAN): 1-866-302-4689
International: +800-6225-3000
Local: (613) 592-6676, select option 2 for support
Once the N-able N-central server is activated you will receive an email with your Company IDand instructions.
page 56

To purchase licenses for features, contact your Partner Success Manager. You can find their contact
information in the Partner Success Center:Click the Need Assistance? button.In the Partner Success
Manager area, click View Info.Use the contact information to contact your Partner Success Manager or
email [email protected].
page 57

Contacting Technical Support
If you require assistance with configuring N-able N-central or have a technical issue, contact Technical
Support using the N-able Partner Success Center at https://success.n-able.com/ and clicking the Need
Assistance button. You can also call at 1-855-679-0817, or use the LiveChat feature within N-able N-central.
You can submit a case through the Partner Success Center directly here. You will need to be logged in to the
Partner Success Center.
In the Success Center Knowledge Base is a wide arrange of information including:
n
Case management access
n
All current N-able products, service packs and hot fixes, along with the appropriate release notes and
installation guides
n
product documentation, including online help, manuals, system requirements,
installation/configurations guides and technical references
n
FAQs
n
Support definitions, holiday support coverage calendars, and product life-cycle policies.
The LiveChat enables you to communicate directly with a Support representative if online and open and review
tickets.
For information on the port and address requirements, see Required ports and IP addresses for N-able N-
central Support.
page 58

© 2022 N-able Solutions ULC and N-able Technologies Ltd. All rights reserved.
This document may not be reproduced by any means nor modified, decompiled, disassembled, published or
distributed, in whole or in part, or translated to any electronic medium or other means without the prior written
consent of N-able. All right, title, and interest in and to the software, services, and documentation are and shall
remain the exclusive property of N-able, its affiliates, and/or its respective licensors.
N-ABLE DISCLAIMS ALL WARRANTIES, CONDITIONS, OR OTHER TERMS, EXPRESS OR IMPLIED, STATUTORY OR
OTHERWISE, ON THE DOCUMENTATION, INCLUDING WITHOUT LIMITATION NONINFRINGEMENT, ACCURACY,
COMPLETENESS, OR USEFULNESS OF ANY INFORMATION CONTAINED HEREIN. IN NO EVENT SHALL N-ABLE, ITS
SUPPLIERS, NOR ITS LICENSORS BE LIABLE FOR ANY DAMAGES, WHETHER ARISING IN TORT, CONTRACT OR ANY
OTHER LEGAL THEORY, EVEN IF N-ABLE HAS BEEN ADVISED OF THE POSSIBILITY OF SUCH DAMAGES.
The N-ABLE, N-CENTRAL, and other N-able trademarks and logos are the exclusive property of N-able Solutions
ULC and N-able Technologies Ltd. and may be common law marks, are registered, or are pending registration
with the U.S. Patent and Trademark Office and with other countries. All other trademarks mentioned herein are
used for identification purposes only and are trademarks (and may be registered trademarks) of their
respective companies.
About N-able
N-able empowers managed services providers (MSPs) to help small and medium enterprises navigate the
digital evolution. With a flexible technology platform and powerful integrations, we make it easy for MSPs to
monitor, manage, and protect their end customer systems, data, and networks. Our growing portfolio of
security, automation, and backup and recovery solutions is built for IT services management professionals. N-
able simplifies complex ecosystems and enables customers to solve their most pressing challenges. We
provide extensive, proactive support—through enriching partner programs, hands-on training, and growth
resources—to help MSPs deliver exceptional value and achieve success at scale. For more information, visit
www.n-able.com.
page 59
