
Informatica
®
Axon Data Governance
5.2
User Guide
Informatica Axon Data Governance User Guide
5.2
March 2018
©
Copyright Informatica LLC 2015, 2019
This software and documentation are provided only under a separate license agreement containing restrictions on use and disclosure. No part of this document may be
reproduced or transmitted in any form, by any means (electronic, photocopying, recording or otherwise) without prior consent of Informatica LLC.
Informatica and the Informatica logo are trademarks or registered trademarks of Informatica LLC in the United States and many jurisdictions throughout the world. A
current list of Informatica trademarks is available on the web at https://www.informatica.com/trademarks.html. Other company and product names may be trade
names or trademarks of their respective owners.
U.S. GOVERNMENT RIGHTS Programs, software, databases, and related documentation and technical data delivered to U.S. Government customers are "commercial
computer software" or "commercial technical data" pursuant to the applicable Federal Acquisition Regulation and supplemental regulations. As such,
the use, duplication, disclosure, and adaptation is subject to the restrictions and license terms set forth in the applicable Government contract, and, to the
extent applicable by the terms of the Government contract, the additional rights set forth in FAR 52.227-19, Commercial Computer Software License.
Portions of this software and/or documentation are subject to copyright held by third parties, including without limitation: Copyright DataDirect Technologies. All rights
reserved. Copyright
©
Sun Microsystems. All rights reserved. Copyright
©
RSA Security Inc. All Rights Reserved. Copyright
©
Ordinal Technology Corp. All rights
reserved. Copyright
©
Aandacht c.v. All rights reserved. Copyright Genivia, Inc. All rights reserved. Copyright Isomorphic Software. All rights reserved. Copyright
©
Meta
Integration Technology, Inc. All rights reserved. Copyright
©
Intalio. All rights reserved. Copyright
©
Oracle. All rights reserved. Copyright
©
Adobe Systems Incorporated.
All rights reserved. Copyright
©
DataArt, Inc. All rights reserved. Copyright
©
ComponentSource. All rights reserved. Copyright
©
Microsoft Corporation. All rights
reserved. Copyright
©
Rogue Wave Software, Inc. All rights reserved. Copyright
©
Teradata Corporation. All rights reserved. Copyright
©
Yahoo! Inc. All rights reserved.
Copyright
©
Glyph & Cog, LLC. All rights reserved. Copyright
©
Thinkmap, Inc. All rights reserved. Copyright
©
Clearpace Software Limited. All rights reserved. Copyright
©
Information Builders, Inc. All rights reserved. Copyright
©
OSS Nokalva, Inc. All rights reserved. Copyright Edifecs, Inc. All rights reserved. Copyright Cleo
Communications, Inc. All rights reserved. Copyright
©
International Organization for Standardization 1986. All rights reserved. Copyright
©
ej-technologies GmbH. All
rights reserved. Copyright
©
Jaspersoft Corporation. All rights reserved. Copyright
©
International Business Machines Corporation. All rights reserved. Copyright
©
yWorks GmbH. All rights reserved. Copyright
©
Lucent Technologies. All rights reserved. Copyright
©
University of Toronto. All rights reserved. Copyright
©
Daniel
Veillard. All rights reserved. Copyright
©
Unicode, Inc. Copyright IBM Corp. All rights reserved. Copyright
©
MicroQuill Software Publishing, Inc. All rights reserved.
Copyright
©
PassMark Software Pty Ltd. All rights reserved. Copyright
©
LogiXML, Inc. All rights reserved. Copyright
©
2003-2010 Lorenzi Davide, All rights reserved.
Copyright
©
Red Hat, Inc. All rights reserved. Copyright
©
The Board of Trustees of the Leland Stanford Junior University. All rights reserved. Copyright
©
EMC
Corporation. All rights reserved. Copyright
©
Flexera Software. All rights reserved. Copyright
©
Jinfonet Software. All rights reserved. Copyright
©
Apple Inc. All rights
reserved. Copyright
©
Telerik Inc. All rights reserved. Copyright
©
BEA Systems. All rights reserved. Copyright
©
PDFlib GmbH. All rights reserved. Copyright
©
Orientation in Objects GmbH. All rights reserved. Copyright
©
Tanuki Software, Ltd. All rights reserved. Copyright
©
Ricebridge. All rights reserved. Copyright
©
Sencha,
Inc. All rights reserved. Copyright
©
Scalable Systems, Inc. All rights reserved. Copyright
©
jQWidgets. All rights reserved. Copyright
©
Tableau Software, Inc. All rights
reserved. Copyright
©
MaxMind, Inc. All Rights Reserved. Copyright
©
TMate Software s.r.o. All rights reserved. Copyright
©
MapR Technologies Inc. All rights reserved.
Copyright
©
Amazon Corporate LLC. All rights reserved. Copyright
©
Highsoft. All rights reserved. Copyright
©
Python Software Foundation. All rights reserved.
Copyright
©
BeOpen.com. All rights reserved. Copyright
©
CNRI. All rights reserved.
This product includes software developed by the Apache Software Foundation (http://www.apache.org/), and/or other software which is licensed under various
versions of the Apache License (the "License"). You may obtain a copy of these Licenses at http://www.apache.org/licenses/. Unless required by applicable law or
agreed to in writing, software distributed under these Licenses is distributed on an "AS IS" BASIS, WITHOUT WARRANTIES OR CONDITIONS OF ANY KIND, either express
or implied. See the Licenses for the language governing permissions and limitations under the Licenses.
This product includes software which was developed by Mozilla (http://www.mozilla.org/), software copyright The JBoss Group, LLC, all rights reserved; software
copyright
©
1999-2006 by Bruno Lowagie and Paulo Soares and other software which is licensed under various versions of the GNU Lesser General Public License
Agreement, which may be found at http:// www.gnu.org/licenses/lgpl.html. The materials are provided free of charge by Informatica, "as-is", without warranty of any
kind, either express or implied, including but not limited to the implied warranties of merchantability and for a particular purpose.
The product includes ACE(TM) and TAO(TM) software copyrighted by Douglas C. Schmidt and his research group at Washington University, University of California,
Irvine, and Vanderbilt University, Copyright (
©
) 1993-2006, all rights reserved.
This product includes software developed by the OpenSSL Project for use in the OpenSSL Toolkit (copyright The OpenSSL Project. All Rights Reserved) and
redistribution of this software is subject to terms available at http://www.openssl.org and http://www.openssl.org/source/license.html.
This product includes Curl software which is Copyright 1996-2013, Daniel Stenberg, <[email protected]>. All Rights Reserved. Permissions and limitations regarding this
software are subject to terms available at http://curl.haxx.se/docs/copyright.html. Permission to use, copy, modify, and distribute this software for any purpose with or
without fee is hereby granted, provided that the above copyright notice and this permission notice appear in all copies.
The product includes software copyright 2001-2005 (
©
) MetaStuff, Ltd. All Rights Reserved. Permissions and limitations regarding this software are subject to terms
available at http://www.dom4j.org/ license.html.
The product includes software copyright
©
2004-2007, The Dojo Foundation. All Rights Reserved. Permissions and limitations regarding this software are subject to
terms available at http://dojotoolkit.org/license.
This product includes ICU software which is copyright International Business Machines Corporation and others. All rights reserved. Permissions and limitations
regarding this software are subject to terms available at http://source.icu-project.org/repos/icu/icu/trunk/license.html.
This product includes software copyright
©
1996-2006 Per Bothner. All rights reserved. Your right to use such materials is set forth in the license which may be found at
http:// www.gnu.org/software/ kawa/Software-License.html.
This product includes OSSP UUID software which is Copyright
©
2002 Ralf S. Engelschall, Copyright
©
2002 The OSSP Project Copyright
©
2002 Cable & Wireless
Deutschland. Permissions and limitations regarding this software are subject to terms available at http://www.opensource.org/licenses/mit-license.php.
This product includes software developed by Boost (http://www.boost.org/) or under the Boost software license. Permissions and limitations regarding this software
are subject to terms available at http:/ /www.boost.org/LICENSE_1_0.txt.
This product includes software copyright
©
1997-2007 University of Cambridge. Permissions and limitations regarding this software are subject to terms available at
http:// www.pcre.org/license.txt.
This product includes software copyright
©
2007 The Eclipse Foundation. All Rights Reserved. Permissions and limitations regarding this software are subject to terms
available at http:// www.eclipse.org/org/documents/epl-v10.php and at http://www.eclipse.org/org/documents/edl-v10.php.
This product includes software licensed under the terms at http://www.tcl.tk/software/tcltk/license.html, http://www.bosrup.com/web/overlib/?License, http://
www.stlport.org/doc/ license.html, http://asm.ow2.org/license.html, http://www.cryptix.org/LICENSE.TXT, http://hsqldb.org/web/hsqlLicense.html, http://
httpunit.sourceforge.net/doc/ license.html, http://jung.sourceforge.net/license.txt , http://www.gzip.org/zlib/zlib_license.html, http://www.openldap.org/software/
release/license.html, http://www.libssh2.org, http://slf4j.org/license.html, http://www.sente.ch/software/OpenSourceLicense.html, http://fusesource.com/downloads/
license-agreements/fuse-message-broker-v-5-3- license-agreement; http://antlr.org/license.html; http://aopalliance.sourceforge.net/; http://www.bouncycastle.org/
licence.html; http://www.jgraph.com/jgraphdownload.html; http://www.jcraft.com/jsch/LICENSE.txt; http://jotm.objectweb.org/bsd_license.html; . http://www.w3.org/

Consortium/Legal/2002/copyright-software-20021231; http://www.slf4j.org/license.html; http://nanoxml.sourceforge.net/orig/copyright.html; http://www.json.org/
license.html; http://forge.ow2.org/projects/javaservice/, http://www.postgresql.org/about/licence.html, http://www.sqlite.org/copyright.html, http://www.tcl.tk/
software/tcltk/license.html, http://www.jaxen.org/faq.html, http://www.jdom.org/docs/faq.html, http://www.slf4j.org/license.html; http://www.iodbc.org/dataspace/
iodbc/wiki/iODBC/License; http://www.keplerproject.org/md5/license.html; http://www.toedter.com/en/jcalendar/license.html; http://www.edankert.com/bounce/
index.html; http://www.net-snmp.org/about/license.html; http://www.openmdx.org/#FAQ; http://www.php.net/license/3_01.txt; http://srp.stanford.edu/license.txt;
http://www.jmock.org/license.html; http://xsom.java.net; http://benalman.com/about/license/; https://github.com/CreateJS/
EaselJS/blob/master/src/easeljs/display/Bitmap.js; http://www.h2database.com/html/license.html#summary; http://jsoncpp.sourceforge.net/LICENSE; http://
jdbc.postgresql.org/license.html; http://protobuf.googlecode.com/svn/trunk/src/google/protobuf/descriptor.proto; https://github.com/rantav/hector/blob/master/
LICENSE; http://web.mit.edu/Kerberos/krb5-current/doc/mitK5license.html; http://jibx.sourceforge.net/jibx-license.html; https://github.com/lyokato/libgeohash/blob/
master/LICENSE; https://github.com/hjiang/jsonxx/blob/master/LICENSE; https://code.google.com/p/lz4/; https://github.com/jedisct1/libsodium/blob/master/
LICENSE; https://github.com/EsotericSoftware/kryo/blob/master/license.txt; http://www.scala-
lang.org/license.html; https://github.com/tinkerpop/blueprints/blob/master/LICENSE.txt; http://gee.cs.oswego.edu/dl/classes/EDU/oswego/cs/dl/util/concurrent/
intro.html; https://aws.amazon.com/asl/; https://github.com/twbs/bootstrap/blob/master/LICENSE; https://sourceforge.net/p/xmlunit/code/HEAD/tree/trunk/
LICENSE.txt; https://github.com/documentcloud/underscore-contrib/blob/master/LICENSE, and https://github.com/apache/hbase/blob/master/LICENSE.txt.
This product includes software licensed under the Academic Free License the Common Development and
Distribution License (http://www.opensource.org/licenses/cddl1.php) the Common Public License (http://www.opensource.org/licenses/cpl1.0.php), the Sun Binary
Code License Agreement Supplemental License Terms, the BSD License (http:// www.opensource.org/licenses/bsd-license.php), the new BSD License (http://
opensource.org/licenses/BSD-3-Clause), the MIT License (http://www.opensource.org/licenses/mit-license.php), the Artistic License (http://www.opensource.org/
licenses/artistic-license-1.0) and the Initial Developer’s Public License Version 1.0
This product includes software copyright
©
2003-2006 Joe WaInes, 2006-2007 XStream Committers. All rights reserved. Permissions and limitations regarding this
software are subject to terms available at http://xstream.codehaus.org/license.html. This product includes software developed by the Indiana University Extreme! Lab.
For further information please visit http://www.extreme.indiana.edu/.
This product includes software Copyright (c) 2013 Frank and Markus Moeller. All rights reserved. Permissions and limitations regarding this software are subject
to terms of the MIT license.
See patents at https://www.informatica.com/legal/patents.html.
DISCLAIMER: Informatica LLC provides this documentation "as is" without warranty of any kind, either express or implied, including, but not limited to, the implied
warranties of noninfringement, merchantability, or use for a particular purpose. Informatica LLC does not warrant that this software or documentation is error free. The
information provided in this software or documentation may include technical inaccuracies or typographical errors. The information in this software and documentation
is subject to change at any time without notice.
NOTICES
This Informatica product (the "Software") includes certain drivers (the "DataDirect Drivers") from DataDirect Technologies, an operating company of Progress Software
Corporation ("DataDirect") which are subject to the following terms and conditions:
1. THE DATADIRECT DRIVERS ARE PROVIDED "AS IS" WITHOUT WARRANTY OF ANY KIND, EITHER EXPRESSED OR IMPLIED, INCLUDING BUT NOT LIMITED TO,
THE IMPLIED WARRANTIES OF MERCHANTABILITY, FITNESS FOR A PARTICULAR PURPOSE AND NON-INFRINGEMENT.
2. IN NO EVENT WILL DATADIRECT OR ITS THIRD PARTY SUPPLIERS BE LIABLE TO THE END-USER CUSTOMER FOR ANY DIRECT, INDIRECT, INCIDENTAL,
SPECIAL, CONSEQUENTIAL OR OTHER DAMAGES ARISING OUT OF THE USE OF THE ODBC DRIVERS, WHETHER OR NOT INFORMED OF THE POSSIBILITIES
OF DAMAGES IN ADVANCE. THESE LIMITATIONS APPLY TO ALL CAUSES OF ACTION, INCLUDING, WITHOUT LIMITATION, BREACH OF CONTRACT, BREACH
OF WARRANTY, NEGLIGENCE, STRICT LIABILITY, MISREPRESENTATION AND OTHER TORTS.
The information in this documentation is subject to change without notice. If you any problems in this documentation, report them to us at
Informatica products are warranted according to the terms and conditions of the agreements under which they are provided. INFORMATICA PROVIDES THE
INFORMATION IN THIS DOCUMENT "AS IS" WITHOUT WARRANTY OF ANY KIND, EXPRESS OR IMPLIED, INCLUDING WITHOUT ANY WARRANTIES OF
MERCHANTABILITY, FITNESS FOR A PARTICULAR PURPOSE AND ANY WARRANTY OR CONDITION OF NON-INFRINGEMENT.
Publication Date: 2019-05-16
Table of Contents
Preface ...................................................................... 8
Informatica Resources................................................... 8
Informatica Network................................................. 8
Informatica Knowledge Base............................................ 8
Informatica Documentation............................................. 8
Informatica Product Availability Matrixes.................................... 9
Informatica Velocity.................................................. 9
Informatica Marketplace............................................... 9
Informatica Global Customer Support...................................... 9
Chapter 1: Getting Started with Axon........................................ 10
Introduction to Axon.................................................... 10
Inventorize....................................................... 10
Connect......................................................... 11
Control......................................................... 11
Users............................................................. 12
User Profiles...................................................... 12
Chapter 2: Search and View................................................. 14
Searching and Viewing Objects Overview...................................... 14
The Axon Interface..................................................... 15
Toolbar......................................................... 15
Facets.......................................................... 16
Grid........................................................... 16
Searching for Objects................................................... 18
Unison Search..................................................... 18
Unison Search Operators.............................................. 19
Unison Search Options............................................... 20
Quick Search..................................................... 21
Working with the Search Results............................................ 21
Add Grid Items to Unison Search......................................... 22
Searching in Hierarchical Facets......................................... 22
Saving and Sharing Searches........................................... 22
Viewing Object Details.................................................. 24
Summary........................................................ 24
Interfaces....................................................... 24
Attributes........................................................ 25
Relationships..................................................... 26
Stakeholders..................................................... 26
Values.......................................................... 27
4 Table of Contents
Data Quality...................................................... 27
Impact......................................................... 27
History......................................................... 27
Change......................................................... 28
Viewing My Items..................................................... 28
Following Objects..................................................... 28
Viewing Notifications................................................... 28
Notifications in Axon................................................ 29
Notifications via Email............................................... 29
Managing Locks...................................................... 29
Viewing Object Dashboards............................................... 30
Data Quality View................................................... 30
Stewardship View.................................................. 31
Process View..................................................... 32
Viewing Data Privacy Metrics.............................................. 32
Risk Score....................................................... 33
Risk Cost........................................................ 34
Protection Status................................................... 34
Sensitivity Levels................................................... 34
Policy Violations................................................... 34
Severity Level..................................................... 35
Viewing Data Privacy Dashboard......................................... 35
Viewing Insight Maps................................................... 35
Interpreting and Interacting with the Map................................... 36
Insight Maps Palette................................................. 37
Viewing Local Maps.................................................... 39
Viewing Process Maps.................................................. 39
Viewing Data Quality Reports.............................................. 41
Chapter 3: Create........................................................... 42
Create Objects Overview................................................. 42
Creating an Object..................................................... 43
Capability Properties................................................ 43
Data Set Properties................................................. 44
Geography Properties................................................ 45
Glossary Properties................................................. 45
Organizational Unit Properties.......................................... 47
Policy Properties................................................... 48
Process Properties.................................................. 49
Product Properties.................................................. 50
Project Properties.................................................. 51
Regulation Properties................................................ 51
Regulator Properties................................................. 54
Table of Contents 5
Regulatory Theme Properties........................................... 54
System Interface Properties............................................ 55
System Properties.................................................. 56
Editing an Object...................................................... 57
Clone Data Set....................................................... 57
Cloning a Data Set.................................................. 58
Create Change Requests................................................. 58
Creating a Change Request............................................ 59
Create Workflows..................................................... 59
Custom Workflows.................................................. 60
Creating a Custom Workflow........................................... 60
Assigning and Running a Workflow....................................... 60
Workflows Discussion................................................ 61
Stuck Workflow.................................................... 61
Create a Workflow Diagram............................................ 61
Workflow Diagram Example............................................ 63
Connect Objects...................................................... 68
View and Edit Modes................................................ 68
Create Connections................................................. 69
Search and Add Connections........................................... 69
Data Quality Rules..................................................... 69
Local DQ Rules.................................................... 70
Standard DQ Rules.................................................. 70
Creating Local DQ Rules.............................................. 70
Linking Profiles and Scorecards to Local DQ Rules............................. 72
Enhance Local DQ Rules.............................................. 73
Creating Standard DQ Rules............................................ 74
Associating Local Data Quality Rules to a Standard Data Quality Rule................. 74
Manually Add DQ Report Data........................................... 75
Bulk Upload Objects.................................................... 75
Bulk Uploading Data................................................. 77
Chapter 4: Administer....................................................... 79
Administrative Tasks Overview............................................. 80
User Roles.......................................................... 80
Configure Roles.................................................... 80
Object Permissions.................................................... 81
Assign Permissions to Roles........................................... 82
Default Workflows..................................................... 82
Create a Default Workflow............................................. 83
Add Users.......................................................... 83
Bulk Upload Users to the People Facet..................................... 84
Manually Add Users to the People Facet.................................... 85
6 Table of Contents
View Licensed Users................................................... 86
Bulk Update......................................................... 86
Manage Locks....................................................... 87
Configure Glossary Rules Engine............................................ 87
Reindex Search Service and Rebuild Maps Database............................... 88
Download Logs....................................................... 89
Configure Dropdowns................................................... 89
Configure Static Pages.................................................. 90
View System Information................................................. 91
Display Your Organization Logo............................................ 91
Customize the Axon Interface Theme......................................... 92
Linking to Enterprise Metadata............................................. 92
Configure Access to Enterprise Data Catalog................................. 92
Enterprise Catalog Facets............................................. 93
Integration Overview................................................. 96
Bulk Upload Templates.................................................. 98
Business & Change Object Templates...................................... 98
Data & Technology Object Templates..................................... 105
Organizational Object Templates........................................ 124
Relationship Templates.............................................. 132
Role Templates................................................... 142
Configure Access Control............................................... 145
Configure Access to Informatica Data Quality................................... 146
Configure Access to Secure@Source........................................ 147
Specify Prefix for Object Reference Numbers................................... 147
Configure Email Delivery Options........................................... 148
Specify Support Email Address............................................ 149
Update Cache with Configuration Values...................................... 150
Appendix A: Glossary...................................................... 151
Index........................................................... 154
Table of Contents 7

Preface
The Axon User Guide is intended to help data stewards, administrators, business users and technical users to
work with Axon.
This guide covers the tasks that you can perform using the Axon web UI.
Informatica Resources
Informatica Network
Informatica Network hosts Informatica Global Customer Support, the Informatica Knowledge Base, and other
product resources. To access Informatica Network, visit https://network.informatica.com.
As a member, you can:
•
Access all of your Informatica resources in one place.
•
Search the Knowledge Base for product resources, including documentation, FAQs, and best practices.
•
View product availability information.
•
Review your support cases.
•
Find your local Informatica User Group Network and collaborate with your peers.
Informatica Knowledge Base
Use the Informatica Knowledge Base to search Informatica Network for product resources such as
documentation, how-to articles, best practices, and PAMs.
To access the Knowledge Base, visit https://kb.informatica.com. If you have questions, comments, or ideas
about the Knowledge Base, contact the Informatica Knowledge Base team at
KB_Feedback@informatica.com.
Informatica Documentation
To get the latest documentation for your product, browse the Informatica Knowledge Base at
https://kb.informatica.com/_layouts/ProductDocumentation/Page/ProductDocumentSearch.aspx.
If you have questions, comments, or ideas about this documentation, contact the Informatica Documentation
team through email at infa_documentation@informatica.com.
8

Informatica Product Availability Matrixes
Product Availability Matrixes (PAMs) indicate the versions of operating systems, databases, and other types
of data sources and targets that a product release supports. If you are an Informatica Network member, you
can access PAMs at
https://network.informatica.com/community/informatica-network/product-availability-matrices.
Informatica Velocity
Informatica Velocity is a collection of tips and best practices developed by Informatica Professional
Services. Developed from the real-world experience of hundreds of data management projects, Informatica
Velocity represents the collective knowledge of our consultants who have worked with organizations from
around the world to plan, develop, deploy, and maintain successful data management solutions.
If you are an Informatica Network member, you can access Informatica Velocity resources at
http://velocity.informatica.com.
If you have questions, comments, or ideas about Informatica Velocity, contact Informatica Professional
Services at ips@informatica.com.
Informatica Marketplace
The Informatica Marketplace is a forum where you can find solutions that augment, extend, or enhance your
Informatica implementations. By leveraging any of the hundreds of solutions from Informatica developers
and partners, you can improve your productivity and speed up time to implementation on your projects. You
can access Informatica Marketplace at https://marketplace.informatica.com.
Informatica Global Customer Support
You can contact a Global Support Center by telephone or through Online Support on Informatica Network.
To find your local Informatica Global Customer Support telephone number, visit the Informatica website at
the following link:
http://www.informatica.com/us/services-and-training/support-services/global-support-centers.
If you are an Informatica Network member, you can use Online Support at http://network.informatica.com.
Preface 9

C h a p t e r 1
Getting Started with Axon
This chapter includes the following topics:
•
Introduction to Axon, 10
•
Users, 12
Introduction to Axon
Axon Data Governance is a knowledge repository tool that you can use to document the data items that
require governance. Data owners, data stewards, subject matter experts, and other responsible stakeholders
collaborate across the organization to progressively chart the business reality of data, its lineage, and usage
across processes, policies, projects, and regulation.
Inventorize
To effectively use Axon, you must inventorize the important data assets of your organization. Axon is a
central repository for the frequent tasks performed by any department and the data assets used in the
department.
Axon does not store any source data. Axon maintains an inventory of metadata such as systems, data sets,
attributes, definitions, and projects. Content managers can manually create data objects or bulk upload them
to Axon. Administrators can assign stakeholders to objects and establish ownership of data.
You can create the following types of data and technology related data objects:
•
Attributes
•
Data Sets
•
Data Quality
•
Glossary
•
System Interface
•
System
You can create the following types of business and change related data objects:
•
Business Area
•
Change Request
•
Committee
•
Policy
10
•
Process
•
Project
•
Role
You can create the following types of organizational data objects:
•
Business Area
•
Capability
•
Client
•
Legal Entity
•
Org Unit
•
People
•
Product
You can create the following types of regulatory data objects:
•
Geography
•
Regulation
•
Regulator
•
Regulatory Theme
Connect
Axon connects data in the inventory and displays the connected data in dashboards, maps, and advanced
search results. Content managers can manually define connections between objects. Axon consumers can
view these connections after they open the object.
Axon displays lineage connections between objects as maps. You can view two types of map. You can view a
local map when you open an object, or a system wide Insight map from the toolbar. You can narrow down the
scope of the Insight map when you perform a Unison search. Unison search is a powerful search function
that searches for the objects and the linked objects in all the available facets.
Axon displays dashboards to represent the health of your data. Axon displays local dashboards and system-
wide dashboards. The local dashboard displays the data quality of the active object, including a roll-up of the
data quality scores of linked objects. You can configure the information that Axon displays in the system-
wide dashboard.
Control
Axon provides an integrated view of roles and responsibilities. Consumers of data can view object
information from the Axon interface without logging in. Axon ensures that content is managed responsibly by
permitting only assigned users to edit objects.
You can manage users in Axon with profiles and roles. Profiles control the level of access that a user has
while working with Axon.
Content managers can assign stakeholders to objects. Administrators assign stakeholder roles to users.
Every object displays a list of stakeholders. Stakeholders establish who in the organisation has knowledge
pertinent to the object. This allows all users to communicate with the right people when considering
definitions and understanding the effects of changes.
Introduction to Axon
11
Users
You can view objects in Axon without logging in. After logging in, you can perform tasks on objects based on
the user profile that the administrator has associated with your account.
An Axon user can perform the following different types of tasks based on the profile that is assigned to their
account:
•
Administering users and managing Axon
•
Creating and managing content
•
Viewing content
User Profiles
Every Axon user has a user profile. The type of profile decides the tasks that a user can perform in Axon. An
administrator associates user profiles to user accounts.
Users can have one of the following user profiles associated with their account:
WebUser
A WebUser is the most basic user profile in Axon. WebUsers have permission to view content.
An administrator can provide advanced permissions to a WebUser on a facet by assigning a role. The
WebUser then becomes a stakeholder for the facet and can perform other tasks to create or manage
content for the facet. For example, a WebUser with the relevant role and permission can bulk upload data
to Axon.
Admin
Users can perform administrative tasks on facets if they are assigned the Admin profile. Users with the
admin profile have access to the Admin Panel.
Users with the Admin profile can perform the following tasks from the Admin Panel:
•
Assign roles and permissions
•
Use the static page editor
•
Manage locks
•
Reset passwords
•
View Enterprise Catalog menu items
•
Bulk upload objects
•
View non-public and deleted objects
•
View licensed users
•
Download logs
SuperAdmin
Users with the SuperAdmin profile can perform all administrative tasks in Axon. In addition to the tasks
that a user with the Admin profile can perform, a user with a SuperAdmin profile can perform the
following tasks:
•
Create roles and permissions
•
Configure default workflows
•
Configure drop-downs
12
Chapter 1: Getting Started with Axon
•
Edit the glossary rules engine
•
Bulk upload objects
•
Import Data
•
Configure automatic glossary assignment
•
View non-public and deleted objects
•
View licensed users
•
Download logs
•
Customize and configure Axon
Users 13

C h a p t e r 2
Search and View
This chapter includes the following topics:
•
Searching and Viewing Objects Overview, 14
•
The Axon Interface, 15
•
Searching for Objects, 18
•
Working with the Search Results, 21
•
Viewing Object Details, 24
•
Viewing My Items, 28
•
Following Objects, 28
•
Viewing Notifications, 28
•
Managing Locks, 29
•
Viewing Object Dashboards, 30
•
Viewing Data Privacy Metrics, 32
•
Viewing Insight Maps, 35
•
Viewing Local Maps, 39
•
Viewing Process Maps, 39
•
Viewing Data Quality Reports, 41
Searching and Viewing Objects Overview
You can access Axon using a web browser. After you open Axon, you can search for objects in the Axon,
manage notifications, and view maps and dashboards. To look up objects, you do not need to be logged in.
From the Axon home page, you can log in using your username and password. Once you log in, you can
create objects, view notifications and other personalized items.
14

The Axon Interface
Search and view objects from the Axon interface. You can log in to Axon from the landing page, access
Unison and Quick searches, and view Axon facets and objects. The landing page and Unison are the two main
pages of Axon.
After you run a Unison search, you can view the objects in the search results.
The following image shows the Axon interface:
1.
Toolbar. Visible from the landing page and Unison.
2.
Facets. Visible in Unison.
3.
Grid. Visible in Unison.
Toolbar
Axon displays a toolbar at the top of the Axon interface. The toolbar has menus that you use to view more
options to perform specific actions. The menu items in the toolbar change based on the Axon page that you
are accessing and whether you are logged in or not.
The following table lists the menu items visible in the toolbar from the landing page and the login criteria to
see the options:
Toolbar Option Login Required? Description
Search No Search for Axon objects in the catalog using
Unison search.
Quick Search No Search for Axon objects and directly open the
object from the list of results.
Login No Log in to Axon.
Help No Access the online help for Axon.
My Items Yes View the recently visited objects, the objects
that you are following, and the objects in which
you have a stakeholder role.
The Axon Interface 15

Toolbar Option Login Required? Description
Create Yes Create new objects based on your role.
Notifications Yes View your Axon notifications and actions that
you need to perform.
Locks Yes Prevent users from editing an object. You can
view objects that you have locked and manage
locks from the My Locked Items pop-up.
User Menu Yes Perform the following actions from the user
menu:
-
Access your page in the people facet and
manage objects that you are following.
-
Access the Admin Panel if you have an
administrator account.
-
Log out of Axon.
The following table lists the menu items visible in the toolbar from Unison and the login criteria to see the
options:
Toolbar Option Login Required? Description
Maps No View search results as an interactive diagram
using Insight Maps.
Enterprise Catalog Yes Access the Resources and Fields facets to link
enterprise metadata from Enterprise Data
Catalog.
Facets
Axon displays objects in the Unison page categorized by facets. Axon uses facets to describe different
aspects of an organization.
Unison does not display all the facets by default. Axon contains a large number of facets and not all of them
might be relevant to your organization. If you want to show or hide a facet, click the + icon to the right of the
Unison page and select the checkbox against the facet from the drop-down menu. You can choose to save
the layout so that you can view the facets that you want whenever you log in. When you save the layout, Axon
saves the grid columns along with the facet. When you switch from one facet to another, Axon automatically
changes the facet on the Unison search toolbar. Each facet has a counter that displays the number of objects
in the facet and how many of them are currently visible. Axon filters the objects in a facet based on the
search keyword in the Unison search.
Grid
Axon displays objects in a grid below the facets. The grid consists of List and Dashboard tabs. If you open
Unison without searching for any keyword, Axon displays all the objects from the catalog in the grid.
List
Axon displays objects on the List tab of the grid based on the search criteria. The List tab consists of grid
columns that you can configure. The grid columns vary based on a facet. The number of rows in the grid
16
Chapter 2: Search and View

increases dynamically as you scroll down. The objects in the grid are not sorted. You can choose to sort
based on the columns that contain the sort arrow icon next to it.
The following table describes sample grid columns:
Column Name Description
Name Name of the object.
Description Description of the object.
Type Type of the object.
Axon Status Status of the object. Permitted values: Active, Inactive, Pending Review, Obsolete, Deleted.
Long Name Full name of the object.
Lifecycle Lifecycle of the object. The permitted values are based on the object type. An administrator can
customize these values.
Classification Classification of the object. The permitted values are based on the object type. An administrator can
customize these values.
Dashboard
Axon displays search results as a dashboard for each facet. The dashboard provides a visual representation
of data based on the search results that you view in the List tab.
If you click the Dashboard tab from the grid without performing a Unison search, Axon uses data available for
all the objects in the facet to calculate the dashboard results. After you perform a Unison search, Axon
calculates and displays graphs based on the search results for each facet on the Dashboard tab.
The dashboard items differ based on each facet. For example, when you view the dashboard for a Data Set
facet, Axon displays graphs for parameters, such as Status, Lifecycle, and Type. When you view the
dashboard for a Process facet, Axon displays graphs parameters, such as Type, Lifecycle, Status,
Classification, Automation, and Level.
Hover the mouse over a graph to see the breakdown of a parameter. Click a color in the legend below the
graph to remove a value from the graph. Axon redraws the dashboard to display graphs based on the
remaining values.
The following image shows a sample dashboard for a Data Set facet:
The Axon Interface
17

Searching for Objects
Use Unison and Quick searches to search for objects in Axon. Searching for an object is the quickest way to
view the object properties.
Unison Search
Unison search is a powerful search function that is central to Axon. When you run a Unison search, Axon
searches for the objects and the linked objects in all the available facets. Axon searches for objects in all
facets during each Unison Search, regardless of whether or not the facets are hidden.
Axon filters the objects in the facets based on the keyword that you searched. You can select a facet in which
you want to perform the search. When you click the menu to select a facet, you can view the active and
hidden facets. If you select another active facet, Axon automatically switches to the facet that you selected
in the Facets layout. If you click a hidden facet, the facet is added to the active facets and appears in the
Facets layout. You can configure the filter options to refine the search. The filter options appear based on the
facet that you select. For example, you want to search the glossary term CMD-ID that has an approved
lifecycle and active status. You enter the keyword as CMD-ID and select the Glossary facet. Configure the
filter options such as Text search, Lifecycle, and Status, and then perform a search to find accurate results.
The following image shows a sample Unison search criteria:
When Axon applies an active filter to a facet based on the search keyword, the color of the facet changes to
orange. You can see a count of the number of objects in a facet next to the facet name. After you search for
an object, Axon updates the counter in each facet to show the number of assets that are linked to the search
keyword and filters the objects in the facets to display only those that are linked. After you search for the first
time, Axon creates and displays a search counter with a numeric digit drop-down. The search counter
increases based on the number of searches. You can view the current active searches that you performed
from the search counter drop-down. You can view all the saved searches from the My searches list.
When you open maps, Axon displays objects linked to the keyword that you searched for. You can see how
objects in one facet are connected to items in other facets. Unison search uses both direct and indirect
connections to display the items that are most relevant to the search.
For some facets, Axon uses a direct connection to filter objects. For example, when you filter for projects, the
objects are filtered in the systems, processes, policies, people and glossary facets that are directly
connected to the project.
For some facets, Axon uses an indirect connection to filter objects. For example, when Axon filters objects in
projects, data sets and attribute facets are filtered based on an indirect link through the system and glossary
18
Chapter 2: Search and View
items that are connected to the project. Axon first looks at the system and glossary items that the project
links to and then determines which data set and attributes are relevant.
You can perform the following tasks after you search for a keyword:
Add to search
You can add a keyword to an existing search. Axon treats the search keywords as an AND operation.
When you search a keyword for the first time after you log in, you can view the Add to search button.
When you add a keyword to a search, Axon filters the search results further to only items that match the
filter in each facet with an active search. Enter another keyword and click Add to Search to add the
keyword to an existing search. For example, you first search for the Party Data glossary term. Enter the
name "John" in the keyword, select the People facet, and click Add to search. Axon refines the search
and filters the Party Data glossary term for which the stakeholder is "John".
Clear
Clear the previous search before you start a new search. Click Clear next to the Add to search button to
clear all the searches that you performed.
Unison Search Operators
You can include logical operators in a search query to refine the search results. Apply the logical operators
such as AND, OR, and NOT to filter to the search results.
After you log in and search for the first time, you can view the AND drop-down next to the search field.
Use the following operators to refine the Unison search results:
Find
The default operator that you always apply when you perform the first search.
And
The operator adds additional search options to a simple search that you already performed. For
example, you want to search for an attribute that is part of a data set and the data set needs to be part of
a particular system. When you use the AND operator, objects that match both criteria appear in the
search results. The And operator has a blue background color.
Or
The operator helps search based on any one of the multiple search criteria. For example, you want to
search for a data set with the name "Trading" or a system with a "Trading Platform" classification. The
search results include all the data sets that start with the name "Trading" and the systems that are
classified as "Trading Platform". The Or operator has a green background color.
Not
The operator that excludes a specific item from a search. For example, you want to search for a system
with the name "Enterprise" excluding the associated glossary "CMD-ID". The Not operator has a red
background color.
Searching for Objects
19

Unison Search Options
Every time you perform a search, Axon adds the search criteria for reuse. Click the count drop-down to view
the search options for each search operation that you performed.
The following image shows the various search options that you can use in a Unison search:
You can perform the following operations for a Unison search:
Edit
You can choose to update a search. Click Edit and update the keyword and search filter.
Reorder this search
You can choose to perform a specific search operation prior to another search operation from a list of
multiple searches. Click the Reorder this search icon and drag it upwards or downwards to change the
order of search.
Mute this search
You can choose not to run a specific search from a list of multiple searches. Click the Mute this search
icon to disable the search. Later, if you want to use any other option for the search, you need to click the
Unmute this search icon.
Run only this search
You can choose to run a particular search from a list of searches. Click the Run only this search icon to
run a specific search.
Clear this search
If you want to delete a particular search, click the Clear this search icon.
Add to group
If you have multiple complex searches, you might want to group specific searches and run them before
the rest of the searches. To group searches, click the Add to group icon. Axon adds the search to a
group. When you run a search, Axon first applies search criteria based on the combination of the group
and then based on the rest of the searches. For example, you want to search the attributes that do not
contain any glossary or data quality rule. First, you group the search for all the attributes that do not
contain any glossary. Next, group the search for all the attributes that do not contain any data quality
rule. When you apply the AND operator to both the groups, objects that match both criteria appear in the
search results.
If you choose to reorder, mute, run, or clear a search that is part of a group, the action applies to all the
searches within the group. If you want to separate a group, click the Remove from group icon.
20
Chapter 2: Search and View
Save search
You can choose to save the searches for reuse. Click the Save search icon to save the searches. You
need to provide a name and description for the search criteria. You can edit a saved search to add more
filters. You can save the edited search as an update to the existing search or as a new search.
Refresh
If you want to refresh the search results, click the Refresh icon.
Quick Search
Quick Search makes it easy to find objects in Axon across all facets directly. The Quick Search bar is located
in the toolbar and is visible from the landing page and Unison. Quick Search searches every item in Axon for a
match.
To perform a quick search, click the search icon to expand the menu and type a search keyword. Axon
displays a list of terms that match your keyword in a window that opens below the search menu. If you click
the name of any object displayed in the Quick Search results, Axon opens the object page.
Quick search looks for the following matches:
•
Object names
•
Alias name (Glossary facet only)
•
Reference ID (for those facets that have one)
As Quick Search allows partial matches, it starts searching as soon as you start typing. Normally you do not
need to enter many characters before you are offered results. The search refines itself based on your search
keyword.
Quick Search also searches for any glossary item alias names. If any matches are found on the alias term,
Axon displays the object’s standard name (not the alias) in the results pop-up.
Quick Search may find matches across many facets. When this happens, Axon displays the results ordered
by facet. Axon displays only the first three matches per facet in the search window. You can use the scroll
bar to see more results in the pop-up.
You can re-order the facets that Axon displays in the search window to move the results that you are
interested in. Click the drop-down arrow next to the gear icon in the Quick Search menu. Axon displays a list
of facets in the Order Search Results window. Select the facet that you wish to re-order and click and drag it
up or down the list. Axon will remember your preference for the rest of the login session, or until you clear
cookies on the page.
Working with the Search Results
You can filter the objects, search within hierarchical facets, and save and share search results after Axon
displays the Unison search results.
You can filter the search results based on one or more items shown in any of the grids. Each facet has one or
more filters. The filters vary based on the facet. Some facets, including the glossary facet, have options to
include items within the same facet that are hierarchically linked to the search term. You can also share the
saved search results with other Axon users.
Working with the Search Results
21
Add Grid Items to Unison Search
You can manually add items from the grid to the current search to refine the search results.
To add items to the current search, you need to select a single row or multiple rows that you want to include
from the grid. To select multiple items, use the Shift or Control keys when you click the items.
When you click the Add to search button, Axon includes the selected items in the current search and refines
search results based on the selected grid items. After you run the search, Axon updates the search counter.
When you click the search counter drop-down, you can view the grid items are added to the search operations
with the default And operator. You cannot edit the grid items search criteria. You can edit the search
operators and use other search options, such as reorder the search and mute the search.
Searching in Hierarchical Facets
For many Axon facets, such as Glossary, Process, and Policy, you can organize objects in a logical hierarchy,
with a nested series of parent-child relationships . Any facet that offers the ability to associate an object to a
parent is a hierarchical facet.
When searching in hierarchical facets there are two special filters available in Unison Search.
You can use the following special filters to search within the hierarchical facets:
Level
You can quickly find objects at that are in the top level, first level or second level of nesting. A top-level
object is any term that does not have a parent object. A first-level object is the immediate child of a top-
level object. A second-level object is the immediate child of a first-level object.
Axon permits any number of levels of nesting but you can search on only the first five levels. Use the
check box to select multiple levels to search on.
Children
You can explore a specific chain of parent-child relationships in a facet. When you find a term with
children, you can choose to add either the immediate child objects or all child objects to the current
search.
Saving and Sharing Searches
You can save and manage frequent searches to easily recreate a specific search results view. You can also
share these searches with other Axon users.
Before you perform a search, you can click the My searches button to view previous searches. After you
perform the first search, the My searches button disappears. To view the My searches button again, you need
to clear the searches.
To save searches, perform a Unison search in as many facets as required. Every time you perform a search,
Axon adds the search criteria and displays the count next to the Add to search button. Click the count drop-
down to view and save the list of searches. Provide a name and description, and save the search.
22
Chapter 2: Search and View

The following image shows sample searches that you can save:
To manage your saved searches, click Manage searches from the My searches drop-down. You can view all
the saved searches in the Saved Searches tab. To view or run a search that is shared with you, click the
Searches Shared With Me tab. When you click the link to the right hand side of the row, Axon automatically
runs the search. This search overrides any active search that you started in Axon. You can choose to share
searches with others so that they can view the same search results if the other users have the same
permissions. The shared search results vary based on the user permissions. The other users cannot modify
the shared search. To share a search, Edit > Share Selected Searches.
The following image shows the Manage Search page:
You can perform the following tasks to manage a search:
•
Add a description of what the search does.
•
Delete searches that you no longer require.
•
Share a search with other Axon users so that they can view the same search results if the other users
have the same permissions.
•
Access saved searches that are shared with you. If you run a shared search, the search overrides any
active search that you have in Axon.
Working with the Search Results
23
Viewing Object Details
Axon displays information about an object in different tabs. You can open an object and click the tabs to view
the object properties. Axon does not display all the tabs in all the objects.
Summary
You can view a summary information of an object in the Summary tab. Axon displays object properties in the
Summary tab in different sections.
The Summary tab contains properties in the following sections:
Definition
Object description and any key descriptors that support the description.
May contain one or more of the following properties:
•
System
•
Usage
•
Glossary
Classifications
Describes the main classification of the object. For example, Axon Status and Lifecycle.
Scorecard
Displays key information on how comprehensive the stewarding of the object is. You can view a
scorecard for glossary and data set objects.
Documents
Displays supporting files that the data steward has uploaded to the object.
Interfaces
View information about other systems connected to the current system in the Interfaces tab. Axon displays
object properties in the Interfaces tab in different sections.
The Interfaces tab contains properties in the following sections:
Maps
Provides a graphical representation of the relationships between objects across different facets.
System Interfaces
Show which other systems are connected to this system. You can edit the system interfaces to
configure details about which data flows through the interfaces.
Data Flow Outside The Interfaces
Displays any attribute flow described elsewhere affecting the current system, but which has not been
linked to an interface. If you see information in this section, you should explore why this data is not
described within an interface, and if required, create a link to an interface.
24
Chapter 2: Search and View

Attributes
Displays information about each attribute belonging to a Data Set.
Axon displays the following information by default in the Structure section:
Name Description
KDE Displays a count of how many Process objects have indicated this attribute is a key data element to
them. If a number is shown, click into it to see a link to each related Process object.
Name Name of the attribute as known in the business.
Definition Definition of the item.
Glossary Individual attributes linked to a single glossary item. Recommended to facilitate finding data concepts
across systems irrespective of their system specific naming.
Origination Describes how the attribute originated. Permitted values: Created/Set Here, Sourced, Unknown
Axon displays the following information when you choose to display extra columns:
Name Description
Key Indicates if the item is a Primary Key in the data set it lives in.
Ref. ID. Unique reference assigned automatically to each attribute by Axon.
DB Field Name The name of the field in the database holding the data. Can be an encoded string. For example,
database.table.fieldname.
Editability Options: Read Only, Unknown or Editable - Restricted to List / List with Free Text Override / Free
Text
Editability Role Role of the user who can make edits. Permitted values: Admin Only / Most Users / Restricted
User Group.
Requirement Indicates if the field is mandatory, optional or conditional when a new row is created.
Business Logic Optional field to describe the context of the business logic.
Data Type Technical metadata field. Captures the datatype of the attribute in the underlying database as per
the SQL92 ISO standard.
Data Length Technical metadata field. Captures the field length in the underlying database.
Related To Concatenation of the related Data Set & Attribute
Relationship Type Describes attribute linking which indicates the nature of the sourcing. Permitted values: Enforced
Lookup, Unenforced Lookup, Sourced From
Interface Populated if the Attribute Link is described via an Interface.
Sourcing Logic Captures any logic applied to the flow of data. For exmaple, selections or transformations
performed.
Viewing Object Details 25
Relationships
The Relationships tab provides a context to the object by displaying where the object is placed in a hierarchy
of related objects. You can view information about how individual attributes in a data set link to other
attributes in other data sets and systems. The data flow shows the lineage through the systems of your
organization.
When you open a Glossary object, you can view the Hierarchy and Relationships sub-tabs from the
Relationships tab.
The Hierarchy sub-tab provides a single view of all the relationships between glossaries. You can view the
hierarchical, parent-child relationships for a Glossary object. You can also view other types of relations for an
object that are present in the Relationships sub-tab, such as is identified by, is related to, is specialism of, is
classified by, is described by, is part of, and is made up of. For example, the other types of glossary relations
can include relations, such as "Customer is part of a Legal Entity" and "Employee is identified by Employee
ID." You can see the other glossary relationships marked in a dark orange color. Axon displays all glossary
relationships by default. If you do not want to view the other relationships, clear Show Relationships.
The Relationships sub-tab displays a visual representation of the object and the relationships with the other
objects. The Relationships sub-tab does not show the parent-child relationships of an object.
Stakeholders
You can define who in the organisation has knowledge pertinent to the object in the Stakeholders tab. This
allows all users to communicate with the right people when considering definitions, understanding the
effects of changes etc. Axon displays object properties in the Stakeholders tab in different sections and sub-
tabs. You can add, remove, set delegates in the Stakeholders tab.
The Stakeholders tab of a data set contains properties in the following sections:
Data Sets
Displays names of the stakeholders, their roles, and the org unit to which they belong. You can see if the
user has accepted the role or not.
Data Attributes
Displays roles of the stakeholders at the attribute level. You can assign one owner and one steward to
each attribute.
Stakeholder Community
Displays the wider stakeholder community. If the current active object is connected to any other object
in Axon, the stakeholders of those connected items collectively form the wider stakeholder.
Axon displays information about users who follow the object in the Followers sub-tab. You can see the
names of the followers, the organizational unit to which they belong, their function and the date since when
they are following the object.
26
Chapter 2: Search and View

Values
Displays the values for each attribute that belongs to a Data Set facet. You can upload several values for
each attribute that you enter in the Attributes tab.
Axon displays the following information in the Value Updates and Availability section:
Name Description
Value Update Frequency The frequency at which you plan to update the list of values.
Update Frequency
Comments
Notes or comments about the frequency at which you plan to update the list of values.
Availability The method by which you plan to make the list of values available to other applications.
Availability Comments Notes or comments about the availability of the list of values.
The Values - Full List or Values - Sample Set section displays the list of values for the Data Set that you have
opened. The columns you see depend on the entries that you have made in the Structure section of the
Attributes tab.
To add a new column to the list of values, go to the Attributes tab and add the column as a new attribute.
After you have added the new attribute entry, select the Values tab and click Edit. When you download the
template file to upload values, you will see the new column that you have added in the Attributes tab.
Data Quality
Displays a dashboard of data quality results against the current object. The scope of the maps is limited to
only the objects that are connected to the active object.
When you open a data set object, you can view the Dashboard and Rules sub-tabs from the Data Quality tab.
The Rules sub-tab shows the list of data quality rules for all attributes in a data set. If the attributes within
the data set do not contain data quality rules, Axon displays the data quality rules from the upstream data
sets in the lineage. Axon checks for the upstream data sets in the lineage till it finds an associated data
quality rule for the linked attributes. Axon inherits and displays the first occurrence of all data quality rules
from the linked attributes.
In the Rules sub-tab, Axon displays the related Data Set and System information for a data quality rule that is
inherited from the upstream data sets.
Impact
A key part of Axon is explaining the context of an object, by showing which objects in other facets it has been
connected to.
History
Displays a record of all edits that have been made to an object. This shows what was changed, when and by
whom. Axon does not delete the history, so there is a full history of the object allowing full traceability.
Viewing Object Details
27
Change
Displays the current and past change requests that are active for the current object. You can also view
custom workflows.
Users of Axon can communicate about changes that they would want to make to objects using change
requests. A change request can also be used to notify stakeholders of missing information. Any logged in
user can create a change request. Axon creates a workflow based on the change request. Stakeholders
review the workflow and act on it.
Viewing My Items
The My Items menu allows you to see personalised information on how you have used Axon.
You can perform the following tasks from the My Items menu:
•
View objects you have visited recently.
•
View objects you are following.
•
View objects in which you have a Stakeholder role.
Axon displays the following tabs in the My Items menu:
•
Recent
•
Following
•
Roles
You can search for objects that Axon displays in any of these tabs. You can narrow down your search by
object type.
Following Objects
You can follow an object to get notified when changes are made to the object. As a follower, you are not a
direct stakeholders and you will not be included in workflows and change requests. You can be part of a
workflow or change request by becoming a part of the discussion.
Axon displays updates about the objects that you are following in the Activity Stream in your My Account
page. If you have set a frequency for activity emails, Axon will email you updates about the object that you
are following.
Open an object and click Follow in the top right hand corner to follow an object. Once you click Follow, your
name will appear in the Following sub tab of the page.
Viewing Notifications
You can view notifications in Axon or receive emails at a regular intervals.
28
Chapter 2: Search and View
Notifications in Axon
Axon displays notifications in the notifications center after you log in. The notification centers displays the
number of unread notification in the toolbar. Click the bell icon in the toolbar to view new and past
notifications. The notification center displays information in the Roles and Workflow tabs.
The following types of notification appear in the notifications centre:
Roles
You see a notification for all the objects for which you have been assigned a stakeholder role. Click the
role title to open the object. You can then click Yes or No to accept or reject the role assignment. You
cannot dismiss notifications in the Roles tab.
Workflow
Axon displays a notification when someone raises a change request for an object where you are a
stakeholder. You can open the object or the change request from the notification. Click the X button to
dismiss the notification.
Bulk Upload
You can see the status of bulk upload tasks.
Notifications via Email
You can receive email notifications if Axon is configured to work with your organisation’s email system. You
can choose to either receive automated emails based on some events, or on a regular basis. If another Axon
user shares a search with you, you are automatically informed of this by email.
You can choose to receive an email on a regular basis that tells them what is happening in your Axon
account. You can manage these emails by selecting a frequency in the Activity Stream.
Axon sends the following information in the Activity Stream email:
•
Role acceptances awaiting approval
•
Pending workflow actions. Includes discussions that you are part of and you have not yet contributed to.
•
A summary of changes that a user has made to an object where you are either the stakeholder or a
follower. If you are part of a change request where you have been assigned a role, the Axon notification
email will contain information depending on whether the role is included in the underlying workflow.
Managing Locks
You can lock an object to prevent other users from editing the object. You can manage locks from the
toolbar.
If there is a lock on an object, Axon displays an orange padlock icon beside the Edit button. Hovering over
this padlock will trigger a message with the name of the user who locked the object. An edit lock prevents
more than one user from editing an object concurrently. This lock does not persist after the user has saved
and closed the object. The user who applied the edit lock or an administrator can remove this type of lock.
Managing Locks
29

Viewing Object Dashboards
View a dashboard for each object within a facet. Use the information in the dashboard to get a visual
representation about the data quality rules, data stewardship, processes, and data privacy in Axon.
You can view object dashboard results for the following areas:
•
Data Quality
•
Stewardship
•
Process
•
Data Privacy
Each of these views is predefined by default and show data if the required information is available. You can
use filters to change the views. Click the legends on each of the charts to change the display. After each
change, Axon revises and reloads the dashboard.
Data Quality View
Open the Dashboard tab of an object to view data quality scores from the data quality rules that you have
created.
The following image shows the Dashboard page:
1. Axon displays the overall score for each data quality rule type. The default data quality rule types are
completeness, accuracy, consistency, validity, and timeliness. Displays scores based on the arithmetic
average of the rules in the scope of your Unison search. Takes into consideration the most recently
uploaded score for each rule, or the most recently measured value in Informatica Data Quality.
Determines the chart color based on the average value of the respective thresholds.
2. Drop-down menu to select the dashboard view.
3. The number of rules by type. Filter scores based on types that you want to exclude.
4. The number of rules by criticality. Filter scores based on the criticality that you want to exclude.
5. The number of rules by target. Filter the scores based on the target threshold results.
6. The number of data quality rules that are measured and not measured.
Axon displays the following sections in the dashboard:
30
Chapter 2: Search and View
DQ Rules by Type
Displays the number of data quality rules based on the rule type. You can view information about the
following rule types:
•
Accuracy
•
Timeliness
•
Completeness
•
Validity
•
Consistency
Hover your mouse over the graph to see a breakdown of the rules by data quality rule type. Click a color
in the legend below the graph to remove a rule type from the score chart. Axon redraws the dashboard to
display the scores based on the remaining rule types.
DQ Rules by Criticality
Displays the results of the data quality rules by criticality. Click any of the colors in the legend below the
graph to remove the rules that have the threshold value that you want to hide. For example, if you click
the amber color to hide all the data quality rules that have a low criticality, Axon redraws the dashboard
to display the scores based on the data quality rules that have medium and high criticality.
Hover your mouse over the graph to see the breakdown of rules that meet the criticality criteria.
DQ Rules against Target
Displays the number of rules for each rule type by target threshold values and represents the threshold
results by color. Axon uses the following criteria to displays the colors:
1. Above target - displayed in green color.
2. Below threshold - displayed in amber color.
3. Below threshold - displayed in red color.
Hover your mouse over any of the rule types to see the number of rules that meet the measured
threshold values.
DQ Rules Measured
Displays the count of the data quality rules that are measured or not measured against the default data
quality rule types that are available in Axon. The orange bars display the total number of data quality
rules for a particular rule type measured. The blue bars display the total number of data quality rules for
a particular rule type that are not measured. Hover your mouse over the graph to see a breakdown of the
data quality rules that are measured and not measured.
Stewardship View
Within an object, you can view a dashboard of the data stewardship status in the Stewardship view.
Axon displays the stewardship status in the following sections:
Roles per Role Type
Displays a graph of the types of roles. Hover your mouse over the graph to see a breakdown by role type.
Click the colors in the legend below the graph to exclude role types.
People Per Org Unit
Displays a graph of the People per Org Unit. Hover your mouse over the graph to see a breakdown of
People by Org Unit type. Click the colors in the legend below the graph to exclude departments from the
Org Unit.
Viewing Object Dashboards
31
Role Acceptance
Displays a graph of the Role Acceptance requests that are pending.
Change Requests
Displays a pie-chart of Change Requests by request type. Hover your mouse over the graph to see a
breakdown of the Change Requests. Click the colors in the legend below the pie-chart to exclude Change
Requests that are Completed, Cancelled, Pending Start, and Running.
Change Request Creation
Displays a graph of the change requests created over a period of time. Click the colors in the legend
below the graph to exclude different periods of time.
Change Request Update
Displays a graph of the change request updated over a period of time. Click the colors in the legend
below the graph to exclude different periods of time.
Process View
Within an object, you can view a dashboard of the status of processes in the Process view.
Axon displays the status of Processes in the following sections:
Lifecycles
Displays a pie-chart of the Processes that are in production and that need to be replaced. Click the
colors below the pie-chart to exclude a status.
Types
Displays a pie-chart of the Processes by type. Click the colors below the pie-chart to exclude one or more
Process type.
Classification
Displays a pie-chart of the Processes by classification. Click the colors below the pie-chart to exclude
one or more classification.
Automation
Displays a pie-chart of the Processes by automation. Click the colors below the pie-chart to exclude one
or more automation type.
Viewing Data Privacy Metrics
If you have access to Secure@Source, you can view the data privacy metrics extracted from Secure@Source
in the System and Policy facets of Axon. The data privacy metrics helps you determine whether your
organization is compliant with statutory regulations, such as General Data Protection Regulation (GDPR)
policy.
Axon displays data privacy metrics, such as risk score, risk cost, protection status, and sensitivity levels,
sourced from Secure@Source on the Data Privacy dashboard. For example, you want to review if the current
status of data privacy supports GDPR compliance. You can view the Data Privacy dashboard to identify the
amount of sensitive data that is protected, risk costs, and the policy violations. Based on the current
aggregate state of the privacy metrics, you can take necessary actions to identify and protect sensitive data.
32
Chapter 2: Search and View

In Secure@Source, data privacy metrics are measured for a data store. A data store is a repository object
that connects to the data source that you want to analyze. You add data stores to scan jobs. The scan job
connects to and identifies sensitive data in the data source.
You can link a security or classification policy from Secure@Source to an Axon policy. A security policy is a
rule-based policy designed to detect violations. A security policy contains the severity level of a violation and
a rule that defines the violation. Classification policies cater to specific data security standards, such as PCI,
PHI, PII, that are available by default. A classification policy defines the rules that Secure@Source uses to
identify sensitive data and classify a data store based on industry or organization data security standards.
Axon displays the following data privacy metrics for system and classification policies:
•
Risk score
•
Risk cost
•
Protection status
•
Sensitivity levels
Axon displays the following data privacy metrics for security policies:
•
Policy violations
•
Severity level
The following image shows a sample data privacy dashboard for a system:
1. The overall risk score for the scanned data stores that are associated to a system. Axon displays a
distribution chart with the total number of data stores and the level of risk based on the different color
codes.
2. The total cost of exposed sensitive data. View the number of sensitive fields and records that are
exposed.
3. The percentage of unprotected data. View the number of protected and unprotected sensitive fields.
4. The sensitivity levels of data in the data stores.
Risk Score
Displays a number that summarizes the overall risk score of the scanned data stores that are associated to a
system or classification policy. The higher the number, the greater the risk to sensitive data. The risk score
value ranges from 0-100. View the total number of data stores that are at risk along with data store
Viewing Data Privacy Metrics
33
distribution chart based on the severity level of the risk. The data store risk chart shows the distribution of
risk based on the following levels:
•
High Risk
•
Medium Risk
•
Low Risk
•
No Risk
•
Not Measured
Risk Cost
Displays the cost that the business might incur if the sensitive data in the data store is exposed. The data
risk cost of a data store is the product of the cost for each occurrence of sensitive data and the number of
records of sensitive data. You can view the following details:
•
The number of sensitive fields that are exposed
•
The number of sensitive records that are exposed
Protection Status
Displays the percentage of unprotected sensitive data in the data store that is associated with a system or
classification policy. A field is protected if a PowerCenter mapping includes a data masking transformation
for the column. The Protection Status indicator shows the number of sensitive fields that are protected and
unprotected.
Sensitivity Levels
The level of data sensitivity of a data store that is associated to a system or classification policy. You can
view the following default sensitivity levels:
•
Public
•
Internal
•
Confidential
•
Restricted
The sensitivity level for a system contains a pie chart that includes distribution of data stores based on the
sensitivity level. You can also view the total number of data stores.
The sensitivity level for a classification policy shows only one sensitivity level. If a data store matches a
classification policy, the scan job in Secure@Source updates the data store with the sensitivity level of the
classification policy. When you click on the Secure@Source link to view the sensitivity level, you might find a
different sensitivity level for the classification policy because Axon displays the aggregate sensitivity value at
the data store level.
Policy Violations
Displays the total number of violations that Secure@Source detected for a security policy associated with an
Axon business policy. Axon displays the total number of violations measured over the last 30 days. You can
see the aggregate number of data stores associated with the violations for the security policy. You can also
view the number of violations in each data store.
34
Chapter 2: Search and View

A security policy violation occurs when one or more properties in an anomaly, data store, or user activity
event match the rule specified in a security policy. The count only includes the data stores to which you have
access. To view more details about the security policy in Secure@Source, you can click the link that displays
the associated security policy name on the dashboard.
The following image shows a sample data privacy dashboard for an Axon policy that is associated with a
security policy:
1. The total number of security policy violations. Axon lists the top five data stores with the corresponding
number of violations.
2. The severity level of the policy violation.
3. The Secure@Source link to the associated security policy.
Severity Level
Displays the severity level of violation of a security policy that is associated with the Axon policy. A violation
can only have one severity level. The severity level can have one of the following values:
•
Critical
•
High
•
Medium
•
Low
•
Informational
Viewing Data Privacy Dashboard
You can view the data privacy metrics extracted from Secure@Source in System and Policy facets.
1. Click an object from a System or Policy facet.
2. Click the Dashboard tab.
3. Select the Data Privacy view from the list.
The dashboard appears with the data privacy metrics.
Viewing Insight Maps
Axon can display Unison search results as an interactive map. Maps are a graphical representation of the
relationships between objects across different facets. You can apply different overlays, exclude nodes and
Viewing Insight Maps
35
group nodes to view more or less information on the map. Insight maps are not limited in scope to any
particular facet or object type.
You can view the following types of maps in Axon:
System Lineage
Displays system objects and how information flows across them. The dotted lines between systems
describe a system interface. The solid lines between systems describe the linking attributes.
Data Lineage
Displays data set objects and how information flows across them. Axon displays the Data Set Lineage
view only when you have described Linking Attributes. Axon displays labels for both system names and
the Data Set Name, with searchable data set reference number.
Multi-Node
Each node is an object type from a limited range of facets (system, process, project and their
stakeholders). You can view the multi-node map with only the System and Stakeholder filters applied and
for the Project and Processes facets. Axon displays connections between these objects in the map. You
can modify the map by controlling the Information menu that appears upon mouseover.
When you click the information bar, you can add in objects that are connected to the current which are
not in scope of the original map. This is limited to the 4 facets available in the filter, but allows you to
expand the map to see a collection of connected objects.
Interpreting and Interacting with the Map
You can interact with an Insight map to obtain the information that you need. The colour of the node shows
whether they are in scope of the active search.
The lines connecting items on the map represent connections between items. Clicking on any item that is
connected to any other item highlights the inbound and outbound paths. A dotted line between objects
means that one or more interfaces exist between two objects. A solid line means that a flow of data lineage
is available described between data sets held in systems.
You can perform the following tasks on the map:
Highlight a Node
Click on a node and see the information flow. Axon highlights the lines to show information flowing in
and out of an object. This works when you have created system interfaces or linking attribute
relationships.
Moving Objects
Left click and drag an object to move it around the map. To move more than one object, draw a rectangle
around the objects using a left click and highlight multiple items. For larger maps that exceed the
viewable area, right click and drag the map canvas to move around.
Open the Information Menu
You can hover your cursor over an object to see the information menu. Some of the actions that you
perform in the information menu will temporarily change the look of the map without refocusing the
search in Unison Search.
You can perform the following tasks from the information menu:
•
Go to object. Open the object in a new browser tab.
•
Hide the object. Temporarily remove the item and the interface lines that connect it to other systems
from the map.
36
Chapter 2: Search and View
•
Focus object. Limit the map view to items directly connected to one object. An object in focus is
highlighted in green color
•
Hide upstream or Hide downstream. View information that flows into or out of a given system. Hide
upstream will suppress the flow into the object and Hide downstream will suppress the flow from the
object.
Insight Maps Palette
After you open an Insight Map, you can use the palette to change the way Axon displays the map. Click the -
icon on the right hand side of the Axon map screen to hide the palette and the + icon to show the palette if it
is hidden.
You can perform the following tasks from the Insight Map palette:
Change the Map Type
Select a map type from the drop-down list. Axon redraws the map based on the map type that you
selected.
The following options are available from the drop-down list:
•
System Lineage
•
Data Set Lineage
•
Multi Node Lineage
Change the Map Layout
You can change the direction of the lineage flow by changing the map layout. Select a layout from the
drop-down list to change the map layout.
The following options are available from the drop-down list:
•
Left to Right. Use this layout for small to medium sized maps.
•
Top to Bottom. Use this layout to represent information flows that aggregate into a central point.
•
Organic. Use this layout for larger maps or maps with no overriding direction in the information flow.
Change the Overlay
Axon can place additional information on the map in the form of an information box above each object
by changing the overlay. Adding an overlay increases the space required on the screen to display the
map. Overlays are therefore limited by default to show a maximum of 10 items in an overlay, with
multiple pages to hold extra information. The grey box at the bottom of each overlay shows users how
many pages of information each overlay contains.
The following data overlay types are available:
•
Description
•
Glossary
•
Attributes
•
Linking Attributes
•
Data Quality
The following business overlay types are available:
•
Stakeholders
•
Processes
Viewing Insight Maps
37
•
Projects
•
Policies
You can connect information in an overlay by using the following types of highlighting:
•
Simple Highlighting. Click on an item in an Overlay, and it will turn dark blue. If the same item is
relevant to other objects, it will be highlighted in a lighter blue.
•
Advanced Highlighting. Some Overlays can show how the information of interest flows between
objects by colouring the interface lines red. This is particularly useful for looking at Linking Attributes,
where connected objects may have different names in connected systems and data sets.
Click Clear Overlays from the Overlay drop-down menu to remove any overlay that Axon displays on the
map.
Apply Filters
Filters allow you to show hide objects or connections that are described based on certain
characteristics. The filters available depend on the map type that you are using.
You can set the following types of filters:
•
Links. Differentiate between Interface and Data Attribute links by selecting or removing the checkbox.
•
System Classification. Include or exclude systems by selecting or removing the checkbox.
•
Interface automation.
After Axon displays a map, you can perform tasks such as zooming in and out to change the map display.
These actions do not change the information displayed in the map but change the way Axon displays the
map.
You can perform the following additional tasks on a map that Axon displays:
•
Zoom in to the map.
•
Zoom out of the map.
•
Redraw the map.
•
Reset the map.
•
Export the map.
•
Use the map navigator to scroll and view the sections of a large map.
•
View the map in a new full screen browser tab.
38
Chapter 2: Search and View

Viewing Local Maps
You can view a local map from one of the tabs after you open an object from Unison. Local maps display the
immediate relationships of the object that you have currently opened.
The following table describes the different Axon facets that have local maps and how to view the map:
Facet Section Description
Data Set Relationship Displays a graphical representation of the Inbound and Outbound
relationships described in the two tables immediately above the map.
The map is therefore scoped to show only these connections, although
it will show the full lineage relevant the active data sets’ attributes.
System Interfaces System lineage map relevant to the active system. Shows immediate
interface connections, and full linking attribute lineage relevant to the
attributes held in the active system.
System Data Map sub-tab under the
Data tab
Data Lineage map scoped to the lineage of Data Sets and Attributes
belonging to the active system
Glossary Relationships under the
Relationships tab
Glossary, System and Data Set Lineage maps scoped to the items
connected to the active glossary object.
Glossary Data Map sub-tab under the
Data Tab
Full set of locally scoped Insight Maps focused showing lineage on
objects linked to the active glossary object.
DQ Rule Relationships sub-tab under
the Standardised DQ Rules
System and Data Set Lineage maps.
Process Context map in the Summary
tab and Process map in the
Components tab
A context map shows the dependencies, such as predecessors and
successors, for a process. A process map shows the process flow
between the immediate children of a process object.
Capability Map under the Relationship
tab
Capability lineage map is a feature in beta. It currently shows all
capability children.
Project Data Map sub-tab under the
Data Tab
System lineage map scoped to any systems linked to the active
project.
Viewing Process Maps
You can view context and process maps in a Process object. A context map within a process provides a
visual representation of the process dependencies. A process map within a process provides a visual
representation of the process flow.
Within a map, you can see the following types of steps:
•
Start. A green circle indicates the start step for a process.
•
End. A blue circle indicates the end step for a process.
•
Control. An orange decision box indicates the decision control step for a process.
Viewing Local Maps
39

Context Maps
A context map shows the dependencies, such as predecessors and successors, for a process. A predecessor
for a process indicates the steps that you need to follow before the process. A successor for a process
indicates the steps that you need to follow after the process. View the context map from the Summary tab.
You can edit and add predecessors for a process. A context map provides a complete view of the
dependencies for a process.
For example, you run a Know Your Client (KYC) compliance process. After completing the KYC process, you
need to run the Anti-Money Laundering (AML) process. The AML process is a dependency for the KYC
process.
The following image shows a sample context map for a KYC compliance process:
You can go to each object in the map to view further details. If you select a predecessor object, you can view
the process object and all the successor objects. If you choose to view a successor object, you can see all
the predecessor and process objects.
Process Maps
A process map shows the process flow between the immediate children of a process object. View the
process map from the Components tab. A process map shows the flow of a process.
For example, you want to view the flow of a KYC compliance process. You need to initiate the KYC process,
analyze the risks, and decide whether to escalate, monitor, or activate the customer account.
The following image shows a sample process map for a KYC compliance process:
You can go to each object in the map to view details of each step.
40
Chapter 2: Search and View
Viewing Data Quality Reports
Axon displays data quality reports based on data quality rules that you configure. Axon supports local data
quality rules and standard data quality rules. Local data quality rules are assigned against attributes upon
which scores are recorded. Standard data quality rules are assigned at the glossary level and give guidance
on how attributes linked to a glossary term should be measured.
Axon does not replace your existing data quality measuring and profiling systems, but it can take inputs from
them. You can do this by a technical linking of systems, or uploading extracts to Axon as a bulk upload.
You can view dashboards when you open certain object types. The Summary tab of such objects display the
dashboard. Local dashboards show a roll up of data quality scores linked to the object.
Viewing Data Quality Reports 41

C h a p t e r 3
Create
This chapter includes the following topics:
•
Create Objects Overview, 42
•
Creating an Object, 43
•
Editing an Object, 57
•
Clone Data Set, 57
•
Create Change Requests, 58
•
Create Workflows, 59
•
Connect Objects, 68
•
Data Quality Rules, 69
•
Bulk Upload Objects, 75
Create Objects Overview
You can create several types of objects in Axon. Objects are data assets that belong to one of the various
areas of data governance, such as Regulatory area, Organizational area, Business and Change area, and Data
and Technology area.
You must verify the following prerequisites before you create an object:
•
The Create New Item permission is assigned to your role or user. Contact your Axon administrator for this
permission.
•
Some objects require that other associated objects are already present in Axon. For example, to create a
data set, its associated system must already be present in Axon.
Consider the following guidelines when you create an object:
•
When you create an object, update the Stakeholder tab with the appropriate stakeholder information.
•
To create a large number of items, use the bulk upload feature.
42

Creating an Object
You can create objects in Axon and add properties to it.
1. Log in to Axon.
2. In the Axon toolbar, click the Create menu, move your mouse over a governance area, and click on the
object name that you want to create.
The Summary tab appears where you can enter the basic properties of the object..
3. In the Definition and Classifications section, enter the properties of the object . Click Save to save the
object and add additional properties. Click Save and Close to finish creating the object.
If you clicked Save, the following additional tabs appear:
•
Relationships
•
Stakeholders
•
Impact
•
Workflow
4. Enter the associated properties of the object in the additional tabs. Click Close.
Capability Properties
A capability refers to a list of activities, deliverables or skills that is available in your organization. A
capability might cross departmental boundaries. Axon users can see the resources that are brought together
to deliver a capability in a particular context.
The following table describes the properties for creating a capability:
Field Description
Primary Name Name of the capability.
Ref. ID for the capability. If you leave this field empty, Axon assigns a new reference automatically.
Description Description of the capability.
Parent Parent of the capability if the capability belongs to a hierarchy.
The following table describes the properties for classifying a capability:
Field Description
Axon Status Status of the capability asset in Axon.
Axon Viewing Whether the capability should be available for public viewing or not.
Axon is meant for public use within your organization. Contact Informatica Global Customer Support
before setting this field as Non-Public.
Creating an Object 43
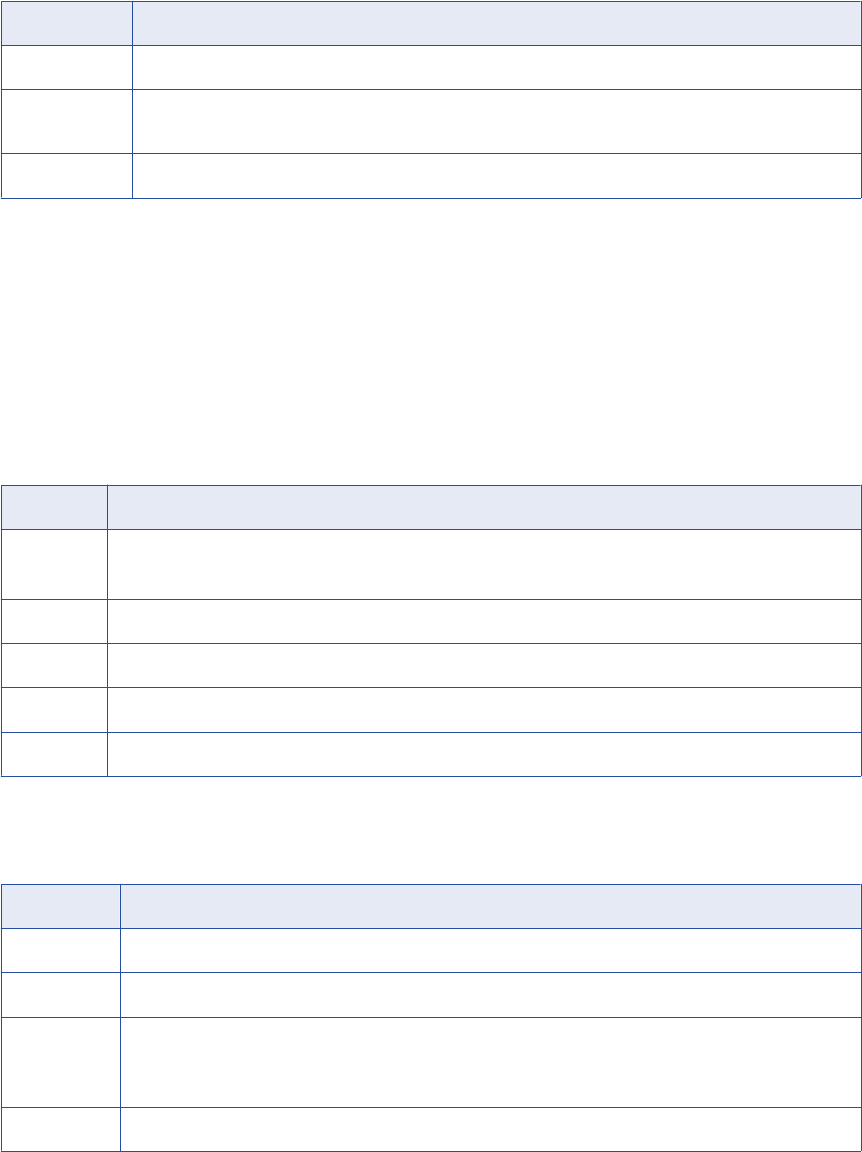
Field Description
Lifecycle Stage of the capability in the approval lifecycle.
Classification Classification of the capability that best describes its purpose, for example, Regulatory Capability.
The options you see here are predefined in your Axon installation.
Capability Type Type of capability that best describes the object.
Data Set Properties
A data set refers to a data object that you can create and then define its attributes. In Unison search, Data
Sets and Attributes are displayed as separate facets. However, the attributes of a data object exist only
within the context of a data set. The items in the Attributes facet represent a different view of the items in the
Data Sets facet.
The following table describes the properties for creating a data set:
Field Description
Name Name of the data set.
You can create several data sets with the same name, if they belong to different systems.
System System that the data set belongs to.
Definition Description of the data set.
Glossary Glossary that the data set is associated with.
Usage Additional information about the data set.
The following table describes the properties for classifying a data set:
Field Description
Axon Status Status of the data set asset in Axon.
Type Type of the data set. The options you see here are predefined in your Axon installation.
Axon Viewing Whether the data set should be available for public viewing or not.
Axon is meant for public use within your organization. Contact Informatica Global Customer Support
before setting this field as Non-Public.
Lifecycle Stage of the data set in the governance lifecycle.
44 Chapter 3: Create

Attribute Values
The following table describes the properties for the values of a data set attribute:
Field Description
Value Update
Frequency
The frequency at which you plan to update the list of values.
Select one of the following frequencies:
-
Daily
-
Weekly
-
Monthly
-
Quarterly
-
Yearly
-
Ad-hoc
-
Other
-
Unknown
Update Frequency
Comments
Notes or comments about the frequency at which you plan to update the list of values
Availability The method by which you plan to make the list of values available to other applications.
Select one of the following methods:
-
Other applications can retrieve and display the values one object at a time.
-
Other applications can retrieve the values using batch operation.
-
The IT system administrator for other applications can retrieve the values using batch
operation.
-
The values are available for data warehousing.
Availability
Comments
Notes or comments about the availability of the list of values.
Values in Axon Select whether the value is part of a complete list of values or a sample representation of
values.
Geography Properties
Geography refers to a region or country in which you want to enforce a regulation. For example, you create a
regulation that applies to only the offices in the United States. You can specify the geography when you edit a
Regulation or Regulator facet.
The following table describes the properties that you can provide to create a geography:
Field Description
Name Name of the geographical region or country in which you want to enforce a regulation.
Description Description of the geographical region.
Glossary Properties
The Glossary captures an organization's agreed definitions for data, activities, business terms, and other
objects. A set of well-described glossary terms allows users from different business functions to link their
data and activities to definitions that everyone within the organization can understand. In a glossary, you can
Creating an Object
45

organize terms in logical hierarchies. A good glossary unifies the meanings of terms for use by a wide group
of people, and facilitates search and addition of terms. After you create a glossary object, you can edit and
configure relationships between glossaries.
The following table describes the properties that you can enter to create a glossary:
Field Description
Name Name of the glossary.
Description Description of the glossary.
Format Type Format in which the glossary is expressed.
Alias Names Alternate names for the glossary. Enter synonyms of the glossary that is commonly used in your
organization.
Format Description Description of the glossary format.
LDM Reference Place of the glossary in a Logical Data Model.
Business Logic Business context in which the glossary is used.
Examples Contextual examples of the business logic.
Parent Parent of the glossary in the glossary hierarchy. The options you see here are created by your
Data Steward.
The following table describes the properties that you can enter to classify a glossary:
Field Description
Axon Status Status of the glossary in Axon.
Lifecycle Stage of the glossary in the approval lifecycle.
Axon Viewing Whether the glossary should be available for public viewing or not.
Axon is meant for public use within your organization. Contact Informatica Global Customer
Support before setting this field as Non-Public.
Type Whether the glossary refers to an entity, a domain, or a business term.
Security Classification Security classification of the glossary. The options you see here are predefined in your Axon
installation.
Glossary Relationships
To configure relationships between glossaries, click the Relationships tab, and click Edit.
46
Chapter 3: Create

The following table describes the relationships that you can configure when you edit a glossary:
Relationship Description
Is Related to Defines how a glossary is related to another glossary. Use this type of relationship to describe the
relationships, other than parent-child relationship, between two glossaries.
Is Identified by Defines identity of a glossary. For example, an Employee is identified by the Employee ID and a
Person is identified by the SSN.
Is Specialism of Defines how you can categorize a glossary. For example, an IT Employee is specialism of
Employees.
Is Described by Defines how a glossary is described by another glossary. For example, a Date Format is described
by the Region and Tax is described by the Country.
Is Classified by Defines the classification for a glossary. For example, a Country is classified by the Region.
Is Made up of Defines how you can calculate or derive a glossary from other glossaries. For example, Revenue is
made up of the License Sale and Subscription Sale.
Organizational Unit Properties
An organizational unit describes the complex hierarchical structure of an organization. You must create an
org unit before you create the People object. You must have an Admin profile to create an org unit. If your
organization uses Single Sign-On authentication, you can link the Org Unit facet to an HR view.
The following table describes the properties that you need to specify when you create an org unit:
Field Description
Primary Name Name of the local department, team, or unit.
Ref. Reference identifier for the org unit. The reference ID must be a
string data type. If you enter a number, you must format the
column to Text type. Otherwise, when you bulk upload org unit
assets using a template, Microsoft Excel alters the reference ID by
deleting trailing zeros.
Description Relevant description about the org unit.
Parent Parent of the org unit. The parent record must exist in Axon before
you create an org unit asset.
Axon Status Status of the org unit object in Axon.
Creating an Object 47

Policy Properties
A policy is a statement of a plan or principles that address the needs of a particular situation. For example, to
meet a regulatory requirement, a policy describes the agreed manner in which the requirement is met. In
Axon, you can see how policies interact with other objects and activities.
The following table describes the properties for creating a policy:
Field Description
Name Name of the policy. Enter a name that users can recognize easily.
Ref. ID for the policy. If you leave this field empty, Axon assigns a new reference automatically.
Description Description of the policy.
Type Category that best describes the policy. The options you see here are predefined in your
Axon installation.
Internal Whether the policy is internal or external.
URL Link to another page where the policy is mentioned in detail.
Parent Parent of the policy if the policy belongs to a hierarchy.
Security or
Classification Policy
Reference
The name of the Secure@Source policy that you want to link to the Axon policy. You can
select a security or classification policy.
The following table describes the properties for classifying a policy:
Field Description
Effective Date Date from which the policy is effective.
When you bulk upload policy assets from a Microsoft Excel file, sometimes, Microsoft Excel converts
the date into number of days. To prevent this, enter a single quote before the date. For example, enter
March 20, 2017 as '20-03-2017 in Microsoft Excel.
End Date Date after which the policy ceases to be effective.
When you bulk upload policy assets from a Microsoft Excel file, sometimes, Microsoft Excel converts
the date into number of days. To prevent this, enter a single quote before the date. For example, enter
March 20, 2017 as '20-03-2017 in Microsoft Excel.
Axon Status Status of the policy asset in Axon.
Lifecycle Stage of the policy in the approval lifecycle.
Axon Viewing Whether the policy should be available for public viewing or not.
Axon is meant for public use within your organization. Contact Informatica Global Customer Support
before setting this field as Non-Public.
48 Chapter 3: Create

Process Properties
A process is a series of actions performed in a logical order to achieve a particular task or objective. Axon is
not a process mapping tool, but Informatica recommends users to inventorize the key aspects of each
process in Axon. Using Axon, you can link processes to their dependencies and view how data and business
tasks interact with each other.
The following table describes the properties for creating a process:
Field Description
Primary Name Name of the process.
Ref. ID for the process. If you leave this field empty, Axon assigns a new reference automatically.
Description Description of the process.
Parent Parent process of the process that you create. After you create a process, you can view the parent
name of the process when you hover over the process name regardless of the tab that you are in.
Input Description Description of relevant inputs to the process.
Output
Description
Description of relevant outputs from the process.
Class Classification of the process. The options you see here are predefined in your Axon installation.
Automation Level of automation.
-
The Manual option means that the process requires human intervention at every stage of the
workflow.
-
The Partially Automated option means that the process requires human intervention at some,
but not all, stages of the workflow.
-
The Fully Automated option means that the process requires no human intervention at any
stage of the workflow.
Permissions Default permission granted to the user for working with the process.
Duration The time duration for the process that you create. Choose hours or days as the unit of time. If you
want to enter the unit of time in weeks or week days, you can configure the Process Duration
Type property from Meta-Model Administration | Dropdown Configurations in the Admin Panel.
You can view the specified process duration in a process or context map.
The following table describes the properties for classifying a process:
Field Description
Axon Status Status of the process asset in Axon.
Lifecycle Stage of the process in the approval lifecycle.
Type Whether you are creating a complete process, a step within a process, or a control within a process.
Creating an Object 49

Field Description
Step Type Whether you are creating the starting step of a process, the ending step of a process, or a common
step across the process.
Axon Viewing Whether the process should be available for public viewing or not.
Axon is meant for public use within your organization. Contact Informatica Global Customer Support
before setting this field as Non-Public.
Product Properties
A product captures the core product segmentation of an organization and describes the context of the
products by connecting them to other facets.
The following table describes the properties that you can provide to create a product:
Field Description
Name Short name of the product. Enter a name that users can recognize easily.
Description Description of the product.
Long Name Full name of the product.
Parent Parent name of the product that you want to create.
The following table describes the properties that you can enter to classify a product:
Field Description
Axon Status Status of the product asset in Axon.
Axon Viewing Whether the product should be available for public viewing or not.
Axon is meant for public use within your organization. Contact Informatica Global Customer Support
before setting this field as Non-Public.
Lifecycle Stage of the product in the production lifecycle. The stages are In Production and Being Considered.
50 Chapter 3: Create

Project Properties
A project is a collection of activities that are planned and organized in order to achieve a particular set of
objectives. Projects are often complex, and are managed using project management tools. In Axon, you can
view how projects interact with and are dependent on other functions within your organization.
The following table describes the properties for creating a project:
Field Description
Name Name of the project. Enter a name that users can recognize easily.
Ref. ID for the project. If you leave this field empty, Axon assigns a new reference automatically.
Description Description of the project.
Type Whether you are creating a program, a project within a program, a workstream within a project, or a
workpackage within a project. The options you see here are predefined in your Axon installation.
Parent Parent project of the project you are creating.
Classification Purpose of the project.
The following table describes the properties for classifying a project:
Field Description
Axon Status Status of the project asset in Axon.
Lifecycle Stage of the project in the project management lifecycle.
Axon Viewing Whether the project should be available for public viewing or not.
Axon is meant for public use within your organization. Contact Informatica Global Customer Support
before setting this field as Non-Public.
RAG Status of the project in the project management lifecycle. Select Red, Amber or Green.
Start Date Start date of the project.
When you bulk upload a project assets from a Microsoft Excel file, sometimes, Microsoft Excel
converts the date into number of days. To prevent this, enter a single quote before the date. For
example, enter March 20, 2017 as '20-03-2017 in Microsoft Excel.
End Date End date of the project.
When you bulk upload a project assets from a Microsoft Excel file, sometimes, Microsoft Excel
converts the date into number of days. To prevent this, enter a single quote before the date. For
example, enter March 20, 2017 as '20-03-2017 in Microsoft Excel.
Regulation Properties
A regulation is a directive or rule that you employ to manage an activity, system, or organization. For
example, the General Data Protection Regulation (GDPR) policy helps you determine whether your
Creating an Object
51

organization is compliant with statutory regulations on data privacy and protection. A regulation holds the
interpretation of regulatory documentation for an organization. In Axon, you can link external regulation to
internal policies to ensure compliance.
The following table describes the properties that you can provide to create a regulation:
Field Description
Long Name Full name of the regulation, for example, General Data Protection Regulation.
Ref ID for the regulation. If you leave this field empty, Axon assigns a reference identifier
automatically.
Description Description of the regulation.
Short Name Short name of the regulation. The most commonly used name or an acronym for the regulation,
such as GDPR. Enter a name that users can recognize easily.
Legal Advice A description of the legal advice.
Legal Advice Type The type of legal advice.
Select one of the following legal advice types:
-
Comment
-
Guideline
-
Legal Requirement
Additional Info Any additional information that provides a context to the regulation.
Parent Parent object of the regulation.
The following table describes the properties that you can provide to classify a regulation:
Field Description
Compliance
Level
The current state of the response of the organization to the regulation.
Select one of the following compliance levels:
-
Unknown
-
Fully Compliant
-
Compliant with Exceptions
-
Materially Not Compliant
Maturity The level of maturity in understanding and interpreting the regulation.
Select one of the following maturity stages:
-
Initial Draft
-
Open for Comments
-
Comments Incorporated
-
Finalizing
-
Finalized
Probability The extent to which a regulation is probable.
Select Confirmed.
52 Chapter 3: Create

Field Description
Impact Rating The level of impact of the regulation on the organization.
Select one of the following impact ratings:
-
None
-
Unknown
-
Low
-
Medium
-
High
Status Status of the regulation in Axon.
Select one of the following statuses:
-
Active
-
Obsolete
-
Deleted
Stage The stage of the organization when a regulation is created or updated.
Select one of the following stages:
-
Interpretation
-
Impact Assessment
-
Impact Approval
-
Completed
Access Control Whether or not the regulation needs to be available to public.
Axon is meant for public use within your organization. Contact Informatica Global Customer
Support before you configure the field to "Non-Public."
Publication Date The date of the original publication of the regulation.
If a regulation object is manually created and the object is a child of another regulation object,
the publication date automatically inherits the value from the parent.
Compliance Date The date by when you want to enforce the regulation, for example, 25th May 2018.
If a regulation object is manually created and is the child of another regulation object, the
compliance date automatically inherits the value from the parent.
Comments Date The date by when you want the stakeholders of an organization to provide comments or opinions
on the draft regulation.
Finalisation Date The date by when you want the stakeholders to submit comments and finalize the regulation.
Creating an Object 53

Regulator Properties
A regulator is a person who applies or enforces the regulation. One regulator can start a regulation and other
regulators can adopt the regulation. For example, the European Union (EU) is the regulator of GDPR.
The following table describes the properties that you can provide to create a regulator:
Field Description
Name Full name of the regulator.
Short Name Short name of the regulator. The most commonly used name or an acronym for the regulator. Enter a
name that users can recognize easily.
Description Description of the regulator.
Regulatory Theme Properties
A regulatory theme classifies a regulation based on the type of data. For example, you can create a regulatory
theme to know what is the Credit Exposure limit for your organization or to protect sensitive, personal data of
employees.
The following table describes the properties that you can provide to create a regulatory theme:
Field Description
Name Full name of the regulatory theme.
Description Description of the regulatory theme.
Ref ID for the regulatory theme.
Short Name Short name of the regulatory theme. The most commonly used name or an acronym for the regulatory
theme. Enter a name that users can recognize easily.
Parent Parent object of the regulatory theme.
The following table describes the property that you can select to classify a regulatory theme:
Field Description
Axon Status Status of the regulatory theme in Axon.
Select one of the following statuses:
-
Active
-
Inactive
-
Pending Review
-
Obsolete
-
Deleted
54 Chapter 3: Create

System Interface Properties
System interfaces facilitate the flow of information between systems and data sets. These interfaces might
be technical assets that are supplied by your IT department. These interfaces might also be manual activities
that you create to fully understand the flow of data within an organization. When you create a system
interface in Axon, you create a dotted line between two objects in a system lineage map. You can use system
interfaces to explain data lineage by looking at the attributes that link two objects.
The following table describes the properties for creating a system interface:
Field Description
Name Name of the system interface.
You can create several interfaces between the same systems. Duplicate names are allowed,
but Informatica recommends that you enter a name that is descriptive and unique.
Ref. ID for the system interface. If you leave this field empty, Axon assigns a new reference
automatically.
Source System System or data set from which the information flows out.
Target System System or data set to which the information flows in.
Description Description of the system interface.
Synchronization Control Description of the rules that control the synchronization of information between the two
connected interfaces.
The following table describes the properties for classifying a system interface:
Field Description
Axon Status Status of the system interface asset in Axon.
Axon Viewing Whether the system interface should be available for public viewing or not.
Axon is meant for public use within your organization. Contact Informatica Global Customer
Support before setting this field as Non-Public.
Lifecycle Stage of the system interface in the production lifecycle.
Automation Level of automation.
Frequency Frequency at which data flows between the source and target system.
Asset ID ID of the asset.
Transfer Method Protocol or medium used to move information between the source and target system.
Creating an Object 55
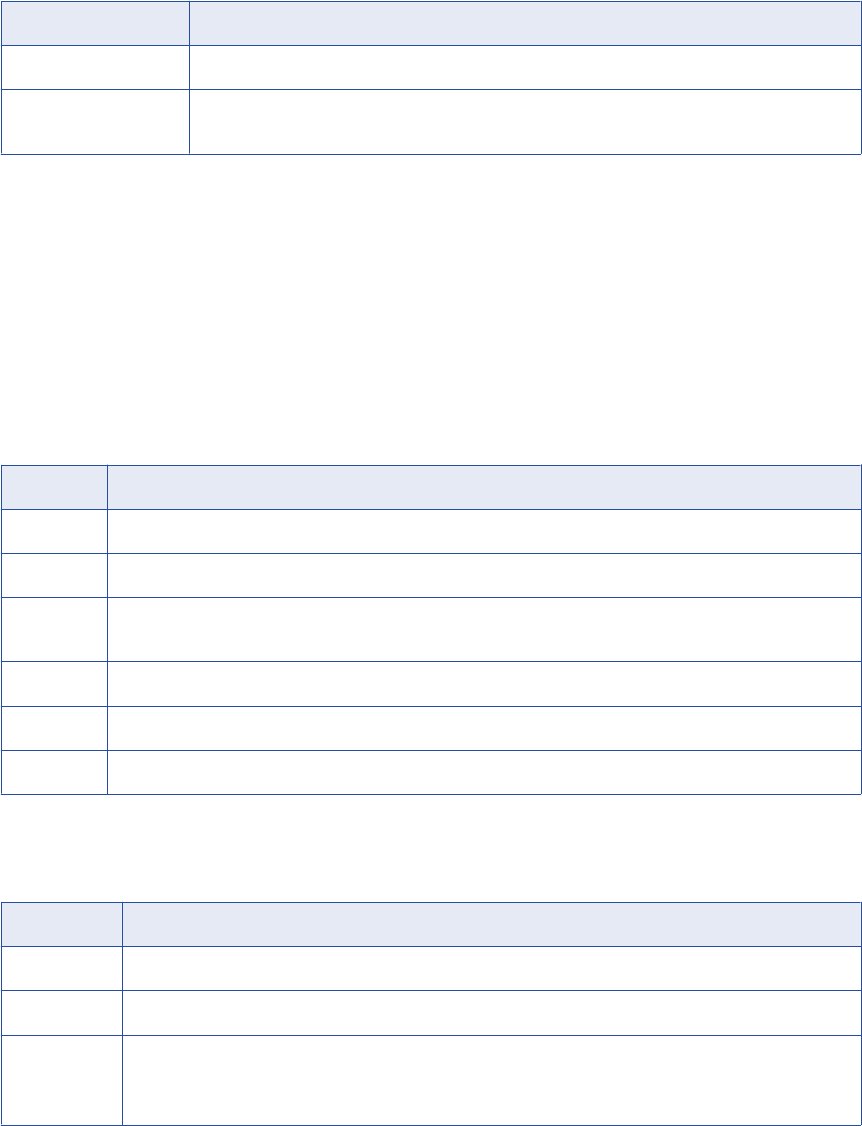
Field Description
Transfer Format Format or file type used to flow information between the source and target system.
Interface Classification Classification of the system interface that best describes its purpose, for example,
Migration. The options you see here are predefined in your Axon installation.
System Properties
A system is a container that holds one or more collections of data assets that are useful to your organization.
The definition of a system is broader than only the software applications that are supplied by your IT
department. A system refers to business categories and functions that retrieve data from their sources and
use them. In Axon, data assets, such as documents and end-user computing applications, are often
described as systems.
The following table describes the properties for creating a system:
Field Description
Short Name Short name of the system. Enter a name that users can recognize easily.
Description Description of the system.
Type Whether the system is a software application or one of several file types. You also need to specify
whether the system is hosted internally inside your organization or externally outside your organization.
Long Name Full name or proper name of the system.
URL Link to another page where related information is mentioned.
Parent Parent process of the system that you create.
The following table describes the properties for classifying a system:
Field Description
Axon Status Status of the system asset in Axon.
Lifecycle Stage of the system in the production lifecycle.
Axon Viewing Whether the system should be available for public viewing or not.
Axon is meant for public use within your organization. Contact Informatica Global Customer Support
before setting this field as Non-Public.
56 Chapter 3: Create

Field Description
CIA Rating Confidentiality, Integrity and Availability (CIA) rating of the system.
This rating indicates the security assessment of your system.
-
1 indicates weak security (less secure).
-
2 indicates average security (moderately secure).
-
3 indicates strong security (most secure).
Each of the CIA elements is rated from 1 to 3. The value you select here is a composite rating of all
three elements. For example, a rating of 213 means that:
-
Confidentiality is rated at 2 (moderately secure).
-
Integrity is rated at 1 (less secure).
-
Availability is rated at 2 (most secure).
Confidentiality, Integrity and Availability are crucial elements of your system’s security.
-
Confidentiality: The system’s ability to show the right information to the right users who have the
right credentials.
-
Integrity: The system’s ability to ensure that the information shown to the users have not been
compromised.
-
Availability: The system’s ability to show the right information to the right users at the right time.
Asset ID ID for the system.
Classification Classification of the system that best describes its function, for example, Sales Reporting. The
options you see here are predefined in your Axon installation.
Editing an Object
You can edit the properties of the objects in Axon. You must have the edit permission to edit an object.
1. Log in to Axon.
2. Click a facet to edit an object.
3. Click the object that you want to edit.
The Summary tab appears where you can enter the basic properties of the object.
4. Click Edit > Edit Item.
5. In the Definition and Classifications section, edit the properties that you want to change for the object.
6. To save and finish the changes, click Save and Close.
Clone Data Set
In an organization, you can come across multiple repositories that contain similar data sets. The process of
creating data sets and attributes for each system is time-consuming, and most of the data sets and
attributes might be similar. To reduce the time and effort, you can clone a data set that contains all the
attributes and associate the data set with different systems. You can clone a data set to quickly reuse the
data set attributes in different systems instead of creating the attributes again.
Editing an Object
57
You might see a duplication of data across systems or across multiple versions of a system running in
different parts of an organization. For example, if you want to run five instances of the same system but in
different departments of your organization, you can clone the data set that contains all the attributes.
When you clone a data set, Axon creates and saves a copy of the data set. Axon replicates data to the
Summary and Attributes tabs. You can add details in other tabs, such as Stakeholders and Impact, that are
not cloned.
After you clone a data set, Axon appends the word (clone) to the data set name. For example, if the data set
name is KYC Data, Axon creates a clone of the data set with the name "KYC Data (clone)". You can choose to
use the same name or provide a unique name for the cloned data set.
Cloning a Data Set
You can clone a data set along with the attributes in Axon. You can clone one data set at a time.
1. Open a data set that you want to clone.
2. Click Edit > Clone Data Set.
The Clone Data Set dialog box appears and displays a confirmation message.
3. To clone the data set, click Continue.
Axon replicates data in the Summary and Attributes tabs. By default, Axon appends the word (clone) to
the data set name.
4. Optionally, edit the name of the data set.
5. Optionally, update the fields in the remaining tabs that are not cloned.
6. Click Save and Close.
Create Change Requests
Create a change request to facilitate communication and discussion between the object stakeholders and the
wider Axon community.
Raise a change request to provide a controlled and audited change approval process. Assign a workflow to
the change request, and run the workflow to activate the change request. The types of change requests that
you can create depend on the configuration of each instance of Axon and the configured workflows. Any user
that logs in to Axon can raise a change request.
You can find or track a change request in the following locations:
•
Unison Search. Change Requests have their own facet. Each change request is linked to the object that
they belong to.
•
Object View. View a change request in the Change tab of an object.
•
My Account. Object stakeholders that are a part of change request workflow can find a list in the My
Account | Change Request view.
58
Chapter 3: Create

Creating a Change Request
Create a change request for objects in Axon to update, enhance, or request information for an item. You must
configure at least one workflow to activate a change request.
1. Click the object for which you want to raise a change request.
2. In the Change tab of the object, click the Change Request tab.
3. Click Edit > Raise Change Request.
The New Change Request page appears.
4. Configure the following properties to define a change request:
Field Description
Title Provide a short, meaningful title for the change request.
Type Select the option that best describes the type of change request.
You can either request for a change or request for information.
Summary Provide a full description to explain why you want to raise the change request.
The summary must contain enough information for stakeholders to assess the change request. A
change request might be rejected if the details are not sufficient.
Parent Select a parent name if the change request is part of a collection of related requests.
You can associate the change request as a child of the parent change request.
5. Configure the following properties to classify a change request:
Field Description
Severity Select the severity of the change request. You can select a low, medium, or high severity.
Urgency Select the level of urgency for the change request. Select low, medium, or high.
Estimated Benefit Enter the amount of estimated benefit after you make the change. Expressed in GBP.
Estimated Cost Enter the amount of the estimated cost to make the change. Expressed in GBP.
6. Click Save and Close.
You can view the Summary, Relationships, Stakeholders, and History tabs of the change request that you
created.
Create Workflows
Workflows are predetermined steps that a change request must follow to ensure that the right people have
the opportunity to provide input, challenge, and approve matters related to the objects that they change.
Axon includes a Business Process Model and Notation (BPMN) 2.0 workflow component to support data
governance and change control efforts.
Create Workflows
59

To create a workflow, leverage the different roles that you can assign to items in each facet. You can assign
each workflow step to a role for assessment. The workflows available for a change request might vary
depending on the facets.
You can create default and custom workflows in Axon. A custom workflow is a workflow that you can
configure for each object within a facet. A default workflow is a workflow that you configure for a facet, and
the workflow applies to all the objects in the facet.
For more information on default workflows, refer the following topics:
•
“ Default Workflows” on page 82
•
“Create a Default Workflow” on page 83
Custom Workflows
Create and use custom workflows for an object within a facet.
You can create additional workflows for an object. If you want an object to follow one or more specific
workflows, create a custom workflow for the object. For example, you can create a custom workflow that
applies to a specific glossary item. A stakeholder with edit permissions for an object can create and manage
custom workflows.
Creating a Custom Workflow
Create a custom workflow for an object in a facet. A stakeholder with edit permissions can create a custom
workflow.
1. Click the object for which you want to create a custom workflow.
2. Click Edit.
The object opens in the edit mode.
3. Click the Workflow tab.
4. Choose to add a new workflow.
5. Enter a name for the workflow.
The name must contain a minimum of six characters.
6. Provide a description for the workflow.
Axon creates a canvas with many swimlanes based on the roles that are defined for the facet.
7. In Workflow Diagram section, create a workflow diagram on the canvas. Use the Toolbar to add objects
and connect them. Use the Properties panel to specify additional properties for the objects.
8. Click Save.
Assigning and Running a Workflow
After you create a change request, you must assign a workflow to the change request. To activate the change
request, you must run the workflow. You can choose a default or custom workflow.
1. Click the object in which you created a change request.
2. In the Change | Change Requests view, click the change request for which you want to run the workflow.
Before you open the change request, you can see that the change request is in the Pending Start state.
3. In the Summary tab, select a workflow from the list.
60
Chapter 3: Create
You can view the list of custom and default workflows that are applicable for the object.
4. To run the workflow, click Start.
Axon displays a message that the workflow is initiated. The stakeholder can add comments and
complete the tasks based on the tasks specified for different roles in the workflow.
Workflows Discussion
When you run a workflow, Axon displays a notification to the stakeholders about the change request based
on the tasks that they need to perform.
A stakeholder can review and take necessary actions for the change request. After you start the workflow,
the workflow diagram shows the active task in green color.
The Discussion section of the workflow contains an audit trail of all the steps for which actions are taken or
discussions are held. For example, you can see the task name, status, description, and due date for a user
task. You can use the @ special character to address the user in a discussion. When a user is assigned to
perform a task, Axon invites the user to post the results and shows the relevant actions that the user needs
to perform to complete the task. If a user task is followed by a gateway, the user has an option to capture the
decision made as part of the user task.
After all the responsible stakeholders complete the tasks, the designated stakeholder can close the change
request.
Stuck Workflow
When a change request workflow is stuck, an Admin user or an object stakeholder with edit permissions can
help progress the workflow.
Stuck workflow occurs due to the following reasons:
•
The responsible user might not be available to complete the action in the active workflow step.
•
A required stakeholder role might be vacant during the life of the change request.
To allow the progress of a workflow, you can add a user to the required role as a delegate of an existing role
if the role is vacant. Allow the user take the appropriate action, and approve the step when complete. Then,
remove the user from the role for the task. You must add an entry to the Discussion section of the Change
Request to record the actions that you take. You can also view the updates to the change request from the
History tab of the Change Request.
Note: The workflow can get stuck only during the progress of a workflow. If a user role is vacant, you cannot
assign the workflow to a Change Request object .
Create a Workflow Diagram
Axon implements an open source workflow engine, Camunda, which provides a visual editor to create and run
a workflow from a browser.
When you provide a name and description for a new workflow, Axon creates a canvas to create a workflow
diagram. The Workflow Diagram section has three components: a toolbar on the left, a canvas in the center,
and a properties panel on the right.
Create Workflows
61

The following image shows the different sections of a workflow diagram:
1. Toolbar
2. Canvas
3. Properties
Toolbar
Use the toolbar to create a workflow diagram. The toolbar has three sections. The top section contains tools
to select the items, resize the canvas, and connect the items. The middle section lists the building blocks of
the workflow. You can select the items and drag to the canvas to create the workflow. Use the tools in the
bottom section to show or hide the toolbar.
The following table describes the different tools that you can use to create a workflow diagram:
Tool Name Description
Hand Use the hand tool to select an item.
Lasso Use the lasso tool to select a block on the swimlane.
Create/ Remove Space Use the create/ remove tool to increase or decrease the canvas size.
Global Connect Use the global connect tool to connect the items in a workflow.
Create StartEvent Use the Create StartEvent tool to start a workflow event.
You can decide the role that can start the event.
Create EndEvent Use the Create EndEvent tool to end a workflow event.
You can decide the role that can end the event.
Create ExclusiveGateway Use the Create ExclusiveGateway tool to create decision boxes that can have two results.
For example, a validate request can have two values: accept and reject.
A gateway and the preceding user task must be close to one another in the same
swimlane because they both are a logical unit and must be performed by the same user.
62 Chapter 3: Create

Tool Name Description
Create UserTask Use the Create UserTask tool to create tasks that a user can perform. You must enter a
name and due date for the user task. The description is optional.
You can create user tasks such as validate request, capture impact assessment, confirm
feasibility, and approve request.
Create Pool/ Participant Use the Create Pool/ Participant tool to add a swimlane for a user role.
Upload BPMN Use the Upload BPMN tool to upload a workflow diagram to the canvas. This tool presently
is not in use.
Download BPMN Use the Download BPMN tool to download a workflow diagram from the canvas. This tool
presently is not in use.
Hide/ Show Use the Hide/ Show tool to hide or show the toolbar.
Canvas
The canvas provides a visual representation of the workflow. When you create a custom or default workflow,
Axon automatically creates an empty canvas with swimlanes for each role that is defined for a facet. For
example, if a Glossary facet has four roles, Axon creates four swimlanes, one for each role.
Select a swimlane and drag a corner to resize the canvas vertically and horizontally. Select items from the
toolbar, drag them to the canvas, and connect them. When you place an item on the canvas, you can click the
item to view the toolbar options that are relevant to the object.
BPMN workflows use swimlanes to capture who is responsible for a set of tasks. The tasks that you specify
in a swimlane becomes the responsibility of the role associated with the swimlane. If one or more roles do
not contain any task in the workflow, you can leave the swimlanes empty or delete the swimlanes. If you want
to create the swimlane again, you can use the tool bar to create a swimlane and you must specify the role
name and the correct role ID.
Properties
In the Properties panel, you can specify additional properties for the items or tasks on the canvas. Additional
properties include required and optional fields for each item. To perform the tasks in a workflow, you must
configure the details such as due date and step description.
You must specify the required fields for the following items and tasks:
•
User Task. Specify the due date by when the user must complete the task.
•
Gateway. Specify labels for the lines that start from the gateway. The labels need to be short and unique.
The labels serves decision routing actions when you run the workflow.
Workflow Diagram Example
The example shows a new Default Workflow being created. Apart from the different start point, the
functionality to build the workflow is identical. The facet used in this example is Product. After you select the
Product facet, you can see that one default workflow already exists. You can either select this one to edit, or
create another.
1. From the Axon toolbar, click Admin Panel under the user name.
The Admin Dashboard appears with the Axon version details, status of Axon services, and Axon
message queues.
Create Workflows
63

2. On the left navigation pane, click DG Operating Model > Default Workflows.
3. Select the Product facet for which you want to configure a workflow.
4. Choose to add a new workflow.
5. Enter a name for the workflow.
The name must contain a minimum of six characters.
6. Provide a description for the workflow.
Axon creates a canvas with many swimlanes based on the roles that are defined for the facet.
7. Remember that the swimlanes appear with a lane for each type of stakeholder role configured for the
facet, that is for the Product Steward, Product Owner role.
8. Click into one of the lanes, so that a dotted line appears, and use the bin icon on the menu to delete this
lane. You can add it back in later if required.
9. From the toolbar, choose the Start Event, and place it in the Steward’s swimlane. This means that the
objects Stewards’ will receive the first request to action when a ticket is raised against this request.
10. Typically the first thing that anyone does is to validate that the request should have been routed to this
workflow. If OK, then do something. If Not OK, inform the requestor and close the ticket.
11. The first step is to raise a User Action, and populate the Properties on the right.
1. Click into the Start action.
2. From the options cloud that appears, choose the User Action and drop it in the Steward's swimlane.
3. A line will automatically draw between the two concepts.
The following image shows the start step and the first user task of the workflow:
The User Action can be populated by completing the Properties section, as above.
12. Next, you need a Gateway to show that there are two options - accept as valid request or reject.
1. Click in the User Action and the same option cloud appears as before. This time select the diamond
shaped concept, ensuring that it is placed in the Steward's swimlane.
2. In the next picture the user has increased the horizontal width of all swimlanes, increased the height
of the Steward's swimlane, and finally used the lasso tool on the Toolbar to grab and move the
concepts you have created so far to the bottom of the swimlane.
64
Chapter 3: Create

The following image shows the increased length of the swimlane:
13. Now, you can add the two possible paths. First, an invalid request needs a User Action to Inform the user
and then a Close Action.
1. Always remember to click the predecessor object, create the User Action, and close the workflow.
Remember to populate the Properties for each object.
2. Lines leaving a gateway MUST have a name added to them, because these will appear in the any
active workflow as labels on the Accept/Reject buttons. Keep them short and clear.
The following image shows the workflow diagram with the user task:
14. If you want to leave the Gateway on the alternative (valid request) path, then you need to create the next
User Task.
This step is to ‘Perform Detailed Analysis’, and has been created in the picture below. As you can see,
this is also performed by the Product Steward.
Create Workflows
65

The following image shows the workflow diagram with the user task:
15. After some additional tasks by the Steward shown as an additional User Task (Collate Report) in the
same swimlane, it is time to send to the Product Owner user for review and approval.
This time, from the option cloud on the ‘Collate Report’ User Action, simply drag the User Action into the
Owner’s swimlane, and fill in the Properties.
The following image shows the properties that you can fill in for the user task:
16. As the possible actions are to either accept or reject the findings in the report, you need a Gateway to
show these two alternatives. If the Owner rejects the report, then you should connect this new Gateway
to the User Action already created to ‘Advise Requestor of Action taken’, and then you close the
workflow.
The following image shows the alternatives for the gateway:
66
Chapter 3: Create

17. As this Gateway and the User Action both already appear on the page, you need to do something slightly
different to connect them.
1. Click on the Gateway, and select the lines icon, from the option cloud.
2. Once clicked simply move your mouse toward the ‘Advise Requestor…’ User Action, and a line will be
drawn between them.
3. Remember to go back to this new line and name it. Click in the line between the two concepts and
fill in the Properties. The line’s name will later appear in the workflow step when the Owner has to
accept/reject the step.
The following image shows the workflow with the Reject path complete:
18. If the reviewed report is accepted, add something in to show what happens. The Steward is expected to
implement the report, so create a User Action in the Steward’s swimlane.
The following image shows the action added to the steward role:
19. Save and close the workflow.
you now have a completed workflow. All paths ultimately lead to the Close event. All lines leading FROM
a Gateway have a name, which creates the approve/reject buttons in a live workflow.
20. When a Change Request is raised against the workflow, you can see the CR on the canvas.
Create Workflows
67

You can see that:
1. The Active Step, i.e. the step awaiting action is Green. If orange it is alerting users that the Due By
Date is less than a day away.
2. The description that was created for this workflow step (in the Properties section) appears as
guidance on the action expected by the Steward in the Discussion section below the canvas..
3. There are two green buttons in the Discussion, which allow the Steward to accept/reject the step.
They have the same names as the lines that leave the Gateway immediately after the active User
Action.
The following image shows the workflow diagram for the change request:
Connect Objects
The context of an object is critical information that you need to know. Axon derives the context of an object
from the other objects it is connected to in different facets.
You can associate an object from one facet to another facet. The Impact tab of an object shows the
connection of the object across many other facets. If you have edit permissions, you can connect the objects
from the Impact tab.
From the Impact tab of an object, you can perform the following tasks:
•
View and edit a connection.
•
Create a connection.
•
Search and add a connection.
View and Edit Modes
If you view an object in the View mode, you can see the facets to which the object is connected. If you view
the same object in the Edit mode, you can see additional facets to which you can connect the object. For
example, if you open a Data Set object, you can see the Policy facet in the View mode and the Policy, Client,
and Legal Entity facets in the Edit mode.
The connections to objects in the other facets are unidirectional. For example, you can edit the Impact tab of
a Process object to connect the object to the System object. If you look at the connected System object, you
can view the relationship, but cannot edit the relationship.
68
Chapter 3: Create

Create Connections
Users with the appropriate edit permissions can add or manage connections. Create a connection in the Edit
mode. Use the + icon to add a connection, and the - icon to delete a connection. When you create a
connection, the fields that appear depend on the facet type.
The following fields might appear when you create a connection:
Field Type Description
Relationship
Type
Required The type of relationship between the object and facet. You can configure the list of
the relationship types.
Object Required The name of the object that you want to connect the active object to.
Ref. Optional The reference number of the object that the object connects to.
After you select an object, Axon automatically populates the reference number and
ensures that the correct object is selected.
Owner Optional The owner of the object that the object connects to.
After you select an object, Axon automatically populates the owner.
Description Optional Description of the relationships between the objects.
Search and Add Connections
You can provide search criteria to find and add objects. To search and add objects, click the Search and Add
button next to the Grid Settings. You can select a lifecycle status or perform a keyword search to find the
objects.
After the search results appear, you can perform the following tasks:
•
Add each object one by one.
•
Remove a collection of object connections.
•
Add all the objects that belong to a hierarchy together based on the relationship type.
•
Add the additional or missing objects if all the hierarchical objects are added.
Data Quality Rules
The Data Quality facet displays the data quality rules. You can configure different types of data quality rules
to check the quality of the data in your systems. Technical users implement the rules in a third-party data
quality product.
You can use Informatica Analyst and Informatica Developer to analyze the source data and metadata. Axon
can import data quality information from profiles and scorecards that you define in Informatica Data Quality.
You can create profiles to analyze the content, quality, and structure of data sources. Scorecards monitor
data quality. You must install the Axon Agent before you can configure technical references to profiles and
scorecards in Informatica Data Quality.
Data Quality Report holds the scores or ratings of the Data Quality Rules for a given period. Typically, a set of
rows in a table are validated against a DQ Rule and the report list the percentage of compliant rows as well as
Data Quality Rules
69
the number of exceptions. The report displays the scores in red, amber, or green color according to the rule
thresholds that you have specified in the respective rule.
Some DQ systems provide results as exceptions or variances from a perfect score. For example, a 5% value
might not meet the rule requirements. Axon requires the data as an achieved score. It only considers values
that are in the following format:
•
0 or 1
•
Yes or No
•
True or False
When the profile result for a column is in numeric values other than Axon standard, there is no error logged in
Axon. Axon updates the volume count result as 0%. When the profile result for a column has string values,
then Axon records an error message.
Local DQ Rules
DQ rules defined within the context of a System are also referred to as Local Data Quality Rules. Only Local
DQ rules can have scores or reports associated to them. All DQ dashboards seen in Axon relate to Local DQ
Rules and reports.
Before you can create a local DQ Rule, you must create a data set with at least one attribute. DQ Rules are
measured against the attributes in the data set. Create the attributes before you create the DQ Rules. You can
create new local DQ rules manually or by bulk upload. During bulk upload, do not mix rules for different Data
Sets in the same upload file.
Standard DQ Rules
Large organisations often have departments working independently of each other, using their own data
sources and systems. In turn these functions are unaware that other areas use the same data, so set up their
own controls and quality measurement. As a result the same data is often measured in different DQ tools/
systems/data sets. Where this occurs, it is desirable that similar data is subject to the same quality
measurement standards. Axon facilitates this via Standard DQ Rules.
Standard DQ Rules set the guidelines for how anything linked to a Standard DQ Rule (Data Sets or Attributes)
should be measured, wherever this occurs. Standard DQ rules are described at the glossary level. Since
similar data should be associated to the same Glossary term, it is the ideal place to share common
standards. Any local DQ rules controlling attributes linked to this glossary object can therefore be set up
against these standards.
Creating Local DQ Rules
Create a local DQ Rule for a data set. You provide initial details when you create a new DQ rule. After you
save the DQ rule, Axon redirects you to the edit mode where you can provide more details. In both create and
edit modes, Axon marks the mandatory fields with a red asterisk.
1. From Unison search, open a data set object.
2. From the Actions menu, click + New DQ Rule.
The New DQ Rule page opens.
70
Chapter 3: Create

3. In the Definition section of the Summary tab, configure the following properties:
Option Description
Name* Specify a name for the DQ rule.
Description* Describe the logic for the DQ rule.
Ref* Unique identifier for each object. Axon will auto-assign a unique reference ID if you leave
this property blank.
Type* Select from one of the following types of DQ rules:
•
Accuracy
•
Consistency
•
Validity
•
Timeliness
•
Integrity
•
Purity
Measured In* Name of the system in which the rule is measured. This is often the name of the DQ profiling
or measurement system used for the given data set.
Measuring
Method*
How the DQ rule is evaluated. You can specify one of the following options:
•
System Function
•
Technical Script
•
Business Extract
4. In the Optional Fields section of the Summary tab, configure the following properties:
Option Description
Measuring Method Description Optional. Add relevant information about the measurement process.
Population Optional. Describe the population in scope for the rule.
Technical Description A technical description of the rule logic. Can include SQL or pseudo SQL.
5. In the Attribute Items in Measure section of the Summary tab, configure the following properties:
Option Description
Attribute Select the name of the attribute that the rule is measuring. Click the Add button to select
multiple attributes.
Measured
Against
Optional section for rule types only to show against which attribute in the current data set is
being measured. Click the Edit icon to open the Select Component dialog box.
6. Click Add Item if you want to add more attributes to measure the DQ Rule against. Informatica
recommends that you measure only one DQ Rule against one attribute.
Data Quality Rules
71

7. In the Classifications section of the Summary tab, configure the following properties.
Option Description
Lifecycle Lifecycle status of the object.
Axon Viewing Choose if the DQ Rule is public or non-public.
Criticality Level of criticality . Select from one of the following options:
•
Low
•
Medium
•
High
Frequency How often the rule is measured. Select one of the following values from the drop-down menu:
•
Daily
•
Weekly
•
Monthly
•
Quarterly
•
AdHoc
•
Bi-Weekly
Automation How automated the DQ measurement process is. Select from one of the following options:
•
Fully Automated
•
Partially Automated
•
Manual
•
Unknown
Green Target Enter this as a number from 0 to 100 to reflect the proportion of the measured data has achieved
this level of performance Do not enter characters e.g. %. Decimal Points are acceptable,
although results are rounded. Some DQ measurement systems report deviation from a perfect
score rather than stating the actual score - do not enter as deviation, i.e. if 5% deviation is
reported, enter ‘95’
Amber Target A number from 0 to 100 that indicates the threshold value for amber color.
8. Click Save and Close.
Linking Profiles and Scorecards to Local DQ Rules
You can link DQ Rules to columns in Informatica Data Quality. Informatica Data Quality runs a profile or
scorecard which you define against the data in a column or metric. Axon fetches the profile score or
scorecard data and displays it as a report or dashboard in the data set, DQ rule or system.
You must create and save a DQ Rule before you link profiles and scorecards to DQ Rules.
1. From Unison search, open a data set object.
2. In the Data Quality tab, click the Rules sub-tab.
3. In the Ref column, click the DQ Rule that you want to edit.
Axon displays the DQ Rule.
4. Optionally, search for a DQ Rule from Unison or open the Data Quality facet in Unison to see existing
rules.
5. Click Edit.
72
Chapter 3: Create
6. In the Summary tab, edit the Technical Rule Reference in the optional fields section under Definition.
Axon displays the Select Technical Rule Reference dialog box.
7. Click either the Scorecard or Profile radio button.
8. Select a project that Axon displays. The list of projects are from the Model Repository Service in the
Informatica domain.
9. Select the scorecard or profile and the column or metric.
10. Select the Frequency under Basic Classifications in the Classifications section.
11. Select a frequency and configure the scheduling details based on the frequency that you selected. Axon
fetches scores from Data Quality based on these parameters.
12. Select Execute Rule for Axon to run the profile or scorecard in Informatica Data Quality at the scheduled
frequency. The data is purged from Informatica Data Quality after the rule is executed. If you do not
select Execute Rule, Axon fetches the latest data available in Informatica Data Quality.
13. Click Save and Close.
Enhance Local DQ Rules
Add information to DQ Rules after you create and save the DQ rule. You can update the existing data to
provide more information or link it to other items in Axon.
All users of Axon can view the details in the DQ Rule objects. Only users with permissions on individual items
can make edits. Users with no edit rights may be able to make associations to an item if they hold edit rights
against other item types.
You can add more information to a DQ Rule in the following tabs.
Stakeholder Tab
Displays a list of stakeholders and followers for the DQ Rule.
You can view information about stakeholders in the following sections:
•
Direct Stakeholders. Responsible for providing, defining or maintaining the item
•
Stakeholder Community. If this item is connected to any other items in Axon, the stakeholders of
those connected items collectively make up the wider stakeholder community.
Report Tab
Displays reports and results about the DQ rules. You can upload data or manually add data here.
Displays historical scores for the DQ Rule. Axon considers only the latest score for calculation in the DQ
Dashboard. The same report is displayed in the Data Quality Dashboard in the Data Quality tab of a Data
Set.
You can view information in the following sections:
•
DQ Results. A chart of DQ performance for the rule over the last 12 months.
•
DQ Reports. Gives greater detail on all DQ reports added for the rule.
Relationships Tab
Summarises information on Data Quality into the following sub-views:
•
Standardised DQ Rules
•
Non-Standardised DQ Rules
Impact Tab
The Impact tab shows how connected an item is across many other facets
Data Quality Rules
73

Creating Standard DQ Rules
Create a standard DQ Rule in a Glossary object. You must have edit permission on the Glossary object.
1. From Unison search, open the Glossary object where you want to create a standard DQ Rule.
2. Click the Data Quality tab.
3. Click the Edit icon.
4. In the Standard Data Quality Rules section, specify the following properties:
Option Description
Standard Ref Unique identifier for each object. Axon will auto-assign a unique reference ID if you leave
this property blank.
Name Specify a name for the standard DQ rule.
Type Select from one of the following types of DQ rules:
•
Completeness
•
Accuracy
•
Consistency
•
Validity
•
Timeliness
Description Describe the logic for the standard DQ rule.
Technical
Description
A technical description of the rule logic. Can include SQL or pseudo SQL.
Criticality Level of criticality . Select from one of the following options:
•
Low
•
Medium
•
High
Axon Status Select one of the following status from the drop-down menu:
•
Active
•
In Design
•
Being Implemented
•
Obsolete
•
Deleted
5. Click - if you choose to add a new standard rule
6. Click Save and Close.
Associating Local Data Quality Rules to a Standard Data Quality
Rule
If an existing local Data Quality rule that applies to an attribute is associated with the Glossary object, you
can view it in the Local Data Quality Rules grid in the Data Quality tab of the Glossary object.
Define local Data Quality rules before you associate a local Data Quality rule to a standard Data Quality rule.
1. From Unison search, open the Glossary object where you want to associate a standard Data Quality Rule.
74
Chapter 3: Create

2. Click the Data Quality tab.
3. Click the + icon below the local Data Quality Rule to copy it as a standard Data Quality Rule.
Manually Add DQ Report Data
Manually add DQ report data by editing a local DQ Rule. You cannot add scores to a standard DQ Rule.
1. From Unison search, open a data set object.
2. In the Data Quality tab, click the Rules sub-tab.
3. In the Ref column, click the DQ Rule that you want to edit.
Axon displays the DQ Rule.
4. Click the Report tab.
5. Click Edit.
6. Configure the following properties:
Option Description
Report Date The date of the DQ report in the format DD/MM/YYYY. This is not the date the reports are
uploaded to Axon, it is when the evaluation of the data was performed in your DQ system.
Multiple reports for the same item and multiple items can be uploaded at the same time.
Result The score expressed as a number between 0 and 100, of items that meet the expectations of the
quality rule. Axon displays this number as a percentage. Do not use a % sign when entering data.
You can enter scores expressed with decimal places. Most Axon screens round off the score
with a decimal value.
Report URL Link to the full report generated by the DQ system.
Exception
Count
Some DQ systems report the number of records that did not meet standards. Specify that
information.
Volume Number of observations in the report.
7. Click the + icon to add another row.
8. Click Save and Close.
Bulk Upload Objects
If you have large amounts of objects, relationships, and roles to enter in Axon, you can use the bulk upload
option. You can download a Microsoft Excel template from Axon for bulk upload.
A WebUser with the New or Edit permission, Admin, and SuperAdmin can bulk upload data to Axon. If a web
user has the New permission for an object, the user can upload a new file but cannot upload existing items. If
a web user has the Edit permission, the user can update existing items but cannot upload a new file. A web
user can upload new items or update existing relationships and roles for objects that they can add or edit.
Use the bulk upload template when you need to perform the following tasks:
•
Add new objects, relationships, and roles to Axon.
Bulk Upload Objects
75
•
Update existing objects, relationships, and roles to Axon.
You can use a Microsoft Excel template that you have created to upload data to Axon. Informatica
recommends that you use the templates that Axon provides.
You can use a comma-separated-value (CSV) file format to bulk upload to Axon. You can use a CSV file that
you created to upload data to Axon. If you want to use the Axon template, you need to download and save the
Microsoft Excel template in the CSV format.
Note: You must have the necessary permission to create or update Axon objects before you can bulk upload
data.
You can bulk upload the following types of objects:
•
Attribute
•
Business Area
•
Capability
•
Data Set
•
DQ Measure
•
DQ Report
•
Glossary
•
Interface
•
Legal
•
Org Unit
•
People
•
Policy
•
Process
•
Product
•
Project
•
System
You can bulk upload the following types of relationships:
•
Attribute X Attribute
•
Business Area X Process
•
Capability X Process
•
Glossary X Glossary
•
Glossary X Project
•
Interface X Glossary
•
People X People
•
Policy X Business Area
•
Policy X Glossary
•
Policy X Process
•
Policy X Project
•
Process X Glossary
•
Process X Legal
•
Process X System
76
Chapter 3: Create

•
Process X Process
•
Project X System
•
System X Glossary
•
System X Product
You can bulk upload the following types of roles:
•
Dataset
•
Glossary
•
Interface
•
Process
•
System
Bulk Uploading Data
To bulk upload data, you must use a Microsoft Excel template. Enter the data in the template and upload the
filled template to Axon.
The following image shows the tasks that you must perform to upload data to Axon:
1. Enter data in the Microsoft Excel template and select the template file in Axon.
2. Map the columns in the template to the columns in Axon.
3. Upload the template to Axon.
Select Template File
1. In the Axon toolbar, click Create > Upload from file.
Axon displays the Upload from File page. Use the wizard to choose options related to bulk uploading of
data. The first step of the wizard is Choose File.
2. From the Upload Type list, select the type of item that you want to upload. The type of upload items
include Relationship, Object, and Role.
3. Based on the type of upload item, select the type of a relationship, object, or role in the field to the right
of the Upload Type list.
4. Choose whether you want to upload new items or update existing items.
The options to upload a new item or update an existing item appear based on the type of item that you
choose to upload.
Bulk Upload Objects
77
5. Click Download Template.
A Microsoft Excel template is downloaded to the Downloads folder.
6. In the Microsoft Excel template, add the data that you want to add or update in Axon, and then save the
template.
Note: In the template, columns with headers in red color are required.
7. Click Choose File and select the template file.
8. To cancel the upload when Axon detects a conflict, select Cancel on warning.
9. Click Next — Map Columns.
Map Columns
1. In the Map Columns step of the wizard, map the columns in the Microsoft Excel template to the
properties that Axon supports. Double-click a column in the Column in Uploaded File column and select
the value that corresponds to the value in the Axon Field column.
2. To continue with the bulk upload wizard steps, click Next Start Upload.
Upload Template File
1. In the Upload step of the wizard, review the progress of the upload task. If the upload fails, you can
download the error report to troubleshoot the upload.
Axon displays a progress bar and a message to indicate the progress of the upload task.
2. To view the status of the bulk upload job, click Go to My Jobs.
Axon displays the list of pending tasks in the My Jobs page of the Activity Stream tab. You can open the
My Jobs page from the People object to view the progress of the upload task in the Status column at
any time.
3. From the Action column in the My Jobs page, you can upload a fixed file again, or download the original
file that you uploaded.
4. Optionally, click the Notifications icon on the Axon toolbar and click the Bulk Upload tab to see the
progress of the pending task.
78
Chapter 3: Create

C h a p t e r 4
Administer
This chapter includes the following topics:
•
Administrative Tasks Overview, 80
•
User Roles, 80
•
Object Permissions, 81
•
Default Workflows, 82
•
Add Users, 83
•
View Licensed Users, 86
•
Bulk Update, 86
•
Manage Locks, 87
•
Configure Glossary Rules Engine, 87
•
Reindex Search Service and Rebuild Maps Database, 88
•
Download Logs, 89
•
Configure Dropdowns, 89
•
Configure Static Pages, 90
•
View System Information, 91
•
Display Your Organization Logo, 91
•
Customize the Axon Interface Theme, 92
•
Linking to Enterprise Metadata, 92
•
Bulk Upload Templates, 98
•
Configure Access Control, 145
•
Configure Access to Informatica Data Quality, 146
•
Configure Access to Secure@Source, 147
•
Specify Prefix for Object Reference Numbers, 147
•
Configure Email Delivery Options, 148
•
Specify Support Email Address, 149
•
Update Cache with Configuration Values, 150
79

Administrative Tasks Overview
As an administrator, you can perform administrative tasks such as managing users, configuring roles,
assigning permissions, adding users, and customizing the Axon interface. You must have an Admin or
SuperAdmin profile before you can perform administrative tasks.
User Roles
A role is a collection of permissions. Permissions that you assign to a role determine the actions that users
who are assigned the role can perform. When you assign a role to a user, you also define the scope of the
permissions by specifying the facet for which the role applies.
A user can perform one or more of the following types of tasks based on the permissions that you assign:
•
New. Create objects.
•
Edit. Edit objects.
•
View. View objects.
Stakeholders have business or technical expertise on the object. The following types of stakeholder roles are
available in Axon:
•
Authority Role
•
Knowledge Role
•
Ownership Role
•
SMR Role
•
Stewardship Role
As an administrator, you can assign one of the stakeholder roles to any Axon user. When you make a user a
stakeholder for an object, other users see that the stakeholder user has ownership or responsibility for the
object. Typically, you assign stakeholder roles to Axon users according to the specific expertise that the
users demonstrate. If an Axon user is not available to perform a task that is required by a role, you can assign
the same stakeholder role to another user.
Configure Roles
Axon provides a number of default roles. You can configure new roles based on the needs of your
organization.
1. From the Axon toolbar, click the Admin Panel menu item under your user name.
2. In the menu on the left, click Roles and Responsibilities under DG Operating Model.
3. Click Edit.
4. In the Roles and Responsibilities page, click the + icon to add a new role.
5. Configure the following properties:
Option Description
PrimaryName Provide a name for the role.
80 Chapter 4: Administer

Option Description
Description Provide a description for the role.
Default Select the checkbox to make this a default role when you save an object. All objects need at
least one default role. If you select this option, you must assign the Edit permission to the role.
Module From the drop-down menu, select a module. In the object page, you can filter the grid by module
to quickly find the role.
Role Type From the drop-down menu, select a role type. The role type affects dashboards and scorecards.
6. Click Save and Close.
Object Permissions
Configure the actions that a role can perform by assigning permissions. When you assign permissions to a
role, all users who are assigned the role inherit the permissions.
You can grant the following permissions:
New
A role with the New permission can create objects within the same facet as the object for which you
have assigned the role.
Edit
A role that has the Edit permission on an object can edit and update the object properties.
View
A user with the View permission can view objects. All Axon users have the View permission.
The following table lists the permissions for Axon users when they search for "Deleted" objects in Unison
search:
User Profile Deleted Objects Appear in Unison
Search
Can Open Deleted Objects from
Unison Search
User not logged into Axon No No
WebUser with no stakeholder role No No
WebUser with stakeholder role No No
Admin or SuperAdmin Yes Yes
Object Permissions 81

The following table lists the permissions for Axon users when they search for "Non-Public" objects in Unison
search:
User Profile Non-Public Objects Appear in
Unison Search
Can Open Non-Public Objects from
Unison Search
User not logged into Axon No No
WebUser with no stakeholder role Yes No
WebUser with stakeholder role Yes Yes
Admin or SuperAdmin Yes Yes
Assign Permissions to Roles
Permissions define the level of access that users have on objects in a facet. You must define the scope of
the permission by selecting the facet for which the role is valid. All users who are assigned the role inherit the
permissions.
1. From the Axon toolbar, click the Admin Panel menu item under your user name.
2. In the menu on the left of the page, click Role Permissions under DG Operating Model.
3. Click Edit.
4. Click the + icon against the role that you want to update.
5. Configure the following properties:
Option Description
Module From the drop-down menu, select the facet for which the permissions is valid.
Role From the drop-down menu, select the role for which the permission is valid.
Permission From the drop-down menu, select the type of permission that you want to assign to the role.
6. Click Save and Close.
Default Workflows
Default workflows are specific to a facet and apply to all the objects in the facet.
Each facet can have multiple default workflows. If you want multiple objects to follow a workflow, create a
default workflow. For example, you can use one or more default workflows to control changes to any objects
in the Glossary facet.
A SuperAdmin user can configure and manage default workflows. Create and edit a default workflow from
the Admin Panel menu. To edit a default workflow, you must select a facet and workflow. You can assign
tasks to different roles that are defined for the facet.
82
Chapter 4: Administer
Create a Default Workflow
You can create default workflows for a facet. The default workflow applies to all the objects in the facet. You
must have a SuperAdmin profile to create a default workflow.
1. From the Axon toolbar, click Admin Panel under the user name.
The Admin Dashboard appears with the Axon version details, status of Axon services, and Axon
message queues.
2. On the left navigation pane, click DG Operating Model > Default Workflows.
3. Select the facet for which you want to configure a workflow.
4. Choose to add a new workflow.
5. Enter a name for the workflow.
The name must contain a minimum of six characters.
6. Provide a description for the workflow.
Axon creates a canvas with many swimlanes based on the roles that are defined for the facet.
7. In Workflow Diagram section, create a workflow diagram on the canvas. Use the Toolbar to add objects
and connect them. Use the Properties panel to specify additional properties for the objects.
8. In the workflow diagram, specify the required fields for the following items:
•
User Task. You need to enter a name and due date for a user task.
•
Exclusive Gateway. Specify short, unique labels for the lines that start from an exclusive gateway.
The labels serve decision routing actions when you run the workflow. A gateway and the preceding
user task must be close to one another in the same swimlane because they both are a logical unit
and must be performed by the same user.
9. Click Save.
Add Users
You can add users to Axon by manually creating a People object or by bulk uploading People objects. To
manually create a People object or to bulk upload People, you must have the Admin or SuperAdmin profile.
Before you can create People objects, you must create the necessary Org Unit objects. You can create Org
Units manually or by bulk importing objects. When you add a People object, you may require to configure the
Manager property. The Manager property specifies the reporting structure. Ensure that the Manager accounts
are available in Axon before you create the People objects.
If your organization uses Single Sign-On, you can link the People facet to an external databases such as
LDAP. You can link the Org Unit facet to a HR view. If you link the People facet to an external database, you
do not create People and Org Unit objects.
Add Users
83

Bulk Upload Users to the People Facet
You can bulk upload a large number of People objects to Axon. Specify data in a Microsoft Excel sheet and
upload the sheet to Axon. You must have the Admin or SuperAdmin profile to bulk upload data to Axon.
1. In the Axon toolbar, click Upload from file from the Create menu.
Axon displays the Upload from File page. Use the wizard to make choices related to bulk uploading of
data.
2. In the Choose File step of the wizard, download an object template for People.
3. Configure the following properties in the Microsoft Excel file:
Field Description
First Name Required. First name of the user. Specify the name as it is recorded in the
LDAP directory server of your organization.
Last Name Required. Last name of the user. Specify the name as it is recorded in the
LDAP directory server of your organization.
Function Job title or role of the user.
Function Description Job description of the role of the user.
Description Description about the user.
Email Required. Email address of the user. Must be unique. Axon sends emails to
this address.
Password A password to provide access to the user. The user can change the
password later. Not required if you enable Single Sign-On authentication.
Org Unit Reference Required. The reference identifier of the organizational unit that the user is
associated with.
Profile Required. A user profile that controls the tasks that the user can perform
and the objects that the user can view.
Select one of the following user profiles:
- WebUser
- Admin
- SuperAdmin
- Data Importer
Office Location Office location of the user.
Internal Mail Code Internal office mail code of the user.
Office Telephone Office phone number of the user.
Mobile/Cell Mobile phone number of the user.
84 Chapter 4: Administer

Field Description
LAN ID Network ID of the user.
LAN ID might be required if you want to enable Single Sign-On
authentication.
If the LAN ID column is empty, you must not map the LAN ID column of the
template to any field in the Axon Field column when you perform a bulk
upload.
Employment Type Required. The type of employment of the user. Specify whether the
employment of the user is external or internal.
Lifecycle Required. The status of the employment of the user.
You can select one of the following default statuses:
- Working
- Temporarily Inactive
- Pending Deactivation
- Left the Company
An administrator can configure these values. Specify customized values if
your organization does not have the default values.
4. Select the file from your computer and choose to update existing objects or upload new items.
5. Click Next - Map Columns.
6. In the Map Columns step of the wizard, map the columns in the Excel file to the properties that Axon
supports. You can select the column that is present in the Excel file that you want to map to the Axon
field from the drop-down menu from the Column in Uploaded File property.
7. To continue with the bulk upload wizard steps, click Next - Start Upload.
8. In the Upload step of the wizard, review the progress of the upload task. Axon displays a progress bar
and a message to indicate the progress of the upload task.
Manually Add Users to the People Facet
You create users in the People facet like how you create other objects in Axon. You must be logged in with an
Admin profile to create People.
1. From the toolbar, click Create.
2. From the sub-menu, click People under Organizational.
3. Configure the following properties in the Summary tab:
Option Description
Email Email address of the person. Must be unique. Axon sends emails to this address.
Password Optional. Provide a password. The user can change the password later. Not required when
using Single Sign-On
Confirm Repeat the password.
Add Users 85

Option Description
Profile User profile assigned to the person. The object is always saved with the WebUser profile,
regardless of the value that you select here.
Note: To change the profile after you save the object, open the object in Edit mode and
select a different profile value.
Axon Status Status of the object.
First Name First name of the user. Specify the name as it is recorded in the LDAP directory of your
organization.
Last Name Last name of the user. Specify the name as it is recorded in the LDAP directory of your
organization.
Description Other relevant information about the user. Axon displays this information in the About Me
section.
Org Unit Organization unit that the user is associated with.
Function Name Job title or role of the user.
Function
Description
Job description of the role of the user.
4. Click Save & Close to save the user details.
View Licensed Users
You can view the count and list of licensed users that have create or edit permissions in Axon. The licensed
users include SuperAdmin, Admin, and any other user that is assigned a role with create or edit permissions.
View the number of licensed users and the list of users to verify that the licenses are effectively used in your
organization. For example, if you buy 20 licenses and if you find that your organization uses only 15 licenses,
you can assign the remaining licenses to additional users. If the licenses used are more than 20, then you can
revoke some of the licenses.
Log in with the SuperAdmin profile to view the number of licensed users from the Admin Dashboard. To view
the list of licensed users, click DG Operating Model > Licensed Users. You can filter the results based on the
type of user profile, first name, and last name.
Bulk Update
You can perform a bulk update to make changes to certain fields for a single object or multiple objects in a
facet at a time.
A user with the SuperAdmin profile can perform a bulk update.
In a facet, select as many objects as you want and click Bulk Update. In the Bulk Update Items section, you
can see the selected objects. In the Definition section, you can view the fields that you can update for the
86
Chapter 4: Administer

objects. Use bulk update to make a collection of changes at once. For example, change the Axon Status from
"Inactive" to "Active" using a single update instead of changing the status from each object.
Note: Axon does not perform bulk updates on locked objects.
Manage Locks
Locks prevent users from editing an object. With an Admin profile, you can manage locked objects.
A content manager can assign one of the following types of locks:
Edit Lock
This lock prevents other users from editing an object that is currently being edited by a content manager.
After a content manager finishes editing the object and clicks Save and Close, Axon removes the edit
lock. You can manually remove an edit lock if Axon does not automatically remove the edit clock after
the content manager finishes editing the object.
Permanent Lock
Content managers can assign a permanent lock to an object that they are editing. Permanent locks
persist even after the object is closed. This prevents other users from editing the item until the content
manager who assigned the lock unlocks the object.
Axon displays the name of the user who has assigned the permanent lock when you hover the cursor
over the lock. As an administrator, you can unlock an object that has a permanent lock. Before you
remove a permenant lock, you must contact the content manager who placed the lock to ensure that
edits made to the object are not lost.
Configure Glossary Rules Engine
You can configure Axon to customize the search behavior and automate connections to Glossary items are
made. You need a SuperAdmin profile to access the Automatic Glossary Assignment Dashboard page. In this
page, you can find links that describe the application of the glossary term around the business.
1. From the Axon toolbar, click the Admin Panel menu item under your user name.
2. In the super admin menu on the left of the page, click Glossary Rules Engine under Operational
Management.
3. Configure the following properties in the Summary tab of the Automatic Glossary Assignment
Dashboard page:
Option Description
Choose System From the drop-down menu, select the system you want to run rules against.
Only Process Uncategorised
Attributes?
Select Yes to apply changes to glossaries that currently have no glossary
assigned to them. Select No to alter existing glossary assignments.
Manage Locks 87
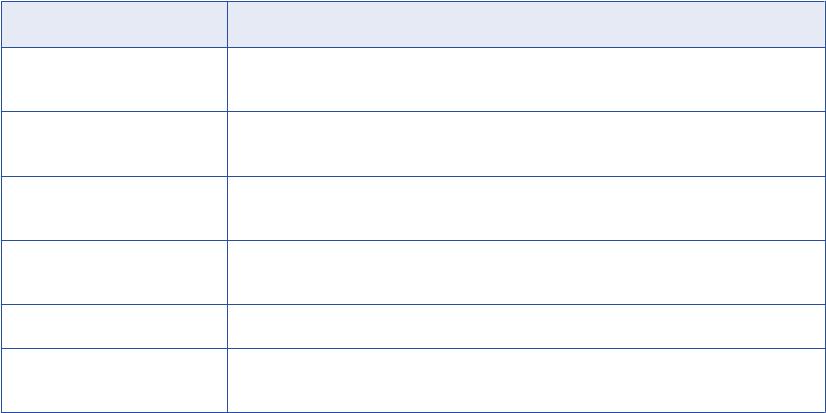
Option Description
Choose Commit Mode Select Dry Run Mode to highlight changes that can be made without affecting any
data. Select Full Commit Mode to apply changes to glossaries in Axon.
Include RI Copy-Across
Categoriser?
Choose to copy glossary information across the attribute lineage. Select No to
not copy glossary information across the attribute lineage
Include Custom Rules? Choose to include any rule based assignment. Select No to exclude any rule
based assignment.
Include PK Copy-Down
Categoriser?
Choose to copy data set glossary information to the primary key attributes within
the data set.
Include Closure Categoriser? Choose to trigger additional logic as configured on the Axon instance.
Later Passes Can Overwrite
Earlier Ones?
Choose to avoid lower ranked rules to affect previous pass rules.
4. In the Manually Override Rule property, enter a comma separated list of rule IDs. Axon runs only the
given collection of rules.
5. Review the attributes that match the rules and search engine settings. When you run these changes in
full commit mode, the values Axon changes the glossary assignment based on the summary in the
Affected Items grid.
6. Click Run.
Reindex Search Service and Rebuild Maps Database
Axon uses Apache Solr to index and search objects. The graph database stores the maps that Axon displays.
You can reindex the Solr service if Axon cannot retrieve objects from a search query. Similarly, you can
rebuild the graph database if Axon cannot display maps.
Reindex Search Service
You might want to reindex the search service under the following circumstances:
•
You have created an object but Axon does not display it in the search result.
•
You have migrated all Axon data from one instance to another.
To reindex the search service, perform the following steps:
1. From the Axon toolbar, click the Admin Panel menu item under your user name.
2. In the menu on the left, click Operational Management.
3. In the Axon Management page, click Administrator’s Panel.
4. Select the Reindex Solr option, and click Run.
To reindex the Solr service using the command line interface, go to the
<INSTALLATION_DIR>/axonhome/axon
directory and run the following command:
php app/console diaku:reindex-solr
88
Chapter 4: Administer
Rebuild Graph Database
You might want to rebuild the graph database under the following circumstances:
•
Axon does not display maps in the Maps tab.
•
You have migrated all Axon data from one instance to another.
To rebuild the graph database, perform the following steps:
1. From the Axon toolbar, click the Admin Panel menu item under your user name.
2. In the menu on the left, click Operational Management.
3. In the Axon Management page, click Administrator’s Panel.
4. Select the Rebuild Graph DB option, and click Run.
To rebuild the graph database from the Linux environment, go to the
<INSTALLATION_DIR>/axonhome/axon
directory, and run the following command:
php app/console diaku:run-full-etl
After you rebuild the database, run the following commands to restart the Daemon Tools, odbConsumer, and
Unison Search services:
service axon_daemontools restart
service OdbConsumer restart
service axon_unison_microservice restart
Download Logs
You can download application logs to troubleshoot the errors that occur in Axon.
Application logs store internal errors that occur while you work with the Axon interface. For example, you
might not be able to edit an object even if you have permissions.
A user with the Admin or SuperAdmin profile can view the application logs. To download application logs,
click Download Logs from the Operational Management menu on the Admin Panel page. You can open or
save the
application.log
file to view the logs.
Configure Dropdowns
You can assign classifications when you create objects. If you have a SuperAdmin profile, you can create new
classifications or modify the default classifications to suit the needs of your organization.
1. From the Axon toolbar, click the Admin Panel menu item under your user name.
2. In the menu on the left, click Dropdown Configurations under Meta-Model Administration.
3. In the Dropdown Configurations page, select a module from the drop-down list in the Choice property.
Axon filters the list of choices to display the options available in the facet that you selected.
4. Click the module that you want to edit.
Axon displays the configuration menu editor.
5. In the configuration page, click the + icon to add a new item to the drop-down menu.
Download Logs
89

For example, if you selected Process Duration Type, you can add more values, such as seconds and
minutes.
6. Configure the following properties:
Option Description
PrimaryName Specify a name that Axon will display in the drop-down menu.
Description Specify a description that Axon will display in the drop-down menu.
7. Click Save and Close.
Configure Static Pages
Axon contains a number of static HTML pages. If you have a SuperAdmin profile, you can customize the
static pages.
1. From the Axon toolbar, click the Admin Panel menu item under your user name.
2. In the menu on the left, click Static Page Editor under Meta-Model Administration.
•
To create a new static page, click + New Static Page from the Actions menu.
•
To edit an existing static page, click the title of the static page.
3. Configure the static page properties.
Option Description
Title Specify a title for the static page. Axon does not display the title anywhere.
Link Specify a link for the static page. Axon configures the URL of the page in the following format:
<Axon_URL>/<link>
Context Specify a description for the static page. Axon does not display the context anywhere.
Content Specify the content that is displayed in the static page. You can use HTML tags to format the
content.
Homepage Choose to make this page the homepage.
4. Click Save and Close.
90
Chapter 4: Administer
View System Information
Administrators can view system information from the Admin Panel. Axon displays static information and real
time information. Use the system information to troubleshoot Axon before you contact Informatica Global
Customer Support.
Axon displays the following static information in the Admin Panel:
•
Axon version
•
Axon build
•
Axon core
•
Build date
Axon displays the following real time data in the Admin Panel:
•
Status of the Axon services
•
Axon message queue
Axon represents the status of Axon services using colors, and reports the health of the application services.
A green-colored dot next to a service means that the service is healthy. A red-colored dot indicates that the
service has shut down.
You can also check the status of specific services from the Linux environment. To check the status of a
service, run the following command as a root user or sudo user:
service <service_name> status
For example, to check the status of the Search service, run the following command:
service tomcat-solr status
For the complete list of services used by Axon, see the Working with Services topic in the Monitoring Axon
chapter.
Display Your Organization Logo
You can replace the logo in the Axon toolbar with the logo of your organization.
1. From the Axon toolbar, click the Admin Panel menu item under your user name.
2. In the menu on the left, under the Customize & Configure category, click Change Logo.
3. In the Upload Logo field, click Browse to select the image file that contains the logo of your organization.
4. Click Save to upload the file to Axon.
5. Run the following commands in the Linux environment to stop the HTTPD and Memcached services,
clear the contents of the
cache
directory, and start the HTTPD and Memcached services:
service httpd stop
<INSTALLATION_DIR>/axonhome/third-party-app/scripts/memcached stop
rm -rf <INSTALLATION_DIRECTORY>/axonhome/axon/app/cache/*
<INSTALLATION_DIR>/axonhome/third-party-app/scripts/memcached start
service httpd start
View System Information
91
Customize the Axon Interface Theme
You can change the colors of the Axon interface to reflect the theme and colors of your organization.
1. From the Axon toolbar, click the Admin Panel menu item under your user name.
2. In the menu on the left, under the Customize & Configure category, click Customize Styles.
3. In the Upload Custom CSS field, enter the stylesheet content for the theme and colors of your
organization.
4. Click Save.
5. Run the following commands in the Linux environment to stop the HTTPD and Memcached services,
clear the contents of the
cache
directory, and start the HTTPD and Memcached services:
service httpd stop
<INSTALLATION_DIR>/axonhome/third-party-app/scripts/memcached stop
rm -rf <INSTALLATION_DIRECTORY>/axonhome/axon/app/cache/*
<INSTALLATION_DIR>/axonhome/third-party-app/scripts/memcached start
service httpd start
Linking to Enterprise Metadata
Integrate Axon with Informatica Enterprise Data Catalog to view links to technical enterprise assets in
systems, glossaries, and data sets. After integration, Axon fetches Enterprise Data Catalog resources and
fields and displays them in the Resources and Fields facets. You can link resources to systems. You can link
fields to attributes in data sets. Axon uses Informatica CLAIRE to recommend attributes to which you can link
the fields.
To view a field from Enterprise Data Catalog that you linked to an attribute, navigate to Linked Fields on the
Attributes tab of a Data Set facet. In the Relationships tab of a Data Set facet, you can click Show
Recommendations to view the related attributes that Axon recommends for possible linking with fields. Axon
displays attribute recommendations only if the associated fields are interlinked in Enterprise Data Catalog.
You also need to ensure that you provide the accurate Axon Resource Name parameter value when you
configure access to Enterprise Data Catalog.
For a list of resource types available in Enterprise Data Catalog, see the Catalog Administrator Guide.
Configure Access to Enterprise Data Catalog
If you selected the advanced configuration option during Axon installation, you would have entered the
configuration settings for Enterprise Data Catalog. If you did not select advanced configuration during Axon
installation or if you want to update the connection settings for Enterprise Data Catalog after the installation,
go to the Axon Admin Panel.
You must have the Super Admin profile to perform this task.
1. From the Axon toolbar, click the Admin Panel menu item under your user name.
2. In the menu on the left, under the Customize & Configure category, click Configure Axon.
3. In the Group dropdown, select Enterprise Data Catalog.
92
Chapter 4: Administer

4. Click Edit, and configure the following properties:
Property Description
Enterprise Data Catalog Server Host URL of the Enterprise Data Catalog service in the following format:
http(s)://<host_name>
or
http(s)://<IP_address>
Enterprise Data Catalog Server Port Port number of the Enterprise Data Catalog service
Enterprise Data Catalog Server Login
User Name
User name to log in to Enterprise Data Catalog server
Enterprise Data Catalog Server Login
Password
Password to log in to Enterprise Data Catalog server
Enterprise Data Catalog Server Login
Namespace
User security domain of Enterprise Data Catalog server
Enterprise Data Catalog Axon Resource
Name
Resource name in Enterprise Data Catalog that is configured to
connect to your specific Axon application
5. Click Save.
6. In the Linux environment, run the following command to clear the contents of the
cache
directory:
rm -rf <INSTALLATION_DIRECTORY>/axonhome/axon/app/cache/*
7. Run the following command to restart the Memcached service:
<INSTALLATION_DIR>/axonhome/third-party-app/scripts/memcached restart
8. Run the following command to restart the HTTPD service:
service httpd restart
Note: When you clear the cache and restart the Memcached and HTTPD services, the Axon web interface
might be disrupted for some users that are logged into Axon. Informatica recommends that you update the
cache after you save your changes in all the Configure Axon pages. Additionally, perform this action during a
maintenance period when very few users are using Axon.
Enterprise Catalog Facets
Users with the admin profile can view enterprise metadata from the Axon toolbar. After integrating Axon and
Enterprise Data Catalog, users with an administrator profile can view a list of resources from Enterprise Data
Catalog in the Resources facet and fields data in the Fields facet under Enterprise Catalog. WebUsers can
view field information in attributes and view resource information in System and Glossary read views.
Axon displays enterprise metadata in the following facets:
Resources Facet
A resource is an Enterprise Data Catalog object that represents an external data source or metadata
repository from where scanners extract metadata. Scanners in Enterprise Data Catalog fetch the
metadata from resources. Enterprise Data Catalog performs basic metadata operations, such as
extraction, storage, and management of metadata at the resource level. Axon displays resources from
the relational sources, file systems such as Amazon S3, Native, and HDFS, and Salesforce application
from Enterprise Data Catalog.
Linking to Enterprise Metadata
93

The following image shows a sample list of Enterprise Catalog resources:
The Resources facet displays the following information in a tabular format:
•
Resource Name
•
Description
•
Type
•
Linked Axon Systems
•
Created
The Resource Name column contains the hyperlink to the resources in Enterprise Data Catalog. The
Linked Axon Systems column displays information after you link systems to resources. All other
columns display information that Axon fetches from Enterprise Data Catalog.
If you have access to only Enterprise Data Catalog or both Enterprise Data Catalog and Secure@Source,
the Resource Name hyperlink opens the resource information in the Enterprise Data Catalog application.
If you have access to only Secure@Source, you can click the Resource Name hyperlink to view the list of
data stores in the Secure@Source application. You can search for the data store name from the list of
data stores.
You can filter the information in the Resources facet by filter type. You can search by resource name and
narrow down your search by the uploaded or updated date. The created date is in the
YYYY/MM/DD
HH:MI:SS
format.
Fields Facet
After you link systems to resources, Axon displays fields from the linked resources in the Fields facet.
94
Chapter 4: Administer

The following image shows the list of Enterprise Catalog fields:
The Fields facet displays the following information in a tabular format:
•
Name
•
Type
•
Parent Name
•
Resource Name
•
Status
•
Linked Glossary
•
Inferred Glossary
You can view the following types of Enterprise Catalog fields in Axon: Column, JSON Field, XML Field,
CSV Field, and Salesforce Field.
In the Linked Glossary column, you can view the Axon glossaries that you linked to fields in Enterprise
Data Catalog. In the Inferred Glossary column, you can view the Axon glossaries linked to data domains
in Enterprise Data Catalog. If the data domain has one or more than one column associated with the
data domain, all the fields appear in the Fields facet with the same Axon glossary name listed in the
Inferred Glossary column. Axon provides glossary recommendations for attributes.
Click the name, parent name, and resource name links in the facet to launch Enterprise Data Catalog and
view more information about each item.
You can create an Axon resource in Catalog Administrator. For more information on the resource-related
task that you need to perform in Enterprise Data Catalog, see the Axon Resource Properties topic in the
Catalog Administrator Guide.
You can run a profile on resources in Enterprise Data Catalog and identify fields from the profile results
that match data domains. You can link those data domains to Axon glossaries in Enterprise Data
Catalog. If you link fields to a data domain in Enterprise Data Catalog, the fields appear on the Fields
facet with the associated glossary name displayed in the Inferred Glossary column.
You can filter the information in the Fields facet by status type. You can search by the field name, parent
name, linked glossary, or inferred glossary, and narrow down the search by selecting resources to search
in. In the Parent Name field, Axon displays suggestions for table names along with the schema
information for relational sources and path information for non-relational sources.
Linking to Enterprise Metadata
95

Integration Overview
You associate Axon objects with Enterprise Data Catalog assets. WebUsers see technical assets in Axon
systems, glossaries, and data sets.
The following table lists the tasks that Axon users perform to view technical metadata:
Task User Profile Result
Provide the machine details
of your Enterprise Data
Catalog deployment when
you install Axon.
Installer Axon and Enterprise Data Catalog are integrated. Axon displays
the resources from Enterprise Data Catalog in the Resources
facet.
For more information on installing Axon, see the Informatica Axon
5.0 Installation Guide.
Link Enterprise Data
Catalog resources to one or
more Axon systems.
Admin or
SuperAdmin
Axon associates systems and resources and displays the linked
resources in the Enterprise Catalog tab when you open the
system object.
Link fields to attributes in
data sets.
Admin or
SuperAdmin
Axon displays the technical metadata from the fields in the
Attributes tab when you open the data set object.
Ignore Admin or
SuperAdmin
Axon does not associate the fields in the Fields facet with the
corresponding attributes in Enterprise Data Catalog. In Axon, the
status of the ignored fields change from Reported to Ignored.
Linking Resources with Systems
Link Enterprise Data Catalog resources with Axon systems to view the resources in the Fields facet in Axon.
You can add an existing system or create a system. You must have an admin profile to view the Resources
facet. You must have an Enterprise Data Catalog account to view the resource details.
1. From the Axon toolbar, click Enterprise Catalog to view the Resources facet.
2. Review the resource details and select the rows that you want to link to Axon systems. To make multiple
selections, hold the control key and click every row that you want to include.
3. Right-click a row and click Manage Linking.
The Link Axon System(s) dialog box opens.
The following image shows a sample system to which you can link a resource:
4. In the System Name column, start typing the name of the system that you want to link to the rows that
you selected.
Axon starts suggesting systems based on the keywords that you type.
5. Select the system from the list of suggestions that Axon makes.
Axon updates the Description and Type columns with information about the system that you selected.
96
Chapter 4: Administer

6. Optionally, click Create to create a system.
a. Configure the required properties.
b. Click Save.
7. Optionally, click the + icon to add a row and link another system. You can add multiple systems to
Enterprise Data Catalog resources.
8. Optionally, click the X icon to delete a row and remove an existing link.
9. Click Save.
Note: Axon lists a resource in the Resources facet even if you save the resource without running it or
purge the resource in Enterprise Data Catalog. If you link the resource to a system, the Fields facet does
not list the corresponding fields.
Linking Fields with Attributes
Link columns in Enterprise Data Catalog to data set attributes in Axon. You must have one of the
administrator profile to view the Fields facet. You can set the status of columns that are not relevant to
Ignore.
1. From the Axon toolbar, click Enterprise Catalog to view the Fields facet.
2. Review the field details and select the rows that you want to link to attributes in data sets. To make
multiple selections, hold the control key and click the rows that you want to include.
3. Right-click a row and click Manage Linking. Optionally, click the drop-down menu next to the Search
button and click Manage Linking.
The Link Axon System(s) dialog box opens.
The following image shows a sample attribute to which you can link a field:
4. In the Associate to field, select a data set attribute that you want to link the field.
Informatica CLAIRE recommends attributes of the selected data set that you can link the fields to. You
can also view the list of data set attributes available in Axon.
5. Optionally, click Create to create a data set.
a. In the Create a Data Set dialog box, specify values for the required properties.
b. Click Save.
Linking to Enterprise Metadata
97

6. From the Type dropdown, select the link type.
Option Description
Existing Select an existing attribute of the data set.
New from Field Create an attribute from the field information.
7. Based on the type of link, Axon updates the Attribute, Definition, and Glossary columns.
If you select New from Field, Axon recommends a list of glossaries that you can associate with the
attribute.
8. Optionally, click the + icon to associate a new attribute to a field.
9. Optionally, click the X icon to unlink the Axon data set attribute and the Enterprise Data Catalog field.
10. Click Save.
Bulk Upload Templates
You can download predefined Microsoft Excel templates to bulk upload in Axon. You can also use custom
Microsoft Excel templates to upload data to Axon. Informatica recommends that you use the templates that
Axon provides.
You can use a comma-separated-value (CSV) file format to bulk upload data to Axon. You can use a CSV file
that you created to upload data to Axon. If you want to use the Axon template, you need to download and
save the Microsoft Excel template in the CSV format.
Use the bulk upload template when you need to perform the following tasks:
•
Add new objects, relationships, and roles to Axon.
•
Update existing objects, relationships, and roles to Axon.
Business & Change Object Templates
Use Business and Change object templates to explain different business functions and changes to objects in
an organization. Download templates for Business and Change objects from Axon to perform a bulk upload.
You can bulk upload the following types of objects:
•
Policy
•
Project
•
Process
98
Chapter 4: Administer

Policy
Download the Policy template to bulk upload policies to Axon. You can choose to upload a new policy or
update an existing policy.
Upload New Items
The following table describes the fields of the Policy template that you can use to upload new items:
Field Type Description
Policy Name Required Name of the policy. Enter a name that other Axon users can
recognize easily.
Reference Optional Reference identifier for the policy. If you leave this field
empty, Axon assigns a new reference automatically.
Internal Required Indicates whether the policy is internal or external.
URL Optional Link to another page where the policy is mentioned in detail.
Definition Required Definition of the policy.
Effective Date Optional The date from which the policy is effective. The effective
date must be in the DD/MM/YYYY format.
End Date Optional The date after which the policy ceases to be effective. The
end date must be in the DD/MM/YYYY format.
Parent Policy Name Optional Name of the parent policy if the policy belongs to a
hierarchy.
Policy Lifecycle Required Stage of the policy in the approval lifecycle.
You can select the following default stages:
-
Proposed
-
Draft
-
Enforced
-
To Be Replaced
You can also create policy lifecycle stages.
Policy Type Required Category that best describes the policy.
You can select the following default policy types:
-
Conduct Standards
-
Data Standards
-
Technical Standards
-
Technical Guidelines
-
Procedures
You can also create policy types.
User Email Optional Email address of the user. Must be unique. Axon sends
emails to this email address.
User First Name Optional First name of the user. Specify the name as it is recorded in
the LDAP directory server of your organization.
User Last Name Optional Last Name of the user. Specify the name as it is recorded in
the LDAP directory server of your organization.
Bulk Upload Templates 99

Field Type Description
User Lan ID Optional Network ID of the user.
Governance Role Optional The role of the user.
You can select the following roles:
-
Policy Owner
-
Policy Steward
-
Policy Subject Matter Expert
Update Existing Items
The following table describes the fields of the Policy template that you can use to update existing items:
Field Type Description
Policy ID Optional ID for the policy.
Policy Name Required Name of the policy. Enter a name that other Axon users can
recognize easily.
Reference Optional Reference identifier for the policy. If you leave this field
empty, Axon assigns a new reference automatically.
Internal Required Indicates whether the policy is internal or external.
URL Optional Link to another page where the policy is mentioned in detail.
Definition Required Definition of the policy.
Effective Date Optional The date from which the policy is effective. The effective
date must be in the DD/MM/YYYY format.
End Date Optional The date after which the policy ceases to be effective. The
end date must be in the DD/MM/YYYY format.
Parent Policy Name Optional Name of the parent policy if the policy belongs to a
hierarchy.
Policy Lifecycle Required Stage of the policy in the approval lifecycle.
You can select the following default stages:
-
Proposed
-
Draft
-
Enforced
-
To Be Replaced
You can also create policy lifecycle stages.
Policy Type Required Category that best describes the policy.
You can select the following default policy types:
-
Conduct Standards
-
Data Standards
-
Technical Standards
-
Technical Guidelines
-
Procedures
You can also create policy types.
100 Chapter 4: Administer

Project
Download the Project template to bulk upload projects to Axon. You can choose to upload a new project or
update an existing project.
Upload New Items
The following table describes the fields of the Project template that you can use to upload new items:
Field Type Description
Reference Optional Reference identifier for the project. If you leave this field
empty, Axon assigns a new reference automatically.
Project Name Required Name of the project. Enter a name that other Axon users
can recognize easily.
Project Description Required Description of the project.
Start Date Required Start date of the project. The start date must be in the
DD/MM/YYYY format.
End Date Required End date of the project. The end date must be in the
DD/MM/YYYY format.
Parent Project Name Optional Parent of the project that you create.
RAG Required Status of the project in the project management lifecycle.
Select Red, Amber, or Green.
Classification Optional Classification of the project.
Select whether you want to classify the project as a
mandatory change or a discretionary change.
Project Lifecycle Required Stage of the project in the project management lifecycle.
You can select the following default stages:
-
Initiation
-
Planning
-
Execution
-
Closure
-
Closed
You can also create project lifecycle stages.
Project Type Required Indicates the type of the project.
Specify whether you want to create a program, a project
within a program, a workstream within a project, or a
workpackage within a project.
User Email Optional Email address of the user. Must be unique. Axon sends
emails to this email address.
User First Name Optional First name of the user. Specify the name as it is recorded
in the LDAP directory server of your organization.
User Last Name Optional Last Name of the user. Specify the name as it is recorded
in the LDAP directory server of your organization.
Bulk Upload Templates 101

Field Type Description
User Lan ID Optional Network ID of the user.
Governance Role Optional The role of the user.
You can select the following roles:
-
Project Sponsor
-
Project Manager
-
Project Steward
-
Project Stakeholder
-
Project Member
Update Existing Items
The following table describes the fields of the Project template that you can use to update existing items:
Field Type Description
Project ID Optional ID for the project.
Reference Optional Reference identifier for the project. If you leave this field
empty, Axon assigns a new reference automatically.
Project Name Required Name of the project. Enter a name that other Axon users
can recognize easily.
Project Description Required Description of the project.
Start Date Required Start date of the project. The start date must be in the
DD/MM/YYYY format.
End Date Required End date of the project. The end date must be in the
DD/MM/YYYY format.
Parent Project Name Optional Parent of the project that you create.
RAG Required Status of the project in the project management lifecycle.
Select Red, Amber, or Green.
Classification Optional Classification of the project.
Select whether you want to classify the project as a
mandatory change or a discretionary change.
Project Lifecycle Required Stage of the project in the project management lifecycle.
You can select the following default stages:
-
Initiation
-
Planning
-
Execution
-
Closure
-
Closed
You can also create project lifecycle stages.
Project Type Required Indicates the type of the project.
Specify whether you want to create a program, a project
within a program, a workstream within a project, or a
workpackage within a project.
102 Chapter 4: Administer

Process
Download the Process template to bulk upload processes to Axon. You can choose to upload a new process
or update an existing process.
Upload New Items
The following table describes the fields of the Process template that you can use to upload new items:
Field Type Description
Process Name Required Name of the process.
Reference Optional Reference identifier for the process. If you leave this field
empty, Axon assigns a new reference automatically.
Description Required Description of the process.
Input Description Optional Description of relevant inputs to the process.
Output Description Optional Description of relevant outputs from the process.
Step Type Required Specify whether you are creating the starting step of a
process, the ending step of a process, or a common step
across the process.
Parent Process Name Optional Parent of the process.
Process Type Required The type of process that you create.
Specify whether you are creating a complete process, a step
within a process, or a control within a process.
Lifecycle Required Stage of the process in the approval lifecycle.
You can select the following default stages:
-
In Production
-
Being considered
-
Being Designed/Built
-
To be Replaced
-
Being Decommissioned
-
Decommissioned
You can also create process lifecycle stages.
Classification Optional Classification of the process.
You can classify into the following processes: Execution
Process, Control Process, Quality Analysis Process, and
Exception Process.
Automation Optional Level of automation.
-
The Manual option means that the process requires
human intervention at every stage of the workflow.
-
The Partially Automated option means that the process
requires human intervention at some, but not all, stages of
the workflow.
-
The Fully Automated option means that the process
requires no human intervention at any stage of the
workflow.
Bulk Upload Templates 103

Field Type Description
User Email Optional Email address of the user. Must be unique. Axon sends
emails to this email address.
User First Name Optional First name of the user. Specify the name as it is recorded in
the LDAP directory server of your organization.
User Last Name Optional Last Name of the user. Specify the name as it is recorded in
the LDAP directory server of your organization.
User Lan ID Optional Network ID of the user.
Governance Role Optional The role of the user.
You can select the following roles:
-
Process Owner
-
Process Steward
-
Process Executor
-
Process SME
Update Existing Items
The following table describes the fields of the Process template that you can use to update existing items:
Field Type Description
Process ID Optional ID of the process.
Process Name Required Name of the process.
Reference Optional Reference identifier for the process. If you leave this field
empty, Axon assigns a new reference automatically.
Description Required Description of the process.
Input Description Optional Description of relevant inputs to the process.
Output Description Optional Description of relevant outputs from the process.
Step Type Required Specify whether you are creating the starting step of a
process, the ending step of a process, or a common step
across the process.
Parent Process Name Optional Parent of the process.
Process Type Required The type of process that you create.
Specify whether you are creating a complete process, a step
within a process, or a control within a process.
104 Chapter 4: Administer

Field Type Description
Lifecycle Required Stage of the process in the approval lifecycle.
You can select the following default stages:
-
In Production
-
Being considered
-
Being Designed/Built
-
To be Replaced
-
Being Decommissioned
-
Decommissioned
You can also create process lifecycle stages.
Classification Optional Classification of the process.
You can classify into the following processes: Execution
Process, Control Process, Quality Analysis Process, and
Exception Process.
Automation Optional Level of automation.
-
The Manual option means that the process requires
human intervention at every stage of the workflow.
-
The Partially Automated option means that the process
requires human intervention at some, but not all, stages
of the workflow.
-
The Fully Automated option means that the process
requires no human intervention at any stage of the
workflow.
Data & Technology Object Templates
The Data & Technology Object templates contain the main Axon components that identify the systems and
data present in an organization and how the systems relate to each other. You can use the data quality
objects to control and measure the quality of customer data. Download templates for Data and Technology
objects from Axon to perform a bulk upload.
You can bulk upload the following types of objects:
•
DQ Report
•
Attribute
•
Attribute Values
•
DQ Measure
•
Data Set
•
Interface
•
Glossary
•
System
Bulk Upload Templates
105

DQ Report
Download the DQ Report template to bulk upload data quality reports to Axon. You can choose to upload a
new DQ report or update an existing DQ report.
Upload New Items
The following table describes the fields of the DQ Report template that you can use to upload new items:
Field Type Description
Report Date Required The date when the evaluation of the data was performed in
the DQ system.
The date of the DQ report must be in the DD/MM/YYYY
format. Do not enter the date when the reports are uploaded
to Axon. You can upload multiple reports for the same item
and multiple items at the same time.
DQ Result Required The score, expressed as a number between 0 and 100, of
items that meet the expectations of the quality rule.
Axon displays this number as a percentage. Do not use a %
sign when entering data. You can enter scores expressed
with decimal places. Most Axon screens round off the score
with a decimal value.
DQ Report URL Optional Link to the full report generated by the DQ system.
Exception Count Optional The number of records that did not meet standards based
on some DQ system reports. Specify the exception
information.
Volume Optional Number of observations in the report.
DQ Measure Reference Required The unique reference number of the Local DQ rule.
Update Existing Items
The following table describes the fields of the DQ Report template that you can use to update existing items:
Field Type Description
DQ Report ID Optional ID of the DQ report.
Report Date Required The date when the evaluation of the data was performed in
the DQ system.
The date of the DQ report must be in the DD/MM/YYYY
format. Do not enter the date when the reports are uploaded
to Axon. You can upload multiple reports for the same item
and multiple items at the same time.
DQ Result Required The score, expressed as a number between 0 and 100, of
items that meet the expectations of the quality rule.
Axon displays this number as a percentage. Do not use a %
sign when entering data. You can enter scores expressed
with decimal places. Most Axon screens round off the score
with a decimal value.
106 Chapter 4: Administer

Field Type Description
DQ Report URL Optional Link to the full report generated by the DQ system.
Exception Count Optional The number of records that did not meet standards based
on some DQ system reports. Specify the exception
information.
Volume Optional Number of observations in the report.
DQ Measure Reference Required The unique reference number of the Local DQ rule.
Attribute
Download the Attribute template to bulk upload attributes to Axon. You can choose to upload a new attribute
or update an existing attribute.
Upload New Items
The following table describes the fields of the Attribute template that you can use to upload new items:
Field Type Description
Reference Number Optional The unique reference ID of the attribute.
If the Reference Number column is empty, you need to
remove the column mapping to the Reference Number field
when you perform a bulk upload. Alternatively, you can
choose to delete the Reference Number column from the
template before you perform a bulk upload.
Attribute Name Required Name of the attribute as known in the business.
Attribute Definition Required Definition of the attribute.
DB Format Optional The data type of the attribute.
For example, you can enter
DATE
for a date data type.
Note: In the Map Columns step of bulk upload, if you do
not specify a value for this field, Axon assigns the
VARCHAR(255)
data type by default.
Key Optional Indicates whether the attribute is a primary key.
Business Logic Optional Describes the relevant business logic for the attribute.
Attribute Requirement Optional Indicates if the field is mandatory, optional or conditional
when a new row is created.
Attribute Data Set Required Reference to the data set that contains the attribute.
Attribute System Optional Short name of the system that contains the data set and
the attribute.
Attribute Glossary Name Required The glossary reference that captures the attribute name.
Bulk Upload Templates 107

Field Type Description
Attribute Glossary Parent
Name
Optional Parent of the glossary asset that captures the attribute in
the glossary hierarchy.
The parent glossary term must exist in Axon.
Origination Optional The origin of the attribute.
You can select one of the following types: Created/Set
Here, Sourced, or Unknown.
Editability Optional Describes whether you can edit the attribute. The following
editability options are available: Read Only, Unknown, or
Editable - Restricted to List / List with Free Text Override /
Free Text.
Editability Role Optional The role of the user who can edit the attribute. The
permitted roles are Admin Only, Most Users, and Restricted
User Group.
User Email Optional Email address of the user. Must be unique. Axon sends
emails to this email address.
User First Name Optional First name of the user. Specify the name as it is recorded
in the LDAP directory server of your organization.
User Last Name Optional Last Name of the user. Specify the name as it is recorded
in the LDAP directory server of your organization.
User Lan ID Optional Network ID of the user.
Governance Role Optional The role of the user.
You can select the following roles:
-
Data Attribute Owner
-
Data Attribute Steward
-
DQ Attribute Steward
-
Data Attribute Business Subject Matter Expert
-
Data Attribute Technical Subject Matter Expert
Update Existing Items
The following table describes the fields of the Attribute template that you can use to update existing items:
Field Type Description
Attribute ID Optional ID of the attribute.
Reference Number Optional The unique reference ID of the attribute.
If the Reference Number column is empty, you need to
remove the column mapping to the Reference Number field
when you perform a bulk upload. Or, you can choose to
delete the Reference Number column from the template
before you perform a bulk upload.
Attribute Name Required Name of the attribute as known in the business.
108 Chapter 4: Administer

Field Type Description
Attribute Definition Required Definition of the attribute.
DB Format Optional The data type of the attribute.
For example, you can enter
DATE
for a date data type.
Note: In the Map Columns step of bulk upload, if you do
not specify a value for this field, Axon assigns the
VARCHAR(255)
data type by default.
Key Optional Indicates whether the attribute is a primary key.
Business Logic Optional Describes the relevant business logic for the attribute.
Attribute Requirement Optional Indicates if the field is mandatory, optional or conditional
when a new row is created.
Attribute Data Set Required Reference to the data set that contains the attribute.
Attribute System Optional Short name of the system that contains the data set and
the attribute.
Attribute Glossary Name Required The glossary reference that captures the attribute name.
Attribute Glossary Parent
Name
Optional Parent of the glossary asset that captures the attribute in
the glossary hierarchy.
The parent glossary term must exist in Axon.
Origination Optional The origin of the attribute.
You can select one of the following types: Created/Set
Here, Sourced, or Unknown.
Editability Optional Describes whether you can edit the attribute. The following
editability options are available: Read Only, Unknown, or
Editable - Restricted to List / List with Free Text Override /
Free Text.
Editability Role Optional The role of the user who can edit the attribute. The
permitted roles are Admin Only, Most Users, and Restricted
User Group.
Note:
•
Make sure that the attributes you update already exist in Axon.
•
In the template, enter the values in the correct format that is required by the fields. When you upload the
template, Axon validates your entries and displays an error if the formats are incorrectly entered.
Bulk Upload Templates
109
Attribute Values
Download the Attribute Values template to bulk upload values for Data Set attributes. You can choose to
replace the existing values or add to the existing list of values.
Replace Existing Values
To replace the existing list of values for a Data Set attribute, perform the following steps:
1. Open the Data Set for which you want to upload attribute values, and go to the Values tab.
2. Click Download Template to download the template file.
3. Enter the values in the template file.
Note:
•
The columns you see in the template file depend on the entries that you have made in the Structure
section of the Attributes tab.
•
Do not modify the headers in the template.
•
Enter the values according to the format required by the headers. The format of the values you enter
must match the format of the existing values.
4. In the Values tab of the Data Set, click Choose File, and select the template from your local machine.
5. In the Upload Type field, select Overwrite.
6. Click Save.
Axon erases all existing values for the Data Set attribute and creates new values from your template.
Add to Existing Values
To add new values to the existing values of a Data Set attribute, perform the following steps:
1. Open the Data Set for which you want to upload attribute values, and go to the Values tab.
2. Click Download Template to download the template file.
3. Enter the values in the template file.
•
The columns you see in the template file depend on the entries that you have made in the Structure
section of the Attributes tab.
•
Do not modify the headers in the template.
•
Enter the values according to the format required by the headers. The format of the values you enter
must match the format of the existing values.
4. In the Values tab of the Data Set, click Choose File, and select the template from your local machine.
5. In the Upload Type field, select Append.
6. Click Save.
Axon uploads the attribute values from your template and adds them to the list of existing values.
110
Chapter 4: Administer

DQ Measure
Download the DQ Measure template to bulk upload data quality measures to Axon. You can upload new items
for a DQ Measure object.
Upload New Items
The following table describes the fields of the DQ Measure template that you can use to upload new items:
Field Type Description
Rule Name Required Name of the rule.
Rule Description Required Description of the logic for the rule.
Reference Optional The unique reference number.
Based on this reference number, Axon loads the scores in the
DQ report.
Criticality Required Level of criticality. Select from one of the following options:
-
Low
-
Medium
-
High
Technical Description Optional A technical description of the rule logic. Can include SQL or
pseudo SQL.
Population Description Optional Describes the population in scope for the rule.
Measuring Method
Description
Optional The relevant information about the measurement process.
Amber Target Required A number from 0 to 100 that indicates the threshold value for
the amber color.
Green Target Required A number that indicates the threshold value for the green color.
Reflects the proportion of the measured data that achieved the
performance level for the green target. Enter a number from 0
to 100. Do not enter characters such as %.
Decimal Points are acceptable, although results are rounded.
Some DQ measurement systems report deviation from a perfect
score rather than stating the actual score. Do not enter the
deviation percentage. If 5% deviation is reported, enter "95".
Measured in System Required Name of the system in which the rule is measured. This is often
the name of the DQ profiling or measurement system used for
the given data set.
Rule Type Required The type of rule that Axon supports. You can select one of the
following types of DQ rules:
-
Accuracy
-
Consistency
-
Validity
-
Timeliness
-
Integrity
-
Purity
Bulk Upload Templates 111

Field Type Description
Frequency Optional Specifies how often the rule is measured. Select one of the
following values:
-
Daily
-
Weekly
-
Monthly
-
Quarterly
-
AdHoc
-
Bi-Weekly
Measuring Method Optional Specifies how the DQ rule is evaluated. You can specify one of
the following options:
-
System Function
-
Technical Script
-
Business Extract
Automation Level Optional Specifies how automated the DQ measurement process is.
Select one of the following options:
-
Fully Automated
-
Partially Automated
-
Manual
-
Unknown
Strategic DQ Measure
Reference
Optional The reference to the Strategic DQ Measure that is attached to a
glossary term and specifies how to validate the data related to
the glossary.
Attribute Name Required Name of the attribute that the rule measures.
Attribute Data Set Name Optional Name of the data set that contains the attribute.
Attribute Data Set System
Name
Optional Short name of the system that contains the data set and the
attribute.
User Email Optional Email address of the user. Must be unique. Axon sends emails
to this email address.
User First Name Optional First name of the user. Specify the name as it is recorded in the
LDAP directory server of your organization.
User Last Name Optional Last Name of the user. Specify the name as it is recorded in the
LDAP directory server of your organization.
User Lan ID Optional Network ID of the user.
Governance Role Optional The role of the user.
You can select the following roles:
-
DQ Steward
-
DQ Business Subject Matter Expert
-
DQ Technical Subject Matter Expert
112 Chapter 4: Administer

Data Set
Download the Data Set template to bulk upload data sets to Axon. You can choose to upload a new data set
or update an existing data set.
Upload New Items
The following table describes the fields of the Data Set template that you can use to upload new items:
Field Type Description
Reference Number Optional The unique identifier for the data set.
Data Set Name Required Name of the data set as known in the business.
Data Set Definition Required Description of the data set.
Data Set Usage
Description
Optional Additional information about the data set.
Data Set Type Required Type of the data set.
You can select the following data set types:
-
Value List
-
Data Set
-
Document
-
Report
-
Message
Default is Data Set.
System Name Required Short name of the system that contains the data set.
Lifecycle Required Stage of the data set in the governance lifecycle.
You can select the following default stages:
-
Draft
-
Confirmed
-
Governed
You can also create lifecycle stages.
Glossary Name Required The glossary that the data set is associated with.
Glossary Parent Name Optional Parent of the glossary asset in the glossary hierarchy.
The parent glossary term must exist in Axon.
User Email Optional Email address of the user. Must be unique. Axon sends
emails to this email address.
User First Name Optional First name of the user. Specify the name as it is recorded in
the LDAP directory server of your organization.
User Last Name Optional Last Name of the user. Specify the name as it is recorded in
the LDAP directory server of your organization.
Bulk Upload Templates 113

Field Type Description
User Lan ID Optional Network ID of the user.
Governance Role Optional The role of the user.
You can select the following roles.
-
Data Steward
-
Data Business Subject Matter Expert
-
Data Technical Subject Matter Expert
-
Data Owner
Update Existing Items
The following table describes the fields of the Data Set template that you can use to update existing items:
Field Type Description
Data Set ID Optional ID of the data set.
Reference Number Optional The unique identifier for the data set.
Data Set Name Required Name of the data set as known in the business.
Data Set Definition Required Description of the data set.
Data Set Usage
Description
Optional Additional information about the data set.
Data Set Type Required Type of the data set.
You can select the following data set types:
-
Value List
-
Data Set
-
Document
-
Report
-
Message
Default is Data Set.
System Name Required Short name of the system that contains the data set.
Lifecycle Required Stage of the data set in the governance lifecycle.
You can select the following default stages:
-
Draft
-
Confirmed
-
Governed
You can also create lifecycle stages.
Glossary Name Required The glossary that the data set is associated with.
Glossary Parent Name Optional Parent of the glossary asset in the glossary hierarchy.
The parent glossary term must exist in Axon.
114 Chapter 4: Administer

Interface
Download the Interface template to bulk upload interfaces to Axon. You can choose to upload a new
interface object or update an existing interface object.
Upload New Items
The following table describes the fields of the Interface template that you can use to upload new items:
Field Type Description
Interface Name Required Name of the interface.
Reference Optional Reference ID for the interface. The reference ID must be a
string data type.
If you enter a number, you must format the column to Text
type. Otherwise, Microsoft Excel alters the reference ID by
deleting trailing zeros.
Asset ID Optional A unique identifier or a serial number for a system or an
interface that the IT or Property department assigns.
Synchronisation Control Optional Description of the rules that control the synchronization of
information between the two connected interfaces.
Interface Description Required Description of the system interface.
Transfer Method Optional Protocol or medium used to move information between
the source and target system.
You can select the following methods: FTP, SFTP, SCP,
HTTP, HTTPS, SOAP, MQSERIES, or EMAIL.
Transfer Format Optional Format or file type used to flow information between the
source and target system.
You can select the following formats: XML, XBRL, JSON,
Delimited, or XLS.
Interface Classification Optional Classification of the system interface that best describes
its purpose.
You can select the following default interfaces:
-
BAU
-
Reconciliation
-
Ref Data Distribution
-
Migration
You can also create interface classifications.
Lifecycle Required Stage of the system interface in the production lifecycle.
You can select the following default stages:
-
In Production
-
Being Considered
-
Being Designed/ Built
-
To Be Replaced
-
Being Decommissioned
-
Decommissioned
You can also create lifecycle stages.
Source System Name Required System or data set from which the information flows out.
Bulk Upload Templates 115

Field Type Description
Target System Name Required System or data set to which the information flows in.
Automation Level Required Level of automation of the interface.
You can select the following the automation levels:
-
Manual - File based
-
Manual - Re-keyed
-
Partially Automated
-
Fully Automated
-
Unknown
Default is Unknown.
Frequency Optional Frequency at which data flows between the source and
target system.
You can select the following frequencies:
-
Ad-Hoc
-
Monthly
-
Weekly
-
Daily
-
Realtime
-
Unknown
-
Yearly
-
Semi-Annually
-
Quarterly
User Email Optional Email address of the user. Must be unique. Axon sends
emails to this email address.
User First Name Optional First name of the user. Specify the name as it is recorded
in the LDAP directory server of your organization.
User Last Name Optional Last Name of the user. Specify the name as it is recorded
in the LDAP directory server of your organization.
User Lan ID Optional Network ID of the user.
Governance Role Optional The role of the user.
You can select the following roles.
-
Interface Business Owner
-
Interface IT Owner
-
Interface Business Subject Matter Expert
-
Interface Technical Subject Matter Expert
Update Existing Items
The following table describes the fields of the Interface template that you can use to update existing items:
Field Type Description
Interface ID Optional ID of the interface.
Interface Name Required Name of the interface.
116 Chapter 4: Administer

Field Type Description
Reference Optional Reference ID for the interface. The reference ID must be a
string data type.
If you enter a number, you must format the column to Text
type. Otherwise, Microsoft Excel alters the reference ID by
deleting trailing zeros.
Asset ID Optional A unique identifier or a serial number for a system or an
interface that the IT or Property department assigns.
Synchronisation Control Optional Description of the rules that control the synchronization of
information between the two connected interfaces.
Interface Description Required Description of the system interface.
Transfer Method Optional Protocol or medium used to move information between
the source and target system.
You can select the following methods: FTP, SFTP, SCP,
HTTP, HTTPS, SOAP, MQSERIES, or EMAIL.
Transfer Format Optional Format or file type used to flow information between the
source and target system.
You can select the following formats: XML, XBRL, JSON,
Delimited, or XLS.
Interface Classification Optional Classification of the system interface that best describes
its purpose.
You can select the following default interfaces:
-
BAU
-
Reconciliation
-
Ref Data Distribution
-
Migration
You can also create interface classifications.
Lifecycle Required Stage of the system interface in the production lifecycle.
You can select the following default stages:
-
In Production
-
Being Considered
-
Being Designed/ Built
-
To Be Replaced
-
Being Decommissioned
-
Decommissioned
You can also create lifecycle stages.
Source System Name Required System or data set from which the information flows out.
Target System Name Required System or data set to which the information flows in.
Bulk Upload Templates 117
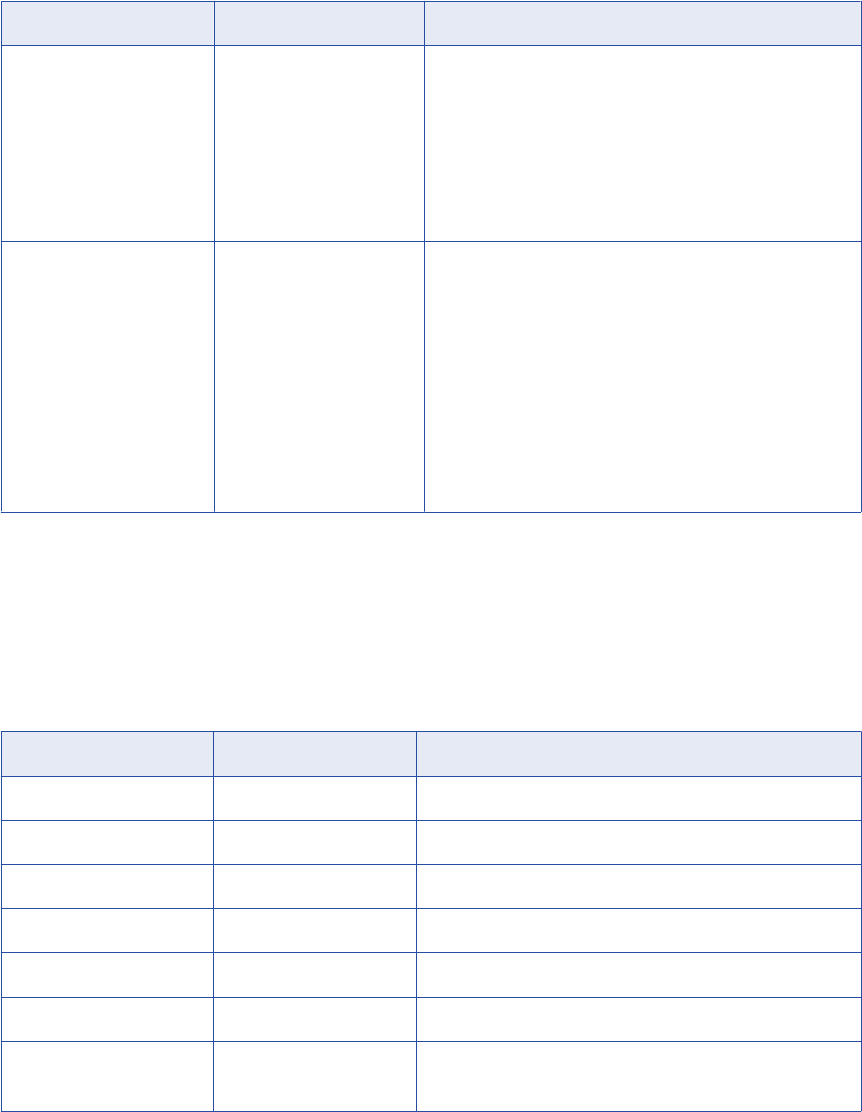
Field Type Description
Automation Level Required Level of automation of the interface.
You can select the following the automation levels:
-
Manual - File based
-
Manual - Re-keyed
-
Partially Automated
-
Fully Automated
-
Unknown
Default is Unknown.
Frequency Optional Frequency at which data flows between the source and
target system.
You can select the following frequencies:
-
Ad-Hoc
-
Monthly
-
Weekly
-
Daily
-
Realtime
-
Unknown
-
Yearly
-
Semi-Annually
-
Quarterly
Glossary
Download the Glossary template to bulk upload glossaries to Axon. You can choose to upload a new glossary
or update an existing glossary.
Upload New Items
The following table describes the fields of the Glossary template that you can use to upload new items:
Field Type Description
Glossary Name Required Name of the glossary asset.
Glossary Definition Required Definition of the glossary asset.
Examples Optional Contextual examples of the glossary asset.
Business Logic Optional Business context in which the glossary is used.
Format Description Optional Description of the glossary format.
LDM Reference Optional Place of the glossary asset in the Logical Data Model.
Parent Glossary Name Optional Parent of the glossary asset in the glossary hierarchy.
The parent glossary term must exist in Axon.
118 Chapter 4: Administer

Field Type Description
Lifecycle Required Stage of the glossary in the approval lifecycle.
You can select the following default stages:
-
Proposed
-
Being validated
-
Awaiting Approval
-
Approved
-
Being Phased Out
You can also create lifecycle stages.
Format Type Required Format in which the glossary asset is expressed.
You can select the following data types: Text, Number,
Decimal, Percentage, Fraction, Date, Time, or Datetime.
Security Classification Required Security classification of the glossary asset.
Specify whether the glossary is public, internal,
confidential, or secret. You can also create security
classifications.
Glossary Type Required The type of glossary asset. Specify whether the glossary
asset refers to an entity, a domain, or a business term.
User Email Optional Email address of the user. Must be unique. Axon sends
emails to this email address.
User First Name Optional First name of the user. Specify the name as it is recorded in
the LDAP directory server of your organization.
User Last Name Optional Last Name of the user. Specify the name as it is recorded in
the LDAP directory server of your organization.
User Lan ID Optional Network ID of the user.
Governance Role Optional The role of the user.
You can select the following roles:
-
Glossary Definition Owner
-
Glossary Steward
-
Glossary Subject Matter Expert
-
Strategic Data Owner
-
Data Quality Steward
Update Existing Items
The following table describes the fields of the Glossary template that you can use to update existing items:
Field Type Description
Glossary ID Optional ID of the glossary.
Glossary Name Required Name of the glossary asset.
Glossary Definition Required Definition of the glossary asset.
Examples Optional Contextual examples of the glossary asset.
Bulk Upload Templates 119

Field Type Description
Business Logic Optional Business context in which the glossary is used.
Format Description Optional Description of the glossary format.
LDM Reference Optional Place of the glossary asset in the Logical Data Model.
Parent Glossary Name Optional Parent of the glossary asset in the glossary hierarchy.
The parent glossary term must exist in Axon.
Lifecycle Required Stage of the glossary in the approval lifecycle.
You can select the following default stages:
-
Proposed
-
Being validated
-
Awaiting Approval
-
Approved
-
Being Phased Out
You can also create lifecycle stages.
Format Type Required Format in which the glossary asset is expressed.
You can select the following data types: Text, Number,
Decimal, Percentage, Fraction, Date, Time, or Datetime.
Security Classification Required Security classification of the glossary asset.
Specify whether the glossary is public, internal,
confidential, or secret. You can also create security
classifications.
Glossary Type Required The type of glossary asset. Specify whether the glossary
asset refers to an entity, a domain, or a business term.
System
Download the System template to bulk upload systems to Axon. You can choose to upload a new system or
update an existing system.
Upload New Items
The following table describes the fields of the System template that you can use to upload new items:
Field Type Description
System Name Required Short name of the system. Enter a name that other Axon
users can recognize easily.
System Long Name Optional Full name or long name of the system.
Asset ID Optional A unique identifier for the system or the interface. The IT or
Property department designates the Asset ID.
External Required A flag for systems that are not owned or controlled by the
client organization from which a data feed is taken. Select
True or False.
120 Chapter 4: Administer

Field Type Description
CIA Rating Optional Confidentiality, Integrity and Availability (CIA) rating of the
system.
Confidentiality, Integrity and Availability are crucial elements
of your system’s security.
-
Confidentiality: The system’s ability to show the right
information to the right users who have the right
credentials.
-
Integrity: The system’s ability to ensure that the
information shown to the users have not been
compromised.
-
Availability: The system’s ability to show the right
information to the right users at the right time.
This rating indicates the security assessment of your system.
-
1 indicates weak security (less secure).
-
2 indicates average security (moderately secure).
-
3 indicates strong security (most secure).
Each of the CIA elements is rated from 1 to 3. The value you
select here is a composite rating of all three elements. For
example, a rating of 213 means that:
-
Confidentiality is rated at 2 (moderately secure).
-
Integrity is rated at 1 (less secure).
-
Availability is rated at 2 (most secure).
System Description Required Description of the system and the business purpose.
System URL Optional Link to another page where related information is mentioned.
Parent System Name Optional Parent name of the system if the system belongs to a
hierarchy.
Lifecycle Required Stage of the system in the production lifecycle.
You can select the following default stages:
-
In Production
-
Being considered
-
Being Designed/Built
-
To be Replaced
-
Being Decommissioned
-
Decommissioned
You can also create lifecycle stages.
System Type Required Whether the system is a software application or one of
several file types. You also need to specify whether the
system is hosted internally inside your organization or
externally outside your organization.
System Classification Optional Classification of the system that best describes its function,
for example, Sales Reporting.
You can classify a system into the following default types:
-
Document Management Platform
-
Collateral Management Platform
-
Order Management Platform
-
Credit Risk Platform
-
Market Risk Platform
-
Operational Risk Platform
-
Conduct Risk Platform
You can also create system classifications.
Bulk Upload Templates 121

Field Type Description
User Email Optional Email address of the user. Must be unique. Axon sends
emails to this email address.
User First Name Optional First name of the user. Specify the name as it is recorded in
the LDAP directory server of your organization.
User Last Name Optional Last Name of the user. Specify the name as it is recorded in
the LDAP directory server of your organization.
User Lan ID Optional Network ID of the user.
Governance Role Optional The role of the user.
You can select the following roles:
-
System Business Owner
-
System IT Owner
-
System Business Subject Matter Expert
-
System Technical Subject Matter Expert
-
System Data Subject Matter Expert
Update Existing Items
The following table describes the fields of the System template that you can use to update existing items:
Field Type Description
System ID Optional ID of the system.
System Name Required Short name of the system. Enter a name that other Axon
users can recognize easily.
System Long Name Optional Full name or long name of the system.
Asset ID Optional A unique identifier for the system or the interface. The IT or
Property department designates the Asset ID.
External Required A flag for systems that are not owned or controlled by the
client organization from which a data feed is taken. Select
True or False.
122 Chapter 4: Administer

Field Type Description
CIA Rating Optional Confidentiality, Integrity and Availability (CIA) rating of the
system.
Confidentiality, Integrity and Availability are crucial
elements of your system’s security.
-
Confidentiality: The system’s ability to show the right
information to the right users who have the right
credentials.
-
Integrity: The system’s ability to ensure that the
information shown to the users have not been
compromised.
-
Availability: The system’s ability to show the right
information to the right users at the right time.
This rating indicates the security assessment of your
system.
-
1 indicates weak security (less secure).
-
2 indicates average security (moderately secure).
-
3 indicates strong security (most secure).
Each of the CIA elements is rated from 1 to 3. The value you
select here is a composite rating of all three elements. For
example, a rating of 213 means that:
-
Confidentiality is rated at 2 (moderately secure).
-
Integrity is rated at 1 (less secure).
-
Availability is rated at 2 (most secure).
System Description Required Description of the system and the business purpose.
System URL Optional Link to another page where related information is
mentioned.
Parent System Name Optional Parent name of the system if the system belongs to a
hierarchy.
Lifecycle Required Stage of the system in the production lifecycle.
You can select the following default stages:
-
In Production
-
Being considered
-
Being Designed/Built
-
To be Replaced
-
Being Decommissioned
-
Decommissioned
You can also create lifecycle stages.
Bulk Upload Templates 123

Field Type Description
System Type Required Whether the system is a software application or one of
several file types. You also need to specify whether the
system is hosted internally inside your organization or
externally outside your organization.
System Classification Optional Classification of the system that best describes its function,
for example, Sales Reporting.
You can classify a system into the following default types:
-
Document Management Platform
-
Collateral Management Platform
-
Order Management Platform
-
Credit Risk Platform
-
Market Risk Platform
-
Operational Risk Platform
-
Conduct Risk Platform
You can also create system classifications.
Organizational Object Templates
Use Organizational object templates to explain the different functions of an organization. Download
templates for Organizational objects from Axon to perform a bulk upload.
You can bulk upload the following types of objects:
•
Business Area
•
Capability
•
Legal
•
Product
•
People
•
Org Unit
Business Area
Download the Business Area template to bulk upload business area data to Axon. You can choose to upload
a new business area object or update an existing business area object.
Upload New Items
The following table describes the fields of the Business Area template that you can use to upload new items:
Field Type Description
Business Area Name Required Name of the business area.
Description Required Description of the business area.
Parent Business Area Optional Parent name of the business area if the business area
belongs to a hierarchy.
124 Chapter 4: Administer

Field Type Description
Lifecycle Required Stage of the business area in the governance lifecycle.
You can select the following default stages:
-
Proposed
-
Operating
-
Retired
You can also create the lifecycle stages.
User Email Optional Email address of the user. Must be unique. Axon sends
emails to this email address.
User First Name Optional First name of the user. Specify the name as it is recorded in
the LDAP directory server of your organization.
User Last Name Optional Last Name of the user. Specify the name as it is recorded in
the LDAP directory server of your organization.
User Lan ID Optional Network ID of the user.
Governance Role Optional The role of the user.
You can select the following roles:
-
Business Area Head
-
Business Area Subject Matter Expert
Update Existing Items
The following table describes the fields of the Business Area template that you can use to update existing
items:
Field Type Description
Business Area ID Optional ID of the business area.
Business Area Name Required Name of the business area.
Description Required Description of the business area.
Parent Business Area Optional Parent name of the business area if the business area
belongs to a hierarchy.
Lifecycle Required Stage of the business area in the governance lifecycle.
You can select the following default stages:
-
Proposed
-
Operating
-
Retired
You can also create the lifecycle stages.
Bulk Upload Templates 125

Capability
Download the Capability template to bulk upload capabilities to Axon. You can choose to upload a new
capability or update an existing capability.
Upload New Items
The following table describes the fields of the Capability template that you can use to upload new items:
Field Type Description
Reference Optional A unique identifier for the capability.
Capability Name Required Name of the capability.
Capability Definition Required Description of the capability.
Parent Capability Optional Parent name of the capability if the capability belongs to a
hierarchy.
Classification Optional Classification of the capability that best describes its
purpose.
You can classify the capability into the following default
types:
-
Regulatory Capability
-
Organisational Capability
-
Senior Management Regime
-
PRA - Prescribed Responsibilities
-
FCA Key Functions
-
Significant Harm Function
You can also create classification types.
Lifecycle Required Stage of the capability in the approval lifecycle.
You can select one of the following default stages:
-
In Effect
-
Being Proposed
-
Retired
You can also create lifecycle stages.
Capability Type Required Type of capability that best describes the object. Specify
whether the object is a capability or a responsibility.
User Email Optional Email address of the user. Must be unique. Axon sends
emails to this email address.
User First Name Optional First name of the user. Specify the name as it is recorded in
the LDAP directory server of your organization.
User Last Name Optional Last Name of the user. Specify the name as it is recorded in
the LDAP directory server of your organization.
User Lan ID Optional Network ID of the user.
Governance Role Optional The role of the user.
You can select the following roles:
-
Capability Executive Head
-
Capability Non-Executive Head
126 Chapter 4: Administer

Update Existing Items
The following table describes the fields of the Capability template that you can use to update existing items:
Field Type Description
Capability ID Optional ID of the capability.
Reference Optional A unique identifier for the capability.
Capability Name Required Name of the capability.
Capability Definition Required Description of the capability.
Parent Capability Optional Parent name of the capability if the capability belongs to a
hierarchy.
Classification Optional Classification of the capability that best describes its
purpose.
You can classify the capability into the following default
types:
-
Regulatory Capability
-
Organisational Capability
-
Senior Management Regime
-
PRA - Prescribed Responsibilities
-
FCA Key Functions
-
Significant Harm Function
You can also create classification types.
Lifecycle Required Stage of the capability in the approval lifecycle.
You can select one of the following default stages:
-
In Effect
-
Being Proposed
-
Retired
You can also create lifecycle stages.
Capability Type Required Type of capability that best describes the object. Specify
whether the object is a capability or a responsibility.
Legal
Download the Legal template to bulk upload legal data to Axon. You can choose to upload a new legal object
or update an existing legal object.
Upload New Items
The following table describes the fields of the Legal template that you can use to upload new items:
Field Type Description
Short Name Required Short name of the legal object. Enter a name that other Axon
users can recognize easily.
Long Name Required Full name of the legal object.
Description Optional Description of the legal object.
Bulk Upload Templates 127

Field Type Description
Parent Short Name Optional Short name of the parent of the legal object.
User Email Optional Email address of the user. Must be unique. Axon sends
emails to this email address.
User First Name Optional First name of the user. Specify the name as it is recorded in
the LDAP directory server of your organization.
User Last Name Optional Last Name of the user. Specify the name as it is recorded in
the LDAP directory server of your organization.
User Lan ID Optional Network ID of the user.
Governance Role Optional The role of the user.
You can select the following roles:
-
Entity Head Legal Counselor
-
Entity Legal Subject Matter Expert
Update Existing Items
The following table describes the fields of the Legal template that you can use to update existing items:
Field Type Description
Legal ID Optional ID of the legal object.
Short Name Required Short name of the legal object. Enter a name that other Axon
users can recognize easily.
Long Name Required Full name of the legal object.
Description Optional Description of the legal object.
Parent Short Name Optional Short name of the parent of the legal object.
Product
Download the Product template to bulk upload products to Axon. You can choose to upload a new product or
update an existing product.
Upload New Items
The following table describes the fields of the Product template that you can use to upload new items:
Field Type Description
Product Name Required Short name of the product. Enter a name that other Axon
users can recognize easily.
Long Name Optional Full name of the product.
Product Description Required Description of the product.
128 Chapter 4: Administer

Field Type Description
Parent Product Optional Parent name of the product if the product belongs to a
hierarchy.
Lifecycle Required Stage of the product in the governance lifecycle.
Select one of the following default stages:
-
In Production
-
Being Considered
You can also create lifecycle stages.
User Email Optional Email address of the user. Must be unique. Axon sends emails
to this email address.
User First Name Optional First name of the user. Specify the name as it is recorded in
the LDAP directory server of your organization.
User Last Name Optional Last Name of the user. Specify the name as it is recorded in
the LDAP directory server of your organization.
User Lan ID Optional Network ID of the user.
Governance Role Optional The role of the user.
You can select the following roles:
-
Product Owner
-
Product Steward
Update Existing Items
The following table describes the fields of the Product template that you can use to update existing items:
Field Type Description
Product ID Optional ID of the product.
Product Name Required Short name of the product. Enter a name that other Axon
users can recognize easily.
Long Name Optional Full name of the product.
Product Description Required Description of the product.
Parent Product Optional Parent name of the product if the product belongs to a
hierarchy.
Lifecycle Required Stage of the product in the governance lifecycle.
Select one of the following default stages:
-
In Production
-
Being Considered
You can also create lifecycle stages.
Bulk Upload Templates 129

People
Download the People template to bulk upload people data to Axon. Before you can create People objects, you
must create the necessary Org Unit objects.
Upload New Items
The following table describes the fields of the People template that you can use to upload new items:
Field Type Description
First Name Required First name of the user. Specify the name as it is recorded in
the LDAP directory server of your organization.
Last Name Required Last name of the user. Specify the name as it is recorded in
the LDAP directory server of your organization.
Function Optional Job title or role of the user.
Function Description Optional Job description of the role of the user.
Description Optional Description about the user.
Email Required Email address of the user. Must be unique. Axon sends
emails to this address.
Password Optional A password to provide access to the user. The user can
change the password later. Not required if you enable Single
Sign-On authentication.
Org Unit Reference Required The reference identifier of the organizational unit that the
user is associated with.
Profile Required A user profile that controls the tasks that the user can
perform and the objects that the user can view.
Select one of the following user profiles:
-
WebUser
-
Admin
-
SuperAdmin
-
Data Importer
Office Location Optional Office location of the user.
Internal Mail Code Optional Internal office mail code of the user.
Office Telephone Optional Office phone number of the user.
Mobile/Cell Optional Mobile phone number of the user.
LAN ID Optional Network ID of the user.
LAN ID might be required if you want to enable Single Sign-
On authentication.
If the LAN ID column is empty, you must not map the LAN ID
column of the template to any field in the Axon Field column
when you perform a bulk upload.
130 Chapter 4: Administer

Field Type Description
Employment Type Required The type of employment of the user. Specify whether the
employment of the user is external or internal.
Lifecycle Required The status of the employment of the user.
You can select one of the following default statuses:
-
Working
-
Temporarily Inactive
-
Pending Deactivation
-
Left the Company
You can also create statuses.
Org Unit
Download the Org Unit template to bulk upload organizational units to Axon. You can choose to upload a
organizational unit or update an organizational unit.
Upload New Items
The following table describes the fields of the Org Unit template that you can use to upload new items:
Field Type Description
Org Unit Name Required Name of the local department, team, or unit.
Description Optional Relevant description about the organizational unit.
Reference Required Reference identifier for the organizational unit. The
reference ID must be a string data type. If you enter a
number, you must format the column to Text type.
Otherwise, Microsoft Excel alters the reference ID by
deleting trailing zeros.
Parent Org Unit Reference Optional Parent of the organizational unit if the organization
belongs to a hierarchy. The parent record must exist in
Axon.
Axon Status Required The status of the org unit.
You can select the following default values:
-
Active
-
Inactive
-
Pending
-
Review
-
Obsolete
-
Deleted
You can customize the values if required.
Bulk Upload Templates 131
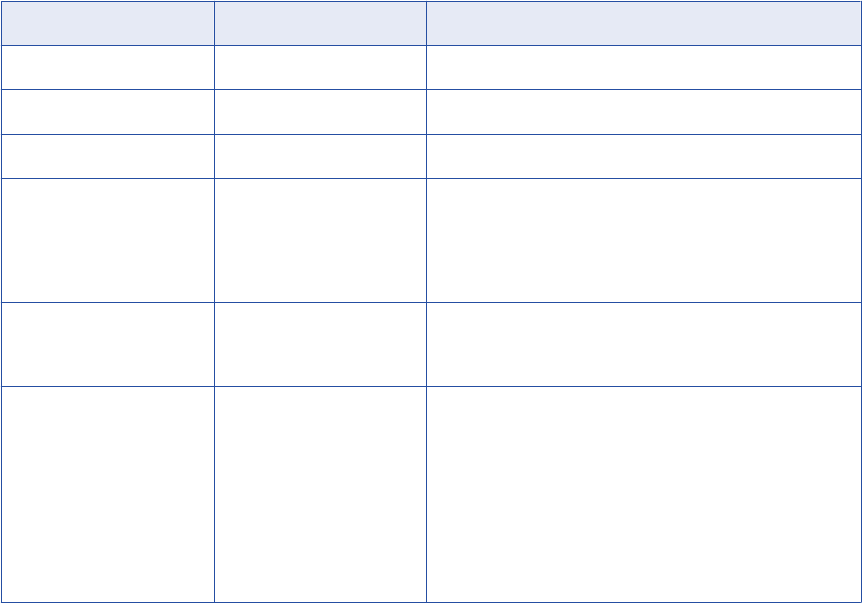
Update Existing Items
The following table describes the fields of the Org Unit template that you can use to update existing items:
Field Type Description
Org Unit ID Optional ID of the organizational unit.
Org Unit Name Required Name of the local department, team, or unit.
Description Optional Relevant description about the organizational unit.
Reference Required Reference identifier for the organizational unit. The
reference ID must be a string data type. If you enter a
number, you must format the column to Text type.
Otherwise, Microsoft Excel alters the reference ID by
deleting trailing zeros.
Parent Org Unit Reference Optional Parent of the organizational unit if the organization
belongs to a hierarchy. The parent record must exist in
Axon.
Axon Status Required The status of the org unit.
You can select the following default values:
-
Active
-
Inactive
-
Pending
-
Review
-
Obsolete
-
Deleted
You can customize the values if required.
Relationship Templates
Use Relationship templates to explain how one object is linked to the other object. Download templates for
Relationships from Axon to perform a bulk upload.
You can bulk upload the following types of relationships:
•
Process X System
•
Policy X Project
•
Policy X Business Area
•
System X Glossary
•
Glossary X Glossary
•
Project X System
•
Process X Process
•
Business Area X Process
•
Attribute X Attribute
•
Policy X Process
•
Capability X Process
•
Policy X Glossary
•
Process X Legal
132
Chapter 4: Administer

•
People X People
•
Glossary X Project
•
System X Product
•
Process X Glossary
•
Interface X Glossary
Process X System
Download the Process X System relationship template to bulk upload the relationships between a process
and system.
The following table describes the fields of the Process X System relationship template:
Field Type Description
Process Name Required Name of the process. Enter a name that other Axon users can
recognize easily.
Process Parent Name Optional Name of the parent process if the process belongs to a hierarchy.
System Name Required Short name of a system or an acronym that other Axon users can
recognize easily for a system.
Parent System Name Optional Name of the parent system if the system belongs to a hierarchy.
Rel. Type Required The type of relationship between the process and system.
Select Process is applicable to System.
Policy X Project
Download the Policy X Project relationship template to bulk upload the relationships between a policy and
project.
The following table describes the fields of the Policy X Project relationship template:
Field Type Description
Rel. Description Optional Description about the relationship between the policy and
project.
Policy Name Required Name of the policy. Enter a name that other Axon users can
recognize easily.
Policy Parent Name Optional Parent of the policy if the policy belongs to a hierarchy.
Project Name Required Name of the project. Enter a name that users can recognize
easily.
Parent Project Name Optional Parent of the project if the project belongs to a hierarchy.
Rel. Type Required The type of relationship between the policy and project.
Specify that the policy is relevant to the project.
Bulk Upload Templates 133

Policy X Business Area
Download the Policy X Business Area relationship template to bulk upload the relationships between a policy
and business area.
The following table describes the fields of the Policy X Business Area relationship template:
Field Field Description
Policy Name Required Name of the policy. Enter a name that other Axon users can
recognize easily.
Policy Parent Name Optional Parent of the policy if the policy belongs to a hierarchy.
Business Area Name Required Name of the business area. Enter a name that other Axon
users can recognize easily.
Parent Business Area
Name
Optional Parent name of the business area if the business area
belongs to a hierarchy.
Rel. Type Required The type of relationship between the policy and business
area.
Specify whether the policy is owned by the business area or
the policy is a training requirement for the business area.
System X Glossary
Download the System X Glossary relationship template to bulk upload the relationships between a system
and glossary.
The following table describes the fields of the System X Glossary relationship template:
Field Type Description
Glossary Name Required Name of the glossary.
Glossary Parent Name Optional Parent of the glossary term. The glossary parent name must
exist in Axon.
System Name Required Short name of a system or an acronym that other Axon users
can recognize easily for a system.
Strategic Data Item Optional The name of the data set that acts as a strategic data item.
Strategic Data Item
System
Optional The name of the system that contains the data set that acts
as a strategic data item.
Rel. Type Required . The type of relationship between the system and glossary.
Select one of the following types:
-
Strategic Master Source for
-
Expected glossary item coverage
134 Chapter 4: Administer

Glossary X Glossary
Download the Glossary X Glossary relationship template to bulk upload the relationships between glossaries.
The following table describes the fields of the Glossary X Glossary relationship template:
Field Type Description
Source Glossary Name Required Name of the source glossary.
Source Glossary Parent
Name
Optional Parent name of the source glossary. The source glossary parent
name must exist in Axon.
Target Glossary Name Required Name of the target glossary.
Target Glossary Parent
Name
Optional Parent name of the target glossary. The target glossary parent
name must exist in Axon.
Rel. Type Required The type of relationship between the source and target
glossaries.
You can select the following default relationship types:
-
Is Related to
-
Is Identified by
-
Is Specialism of
-
Is Described by
-
Is Classified by
-
Is Made up of
You can also create relationship types if required.
Project X System
Download the Project X System relationship template to bulk upload the relationships between a project and
system.
The following table describes the fields of the Project X System relationship template:
Field Type Description
Rel. Description Optional Description about the relationship between the project and
system.
Project Name Required Name of the project. Enter a name that other Axon users can
recognize easily.
Parent Project Name Optional Parent project of the project if the project belongs to a
hierarchy.
System Name Required Short name of a system or an acronym that other Axon users
can recognize easily for a system.
Rel. Type Required The type of relationship between the project and system.
Select whether the project is building a new system, the
project is decommissioning the system, the project is
affecting the system, or project sources data from the
system.
Bulk Upload Templates 135

Process X Process
Download the Process X Process relationship template to bulk upload the relationships between processes.
The following table describes the fields of the Process X Process relationship template:
Field Type Description
Process Name Required Name of the process.
Process Parent Name Optional Parent of the process.
Predecessor Process
Name
Required Name of the predecessor process.
Predecessor Process
Parent Name
Optional Parent of the predecessor process.
Business Area X Process
Download the Business Area X Process relationship template to bulk upload the relationships between a
business area and process.
The following table describes the fields of the Business Area X Process relationship template:
Field Type Description
Rel. Description Optional Description of the relationship between the business area and
process.
Process Name Required Name of the process. Enter a name that other Axon users can
recognize easily.
Process Parent Name Optional Name of the parent process if the process belongs to a
hierarchy.
Business Area Name Required Name of the business area. Enter a name that other Axon users
can recognize easily.
Business Parent Area
Name
Optional Parent name of the business area if the business area belongs
to a hierarchy.
Rel. Type Required The type of relationship between the business area and process.
Select Process is relevant for Business Area.
136 Chapter 4: Administer

Attribute X Attribute
Download the Attribute X Attribute relationship template to bulk upload the relationships between attributes.
The following table describes the fields of the Attribute X Attribute relationship template:
Field Type Description
Sourcing Logic Optional Indicates the logic that is applied to the flow of data. For
example, selections or transformations performed.
Sourcing Type Required The type of sourcing for the attribute. Specify whether the
sourcing type is enforced lookup, unenforced lookup, or sourced
from.
Target Attribute Name Required Name of the target attribute.
Target Data Set Name Optional Name of the target data set that contains the attribute.
Target System Name Optional Short name of the target system that contains the data set and
the attribute.
Source Attribute Name Required Name of the source attribute.
Source Data Set Name Optional Name of the source data set that contains the attribute.
Source System Name Optional Short name of the source system that contains the data set and
the attribute.
Scope of Data Optional The actual scope of data. Specify if you want all the data or a
subset of data.
Interface Name Optional Name of the system interface.
If you specify the Interface Name field, you need to fill in the
Interface Source System and Interface Target System fields.
Interface Source System Optional System from which the information flows out.
Interface Target System Optional System to which the information flows in.
Policy X Process
Download the Policy X Process relationship template to bulk upload the relationships between a policy and
process.
The following table describes the fields of the Policy X Process relationship template:
Field Type Description
Rel. Description Optional Description about the relationship between the policy and
process.
Policy Name Required Name of the policy. Enter a name that other Axon users
can recognize easily.
Bulk Upload Templates 137

Field Type Description
Policy Parent Name Optional Parent name of the policy if the policy belongs to a
hierarchy.
Process Name Required Name of the process.
Parent Process Name Optional Parent name of the process if the process belongs to a
hierarchy.
Rel. Type Required The type of relationship between the policy and process.
Specify that the policy regulates the process.
Capability X Process
Download the Capability X Process relationship template to bulk upload the relationships between a
capability and process.
The following table describes the fields of the Capability X Process relationship template:
Field Type Description
Process Name Required Name of the process. Enter a name that other Axon users can
recognize easily.
Process Parent Name Optional Name of the parent process if the process belongs to a hierarchy.
Capability Name Required Name of the capability.
Capability Parent Name Optional Parent of the capability. The capability parent name must exist in
Axon.
Rel. Type Optional The type of relationship between the capability and process.
Select Is Supporting the Capability.
Policy X Glossary
Download the Policy X Glossary relationship template to bulk upload the relationships between a policy and
glossary.
The following table describes the fields of the Policy X Glossary relationship template:
Field Type Description
Rel. Description Optional Description about the relationship between the policy and
glossary.
Policy Name Required Name of the policy. Enter a name that other Axon users can
recognize easily.
Policy Parent Name Optional Parent name of the policy if the policy belongs to a hierarchy.
Glossary Name Required Name of the glossary.
138 Chapter 4: Administer

Field Type Description
Parent Glossary Name Optional Parent name of the glossary term. The glossary parent name
must exist in Axon.
Rel. Type Required The type of relationship between the policy and glossary.
Specify that the policy regulates the glossary.
Process X Legal
Download the Process X Legal relationship template to bulk upload the relationships between a process and
legal entity.
The following table describes the fields of the Process X Legal relationship template:
Field Type Description
Process Name Required Name of the process. Enter a name that other Axon users can
recognize easily.
Process Parent Name Optional Name of the parent process if the process belongs to a hierarchy.
Legal Short Name Required Short name of the legal entity. Enter a name that other Axon
users can recognize easily.
Parent Legal Short Name Optional Name of the parent legal entity if the legal entity belongs to a
hierarchy.
Rel. Type Required The type of relationship between the process and legal entity.
Select one of the following types:
-
Legal entity is Data Controller
-
Legal Entity is Data Processor
People X People
Download the People X People relationship template to bulk upload the relationships between an employee
and manager.
The following table describes the fields of the People X People relationship template:
Field Type Description
Manager Email Optional Email address of the manager of the employee.
Manager First Name Optional First name of the manager of the employee.
Manager Last Name Optional Last name of the manager of the employee.
Manager LAN ID Optional Network ID of the manager of the employee.
Employee Email Optional A unique email address of the employee. Axon sends emails to
this address.
Bulk Upload Templates 139

Field Type Description
Employee First Name Optional First name of the employee. Specify the name as it is recorded
in the LDAP directory server of your organization.
Employee Last Name Optional Last name of the employee. Specify the name as it is recorded
in the LDAP directory server of your organization.
Employee LAN ID Optional Network ID of the employee.
LAN ID might be required if you want to enable Single Sign-On
authentication.
If the LAN ID column is empty, you must not map the LAN ID
column of the template to any field in the Axon Field column
when you perform a bulk upload.
Rel. Type Required The type of relationship between the employee and manager.
Specify one of the following relationship types:
-
Direct report
-
Dotted line
Glossary X Project
Download the Glossary X Project relationship template to bulk upload the relationships between a glossary
and project.
The following table describes the fields of the Glossary X Project relationship template:
Field Type Description
Rel. Description Optional The description about the relationship between the glossary and
project.
Glossary Name Required Name of the glossary.
Glossary Parent Name Optional Parent name of the glossary term. The glossary parent name
must exist in Axon.
Project Name Required Name of the project. Enter a name that other Axon users can
recognize easily.
Parent Project Name Optional Parent name of the project if the project belongs to a hierarchy.
Rel. Type Required The type of relationship between the glossary and project.
Specify whether the glossary is used for the project or is KDE for
the project.
140 Chapter 4: Administer

System X Product
Download the System X Product relationship template to bulk upload the relationships between a system and
product.
The following table describes the fields of the System X Product relationship template:
Field Type Description
Product Name Required Name of the product.
Product Parent Name Optional Parent name of the product if the product belongs to a
hierarchy.
System Name Required Short name of a system or an acronym that other Axon users
can recognize easily for a system.
Rel. Type Required The type of relationship between the system and product.
Specify whether the relationship type supports order
management, trade execution, settlement, exposure
management, or position management.
Product x Legal Entity Rel
Type
Optional The type of relationship between the product and the legal
entity. Select Risk Owning Entity or Booking Entity.
Legal Entity Short Name Optional Short name of the legal entity.
Legal Entity Parent Name Optional Parent name of the legal entity if the legal entity belongs to a
hierarchy.
Process X Glossary
Download the Process X Glossary relationship template to bulk upload the relationships between a process
and glossary.
The following table describes the fields of the Process X Glossary relationship template:
Field Type Description
Rel. Description Optional Description of relationship between the process and glossary.
Glossary Name Required Name of the glossary.
Glossary Parent Name Optional Parent of the glossary term. The glossary parent name must exist
in Axon.
Process Name Required Name of the process. Enter a name that other Axon users can
recognize easily.
Process Parent Name Optional Name of the parent process if the process belongs to a hierarchy.
Rel. Type Required The type of relationship between the process and glossary.
Select one of the following types:
-
Is used in Process
-
Is KDE for Process
Bulk Upload Templates 141

Interface X Glossary
Download the Interface X Glossary relationship template to bulk upload the relationships between an
interface and a glossary.
The following table describes the fields of the Interface X Glossary relationship template:
Field Type Description
Rel. Type Required The type of relationship between the interface and the
glossary.
Specify that the relationship type is the expected glossary
item coverage.
Interface Name Required Name of the system interface.
Interface Source System Optional System from which the information flows out.
Interface Target System Optional System to which the information flows in.
Glossary Name Required Name of the glossary.
Glossary Parent Name Optional Parent of the glossary term. The glossary parent name must
exist in Axon.
Role Templates
Use Role templates to explain how you can assign different stakeholder roles for an object. Download
templates for Roles from Axon to perform a bulk upload.
You can bulk upload the following types of roles:
•
Glossary
•
Data Set
•
System
•
Interface
•
Process
Glossary Role
Download the Glossary Role template to bulk upload glossaries to Axon.
The following table describes the fields of the Glossary Role template:
Field Type Description
Glossary Name Required Name of the glossary.
Glossary Parent Name Optional Parent name of the glossary term. The glossary parent name
must exist in Axon.
User Email Optional Email address of the user. Must be unique. Axon sends emails
to this email address.
142 Chapter 4: Administer
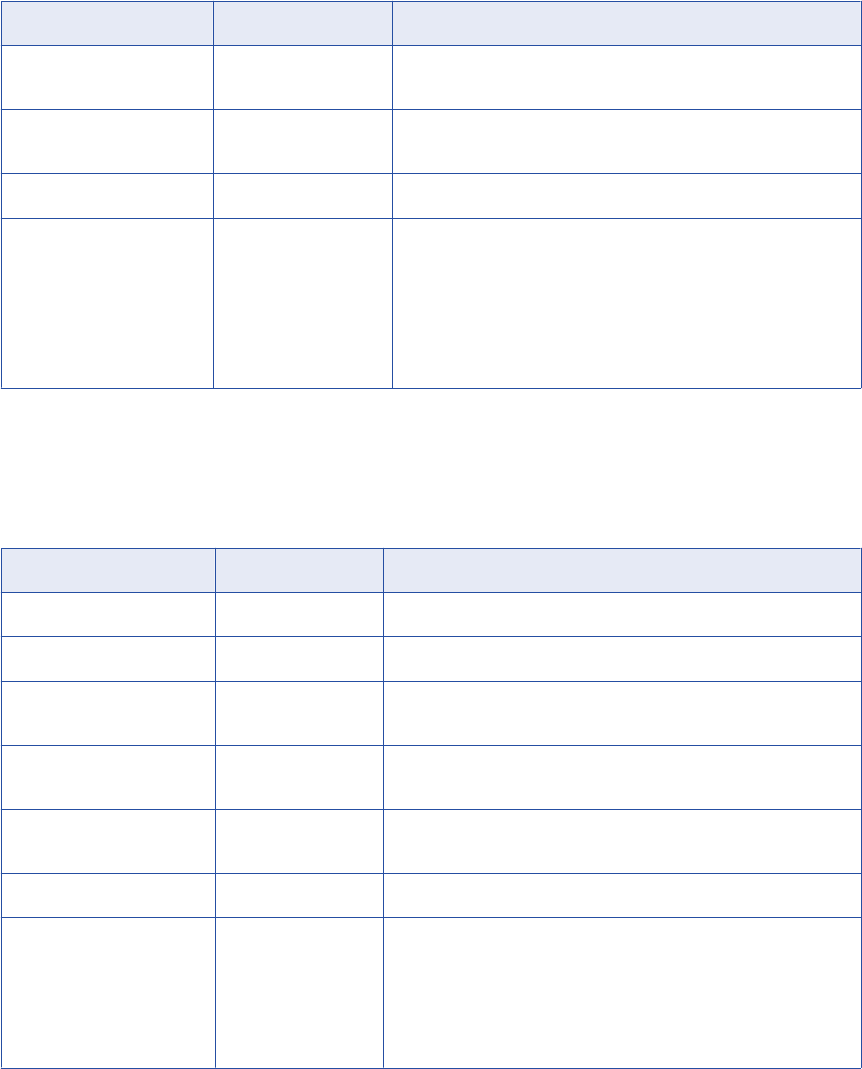
Field Type Description
User First Name Optional First name of the user. Specify the name as it is recorded in
the LDAP directory server of your organization.
User Last Name Optional Last Name of the user. Specify the name as it is recorded in
the LDAP directory server of your organization.
User Lan ID Optional Network ID of the user.
Governance Role Required The role of the user.
You can select the following roles:
-
Glossary Definition Owner
-
Glossary Steward
-
Glossary Subject Matter Expert
-
Strategic Data Owner
-
Data Quality Steward
Data Set Role
Download the Data Set Role template to bulk upload data sets to Axon.
The following table describes the fields of the Data Set Role template:
Field Type Description
Data Set Name Required Name of the data set.
Data Set System Name Optional Name of the system that the data set belongs to.
User Email Optional Email address of the user. Must be unique. Axon sends emails
to this email address.
User First Name Optional First name of the user. Specify the name as it is recorded in the
LDAP directory server of your organization.
User Last Name Optional Last Name of the user. Specify the name as it is recorded in the
LDAP directory server of your organization.
User Lan ID Optional Network ID of the user.
Governance Role Required The role of the user.
You can select the following roles.
-
Data Steward
-
Data Business Subject Matter Expert
-
Data Technical Subject Matter Expert
-
Data Owner
Bulk Upload Templates 143

System Role
Download the System Role template to bulk upload systems to Axon.
The following table describes the fields of the System Role template:
Field Type Description
System Name Required Short name of a system or an acronym that other Axon users
can recognize easily for a system.
User Email Optional Email address of the user. Must be unique. Axon sends emails
to this email address.
User First Name Optional First name of the user. Specify the name as it is recorded in the
LDAP directory server of your organization.
User Last Name Optional Last Name of the user. Specify the name as it is recorded in the
LDAP directory server of your organization.
User Lan ID Optional Network ID of the user.
Governance Role Required The role of the user.
You can select the following roles:
-
System Business Owner
-
System IT Owner
-
System Business Subject Matter Expert
-
System Technical Subject Matter Expert
-
System Data Subject Matter Expert
Interface Role
Download the Interface Role template to bulk upload interfaces to Axon.
The following table describes the fields of the Interface Role template:
Field Type Description
Interface Name Required Name of the system interface.
Interface Source System Optional System from which the information flows out.
Interface Target System Optional System to which the information flows in.
User Email Optional Email address of the user. Must be unique. Axon sends emails
to this email address.
User First Name Optional First name of the user. Specify the name as it is recorded in
the LDAP directory server of your organization.
User Last Name Optional Last Name of the user. Specify the name as it is recorded in
the LDAP directory server of your organization.
144 Chapter 4: Administer

Field Type Description
User Lan ID Optional Network ID of the user.
Governance Role Required The role of the user.
You can select the following roles.
-
Interface Business Owner
-
Interface IT Owner
-
Interface Business Subject Matter Expert
-
Interface Technical Subject Matter Expert
Process Role
Download the Process Role template to bulk upload processes to Axon.
The following table describes the fields of the Process Role template:
Field Type Description
Process Name Required Name of the process.
Parent Process Name Optional Parent name of the process.
User Email Optional A unique email address of the user. Axon sends emails to
this email address.
User First Name Optional First name of the user. Specify the name as it is recorded in
the LDAP directory server of your organization.
User Last Name Optional Last Name of the user. Specify the name as it is recorded in
the LDAP directory server of your organization.
User Lan ID Optional Network ID of the user.
Governance Role Required The role of the user.
You can select one the following roles:
-
Process Owner
-
Process Steward
-
Process Executor
-
Process SME
Configure Access Control
You can define access control for users that log in to Axon.
You must have the Super Admin profile to perform this task.
1. From the Axon toolbar, click the Admin Panel menu item under your user name.
2. In the menu on the left, under the Customize & Configure category, click Configure Axon.
3. In the Group dropdown, select Environment.
4. Click the Edit button, and then click the Edit icon.
Configure Access Control
145

5. In the Provide Access Control List Configuration window, define the Access Control List (ACL) method
and role for Axon users.
6. Click Save to save your changes in the Provide Access Control List Configuration window.
7. Click Save in the main Configure Axon page to save your settings.
8. In the Linux environment, run the following command to clear the contents of the
cache
directory:
rm -rf <INSTALLATION_DIRECTORY>/axonhome/axon/app/cache/*
9. Run the following command to restart the Memcached service:
<INSTALLATION_DIR>/axonhome/third-party-app/scripts/memcached restart
10. Run the following command to restart the HTTPD service:
service httpd restart
Note: When you clear the cache and restart the Memcached and HTTPD services, the Axon web interface
might be disrupted for some users that are logged into Axon. Informatica recommends that you update the
cache after you save your changes in all the Configure Axon pages. Additionally, perform this action during a
maintenance period when very few users are using Axon.
Configure Access to Informatica Data Quality
If you have installed the Axon Agent, you must specify the details of the Axon Agent installation in Axon.
Axon uses the parameters you specify to connect to Informatica Data Quality.
You must have the Super Admin profile to perform this task.
1. From the Axon toolbar, click the Admin Panel menu item under your user name.
2. In the menu on the left, under the Customize & Configure category, click Configure Axon.
3. In the Group dropdown, select Data Quality.
4. Click Edit, and configure the following properties:
Property Description
Data Quality Server Host Host name of the system where you installed the Axon Agent
Data Quality Server Port Port number on which the Axon Agent runs
5. Click Save.
6. In the Linux environment, run the following command to clear the contents of the
cache
directory:
rm -rf <INSTALLATION_DIRECTORY>/axonhome/axon/app/cache/*
7. Run the following command to restart the Memcached service:
<INSTALLATION_DIR>/axonhome/third-party-app/scripts/memcached restart
8. Run the following command to restart the HTTPD service:
service httpd restart
Note: When you clear the cache and restart the Memcached and HTTPD services, the Axon web interface
might be disrupted for some users that are logged into Axon. Informatica recommends that you update the
cache after you save your changes in all the Configure Axon pages. Additionally, perform this action during a
maintenance period when very few users are using Axon.
146
Chapter 4: Administer
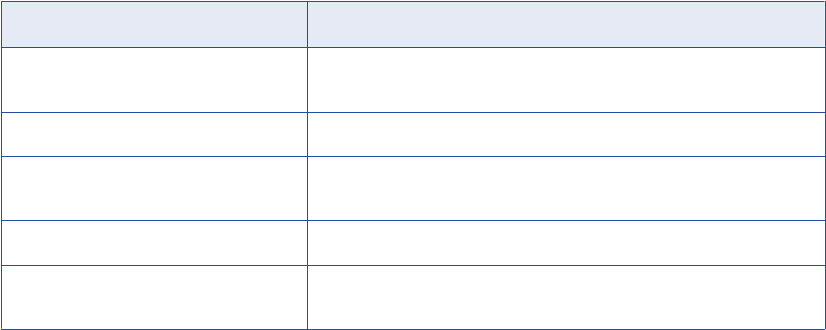
Configure Access to Secure@Source
If you selected the advanced configuration option during Axon installation, you would have entered the
configuration settings for Secure@Source. If you did not select advanced configuration during Axon
installation or if you want to update the connection settings for Secure@Source after the installation, go to
the Axon Admin Panel.
You must have the Super Admin profile to perform this task.
1. From the Axon toolbar, click the Admin Panel menu item under your user name.
2. In the menu on the left, under the Customize & Configure category, click Configure Axon.
3. In the Group dropdown, select Secure@Source.
4. Click Edit, and configure the following properties:
Property Description
Secure@Source Server Host URL of the Secure@Source service in the following format:
http(s)://<host_name>
or
http(s)://<IP_address>
Secure@Source Server Port Port number of the Secure@Source service
Secure@Source Server Login User
Name
User name to log in to the Secure@Source server
Secure@Source Server Login Password Password to log in to the Secure@Source server
Secure@Source Server Login
Namespace
User security domain of Secure@Source
5. Click Save.
6. In the Linux environment, run the following command to clear the contents of the
cache
directory:
rm -rf <INSTALLATION_DIRECTORY>/axonhome/axon/app/cache/*
7. Run the following command to restart the Memcached service:
<INSTALLATION_DIR>/axonhome/third-party-app/scripts/memcached restart
8. Run the following command to restart the HTTPD service:
service httpd restart
Note: When you clear the cache and restart the Memcached and HTTPD services, the Axon web interface
might be disrupted for some users that are logged into Axon. Informatica recommends that you update the
cache after you save your changes in all the Configure Axon pages. Additionally, perform this action during a
maintenance period when very few users are using Axon.
Specify Prefix for Object Reference Numbers
Each Axon object is stored in the database with a unique reference number. For each object type, you must
specify the prefix for the reference number. This helps you quickly identify an object type when you search
Configure Access to Secure@Source
147

for the objects in the database. For example, if you prefix policy reference numbers with "POL-", you can
identify the POL-2335446 object as a policy.
You must have the Super Admin profile to perform this task.
1. From the Axon toolbar, click the Admin Panel menu item under your user name.
2. In the menu on the left, under the Customize & Configure category, click Configure Axon.
3. In the Group dropdown, select Reference Number Settings.
4. Click the Edit button, and then click the Edit icon.
5. In the Facets Reference Number window, enter the prefixes for the Axon object types.
6. Click Save to save your changes in the Facets Reference Number window.
7. Click Save in the main Configure Axon page to save your settings.
8. In the Linux environment, run the following command to clear the contents of the
cache
directory:
rm -rf <INSTALLATION_DIRECTORY>/axonhome/axon/app/cache/*
9. Run the following command to restart the Memcached service:
<INSTALLATION_DIR>/axonhome/third-party-app/scripts/memcached restart
10. Run the following command to restart the HTTPD service:
service httpd restart
Note: When you clear the cache and restart the Memcached and HTTPD services, the Axon web interface
might be disrupted for some users that are logged into Axon. Informatica recommends that you update the
cache after you save your changes in all the Configure Axon pages. Additionally, perform this action during a
maintenance period when very few users are using Axon.
Configure Email Delivery Options
To receive email notifications, you must enter the details of the email server in Axon.
You must have the SuperAdmin profile to perform this task.
1. From the Axon toolbar, click the Admin Panel menu item under your user name.
2. In the menu on the left, under the Customize & Configure category, click Configure Axon.
3. In the Group dropdown, select Email Options.
4. Click Edit.
5. Configure the following properties:
Option Description
Mailer Transport Email protocol
Mailer Host Your email host address
Mailer User Name Your email user name
Mailer Password Your email password
Mailer Port Email server port
148 Chapter 4: Administer

Option Description
Disable Email Delivery Select the check box to disable email delivery to Axon users
6. Click Save.
7. In the Linux environment, run the following command to clear the contents of the
cache
directory:
rm -rf <INSTALLATION_DIRECTORY>/axonhome/axon/app/cache/*
8. Run the following command to restart the Memcached service:
<INSTALLATION_DIR>/axonhome/third-party-app/scripts/memcached restart
9. Run the following command to restart the HTTPD service:
service httpd restart
Note: When you clear the cache and restart the Memcached and HTTPD services, the Axon web interface
might be disrupted for some users that are logged into Axon. Informatica recommends that you update the
cache after you save your changes in all the Configure Axon pages. Additionally, perform this action during a
maintenance period when very few users are using Axon.
Specify Support Email Address
To contact the support team, Axon users can click the ? icon and then select Contact Support. You can
change the default email address for Axon support when users choose to contact the support team.
You must have the Super Admin profile to perform this task.
1. From the Axon toolbar, click the Admin Panel menu item under your user name.
2. In the menu on the left, under the Customize & Configure category, click Configure Axon.
3. In the Group dropdown, select Email Options.
4. Click Edit.
5. In the Support Email field, enter the default email address for Axon support.
6. In the Linux environment, run the following command to clear the contents of the
cache
directory:
rm -rf <INSTALLATION_DIRECTORY>/axonhome/axon/app/cache/*
7. Run the following command to restart the Memcached service:
<INSTALLATION_DIR>/axonhome/third-party-app/scripts/memcached restart
8. Run the following command to restart the HTTPD service:
service httpd restart
Note: When you clear the cache and restart the Memcached and HTTPD services, the Axon web interface
might be disrupted for some users that are logged into Axon. Informatica recommends that you update the
cache after you save your changes in all the Configure Axon pages. Additionally, perform this action during a
maintenance period when very few users are using Axon.
Specify Support Email Address
149
Update Cache with Configuration Values
Some Axon configurations in the Admin Panel are saved to the Axon database, but these configuration values
are not loaded to the Axon cache. To make the configuration changes available to the Axon users, you must
update the Axon cache with the new configuration values.
You must update the Axon cache when you perform the following configurations:
•
Change the support email address
•
Configure email delivery options
•
Configure a SAML 2.0 application to work with Axon
•
Configure Access Control
•
Configure access to Enterprise Data Catalog
•
Configure access to Data Quality
•
Configure access to Secure@Source
•
Specify prefix for the reference numbers of Axon objects
After you make the above configurations, perform the following steps in the Linux environment to clear the
Axon cache and load the cache with the new configuration values:
1. Run the following command to clear the contents of the
cache
directory:
rm -rf <INSTALLATION_DIRECTORY>/axonhome/axon/app/cache/*
2. Run the following command to restart the Memcached service:
<INSTALLATION_DIR>/axonhome/third-party-app/scripts/memcached restart
3. Run the following command to restart the HTTPD service:
service httpd restart
Note: When you clear the cache and restart the Memcached and HTTPD services, the Axon web interface
might be disrupted for some users that are logged into Axon. Informatica recommends that you update the
cache after you save your changes in all the Configure Axon pages. Additionally, perform this action during a
maintenance period when very few users are using Axon.
150
Chapter 4: Administer
A p p e n d i x A
Glossary
admin
The user profile that can perform administrative tasks on facets. Users with the admin profile have access to
the Admin Panel.
attribute
A property of the data set. The attributes of a data object exist only within the context of a data set.
attribute link
The link that shows how an attribute in a data set is connected to one or more attributes in other data sets
and systems.
Axon
Axon is a knowledge repository and governance tool that stores the core data items and the business context
of your organization.
capability
A facet that refers to a list of activities, deliverables, or skills that is available in your organization. Use the
Capability facet to inventorize the core capabilities of your organization and link them to the data,
information technology, and business assets.
change request
A change request facilitates communication and discussion between the object stakeholders and the wider
Axon community.
client
A facet that captures the core client segments of an organization and describes the context by connecting
the clients to the other facets.
committee
A facet that contains an inventory of the core governance bodies of an organization and how they are related
to each other.
data quality
A facet that displays the data quality rules and reports.
data set
A facet that holds the data structures, such as client, product, and transaction, of a system.
DQ Report
A data quality report that holds the scores or ratings of the data quality rules for a given period.
DQ Rule
A data quality rule that checks the quality of the data in systems.
facet
A structure that describes different aspects of an organization.
glossary
A facet that captures the definitions for data, activities, business terms, and other objects of an organization.
grid
A grid shows the list of objects based on the search criteria. The grid consists of columns that you can
configure.
Insight Map
A graphical representation of the relationships between objects across different facets.
legal entity
A facet that contains an inventory of the legal entities of an organization that is aligned across different
entities and jurisdictions.
Local DQ Rule
The data quality rules that are defined within the context of a system.
Local Map
A graphical representation of the immediate relationships of the object that you have currently opened.
object
A term that indicates each item listed in a facet.
org unit
A facet that describes the complex hierarchical structure of an organization.
people
A facet that describes the Axon users, the user profiles, and the org units to which the users belong.
policy
A facet that contains a statement of a plan or principles that address the needs of a particular situation.
process
A facet that contains a series of actions performed in a logical order to achieve a particular task or objective.
152
Glossary
product
A facet that captures the core product segments of an organization and describes the context by connecting
the products to the other facets.
project
A facet that contains a collection of activities that are planned and organized in order to achieve a particular
set of objectives.
Quick Search
Finds objects in Axon across all facets.
role
A facet that describes the role of stakeholders in different areas such as data, information technology, and
business areas.
Standard DQ Rule
A data quality rule that is configured at the glossary level. A Standard DQ Rule sets the guidelines to measure
the quality of an object, such as a data set and attributes, that is linked to a Standard DQ Rule.
superadmin
The user profile that can perform all administrative tasks in Axon. In comparison to an admin profile, a user
with a SuperAdmin profile can perform additional tasks, such as configure default workflows and edit
glossary rules engine.
system
A facet that holds one or more collections of data assets that are useful to your organization.
system interface
A facet that facilitates the flow of information between systems and data sets.
Unison Search
A powerful search function that is central to Axon. When you search using Unison, you can view objects that
are linked to the object that you searched for in all the available facets.
user profile
A profile that the administrator associates to the user account to perform tasks on objects in Axon.
webuser
The most basic user profile in Axon that has permission to view content. An administrator can provide
advanced permissions to a WebUser on a facet by assigning a role.
Appendix A: Glossary
153

I
A
add
DQ report 75
add grid items 22
add users
bulk upload 84
manually 85
assign
change request 60
axon
bulk update 86
Axon
data quality report 41
data quality rule 41
Unison search 18
user 12
user 12
Axon interface
facet 16
grid 16
toolbar 15
Axon Interface
facet 15
grid 15
toolbar 15
B
bulk upload
people 84
templates 77, 98
bulk upload templates
object templates 98, 105, 124
relationship templates 132
role templates 142
C
canvas
swimlane 61
change request
create 59
clone
data set 57
cloning
data set 58
roles and responsibilities 80
dropdown 89
static pages 90
create
change request 58
create (continued)
custom 60
default 83
object 42
standard DQ rule 74
59
creating
change request 59
local DQ rule 70
D
data privacy
GDPR 32
secure@source 32
data sets
values 27
download logs 89
E
Enterprise Catalog
Fields 93
Link Fields 97
Link Resources 96
Resources 93
G
glossary rules engine 87
grid
dashboard 16
list 16
H
hierarchical facet
children 22
level 22
I
impact tab
connect objects 68
create connections 69
search and add 68, 69
view and edit 68
154

L
licensed user 86
Link Fields
Attributes 97
Link Resources
Systems 96
M
managing locks
edit lock 87
permanent lock 87
maps
context map 39
insight map 36
local map 39
process map 39
O
object permissions
roles 81
object properties
org unit 47
organizational unit 47
object templates
business and change 98
data and technology 105
organizational 124
objects
create 42
creating an object 43
editing an object 57
search and view 14
P
properties
capability 43
data set 44
geography 45
glossary 46
people 85
policy 48
process 49
product 50
project 51
regulation 52
regulator 54
regulatory theme 54
system 56
system interface 55
R
Rebuild Maps Database 88
Reindex Search Service 88
run
change request 60
S
search operator
AND 19
NOT 19
OR 19
search option
group 20
mute 20
reorder 20
U
Unison search
bulk update 86
hierarchical facet 22
objects 18
options 20
save search 22
share search 22
user
admin 12
superadmin 12
webuser 12
V
values 27
view
attributes 25
change 28
dashboards 30
data quality 27
History 27
impact 27
interfaces 24
relationships 26
Stakeholders 26
summary 24
W
diagram
canvas 61
properties 61
toolbar 61
type
custom 60
default 82
discussion 61
Index 155
