
1
Creating Groups and
Group Dashboards
We know it’s essential to be able to customize your views and communication. We’ve
created groups so you can communicate with students, manage groups of students,
or connect similar students. You can also create groups for your school, invite your
colleagues to join the conversation, and create and view other dashboards using
groups.
To create a group:
• Click “Network”>“My Groups”>“Create Group” (upper right-hand side)
• Complete the required information and submit your request to create a group by
clicking “Create Group”
Once your group has been approved, you will receive an email confirming its
approval. You can see your pending group requests under “Network”>“My
Groups”>“Your Groups Pending Approval”.
Only student data will appear in group dashboards. To enable a dashboard with
student data from all group members, check the “Student Data” box. Remember that
any groups that have dashboards enabled should be set to private.
Group dashboards can be helpful in segmenting large groups of students. For
example, you might create a group and group dashboard for 9th grade and 10th
grade students.

2
To view the group dashboard, click on “Generate Student Report”
Inviting Others to Join a Group
You can invite others to join a group you own or are a moderator of by searching for
them by name, city, state, or email.
To invite others:
• Type their name, city, state, or email in the “Invite Members” field
• Click on the user to add him or her to the field
• Once all of the members you want to invite appear in the field, click “Invite”
Once a person has been invited into a group and accepts the invitation, he or she
will be added to the group and dashboard for the group.
3
Managing Group Member Requests
If you choose instead to have a student search for the group and request to join,
y
ou will need to approve the request. You can search for groups by clicking on
“Network”>“Group Search” and then searching by name, location, or school
affiliation.
To request to join a group:
• Navigate to the group
• Click the “Join” button in the upper right-hand corner
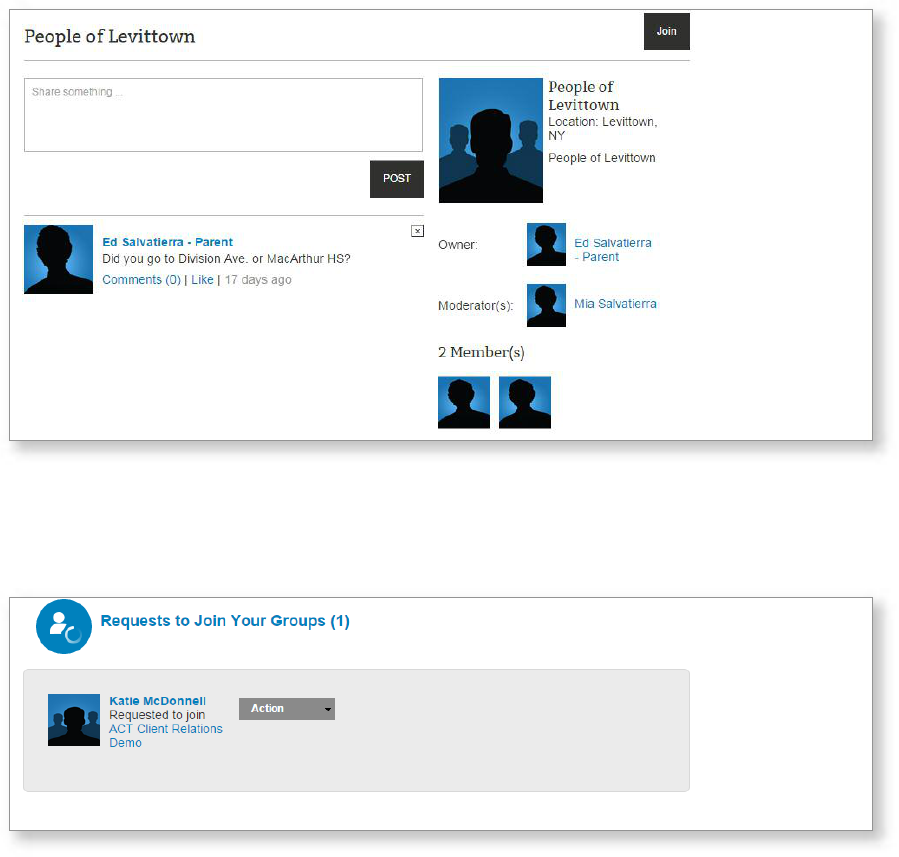
As the owner of a group, you are responsible for approving members who have
requested to join the group. You can see pending requests to join the group under
“Network”>“My Groups”> “Requests to Join Your Groups”.
Once a request is approved, that student will be added to the group and dashboard
for the group.

4
You may need to remove members from a group and corresponding group
dashboard.
T
o remove a member from a group:
• Navigate to the group
• Click on the “See all members” button
• Hover your cursor over the member you would like to remove
• Click on the pencil icon and select “Remove”
Adding Moderators
You may also choose to have other counselors, mentors, or educators approve
requests to join a group and/or view the group dashboard information. In order to
grant them access, they will need to be added as a moderator of your group.
To add a moderator:
• Make sure the counselor, mentor, or educator is registered with ACT Profile and
has chosen the counselor role upon registration. If he or she doesn’t remember,
go to “My Profile”>“My Account”>“About Me”
• Type his or her name, city, state, or email in the “Add Moderators” field
• Click on the user to add him or her to the field
• Once all of the members you want to add appear in the field, click “Add”
© 2015 by ACT, Inc. All rights reserved. 4562
