
18

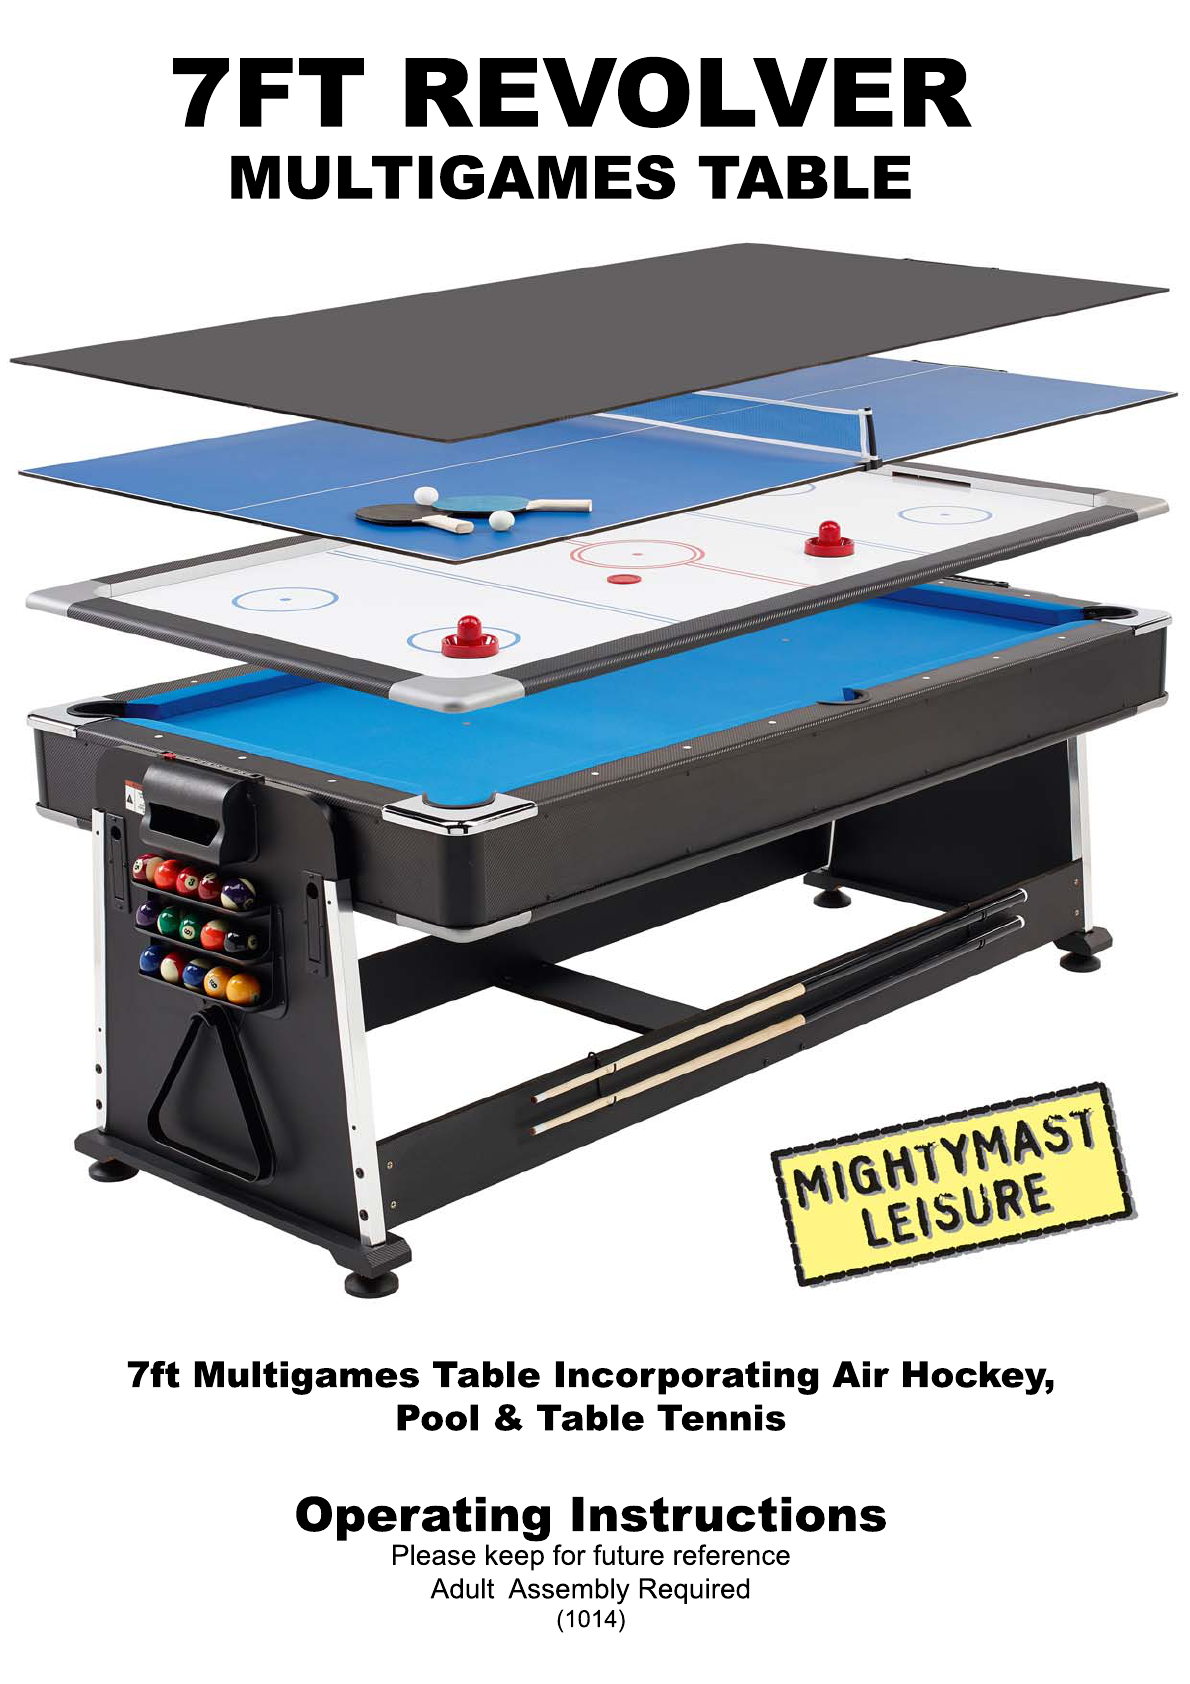
INSTRUCTIONS FOR THE 7FT REVOLVER 3-IN-1 MULTIGAMES TABLE
Please keep these instructions for future reference. Adult assembly required.
Warning:
Choking Hazard – This item contains small parts & small balls. Not suitable for children under 5 years.
Tools required
Philips Screwdriver – not included
Standard (flat head) Screwdriver – not included
Allen Key – included
Note: electric screwdrivers may be helpful during assembly however please set a low torque & use extreme caution.
Assembly Tips
Make sure you understand the following before you begin to assemble your games table.
1. READ THIS MANUAL all the way through before beginning assembly.
2. Some drawings or images in the manual may not look exactly like your product.
3. You will need a second adult to assist with this assembly (ideally 4 adults needed for lifting).
4. Save all packing materials until the parts have been inspected & the table is assembled.
Unpack the pieces
1. Lay the box on a flat surface (the floor). You may want this near your area of assembly.
2. Unpack the boxes & parts bags. Inspect & count the parts. The Parts Identifier page can be used to record your
results.
3. Some parts on the Parts Identifier page are pre-assembled.
4. If any parts are missing please contact Mightymast Leisure immediately.
5. Note that some parts are stored inside the table top.
1

ASSEMBLY
Step 1
1. Lift the air hockey top off the pool table & lay aside somewhere safe for now. Either carefully lay it on the floor
or up against a wall. Be careful not to damage the air hockey fan motor.
2. Remove all accessories & boxes from inside the pool table top.
3. Now replace the air hockey top back onto the pool table & at the same time thread the fan motor cable
through the hole in the side of the table. Be careful not to pinch the cable.
4. Use #15 screws to attach both the air hockey & pool tops together in the marked places around the sides of
the table – see diagram below:
Step 2
5. Screw the four leg levellers #27 into the two pedestal supports #13.
6. Next place the two pedestals #12 into the recess of the two pedestal supports #13 & secure them with screws
#8 – see diagram below:
2

Step 3
7. Attach the two latches #24 to the outside of each pedestal using screws #3.
8. Important – to ensure the latches are attached in identical positions around the leg platform please make sure
each latch is seated firmly on the bottom
of the latch-receiving slot. See diagram below:
Step 4
9. Attach the two side rails #14 to the inside of the two pedestals #12 using the #11 barrel nuts, #4 hex bolts &
#5 washers. Hand tighten only at this stage.
10. Attach rail A #35 to both side rails #14 using #2 washers, #33 bolts & #34 barrel nuts.
11. Hang the two #31 pool cue holders over one of the #14 side rails.
12. Do not tighten the fixings at this point. See diagram below:
3

Step 5
13. Place the complete table top onto the leg assembly. Ideally this requires four adults each lifting one corner of
the table top, then carefully lowering it onto the leg assembly ensuring both rotational bolts #32 slot into the
groove in the top of the two pedestals #12.
14. Important: before lifting the table top make sure the rotational bolts are unscrewed wide enough to just fit
into the groove on top of the pedestals. Do not over-unscrew.
15. Firmly tighten all nuts & bolts on the leg assembly which were left only hand-tightened in Step 4. See diagram
below:
Step 6
16. Now attach the two puck catchers #6 to the outside of both pedestals using screws #7.
17. Plastic tray A #25 & plastic tray B #26 can also be screwed to the outside of the pedestals using screws #7. The
holes have already been pre-drilled to show which end the different trays should be placed. See diagram
below:
4

Step 7
18. Lay the table tennis pitch #9 onto the table top & attach the net by sliding parts #28 onto the side of the pitch
– see diagram below:
5

USING THE TABLE
To rotate the table
Caution – this should only be performed by an adult as the rotating table may pinch body parts if not careful.
• Pull out the two table latches on both ends.
• Slowly rotate the table. If the edge of the table top catches on any part of the leg assembly when rotating then
a small adjustment will need to be made to the leg assembly to make it square to the table top. Do this by
lifting one leg off the floor at a time & by applying pressure to rotate the frame slightly so that it is more square
to the table top.
• If the pool table side is not level then first try to rectify this by using the leg levellers on each leg. Much of the
table can easily be levelled using this method.
• Push the table latches back in.
• Note that the table top cannot be rotated if the table tennis pitch is being stored underneath by resting it on
the side rails. It must be removed first before rotation & can be replaced afterwards.
If the fan does not work
Check the toggle switch on the cable is pressed on. Alternatively check the fuse in the plug top.
Important Safety & Operating Instructions
1. Caution – this table is not a toy & is intended for use by or under the supervision of adults. Adults should
review safety guidelines with children to avoid possible risk of electric shock or other injuries.
2. Power sources – the hockey game should be operated only from 240V AC.
3. The power cable should be routed so that it is not likely to be walked on or pinched by items placed upon or
against it.
4. Ventilation – openings in the game are provided for the exhaust air to create a cushion effect. The openings
on the air blower are for the intake air. Keep clear of the air blower when it is on. Do not put your hand or
other objects near the intake openings. To ensure reliable operation of the game & protect it from overheating
these openings must not be blocked or covered.
5. This product is intended for indoor use only. Please do not sit, climb or lean on the table. Do not drag the table
when moving it in order to avoid damaging the legs. Please use just furniture spray polish to clean the exterior
surfaces.
Game Rules
Air Hockey
The object of the game is to be the first player to score 10 goals against the opponent. A coin toss is used to determine
which player starts with the puck (serve). The player winning the coin toss gets the puck & begins play by striking the
puck with their pusher onto the opponent’s side. Players can strike the puck anywhere on their half of the playing
surface. Players cannot cross the centreline to strike the puck. If a goal is scored when a player strikes the puck over
the centreline it does not count.
A player may stand anywhere around the table on their side of the centreline. Players may not stand past that line.
When the puck contacts any part of the centreline either player may strike the puck to score. A goal is scored when
the puck enters & drops inside the opponent’s goal.
The player scored upon receives possession of the puck for the next serve. If the puck stops in the goal & has tilted
into the goal drop it counts as a goal. If the puck stops in the goal & has not tilted into the goal, it does not count as a
6

goal. Players can remove the puck out of the goal with their hands or pusher. If the puck rebounds out of the goal the
point does not count. The first player to score 10 points is declared the winner.
Pool (8-Ball)
All 15 balls are racked with the 8-ball in the middle (many players also alternate stripes & solids at the end of the
bottom row). The balls are broken wide open. No matter what happens on the break the shooter still has their choice
of playing stripes or solids. The first player to sink a striped or solid ball is committed to those balls for the remainder
of the game. After a player has pocketed all their stripes or solid balls they may shoot at the 8 ball. The shooter must
call the pocket for the 8 ball. If they miss the game continues. Once the 8 ball is legally pocketed a winner is declared.
Table Tennis
Opponents flip a coin & the winner may choose either end of the table or the right to serve or receive first. If they
choose an end at which to play the other player has the choice of serving or receiving first. Each match shall consist of
the best two out of three games with the winning player reaching 21 points first or being ahead by two after the score
reaches 20 all in each game.
The serve changes from one player to the other every time five points are scored, except when the score becomes
tied 20-20. At this time the serve changes & continues to change after each point until one player scores two
consecutive points, thus winning the game.
The serve must be made from behind the end line. The server puts the ball into play by tossing it into the air from the
palm of one hand & striking it with the paddle (held in the other hand) so that it hits their own court. The ball must go
over the net & hit the receiver’s court. The receiver must return the ball over the net so that it hits the server’s court.
Play continues until one player fails to make a legal return. The opponent then scores a point.
For sales & service please contact:
Mightymast Leisure Ltd
58 Bentwaters Park
Rendlesham, Woodbridge
Suffolk. IP12 2TW
UK
Tel: +44 (0)1394-460896
Fax: +44 (0)1394-461326
www.mightymast.com
7
