
GE Digital Proficy Historian and Operations Hub: Data Analysis in Context 1
Global Configuration
Plant Applications 8.2

Proprietary Notice
The information contained in this publication is believed to be accurate and reliable. However, General Electric Company assumes no
responsibilities for any errors, omissions or inaccuracies. Information contained in the publication is subject to change without notice.
No part of this publication may be reproduced in any form, or stored in a database or retrieval system, or transmitted or distributed in any
form by any means, electronic, mechanical photocopying, recording or otherwise, without the prior written permission of General Electric
Company. Information contained herein is subject to change without notice.
Trademark Notices
GE, the GE Monogram, and Predix are either registered trademarks or trademarks of General Electric Company.
Microsoft® is a registered trademark of Microsoft Corporation, in the United States and/or other countries.
All other trademarks are the property of their respective owners.
We want to hear from you. If you have any comments, questions, or suggestions about our documentation, send them to the following email
address:
© 2021, General Electric Company. All rights reserved.
i
Table of Contents
Plant Applications Global Configuration ................................................................................................ 10
Global Configuration Node .................................................................................................................... 10
Configuration with a Manufacturing Database ...................................................................................... 11
Establishing Fault Logic ........................................................................................................................ 11
Gallery Physical Path ............................................................................................................................ 12
Input Tags ............................................................................................................................................. 12
Reloading Proficy Server Services ....................................................................................................... 13
Service Reload Guide ........................................................................................................................ 13
Establishing Running Logic ................................................................................................................... 14
Examples of Running Logic ............................................................................................................... 14
Show Additional Web Part Configuration Tabs ..................................................................................... 15
Subscription Upload Result Sets .......................................................................................................... 15
Schedule Statuses ................................................................................................................................ 19
Adding a Schedule Status ................................................................................................................. 19
Exporting Schedule Status Configuration .......................................................................................... 19
Enable PO Ordering .......................................................................................................................... 19
Data Types ............................................................................................................................................ 20
Creating Custom Data Types and Phrases ....................................................................................... 20
Exporting Custom Data Types........................................................................................................... 21
Importing Custom Data Types ........................................................................................................... 21
Data Source Types ............................................................................................................................... 21
Default Data Source Types ............................................................................................................ 21
Adding Data Source Types................................................................................................................ 22
System Cross References Dialog Box .............................................................................................. 22
Creating Cross-References for a Data Source.................................................................................. 23
Exporting Cross-reference Configurations ........................................................................................ 23
Importing Cross-reference Configurations ........................................................................................ 23
Color Schemes ...................................................................................................................................... 24
Creating Color Schemes ................................................................................................................... 24
Deleting a Color Scheme ................................................................................................................... 24
Renaming Color Schemes................................................................................................................. 25
Reason Trees ........................................................................................................................................ 25
Table of Contents
ii
Multiple Reasons ........................................................................................................................... 25
Multiple Reason Trees ................................................................................................................... 25
Reason Trees and Downtime Reporting........................................................................................ 25
Changing Reason Trees ................................................................................................................ 26
Creating Reason Trees ..................................................................................................................... 26
Step 1: Define list of available Reasons ........................................................................................ 26
Step 2: Define your Reason Categories ........................................................................................ 27
Step 3: Create your Reason Tree .................................................................................................. 27
Step 4: Create Reason Levels ....................................................................................................... 28
Step 5: Structure your Trees .......................................................................................................... 28
Exporting Reasons ............................................................................................................................ 28
Importing Reasons ............................................................................................................................ 28
Exporting Trees ................................................................................................................................. 29
Importing Trees ................................................................................................................................. 29
Subscription Information ....................................................................................................................... 29
Subscription Prerequisites ................................................................................................................. 30
Production Schedule Download ........................................................................................................ 31
Production Performance Upload ....................................................................................................... 31
Four Production Performance Upload Subscriptions .................................................................... 31
Subscription Groups .......................................................................................................................... 32
Creating a Subscription Group ...................................................................................................... 32
Subscription Group Properties ....................................................................................................... 33
Exporting Subscription Groups ...................................................................................................... 33
Importing Subscription Groups ...................................................................................................... 33
Subscriptions ..................................................................................................................................... 34
Creating a Subscription.................................................................................................................. 34
Editing Subscription Properties ...................................................................................................... 34
Exporting Subscriptions ................................................................................................................. 35
Importing Subscriptions ................................................................................................................. 36
XML Schemas of Subscription Messages ......................................................................................... 36
Production Schedule Schema ....................................................................................................... 37
Production Performance (Production/Consumption Confirmation) ............................................... 51
Production Performance (Order Confirmation) .............................................................................. 62
Global Configuration
iii
Test Performance (Quality Data) ................................................................................................... 66
Sample XML file for Test Performance .......................................................................................... 71
Engineering Units .................................................................................................................................. 72
Creating Engineering Units................................................................................................................ 72
Engineering Unit Conversions ........................................................................................................... 73
Exporting Engineering Units .............................................................................................................. 74
Importing Engineering Units .............................................................................................................. 74
Plant Applications Site Parameters ....................................................................................................... 74
Client Parameters ................................................................................................................................. 74
Audit Trail Purge Days ....................................................................................................................... 74
DaysBackOpenDowntimeEventCanBeAdded ................................................................................... 75
DefaultDomainName ......................................................................................................................... 75
ESignatureInactivityPeriod ................................................................................................................ 76
ESignatureRequireAuthentication ..................................................................................................... 76
GridComboBoxMaxDrop ................................................................................................................... 77
LargeIcons ......................................................................................................................................... 77
ManageSecurityRolesByNTGroup .................................................................................................... 78
OpenDowntimeEventCanBeAddedDaysBack ................................................................................... 78
Scanner Date Time Format ............................................................................................................... 79
Scanning Prefix Site Parameter ........................................................................................................ 79
Session Timeout Duration Site Parameter ........................................................................................ 80
ShowSystemUsersInAdmin Site Parameter ...................................................................................... 80
TranslatePrompts .............................................................................................................................. 81
Use Event Number for Scanning ....................................................................................................... 81
WindowsAuthentication ..................................................................................................................... 82
Dashboard Parameters ......................................................................................................................... 82
Ad Hoc Report Life (Days)................................................................................................................. 82
Dashboard Engine Server ................................................................................................................. 83
Gallery Physical Path ........................................................................................................................ 83
Gallery Virtual Path ............................................................................................................................ 83
Microsoft Dashboard Catalog ............................................................................................................ 84
Microsoft Dashboard Server .............................................................................................................. 84
Proficy Dashboard Server ................................................................................................................. 85
Table of Contents
iv
Proficy Dashboard Virtual Path Site .................................................................................................. 85
Session Manager Stat Life (Days) ..................................................................................................... 86
Show Additional Web Part Configuration Tabs ................................................................................. 86
Web App Physical Path ..................................................................................................................... 86
Excel Add-In Parameters ...................................................................................................................... 87
EventNumIsNumber .......................................................................................................................... 87
ProdCodeIsNumber ........................................................................................................................... 87
ShowHeader .........................................
............................................................................................. 87
UpdateAddInLinks ............................................................................................................................. 88
General Site Parameters ....................................................................................................................... 88
AllowPasswordSave .......................................................................................................................... 88
ApproverDefaultReasonId ................................................................................................................. 89
ApproverDefaultReasonTreeId .......................................................................................................... 90
CheckSQLConnection ....................................................................................................................... 90
CompanyName .................................................................................................................................. 91
DatabaseReconnectionMaxSilentRetries .......................................................................................... 91
DatabaseReconnectionRetryTime .................................................................................................... 91
DBOPassword ................................................................................................................................... 91
DBOUser ........................................................................................................................................... 92
EnableChangePasswordDialog .........................
................................................................................ 92
Editing EndOfDayHour ...................................................................................................................... 92
Editing EndOfDayMinute ................................................................................................................... 93
HistorianServer .................................................................................................................................. 93
LanguageNumber .............................................................................................................................. 93
MaxLoginAttempts ............................................................................................................................. 95
PointVerification ................................................................................................................................. 95
ReportServer ..................................................................................................................................... 96
SerialNumber ..................................................................................................................................... 96
ShiftInterval ........................................................................................................................................ 96
ShiftOffset .......................................................................................................................................... 97
SiteName ........................................................................................................................................... 97
SpecificationSetting ...............................
............................................................................................ 97
Temporary Unit .....................................
............................................................................................. 98
Global Configuration
v
UserDefaultReasonId ........................................................................................................................ 98
UserDefaultReasonTreeId ................................................................................................................. 99
RSName ............................................................................................................................................ 99
History Parameters ............................................................................................................................. 100
Populate Alarm_History ................................................................................................................... 100
Populate Container_Location_History ............................................................................................. 100
Populate Defect_Details_History ..................................................................................................... 101
Populate Event_Component_History .............................................................................................. 101
Populate Event_Detail_History ........................................................................................................ 102
Populate Event_History ................................................................................................................... 103
Populate PrdExec_Input_Event_History ......................................................................................... 104
Populate PrdExec_Output_Event_History ...................................................................................... 104
Populate PrdExec_Path_Unit_Starts_History ................................................................................. 105
Populate Production_Plan_History .................................................................................................. 105
Populate Production_Plan_Starts_History ...................................................................................... 106
Populate Production_Setup_Detail_History .................................................................................... 106
Populate Production_Setup_History ............................................................................................... 107
Populate Production_Setup_Starts_History .................................................................................... 107
Populate Production_Starts_History ............................................................................................... 108
Populate Sheet_Column_History .................................................................................................... 109
Populate Test_History ..................................................................................................................... 109
Populate Timed_Event_Detail_History ............................................................................................ 110
Populate User_Defined_Event_History ........................................................................................... 111
Populate Waste_Event_Detail_History ........................................................................................... 111
Populate Web_Report_History ........................................................................................................ 112
Rest Service Parameters .................................................................................................................... 113
DurationFormat ................................................................................................................................ 113
S88 Interface Parameters ................................................................................................................... 113
Auto Configure Units ....................................................................................................................... 113
Default Data Source ........................................................................................................................ 114
Default Product Family .................................................................................................................... 114
Ignore Event Status Changes ......................................................................................................... 114
Purge Orphaned Records (Days) .................................................................................................... 115
Table of Contents
vi
Purge Processed Records (Days) ................................................................................................... 115
Wait Time (milliseconds) ................................................................................................................. 116
Services Parameters ........................................................................................................................... 116
AllowEventMoveOutsideWindow ..................................................................................................... 116
ArchiveLogFiles ............................................................................................................................... 116
ArchiveLogFilesPath ........................................................................................................................ 117
BackCalcCount ................................................................................................................................ 117
BufferFilePath .................................................................................................................................. 118
ClearAppliedProductIfSame ............................................................................................................ 118
Critical Email Group ......................................................................................................................... 119
Debug for Database Manager Sps .................................................................................................. 119
DebugMode ..................................................................................................................................... 120
Default Time Zone ........................................................................................................................... 120
Coordinated Universal Time (UTC) Considerations .................................................................... 121
Reporting and UTC ...................................................................................................................... 121
Upgrading Plant Applications to use UTC ................................................................................... 121
DefaultPrinter ................................................................................................................................... 122
Informational Email Group ............................................................................................................... 122
IsAlive .............................................................................................................................................. 123
LogFilePath ..................................................................................................................................... 123
MaxEventTimeSpan ........................................................................................................................ 124
MaxMegLogFileSize ........................................................................................................................ 124
MaxPSTimeSpan ............................................................................................................................. 125
MinEventTimeSpan ......................................................................................................................... 125
MinPSTimeSpan .............................................................................................................................. 125
MultiThreaded .................................................................................................................................. 126
Perform Automatic Service Reloads ............................................................................................... 126
Product Summarization Sigma ........................................................................................................ 127
TriggerOlderEvents ......................................................................................................................... 127
ReadLagTime .................................................................................................................................. 128
Recognize Crew Schedule .............................................................................................................. 128
Reload Interval (Minutes) ................................................................................................................ 129
UnicodeTextFiles ............................................................................................................................. 129
Global Configuration
vii
Warning Email Group ...................................................................................................................... 130
System Parameters ............................................................................................................................. 130
Ad hoc Content Generator Port ....................................................................................................... 130
ClusteredSystem ............................................................................................................................. 131
License Manager - Support Old Client ............................................................................................ 131
License Manager - Write Stats to Database.................................................................................... 131
Local Connection Pool ..................................................................................................................... 131
WebApps Log Level ........................................................................................................................ 131
WebAppServer ................................................................................................................................ 131
WebAppsLoadURLService .............................................................................................................. 131
WebAppsLoginServer ...................................................................................................................... 132
Web Server Parameters ...................................................................................................................... 132
ASP Print Que Max Attempts .......................................................................................................... 132
AutoStartAccess .............................................................................................................................. 132
AutoStartExcel ................................................................................................................................. 133
EndOfWeekDay ............................................................................................................................... 133
EngineLoggingLevel ........................................................................................................................ 134
Error Message Levels ...................................................................................................................... 134
EngineRestartHours ........................................................................................................................ 135
ExcelAddIns ..................................................................................................................................... 135
FTPPW ............................................................................................................................................ 136
FTPSiteName .................................................................................................................................. 136
FTPUid ............................................................................................................................................. 136
LogFilePurgeDays ........................................................................................................................... 137
MaxEngineFails ............................................................................................................................... 137
MaxReportFails ............................................................................................................................... 138
MaxSQLLoginAttempts .................................................................................................................... 138
NPTCharacterFlag ........................................................................................................................... 139
OEE Max Limit Override .................................................................................................................. 139
ReportTimerInterval ......................................................................................................................... 139
SQL Reporting Services .................................................................................................................. 140
WA_HistorianForceLocal ................................................................................................................. 141
WA_PreCompilePages .................................................................................................................... 141
Table of Contents
viii
WebSiteTimeoutMin ........................................................................................................................ 141
Restart Services in Tomcat Server ..................................................................................................... 142
Enterprise Connector Service ............................................................................................................. 143
Production Performance (Order Confirmation)................................................................................ 144
Production Performance (Production/Consumption Confirmation) ................................................. 144
Production Statuses and Events ......................................................................................................... 145
Production Event Status Changes ............................................................................................... 145
Production Status Attributes ........................................................................................................ 146
Adding and Defining Production Statuses ....................................................................................... 146
Editing Production Statuses ............................................................................................................ 147
Locking Production Statuses ........................................................................................................... 147
Exporting Production Statuses ........................................................................................................ 147
Importing Production Statuses ........................................................................................................ 148
Administer Calculations ....................................................................................................................... 148
How to Create Simple Equation Calculations?................................................................................ 148
How to Create Custom Logic (VBScript) Calculations? .................................................................. 149
How to Create Stored Procedure Calculations? ............................................................................. 150
Optimizing Calculations ................................................................................................................... 151
Troubleshooting ........................................................................................................................... 151
How to Create Calculations Based on Process Data? .................................................................... 151
User-Defined Properties ...................................................................................................................... 152
Deleting User-Defined Properties .................................................................................................... 153
User-Defined Property Field Types ................................................................................................. 153
User-Defined Properties for Subscriptions .......................................................................................... 155
Administer Alarms ............................................................................................................................... 157
Configuring Alarms .......................................................................................................................... 158
Implementing Auto-Calculated SPC Limits ..................................................................................... 160
Setting Up Email Notifications for Alarms ........................................................................................ 161
Using String Values for Alarms ....................................................................................................... 161
Importing Alarm Configuration ......................................................................................................... 162
Exporting Alarm Configuration ........................................................................................................ 162
Creating a User-Defined Event ........................................................................................................... 163
Adding Subtypes for Production Events .......................................................................................... 164
Global Configuration
ix
Locking Production Statuses ........................................................................................................... 164
Exporting Event Subtypes ............................................................................................................... 165
Importing Event Subtypes ............................................................................................................... 165
Administer Models ............................................................................................................................... 166
Creating Models for User-Defined Events ....................................................................................... 166
Customizing the User Interface ........................................................................................................... 166
Editing Language Translations ........................................................................................................ 167
Exporting Language Prompts .......................................................................................................... 167
Importing Language Prompts .......................................................................................................... 168
Multi-Lingual Support .......................................................................................................................... 168
Adding Global Descriptions ............................................................................................................. 169
Multi-Lingual Enabled ...................................................................................................................... 170
10
Plant Applications Global Configuration
Plant Applications Global Configuration provides the tools and methods available to install,
troubleshoot, configure, update, tweak, debug and monitor performance of the Proficy Server. A Plant
Applications administrator should become familiar with all of the tools that are available for proper
maintenance of the system and ease of troubleshooting.
The Plant Applications .log and .shw files are a mechanism for analyzing the Plant Applications
system. They provide an excellent source of data for troubleshooting and understanding current
configuration. There are many SQL Server tools to help in debugging and maintenance. An
administrator should be familiar with the SQL Server tools available. Also, the Microsoft Performance
Monitor shows real time performance statistics that can identify problems within the system.
The Proficy Server parameters that are available to customize settings used by the Plant Applications
system are explained in detail. There are a number of Plant Applications site parameters that the
administrator should be aware of when troubleshooting issues with the Proficy Server. Site
parameters are used to set global default values for items such as passwords, number of log in
attempts, directory locations etc. specific to a site. It is important for a site to understand what site
parameters are available, how to configure them and to set default values according to the
requirements for the site.
Performing system backups should be a part of an administrator’s daily maintenance routine. A site
should have standard measures to adequately preserve and restore a Microsoft SQL Server
database. This can be done with software such as BackupExec, ARCserve, or using SQL Server
itself.
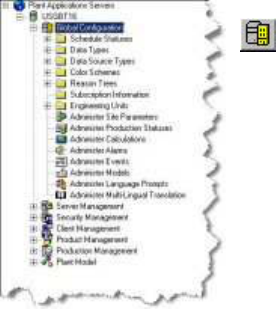
Global Configuration Node
Global Configuration is where you configure components that
affect almost all aspects of Plant Applications.
From Schedule Statuses, you add and manage production
schedule statuses. Schedule statuses indicate the status a
process order is set at. The status can be used to indicate the
various statuses a process order cycles through.
From Data Types, you add and manage data types, which
defines what data type, such as “integer,” can be entered in
associated variable cells.
From Data Source Types, you add and manage data source
types, which are used to identify the source of data for a
variable.
From Color Schemes, you manage color schemes, which you
can apply to various displays.
From Reason Trees, you configure reason trees, which are used to identify reasons for
downtime or waste and the actions taken.
From Subscription Information, you manage subscriptions, which allow Plant Applications
to launch an upload of data to an external system, such as an ERP system, based on the
status triggers you specify.
From Engineering Units, you add and manage engineering units and conversion
information, which are units of measurement used in bills of materials.
Global Configuration
11
From Administer Site Parameters, you change the default values of the site parameters,
which are used to set global default values for items, such as passwords, number of log in
attempts and directory locations, which are specific to a site.
From Administer Production Statuses, you add and manage production statuses, which
are used to indicate the current status a production event is in on a specific production unit.
From Administer Calculations, you create and manage a library of calculations.
From Administer Alarms, you configure alarm, which compare data to product-based
specification limits in real time and are used to alarm critical variables where
acknowledgement of a violation is required.
From Administer Events, you add and manage event types, which provide a snapshot of
data over a period of time or at a specific point in time.
From Administer Models, you manage event detection models, which are used to capture
events such as reel turn-ups, batch starts/stops, product changes, consumption of product
on a production line, and so on.
From Administer Language Prompts, you edit the translated prompts presented in the
user interface.
From Administer Multi-Lingual Translation, you create two descriptions, one local and
one global, for almost everything in the database.
Configuration with a Manufacturing Database
Configuration of Plant Applications changes for some items if you are connected to a Unified
Manufacturing Database (UMDB), which merges Plant Applications tables with Proficy SOA (S95)
data structures. Refer to topics about the Manufacturing Execution System (MES) Core Service
Provider and UMDB in the online help.
If you are not using a UMDB but connecting to a Plant Applications database, proceed with Plant
Applications configuration by following the instructions in this section.
Establishing Fault Logic
After determining a location, you must use VBScript to identify the faults for each location. Click the
drop-down list of locations (for each location that has faults) and fill in the script. End each script with
Fault = <Fault Name>, or Fault = <Fault Value>. If you provide a fault that does not match one
already defined in the fault list, the model still logs downtime; however, the fault is ignored.
To search for available faults and automatically fill in either the value or the name, click Insert Fault....
Only those faults already identified for the selected location are displayed.
You can also click Check Syntax to check that the script follows proper VBScript syntax.
A fault script can be defined for each location. However, only the fault script for the location
determined by location logic will run.
Fault Logic Example #1
In this example, if alias A = 1 then the fault "Conveyor Fault" is returned; if A = 2 then the fault
"Lubrication" is returned.
if A = 1 Then Fault = "Conveyor Fault"
if A = 2 Then Fault = "Lubrication"
Fault Logic Example #2

Gallery Physical Path
12
This example checks to see if the bits are set in a given alias and return the fault accordingly.
if A And &H1 Then Fault = 0
if A And &H2 Then Fault = 1
You can also use the following:
if A And &H1 Then Fault = "Conveyor Fault"
if A And &H2 Then Fault = "Lubrication"
Fault Logic Example #3
This example rounds the value in alias A and then uses a case statement to return Fault codes.
Select Case Round(A)
Case 0 Fault = "R1 Jam"
Case 1 Fault = "R1 Jam"
Case 2 Fault = "R1 Starve"
Case 4 Fault = "R1 Block"
End Select
You can also use the following:
Select Case Round(A)
Case 0 Fault = 1
Case 1 Fault = 2
Case 2 Fault = 3
Case 4 Fault = 4
End Select
Gallery Physical Path
This is the physical location of the Web Part Gallery for customers who are using DDRK to control
their Dashboard.
To change this site parameter:
1. Log in to the Plant Applications Administrator.
You must have Administrator access to the Administrator security group to change
site parameters.
2. Open Global Configuration.
3. Right-click on Administer Site Parameters and select Edit Site Parameters from the pop-up
menu.
4. In the Site Parameters dialog box, under Dashboard double-click on Gallery Physical Path.
5. In the Edit Parameter dialog box, click in the Value field and enter the path that is the
physical location for your Web Part Gallery.
6. Click the OK button to save your changes and close the dialog box.
7. Click the Close button to close the Site Parameters dialog box.
8. Refresh the server.
Input Tags

Global Configuration
13
You can define as many inputs as necessary. For each input, an alias is automatically assigned.
When logic is defined for the model, this alias is used to refer to a specific input inside the script (or
model logic). The Trigger column determines whether or not a change in value of the specified tag
will cause the model to be triggered or evaluated. Items with the trigger off are collected and passed
into the model when one of the other tags change. At least one tag must have the trigger on for the
model to work. Inputs marked as triggers are constantly monitored by the Event Manager for data
changes. Non-trigger inputs are only monitored or read when a trigger tag changes.
Add tags to the model by typing in the tag name from the Tag Search screen. You can press Shift or
Ctrl to select multiple tags. You can also use the browse button (...) to the right of the tag to search.
You must choose an attribute for each tag. This determines what will be passed in as an input to the
model. The only choices are Value and Time-stamp, with Value as the default. You can add the
same tag as several different inputs to the same model.
The Sampling Type and Time Offset determine how tag information is collected from the historian and
how it will be passed into the model. Choices include Interpolated, Last Good Value, and Next Good
Value. In the Precision column, you can set the number of decimal places for the input value of the
tag.
You can use the time offset to offset the collection of tag information by plus or minus `n' seconds
relative to the time-stamp that triggered the model to fire (as opposed to the time-stamp the downtime
event started, finished, and so forth).
Reloading Proficy Server Services
Reloading a service causes it to re-build its cache of configuration data. Depending on the service
and the amount of configuration in the system, this may take several minutes to reload. For example,
reloading the Calculation Manager may take it off-line for 10 minutes while it re-builds its
cache. During this period, data will not be lost, but it will be delayed.
Reloading and restarting service settings are configured with User and Site Parameters. These
parameters contain a value in minutes which identify the time period, going back from NOW, for a
service to be backdated so that it captures all of the activities (e.g. redo calculations, trigger events,
data changes etc.) from this earlier period using the new configuration setting.
User parameters take precedence over Site parameters. User parameters are set directly
against a service. Site parameters provide a global setting for the site.
Reloading of services is defaulted to 30 minutes and restarting of services is defaulted to go back 3
days, e.g. Event Manager goes back 3 days on a restart, on a reload it goes back 30
minutes. Administrators must take great caution to not set these parameters to go too far back in time
or they will overload the system. These parameters are configured directly in the SQL tables.
Proficy Server services are configured to automatically reload every six hours and then they run using
their configuration cache.
Service Reload Guide
Reload Alarm Manager (Alarm Mgr): A configuration reload should be done when alarm
configuration changes are made.
Reload Calculation Manager (Calculation Mgr): A configuration reload should be done
when calculation configuration changes. The Calculation Manageralso supports reloading
with an Effective Date set back in time. ALL calculation variables are recalculated back to
that time.
Reload Email Engine: A configuration reload should be done when the Email Engine
configuration changes.

Establishing Running Logic
14
Reload Event Manager (EventMgr):-A configuration reload should be done when an Event
Model configuration changes. The Event Manager Service should be reloaded when new
event detection information has been configured. It is very important when reloading to set
the reload date to the last day an event was detected prior to starting up if the system has
been down for more than one hour.
Reload FTP Engine: A configuration reload should be done when FTP configuration changes
are made.
Reload Reader: A configuration reload should be done if any time based variables are added
or updated. The Reader also supports reloading with an Effective Date set back in time. ALL
variables have their time based data recollected back to that time. This can be detrimental to
system performance.
Reload Stubber: A configuration reload should be done when configuration changes are
made that impact test scheduling or if time based AutoLog sheets have a time interval
changed.
Reload Summary Manager:A configuration reload should be done when an Event Based
variable configuration changes.
Reload Writer:A configuration reload should be done when a variable has the Output Tag
changed.
Establishing Running Logic
Once you define inputs, these values can be used in VBScripts to determine information about the
model, such as the source location. Depending on the logic you are editing, you must include at least
one of the statements listed in the following table.
Model # The script determines You must include at least one of these statements in
the script
All Models Whether or not the line
is running
Running = True
Running = False
Model 211 The location Location = "location name"
Model 212 The equipment status Status = True
Status = False
All Models Faults for each location
Fault = "Fault name"
Fault = Fault value
The running script determines whether or not the production line is running. If the line is not running
(Running = False), all subsequent scripts are fired. If the line is running (Running = True), none of the
subsequent scripts are fired.
Examples of Running Logic
Running Logic Example #1
In this example of a Running Logic model, F is the alias that corresponds to FIX.LINESPEED.F_CV.
This line is said to be running when the LINESPEED tag is greater than 20. The line is not running if
the LINESPEED is less than 20.
if F < 20 then
Running = False
else
Running = True
end if

Global Configuration
15
Running Logic Example #2
In this example, the line is running when the aliases for A, B, and C are all equal to zero. It assumes,
of course, that A, B, and C each have tags corresponding to them (such as FaultTag, ErrorFlagTag,
and AlarmTag). If any of the tags have a non-zero value, then the line is assumed to be down; a
downtime event is then triggered.
if A+B+C THEN
Running = False
else
Running = True
end if
Show Additional Web Part Configuration Tabs
This parameter controls the visibility of the advanced tabs in the Web Parts Administrator. By setting
this parameter to True, two additional tabs are displayed in the Web Parts Administrator. The tabs
are: Manage Parameter Types and Manage Dialogs.
To change this site parameter:
1. Log in to the Plant Applications Administrator.
You must have Administrator access to the Administrator security group to change
site parameters.
2. Open Global Configuration.
3. Right-click on Administer Site Parameters and select Edit Site Parameters from the pop-up
menu.
4. In the Site Parameters dialog box, under Dashboard double-click on Show Additional Web
Part Configuration Tabs.
5. In the Edit Parameter dialog box, select either True or False from the Value drop-down list.
6. Click the OK button to save your changes and close the dialog box.
7. Click the Close button to close the Site Parameters dialog box.
8. Refresh the server.
Subscription Upload Result Sets
These result sets have nothing to do with the result sets that Plant Applications supports, such as
Result Set 15, ProductionPlan and Result Set 16, ProductionSetup.
-----------------------------------------------------------------------------------------------------
-- Resultset 1: Last Run Time and IDs for the Post-Processing Orchestration
-----------------------------------------------------------------------------------------------------
@TimeStamp DATETIME
@SubscriptionGroupId INT,
@SubscriptionGroupDesc VARCHAR(255),
@SubscriptionId INT,
Subscription Upload Result Sets
16
@DataSourceId INT,
-----------------------------------------------------------------------------------------------------
-- Resultset 2: Order Confirmation
-----------------------------------------------------------------------------------------------------
PUBLISH_DATE DATETIME,
PROCESS_ORDER VARCHAR(100),
START_TIME DATETIME,
END_TIME DATETIME,
PROCESS_SEGMENT_ID VARCHAR(100),
CONFIRMATION INT,
COMPLETE INT,
TECO INT,
Sequence INT
-----------------------------------------------------------------------------------------------------
-- Resultset 3: Material Produced Actual (MPA)
-----------------------------------------------------------------------------------------------------
Returned if SubscriptionGroupId = ProductionPerformanceGroupId
OR SubscriptionGroupId = OrderConfirmationGrouPid
SELECT PUBLISH_DATE DATETIME,
PROCESS_ORDER VARCHAR(100),
EVENT_ID INT,
START_TIME DATETIME,
END_TIME DATETIME,
SAP_PRODUCT VARCHAR(100),
BATCH VARCHAR(100),
QUANTITY REAL,
UOM VARCHAR(100),
DataType VARCHAR(255),
PROCESS_SEGMENT_ID VARCHAR(100),
STORAGE_ZONE VARCHAR(100),
PPId INT,
PathId INT,
Sequence INT
Global Configuration
17
-----------------------------------------------------------------------------------------------------
-- Resultset 4: Material Produced Actual Properties (MPAP)
-----------------------------------------------------------------------------------------------------
Returned IF SubscriptionGroupId = ProductionPerformanceGroupId
EVENT_ID INT,
PROPERTY_NAME VARCHAR(100),
VALUE_STRING VARCHAR(100),
DATA_TYPE VARCHAR(100),
UOM VARCHAR(100),
TestId INT
-----------------------------------------------------------------------------------------------------
-- Resultset 5: Material Consumed Actual (MCA)
-----------------------------------------------------------------------------------------------------
Produced IF SubscriptionGroupId = ConsumptionPerformanceGroupId
PUBLISH_DATE DATETIME,
PROCESS_ORDER VARCHAR(100),
EVENT_COMPONENT_ID INT,
SOURCE_EVENT_NUMBER VARCHAR(100),
START_TIME DATETIME,
END_TIME DATETIME,
SAP_PRODUCT VARCHAR(100),
QUANTITY REAL,
UOM VARCHAR(100),
DataType VARCHAR(255),
PROCESS_SEGMENT_ID VARCHAR(100),
STORAGE_ZONE VARCHAR(100),
PPId INT,
PathId INT,
Sequence INT
-----------------------------------------------------------------------------------------------------
-- Resultset 6: Material Consumed Actual Property (MCAP)
-----------------------------------------------------------------------------------------------------
Produced IF SubscriptionGroupId = ConsumptionPerformanceGroupId
Subscription Upload Result Sets
18
EVENT_COMPONENT_ID INT,
PROPERTY_NAME VARCHAR(100),
VALUE_STRING VARCHAR(100),
DATA_TYPE VARCHAR(100),
UOM VARCHAR(100),
TestId INT
-----------------------------------------------------------------------------------------------------
-- Resultset 7: Test Header
-----------------------------------------------------------------------------------------------------
Produced if SubscriptionGroupId = TestConformanceGroupId
PUBLISH_DATE DATETIME,
PROCESS_ORDER VARCHAR(100),
TEST_HEADER_ID INT,
TEST_SEGMENT_ID VARCHAR(100),
BATCH VARCHAR(100),
START_TIME DATETIME,
END_TIME DATETIME,
TEST_NAME VARCHAR(100),
PPId INT,
PathId INT,
EventId INT,
Sequence INT
-----------------------------------------------------------------------------------------------------
-- Resultset 8: Test Details
-----------------------------------------------------------------------------------------------------
TEST_HEADER_ID INT,
TEST_DESC VARCHAR(100),
ENTRY_ON DATETIME,
RESULT VARCHAR(100),
DATA_TYPE VARCHAR(100),
COMMENT VARCHAR(1000),
DISPOSITION VARCHAR(100),
UnitOfMeasure VARCHAR(100),

Global Configuration
19
TestId INT,
Sequence INT
Schedule Statuses
Schedule statuses indicate the status at which a process order is set. Examples of standard schedule
statuses are Active, Complete, Next, Overproduced, Pending, Planning, and Underproduced.
The status can be used to indicate the various statuses a process order cycles through.
There are two schedule statuses that have special logic written around them: Active and Complete.
The Active status is used to determine when to calculate production amounts for a process order. In
the Schedule View display, the currently active process order is used to track the actual quantity
produced against a process order and its planned quantity. Changing the status of an active process
order from Active to Complete allows a different process order to be activated. If another process
order has a status of Next, it will automatically become the active process order when the current
active process order is moved to Complete.
The other schedule statuses and any statuses that you add are used mainly for reporting purposes.
Adding a Schedule Status
If your plant uses different schedule statuses, you can either add new schedule statuses or rename
the existing default schedule statuses.
Another way to add schedule statuses is to export the schedule statuses, make changes to the file,
and then import the changes back into the Proficy database.
To add a schedule status:
1. In the Plant Applications Server Manager tree, expand Global Configuration.
2. Right-click on Schedule Statuses and click Add New Schedule Status. An editable text field
appears.
3. Type the name of the schedule status and press ENTER.
Exporting Schedule Status Configuration
You can export your configured schedule statuses into an Excel workbook and then use the Excel
workbook to import the information into another Plant Applications database or you can make
changes to the workbook and then import the information back into the same Plant Applications
database.
To export schedule statuses:
1. In the Plant Applications Server Manager tree, expand Global Configuration.
2. Right-click Schedule Statuses and click Export Schedule Statuses. The Configuration
Export dialog box appears.
3. Make sure the Schedule Statuses option is selected and click OK. The export process will
begin. An Excel workbook will be created with a worksheet that will contain your schedule
status configuration information.
Enable PO Ordering

Data Types
20
In the Schedule View display, the selected process order can be moved up or down one row on the
path it is bound to, switching places with the process order above or below it. The status the process
order is in must have Enable PO Ordering enabled.
To enable PO ordering:
1. In the Plant Applications Administrator, expand Global Configuration.
2. Expand Schedule Statuses, right-click on a status and select Enable <schedule status> PO
Ordering.
Data Types
The Data Type for the variable defines what data can be entered in associated variable cells. The
system has pre-configured data types, however you can also create custom data types. The system
configured valid data types are:
Array Float: an array of floating-point numbers between –9999999.999999 and 9999999.999999.
Array Integer: an array of integer numbers between –36,768 and 36,768.
Array String: an array of sequences of up to 25 characters.
Comment: a comment variable.
Float: a floating-point number.
Integer: an integer number between –36,768 and 36,768.
Logical: provides a checkbox in the AutoLog sheet for a variable.
String: a sequence of characters.
Custom Data Types: are user defined pick lists that can be created and used for selecting multiple
values for an Autolog variable.
Creating Custom Data Types and Phrases
Custom data types enable you to create multiple values which can be selected for a specific variable
in an Autolog display. When you create a variable and select the user-defined data type, the phrases
created for the specific user-defined data type are then presented in a drop-down list in an Autolog
sheet.
For example, you can create a data type named Shift and create three phrases: Shift A, Shift B, and
Shift C. Next, you can create a variable named Shift and select the data type Shift. When you add
the variable to an Autolog display, you will be able to select Shift A, Shift B, or Shift C from a list in
the Autolog display for the variable Shift.
1. In the Plant Applications Server Manager tree, expand Global Configuration.
2. Right-click Data Types and click New Data Type. An editable text field appears
3. Type in the name of the new data type.
4. Select the new data type; right-click and select New Phrase. An editable text field appears
under the new data type.
5. Type in the name of the new phrase.
6. Repeat New Phrase until each phrase has been selected.

Global Configuration
21
7. Phrases may be arranged in order by dragging each phrase into the appropriate position.
Dropping a phrase on top of another will cause the dropped phrase to move before the
phrase being dropped on.
Exporting Custom Data Types
You can export your custom data types into an Excel worksheet. You can then modify the data and
import the information back into the Plant Applications server or to another Plant Applications server.
To export custom data types:
1. In the Plant Applications Administrator, expand Global Configuration.
2. Right-click Data Types and select Export Data Types. The Configuration Export dialog box
appears.
3. Ensure Custom Data Types is selected and click OK. Excel automatically starts and a
worksheet is created containing the custom data type configurations.
Importing Custom Data Types
To import custom data types:
1. Open the Excel file containing the configurations you wish to import, and ensure that each line
item you wish to import contains an 'x' in the Selected column.
2. Open or return to the Plant Applications Administrator.
3. In the Server Manager tree, expand Global Configuration.
4. Right-click Data Types and select Import Configuration. The import process will begin.
5. If the import is successful, a message will be displayed.
6. Click OK and refresh the server.
Data Source Types
In order to interface Plant Applications with external systems (such as enterprise resources systems),
you can add data sources and map cross-references between external systems' keys and items in
Plant Applications.
Data source cross-reference configurations can be exported to and imported from and from Excel. For
more information, see Creating Cross-References for a Data Source.
Default Data Source Types
By default, Plant Applications provides 12 data source types. They are:
AcquiData
Aliased
Autoline
AutoLog
CalculationMgr
File Transfer
Historian
Other

Data Source Types
22
Replix
SAP
Undefined
Valmet Lab Data
Adding Data Source Types
To add a new data source:
1. In the Plant Applications Administrator Server Manager tree, expand Global
Configuration.
2. Right-click on the Data Source Types folder and choose Add New Data Source. The Data
Source Types folder expands, and a new item, ready for naming, appears at the top of the
list.
3. Enter the name of the new data source and then press ENTER.
Use the right-click menu commands to rename or delete the data sources that you
have added.
4. Right-click the new data source and choose Activate.
To avoid items being cross-referenced to the wrong data sources, you should
deactivate the external data sources that are not in use.
System Cross References Dialog Box
To access this dialog box: In the Plant Applications Administrator, right-click on a Data Source
(Global Configuration > Data Source Types) and click Modify System Cross References.
In the System Cross References dialog box, you configure cross-references between Plant
Applications items and "foreign" keys within an external system.
You can also import and export system cross references to and from Excel.
Subscription
Choosing a subscription from the drop-down list serves two purposes:
It filters searches for existing cross-references.
It allows you to enter XML information for the selected subscription, which will be used by the
connector to an external system. For the Enterprise Connector, you will most likely need to
select Variables for the Plant Applications Item. If you select:
o ProductionPerformance subscription, then the stored procedure will expect
<MaterialProducedActualProperty> to be entered in the XML Header data box.
o ConsumptionPerformance subscription, then the stored procedure will expect
<MaterialConsumedActualProperty> to be entered in the XML Header data box.
o TestConformance subscription, then the stored procedure will expect
<TestPerformance> to be entered in the XML Header data box.
When you choose a subscription from the drop-down menu, a window opens in the center of the
dialog box, allowing you to enter additional information that identifies the cross-referenced items.
Plant Applications Item

Global Configuration
23
This is a search filter for existing cross references, and also limits hits when searching for Plant
Applications items to add when creating new cross-references. If you are searching for existing cross
references, select the item type associated with the cross reference you want to find before clicking
Search. If you are adding new items, choose the item type you want to add before clicking Add New.
Search String
This is a search filter for existing cross-references. Enter a character string contained within the
name(s) of the items you wish to find. The search will return only items in the category defined in
Plant Applications Item.
Filter
Enter a string to limit hits when adding new items. Characters may be from the beginning, within, or at
the end of an item name. You may use the percent symbol (%) as a wild card character within the
string.
New Alias
Enter the name of an alias to which to map a foreign key.
Creating Cross-References for a Data Source
To create cross-references for a data source:
1. In the Server Manager tree, expand Global Configuration and then the Data Source
Types folder.
2. Right-click the data source for which you wish to create cross-references and then click
Modify System Cross References.
3. In the System Cross References dialog box, choose the Plant Applications Item type for
which you want to create cross-references. Note that relevant column headings appear in the
main window. Click Add New at the bottom right of the dialog box to open the Search dialog
box.
4. Use the Search dialog box to locate and select the Plant Applications items you wish to add.
When you have made your selection, click OK to close the Search dialog box. The selected
items now appear in columns in the System Cross References main window.
Items previously mapped to the current data source will not be returned in a search.
5. In the Foreign Key column, for each line item enter the key ID for the external system.
6. To map a foreign key to an alias, enter a name for the alias in New Alias, and then click Add.
You can then enter the foreign key for the alias.
Exporting Cross-reference Configurations
To export cross-reference configurations to an Excel file:
1. In the Server Manager tree, expand Global Configuration and then the Data Source
Types folder.
2. Right click the data source containing the cross-references you wish to export and click
Export Cross Reference. Excel opens with the exported configurations appearing in a
worksheet.
3. Save the Excel file.
Importing Cross-reference Configurations

Color Schemes
24
To import cross-reference configurations from an Excel file:
1. Open the Excel file containing the configurations you wish to import, and ensure that each line
item you wish to import contains an 'x' in the Selected column.
2. Open or return to the Plant Applications Administrator.
3. In the Server Manager tree, expand Global Configuration and then the Data Source
Types folder.
4. Right click the data source to which you want to import cross-references, and then click
Import Configuration.
Color Schemes
To manage color schemes: In the Plant Applications Server Manager tree, expand Global
Configuration and expand Color Schemes.
Color schemes determine the color of various parts of a display, such as the font color, specification
colors, and background color. You can use the default color schemes or create your own. When you
create a display, you can apply your color scheme through the display options.
By default, two color schemes are provided for you: <Default> and GradeBook Operator.
Creating Color Schemes
To create a custom color scheme:
1. In the Plant Applications Server Manager tree, expand Global Configuration.
2. Right-click on Color Schemes and click Add New Color Scheme. An editable text field will
appear.
3. Type name for the New Color Scheme and press ENTER.
4. Right click on the scheme and click Edit <color scheme>. The Color Scheme Editor dialog
box appears.
5. Under the Color column, click the color cell you want to change. The Color dialog box
appears.
6. Select a color and click OK. The cell is updated with the selected color.
7. Click the Save button then close the Color Scheme Editor dialog box.
Deleting a Color Scheme
To manage color schemes: In the Plant Applications Server Manager tree, expand Global
Configuration and expand Color Schemes.
When you delete a color scheme that is being used by a display, the display will automatically revert
to the default color scheme.
You cannot delete the <Default> color scheme.
To delete a custom color scheme:
1. Right-click on the color scheme you want to delete and click Delete <color scheme>. The
Confirm Delete dialog box appears.
2. Click OK to delete the color scheme.

Global Configuration
25
Renaming Color Schemes
To manage color schemes: In the Plant Applications Server Manager tree, expand Global
Configuration and expand Color Schemes.
When you rename a color scheme, any display that uses the color scheme will automatically be
updated with the new name.
You cannot rename the <Default> color scheme.
To rename a color scheme:
1. Right-click on the color scheme you want to rename and click Rename <color scheme>. The
color scheme name becomes an editable field.
2. Type the new name of the color scheme and press ENTER.
Reason Trees
Reasons Trees are the association of individual reasons into a multiple level hierarchy. This
hierarchy, or "tree," is meant to provide a drill-down of reasons, presumably from a general category
to more and more specific reasons at lower levels of the tree.
The different levels of the tree can be used at report time to provide different "angles" of reporting.
Each level of the Reason Tree is given a title or "Level." This is used in reporting and shows up in the
client application as a descriptive title for each Reason Level.
Multiple Reasons
It is really dependent on the detail you want to report Downtime or Waste by. If you want to analyze
Downtime to the specific "fault" level, then you will need a Reason roughly for each possible fault. You
will also need appropriate Reasons to fill out higher levels of the tree to provide some organization
and drill down into those detailed faults.
Multiple Reason Trees
You generally need only one Reason Tree for Downtime, and one Reason Tree for Waste. Some
sites have a standard Reason Tree that they use across all types of operations in a plant. This
provides a standard set of reporting without regard to equipment type or process. The drawback of
this approach is that detailed fault information that is specific to the equipment or process can be
overlooked.
A compromise approach is to have a standard Reason Tree structure for Level 1 and 2, then move
into equipment specific reasons for Level 3 and beyond. This allows you to report Downtime or Waste
across the plant in a standard way for broad categories while also allowing you to report at a detailed
level for each piece of equipment.
This makes for very large Reason Trees and associated maintenance issues; however, it is generally
worthwhile in the information that can be extracted in reporting.
Reason Trees and Downtime Reporting
The two main purposes of Reason Trees are to provide drill-down for operators to enter and
investigate Reasons, and to categorize items for reporting. A general strategy is to make the first level
of Reasons broad categories and to have subsequent levels drill into more and more detail. This will
allow you to report and classify Downtime or Waste items at a broad category level down to a detailed
level.

Reason Trees
26
At report time, it is possible to report on specific lower-level Reasons without specifying a higher-level
Reason (essentially by specifying any or the wildcard character at higher levels on the hierarchy).
Changing Reason Trees
When simply re-arranging a Reason Tree, the historical data is not altered. However the client
Displays may not view the historical data the same way. In other words, if you alter the hierarchy and
relationships between Reasons (and particularly reason levels), the client may not be able to display
reasons within the current hierarchy because the drill-down path has changed. Again, this will not
affect reporting, so unless you intend to change the Reasons attached to historical information, this
will not be a large issue.
Deleting Reasons all together (as opposed to simply removing it from the Reason Tree) will impact
historical data. Any place a deleted Reason showed up in history will be nulled. For the records
affected, only the deleted Reason will be nulled, so other levels will remain intact for reporting. As far
as viewing from the client displays, the same issues as discussed in the above paragraph apply.
Creating Reason Trees
Overview
1. Define list of available Reasons
2. Define list of Categories
3. Create Reason Tree
4. Create Reason Tree Headers
5. Arrange available Reasons in a tree
Step 1: Define list of available Reasons
When you consider what reasons to add, you should think in terms of "cause" reasons and "action"
reasons. Cause reasons would be those things that caused the Downtime or Waste event to occur.
Action reasons would be the actions taken in response to the event. If you choose to, you can create
a Reason Tree for Causes and then a Reason Tree for Actions, which can be used when configuring
Alarm Templates and Production Events, such as Downtime, Waste, or User-defined events.
You can also add new reasons when you create your Reason Trees in Step 5.
1. Expand Global Configuration and the Reason Trees folder.
2. To create a new Reason, right-click on the Reasons folder and click Add New Reason. The
New Reason dialog box appears.
3. Do the following:
In the Description box, type the name of the new Reason. Reason names must be unique on
a given server.
In the Code box, type the code for this Reason. This field is not required by Plant
Applications, but it may be used for grouping Reasons on custom reports and used by the
SDK.
Select Not Required [Comment] if no comment is required when the user selects this
Reason from within a Display.
Select Required [Comment] to force the user to enter a comment whenever this Reason is
selected from within a Downtime Display.
Comments can be required only from within a Downtime Display. You can still add
comments from other Displays, such as Alarm Displays, but they can not be made to
be required.

Global Configuration
27
Select Suggested [Comment] to give the user the option of entering a comment when this
Reason is selected from within a Display.
4. Click the Apply button to add the new Reason and to continue adding additional Reasons.
5. After adding all your Reasons, click OK.
Step 2: Define your Reason Categories
Reason Categories allow you to group Reasons together for reporting purposes. This will help you
track Downtime across production lines, for example. You can create a Reason Category and attach
the Reason Category to different Reasons in your Reason Tree. Then, any Downtime associated with
one of the Reasons that are attached to a particular Reason Category gets totaled under that Reason
Category.
When you attach a Reason Category to a Reason Level 1, all Reasons underneath the Reason Level
1 are also attached to the Reason Category. Reasons can also have more than one Reason Category
attached to them.
Default Reason Categories are identified by a blue Reason Category icon and cannot be renamed
or edited. User-defined Reason Categories are identified by a red Reason Category icon . The
following default Reason Categories are provided:
Breaks
Outside Area
Planned Downtime
Unavailable Time
Unplanned Downtime
To create a new Reason Category:
1. Open Global Configuration.
2. Open the Reason Trees folder.
3. Right-click on the Categories folder and select Add New Reason Category from the pop-up
menu.
4. Type the name of the new Reason Category and press Enter.
To attach a Reason Category to a Reason:
1. Open the Trees folder.
2. Open the desired Reason Tree.
3. Open the Reason Tree folder.
4. Right-click on the desired Reason and select Attach Categories from the pop-up menu.
5. In the Add Category to tree dialog box, under Non-members, select one or more Reason
Categories to attach to the Reason and click the Add Selected button.
6. Click the Close button to close the Add Category to tree dialog box.
Step 3: Create your Reason Tree
1. To create a new Reason Tree, right-click on the Trees folder and select Add New Reason
Tree from the pop-up menu.
2. Type the name of the new Reason Tree and press Enter.
Reason tree names must be unique on a given server.

Reason Trees
28
Step 4: Create Reason Levels
Reason levels help you further refine your reasons. When you create your Reason Levels, start with
the broadest level first. The second Reason Level that you add becomes a sub-reason under the first
level. If you add a third reason level, that becomes a sub-reason under the second Reason Level.
You can add up to four Reason Levels.
Reason Levels are also used as column headings in the various Displays, such as the
Downtime Display or the Waste Display.
1. Open the newly created Reason Tree. Right-click on Reason Level Titles and select Add
New Reason Level Title.
2. Type in the name of the Reason Level Title for Level 1 of the new Reason Tree and press
Enter.
3. Repeat steps 1 - 2 to add additional Reason Levels.
You can add up to four Reason Levels.
Step 5: Structure your Trees
1. To add a Level 1 Reason, open the desired Reason Tree.
2. Right-click on the Reason Tree folder and select Edit Reason Tree Membership from the
pop-up menu.
You can add new reasons by selecting Add New Reason from the pop-up menu. For more
information about using the New Reason dialog box, click here.
3. In the Add Reasons to tree dialog box, select one or more Reasons from the Non-Members
list and click the Move Selected button
4. Click the Close button.
5. To add a Level 2 Reason, right-click a Level 1 Reason and select Edit Next Level Reason
Membership from the pop-up menu.
6. In the Add Reasons to tree dialog box, select one or more Reasons from the Non-Members
list and click the Move Selected button.
7. Click the Close button.
8. Repeat these steps for each Reason in Level 1 and for each subsequent Reason until the
Reason Tree is complete.
Exporting Reasons
To export reasons:
1. In the Plant Applications Administrator, expand Global Configuration.
2. Expand Reason Trees, right-click Reasons and select Export Reasons. The Configuration
Export dialog box appears.
3. Ensure Event Reasons is selected and click OK. Excel automatically starts and a worksheet
is created containing the reason configuration.
Importing Reasons
To change the name of a reason, change the New Reason Name before you import the
configurations.
To import reasons:

Global Configuration
29
1. Ensure the Excel workbook that contains the reason configuration is open and the
configurations you want to import are selected.
2. In the Plant Applications Administrator, expand Global Configuration.
3. Expand Reason Trees, right-click Reasons and select Import Configuration.
4. Click OK.
Exporting Trees
To export trees:
1. In the Plant Applications Administrator, expand Global Configuration.
2. Expand Reason Trees, right-click Trees and select Export Trees. The Configuration
Export dialog box appears.
3. Select or clear the following options.
Reason Tree Setup: This option will export the reason tree name, any assigned security
group, and the reason level titles.
Reason Tree Categories: This option will export the reason tree name, all reason levels that
have an assigned category, and the category.
Reason Tree Data: This option exports the reason tree name and the reason levels. You can
then change or add a reason, change FALSE to TRUE under Add Missing Reasons, and
select the changed rows. This will add new reasons to the database and attach them to the
reason tree.
4. Click OK. Excel automatically starts and a worksheet is created containing the reason tree
configuration.
Importing Trees
After you've exported your tree configurations, you can edit the configurations and then import the
changes into Plant Applications.
Reason Trees worksheet: You can change or add reason level titles for each tree. If you
change the reason tree name, a new tree is created.
Reason Category worksheet: You can edit an existing category and add a new category.
Upon import, the category will be added to the lowest level reason.
Event Reason Tree worksheet: You can then change or add a reason, change FALSE to
TRUE under Add Missing Reasons, and select the changed rows. This will add new reasons
to the database and attach them to the reason tree.
To import reason trees:
1. Ensure the Excel workbook that contains the tree configuration is open and the configurations
you want to import are selected.
2. In the Plant Applications Administrator, expand Global Configuration.
3. Expand Reason Trees, right-click Trees and select Import Configuration. Your selected
configurations are imported.
4. Click OK and refresh the server.
Subscription Information

Subscription Information
30
In order to use subscriptions, there are a few registry changes that must be made. For
more information, see Enterprise Connector service.
Plant Applications supports interaction with ERP systems through comprehensive, complex
subscriptions, as well as incremental updates. Subscriptions allow Plant Applications to launch an
upload of data (performance upload) to an external system, based on the status triggers you specify.
For example, you may wish to update your ERP system every hour and on batch completion, but only
when the schedule’s status is Running and also whenever the Production Plan status changes from
Pending to Complete. Subscriptions are also used to update the Plant Applications database when
information is received from (schedule download) an ERP system.
Subscription information populates the ERP_Transactions, Subscription, Subscription_Groups, and
Subscriptions_Triggers tables in the Plant Applications database.
By default, Plant Applications includes five pre-defined subscription groups and subscriptions. These
subscriptions conform to the S95/B2MML standards as defined by the World Batch Forum
(www.wbf.org). The subscription groups and subscriptions are:
ScheduleDownload
ProductionPerformance
ConsumptionPerformance
TestConformance
OrderConfirmation
Subscription Prerequisites
Several areas in Plant Applications must be addressed prior to using subscriptions:
Plant Model: Configure the Plant Model to represent your manufacturing equipment. See The Plant
Model.
Products: In Product Management, create products for both finished products and the formulation
items that are used in making them. "FreshFace Toothpaste," for example, is a product, but baking
soda (one of the many formulation items that go into the toothpaste) is also handled as a product. See
How To Add New Products and Product Families.
After they are configured, associate the products to appropriate units in the plant model. See Mapping
Products To Units.
Production Events and Genealogy: To generate consumption against formulation items that are
associated with product or process orders, genealogy must occur between production events and raw
material events. See Configuring Placeholder Production Events On A Unit and Creating and
Configuring The Genealogy View Display.
Event Components: All events that are linked to the production event (records in the Event
Components table that link the production event to a raw material event) are searched, and the
Dimension X field from the Event Component record, where the field Report_As_Consumption is set
to ’r;1’, is used as the amount of product consumed.
Execution paths: Configure production execution paths in the plant model. See Defining Execution
Paths.
External Data Sources & Cross References, Subscriptions & Triggers: If required — for example,
if you want to retrieve process orders from an ERP system—configure external data sources, cross
references, subscriptions and triggers as required for Plant Applications to interact with an external
applications. See Data Source Types and Subscription Information.

Global Configuration
31
Engineering Units: Engineering Units must be created before working with bills of materials. See
Engineering Units.
Production Schedule Download
XML SchemasThe ScheduleDownload subscription is triggered when the Enterprise Connector
receives an XML file containing scheduling information from the BizTalk server. Based on the root
node of the XML file, the Enterprise Connector calls the spS95_ProductionScheduleDownload stored
procedure. The stored procedure updates the production plan, production schedule and bill of
materials tables in the Plant Applications database. The stored procedure also returns Result Sets 15
and 16 to the Enterprise Connector. The Enterprise Connector publishes the result sets to the Plant
Applications message bus, which passes the information to the appropriate Plant Applications client
displays and reports.
If there are any errors, the spS95_ProductionScheduleDownload stored procedure returns error
codes to the Enterprise Connector. The Enterprise connector matches the error code to an email
message code and determines what message to send and to whom it should be sent.
Production Performance Upload
Once a process order completes and based on your defined triggers, the production performance
information is uploaded via BizTalk to an ERP system.
The Enterprise Connector executes the "gatekeeper" stored procedure. The gatekeeper stored
procedure looks at the Subscription, Subscription_Trigger, and Subscription_Group tables to
determine which subscription to process. Based on the ID of the subscription, the gatekeeper calls
another stored procedure (in the case of a performance upload,
spS95_IncrementalProductionPerformance) that returns a result set to the Enterprise Connector. The
Enterprise Connector will then create one or more XML files, which get processed by the appropriate
BizTalk orchestration.
The upload stored procedure returns different result sets, depending on the subscription group the
subscription ID that was passed belongs to.
These result sets have nothing to do with the result sets that Plant Applications supports,
such as Result Set 15, ProductionPlan and Result Set 16, ProductionSetup.
Subscription Group Result Sets
Returned
OrderConfirmation Result Sets 1, 2, 3
ProductionPerformance Result Sets 1, 2, 3, 4
ConsumptionPerformance Result Sets 1, 2, 5, 6
TestPerformance Result Sets 1, 2, 7, 8
Four Production Performance Upload Subscriptions
There are four subsets of the ProductionPerformance upload. Each subset subscription has a priority
assigned to the subscription group to which it belongs. The priority determines which subscription is
processed first if there are multiple messages. In order of priority, the four subsets are:

Subscription Information
32
ProductionPerformance (1): The ProductionPerformanceUpload subscription is an ISA S95
standard and uses the ProductionPerformance schema to upload process order information to an
ERP via BizTalk server. The ProductionPerformanceUpload reports actual production and includes:
Material Produced Actual (MPA) information correlates to Event IDs in Plant Applications.
Material Produced Actual Properties (MPAP) are the test results.
ConsumptionPerformance (2): The ConsumptionPerformance subscription is an ISA S95 standard
and uses the ProductionPerformance schema. The ConsumptionPerformance subscription reports
actual consumption, and includes:
Material Consumed Actual (MCA) information that correlates to event components in Plant
Applications.
Material Consumed Actual Properties are the test results.
TestConformance (3): The TestConformance subscription is not currently an ISA S95 standard. It
does, however, follow the ProductionPerformance schema. The TestConformance subscription
reports quality information.
OrderConfirmation (4): The OrderConfirmation subscription is not currently an ISA S95 standard. It
does, however, follow the ProductionPerformance schema. The OrderConfirmation is sent only once,
when an order is completed. It should be the last message sent.
Subscription Groups
Subscription Groups are a way to categorize your subscriptions. By default, Plant Applications installs
five subscription groups: one for schedule downloads and four for performance uploads.
You can create your own custom subscriptions and either add them to an existing subscription group
or add them to a new subscription group.
Each subscription group has a stored procedure attached to it that is called when the particular
subscription is triggered.
The S95/B2MML interface connector solution provides some flexibility in the handling of exceptions
(unknown data such as product name, no supporting path in the plant model, etc) that may be
encountered as the Schedule is downloaded from the Foreign System, parsed and examined in Plant
Applications. Flexibility is provided by permitting the user to predetermine how certain exceptions
should be handled when encountered.
A number of possible exceptions are predicted within the code. These conditions all have default
exception handling routines associated with them. These defaults are configurable and can be
changed to other available choices depending on the requirements of the site.
The pre-defined exception handling choices are added as User Defined Properties (UDP) and the
default is configured in the UDP related tables. The defaults should be confirmed or changed as part
of the configuration of the Production Download solution.
Creating a Subscription Group
To manage subscription information: In the Plant Applications Administrator, expand the Server
Manager tree and expand Global Configurations.
Each subscription group is assigned a unique ID, Subscription_Group_ID, and is added to the
Subscription table in the Plant Applications database.
To create a new subscription group:
1. Right-click the Subscription Information folder and click New Subscription Group. The
Subscription Information folder expands and an empty text field becomes active.

Global Configuration
33
2. Type the name of the subscription group and press ENTER.
After you have created a subscription group, you can perform the following tasks by right-clicking on
the subscription group.
Add a new subscription group
Edit the subscription group properties
Delete the subscription group
When you delete a subscription group, any subscriptions that are members of the
subscription group are deleted and all information is deleted from the Subscription,
Subscription_Group, and Subscription_Trigger tables.
Rename the subscription group
Create a new subscription
Import and export subscriptions
Subscription Group Properties
To manage subscription information: In the Plant Applications Administrator, expand the Server
Manager tree and expand Global Configurations.
Subscription group properties are used to determine the order in which the subscriptions are
uploaded and identify the stored procedure to call when a subscription is triggered.
To edit subscription group properties:
1. Right-click a subscription group and click Subscription Group Properties. The
Subscription Groups dialog box appears.
2. In the Stored Procedure box, click the Browse button. The Select the stored procedure
dialog box appears which lists all of the stored procedure with the spLocal prefix.
3. Click the stored procedure and click OK. The Select the stored procedure dialog box closes
and the Stored Procedure box is populated with the name of the stored procedure.
4. In the Priority box, type the number of the priority. This will determine the order that
messages are uploaded and the order the subscription groups are sorted in the tree.
5. Click OK.
Exporting Subscription Groups
When you export subscription groups, you export the configured properties for each subscription
group.
To export subscription groups:
1. In the Plant Applications Administrator, expand Global Configuration.
2. Right-click Subscription Groups and select Export Subscription Groups. The
Configuration Export dialog box appears.
3. Ensure that Subscription Groups is selected and click OK. Excel will automatically start and
a worksheet containing subscription group configurations will be created.
Importing Subscription Groups
You can either change an existing subscription group description or add a new row. You cannot
change the stored procedure or priority of an existing group. Furthermore, after you import a
subscription group, you must add subscriptions to it, either manually or through import.

Subscription Information
34
To import subscription groups:
1. Ensure the Excel workbook that contains the subscription groups configuration is open and
the configurations you want to import are selected.
2. In the Plant Applications Administrator, expand Global Configuration.
3. Right-click Subscription Groups and select Import Configuration. Your selected
configurations are imported.
4. Click OK and refresh the server.
Subscriptions
Subscriptions allow Plant Applications to launch an upload of data to an external system, based on
the status triggers you specify. For example, you may wish to update your ERP system every hour
and on batch completion, but only when the schedule’s status is Running and also whenever the
Production Plan status changes from Pending to Complete.
Creating a Subscription
To manage subscription information: In the Plant Applications Administrator, expand the Server
Manager tree and expand Global Configurations.
1. Expand Subscription Information.
2. Right-click a subscription group and click New Subscription. The subscription group
expands, and a new item, ready for naming, appears at the top of the list.
3. Type the name of the new subscription and then press ENTER.
By default, new subscriptions are active, which is indicated by the green icon. Inactive
subscriptions are indicated by a red icon.
Editing Subscription Properties
To manage subscription information: In the Plant Applications Administrator, expand the Server
Manager tree, expand Global Configurations, and expand Subscription Information.
Subscription properties determine when a subscription is triggered and how various errors are
handled, via the user-defined properties (UDPs). You can create triggers based on time or production
status change or both. If you configure both triggers, and a production change triggers a subscription
before the time interval has elapsed, the start time of the interval is reset.
Triggers affect only performance uploads.
1. Expand the subscription group.
2. Right-click a subscription and click Subscription Properties. The Subscription dialog box
appears.
3. To trigger this subscription based on time, click the General tab and do the following:
a. Type a new description in the Description box, if necessary.
Subscription names must be unique on a server.
b. Select or clear the Active check box.
c. From the Table list, select either Production Plan or Events. This will determine
what to use as a key. If you select Production Plan, you can select a production
execution path. If you select Events, you can select production events.
d. In the Key box, click the Browse button. The Assign Property Value dialog box
appears.

Global Configuration
35
e. Make your selection from the Value list.
f. Click OK. The Assign Property Value dialog box closes.
g. In the Interval box, type the number of minutes to specify the frequency at which this
subscription is triggered.
h. In the Offset box, enter the number of minutes after midnight at which the first
subscription would have been triggered. Thereafter, the interval determines the
frequency. For example, with an offset of 1 and an interval of 20, Plant Applications
calculates the trigger time based on the first subscription having fired at 00:21 and
then every 20 minutes thereafter.
4. To trigger this subscription by event, click the Triggers tab and do the following:
a. Click the New button. A row is added.
b. From the Table column, select either Production Plan or Events. This will determine
what to use as a key. If you select Production Plan, you can select a production
execution path. If you select Events, you can select production events.
c. In the Key column, click the Browse button. The Assign Property Value dialog
box appears.
d. Make your selection from the Value list.
e. Click OK. The Assign Property Value dialog box closes.
f. The Column column displays the name of the column in the selected table.
g. In the From column, select a production status.
h. In the To column, select a production status.
Example:
Let's assume you selected Production Plan as your table, in the From column you
selected In Progress, and in the To column you selected Complete. Then, when the
value in the PP_Status_Id column of the Production_Plan table changes from In
Progress to Complete, this subscription would be triggered.
You can trigger subscriptions by both time and event, or just by time or just by
event. If you use both triggers and the subscription is triggered by change in
production status, then the time interval will be reset based on the time of the
event. For example, if you have a time trigger of 10 minutes and an event
triggers a subscription after five minutes, the subscription will not trigger again
until either another change in production status occurs or 10 minutes has
elapsed.
5. On the User Defined Properties tab, do the following:
a. Click Add to add new user-defined properties.
b. Click Update to update the value of a user-defined property.
c. Click Delete to delete user-defined properties.
6. Click the Save button to save your changes.
Exporting Subscriptions
When you export a subscription, you export the configured properties for the subscription. You can
export only one subscription at a time.
To export subscriptions:
1. In the Plant Applications Administrator, expand Global Configuration.

Subscription Information
36
2. Expand Subscription Information.
3. Right-click on the subscription you want to export and select Export Subscriptions. The
Configuration Export dialog box appears.
4. Ensure Subscriptions is selected and click OK. Excel will automatically start and a
worksheet containing the configuration for the selected subscription will be created.
Importing Subscriptions
You can edit an existing subscription group description and a new subscription will be added upon
successful completion of an import. You can also edit the subscription description and a new
subscription will be added to the subscription group. However, you cannot edit or add any information
to the other columns without changing the subscription group description or the subscription
description or both.
To import subscriptions:
1. Ensure the Excel workbook that contains the subscription configuration is open and the
configuration you want to import is selected.
2. In the Plant Applications Administrator, expand Global Configuration.
3. Expand Subscription Information.
4. Right-click on a subscription and select Import Configuration. You selected configurations
are imported.
5. Click OK and refresh the server.
XML Schemas of Subscription Messages
These chapters are intended to describe the schemas used by the Enterprise Connector that
implements the ISA 95 (S95) standard to define the interface between an enterprise's business and
manufacturing systems through an XML-based tagging schema called B2MML version 2.
The Business To Manufacturing Markup Language (B2MML) is used courtesy of the WBF. For more
information about WBF and B2MML you can visit:
http://www.wbf.org/displaycommon.cfm?an=1&subarticlenbr=45.
XML Schemas
Enterprise Connector uses three different schemas:
Production Schedule
Production Performance
Test Performance
The Production Schedule that is used by the Enterprise Connector is a subset of the schema defined
by the B2MML. The Enterprise Connector will utilize only the information that is required.
The Production Performance is used by the Enterprise connector in three subsets:
Production Performance Production Confirmation
Production Performance Consumption Confirmation
Production Performance Order Confirmation
This schema is as well defined by the B2MML and Enterprise Connector will use only the necessary
data on each case.

Global Configuration
37
The Test Performance Schema is not a current standard supported by B2MML, it's our own schema
designed in anticipation that it will be adopted by the B2MML.
Production Schedule Schema
This chapter defines the production schedule schema that is used by the Enterprise Connector.
ProductionSchedule
Contains a definition of a production schedule, including the location of the scheduled elements, the
publication date of the schedule, the time range of the schedule, and the list of production requests
that make up the schedule.
ProductionRequest
Contains a definition of a production request element of a production schedule, including the
associated product to be produced, the time range of the request, the priority of the request, the
segment requirements of the request, and the definition of the expected segment response.
SegmentRequirement
Contains a definition of the schedule for a specific segment of production, including an identification of
the associated product or process segment, the time range of the request, the expected duration of
the request, production parameters for the segment, and the definition of the personnel, equipment,
material produced, material consumed, and consumables to be used in production.
EquipmentRequirement
Contains a definition of an equipment requirement for a segment requirement, including an
identification of the quantity of the resource used, or a definition of required subsets identified by
resource properties.
MaterialProducedRequirement
Contains a definition of a material to be produced for a segment requirement, including an
identification of the quantity of the resource produced, or a definition of required subsets identified by
resource properties.
MaterialProducedRequirementProperty
Contains a definition of a subset of a material produced in a segment requirement, including the value
used to identify the subset and the quantity of the material produced.
MaterialsConsumedRequirement
Contains a definition of a material to be consumed for a segment requirement, including an
identification of the quantity of the resource consumed, or a definition of required subsets identified by
resource properties.
MaterialsConsumedRequirementProperty
Contains a definition of a subset of a material consumed in a segment requirement, including the
value used to identify the subset and the quantity of the material consumed.
Description and Proficy Mapping
Element Or
der
Onl
y
Or
der
&
BO
M
Description Proficy Mapping Definition

Subscription Information
38
ProductionSchedule (PS) X
X
Main Header
element. No specific
meaning
N/A
ID X
X
Contains SAP IDOC
Number.
N/A -> This not used in
Proficy but should you want
it recorded you can use the
User Defined Parameter
(UDP) linked to the
Production_Plan record.
(Table_Value_Fields). If
there were 3 IDOCs there
would be 3 UDP entries in
the Table_Value_Fields
table.
Description X
X
Not used N/A
Location
X
X
The sub elements below
define the area of the
plant the schedule
applies.
N/A. This is not used in
Proficy since there is a
more specific definition of
location found under
MaterialProducedRequirem
ent.
EquipmentID X
X
EquipmentElementLevel X
X
Location
X
X
EquipmentID X
X
EquipmentElementLevel X
X
PublishedDate X
X
Not used N/A
StartTime X
X
Not used N/A
EndTime X
X
Not used N/A
EquipmentElementLevel X
X
Not used N/A
ProductionRequest X
X
This element defines a
single schedule
item. There can be
more than one
ProductionRequest, or
Schedule, within a single
ProductionSchedule
XML file.
Each instance of this
element will be associated
with a unique
Production_Plan Record in
the Proficy Database.
ID X
X
This defines the Process
Order Number. This is
the Unique SAP Order
ID.
Production_Plan.Process_
Order. If the Process Order
exists in the
Production_Plan table but
has never been active then
Update with new values; If
the Process Order does not
exist then Add new Process
Order with Status Pending;
If Process Order is active
then fail (see error
handling)

Global Configuration
39
Description X
X
This will be used to
specify special
instructions related to
the Process Order. For
example: Use Care
This will be stored as a
comment associated with
the Production Plan.
Comments.Comment_Text
will contain the comment
and the associated
Comment_Id will be
recorded in the
Production_Plan.Comment
_Id field. The SAP Interface
will have a known userid.
Only comments with this
known userid will be
updated. Comments with
other userids will be
maintained and chained the
comments of this
Production Plan.
ProductProductionRuleID X
X
This defines the specific
Recipe (BOM) which will
be u
sed when producing
this Process Order.
This will be associated with
the appropriate
BOM_Formulations record
in the Proficy Database
which represents this
recipe. The value will
become the
BOM_Forumlations.BOM_F
ormulation_Desc and the
associated
BOM_Formulation_Id will
be recorded in
Production_Plan.BOM_For
mulation_Id
StartTime X
X
Not used N/A
EndTime X
X
Not used N/A
Priority X
X
Not used N/A
SegmentRequirement X
X
In the case that this
Process Order will travel
through multiple pieces
of equipment
(Production Units), there
will be one
SegmentRequirement
for each piece of
equipment. There must
be at least one
SegmentRequirement.
N/A
ID X
X
Unique Sequence Id
starting with 1.
N/A
ProductSegmentID X
X
Not Used N/A
ProcessSegmentID X
X
Not Used N/A
Description X
X
Not Used N/A
EarliestStartTime X
X
Defines the planned start
time for the Process
Order
Production_Plan.Forecast_
Start_Time

Subscription Information
40
LatestEndTime X
X
Defines the planned end
time for the Process
Order
Production_Plan.Forecast_
End_Time
Duration X
X
Not Used N/A
ProductionParameter X
X
Not Used N/A
PersonnelRequirement X
X
Not Used N/A
EquipmentRequirement
X
X
The sub-
elements below
this define the specific
equipment which this
Process Order will run
on.
N/A
EquipmentID X
X
This contains the unique
SAP Code which
identifies the piece of
Production Equipment.
This ID will be mapped to a
Production Execution Path
in Proficy in the table
PrdExec_Paths. The ID
will either be stored in the
table
PrdExec_Paths.Path_Code
or as a foreign system key
associated with this Path in
the Cross Reference
Tables.
EquipmentClassID X
X
Not Used N/A
Description X
X
Not Used N/A
Location X
X
Not Used N/A
Quantity X
X
Not Used N/A
EquipmentRequirement
Property
X
X
Not Used N/A
RequiredByRequestedS
egementResponse
X
X
Not Used N/A
MaterialProducedRequir
ement
X
X
The sub-
elements below
this define the material
to be produced by this
process order. If
multiple materials will be
produced (ie different
lots, etc) there will be
multiple
MaterialProducedRequir
ements.
Each
MaterialProducedRequirem
ent will result in a
Production_Setup record
with the PP_Id column
associated to the
Production_Plan.PP_Id of
the corresponding Process
Order. Optionally, if there
is only 1
MaterialProducedRequirem
ent, and no MaterialLotId or
MaterialSubLotId is
specified below, this may
be omitted and all relevant
data can be stored directly
in the Production_Plan
record.
MaterialClassID X
X
Not Used N/A

Global Configuration
41
MaterialDefinitionID X
X
This is the Unique SAP
Id for the Product to be
produced.
This ID will be mapped to a
specific record in the
Products table in the
Proficy Database. It will
either be stored in the
Products.Prod_Code or as
a foreign system key
associated with this
Product in the Cross
Reference Table.
MaterialLotID X
X
In Batching operations,
this will contain the
Batch Number for the
material produced. In
Non-Batch operations,
this will likely be blank.
Will be stored as a
Production_Setup.Pattern_
Code
MaterialSubLotID X
X
Not Used N/A
Description X
X
Contains the De
scription
of the Material to be
produced.
This will only be used in the
event that the Product
defined in the
MaterialDefinitionId is not
found in the Proficy
Database. In this case, a
new Product will be created
in Proficy with the
Prod_Code =
MaterialDe
finitionId and the
Prod_Desc =
Description. In all other
cases, this element is
ignored.
Location X
X
The sub-
elements below
this where the material
produced will be
stored. i.e. Which SAP
warehouse location.
N/A
EquipmentID X
X
The Unique SAP ID of
the site where the
material will be
produced.
This is not used in Proficy
as it is assumed that one
Proficy Server will only
have one SAP Site
included.
EquipmentElementLe
vel = Site
X
X
Hard coded to Site to
indicate that this
Location Element
defines the Site level of
the hierarchy
N/A
Location X
X
Defines another layer of
more detail on the
location.
N/A
EquipmentID X
X
The Unique SAP ID of
the particular
Warehouse within the
Plant where the material
will be placed after
production.
This will be associated with
a specific Production_Unit
in the Proficy
Database. The actual ID
will be stored in the Cross
Reference tables
associated with this unit.

Subscription Information
42
EquipmentElementL
evel = StorageZone
X
X
Hard coded to
StorageZone to indicate
that this Location
Element defines the
specific Warehouse
N/A
Quantity X
X
The sub-
elements below
this will define the
quantity to produce
N/A
QuantityString X
X
This will contain the
Quantity to produce
Production_Setup.Forcast_
Quantity -> Note amount of
this Quantity will depend on
whether Proficy Units of
Measure and SAP Units of
Measure are the same. If
they are not, conversion
will
be performed.
DataType X
X
This will specify the
datatype of the above
Quantity
measurement. In all
cases, it will be float
N/A
UnitOfMeasure X
X
This will contain the Unit
Of Measure (Eng Units)
of the above quantity.
If this Unit of Measure
differs from the Unit of
Measure for Dimension X
of the Event Sub Type to
be produced, it will be
converted using the
configured conversion
factor. The converted
quantity will be placed in
the
Production_Setup.Forcast_
Quantity. If the Unit of
Measure is the same -> do
nothing. The Unit of
Measure for Dimension X
was configured when the
Production unit was
attached to the Path and
configured to count
production on this unit
Quantity X
X
This element and its
sub-elements contain a
second measurement for
how much to
produce. For example
above might be KG and
this might be Boxes.
This is not supported in
Proficy and will not be
mapped.
QuantityString X
X
N/A
DataType X
X
N/A
UnitOfMeasure X
N/A

Global Configuration
43
MaterialProducedReq
uirementProperty
X
X
A
MaterialProducedRequir
ementProperty is
essentially an extended
attribute of the
MaterialProducedRequir
ement.
In general, all
MaterialProducedRequirem
entProperty types (defined
by the ID) will result in a
record in Table_Fields with
the Value stored in
Table_Field_Values.
ID = QualityStatus X
X
Table_Fields will contain a
record with
Table_Field_Desc =
QualityStatus
Description X
X
Not Used N/A
Value
X
X
N/A
ValueString X
X
Default Stock Type for
this Material:
-
= unrestricted
-
"X" = Qualitiy
Inpection Required
-
"S" = Blocked
As described above, this
will be stored in
Table_Field_Values
associated with the
Table_Field_Id defined
above.
DataType X
X
Always string N/A
UnitOfMeasure X
X
Not Used N/A
Quantity X
X
Not Used N/A
MaterialProducedReq
uirementProperty
X
X
A
MaterialProducedRequir
ementProperty is
essentially an extended
attribute of the
MaterialProducedRequir
ement.
In general, all
MaterialProducedRequirem
entProperty types (defined
by the ID) will result in a
record in Table_Fields with
the Value stored in
Table_Field_Values.
ID = InspectionLotId X
X
Inspection Lot Number
Not used if Process
Order and Batch ID are
used to identify Quality
Inspection Lot.
Table_Fields will contain a
record with
Table_Field_Desc =
InspectionLotId
Description X
X
Not Used N/A
V
alue
X
X
Not Used N/A
ValueString X
X
Inspection Lot Number
As described above, will be
stored in
Table_Field_Values
associated with the
Table_Field_Id defined
above.
DataType X
X
Always String N/A
UnitOfMeasure X
X
Not Used N/A
Quantity X
X
Not Used N/A
RequiredByRequestedS
egementResponse
X
X
Not Used N/A

Subscription Information
44
MaterialConsumedRequ
irement
X
Each
MaterialConsumedRequi
rement Element
represents an individual
BOM item required to
produce the Process
Order
Will be stored in the Proficy
Database as a
BOM_Formulation_Item. T
he BOM_Formulation_Item
will be associated with the
BOM_Formulation record
which was defined by the
ProductionRuleId Element
above.
MaterialClassID X
Not Used N/A
MaterialDefinitionID X
The SAP Id for the Raw
Material to be
consumed.
The MaterialDefinitionId will
be mapped to a Proficy
Product either via the
Products.Prod_Code or via
the Cross Reference
Tables.
MaterialLotID X
Defines the Lot from
which the material is to
be used.
Stored as part of the
BOM_Formulation_Item
record in the Lot_Desc
column.
MaterialSubLotID X
Not Used Not Used
Description X
Contains the Description
of the Material to be
consumed.
This will only be used in the
event that the Product
defined in the
MaterialDefinitionId is not
found in the Proficy
Database. In this case, a
new Product will be created
in Proficy with the
Prod_Code =
MaterialDefinitionId
and the
Prod_Desc =
Description. In all other
cases, this element is
ignored.
Location X
The sub-
elements below
this where the material
to be consumed is
stored. i.e. Which SAP
warehouse location.
N/A
EquipmentID X
The Unique SAP ID of
the site where the
material is stored.
This is not used in Proficy
as it is assumed that one
Proficy Server will only
have one SAP Site
included.
EquipmentElementLe
vel
X
Hard coded to Site to
indicate that this
Location Element
defines the Site level of
the hierarchy
N/A
Location X
Defines another layer of
more detail on the
location.
N/A

Global Configuration
45
EquipmentID X
The Unique SAP ID of
the particular
Warehouse within the
Plant where the material
is stored.
This will be associated with
a specific Production_Unit
in the Proficy
Database. The actual ID
will be stored in the Cross
Reference tables
associated with this unit. If
the ID is not found in the
Cross Reference tables or
the Prod_Units table then
the message will fail (see
error handling)
EquipmentElementL
evel
X
Hard coded to
StorageZone to indicate
that this Location
Element defines the
specific Warehouse
N/A
Quantity
X
QuantityString X
Defines the quantity to
Consume.
This will be stored in the
BOM_Formulation_Item
record in the Quantity field.
DataType X
This will specify the
datatype of the above
Quantity
measurement. In all
cases, it will be float
N/A
UnitOfMeasure X
This will contain the Unit
Of Measure (Eng Units)
of the above quantity.
If this Unit of Measure
differs from the Unit of
Measure for the
BOM_Formulation_Item in
the Master Formulation, it
will be converted using the
configured conversion
formula.
MaterialConsumedRe
quirementProperty
X
A
MaterialConsumedRequi
rementProperty is
essentially an extended
attribute of the
MaterialConsumedRequi
rement.
In general, most
MaterialConsumedRequire
mentProperty types
(defined by the ID) will
result in a record in
Table_Fields with the Value
stored in
Table_Field_Values.
There
are a few exceptions
however.
ID =
MaterialReservationId
X
The
MaterialReservationId
element specifies the
SAP Id of the BOM
Reservation. This is the
official Reservation in
SAP of the material to be
consumed.
Table_Fields will contain a
record with
Table_Field_Desc =
MaterialReservationId
Description X
Not Used N/A
Value
X
Not Used N/A

Subscription Information
46
ValueString X
The
MaterialReservationId
from SAP will be stored
here.
As described above, will be
stored in
Table_Field_Values
associated with the
Table_Field_Id defined
above.
DataType X
Always String N/A
UnitOfMeasure X
Not Used N/A
Quantity X
Not Used N/A
MaterialConsumedRe
quirementProperty
X
A
MaterialConsumedRequi
rementProperty is
essentially an extended
attribute of the
MaterialConsumedRequi
rement.
In general, most
MaterialConsumedRequire
mentProperty types
(defined by the ID) will
result in a record in
Table_Fields with the Value
stored in
Table_Field_Values.
There
are a few exceptions
however.
ID =
MaterialReservationSequence
X
The
MaterialReservationSeq
uence element specifies
the Sequence number of
this specific Materials
Reservation within the
overall
MaterialReservation
(BOM)
Table_Fields will contain a
record with
Table_Field_Desc =
MaterialReservationSequen
ce
Description X
Not Used N/A
Value
X
Not Used N/A
ValueString X
The
MaterialReservationSeq
uence from SAP will be
stored here.
As described above, will be
stored in
Table_Field_Values
associated with the
Table_Field_Id defined
above.
DataType X
Always String N/A
UnitOfMeasure X
Not Used N/A
Quantity X
Not Used N/A
MaterialConsumedRe
quirementProperty
X
A
MaterialConsumedRequi
rementProperty is
essentially an extended
attribute of the
MaterialConsumedRequi
rement.
ID = Scrap Percent X
A ScrapPercent defines
the standard waste
expected from a given
material
Within the
BOM_Formulation_Items
table, this will be stored in
the Scrap_Factor column.
The ID=Scrap Percent is
the key to determine
that this will go to the
Scrap_Factor column.
Description X
Not Used N/A

Global Configuration
47
Value
X
Not Used N/A
ValueString X
The ScrapPercent value
BOM_Formulation_Items.S
crap_Factor
DataType X
Always float N/A
UnitOfMeasure X
Not Used N/A
Quantity X
Not Used N/A
MaterialConsumedRe
quirementProperty
X
A
MaterialConsumedRequi
rementProperty is
essentially an extended
attribute of the
MaterialConsumedRequi
rement.
In general, most
MaterialConsumedRequire
mentProperty types
(defined by the ID) will
result in a record in
Table_Fields with the Value
stored in
Table_Field_Values.
There
are a few exceptions
however.
ID =
SpecialStockIndicator
X
Special Stock Indicator:
-
"K" = Supplier Owned
[AccountNumber
required]
-
blank = consume site
Owned stock
-
"Z" = SAP will
determine which stock to
consume.)
Table_Fields will contain a
record with
Table_Field_Desc =
SpecialStockIndicator
Description X
Not Used N/A
Value
X
Not Used N/A
ValueString X
The
SpecialStockIndicator
from SAP will be stored
here.
As described above, will be
stored in
Table_Field_Values
associated with the
Table_Field_Id defined
above.
DataType X
Always String N/A
UnitOfMeasure X
Not Used N/A
Quantity X
Not Used N/A
MaterialConsumedRe
quirementProperty
X
A
MaterialConsumedRequi
rementProperty is
essentially an extended
attribute of the
MaterialConsumedRequi
rement.
In general, most
MaterialConsumedRequire
mentProperty types
(defined by the ID) will
result in a record in
Table_Fields with the Value
stored in
Table_Field_Values.
There
are a few exceptions
however.
ID = AccountNumber X
Account Number of the
Vendor or Creditor
(Likely not used)
Table_Fields will contain a
record with
Table_Field_Desc =
AccountNumber
Description X
Not Used N/A
Value
X
Not Used N/A

Subscription Information
48
ValueString X
The AccountNumber
from SAP will be stored
here.
As described above, will be
stored in
Table_Field_Values
associated with the
Table_Field_Id defined
above.
DataType X
Always String N/A
UnitOfMeasure X
Not Used N/A
Quantity X
Not Used N/A
MaterialConsumedRe
quirementProperty
X
A
MaterialConsumedRequi
rementProperty is
essentially an extended
attribute of the
MaterialConsumedRequi
rement.
In general, most
MaterialConsumedRequire
mentProperty types
(defined by the ID) will
result in a record in
Table_Fields with the Value
stored in
Table_Field_Values.
There
are a few exceptions
however.
ID =
StockDeterminationGroup
X
Stock Determination
Group. Materials which
are candidates for
Supplier Owned
Inventory have a stock
determination group set
up in their material
master.
Table_Fields will contain a
record with
Table_Field_Desc =
StockDeterminationGroup
Description X
Not Used N/A
Value
X
Not Used N/A
ValueString X
The
StockDeterminationGrou
p from SAP will be
stored here.
As described above, will be
stored in
Table_Field_Values
associated with the
Table_Field_Id defined
above.
DataType X
Always String N/A
UnitOfMeasure X
Not Used N/A
Quantity X
Not Used N/A
RequiredByRequestedS
egementResponse
X
SegmentResponse X
Sample XML for Production Schedule
<?xml version="1.0" encoding="utf-8" ?>
<ProductionSchedule xmlns="http://www.wbf.org/xml/b2mml-v02">
<ID>0000000479308838</ID>
<Location>
<EquipmentID>1662</EquipmentID>
<EquipmentElementLevel>Site</EquipmentElementLevel>
- <Location>
Global Configuration
49
<EquipmentID>0</EquipmentID>
<EquipmentElementLevel>Area</EquipmentElementLevel>
</Location>
</Location>
- <ProductionRequest>
<ID>000901602441</ID>
<ProductProductionRuleID>1010</ProductProductionRuleID>
<StartTime>2006-01-23T00:00:00</StartTime>
<EndTime>2006-01-23T07:12:00</EndTime>
- <SegmentRequirement>
<ID>1</ID>
<EarliestStartTime>2006-01-23T00:00:00</EarliestStartTime>
<LatestEndTime>2006-01-23T07:12:00</LatestEndTime>
- <EquipmentRequirement>
<EquipmentID>JXXS</EquipmentID>
</EquipmentRequirement>
- <MaterialProducedRequirement>
<MaterialDefinitionID>000000000084962822</MaterialDefinitionID>
<MaterialLotID>6023JAJ0</MaterialLotID>
<Description> 50G FLEX</Description>
- <Location>
<EquipmentID>1662</EquipmentID>
<EquipmentElementLevel>Site</EquipmentElementLevel>
</Location>
- <Quantity>
<QuantityString>16695.000</QuantityString>
<DataType>float</DataType>
<UnitOfMeasure>CS</UnitOfMeasure>
</Quantity>
- <Quantity>
<QuantityString>16695.000</QuantityString>
<DataType>float</DataType>
<UnitOfMeasure>CS</UnitOfMeasure>
</Quantity>
- <MaterialProducedRequirementProperty>
<ID>QualityStatus</ID>
<Description />
- <Value>
<ValueString>X</ValueString>
<DataType>string</DataType>
</Value>
<Quantity />
Subscription Information
50
</MaterialProducedRequirementProperty>
- <MaterialProducedRequirementProperty>
<ID>InspectionLotID</ID>
<Description />
- <Value>
<ValueString>000000000000</ValueString>
<DataType>string</DataType>
</Value>
<Quantity />
</MaterialProducedRequirementProperty>
</MaterialProducedRequirement>
- <MaterialConsumedRequirement>
<MaterialDefinitionID>000000000010042526</MaterialDefinitionID>
<Description>Salt Flake and SSA</Description>
- <Location>
<EquipmentID>1662</EquipmentID>
<EquipmentElementLevel>Site</EquipmentElementLevel>
- <Location>
<EquipmentID>STSO</EquipmentID>
<EquipmentElementLevel>StorageZone</EquipmentElementLevel>
</Location>
</Location>
- <Quantity>
<QuantityString>379.725</QuantityString>
<DataType>float</DataType>
<UnitOfMeasure>KG</UnitOfMeasure>
</Quantity>
- <MaterialConsumedRequirementProperty>
<ID>MaterialReservationID</ID>
<Description />
- <Value>
<ValueString>0043845745</ValueString>
<DataType>string</DataType>
</Value>
<Quantity />
</MaterialConsumedRequirementProperty>
- <MaterialConsumedRequirementProperty>
<ID>MaterialReservationSequence</ID>
<Description />
- <Value>
<ValueString>0010</ValueString>
<DataType>string</DataType>

Global Configuration
51
</Value>
<Quantity />
</MaterialConsumedRequirementProperty>
- <MaterialConsumedRequirementProperty>
<ID>ScrapPercent</ID>
<Description />
- <Value>
<ValueString>170.00</ValueString>
<DataType>float</DataType>
<UnitOfMeasure>percent</UnitOfMeasure>
</Value>
<Quantity />
</MaterialConsumedRequirementProperty>
</MaterialConsumedRequirement>
</SegmentRequirement>
</ProductionRequest>
</ProductionSchedule>
Production Performance (Production/Consumption Confirmation)
This section defines the production performance order confirmation schema used by the Enterprise
Connector.
ProductionPerformance
The top level element. Contains a definition of a report on production performance, including the
location of the performance, the publication data of the performance report, the ID of the associated
production schedule, the duration of the production performance, and the list of production responses
making up the production performance report. May include application specific defined elements.
ProductionResponse
Contains a definition of a production response report, including the identification of an associated
production request, the product produced, the duration of the report, and the segments making up the
production response. May include application specific defined elements. May be a top level element
for defined locations.
SegmentResponse
Contains a definition of a report on a segment. Includes the duration, production data, personnel,
equipment, material produced, material consumed, and consumables used.
MaterialProducedActual
Contains a report on actual material resources produced. May define the quantity of the resource
produced, or may contain a list of property definitions and quantities for each property subset.
Description and Proficy Mapping
Element Pr
od
Co
ns
Description Proficy Mapping Definition
ProductionPerformance
X
X
ID X
X
Not Used N/A
Description X
X
Not Used N/A

Subscription Information
52
Location X
X
Not Used N/A
PublishedDate X
X
The current time when
the document was
produced.
GETDATE()
ProductionScheduleID X
X
Not Used N/A
StartTime X
X
Not Used N/A
EndTime X
X
Not Used N/A
EquipmentElementLevel X
X
Not Used N/A
ProductionResponse X
X
There is one
Production Response
element for each
Process Order this
Message refers
to.
There will never be
more than 1 Process
Order in a single
message so there will
never be more than 1
ProductionResponse
section.
ID X
X
The sequence number
for the
ProductionResponse.
Always 1
1
ProductionRequestID X
X
This should be the
Unique SAP Id for the
Process Order.
Production_Plan.Process_
Order
ProductProductionRuleID X
X
Not Used N/A
StartTime X
X
Not Used N/A
EndTime X
X
Not Used N/A
SegmentResponse X
X
There will be a
SegmentResponse for
each piece of
equipment where the
process order was
produced. Typically,
there will only be one
SegmentResponse
section.
ID X
X
Sequence Number for
the segment response.
1
ProductSegmentID X
X
Not Used N/A
ProcessSegmentID X
X
Indicates which type of
transaction this
schema is. For the
purposes of Appendix
B, this will always be
MAKE
MAKE
Description X
X
Not Used N/A
ActualStartTime X
X
Not Used specifically
by SAP. Will provide
Actual Start time of the
Process order.
Production_Plan.Actual_St
art_Time

Global Configuration
53
ActualEndTime X
X
Posting date in the
document (yyyyMMdd)
Previous Date: if
midnight
Production_Plan.Actual_E
nd_Time or Interval End
Time (GETDATE) in the
case of a Periodic update
of an open Process order.
ProductionData X
X
Not Used N/A
PersonnelActual X
X
Not Used N/A
EquipmentActual X
X
Not Used N/A
MaterialProducedActual X
There will be one
MaterialProducedActu
al for each
Batch/Lot/Event
recorded in Proficy
against the Process
Order.
MaterialClassID X
MaterialDefinitionID X
Indicates the SAP
MaterialDefinitionId
(Product) of the
material Produced.
Depending on if the Event
has an Applied product
assigned or not, this will
come from either
Production_Starts.Prod_ID
or
Events.Applied_Product.
MaterialLotID X
Lot / Batch Number of
the material produced.
Events.Event_Num
MaterialSubLotID X
Not Used N/A
Description X
Not Used N/A
Location X
The sub-elements
below this where the
material produced is
stored. i.e. Which
SAP warehouse
location the material is
stored.
N/A
EquipmentID X
The Unique SAP ID of
the ste where the
material is stored.
This is not used in Proficy
as it is assumed that one
Proficy Server will only
have one SAP Site
included. This will be
hardcoded in BizTalk or in
a
parameter where BizTalk
can pick it up.
EquipmentElementLevel
X
Hard coded to Site to
indicate that this
Location Element
defines the Site level
of the hierarchy
Site
Location X
Defines another layer
of more detail on the
location.

Subscription Information
54
EquipmentID X
The Unique SAP ID of
the particular
Warehouse within the
Plant where the
material is stored.
A Variable associated with
the Production Event will
contain this Location
information. The Variable
will be populated with the
appropriate location based
on what was provided in
the
ProductionSchedule. The
Value for this element will
then be retrieved from
Tests.Result for the
appropriate variable on the
given Production Event.
EquipmentElementLev
el
X
Hard coded to
StorageZone to
indicate that this
Location Element
defines the specific
Warehouse
StorageZone
Quantity X
The elements below
this indicate the size of
this Production Event
N/A
QuantityString X
The actual size
produced rounded to 3
decimal places.
Event_Details.Initial_Dime
nsion_X for the Production
Event.
DataType X
Always Float Float
UnitOfMeasure X
Will indicate the unit of
measure the above
size is measured in.
Event_Sub_Type.Dimensio
n_X_EngUnits
MaterialProducedActual
Property
X
MaterialProducedActu
alProperties represent
Variable data
associated with a
Production Event and
flagged to be sent to
SAP.
N/A
ID = QualityStatus X
ID will indicate the
Property Name.
In this
case QualityStatus
The Proper name will be
found in the System Cross
Reference Tables, if not
found, the Variable
Descriptions
(Variables.Var_Desc) will
be used.
Description X
Not Used N/A
Value X
The elements below
this will indicate the
value for the Property.
N/A
ValueString X
This will store the
actual value of the
Variable
Tests.Result for the
Variable
DataType X
This will sto
re the Data
Type of the Variable
Variables.Data_Type_Id
(mapped to the correct
Data_Types.Data_Type_D
esc field)

Global Configuration
55
UnitOfMeasure X
This will store the Unit
of Measure for the
Variable.
Variables.Eng_Units.
Quantity X
Not Used N/A
RequiredByRequestedS
egementResponse
X
Not Used N/A
MaterialProducedActual
Property
X
MaterialProducedActu
alProperties represent
Variable data
associated with a
Production Event and
flagged to be sent to
SAP.
N/A
ID =
ShelfLifeExpirationDate
X
ID will indicate the
Property Name.
In this
case
ShelfLifeExpirationDat
e
The Proper name will be
found in the System Cross
Reference Tables, if not
found, the Variable
Descriptions
(Variables.Var_Desc) will
be used.
Description X
Not Used N/A
Value X
The elements below
this will indicate the
value for the Property.
N/A
ValueString X
This will store the
actual value of the
Variable
Tests.Result for the
Variable
DataType X
This will store the Data
Type of the Variable
Variables.Data_Type_Id
(mapped to the correct
Data_Types.Data_Type_D
esc field)
UnitOfMeasure X
This will store the Unit
of Measure for the
Variable.
Variables.Eng_Units.
Quantity X
Not Used N/A
RequiredByRequestedS
egementResponse
X
Not Used N/A
RequiredByRequestedSeg
ementResponse
X
Not Used N/A

Subscription Information
56
MaterialConsumedActual
X
There will be one
MaterialConsumedAct
ual for each Raw
Material consumed
(Goods Issue) in
producing this Process
Order.
All Raw Material
consumptions are
expected to be recorded in
the Proficy as Production
events connected by
Event_Component records
to the Production Events
produced in the making of
the Process Order.
In some cases, the Raw
Material will be directly
connected to the
Production Event
produced, but in others, it
will be necessary to go
back several levels of
Genealogy
(Event_Components) in
order to find the actual
Raw Material. Further
details on the rules for
determining the actual Raw
Materials to report will be
defined in the Detail
Design document to follow
this document.
MaterialClassID
X
Not Used N/A
MaterialDefinitionID
X
This will indicate the
MaterialDefinitionId
(Product) of the Raw
Material consumed
Depending on if the Event
has an Applied product
assigned or not, this will
come from either
Production_Starts.Prod_ID
or
Events.Applied_Product.
MaterialLotID
X
This will indicate the
Batch or Lot ID of the
material consumed.
Events.Event_Num of the
consumed (Source)
Production Event.
MaterialSubLotID
X
Not Used N/A
Description
X
Not Used N/A
Location
X
The sub-elements
below this where the
material consumed
was stored.
i.e. Which
SAP warehouse
location the material
was stored.
N/A
EquipmentID
X
The Unique SAP ID of
the site where the
material was stored.
This is not used in Proficy
as it is assumed that one
Proficy Server will only
have one SAP Site
included. This will be
hardcoded in BizTalk or in
a parameter where BizTalk
can pick it up.

Global Configuration
57
EquipmentElementLevel
X
Hard coded to Site to
indicate that this
Location Element
defines the Site level
of the hierarchy
Site
Location
X
Defines another layer
of more detail on the
location.
EquipmentID
X
The Unique SAP ID of
the particular
Warehouse within the
Plant where the
material is stored.
A Variable associated with
the consumed Production
Event will contain this
Location information. The
Variable will be populated
with the appropriate
location information. The
Value for this element will
then be retrieved from
Tests.Result for the
appropriate variable on the
consumed Production
Event.
EquipmentElementLev
el
X
Hard coded to
StorageZone to
indicate that this
Location Element
defines the specific
Warehouse
StorageZone
Quantity
X
The elements below
this indicate the
amount consumed
from the Production
Event
N/A
QuantityString
X
The actual size
consumed rounded to
3 decimal places.
Event_Components.Dimen
sion_X
Some additional rules
apply when you have to go
up multiple levels of
Genealogy to find the raw
materials in order to
decide
which measurement of
consumption is the actual
one to use for
reporting. These rules will
be defined in the Detail
Design document to follow
this document.
DataType
X
Always Float Float
UnitOfMeasure
X
Will indicate the unit of
measure the above
size is measured in.
Event_Sub_Type.Dimensio
n_X_EngUnits

Subscription Information
58
MaterialConsumedActua
lProperty
X
MaterialConsumedAct
ualProperties
represent Variable
data associated with
an Event_Component
record and flagged to
be sent to SAP.
N/A
ID =
MaterialReservationID
X
ID will indicate the
Property Name.
In this
case
MaterialReservationID
The Proper name will be
found in the System Cross
Reference Tables, if not
found, the Variable
Descriptions
(Variables.Var_Desc) will
be used.
Description
X
Not Used N/A
Value
X
The elements below
this will indicate the
value for the Property.
N/A
ValueString
X
This will store the
actual value of the
Variable
Tests.Result for the
Variable
DataType
X
This will store the Data
Type of the Variable
Variables.Data_Type_Id
(mapped to the correct
Data_Types.Data_Type_D
esc field)
UnitOfMeasure
X
This will store the Unit
of Measure for the
Variable.
Variables.Eng_Units.
Quantity
X
Not Used N/A
RequiredByRequestedS
egementResponse
X
Not Used N/A
MaterialConsumedActua
lProperty
X
MaterialConsumedAct
ualProperties
represent Variable
data associated with
an Event_Component
record and flagged to
be sent to SAP.
N/A
ID =
MaterialReservationSequence
X
ID will indicate the
Property Name.
In this
case
MaterialReservationSe
quence
The Proper name will be
found in the System Cross
Reference Tables, if not
found, the Variable
Descriptions
(Variables.Var_Desc) will
be used.
Description
X
Not Used N/A
Value
X
The elements below
this will indicate the
value for the Property.
N/A
ValueString
X
This will store the
actual value of the
Variable
Tests.Result for the
Variable

Global Configuration
59
DataType
X
This will store the Data
Type of the Variable
Variables.Data_Type_Id
(mapped to the correct
Data_Types.Data_Type_D
esc field)
UnitOfMeasure
X
This will store the Unit
of Measure for the
Variable.
Variables.Eng_Units.
Quantity
X
Not Used N/A
RequiredByRequestedS
egementResponse
X
Not Used N/A
MaterialConsumedActua
lProperty
X
MaterialConsumedAct
ualProperties
represent Variable
data associated with
an Event_Component
record and flagged to
be sent to SAP.
N/A
ID =
SpecialStockIndicator
X
ID will indicate the
Property Name.
In this
case
SpecialStockIndicator
The Proper name will be
found in the System Cross
Reference Tables, if not
found, the Variable
Descriptions
(Variables.Var_Desc) will
be used.
Description
X
Not Used N/A
Value
X
The elements below
this will indicate the
value for the Property.
N/A
ValueString
X
This will store the
actual value of the
Variable
Tests.Result for the
Variable
DataType
X
Th
is will store the Data
Type of the Variable
Variables.Data_Type_Id
(mapped to the correct
Data_Types.Data_Type_D
esc field)
UnitOfMeasure
X
This will store the Unit
of Measure for the
Variable.
Variables.Eng_Units.
Quantity
X
RequiredByRequestedS
egementResponse
X
MaterialConsumedActua
lProperty
X
MaterialConsumedAct
ualProperties
represent Variable
data associated with
an Event_Component
record and flagged to
be sent to SAP.
N/A
ID = AccountNumber
X
ID will indicate the
Property Name.
In this
case AccountNumber
The Proper name will be
found in the System Cross
Reference Tables, if not
found, the Variable
Descriptions
(Variables.Var_Desc) will
be used.

Subscription Information
60
Description
X
Not Used N/A
Value
X
The elements below
this will indicate the
value for the Property.
N/A
ValueString
X
This will store the
actual value of the
Variable
Tests.Result for the
Variable
DataType
X
This will store the Data
Type of the Variable
Variables.Data_Type_Id
(mapped to the correct
Data_Types.Data_Type_D
esc field)
UnitOfMeasure
X
This will store the Unit
of Measure for the
Variable.
Variables.Eng_Units.
Quantity
X
Not Used N/A
RequiredByRequestedS
egementResponse
X
Not Used N/A
MaterialConsumedActua
lProperty
X
MaterialConsumedAct
ualProperties
represent Variable
data associated with
an Event_Component
record and flagged to
be sent to SAP.
N/A
ID = Heel
X
ID will indicate the
Property Name.
In this
case Heel
The Proper name will be
found in the System Cross
Reference Tables, if not
found, the Variable
Descriptions
(Variables.Var_Desc) will
be used.
Description
X
Not Used N/A
Value
X
The elements below
this will indicate the
value for the Property.
N/A
ValueString
X
This will store the
actual value of the
Variable
Tests.Result for the
Variable
DataType
X
This will store the Data
Type of the Variable
Variables.Data_Type_Id
(mapped to the correct
Data_Types.Data_Type_D
esc field)
UnitOfMeasure
X
This will store the Unit
of Measure for the
Variable.
Variables.Eng_Units.
Quantity
X
Not Used N/A
RequiredByRequestedS
egementResponse
X
Not Used N/A
ConsumableActual
X
Not Used N/A
SegmentResponse
X
Not Used N/A
RequiredByRequestedSege
mentResponse
X
Not Used N/A
SegmentState
X
Not Used N/A
Global Configuration
61
Sample XML file for Production Performance Production Confirmation
- <ProductionPerformance>
<Description>Production Performance Production</Description>
<PublishedDate>2006-03-21T10:54:23.8870000-08:00</PublishedDate>
- <ProductionResponse>
<ID>1</ID>
<ProductionRequestID>0000000000006</ProductionRequestID>
- <SegmentResponse>
<ID>1</ID>
<ProcessSegmentID>MAKE</ProcessSegmentID>
<ActualStartTime>2006-03-21T10:14:23.0000000-08:00</ActualStartTime>
<ActualEndTime>2006-03-21T10:38:09.0000000-08:00</ActualEndTime>
- <MaterialProducedActual>
<MaterialDefinitionID>000000000011080431</MaterialDefinitionID>
<MaterialLotID>9000000000006</MaterialLotID>
- <Location>
<EquipmentID>0000</EquipmentID>
<EquipmentElementLevel>Site</EquipmentElementLevel>
- <Location>
<EquipmentID>LDFM</EquipmentID>
<EquipmentElementLevel>StorageZone</EquipmentElementLevel>
</Location>
</Location>
- <Quantity>
<QuantityString>300</QuantityString>
<DataType>float</DataType>
<UnitOfMeasure>Kg</UnitOfMeasure>
</Quantity>
- <MaterialProducedActualProperty>
<ID>Auto TO Creation with LTA</ID>
<Description>Auto TO Creation with LTA</Description>
- <Value>
<ValueString />
<DataType>string</DataType>
<UnitOfMeasure />
</Value>
</MaterialProducedActualProperty>
</MaterialProducedActual>
</SegmentResponse>
</ProductionResponse>
</ProductionPerformance>
Subscription Information
62
Sample XML file for Production Performance Consumption Confirmation
- <ProductionPerformance>
<Description>Production Performance Consumption</Description>
<PublishedDate>2005-10-20T10:53:41.0370000-07:00</PublishedDate>
- <ProductionResponse>
<ID>1</ID>
<ProductionRequestID>000000000012</ProductionRequestID>
- <SegmentResponse>
<ID>1</ID>
<ProcessSegmentID>MAKE</ProcessSegmentID>
<ActualStartTime>2005-10-19T11:54:54.0000000-07:00</ActualStartTime>
<ActualEndTime>2005-10-19T11:57:54.0000000-07:00</ActualEndTime>
- <MaterialConsumedActual>
<MaterialDefinitionID>000000000011080431</MaterialDefinitionID>
<MaterialLotID>001441</MaterialLotID>
- <Location>
<EquipmentID>0000</EquipmentID>
<EquipmentElementLevel>Site</EquipmentElementLevel>
- <Location>
<EquipmentID>Test Mucilloid</EquipmentID>
<EquipmentElementLevel>StorageZone</EquipmentElementLevel>
</Location>
</Location>
- <Quantity>
<QuantityString>20</QuantityString>
<DataType>float</DataType>
<UnitOfMeasure>kg</UnitOfMeasure>
</Quantity>
</MaterialConsumedActual>
</SegmentResponse>
</ProductionResponse>
</ProductionPerformance>
Production Performance (Order Confirmation)
This section defines the production performance order confirmation schema used by the Enterprise
Connector.
ProductionPerformance
The top-level element. Contains a definition of a report on production performance, including the
location of the performance, the publication data of the performance report, the ID of the associated
production schedule, the duration of the production performance, and the list of production responses
making up the production performance report. May include application specific defined elements.

Global Configuration
63
ProductionResponse
Contains a definition of a production response report, including the identification of an associated
production request, the product produced, the duration of the report, and the segments making up the
production response. May include application specific defined elements. May be a top level element
for defined locations.
SegmentResponse
Contains a definition of a report on a segment. Includes the duration, production data, personnel,
equipment, material produced, material consumed, and consumables used.
MaterialProducedActual
Contains a report on actual material resources produced. May define the quantity of the resource
produced, or may contain a list of property definitions and quantities for each property subset.
Description and Proficy Mapping
Element
Description
Proficy Mapping Definition
ProductionPerformance
ID Not Used N/A
Description Not Used N/A
PublishedDate The current time when the
document was produced.
GETDATE()
ProductionScheduleID Not Used N/A
StartTime Not Used N/A
EndTime Not Used N/A
EquipmentElementLevel Not Used N/A
ProductionResponse There is one Production
Response element for
each Process Order this
Message refers to. There
will never be more than 1
Process Order in a single
message so there will
never be more than 1
ProductionResponse
section.
ID The sequence number for
the
ProductionResponse. Alw
ays 1
1
ProductionRequestID This should be the Unique
SAP Id for the Process
Order.
Production_Plan.Process_Order
ProductProductionRuleI
D
Not Used N/A
StartTime Not Used N/A
EndTime Not Used N/A

Subscription Information
64
SegmentResponse There will be a
SegmentResponse for
each piece of equipment
where the process order
was produced. Typically,
there will only be one
SegmentResponse
section.
ID Sequence Number for the
segment response.
1
ProductSegmentID Not Used N/A
ProcessSegmentID Indicates which type of
transaction this schema
is.
ORDER CONFIRMATION
Description
ActualStartTime Not Used specifically by
SAP. Will provide Actual
Start time of the Process
order.
Production_Plan.Actual_Start_Time
ActualEndTime Posting date in the
document (yyyyMMdd)
Previous Date: if midnight
Production_Plan.Actual_End_Time or
Interval End Time (GETDATE) in the
case of a Periodic update of an open
Process order.
ProductionData
PersonnelActual
EquipmentActual
MaterialProducedAct
ual
There will be one
MaterialProducedActual
for each Batch/Lot/Event
recorded in Proficy against
the Process Order.
MaterialClassID Not Used N/A
MaterialDefinitionID Indicates the SAP
MaterialDefinitionId
(Product) of the material
Produced.
Depending on if the Event has an
Applied product assigned or not, this
will come from either
Production_Starts.Prod_ID or
Events.Applied_Product.
MaterialLotID Lot / Batch Number of the
material produced.
Events.Event_Num
MaterialSubLotID Not Used N/A
Description Not Used N/A
Quantity The elements below this
indicate the size of this
Production Event
N/A
QuantityString The actual size produced
rounded to 3 decimal
places.
Event_Details.Initial_Dimension_X for
the Production Event.
DataType Always Float Float
UnitOfMeasure Will indicate the unit of
measure the above size is
measured in.
Event_Sub_Type.Dimension_X_Eng
Units

Global Configuration
65
Any Additional *Wildcard* data
The Any section of the schema will be
populated with the value of any
Process Order Variable which has
been identified for upload to SAP as
part of the Order Confirmation
message.
ConfirmProcessOrd
er
This will be a variable
associated with the
Process order
The Cross Reference Table, or
Variable Description will be used as
the element name and the
Tests.Result will be used as the value
DeliveryComplete This will be a variable
associated with the
Process order
The Cross Reference Table, or
Variable Description will be used as
the element name and the
Tests.Result will be used as the value
TECOProcessOrder
This will be a variable
associated with the
Process order
The Cross Reference Table, or
Variable Description will be used as
the element name and the
Tests.Result will be used as the value
Sample XML file for Production Performance (Order Confirmation)
- <ProductionPerformance>
<Description>Production Performance Order Confirmation</Description>
<PublishedDate>2005-12-14T10:42:57.0000000-08:00</PublishedDate>
- <ProductionResponse>
<ID>1</ID>
<ProductionRequestID>000000000100</ProductionRequestID>
- <SegmentResponse>
<ID>1</ID>
<ProcessSegmentID>ORDER CONFIRMATION</ProcessSegmentID>
<ActualStartTime>2005-12-14T10:42:57.0000000-08:00</ActualStartTime>
<ActualEndTime>2006-01-06T10:13:19.0000000-08:00</ActualEndTime>
- <MaterialProducedActual>
<MaterialDefinitionID>000000000011080431</MaterialDefinitionID>
<MaterialLotID>1012</MaterialLotID>
<Description>000000000011080431</Description>
- <Quantity>
<QuantityString>100</QuantityString>
<DataType>float</DataType>
<UnitOfMeasure>kg</UnitOfMeasure>
</Quantity>
</MaterialProducedActual>
- <MaterialProducedActual>
<MaterialDefinitionID>000000000011080431</MaterialDefinitionID>
<MaterialLotID>1013</MaterialLotID>
<Description>000000000011080431</Description>

Subscription Information
66
- <Quantity>
<QuantityString>200</QuantityString>
<DataType>float</DataType>
<UnitOfMeasure>kg</UnitOfMeasure>
</Quantity>
</MaterialProducedActual>
</SegmentResponse>
- <Any>
<ConfirmProcessOrder>1</ConfirmProcessOrder>
<DeliveryComplete>0</DeliveryComplete>
<TECOProcessOrder>0</TECOProcessOrder>
</Any>
</ProductionResponse>
</ProductionPerformance>
Test Performance (Quality Data)
This section defines the Test performance schema that is used by the Enterprise Connector.
TestPerformance
Contains a definition of a report on Test Performance, including the publication data, the ID of the test
performance report and the quality
TestResponse
Contains a definition of the report including the list of responses or changed process orders since the
last upload. It can be sent many times during the lifespan of a Process Order.
TestSegmentResponse
Contains the duration of the test as well as the identification of the equipment, there can be many
testsegmentresponses per batch.
TestData
Contains the Event Comment designating a "FAIL" Disposition, "Warning" Comments on
specified/configured, Test Variable designating a "Pass" Disposition and the test result
TestResult
Contains the result of each test as well as the identification of each variable test, it can be many test
results.
Description and Proficy Mapping
Element
Description
Proficy Mapping Definition
TestPerform
ance
ID Unique Id of
Test
Performance
Report
N/A
Description Not Used N/A
Location Not Used

Global Configuration
67
PublishedDate
The current time
when the
document was
produced.
GETDATE()
TestScheduleID
ID of Associated
Test Schedule
N/A
StartTime Not Used N/A
EndTime Not Used N/A
EquipmentElementLevel Not Used N/A
TestResponse List of
Responses (List
of
changed Proce
ss Orders since
last upload ->
for Phase 1 List
of Completed
Process orders
as designated
by
Production_Plan
_Status
= (UDP
for
PO definitely
complete(Confir
mtoSAP etc)
since last
upload.
There can be
many
TestResponses
ID The sequence
number for the
TestResponse.
Unique
Response ID;
Scope within
this
TestPerformanc
e so integer
starting with 1
1
TestRequestID This should be
the Unique SAP
Id for the SAP
Inspection Lot
ID
N/A
ProductionRequestID Unique Order
ID; Corresponds
to
ProductionRequ
estID in
ProductionSche
dule
Production_Plan.Process_Order
TestDefinitionID Not Used N/A
StartTime Not Used N/A

Subscription Information
68
EndTime Not Used N/A
TestSegmentResponse There will be a
SegmentRespo
nse for each
piece of
equipment
(Path) where the
process order
was
produced. Typic
ally, there will
only be one
SegmentRespo
nse section.
However a
generic solution
would provide
for the
possibility of
many Segment
Responses
There can be
many
TestSegmentRe
sponses per
Batch
ID Sequence
Number for the
segment
response.
1
TestSegmentID ID of Business
View of Testing
IE -> END OF
BATCH
Table_Fields will contain a record with
Table_Field_Desc = TestSegmentID
Value stored in Table_Field_Values = will
be -> as per this example END OF
BATCH &against subscr record
Description
ActualStartTime Actual Start
Time of this
Process Order
Events.Start_Time
ActualEndTime
Actual End Time
or Interval
end
Time of this
Process order
Events.Timestamp
TestData Section
Identifier
ID Not Used N/A
Code Not Used N/A
Name LOT RELEASE Table_Fields will contain a record with
Table_Field_Desc = TestDataName
Value stored in Table_Field_Values = will
be -> as per this example LOT RELEASE
&subscription record
Description Not Used N/A
StartTime Not used N/A

Global Configuration
69
EndTime
Date and time of
this test event
The First Result_On timestamp for the
variables that are being reported on in this
Production Event segment response.
PerformedBy Not used N/A
ReviewedBy Not used N/A
Type Not used N/A
Comment Not used N/A
Disposition Not used N/A
Status Not used N/A
TestResult There can be
many
TestResults
ID QM_YIELD Test Result Variables that are to be
upl
oaded to SAP for this Production Event
will be signified by having SAPTest=xxxxx
In the extended_info of the variables. IE
SAPTest=QM_YIELD
Extended_Info may be used for more than
one purpose on variables. When parsing
the extended_info field sections will be
separated by a semi- colon
SAPTest=QM_YIELD;Otherpurpose= ;Ot
herPurpose2=
Description Not used N/A
DataEntryTime Date and Time
the entry was
made
Tests.Entry_On
ExpirationTime Not used N/A
EnteredBy Not used N/A
ReviewedBy Not used N/A
Result
ValueString 50.2 Tests.Result (Production Event Variable).
Send original value -> no formatting or
rounding.
DataType Float If numeric value always send float.
UnitOfMeasure Not used N/A
Comment Good Variable.Comment_Id mapped to
Comments.Comment_Text
Disposition A ---Pass => A;
Fail => R;
Otherwise null.
N/A
Comment Not used N/A
Disposition Not used N/A
Status Not used N/A
RequiredByRequestedSe
gmentResponse
Not used N/A

Subscription Information
70
TestResult Quality
Comment
Example
If there is no
result but
Comment is not
null, then map
only Fields
noted under this
TestResult
section to a
ZXCOMM
record.
There will only
be one
COMMENT Test
Result per
TestData (LOT
RELEASE)
ID COMMENT N/A
Description Not Used N/A
DataEntryTime 2001-12-
17T09:30:47-
05:00
Events.Entered_On
ExpirationTime Not Used N/A
EnteredBy Not Used N/A
ReviewedBy Not Used N/A
Result
ValueString N/A
DataType N/A
UnitOfMeasure Not used N/A
Comment Bird in Batch Events.Comment_Id mapped to
Comments.Comment_Text
Disposition A ---Pass => A;
Fail => R;
Otherwise null.
Proficy will
always return
full string
of FAIL as the
Disposition for a
Event
Comment.
FAIL
Status Not used N/A
RequiredByRequestedSe
gmentResponse
Not used N/A
MaterialTestedActual
MaterialClassID N/A
MaterialDefinitionID

Global Configuration
71
MaterialLotID MaterialLotID is
SAP Batch ID:
Lot / Batch
Number
Normally:
Ignored.
If there is more
than one Batch
in an Order, this
will be used to
determine for
which Batch the
Inspection Lot is
recorded.
Will only have a value for production
events or batch operations.
Events.Event_Num
If there is only one Batch per Process
order then return nothing.
If there is not a batch number then return
nothing.
MaterialSubLotID Not used N/A
MaterialSampleID Not used N/A
Description
Not used N/A
Location
Not used N/A
Quantity
Not used N/A
MaterialTestedActualPrope
rty
Not used N/A
RequiredByRequestedSeg
mentResponse
Not used N/A
PersonnelActual Not used N/A
EquipmentActual
Not used N/A
MaterialConsumedActual Not used N/A
ConsumableActual Not used N/A
TestSegmentResponse Not used N/A
RequiredByRequestedSege
mentResponse
Not used N/A
SegmentState Not used N/A
Any
Not used N/A
Sample XML file for Test Performance
<?xml version="1.0" encoding="utf-8" ?>
- <TestPerformance>
<Description>Test Performance</Description>
<PublishedDate>2005-10-20T10:53:53.3470000-07:00</PublishedDate>
- <TestResponse>
<ID>1</ID>
<ProductionRequestID>000000000003</ProductionRequestID>
- <TestSegmentResponse>
<ID>1</ID>
<TestSegmentID>End Of Batch</TestSegmentID>
<ActualStartTime>1900-01-01T00:00:00.0000000-08:00</ActualStartTime>

Engineering Units
72
<ActualEndTime>2005-10-18T16:12:04.0000000-07:00</ActualEndTime>
- <TestData>
<ID>1</ID>
<Name>Lot Release</Name>
<StartTime>1900-01-01T00:00:00.0000000-08:00</StartTime>
<EndTime>2005-10-18T16:12:04.0000000-07:00</EndTime>
- <TestResult>
<ID>QUA001</ID>
<DataEntryTime>2005-10-18T16:12:12.9230000-07:00</DataEntryTime>
- <Result>
<ValueString>11</ValueString>
<DataType>float</DataType>
</Result>
</TestResult>
- <TestResult>
<ID>QUA002</ID>
<DataEntryTime>2005-10-18T16:12:12.9400000-07:00</DataEntryTime>
- <Result>
<ValueString>12</ValueString>
<DataType>float</DataType>
</Result>
</TestResult>
</TestData>
- <MaterialTestedActual>
<MaterialLotID>001394</MaterialLotID>
</MaterialTestedActual>
</TestSegmentResponse>
</TestResponse>
</TestPerformance>
Engineering Units
At the global level in Plant Applications, engineering units (units of measurement used in bills of
materials, subscriptions, and event subtypes) can be added. Excel import and export is supported.
Using Excel, unit conversions can also be created, imported, and exported.
You must create one engineering unit for the unit of measure used on the production unit and one
engineering unit for the unit of measure used by the external system, such as an ERP.
Engineering units must be configured prior to administering bills of materials,
subscriptions, or event subtypes.
Creating Engineering Units
Engineering units must be configured prior to administering bills of materials or subscriptions.

Global Configuration
73
To add an engineering unit:
1. In the Server Manager tree, expand Global Configuration and the Engineering Units
folder.
2. Right-click the Units folder and click Add New Engineering Unit. The Engineering Units
dialog box appears.
3. Enter a description and code for the new engineering unit, and then click the Save button.
Click the Close button to close the Engineering Units dialog box.
If you want to create configurations in an Excel worksheet, right click the Engineering
Units folder and click Export Configurations. If no units currently exist, Plant
Applications will create a blank worksheet in Excel with the appropriate columns inserted;
you can later import your configurations into Plant Applications.
Engineering Unit Conversions
Engineering unit conversions are used to convert engineering units from Plant Applications to another
unit of measure used by another system. For example, if you use pounds in Plant Applications and
kilograms in an ERP system, you can create conversions to automatically convert the pounds to
kilograms. Engineering unit conversions are created in an Excel worksheet and then imported into
Plant Applications. Start by exporting a blank worksheet (containing the appropriate columns) to
Excel.
To create new engineering unit conversions:
1. In the Server Manager tree, expand Global Configuration and then the Engineering
Units folder.
2. Right-click the Engineering Unit Conversions folder and then click Export Conversions.
3. In the Configuration Export dialog box, ensure that Engineering unit conversions is
selected, and then click OK. Excel opens with a worksheet containing any existing
conversions. If no conversions currently exist, a blank worksheet is created in Excel with the
following columns:
Column Name
Description
Return Messages This column will be populated with status messages after you
have imported your unit conversions into Plant Applications.
Selected Type an X to import this row into Plant Applications. If you don't
want a particular row imported, leave it blank.
Description A user-defined description of this unit conversion.
Engineering Unit Code
(From)
The code of the engineering unit you want to convert from. (The x
in y = mx + b)
Engineering Unit Code
(To)
The code of the engineering unit you want to convert to. (The y in
y = mx + b)
Slope The slope of your conversion equation.
(The
m
in y = mx
+ b)
Intercept The intercept of the conversion equation.
(The
b
in y = mx + b)
Custom SQL Custom SQL code used to convert the engineering units.
4. Enter your engineering units and conversion factors/stored procedures in the worksheet, save
the worksheet, and leave it open.
5. Return to the Plant Applications Administrator, right-click Engineering Unit Conversions and
click Import Conversions.

Plant Applications Site Parameters
74
Prior to importing, the engineering units and codes for which you have entered
conversions must already exist in the Proficy database. See Engineering Units for more
information.
Exporting Engineering Units
To export engineering units:
1. In the Server Manager tree, expand Global Configuration and then the Engineering
Units folder.
2. Right click Units and click Export Engineering Units. Excel opens with the exported
configurations appearing in a worksheet.
3. Save the Excel file.
Importing Engineering Units
To import engineering units:
1. Open the Excel file containing the configurations you wish to import, and ensure that each line
item you wish to import contains an 'x' in the Selected column.
2. Open or return to the Plant Applications Administrator.
3. In the Server Manager tree, expand Global Configuration and then the Engineering Units
folder.
4. Right-click the Units folder and then choose Import Configuration.
Plant Applications Site Parameters
Site parameters are used to set global default values for items such as passwords, number of log in
attempts, directory locations etc. specific to a site. It is important for a site to understand what site
parameters are available, how to configure them and to set default values according to the
requirements for the site.
NOTE: When you modify some site parameters after installing Plant Applications Web
Client, a message appears asking to restart the web client services.
You must manually restart these services in Tomcat Server.
activities-app-service
activities-service
mymachine-service-impl
downtime-app-service
mes-service-impl
FaultInfo
productionmetrics-app-service
Client Parameters
Audit Trail Purge Days

Global Configuration
75
This site parameter specifies how many days of information will be saved for the audit trail.
To change this site parameter:
1. Log in to the Plant Applications Administrator.
You must have Administrator access to the Administrator security group to
change site parameters.
2. Expand Global Configuration.
3. Select Administer Site Parameters and select Edit Site Parameters. The Site Parameters
dialog box appears.
4. Double-click Audit Trail Purge Days. The Edit Parameter dialog box appears.
5. In the Value box, type the number of days of audit information you want to keep.
6. Click the OK button to close the dialog box.
7. Click the Close button to close the Site Parameters dialog box.
8. Refresh the server.
DaysBackOpenDowntimeEventCanBeAdded
This site parameter works in conjunction with the OpenDowntimeEventCanBeAddedDaysBack site
parameter. If the OpenDowntimeEventCanBeAddedDaysBack site parameter is set to True, the
DaysBackOpenDowntimeEventCanBeAdded site parameter determines how far back (in number of
days) you can add an open downtime event. By default, the value is set to 0 (zero), which means that
you can add Downtime events as far back as you want.
Keep in mind that when you add an earlier Downtime event, ALL subsequent events are automatically
merged.
To change this site parameter:
1. Log in to the Plant Applications Administrator.
You must have Administrator access to the Administrator security group to change
site parameters.
2. Open Global Configuration.
3. Right-click on Administer Site Parameters and select Edit Site Parameters from the pop-up
menu.
4. In the Site Parameters dialog box, double-click on
DaysBackOpenDowntimeEventCanBeAdded.
5. In the Edit Parameter dialog box, enter the number of days back an open Downtime event
can be added.
The number of days back starts from the current time.
6. Click the OK button to save your changes and close the dialog box.
7. Click the Close button to close the Site Parameter dialog box.
8. Refresh the server.
DefaultDomainName
This site parameter is used to set the domain name for Proficy Server. If a default domain name is
specified, a user not belonging to the domain must log on with the domain name and user name in
this format: <domain name>\user name.

Client Parameters
76
To change this site parameter:
1. Log in to the Plant Applications Administrator.
You must have Administrator access to the Administrator security group to
change site parameters.
2. Expand Global Configuration.
3. Right-click Administer Site Parameters, and select Edit Site Parameters. The Site Parameters
dialog box appears.
4. Double-click DefaultDomainName. The Edit Parameter dialog box appears.
5. In the Value box, type the Default Domain Name.
6. Click the OK button to close the dialog box.
7. Click the Close button to close the Site Parameters dialog box.
8. Refresh the server.
ESignatureInactivityPeriod
The value entered for this site parameter is the number of minutes a user has after authentication to
make additional changes without having to authenticate again. For example, let's say the site
parameter is set to 2. After you make a change and authenticate that change, you have two minutes
to make additional changes without having to authenticate the changes. Additionally, any change you
make within the two minutes will re-set the clock to give you another two minutes.
The site parameter applies only to user-level authorization. Approver-level authorization
will still be required regardless of how this site parameter is set.
This parameter can be overridden if the ESignatureRequireAuthentication site
parameter is set to True.
To set the ESignatureInactivityPeriod site parameter:
1. Log on to the Plant Applications Administrator program.
2. Open Global Configuration.
3. Right-click on Administer Site Parameters and select Edit Site Parameters.
4. In the Site Parameters dialog box, double-click on ESignatureInactivityPeriod.
5. In the Edit Parameter dialog box, enter the number of minutes in the Value field.
6. Click the OK button to save your changes and close the Edit Parameter dialog box.
7. Click the Close button to close the Site Parameters dialog box.
8. Refresh the server.
ESignatureRequireAuthentication
If set to True, this site parameter overrides the ESignatureInactivityPeriod site parameter. In other
words, every change will require user verification regardless of the value set in the
ESignatureInactivityPeriod site parameter. However, if the ESignatureRequireAuthentication is
set to True, then you will need to supply only your password for each user-level verification. Your user
name will already be filled in for you. However, anything that requires approver-level verification will
still require a name and password.
To set the ESignatureRequireAuthentication site parameter:
1. Log on to the Plant Applications Administrator program.

Global Configuration
77
2. Open Global Configuration.
3. Right-click on Administer Site Parameters and select Edit Site Parameters.
4. In the Site Parameters dialog box, double-click on ESignatureRequireAuthentication.
5. In the Edit Parameter dialog box, make a selection from the drop-down list.
6. Click the OK button to save your changes and close the Edit Parameter dialog box.
7. Click the Close button to close the Site Parameters dialog box.
8. Refresh the server.
GridComboBoxMaxDrop
This site parameter specifies the maximum number of entries that will be displayed in drop-down lists
(pick lists) in Downtime, Waste and Autolog displays. If drop-down lists are not displaying correctly, try
increasing the value of this site parameter.
To change this site parameter:
1. Log in to the Plant Applications Administrator.
You must have Administrator access to the Administrator security group to
change site parameters.
2. Expand Global Configuration.
3. Right-click Administer Site Parameters and select Edit Site Parameters. The Site Parameters
dialog box appears.
4. Double-click GridComboBoxMaxDrop. The Edit Parameter dialog box appears.
5. In the Value box, type the maximum number of entries to display in drop-down lists.
6. Click the OK button to close the dialog box.
7. Click the Close button to close the Site Parameters dialog box.
8. Refresh the server.
LargeIcons
This site parameter specifies the size of icons in the Plant Applications Client toolbar. Valid values
are:
False = Normal
True = Larger
To change this site parameter:
1. Log in to the Plant Applications Administrator.
You must have Administrator access to the Administrator security group to
change site parameters.
2. Expand Global Configuration.
3. Right-click Administer Site Parameters and select Edit Site Parameters. The Site Parameters
dialog box appears.
4. Double-click LargeIcons. The Edit Parameter dialog box appears.
5. Select True or False from the Value list.
6. Click the OK button to close the dialog box.

Client Parameters
78
7. Click the Close button to close the Site Parameters dialog box.
8. Refresh the server.
ManageSecurityRolesByNTGroup
If you are using role-based security and have assigned a Windows NT Group to a role and you have a
role-based site user who is a member of the NT Group, this site parameter determines whether
security is based on the NT Group or the individual role-based site user when the site user log in.
If the parameter is set to True, then when the role-based site user logs in, the site user’s security is
based on the security of the NT Group to which the site user belongs.
If the parameter is set to False, the security is based on the site user’s security levels, not the security
of the NT Group to which the site user belongs.
Example:
Site user, Jakob, is role-based and a member of Windows NT Group, MES Domain
Application Engineers.
You have two Security Roles: Operator role and SuperUser role.
You make Jakob a member of the Operator role.
You make the Windows NT Group, MES Domain Application Engineers, a member of the
SuperUser role.
You have a Security Group: Administrator.
You assign the Security Role, Operator, to the Administrator Security Group with Admin
access.
You assign the Security Role, SuperUser, to the Downtime Display Security Group with
Read/Write access.
It would look similar to this:
Administrator Security Group
SuperUser Role (Read/Write access)
MES Domain Application Engineers
Operator Role (Admin Access)
Jakob
If the site parameter, ManageSecurityRolesByNTGroup is set to True, when site user Jakob logs
in, he will have Read/Write access because he is a member of the MES Domain Application
Engineers group.
If the site parameter, ManageSecurityRolesByNTGroup is set to False, when site user Jakob logs
in, he will have Admin access.
OpenDowntimeEventCanBeAddedDaysBack
This site parameter determines whether you can add past Downtime events. By default, this site
parameter is set to True, which means that, with proper access, a user could add an earlier Downtime
event. We suggest you change this to False to prevent to prevent the addition of Downtime events
prior to the current event.
If an earlier Downtime event is added, then ALL Downtime events subsequent to the
added event are deleted.

Global Configuration
79
If you change the value to False, when you try to insert a row in the Downtime display in the Plant
Applications Client program, it will appear that your row addition was successful. However, if you
close and re-open the display, the changes will not have taken affect.
If you choose to keep this parameter set to True, then you should consider changing the value in the
DaysBackOpenDowntimeEventCanBeAdded site parameter.
To change this site parameter:
1. Log in to the Plant Applications Administrator.
You must have Administrator access to the Administrator security group to change
site parameters.
2. Open Global Configuration.
3. Right-click on Administer Site Parameters and select Edit Site Parameters from the pop-up
menu.
4. In the Site Parameters dialog box, scroll down and double-click on
OpenDowntimeEventCanBeAddedDaysBack.
5. In the Edit Parameter dialog box, click the Value drop-down arrow and select True or False.
6. Click the OK button to save your changes and close the dialog box.
7. Click the Close button to close the Site Parameters dialog box.
8. Refresh the server.
Scanner Date Time Format
This site parameter is used to specify the date format of your barcodes. Use 3 if your barcode dates
are in the format YYMMDDHHMMSS. Use 2 if your barcode dates are in a serial number format (for
example, 37648.460416667). Use 1 if your barcode dates are in a standard date format (for example,
1/27/03).
To change this site parameter:
1. Log in to the Plant Applications Administrator.
You must have Administrator access to the Administrator security group to
change site parameters.
2. Open Global Configuration.
3. Right-click on Administer Site Parameters and select Edit Site Parameters from the pop-up
menu.
4. In the Site Parameters dialog box, under Client, double-click on Scanner Date Time Format.
5. In the Edit Parameter dialog box, click in Value box and type one of the following:
3 = Barcode dates are in the format YYMMDDHHMMSS (*%S030127110300*)
2 = Barcode dates are in serial number format (*%S37648.460416667*)
1 = Barcode dates are in a standard date format (*%S1/27/03,11/Z03*)
6. Click the OK button to close the dialog box.
7. Click the Close button to close the Site Parameters dialog box.
8. Refresh the server.
Scanning Prefix Site Parameter

Client Parameters
80
This site parameter specifies the special character used (typically) to identify input characters as
coming from a barcode reader. The default value is a tilde, ~.
It is strongly recommended that this value not be changed without good reason. This site parameter is
used by Autolog and the Genealogy displays.
In Autolog, a tilde in front of a timestamp will place focus on that specific time. A tilde in front of a
number, identifies that number as a variable ID and will place focus on that variable.
In Genealogy, a tilde in front of a two-digit number identifies the first number as the input, based on
the order of the input in the Raw Materials tab in the Production Unit Properties dialog box, and the
second number as the position, running (1) or staged (2). A tilde in front of "Complete" will complete
the production event that has focus. A tilde in front of "Unload" will unload the production event that
has focus.
Session Timeout Duration Site Parameter
This site parameter is used to set the automatic session timeout for Plant Applications Client
sessions. When there is no mouse or keyboard input for the duration of the session timeout, the user
is logged out of the Plant Applications session and must sign in. Upon authentication, a user has
access to the Client displays that were previously open given they have viewing permission.
To change this site parameter:
1. Log in to the Plant Applications Administrator.
You must have Administrator access to the Administrator security group to change
site parameters.
2. Expand Global Configuration.
3. Right-click Administer Site Parameters, and select Edit Site Parameters. The Site Parameters
dialog box appears.
4. Double-click SessionTimoutDuration in the Client site parameter section. The Edit Parameter
dialog box appears.
5. In general, you will ignore the Host field as it is typically used for a server and not a Clint
configuration. It is enabled through a parameters table.
6. In the Value box, type a number between 0 and 1440 (number of minutes in 24 hours), which is the
number of minutes before the Client is logged off when there is no mouse or keyboard activity. A
value of 0 disables the timeout. A value from 1 to 1440 enables the timeout.
7. Click the OK button to close the dialog box.
8. Click the Close button to close the Site Parameters dialog box.
9. Refresh the server.
ShowSystemUsersInAdmin Site Parameter
When the ShowSystemUsersInAdmin site parameter is enabled (True) the system users are shown
under Security Management in the System Users folder. Each user has a set of parameters that are
applicable to the service or function they represent.
To change this site parameter:
1. Log in to the Plant Applications Administrator.

Global Configuration
81
You must have Administrator access to the Administrator security group to
change site parameters.
2. Expand Global Configuration.
3. Right-click Administer Site Parameters and select Edit Site Parameters. The Site Parameters
dialog box appears.
4. Double-click ShowSystemUsersInAdmin. The Edit Parameter dialog box appears.
5. Select True or False from the Value list.
6. Click the OK button to close the dialog box.
7. Click the Close button to close the Site Parameters dialog box.
8. Refresh the server.
TranslatePrompts
This site parameter allows translation to be turned on (True) or off (False).
To change this site parameter:
1. Log in to the Plant Applications Administrator.
You must have Administrator access to the Administrator security group to
change site parameters.
2. Expand Global Configuration.
3. Right-click Administer Site Parameters and select Edit Site Parameters. The Site Parameters
dialog box appears.
4. Double-click TranslatePrompts. The Edit Parameter dialog box appears.
5. Select True or False from the Value list.
6. Click the OK button to close the dialog box.
7. Click the Close button to close the Site Parameters dialog box.
8. Refresh the server.
Use Event Number for Scanning
This site parameter determines if a Genealogy display will expect an event number or event ID when
scanning a barcode.
If set to False, event IDs are expected.
If set to True, event numbers are expected.
To change this site parameter:
1. Log in to the Plant Applications Administrator.
You must have Administrator access to the Administrator security group to
change site parameters.
2. Expand Global Configuration.
3. Right-click Administer Site Parameters and select Edit Site Parameters. The Site Parameters
dialog box appears.
4. Double-click Use Event Number for Scanning. The Edit Parameter dialog box appears.
5. Select True or False from the Value list.

Dashboard Parameters
82
6. Click the OK button to close the dialog box.
7. Click the Close button to close the Site Parameters dialog box.
8. Refresh the server.
WindowsAuthentication
This site parameter works in conjunction with both Windows Info and Mixed Mode when creating or
editing site users.
You must have Administrator access in the Administrator security group to edit site
parameters.
To set the WindowsAuthentication site parameter:
1. In the Plant Applications Administrator, expand the Server Manager tree and click to expand
Global Configuration.
2. Right-click Site Parameters and click Edit Site Parameters. The Site Parameters dialog
box appears.
3. Double-click WindowsAuthentication. The Edit Parameters dialog box appears.
4. Make a selection from the Value list.
If this site parameter is set to True and you imported the user's Windows information and you
selected the Mixed Mode option, then the user can log in with either their Plant Applications
name and password or their Windows name and password. When the user starts either the
Administrator or Client program, Plant Applications will use their Windows name and
password to automatically log them in.
If this site parameter is set to True and you imported the user's Windows information and you
did not select the Mixed Mode option, then the user must log in using their Windows name
and password. When the user starts either the Administrator or Client program, Plant
Applications will use their Windows name and password to automatically log them in.
If this site parameter is set to False, then the user must log in with their Plant Applications
name and password.
5. Click the OK button to close the Edit Parameters dialog box.
6. Click the Close button to close the Site Parameters dialog box.
Dashboard Parameters
Ad Hoc Report Life (Days)
Use the Ad Hoc Report Life (Days) site parameter to specify the number of days an ad hoc report is
kept in the database. The date is based off the date the report was last accessed.
To edit the Ad Hoc Report Life (Days) site parameter:
1. Log in to the Plant Applications Administrator.
You must have Administrator access to the Administrator security group to
change site parameters.
2. Open Global Configuration.
3. Right-click on the Administer Site Parameters folder and click Edit Site Parameter. The Site
Parameters dialog box appears.

Global Configuration
83
4. Double-click on Ad Hoc Report Life (Days). The Edit Parameter dialog box appears.
5. Type the number of days in the Value box. For example, if you type 4 in the Value box, ad
hoc reports will be kept in the database up to four days from the date they were last
accessed.
6. Click the OK button to save your changes and close the dialog box.
7. Click the Close button to close the Site Parameters dialog box.
8. Refresh the server.
Dashboard Engine Server
The Dashboard Engine Server parameter should contain the name of the server where the Plant
Applications dashboard services are installed.
To edit the Dashboard Engine Server site parameter:
1. Log in to the Plant Applications Administrator.
You must have Administrator access to the Administrator security group to
change site parameters.
2. Open Global Configuration.
3. Right-click on the Administer Site Parameters folder and click Edit Site Parameters. The Site
Parameters dialog box appears.
4. Double-click on Dashboard Engine Server. The Edit Parameter dialog box appears.
5. Type the server name in the Value box.
6. Click the OK button to save your changes and close the dialog box.
7. Click the Close button to close the Site Parameters dialog box.
8. Refresh the server.
Gallery Physical Path
The Gallery Physical Path parameter contains the physical path of the Web Part gallery.
To edit the Gallery Physical Path site parameter:
1. Log in to the Plant Applications Administrator.
You must have Administrator access to the Administrator security group to
change site parameters.
1. Open Global Configuration.
2. Right-click on the Administer Site Parameters folder and click Edit Site Parameters. The
Site Parameters dialog box appears.
3. Double-click on Gallery Physical Path. The Edit Parameter dialog box appears.
4. Enter the physical path to where the Web Parts are located.
5. Click the OK button to save your changes and close the dialog box.
6. Click the Close button to close the Site Parameters dialog box.
7. Refresh the server.
Gallery Virtual Path

Dashboard Parameters
84
This site parameter determines the virtual directory name for the Web Part Gallery for customers who
are using DDRK to drive their dashboard.
To change this site parameter:
1. Log in to the Plant Applications Administrator.
You must have Administrator access to the Administrator security group to change
site parameters.
2. Open Global Configuration.
3. Right-click on Administer Site Parameters and select Edit Site Parameters from the pop-up
menu.
4. In the Site Parameters dialog box, under Dashboard double-click on Gallery Virtual Path.
5. In the Edit Parameter dialog box, click in the Value field and enter the path that is the virtual
directory name for your Web Part Gallery.
6. Click the OK button to save your changes and close the dialog box.
7. Click the Close button to close the Site Parameters dialog box.
8. Refresh the server.
Microsoft Dashboard Catalog
This is the name of the catalog where dashboard information is stored for customers who are using
DDRK for their dashboard.
To change this site parameter:
1. Log in to the Plant Applications Administrator.
You must have Administrator access to the Administrator security group to change
site parameters.
2. Open Global Configuration.
3. Right-click on Administer Site Parameters and select Edit Site Parameters from the pop-up
menu.
4. In the Site Parameters dialog box, under Dashboard double-click on Microsoft Dashboard
Catalog.
5. In the Edit Parameter dialog box, click in the Value field and type the name of the catalog.
6. Click the OK button to save your changes and close the dialog box.
7. Click the Close button to close the Site Parameters dialog box.
8. Refresh the server.
Microsoft Dashboard Server
This is the name of the server where DDRK is running for customers who are using DDRK to drive
their dashboard.
To change this site parameter:
1. Log in to the Plant Applications Administrator.
You must have Administrator access to the Administrator security group to change
site parameters.
2. Open Global Configuration.

Global Configuration
85
3. Right-click on Administer Site Parameters and select Edit Site Parameters from the pop-up
menu.
4. In the Site Parameters dialog box, under Dashboard double-click on Microsoft Dashboard
Server.
5. In the Edit Parameter dialog box, click in the Value field and type the name of the server
where DDRK is located.
6. Click the OK button to save your changes and close the dialog box.
7. Click the Close button to close the Site Parameters dialog box.
8. Refresh the server.
Proficy Dashboard Server
The Proficy Dashboard Server parameter contains the name of the server where the Proficy
dashboard is installed.
To edit the Proficy Dashboard Server site parameter:
1. Log in to the Plant Applications Administrator.
You must have Administrator access to the Administrator security group to
change site parameters.
2. Open Global Configuration.
3. Right-click on the Administer Site Parameters folder and click Edit Site Parameters. The Site
Parameters dialog box appears.
4. Double-click on Proficy Dashboard Server. The Edit Parameter dialog box appears.
5. Type the name of the server where the Proficy dashboard is installed.
6. Click the OK button to save your changes and close the dialog box.
7. Click the Close button to close the Site Parameters dialog box.
8. Refresh the server.
Proficy Dashboard Virtual Path Site
The Proficy Dashboard Virtual Path site parameter contains the virtual path of the Proficy dashboard.
To edit the Proficy Dashboard Virtual Path site parameter:
1. Log in to the Plant Applications Administrator.
You must have Administrator access to the Administrator security group to
change site parameters.
2. Open Global Configuration.
3. Right-click on the Administer Site Parameters folder and click Edit Site Parameters. The Site
Parameters dialog box appears.
4. Double-click on Proficy Dashboard Virtual Path. The Edit Parameter dialog box appears.
5. Enter the virtual path to where the Proficy dashboard is located.
6. Click the OK button to save your changes and close the dialog box.
7. Click the Close button to close the Site Parameters dialog box.
8. Refresh the server.

Dashboard Parameters
86
Session Manager Stat Life (Days)
This is the number of days reporting statistics are saved in the database.
To change this site parameter:
1. Log in to the Plant Applications Administrator.
You must have Administrator access to the Administrator security group to change
site parameters.
2. Open Global Configuration.
3. Right-click on Administer Site Parameters and select Edit Site Parameters. The Site
Parameters dialog box appears.
4. Under Dashboard double-click on Session Manager Stat Life (Days). The Edit Parameter
dialog box appears.
5. Click in the Value field and type the number of days to save reporting statistics.
6. Click the OK button to save your changes and close the dialog box.
7. Click the Close button to close the Site Parameters dialog box.
8. Refresh the server.
Show Additional Web Part Configuration Tabs
Use the Show Additional Web Part Configuration Tabs parameter to control the display of the
Manage Parameter Types tab and the Manage Dialogs tab in the Web Parts Administration dialog
box.
CAUTION: You must be very careful when using this feature. Only someone with
advanced knowledge of Plant Applications, server technology, and web technology should
use this feature.
To edit the Show Additional Web Part Configuration Tabs site parameter:
1. Log in to Plant Applications Administrator.
You must have Administrator access to the Administrator security group to
change site parameters.
1. Expand Global Configuration.
2. Right-click on Administer Site Parameters folder and select Edit Site Parameters. The
Site Parameters dialog box appears.
3. Double-click Show Additional Web Part Configuration Tabs. The Edit Parameter dialog
box appears.
4. Select True to display the tabs or select False to hide the tabs.
5. Click the OK button to save your changes and close the dialog box.
6. Click the Close button to close the Site Parameters dialog box.
7. Refresh the server.
Web App Physical Path
This is the physical location of the Proficy Dashboard Web application.
To change this site parameter:

Global Configuration
87
1. Log in to the Plant Applications Administrator.
You must have Administrator access to the Administrator security group to change
site parameters.
2. Open Global Configuration.
3. Right-click on Administer Site Parameters and select Edit Site Parameters from the pop-up
menu.
4. In the Site Parameters dialog box, under Dashboard double-click on Web App Physical Path.
5. In the Edit Parameter dialog box, click in the Value field and type the physical path of the
server where the Proficy Dashboard Web applications is located.
6. Click the OK button to save your changes and close the dialog box.
7. Click the Close button to close the Site Parameters dialog box.
8. Refresh the server.
Excel Add-In Parameters
EventNumIsNumber
The way you search for product attributes will be affected by how the site parameter,
EventNumIsNumber, has been set in the Plant Applications Administrator (Plant Applications
Administrator > Global Settings > Site Parameters > Edit Site Parameters). If EventNumIsNumber has
a value of 1, it tells the Plant Applications Add-in that the Primary Event Numbers are all numeric.
Since Event IDs are also numeric, when you search for production event attributes you will need to
tell Plant Applications whether you are using Primary Event Numbers or Event IDs.
What if some Primary Event Numbers are numeric and some alpha-numeric?
If some of your Primary Event Numbers are numeric and some alpha-numeric, and
EventNumIsNumber has a value of 1, you can simply use your Primary Event Numbers to find the
associated attributes. However, if you are using Event IDs, you will need to select Force ID option.
ProdCodeIsNumber
The way you search for product attributes will be affected by how the site parameter,
ProdCodeIsNum, has been set in the Plant Applications Administrator (Plant Applications
Administrator > Global Settings > Site Parameters > Edit Site Parameters). If ProdCodeIsNum has a
value of 1, it tells the Plant Applications Add-in that the Product Codes are all numeric. Since Product
IDs are also numeric, when you search for product attributes you will need to tell Plant Applications
whether you are using Product Codes or Product IDs.
What if some Product Codes are numeric and some alpha-numeric?
If some of your Product Codes are numeric and some alpha-numeric, and ProdCodeIsNum has a
value of 1, you can simply use your Product Codes to find the associated attributes. However, if you
are using Product IDs, you will need to select Force ID option.
ShowHeader
This site parameter determines the default value in the Options dialog box in the Excel Add-in. If set
to true, the Show header label option will be the default setting. If set to False, the Hide header label
option will be the default.
True: Show header label. Includes row or column headers on your worksheet.

General Site Parameters
88
False: Hide header label. Does not include row or column headers on your worksheet.
To change this site parameter:
1. Log in to the Plant Applications Administrator.
You must have Administrator access to the Administrator security group to
change site parameters.
2. Expand Global Configuration.
3. Right-click Administer Site Parameters and select Edit Site Parameters. The Site Parameters
dialog box appears.
4. Double-click ShowHeader. The Edit Parameter dialog box appears.
5. Select True or False from the Value list.
6. Click the OK button to close the dialog box.
7. Click the Close button to close the Site Parameters dialog box.
8. Refresh the server.
UpdateAddInLinks
This site parameter determines the default setting in the Excel Add-in Options dialog box. You can
determine if you want Excel to update the Add-in links every time a Plant Applications workbook is
opened.
Yes: Update. If you regularly trade (or move) workbooks between computers, we recommend
that you select this option to update the links.
No: Don’t Update. If the majority of the time you keep your workbooks on the computer where
they were created, then you can choose not to update the links.
To change this site parameter:
1. Log in to the Plant Applications Administrator.
You must have Administrator access to the Administrator security group to
change site parameters.
2. Expand Global Configuration.
3. Right-click Administer Site Parameters and select Edit Site Parameters. The Site Parameters
dialog box appears.
4. Double-click UpdateAddInLinks. The Edit Parameter dialog box appears.
5. Select Yes or No from the Value list.
6. Click the OK button to close the dialog box.
7. Click the Close button to close the Site Parameters dialog box.
8. Refresh the server.
General Site Parameters
AllowPasswordSave
Set this site parameter to True if you want to have the option of saving the current log in name and
password as the default. When the user logs in to either the Plant Applications Administrator program
or the Plant Applications Client program, the Save Password option is added to the Plant

Global Configuration
89
Applications Server Login dialog box. If you select the Save Password option, Plant Applications
remembers your password and automatically logs you in to the program.
Even if you return the site parameter to False, the user information is stored in a registry. If you want
to require users to log in every time they open Plant Applications, you will need to clear the user
information. See below.
If you select the Save Password option, then anyone using your computer can start Plant
Applications and will have your access level. In other words, they will be logged in as you.
This parameter will have no affect for those users who were imported from the Windows
domain IF you have the WindowsAuthentication site parameter set to True.
To change the AllowPasswordSave site parameter:
1. Log in to the Plant Applications Administrator.
You must have Administrator access to the Administrator security group to change
site parameters.
2. Expand Global Configuration.
3. Right-click Administer Site Parameters and click Edit Site Parameters. The Site Parameter
dialog box appears.
4. Double-click on AllowPasswordSave. The Edit Parameter dialog box appears.
5. Select True or False from the Value drop-down list.
6. Click the OK button to save your changes and to close the dialog box.
7. Click the Close button to close the Site Parameters dialog box.
8. Refresh the server.
To clear the user information:
1. Open the Plant Applications Administrator.
2. From the File menu, click Server. The Connect Server dialog box appears.
3. Right-click on the desired server and click Clear User Info.
4. Click Close.
ApproverDefaultReasonId
Use this site parameter to specify a default approver-level reason. Before you can specify a default
reason, you must first specify a default reason tree in the ApproverReasonTreeId site parameter. For
information about reason trees, see Reason Trees.
You can choose to provide a reason for Approver authentication. Whenever an Approver signature is
provided, a default reason can be automatically attached to the signature.
To change this site parameter:
1. Log in to the Plant Applications Administrator.
You must have Administrator access to the Administrator security group to
change site parameters.
2. Expand Global Configuration.
3. Right-click Administer Site Parameters and select Edit Site Parameters. The Site Parameters
dialog box appears.
4. Double-click ApproverDefaultReasonId. The Edit Parameter dialog box appears.

General Site Parameters
90
5. Select the default reason ID from the Value list.
6. Click the OK button to close the dialog box.
7. Click the Close button to close the Site Parameters dialog box.
8. Refresh the server.
ApproverDefaultReasonTreeId
Use this site parameter to specify a default approver-level reason tree. You must first select a reason
tree before you can specify a reason for the ApproverDefaultReasonId site parameter. For information
about reason trees, see Reason Trees.
You can choose to provide a reason for Approver authentication. Whenever an Approver signature is
provided, a default reason can be automatically attached to the signature.
To change this site parameter:
1. Log in to the Plant Applications Administrator.
You must have Administrator access to the Administrator security group to
change site parameters.
2. Expand Global Configuration.
3. Right-click Administer Site Parameters and select Edit Site Parameters. The Site Parameters
dialog box appears.
4. Double-click ApproverDefaultReasonTreeId. The Edit Parameter dialog box appears.
5. Select the default reason tree ID from the Value list.
6. Click the OK button to close the dialog box.
7. Click the Close button to close the Site Parameters dialog box.
8. Refresh the server.
CheckSQLConnection
Use this site parameter to test SQL before executing any stored procedure to validate the SQL
connection.
To change this site parameter:
1. Log in to the Plant Applications Administrator.
You must have Administrator access to the Administrator security group to
change site parameters.
2. Expand Global Configuration.
3. Right-click Administer Site Parameters and select Edit Site Parameters. The Site Parameters
dialog box appears.
4. Double-click CheckSQLConnection. The Edit Parameter dialog box appears.
5. Select True or False from the Value list.
6. Click the OK button to close the dialog box.
7. Click the Close button to close the Site Parameters dialog box.
8. Refresh the server.

Global Configuration
91
CompanyName
The value of this site parameter is displayed on various reports.
To change the CompanyName site parameter:
1. Log in to the Plant Applications Administrator.
You must have Administrator access to the Administrator security group to change
site parameters.
2. Expand Global Configuration.
3. Right-click Administer Site Parameters and click Edit Site Parameters. The Site Parameter
dialog box appears.
4. Under General, double-click CompanyName. The Edit Parameter dialog box appears.
5. In the Value box, type the name of your company.
6. Click the OK button to save your changes and to close the dialog box.
7. Click the Close button to close the Site Parameters dialog box.
8. Refresh the server.
DatabaseReconnectionMaxSilentRetries
This site parameter determines the maximum number of times the SDK and web services will try to
reconnect to the database. After the specified number of retries has been attempted and no
connection has been established the program will stop.
This site parameter does not affect the Client or the Excel Add-in.
The amount of time to wait between retries is determined by the DatabaseReconnectionRetryTime
site parameter.
DatabaseReconnectionRetryTime
This site parameter determines the amount of time to wait, in seconds, between attempts to reconnect
to the database after the connection has been lost or interrupted.
DBOPassword
This site parameter contains the Plant Applications MSSQL database owner password. For security,
the password is displayed as <encrypted>.
To change the DBOPassword site parameter:
1. Log in to the Plant Applications Administrator.
You must have Administrator access to the Administrator security group to change
site parameters.
2. Expand Global Configuration.
3. Right-click Administer Site Parameters and click Edit Site Parameters. The Site Parameter
dialog box appears.
4. Under General, double-click DBOPassword. The Edit Parameter dialog box appears.
5. In the Value box, type the new password.
6. Click the OK button to save your changes and to close the dialog box.

General Site Parameters
92
7. Click the Close button to close the Site Parameters dialog box.
8. Refresh the server.
DBOUser
This site parameter contains the Plant Applications MSSQL database owner user name.
To change the DBOUser site parameter:
1. Log in to the Plant Applications Administrator.
You must have Administrator access to the Administrator security group to change
site parameters.
2. Expand Global Configuration.
3. Right-click Administer Site Parameters and click Edit Site Parameters. The Site Parameter
dialog box appears.
4. Under General, double-click DBOPassword. The Edit Parameter dialog box appears.
5. In the Value box, type the new user name.
6. Click the OK button to save your changes and to close the dialog box.
7. Click the Close button to close the Site Parameters dialog box.
8. Refresh the server.
EnableChangePasswordDialog
This site parameter controls whether users will be allowed to change their Windows password when
they log in to Plant Applications with their Windows user name and password. If this is set to True,
Plant Applications users will be able to change their expiring Windows passwords if they use their
Windows user name and password to log in to Plant Applications.
INFORMATION: To use Windows user names and passwords, WindowsAuthentication
must be set to True and the user's properties must be correctly configured.
Editing EndOfDayHour
The EndOfDayHour site parameter is one of two site parameters that are used to define the hour that
your production day starts and ends. The EndOfDayHour site parameter determines the hour that
your production day will start and end. The EndOfDayMinute site parameter determines the minute
of the hour that your production day will start and end. For example, The default value of the
EndOfDayHour site parameter is 7 and the default value of the EndOfDayMinute is zero, which
means that your production day will start at 7:00 a.m. and will end the following day at 7:00 a.m.
Tell me about the EndOfDayMinute site parameter.
To edit this site parameter:
1. Start the Plant Applications Administrator.
2. Open the Global Settings folder
3. Right-click on Site Parameters and select Edit Site Parameters from the pop-up menu.
4. Scroll down and double-click EndOfDayHour.
5. In the Edit Parameter dialog box, type a new value in the Value box.
6. Click OK to save your changes and close the Edit Parameter dialog box.

Global Configuration
93
7. Close the Site Parameters dialog box.
Editing EndOfDayMinute
The EndOfDayMinute site parameter is one of two site parameters that are used to define when your
production day starts and ends. The EndOfDayMinute site parameter determines the minutes of the
hour when your production day will start and end. The default value is 0, which means that your
production day will start at the hour defined by the EndOfDayHour site parameter and zero minutes.
For example, if the EndOfDayHour site parameter value is 7 and the EndOfDayMinute site
parameter value is 35, then your production day is defined as starting at 7:35:00 a.m. and ending at
7:35:00 a.m. on the next day.
Tell me about the E
ndOfDayHour site parameter.
To edit this site parameter:
1. Start the Plant Applications Administrator.
2. Open the Global Settings folder
3. Right-click on Site Parameters and select Edit Site Parameters from the pop-up menu.
4. Scroll down and double-click EndOfDayHour.
5. In the Edit Parameter dialog box, type a new value in the Value box.
6. Click OK to save your changes and close the Edit Parameter dialog box.
7. Close the Site Parameters dialog box.
HistorianServer
This site parameter is used only if ProcessBook is on the PC and you right-click on a PI-based
historian value in AutoLog to trend it. If ProcessBook is there, it will use the HistorianServer parameter
as the source for the ProcessBook trend.
To change this site parameter:
1. Log in to the Plant Applications Administrator.
You must have Administrator access to the Administrator security group to
change site parameters.
2. Expand Global Configuration.
3. Right-click Administer Site Parameters and select Edit Site Parameters. The Site Parameters
dialog box appears.
4. Double-click HistorianServer. The Edit Parameter dialog box appears.
5. In the Value box, type the PI-based historian server name.
6. Click the OK button to close the dialog box.
7. Click the Close button to close the Site Parameters dialog box.
8. Refresh the server.
LanguageNumber
The regional settings of the Plant Applications client computer determine which language is displayed
at runtime by the Plant Applications client container and all displays. Various prompts, messages,
common dialog text have been translated into several languages. By default, US-English is used. Any

General Site Parameters
94
other languages need to be added by running ConfigurePALanguages.exe and selecting the
additional language or languages to be used.
The regional setting determines the language used for all site users who connect to this server. If this
site is enabled for Multi-Lingual Support when installing the Proficy (Plant Applications) Server, the
user parameter determines whether a user sees the local description (text entered when an object is
created; the language is determined by the regional settings of the user's workstation) or the global
description.
The default language in the Language Translation Edit dialog box is determined by the regional site
parameter setting.
Note: The LocaleID (regional settings) are in the LanguageRef.txt file, which is installed
at <Program Files>\Common Files\Proficy\Plant Applications.
To change this parameter for the site:
1. Log in to the Plant Applications Administrator.
You must have Administrator access to the Administrator security group to change
site parameters.
2. Expand Global Configuration.
3. Right-click on Administer Site Parameters, and click Edit Site Parameters. The Site
Parameters dialog box appears.
4. Under the General section, double-click the LanguageNumber parameter. The Edit Parameter
dialog box appears
5. Select a new language value from the Value list.
6. Click the OK button to save your changes and close the dialog box.
7. Click the Close button to close the Site Parameters dialog box.
8. Refresh the server.
To change this parameter for a user:
1. Log in to the Plant Applications Administrator program.
2. Expand Security Management and expand the Site Users folder.
3. Right-click on the desired site user and click Edit <user name> Parameters. The User
Parameters <user name> dialog box appears.
4. Do one of the following:
To change an existing language setting:
a. Double-click the LanguageNumber parameter. The Edit Parameter dialog box
appears.
b. Select a new language from the Value list.
c. Click the OK button to close the dialog box.
To specify a language setting:

Global Configuration
95
d. Click the Add button at the bottom of the screen. The Add Parameter dialog box
appears.
e. Select LanguageNumber from the Parameter Name .
f. Select a language from the Value drop-down list.
g. Click the OK button to save your changes and close the dialog box.
h. Click the Close button in the User Parameters <user name> dialog box.
5. Refresh the server.
MaxLoginAttempts
The application developer can set an account lockout threshold, which prevents a user from
accessing the account after he enters an incorrect user name or password beyond the number of
acceptable times.
When a user logs in or enters an electronic signature at run time, he receives an error if the account
has been disabled. The application developer can configure the message to display with the error,
such as a telephone number or the name of a contact person; otherwise, a general message is
displayed.
To determine the number of login attempts:
1. Log in to the Plant Applications Administrator.
You must have Administrator access to the Administrator security group to
change site parameters.
2. Expand Global Configuration.
3. Right-click Administer Site Parameters and select Edit Site Parameters. The Site Parameters
dialog box appears.
4. Double-click MaxLoginAttempts. The Edit Parameter dialog box appears.
5. In the Value list, type the maximum number of login attempts.
6. Click the OK button to close the dialog box.
7. Click the Close button to close the Site Parameters dialog box.
8. Refresh the server.
PointVerification
If set to True, when any changes are made in the Plant Applications Administrator program, the user
who made the change will have to verify his or her identity by entering their user name and password.
Additionally, when this site parameter is set to True, the Unauthenticate button will be enabled on
the Plant Applications Administrator toolbar.
To set the PointVerification site parameter:
1. Log in to the Plant Applications Administrator.
2. Open Global Configuration.
3. Right-click on Administer Site Parameters and select Edit Site Parameters from the pop-up
menu.
4. In the Site Parameters dialog box, double-click on PointVerification.
5. In the Edit Parameter dialog box, select True from the Value drop-down list.

General Site Parameters
96
6. Click the OK button to save your changes and close the dialog box.
7. Click the Close button to close the Site Parameters dialog box.
8. Refresh the server.
ReportServer
This site parameter defines the HTTP location of the web server, which has the following format:
http://<Servername>/PAReporting
or
https://<Servername>/PAReporting
Another Site Parameter, UseHTTPS, controls whether a secure site is used.
NOTE: The name of the virtual directory under the web site is changed in Release 6.2 to
PAReporting from ReportServer.
To change this site parameter:
1. Log in to the Plant Applications Administrator.
NOTE: You must have Administrator access to the Administrator security group to
change site parameters.
2. Expand Global Configuration.
3. Right-click Administer Site Parameters and select Edit Site Parameters. The Site Parameters
dialog box appears.
4. Double-click ReportServer. The Edit Parameter dialog box appears.
5. In the Value box, type the location of the web server.
6. Click the OK button to close the dialog box.
7. Click the Close button to close the Site Parameters dialog box.
8. Refresh the server.
SerialNumber
This site parameter contains the Plant Applications licensing site-specific serial number. A string that
must match the serial number keyed into the license file. This gets set when you install the Proficy
Server.
NOTE: This is a legacy site parameter used by pre-4.x versions of Plant Applications.
ShiftInterval
This site parameter defines the default number of minutes per shift.
To change this site parameter:
1. Log in to the Plant Applications Administrator.
You must have Administrator access to the Administrator security group to
change site parameters.
2. Expand Global Configuration.

Global Configuration
97
3. Right-click Administer Site Parameters and select Edit Site Parameters. The Site Parameters
dialog box appears.
4. Double-click ShiftInterval. The Edit Parameter dialog box appears.
5. In the Value box, type the number of minutes per shift.
6. Click the OK button to close the dialog box.
7. Click the Close button to close the Site Parameters dialog box.
8. Refresh the server.
ShiftOffset
This site parameter defines the default number of minutes after midnight that the first shift starts.
To change this site parameter:
1. Log in to the Plant Applications Administrator.
You must have Administrator access to the Administrator security group to change
site parameters.
2. Expand Global Configuration.
3. Right-click Administer Site Parameters and select Edit Site Parameters. The Site Parameters
dialog box appears.
4. Double-click ShiftOffset. The Edit Parameter dialog box appears.
5. In the Value box, type the number of minutes after midnight the first shift starts.
6. Click the OK button to close the dialog box.
7. Click the Close button to close the Site Parameters dialog box.
8. Refresh the server.
SiteName
This site parameter contains the name of the plant site.
To change this site parameter:
1. Log in to the Plant Applications Administrator.
You must have Administrator access to the Administrator security group to change
site parameters.
2. Expand Global Configuration.
3. Right-click Administer Site Parameters and select Edit Site Parameters. The Site Parameters
dialog box appears.
4. Double-click SiteName. The Edit Parameter dialog box appears.
5. In the Value box, type the name of the plant site.
6. Click the OK button to close the dialog box.
7. Click the Close button to close the Site Parameters dialog box.
8. Refresh the server.
SpecificationSetting

General Site Parameters
98
SpecificationSetting is used by an Autolog display to color code test values by comparing them to
specification limits. SpecificationSetting is also used to determine if a value should or should not
generate an alarm. Possible options are:
Test Value greater than (>) Limit Trigger Spec Exceedance
Test Value greater than or equal to (>=) Limit Trigger Spec Exceedance
To change this site parameter:
1. Log in to the Plant Applications Administrator.
You must have Administrator access to the Administrator security group to change
site parameters.
2. Expand Global Configuration.
3. Right-click Administer Site Parameters and select Edit Site Parameters. The Site Parameters
dialog box appears.
4. Double-click SpecificationSetting. The Edit Parameter dialog box appears.
5. Choose one of the options from the Value list.
6. Click OK to close the dialog box.
7. Click the Close button to close the Site Parameters dialog box.
8. Refresh the server.
Temporary Unit
Creating new events on an input in genealogy allows the event to be created on the unit specified in
this site parameter.
To change this site parameter:
1. Log in to the Plant Applications Administrator.
You must have Administrator access to the Administrator security group to change
site parameters.
2. Expand Global Configuration.
3. Right-click Administer Site Parameters and select Edit Site Parameters. The Site Parameters
dialog box appears.
4. Double-click Temporary Unit. The Edit Parameter dialog box appears.
5. Choose a production unit from the Value list.
6. Click OK to close the dialog box.
7. Click the Close button to close the Site Parameters dialog box.
8. Refresh the server.
UserDefaultReasonId
Use this site parameter to specify a default User-level reason. Before you can specify a default
reason, you must first specify a default reason tree in the UserReasonTreeId site parameter. For
information about reason trees, see Reason Trees.
You can choose to provide a reason for User authentication. Whenever a User signature is provided,
a default reason can be automatically attached to the signature.

Global Configuration
99
To change this site parameter:
1. Log in to the Plant Applications Administrator.
You must have Administrator access to the Administrator security group to change
site parameters.
2. Expand Global Configuration.
3. Right-click Administer Site Parameters and select Edit Site Parameters. The Site Parameters
dialog box appears.
4. Double-click UserDefaultReasonId. The Edit Parameter dialog box appears.
5. Choose a reason from the Value list.
6. Click OK to close the dialog box.
7. Click the Close button to close the Site Parameters dialog box.
8. Refresh the server.
UserDefaultReasonTreeId
Use this site parameter to specify a default User-level reason tree. You must first select a reason tree
before you can specify a reason for the UserDefaultReasonId site parameter. For information about
reason trees, see Reason Trees.
You can choose to provide a reason for User authentication. Whenever a User signature is provided,
a default reason tree can be automatically attached to the signature.
To change this site parameter:
1. Log in to the Plant Applications Administrator.
You must have Administrator access to the Administrator security group to change
site parameters.
2. Expand Global Configuration.
3. Right-click Administer Site Parameters and select Edit Site Parameters. The Site Parameters
dialog box appears.
4. Double-click UserDefaultReasonTreeId. The Edit Parameter dialog box appears.
5. Choose a reason tree from the Value list.
6. Click OK to close the dialog box.
7. Click the Close button to close the Site Parameters dialog box.
8. Refresh the server.
RSName
This site parameter defines the name and default directory of the web server.
To change this site parameter:
1. Log in to the Plant Applications Administrator.
You must have Administrator access to the Administrator security group to change site
parameters.
2. Expand Global Configuration.

History Parameters
100
3. Right-click Administer Site Parameters and select Edit Site Parameters. The Site Parameter
dialog box appears.
4. Under Web Server, double-click RSName. The Edit Parameter dialog box appears.
5. In the Value box, type the new name and default directory of the web server.
6. Click the OK button to save your changes and to close the dialog box.
7. Click the Close button to close the Site Parameters dialog box.
8. Refresh the server.
History Parameters
Populate Alarm_History
Use this site parameter to determine whether a history of changes to the Alarms table will be stored. If
you set the value to True, any changes to the Alarms table will be recorded in the Alarm_History
table.
If you have installed Proficy DataMart, as soon as you add the server to the DataMart, this site
parameter is set to True, changed to a system parameter, and is no longer visible in the Plant
Applications Administrator.
Keep in mind that if there are a lot of changes, this table can become quite large. For
example, if you were to delete a number of records in the Alarms table, ALL of those
deletions would be recorded in the Alarm_History table.
To change this site parameter:
1. Log in to the Plant Applications Administrator.
You must have Administrator access to the Administrator security group to change site
parameters.
2. Open Global Configuration.
3. Right-click on Administer Site Parameters and select Edit Site Parameters from the pop-up
menu.
4. In the Site Parameters dialog box, scroll down and double-click on Populate Alarm_History.
5. In the Edit Parameter dialog box, select True or False from the Value drop-down list.
6. Click the OK button to save your changes and close the dialog box.
7. Click the Close button to close the Site Parameters dialog box.
8. Refresh the server.
Populate Container_Location_History
Use this site parameter to determine whether a history of changes to the Container_Location table will
be stored. If you set the value to True, any changes to the Container_Location table will be recorded
in the Container_Location_History table.
If you have installed Proficy DataMart, as soon as you add the server to the DataMart, this site
parameter is set to True, changed to a system parameter, and is no longer visible in the Plant
Applications Administrator.

Global Configuration
101
Keep in mind that if there are a lot of changes, this table can become quite large. For
example, if you were to delete a number of records in the Container_Location table, ALL
of those deletions would be recorded in the Container_Location_History table.
To change this site parameter:
1. Log in to the Plant Applications Administrator.
You must have Administrator access to the Administrator security group to change site
parameters.
2. Open Global Configuration.
3. Right-click on Administer Site Parameters and select Edit Site Parameters from the pop-up
menu.
4. In the Site Parameters dialog box, scroll down and double-click on Populate
Container_Location_History.
5. In the Edit Parameter dialog box, select True or False from the Value drop-down list.
6. Click the OK button to save your changes and close the dialog box.
7. Click the Close button to close the Site Parameters dialog box.
8. Refresh the server.
Populate Defect_Details_History
Use this site parameter to determine whether a history of changes to the Defect_Details table will be
stored. If you set the value to True, any changes to the Defect_Details table will be recorded in the
Defect_Details_History table.
If you have installed Proficy DataMart, as soon as you add the server to the DataMart, this site
parameter is set to True, changed to a system parameter, and is no longer visible in the Plant
Applications Administrator.
Keep in mind that if there are a lot of changes, this table can become quite large. For
example, if you were to delete a number of records in the Defect_Details table, ALL of
those deletions would be recorded in the Defect_Details_History table.
To change this site parameter:
1. Log in to the Plant Applications Administrator.
You must have Administrator access to the Administrator security group to change site
parameters.
2. Open Global Configuration.
3. Right-click on Administer Site Parameters and select Edit Site Parameters from the pop-up
menu.
4. In the Site Parameters dialog box, scroll down and double-click on Populate
Defect_Details_History.
5. In the Edit Parameter dialog box, select True or False from the Value drop-down list.
6. Click the OK button to save your changes and close the dialog box.
7. Click the Close button to close the Site Parameters dialog box.
8. Refresh the server.
Populate Event_Component_History

History Parameters
102
Use this site parameter to determine whether a history of changes to the Event_Components table
will be recorded. If you set the value to True, any changes to the Event_Components table will be
recorded in the Event_Component_History table.
If you have installed Proficy DataMart, as soon as you add the server to the DataMart, this site
parameter is set to True, changed to a system parameter, and is no longer visible in the Plant
Applications Administrator.
Keep in mind that if there are a lot of changes, this table can become quite large. For
example, if you were to delete a number of records in the Event_Components table, ALL
of those deletions would be recorded in the Event_Component_History table.
To change this site parameter:
1. Log in to the Plant Applications Administrator.
You must have Administrator access to the Administrator security group to change site
parameters.
2. Open the Global Configuration folder.
3. Right-click on Administer Site Parameters and select Edit Site Parameters from the pop-up
menu.
4. In the Site Parameters dialog box, scroll down and double-click on Populate
Event_Component_History.
5. In the Edit Parameter dialog box, select True or False from the Value drop-down list.
6. Click the OK button to save your changes and close the dialog box.
7. Click the Close button to close the Site Parameters dialog box.
8. Refresh the server.
Populate Event_Detail_History
Use this site parameter to determine whether a history of changes to the Event_Details table will be
recorded. If you set the value to True, any changes to the Event_Details table will be recorded in the
Event_Detail_History table.
If you have installed Proficy DataMart, as soon as you add the server to the DataMart, this site
parameter is set to True, changed to a system parameter, and is no longer visible in the Plant
Applications Administrator.
Keep in mind that if there are a lot of changes, this table can become quite large. For
example, if you were to delete a number of records in the Event_Details table, ALL of
those deletions would be recorded in the Event_Detail_History table.
To change this site parameter:
1. Log in to the Plant Applications Administrator.
You must have Administrator access to the Administrator security group to change site
parameters.
2. Open Global Configuration.
3. Right-click on Administer Site Parameters and select Edit Site Parameters from the pop-up
menu.
4. In the Site Parameters dialog box, scroll down and double-click on Populate
Event_Detail_History.
5. In the Edit Parameter dialog box, select a Value from the drop-down list:

Global Configuration
103
Full History – All changes are recorded to the history table and, if the generating time stamp
is set to move at some interval (Auto move End Time), history is recorded at those intervals.
History Based On Event Status – History is recorded for all associated events that have a
status for which the Bypass History flag is not set.
No History – No changes, included History changes for a Complete status, are recorded in
the History table.
TIP: To monitor event progress for long production events and control history data collection, refer
to Event Dimension Periodic Update.
6. Click the OK button to save your changes and close the dialog box.
7. Click the Close button to close the Site Parameters dialog box.
8. Refresh the server.
Populate Event_History
Use this site parameter to determine whether a history of changes to the Events table will be
recorded. If you set the value to True, any changes to the Events table will be recorded in the
Event_History table.
If you have installed Proficy DataMart, as soon as you add the server to the DataMart, this site
parameter is set to True, changed to a system parameter, and is no longer visible in the Plant
Applications Administrator.
Keep in mind that if there are a lot of changes, this table can become quite large. For
example, if you were to delete a number of records in the Events table, ALL of those
deletions would be recorded in the Event_History table.
To change this site parameter:
1. Log in to the Plant Applications Administrator.
You must have Administrator access to the Administrator security group to change site
parameters.
2. Open Global Configuration.
3. Right-click on Administer Site Parameters and select Edit Site Parameters from the pop-up
menu.
4. In the Site Parameters dialog box, scroll down and double-click on Populate Event_History.
5. In the Edit Parameter dialog box, select a Value from the drop-down list:
Full History – All changes are recorded to the history table and, if the generating time stamp is
set to move at some interval (Auto move End Time), history is recorded at those intervals.
History Based On Event Status – History is recorded for all associated events that have a
status for which the Bypass History flag is not set.
No History – No changes, included History changes for a Complete status, are recorded in
the History table.
TIP: To monitor event progress for long production events and control history data collection, refer
to Event Dimension Periodic Update.
6. Click the OK button to save your changes and close the dialog box.
7. Click the
Close button to close the Site Parameters dialog box.
8. Refresh the server.

History Parameters
104
Populate PrdExec_Input_Event_History
Use this site parameter to determine whether a history of changes to the PrdExec_Input_Event table
will be recorded. If you set the value to True, any changes to the PrdExec_Input_Event table will be
recorded in the PrdExec_Input_Event_History table.
If you have installed Proficy DataMart, as soon as you add the server to the DataMart, this site
parameter is set to True, changed to a system parameter, and is no longer visible in the Plant
Applications Administrator.
Keep in mind that if there are a lot of changes, this table can become quite large. For
example, if you were to delete a number of records in the PrdExec_Input_Event table, ALL
of those deletions would be recorded in the PrdExec_Input_Event_History table.
To change this site parameter:
1. Log in to the Plant Applications Administrator.
You must have Administrator access to the Administrator security group to change site
parameters.
2. Open Global Configuration.
3. Right-click on Administer Site Parameters and select Edit Site Parameters from the pop-up
menu.
4. In the Site Parameters dialog box, scroll down and double-click on Populate
PrdExec_Input_Event_History.
5. In the Edit Parameter dialog box, select True or False from the Value drop-down list.
6. Click the OK button to save your changes and close the dialog box.
7. Click the Close button to close the Site Parameters dialog box.
8. Refresh the server.
Populate PrdExec_Output_Event_History
Use this site parameter to determine whether a history of changes to the PrdExec_Output_Event
table will be recorded. If you set the value to True, any changes to the PrdExec_Output_Event table
will be recorded in the PrdExec_Output_Event_History table.
If you have installed Proficy DataMart, as soon as you add the server to the DataMart, this site
parameter is set to True, changed to a system parameter, and is no longer visible in the Plant
Applications Administrator.
Keep in mind that if there are a lot of changes, this table can become quite large. For
example, if you were to delete a number of records in the PrdExec_Output_Event table,
ALL of those deletions would be recorded in the PrdExec_Output_Event_History table.
To change this site parameter:
1. Log in to the Plant Applications Administrator.
You must have Administrator access to the Administrator security group to change site
parameters.
2. Open Global Configuration.
3. Right-click on Administer Site Parameters and select Edit Site Parameters from the pop-up
menu.
4. In the Site Parameters dialog box, scroll down and double-click on Populate
PrdExec_Output_Event_History.

Global Configuration
105
5. In the Edit Parameter dialog box, select True or False from the Value drop-down list.
6. Click the OK button to save your changes and close the dialog box.
7. Click the Close button to close the Site Parameters dialog box.
8. Refresh the server.
Populate PrdExec_Path_Unit_Starts_History
Use this site parameter to determine whether a history of changes to the PrdExec_Path_Unit_Starts
table will be recorded. If you set the value to True, any changes to the PrdExec_Path_Unit_Starts
table will be recorded in the PrdExec_Path_Unit_Starts_History table.
If you have installed Proficy DataMart, as soon as you add the server to the DataMart, this site
parameter is set to True, changed to a system parameter, and is no longer visible in the Plant
Applications Administrator.
Keep in mind that if there are a lot of changes, this table can become quite large. For
example, if you were to delete a number of records in the PrdExec_Path_Unit_Starts
table, ALL of those deletions would be recorded in the
PrdExec_Path_Unit_Starts_History table.
To change this site parameter:
1. Log in to the Plant Applications Administrator.
You must have Administrator access to the Administrator security group to change site
parameters.
2. Open Global Configuration.
3. Right-click on Administer Site Parameters and select Edit Site Parameters from the pop-up
menu.
4. In the Site Parameters dialog box, scroll down and double-click on Populate
PrdExec_Path_Unit_Starts_History.
5. In the Edit Parameter dialog box, select True or False from the Value drop-down list.
6. Click the OK button to save your changes and close the dialog box.
7. Click the Close button to close the Site Parameters dialog box.
8. Refresh the server.
Populate Production_Plan_History
Use this site parameter to determine whether a history of changes to the Production_Plan table will be
recorded. If you set the value to True, any changes to the Production_Plan table will be recorded in
the Production_Plan_History table.
If you have installed Proficy DataMart, as soon as you add the server to the DataMart, this site
parameter is set to True, changed to a system parameter, and is no longer visible in the Plant
Applications Administrator.
Keep in mind that if there are a lot of changes, this table can become quite large. For
example, if you were to delete a number of records in the Production_Plan table, ALL of
those deletions would be recorded in the Production_Plan_History table.
To change this site parameter:
1. Log in to the Plant Applications Administrator.

History Parameters
106
You must have Administrator access to the Administrator security group to change site
parameters.
2. Open Global Configuration.
3. Right-click on Administer Site Parameters and select Edit Site Parameters from the pop-up
menu.
4. In the Site Parameters dialog box, scroll down and double-click on Populate
Production_Plan_History.
5. In the Edit Parameter dialog box, select True or False from the Value drop-down list.
6. Click the OK button to save your changes and close the dialog box.
7. Click the Close button to close the Site Parameters dialog box.
8. Refresh the server.
Populate Production_Plan_Starts_History
Use this site parameter to determine whether a history of changes to the Production_Plan_Starts
table will be recorded. If you set the value to True, any changes to the Production_Plan_Starts table
will be recorded in the Production_Plan_Starts_History table.
If you have installed Proficy DataMart, as soon as you add the server to the DataMart, this site
parameter is set to True, changed to a system parameter, and is no longer visible in the Plant
Applications Administrator.
Keep in mind that if there are a lot of changes, this table can become quite large. For
example, if you were to delete a number of records in the Production_Plan_Starts table,
ALL of those deletions would be recorded in the Production_Plan_Starts_History table.
To change this site parameter:
1. Log in to the Plant Applications Administrator.
You must have Administrator access to the Administrator security group to change site
parameters.
2. Open Global Configuration.
3. Right-click on Administer Site Parameters and select Edit Site Parameters from the pop-up
menu.
4. In the Site Parameters dialog box, scroll down and double-click on Populate
Production_Plan_Starts_History.
5. In the Edit Parameter dialog box, select True or False from the Value drop-down list.
6. Click the OK button to save your changes and close the dialog box.
7. Click the Close button to close the Site Parameters dialog box.
8. Refresh the server.
Populate Production_Setup_Detail_History
Use this site parameter to determine whether a history of changes to the Production_Setup_Detail
table will be recorded. If you set the value to True, any changes to the Production_Setup_Detail table
will be recorded in the Production_Setup_Detail_History table.
If you have installed Proficy DataMart, as soon as you add the server to the DataMart, this site
parameter is set to True, changed to a system parameter, and is no longer visible in the Plant
Applications Administrator.

Global Configuration
107
Keep in mind that if there are a lot of changes, this table can become quite large. For
example, if you were to delete a number of records in the Production_Setup_Detail table,
ALL of those deletions would be recorded in the Production_Setup_Detail_History table.
To change this site parameter:
1. Log in to the Plant Applications Administrator.
You must have Administrator access to the Administrator security group to change site
parameters.
2. Open Global Configuration.
3. Right-click on Administer Site Parameters and select Edit Site Parameters from the pop-up
menu.
4. In the Site Parameters dialog box, scroll down and double-click on Populate
Production_Setup_Detail_History.
5. In the Edit Parameter dialog box, select True or False from the Value drop-down list.
6. Click the OK button to save your changes and close the dialog box.
7. Click the Close button to close the Site Parameters dialog box.
8. Refresh the server.
Populate Production_Setup_History
Use this site parameter to determine whether a history of changes to the Production_Setup table will
be recorded. If you set the value to True, any changes to the Production_Setup table will be recorded
in the Production_Setup_History table.
If you have installed Proficy DataMart, as soon as you add the server to the DataMart, this site
parameter is set to True, changed to a system parameter, and is no longer visible in the Plant
Applications Administrator.
Keep in mind that if there are a lot of changes, this table can become quite large. For
example, if you were to delete a number of records in the Production_Setup table, ALL of
those deletions would be recorded in the Production_Setup_History table.
To change this site parameter:
1. Log in to the Plant Applications Administrator.
You must have Administrator access to the Administrator security group to change site
parameters.
2. Open Global Configuration.
3. Right-click on Administer Site Parameters and select Edit Site Parameters from the pop-up
menu.
4. In the Site Parameters dialog box, scroll down and double-click on Populate
Production_Setup_History.
5. In the Edit Parameter dialog box, select True or False from the Value drop-down list.
6. Click the OK button to save your changes and close the dialog box.
7. Click the Close button to close the Site Parameters dialog box.
8. Refresh the server.
Populate Production_Setup_Starts_History

History Parameters
108
Use this site parameter to determine whether a history of changes to the Production_Setup_Starts
table will be recorded. If you set the value to True, any changes to the Production_Setup_Starts table
will be recorded in the Production_Setup_Starts_History table.
If you have installed Proficy DataMart, as soon as you add the server to the DataMart, this site
parameter is set to True, changed to a system parameter, and is no longer visible in the Plant
Applications Administrator.
Keep in mind that if there are a lot of changes, this table can become quite large. For
example, if you were to delete a number of records in the Production_Setup_Starts table,
ALL of those deletions would be recorded in the Production_Setup_Starts_History table.
To change this site parameter:
1. Log in to the Plant Applications Administrator.
You must have Administrator access to the Administrator security group to change site
parameters.
2. Open Global Configuration.
3. Right-click on Administer Site Parameters and select Edit Site Parameters from the pop-up
menu.
4. In the Site Parameters dialog box, scroll down and double-click on Populate
Production_Setup_Starts_History.
5. In the Edit Parameter dialog box, select True or False from the Value drop-down list.
6. Click the OK button to save your changes and close the dialog box.
7. Click the Close button to close the Site Parameters dialog box.
8. Refresh the server.
Populate Production_Starts_History
Use this site parameter to determine whether a history of changes to the Production_Starts table will
be recorded. If you set the value to True, any changes to the Production_Starts table will be recorded
in the Production_Starts_History table.
If you have installed Proficy DataMart, as soon as you add the server to the DataMart, this site
parameter is set to True, changed to a system parameter, and is no longer visible in the Plant
Applications Administrator.
Keep in mind that if there are a lot of changes, this table can become quite large. For
example, if you were to delete a number of records in the Production_Starts table, ALL of
those deletions would be recorded in the Production_Starts_History table.
To change this site parameter:
1. Log in to the Plant Applications Administrator.
You must have Administrator access to the Administrator security group to change site
parameters.
2. Open Global Configuration.
3. Right-click on Administer Site Parameters and select Edit Site Parameters from the pop-up
menu.
4. In the Site Parameters dialog box, scroll down and double-click on Populate
Production_Starts_History.
5. In the Edit Parameter dialog box, select True or False from the Value drop-down list.

Global Configuration
109
6. Click the OK button to save your changes and close the dialog box.
7. Click the Close button to close the Site Parameters dialog box.
8. Refresh the server.
Populate Sheet_Column_History
Use this site parameter to determine whether a history of changes to the Sheet_Columns table will be
recorded. If you set the value to True, any changes to the Sheet_Columns table will be recorded in
the Sheet_Column_History table.
If you have installed Proficy DataMart, as soon as you add the server to the DataMart, this site
parameter is set to True, changed to a system parameter, and is no longer visible in the Plant
Applications Administrator.
Keep in mind that if there are a lot of changes, this table can become quite large. For
example, if you were to delete a number of records in the Sheet_Columns table, ALL of
those deletions would be recorded in the Sheet_Column_History table.
To change this site parameter:
1. Log in to the Plant Applications Administrator.
You must have Administrator access to the Administrator security group to change site
parameters.
2. Open Global Configuration.
3. Right-click on Administer Site Parameters and select Edit Site Parameters from the pop-up
menu.
4. In the Site Parameters dialog box, scroll down and double-click on Populate
Sheet_Column_History.
5. In the Edit Parameter dialog box, select True or False from the Value drop-down list.
6. Click the OK button to save your changes and close the dialog box.
7. Click the Close button to close the Site Parameters dialog box.
8. Refresh the server.
Populate Test_History
Use this site parameter to determine whether a history of changes to the Tests table will be recorded.
If you set the value to True, any changes to the Tests table will be recorded in the Test_History
table.
If you have installed Proficy DataMart, as soon as you add the server to the DataMart, this site
parameter is set to Full History, changed to a system parameter, and is no longer visible in the Plant
Applications Administrator. If you change the site parameter's value to any value other than Full
History, you may cause the DataMart to become out of sync with your Plant Applications database.
Keep in mind that if there are a lot of changes, this table can become quite large. For
example, if you were to delete a number of records in the Tests table, ALL of those
deletions would be recorded in the Test_History table.
To change this site parameter:
1. Log in to the Plant Applications Administrator.

History Parameters
110
You must have Administrator access to the Administrator security group to change site
parameters.
2. Open Global Configuration.
3. Right-click on Administer Site Parameters and select Edit Site Parameters from the pop-up
menu.
4. In the Site Parameters dialog box, scroll down and double-click on Populate Test_History.
5. In the Edit Parameter dialog box, select a Value from the drop-down list:
Full History – Any and all changes (result_on and test value changes) to the Tests table will
be recorded in the Test_History table. If the generating time stamp is set to move at some
interval (Auto move End Time), history is recorded at those intervals.
History Based On Event Status and Value Change – History is recorded in the Test_History
table for all associated events that have a status for which the Bypass History flag is not
set. History records associated with test value changes are also updated.
History (Based) On Value Change Only – Only test value changes are recorded in the
Test_History table
No History – No changes, included History changes for a Complete status, are recorded in
the History table.
TIP: To monitor event progress for long production events and control history data collection, refer
to Event Dimension Periodic Update.
6. Click the OK button to save your changes, and close the dialog box.
7. Click the Close button to close the Site Parameters dialog box.
8. Refresh the server.
Populate Timed_Event_Detail_History
Use this site parameter to determine whether a history of changes to the Timed_Event_Details table
will be recorded. If you set the value to True, any changes to the Timed_Event_Details table will be
recorded in the Timed_Event_Detail_History table.
If you have installed Proficy DataMart, as soon as you add the server to the DataMart, this site
parameter is set to True, changed to a system parameter, and is no longer visible in the Plant
Applications Administrator.
Keep in mind that if there are a lot of changes, this table can become quite large. For
example, if you were to delete a number of records in the Timed_Event_Details table, ALL
of those deletions would be recorded in the Timed_Event_Detail_History table.
To change this site parameter:
1. Log in to the Plant Applications Administrator.
You must have Administrator access to the Administrator security group to change site
parameters.
2. Open Global Configuration.
3. Right-click on Administer Site Parameters and select Edit Site Parameters from the pop-up
menu.
4. In the Site Parameters dialog box, scroll down and double-click on Populate
Timed_Event_Detail_History.
5. In the Edit Parameter dialog box, select True or False from the Value drop-down list.

Global Configuration
111
6. Click the OK button to save your changes and close the dialog box.
7. Click the Close button to close the Site Parameters dialog box.
8. Refresh the server.
Populate User_Defined_Event_History
Use this site parameter to determine whether a history of changes to the User_Defined_Events table
will be recorded. If you set the value to True, any changes to the User_Defined_Events table will be
recorded in the User_Defined_Event_History table.
If you have installed Proficy DataMart, as soon as you add the server to the DataMart, this site
parameter is set to True, changed to a system parameter, and is no longer visible in the Plant
Applications Administrator.
Keep in mind that if there are a lot of changes, this table can become quite large. For
example, if you were to delete a number of records in the User_Defined_Events table, ALL
of those deletions would be recorded in the User_Defined_Event_History table.
To change this site parameter:
1. Log in to the Plant Applications Administrator.
You must have Administrator access to the Administrator security group to change site
parameters.
2. Open Global Configuration.
3. Right-click on Administer Site Parameters and select Edit Site Parameters from the pop-up
menu.
4. In the Site Parameters dialog box, scroll down and double-click on Populate
User_Defined_Event_History.
5. In the Edit Parameter dialog box, select True or False from the Value drop-down list.
6. Click the OK button to save your changes and close the dialog box.
7. Click the Close button to close the Site Parameters dialog box.
8. Refresh the server.
Populate Waste_Event_Detail_History
Use this site parameter to determine whether a history of changes to the Waste_Event_Details table
will be recorded. If you set the value to True, any changes to the Waste_Event_Details table will be
recorded in the Waste_Event_Detail_History table.
If you have installed Proficy DataMart, as soon as you add the server to the DataMart, this site
parameter is set to True, changed to a system parameter, and is no longer visible in the Plant
Applications Administrator.
Keep in mind that if there are a lot of changes, this table can become quite large. For
example, if you were to delete a number of records in the Waste_Event_Details table, ALL
of those deletions would be recorded in the Waste_Event_Detail_History table.
To change this site parameter:
1. Log in to the Plant Applications Administrator.
You must have Administrator access to the Administrator security group to change site
parameters.

History Parameters
112
2. Open Global Configuration.
3. Right-click on Administer Site Parameters and select Edit Site Parameters from the pop-up
menu.
4. In the Site Parameters dialog box, scroll down and double-click on Populate
Waste_Event_Detail_History.
5. In the Edit Parameter dialog box, select a Value from the drop-down list:
Full History – All changes are recorded to the history table and, if the generating time stamp
is set to move at some interval (Auto move End Time), history is recorded at those intervals.
History Based On Event Status – History is recorded for all associated events that have a
status for which the Bypass History flag is not set.
No History – No changes, included History changes for a Complete status, are recorded in
the History table.
TIP: To monitor event progress for long production events and control history data collection, refer
to Event Dimension Periodic Update.
6. Click the OK button to save your changes and close the dialog box.
7. Click the Close button to close the Site Parameters dialog box.
8. Refresh the server.
Populate Web_Report_History
Use this site parameter to determine whether a history of changes to the Web_Report_Instances
table will be recorded. If you set the value to True, any changes to the Web_Report_Instances table
will be recorded in the Web_Report_History table.
If you have installed Proficy DataMart, as soon as you add the server to the DataMart, this site
parameter is set to True, changed to a system parameter, and is no longer visible in the Plant
Applications Administrator.
Keep in mind that if there are a lot of changes, this table can become quite large. For
example, if you were to delete a number of records in the Web_Report_Instances table,
ALL of those deletions would be recorded in the Web_Report_History table.
To change this site parameter:
1. Log in to the Plant Applications Administrator.
You must have Administrator access to the Administrator security group to change site
parameters.
2. Open Global Configuration.
3. Right-click on Administer Site Parameters and select Edit Site Parameters from the pop-up
menu.
4. In the Site Parameters dialog box, scroll down and double-click on Populate
Web_Report_History.
5. In the Edit Parameter dialog box, select True or False from the Value drop-down list.
6. Click the OK button to save your changes and close the dialog box.
7. Click the Close button to close the Site Parameters dialog box.
8. Refresh the server.

Global Configuration
113
Rest Service Parameters
DurationFormat
This site parameter sets the format for the duration of an event, for example, a downtime event.
Possible values are as follows:
HH:TT is hours with two decimal places (display example: 15.25 Hours).
HH:MM:SS is hours:minutes:seconds (display example: 04:14:35).
MM.T is minutes with one decimal place (display example: 35.6 Mins).
MM.TT is minutes with two decimal places (display example: 35.63 Mins).
To set the DurationFormat site parameter:
1. Log on to the Plant Applications Administrator program.
2. Open Global Configuration.
3. Right-click on Administer Site Parameters and select Edit Site Parameters.
4. In the Site Parameters dialog box, double-click on DurationFormat under Rest Service.
5. In the Edit Parameter dialog box, make a selection from the drop-down list.
6. Click the OK button to save your changes, and close the Edit Parameter dialog box.
7. Click the Close button to close the Site Parameters dialog box.
8. Refresh the server.
S88 Interface Parameters
Auto Configure Units
This site parameter is used by model 49000 to determine if it will auto-configure your plant model. If
set to True, model 49000 will create your department, production line, and production units based on
how you've configured Model 118. Once your plant model is configured, it is recommended that you
set this value to 0 to prevent the creation of an invalid production unit.
To change this site parameter:
1. Log in to the Plant Applications Administrator.
You must have Administrator access to the Administrator security group to change site
parameters.
2. Expand Global Configuration.
3. Right-click Administer Site Parameters and choose Edit Site Parameters. The Site
Parameters dialog box appears.
4. Under the S88 Interface section, double-click Auto Configure Units. The Edit Parameter
dialog box appears.
5. Make your selection in the Value list.
6. Click the OK button to save your changes and close the dialog box.
7. Click the Close button to close the Site Parameters dialog box.
8. Refresh the server.

S88 Interface Parameters
114
Default Data Source
This site parameter is used by model 49000 to specify the data source type. The data source type will
be used to map various objects (variables, for example) to the batch data. For example, if you have
ProductABC in Plant Applications and the same product is called Batch123 in your batch data, you
can create a cross reference so that Plant Applications will know that Batch123 is ProductABC and
vice versa.
The available data sources are determined by the active data sources listed in Data Source Types.
If you have specified a data source in Model 118, Model 118 takes precedence over Model
49000.
To change this site parameter:
1. Log in to the Plant Applications Administrator.
You must have Administrator access to the Administrator security group to change site
parameters.
2. Expand Global Configuration.
3. Right-click Administer Site Parameters and choose Edit Site Parameters. The Site
Parameters dialog box appears.
4. Under the S88 Interface section, double-click Default Data Source. The Edit Parameter dialog
box appears.
5. Select a data source from the Value list.
6. Click the OK button to save your changes and close the dialog box.
7. Click the Close button to close the Site Parameters dialog box.
8. Refresh the server.
Default Product Family
This site parameter is used by model 49000 to specify the product family your batch product will be
associated with. If you leave this blank, your batch product will be associated with the default,
"Product Family." (Product family ID = 1).
If you have specified a default product family in Model 118, Model 118 takes precedence
over Model 49000.
Ignore Event Status Changes
This site parameter is used by model 49000. If this site parameter is set to True there will be no
additional Event_Status changes performed after the initial event creation.
To change this site parameter:
1. Log in to the Plant Applications Administrator.
You must have Administrator access to the Administrator security group to change site
parameters.
2. Expand Global Configuration.
3. Right-click Administer Site Parameters and choose Edit Site Parameters. The Site
Parameters dialog box appears.
4. Under the S88 Interface section, double-click Ignore Event Status Changes. The Edit
Parameter dialog box appears.

Global Configuration
115
5. Make your select from the Value list.
6. Click the OK button to save your changes and close the dialog box.
7. Click the Close button to close the Site Parameters dialog box.
8. Refresh the server.
Purge Orphaned Records (Days)
This site parameter is used by model 49000 to determine how long orphaned records will be kept in
the Event Transactions table. Setting this property to 0 means that orphaned records will never be
purged.
To change this site parameter:
1. Log in to the Plant Applications Administrator.
You must have Administrator access to the Administrator security group to change site
parameters.
2. Expand Global Configuration.
3. Right-click Administer Site Parameters and choose Edit Site Parameters. The Site
Parameters dialog box appears.
4. Under the S88 Interface section, double-click Purge Orphaned Records (Days). The Edit
Parameter dialog box appears.
5. In the Value box, type the number of days to keep orphaned records.
6. Click the OK button to save your changes and close the dialog box.
7. Click the Close button to close the Site Parameters dialog box.
8. Refresh the server.
Purge Processed Records (Days)
This site parameter is used by model 49000 to determine how long processed records will be kept in
the Event Transactions table. The default value of the site parameter is 0 and the processed records
will not be purged as long as the site parameter value is 0.
To change this site parameter:
1. Log in to the Plant Applications Administrator.
You must have Administrator access to the Administrator security group to change site
parameters.
2. Expand Global Configuration.
3. Right-click Administer Site Parameters and choose Edit Site Parameters. The Site
Parameters dialog box appears.
4. Under the S88 Interface section, double-click Purge Processed Records (Days). The Edit
Parameter dialog box appears.
5. In the Value box, type the number of days to keep processed records.
6. Click the OK button to save your changes and close the dialog box.
7. Click the Close button to close the Site Parameters dialog box.
8. Refresh the server.

Services Parameters
116
Wait Time (milliseconds)
This site parameter is used by model 49000 to determine the time, in milliseconds, between
processing records in the Event Transactions table. A value of 0 means that all records will be
processed with no wait time between.
To change this site parameter:
1. Log in to the Plant Applications Administrator.
You must have Administrator access to the Administrator security group to change site
parameters.
2. Expand Global Configuration.
3. Right-click Administer Site Parameters and choose Edit Site Parameters. The Site
Parameters dialog box appears.
4. Under the S88 Interface section, double-click Wait Time (milliseconds). The Edit Parameter
dialog box appears.
5. In the Value box, type the wait time, in milliseconds.
6. Click the OK button to save your changes and close the dialog box.
7. Click the Close button to close the Site Parameters dialog box.
8. Refresh the server.
Services Parameters
AllowEventMoveOutsideWindow
Use this parameter to allow users to change the timestamp of a production event (column) beyond the
timestamp of neighboring production events (columns). For example, there are three production
events: one at 1:00, one at 1:30, and one at 2:00. If this parameter is set to True, a user with the
proper access level could change the timestamp of the 1:30 production event to 12:30 or 2:15.
To change this site parameter:
1. Log in to the Plant Applications Administrator.
You must have Administrator access to the Administrator security group to change site
parameters.
2. Expand Global Configuration.
3. Right-click Administer Site Parameters and click Edit Site Parameters. The Site Parameters
dialog box appears.
4. Double-click AllowEventMoveOutsideWindow. The Edit Parameter dialog box appears
5. Select True or False from the Value drop-down list.
6. Click the OK button to save your changes close the dialog box.
7. Click the Close button to close the Site Parameters dialog box.
8. Refresh the server.
ArchiveLogFiles
By making this TRUE, shortly after midnight, Proficy Manager will move the previous day's log files to
the directory specified by ArchiveLogFilesPath. In addition, Proficy Manager will turn on the Windows

Global Configuration
117
file compression flag for each archived log file to reduce space. Each service will close and reopen
their log file shortly after midnight each day so Proficy Manager can move the previous day's log file.
To change this site parameter:
1. Log in to the Plant Applications Administrator.
You must have Administrator access to the Administrator security group to change site
parameters.
2. Expand Global Configuration.
3. Right-click Administer Site Parameters and select Edit Site Parameters. The Site Parameter
dialog box appears.
4. Under Services, double-click ArchiveLogFiles. The Edit Parameter dialog box appears.
5. In the Value box, select True or False.
6. Click the OK button to save your changes and to close the dialog box.
7. Click the Close button to close the Site Parameters dialog box.
8. Refresh the server.
ArchiveLogFilesPath
The ArchiveLogFilesPath site parameter specifies the directory to archive the log files. Dated sub-
directories (for example,. 9_10_2007) are created under this directory for a day’s log files.
To change this site parameter:
1. Log in to the Plant Applications Administrator.
You must have Administrator access to the Administrator security group to change site
parameters.
2. Expand Global Configuration.
3. Right-click Administer Site Parameters and select Edit Site Parameters. The Site Parameter
dialog box appears.
4. Under Services, double-click ArchiveLogFilesPath. The Edit Parameter dialog box appears.
5. In the Value box, type the path where the log files are to be located
6. Click the OK button to save your changes and to close the dialog box.
7. Click the Close button to close the Site Parameters dialog box.
8. Refresh the server.
BackCalcCount
This site parameter is used by the Plant Applications Calculation Manager. It is the maximum number
of times a calculation can run when triggered. For example, a calculation is dependent on the
"previous value" of some variable. If that variable changes, it could cause the calculation to run at
many points in time. That number of times cannot exceed the value specified by this parameter.
To change this site parameter:
1. Log in to the Plant Applications Administrator.
You must have Administrator access to the Administrator security group to change site
parameters.
2. Open Global Configuration.

Services Parameters
118
3. Right-click on Administer Site Parameters and select Edit Site Parameters from the pop-up
menu.
4. In the Site Parameter dialog box, under Services double-click on BackCalcCount.
5. In the Edit Parameter dialog box, click in the Value box and type the number of times a
calculation can run when triggered.
6. Click the OK button to save your changes and to close the dialog box.
7. Click the Close button to close the Site Parameters dialog box.
8. Refresh the server.
BufferFilePath
Each of the Plant Applications services has a buffer file. The location of the buffer files is determined
by the site parameter BufferFilePath. The buffer files store queued actions for the Plant Applications
service to execute. If missing, the files and directories located in the BufferFilePath are automatically
created.
Deletion of the buffer files can be a potentially helpful option when troubleshooting a problem as it will
effectively reset the server. The Plant Applications services must be shut down for the buffer files to
be deleted. By removing the buffer files, you are removing any queued actions so when the services
are restarted there is no historical processing and Plant Applications will only process new events. It
must be noted that, for the same reason, it will also result in some lost data as any recently queued
actions will be lost.
To change this site parameter:
1. Log in to the Plant Applications Administrator.
You must have Administrator access to the Administrator security group to change site
parameters.
2. Open Global Configuration.
3. Right-click on Administer Site Parameters and select Edit Site Parameters. The Site
Parameter dialog box appears.
4. Under Services, double-click BufferFilePath. The Edit Parameter dialog box appears.
5. In the Value box, type the full path where the buffer files should be created.
6. Click the OK button to save your changes and to close the dialog box.
7. Click the Close button to close the Site Parameters dialog box.
8. Refresh the server.
ClearAppliedProductIfSame
By default, the applied product of a production event will be reset to NULL if the product running for
the time range of the event is the same as the applied product. Set to False to leave the applied
product to the explicitly set value.
To change this site parameter:
1. Log in to the Plant Applications Administrator.
You must have Administrator access to the Administrator security group to change
site parameters.
2. Open Global Configuration.

Global Configuration
119
3. Right-click on Administer Site Parameters and select Edit Site Parameters from the pop-up
menu.
4. In the Site Parameters dialog box, under Services, double-click ClearAppliedProductIfSame.
5. In the Edit Parameter dialog box, select either True or False from the Value drop-down list.
6. Click the OK button to close the dialog box.
7. Click the Close button to close the Site Parameters dialog box.
8. Refresh the server.
Critical Email Group
This site parameter specifies the email group to be used for critical level email messages from the
server. The available values are determined by the groups in the E-mail Engine Configuration.
To change this site parameter:
1. Log in to the Plant Applications Administrator.
You must have Administrator access to the Administrator security group to change site
parameters.
2. Expand Global Configuration.
3. Right-click Administer Site Parameters and select Edit Site Parameters. The Site Parameter
dialog box appears.
4. Under Services, double-click Critical Email Group. The Edit Parameter dialog box appears.
5. In the Value box, select the email group.
6. Click the OK button to save your changes and to close the dialog box.
7. Click the Close button to close the Site Parameters dialog box.
8. Refresh the server.
Debug for Database Manager Sps
This site parameter is used to activate debug for Database Manager stored procedures.
To change this site parameter:
1. Log in to the Plant Applications Administrator.
You must have Administrator access to the Administrator security group to change
site parameters.
2. Open Global Configuration.
3. Right-click on Administer Site Parameters and select Edit Site Parameters. The Site
Parameters dialog box appears.
4. Under Services, double-click Debug for Database Manager Sps. The Edit Parameter dialog
box appears.
5. Select either True or False from the Value drop-down list.
6. Click the OK button to close the dialog box.
7. Click the Close button to close the Site Parameters dialog box.
8. Refresh the server.

Services Parameters
120
DebugMode
This site parameter is used to enable debug mode for all services. Therefore, it should be changed
only by someone with advanced knowledge of Plant Applications and SQL Server. To enable debug
mode for individual services, see Service Debugging.
The default is 0. An 8-bit mask is used to determine integer values up to 255.
To change this site parameter:
1. Log in to the Plant Applications Administrator.
You must have Administrator access to the Administrator security group to change site
parameters.
2. Expand Global Configuration.
3. Right-click Administer Site Parameters and select Edit Site Parameters. The Site Parameter
dialog box appears.
4. Under Services, double-click DebugMode. The Edit Parameter dialog box appears.
5. In the Value box, type the value that corresponds to the desired debug mode.
0 = Off
1 = Low
15 = Medium
255 = High
6. Click the OK button to save your changes and to close the dialog box.
7. Click the Close button to close the Site Parameters dialog box.
8. Refresh the server.
Default Time Zone
The Default time zone site parameter enables you to choose to use Coordinated Universal Time
(UTC) or the time zone of the Proficy Server for timestamps the Plant Applications services. The
default value is the time zone of the Proficy Server.
IMPORTANT: You must have the latest Microsoft Windows updates installed to use UTC.
If you select UTC, a Time Zone option is added to the department properties, which will enable you to
assign a time zone for each department in your plant model so that each department can be treated
as an individual site.
IMPORTANT: If you select UTC, you must Proficy DataMart for your reporting solution.
The Plant Applications Web Reporting is not supported. To contact a sales representative,
please see the Contacting GE topic.
To change this site parameter:
1. Log in to the Plant Applications Administrator.
You must have Administrator access to the Administrator security group to change site
parameters.
2. Expand Global Configuration.
3. Right-click Administer Site Parameters and select Edit Site Parameters. The Site Parameter
dialog box appears.
4. Under Services, double-click Default time zone. The Edit Parameter dialog box appears.

Global Configuration
121
NOTE: If you see the message, "[Coordinated Universal Time] not found in registry," you
must install the latest Microsoft Windows updates.
5. Select Coordinated Universal Time or the desired time zone from the Value list.
6. Click the OK button to save your changes and to close the dialog box.
7. Click the Close button to close the Site Parameters dialog box.
8. After changing this parameter, on the Proficy Server, you must:
a. Stop Proficy Server Manager
b. Stop Proficy Server License Manager
c. Start Proficy Server License Manager
d. Start Proficy Server Manager
Coordinated Universal Time (UTC) Considerations
Plant Applications 5.x supports Coordinated Universal Time (UTC) as an option on a new installation
of the Proficy Server. When you install a new Proficy Server, you can use the time zone of the server
to store your data as you would in versions earlier than 5.0 or you can use the UTC option. The UTC
option is required to support a Regional Server where plants span time zones. It is also required to
support storage of time across the Daylight Saving Time (DST) boundary. UTC is similar to using
GMT +0:00 as your time zone, with the exception that UTC does not acknowledge Daylight Saving
Time. For example, GMT -6:00 is minus five hours from UTC, when adjusting for Daylight Saving
Time. When you choose the UTC option, all the data is stored on your server in UTC time regardless
of the time zone of the server.
Reporting and UTC
Plant Applications displays, such as Autolog, support UTC including displaying data across the DTS
boundary. When data comes into a display, the timestamp is converted to the time zone of the client.
For example, a test value with a UTC timestamp of 07:00:00 would be displayed with a timestamp of
02:00:00 on a client with a time zone of GMT -6:00 (assuming Daylight Saving Time). For data that
crosses the Fall DST boundary, you will see multiple rows/columns, depending on the display, in the
same time range. The rows/columns will be in order of UTC. For example, consider a time based
Autolog display with columns every 30 minutes. Assuming your DST boundary is at 2:00 AM, the first
1:30 AM column in Autolog will be from before 2:00 AM and the second 1:30 AM column will be from
after the DST boundary.
UTC-enabled standard reports are scheduled to be supported as part of the first SIM for this version
of Plant Applications. The SIM is expected to be out within few months of the initial release of Plant
Applications 5.0, and a UTC-enabled Excel Add-in is expected to follow soon after. For the initial
release of Plant Applications 5.0, our standard reports, including the Add-in for Excel, do not support
UTC.
NOTE: If you have custom reports, they will need to be rewritten if you wish to use UTC.
Upgrading Plant Applications to use UTC
There is no automated upgrade path to use UTC on an existing Plant Applications installation.
Therefore, we are providing the following manual options for you to consider, if you decide to upgrade
to using UTC on an existing database. We are unable to go through all the scenarios or provide the
technical details of how to implement them; these are just options to consider. With both options you
must first make a copy of your production database.
IMPORTANT: Before proceeding, it is important to understand that these options require
advanced knowledge of both SQL Server and Plant Applications.

Services Parameters
122
IMPORTANT: Either option must be fully tested before implementing in a production
environment.
Option 1: Create a gap in your data
You must create a gap in your data between the last timestamp recorded at local server time and the
first timestamp recorded when you switch to UTC.
1. Create a copy of your production database. After you have tested this option, you can use the
copy of your production database as a backup or for reporting, while you wait for the new
UTC database to be populated.
2. Do one of the following:
o If your server time is -GMT, you can simply switch to UTC because the gap is created
automatically when you switch to UTC time.
Example
If you are at GMT -5:00 and your last data was recorded at 14:22, when you switch to UTC
(GMT) the data is stored at 19:22, creating a gap in your data of five hours.
o If you are +GMT, wait until the UTC time is newer than your last time stamp in the
database. This is to prevent data from being overwritten.
Example
If you are at GMT +3:00 and your last data was recorded at 11:00:00, you can shut down
the server, wait for four hours and switch to UTC. Your data will be stored at 12:00:00,
providing a one hour gap.
3. Perform the Move Server procedure. See Knowledgebase article KB5427 on our Web site:
https://digitalsupport.ge.com.
Option 2: Eliminate the runtime data from the copy of your database
1. Create a copy of your production database. After you have tested this option, you can use the
copy of your production database as a backup or for reporting, while you wait for the new
UTC database to be populated.
2. Perform the Move Server procedure, along with the optional truncate runtime data procedure.
See Knowledgebase article KB5427 on our Web site: https://digitalsupport.ge.com.
NOTE: The Move Server document will be updated to include the truncate runtime data
procedure by Q4 2010.
DefaultPrinter
This site parameter is used to set the default printer for Proficy Server for table-driven prints
(Printer_Id from Report_Printers table). A value of 1 indicates no printer defined.
Informational Email Group
This site parameter specifies the email group to be used for informational level email messages from
the server. The available values are determined by the groups in the E-mail Engine Configuration.
To change this site parameter:
1. Log in to the Plant Applications Administrator.

Global Configuration
123
You must have Administrator access to the Administrator security group to change site
parameters.
2. Expand Global Configuration.
3. Right-click Administer Site Parameters and select Edit Site Parameters. The Site Parameter
dialog box appears.
4. Under Services, double-click Informational Email Group. The Edit Parameter dialog box
appears.
5. In the Value box, select the email group.
6. Click the OK button to save your changes and to close the dialog box.
7. Click the Close button to close the Site Parameters dialog box.
8. Refresh the server.
IsAlive
When the parameter is set to True it immediately activates a heartbeat signal for all the Proficy
services. In each services log file the text "Alive..." is written once per minute. If the frequency is
significantly great than a minute or not being written at all then there is a problem with the service and
a restart should be attempted.
NOTE: This flag should not be left on for a long period of time as it will generate large log
files.
To change this site parameter:
1. Log in to the Plant Applications Administrator.
You must have Administrator access to the Administrator security group to change site
parameters.
2. Expand Global Configuration.
3. Right-click Administer Site Parameters and select Edit Site Parameters. The Site Parameter
dialog box appears.
4. Under Services, double-click IsAlive. The Edit Parameter dialog box appears.
5. Select True or False from the Value list.
6. Click the OK button to save your changes and to close the dialog box.
7. Click the Close button to close the Site Parameters dialog box.
8. Refresh the server.
LogFilePath
Each of the Proficy services has a log file. The location of all the log files on the server is set by the
site parameter LogFilePath (the default path is C:\Program Files\Proficy\Proficy Server\LogFiles). The
log files report reload times, execution messages and errors and, when debug is turned on,
debugging information. Log files should be check periodically and any error messages should be
resolved. Every time a service is restarted, a new log file is created.
To change this site parameter:
1. Log in to the Plant Applications Administrator.
You must have Administrator access to the Administrator security group to change site
parameters.

Services Parameters
124
2. Expand Global Configuration.
3. Right-click Administer Site Parameters and select Edit Site Parameters. The Site Parameter
dialog box appears.
4. Under Services, double-click LogFilePath. The Edit Parameter dialog box appears.
5. In the Value box, type the full path for the location of the log files.
6. Click the OK button to save your changes and to close the dialog box.
7. Click the Close button to close the Site Parameters dialog box.
8. Refresh the server.
MaxEventTimeSpan
This site parameter defines the maximum time span (in minutes) to retrieve data (process an event
and to data) from the historian for an event. If event start time is further back in time than the specified
value, then no data is retrieved beyond the time span, only for the period.
To change this site parameter:
1. Log in to the Plant Applications Administrator.
You must have Administrator access to the Administrator security group to change site
parameters.
2. Expand Global Configuration.
3. Right-click Administer Site Parameters and select Edit Site Parameters. The Site Parameter
dialog box appears.
4. Under Services, double-click MaxEventTimeSpan. The Edit Parameter dialog box appears.
5. In the Value box, type the maximum number of minutes.
6. Click the OK button to save your changes and to close the dialog box.
7. Click the Close button to close the Site Parameters dialog box.
8. Refresh the server.
MaxMegLogFileSize
The MaxMegLogFileSize parameter specifies the maximum size a service log file can be (in
megabytes). When this size is reached the log file is closed and a new one opened. (0 = no limit).
To change this site parameter:
1. Log in to the Plant Applications Administrator.
You must have Administrator access to the Administrator security group to change site
parameters.
2. Expand Global Configuration.
3. Right-click Administer Site Parameters and select Edit Site Parameters. The Site Parameter
dialog box appears.
4. Under Services, double-click MaxMegLogFileSize. The Edit Parameter dialog box appears.
5. In the Value box, type the number of megabytes log files are allowed to be
6. Click the OK button to save your changes and to close the dialog box.
7. Click the
Close button to close the Site Parameters dialog box.

Global Configuration
125
8. Refresh the server.
MaxPSTimeSpan
This site parameter defines the maximum time span (in minutes) to retrieve data (process an event
and to data) from the historian for a product change. If product change start time is further back in
time than the defined value, then no data is retrieved beyond the time span, only for the period.
To change this site parameter:
1. Log in to the Plant Applications Administrator.
You must have Administrator access to the Administrator security group to change site
parameters.
2. Expand Global Configuration.
3. Right-click Administer Site Parameters and select Edit Site Parameters. The Site Parameter
dialog box appears.
4. Under Services, double-click MaxPSTimeSpan. The Edit Parameter dialog box appears.
5. In the Value box, type the maximum number of minutes.
6. Click the OK button to save your changes and to close the dialog box.
7. Click the Close button to close the Site Parameters dialog box.
8. Refresh the server.
MinEventTimeSpan
This site parameter defines the minimum event time span (in minutes) to skip processing an event
and gathering to data from the historian.
To change this site parameter:
1. Log in to the Plant Applications Administrator.
You must have Administrator access to the Administrator security group to change site
parameters.
2. Expand Global Configuration.
3. Right-click Administer Site Parameters and select Edit Site Parameters. The Site Parameter
dialog box appears.
4. Under Services, double-click MinEventTimeSpan. The Edit Parameter dialog box appears.
5. In the Value box, type the minimum number of minutes.
6. Click the OK button to save your changes and to close the dialog box.
7. Click the Close button to close the Site Parameters dialog box.
8. Refresh the server.
MinPSTimeSpan
This site parameter defines the minimum product change time span (in minutes) to skip processing an
event and gathering to data from the historian.
To change this site parameter:
1. Log in to the Plant Applications Administrator.

Services Parameters
126
You must have Administrator access to the Administrator security group to change site
parameters.
2. Expand Global Configuration.
3. Right-click Administer Site Parameters and select Edit Site Parameters. The Site Parameter
dialog box appears.
4. Under Services, double-click MinPSTimeSpan. The Edit Parameter dialog box appears.
5. In the Value box, type the minimum number of minutes.
6. Click the OK button to save your changes and to close the dialog box.
7. Click the Close button to close the Site Parameters dialog box.
8. Refresh the server.
MultiThreaded
The MultiThreaded site parameter enables or disables multithreading for the Proficy Server services.
For more information, see the Multithreading topic.
To change this site parameter:
1. Log in to the Plant Applications Administrator.
You must have Administrator access to the Administrator security group to change site
parameters.
2. Expand Global Configuration.
3. Right-click Administer Site Parameters and select Edit Site Parameters. The Site Parameter
dialog box appears.
4. Under Services, double-click MultiThreaded. The Edit Parameter dialog box appears.
5. In the Value box, select True to enable multithreading or False to disable multithreading.
6. Click the OK button to save your changes and to close the dialog box.
7. Click the Close button to close the Site Parameters dialog box.
8. Refresh the server.
Perform Automatic Service Reloads
This site parameter determines whether Plant Applications services automatically reload after a
configuration change. If set to True, the Plant Applications services will automatically reload. If set to
False, you will be prompted to reload the services.
Setting this parameter to False will allow you to control when you want to reload the
services because you'll be prompted after every configuration change.
To change this site parameter:
1. Log in to the Plant Applications Administrator.
You must have Administrator access to the Administrator security group to change
site parameters.
2. Open Global Configuration.
3. Right-click on Administer Site Parameters and select Edit Site Parameters from the pop-up
menu.

Global Configuration
127
4. In the Site Parameters dialog box, under Services, double-click on Perform automatic service
reloads.
5. In the Edit Parameter dialog box, select either True or False from the Value drop-down list.
6. Click the OK button to close the dialog box.
7. Click the Close button to close the Site Parameters dialog box.
8. Refresh the server.
Product Summarization Sigma
Use this site parameter to change the multiplier used in Cpu, Cpl, Ppu, and Ppl calculations (these
are used for Cpk and Ppk calculations). The default value is 3, which reflects the standard multiplier
used in "6 sigma" calculations. For example, if the value is changed to 2, then rather than having 3σ
as the divisor for the Cpu calculation, you would have a divisor of 2σ.
To change this site parameter:
1. Log in to the Plant Applications Administrator.
You must have Administrator access to the Administrator security group to change site
parameters.
2. Open Global Configuration.
3. Right-click Administer Site Parameters and choose Edit Site Parameters.
4. The Site Parameters dialog box appears.
5. Scroll down and double-click Product Summarization Sigma.
6. The Edit Parameter dialog box appears.
7. Enter a number from 1 to 4 in the Value box. The following formula shows how this number
will be used:
8. Ppk = min( (USL - XBar) / (ProductSummarizationSigma * StDev), (xBar - LSL) /
(ProductSummarizationSigma * StDev))
9. Cpk = min( (USL - XBar) / (ProductSummarizationSigma * Sigma), (xBar - LSL) /
(ProductSummarizationSigma * Sigma))
10. Click OK to save your changes and close the dialog box.
11. Click Close to close the Site Parameters dialog box.
12. Refresh the server.
For more information on Cp, Cpk, Pp, and Ppk calculations, see Variable Property Definitions.
TriggerOlderEvents
The TriggerOlderEvents site parameter defines the cutoff time in which the Plant Applications
Services no longer process events. The parameter is defined as number of months and by default is
set to 6 months. If your site needs to process changes to events that are older than 6 months, you
can modify the TriggerOlderEvents site parameter to increase the time window.
To change this site parameter:
1. Log in to the Plant Applications Administrator.
You must have Administrator access to the Administrator security group to change site
parameters.

Services Parameters
128
2. Expand Global Configuration.
3. Right-click Administer Site Parameters, and then select Edit Site Parameters.
The Site Parameter window appears.
4. Under Services, double-click TriggerOlderEvents.
The Edit Parameter window appears.
5. In the Value box, enter the number of months.
6. Select OK to save your changes.
7. Select Close to close the Site Parameters window.
8. Refresh the server.
ReadLagTime
This site parameter defines the default value for determining how long to wait after scheduled time
before processing a time-based variable.
To change this site parameter:
1. Log in to the Plant Applications Administrator.
You must have Administrator access to the Administrator security group to change site
parameters.
2. Expand Global Configuration.
3. Right-click Administer Site Parameters and select Edit Site Parameters. The Site Parameter
dialog box appears.
4. Under Services, double-click ReadLagTime. The Edit Parameter dialog box appears.
5. In the Value box, type the number of seconds to wait.
6. Click the OK button to save your changes and to close the dialog box.
7. Click the Close button to close the Site Parameters dialog box.
8. Refresh the server.
Recognize Crew Schedule
In order to have Plant Applications use your crew schedule, you must set the Recognize Crew
Schedule site parameter to True. The default is False. Setting this site parameter to True will override
the following site parameters:
ShiftOffset
ShiftInterval
EndOfDayHour
EndOfDayMinute
To change this site parameter:
1. Log in to the Plant Applications Administrator.
You must have Administrator access to the Administrator security group to change site
parameters.
2. Expand Global Configuration.

Global Configuration
129
3. Right-click Administer Site Parameters and select Edit Site Parameters. The Site Parameter
dialog box appears.
4. Under Services, double-click Recognize Crew Schedule. The Edit Parameter dialog box
appears.
5. Select True or False from the Value list.
6. Click the OK button to save your changes and to close the dialog box.
7. Click the Close button to close the Site Parameters dialog box.
8. Refresh the server.
Reload Interval (Minutes)
This site parameter defines an integer value which sets the frequency (in minutes) when the Plant
Applications services will automatically reload their configuration to pick up changes.
To change this site parameter:
1. Log in to the Plant Applications Administrator.
You must have Administrator access to the Administrator security group to change site
parameters.
2. Expand Global Configuration.
3. Right-click Administer Site Parameters and select Edit Site Parameters. The Site Parameter
dialog box appears.
4. Under Services, double-click Reload Interval (Minutes). The Edit Parameter dialog box
appears.
5. In the Value box, type the number of minutes.
6. Click the OK button to save your changes and to close the dialog box.
7. Click the Close button to close the Site Parameters dialog box.
8. Refresh the server.
UnicodeTextFiles
This site parameter determines whether text files created by Plant Applications will be output as ANSI
or Unicode. If the parameter is set to True, the output will be Unicode. Text files are created by
models or by using Result set 50 in a stored procedure that is called by Event Manager or
CalcManager. The following models create text files:
Model
Number
Model Description
78 Qupid interface
77 Production event data from a
stored procedure
92 Reel data
99 Event status and comment
93 Export events (Autoline) (table
driven)
97 Specification exports
94 Event export (Autoline)

System Parameters
130
96 Specification exports
(Acquidata)
95 Event exports (Acquidata)
NOTE: .log and .shw files are not controlled by this parameter. They are output in
Unicode.
To change this site parameter:
1. Log in to the Plant Applications Administrator.
You must have Administrator access to the Administrator security group to change site
parameters.
2. Expand Global Configuration.
3. Right-click Administer Site Parameters and select Edit Site Parameters. The Site Parameter
dialog box appears.
4. Under Services, double-click UnicodeTextFiles. The Edit Parameter dialog box appears.
5. In the Value box, select True to output text files in Unicode.
6. Click the OK button to save your changes and to close the dialog box.
7. Click the Close button to close the Site Parameters dialog box.
8. Refresh the server.
Warning Email Group
This site parameter specifies the email group to be used for warning level email messages from the
server. The available values are determined by the groups in the E-mail Engine Configuration.
To change this site parameter:
1. Log in to the Plant Applications Administrator.
You must have Administrator access to the Administrator security group to change site
parameters.
2. Expand Global Configuration.
3. Right-click Administer Site Parameters and select Edit Site Parameters. The Site Parameter
dialog box appears.
4. Under Services, double-click Warning Email Group. The Edit Parameter dialog box appears.
5. In the Value box, select the email group.
6. Click the OK button to save your changes and to close the dialog box.
7. Click the Close button to close the Site Parameters dialog box.
8. Refresh the server.
System Parameters
Ad hoc Content Generator Port
This is the port number that the Content Generator receives requests on. This is a system parameter
and should not be changed.
Global Configuration
131
ClusteredSystem
This is a system parameter and should be changed only by someone with advanced knowledge.
Select 1 to use Plant Applications in a clustered setup. Contact GE Intelligent Platforms support if you
need to enable this. Valid values are:
0 = False
1 = True
License Manager - Support Old Client
This is a system parameter and should not be changed. This True/False flag controls whether the
license manager will support old (pre-4.0) clients. These clients require license information to be
written to the database. If the site does not have old clients, then it would be better for performance
the set this to False, but it will not hurt to leave it True.
License Manager - Write Stats to Database
This is a system parameter and should not be changed. There is a table in the database
(License_Mgr_Stats) which has license usage statistics by month. This setting controls if the License
Manager will update the table or not.
Local Connection Pool
This is a system parameter and should be changed only by someone with advanced knowledge. This
system parameter determines the number of threads available for use by the ODBC Models (604,
605, 607).
WebApps Log Level
The level of logging to use for the .NET Web applications. This should never be changed directly. It
should only be changed by the WebApps administration page (http://<your server
name>/apps/administration/main.aspx).
To change this parameter:
1. Open your browser.
2. In the address bar, type http://<your server name>/apps/administration/main.aspx and
press ENTER.
3. If necessary, enter your user name and password to log on to the Web Server.
4. From the Administration Options drop-down list, select Log Writer Settings.
5. On the Log Writer Settings tabbed page, select the logging level from the drop-down list.
WebAppServer
This system parameter stores the server name where the web server is installed. It uses this to
connect to the authentication services. This should not be changed.
WebAppsLoadURLService
The partial address (URL) of the web service that is used to generate URLs for the .NET reports. This
is a system parameter and should never be changed.

Web Server Parameters
132
WebAppsLoginServer
The partial address (URL) of the authentication web service. This is a system parameter and should
not be changed.
Web Server Parameters
ASP Print Que Max Attempts
IMPORTANT: This site parameter should be changed only by someone with advanced
knowledge of Plant Applications or when instructed by Customer Support.
This Web Server site parameter determines the number of attempts the ASP engine will make to print
a report.
To change this site parameter:
1. Log in to the Plant Applications Administrator.
NOTE: You must have Administrator access to the Administrator security group to
change site parameters.
2. Expand Global Configuration.
3. Right-click Administer Site Parameters and click Edit Site Parameters. The Site Parameter
dialog box appears.
4. Double-click on ASP Print Que Max Attempts. The Edit Parameter dialog box appears.
5. Enter the maximum number of attempts in the Value field.
6. Click the OK button to close the dialog box.
7. Click the Close button to close the Site Parameters dialog box.
8. Refresh the server.
AutoStartAccess
This site parameter determines whether Microsoft Access will be loaded when the Report Engine is
started or when Access is actually needed to generate a report.
If you set the parameter to 1 (one), Access will start when the Report Engine starts.
If you set the parameter to 0 (zero), Access will not start until it is needed to generated a
report.
To change this site parameter:
1. Log in to the Plant Applications Administrator.
You must have Administrator access to the Administrator security group to change site
parameters.
2. Open Global Configuration.
3. Right-click on Administer Site Parameters and select Edit Site Parameters from the pop-up
menu.
4. In the Site Parameters dialog box, double-click on AutoStartAccess.
5. In the Edit Parameter dialog box, type 1 (Access will start when the Report Engine starts) or 0
(Access will not start until it is needed to generate a report) in the Value field.

Global Configuration
133
6. Click the OK button to save your changes and close the dialog box.
7. Click the Close button to close the Site Parameters dialog box.
8. Refresh the server.
AutoStartExcel
This site parameter determines whether Microsoft Excel will be loaded when the Report Engine is
started or when Excel is actually needed to generate a report.
If you set the parameter to 1 (one), Excel will start when the Report Engine starts.
If you set the parameter to 0 (zero), Excel will not start until it is needed to generated a report.
To change this site parameter:
1. Log in to the Plant Applications Administrator.
You must have Administrator access to the Administrator security group to change site
parameters.
2. Open Global Configuration.
3. Right-click on Administer Site Parameters and select Edit Site Parameters from the pop-up
menu.
4. In the Site Parameters dialog box, double-click on AutoStartExcel.
5. In the Edit Parameter dialog box, type 1 (Excel will start when the Report Engine starts) or 0
(Excel will not start until it is needed to generate a report) in the Value field.
6. Click the OK button to save your changes and close the dialog box.
7. Click the Close button to close the Site Parameters dialog box.
8. Refresh the server.
EndOfWeekDay
This site parameter is used to set the day that signifies the end of the week (Range=1-7 with Day 1 =
Monday (US English Default DATEFIRST SQL setting)). This is used for reporting.
To change this site parameter:
1. Log in to the Plant Applications Administrator.
You must have Administrator access to the Administrator security group to change site
parameters.
2. Expand Global Configuration.
3. Right-click Administer Site Parameters and choose Edit Site Parameters. The Site
Parameters dialog box appears.
4. Under the Web Server section, double-click EndOfWeekDay. The Edit Parameter dialog box
appears.
5. In the Value box, type the value that corresponds to the day your work week ends.
6. Click the OK button to save your changes and close the dialog box.
7. Click the Close button to close the Site Parameters dialog box.
8. Refresh the server.

Web Server Parameters
134
EngineLoggingLevel
IMPORTANT: This site parameter should be changed only by someone with advanced knowledge of
Plant Applications or when instructed by Customer Support.
This site parameter determines the level of error messages that will be recorded by the report engine.
The number of days error messages are kept are determined by the site parameter,
LogfilePurgeDays.
Error Message Levels
Level 0: Level 0 messages are messages that are always recorded. Typical messages included
information about services starting and stopping; problems with the system, such as lack of disk
space; or initialization information. If you select level 0, no other messages will be logged.
Level 1: Level 1 messages are critical messages and generate an email. Typically, a level 1 message
means that the engine will shut down. If you select level 1, all level 1 and level 0 messages will be
recorded.
Level 2: Level 2 messages record known, specific errors that have occurred within a report. If you
select level 2, all messages with a level 2 and below (2, 1, 0) will be recorded.
Level 3: Level 3 messages record general errors within the report engine. If you select level 3, all
messages with a level 3 and below (3, 2, 1, and 0) will be recorded.
Level 4: Level 4 messages record all general activity. If you select level 4, all messages with a level 4
and below (4, 3, 2, 1, and 0) will be recorded.
To change this site parameter:
1. Log in to the Plant Applications Administrator.
You must have Administrator access to the Administrator security group to change site
parameters.
2. Open Global Configuration.
3. Right-click on Administer Site Parameters and select Edit Site Parameters from the pop-up
menu.
4. In the Site Parameters dialog box, double-click on EngineLoggingLevel.
5. In the Edit Parameter dialog box, in the Value field, enter the maximum level of error
messages you want to record.
6. Click the OK button to save your changes and close the dialog box.
7. Click the Close button to close the Site Parameters dialog box.
8. Refresh the server.
To view the Report Engine log files:
1. Log in to the Plant Applications Administrator
You must have Manager access or greater to the Administrator security group to start the
Web Administrator.
2. Open Server Management.
3. Right-click on the Administer Web Server folder and select Administer Web Server from the
pop-up menu.

Global Configuration
135
4. In the Proficy Server Login dialog box, enter your Plant Applications user name and password
and click OK.
5. Open the Web Server folder, and then open the Engines folder.
6. Select an engine to view its log file.
EngineRestartHours
IMPORTANT: This site parameter should be changed only by someone with advanced knowledge of
Plant Applications or when instructed by Customer Support.
This site parameter determines the number of hours the report engine will run before shutting itself
down. The default is four hours.
To change this site parameter:
1. Log in to the Plant Applications Administrator.
You must have Administrator access to the Administrator security group to change site
parameters.
2. Open Global Configuration.
3. Right-click on Administer Site Parameters and select Edit Site Parameters from the pop-up
menu.
4. In the Site Parameters dialog box, double-click on EngineRestartHours.
5. In the Edit Parameter dialog box, enter the number of hours in the Value field.
6. Setting the Value to 0 (zero) causes the engine to never intentionally shut down.
7. Click the OK button to save your changes and close the dialog box.
8. Click the Close button to close the Site Parameters dialog box.
9. Refresh the server.
ExcelAddIns
Use this site parameter to specify the add-ins (Add-ins are programs that add optional commands
and features to Microsoft Excel) that you want to load automatically into Microsoft Excel.
To change this site parameter:
1. Log in to the Plant Applications Administrator.
You must have Administrator access to the Administrator security group to change site
parameters.
2. Open Global Configuration.
3. Right-click on Administer Site Parameters and select Edit Site Parameters from the pop-up
menu.
4. In the Site Parameters dialog box, double-click on ExcelAddIns.
5. In the Edit Parameter dialog box, enter the add-ins you want to load into Excel in the Value
field.
6. Separate each add-in with a comma and no spaces.
7. Click the OK button to save your changes and close the dialog box.

Web Server Parameters
136
8. Click the Close button to close the Site Parameters dialog box.
9. Refresh the server.
FTPPW
This site parameter contains the password for the FTP engine to use for logins.
To change this site parameter:
1. Log in to the Plant Applications Administrator.
You must have Administrator access to the Administrator security group to change site
parameters.
2. Expand Global Configuration.
3. Right-click Administer Site Parameters and select Edit Site Parameters. The Site Parameter
dialog box appears.
4. Under Web Server, double-click FTPPW. The Edit Parameter dialog box appears.
5. In the Value box, type the new password.
6. Click the OK button to save your changes and to close the dialog box.
7. Click the Close button to close the Site Parameters dialog box.
8. Refresh the server.
FTPSiteName
This site parameter defines the default directory for the FTP engine to use for transfers. This site
parameter is used along with RSName to define the FTP location.
To change this site parameter:
1. Log in to the Plant Applications Administrator.
You must have Administrator access to the Administrator security group to change site
parameters.
2. Expand Global Configuration.
3. Right-click Administer Site Parameters and select Edit Site Parameters. The Site Parameter
dialog box appears.
4. Under Web Server, double-click FTPSiteName. The Edit Parameter dialog box appears.
5. In the Value box, type the web server name.
6. Click the OK button to save your changes and to close the dialog box.
7. Click the Close button to close the Site Parameters dialog box.
8. Refresh the server.
FTPUid
This site parameter defines the user ID for the FTP engine to use for logins.
To change this site parameter:
1. Log in to the Plant Applications Administrator.

Global Configuration
137
You must have Administrator access to the Administrator security group to change site
parameters.
2. Expand Global Configuration.
3. Right-click Administer Site Parameters and select Edit Site Parameters. The Site Parameter
dialog box appears.
4. Under Web Server, double-click FTPUid. The Edit Parameter dialog box appears.
5. In the Value box, type the new user ID.
6. Click the OK button to save your changes and to close the dialog box.
7. Click the Close button to close the Site Parameters dialog box.
8. Refresh the server.
LogFilePurgeDays
This site parameter specifies the number of days error messages are kept
To change this site parameter:
1. Log in to the Plant Applications Administrator.
You must have Administrator access to the Administrator security group to change site
parameters.
2. Expand Global Configuration.
3. Right-click Administer Site Parameters and select Edit Site Parameters. The Site Parameter
dialog box appears.
4. Under Web Server, double-click LogFilePurgeDays. The Edit Parameter dialog box appears.
5. In the Value box, type the number of days to keep error messages.
6. Click the OK button to save your changes and to close the dialog box.
7. Click the Close button to close the Site Parameters dialog box.
8. Refresh the server.
MaxEngineFails
IMPORTANT: This site parameter should be changed only by someone with advanced knowledge of
Plant Applications or when instructed by Customer Support.
Use this parameter to specify the number of times a report engine is allowed to fail before the report
engine shuts down.
To change this site parameter:
1. Log in to the Plant Applications Administrator.
You must have Administrator access to the Administrator security group to change site
parameters.
2. Open Global Configuration.
3. Right-click on the Administer Site Parameters folder and select Edit Site Parameters from the
pop-up menu.
4. In the Site Parameters dialog box, double-click on MaxEngineFails.
5. In the Edit Parameter dialog box, enter the number of engine fails allowed in the Value field.

Web Server Parameters
138
6. Click the OK button to save your changes and close the dialog box.
7. Click the Close button to close the Site Parameters dialog box.
8. Refresh the server.
MaxReportFails
IMPORTANT: This site parameter should be changed only by someone with advanced knowledge of
Plant Applications or when instructed by Customer Support.
Use this parameter to determine the number of times a report is allowed to fail before its status is set
to Failed. Once the report's status is Failed, the report will not run again until someone with
Administrator access in the Administrator security group manually starts the report and it runs
successfully.
To change this site parameter:
1. Log in to the Plant Applications Administrator.
You must have Administrator access to the Administrator security group to change site
parameters.
2. Open Global Configuration.
3. Right-click on the Administer Site Parameters folder and select Edit Site Parameters from the
pop-up menu.
4. In the Site Parameters dialog box, double-click on MaxReportFails.
5. In the Edit Parameter dialog box, enter the number of report fails allowed in the Value field.
6. Click the OK button to save your changes and close the dialog box.
7. Click the Close button to close the Site Parameters dialog box.
8. Refresh the server.
MaxSQLLoginAttempts
IMPORTANT: This site parameter should be changed only by someone with advanced knowledge of
Plant Applications or when instructed by Customer Support.
Use this site parameter to specify the number of times the report engine and scheduler will attempt to
reconnect to SQL after a lost connection.
To change this site parameter:
1. Log in to the Plant Applications Administrator.
You must have Administrator access to the Administrator security group to change site
parameters.
2. Open Global Configuration.
3. Right-click on Administer Site Parameters and select Edit Site Parameters from the pop-up
menu.
4. In the Site Parameters dialog box, double-click on MaxSQLLoginAttempts.
5. In the Edit Parameter dialog box, enter the number of report fails allowed in the Value field.
6. Click the OK button to save your changes and close the dialog box.
7. Click the Close button to close the Site Parameters dialog box.
8. Refresh the server.

Global Configuration
139
NPTCharacterFlag
Use this site parameter to determine the text that is displayed on reports that include events that
occurred during non-productive time. You can enter a maximum of 64 characters, which can include
letters, numbers, and special characters, such as @#$%^.
The default value is (NPT).
To change this site parameter:
1. Log in to the Plant Applications Administrator.
You must have Administrator access to the Administrator security group to change site
parameters.
2. Expand Global Configuration.
3. Right-click on Administer Site Parameters and select Edit Site Parameters. The Site
Parameters dialog box appears.
4. Double-click NPTCharacterFlag. The Edit Parameter dialog box appears.
5. Enter the text in the Value field.
6. Click the OK button to save your changes and close the dialog box.
7. Click the Close button to close the Site Parameters dialog box.
8. Refresh the server.
OEE Max Limit Override
If set to True, this site parameter allows availability, performance, quality and OEE to exceed 100
percent. The default is False.
To change this site parameter:
1. Log in to the Plant Applications Administrator.
You must have Administrator access to the Administrator security group to change site
parameters.
2. Expand Global Configuration.
3. Right-click Administer Site Parameters and select Edit Site Parameters. The Site Parameter
dialog box appears.
4. Under Web Server, double-click OEE Max Limit Override. The Edit Parameter dialog box
appears.
5. Select True or False from the Value list.
6. Click the OK button to save your changes and to close the dialog box.
7. Click the Close button to close the Site Parameters dialog box.
8. Refresh the server.
ReportTimerInterval
This site parameter controls how often, in seconds, the report engine queries the Plant Applications
database. The default value is 5 seconds. Under most circumstances, this parameter should not be
changed.
To change this site parameter:

Web Server Parameters
140
1. Log in to the Plant Applications Administrator.
You must have Administrator access to the Administrator security group to change site
parameters.
2. Open Global Configuration.
3. Right-click on Administer Site Parameters and select Edit Site Parameters. The Site
Parameters dialog box appears.
4. Under Web Server double-click on ReportTimerInterval. The Edit Parameter dialog box
appears.
5. Click in the Value field and type the number of seconds, which specifies how often the report
engine will query the Plant Applications database.
6. Click the OK button to save your changes and close the dialog box.
7. Click the Close button to close the Site Parameters dialog box.
8. Refresh the server.
SQL Reporting Services
Developers can create reports using Microsoft Visual Studio. Once reports have been deployed to
Internet Information Services, they can be executed and viewed from the Plant Applications Web
Report Server.
After the report and been created and deployed, there are five site parameters that must first be
configured.
SQL Reporting Services Database Name
SQL Reporting Services http Location
SQL Reporting Services Password
SQL Reporting Services Server Name
SQL Reporting Services Username
After you have configured the site parameters, there are steps required to create a Plant Applications
report type that acts as a shell pointing to the SQL report.
To change this site parameter:
1. Log in to the Plant Applications Administrator.
You must have Administrator access to the Administrator security group to change site
parameters.
2. Expand Global Configuration.
3. Right-click Administer Site Parameters and select Edit Site Parameters. The Site Parameter
dialog box appears.
4. Under Web Server, double-click each of the following five site parameters. The Edit
Parameter dialog box appears.
5. In the value field, type the appropriate information for each parameter.
SQL Reporting Services Database Name: Type the name of SQL Server database for
Reporting Services
SQL Reporting Services http Location: Type the default URL For Microsoft SQL Server
Reporting Services (for example, http://<ServerName>/SQLReportServer)

Global Configuration
141
SQL Reporting Services Password: Type the password for accessing Reporting Services
database
SQL Reporting Services Server Name: Type the name of SQL Server that hosts Reporting
Services database
SQL Reporting Services Username: Type the username for accessing Reporting Services
database
6. Click the OK button to save your changes and to close the dialog box.
7. Click the Close button to close the Site Parameters dialog box.
8. Refresh the server.
WA_HistorianForceLocal
This parameter should not be changed. If set to True, it forces any Historian to bypass the RDS.
WA_PreCompilePages
If this site parameter is set to True, Web applications will preload all pages. Initially, this will affect
performance, but the result will be faster loading Web applications. If this site parameter is set to
False, the initial page will load faster, but subsequent pages will load slower.
To change this site parameter:
1. Log in to the Plant Applications Administrator.
You must have Administrator access to the Administrator security group to change site
parameters.
2. Expand Global Configuration.
3. Right-click Administer Site Parameters and select Edit Site Parameters. The Site
Parameter dialog box appears.
4. Under Web Server, double-click WA_PreCompilePages. The Edit Parameter dialog box
appears.
5. Select True or False from the Value list.
6. Click the OK button to save your changes and to close the dialog box.
7. Click the Close button to close the Site Parameters dialog box.
8. Refresh the server.
WebSiteTimeoutMin
IMPORTANT: This site parameter should be changed only by someone with advanced
knowledge of Plant Applications or when instructed by Customer Support.
Use this site parameter to specify the number of minutes the Web client can remain inactive before
IIS (Internet Information Server is the Microsoft web and FTP server) drops the session.
To change this site parameter:
1. Log in to the Plant Applications Administrator.
You must have Administrator access to the Administrator security group to change site
parameters.
2. Expand Global Configuration.

Restart Services in Tomcat Server
142
3. Right-click Administer Site Parameters and click Edit Site Parameters. The Site Parameters
dialog box appears.
4. Scroll down and double-click WebSiteTimeoutMin. The Edit Parameter dialog box appears.
5. In the Value field, enter the number of minutes of inactivity before timing out.
6. Click the OK button to save your changes and close the dialog box.
7. Click the Close button to close the Site Parameters dialog box.
8. Refresh the server.
Restart Services in Tomcat Server
These are the list of services to be restarted in Tomcat Server when the relevant Site parameters or
Sheet options are modified.
Display
Option ID
Display Option Name Cached in Service
445
Create Activities for
each title in the display
activities-app-service, activities-service
446
Unit to associate
activities to
mymachine-service-impl, downtime-app-service,
mes-service-impl, FaultInfo, productionmetrics-app-service
458
Displays the chosen
option instead of
var_desc
activities-app-service, activities-service
Site
Parameter
ID
Site Parameter
Name
Site Parameter Long
Description
Cached in Service
8 LanguageNumber
Language Setting productionmetrics-app-service
12 SiteName Set Site Name processanalyzer-service-impl
14 EndOfDayHour
Set end of production day
hour value (Range = 0-23)
activities-app-service, activities-
service, productionmetrics-app-
service
15 EndOfDayMinute
Set end of production day
minute value (Range = 0-59)
activities-app-service, activities-
service, productionmetrics-app-
service
16 ShiftInterval
Shift interval value is number
of minutes per shift
activities-app-service, activities-
service, productionmetrics-app-
service
17 ShiftOffset
Shift offset value is first shift
starts x minutes after midnight
activities-app-service, activities-
service, productionmetrics-app-
service
301 EndOfWeekDay
Set the day that signifies the
end of the week [Range=1-7
with Day 1 = Monday (US
English Default DATEFIRST
SQL setting)].
Used for reports.
activities-app-service, activities-
service, productionmetrics-app-
service
317
OEE Max Limit
Override
Allow Availability,
Performance, Quality and
OEE to exceed 100 percent.
productionmetrics-app-service

Global Configuration
143
607
Populate OEE
Aggregation
Populate OEE Aggregation
table for all units
productionmetrics-app-service
609 Comparison Type
To identify comparison mode
for Analysis
processanalyzer-service-impl
612 BorderDuration
Duration (in minutes) of
trending of values before and
after the Alarm. Default is
240.
alarm-app-service
Enterprise Connector Service
The Enterprise Connector service provides various functions in support of the interface to Microsoft
BizTalk® server as described in the following.
There are registry settings that must be manually created to configure the service. For
more information, see Registry Settings.
Download
Used to download schedules from ERP to Plant Applications. ERP sends a message which BizTalk
picks up (Schedule Download Template in Enterprise Connector), transforms and sends to this
service. This service then calls the stored procedure setup for subscription group
'ScheduleDownload'. If the stored procedure returns result set 15 & 16 then these are published to the
message bus. Any errors / warnings the stored procedure return are then passed back BizTalk for
email and logging. This is all done through the XML schema B2MML-V02-ProductionSchedule.xsd.
Upload
Used to upload performance data to ERP. The service polls the SP spS95_UploadGateKeeper for
which data needs to be uploaded. It then calls the SPs returned by the gate keeper and uploads that
data to BizTalk (Production Performance Template in Enterprise Connector) which then transforms
that data and uploads it to ERP. This is done through the schema B2MML-V02-
ProductionPerformance.xsd.
Execute Stored Procedure
Used by BizTalk orchestrations to execute stored procedures that exist in the Plant Applications
database. (ExecuteStoredProcedure sample in Enterprise Connector)
Get / Set UDP
Used by Biztalk orchestrations to set / get UDPs. (UDP sample in Enterprise Connector)
Registry Settings
These keys don't already exist in the registry and have to be created manually. The location is:
HKEY_LOCAL_MACHINE\SOFTWARE\Proficy\Proficy Enterprise Connector
IMPORTANT: There is potential to cause systemic disruptions when editing the Windows Registry.
Do not attempt to perform such editing if your are not familiar with the registry.
UploadPollInterval: How often the upload polls the gatekeeper for data to upload to ERP. Default is
30000 or 30 seconds.
OneResponsePerUploadMessage: If set to 0 then each message for upload can contain multiple
process orders. Otherwise only one process order is sent per message. Default is 1.
PublishDirectB2MML: If set to 0, TestConformance, OrderConfirmation, ConsumptionPerformance,
and so on are placed into one schema (PublishedData) and sent to Biztalk. Otherwise they are
Enterprise Connector Service
144
separated into their own schemas. Default is 0 because Biztalk only listens for one message type at a
time when we can send 1 of 4.
SqlTimeout: How long the service will wait before timing out on SQL statements and throw an
exception. Default is 300 (5.0 minutes).
LoggingLevel: The level of errors to log. [1 (Critical), 2 (Critical & Warning), 3 (All)] Default value is 3.
Production Performance (Order Confirmation)
This section defines the production performance order confirmation schema used by the Enterprise
Connector.
ProductionPerformance
The top-level element. Contains a definition of a report on production performance, including the
location of the performance, the publication data of the performance report, the ID of the associated
production schedule, the duration of the production performance, and the list of production responses
making up the production performance report. May include application specific defined elements.
ProductionResponse
Contains a definition of a production response report, including the identification of an associated
production request, the product produced, the duration of the report, and the segments making up the
production response. May include application specific defined elements. May be a top level element
for defined locations.
SegmentResponse
Contains a definition of a report on a segment. Includes the duration, production data, personnel,
equipment, material produced, material consumed, and consumables used.
MaterialProducedActual
Contains a report on actual material resources produced. May define the quantity of the resource
produced, or may contain a list of property definitions and quantities for each property subset.
Production Performance (Production/Consumption Confirmation)
This chapter defines the production performance production/consumption confirmation schema that is
used by the Enterprise Connector.
ProductionPerformance
The top-level element. Contains a definition of a report on production performance, including the
location of the performance, the publication data of the performance report, the ID of the associated
production schedule, the duration of the production performance, and the list of production responses
making up the production performance report. May include application specific defined elements.
ProductionResponse
Contains a definition of a production response report, including the identification of an associated
production request, the product produced, the duration of the report, and the segments making up the
production response. May include application specific defined elements. May be a top level element
for defined locations.
SegmentResponse
Contains a definition of a report on a segment. Includes the duration, production data, personnel,
equipment, material produced, material consumed, and consumables used.

Global Configuration
145
MaterialProducedActual
Contains a report on actual material resources produced. May define the quantity of the resource
produced, or may contain a list of property definitions and quantities for each property subset.
MaterialProducedActualProperty
Contains a definition of actual materials produced, for a subset of the materials identified by a
property value. Includes the quantity of the resource produced.
MaterialConsumedActual
Contains a report on actual material resources consumed. May define the quantity of the resource
consumed, or may contain a list of property definitions and quantities for each property subset.
MaterialConsumedActuaProperty
Contains a definition of actual material resources consumed, for a subset of the resource identified by
a property value. Includes the quantity of the resource consumed.
Production Statuses and Events
Production Statuses are used to indicate the current status of a Production Event. Statuses are used
as follows:
Indicate the statuses that a batch cycles through.
Indicate the status or disposition of a Production Event or User-Defined Event.
Indicate the Inventory or Work In Progress of an event on a Production Unit.
NOTE: Starting with Plant Applications 8.1, users can create more than 255 production
status.
Production Event Status Changes
Production Statuses are defined to indicate if the Event is counted for production and/or inventory.
Production Event output that has not yet been consumed by a Production Unit is considered inventory
or work-in-progress. When the output from a Production Event is consumed or rejected (or wasted),
the event is no longer available in inventory. Output that is completely built by a Production Event on
a Production Unit but that has not yet been released to the next processing step is considered
inventory.
When a status change occurs, the status of the Production Event changes and is automatically
updated on any displays where that Production Event is shown. In addition, the status change may
trigger alarms and calculations. These alarms and calculations may be on the unit where the change
occurred or may be on upstream or downstream units. This provides a variety of ways to highlight an
issue with a product that may need to be dealt with upstream or downstream in the production
process.
Changing the status may also affect how Production Events can be routed through the process. Each
Production Unit has one or more Raw Material Inputs defined. For each input, the valid statuses
available to move upstream product into the next Input are defined. Through this configuration,
rejected statuses can be prevented from moving further in the process.
Changing the status of a Production Event can affect its potential paths through the process. The
case that is potentially most important to consider is what should happen when the status is changed
after a Production Event has already moved forward in the process. Sometimes the output of the next
unit in line needs to be automatically rejected, other times the process may need to be shut down.
Both can be achieved through Alarms and Calculations. Specifically, a genealogy calculation can be
employed.

Production Statuses and Events
146
Genealogy calculations are triggered by additions or updates to the genealogy of events across Units.
Through a genealogy calculation, changes in the data or the status of a Production Event can fire
calculations upstream and downstream in the process, which can in-turn provide alarming or
automatic disposition at that point in the process.
Production Status Attributes
Production Status (Name): Assigns a unique name to each Production Status in the system.
Description: Describes the Production Status.
Status: Indicates whether the status is Good or Bad to determine whether the Production Event
should be counted as Good Production.
Production: Determines whether a Production Status should be considered a Valid Status for
Production Counting. Set to Yes to include the status.
Inventory: Determines whether a Production Status should be considered an Inventory status. Set to
Yes to include the status.
Bypass History: Stops history recording when periodic event dimension updating is set to monitor
event progress during the course of long production events. Refer to Periodic Event Dimension
Update.
Lock Event Data: Places a permanent lock on the particular Production Event or User-Defined
Event status to lock all associated data and prevent data changes. Only transitions from one locked
status to another locked status are allowed. Locking is enforced by the database update procedures.
Once an event is locked, the update procedures will not allow changes to the data. Refer to Locking
Production Statuses.
Icon: In Genealogy View, the icon is shown in the Inventory Load list and the flag is shown while
dragging and dropping Production Events into a Raw Material Input.
Color: In Genealogy View, the status color is the fill color of the Production Event when it is on a
Raw Material Input position or is the color of the Production Event in the family tree view.
Adding and Defining Production Statuses
1. In the Plant Applications Administrator, expand Global Configuration
2. Right-click Administer Production Statuses and select Edit Production Status. The
Production Status Editor dialog box appears.
3. Click New. The boxes become editable.
4. In the Description box, type the name of the new production status.
5. In the Status box, select the status that will indicate if this production status will be
considered a state of Good or Bad production.
6. In the Production box, select Yes if this is a status that will allow this event to be counted as
production on this unit or select No if this status will not allow this event to be counted as
production on this unit.
7. In the Inventory box, select Yes if this is a status that will allow this event to be counted as
production on this unit or select No if this status will not allow this event to be counted as
production on this unit.
8. Under Icon, select the desired flag color for this status.
9. Under Color, select the desired color for this status.
10. Click the check box to select the Bypass History flag to not record history for the chosen
event status. Refer to Periodic Event Dimension Update.

Global Configuration
147
11. Click Save to complete the addition of the new production status.
Editing Production Statuses
1. In the Plant Applications Administrator, expand Global Configuration.
2. Right-click Administer Production Statuses and select Edit Production Status. The
Production Status Editor dialog box appears.
3. Select the production status to be edited from the drop down list and click Update. The boxes
become editable.
NOTE: NoId-Staged, NoId-Running, Staged, and Running are used for genealogy to
define events in the running or staged positions and do not get processed until the
production status has changed to a different status. Therefore, it is recommended that the
names of these four production statuses not be changed.
4. Make the desired changes and click Update to save the changes.
Locking Production Statuses
Production Statuses are used to indicate the current status of a Production Event and are set up
through the Production Status Editor. Refer to Setting Up a User-Defined Event.
In cases where Production Event data is placed into other systems, it may be desirable to lock data
related to Production Events in certain status states from any changes. For example, locking a
Production Event status means that changes can no longer be manually entered in an Autolog
display.
To lock a production status, follow these steps:
1. Right-click Administer Production Statuses under Global Configuration in the Plant
Applications Administrator, and choose Edit Production Status.
2. In the Production Status Editor,select a Production Status.
3. Click the Update button.
4. Select the Lock Event Data check box. A warning is displayed to let you know that the action
PERMANENTLY locks all data for Production Events with this status. Once locked, a status
cannot be unlocked.
5. Click Yes in the message dialog box to continue.
6. Click the Update button again. Another warning is displayed to let you know that selecting
Yes will DELETE transitions to any unlocked statuses on ALL units that have the status you
are about to lock. Only transitions to other locked statuses are allowed once a status is
locked. Changes apply across the Enterprise.
After a Production Status is locked, open the Unit Properties Configuration screen for a unit, and click
the Production Statuses tab. You will see that only other locked statuses can serve as a valid
transition for the status you locked.
Exporting Production Statuses
Exporting production statuses creates an Excel worksheet containing the configuration from the
Production Status Editor dialog box for each production status.
To export production statuses:
1. In the Plant Applications Administrator, expand Global Configuration.

Administer Calculations
148
2. Right-click Production Statuses and select Export Production Statuses. The
Configuration Export dialog box appears.
3. Ensure Production Statuses is selected and click OK. Excel automatically starts and a
worksheet is created containing production status configuration.
Importing Configurations
Importing Production Statuses
After you have exported your production status configurations, you can edit the information in the
worksheet and import those changes into a Plant Application server. If you edit the Status Desc, a
new production status is created. If any of the other information for a specific production status is
edited, the existing production status is updated.
To import production statuses:
1. Ensure the workbook containing the production statuses configuration worksheet is open and
the configurations you want to import are selected.
2. In the Plant Applications Administrator, expand Global Configuration.
3. Right-click Production Statuses and select Import Configuration. Your selected
configurations are imported.
4. Click OK and refresh the server.
Administer Calculations
To manage calculations: In the Plant Applications Server Manager tree, expand Global
Configuration and expand Administer Calculations.
Administer Calculations is where you create and manage calculations that are available for use with
all variables in the plant model. You can also create and manage calculations at the variable level in
the plant model.
You can create three types of calculations:
Equation
VB Script
Stored Procedure
How to Create Simple Equation Calculations?
To access the Calculation Configuration dialog box: In the Plant Applications Server Manager tree,
expand Global Configuration and double-click on Administer Calculations.
To create a simple equation calculation:
1. From the Calculation Configuration dialog box, click New. The Define Calculation tab is
opened.
2. Select a calculation Type of "Equation."
3. Type in the number of inputs the calculation will have.
4. Type the Equation within the Equation window. Variables names A-Z are used as "aliases" to
inputs, with "A" being the first input, "B" being the second input, and so on.
5. Select the "Identify Input Variables" tab.

Global Configuration
149
6. Select the first Calculation Input and select identify the variable attached to the calculation by
selecting the "…" button at the bottom of the screen.
7. From the Search Variables dialog, optionally select a Production Line, Production Unit, and all
or part of a variable description to limit the variable search.
8. Select the "Search" button.
9. Select a variable from the search results to attach to the calculation and select "OK" to return
to the calculation configuration window.
10. Select "Save" to save the calculation.
11. Set up the calculation interval. By default, the calculation will trigger each time one of the
input variables change. You may also force calculation on a time or event basis by modifying
the attributes of the variable the calculation is attached to.
12. Select the Variable; right-click and select "Variable Sheet."
13. In the Variable Sheet window, select "Production Event" for the Event Type. This will cause
the calculation to fire whenever the input variables change, or whenever a Production Event is
created or modified.
14. When finished in the Variable Sheet, select the "Save" icon in the toolbar to make the current
changes active.
How to Create Custom Logic (VBScript) Calculations?
All calculations that are configured and saved are stored in a library so you can reuse them on other
variables. Keep in mind that when a calculation from the library is applied to another variable, the
calculation should be renamed and saved as a new calculation if any changes are made to the
calculation template.
VBScript functions are ideal for intermediate type calculations if you know how to write in Microsoft
VBScript. (For more information on VBScript, click here to go to Microsoft's site).These calculations
support program flow logic, such as If, While, and For statements. All inputs must be defined,
whether they originated from a variable or a constant. Only one result can be obtained from an
equation calculation.
All scripts must set a variable called "Result" equal to the value that should be returned for the
calculation. Variables names A - Z are used as aliases to inputs, with "A" being the first input, "B"
being the second input, and so on.
You can use the following operators in your equations:
+ (addition)
- (subtraction)
* (multiplication)
/ (division)
The following VBScript functions are available for use within equations:
Function
Description
Abs Returns the absolute value of a specified number
Atn Returns the arc tangent of a specified number
Cos Returns the cosine of a specified number (angle)
Exp Returns
e
raised to a power
Hex Returns the hexadecimal value of a specified
number
Int Returns the integer part of a specified number

Administer Calculations
150
Fix Returns the integer part of a specified number
Log Returns the natural logarithm of a specified
number
Oct Returns the octal value of a specified number
Rnd Returns a random number less than 1 but greater
or equal to 0
Sgn Returns an integer that indicates the sign of a
specified number
Sin Returns the sine of a specified number (angle)
Sqr Returns the square root of a specified number
Tan Returns the tangent of a specified number (angle)
To create a VBScript calculation: (Interface accessed from the Proficy Client has slight differences.)
1. Create a new variable or select an existing variable.
2. Right-click on the variable and select Create Standard Calculation.
3. In the Calculation Configuration dialog box, choose VBScript from the Type list.
4. Choose the appropriate trigger from the Trigger list.
5. In # of inputs, type the number of inputs the calculation will have.
6. On the Script tab, type the VBScript calculation.
7. Click the Inputs tab, and click New to add the first input.
8. Select the first input with alias of ’r;a." The attributes of this input will be displayed under
Selected Input.
9. Edit the Name, Entity, and Attributes to be associated with the Input.
10. Repeat steps 6 - 8 for the remaining calculation inputs.
11. Click Save to save the calculation and close the Calculation Configuration dialog box.
How to Create Stored Procedure Calculations?
To access the Calculation Configuration dialog box: In the Plant Applications Server Manager tree,
expand Global Configuration and double-click on Administer Calculations.
1. From the Calculation Configuration dialog box, click New. The Define Calculation tab is
opened.
2. Select a Calculation Type of "Stored Procedure."
3. Search for a Stored Procedure to attach to the calculation by selecting the "…" button on the
"Stored Procedure" sub-tab.
4. Select the "OK" when finished and return to the Calculation Configuration window.
5. This example stored procedure has 3 inputs. A prototype of the stored procedure is provided
in the window below the Stored Procedure selection. The first parameter of every Stored
Procedure calculation is the OUTPUT parameter. The remainder of parameters are expected
to be supplied by the calculation.
6. Type in the number of inputs in the " Inputs" field.
7. Select the "Inputs" sub-tab.
8. Select the first Input with alias of "a" The attributes of this input will be displayed within the
"Selected Input" frame.

Global Configuration
151
9. Select the "Modify" button, and identify the Name, Entity, and Attribute to be associated with
the Input. In this example, the first parameter is expected to be a Unit Id, so select "This
Variable" for the entity, "Master PUId" for the Attribute, then select "Apply."
10. Select the second Input, select "Modify" and specify "This Event" for the Entity, and "Start
Time" for the Attribute. Select "Apply" when finished. This will pass in the start time of the
calculation time period as the second parameter. The calculation time period will be identified
later when editing the configuration of the variable this calculation is attached to.
11. Select the third Input, select "Modify" and specify "This Event" for the Entity, and "End Time"
for the Attribute. Select "Apply" when finished. This will pass in the end time of the calculation
time period as the third parameter.
12. Select "Save" to save the calculation and close the Calculation Configuration window.
13. Set up the calculation interval. Select the Variable; right-click and select "Variable Sheet."
14. In the Variable Sheet window, select "Time" for the Event Type, enter "440" for the Sampling
Interval, and enter "80" for the Sampling Offset. This will create a daily calculation that will
produce the total waste amount for the day at 8:00 am each day.
15. When finished in the Variable Sheet, select the "Save" icon in the toolbar to make the current
changes active.
Optimizing Calculations
Calculation optimization prevents redundant calculations from being re-fired and speeds up results
processing by the Proficy server. Optimization adds a delay of 500 milliseconds between inputs. For
example, if the calculation has multiple inputs, there will be a delay of 500 milliseconds between input
changes before the calculation fires. To select optimization, do one of the following:
If running Plant Applications as a standalone implementation, access the Calculations
Manager interface from the Plant Applications Administrator. Select the Optimize
Calculation Runs check box in the Calculation Configuration dialog box to optimize
calculations.
If running Plant Applications as an implementation merged with Proficy SOA, access the
Calculations Manager interface from the Proficy Client. Select the Optimized check box in the
Definition tab to optimize calculations.
If your calculation code requires the calculation to fire after every change in input, then you must clear
the Optimize Calculation Runs check box.
Troubleshooting
If you experience the following, you may need to clear the "optimize" check box.
Calculations having a trigger of Event/Variable are fired in the CalculationMgr log file, but the
results are not processed into the Plant Applications database. Results are very sporadic and
inconsistent.
The stored procedure returns an output value regardless of what happens in the stored
procedure, but there is no value in the Tests table.
How to Create Calculations Based on Process Data?
1. Browse into the Plant Model.
2. Right-click on a Group and select "New Variable"
3. Type in the name of the new Variable. Variable names must be unique within a given
Production Unit.
4. Select the new variable; right-click and select "Variable Sheet"

User-Defined Properties
152
5. Make sure the "Data Source," "Event Type," "Sampling Interval," "Sampling Offset,"
"Sampling Type," and "Input Tag" are visible. Select the "Column/Row Visibility" icon in the
Variable Sheet window toolbar to change column visibility.
6. Select the appropriate columns in the "Hidden" list and move them into the "Visible" list by
selecting the ">" button.
7. Close the "Column/Row Visibility" Dialog To Return To the Variable Sheet window.
8. Select a Data Source of "PI," an Event Type of "Delay," and a Sampling Type of "Average."
9. If the Input Tag that will drive the calculation is known, then type it into the Input Tag column.
To search for a Tag, select the Input Tag column, right-click, and select "Tag Search."
10. Search for an appropriate Tag, select a Tag from the search results, and select "OK."
11. The selected tag will appear in the Input Tag column.
12. To save the variable, select the "Save" icon in the Variable Sheet window toolbar.
User-Defined Properties
You can think of user-defined properties (UDP) as a way to add a "virtual" column to a table in the
Plant Applications database. User-defined properties can map the values to a specific table. There
are three tables in the Plant Applications database used to map the UDP value to the appropriate item
in the appropriate table.
Tables: This table lists all of the tables in the Plant Applications database. Each table name
has a unique ID (TableId).
Table_Fields: This table lists all of the user-defined properties. Each user-defined property is
assigned a field type (ED_Field_Type_Id), which specifies the data type, and a unique ID
(Table_Field_Id). The table contains the following columns:
o TableId: This maps the UDP value to the correct table.
o Table_Field_Id: This defines the UDP.
o ED_Field_Type_Id: This defines the type of field, such as text or numeric or
TRUE/FALSE.
o Table_Field_Desc: This is a description of the table fields.
Table_Fields_Values: This table maps the value for a UDP to the appropriate row in the
appropriate table. The table contains the following columns:
o TableId: This maps the UDP value to the correct table.
o Table_Field_Id: This defines the UDP.
o KeyId: This defines the row in the table specified by the value in the TableId field.
o Value: This is the value of the UDP.
User-defined properties are managed using the Administer User-defined Properties dialog box. For
more information on creating user-defined properties, see the topic, Adding User-defined Properties.
You can create user-defined properties for several tables. The following is a list of tables for which
you can create user-defined properties.
Bill_Of_Material_Formulation
Bill_Of_Material_Formulation_Item
Characteristics
Customer
Customer_Order_Line_Details
Product_Family
Product_Groups
Production_Plan
Production_Plan_Statuses
Production_Setup
Global Configuration
153
Customer_Order_Line_Items
Customer_Orders
Departments
Email_Message_Data
Event_Reason_Catagories
Event_Reasons
Event_Subtypes
Phrase
PrdExec_Inputs
PrdExec_Path_Units
PrdExec_Paths
Prod_Lines
Prod_Units
Production_Setup_Detail
Production_Status
Products
PU_Groups
Report_Definitions
Report_Types
Shipment
Shipment_Line_Items
Specifications
Subscription
Subscription_Group
Users
Variables
Deleting User-Defined Properties
You can delete an assigned value or a column. Before you can delete a column, you must first delete
all values assigned to the column.
To delete an assigned value:
1. Expand Global Configuration, right-click on Administer User Defined Properties and click
Administer User Defined Properties. The User Defined Properties dialog box appears.
2. From the Tables drop-down list, select the table from which you want to delete the user-
defined property.
3. From the list of assigned values, select the value(s) you want to delete.
4. Click the Delete Field button. The selected items are marked with a red asterisk (*) and the
assigned values are displayed in red.
5. Click the Save button. The marked items are deleted.
To delete a column:
1. Expand Global Configuration, right-click on Administer User Defined Properties and click
Administer User Defined Properties. The User Defined Properties dialog box appears.
2. From the Tables drop-down list, select the table from which you want to delete the user-
defined property.
3. From the list of assigned values, delete all values.
4. From the list of columns, select the column you want to delete.
5. Click the Delete column button. "Are you sure you want to DELETE the Field [column
name]?" appears.
6. Click Yes to delete the column.
7. If you have not deleted all assigned values, "Cannot delete column - Value(s) exist for it."
appears. Click OK. and delete all the values.
User-Defined Property Field Types

User-Defined Properties
154
The field type specifies the data type of the user-defined property.
Although you can select a variety of field types in the Add User Defined Property dialog box, each
default user-defined property has a pre-assigned field type.
Field Type
User
-
defined Property
Numeric Email Action
Numeric BTSched - NoMcrProductOption
Numeric BTSched - DefPPStatusId
Numeric BTSched - ErrPPStatusId
Text BTSched - NoBOMFormulationOption
Numeric BTSched - RemoveLeadingZeros
Product BTSched - DefMPRProdId
Product BTSched - DefMCRProdId
Text BTSched - DefPathLineId
Text BTSched - RepeatedProcessOrder
Numeric BTSched - IgnoreBOMInfo
Numeric Flag Email
Product Family
BTSched - DefRawMatProdFamId
Numeric BTSched - ReportCorrections
Numeric BTSched - AutoConfirmMpaMca
Numeric BTSched - ReportDeletions
Numeric BTSched - OnlySendMpaMcaSinceLastProcessedDt
Text BTSched - NoUpdateProcessOrderStatuses
Numeric BTSched - ProdCodeInDescription
Text BTSched - DelimiterProdCode
Numeric BTSched - UpdateMPRDescription
Numeric BTSched - UpdateMCRDescription
Data Source BTSched - DataSourceId
Text TP - SegmentName
Text TP - TestName
Text BT - TestPerformanceHeader
Text BT - MaterialProducedActualPropertyHeader
Text BT - MaterialConsumedActualPropertyHeader
Numeric PP - TriggerStatusId000
Numeric PP - TriggerStatusId001
Numeric PP - TriggerStatusId010
Numeric PP - TriggerStatusId011
Numeric PP - TriggerStatusId100
Product Family BTSched - DefProductFamilyId
Numeric PP - TriggerStatusId101
Numeric PP - TriggerStatusId110
Numeric PP - TriggerStatusId111
Text PP - MPAStorageZone
Text PP - TestWarningVarAlias
Text PP - ConfirmProcessSegId
Text PP - ProduceProcessSegId
Text PP - ConsumeProcessSegId
Numeric PP - PadZeros
Numeric PP - MPAEventIdentifybyProcessOrder

Global Configuration
155
Numeric BTSched - DefBOMFamilyId
Text PP - StatusToTriggerUpload
Text PS - MaterialReservID
Text PS - MaterialReservSeq
Text PS - ScrapPercent
Text PS - InspectionLotID
Text PS - StorageZone
Numeric SAP - TECO
Numeric SAP - Complete
Numeric SAP - Confirm
Text BTSched - MaterialSeqMCRPDesc
Numeric BTSched - UserId
Text BTSched - ScrapPercentMCRPDesc
Text AutoCompToConfirmToSAP
Text ECUnitType
Data Source EventNumDSId
Text SentToSapFlg
Numeric Time Modifier
Numeric BTSched - NoProdOnPathOption
Numeric MC - Convert MCA UOM to BOM UOM
Text Original Engineering Unit
Numeric MP - Convert MPA UOM to Production Setup UOM
Numeric PA S88 Interface implemented
Numeric PS - PlantId
Numeric BTSched - NoPathOption
Numeric BTSched - NoMprProductOption
User-Defined Properties for Subscriptions
Id
Name
Valu
es
Result
-8
BTSched - NoPathOption 1 SP generates message -144 and quits. The
email_message_data table does not have
message -144. The SP should be changed to
generate message -142, instead
2 SP generates message -141 and leaves the
process order unbound.
3
SP generates message -142 and quits.
-9
BTSched -
NoMprProductOption
1 If the MPR product does not exist, SP creates the
product, sets the process order to the ’r;Error’
status and generates message -171. If the SP can
not successfully create the new product it
generates message -169 and quits.
2 If the MPR product does not exist, SP uses the
default MPR Product and generates message -
160.
3 SP generates message -161 and quits.
-3
BTSched - DataSourceId Parameter should point to the ’r;SAP’ data source
(18). The SP should be changed to use 18 as the
default value instead 50001.

User-Defined Properties for Subscriptions
156
-
10
BTSched -
NoMcrProductOption
1 If the MCR product does not exist, SP creates the
product. If the SP can not successfully create the
new product it generates message -170 and quits.
If the new MCR product could be associated with
any production unit (passed on the XML file) or
production path, then the interface set the process
order to the ’r;Error’ status.
2 If the MCR product does not exist, SP uses the
default MCR Product and generates message -
167.
3 SP generates message -168 and quits
-7
BTSched -
NoProdOnPathOption
2 If the MPR product is not associated with the
production path, the SP will make the process
order unbound and will generate message -163.
3 If the MPR product is not associated with the
production path, the SP generates message -164
and quits.
-
15
BTSched – DefMPRProdId Default Product Id to be used when the MPR
Product does not exist and and UDP -9 is set to 2.
The Default value for this UDP is 1.
-
16
BTSched - DefMCRProdId Default Product Id to be used when the MCR
Product does not exist and and UDP -10 is set to
2. The Default value for this UDP is 1.
-
19
BTSched - IgnoreBOMInfo 0 Interface does not update the Bill Of Material-
related tables.
<>0 Interface updates the Bill Of Material-
related tables
using the information provided in the XML file.
-
13
BTSched –
NoBOMFormulationOption
1 If interface cannot find the Bill Of Material for this
process order, it creates a new Bill Of Material and
generates message -120.
2 If interface cannot find the Bill Of Material for this
process order, it generates message -121 and
quits.
-
18
BTSched -
RepeatedProcessOrder
Removed on the latest SP release.
-
26
BTSched –
ProdCodeInDescription
0 The SP always sets this UDP to 0.
Interface uses the passed Product Description
when searching MPR and MCR products in the
database by description.
1 Interface uses the concatenation of the passed
Product Code and description when searching
MPR and MCR products in the database by
description.
-
28
BTSched –
UpdateMPRDescription
0 It does not update the MPR product description.
1 The interface updates the description for the MPR
products if their descriptions do not match their
description on the XML file.
-
29
BTSched -
UpdateMCRDescription
0 It does not update the MPR product description.
1 The interface updates the description for the MCR
products if their descriptions do not match their
description on the XML file.

Global Configuration
157
-
76
BTSched –
PerformConcurrencyCheckFlag
0 Process order will be created or updated
regardless of the value of the
<ProductionSchedule>/<ID> element. New
process order will be created without any
reference to the document that created them.
Updateable process orders will be updated, but the
document ID reference, which is a UDP on the
Production_Plan table, will not be updated
for the
process order.
1 A concurrency check will be performed when a
process order is created or updated. For new
process orders, the process order will be created
and a reference added that shows the document
ID in the form of a UDP on the Production_Plan
table. The Value of the UDP will be the value of
<ProductionSchedule>/<ID> element from the S95
message that created it. Updateable process
orders will be updated only if the existing
document ID reference is alpha-numerically
greater than the document ID in the message
trying to update the process order. If the update is
successful on the process order, the UDP will
value for the document ID will be updated as well.
The bold values identify the default values for the UDP.
Administer Alarms
Alarms are used for the following purposes:
Document alarm conditions, including reasons and actions
Provide real-time and historical analysis
Expose exception-based operating procedures
Provide quality control and disposition
Alarm conditions are based on alarm rules, which compare data to product-based specification limits
in real time and are used to alarm critical variables where acknowledgement of a violation is required.
Alarms capture key events requiring immediate operator action. They can also automatically capture
cause reasons, based on alarm location, and the corrective action taken, which is entered by an
operator. They can be recognized by pop-up messages, audible alarms, and color coding of cells in
displays. Standard operating procedures and other documentation can be attached to alarms.
Email notifications can be set up for variables, products, or equipment and assigned to email groups.
NOTE: Specifications must be assigned to a variable before the variable can be included
in an alarm template.
To use alarms, you must:
Create your plant model, including variables. For more information, see the topics, The Plant
Model and Configuring Variables.
Create a product family. For more information, see the topic, Creating a Product Family.
Add products to the product family. For more information, see the topic, Adding Products.

Administer Alarms
158
Assign specification limits to variables. For more information, see the topic, Building a Unit-
level Recipe or Production Specification or Building a Central-level Recipe or Product
Specification.
Create an alarm template. For more information, see the topic, Configuring Alarms,
Create an alarm display. For more information, see the topic, Configuring an Alarm View
Display.
Set up email notifications. For more information, refer to Configuring Alarms and Setting Up
Email Notifications for Alarms.
Configuring Alarms
To configure an alarm:
1. In the Server Manager tree, expand Global Configuration.
2. Right-click Administer Alarms and choose Administer Alarms. The Alarm Configuration
dialog box appears.
3. Click the Search Template tab to search for a template to edit, or click Add Template.
4. Click the General tab, and do the following:
NOTE: Before selecting an SPC Rule to configure alarms, read Implementing Auto-
Calculated SPC Limits to review options.
a. In the Template Description box, type the name of the template.
b. From the Alarm Triggers list, select the type of alarm triggers. You can select:
o Variable Limits: An alarm event will trigger if the variable value is outside the chosen
specification limits, which are defined directly on a variable.
o SPC or SPC Group. An alarm will trigger when any one of the defined SPC rules for
the configured variables have been satisfied. Some SPC rules can be set to have
either a minimum number of points reached out of maximum (n out of m points) and
be greater than or less than a specified limit. Other rules use a trend with n number of
points in a row moving in an upward or downward direction. Plant Applications
provides for setting a sampling size for a variable as greater than 0 to automatically
calculate the mean, sigma, and control limits to evaluate alarms.
SPC rules are also prioritized by their order in the SPC list. When a new rule is
created, it is appended to the list. Each rule can be moved up or down in the priority
sequence.
o Variable Limits String - [Equal Spec]: An alarm event will trigger if the variable
value is equal to the specification limits. For more information, see the topic, Using
String Values for Alarms.
o Variable Limits String - [Not Equal Spec]: An alarm event will trigger if the variable
value is not equal to the target specification limit. For example, if the target value is
"Good,", then any other value that is entered will trigger an alarm. For more
information, see the topic, Using String Values for Alarms.
o Variable Limits String - [Use Phrase Order]: An alarm event will trigger if the
variable value is equal to the value of the phrase order. For example, For more
information, see the topic, Using String Values for Alarms.
c. Select the trigger(s), and then click Edit to edit the values.
d. Add a general comment or attach any documents the general alarm template should
carry (as opposed to comments for individual variable alarms).
5. Click the Details tab and do the following:

Global Configuration
159
a. In the Custom Text box, type the text that should be added to the description of each
alarm generated from this Alarm Template.
b. Select one or more of the following options to include in the alarm description:
o Include Variable Description
o Include Template Description
o Include Trigger Description
c. To require an electronic signature on any alarm updates or acknowledgements,
select User or Approver from the Electronic Signature Configuration list.
d. Choose the Alarm Cutout variable and comparison value. Alarms from this template
will be closed or disabled when the variable identified satisfies the comparison
condition.
e. Under Custom Stored Procedure Call, click the Browse button to select the
spLocal that will be called when the alarm is created, updated, or closed. Click here
to view required inputs.
f. Under Email Group Notification, click the drop-down arrow to select a product or
equipment item to send a notification based on product or equipment. Complete the
setup for the group as described in Setting Up Email Notifications for Alarms.
6. Click the Reasons tab and do the following:
NOTE: For information on creating reason trees, click here.
a. Under Cause Reasons, select Require Cause Reason Entry to require a cause
reason when acknowledging the alarm.
b. Under Reason Tree, select the Cause reason tree that should be used to classify
alarms reasons.
c. Under Default Cause Reason, select the default Cause reasons that should be
supplied for alarms generated from this template.
d. Under Action Reasons, select Require Action Reason Entry to require an action
reason when acknowledging the alarm.
e. Under Reason Tree, select the Action reason tree that should be used to classify
alarms reasons.
f. Under Default Action Reason, select the default Action reasons that should be
supplied for alarms generated from this template.
7. Click the Attached Variables tab and do the following:
NOTE: The variables you add will be assigned to this alarm template and will be bound by
the variable limits or SPC rules. Only the variables configured within the template will be
available in an Alarm View display.
a. Click Add to search for variables to add to the template. The Search Variables
dialog box appears.
b. Select one or more variables from the Search Results list.
c. Click OK to return to the Alarm Configuration dialog box.
d. Under Email Group, select the email group you want to receive alarm notifications
for variables. To set up alarm notifications for products and equipment, refer to
Setting Up Email Notifications for Alarms.
e. Set a Sampling Size if you want to use an auto-generated mean and sigma for control
limits. Refer to Implementing Auto-Calculated SPC Limits.
f. Variable/Template Comments displays documentation or comments associated with
the alarm template.

Administer Alarms
160
g. Variable Specific Comments displays documentation or comments associated with
a specific variable.
h. Alarm Description displays the variable name and additional information, based on
the alarm trigger type.
i. Other Templates Configured for Variable displays any other template for which the
selected variable is configured.
8. Close the Alarm Configuration dialog box.
9. Set the SpecificationSetting site parameter, which determines if alarm exceedance is based
on a value being greater than the specification or greater than or equal to the specification.
NOTE: The SpecificationSetting Site Parameter applies to values derived from a
calculated sigma for existing rules and all new rules except "n consecutive points
alternating up or down."
Implementing Auto-Calculated SPC Limits
Plant Applications offers an option to automatically calculate control limits based on a configurable
sample size. The implementation affects four existing SPC-based alarm rules and adds these five
additional SPC rules:
n out of m points beyond two sigmas from the mean
n consecutive points alternating up or down
n out of m points beyond one sigma from the mean
n consecutive points within +/- one sigma from the mean
n consecutive points outside +/- one sigma from the mean
NOTE: The SpecificationSetting Site Parameter applies to values derived from a
calculated sigma for existing rules and all new rules except "n consecutive points
alternating up or down."
Rules are selected at the General tab in the Alarm Configuration screen as described at Configuring
Alarms. For each attached variable, a sampling size can be specified at the Attached Variables tab.
The sampling size is the number of data points desired to calculate the mean, standard deviation
(sigma), and control limits for the data set. When the sample size is zero, control limits from a
specification are used to evaluate alarms. In this case, a delta of six sigma between the lower control
limit (LCL) and upper control limit (UCL) is assumed. The mean is calculated as (LCL + UCL) / 2, and
sigma calculation is based on an assumed normal data distribution.
When the sample size is greater than zero (a maximum sample size of 100 is permitted), the mean
and sigma are calculated according to three scenarios. In these, control limits are set as three
standard deviations (3 sigma) from the mean for process control assuming normally distributed data.
The scenarios are:
A new or existing product has fewer data points than the specified sampling size.
Specification control limits are used if defined to derive the mean and sigma for evaluating
alarms.
Data collection for a product reaches the sampling size. The mean and sigma are
automatically calculated and stored when the sample size is reached and control limits are
derived. The mean and sigma are recalculated for each additional data point and based on
the sample size. This approach generates a rolling mean and sigma to evaluate alarms.
Control limits are manually set by an override action during production. The mean and sigma
are derived from the new control limits for alarm evaluation. Once the specified number of
data points are collected with a new specification in effect, the rolling calculation of the mean

Global Configuration
161
and sigma automatically starts based on sampling size to derive control limits and evaluate
alarms.
The General tab in the Alarm Configuration screen provides a Disabled Products feature to specify
one or more products for which you wish to disable alarms.
Setting Up Email Notifications for Alarms
Email notifications can be set up for variables, products, or equipment and assigned to email groups.
Recipients are associated with a group. When an alarm is triggered and email notifications have been
defined for products or equipment, recipients from email groups that are associated with the products
or equipment are sent notices. Email can also be sent for alarms triggered by variables.
To set up email notification for a variable, use the Attached Variables tab in the Alarm Configuration
screen. To set up email notification for product or equipment items, use the Details tab. Follow the
instructions given in Configuring Alarms.
To associate products or equipment with an email group, follow these steps:
1. Create an email group in the Email Engine Configuration folder in the Server Management
section of the Plant Applications Administrator.
2. Right-click on the group to display the Alarm Notification screen.
3. Select the group, item, and items within the group.
Using String Values for Alarms
You can create string values for variables using custom data types (phrases). These phrases are then
available from drop-down lists for manual entry in an Autolog display where they can be compared
against specifications and used to trigger alarms.
To use string values for variables:
1. Create data types and then create phrases for those data types. When entering
specifications, the phrases will be available from drop-down lists. When configuring the
variable, the user-created data type will be available in the data type variable property. For
more information on creating data types and phrase, see the topic, Creating Custom Data
Types.
2. Select your user-created data type and string specification setting in the variable sheet for the
variable(s). (Use the Column/Row Visibility feature to show fields as needed.) The data type
determines which phrases are available for the variable and which specifications are
available. The string specification setting determines how the alarm will be triggered and
controls which variables are available for the alarm template. For more information on the
data type variable property and the string specification setting property, see the topic,
Variable Property Definitions.
NOTE: When configuring variables having a Data Types of “String” or a custom Data
Type with a string phrase, you need to set the String Specification Setting on the Variables
sheet for the variable to evaluate properly in alarms. Refer to "String Specification
Setting" in the "Variable Property Definitions Topic" under "Plant Model."
3. Enter specifications for the variable(s). The available specifications are determined by the
data type you selected in step 2. For more information on entering specifications, see the
topic Building a Unit-level Recipe or Production Specification.
4. Create alarm templates. The variables that are available will depend on the alarm trigger you
select and on the variables string specification setting (see step 2). For more information on
alarms and creating alarm templates, see the topic
Configuring Alarms.

Administer Alarms
162
5. Create the Autolog and Alarm displays. For more information, see the topics, Autolog Display
and Alarm View Display.
Importing Alarm Configuration
You can import alarm configuration information into Plant Applications, either on the same server or
on a different server. Importing can help minimize or eliminate tedious data entry of information that
may already exist in Plant Applications. Additionally, you can create export "templates," edit the
worksheets and then import the edited configurations into Plant Applications.
Keep in mind that you can change the information in your worksheet, and the changed information will
be imported.
You must have Administrator access to the Administrator security group to import or export
objects.
IMPORTANT: You must have the Excel workbook open that contains the alarm
configuration information.
To import alarm configuration:
1. Open the Excel workbook that contains the exported alarm configuration.
2. In the workbook, under the Selected column, place an X in the cell that corresponds to the
information you want to import.
3. In the Plant Applications Administrator, expand Global Configuration.
4. Right-click Administer Alarms and select Import Configuration.
5. If there were errors during the import, Import Finished – WITH ERRORS will be displayed.
Click OK and return to the worksheet and correct the errors.
If the import was successful, Import Finished – refresh server to see data will be displayed.
Click OK and refresh the server.
If you forgot to select information, No data selected for import – Use an x to select data to
Import will be displayed. Click OK and select the data in your Excel worksheet
Exporting Alarm Configuration
When you export alarms, Plant Applications automatically launches Excel and creates the necessary
worksheets within the Excel workbook, based on the items you select. After the workbook has been
created, you can edit the information within the workbook. Then, you can import the data into Plant
Applications either on the same server or on a different server. For more information, see Importing
Alarm Configuration.
You must have Administrator access to the Administrator security group to export alarm
configuration information.
Before you begin the export, you should close all instances of Excel, unless you want the information
added to the open Excel workbook.
When you export the alarms, you can export the following information.
Alarm Templates: This spreadsheet contains the template information from the alarm
configuration.
Alarm Template Variables: This spreadsheet contains the variables and the associated
production units and production lines for each template.

Global Configuration
163
Alarm Rules: For SPC or SPC Group alarms, this spreadsheet contains the configuration
information for each SPC rule. This spreadsheet will not contain data if no SPC or SPC Group
alarms have been configured.
To export alarm template configurations:
1. In the Plant Applications Administrator, expand Global Configuration.
2. Right-click Administer Alarms and select Export Alarms. The Configuration Export dialog
box appears.
3. Select the information you want to export. Clear the information you do not want to export
4. Click OK. Excel automatically opens with the specified alarm template information. Each
option you selected in the Configuration Export dialog box will be on a separate worksheet.
After the export is complete, you edit any of the information and then import the changes back into the
same server or import the information into a different server. If you change the name of an existing
alarm template and then import the information back into the same server, a new alarm template is
created. The existing alarm template is not changed or deleted.
Creating a User-Defined Event
You must have an Efficiency Management module license to configure User-Defined Events.
A User-Defined Event (UDE) is a generic, manually recorded event used to document important
occurrences related to process operations. Refer to Setting Up User-Defined Events for other, related
steps to configuring a UDE.
Follow these steps:
1. In the Plant Applications Administrator, expand Global Configuration.
2. Double-click Administer Events, or select Administer Events / Event Subtypes from the right-
click menu. The Master Event List dialog box appears.
TIP: User-Defined Events use Event Subtypes to create events with a unique configuration. Refer
to Adding Subtypes for Production Events.
3. Select User-Defined Event from the Type To Add list.
4. Click Add Event. The User-Defined Event Configuration dialog box appears.
5. Do the following:
a. On the General tab, type a name for the user-defined event in the Name box.
b. Under Flags, select one or more of the following options:
o Require Selection Of Event Duration: Select this option to allow editing of the start
and end times of the event in the display. If this option is not selected, you can edit
only the start time.
o Require Cause Reason Selection: Select this option to allow the operator to select
a Cause Reason for the event. If you select this option, you can specify a default
Reason Tree on the Reason Trees tab.
o Require Acknowledgement: Select this option to allow the operator to acknowledge
the event.
o Require Action Reason Selection: Select this option to allow the operator to select
an Action Reason for the event. If you select this option, you can specify a default
Reason Tree on the Reason Trees tab.

Creating a User-Defined Event
164
c. Under Electronic Signature Level, select either User Level or Approver Level from the
list.
d. If you are setting up UDE status locking, select a default status in the Default
Production Status field. Selecting a default status enables production statuses for
User-Defined Events.
TIP: Select True for the DisplayStatus setting in the Display Options screen to add a status
field to Autolog UDE displays. Refer to Autolog Display Options Settings.
e. Under Comment, type any comments that you want to appear in the display.
f. If you selected either Require Action Reason Selection or Require Cause Reason
Selection or both options, click the Reason Trees tab to select the Cause Reason
Tree and the Action Reason Tree.
g. Click the Icon tab to select a different icon used to identify user-defined events in the
Sequence of Events display.
6. Click OK to save your changes, and close the User Defined Event Configuration dialog
box.
Adding Subtypes for Production Events
This topic describes adding product events as subtypes with a unique configuration using Administer
Event function under Global Configuration. The event by subtype is selectable when adding events to
a unit.
A production unit can have only one associated production event. You must have the license for the
Quality Management module to configure production event detection.
Event subtypes describe:
The type of product being made on a production unit for a specific event type.
The names and engineering units for the product produced on that unit.
The assignment of action and cause reason trees and their initial values.
Examples of event subtypes include reels, rolls, batches, lotion batches, mash, fermented beer, and
clothing changes.
Adding a subtype for a production event:
1. In the Plant Applications Administrator, expand Global Configuration.
2. Double-click Administer Events. The Master Event List dialog box appears.
3. Select Production Event from the Type To Add list.
4. Click Add Event. The Production Event Configuration dialog box appears.
5. Complete the information in the dialog box:
Name - name for the production event occurrence, which is the subtype
Dimension X, Y, Z, A - dimensions of the event such as weight, width, length (Dimension X is
the primary dimension used to measure production. Dimensions Y, Z, and A are commonly
used as length in multi-dimensional products such as paper and steel.)
Comment - applicable comments that you want to appear in the display
6. Click OK to save your changes.
Locking Production Statuses

Global Configuration
165
Production Statuses are used to indicate the current status of a Production Event and are set up
through the Production Status Editor. Refer to Setting Up a User-Defined Event.
In cases where Production Event data is placed into other systems, it may be desirable to lock data
related to Production Events in certain status states from any changes. For example, locking a
Production Event status means that changes can no longer be manually entered in an Autolog
display.
To lock a production status, follow these steps:
1. Right-click Administer Production Statuses under Global Configuration in the Plant
Applications Administrator, and choose Edit Production Status.
2. In the Production Status Editor, select a Production Status.
3. Click the Update button.
4. Select the Lock Event Data check box. A warning is displayed to let you know that the action
PERMANENTLY locks all data for Production Events with this status. Once locked, a status
cannot be unlocked.
5. Click Yes in the message dialog box to continue.
6. Click the Update button again. Another warning is displayed to let you know that selecting
Yes will DELETE transitions to any unlocked statuses on ALL units that have the status you
are about to lock. Only transitions to other locked statuses are allowed once a status is
locked. Changes apply across the Enterprise.
After a Production Status is locked, open the Unit Properties Configuration screen for a unit, and click
the Production Statuses tab. You will see that only other locked statuses can serve as a valid
transition for the status you locked.
Exporting Event Subtypes
Exporting event subtypes for UDEs or Production Events creates an Excel workbook containing a
worksheet with event subtype configurations for export and import to use on another server.
To export event subtypes:
1. In the Plant Applications Administrator, expand Global Configuration.
2. Right-click Administer Events and select Export Events / Event Subtypes. The
Configuration Export dialog box appears.
3. Ensure Event Subtypes is selected, and click OK. Excel automatically creates a workbook
containing a worksheet with the event subtype configurations.
Importing Event Subtypes
You can import event subtypes that are exported from an Excel workbook to use on another server.
To import event subtypes:
1. Ensure the workbook containing the event subtype configurations worksheet is open and the
configurations you want to import are selected.
2. In the Plant Applications Administrator, expand Global Configuration.
3. Right-click Administer Events, and select Import Configuration. Your selected
configurations are imported.
4. Click OK, and refresh the server.

Administer Models
166
Administer Models
To manage models: In the Plant Applications Server Manager tree, expand Global Configuration
and expand Administer Models.
Plant Applications models describe what to watch and what to do in the context of system events. An
important aspect of administration is to set up models for event collection. The models and
approaches are described elsewhere in this help system.
Creating Models for User-Defined Events
Follow these steps to create a new model for a User-Defined Event (UDE). Also refer to Adding
Subtypes for User-Defined Events.
1. Click Global Configuration.
2. Double-click Administer Models.
3. In the Event Detection Model Manager dialog box, select the desired model that you want to
use as a template and click New. This will automatically open the Model General tabbed
page.
4. Click the Model General tab and do the following:
a. In the Name box, type a name for your new Model.
b. From the Event Type drop-down list, select User-Defined Event.
c. A new model number is automatically created for you. If you want to change this
model number, type the new model number in the Number box.
NOTE: User-created models are given a model number greater than 50000.
d. If necessary, type a new version number in the Version box.
e. Under Model Comments, type any additional information you want in this box.
5. Click the Model Properties tab and do the following:
a. Click New to add a new property.
b. To specify a default value for a property, select the property and then click the
Browse button . In the Assign Property Value dialog box, choose or type the
default value and click OK.
NOTE: Your stored procedure will need to issue a result set of type 8.
c. Select Property Is Locked at Configuration Time to prevent the property from
being edited when the event is configured on the production unit.
d. Select Property Is Optional to make the property optional, rather than required.
e. Under Property Comments, type any additional information you want in this box.
6. On the User-defined Properties tab, add any other properties you want for this model.
7. Close the Event Detection Model Manager dialog box.
Customizing the User Interface
You can customize the Plant Applications Client's user interface by editing prompts. These prompts
can be changed to suit the needs of your users or your company. Along with English, these prompts

Global Configuration
167
are available in a number of languages, which you can also change. To view the prompts in a
different language, your user profile must have the language parameter set to the specific language.
If a site has users viewing displays in more than one language, careful consideration
should be made when making translations. When alternative text is created, it is saved to
the tables in the database. The changes are server specific rather than user-specific.
Therefore, any changes made will be available to all users who log in to this specific
server.
To edit the user interface:
1. Log in to the Plant Applications Administrator program.
You must have Administrator access to the Administrator security group to perform this
function.
2. Open the Global Configuration folder.
3. Right-click on Administer Language Translations and select Administer Language
Translations from the pop-up menu.
4. In the Language Translations Edit dialog box, do one of the following:
To search for prompts by application, click Search by Application and select the desired
application from the drop-down list.
To search for prompts by prompt number, click Search by Prompt Number Range and enter
the beginning prompt number in the first field and the ending prompt number in the second
field. If you are searching for a specific prompt number, enter the same number in both fields.
5. Click the Search button.
6. In the Prompt Override column, click the cell next to the prompt(s) you want to edit and type
your new prompt(s).
7. Click the Close button .
Editing Language Translations
Display headings, labels, comments and messages within Plant Applications are identified by prompts
in the Plant Applications database. Plant Applications has these prompts translated into a variety of
languages. However, local dialects, corporate terms, different terminology etc. may be a reason to
create alternative text instead of what is displayed within the defaulted language. The prompts can be
edited to use alternative text by creating a translation.
The LogPromptNumbers parameter which can be applied to any System or Site User is used to
discover the prompt numbers for any display the User views through the Client. When
LogPromptNumbers is equal to True(1), the prompt numbers are written to the C:\Program
Files\Common Files\ProficySDKErrors.log file. The numbers can then be used within the
Language Translations setup in the Plant Applications Administrator.
IMPORTANT: When alternative text is created, it is saved to the tables in the
database. All users will see the changes because it is not specific to each
user. Therefore, if a site has users viewing displays in more than one language, careful
consideration should be made when making translations as all changes will be viewed by
all users.
Exporting Language Prompts
Exporting language prompts creates an Excel workbook containing a worksheet with the selected
language and application prompts and any prompt overrides.

Multi-Lingual Support
168
To export language prompts:
1. In the Plant Applications Administrator, expand Global Configuration.
2. Right-click Administer Language Prompts and select Export Configuration. The Configuration
Export dialog box appears.
3. Do the following:
a. Ensure Prompt Overrides is selected.
b. Select a language from the Language list. The worksheet will contain the U.S.
English text and the translated text in the selected language.
c. Select an application from the Application list.
4. Click OK. Excel automatically creates a worksheet containing the language prompts
configuration.
Importing Language Prompts
After you have exported your language prompts, you can edit the information in the Override column
and import the changes into a Plant Applications server.
To import language prompts:
1. Ensure the worksheet with your language prompt configurations is open and the
configurations you want to import are selected.
2. In the Plant Applications Administrator, expand Global Configuration.
3. Right-click Administer Language Prompts and select Import Configuration. Your selected
configurations will be imported.
4. Click OK and refresh the server.
Multi-Lingual Support
This functionality is available only if you selected the Install Multi-Lingual Support option
when installing the Proficy Server.
IMPORTANT: If you make any regional changes in the Windows Control Panel, shut down
all instances of the Client and the Administrator on that machine before making those
changes. If the Client and/or Administrator were running when you made changes, stop
the applications and restart them. Any results gathered before you do may be invalid.
The local description is the text that was entered when the various objects were created. The
language used for this text is determined by the regional settings of the user's computer.
As an alternate to the local description, you can create a global description. This global description
can be in a different language or just an alternate description.
By default, the LanguageNumber site parameter is set to US-English. If you want to use a different
language, you must change this site parameter.

Global Configuration
169
NOTE: The site parameter, LanguageNumber, has no affect on what's displayed as the
local description. It simply determines which description a user will see.
Multi-lingual support allows you to create a second description for the following objects:
Reasons
Production Status
Waste Event Type
Reason Trees
Displays
Display Groups
Views
Product Family
Product Group
Products
Product Property
Characteristics
Characteristic Groups
Specification Variables
Production Lines
Production Units
variable groups
Variables
Departments
Waste Conversions
Reason Shortcuts
Timed Event Statuses
Waste Event Faults
Timed Event Faults
Adding Global Descriptions
To add a global description:
1. Log in to the Plant Applications Administrator program.
You must have at least Manager rights to the Administrator security group.
2. Expand Global Configuration.
3. Right-click on Administer Multi Lingual Translations and click Administer Multi Lingual
Translations. The Multi-Lingual Edit dialog box appears.

Multi-Lingual Support
170
4. Select one of the objects in the left-hand pane.
5. To search for specific text, enter the text in the Description field; otherwise, leave the
asterisk (*) in the field.
6. Do one of the following:
To search for local descriptions, select Local.
To search for global descriptions, select Global.
To search for any empty descriptions, select Empty.
7. Click the Search button.
8. In the right-hand pane, under the Global Description column, click the cell adjacent to the
text you want to create a global description for and enter the global description.
9. After you have entered all of your global descriptions, click the Save button.
10. Click the Close button.
Multi-Lingual Enabled
This is a system parameter and should not be changed. Its value is determined during installation of
the Proficy Server, based on whether the option, Install Multi-Lingual Support, is selected during
installation.
