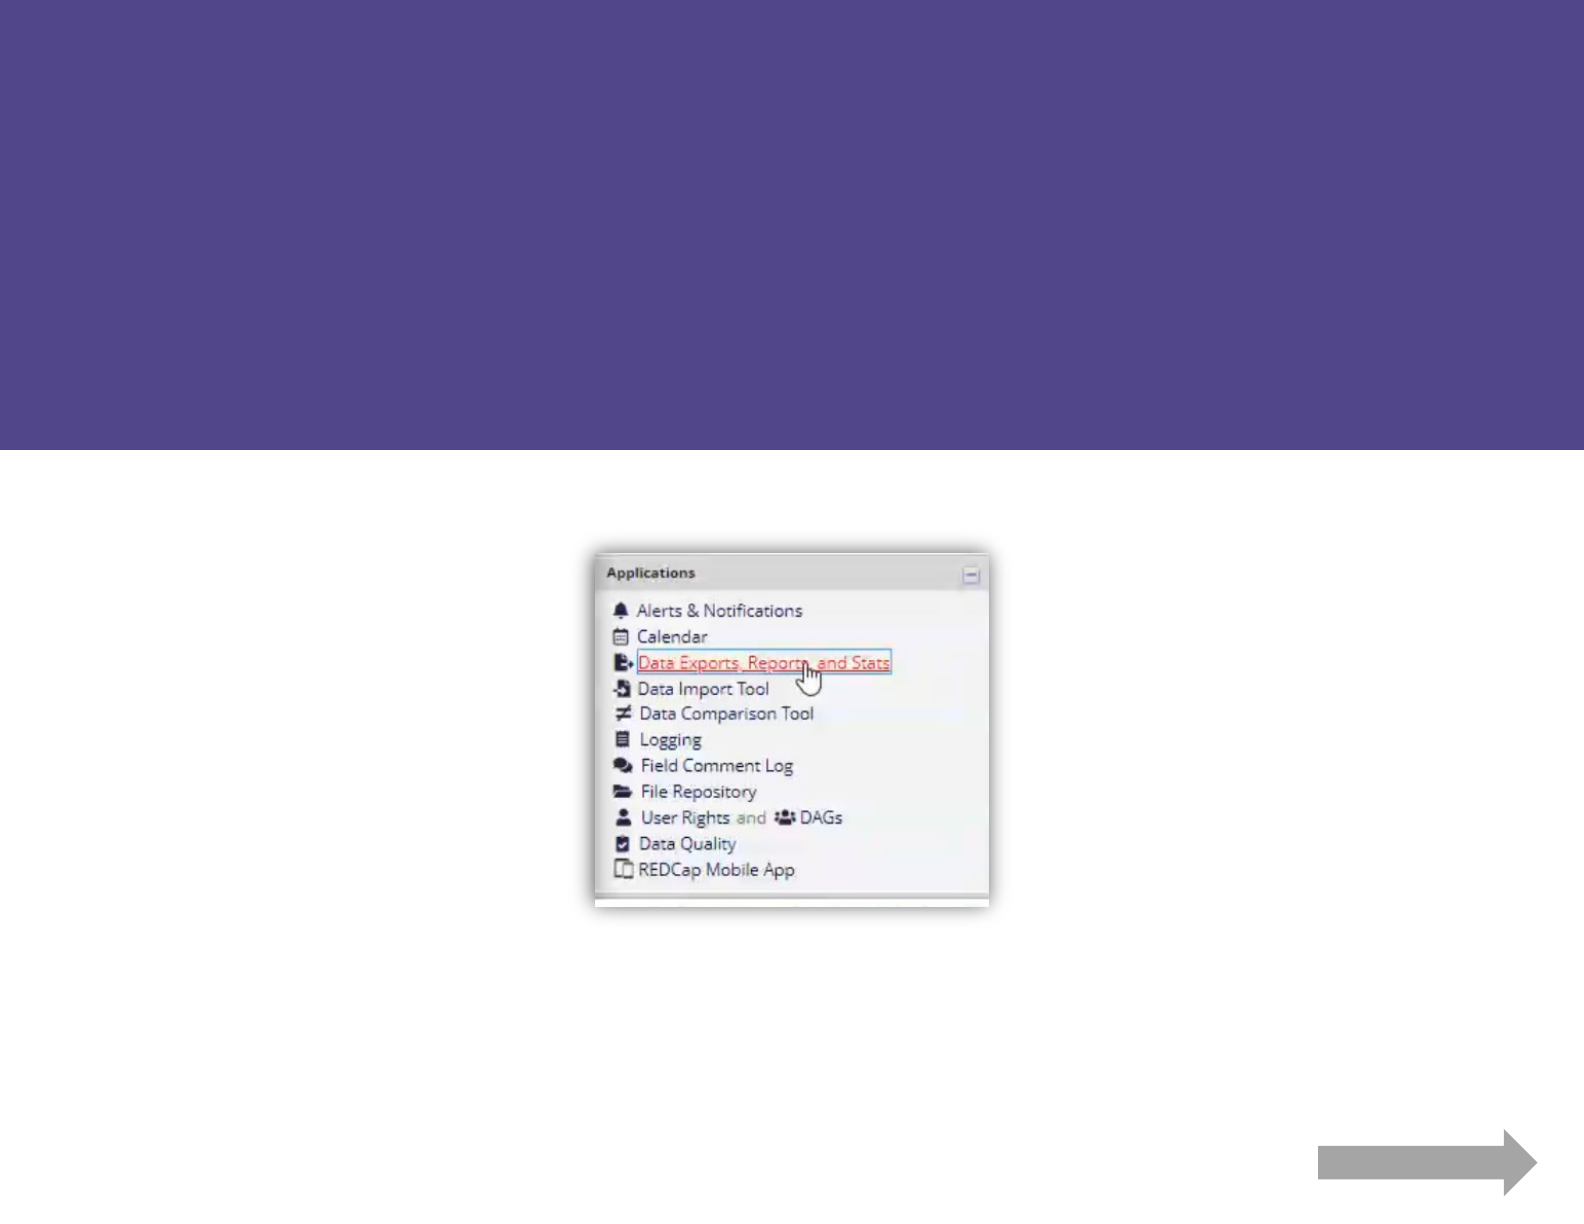
To begin, go to ‘Data Exports, Reports, and Stats’ in the left column
This guide covers how to view & export data from an existing instrument (survey or form)
See our other guides for support on
building & distributing instruments

There are multiple ways to view your data.
We’ll begin with the ‘View Report’ button
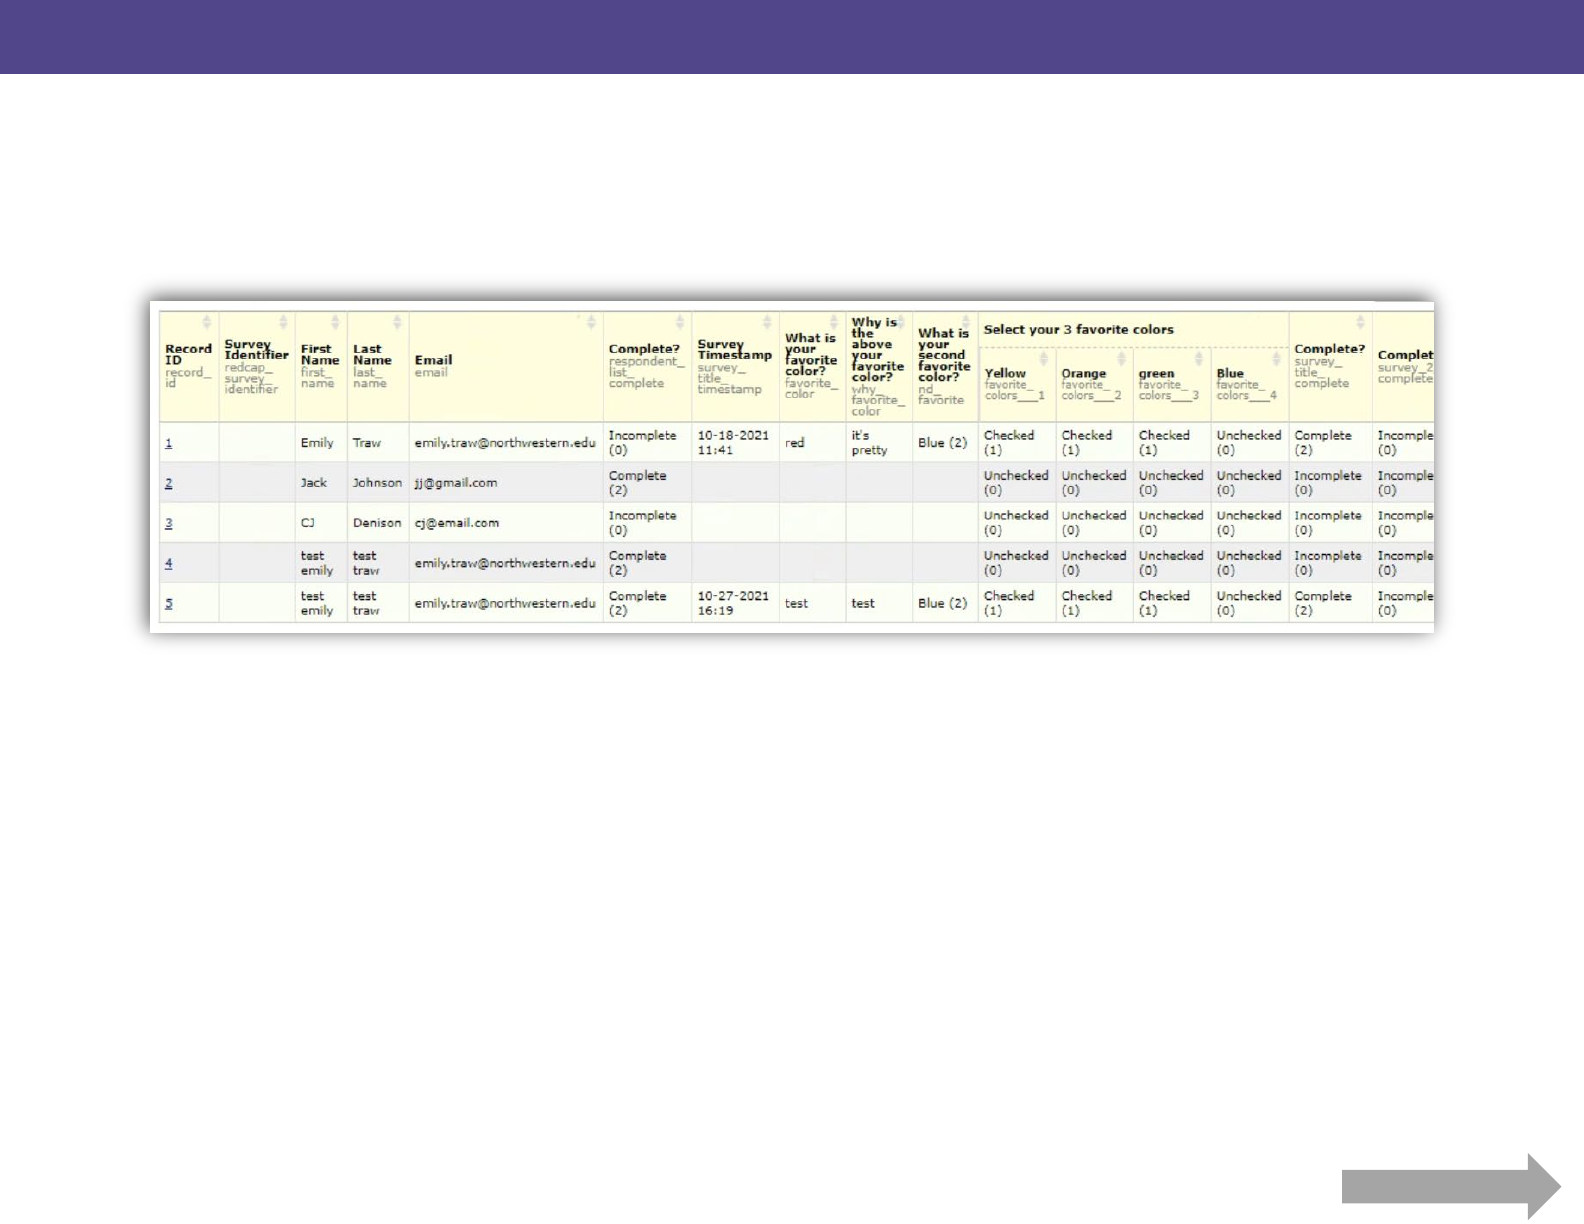
The ‘View Report’ option shows all the data in your project. This is helpful to
check test entries prior to distributing the survey(s) to your recipients.
Note: Multiple select checkbox options appear as indicated under the
“Select your 3 favorite colors” columns. These populate as 1’s and 0’s as
opposed to a list of selection options. This format allows for effective
analysis when exported to excel or another statistical program. We will
review an option to view this as a list later in the guide.

There are multiple ways to view your data.
Next, we’ll look at the ‘Export Data’ option.
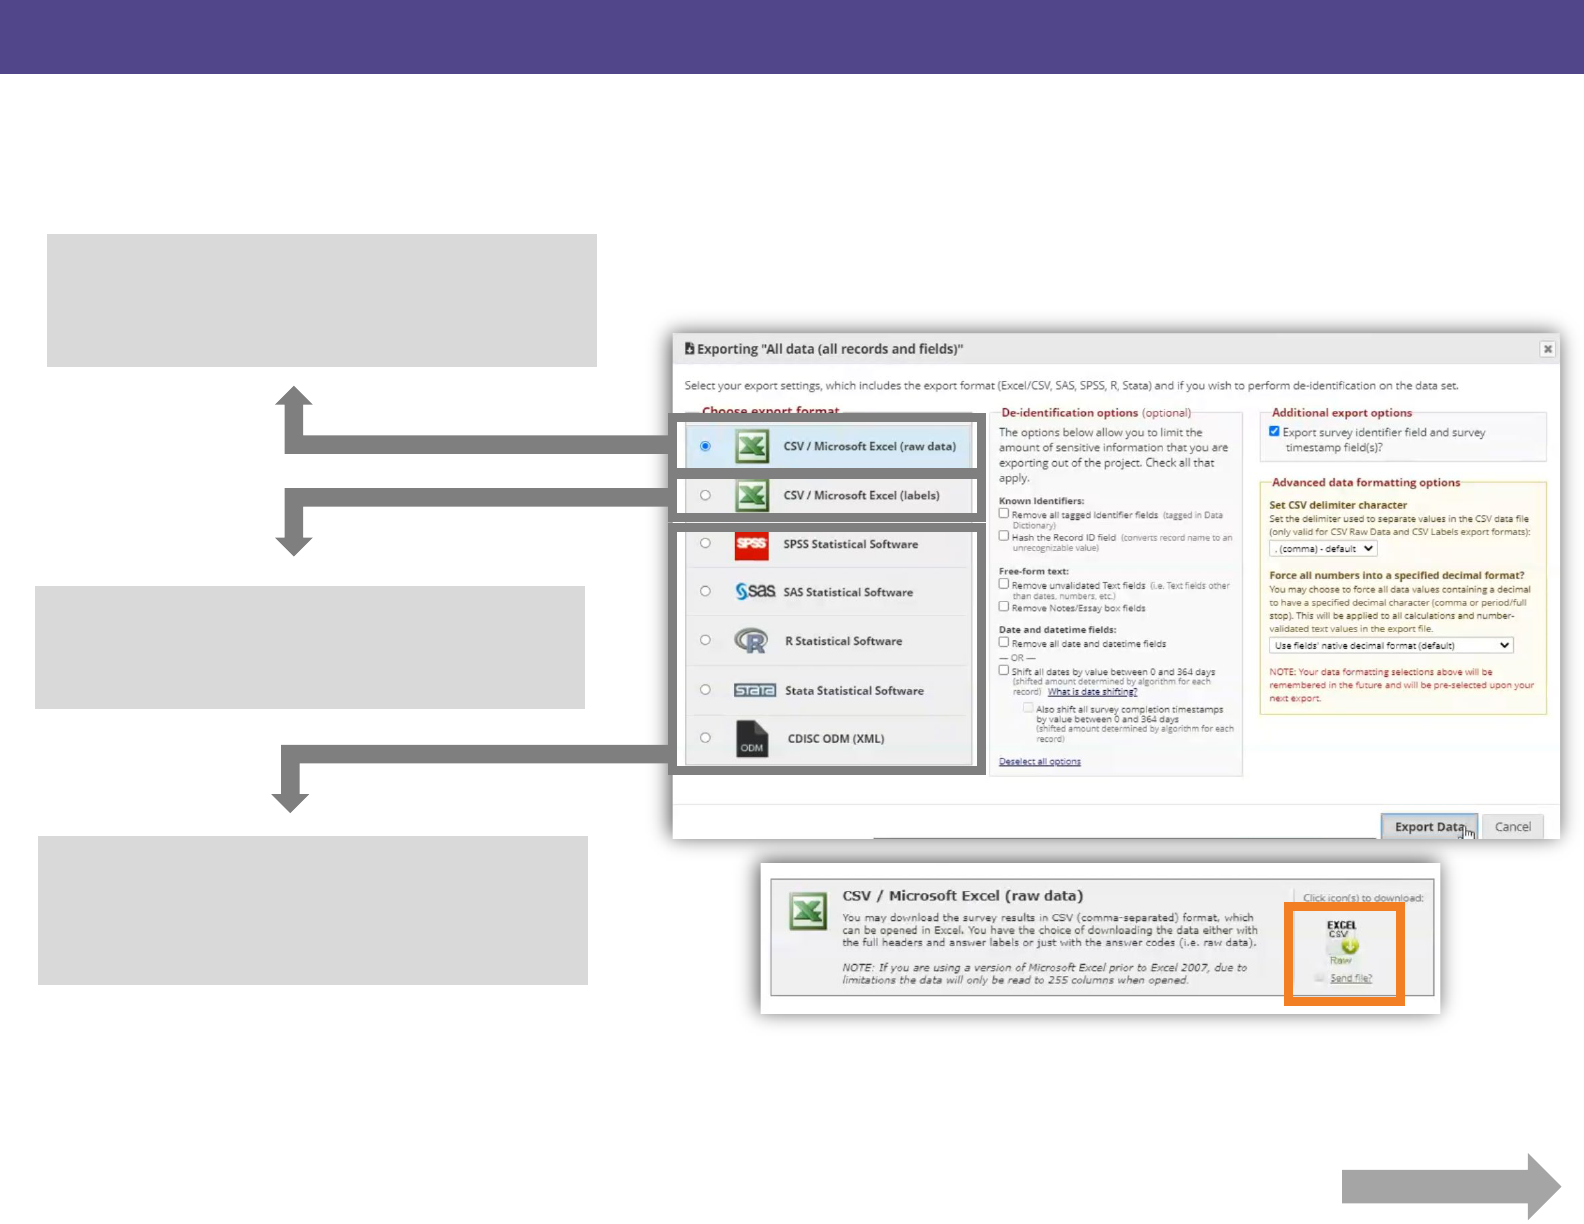
The raw data Excel option is most appropriate for
statistical analysis. Data will appear like the
overview screen whereas multiple selection options
are coded as a 1 (selected) or 0 (not selected)
The labeled Excel option is best for general
review/analysis like program feedback surveys,
information capture forms, etc
The other options export to either a format
supported by specific statistical platform or XML
code. If you are working with a statistician, they will
likely request you export to one of these options.
After you select your format, click ‘Export Data’ in the lower corner.
On the next screen, click the respective icon to download
There are multiple ways to view your data.
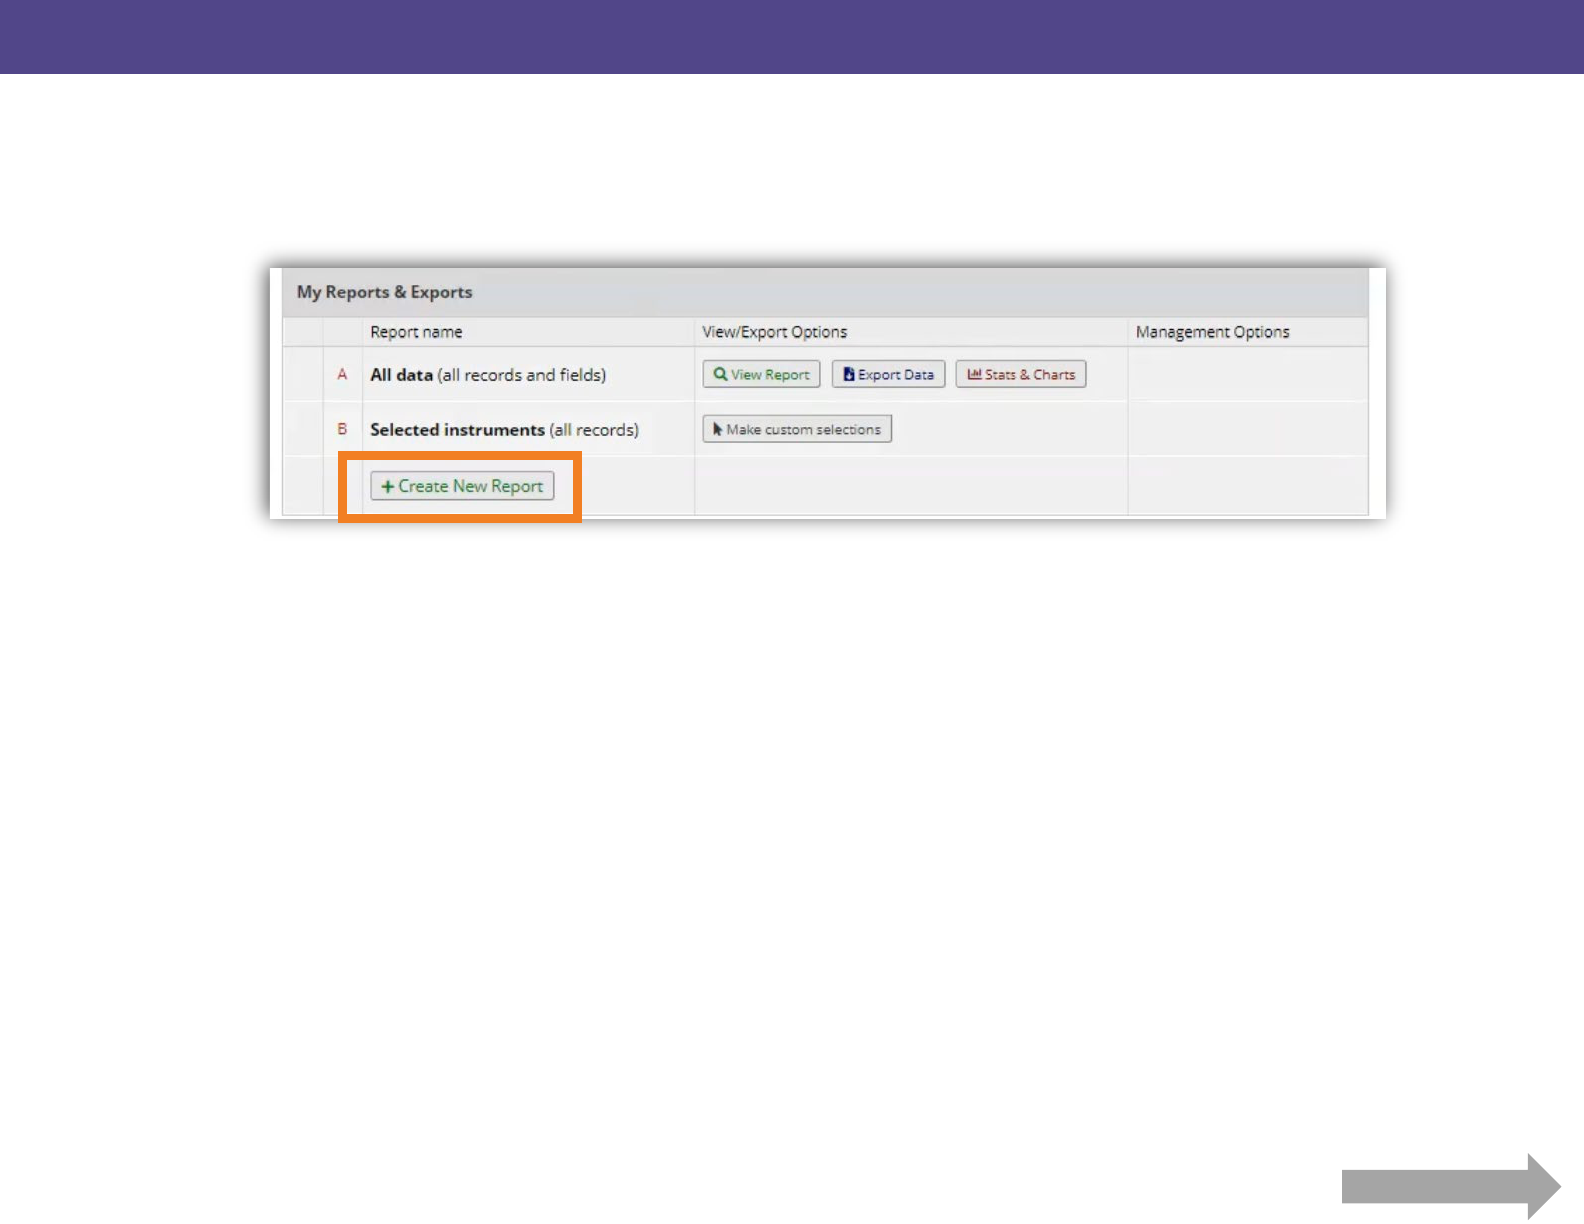
Next, we’ll create a report to export specified data.
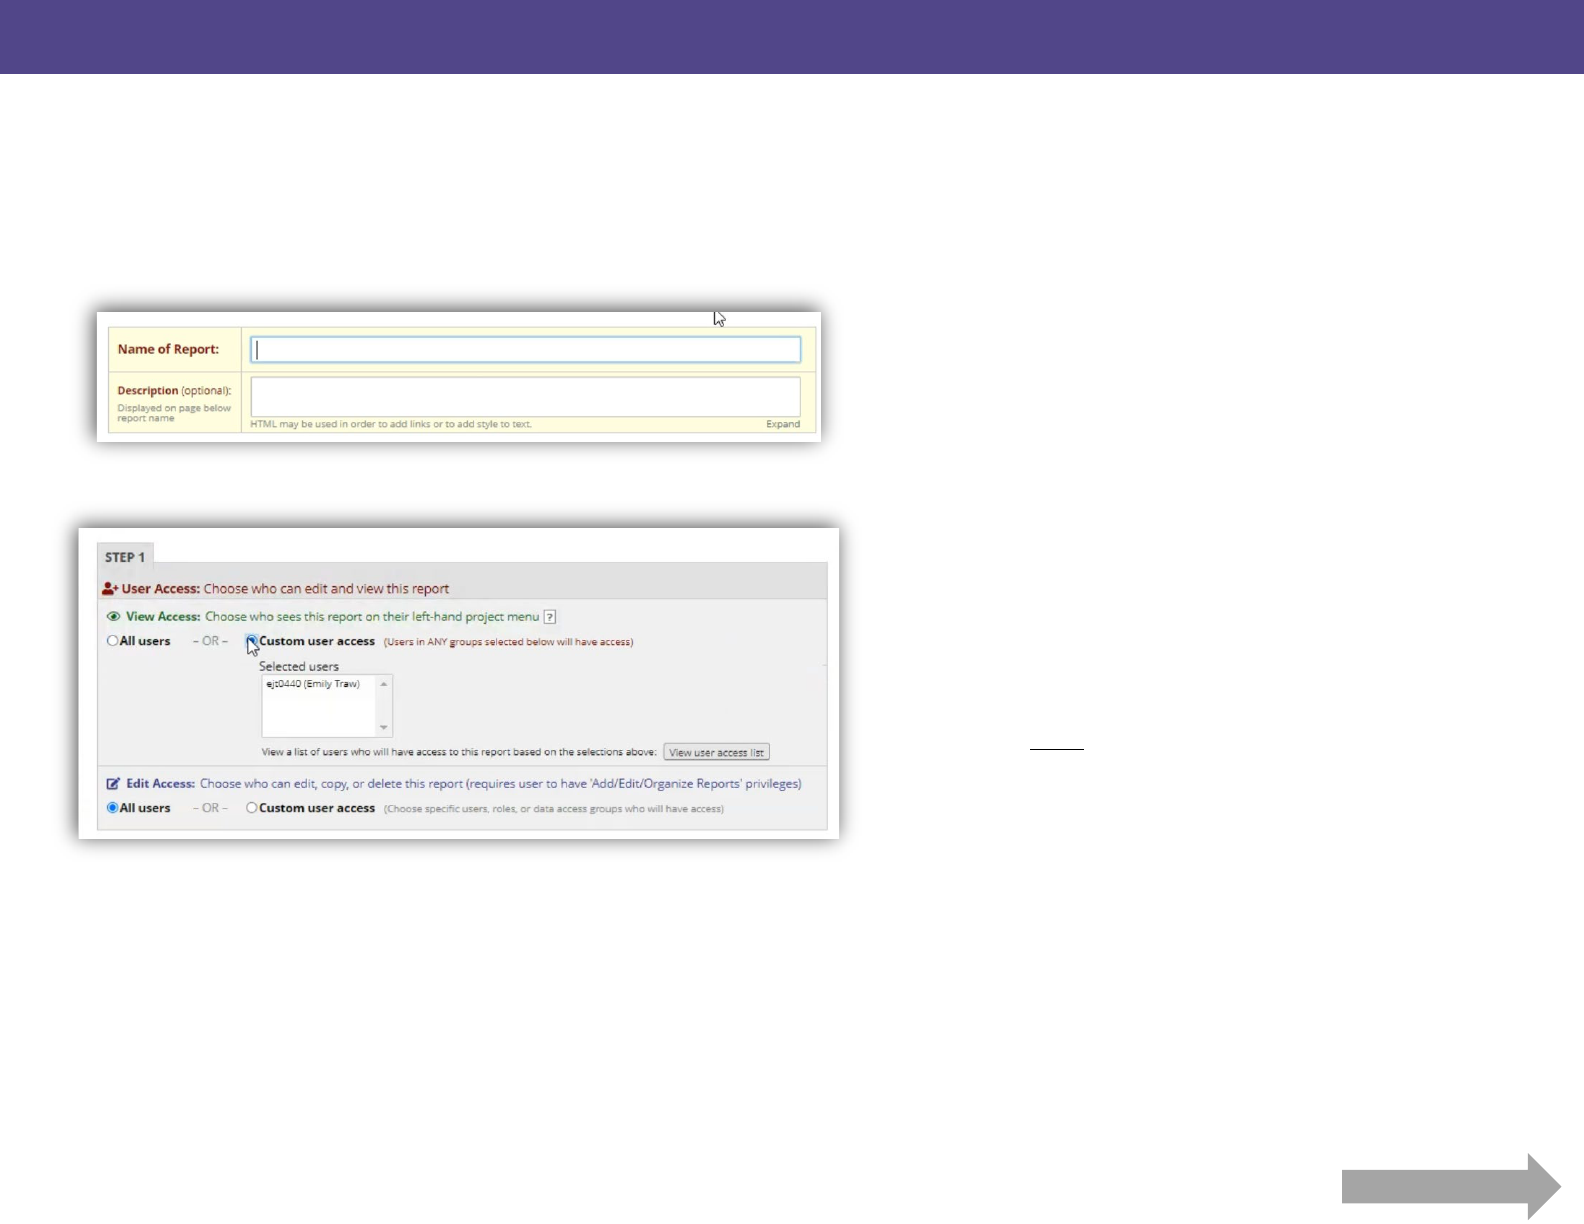
First you’ll want to name & describe your
custom report
If you have other REDCap users added to your
project (these are usually other staff/faculty on
your team), you can grant them access to view the
report. Note: If they are not an authorized REDCap
added to your project, they will not appear here.
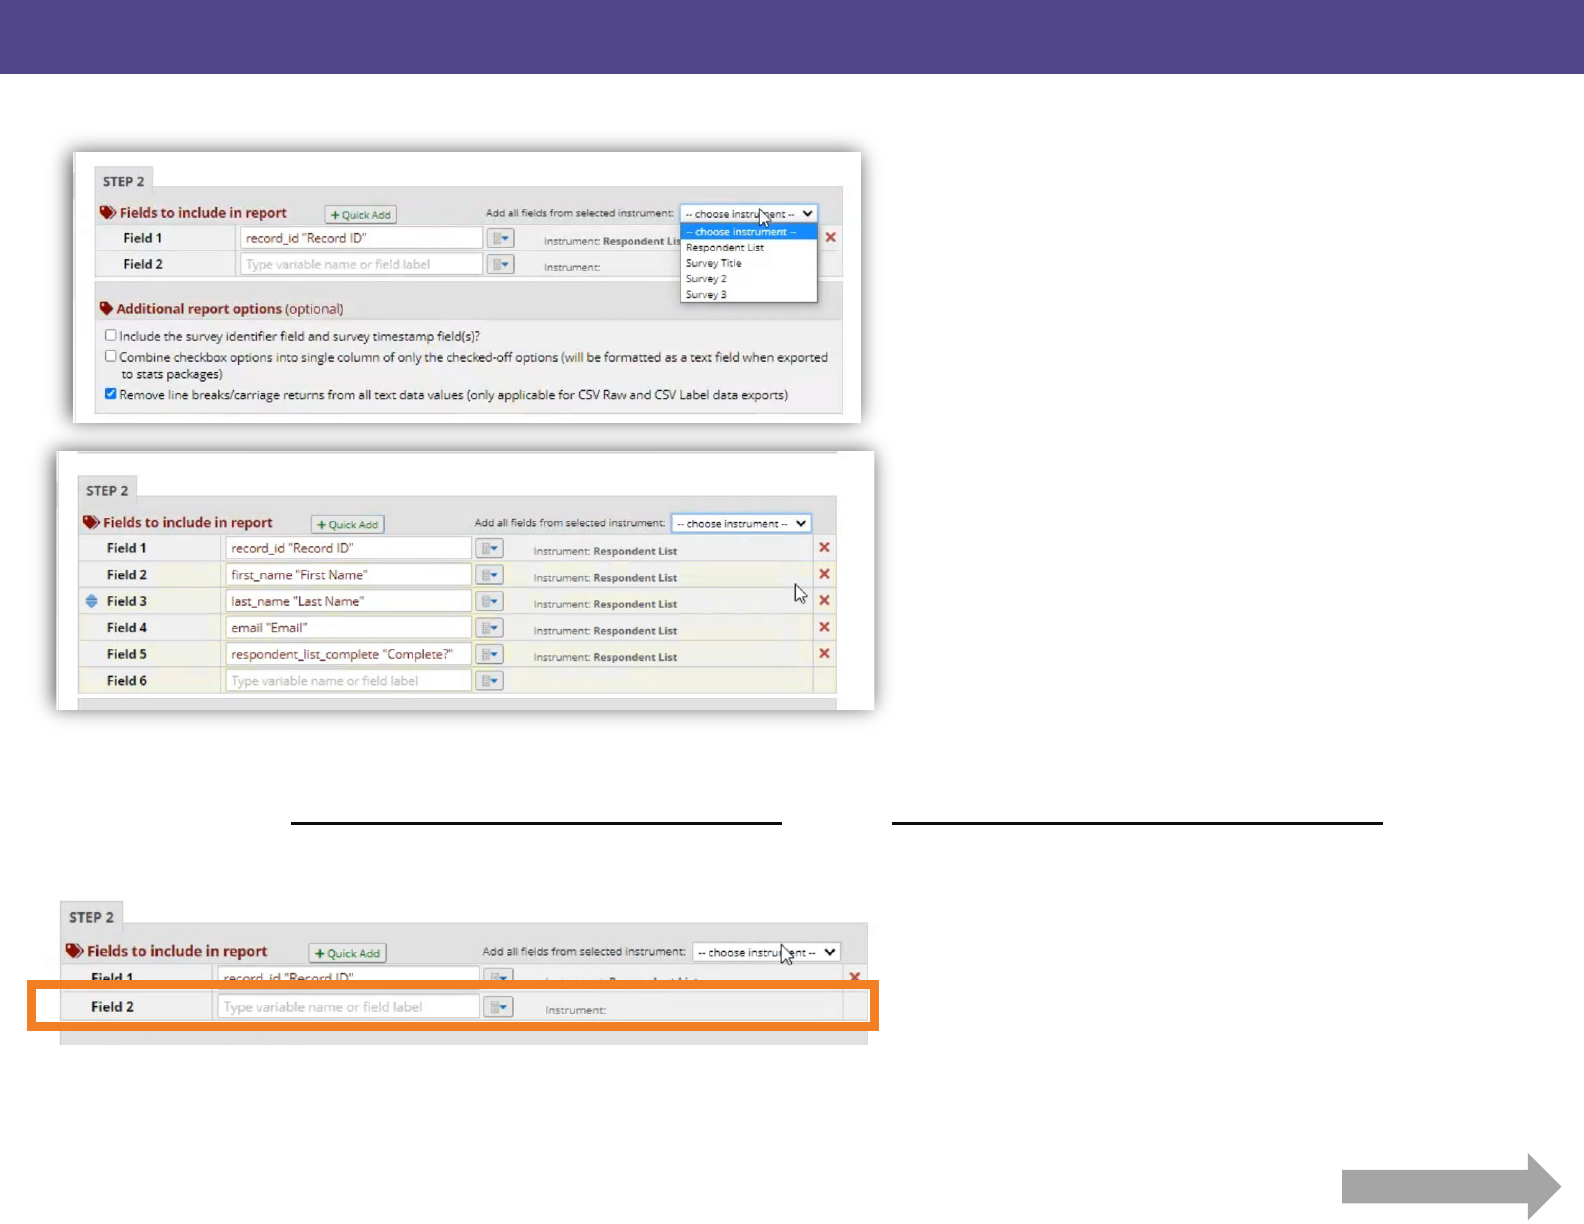
Next, select which instrument you want to
include variables from. In other words, select
the survey/form you want to pull data from.
All the instruments from that survey will
populate. You can remove fields you don’t
want using the red crosses on the right. If you
want to select variables from multiple
instruments, go back to the drop-down menu
and select the next instrument you want to
pull from. Those variables will populate under
your existing variables.
OR
In addition to the method above, you can also
select variables from your project directly into
the next open field by typing or clicking the
blue-arrow icon then selecting. Variables will
auto-populate as you begin typing.
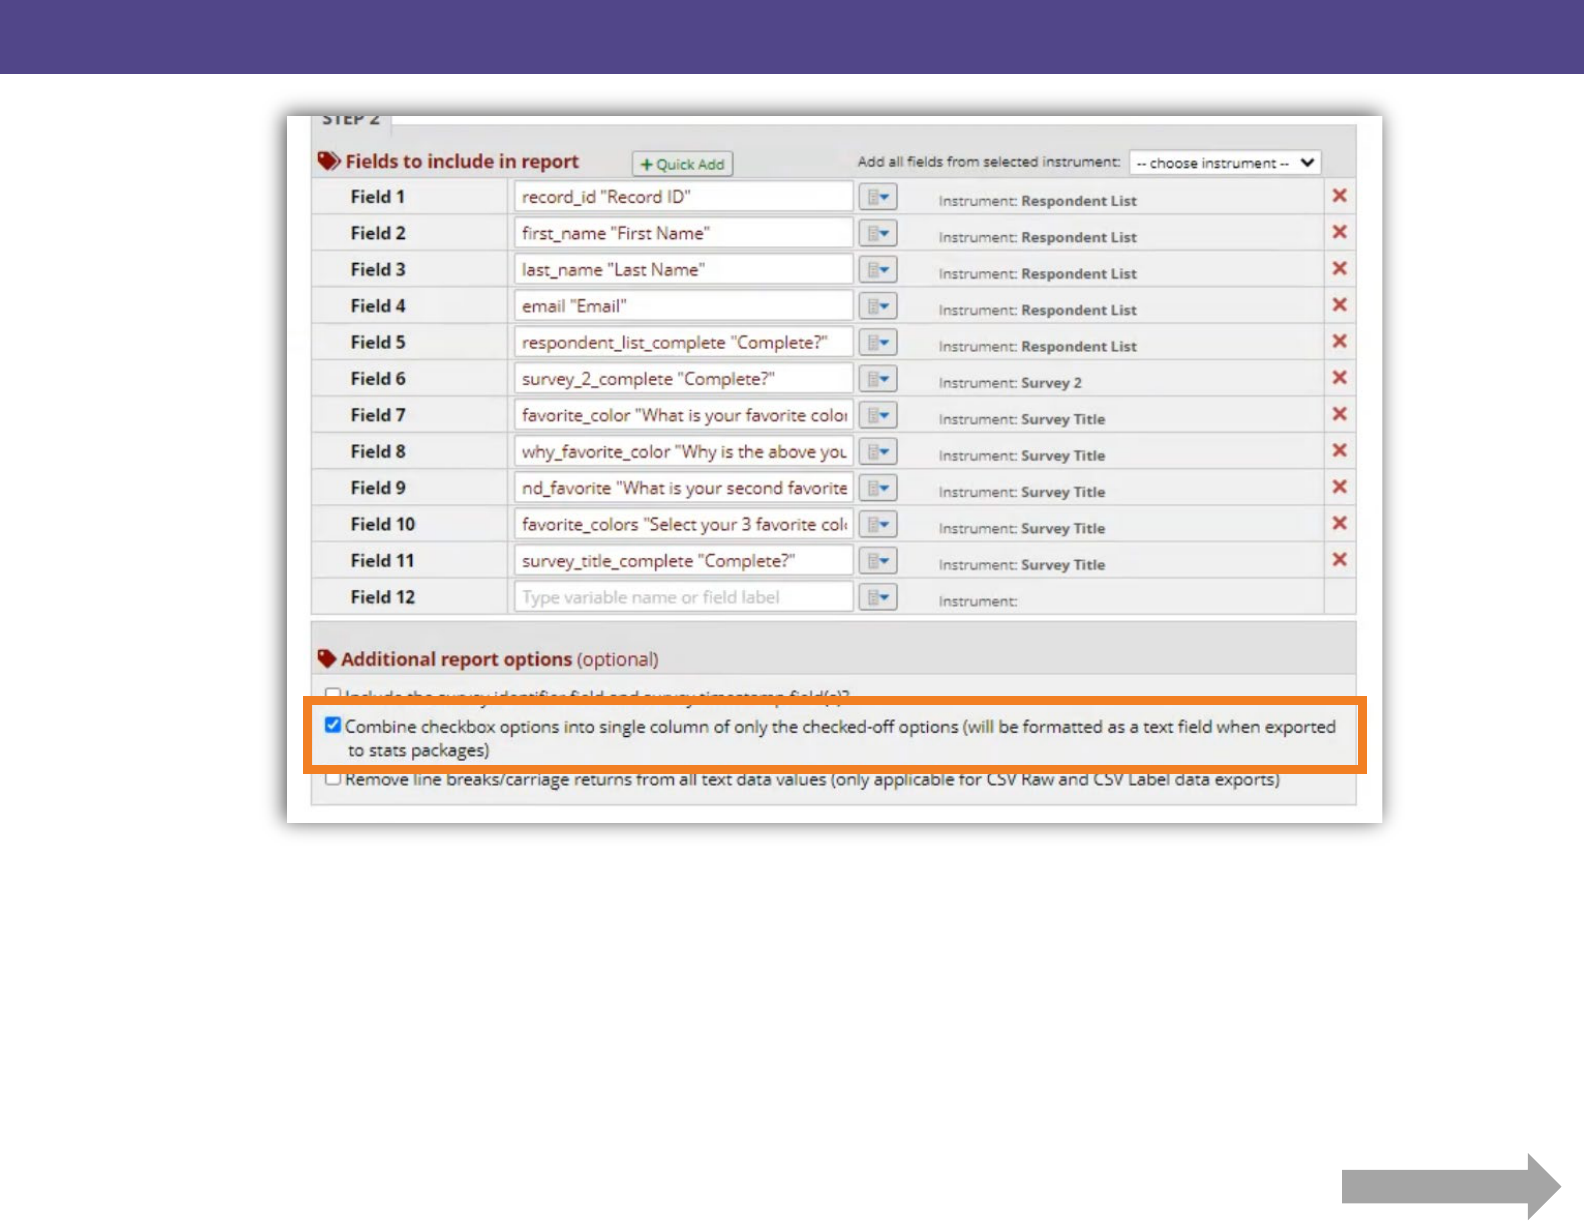
If you have a survey question/variable with multiple selection checkboxes, you can have REDCap format
them as a text field instead of the raw data (presented as 1’s and 0’s). Select the ‘Combine checkbox
options’ box under ‘Additional report options’. This is suggested for general program evaluations and
simple analyses. For statistical exports, we suggest leaving this unchecked.
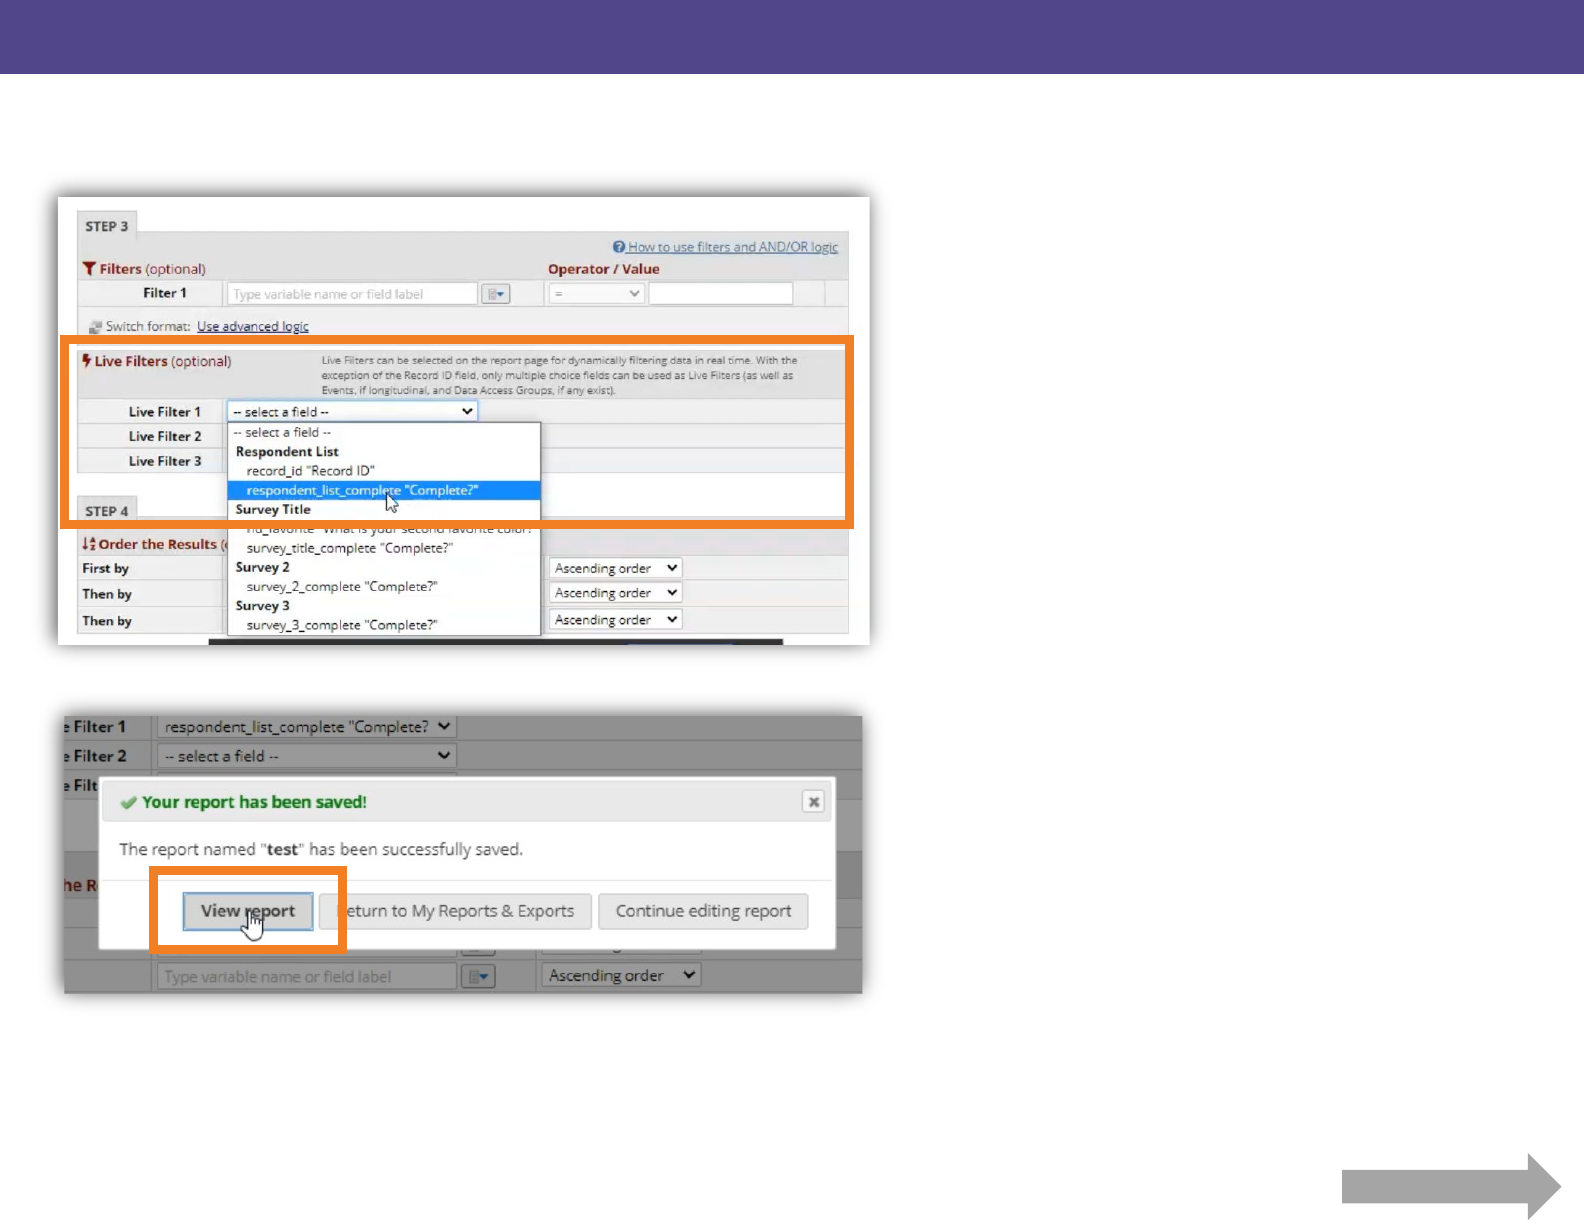
REDCap also allows you to add Live Filters to your
report. Live Filters allow you to quickly toggle between
two or more categories in a given data-set. In this
example, we’ll add a Live Filter to differentiate
between complete and incomplete entries on our
respondent list.
Under the desired variable (‘Respondent List’ in this
case), select “Complete?”. After entering your Live
Filter(s), click the blue “Save Report” button at the
bottom of the screen.
On the pop-up, select “view report”
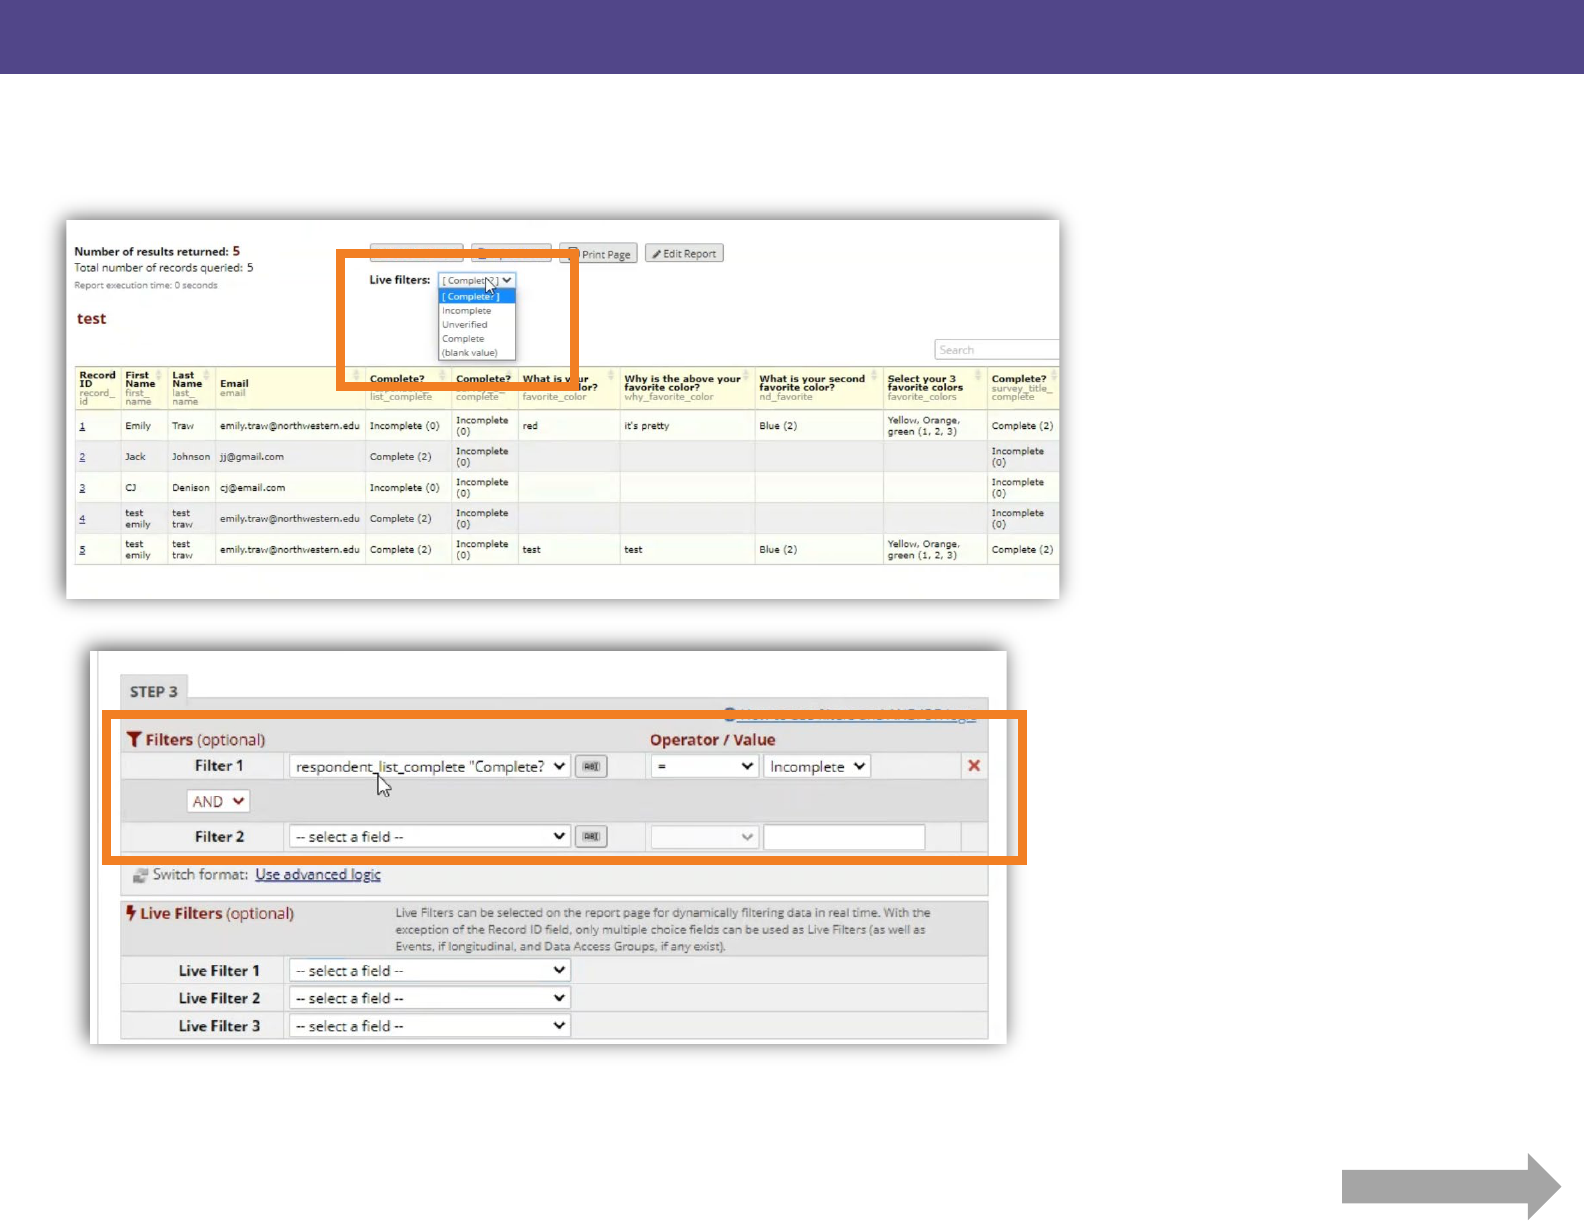
Your Live Filter will appear above
the data-set. You can add multiple
filters for a given report.
If you want to filter which data
populate the report (as opposed to
a Live Filter which sorts/screens the
data), select the standard filter
option in the settings. This will
create a report that only meets the
criteria you select.
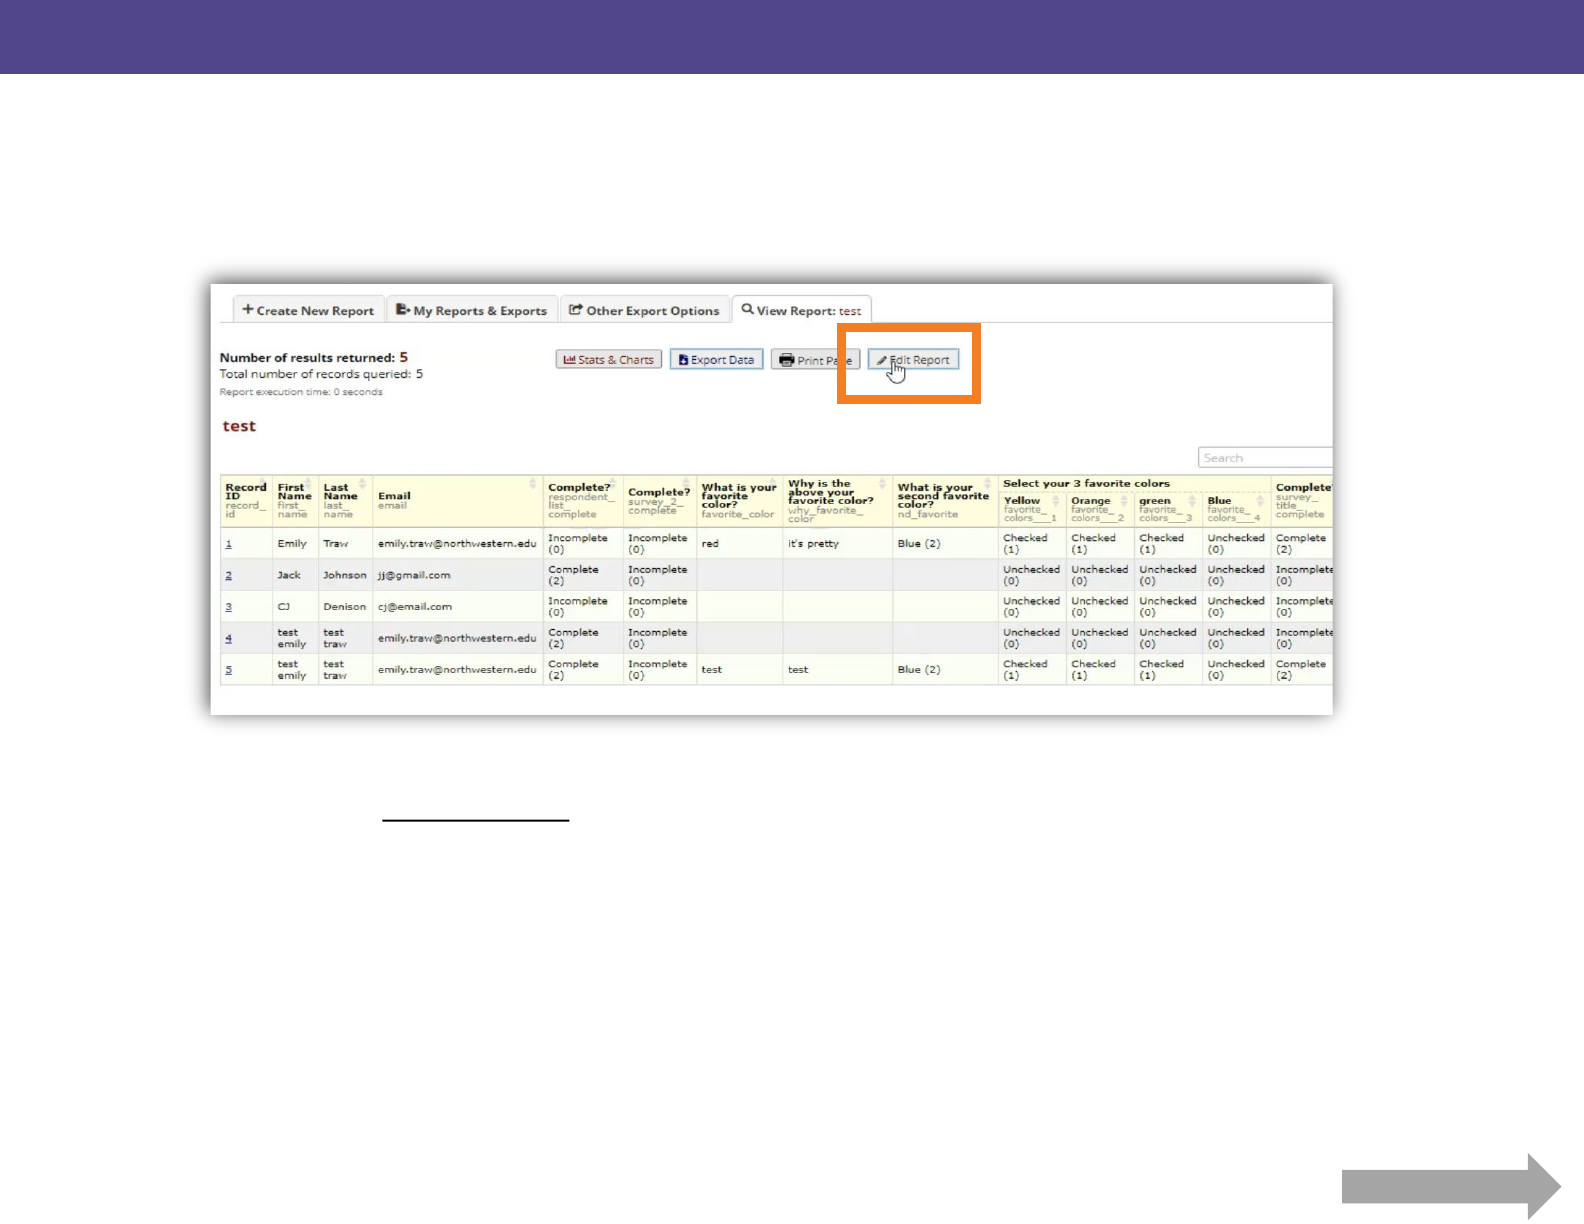
• You can edit a report at any point to add more Live
Filters, edit standard filters, change viewing settings, etc.
Changing the report does not change the data – only
how you view the data.
• Data export tools work for both surveys (that are sent
out to external users) and forms if you’re using REDCap
for data capture purposes (like a research study)
Two Reminders:

See our other guides to learn more foundational REDCap and Data Management skills
