
1
Insider's Guide to
Kitchen Design

2
WELCOME
Hello there!
I am so happy you’ve purchased An Insider’s Guide to Kitchen Design. This guide is born out of my love
for kitchen design and my experience as both an interior designer, kitchen designer and homeowner
(we’ve restored and renovated our 1940s Chicago Bungalow). My design education also included
coursework ailiated with the NKBA (National Kitchen & Bath Association), which I highly recommend
as a resource to designers and homeowners alike. The majority of imagery in this PDF is of kitchens
from our design portfolio (the source is otherwise attributed). I opened my full service design firm,
Centered by Design in 2015, and kitchen design has become a passion for our firm.
Designing a kitchen, or the heart of the home as we like to call it, takes a lot of knowledge, organization,
a great team and an even better project manager. Whether you are about to embark on your own
renovation and have a designer, contractor or cabinet maker, etc. this guide will give you a lot to think
about and empower you to make educated design choices!
The guide is broken into four sections: Practical Advice, Design Guidelines, How To Get Started and
Sample Drawing Set. Follow it in order and use it like a workbook for maximum eiciency. It’s never
too early to start planning your dream kitchen, Bon Appetit!
For all our latest design inspiration follow along on Instagram @centered_by_design
Claire Staszak, Principal, Centered by Design

3
SECTION I
- Practical Advice -
TABLE OF CONTENTS:
• Fill out the Kitchen Questionnaire: Think Like a Researcher
• Review the Kitchen Remodeling Checklist: Make your Wishlist
• Average Kitchen Renovation Cost Template: Be Prepared
• Interview Contractors: Get Multiple Bids
• Step by Step
: Schedule, Timeline, Budget, Plan
• Basic Glossary: Learn Industry Terminology
• Cabinet Knowledge: Not all Cabinets are Created Equal

4
Kitchen Questionnaire - Part 1
Household Information:
How many people are in your household, and who is/are the primary cook(s)? Do you cook frequently
or is the kitchen used more on the weekends / special occasions? Do you enjoy entertaining or have any
special hobbies to consider, like baking?
Children:
If you have children, do they like to cook? And what considerations would you like to make for them in
the kitchen?
(e.g., step stool, cutting boards, pantry access, microwave or appliance heights)
Pets:
If you have pets, what would you like us to know about them and their use of the kitchen?
(e.g., pet food storage, bowls, water access, etc.)
Research:
What DO you like and what do you NOT like about your current kitchen?
Do you consider your kitchen as just another room in your home, or is it more of a living space/heart-of-
the-home where you and your family spend a majority of time?
What improvements are you looking for in a new kitchen? (e.g., Easier to clean; Upgraded appliances;
More eicient traic pattern; More storage; Better lighting; Additional workspace; Other)
Do you prefer small appliances out and accessible or hidden away for clear counters?
What key small appliances do you use daily?
Are there entertaining features or technology you would like to see in your kitchen?

5
Are there any new or dierent appliances you hope to incorporate into the new kitchen design?
Design:
What style would you like your new kitchen space to have? Formal, Traditional, Transitional,
Contemporary, Open and Airy, Modern? Are there any kitchen designers, magazines or brands you love
that you’d like to emulate or incorporate in the kitchen?
What colors do you like/dislike?
Which metal finishes do you prefer? Are there any you really don’t like? Brass, Bronze, Polished Nickel,
Chrome - satin or with shine?
What type of finish would you prefer for new cabinets? Natural wood, Light wood, Medium wood, Dark
wood, Metal/glass, Aged/antique, Painted, High-Gloss, etc.?
What type of material are you considering for your countertops? What is most important to you in
regards to durability, natural materials, cost, aesthetics?
Do you need additional decorative or task lighting? Do you like under cabinet lighting?
What are key areas you’d like to invest in or areas of importance to you? Please refer to our kitchen
design checklist.
Anything else you would like us to know or consider as we design your new kitchen!?
Kitchen Questionnaire - Part 2

6
Kitchen Remodel Checklist
O/X CLIENT NOTES DESIGNER NOTES
Kitchen Floor Plan
most recent revision date:
Cabinet Cabinetry
cabinet door style
cabinet hardware
cabinet accessories
Countertop
edge detail
backsplash/ tile
grout
Plumbing
sink
single/ double basin
confirmed sink cabinet size:
drain
faucet
single / double / high-arc spout /
pull-out sprayer / seperate sprayer
garbage disposal
Appliances
dishwasher
refrigerator
water filter / ice maker
freezer
side by side / top / bottom
range
gas / electric
range hood
ovens
single / double / convection/
microwave & oven combo
cooktop
gas/ induction
microwave
wine fridge
built in coee maker
Electrical
decorative lighting
reccessed cans

7
Average Kitchen Renovation Cost Template
Highest Cost Items:
• Contractor Fees : Estimate 30 - 50% of overall project budget
• Designer Fees : Estimate 10-20% of overall project budget
• Cabinets: $10K - 50K
• Appliances: $6K - 100K
• Countertops: $5K - 25K
Median Cost Items:
• Backsplash: $1K +
• Hood/Exhaust Fan: $2500 +
• Cabinet Hardware: $500 +
• Light Fixtures: $2000 +
• Furniture: TBD
Lower Cost Items:
• Faucet: $650 +
• Sink: $800 +
• Flooring: $5 - $10/ sq
• Inspection/Permit Cost: TBD
Total $_______
Thoughts on How to Value Engineer:
Everyone has costs top of mind when undertaking a large renovation. Our advice is to decide what is
most important to you and put your money there. If this is your “forever home”, invest in cabinets that
will stand the test of time, appliances and countertops are easier to swap out over the years. If this
is an investment property, higher end appliances and quality countertops will garner more interest.
There is a huge range for costs of items like hardware, lighting, sinks and faucets.
With some dilegence, you should be able to find a style you love at a price point that works for you!
Ballpark overall costs to expect, depending on geographic location: $50K - $250K

8
Top 8 Questions To Ask Your Contractor
1. Are you licensed and insured in my city?
2. Could I have the phone/email of two recent clients who could give you a referral?
3. How long have you worked in this industry?
4. If you’re newer to the industry, what did you do before? Experience in peripheral fields like
architecture or building trades is a good sign.
5. Do you work mostly on commercial, residential, new construction, or renovations?
What’s your area of expertise?
6. Have you ever collaborated with an interior designer? Good contractors understand the value of
an interior designer, or home owner who appreciates and understands design details.
7. Can you create a project budget? An itemized list of expected costs broken down per room or
per trade, such as plumbing costs, electrical costs, framing, drywall, tile, etc.
8. Can you explain your process for a “change order?” When changes occur to scope of work, either
increasing or decreasing costs what is the procedure?
We always suggest printing out inspiration photos to show to a potential contractor. Use your photos
as a tool to gauge the contractor’s sensitivity to design details. It is a good sign if they are responsive
to the vision and even add suggestions / comments on design possibilities (or restrictions) based on
their construction knowledge. They likely have a good eye for design and detail which goes a long way
during the building process!

9
What Your Contractor Wants You To Know
1. Create a thorough wish list or scope of items needing to be addressed by area throughout the
home.
2. Prepare a good inspirational package with images. You can gather these on sites like Pinterest and
Houzz. Print these out for your meeting.
3. Provide any plans of existing conditions, including plat survey plans from your closing or floor
plans from your home or online listing.
3'-0"3'-0"
REFREF
14'-2"
7'-0"
4'-6"
3'-6"
5"
7'-0"
5"
5" 14'-2"
5"
3'-6"
2'-0"
2'-0"
4'-0"4'-0"
6'-0"
4'-0"
4'-0"
6'-0"
10'-0"
3'-0"
9'-4"
D/W
MWO
REF
8'-11
1
4
"
3'-0"
10'-0"
5'-0"
5'-0"
DINING ROOM
x
PANTRY
x
KITCHEN
x
19'-9"
CEILING HEIGHT
10'-0"
1'
6'-0"
3'-0"3'-0"
REDUCED DOORWAY
FOR TRIMMED OPENING
STAIR WELL WAINSCOTING
SEE ELEVATION FOR DETAILS
7'-6" 7'-1"
1'-3
1
2
"
1'-3
1
2
"
2'-3
1
2
"
1'-3
1
2
"
TRAY CEILING
The following three suggestions are a good general practice when preparing or meeting with
potential contractors or other trades people:

10
1. SET REALISTIC GOALS : Kitchen renovations are known for going over on time and budget. Even
the biggest budgets need value engineering. Decide what are the most important elements (i.e.
appliance quality, cabinet quality, better lighting plan, etc.) for you and your family, stick to those
priority items and let them guide your choices. Living through a renovation is not easy, plan for it
accordingly or move out!
2. DO YOUR RESEARCH: Make sure you talk to friends, family and professionals for guidance on
their experience with dierent brands, designers, showrooms and dealers. You are about to spend
a lot of money and time to create function and beauty for your family, do your due diligence and
then trust the professionals.
3. CREATE A BUDGET: A simple Excel spreadsheet will do. We always recommend budgeting, even
if at first the numbers feel like a guess. As designs become finalized you can swap numbers for the
actual costs. There are a lot of moving parts and this helps keep track of not only costs, but ordering
too.
4. HIRE YOUR TEAM: Aer steps 1 - 3 you should be well on your way to find your supporting players
for this renovation. Designers and builders can aid in your budgeting process as well. We recommend
involving a good team from the start for eiciency. You will save time, money and costly mistakes
with professional help. We recommend first reaching out to an interior or kitchen designer, they can
oen recommend vetted contractors and builders.
Kitchen Design Step By Step - Part 1:
Planning, Budgeting & Design

11
5. MEASURE YOUR SPACE + IDEATE: Kitchen design comes down to millimeters! Make sure you or
a professional gets very accurate measurements to work from.
6. FLOOR PLANS, ELEVATIONS AND D VIEWS: Now is the time to get creative! Use online space
planning tools like SketchUp and more to draw and ideate for your project. If you are working with
a professional they should provide multiple floor plan options, elevations and 3D views.
7. SUBMIT FOR PERMITS IF NECESSARY:
Work with your city, architect or builder to submit for your permit once plans are drawn and finalized.
8. CREATE PROJECT TIMELINE: Ask your contractor or builder for a timeline and contingency time.
9. FINISH SELECTIONS: With your drawings approved, now is the fun part! Choose your cabinet
door style, color/s, metal finishes for plumbing, lighting, countertops, hardware, etc. If you are
struggling, this is another good stopping point to involve a designer.
. PREPARE FOR CONSTRUCTION: Setting up a makeshi kitchen in the basement or elsewhere
really helps if you are living through a renovation. We recommend access to a fridge, sink, crockpot
and hotplate! Get ready for some dust...we promise once it’s all over it will be worth it!
Kitchen Design Step By Step - Part 1:
Planning, Budgeting & Design

12
1. DEMOLITION (~ WEEK)
2. STRUCTURAL CHANGES: (- WEEKS)
• Framing
• Plumbing
• Electrical
• Mechanical
3. DRYWALL & PAINTING (~1 WEEK)
4.
FLOORING ( - DAYS)
5. CABINET INSTALLATION ( - DAYS)
6. COUNTERTOPS & BACKSPLASH (~ - WEEKS)
• Cabinets must be installed to measure.
• Fabrication & Installation require multiple site visits.
7.
APPLIANCES & DECORATIVE LIGHTING ( - DAYS)
8. FINISHING DETAILS & HARDWARE ( - WEEKS)
9. PUNCH LIST & CLEAN ( - DAYS)
10. ENJOY!!!
Kitchen Design Step By Step - Part 11:
Construction & Project Management

13
Get familiar with cabinet industry terminology and construction:
Wall Cabinet
Also known as upper cabinets,
typically 12-13” deep
Base Cabinet
Also known as lower cabinets,
typically 24” deep
Appliance Box and Panel
Cabinetry used to house / hide
appliances
Crown Molding & Back Band
Detailed woodwork used to finish
the tops of wall cabinets
Toe Kick & Furniture Base
Detailed woodwork used to finish
the bottom of base cabinets
Flush End vs. Paneled End
Refers to how the side of cabinet is
finished
Basic Cabinetry Glossary - Part 1

14
Inset vs. Overlay Cabinet
Most popular types of cabinet doors/
styles in the USA
Inset Cabinet
Features doors and drawers that
fit inside of the cabinet face frame.
Overlay Cabinet
Refers to how much a door overlays
the face frame of the cabinet.
Basic Cabinetry Glossary - Part 2
Door Style
Defines the look, construction and
type of cabinetry door.
Appliance Garage
Custom cabinetry, designed to
conceal large appliances.
Pull out/ Roll out Cabinet
Cabinetry type that rolls or pulls out,
f.e. for spice storage, trash can, etc.
Get familiar with cabinet industry terminology and construction:

15
Cabinet Knowledge: General FAQ
• Good quality cabinetry is absolutely beautiful and will add value to your home.
• Invest in the best you can aord. You will use and touch your cabinets everyday.
• Make sure your cabinetry is built out of solid materials. Quality cabinetry should have a minimum
of plywood box construction with corner braces, full height backs, so close hinges and joinery
details (such as dovetail drawer boxes).
• Cabinet face frames and doors should be made of solid wood or (if painted) there may be a
wooden frame with a composite center panel.
• Talk to your cabinet maker about their finishing process and cabinet interiors. Great cabinets are
finished by hand with very high quality painted and hand applied finishes.
What are the things you need to consider before you purchase your cabinetry?

16
TABLE OF CONTENTS:
• Kitchen Inspiration Sources: Start Dreaming & Designing
• Styles of Kitchen Design: What’s Your Style?
• 10 Ways to Layout Subway Tile: So Much to Choose From
• 7 Favorite Countertop Edge Profiles: Details that Matter
• 18 Favorite Light and Dark Cabinet Colors: Tried and True Colors
SECTION II
- Design Guidelines -

17
The following are my favorite design accounts/ brands to look at for inspiration!
Corey Damen Jenkins
@coreydamenjenkins
coreydamenjenkins.com
Humphrey Munson
@humphreymunson
humphreymunson.co.uk
KitchenLab Interiors
@kitchenlabinteriors
kitchenlabinteriors.com
Jean Stoer
@jeanstoerdesign
jeanstoerdesign.com
Kate Marker Interiors
@katemarkerinteriors
katemarkerinteriors.com
Waterworks
@wtrwrks
waterworks.com/us_en/
Kitchen Inspiration Sources
18
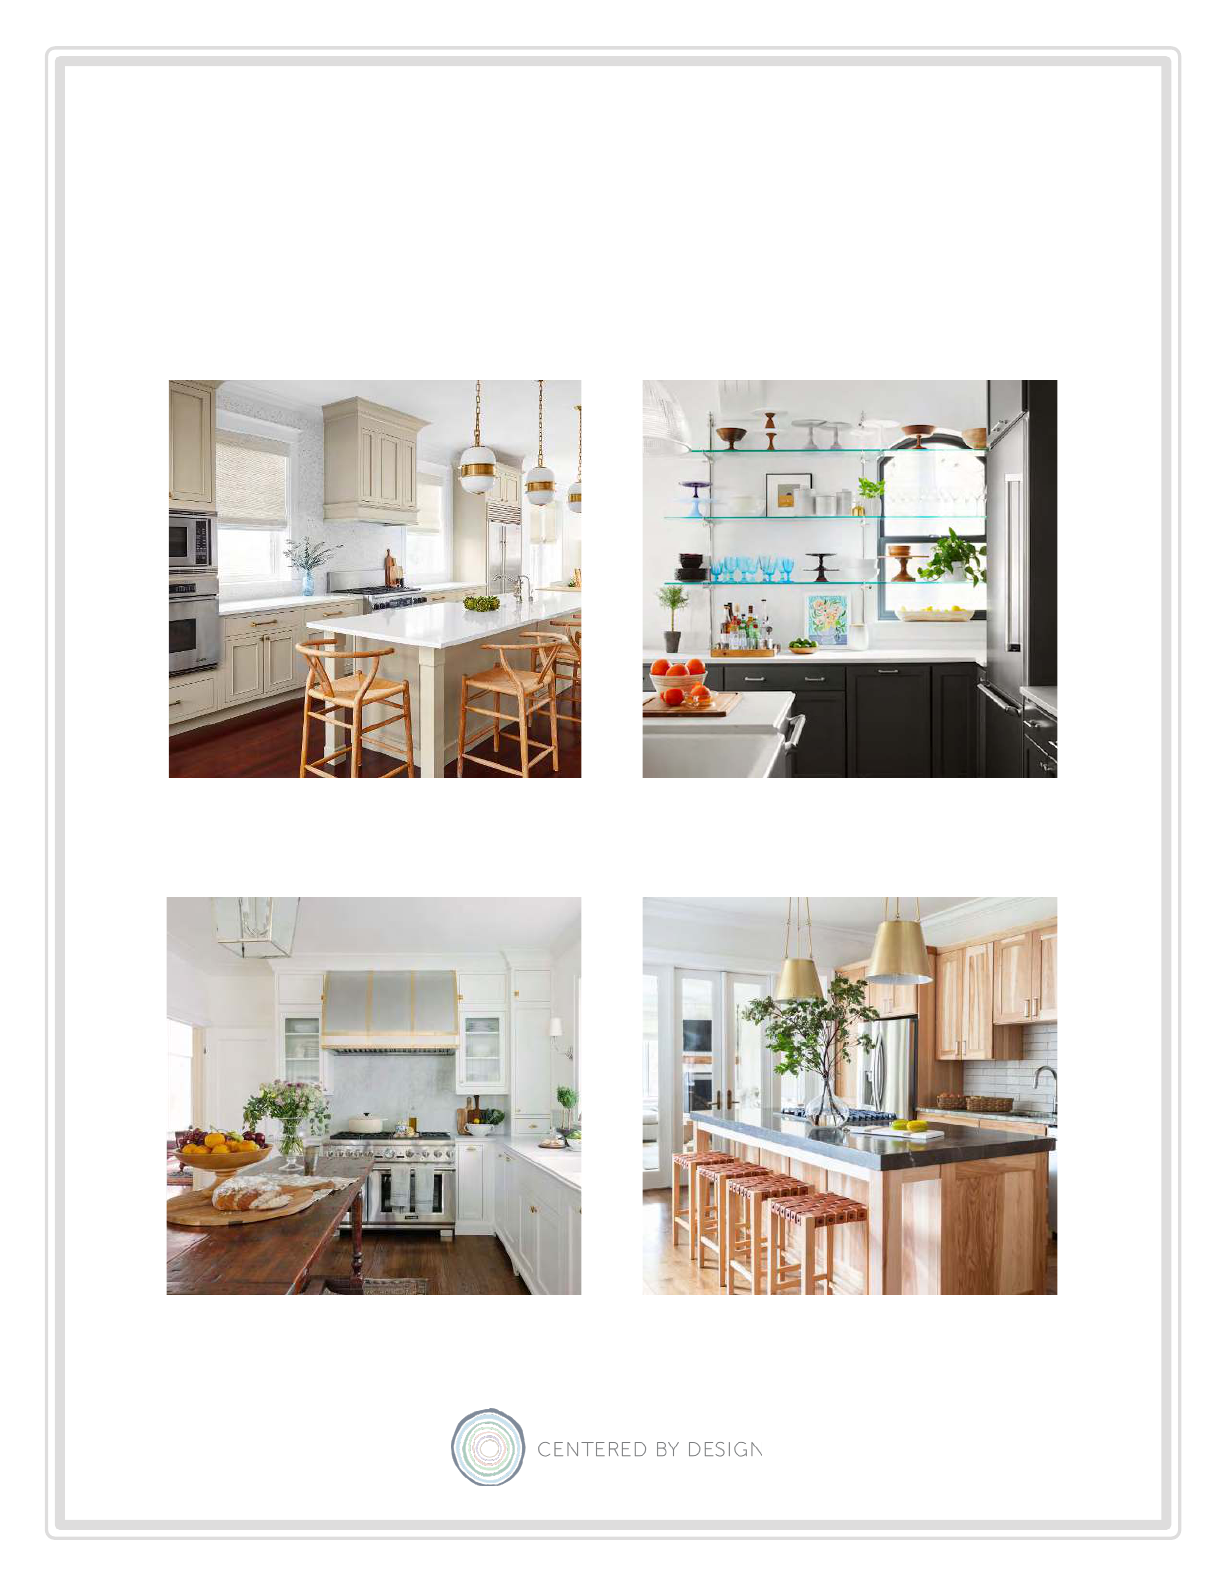
What’s your style? No need to pick just one! The best kitchen designs oen result from combining
unexpected elements from dierent design genres.
Traditional
@centeredbydesign
Modern
@centeredbydesign
Styles of Kitchen Design
French Country
@centeredbydesign
All Wood / Rustic
@centeredbydesign

19
Bohemian/Eclectic
@annaburkeinteriors
Transitional
@katemarkerinteriors
Styles of Kitchen Design
European Modern
@formandfield
Scandinavian
@pinterest (source unattributed)
What’s your style? No need to pick just one! The best kitchen designs oen result from combining
unexpected elements from dierent design genres.

20
1
Stack Bond
by. Ann Sacks
2
Vertical Stack Bond
by. Fireclay Tile
4
Crosshatch
by. Claybrook
3
Running Bond
by. Ann Sacks
5
4x4 Square Tile
by. Entrance
Designer Tip:
For more modern spaces, try Stack Bond
and Vertical Stack Bond patterns.
Designer Tip:
For a more vintage aesthetic, try 4 x 4
Square and Offset patterns.
Our 10 Favorite Subway Tile Layouts

21
9
Diagonal Herringbone
by. Centered by Design
7
Diagonal Offset
by. Home Designing
8
Traditional Herringbone
by. Erin Hanrahan
6
Offset
by. Centered by Design
10
Straight Herringbone
by. Bedrosians Tile & Stone
Designer Tip:
Shower niches are a great place for
contrasting mosaic tiles.
Designer Tip:
Don’t forget to choose your grout color!
Decide if you want grout to match or
contrast with your tile selection.
Our 10 Favorite Subway Tile Layouts
22
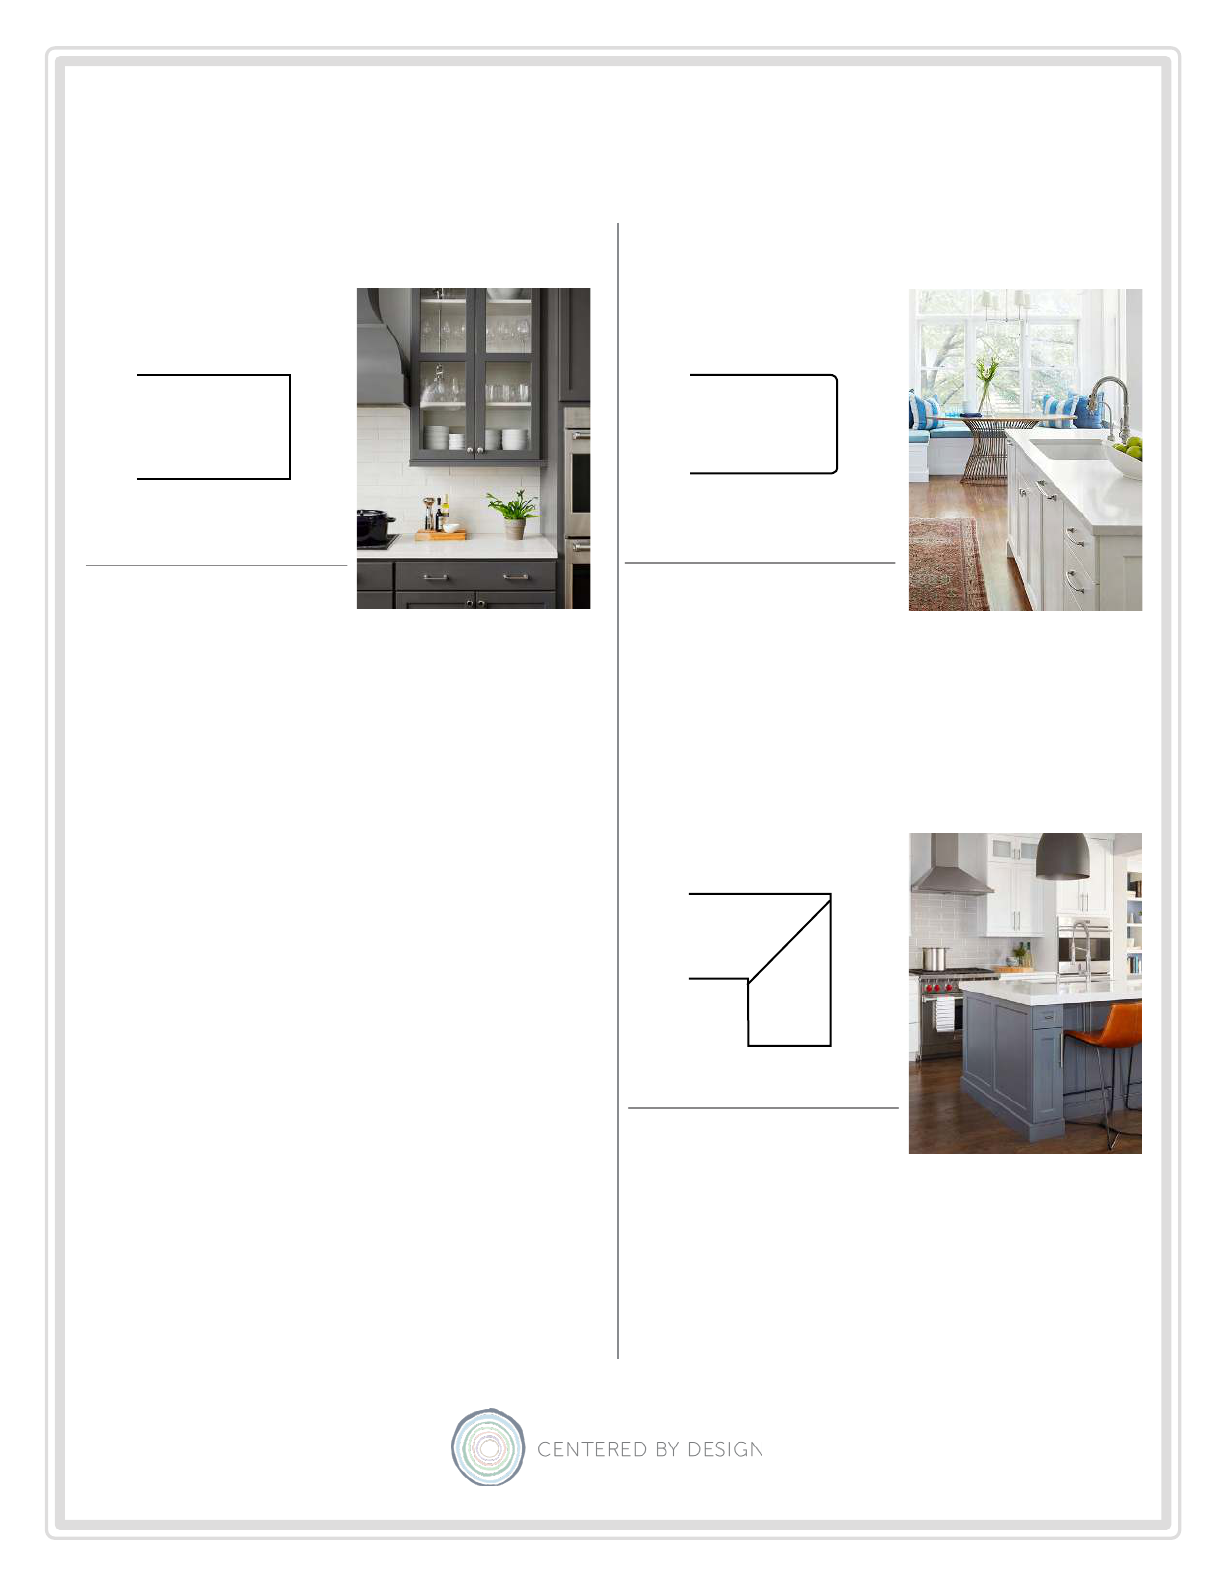
Our 7 Favorite Countertop Edge Proles
2
Eased Edge Square
1
Square
by. Centered by Design
by. Centered by Design
3
Miter with Apron
by. Centered by Design
Designer Tips:
Countertops are typically priced by a stone
fabricator. This is the person who installs the
stone in your home. You visit stone yards to
chose your slab and they can connect you
with a stone fabricator.
Fabricators will visit your site and laser
measure for accuracy of the installation.
Make sure you have chosen or installed a
sink prior to measure.
Make sure to think about your backsplash
and edge prole when considering your
kitchen design.
Styles 1-4 are great in more modern kitchens
and style 5-7 work well in more traditional
settings.

23
Our 7 Favorite Countertop Edge Proles
4
Bullnose
by. Cambria
5
Ogee with Dupont
6
Ogee
by. Centered by Design
by. Centered by Design
7
Bevel
by. Cambria

24
Our Top 9 White Paint Colors
Chantilly Lace
Simply White
White Dove
Intense White
Wevet
Ammonite
Cornforth White
Skimming Stone
Mountain Peak White

25
Our Top 9 Dark Paint Colors
French Beret
Overcoat
Metropolitan
Worsted
Down Pipe
Wrought Iron
Off Black
Mahogany
Kendall Charcoal

26
TABLE OF CONTENTS:
• How To Measure Your Kitchen: Break out the Tape Measure
• Sample Floor Plan: Designing starts here!
• Sample Electrical Plan: Get lit!
• Designer Tips: Mixing Metals: Don’t fear the mix
• Designer Tips: Kitchen Sinks: Get the look you want
• Designer Tips: Hanging Lighting: Play with Scale
• Designer Tips: Bar & Counter Stools: Check your Measurements
• Designer Tips: Hardware Count & Placement: Count & Re-count
SECTION III
- How To Get Started -

27
1. Prepare a piece of paper, pencil and a good measuring tape.
2. Try to draw the shape of the room, based on where you stand.
3. Begin with measuring the ceiling height, and write it down on the site as folllows: Ceiling H= xx”
4. Next, measure every wall’s length and write them down next to each of them.
5. If there’s an opening (window or door), make sure to mark it on the plan.
6. Measure each opening from outside to outside, including the trim that goes around it. Do the
same for height & width. For window, make sure you also measure from floor to the top of the sill.
7. Write down which room the door leads to - this will influence the design process.
8. Next, measure the space between wall and window/ door on each side, and write those down.
9. Lastly, note any of the existing mechanical locations, like sink plumbing, radiators, or can lighting.
How To Measure Your Kitchen

28
Sample Floor Plan

29
Sample Electrical Plan

30
Designer Tips: Mixing Metals
Satin Brass, Polished Nickel & Stainless Steel
Aged Brass, Silver, Stainless Steel & Polished
Satin Brass & Stainless Steel
Designer Tips:
- General:
Don’t be afraid to mix metals. It is a good
way to add some character to your kitchen
and make it more YOU!
- Mixing yes’s:
• Mix brass and dark bronze
• Mix brass and chrome
• Mix brass and nickel
- Mixing no’s:
• Don’t mix nickel and chrome
• Select 1 main nish and accentuate it
with up to 2 others, including appliance
nish.

31
Designer Tips: Kitchen Sinks
Undermount Sink
Top Mount Sink
Apron Front Sink
Designer Tips:
- Top Mount Sink:
Otherwise know as “drop-in sink”. It is
relatively easy and inexpensive to install.
It also doesn’t require an internal support
system under the counter, making it a good
choice for DIY people on a tighter budget.
- Undermount Sink:
Mounted underneath the counter, providing
a clean, modern look. Edge of the counter
drops off directly into the sink basin. They
typically require more work to install because
the sink must be glued to the underside of
the counter. For most sinks of that type you
need to have holes cut into your counter
top to install your faucet.
- Apron Front:
Features a large forward-facing section that
replaces a portion of the counter. Typically
used in farmhouse style or more traditional
projects.

32
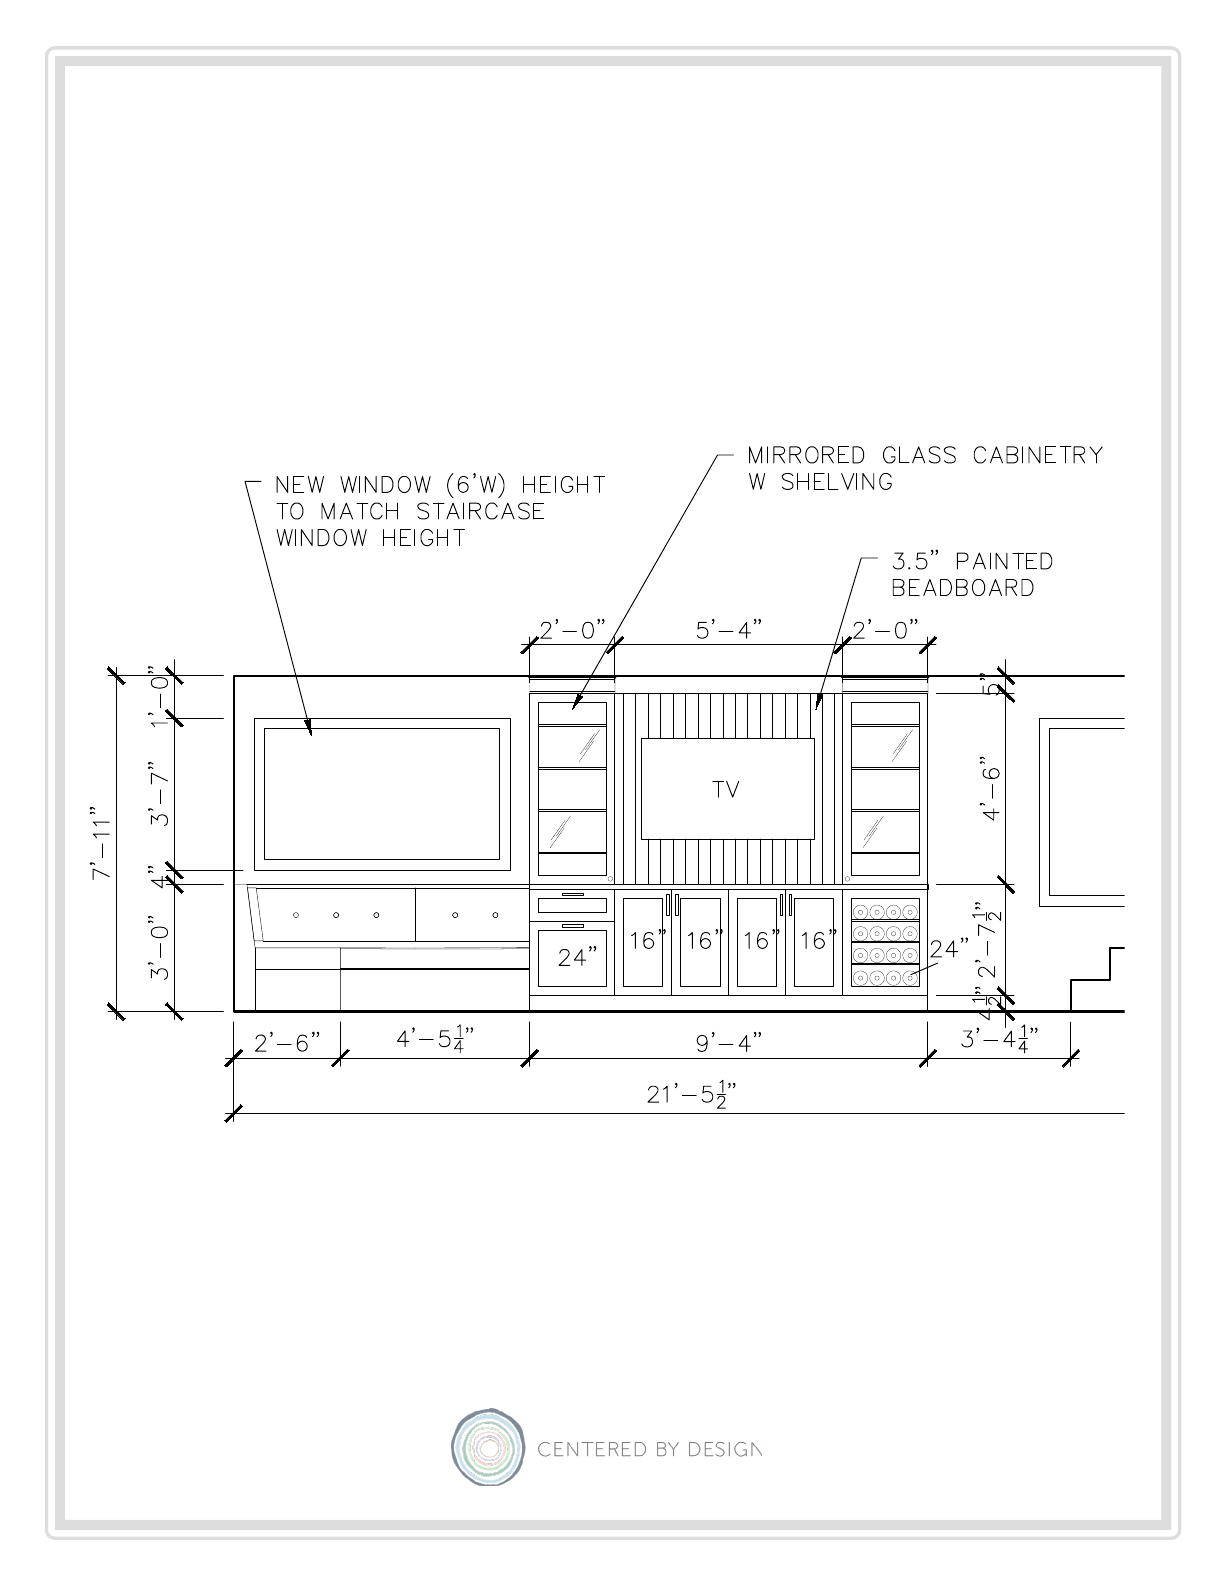
Designer Tips: Hanging Lighting
PANTRY
x
KITCHEN
x
FAMILY ROOM
PANTRY
x
KITCHEN
x
FAMILY ROOM
LED LED LED LED LED
LED LED LED LED LED LED LED LED
LED LED LED LED LED LED LED LED
LED LED LED LED LED LED LED LED LED LED LED LED
LED LED LED LED LED LED LED LED LED LED
LED LED LED LED LED
Sample Kitchen Electrical Plan
Pendant above Kitchen Island
Designer Tips:
- Island Pendants:
For best visual and functional effect we
recommend installing ceiling xtures 30”-
36” from the surface of your kitchen island. If
there are multiple pendants being installed,
the widest part of the xtures should be
spaced a minimum of 30” apart.
- Linear Pendants:
Best choice to light extra long surfaces.
Selecting a xture that’s about 2/3 the size
of the kitchen island or a dining table is the
key to achieve a perfectly lit surface.
- Lighting at Round Dining Table:
Choose a xture that measures between
1/2 and 3/4 of the table diameter. We
recommend its installation at 32”-36” from
the surface of your dining table.
Pendant above Dining Table
*Play with scale! Lighing can make more impact when it’s oversized, or it
can be more subtle if petite.

33
Designer Tips: Bar & Counter Stools
Counter Stools with Back
Dining Chair vs. Counter Stool vs. Bar Stool; source: furniture.com
Counter Stools with no Back
Designer Tips:
- Counter Stools:
A typical counter stool seat height should t
between 23” - 28” off the oor to the top
of the seat. These will work perfectly with a
counter height of 35” - 37”. These are most
commonly used in kitchens.
- Bar Stools:
A typical bar stool seat height should t
between 29” - 32” off the oor to the top
of the seat. These will work perfectly with
a counter height of 41” - 43”. These are
most commonly used in bar areas, or raised
island counters.
- Spacing:
Measure your overall island size and divide
it by 24 to determine the optimal number
of seats.
Dining Chair
Counter Stool
Bar Stool

34
Designer Tips: Hardware Count & Placement
Cabinet Pulls placed horizontally & vertically
Cabinet Knobs on Top Cabinets
Sample Hardware Placement Sketch
Designer Tips:
- General:
Sketch your hardware on a cabinetry shop
drawing or a photo and make sure to count
it twice before you place an order! Don’t be
afraid to mix hardware nishes and styles.
- Cabinet Knobs:
Very commonly used for top cabinets.
Typically more traditional in style, most used
sizes are 1.25” & 1.5”.
- Cabinet Pulls:
Can be installed horizontaly or vertically,
depending on a cabinet type. Install handle
pulls on all drawers for easier use, especially
if any of them will hold heavy items. A good
rule of thumb for pull sizing is 1/3 of the
cabinet size. Ex: 24” cabinet = 8” pull.
Sketch out hardware to help with accurate count, ex: here we have:
- 12” Appliance Pulls, Qty: 4
- 1.25” Cabinet Knobs, Qty: 4

35
TABLE OF CONTENTS:
• Existing Floor Plan
• New Floor Plan
• North Elevation
• South Elevation
• East Elevation
• Island - East Elevation
• Island - North Elevation
SECTION IV
- Sample Kitchen Drawings Set -

36
Existing Floor Plan

37
New Floor Plan
38
North Elevation

39
South Elevation

40
East Elevation

41
Island - East Elevation

42
Island - North Elevation

43
TABLE OF CONTENTS:
• Before Photos
• 3D Rendering
• Aer Photos
SECTION V
- Completed Kitchen Project -

44
Before Photos

45
3D Rendering

46
After Photos

47
After Photos
48
For more information about our services, and to purchase our range of
PDF’s for sale, please visit: www.centeredbydesign.com
Additional Resources:
• Centered by Design Online Shop
https://centeredbydesign.com/shop/homeowners/
• National Kitchen & Bath Association
https://nkba.org/
• National Association of the Remodeling Industry
https://www.nari.org/
• Unique Kitchens and Baths
https://www.uniquekitchensandbaths.net/
• Stoer Home Cabinetry
https://stoerhome.com/pages/cabinetry
• Circa Lighting
https://www.circalighting.com/
• Top Knobs
https://www.topknobs.com/
• Rejuvenation
https://www.rejuvenation.com/
• Waterworks
https://www.waterworks.com/us_en/
• This Old House
https://www.thisoldhouse.com/kitchens/21015310/the-don-t-get-burned-kitchen-
remodeling-guide
