
Technology Training
Microsoft Forms
Technology Training
Rosalyn Donaldson, Manager
Mohammad, Jadun, PhD, Accessibility
Sharyn Zembower, Coordinator
Table of Contents
Getting Started ....................................................................................................................................................1
Settings, Theme, Sharing, and Preview ....................................................................................................1
Settings...............................................................................................................................................2
Themes ...............................................................................................................................................2
Share ..................................................................................................................................................3
Preview...............................................................................................................................................3
Creating the Form ................................................................................................................................................3
Question Type Definitions ........................................................................................................................4
Adding Questions .....................................................................................................................................4
Choice .................................................................................................................................................4
Text.....................................................................................................................................................5
Rating .................................................................................................................................................5
Date ....................................................................................................................................................5
Ranking ...............................................................................................................................................6
Likert ..................................................................................................................................................6
Net Promoter Score ...........................................................................................................................7
Section................................................................................................................................................7
Branching .............................................................................................................................................................8
Share ....................................................................................................................................................................8
Reviewing Results................................................................................................................................................9
Responses Tab ..........................................................................................................................................9
Quiz ......................................................................................................................................................................10
Create Questions ......................................................................................................................................10
Quiz Results ..............................................................................................................................................11
pg. 1
Microsoft Forms
Microsoft Forms is an online tool that can be used to create surveys, quizzes, polls, or to gather other
information such as registrations for an event or use of equipment and automate data entry. The Form can be
distributed via email with a link or embedded on a website and responses and feedback are immediate.
Getting Started
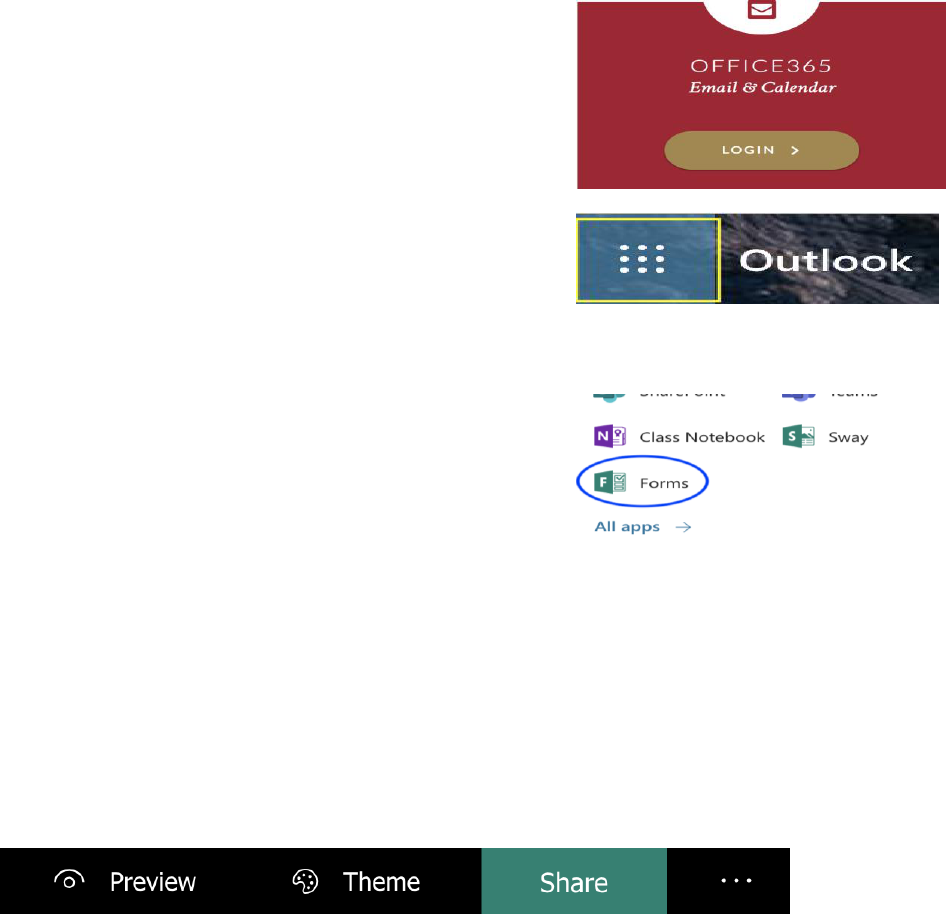
1. Navigate to your Penguin Portal and log
into your YSU Office 365 account using your
YSU username and password.
2. Click on the apps boxes in the upper left
corner.
3. Select Forms. (Note: If Forms is not visible,
click on All Apps.)
4. Click New Form or New Quiz.
5. Enter a name for your survey, poll, or quiz,
and an optional subtitle or description.
a. Note: The Form will automatically
save as you create.
Settings, Themes, Sharing, and Preview
There are four (4) areas to consider while creating the Form.

pg. 2
Settings
Settings determine who can fill out your form, the
options for the responses, and notifications.
Click the three dots(…) in the upper right corner.
1. Select settings.
2. Adjust your settings.
3. Click the three dots(…).
Who Can Fill Out this Form
• Only respondents within your organization.
• Respondents outside your organization.
• Determine if you want to record their
name.
• How many times can a respondent submit
the form.
Options for Responses and Notifications
• Accept Responses
• Start and End Dates
• If form is a quiz, do you want to shuffle
question?
• Customizable submission response
• Email
• Notification of Submissions
Themes
You can customize the form colors, banners, and add
images to the form background.
1. Click on Theme.
2. Select a color, background picture, or
3. Click the + sign to upload a picture.
4. After clicking the + sign select upload image
or customize color.
a. If customizing color, input your
HEX#
b. If uploading an image, select Image
Search, OneDrive, or Upload.
5. Click back

pg. 1
Share
• Share determines how you want to send and collect responses via a link, embed into a website, or send
as an email.
• Allows you to add collaborators.
• You can also obtain and use as a template
Preview
Preview allows you to see the form as a respondent before you distribute.
1. Click preview to see the form as respondents would see it.
2. Fill out the form as a test.
a. Preview as responding on a computer.
b. Preview as responding on a mobile device.
3. Click share.
4. Select who and how you want to collect responses.
5. Obtain a link to share editing privileges.
Creating the Form
There are eight (8) different types of questions that can be added to your form.

pg. 2
Question Type Definitions
• Choice = Multiple Choice or Multiple Answer Questions that offer and additional ‘Option’ response
• Text = Freeform Short Answer or Essay
• Rating = Provide a ranking using up to 10 numbers or stars
• Date = Select a Date
• Rank = Move responses up or down in your chose order
• Likert = Scaling options for statements
• Net Promoter Score = participant selects one score for their answer from numbers one through 10.
• Section = Add a section to the Form and add an additional set of instructions or a description.
Adding Questions
1. Click ‘Add New’
2. Select question type.
a. Note: Click the three dots for additional choices.
Choice
1. Select choice.
2. Enter your question text.
a. Note: Click the ‘add media’ icon to upload an image or video in order to give context to the
question.
3. Enter answer options.
4. If applicable enter ‘Other’ choice for an additional option not listed.
5. If multiple responses, toggle the ‘multiple answers’ button.
6. If a required question, toggle the required answer button.
7. Click the more settings (…) and you can choose to shuffle the options, create a drop-down box of
answers instead of radio buttons, or create a subtitle to the question.
For all question types you can duplicate or move questions up and down your form.
1. Click the double page icon in the upper right corner of the text box to duplicate the question.
2. Click the up or down arrows to move the questions up or down.
3. Click the trash can to delete the question.

pg. 3
Text
The text question can be used as a short answer or as an essay question.
1. Click ‘Add New’.
2. Select text.
3. Enter your question text and if applicable click the ‘add media’ icon to upload an image or video.
4. If the question requires a longer response, toggle the long response button.
5. If a required question, toggle the required answer button.
Text questions can also be set to require a numerical answer and you can restrict the numbers based on
conditions. Click the more settings (…) to set restrictions or add a subtitle.
Rating
Ratings use either star symbols or numbers from 1-10.
1. Click ‘Add New’.
2. Select rating.
3. Enter question text and if applicable click the ‘add media’ icon to upload an image or video.
4. Select level from 1-10.
5. Select numbers or stars to demonstrate rating.
6. If a required question, toggle the required answer button.
7. Click the more settings (…) to add labels to the rating at the beginning and the end.

pg. 4
Date
1. Click ‘Add New’.
2. Select date.
3. Enter question text and if applicable click the ‘add media’ icon to upload an image or video.
4. If a required question, toggle the required answer button.
5. Select more settings (…) to add a subtitle.
Ranking
1. Click ‘Add New’ and click the ellipse (…).
2. Select ranking.
3. Enter question text.
4. Enter options.
5. If a required question, toggle the required answer button.
6. Click the more settings button (…) to add a subtitle.
Likert
The Likert question is a great scaling question that allows you to place statements in rows and scales in
columns. Responders will have to click a radio button response in each row and you can only have one
response per row.
1. Click ‘Add New’ and click the ellipse (…).
2. Select Likert.
3. Enter question text and if applicable click the ‘add media’ icon to upload an image or video.
4. Add statements.
5. Add scaling options. (IE excellent, above average, average, below average, poor)

pg. 5
6. If a required question, toggle the required answer button.
7. Click more settings (…) to add a subtitle.
Note: You can only add 10 statements per Likert Question. On a mobile device Likert questions will be grouped
together. You can auto collapse and expand each question.
Net Promoter Score
The Net Promoter Score is an index ranging from 0-10 that measures the willingness of respondents to
recommend a program or service to others.
1. Click ‘Add New’ and click the ellipse (…).
2. Select Net Promoter Score.
3. Add question text and if applicable click the ‘add media’ icon to upload an image or video.
4. If a required question, toggle the required answer button.
5. Click more settings (…) to add a subtitle.
Section
1. Click ‘Add New’ and click the ellipse (…).
2. Select section and if applicable click the ‘add media’ icon to upload an image or video.
3. Add section title and description.

pg. 6
Branching
Branching allows you to add logic to a survey or quiz so that it changes according to the responses to specific
questions. In a survey or quiz that branches, questions appear only if they are relevant to the responder. If
the questions do not apply, the responder is redirected to a different set of questions or skips a set of
questions altogether.
Note: Before branching create all your questions first and do not add any sections to your form.
1. Click the ellipse button (…) in the upper right corner of your form.
2. Select branching and a new page will appear.
3. On the Branching options page, there are dropdown menus that appear with each answer under every
question. Click the arrow to see a dropdown menu.
4. The dropdown menu contains a list of every question that follows.
5. For each possible response to the question, select the question that you want to branch to.
6. If you want a particular question assigned as the final one in the survey or quiz, click the dropdown
menu next to that question, and then select End of the form.
Share
1. Click share.
2. Select who and how you want to collect responses.
3. Obtain a link to share editing privileges.
4. Distribute form or form link to respondents.

pg. 7
Reviewing Results
One of the key features of using Microsoft Forms is being able to immediately review results as respondents
submit their responses and the ability to organize and filter data in an excel spreadsheet.
Responses Tab
1. To view a summary of results, click the
Responses Tab.
2. Note: The circle with a number in it, next
to the word Responses, indicates the
number of responses that have been
submitted.
3. For in depth analysis and filtering, click the
Open in Excel tab.
4. Review number of responses and average
time to complete the form.
5. Scroll down through the results for
response counts/question and graphs
representing the percentage to the
responses.
6. To view individual results, click the view
results button at the top or View details in
each question.

pg. 2
Quiz
If you are using Microsoft Forms to create a quiz, question creation is essentially the same with the exception
of being able to add points and mark a response as correct.
Create Questions
1. Select Forms. (Note: If Forms is not visible, click on All Apps.)
2. Click New Quiz.
3. Create a multiple-choice question.
4. Select the correct answer.
5. Input feedback.
6. Provide question point total.

pg. 2
Quiz Results
1. Click the Responses Tab.
2. Click Review Responses or
3. Click Post Scores.
If you need any additional assistance please contact Sharyn Zembower, ([email protected]) or Rosalyn
Donaldson, ([email protected]).
Microsoft Forms (6-10-2019)
