
NearTao’s Guide to SP-404 mk2
An Unofficial Reference for Firmware 3.02"
Revision 0.29"
"
NearTao’s Guide to the SP-404 mk2

This page intentionally (or unintentionally left blank)?#
NearTao’s Guide to the SP-404 mk2

Foreword
Thanks for downloading this guide and reading it. I’ll be honest, I have no idea where this will
go over the years or if it will every truly be “done”, but I really want to put something together
that will be useful for the community, and really help both new comers and experienced
producers get as much as possible out of their purchase of the mk2. At the very least, it’s
probably worth checking out the updates from time to time, and don’t hesitate to reach out if
you’ve got suggestions."
I’ve always been of the mind that it is important to give more than you take, and this is my
effort to really try and give something of myself that others can get their own leg up. Please
know, I’ll do my best to give you tips and shortcuts, but honestly, there is no greater teacher
than your own hard work. If you really want to master anything in life it is not about the
exercise here or there, but the journey that you take to build up your hundreds and thousands
of hours."
A few folks have reached out to me and asked why am I writing this book, and why in the world
would I give it out for free? Well it’s not that complicated for me, but I can break it down as
follows:"
* The best way to really learn something for yourself is to teach others"
* If I give it out for free, I don’t owe anybody anything and can do it at my own pace"
* In general I believe in sharing information and experience as much as possible"
* I don’t need another job, I’m doing this for fun and to see what may come of it in the future"
* While a secondary source of income might be nice, I don’t need one right now"
To all of you sample heads out there, I hope to teach you what the SP-404 mk2 is, and how to
get the most you can out of it. It is a quirky little device, far away from perfection, but I do
believe that if you give it a chance it is bound to put a smile on your face."
Well met my friends!"
NearTao’s Guide to the SP-404 mk2
I

About the Author
I am somebody who looks at just about anything, and usually thinks “I can figure that out”.
This has resulted in learning to program, making tons of artwork, getting into music, and having
altogether too many hobbies. I am incredibly introverted, but if we have something in
common, I am more than happy to talk your ear off. "
School was pretty tough for me. I was smart, but I was not cool or popular, I was not athletic,
and tended to get bullied a lot. This resulted in me having a few really close friends, but I
mostly preferred to interact with adults or keep to myself. I spent equal parts studying
philosophy, teaching myself about computers, and either reading books or playing games
where I had time."
In college I faired a lot better than public school, and got a degree in Computer Science. There
were a lot more like minded class mates, but I showed up with a chip on my shoulder and
something to prove. I quarreled with my professors frequently and would point out the
smallest minutia as incorrect, which resulted in my learning a lot, but my grades really suffered."
After college, I got involved in music production in the early 2000’s after graduating college,
and started by using Acid Pro DJ, and quickly started exploring how to build songs from loops
to build songs. From there I ended up buying a Korg Triton Studio (which I still have), and was
an early adopter of both Ableton Live (started using it at version 1.1) and Propellerheads
Reason (I forget if it was version 1.0 or 2.0 where I started with it). Over the years I have gone
through a lot of music software/gear, and as I’ve gotten older I have started to value learning
things far more deeply. "
I’ve worked throughout a fair amount of the tech industry, between startups and mega
corporations and everywhere between. Most of my career has been in the discipline of
Release Engineering, and this discipline consumed about half of my life. It taught me a lot
about manufacturing, the need for consistency and repeatability, gathering and analyzing
metrics, and quite frankly how to hold your own against the rest of the business forces. It’s not
a glamorous job, but it is absolutely necessary and I respect anybody in the field."
My current employer, though a few roles ago, paid for me to go back to school and get an
MBA, while working of course, but there were no strings attached. I spent nearly four years to
do it, and I graduated with a 4.0. Through this time, having a family, managing a nearly fifty
person team, and going back to school is probably one of the hardest things I have done in my
life, but I also look back on this time as something to be proud of. "
It took me some time to get back into music, or even any other hobby, but the last three years
have been a lot of spending time finding myself again. I used to love video games, movies, or
hanging out with close friends. Most of my friends have moved away, and the pandemic has
made staying in touch both easier and harder in a lot of ways. There are a few games I’ll still
play once in a while, and movies just don’t interest me as much as they used to."
Today, I will admit, that I have more gear than I need, but I do have fun with it. We all struggle
with getting the right size and amount of gear, and there’s always just so much new and
interesting things to get and learn about. I used to subscribe to magazines and read forums to
learn about the latest and greatest new technology, but these days I mostly ignore it for my
own sanity and to give my wallet a chance. "
So my dear reader, it is nice to have you, and my parting advice… will be scattered throughout
the rest of this guide, hopefully over the years to come, with love and respect for all of you.#
NearTao’s Guide to the SP-404 mk2
II

Contact Information
If you need to get in contact with me, or just want to say hello, the easiest way is to probably
reach out to me via email, but I have also setup a blog, and have a discord server. I have
considered getting a PO Box from time to time, but at the moment I haven’t had any need for
this. "
Don’t take it personally if I don’t get back to you right away. Right now I don’t get a lot of
messages whether it is from email, forums, discord, or some other platform, but sometimes I
try to keep focus on writing the guide, which results in my not checking some platforms from
time to time."
Email: [email protected] "
Blog: https://neartao.com"
Discord: https://discord.gg/qMuSpuxC4n"
I have setup a YouTube channel, and I have for the time being been publishing some videos on
how to use the SP-404 mk2 to make different types of tracks. There’s probably another 100 or
so music videos that I’ve posted over the years, some are good, others are more experimental.
You have been warned!"
NearTao YouTube Channel: https://youtube.com/neartao"
Beyond that, I’ve setup a soundcloud page that currently has over 300 tracks I have put
together, and has all of my early albums, track a day projects, and all sorts of other things."
NearTao SoundCloud: https://soundcloud.com/neartao"
There are a few other sites that I’ve setup such as band camp, but frankly it feels like a lot of
work to monetize tracks these days. Maybe I’ll get back to making albums or putting together
beat tapes one of these days, but for now I am staying focussed on trying to keep the guide
moving forward."
"
NearTao’s Guide to the SP-404 mk2
III

Book Updates
To keep things simple, I am creating a dedicated URL on my website, starting a thread on SP-
Forums, and using my discord server."
NearTao Guidebook URL: https://neartao.wordpress.com/neartaos-guide-to-the-sp404-mk2/"
I’m also putting up blog notifications for updates, and trying to update a lot of forums, and my
discord server as I publish updates. Frankly it is a bit more work than I care to do, but I haven’t
gotten to the point of trying to write any code to automate it either."
So, if you’re looking to stay up to date, consider subscribing to my blog, or registering on my
discord server. "
Blog: https://neartao.com"
Discord: https://discord.gg/qMuSpuxC4n"
I’ve considered setting up a mailing list, but just haven’t gotten that far yet."
NearTao’s Guide to the SP-404 mk2
IV

Donations
First this is a free guide, if you paid for this guide, please reach out to me and let me know
where you got it from. It is intended to be free, and I want to know if somebody is profiting
from stealing my work."
On the subject of donations, it’s appreciated, but not necessary. Say hi on my discord server,
post a friendly comment on one of my songs, surprise me. I’d be much more interested in
seeing people paying it forward, for example by donating to something local, call somebody
you haven’t talked to in a long time, or do something nice for some one just because you can.
Reach out, I’d be super excited to hear what you’ve done!"
If you read through all that and still want to donate something, use the link below. I may also
start a cassette tape collection as I’ve started sampling off of them again… but who knows.
Reach out if you’re looking to get rid of some cassettes!"
Donations: https://www.buymeacoffee.com/neartao"
I’ve also setup a subscription on my Discord server. Currently it is just early access/special
access to random projects I am working on. Some of it may be music related where you can
provide feedback or ask random questions about things I am working on, and a good portion
of it is likely to just be things I find interesting and am experimenting with. That may be art,
games, media… who knows.#
NearTao’s Guide to the SP-404 mk2
V

Guide Versions
Guide
Version
Mk2 Firmware
Version
Change
Date
Notes
0.29
3.02
Dec 8, 2023
Documented using DEL in Chop Pad Assign menu"
Determined incoming USB audio reduction at 0.7db"
Added a tip for Importing renamed Projects from SD"
USB Outputs 1/2 go sent to EXT SRC, and 3/4 to MAIN"
Remove Stubbed out Chapters"
Converted a lot of ??? Marks into comments for future"
Remove a bunch of stubbed out Appendices"
Removed Patreon… nobody ever used it RIP"
Removed Glossary
0.28
3.02
July 15, 2023
Updates from experiments from livestream at https://
youtube.com/live/LT8YEWt7zuY?feature=share"
* T: Sampling explanation"
* Exact Sample length measurement"
* 32 minute mono samples!"
* Attenuator is -14db"
* -3db sampling headroom (for FX?)"
Added a sub section on maximizing recording volume
0.27
3.0
April 8, 2023
Updates for Firmware 3.0 release"
* Chapter 2 - Minor tweaks on features (SD Card)"
* Chapter 5 - New sampling features"
* Chapter 7 - Pattern/Sequencer features"
* Chapter 8 - DJ Mode features"
* Chapter 9 - New Utility/Preference settings"
* Chapter 10 - Midi Features, but needs reorganization for
A/B"
* Appendix G - Shortcuts (got a lot of them, but needs a
rewrite)
0.26
2.01
Mar 13, 2023
Added some comments while streaming live and looking
through the guide. Might not be super exciting to watch,
but figured I need a kick to get back to working on the
guide more. Plenty of things still to experiment and
research that don’t meet the “In Five” format."
Experiment Added"
* Does the mk2 have 32 note polyphony with mono
samples?"
Updated Polyphony question in FAQ."
Midi Pattern Selection, Effect Automation written
Guide
Version
NearTao’s Guide to the SP-404 mk2
VI

0.25
2.01
Jan 5, 2023"
Tweak cover, including trying a new image… WIP"
Lots of small formatting tweaks to improve readability"
Ch.2 ‘MIDI Input and Output’ cables update"
Ch.4 ‘USB’ Audio output short test… 3/4 do nothing :/"
Ch.5 ‘Introduction’ section added, ‘Record Threshold’
clarification, Missing Features"
Ch.6 ‘Introduction’, ‘Noise Gate’, ‘Missing Features’"
Ch.7 ‘Pattern Chain’ tweak"
Ch.8 Minimal cleanup"
Ch.9 Minimal cleanup"
Ch.10 Stubbed Sections for new Midi FX/Pattern Features"
Ch.12 May delete… *way* behind… or properly add to doc"
FAQ - Answers for most questions"
Acknowledgements, thanks for the $5, you know who you
are
0.24
2.0
Aug 3, 2022
Lots of new features and functionality to dig into from the
2.0 firmware update… guess it’s time to get to it instead of
wasting the entire summer away. I skimmed through the
document as best I could for a quick pass to include
everything that I have found and learned about the new
firmware. If you find any issues don’t hesitate to reach out,
as a lot has gone into the new firmware and I’m not sure
that it was all caught in the release notes. Next up will be
ready through the manual again and seeing if I missed
anything.
0.23
1.15
May 13, 2022
Fixed numbering of chapters. Added Appendix G to
organize the shortcuts better than what is in the manual.
USB Cable note added to Chapter 2 > Power > USB
Power. New Bug icon to see if it reduces file size.
Removed about 50 ??? to fill in more details and answer
more questions in the FAQ appendix.
0.22
1.15
Apr 7, 2022
Filled out the Midi Chapter, mk2 Companion App Chapter,
and updated the In Five Session notes through Session 12.
0.21
1.14
Mar 29, 2022
Deep dive into the Utility Chapter to cover all of the system
settings and providing insight for why you might want to
set different values where applicable.
0.20
1.14
Mar 21, 2022
Overhaul sections into Chapters to give more structure,
Started to work on Introduction sections for each chapter,
plan to add tips and tricks to a lot of sections, started to fill
in Appendix A, Created Chapter 10 to go over In Five
videos
0.19
1.14
Mar 1, 2022
Fixed the number of Effects Available, Grouped sections
into logical Chapters, modified the table of contents
display, updated forward, and added about the author,
contact information, book updates, and donations
sections, big DJ Mode update
Mk2 Firmware
Version
Change
Date
Notes
Guide
Version
NearTao’s Guide to the SP-404 mk2
VII

0.18
1.14
Feb 27, 2022
Mostly fleshed out the Pattern and related sections. Also
stubbed out some sections for Sampling Tips, Sequencing
Tips, and Pattern Chaining. Is DJ Mode really next?
0.17
1.14
Feb 18, 2022
Massive Effects section update, needs more work, but
tried to give as much info as I could manage
0.16
1.14
Feb 10, 2022
Birthday update… fixed tables floating… Apple Pages you
wonky… finish Skip Back section, a few various updates,
Rename Mixer to Audio Signal Flow, finish Audio Signal
Flow section.
0.15
1.14
Feb 9, 2022
End Snap update, added copy/delete into Sampling
section, finished Sample Mode section
0.14
1.14
Feb 2, 2022
Added some notes on donations, fixed bump map to
bitmap (hah), finished Sample Edit section
0.13
1.14
Jan 26, 2022
Filled out the Sample section
0.12
1.14
Jan 23, 2022
Fill out Data section, filled in a few extra questions.
0.11
1.14
Jan 18, 2022
General Edits, remove Company/History sections (for now),
added Guitar Pedals section under MIC/GUITAR Input
section, Added an Audio Output section, new FAQs, More
content in the Audio Input section
0.10
1.14
Jan 17, 2022
Filled out and formatted the Frequently Asked Questions
section.
0.9
1.14
Jan 13, 2022
Update about USB-C to lightning, update to Polyphony
information (its 32 voice polyphony for mono), Added
Polyphony experiment.
0.8
1.13
Jan 11, 2022
Mic/Guitar Experiment, added phono subsection, made
Inputs a top level section separate from Sampling, Power
section USB-C info/bugs, and battery bugs, added
References, fixing nits where possible
0.7
1.13
Jan 10, 2022
Gain Staging to a point, attempt at some guitar info,
experiment for digital clipping,
0.6
1.13
Jan 9, 2022
Sampling stubbed Gain Staging, filled out Controls, started
MIC/GUITAR
0.5b
1.13
Jan 8, 2022
Reworking sections (Specificaitions/Sampling)
0.5a
1.13
Jan 8, 2022
Added links/contact info into the Overview section
0.5
1.13
Jan 8, 2022
Finish Spec section, add some contact info, decided to put
this out there as a free guide
0.4
1.13
Jan 7, 2022
Move Getting Started to the top, tweak formatting
Mk2 Firmware
Version
Change
Date
Notes
Guide
Version
NearTao’s Guide to the SP-404 mk2
VIII

0.3
1.13
Jan 6, 2022
Flesh out Getting Started/Conventions, and add icons, fill
out Specifications section.
0.2
1.13
Jan 6, 2022
Add title page, start Overview/Getting Started
0.1
1.13
Jan 5, 2022
Initial Document Structure and Outline saved
Mk2 Firmware
Version
Change
Date
Notes
Guide
Version
NearTao’s Guide to the SP-404 mk2
IX

Table of Contents
Chapter 1 - Welcome% "1
Overview% "2
Getting Started% "3
Conventions% "4
Chapter 2 - Features & Specs% "6
Introduction% "7
Sampling% "7
Polyphony% "7
Sample Import Format% "7
Sample Export Format% "8
Maximum Sample Time% "8
Skip Back% "8
Storage% "8
Data% "9
Internal Data% "9
Internal Storage% "9
External Storage% "9
Pattern Sequencer% "9
Beats Per Minute% "10
Pattern Length% "10
Parts Per Quarter Note% "10
Quantization% "10
Effects% "10
Bus Effects% "10
Master Effects% "11
NearTao’s Guide to the SP-404 mk2
X

Input Effects% "11
Interface% "11
Pads% "11
Control Knobs% "11
Value Knob% "11
Display% "12
External Connections% "12
Headphone Jacks% "12
Stereo Output% "12
Stereo Input% "12
Dual Microphone/Guitar Input% "13
MIDI Input and Output% "13
USB-C Connection% "13
Power% "14
AC Power% "14
USB Power% "14
Battery Power% "15
Project Import% "15
DJ Mode% "16
Chapter 3 - System Data% "17
Introduction% "18
System% "18
Projects% "19
Pattern Banks% "19
Patterns% "20
Sample Banks% "20
Samples% "20
NearTao’s Guide to the SP-404 mk2
XI

Chapter 4 - Audio Connectivity% "22
Introduction% "23
Audio Input% "23
MIC/GUITAR Level% "23
Line Level% "25
Phono Level% "25
USB% "26
Gain Staging% "26
Controls% "27
Audio Output% "28
Line Level% "28
Headphone% "29
USB% "29
Chapter 5 - Sampling% "30
Introduction% "31
Sampling% "31
Recording Behavior% "31
Recording% "34
Managing Samples% "36
Sample Edit% "37
Start/End% "37
Start/End Sub Menu% "38
Pitch/Speed% "39
Pitch/Speed Sub Menu% "41
Chop% "41
Chop Value Sub Menu% "44
Envelope% "45
NearTao’s Guide to the SP-404 mk2
XII

Simultaneous Edits% "46
Copy% "46
Delete% "47
Sample Mode% "48
BPM Sync% "48
Gate% "48
One Shot Playback% "49
Loop% "49
Ping-Pong% "49
Reverse% "49
Roll% "50
Mute Groups% "50
Pad Link% "50
Pad Mute% "51
Pad Stop% "51
Chromatic% "51
Fixed/Velocity% "52
Cue% "53
Bus% "53
Skip Back% "54
Audition Buffer% "54
Save Buffer% "55
Routing Behavior% "55
Pad Mute/Cue% "55
Edit Buffer% "55
Missing Features% "56
Gated Release% "56
NearTao’s Guide to the SP-404 mk2
XIII

Resample Pre/Post Effects% "56
Maintain Bus Effects% "56
Chapter 6 - Mixer and Effects% "57
Introduction% "58
Audio Signal Flow% "58
Diagram% "58
Sample% "59
Envelope% "59
PITCH/SPEED% "60
Bank Volume% "60
Line In% "60
Mic/Guitar% "61
Gain Knob% "61
Attenuator% "61
Noise Gate% "61
USB In% "61
Input FX% "61
Bus FX% "62
Master FX% "62
Mixer% "63
Volume Knob% "63
Limiter% "63
Clipper% "63
USB Out% "63
Line Out% "63
Headphone Out% "63
Effects% "64
NearTao’s Guide to the SP-404 mk2
XIV

Diagram% "64
Controls% "65
Settings% "65
Disable Master FX% "65
Effect Types% "65
Saving Effect Settings% "67
Effect Descriptions% "67
Missing Features% "76
Sub% "76
Chapter 7 - Sequences% "77
Introduction% "78
Pattern Sequencer% "78
Recording Behavior% "78
Selecting% "78
Playing% "79
Stopping% "79
Recording% "79
Recording Effects Automation% "80
Overdubbing% "80
Undo% "80
Rehearsal% "81
Erasing Notes% "81
End Recording% "81
Pad Mute Mode% "81
Copy Pattern% "82
Bounce Pattern to Sample% "82
Exchange Pattern% "83
NearTao’s Guide to the SP-404 mk2
XV

Pattern Edit% "83
BPM% "83
Loop Start% "83
Length% "84
Duplicate% "84
Crop% "84
Quantize% "84
Step Sequencing% "85
Mode% "85
Substep% "85
Pad Select% "85
Bar Select% "85
Hold% "85
Pitch% "86
Velocity% "86
BPM% "86
Shuffle% "86
Start% "87
Pattern Record Settings% "87
BPM% "87
Length% "87
Strength% "87
Quantize% "87
Count In% "88
Metronome and Volume% "88
Pattern Chain% "88
Missing Features% "88
NearTao’s Guide to the SP-404 mk2
XVI

Saving Pattern Chains% "88
Chapter 8 - DJ Mode% "89
Introduction% "90
DJ Mode Setup% "91
Enter DJ Mode% "91
Exit DJ Mode% "91
Mix and Cue% "91
Loading Tracks% "91
Assigning Samples to Channels% "92
Editing Samples% "92
Add Marker% "93
Chop Mode% "93
Mark Playback% "94
Reverse Playback% "94
Pad Mode% "94
Pattern Mode% "94
Master Effects% "95
Channel Controls% "95
Adjust Channel Levels% "95
Channel Crossfader% "95
Track Bend% "96
Track BPM% "96
Track Sync% "97
Track Play/Pause% "97
Track Mute/Unmute% "97
Restart Track% "97
Cue Channel% "98
NearTao’s Guide to the SP-404 mk2
XVII

Bus Effects% "98
Mixer/EFX Page Swap% "98
Quick Loop% "98
Time Stretch Type% "99
Missing Features% "99
Mapping External CC% "99
DJ Style Filter Sweep% "99
Channel Level Slopes% "99
Next Track% "99
BPM relevant loop points% "100
Navigation Markers% "100
Channel Level Knob Mode% "100
Chapter 9 - Utility Menu% "101
Introduction% "102
Utility Menu% "102
System% "102
General% "102
Click% "107
MIDI% "108
Gain% "111
Version% "112
Pad Settings% "112
Trigger% "112
LED% "114
Bus Color% "115
Pad Color% "115
EFX Settings% "115
NearTao’s Guide to the SP-404 mk2
XVIII

Favorite% "115
Bus 3% "115
Bus 4% "116
Direct% "116
Other% "116
Import/Export% "116
Import from SD-Card% "117
Export to SD-Card% "117
Format SD-Card% "117
Backup/Restore% "117
Backup% "117
Restore% "117
Factory Reset% "118
All Data% "118
System Data% "118
Tips and Tricks% "118
Chapter 10 - Midi% "119
Introduction% "120
Midi Mode A/B% "120
Midi Cables% "120
Midi Note Offset% "120
MIDI Channels% "121
Sample Banks% "121
Vocoder% "121
Chromatic% "121
Midi Input% "122
Pattern Selection% "122
NearTao’s Guide to the SP-404 mk2
XIX

Effect Control% "123
Midi Output% "124
Conclusion% "124
Chapter 11 - SP404MKII App% "125
Introduction% "126
Installation% "126
Import Samples% "126
Export Samples% "126
Import Patterns% "126
Export Patterns% "126
Settings% "127
Import Projects% "127
Export Projects% "127
Convert SP404SX Projects% "127
Sample Packs% "127
Conclusion% "127
Appendix% "128
Appendix A - Accessories% "129
Introduction% "129
Batteries% "129
USB Power Banks% "130
Headphones% "130
SD Cards% "130
Audio Cables% "131
Cases% "131
Appendix B - Experiments% "132
Is the mk2 polyphony monophonic or stereo?% "132
NearTao’s Guide to the SP-404 mk2
XX

Does the mk2 have 32 note polyphony with mono samples?% "133
Does EXT SOURCE turning red mean that you are clipping?% "134
Does the mic/guitar input produce analog or digital distortions?% "136
Do the headphone jack outputs share an amplifier?% "137
Is there compression on the MIC/GUITAR inputs?% "138
Experiment Template% "138
Appendix C - Frequently Asked Questions% "139
Hardware% "139
Samples% "139
Pads% "142
Skip Back% "142
Effects% "143
Sequencer% "144
Polyphony% "146
DJ Mode% "146
Storage% "147
Audio% "148
MIDI% "149
External Sync% "150
Cables% "151
Power% "151
Firmware Updates% "152
Companion App% "152
Factory Content% "152
Appendix D - Shortcuts% "154
Sample Mode% "154
Pattern Mode% "155
NearTao’s Guide to the SP-404 mk2
XXI


Chapter 1 - Welcome
NearTao’s Guide to the SP-404 mk2
Page 1

Overview
I don’t know about you, but I like guides. The Hitch Hiker’s Guide to the Galaxy and Zen and
the Art of Motorcycle Maintenance meant a lot to me growing up and I have read both books
multiple times. Although I highly doubt that this book will have the level of social influence
either of those books have had, I do hope that this book can help drive people to getting the
most out of their Roland SP-404 mk2."
I’m also super excited that Roland has launched a pdf manual for the mk2. Hopefully this will
make things much easier for me to reference in the future, and be a good way for me to not
have to replicate all of the information Roland has put together."
I am writing up this guide with the following goals."
* Give a solid overview of what the mk2 is and is not"
* Show users how to use the mk2 and point out common pitfalls and mistakes"
* Provide guidance and workflows to help make mk2 users get the most out of their instrument"
* Reference external information where possible for users to do their own further research"
Similarly there are a few things I am not trying to do with this book."
* Replace the existing Roland manual"
* Keep up with all Firmware updates"
NearTao’s Guide to the SP-404 mk2
Page 2

Getting Started
You’ve got this book in your hand (I don’t have physical copies at this time, so let me know
how!), a tablet, or loaded up on your computer, and are wondering how in the world you can
get around. Well, the order of sections is somewhat arbitrary but I am trying to get more
organized as I come to appreciate the mk2. While I tried to put it together in a way that made
the most sense to me, you should absolutely feel comfortable going through this guide in
whatever way makes the most sense for you. Skip through sections, consult what you’re
interested in now, and come back for the rest later."
Why stick with me and this book? I’ve been working on this book since the start of 2022,
where I’ve already seen influencers go from “The mk2 is the best thing ever” to not even
discussing or talking about it. I’m here as a journey to really learn as much as I can about the
mk2 and pass the information along to you, my dear reader, and not just put it out there to get
whatever the click of the day is."
If you’re new to making music, you’ll find a lot of the basic information from how to work your
way around the device, and you may find some of my commentary less informative for you
because it may not make sense. If something seems strange, reach out, and let me know. I’d
like to make this as straightforward a book as possible."
For those of you who have been around a while, you’ll probably find the commentary more
interesting than some of the workflows which may feel quite basic. In the end, I am mixing
both the basic information and the commentary because I’m not sure how else to discuss the
mk2 in a style or approach that doesn’t just replicate the manual."
On the subject of the mk2 manual, it is sufficient to learn a lot about the mk2, so definitely
reach for it since there is a lot of valuable information there. Unfortunately Roland’s mk2
manual has a few problems, though it has gotten better over time. Mostly though, I know what
I am doing with the mk2 and find some of the ways that information is laid out to be
impenetrable, I don’t know how new comers are expected to learn the mk2 other than trial and
error or the good will of folks like me writing books and posting videos. A good percentage of
what I am doing on the mk2 to write this guide is trial and error, for those of you out there doing
the same, welcome to the club, you are in good company!"
I do want to mention that some early concepts for this book didn’t pan out, and I’ve been
slowly growing into a format that seems to work best for how I want to communicate this
information. You’re going to notice a lot of triple question marks throughout the book, and it is
my shorthand way of noting to myself “You need to come back here”, whether it is to clean
something up, learn something new, or just explain something better. Yes I know these notes
are literally everywhere, just please understand that I am doing this in my spare time."
I am also more than open to feedback, and will work through what I can as I have time and
interest. People have reached out to let me know things that are just outright wrong, silly typos
that I have made, or even suggested ways to rewrite some sections to be more intelligible to
them. Please feel free to reach out, and we can make this a more complete guide together."
NearTao’s Guide to the SP-404 mk2
Page 3

Conventions
The SP-404 mk2 has a lot to keep track of, so I wanted to come up with some consistent
conventions for giving directions to operate it. This should help improve the clarity to navigate
this device, which while it isn’t terribly complicated, does have a decent enough set of controls
that I want to have a quick short hand for us to be able to work together. I’ll provide pictures
where it feels appropriate, but I don’t want to over burden this book, and the editing of it going
forward with lots of images. "
Icons"
Throughout this book I will try to remember to use standardized icons to help present
important information and warnings as they make sense to note and identify."
Warning: I will use this icon to indicate a brief section as a warning or heads up.
This section will contain details that may not be well documented or are not well
understood. This will typically indicate something to be aware of on the mk2."
"
Information: I will use this icon to indicate a brief informative section. This will be
something that is nice to know, but may not be essential for the operation of your
SP-404 mk2."
"
Under Construction: this indicates that a section is still being considered,
researched, or in the process of being rewritten. Don’t be surprised if this
information changes, moves, or is just removed."
"
Experiment: This is indicating that I have (or possibly intend) to run an experiment
to get more details on how something works, or more specific information about
the operations of the mk2."
"
Workflow: Indicates a short list of buttons presses or other things necessary to get
a desired result"
"
Bug: Indicates that there’s something that probably isn’t working quite right, not
as documented, or not as expected. This is something I would expect Roland to
fix on the mk2 eventually."
NearTao’s Guide to the SP-404 mk2
Page 4

Controls"
(VOLUME|CTRL1-3 CW|CTRL1-3 CCW) will all be referenced within parenthesis ( )"
* Where CW is turn the knob clockwise"
* Where CCW is turn the knob counter clockwise"
/FX/ will all be referenced within forward slashes / /"
|BUTTON| will all be referenced within pipes | |"
{VALUE CW|VALUE CCW|ENTER} will all be referenced within curly braces { }"
* Where CW is turn VALUE clockwise"
* Where CCW is turn VALUE counter clockwise"
* Where ENTER is push VALUE"
[Pad 1-16|SUB PAD] will all be referenced within brackets [ ]"
* These are velocity sensitive pads that can be effect volume based on how hard they are hit"
<AUDIO OUTPUT> will all be referenced within < >"
* Headphone Jacks"
* L/Mono and R"
>AUDIO INPUT< will all be referenced within > <"
* L/Mono and R"
* Mic/Guitar"
Mic/Guitar & Power Switch?"
Mic/Guitar Gain knob?"
USB-C port?"
`SUB FUNCTION` will all be referenced within back ticks ` `"
* This will be used to typically denote functions accessed by hitting a pad/button twice, or
pressing pads/buttons at the same time. "
-> will denote pressing one pad or button followed by pressing another pad or button"
+ will denote holding a pad or button while holding another pad or button"
Examples"
`CHROMATIC` |Shift|+[Pad 4] - Hold the Shift button and then press Pad 4 to enter Chromatic
Mode"
`F` |A|->|A| - Press the A Bank button twice to enter the F bank (honestly, don’t do this one)"
NearTao’s Guide to the SP-404 mk2
Page 5

Chapter 2 - Features & Specs
NearTao’s Guide to the SP-404 mk2
Page 6

Introduction
This section is mostly to cover what the mk2 actually is, and chase down what any marketing
material may actually mean. There are several areas where I feel like Roland gave us hints at
what they did, but not details of how the mk2 technically works. As much as possible I am
trying to chase down the details in this section to make sure that we really understand what
Roland implemented, and give terms that I am familiar with to describe more fully what the mk2
is doing."
Get ready, this is all of the information from the data sheet, with notes that I have sprinkled
around, as well as additional information for context. There are some things I am not entirely
sure about, especially for specific language that Roland has chosen to use, or how ranges for
some things are managed when driven externally from the mk2. As I get more documented I’ll
work out some experiments, tests, or do further research and reference back into the manual,
community, or anywhere else to try and nail down this information."
Sampling
Between using the mk2 as a sampler or as an effects box, these are the two things that I
expect users to use the most with this box. This section outlines the important details related
to sampling and drills into the specifications to help you better understand what the mk2
offers."
Polyphony
Polyphony dictates how many different sounds or notes you are able to play at the same time.
This will become important to you to understand especially when you start hearing sounds or
notes drop out, it is probably due to the mk2 running out of voices to be able to play a track for
you."
The mk2 is specified as having a maximum polyphony of 32 voices, but doesn’t state whether
each voice is monophonic or stereo in the manual or in marketing material. I have confirmed
that the 32 note polyphony is for a monophonic sample, so if you use only stereo samples then
you’re going to have only 16 notes of polyphony since a stereo sample requires two mono
voices."
Sample Import Format
The mk2 natively supports importing .WAV, .AIFF, and .MP3 files. It is unclear if there are
sample rate, bit depth, or other factors that are important to know when importing samples into
the mk2."
Seems like some good experiments out there to try different .WAV formats, stereo
vs mono (or surround sound), different bit depths and sample rates… could be
cool, or might be super messy outside of “standard” values."
Using the Roland Cloud SP-404 mk2 App allows you to import WAV, AIFF, MP3,
FLAC, M4A files. Maybe anything else? Could be worth researching… "
NearTao’s Guide to the SP-404 mk2
Page 7

Sample Export Format
The mk2 only exports files as stereo, 16-bit, 48khz .WAV files."
Plenty of older devices only support 16-bit at 44.1khz. The older devices may
happily play a 48khz file, but it will be out of tune because it will be playing at a
different speed than the intended 48khz that the mk2 exports. Be aware of what
file format(s) your devices and software support."
Maximum Sample Time
The mk2 can have a single sample that is up to 16 minutes long, documented as approximately
185MB per sample."
During a livestream, I have determined the following information (thanks kernel panic for the q):"
* The maximum sample size is 184,506,412 bytes, which as a stereo sample at 16 bit, 48khz is
16.00.97 minutes long."
* The real constraint is the file size, so you can import a mono sample at 16 bit, 48khz that is
32.01.94 minutes long."
Of note, the SP404 mk2 doesn’t really manage or allow you to record in mono as of this time
(firmware 3.02), so if you want a 32 minute mono sample, you’re going to have to import it
through the Application or SD Card."
This is an interesting discovery, because it means that technically, you could use
two pads (panned mono left and mono right) with the PAD LINK option, to play a 32
minute track/mix. This is twice the advertised limit, and while I can understand why
Roland advertises this way, they should better differentiate between mono/stereo."
Due to the way that Roland converts imported content to its native format, even if
you export at a lower sample rate or bit depth, you’re not going to be able to import
anything that breaks the file size limit of the 16 bit and 48khz file size."
Skip Back
The skip back features allows the mk2 to record the last 25 seconds of audio from the final
output mix into a buffer that the user can access to go back to."
The skip back certainly makes the mk2 an interesting end of chain device as it can
let you capture snippets of a performance that you may not have been intentionally
recording, but if you’re fast enough and want to revisit again to try to recreate or to
sample for future use. Over time I think we’ll see this as a formative mk2 feature."
Storage
Understanding the storage on the mk2 will be important if you plan on really putting the device
through its paces. You might want to know what the different formats of data into and out of it
are as well if you plan on taking any of the patterns or audio files someplace else or operating
with other devices. "
I suspect most people will never fill up the available internal storage, and be able to effectively
use all of it. I can entirely see the use case of having available samples on an SD card to load
NearTao’s Guide to the SP-404 mk2
Page 8

as needed, but seriously, there’s a lot of free space and you’ll have to work pretty hard to use
all of it."
Data
Internally, the mk2 can store up to 16 projects, each project is made up of 10 banks, and each
bank can have both 16 samples and 16 patterns. Some basic math lets us know that internally
the mk2 can store up to 2,650 samples and 2,650 patterns (16 samples/patterns * 10 banks x
16 projects)."
Internal Data
Internally the mk2 appears to handle all samples at a 48kHz sample frequency at a 16-bit linear
depth. It is unclear what the file format is for other metadata other than the boot screen(s)
which are saved as Microsoft Windows bitmap files."
Exporting a project creates many files, but samples are saved as .SMP, and
patterns are saved as .BIN. Pictures are saved as .BMP (bitmap files), and last but
not least there is a PADCONF.BIN file, that presumably contains pad settings for the
project."
"
Could be worth digging into these file formats and seeing what can be changed/
modified. Seems like a future set of experiments to run."
Internal Storage
The mk2 has 16GB of internal storage. From a factory install, only 14.21GB of internal storage
is available, and the lost storage is due to preloaded samples and patterns, settings, metadata,
factory restore data, and drive format."
From a factory reset, if you delete project 1 which contains the factory samples and
patterns, you will have a maximum available amount of free storage of 14.38GB.
You will not be able to address more available storage than this as there is no way
to remove any of the hidden internal content necessary for a factory restore."
External Storage
The mk2 supports up to a 32GB SDHC card. While it might support the older SD card format
that went up to 4GB, it definitely does not support SDXC cards or sizes over 32GB."
Unlike previous SP devices (202/303/404), the mk2 does not support streaming
audio off of the SD Card. It can only be used for backups/restoring data, and
importing/export projects and samples. "
Pattern Sequencer
The pattern sequencer on the mk2 is a pretty substantial upgrade from previous SPs and let’s
you do a lot more "
NearTao’s Guide to the SP-404 mk2
Page 9

Beats Per Minute
The Pattern Sequencer has a BPM range from 40 to 200."
Not entirely sure how it handles ranges outside of this from an external sync
source. Worth investigating."
Pattern Length
Previously the Pattern Sequencer can record patterns of 1, 2, 4, 8, 16, 32, or 64 bars, however
with updated firmware (2.0 and later) you are able to go from any integer value of one bar up to
64 bars. This is quite a change, and a welcome addition."
A technique for older gear to extend the pattern length (at the expense of parts per
quarter note) is to halve your BPM, which will allow you to double the number of
bars you record. By doing this you can go from 64 bars to 128 bars."
Parts Per Quarter Note
The Pattern Sequencer has a resolution of 480 parts per quarter note, which is quite good.
Some devices do go to 960 parts per quarter note or possibly higher, but there was plenty of
gear manufactured that only manages 96 parts per quarter note."
To increase the resolution for parts per quarter note, you can look into doubling the
BPM that you record at. If you were originally going to record a piece at 100 BPM,
recording at 200 BPM will effectively get you 960 parts per quarter note."
Quantization
Finally the Pattern Sequencer supports Quantization and you can apply Strength."
Got quite a few questions here… but going to need some time to experiment, read
docs, and better understand how this works."
Effects
The mk2 comes with a broad selection of effects, but not all effects are available in all of the
use cases for the mk2. The information on the tin states that there are 37 Multi Effects that can
be used on the Bus FX or Master FX. This is true, but also a little bit misleading, as the mk2 (as
of firmware 1.14) has 41 unique effects. Roland has suggested that more effects will come in
firmware updates in the future, and there are several things I’d be interested to see over time."
As of firmware 2.0 the mk2 has added an additional 4 Multi Effects, bringing the total up to 41."
Bus Effects
Nearly all of the Bus Effects overlap with the Master effects. There are 37 Bus effects, but only
one is not available on Master Effects, which is Stopper. Stopper is an effect that you only
NearTao’s Guide to the SP-404 mk2
Page 10

want to engage sparingly because it stops all audio being played, and as such is not a good
candidate for the Master Effects bus."
Master Effects
As above, the Master Effects predominantly overlap with the Bus Effects, but there are only 36
Master Effects available, as it is missing stopper. There are a couple things to note:"
* Five of the Bus Effects are accessing from their designated pads"
* The Master Effect Sync Delay is the same as the Bus Effect Delay"
Input Effects
There are a further 16 Input Effects, many of which are available for the Bus Effects and Master
Effects as well. However, there are 3 unique input effects at this time of Auto Pitch, Vocoder,
Gt Amp Sim that are only available as Input Effects."
Interface
The biggest change to the interface of the mk2 is the addition of the OLED display which
opens up a broader amount of possibilities for the mk2 than the 3 character display of its’
predecessors. The update from 12 to 16 pads is pretty big as well, and gives that much more
options for playing songs, and will allow people on the MPC line to seamlessly move to the SP
if they’d like."
Pads
There are two firsts for the mk2 compared to the SP 202/303/404 product line. First and most
noticeably there are now 16 pads instead of 8 (as the 202/303) or 12 (as the 404/404sx/404a).
Second, the 16 Pads and Sub Pad are now velocity sensitive, which means that you’ll be able
to vary how loud a sample plays based on how hard you hit the pads."
Control Knobs
The mk2 has continued the 4 knob tradition since the 303, and has retained it’s volume knob,
and three CTRL knobs. These knobs are rotary knobs and have a clear start point and end
point. This means that the knobs all have a definitive position and value based on where you
have the knob set. You can somewhat adjust this behavior in your settings to allow for a more
relative feel until the knob value catches up with the parameter value that you are controlling."
Value Knob
Finally the mk2 has added an endless/continuous knob that has a push toggle, to allow for
relative input as well as an additional commit/enter command. This means that you can
endlessly turn the knob clockwise or counter clockwise and it will adjust the specified
parameter based on what the software settings the value knob is currently associated with."
"
My biggest concern for the mk2 currently is the rotary knob. It gets used very
frequently, and is something I expect have issues in the future. If you’re going to
travel make sure that you don’t jam the mk2 into a crowded backpack, or bring a
separate custom purpose case to help protect your device."
NearTao’s Guide to the SP-404 mk2
Page 11

Display
The mk2 has an OLED graphical display now, which although it is not high resolution by any
means, is more than sufficient to display audio data, settings, options, and plenty of other
information that makes than mk2 easier to work with than its predecessors. "
External Connections
There are a number of connections for the mk2, and I’ll do my best to break everything down.
This will allow you to power, send and receive audio signals, and even send and receive Midi
data."
Headphone Jacks
Yes you read that right, the mk2 has multiple (well okay 2) headphone jacks. It has both 1/4”
and 1/8” headphone jacks, which is pretty handy for using different headphone types, and
might be a good way to collaborate with other people with a single device."
The experiment Do the headphone jack outputs share an amplifier? Indicates
that there is a single headphone amplifier, which shouldn’t be a direct concern,
other than there will be an overall lower listening volume if there are two
connections attached the headphone jacks that is worth being aware of."
"
A word of warning on the headphones, the (VOLUME) knob controls both the main
outputs and the headphones, so you cannot control this independently. What
makes this problematic is that the mk2’s USB-C output is also tied to the
(VOLUME) knob, and is lower than the output for the main/headphone output."
Stereo Output
Interestingly the mk2 has impedance balanced 1/4” TRS L/Mono & R jacks. This gives the mk2
some advantages to reduce the noise floor and eliminate ground loop noises when using the
right cables within an impedance balanced studio environment. Broadly, the impedance
balance should help to reduce signal noise introduced by the line."
The above said, I’m not sure how much this will help the average producer, as they
are unlikely to be in a balanced environment, but I guess it is to say that it is a nice
feature to have when you can take advantage of it."
Stereo Input
Sadly the 1/4” L/Mono & R jacks are the TS (no ring to provide impedance balance) type and
appear to not be balanced."
Personally this doesn’t bother me too much, but it is a little bit strange to see
balanced outputs and unbalanced inputs. It’s probably fine, but if you find running
off of batteries or USB adds some noise, try using DC power."
NearTao’s Guide to the SP-404 mk2
Page 12

Dual Microphone/Guitar Input
On the front there is dual microphone and guitar jack that is a 1/4” TRS. For a guitar the ring
isn’t doing anything, so just use a standard TS cable to hook up your guitar and/or pedals. For
microphones you’ll need a TRS cable, as this is how power is provided to the microphone."
I’m not sure what types of microphones the mk2 supports, going to need to do
some research to figure this out."
MIDI Input and Output
The mk2 supports MIDI in and out, using 1/8” TRS jacks. You can buy these cables from
Roland as accessories. For supported devices you should be able to connect TRS MIDI out to
TRS MIDI in across devices."
Roland lists some optional (not included in the box) accessory cables that you can buy, and I’ll
dig more into the specifications of them later."
There are two TRS cable formats for TRS to MIDI, Type A and Type B. Roland uses
the Type A format. Make sure you get the right format documented here. Why
Roland would put BMIDI in the name of their product is beyond me. You’ve been
warned."
I’ve added links to the products above, but it should be noted that the BCC products are
labelled as Midi cables, but there is nothing particularly special about them since they are just
straight TRS connections."
Likewise, the BMIDI cables are just standard TRS Midi Type A to 5-PIN Midi cables, so unless
you like the specific format of the cables, there’s nothing stopping you from getting a different
TRS Midi Type A cable."
USB-C Connection
The mk2 has a USB-C port. It can be used for powering the device, sending and receiving
MIDI information, and sending and receiving audio information. It has a lot of utility and I’ll be
writing about this extensively in sections to come."
As far as I can tell, this is class compliant audio and class compliant midi. This
means that you shouldn’t need any special drivers to use the mk2 with devices that
Product
Description
BMIDI-5-35
Angled TRS Midi (Type A) to Straight 5-PIN Midi Connector
BMIDI-1-35
Angled TRS Midi (Type A) to Angled 5-PIN Midi Connector
BMIDI-2-35
Angled TRS Midi (Type A) to Straight 5-PIN Midi Connector 2’
BCC-1-3535
Angled TRS to Angled TRS
BCC-2-3535
Angled TRS to Angled TRS
NearTao’s Guide to the SP-404 mk2
Page 13

support class compliant audio and midi."
One oddity with the USB connection is that audio seems to be quieter over this
connection for some reason. It seems like Roland put in a -.5db to -7.db gain
reduction on incoming USB audio levels, making you have to normalize audio to get
it back up to a higher level with other content sampled on the mk2."
Power
You can power your mk2 using several options, including the provided AC adaptor, USB, or
with batteries."
AC Power
The mk2 takes DC power in at the terminal. The power adaptor for the mk2 is an AC (wall wart)
adaptor and is specified as a 5.7 volt and 2 amp device, and is center negative. It is noted that
the mk2 draws 1.1 amps of power, so the 2 amps from the power adaptor is more than
sufficient to handle the power requirements of the mk2."
Older SP models were 9v, and you could swap out power supplies with other SPs
or even guitar pedals. This is no longer the case, so make sure when power your
mk2 that you use the provided power or something with the same specifications."
"
Even if you have batteries or a powered USB-C connection, don’t disconnect from
Power as it will turn off the mk2. If you want to disconnect from power, turn off
your mk2 first and then turn it back on once you have switched to your new power
supply. (YouTube Video - Roland SP-404 mk2 Power - DC/USB/Battery)"
USB Power
The mk2 can be powered from another USB device or power adaptor. This can be helpful if
you have a lot of USB devices to power or charge, and don’t want to carry multiple different
power adaptors around with you. One thing to note however, if you are powering over USB,
the device or adaptor must provide 1.5 amps of power, or the mk2 will default to a different
type of power. The older USB standards only provided 500ma of power, and would certainly
be insufficient to power the mk2."
"
My iPad mini has a USB-C port, and it has been able to power my mk2 without any
problems. This has been helpful in conserving battery power on the mk2, but does
put a bit more strain on the iPad’s power supply."
Although you can hook up your iPhone to the mk2, it is unable to supply the
necessary 1.5 amps of power over the port. This is fine if the mk2 is plugged in,
but if you are battery powered on the mk2, then you are going to get consistent
messages about the mk2 using battery power. "
I’ll get into it more later, but I have found you need a USB-C to USB-C cable to
NearTao’s Guide to the SP-404 mk2
Page 14

power the mk2 over USB. A USB-C to USB-A typically only supports 500ma of power which is
not enough, and the USB-C to lightning does not provide power or class compliant audio/midi
at all, for an iPhone you will need the camera kit."
thommyd on discord informed me that some USB cables are not providing enough
power for the mk2 to operate off of the provided power. It sounds like USB bc 1.2
cables will work, and I can confirm that all of the USB-C cables I have work. If the
mk2 is not working over USB, check your cables and power supply."
Battery Power
To power the mk2 off of battery power, you will need 6 Alkaline or Ni-MH batteries. There
doesn’t seem to be a way to tell the mk2 what type of batteries you have inserted like some
other devices do. Roland specifies that for Alkaline batteries you will get approximately 2.5
hours of use and for Ni-MH batteries you will get about 3.5 hours of usage. If you use
rechargeable batteries you can likely expect the amount of time you get between recharges to
be lower, but you’ll go through less batteries."
If you are using rechargeable batteries, it can be a good idea to use the batteries in
sets. I frequently will put some washi tape of the same color/pattern on a set of
batteries for a device so that I will wear all of the batteries out evenly."
"
When you are plugged into an outlet, do not unplug from the outlet even if you have
batteries in the mk2. The mk2 will not switch over to the battery power in time, and
you will have to restart the mk2."
I just wanted to note, that it’s not a great habit to get into leaving batteries in the
mk2 for months or years without checking on them or replacing them. If you’re not
using the mk2 for extended periods of time consider taking the batteries out in case
they leak so that they don’t ruin your device."
The mk2 doesn’t give any information to let you know about remaining battery
power while in the interface. Although a power loss from no longer having
remaining battery life may not be the worst, it can still lead to a loss of work or
other issues. The mk2 really should have some sub menu to indicated battery life."
Project Import
The mk2 is able to import projects from the 404SX and 404A. "
"
I don’t have either of these units, so not able to test or try this out at this time. I
believe that this needs the Roland cloud app, and not able to be done over the sd
card on the mk2."
NOTE: I now have both… need to set aside some time to test."
NearTao’s Guide to the SP-404 mk2
Page 15

DJ Mode
DJ Mode makes it’s introduction to the SP line on the mk2, and allows you to load up two
channels of audio, and use the controls to mix between the two tracks, use effects, and play a
basic but effective DJ set."
NearTao’s Guide to the SP-404 mk2
Page 16

Chapter 3 - System Data
NearTao’s Guide to the SP-404 mk2
Page 17

Introduction
The SP-404 mk2 has several types of concepts and data that you will want to make sure you
understand while you are working with your mk2. This will help ensure that you are managing
your mk2 data appropriately. Below is a sketch to try and help show how I internally think
about the structure of the mk2."
Going from left to right, the mk2 as a System has System Data and 16 Projects. Each Project
has Project Data, 10 Pattern Banks, and 10 Sample Banks. Each Pattern Bank has Pattern
Bank Data and 16 Patterns, and each Sample Bank has Sample Bank Data and 16 Samples."
Although the architecture of the mk2 is fundamentally quite simple to understand, the sheer
amount of differing patterns, samples, and effects permutations give a vast array of options to
create songs with."
System
At the highest level, the mk2 is made up of your System Data and your Projects. The System
Data contains all of your System Settings such as how you configure your pad sensitivity, audio
settings for +/- db, master effects bus settings, as well as other global settings that you will use
across your mk2."
The only way that I am aware of to save your System Data is to make a backup of
your entire mk2. The application, as of mk2 Firmware 1.15 does not appear to give
a way to do a system backup."
"
Backing up your mk2 will create a directory on the SD Card named “BKUP”, and
will then create a folder “BKUP<x>” where <x> is the backup number you choose
from 1 to 99. The artifact that is created for the backup is a single file named
“BKUP01.bin”."
NearTao’s Guide to the SP-404 mk2
Page 18

Restoring a system backup on your will load from a directory named “BKUP<x>” where <x> is
your restore number you choose from 1 to 99, and it will load erase the contents of the
“BKUP01.bin” file appropriately. "
If you want to restore a backup from another mk2 or move the backup files to another SD
Card, make sure that you copy the “BKUP<x>” directory into the “BKUP” directory on another
SD Card. You can rename the directory to anything from 1-99, just make sure that you select
the appropriately numbered directory when you load up from backup."
Projects
The mk2 gives you 16 projects that you can switch between, and each project has a unique set
of 10 Pattern Banks (A-J) and 10 Samples Banks (A-J). "
Exporting a Project will create a directory named “EXPORT” and a sub directory named
“PROJECT”. You can export projects 1-16, and the exported directory will be named
“PROJECT_<x>” where <x> is the number of the project that you are exporting."
Contained within the “PROJECT_<x>” folder is a file named PADCONF.BIN, and three
directories named PICTURE, PTN, and SMPL."
The file PADCONF.BIN presumably contains information about how your pads are configured
for the project, including information about Pad Mutes, and other settings that may impact how
you setup the pads on your mk2. "
The directory PICTURE contains six .bmp files that are bitmaps for your system startup as well
as images that can be cycled for a screensaver. "
The directory PTN contains a file named PTN00001.BIN, which is likely what has all of the
information for patterns you have created on your mk2."
The directory SMPL contains multiple files named “BANK<x>-<y>.SMP” where <x> is the bank
number (where A=1, B=2, C=3…J=10), and <y> is the 1-16 based on which pad the sample is
associated with."
Initial experiments that I have run appear to show that the backup .BIN file is encrypted and
may have a checksum associated with it. Making discrete changes to the file will make it
unable to load, and settings changes, that would likely be a single bit or possibly a byte long
change appear to change multiple file locations within the .BIN file. "
I have also spent some time trying to look through the header of the .BIN file and haven’t found
anything interested that might denote it as a specific type of compressed file, so it is unclear to
me at this time what the file may be."
Pattern Banks
Each Pattern Bank (A-J) contains 16 Patterns. Each Pattern Bank has a unique BPM, so if you
change the BPM for one pattern in a bank, it will change the BPM for all other patterns in the
bank."
"
Each Pattern Bank has a unique BPM, so if you change the BPM for one pattern in
NearTao’s Guide to the SP-404 mk2
Page 19

a bank, it will change the BPM for all other patterns in the bank. If you chain a pattern into a
different Pattern Bank, the BPM will change to the BPM of the new Pattern Bank once the new
Pattern starts playing."
Patterns
A pattern can be anywhere from 1 to 64 bars, but currently it only allows for doubling
increments, meaning 1, 2, 4, 8, 16, 32, or 64 bars. Pattern mode has the ability to modify the
pattern Loop Start and Length, but Loop Start currently does not work, and Length can only be
modified to match the same increments of the number of bars. "
Patterns on the mk2 are restricted to a single track of pattern information, meaning that you
can only play one pattern at a time. This means that you will need to make sure that each
pattern only triggers the pads that you want to play, and may need to chain patterns together
in order to play a full song. "
When copying patterns between Banks, it will retain all of the settings listed above when you
press |COPY| and select a source [PAD] and destination [PAD]. When copying a pattern to
another bank, it will take on the BPM of the Pattern Bank it is copied to."
Sample Banks
Each Sample Bank (A-J) contains 16 Samples. Each Sample Bank has a unique Volume that
you can change by pressing |SHIFT|+|BANK| which will allow you to modify the volume of all
Samples within the modified Sample Bank."
"
If you keep similar sounds within a Sample Bank, modifying the Sample Bank
Volume setting can be a quick way to adjust sounds together to keep them all
relative to each other."
Samples
Each sample on the mk2 must be associated with a unique project, bank, and pad. The mk2
does not allow samples to be linked or referenced to each other, so there is no concept of non-
destructive chopping like there is on other devices. "
Every sample gets it’s Start/Loop/End point, Pitch/Speed/Volume adjustment, Envelope, and
has unique settings liked to |BPM SYNC|, |GATE|, |LOOP|, and |REVERSE|. You can further
adjust a sample’s FX Bus to Bus 1, Bus 2, or Bypass, by pressing |REMAIN|+[PAD] to cycle
through the FX Bus options."
When copying samples between Banks, it will retain all of the settings listed above when you
press |COPY| and select a source [PAD] and destination [PAD]. When copying a sample to
another bank, it will take on the Sample Bank Volume of the Sample Bank it is copied to."
If you want to copy samples between projects, you will either need to export your
sample to SD and then reload it into the new project, or you will need to play the
[PAD] so that it is recorded to Skip Back, switch to the target project, and then
NearTao’s Guide to the SP-404 mk2
Page 20

press |MARK| to load Skip Back to pull the sample from the buffer."
NearTao’s Guide to the SP-404 mk2
Page 21

Chapter 4 - Audio Connectivity
NearTao’s Guide to the SP-404 mk2
Page 22

Introduction
To do anything interesting with your mk2, you’re going to need to connect it to the outside
world to either get input into it, or get output out of it. The chapter covers the audio
connections that you’ll want to be aware of to get the most out of your mk2 and be able to
both record audio from external devices as well as connect speakers or headphones to it so
that you can hear what the mk2 is doing."
Audio Input
Of the many ways that you may choose to utilize your mk2, probably the most consistent thing
that you’re likely to do will be to sample from an external source. This section will cover the
different types of input, and how you may go about utilizing them within the mk2 and your
other devices."
One thing to note about the inputs on the mk2, if you have EXT SOURCE on, or are
in REC mode, it will pass through anything on the inputs from the 1/4” ins, MIC/
GUITAR, and USB-C. This is good if you want this, but could be problematic as
there is no way to switch between the 3 input sources individually if you wanted to."
MIC/GUITAR Level
On the front of the SP-404 mk2 there is a 1/4” TRS jack that can be used to (power/increase
signal strength) of a guitar or a microphone. There is a switch labelled MIC/GUITAR, and a
GAIN knob that can be turned to adjust the incoming signal boost."
I ran some experiments on over driving a line level signal on the mk2, and there
doesn’t appear to be anything special about running line level audio into the MIC/
GUITAR input, if EXT SOURCE is turning red, then you are definitely digitally
clipping your audio."
Microphone"
When the MIC/GUITAR switch on the front of the mk2 is set to MIC, you can connect an
unpowered microphone to the front INPUT jack."
Just discussing microphones would require a guide on its own, and overall is far too deep of a
topic for this section. In this section I will just hit the most important notes."
The mk2 doesn’t have a phantom power switch that would enable it to provide power to
microphones that require it. As such, this means that you won’t be able to directly use a
condenser microphone without having a DI box or amplifier that you can plug the microphone
into, and then hook that up to the mk2. "
If you want to use a microphone with your mk2 then, you are going to want to be looking for
dynamic microphones as they do not require power. Dynamic microphones tend to be lower
cost, but the transient response and high frequency response tends to be lower than that of a
condenser microphone. "
Shure makes the SM57 and SM58 which are both solid dynamic microphone choices found on
stage and in studios, and I have been using an AKG D880 for years that has worked just fine
for capturing a multitude of audio options."
NearTao’s Guide to the SP-404 mk2
Page 23

If you really need a condenser microphone, I might suggest looking into the Zoom product line.
I have the Zoom H6, it is a small field recorder, supports up to six inputs, and can provide
phantom power to microphones, as well as allowing you to record endless amounts of content
on its own. "
The manual does not make it clear what types of microphones are supported on
the mk2, but since there is no phantom power switch, and the manual does not
state that it can provide +12/+24/+48v phantom power I must assume that it
cannot. Condenser mics will need power from batteries or another device."
On some older sampling gear a trick was to hook up your line outputs to the
microphone inputs to add some distortion. This worked due to the the nature of
the AD used. Unfortunately this old school trick doesn’t seem to work as you just
get the traditional digital clipping instead of getting any interesting distortions."
Turning into tip central over here… but it is worth mentioning that even if you don’t
have a microphone, you can plug in headphones into your MIC/GUITAR input to
use them as a microphone. The dynamic and characteristics won’t be as good as a
microphone, but it absolutely works in a pinch. Have fun!"
Guitar"
When the MIC/GUITAR switch on the front of the mk2 is set to GUITAR, you can connect high
impedance devices like a guitar or bass, as well as guitar pedals if you wanted to add one or
more pedal effects to your guitar or bass."
Instrument level brings it’s own challenges with noise. I don’t have a lot of guitars
to choose from (just the 3 string my dad made me)… may need some help beyond
doing pedal stuff for thoughts/suggestions here. Hooked it up, and holy smokes is
my 3 string noisy… woof. Guess will need to come back here later."
"
Tried a few things… noise floor straight from a single pedal into the mk2 is *high*,
and I’m suspecting it might be a noisy power supply. I switched over to my pedal
board and it so far sounds much cleaner, if noisy. I suppose a hold off on this
section for the time being is in order, but even for just testing, got some fun results."
"
The mk2 doesn’t have an built in tuner, so if you’re trying to tune your guitar or bass
you’ll need to look elsewhere. There are plenty of good phone apps and battery
powered tuners. This is a feature I’m hoping we get in the mk2 at some point
though, so we can tune instruments, samples, or whatever else needs tuning."
NearTao’s Guide to the SP-404 mk2
Page 24

Guitar Pedals"
One thing that is great about the guitar input on the mk2 is that it opens up a wide world of
variety for FX. There are so many pedals that range from boutique manufacturers to well
established brand names, and the can add so much unique character and sound."
I am not going to go into any deep discussion on impedance or signal levels, but there are a
few things that are often worth reading up on with your pedals, or trying on your own. Some
pedals will only work at instrument level, and will have to be connected the MIC/GUITAR input
port on the front, but there are some that are also happy to function with a line level signal
source and then output a line level source. Heck, even some pedals will provide stereo output
and occasionally stereo input. It is definitely worth experimentation."
Either way, you can frequently turn the volume way down on a line level output, hook it up to a
guitar pedal input, and then hook the pedal output to the mk2 input. You’ll monitor your input
with EXT SOURCE lit, and slowly increase the gain of your line level device. You’ll probably
notice clipping quickly if you go to far, but just pay attention to your levels and you might just
find some fun new ways to record material for your mk2."
Line Level
For a lot of people, I expect that the 1/4” inputs on the back are going to be the primary way to
get sound into their mk2. Plenty of instruments, radios, phones, tablets, and more output
audio at line level."
There are a number of adaptors to get phono, 1/8” or 1/4” TRS, lightning, USB-C, and other
connectors to output to to line level on 1/4” TS jacks for the L/Mono and R signal. The
important part is to make sure that they output at line level."
If you only connect a device to the mk2 L/MONO input, the mk2 will still record a
stereo sample. There doesn’t appear to be any way to record a mono sample to
the mk2, and I’m just guessing that the only way to get a mono sample onto the
mk2 is to import the sample or use the companion app to load a mono sample."
Phono Level
Before I dig into this section it must be noted, that the mk2 does not by itself support phono
level on its inputs. While you can technically connect phono level up to the line level input
jacks on the mk2, it is going to be incredibly quiet, and the audio will almost certainly have
some distorted qualities to it."
Also, just because you have a device with RCA/Phono jacks doesn’t mean that your device
outputs at phono level, it may be outputting line level. You’ll want to make sure you know what
the specifications are for the outputs."
That said, most turn tables will output at phono level, and need to have their signal boosted up
to line level. This is traditionally done through amplifiers, and is why you will see many people
who sample off of vinyl will have a DJ style mixer as part of their setup, which does the job of
signal amplification, volume control through the track fader and cross fader, signal equalization,
and may even have some other effects."
NearTao’s Guide to the SP-404 mk2
Page 25

USB
Possibly the most surprising feature for me out of the box for the mk2 was just how well
integrated the USB-C class compliant audio is. Connecting it to a phone, tablet, or computer,
with the right cables just works, with minimal setup or fuss."
On the iPhone and iPad, the mk2 becomes your primary input and output device, and it can
even see the two inputs and four distinct outputs. This makes it very easy to just connect to
one of these devices, load up an audio application, and quickly get to sampling and making
music."
There is a system setting to adjust USB output, but there is no system setting to
adjust USB input. This is a problem for iPad/iPhones as you won’t have any way to
adjust the volume for applications that you cannot route through AUM or AudioBus
3."
"
For the iPhone/iPad at least (don’t have Android to test), one issue is that the
volume buttons won’t adjust your audio levels. For music software you can use
AUM or AudioBus 3 as a mixer, but for applications like YouTube, there is no way to
adjust your output, so you may be better off using the line inputs instead."
Using a computer will require a bit more work, but from what I have seen it isn’t much more.
You’ll likely need to adjust your audio outputs to direct them to the mk2, and if you are using a
DAW you may instead want to configure its audio setup within your preferences. That said,
this is still pretty easy, and I’ll try and document it some more in a future section."
Gain Staging
When people talk about gain staging, what is generally meant is to have all of your inputs at an
equal input signal to each other. This is particularly important in studios with large mixers,
because you want to use your mixing console as the master volume control for each audio
channel, otherwise you quickly find that each instrument has a varying amount of volume and
noise floor, and this leads to making it harder to mix."
Traditionally, for many audio sources, you would run a single sin wave as output for each
source, at or near the maximum instrument/device volume without the signal distorting, and
then adjust the input gain on the mixer until you hit a target volume such as 0db or -3db for
each and every device/instrument. By doing this, you will be maximizing the amount of volume
you have the instrument, and in general this will also help to reduce your noise floor. This
allows each fader on the mixing desk to be able to control the volume of any sound relative to
any other sound."
Now there are a couple things to consider here, first, the mk2 doesn’t have any mixer faders,
and second most of the volume gain you can do on the mk2 is done in software."
"
Going to have to come back to this section… I really need to figure out what the
threshold is that is triggering the EXT SOURCE pad to light up red."
NearTao’s Guide to the SP-404 mk2
Page 26

Controls
Monitor External Sources"
When sampling, it is not always necessary to monitor your external sources, but if you don’t
want to enter record mode, and just want to hear how things will sound, if the sound is too loud
or quiet, or if you are getting some kind of clipping or distortion this can be a quick way to hear
how your source is sounding. To monitor your mk2 inputs, all you need to do is press |EXT
SOURCE| and play your audio from your external device. "
The experiment Does EXT SOURCE turning red mean that you are clipping or
not? shows that if you see the EXT SOURCE pad turn red that you are digitally
clipping. Unless you are looking for a specific or intentional effect, you should dial
your audio source back down so that the EXT SOURCE pad stays amber."
Input Settings"
You can adjust your input settings with `INPUT SETTINGS` |SHIFT|+|EXT SOURCE| which will
bring up additional information on your display."
REC BPM (CTRL1) - This sets the BPM that you believe you are recording at in whole number
increments. If you are just recording one shot samples then you probably don’t need to worry
about this too much, but if you are planning on using LOOP or PING-PONG you may be more
interested in getting this set properly."
FINE REC BPM |SHIFT|+(CTRL1) - This allows you to adjust the REC BPM value by one tenth
(or .1) value at a time instead of adjusting the BPM value by whole numbers."
ROUTING (CTRL2) - This allows you to set either Mix or ExtIn. It does not directly impact
what is played, but does impact what will be recorded. If you select Mix, then when sampling
all content that is playing, whether it is from pads or from an external input will be recorded.
When set to ExtIn, then only audio coming in from the Line In, Microphone, Guitar, and USB-C
connection will be recorded."
Although this is undoubtedly useful, I think it would be helpful to have a few extra
settings so that you could have a loop playing on a pad to hold a beat or rhythm,
and then for example use Chromatic mode to just record a new bass line or piano
section. However, this would require additional routing that just does not exist.
Pre/Post Bus?"
Modifier
CTRL1
CTRL2
CTRL3
None
REC BPM
ROUTING
LEVEL
SHIFT
FINE REC BPM
N/A
PAN
NearTao’s Guide to the SP-404 mk2
Page 27

LEVEL (CTRL3) - This adjusts the volume of the sample that will be recorded. 0 is the lowest
and will be so quiet that the sound will be imperceptible, and 127 is the loudest volume you
can record. If you are approaching or going beyond clipping you may see the |EXT SOURCE|
light up red. "
PAN |SHIFT|+(CTRL3) - Adjust the stereo pan of the incoming signal. C indicates that the
signal is centered, so whatever is connected to your inputs will be reflected the same on your
speakers. For either an L or R setting a value of 1 is the lowest amount of panning and a value
of 50 is the highest amount. At a value of L50 you should only hear the inputs in your left ear,
and a value of R50 you should only hear the inputs in your right ear."
Input FX Settings"
From the INPUT SETTINGS menu, you can get to the Input FX settings through the value knob
by pressing {ENTER} to open up the menu. This will break the display down into three
sections EFX Type, EFX Settings Row 1, EFX Settings Row 2. "
To modify EFX Type when the row is underlined press {ENTER} and then rotate {VALUE}. To
exit modify the EFX Type just press {ENTER} again once you are happy with your selection."
To modify EFX Settings Row 1 and EFX Settings Row 2, you only need to rotate {VALUE} to
underline the row that you want to modify and then use the corresponding (CTRL) knob to
change the EFX setting’s value on that row."
By default the EFX Type will be set to Bypass, which indicates that the incoming signal is clean.
There are sixteen EFX that you can select from here, three of which only appear in the Input FX
menu."
Unique FX to Input FX - Auto Pitch, Vocoder, Gt Amp Sim."
Common FX to Input FX - Chorus, JUNO Chorus, Reverb, TimeCtrlDly, Chromatic PS, Downer,
WrmSaturator, 303 VinylSim, 404 VinylSim, Cassette Sim, Lo-fi, Equalizer, Compressor."
For more details on the individual effects, please see the Effects section."
Audio Output
If you’re going to do much of anything with your mk2, you’re going to need to hook it up to
some outputs. I guess you could technically do some field recordings with a microphone and
not hook up the outputs, but this generally seems like an edge case to me."
Line Level
Most gear that has inputs is going to support line level. This is a quite common standard,
though you might need adaptors to adapt the cable type from 1/4” to 1/8”, phono, or other
connection standards."
The L/Mono and R output jacks both provide a panned signal to the L or R channel, neither
provides a stereo signal by itself. So it is possible to only connect to outputs to either the L/
Mono or the R jack, but you will only be getting a mono output."
NearTao’s Guide to the SP-404 mk2
Page 28

"
It is worth checking your gear to make sure it supports line level inputs. For
example, if you want to connect to a DJ style mixer, it will likely have phono jacks
which may mean it takes phono level (and not supported by the mk2), but it may
have a switch to adapt the connection from phono to line level."
You can adjust your line level output relative to gain by going to `UTILITY` |SHIFT|+
[PAD13] then `GAIN` (CTRL3) and select `Line Out` {VALUE} to adjust your line
level output gain from 0db to 12db in 6db increments."
"
The manual states that the mk2 has TRS outputs, which would suggest that the
outputs are balanced. I have not confirmed this yet, and will need to do some
research to determine if they are in fact balanced, or turn out to just be regular TS
outputs."
Headphone
The mk2 has both a 1/4” and 1/8” set of headphone jacks. When you want to use your mk2
with headphones, you don’t have to figure out which jack or adaptor you need to use, just plug
it into the appropriate hardwired jack on your mk2."
If you have headphones with a high impedance, you may want to increase the gain on your
headphones by following the instructions in the info icon below."
Even better, the pair of headphone jacks means that you can have two people connected the
mk2 at the same time, which may open up some interesting audio path workflows for both a
single person as well as a pair of people to get an audio setup off of a single device."
The experiment Do the headphone jack outputs share an amplifier? Indicates
that there is a single headphone amplifier, which shouldn’t be a direct concern,
other than there will be an overall lower listening volume if there are two
connections attached the headphone jacks that is worth being aware of."
Although the headphone and line level volume output are linked, as of the 1.14
firmware release you can adjust the headphone gain relative to line level gain by
-18db to +12db in 6db increments by going to `UTILITY` |SHIFT|+[PAD13] then
`GAIN` (CTRL3) and select `Phones Out` {VALUE} to adjust your headphone gain."
USB
The USB-C audio output on the mk2 is really handy, and is a quick way to get audio from your
SP out to your iPhone, iPad, or computer. Any audio that is going out to your main outs is
automatically also going out the USB-C port. If you are having problems with the USB-C
outputs running too hot, you can lower (but not increase) the relative USB-C output level by
going to `UTILITY` |SHIFT|+[PAD13] then `GAIN` (CTRL3) and select `USB Out` {VALUE} to
adjust your USB output gain from -24db to 0db in 6db increments."
If you send audio to outputs 1/2 from your DAW, it will go through the EXT IN and Input FX
signal path, but if you send audio to outputs 3/4 from your DAW the audio will go straight to
the main outputs on the SP404 mk2.#
NearTao’s Guide to the SP-404 mk2
Page 29

Chapter 5 - Sampling
NearTao’s Guide to the SP-404 mk2
Page 30

Introduction
Sampling and looping was really my own personal introduction into music making, and has
continued to be a core component of most of the music I create and spaces I tend to
experiment in. That isn’t to say that I don’t enjoy synthesis (I do!), but just that there’s a lot of
sounds that can be explored just by sampling something so ordinary, and then manipulating
the sample in ways that can be really delightful. Perhaps to a fault, I find it endlessly interesting
to sample a high pitched sound like a bell or chime, and pitch it down until I have created an
earth shattering gong of doom. So much of our everyday world can feel ordinary, but taking
the time to play around can quickly show us that we’re only limited by our own perspectives,
perceptions, and ways that we approach everything around us."
Sampling
If you’ve got a mk2 and you’re not sampling on it, I guess you’re using it as an FX box, but
that’s missing out on sampling which is arguably the most interesting and fun part of the SP
line. For this section I really just want to break down how to sample, things I’ve learned while
sampling on the mk2, and probably add some notes on stuff that could just work better."
Before you kick off your sampling journey, you’ll want to be aware that the mk2 has two
primary modes, Sample mode and Pattern mode. You change between Sample mode and
Pattern mode by pressing |PATTERN SELECT| to switch between the two modes, and the
button |PATTERN SELECT| led will be dim if you are in Sample mode, and bright if you are in
Pattern mode."
Recording Behavior
'
Before we do a deep dive into sampling, there are some important things to understand about
the behavior of the mk2 when sampling, otherwise you might be confused when things don’t
work quite like you expect."
Input Setting Routing"
The routing setting under `Input Setting` |SHIFT|+[EXT SOURCE] allows you to adjust between
Mix and ExtIn."
"
While it may be obvious from the options listed above, there is no setting to record
only internal sounds (as of 1.14). If you want only record internal sounds on the
mk2 then you may want to disconnect all line/mic/guitar/usb inputs."
Mix
Record all internal (samples/pads) and external (line/mic/guitar/usb) audio
ExtIn
Record only external (line/mic/guitar/usb) audio
NearTao’s Guide to the SP-404 mk2
Page 31

Count In"
The Count In behavior adjusts if the mk2 will add a one bar or two bar metronome
count in, wait for some line level signal, or if it is just off and will start once you
trigger recording."
To change the Count In setting you just press |SHIFT|+[PAD10] and it will cycle between
COUNT-IN OFF, COUNT-IN 1MEAS, COUNT-IN 2MEAS, and COUNT-IN WAIT."
Much of the behavior listed above is really only important if you are recording external samples
as resampling will begin recording as soon as you trigger a sample or pattern."
Record Threshold"
If you have set your count in value to COUNT-IN WAIT, you can adjust the threshold that it will
record in at by adjusting Utility > System > General “Auto Trig Level”."
The value for Auto Trig Level is between 1 to 10, with 1 being the quietest noise starting
recording and 10 being the loudest noise being necessary to start recording."
Metronome"
You can adjust whether the metronome is on or off by pressing |SHIFT|+[PAD9] to toggle the
metronome on and off. There are further options to adjust the metronome in `UTILITY` |SHIFT|
+[PAD13] and then turning (CTRL3) to select CLICK. "
"
Regardless of whether you are sampling external audio or resampling samples/
patterns, if the metronome is turned on then the metronome will play at the BPM of
the currently selected Pattern Bank. Further, the metronome clicks won’t be
recorded as any sampling or resampling activity, so you can always safely turn the
metronome on or off when recording content."
Mono/Stereo Sampling"
As far as I have been able to determine, the mk2 can only sample in stereo, regardless of how
you attach your inputs to the mk2. "
COUNT-IN OFF
Must press |REC| after selecting a pad to trigger the recording
COUNT-IN 1MEAS
Pressing |REC| after selecting a pad will count in one bar before recording
COUNT-IN 2MEAS
Pressing |REC| after selecting a pad will count in two bars before recording
COUNT-IN WAIT
Will begin recording once audio plays over the trigger threshold or |REC| pressed
NearTao’s Guide to the SP-404 mk2
Page 32

If you need to work in mono, your options are to adjust the |PITCH/SPEED| settings for pan by
holding |SHIFT| and turning (CTRL3) fully clockwise for mono right or fully counter clockwise for
mono left, or you can import a mono sample from your SD Card, or your last option is to use
the companion application to drop a mono sample onto a pad."
File Naming"
To see the file name of a sample, you can press the [PAD] and then hold down |REMAIN|.
This will bring up a lot of the metadata information about the sample, including the file name of
the sample. "
File naming so far has been a bit of a mystery to me. When you record onto the mk2 it will
frequently give a name of “New Sample”, but I have seen it pick other names from time to time
which aren’t entirely clear to me, and this may have been adjusted in firmware 1.14, as I have
not been able to reproduce the behavior since firmware 1.13."
"
You can adjust a sample’s filename in the Companion Application. If you have
access to a Windows or Mac this may be the best way to organize and name your
files."
Effects"
While sampling you have the option of using Input FX, Bus FX, and Master FX into your
samples. Doing this is considered destructive, as once you have recorded a sample with FX, it
will always have those FX as part of the sound. For this reason, it may be desirable to record
clean versions of your sounds, and then separate effected versions of the sounds if you feel
you may need to go back to your cleaner audio."
"
Once you sample or resample a sound, the mk2 will disable your Bus FX, but your
Master FX and Input FX will both remain on. This can make things a bit confusing
as if for example you have a compressor on your Master FX, record a sample, and
then play the sample, you will hear a loud whooshing from doubled compression."
End Snap"
This feature was tricky for me to figure out at first, so if it is giving you a hard time, take a deep
breath and read on. "
The first thing to note is that End Snap is an option that is either on or off, and is not a trigger
that actually causes a sample to snap to the end of a bar. So once you are in record mode
whether you are setting things up or actually recording, you can press START/END to turn on
or turn off End Snap mode."
What causes the snap to the end of the last bar is when you press |REC|. The record event is
what will then look backwards and place the End marker to the last previous full bar. I have
had great success waiting until the next bar that I do not want to record starts playing, and
then press |REC| to end the recording."
NearTao’s Guide to the SP-404 mk2
Page 33

Recording
Sample Time Remaining"
I am adding this here because there seems to be an omission in the manual to explain what the
“T:” entry means at the top of the display when you are recording or resampling. To the right of
the T: is a bar, that slowly fills up over time while you are recording. If you’re not recording
terribly long samples you may not have even noticed that it fills up. I have run some
experiments and determined a few things."
The bar will fill up while you are sampling, to the maximum sample time of (for simplicity sake)
16 minutes. There are a total of 30 pixels that represent this bar, and the bar is 16 minutes, or
16 minutes x 60 seconds totals 960 seconds. 960 seconds divided by 30 pixels means that
each pixel width in the bar represents 32 seconds."
Put another way, the maximum sample size is 184,506,412 bytes (and yes I understand some
of this is header information), but that roughly equates to 184,506,412 bytes per 30 pixels, or
roughly 6,150,213 bytes per pixel, or just around 6 megabytes of data per pixel."
Just remember that the T: bar represents the available space per pad, not the drive."
Each pixel width represents:"
* 32 seconds"
* 6 megabytes"
Maximizing Recording Volume"
I’m adding this section because a lot of people have reached out and seem to be having
problems when recording audio and it is coming in lower than they expected. "
First, from experiments that I have run, it appears that no matter what you do to sample, you
will always hit a -3db limit to record in. You will get digital clipping if you try to exceed this limit
through the line in, microphone, or instrument. I suspect that this limit is in place so that you
can still use effects like the isolator, warm saturator, and others without necessarily digitally
clipping. "
Second, I’ve found that frequently the best way to record the highest volume is to use the mic/
inst jack on the front, mostly because the gain knob can give you a bit more boost so that you
can increase the audio levels coming in to *just* before the EXT SOURCE turns red to tell you
that you are digitally clipping. The choice of course is that if you want to record a stereo
sample you are forced to use the line inputs (or USB connection), as the mic/inst jack is mono
only, or you’ll be forced to make two passes at the recording to get a left channel and a right
channel. It can be done this way, but it just isn’t optimal."
Third, I’ll experiment with this more, but I haven’t found a perfect FX setting or set of settings to
get that 3db boost to maximize the incoming audio signal to 0db without coloring the sound. If
you don’t mind a bit of color, definitely try ISOLATOR, WARM SATURATOR, or 303 VINYL SIM
among others, but likely the most straightforward thing to do to get your sample to 0db is to
just normalize it after recording. Obviously if you like a bit of coloring to added to your sample
then go for it, but personally I’d avoid using the compressor or most other options because
you’ll won’t be able to undo the change once it is printed to your sample."
NearTao’s Guide to the SP-404 mk2
Page 34

External Audio"
For sampling external audio, you will want to be in Sample mode (|PATTERN SELECT| led is
dim). Whether you have enabled [EXT SOURCE] or not is irrelevant, as once you start the
sampling process [EXT SOURCE] will be disabled, and monitoring will be turned on."
Once in Sample mode, Sampling in external audio is as simple as pressing |REC|, pressing an
unlit/empty [PAD], and then pressing |REC| to begin recording. This will allow you to record
audio coming in from the line inputs, mic/guitar input, or the USB-C connection. "
As noted above, but just a reminder, the mk2 will mix all audio sources together, so
if you are playing content on the line inputs, mic/guitar input, or the USB-C
connection simultaneously it will record everything. If this is what you want then it
should be cool, but if not, make sure to disconnect or mute the other input sources."
Resampling Audio"
For sampling internal audio (samples that are stored on your pads), make sure that you are in
Sample mode (|PATTERN SELECT| led is dim). The main difference here is that instead of
starting the process with |REC| you will need to start it with |RESAMPLE|."
To resample the content stored on a pad, press |RESAMPLE|, press an unlit/empty [PAD], and
then either press a [PAD] or |REC| to begin recording. Either way will start capturing sound
immediately, but pressing a [PAD] has the advantage of ensuring that the sampling starts lined
up with what is already recorded onto the [PAD]."
One thing to note, you should investigate Pad Mute behavior if you’d like to hear
some pads play, but not have them resampled to the new pad. Pad Mutes can
really open up a lot of interesting resampling techniques that were not available
prior to firmware 1.14."
Resampling for some reason does not follow the COUNT-IN options set, which
makes it difficult to capture some times of content using resampling."
Resampling Patterns"
For sampling patterns (Patterns that are stored in your Pattern Bank), make sure that you are in
Pattern mode (|PATTERN SELECT| led is lit). The process is similar to resampling samples
assigned to pads and starts with |RESAMPLE|."
To resample the Pattern stored on a pad, press |RESAMPLE|, press an unlit/empty [PAD] to
select where to sample, and then press a [PAD] that has a pattern on it to begin recording.
This will record whatever is playing for the pattern into the sample pad, and you can end
recording by pressing |REC| when you have the content that you want."
"
One annoyance with the mk2 when recording a pattern is that when you are
resampling it does not display the bar/measure counter on the display. You’ll need
NearTao’s Guide to the SP-404 mk2
Page 35

to remember the pattern to know when you should stop recording."
"
End Mark is clearly an important thing to use here to sample perfect loops, but my
technique is off, I haven’t been able to determine if you press |START/END| before
the end of the loop, just after, or something else… the timing always seems OFF to
me."
Managing Samples
Copying"
To copy a sample press |COPY|, press the source [PAD] to copy from, the target [PAD] to copy
to, and finish by pressing |COPY|, and this will make an exact copy of the sample and all of the
settings associated with it "
Deleting"
When you make a mistake, or no longer need some recorded content, you can delete it by
pressing |DEL|->[PAD]->|DEL|. This will remove the sample associated with the pad from your
mk2."
Protect"
In some cases you may have a sample that you want to make sure you do not accidentally
delete or overwrite in some way. "
Pressing |SHIFT|+|COPY| enables and disables protect for the currently selected bank. There
is no way to protect a single file."
NearTao’s Guide to the SP-404 mk2
Page 36

Sample Edit
A lot of what is under the SAMPLE EDIT banner on the mk2 is geared toward what I would refer
to as sample playback. To me, editing is something you do that destructively changes the
characteristics of the sample, and not just changing how the device plays the sample back.
Mostly a nit, but I find that it confuses the terminology for people coming from or going to a lot
of other devices. At any rate, you’ll find the handful of sample editing features that are
destructive in the Start/End menu, everything else that you want to do to manipulate or change
the actual sample itself you will have to do through Skip Back, Resampling, or offloading to
other devices, which I’ll go over in the appropriate sections."
To use the Sample Edit features you will need to be in Sample mode. You change between
Sample mode and Pattern mode by pressing |PATTERN SELECT| to switch between the two
modes, and the button |PATTERN SELECT| led will be dim if you are in Sample mode, and
bright if you are in Pattern mode."
To edit a sample, you will also need to select it, either by pressing the [PAD] which trigger the
pad, or holding {ENTER} on the value knob and pressing a pad which will only select the pad
without triggering it."
Pressing |EXIT|+[PAD] will stop the pad from playing if it was already playing."
Start/End
On previous SPs, the |MARK| button was important for setting your start and end points, and
really force you into using your ears to listen to samples. You can still use |MARK|, but the
display certainly helps out a lot. The advantages of having a display to adjust start, end, and
loop points visually cannot be denied, but it can make it harder to dig around for happy
surprises. All of that is to say “don’t forget to close your eyes and use your ears once in a
while”. "
On the mk2 the |START/END| button is where you go when you want to adjust your start, end,
and loop points of whichever [PAD] you have selected. You’ll be treated to the display
changing to a visual representation of the sample. Depending on the length of the sample will
depend on how much time it takes to finish the display update for drawing the sample, but you
can adjust your start, end, and loop points while it is rendering out the waveform."
The section in the SP-404mk2 Reference manual “Editing a Sample (SAMPLE EDIT)” outlines
controls much further, but bellow are a few of them captured"
Hopefully the start and end points of the sample are straight forward, but START determines
where a sample will start playing when you press a pad, and END determines where the
sample will stop playing when you press a pad. "
(CTRL1)
Adjust the start point of the sample
(CTRL2)
Adjusts the loop point of the sample
(CTRL3)
Adjusts the end of the sample
|SHIFT|+{VALUE}
Enter numeric value of the selected point (start/loop/end)
NearTao’s Guide to the SP-404 mk2
Page 37

If you have |LOOP| enabled (as documented in the Sample Mode section), then an additional
option for LOOP can be controlled, which determines where a sample will start playing from
once it has reached the END point to continue playing. This allows for the entire sample to
repeat if you set the START and LOOP point to be the same and is important for beats or other
BPM timed samples, or you can set the LOOP point to some point after START which can be
useful for sustaining sounds such as pianos or strings that you may want to play longer than
what you have for sampled content."
You can adjust the behavior of these knobs to only adjust to sample points with a zero point
cross by pressing |RESAMPLE| to toggle between snapping to a zero point crossing points for
the sample on the timeline and not snapping to a zero point cross. Turing zero point cross on
can be useful when you are finding that your samples have clicks and pops at the start, end, or
loop point, as it will help you find parts of the sample that do not have audio playing at that
part of the sample which is what causes the click in the first place."
The display will only render the left channel of audio. So if you have a sample that
is panned hard right, the display will show a flat line as it does not render any of the
waveform for sample information in the right channel. Just because a sample looks
empty does not mean that it is empty."
Start/End Sub Menu
Once you have entered the |START/END| sample screen, you have the option to make a
handful of destructive edits to the sample by pressing {ENTER} to get access to these options.
These will allow you to modify your sample in various ways, but the changes are permanent. If
you want to try them out, you will likely want to |COPY| the sample first to another pad before
making any of these adjustments."
As of firmware 3.0 if you hold |REMAIN| while making a parameter change, you can update all
of the values for pads in the current Bank. This is a nice feature to bulk edit many samples
without the need to constantly be making Mute Groups to modify samples."
Another 3.0 features is that you can now editing numerical values by pressing |SHIFT|+
{ENTER} on the value knob and then enter the numeric BPM value by using [PAD 1-10]."
Normalize"
Selecting Normalize will increase the maximum volume of the entire sample (not just what is
between the start/end points) to 0db. This is an excellent way to get your audio content to be
louder if it seems very quiet compared to the rest of the samples you are playing."
Personally I try not to normalize every single sample, as this can cause some future work
reducing sample volume later. For example, if you have a drum kit, you may want to increase
the volume of all sounds in relation to each other. Low pitch sounds such as a kick drum tend
to need more volume and so will need to be louder to be audible, while high pitch sounds such
as a high hat tend to need less volume. In other words, normalizing a high hat by itself may
have the unintentional consequence of making it overwhelmingly loud, but normalizing a kick
drum and high hat recorded on the same sample may keep them in a proper volume level in
relationship to one another."
NearTao’s Guide to the SP-404 mk2
Page 38

You may want to truncate your sample before you normalize it if you are trying to increase the
overall volume of your sample, as the content that is outside of the start/end points may be
louder than what is in between your start/end points, thus preventing normalize from increasing
the sample to maximum loudness."
Truncate"
Selecting Truncate will remove all sample content that is outside of the start/end points, and is
an excellent way to save storage space and keep projects clean. Given the sheer amount of
storage space on offer, this may not immediately seem relevant, but for those who want to
maximize the 16GB of internal storage it will likely be necessary."
Just remember that truncating a sample will permanently delete this sample content, making it
unaccessible to you unless you either re-record the content, or are able to restore from a
backup."
"
Truncation isn’t necessary for a sample to play properly, and it can be useful to
keep the extra information around just in case you want to go back to it. For
example, if you have a drum loop and only need one hit off of it, it could be useful
to keep the rest in case you wanted to explore other sounds in the sample later."
Emphasis"
The manual says it increases high-frequency sound, but I hardly hear any difference in the
audio. I guess I am too old to hear the sound enhancement it is talking about."
Only after using this process four or five times can I really start to hear a difference, and it can
certainly be used to be able to better hear some of the high end content that may be very
quiet. To me though, it feels a bit too heavy handed, and since you cannot control the cutoff of
this effect I’d personally much prefer using any of the built in effects where I can adjust a LPF/
BPF/HPF in order to control just how much high end content I’d like to add."
Further, this is a destructive change. Once you have done the process there is no going back
unless you have made a copy of your audio."
Cancel"
Exits out of the menu."
Pitch/Speed
Being able to change the pitch or speed of a sample can help change the overall tone, help get
two sounds to work with each other, or otherwise explore sounds and hear something new.
One of the reasons I have (too many) samplers is because the approaches and algorithms for
changing the pitch of sound are so varied and it can be really fun to explore the boundaries of
technology."
NearTao’s Guide to the SP-404 mk2
Page 39

A feature I had not noticed prior to the 2.0 firmware update (but may have been there before) is
the ability to set fixed velocity per pad. To set fixed velocity for a single pad, simply press |
SHIFT|+[PAD1] and you will see the text Vel toggle between white and black on the screen."
You can switch vinyl mode by |SHIFT|+{VALUE} to turn vinyl mode on and off. With vinyl mode
on the speed and pitch knobs influence each other so as you increase speed you also increase
pitch, and as you decrease speed you also decrease pitch, similar to how adjusting the speed
on a turntable would change the pitch of the record you were playing. With vinyl mode off the
speed and pitch knobs can be changed independently so that you can play the sample slower,
but at a higher pitch for instance."
Without resampling, the mk2 has a range of -12 to +7 semitones with vinyl mode on, and a
range of -12 to +12 semitones with vinyl mode off. If you choose to resample whether you
have vinyl mode on or off you can really stretch and change the samples that you load into the
mk2. "
As of firmware 3.0 if you hold |REMAIN| while making a parameter change, you can update all
of the values for pads in the current Bank. This is a nice feature to bulk edit many samples
without the need to constantly be making Mute Groups to modify samples."
Another 3.0 features is that you can now editing numerical values by pressing |SHIFT|+
{ENTER} on the value knob and then enter the numeric BPM value by using [PAD 1-10]."
Finally in 3.0, we have the ability to adjust BPM values of samples up to the second decimal
place. You can adjust this by using the {VALUE} knob and changing “BPM SET” to “MANU-F”,
which will give you fine control over the decimal value of the BPM."
Firmware 2.0 has added to new options to manipulate our samples when Vinyl Mode is No.
We now have access an additional parameter Vari-Encode which is labelled (VARI) in the menu,
that can be set to Off, Backing, or Ensemble. When set to off, it has the same behavior of as
before, where as Backing and Ensemble are tuned for specific usages. "
Vari-Encode: Off"
Prior to Firmware 2.0, this used to just be the vinyl mode turned off, but it has now been
broken out to it’s own setting. This is probably the most direct, but also tends to be the
harshest mode for adjusting speed independent from pitch. "
With vinyl mode off and the vari-encode engine off, it gets into more of a heavy artifact and
granular sound especially as you get into the extremes of having either pitch or speed go up
while you turn the other down. I am glad to have the option because it is absolutely great
when you need it, but I’ll stick with vinyl mode on for most of my use cases. It’s something
that is likely best used sparingly or when you have the ability to hide some of the artifacts with
some effects or other elements in the mix."
Vari-Encode: Backing"
The Vari-Encode Backing algorithm is geared towards instruments that have a distinct attack
element, and it seems to work best from my usage on monophonic or very clearly stacked hits
happening at roughly the same time. Drums, rhythm guitar, bass lines, piano melodies and
arpeggios, in general seem to benefit from this algorithm being turned on."
NearTao’s Guide to the SP-404 mk2
Page 40

To my ears, it sounds like it is doing its best to preserve the attack element as much as
possible, and doing processing to help smooth out the sustained and decayed part of the
sound as best as it can. "
When run with a mixed loop however, you will probably find that it creates this kind of rhythmic
pulsing kind of sound for a lot of looped content, especially as you get beyond a roughly
5-10% speed change. Interestingly to me, when changing pitch the audio seems to keep a
more pleasing sound when pitching down, but it does pick up a bit of a resonant or ringing
kind of sound as you pitch a loop or sample up. Beyond using this as an effect, it is unlikely
that you will want to use the Backing mode for a lot of more complex or sustained loops and
sounds."
Vari-Encode: Ensemble"
The Vari-Encode Backing algorithm is meant more for sustained sounds that have a lot more
similar content to them. It is meant to target things like piano chords, sustained strings,
ambient guitar washes, or long bass notes. For this space, I find that this mode really shines,
and can do a great job at adjusting the speed to make notes hold longer but keeping the same
pitch. Similar to the Backing algorithm, I suspect that you’ll get your best results when using
monophonic content or basic chords. I have found that doing extreme changes on sustained
content with an additional arpeggiator playing in the background doesn’t seem great."
For my usage, I can see getting a lot of notes that just aren’t quite long enough to sustain just a
bit longer so I can transform content to be useful for whatever patterns or jams I am putting
together. I imagine that this will be equally impressive for the same reason when you are
chopping up sampled content and just need to fix a note or two, especially when ping pong
just isn’t cutting it."
I find that this mode is worth trying if you are attempting to time stretch some mixed content
loops. Changing the speed tends to smear out the attack a bit too much, but sometimes that’s
okay and can still lead to some interesting sounds and effects. Adjusting the pitch doesn’t
impart as much of the resonant effect when pitching up, but pitching down can leave you with
a very dark and slightly low pass filtered kind of sound."
Pitch/Speed Sub Menu
This sub menu is hardly worth spending much time on, but it does allow you to detect the BPM
of a sample by giving the mk2 a rough idea of the BPM of the content at hand, by selecting
100-199, 80-159, 70-139, or 50-99. I am going to guess that the mk2 is just using the length of
the sample instead of doing any deep sample introspection, but it could be helpful if you are
intending to do BPM SYNC to get various samples playing at the same speed together."
The BPM detection on the SP404 mk2 is, as far as I can tell, borderline useless. It is
possible to put it into a state where it will come up with multiple incorrect values on
autodetect. I would advise figuring out (or knowing) the BPM outside of the mk2,
and just manually assigning the value as the fast way to move forward with BPM."
Chop
Chopping samples is a pretty big new feature on the mk2, but is something that has been
available for a lot of other samples for some time. On previous SPs you’d have to copy pads
NearTao’s Guide to the SP-404 mk2
Page 41

and make adjustments, or in the case of the 202 offload a sample to another device so you
could then sample it back in."
Chopping allows you to take one long sample, and split the sample up across multiple pads to
play as distinct parts of a sample as individual pad hits. This can be anything from a single
drum hit, a piano chord, a phrase or two of a song, really anything that you want."
The first thing to know about the Chop mode is that it doesn’t respect your start/
end/loop points. You are free to chop content of the entire sample, not just what
you set for parameters in START/END. If you want to only chop on what is
between your sample’s start and end, then don’t forget to TRUNCATE."
As of Firmware 3.0, an interesting side effect of the DJ Mode changes is that chopping now
allows you to save up to 16 chop markers as part of your sample, and these marks are saved
when you press |EXIT|. You can recall these chops simply by entering back into Chop mode.
This creates some interesting opportunities like letting you chop a sample, but only export
what you need, and if you keep the sample around you can come back to revisit it to extract
other chops you may want later without having to do a lot of work to rechop your sample."
Since we can now save markers in a sample, we now also have a way to delete markers in the
sample. Simply press |SHIFT|+|DEL| while in Chop Mode, and it will delete all of your markers
from the sample if you no longer want them."
I don’t want to do a deep dive on chopping at the moment, because there is so much to it and
it is pretty well explained in the manual. Instead of duplicating what the manual says (for the
time being), I wanted to focus more on what a few workflows of chopping samples looks like."
The short overview of the controls are as follows:"
Each Mark will be assigned a new pad Starting with [PAD1] through [PAD16]. You cannot have
more than sixteen chops on the mk2."
Lazy Chopping"
This is what you get as soon as you load up the |SHIFT|+|START/END| Chop mode."
Okay, this is not what the SP calls it, but it’s what I’ve always seen it referred to as on MPCs.
Essentially you play a pad to start a sample, and then each subsequent pad you hit will set a
marker for where the previous pad ends and the next pad starts. If you’re halfway decent at
this it can be a really quick way to just knock out an eight or sixteen bar sample into distinct
pads. I also like this style because it can give you some happy accidents where things are
chopped up perfectly. This is a great way to break down drums, pianos, pads, or anything that
you want to get close to how you feel the flow of the sample. With the display, you’ve also got
the option for getting far more accurate with the chop point positions if you want, it just
depends on how much time you want to invest on your chops."
(CTRL1)
Move the chop point.
(CTRL2)
Move the currently selected Mark (M with a line above and below it)
(CTRL3)
Cycle through Mark points
|MARK|
Create a Mark at the chop point
NearTao’s Guide to the SP-404 mk2
Page 42

This method tends to work best on samples that have a shuffle, don’t adhere to strong BPM, or
other kinds of live content that you cannot rely on using Auto Mark to select Time Divisions.
Creating Marks by playing sloppy, or intentionally with the volume off can be a good way to
find interesting chops. Sometimes you’ll get a chop that is between note changes, creates a
gated stuttering drum, or other interesting sounds. As I mentioned, you can absolutely make
these perfect, but don’t forget to look for the beauty in weird chops as well."
Time Division"
You’ll find this under the Auto Mark {ENTER} sub menu, and it will allow you to chop a sample
into precise equal sizes. This can be great if you are working with electronic content, or don’t
mind chopping on major beats to avoid/maintain issues with beats shuffling. Similar to Lazy
Chopping, I’d suggest also giving it a try to use odd or wrong Time Division parameters, as it
can expose some new ways to play sounds and build patterns. "
Use this in particular for drums, or anything that maintains the beat/rhythm to the BPM. And
don’t be afraid to get creative. Instead of taking a one or two bar loop and chopping it up, it
can be just as effective to take an eight bar loop, and break it down to eight one bar loops. It
all comes down to how you want to approach the content and what you are trying to do with
the samples."
With practice you may be able to get this to work with time signatures other than 4/4. For
example, with 3/4 content, instead of selecting a time division of 4, 8, or 16, you may find that
a Jazz loop may work with 3, 6, 9, or 12. Just give it a try and see what does and doesn’t work
for you. If you get stuck, don’t forget to go back and try using the Lazy Chop method to tap
out the pads by hand."
Level"
Level is also found under the Auto Mark {ENTER} sub menu, and adds a marker at each
location where the volume of a sample exceeds a certain level."
Personally I’m not as much a fan of this method, only because for some types of content it is
going to put the marker after the attack has started. For example, pads that have a long swell
or reverse cymbal crashes will put a marker at the loudest part of the sound. Sure it gets you
in the ballpark, but you’re likely to spend a lot of time fiddling with the marker points so that
you get the right start and end of a sound. I’m also not convinced that 1-10 leaves enough of a
range for catching sounds, but you may find this works well for you. "
Complaints aside, if you are struggling to get decent chops, this is a method that can give
some meaningful results by just trying a few different values. I’ve found a setting of 3 or 4
tends to give the best results."
A setting of 10 is going to be the most aggressive, and will almost certainly not have enough
pads to capture everything, but can lead to some tiny snippets of content that might be
interesting to loop or otherwise break down and turn into tight rhythms or tones for a song. "
NearTao’s Guide to the SP-404 mk2
Page 43

Transients"
Transients will add markers where there is a significant volume change, and in particular can be
good for content like drums where kicks, snares, and high hats tend to play on their own, or
have distinct enough events that you can have meaningful separation of the sounds."
Where Level is chopping on the loudest part, transients is more aligned with the start of the
attack of the sound. The chopping parameters for Transients is Hard, Mid, and Soft, and
corresponds to how quick of an attack each sound in the sample is. Hard tends to work well
on drum loops and pianos, while soft can be better for more subtle transient changes in pads
or other instruments that tend to slowly build up into a sound."
Saving Markers"
When you press |EXIT| to leave Chop mode, it will save all of your markers. This is useful to be
able to go back to your chops in the future, and extract different samples. You can also use
the first 7 markers in DJ Mode, as they will carry over from Sample Chop mode to DJ Mode
when you place one of the 7 available chops for the track loaded into your DJ Mode slot."
Chop Value Sub Menu
Auto Mark"
Auto Mark gives you three different options for chopping up a sample: Time Division, Level,
and Transient. These map pretty well to other samplers, so if you are familiar with chopping
elsewhere then you’ve probably used something comparable to one of these modes."
Overall, given the sixteen pad limitation I’m okay with the limits at work here, but
people who are coming from more complex samplers like an MPC are going to be
underwhelmed at how limited the SP chopping methods are in comparison. The
SP will force you to work with smaller samples to chop, or longer chops."
Assign To Pad"
Assuming you’ve gotten your sample chopped, this is where you need to go in order to get
those chops laid out onto pads. The method is pretty straight forward, but I found it a little
wonky at first."
Before you enter Assign to Pad mode, make note of the pads you want to export. If
you only want a single kick and snare out of a drum loop, remember which pads
they are on. [SUB PAD] would be a perfect way to play each marked chop here,
but you *cannot* listen to the pads once you are assigning them."
With the warning (and request for this behavior) out of the way, we can move forward. (CTRL2)
allows you to select which chop you want. If the chop is left with a “- - -“ then it will not be
assigned to a pad, and to assign a chop to a pad just use (CTRL2) to select the chop and then
NearTao’s Guide to the SP-404 mk2
Page 44

press [PAD] to assign it to an available pad. Once you are done you just press {ENTER} to
commit."
Using the drum loop example, if you chopped a drum loop to eight chops, and you only
wanted the kick that was on chop 1 and the snare that was on chop 3, you just use (CTRL2) to
select chop 1, and assign the kick to [PAD], use (CTRL2) to scroll passed chop 2 and go
straight to chop 3, then press the [PAD] to assign the snare."
Delete Chop Pad Assignment"
It’s not well documented in the SP404 mk2 manual, but when you are in the process of
assigning chops to pads, you can select a chop with (CTRL2), and press |DEL| to remove the
selected pad assignment. I won’t go into how many times I felt like I was fighting with the
interface to change a chop assigned to one pad and tried to assign it to another, when I really
should have been pressing |DEL| and then assigning the chop to a new pad."
Once I spent some time with Assign To Pad it wasn’t so bad, but coming from the MPC I was
definitely over thinking how capable the Chop mode was. Although it may be fairly bare bones,
it is still a great feature addition from previous SPs."
Delete All Marks"
This option will delete all of the Marks that you placed in chop mode, so if you’re not happy
with where the marks are and how they are chopped you may want to just delete all of them
and start over."
Cancel"
This option will cancel you out of the menu as per usual."
Envelope
The envelope on the SP is pretty basic, and it can only be used to adjust the volume of the
sample. If you have dreams of modifying pitch, frequency cutoff/resonance, speed, or other
features, you’re not going to find it here (at least as of 1.14). "
As bare bones as the mk2 envelope is, it has an AHR (attack, hold, release) instead of an ADSR
(attack, decay, sustain, release). The AHR setup does map well to the 3 control knob scheme,
but I cannot help but wonder what may have been here. It is useful enough for some basic
sound sculpting, and for my usage has been what I go to for eliminating clicks and pops from
the start and end of samples."
As of firmware 3.0 if you hold |REMAIN| while making a parameter change, you can update all
of the values for pads in the current Bank. This is a nice feature to bulk edit many samples
without the need to constantly be making Mute Groups to modify samples."
For in depth details on the Envelope, check the manual. "
NearTao’s Guide to the SP-404 mk2
Page 45

My biggest complaint about the mk2 is that the Envelope release doesn’t respect the Gate
setting. On just about any other sampler, when you release a pad with Gate, it will play out the
release. Instead, the mk2 just stops playback immediately with Gate on. Roland, please fix
this!!!!!"
Eliminate Clicks and Pops"
If you’re finding that you’re samples have clicks and pops, and no matter how much you adjust
the start and end points they continue, you may want to go into envelope to fix this."
Frequently by applying an Attack of 1 and a Release of 1, I have found that it will
quickly reduce or completely eliminate the clicks and pops without much of a
noticable change to the audio."
Adding Expression"
The options with the AHR are a bit limited, but if you have a sample with Gate on, leveraging
Attack or Release can be a way to have a sound change a bit more depending on how long
you hold it."
As an example, I have recorded some high hat loops that play three or four high hats. With
Gate turned on I can then have some control over the volume of the hi hats based on how long
I hold down the pad, and can get some interesting sounds by cutting the sample playback
short."
Simultaneous Edits
The mk2 allows you to edit a number of parameters simultaneously to pads assigned to a mute
group. To select the group of pads you want to edit together you must first assign them to a
mute group, and the mute group is only necessary for performing the action so once you have
performed the edit you can remove all pads from the mute group if desired. To act upon the
mute group simply hold down |COPY| and adjust one of the parameters in either the PITCH/
SPEED or ENVELOPE menu."
When in the PITCH/SPEED menu you can adjust Speed, Pitch, Volume, BPM, BPM SYNC,
GATE, LOOP, or REVERSE. When making these changes while holding down |COPY| you
should see the value of all pads in the mute group change to the same value."
When in the ENVELOPE menu you can adjust Attack, Hold, and Release for all pads in the
mute group. When making these changes while holding down |COPY| you should see the
value of all pads in the mute group change to the same value."
Copy
To copy a sample on a pad, press |COPY|, then press [PAD] to select the source pad, press
[PAD] to select the destination pad, and finally press |COPY| to execute the copy operation.
This will copy the sample and all of the associated settings to the new pad."
NearTao’s Guide to the SP-404 mk2
Page 46

As of firmware 3.0, we can now also copy samples between projects. When you enter Copy
Mode, you can use (CTRL 3) to select a target project to copy a sample to. This is so cool and
helpful for digging for samples."
Further, you can now even copy a bank to another project by pressing |COPY|+|EXIT| and
selecting a target project by using (CTRL 3)."
Delete
To delete a sample and the associated samples on a pad, press |DEL|, then press [PAD] to
select the pad you want to clear, and finally press |DEL| to execute the delete operation.#
NearTao’s Guide to the SP-404 mk2
Page 47

Sample Mode
Sample Mode is mostly settings that control how a sample is played back, and in some cases
can have an immediate change to a sample that is currently playing. None of these sample
settings are destructive, and with the buttons on the mk2 allow you to quickly change these
settings with the press of a button."
BPM Sync
BPM Sync allows you to toggle if a sample plays based on the PITCH/SPEED setting, or
instead if you are going to play the sample in relationship to the speed of the BPM that is set.
Typically you are going to want to turn on BPM Sync to get one or more loops to play in time
to a BPM. Clearly, if you’re not concerned with timing or a BPM, then BPM Sync is probably
going to be a less interesting feature for you."
A few things to consider though, a sample such as a One Shot that is a distinct sound, such as
a Kick Drum, doesn’t inherently have a BPM by itself, so setting a BPM for a single hit or single
note doesn’t necessarily make sense. For content that is rhythmic or looping in nature you are
going to want to properly set the BPM of a sample before you enable BPM Sync, because
otherwise it will not play in time properly to your patterns or other BPM Sync’d material.
Generally speaking BPM Sync only really makes sense for a sample that is a loop, so that it
can be repeated many times."
If you have drum loops, sustaining pads, or instrument progressions BPM Sync can
help you keep everything playing in time. For instance, many modern loop libraries
will tell you what BPM a sample is played at in the file name, and if you import
these samples you can then go to |PITCH/SPEED| and press {ENTER} to set BPM."
Gate
The Gate setting effects how playing a pad will influence playing a sample. This can be a good
way to give an additional amount of expression to a sound so that you could adjust how long
the sample plays for."
With |GATE| lit, the sample will play as long as you hold the pad down, until the end of the
sample. When |GATE| is unlit, the sample will play out until the end of the sample once you hit
the pad."
For short samples like closed hi hats, it may be hard to notice any difference
between |GATE| being lit or unlit, but it can be possible to take an opened hi hat
sample, and play it quickly to simulate a closed hi hat, and then hold then pad
down longer to let the full open hi hat sound play out as a one shot."
Although I will set Gate on and off based on what I am trying to accomplish with a sound, I find
it to be an incredibly expressive way to get more range out of a sample wether it is a single
sound, several sounds played one after another, or a loop. In all of these cases you can use
Gate to determine how long the sample will play out for, and it can open up a world of options.
Besides the opened hi hat, I’ve used Gate on spoken words, bass patterns, swung drums to let
additional notes through from time to time, and creating interesting rhythms with noise
samples. "
NearTao’s Guide to the SP-404 mk2
Page 48

One Shot Playback
Firmware 3.0 added a new mode, that allows you to trigger a sample once, and then it will play
until it has ended playback. You access this new mode by holding {ENTER}+|GATE|, and you
will know it is engaged when you see the |GATE| button slowly blink on and off. This new
feature is useful for letting longer loops playing during a pattern, and it can also be helpful to
avoid the issue where you have a loop playing, and it starts playing, then stops when a pattern
loops around and the event retriggers and stops the loop from playing."
Loop
The Loop setting determines if the loop will sustain indefinitely when on, or just play through a
single time when off. At the surface, if you load up multiple loops all at the same BPM (or
setup with BPM Sync), you could theoretically trigger them on and off and they will all stay in
rhythm forever. Another option to explore with loop is to sample sustaining sounds, find loop
points, and let the sound play for as long as you would like."
Another option for loop is to record content that doesn’t have a distinct BPM, and just different
independent loops to create evolving sounds. This can be as simple as recording off several
distinct sounds, enabling loop, and then triggering the loops as you wish."
With Gate on, the loop will play repeatedly as long as you hold the pad down."
With Gate off, the loop will play repeatedly until you trigger the pad again, which will
stop the loop from playing."
Ping-Pong
Ping-Pong is an alternative behavior to Loop, that is accessed by pressing |SHIFT|+|LOOP|,
and the mode is indicated by the |LOOP| blinking instead of staying lit. With Ping-Pong
enabled, the loop will play forward, then play in reverse, and will continue this back and forth
pattern until the Gate conditions to end are fulfilled similar to Loop. "
Ping-Pong has a number of creative uses, and can frequently be used for smoother volume
and pitch transitions for content that isn’t inherently rhythmic. Pads for example can often be
extended in playtime by enabling Ping-Pong strategically to get a sound to seamlessly go from
playing forward to reverse without the listener noticing."
I have also found Ping-Pong to be a life saver when having chopped up a sample
into distinct parts that live played content in particular may have subtle variations in
a chopped segments length. While you can get some mileage out of time
stretching to length a note, sometimes a Ping-Pong deployed strategically can
blend a chop much more nicely."
Reverse
Reverse is pretty straight forward, and just determines if a sample will play forwards or
backwards. It may not sound particularly fancy, but it can create some interesting effects to a
sample quickly, and who doesn’t like a reverse cymbal crash to lead into a drop?"
As of firmware 2.0 there is a setting Reverse Type under Utility -> System -> General where you
can set reverse type to either 303 or 404. With a setting of 404, toggling REVERSE will change
the direction of the sample and restart playback from the start or end of the sample. With a
NearTao’s Guide to the SP-404 mk2
Page 49

setting of 303, toggling REVERSE will change the direction of the sample and restart playback
from the position of the sample where it is playing."
By using the Reverse Type 303 you can do some fun extended or even infinite playbacks of
loops by changing the direction of the sample for as long as you would like."
Roll
When you hold down Roll and press a pad, it will play the note in 1/2, 1/4, 1/8, 1/16, 1/32, or
1/64th notes adjusted by pressing |SHIFT|+|ROLL| to cycle through the roll setting."
Oddly, Rolls are not recorded into pattern mode, so are only really useful for either
resampling or adding a Roll to a pattern that is not permanent. This feels like an
oversight, and I do hope that this is something that is able to be recorded into
pattern mode in the future."
Mute Groups
To enter Mute Group mode, press |SHIFT|+[PAD8]. Mute Groups allows you to group pads
together so that if any pad in the group is played, it will end the other pad in the group from
playing. There are ten mute groups, allowing you to setup several different Mute Groups for
different purposes in your project."
For me purposes, I will frequently use a Mute Group to take a sample that has a lot of content
in it, that if I played multiple pads at the same time, would trigger too much sound. "
An example of this would be taking a house drum loop, that plays a kick on ever beat, a snare
on the 2 and 4, and a hat on every eighth note. This will typically leave you with chops that
play a kick/hi hat at the same time, a kick/snare/hi hat at the same time, or a hi hat at the same
time. Given the combinations, it is very unlikely that you will want to play and of these three
sample types at the same time, so you may want to place all of these chops into the same
Mute Group."
I’ll also reach for Mute Groups when I am working on an instrumental for a song, which may
have a bass, piano, and horns, playing at the same time. There is a lot of harmonic content
playing, so frequently when you chop this up you will only want one pad playing at a time so
that you do not have all of the sounds playing together."
Pad Link
To enter Pad Link mode, press |SHIFT|+[PAD7]. Pad Link allows you to assign multiple pads
to a group, so that when you trigger one pad, it will trigger multiple pads at the same time.
This can be useful for stacking sounds together to create a bigger sound, such as playing two
or more kick drums at the same time, or using this to play chords if you setup your Pad Links
to trigger multiple different note assignments for a sound."
Personally I will frequently reach for Pad Link when I find a sample that is okay, but needs to be
punched up a bit. For example, I may have a Kick drum that I like, but it is lacking in the low
end. A quick solution can be to load up an 808 bass onto a pad, assign both the Kick and 808
to the Pad Link so that they both trigger at the same time, and then I can tweak and adjust
both pads individually until I get them to work well together."
NearTao’s Guide to the SP-404 mk2
Page 50

Another usage of Pad Link is with loops, as it allows you to trigger sets of loops together at the
same time, so that they will all start and end in time with each other. This can be useful when
for example you have several layers to a song, and it is important that they are all in time.
You’ll find that some loops may be okay out of time and effectively give some swing to the
song, while other more rhythmic portions may be important to stay in tighter time with each
other."
Pad Mute
To mute a pad, press |SHIFT|+|REVERSE|+[PAD] for the pad that you want to mute. This will
mute the pad until you press |SHIFT|+|REVERSE|+[PAD] again, and can be a great way to
create different sections and versus of a song without having to create multiple new patterns or
make multiple Pad Links to create the variations. You will know that you have enabled Pad
Mute because the pad will light up red."
Typically when I make a pattern, I will make multiple copies of the pattern and make small
adjustments or add in different sounds. Pad Mute can help take some of the burden off of
having to copy so many variations because if you want to drop off the hi hats for example, it is
as simple as pressing the button combination to mute the specific sound or sounds so that
they no longer play, until you choose to unmute them."
I have found that Pad Mute also works well for loops and long running samples, allowing you
to mute a sound from playing by muting the pad while you don’t want it to play. It doesn’t
matter so much if the pads are in sync or not, but you will want to remember that this is a hard
volume off for the audio and may sound harsh if not used appropriately."
Timing can be important if you choose to use Pad Mute, at the end of a bar or as part of a drop
it can be an effective tool, but if you’re not able to time it well within the context of the song it
may be confusing to listeners as they hear a sound start to play and then just drop out."
A neat trick that was also added into firmware 1.14 is that you can have Pad-muted
samples monitored to your headphones by going to Utility -> General -> Pad MUTE
-> Master (instead of MasterPhn). This can make it much easier to record
variations of loops from patterns or other sources, or play to existing tracks."
Pad Stop
To stop a pad from playing, the quickest way to end it is to press |EXIT|+[PAD]. This is
particularly useful when you have turned Loop on and Gate off, and the pad keeps triggering
when you press it."
Chromatic
Chromatic mode allows you take a sample and play it chromatically across all of the 16 pads
by pressing |SHIFT|+[PAD4]. This can allow you to play out some melodies or tap out some
scales from a single sample. Better yet, with the 2.0 firmware update, we now have the ability
to record chromatic mode into patterns, as well as having the option to play notes
polyphonically to construct chords if we would like."
!!! I still think it is important to note that there are plenty of use cases where you may want to
make multiple copies of a sample to make your own scale, but it definitely is nice to see the
additions to chromatic mode."
NearTao’s Guide to the SP-404 mk2
Page 51

Chromatic mode has two new play styles to let you take advantage of how you want your
samples to sound. The mk2 can switch modes by pressing the |REMAIN| button and we have
the original mono mode, as well as the new legato and poly modes. "
Mono mode is what the original firmware supported in chromatic mode, and you were only
allowed to play one pitch of your sample at a time. You will know you are in Mono mode if the |
REMAIN| button light remains lit a solid color. When you play a different pitch of your sample
the previous playing sample is stopped so that the new sample can begin playing."
Legato mode is similar to mono mode, where you can only play one sample at a time, but
instead of stopping the sample and playing a new sample, instead the sample continues to
play but the sample is pitched up to the sound of the new sample. You will know you are in
Legato mode if the |REMAIN| button slowly pulses on and off."
A fun use I have found for legato mode is to take a loop, turn vinyl mode off, and then with
legato mode turned on you can keep changing the pitch of the sample and it will continue to
play at the same speed it was playing before."
Poly mode allows us to play chromatic polyphonically, or in other words, play two or more
notes at the same time. This can be useful if you want to create some chords very quickly,
without having to resort to resampling or other workflows that might slow you down. You will
know you are in Poly mode if the |REMAIN| button quickly flashes on and off."
If you’re going to use poly mode, I would suggest experimenting with the different vinyl and
vars-encode algorithms under the |PITCH/SPEED| menu to see what sounds best to you for
the content that you are working with."
Chromatic mode has also introduced the ability to work with keys and scales. You can change
your scale by pressing the {ENTER} on the value knob to cycle between Chromatic, Major,
Minor, Dorian, and Phrygian. To change the key, you hold the |ROLL| button and rotate the
{VALUE} knob to set the key that you want to work in, and this will light up the corresponding
pads on your mk2 that would be valid notes to play in the selected key and scale."
!!! Setting both the key and scale only really makes sense if you have tuned your pad to a C
note, otherwise all of the pads that are lit up are going to be wrong, and are may not sound
right with the rest of what you are playing. If you are planning on just playing by ear anyways,
then don’t worry about turning your sample(s), and just leave the scale set to Chromatic."
Fixed/Velocity
I’m lumping both the Fixed mode accessed through |SHIFT|+[PAD1] and 16 Velocity mode
accessed through |SHIFT|+[PAD2] together, as they are both about adjusting the volume of a
sample."
Fixed Velocity will make it so that any pad hit will be played at the maximum volume. This can
be helpful when you are just trying to playing something out and you want to ensure that you
have consistent levels on it. This can be important when you are playing back a chopped up
loop and you don’t want fluctuations in the volume of the sound that doesn’t come from the
source material."
16 Velocity mode will take the currently selected pad and spread it across all of the pads,
played at increasing velocity levels. This can allow you to play a single sound at a consistent
NearTao’s Guide to the SP-404 mk2
Page 52
level based on the pad you hit. For example, you can play a pattern with full level notes and
ghost notes by playing the appropriate pads to create variations in the velocity."
Cue
There are two ways to send samples to Cue (headphones only). "
Cue mode allows you to send a single pad (no more than one), by pressing |SHIFT|+[PAD3],
this enters Cue mode, and then any pad you press will be output to Cue as long as you hold it.
This feature can be used to quickly listen to different samples if you want to see what content
is on a pad without it going to your main speaker outputs."
When in Cue mode, you can only play samples that are currently not playing.
Samples that are not available to audition will not be lit up. This can limit the
usefulness of Cue mode to some extent, but if you are in the middle of a
performance can be a life saver to figure out what sounds are on your pads."
As of firmware 1.14, you can also send multiple muted pads to Cue. First you need confirm
you have the appropriate setting by going to Utility -> General -> Pad MUTE -> Master (instead
of MasterPhn). This will tell the mk2 to send any pads that are muted to the headphone
outputs instead of the master output. Then, you can toggle pad mutes on and off by pressing
the |SHIFT|+|REVERSE|+[PAD]. This will both mute the pad from the monitors, but also send
the output to your headphones."
Regardless of how you send the pad to Cue, just be aware that it will skip the
effects, so if you want to send audio to Cue that is effected, you will need to
resample the audio so that it has the sounds printed so that you will be able to hear
the sample with the effects."
Bus
The mk2 has two bus effects that you can configure to be either in serial (Bus1 into Bus2) or
parallel (Bus1 is separate from Bus2). The configuration if the busses are in serial or parallel
mode is adjusted by pressing |SHIFT|+[PAD16] to adjust EFX settings. Pressing {ENTER} will
switch between Type A (serial) and Type B (parallel) bus modes."
Regardless of the configuration, you can select if a pad is set to send output to Bus1, Bus2, or
skips the busses be pressing |REMAIN|+[PAD]. Pressing |REMAIN|+[PAD] will cycle between
the currently selected bus and skipping the bus. If you want to send the pad to a different bus
then just make sure that you press [BUS FX] to switch to the other bus."
NearTao’s Guide to the SP-404 mk2
Page 53

Skip Back
The Skip Back feature is pretty much always listening to whatever audio is playing through your
mk2. Any audio that is destined for the Skip Back will end up in a 25 (or 40 based on settings)
second continuously recording buffer, which means that in general, the mk2 can be a decent
end of chain device, especially if you like experimenting with sounds and what to have a fail
safe to try and capture some happy accidents. Although it might not meet every need, due to
the nature of how it works it definitely enables some interesting workflows that were not
available on previous SPs."
Once the mk2 has started “hearing” audio, it will start recording that audio to the Skip Back
buffer, and you will know that there is something in the buffer when you see that the |MARK|
button begins slowly pulsing on and off. To enter Skip Back mode, simply press |MARK| and
you will be brought to a view of all of the contents in the Skip Back buffer that will be up to 25
seconds of audio."
To change the Skip Back sample time between 25 and 40 seconds, go to Utility -> System ->
General and adjust SBS Time from Def to Long. It’s not clear to me why 40 seconds is not the
default behavior or why you might want to have a 25 second skip back buffer instead. Perhaps
an update in the future will enable or disable certain features based on the size of the Skip
Back buffer."
There is setting to control [SUB PAD] behavior under UTILITY -> SYSTEM ->
GENERAL called “Sub Pad Mode” that can be set between Retrig or Skip Back.
Retrig will retrigger the last pad played. When set to Skip Back, pressing [SUB
PAD] will open up the Skip Back interface just like |MARK|. Why is this better?"
The way that a buffer works is that once it is full, it will start overwriting the oldest
data with the newest data. If you try and record 50 seconds of audio into the
buffer, you will end up with only the last 25 seconds in the Skip Back buffer."
You can adjust the Skip Back and how it works in a few fundamental ways. The two primary
changes you make are related to how content does or does not get recorded to the buffer, and
can be adjusted based on your Input Settings and whether you are sending a sample out to
monitor or cue. "
One thing I’d like to point out, that prior to firmware 1.14, Skip Back was practically necessary
for a lot of workflows on the mk2, but with Pad Mutes added, there are better ways to record
some kinds of content. This leaves Skip Back an interesting feature, but I’m going to outline
what I see as valid use cases at this point, instead of covering everything you could possibly
do with it."
Audition Buffer
When you are in the Skip Back buffer, the way that you listen to the buffer is by pressing [SUB
PAD] to trigger the Skip Back to play the buffer contents."
NearTao’s Guide to the SP-404 mk2
Page 54

Save Buffer
Once you are in the Skip Back mode, you save the Skip Back buffer to a pad by pressing |REC|
and then selecting a free pad to save the Skip Back buffer. This is quite fast, and pretty
efficient. "
Routing Behavior
By adjusting routing behavior, you have some control over what content does and does not hit
the Skip Back buffer. This can be important in determining at a high level if you are grabbing
everything coming into and playing on the mk2, or just external instruments. "
As discussed in the Sampling “Recording Behavior” section, there is a routing setting under the
|SHIFT|+[EXT SOURCE] called Routing. When routing is set to Mix, all audio that is sent to
monitor and all input that comes from your Line Inputs, MIC/GUITAR Inputs, and USB-C Inputs
will be mixed together. When routing is set to ExtIn, only audio that comes from your Line
Inputs, MIC/GUITAR Inputs, and USB-C Inputs will be mixed together."
There isn’t any “Internal” only setting, so if you need to make sure you are
recording only internal sounds from the mk2 to your Skip Back buffer, you will want
to make sure to either lower the gain or mute external devices at the source, or just
disconnect them."
Pad Mute/Cue
Don’t overlook Pad Mutes for the Skip Back recording, this is a great way to make sure that
you can still hear some samples play out of the headphones, but that won’t be recorded to the
Skip Back buffer."
If you want to only record some of the pads to your Skip Back, you’ll need to make sure your
routing is set to Mix, and use Pad Mutes as outlined in the Sample Mode section. To adjust
Pad Mutes, press |SHIFT|+|REVERSE|+[PAD] to change muting behavior for each pad. When
pads are muted, the audio will not play to the Skip Back, though it may play out to headphones
depending on your settings."
By using Pad Mutes, you can create some variety to your loops or patterns by
muting and unmuting content, and the Skip Back buffer is a good way to make
several attempts at it until you get the timing right so that you can go back and
extract the best play through."
Edit Buffer
When you enter Skip Back mode by pressing |Mark| you will have a very similar view to what
you would see when sampling editing in the Start/End menu. You’re presented with the option
to set start, end, and loop points with the (CTRL) knobs, you can set gate, loop, and reverse to
adjust playing style, and you can even truncate, normalize, and emphasis a the buffer just like
you would any other sample."
This can be a great way to audition something content that is in the buffer, and if you know you
want it then you can work with it to get it sounded correctly before you save the buffer to a
pad."
NearTao’s Guide to the SP-404 mk2
Page 55

"
I do want to caution people against truncating the buffer. Only because it is a
destructive function, and you are probably better served to just save the buffer first,
and then go about your normal sample editing business because then you can
make copies of the pad in case you ever wanted to go back to the original sample."
Missing Features
Gated Release
This is probably my biggest pet peeve on the mk2. As of firmware 2.0 the Envelope is tied to
the length of the sample, always and forever. If you want to record a tone off of your
synthesizer, use a micro or otherwise short looped sample to extend a sound, well you’re kind
of stuck, because as soon as you lift up the pad, it stops playing. This is not the behavior I
want if I have an envelope with a release, and they really need to add an option someplace so
that you can change the behavior from instant gate stop for the current behavior or a gate
release where when you let go of the pad the loop will play out naturally with the release setting
set in the envelope."
Roland, please fix this!"
Resample Pre/Post Effects
I get the current sampling post effects, but this can cause problems for people resampling no
matter how you set this up, if it is hard coded. I’d like to see an ability to resample pre or post
effects."
Maintain Bus Effects
Every time I resample, the Bus 1/2 gets turned off. I totally get why, because otherwise you
can accidentally double up on effects, but it can also be frustrating for this to happen when I
either want to double up effects, or when I am resampling something that is skipping bus fx,
and it *still* disables them. Again, I get the why this is happening, but I think that a setting or
something should be exposed to change the behavior for more advanced users.#
NearTao’s Guide to the SP-404 mk2
Page 56

Chapter 6 - Mixer and Effects
NearTao’s Guide to the SP-404 mk2
Page 57

Introduction
In some ways there is a lot going on here, and in others, it is kind of basic. If you’re new to
audio signals just know that you can work out how your sounds are being effected, but there
are a number of places that things like volume, effects, panning, etc can modify your sound.
I’ve tried to capture as best I can what it looks like below, but just remember that sometimes
you need to look under the covers to understand what is happening."
On the flip side, if you’ve been working with mixers and buses for some time, there is plenty to
tweak here, but keep in mind that this is a relatively simple implementation in many ways, and
there are bound to be things you’d like to do that at least as of this writing, you just cannot do."
Audio Signal Flow
Alright, first thing is first. Let’s be honest, the mk2 doesn’t really have a mixer. That said,
there’s a lot of places to adjust the volume of your audio, and I wanted to capture it all in one
place to try and make it clear what and where you may want to adjust volume for a sample."
Diagram
The mk2 manual has a nice diagram in the Appendix named “Audio Diagram”. This shows a
view that is important to understand, but I want to break this down a bit different and address
each part in sections. I think I captured most, if not all of what is going on within the mk2."
NearTao’s Guide to the SP-404 mk2
Page 58

Even for the rather simple architectural design of the mk2, there is a *lot* going on here to take
in, and many things that can impact the volume from sample or input, all the way to
your outputs on USB, Headphones, or Line Outputs. "
Getting the right volume of a sample can be hard on the mk2, because there are no
db meters, or anything else within the box to help you. As with many things on the
SP line (and hey, sampling in general), trust your ears. If it sounds good, it probably
is good. Just keep this diagram in mind if something gets hard to trace."
Sample
As usually, to modify a Sample, you’ll want to press |START/END| to enter the Sample Edit
mode."
Honestly, this is pretty straight forward, but a sample does have a volume to itself. Personally I
try to sample everything in, within relation to other sounds, but you don’t always have this
luxury. I guess I just want to help make it clear that you normally want a Kick Drum to be
louder than a Hi Hat. In general, lower frequency content should be louder, and higher
frequency content should be quieter."
I will try and get the Kick and Bass drum to about the same level and I will usually
target around -9db for both. I will then balance other percussive content around
this, but I’ll usually start at around -20db. For other instruments or sounds, I’ll
target -20db to -30db. This is my starting point, but do what works for you."
Just be warned, if you’re struggling to get a sound loud enough in relationship to
other content, you may want to run it through a normalization process. This is
destructive and almost always will require decreasing the volume someplace else in
the process though. This is usually my last resort."
Alright, so maybe it’s not a bug… but Roland, please give us more than just
Normalize, being able to adjust a sample in increments is a basic feature just
about anywhere else, and would help keep making volume changes to single
spaces as necessary."
If you’re getting clicks and pops on your start and end of a sample, I would start here, and do
my best to try and find as close to a 0 cross point as possible. I haven’t really been able to tell
how sticky the mk2 is to 0 point crosses, but if you zoom in far enough you can frequently get
close enough. This is definitely important to find when you get into looping a sample, as it may
be the only sane way to make sure that the loop point and end point match up at a transition
point."
Envelope
To get into Envelope mode, press |SHIFT|+|PITCH/SPEED| as normal."
The envelope isn’t really a place that I would go to for adjusting the volume of a sound, as it is
really more for changing the character of the sound with the AHR. However, it can impact the
volume of a sound, and if you are having volume issues with a sample, I’d definitely take a look
here, as a high Attack, Hold, or Release value can have a significant impact on the sample’s
volume."
NearTao’s Guide to the SP-404 mk2
Page 59

Envelope has been a consistent place for me to go to as well if I am getting clicks and pops on
a sample, and Sample Edit just isn’t cleaning it up well enough. I know I mentioned this
elsewhere, but setting Attack to 1 and Release to 1 has been a very fast way to adjust issues at
least on the Start and End point of a sample when trying to find a 0 cross point in Sample Edit
hasn’t gotten the job done."
PITCH/SPEED
To get into the sample’s Volume, you’ll need to press |PITCH/SPEED|. I cannot be the only
one that finds this a weird place to adjust the volume of a sample, but here it is. "
I’ll be honest, I don’t know if this volume change comes before or after the envelope, but
frankly the nature of how the two work it shouldn’t matter. If I ever get information that
specifies which comes first and it is wrong on my diagram I’ll fix it, but for now the order should
be sufficient for discussion."
To adjust the Volume of a sample, you can change it in this mode from 0-127. A setting of 0
effectively mutes the sample, while a setting of 127 will be the highest the sample can play. If
you’ve Normalized a sample, this is most likely going to be the setting that you want to come
to in order to adjust the volume of the sample in relation to the other samples you are playing."
The Volume change here does not provide gain to a sample. Setting this to 127 will
not make the sample louder than what it was recorded in at. This setting functions
as a pretty straightforward attenuator that will only be able to make the sample play
at a lower level. "
Bank Volume
You can get to the Bank Volume by pressing |SHIFT|+|BANK|. "
The behavior as of firmware 1.14 is a little weird. No matter which bank you select,
it will open up a menu to edit the currently opened bank. Just make sure that you
pay attention to which Bank Volume you are adjusting when making the change."
Similar to the Sample Volume under the |PITCH/SPEED| menu, this setting is from 0-127, and
impacts all of the samples within the selected Bank. Also similar to the Sample Volume, this
can only further reduce the sound, as a setting of 127 will play the samples in the Bank at their
loudest volume, and a setting of 0 will effectively mute all samples in the bank."
With a little organization, or adjusting your workflow, Bank Volume can be an
effective way to adjust many sounds in relationship to each other. Consider having
a bank of drums, then a bank of bass, and a bank of piano chords. With this in
mind you can adjust the Volume of types of sounds in relationship to each other."
Line In
The signal level for your Line Input is best controlled by adjusting the volume on the device that
is outputting. In general, you should set the Volume on your device to be as loud as possible
without clipping ([EXT SOURCE] turns red)."
NearTao’s Guide to the SP-404 mk2
Page 60

Mic/Guitar
The signal level for your microphone and guitar is unlikely to have a gain control, though some
might. The important thing is to adjust the switch to MIC/GUITAR on the front as appropriate
for the device that you are connecting."
Gain Knob
There is a gain knob on the front of the mk2, beside the MIC/GUITAR switch, and this is used
to amplify the incoming signal. Adjust it to taste, but note that you typically want to do this
without clipping ([EXT SOURCE] turns red)."
Attenuator
The attenuator setting off, will not change the value of your line input. With the attenuator
setting on, it will drop the value of the incoming line level audio by roughly -14db."
This is helpful if you have an external device that doesn’t have a gain knob, but
otherwise it is just going to make it hard for you to reach the maximum record
volume. Personally, I would advise having this turned off for most situations as the
main result will make all of your samples much quieter."
Noise Gate
The noise gate is in place on the mk2 to ensure that when there is a sufficiently low signal level,
it will drop the incoming signal to effectively mute it until it hears a sufficiently high level signal
again. For it to do anything you’ll need to turn it on in the settings, which will help ensure that
when the signal is very low you will have a clean audio sample, but it does also impact your
recordings. Personally I’d leave it off for most applications, but if you find you are picking up a
lot of external line noise, definitely consider turning it on in your settings."
USB In
The most important thing to note about the USB input is that it skips the Gain Knob,
Attenuator, and Noise Gate. This is most likely a design decision that was made because only
digital audio is passed between the mk2 and the USB host, and as such it won’t have to
manage noise generated by analog signals."
There’s not a great way to adjust the volume of incoming USB input. Personally I
kind of feel like this is in bug territory, and it is frustrating that allow there is a USB
Out gain, there is no USB In gain. I’ll continue shaking my fist angrily at the sky."
Input FX
The Input FX section can be opened by pressing |SHIFT|+[EXT SOURCE]."
All of the inputs (Line, Mic/Guitar, and USB) pass through the Input FX section. This can be set
to Bypass so that no effects are used, but it can also be used to inject one of sixteen different
effects."
If you are finding that your inputs seem to have an unexpected volume or character
to them, definitely check here to see, and set to Bypass while you try and track
down any possible issues."
NearTao’s Guide to the SP-404 mk2
Page 61

Bus FX
There’s a number of things to know about this section, but I’ll start by letting you know that this
is the first place where you can adjust both the character of a sound, and depending on the
effect, also increase the Volume of a sound over a sample’s original level."
Let’s recap on a few things for Bus FX before we move on."
*
You adjust BUS FX as Serial or Parallel in EFX Settings |SHIFT|+[PAD15] (Type A or B)"
*
You select which Bus you are modifying by pressing [BUS FX]
*
You adjust which Bus a sample is assigned to by pressing |REMAIN|+[PAD] "
The big points to remember is that you can decide if you want to send a pad to Bus
1, Bus 2, or bypass the Bus FX all together and go straight to the Master FX
section."
I won’t be able to cover everything here, but there are effects here that can actually increase
the volume above what a sample was set to. Isolator is able to adjust Low/Mid/High
individually to up to +12db, which can lead to clipping. The Compressor and the 303 Sim are
both able to use compression to increase the overall volume up to the maximum volume,
making them good candidates to get a louder sound out of your samples, but at the potential
expense of reducing your dynamic range (the difference between how loud and how soft you
can play a sound)."
I’m reluctant to dig into too much more in the Bus FX section at the moment, because I’d
rather spend most of the time digging into the details in the Effects section, but depending on
feedback I may add some more content here in the future."
Master FX
The Master FX are useful, but I also find it a bit of an odd duck. You can get into the Master FX
section by pressing |SHIFT|+[PAD16] and you will be brought to a menu where you can select
to use Bypass, or one of the up to 16 favorites. The Master FX are labelled as Bus 3 and Bus
4, but as of firmware 1.14 this is the only way to access them, so you’re not really able to do
much other than set them and forget them, or torture yourself with menu diving."
At this time, I mostly just use the Master FX as something I turn on when I am trying
to put the finishing touches on a track I have recorded, and usually turn it off
otherwise. It is just too easy to forget that the Master FX are on, and adjusting your
audio without realizing or thinking about. Double compression is easy “whoosh”."
The Master FX section is very similar to the Bus FX section, and there are effects that you can
use to boost the overall volume of your audio. Using Isolator or Compressor here is going to
have the same effect on as a sound as it will in the Bus FX."
When something seems to be working a bit weird, or volumes aren’t as you’d
expect for your samples, the Master FX section is definitely an out of the way place
to look, as it is easy to forget that it is on, and you have to specifically go here to
see what the settings are."
NearTao’s Guide to the SP-404 mk2
Page 62

Mixer
The mixer is where all of the audio sections come together and are mixed. As far as I can ell
everything is mixed equally based on each section’s settings. It is unfortunate that you cannot
adjust anything here, I would say that overall there is enough control in previous sections to
manage this. "
The only thing I’d really like to see made available would be some kind of level
meters. A level meter on the Mixer, and strategically placed at the Bank Volume
section would really go a long way towards knowing roughly what the levels were of
your sounds."
Volume Knob
Once the audio gets past the Mixer section, the Volume Knob can be used to attenuate the
output that goes to both your Line Output, USB Output, and your Headphones. Unfortunately
they are both tied together, so to separate them you need to make adjustments in the UTILITY
-> SYSTEM -> GAIN section."
Limiter
After the Volume Knob, the mk2 has a Limiter that will ensure that your audio does not go over
a certain threshold. This is likely somewhere between 0db and -3db, but I haven’t found
anything to clarify this. "
Clipper
Generally you’d use a Clipper to help drive your audio output gain. I’m assuming that the mk2
is doing something like this, but I suspect an experiment is in order here."
USB Out
The USB Out skips the Volume knob and just comes off of the Mixer. As a result, there aren’t
many good ways to adjust the output from the mk2 over USB. However there is one setting
under UTILITY -> SYSTEM -> GAIN called USB Out that allows you to adjust the volume of the
overall output to USB by 6db increments."
Firmware 2.0 added the ability to have USB audio sent directly to LINE OUT without having to
go through the input fx and bus fx sections. You can make this adjustment by going to
UTILITY -> SYSTEM -> GENERAL and changing USB IN from LINE IN which is the default
behavior to MIX OUT if you would like your USB audio to skip your FX."
Line Out
This is your main/monitor line output. It will play anything that is specified to go out to your
monitors (ex. is not Pad Muted)."
Headphone Out
This is your cue output. It is capable of playing cued content and monitored content.#
NearTao’s Guide to the SP-404 mk2
Page 63

Effects
The mk2 has a total of five effects available. There is one input effect that can be used on any
audio that comes in through the Line Input, Mic/Guitar Input, or the USB Input. There are then
two Bus effects that the input and samples can be routed to or bypass, and the Bus effects
can be Serial (one after the other) or Parallel (both are separate). Finally there are two Master
effects that all audio will pass through before going to the outputs."
With this information, if you were using the mk2 as just an effects bus then, you
could technically get up to five effects running at the same time for any content that
is being input. Given the cost of a lot of guitar effect pedals, this might put the mk2
into a reasonable price category just as an FX box."
Unfortunately, there’s no clean way to play your samples through the input effects, but given
that there are only three input only effects, I wouldn’t see this as a big loss. "
Diagram
The Mixer diagram is more detailed, but this view is intending to show at a high level how you
can route audio through your Bus FX (1 & 2) and Master FX (3 & 4) for audio inputs and
samples."
As of firmware 2.0, Roland has added a setting to determine if your samples that are skipping
the Bus FX section should go to the Master FX or if they should bypass the Master FX. This
setting is found under Utility -> EFX SET -> OTHER and is called Dry Routing and has two
settings DRY, and BUS3. A setting of DRY means that samples that skip BUS1/BUS2 will also
NearTao’s Guide to the SP-404 mk2
Page 64

skip BUS3 and BUS4, where as a setting of BUS3 will send the samples directly to BUS3 and
then on to BUS4."
Controls
Settings
Disable Master FX
You can temporarily disable and enable your BUS3/BUS4 effects by holding down {ENTER} on
the value knob and pressing [BUS FX]. This will toggle the routing of samples that are
destined for BUS3 to either bypass BUS3 and go straight to your output or enable the routing
of samples that are destined for BUS3 to go to BUS3."
Effect Types
This table is intended to just show which effects are available for which effect slots of Input FX,
Bus FX, or Master FX. I thought I had seen this table someplace, but the way it is formatted in
the reference manual didn’t quite work for me."
Effect
Input FX
Bus FX (1 & 2)
Master FX (3 & 4)
303 VinylSim
X
X
X
404 VinylSim
X
X
X
Auto Pitch
X
Back Spin
X
Bypass
X
X
X
Cassette Sim
X
X
X
Chorus
X
X
X
Chromatic PS
X
X
X
Cloud Delay
X
X
Compressor
X
X
X
Crusher
X
X
Distortion
X
X
DJFX Looper
X
X
Downer
X
X
X
Equalizer
X
X
X
Effect
NearTao’s Guide to the SP-404 mk2
Page 65

Filter+Drive
X
X
Flanger
X
X
Gt Amp Sim
X
Ha-Dou
X
X
Harmony
X
Hyper-Reso
X
X
Isolator
X
X
JUNO Chorus
X
X
X
Ko-Da-Ma
X
X
Lo-fi
X
X
X
Overdrive
X
X
Phaser
X
X
Resonator
X
X
Reverb
X
X
X
Ring Mod
X
X
SBF
X
X
Scatter
X
X
Slicer
X
X
Stopper
X
Super Filter
X
X
SX Delay
X
X
SX Reverb
X
X
Sync Delay (Delay)
X
X
Tape Echo
X
X
TimeCtrlDly
X
X
X
To-Gu-Ro
X
X
Tremolo/Pan
X
X
Input FX
Bus FX (1 & 2)
Master FX (3 & 4)
Effect
NearTao’s Guide to the SP-404 mk2
Page 66

"
A few interesting things to note:"
4 Unique Input FX: Auto Pitch, Gt Amp Sim, Harmonizer, & Vocoder"
1 Unique Bus FX: Backspin, & Stopper"
"
The 1.14 mk2 reference guide calls out two “VinylSim” effects. This has been
fixed in the 2.0 version of the manual."
Saving Effect Settings
As of firmware 3.0 the mk2 can save the positions of your settings for control knobs 1-3.
Settings on control knobs 4-6 are not saved at this time. To save your settings, simply press |
SHIFT|+|MARK| for 3 or more seconds. This will save the positions for all of your effects, and
they will be saved through power cycles."
'
You can also choose what effect is loaded by default in your MFX slot from a power cycle by
adjusting the setting under UTILITY -> EFX SETTING -> OTHER and the setting MFX TOP is
set to the MFX effect to be loaded."
Effect Descriptions
Instead of going through and describing the effects the same as they are described in the
manual, I’m going to go over each effect, outline what it might be useful for, and any other
notes that might feel relevant at the time."
303 VinylSim"
This is an emulation of the Vinyl Simulation from the SP-303. It sounds good to my ears, but I
have not done a side by side comparison of the effect yet. The stand out feature here is the
compression, as you can dial in how much or how little you would like on the track."
Overall I’ve been happy with the parameters and sound of this effect."
404 VinylSim"
This is an emulation of the Vinyl Simulation from the SP-404. Some people prefer the noise of
this simulation over the 303 and vice versa. A reason you may reach for this effect is because
Vocoder
X
Wah
X
X
WrmSaturator
X
X
X
Zan-Zou
X
X
Input FX
Bus FX (1 & 2)
Master FX (3 & 4)
Effect
NearTao’s Guide to the SP-404 mk2
Page 67

you can adjust the frequency characteristics of the playback, which you cannot do on the 303
simulation effect."
Honestly, you’ve got both, try them both out and see what you like. "
Auto Pitch"
The manual says that this processes the human voice to create a variety of characters, which is
true, but it can also be used on instruments."
I’ve personally used the effect a tiny bit on the mk2, and found it to be suitable for the task. It
compares well to similar boxes with similar auto pitch effects, and if you want to sound like a
robot it does have some room for changing the formant and robot parameters."
Back Spin"
This effect simulates the sound of spinning a record backwards, something that DJs with two
turntables and a microphone would do as an effect to cut between records."
Cassette Sim"
This effect simulates the sound of playing the audio through a cassette tape. All the fine
effects are available including adjustments to the tone, tape hiss, the age of the tape,
distortion, wow/flutter, and tape catches. There is a lot going on, and a lot to like about this
simulation."
Even though I really like the 303 VinylSim effect, lately I’ve found myself reaching for this effect
more when I want to get a bit more of a dirty sound. Maybe it is just because it is new, maybe
because there is more control over the effect, or maybe it is just because it is so good.
Compared to some other tape sims, it’s missing a few features, but because it was kept to six
parameters, I have to say, the probably hit the right ones. Other effects in the chain can pick
up the slack for whatever else you may need."
Chorus"
The chorus effect is frequently a good choice when you want to fill out a sound and use a
sample or sound source to harmonically fill itself out. With the depth and rate parameters you
can go from pleasing harmonic characteristics to spaced out alien noise."
I put this effect in the bread and butter section of effects. It’s always good to have around, but
at this point it is not an exciting effect that people will reach for. Definitely use it to fill out your
melodic, vocal, or other content that could use some voice doubling to make it a bit more
present."
Chromatic PS"
This is a two voice pitch shifter, that allows you to change the pitch for each voice in range of
-24 to +12 semitones. This provides a large range with which to work with, allowing you to
create chords out of a single note."
NearTao’s Guide to the SP-404 mk2
Page 68

I do like this effect for the ability to create some interesting progressions from a single note, but
even if you stick to semitone groups that work, it feels like it frequently creates some
inharmonic or otherwise sour notes. This does feel like an effect that is worth a deep dive
though, and with particular uses may provide some interesting ideas on how to work towards
building out a song."
Cloud Delay"
The cloud delay is a nice granular style effect on the mk2, and seems like an effect that is well
worth exploring to see what kinds of effects you can get out of pads and chords to find some
new shimmering sounds. "
If you are unfamiliar with the effect, it basically takes very small samples of a sound playing
through it, and will then replay them at a different pitch, and density of number of samples
playing concurrently. Check the effect out, you are likely to be able to find something
interesting from experimentation."
Compressor"
The compressor is like most any compressor, it makes everything have a smoother volume
level, and reduces volume variations. Or, in other words, it reduces the dynamic nature of your
audio. This will tend to be a tool you will reach for to help keep a more consistent playing feel
for instruments, but can also be used to make drums or other sounds snap just a little bit more
to increase their presence."
I am a strong believer that a little compression goes a long way. Used sparingly this effect can
give your tracks a bit more oomph, or help an instrument pull up into a piece. Similarly though,
used too much, compression can make everything feel the same in your track, and kill any
subtle emotion from dynamic changes in playing styles. Just be careful with it, and you’ll do
fine."
Crusher"
The crusher is pretty clearly a sample rate reduction effect, and it sounds like it adds a bit of
ring mod to it as well. The filter parameter seems like it is a pretty standard low pass filter, and
the rate adjust how low the sample rate will go. There is even a balance parameter for
adjusting how much the original sound is mixed with the crushed effect."
I usually like this kind of sound, but I feel like the resonance or ring mod parameter needs to be
exposed, because for a lot of content it just feels like it rings a bit too much. It’s not
necessarily an unpleasant sound, but sometimes it just need to be dialed back."
Distortion"
The distortion effect is about as aggressive as you’d want to go in the family of saturation,
overdrive, and distortion effects. "
I’m not sure what it is about this compared to the overdrive, but I feel like I like the tone a lot
more on this effect. Glad that there are options, but this is the one I find myself grabbing more
frequently when I want that distorted sound."
NearTao’s Guide to the SP-404 mk2
Page 69

DJFX Looper"
The DJFX Looper effect will loop over a small amount of audio based on the selected length
parameter. The effect can make for some impactful transitions, but personally I feel like this
effect gets overused on SP songs. Take care people, to only use this effect where appropriate. "
It is good for adding some stutters and glitch effects though, definitely worth practicing with it
to see what you can get."
Downer"
This effect slows down the playback speed of the audio, and has a resonant high pass filter to
further sculpt the sound and to help keep the audio from getting too bass heavy."
'
I find this to be a good effect for creating a darker segment of your track, and depending on
the rate, can add some additional rhythmic and ringing tones to your audio."
Equalizer"
This is a pretty standard three band equalizer, though it doesn’t have quite the granularity of
modern three band equalizers. It operates very similar to Isolator, but instead of having set
low, mid, and high frequency bands, you instead have a bit more control over the bands to be
a little bit more prescriptive on how you modify a sound."
Personally, I’m not reaching for this much. Yes it is more configurable than the Isolator effect,
but if I really need to do heavy EQ work, I’m probably going to want to reach for a dedicated
device to manage the EQ adjustments, and not a six parameter equalizer. Don’t get me wrong,
I am glad that this is here, but unless Roland ever adds the ability to save and name settings so
I can cycle through different favorite settings, this is one that I’m not sure I’ll have the patience
to reach for frequently."
Filter+Drive"
This effect is simply a low pass or high pass filter with overdrive. It can be put to good use to
overdrive a sample, and then pull back either the high end or low end depending on which filter
mode you chose."
It would be an effect that would traditionally be seen in a guitar pedal chain such as an
overdrive followed by a low pass filter, and as such is good for processing guitars, but I do find
it can impart character to other samples such as drums if used sparingly or as a way to create
layers of sounds through resampling."
I do think that this effect could use a bandpass filter as well, but that does tend to
require more parameters than the mk2 has available. If you do want a bandpass,
my advice would be to consider opening the filter all the way up here, and following
up with the Super Filter and use it’s band pass filter."
NearTao’s Guide to the SP-404 mk2
Page 70

Flanger"
A flanger is an effect that plays a signal slightly out of phase and slightly delayed from each
other. The flanger is quite similar to a phaser, but it tends to have more of a comb filter sound
that can produce a bit of a whopping noise. It can make some interesting stereo effects due to
the phase shift."
I’m not sure what else to write about the flanger, it sounds fine, and is another bread and butter
effect especially for a guitar. Check it out?"
Gtr Amp Sim"
This effectively simulates a guitar amplifier. The selection of options is certainly sufficient, and
the parameters on offer are pretty much to the point to allow you to adjust between bass and
guitar sounds."
I find this effect to be good, especially as I don’t have a guitar amplifier or any other hardware
that can directly simulate one. This isn’t likely to blow anybody’s socks off or win any awards,
but for those of you who just need a guitar amp, and don’t want to carry one around, I think
you’ll be pleasantly impressed with what this offers, especially when you consider that you can
stack another four effects on top."
Ha-Dou"
The manual says that this effect generates a wave-like sound, and while this is true, I might
describe it almost as similar to the Resonator effect in that it is making a sound based on your
audio, but both your audio and this effect are mixed together. There is no way to make this
effect 100% wet, so you will always have the audio from the track playing alongside this effect."
So far, I have not really found a solid or consistent use for this effect, but honestly I haven’t
played with it very much at this point. For me it feels like a somewhat inconsistent reverb,
making it a possible sound design tool, but I am not sure what else to do with it right now."
Harmony"
This is a new effect that has been added only to the input fx, and allows you to use the effect
to harmonize with the incoming input signal. It has settings to adjust the root note to
harmonize to and what style of harmonization you want"
Hyper-Reso"
This is a resonator with the manual describing it as creating melodies and bass lines easier.
There is a fair amount of tuning options and ability to adjust the spread, scale and character,
allowing you to really dial in a sound."
I’m a bit on the fence for this effect, as it does feel like it kind of makes everything through it
feel a bit similar. On the other hand I do kind of like this effect, it can give a bit of a dark edge
or bright sheen to select samples, and I suspect, like a lot of other effects, when used
judiciously it can really help strike a tonal character in a few places that are worth investigating.
Overall, I just don’t think it is the effect that you want to push everything through."
NearTao’s Guide to the SP-404 mk2
Page 71

Isolator"
The Isolator effect is a three band boost/cutter. Although you can only adjust volume for the
three bands based on low, mid, and high, it is a quick effect that can allow you to give some
oomph to part of the track while taming other parts that might be a bit too much. "
Although it doesn’t allow you to adjust the frequency bands for the low, mid, and high bands, I
do find this to be a pretty quick and useful effect to change up a sound while playing live."
JUNO Chorus"
This effect models the Roland JUNO-106 and JX series chorus, and although it has limited
parameters compared to the stock chorus effect, it also has a much different character.
Definitely try this out, but due to the limited parameters you’re either going to like what you
hear or you won’t."
I am happy to see the balance parameter here, and I find that this does a lot to help adjust the
tonality of the effect in another dimension that you cannot quite do with the stock chorus
effect. "
Ko-Da-Ma"
This effect is somewhere between a sync’d delay and a reverb, and can add some very
interesting background texture to a track. "
In my uses I have found it to be quite responsive to both bass lines and drum kits, and at larger
values can create some very interesting melodic lines. It is not a go to effect for me, but it is
something that can add some interesting variety and texture and is certainly worth checking
out."
Lo-fi"
The manual says that Lo-fi degrades the tonal character, and while this is true, it isn’t exactly
apparent what it is doing. It sounds like there may be some sample rate reduction, possibly
some sample bit reduction, but the manual isn’t specific on what this effect is doing."
To my ears it does sound good and adds some character to a sound, but you may end up
finding you spend a lot of time adjusting the lofi type, tone, and cutoff without knowing exactly
what it is doing. I place this in that sample and bit rate reduction category, but I do feel like the
manual could have done a better job explaining what the effect is actually doing for at least the
lofi type setting."
Overdrive"
This effect overdrives the sound, and is most likely to be the effect you’ll reach for and
immediately think you made whatever you sampled turn into a guitar. Is this a good thing or
bad thing, it might depend on how hard you push the overdrive."
For me, just like saturation and distortion, I find overdrive to generally be good in moderation.
You can add a lot of sonic character to a sound with overdrive, and can help sounds punch
through a mix, but it can also take away a lot of your available space to place sounds. In the
NearTao’s Guide to the SP-404 mk2
Page 72

end, I tend to find overdrive better when you have fewer elements, and worse when you have a
lot of different elements in a track working together."
Phaser"
The phaser is your general phase-shifted sound effect. It is related to the flanger, but it is a bit
of a simpler effect."
The effect works as advertised, and is one of those bread and butter guitar effects. Try it on
some guitars or melodic content, it is sure to sound quite 70’s to you!"
Resonator"
The Resonator effect allows you to turn your mk2 into a physical modeling synthesizer of sorts.
It uses the Karplus Strong method to simulate plucking strings by playing a sound through it.
This method usually loops a short sound through a filtered delay to generate a string note. It is
a fascinating method, and definitely worth looking into if you’re interested in using your own
effects to achieve similar results."
The first weird thing about this effect is that it is (as of firmware 1.14) only available in the
master effects (bus 3 & 4). "
Reverb"
The reverb effect is your standard run of the mill reverb. It simulates an ambient, room, and
two different hall reverbs. Being able to adjust both the low cut and high cut, as well as pre
delay may make this a reverb that a guitarist might reach for."
What I don’t like about this reverb is that there is no ability to adjust the mix or balance, your
main signal is always on, and you can only adjust the level of the wet signal. This makes it
hard to suggest this reverb as useful for creating large and lush pads because you always have
the full signal of whatever you are running through the reverb. It is a serviceable reverb, I’d just
like to see it able to do a bit more."
Ring Mod"
The Ring Mod effect is typically described as adding a metallic characteristic, and this is no
different here. If you want to make a sound feel more like a bell, brass, or metal plates, this is
the effect for you."
I’ll figure out something else to write here later, but this is just a completely familiar sound in the
guitar space, and I’m not sure what else to write at the moment."
SBF"
This is the sideband filter, and allows you to adjust to a few different filter types, and thankfully
you can adjust the balance from 100% dry to 100% wet, which really opens up more
interesting uses as a sound design tool. The width seems to let you adjust the combs for the
filter, and it definitely has some resonance going on which can produce some subtle to in your
face ringing."
NearTao’s Guide to the SP-404 mk2
Page 73

I find this effect to be quite interesting from a sound design tool, and as an effect that you can
mix in and out to really change the sound of a track."
Scatter"
The scatter effect has several scatter types, that take an audio buffer and break it apart and
play it back into different patterns based on the scatter type. It is similar to the Slicer effect,
but it puts slices of the audio out in a more gated style and can alter the playback direction of
the sound."
I find this effect leads to a more glitchy sound than Slicer, and the depth and speed parameter
can create a variety of tones with the main sound."
Slicer"
This effect slices up an audio source into small pieces, and can create an effect similar to a
gated filter. By adjust the pattern and speed parameter the effect can cover a lot of different
rhythms."
I find this effect to be fairly effective on rhythmic content like drums, but it can be incredibly
effective on sustained sounds like a bass tone or a pad that plays for a long time."
Stopper"
The Stopper effect is only available for Bus 1 and Bus 2, and allows you to get the sound and
quality of stopping a record or a tape. I am sure that the reason this only shows up on Bus 1
and Bus 2 is because the menu diving to turn it on and off would be more hassle than the
effect is worth."
My advice for this effect is to consider only using it on some elements of your track, so that
you still have some kind of rhythm, melody, or other sound playing so that you have a reference
to be able to bring the track back in. Otherwise, once stopper is engaged, you’ll have no frame
of reference for when to disable it and get your track playing again."
Super Filter"
The Super Filter is documented as having an extremely high slope, and the rate of filtering can
be adjust to creating a consistent pumping effect on the audio it is applied to."
With the high slope, I find the effect makes it quite good for use as a filter gate if pushed to the
highest depth. It doesn’t afford any directly interesting patterns, but the rate parameter can get
you some of the way there by adjusting note frequency and changing to dotted or triplets.
With depth, you can get this filter to go from subtle to very extreme. "
SX Delay"
This delay is implemented to work similar to the SP404SX."
NearTao’s Guide to the SP-404 mk2
Page 74

SX Reverb"
This reverb is implemented to work similar to the SP404SX."
Sync Delay"
This effect only appears in the Master FX Bus 3/4 under this name, but the /DELAY/ button the
the face of the mk2 also does the same thing, and is a delay that will be in sync with the tempo
of your currently selected pad bank."
Tape Echo"
The Tape Echo effect simulates having between one and three tape heads on a tape to
produce an echo, and it does allow for wow and flutter to be added to the echo’d sound."
I do like the sound of this effect, but I wish that it allowed you to modify the dry/wet balance
instead of just how much the level was for the effected audio itself. As it stands, it does allow
you to bring the tape echo sound in, and honestly you can use the Cassette Sim effect if you
want to have wow and flutter on your main audio. There are options obviously, but the Tape
Echo and Cassette Sim while sounding similar don’t produce quite the same result."
TimeCtrlDly"
This delay allows you to adjust the time of the delay, and although the pitch is going to change
while you are adjusting it, it is a pretty smooth change. The low pass and high pass filter
damping really get you some ability to adjust how the feedback and delay repeats sounds.
Definitely a nice sounding effect to create some backing audio."
Personally I like the features of this delay, and think it is a good tool for creating ghost notes,
alternative rhythms and a slew of other delay related sounds. "
To-Gu-Ro"
The manual says that this is an undulating effect, and it certainly has some rhythm to it. To me,
it almost feels similar to the Downer effect or a kind of dropper effect where it is taking the
audio that is being played and changing the rate that it is played back."
I’m not sold on the use of this effect much though, as the input is still playing, and you end up
with your original signal mixed with this effect. I find it odd that you’re not able to use this
purely as an effect for interesting sound design applications."
Tremelo/Pan"
This effect will vary the volume and panning of a sound, and is another staple of guitar pedal
effects. When set to tremolo mode it can be used to make a gated filter kind of effect, and
when set to pan mod, it will pan your signal between left and right."
I like this effect for adding some space to a sound, or adding some subtle dynamic character
to a sound. This makes it good for content like pads and melodic content that you’d like to
add a bit more movement."
NearTao’s Guide to the SP-404 mk2
Page 75

Vocoder "
This is a pretty standard vocoder effect, where you take one sound, and impart the quality of
another sound onto it. This gets you a lot of those kinds of sounds where it a synthesizer
seems like it is speaking."
To me, this is a decent effect, and definitely has application outside of just voice work to just
experiment with sound design. It’s also nice that you can control the note and pitch bend from
an external keyboard as this opens up some additional expression for this effect."
Wah"
This is your general wah-wah sound. Another staple of guitar pedals."
I’m not sure what else to say, give it a try. I promise I will come back and write up more when I
am not mind dumbed by these general purpose effects."
WrmSaturator"
The Warm Saturator effect is quite characteristic of a saturator effect, allowing you to drive the
signal in similar way to what an analog tube preamp might sound like. The difference between
saturation, overdrive, and distortion can be subtle, and you’ll want to be careful not to drive
your signal too hard or it may distort. That said, this does lean towards a warm sound, and can
help add some much needed character to digital samples."
Personally I find saturation is best when used right on the edge of overdrive or distortion.
Certainly the more sound, the subtler I would suggest being, though for a single source if it
sounds good, then it be good to drive it harder. My suggestion is when you use this to try and
drive your audio to distortion and then pull it down to where you like the sound. From here
turning the effect on and off to see if you like the change can help hear subtle changes to the
sound from saturation and see if they are appropriate for the sound or track. "
Zan-Zou"
The document says that this effect applies a delay to the negative phase of a sound, and
definitely gives an interesting sonic afterimage. When using this, you’ll probably need to tune
the high pass frequency dampening to make sure you get the sound that you are looking for."
I need to try out this effect more, but I suspect it will be something interesting for introducing a
bit of additional stereo presence for pads that could give them some more space. Certainly
something to play with and see how resampling some audio can give some more tone to a
sound."
Missing Features
Sub
There, I asked for it :D#
NearTao’s Guide to the SP-404 mk2
Page 76

Chapter 7 - Sequences
NearTao’s Guide to the SP-404 mk2
Page 77

Introduction
I’ve got to say, Pattern mode has really come into it’s own from where it was prior to firmware
2.0. Pattern mode is really making me feel much more at home on the mk2 than I had in the
past. Adding the TR-REC should certainly open up some new workflows for people who want
to make sure they stay on the grid, the per step edit values are certainly nice, and it is great to
see the changes to ROLL and having substep patterns now. Wether any of these changes
were in Roland’s initial vision, taking customer feedback, or however else we got them, they
are big, and I’m glad to see them."
The thing I am the biggest fan of though, is having a progress bar for pattern playback on all of
the most important screens now. This just helps know where you are so much better when
recording and is probably one of my biggest thumbs up for changes in this firmware. It might
be a little thing for most people, but I really like to know where I am and being able to tell at a
glance is a big deal for me."
Pattern Sequencer
The Pattern Sequencer on the mk2 is a fairly simple one track event sequencer. It has 480
parts per quarter note, which I imagine should be more than sufficient for most people, and if
you need more resolution, then you’re likely going to want to sample or resample to get sample
rate levels of precision anyways. Each pad event is only able to record trigger, velocity, and
duration events into the sequencer on the mk2, so things like aftertouch, parameter locks, or
CC events are currently out of the question."
Before you begin your sequencing journey, you’ll want to be aware that the mk2 has two
primary modes, Sample Mode and Pattern Mode. You change between Sample Mode and
Pattern Mode by pressing |PATTERN SELECT| to switch between the two modes, and the
button |PATTERN SELECT| led will be dim if you are in Sample mode, and bright if you are in
Pattern mode."
I know that there are a lot of complaints about the Pattern Sequencer on the mk2, but rather
than detailing all of the deficiencies of the mk2’s sequencer here, I would rather stick to
outlining what it does, and suggesting ways that you might be able to get more out of it than
you might first believe."
Recording Behavior
A lot of the behavior for how a pattern is recorded on the mk2 is defined in the |RECORD
SETTINGS| menu, but there are a few other settings such as Count In and Metronome that can
change the recording experience. I have decided to document all of these settings under the
Pattern Record Settings below, as it feels like this is a more natural place to listen everything
that may impact a recording instead of breaking it out here. "
Selecting
Normally to select a pattern, you just press the pad with the associated pattern that you want
to play. This will immediately trigger the pattern and start it playing. If instead you would
prefer to just select the pattern for some reason, you may hold down {ENTER} on the value
knob and press the pattern you would like to select, but please not, that this only works if no
patterns are playing. If a pattern is already playing selecting a pattern will cause it to play next."
NearTao’s Guide to the SP-404 mk2
Page 78

Playing
To play a pattern, you will need to be in Pattern Mode. When you are in Pattern Mode you will
see the LED behind each pad will be lit up to indicate that it has a pattern recorded into it, and
you play the pattern simply by pressing the pad for the pattern that you want to play. If you
press another pattern pad while a pad is playing, the mk2 will transition to the new pattern
once the current pattern has played to the end, and then start playing the new pattern from the
beginning."
In this way, it may be beneficial to think of patterns as logical components of a song that you
can string together to create a complete track. By working this way, it helps you understand
what components of a song you want to be playing at any given time, and by controlling which
part is playing or not playing you can come to a logical arrangement. In my mind it is quite
logical to record a pattern for an introduction, bridge, chorus, main, verse, or any other part of
a song that you may want to transition to."
One thing that the mk2 cannot do it play two patterns at the same time. Although
you can make a drum pattern and a bass pattern separately, you cannot play both
at the same time. To make variations, you will need to make multiple patterns, or
consider leveraging Pad Mutes to vary elements of your song over time."
While a pattern is playing, you can switch to Overdub mode by pressing the |REC| button, and
it will transition to Overdub mode once the pattern starts from the beginning again. This can
be a good way to practice playing new elements for a pattern and keep grooving to it while you
wait for the pattern to start from the beginning instead of having to wait for the Count-In to
start."
Stopping
Pressing |SHIFT|+|EXIT| will stop all sample playback. If you have built up the muscle memory
to press |EXIT| four times, you’ll hopefully be happy to know that this new method works just
as will without having to hammer on the button quite as much."
To stop a pattern, frequently it is as simple as just pressing the pad that the pattern is playing
from again and it will stop immediately. Another option is to press |EXIT| and it will stop
everything that is playing, or if you are completely lost and content won’t stop playing you can
press |EXIT| four times in a row, and it will force stop everything that is playing on the mk2. "
Recording
To record a pattern, while in Pattern Mode simply press |REC| and then an empty pad. This
will then bring up the Pattern Record Settings menu detailed below to allow you to adjust the
BPM, Length, Strength, and Quantization of the pattern you are about to record. Once you
have the settings you want press |REC| one more time, and it will switch to Sample Mode so
that you can then play whatever samples into the sequence that you would like."
Once the length of the pattern has come to an end, it will loop back from the beginning and
continue recording in Overdub mode, enabling you to continue to add more events to your
pattern."
Pressing the |EXIT| button once will exit recording but the pattern will continue to play, pressing
|EXIT| a second time will completely stop the pattern from playing."
NearTao’s Guide to the SP-404 mk2
Page 79

Recording Effects Automation
As of firmware 3.0, you are able to record changes to effects on Bus 1 and Bus 2, including
turning the effects on and off, as well as parameter changes on Control Knobs 1, 2, and 3. "
At this time, you can only record parameter changes for knobs 1, 2, and 3.
Unfortunately we cannot record parameter changes to the sub/second page of
knobs that would be addressed as knobs 4, 5, and 6. Hopefully we will see this
changed in a future update."
To enable record of effects parameter changes, while in Pattern Record mode, press |SHIFT|+|
MARK| to enable and the display will output “MOTION REC START”? Doing this will record the
type of effect being turned on or off, knob value changes for knobs 1, 2, or 3, for the currently
recorded pattern. This allows us to make copies of patterns and create multiple variations of
effects of these patterns that will change based on which pattern is playing."
Deleting All EFX Automation"
To delete EFX Automation while in Pattern Select mode, press |PATTERN EDIT| and then press
the pad that represents the Pattern that you want to edit. To then delete all of the EFX
Automation that have been recorded into the pattern, press |DEL|+|MARK|, you will then see
the message “Operation Completed!” and all of the EFX Automation information will be
deleted. "
Deleting Specific EFX Automation"
You can delete specific EFX Automation, by playing a pattern, and entering |REC| mode.
Toggle to Sample mode by pressing |PATTERN SELECT|, then enter Motion Erase mode by
pressing |SHIFT|+|MARK| which will begin deleting EFX Automation from this point. To stop
deleting EFX Automation simply press |SHIFT|+|MARK| to end the EFX Automation erase
process."
Overdubbing
To overdub a pattern, while in Pattern Mode you press |REC| and then select a pad that already
has a pattern on it. Just like recording, you will then be brought to the Pattern Record Settings
menu that I will outline below to adjust your BPM, Length, Strength, and Quantization of the
pattern you are about to overdub. Once all of your settings are in place, you will press |REC|
one more time, and it will then switch you to Sample Mode so that you can then play whatever
samples you want to overdub them into your pattern."
Undo
When you are recording or overdubbing, the mk2 will remember the last eight pad events that
you recorded, and they will be placed in a buffer. If you want to undo an event, while you are
still in Record or Overdub mode press |SHIFT|+|PATTERN SELECT|, and it will undo events in
reverse order from what they were entered in from the current record or overdub session."
NearTao’s Guide to the SP-404 mk2
Page 80

I have found this mechanic to be okay, but the fact that it only goes eight events back is
somewhat restrictive, especially as you begin to build up patterns are more than two bars long.
So it is probably good for a well established pattern that you are adding a flourish or two into,
but it is equally as useful to just make a copy of the pattern and work on it from there so that
you can easily go back to your original pattern if you make a mistake."
Rehearsal
When you are in record or overdub mode, you can press the |REC| button an additional time
and it will put you into rehearsal mode. This allows you to play pads without impacting the
content that is already in your pattern."
I find this to be a good way to try out playing new elements of the song without committing
them to the pattern until you feel like you have a good flow. Once your pattern is recording you
can drop in and out of Rehearsal mode at will by touching pressing |REC|, and I find this to be
quite handy to lay down parts of your sequence."
Erasing Notes
If you are in Overdub mode, you can erase notes by pressing |DEL| to enter Erase mode, and
hold down the pad you want to erase before the trigger event happens, and it will erase the
event from your sequence. This can be a little difficult to understand, because you can get
false positives where you press the pad after the trigger event, and the pad will stop playing,
but it will not erase the event off of the timeline."
End Recording
To end recording you will also use |EXIT| to stop a pattern that you are recording or
overdubbing from continuing to play, and will return you back to Pattern Mode."
Pad Mute Mode
While playing a Pattern or in Pattern Record mode, you can enter Pad Mute Mode by pressing |
SHIFT|+|REVERSE|+|REMAIN| which will display a message “” to indicate that you are in Pad
Mute Mode. This will change the interface to show the pads that are playing samples, and
when you press a pad it will change the pad to red indicating that it is muted and also mute
audio from the pad. To unmute, simply press the pad again."
If you are in Pattern Record mode and enter Pad Mute Mode, this will then record mute and
unmute events into the pattern. "
The Pad Mute will mute the audio, and not the pad trigger event. This means that
the audio is still playing even if it is muted, so you are able to use this for gate style
effects. As such, it should be noted that the pad will continue to consume
polyphony even if the pad is muted."
Deleting All Pad Mutes"
To delete Pad Mutes while in Pattern Select mode, press |PATTERN EDIT| and then press the
pad that represents the Pattern that you want to edit. To then delete all of the Pad Mutes that
NearTao’s Guide to the SP-404 mk2
Page 81

have been recorded into the pattern, press |DEL|+|REVERSE|, you will then see the message
“Operation Completed!” and all of the pad mute automation information will be deleted. "
Deleting Specific Pad Mutes"
You can delete specific Pad Mute automation for a single pad, by playing a pattern, and
entering |REC| mode. Toggle to Sample mode by pressing |PATTERN SELECT|, then enter
Pad Mute mode by pressing |SHIFT|+|REVERSE|+|REMAIN|. To enter Pad Mute Erase press |
DEL| and you should see the pads turn from a white tone to a blue tone, and you can see the
Pad Mute automation with the pads turning Red as the Pad Mute enables. To delete the Pad
Mute automation for the Pad, simply hold down the Pad for the length of time that you want to
delete the Pad Mute automation."
Copy Pattern
Similar to copying samples, you can copy patterns by pressing |COPY|, selecting the [PAD]
you want to copy, selecting the empty [PAD] you want to copy to, and then finishing by
pressing |COPY| to execute the copy."
Personally I find this an excellent way to make backups and variations of patterns, by quickly
making copies and then working on the next pattern."
As of firmware 2.0, you can now also copy patterns while a pattern is playing, which is an
awesome way to make backups and different variations of patterns quickly while staying in the
flow."
As of firmware 3.0, we can now also copy patterns between projects. When you enter Copy
Mode, you can use (CTRL 3) to select a target project to copy a pattern to. This is so cool and
helpful for using patterns in multiple projects."
Further, you can now even copy a bank to another project by pressing |COPY|+|EXIT| and
selecting a target project by using (CTRL 3)."
Copying Specific Pads"
As of firmware 3.0, you may only copy the pattern for a specific pattern. When initiating a |
COPY|, select the source and destination of the pattern you want to copy, then press |
REMAIN| which will then change the pad interface showing which pads have valid patterns
that you can copy. Selecting the pads to copy will brighten the pads, and then finalize the
copy by pressing |COPY| to complete the operation. If you decide that you want to deselect
the pad selection, pressing |REMAIN| will revert to previous copy functionality, and entering it
again will reset all select pads to deselected."
Bounce Pattern to Sample
As of firmware 3.0 there is a new “Bounce” function that allows you to render a pattern to a
sample bank. When in Pattern mode, and executing a |COPY| to copy a pattern, instead of
selecting a target pattern you press |PATTERN SELECT| and then designate a destination
sample Pad and Bank. "
NearTao’s Guide to the SP-404 mk2
Page 82

The Bounce Pattern method will render the source pattern out as an audio sample to the select
Sample Pad, ignoring any effect settings. If you have any effects enabled, the effects will still
be on, after the Bounce Pattern operation has completed."
If you have recorded EFX Automation or Pad Mute automation, the Bounce Pattern
feature will not include this automation into the sample that is created. If you want
to maintain EFX and Pad Mute automation, you will need to use the Resample and
Snap to End workflow to get similar results. "
Exchange Pattern
You can exchange two patterns by pressing |SHIFT|+[Pad 5], selecting the first [PAD] to
exchange, selecting the second [PAD] to exchange, and then pressing |COPY| to execute the
pattern pad exchange."
I find exchange to be really useful for organizing your patterns into a logical arrangement so
that you can then perform a song by playing a pattern and then queueing up the next pattern
that you want to play, and allowing you to have control over which parts of the song are
playing."
Pattern Edit
Pattern Edit let’s you adjust settings about a pattern, but not necessarily the contents within it.
This allows you to adjust the speed the pattern plays at, what section of the pattern plays, how
long the pattern is, double the size of the pattern, or destructive crop the pattern to make it
permanently smaller."
BPM
In Pattern Edit, (CTRL1) adjusts the BPM value. The BPM setting adjust the beats per minute,
or what speed that the pattern plays at, with a lower value playing slower and a higher value
playing faster. The mk2 supports a BPM value as low as 40 and as high as 200, and adjusting
it will change the timing of when events play on a track. "
Adjusting the BPM for a pattern that plays samples which are one shots with no rhythmic
content will often keep the sound of a track functional and not impart any undesirable results
on the sequence. Changing the BPM this one on one shots often will not be a big deal as a
Kick, Snare, or Hat played at 100 BPM or 200 BPM will just play more frequently. However, for
a pattern that is playing samples that are loops and setup to work for a certain BPM, they may
sound out of time and need other adjustments to make them fit into the pattern properly."
Loop Start
In Pattern Edit, (CTRL2) adjust the Loop Start point, but it can only be moved if the Length
value is less than the length of your pattern. This can be useful if for example you have a four
bar loop, but you want to turn the second half of the pattern and use it as a drop. Once you
have adjust the Length to be smaller than the length of the pattern, you can then adjust the
Loop Start so that it will start on the section of the pattern you want."
NearTao’s Guide to the SP-404 mk2
Page 83

I suspect that this can be useful if you wanted to work on a long pattern and then focus on only
specific sections of the pattern, but at the moment it isn’t really something that is part of my
workflow."
Length
In Pattern Edit, (CTRL3) adjusts the Length of the pattern. The Length value in Pattern Edit
lets you adjust how much of the pattern will play, so that you can take a longer pattern and
then only play a subsection of it. The Length value is in a factor of 2, starting at 1 and going up
to 64, so if you have a Pattern that is 64 measures long, you have a lot of options to shrink it
down to anywhere from 1 to 32 measures long. The nice thing about this adjustment is that it
is a non destructive way to focus in on a smaller portion of a pattern and get focussed on the
pattern and what you want to do with it."
Duplicate
The duplicate function is accessed by pressing {ENTER} on the Value knob while in Pattern
Edit mode, and it will bring up a menu. The first option under the menu is Duplicate, and this
will allow you to double the length of a pattern by essentially making two copies of the pattern.
This function should be thought of as destructive, because it replaces your old pattern
sequence with a new pattern sequence that you cannot directly go back to unless you made a
copy or backup first. "
While simple, I find this to be an effective way to start small and slowly build up a more
complicated track. For example, you could record a simple one bar pattern of kick and snare
drums initially, then duplicate the track to two bars, and then layer in high hats and cymbals to
add some variety to your rhythm. A second duplicate could then take this pattern from two
bars to four bars, and you could then layer in your bass to allow for some more variation and
variety with how the track plays, all without having had to play every single not in. "
Crop
The crop function is accessed by pressing {ENTER} on the Value knob while in Pattern Edit
mode, and it will bring up a menu. The second option under the menu is Crop, and this will
allow you to reduce the size of the pattern. Where duplicate will double the size of a pattern,
Crop will reduce the size of the pattern to that of whatever is between the Loop Start and
Length settings that you have assigned. "
Sequence data is going to be relatively low impact to your storage on the mk2, so I’m not sure
that there is a strong case for cropping frequently. Having the data available if you want to go
back to it is nice, but I also understand the interest in cropping a pattern for sequencer hygiene
to keep your patterns tight and easy to understand."
Quantize
After recording a pattern, you can quantize specific pads when in |PATTERN EDIT| by pressing
|RECORD SETTING| to enter the Quantize page. You can edit the Quantize parameter with
(CTRL2) and the Strength parameter with (CTRL3). Select which pads you want to quantize
by navigating through Pad Banks, and selecting the Pads by pressing them, the pads that have
sequence data will be dark orange, and light up to bright orange when they are selected. To
confirm the Quantize setting for the selected pads press {ENTER}."
NearTao’s Guide to the SP-404 mk2
Page 84

Step Sequencing
The step sequencer was added as part of Firmware 2.0 and can be entered at the Pattern
Sequencer record setup menu by pressing |REMAIN|, or while a pattern is playing while
pressing |SHIFT|+|REC| to enter the TR-REC mode. The step recorder operates similar to a lot
of the other menus that you enter with a button combination to enter and press |EXIT| to leave.
TR-REC mode allows anybody familiar with XOX style step recording to enter events to a grid
in a pattern. The step recorder also has access to per step parameters that can be entered to
control the Substep Pattern, Hold Step, Pitch, Velocity, and Start. Further, from the TR-REC
we can adjust the BPM, Shuffle, edited Pad, and edited Bar."
Mode
The step sequencer has two main modes, Trig and Hold Step, and when you are in TR-REC
window you switch between these two modes by pressing |REMAIN|. When you are in the
Trig mode you have access to the substep setting for each note, and when you are in the Hold
step mode you have access to the Hold setting to adjust how long a note is held for."
!!! One thing to note, when you switch to Hold Step mode, the currently selected pad will
switch to have GATE turned on if it was not. If you suddenly notice that a number of your pads
have GATE turned on, it is likely due to switching modes. "
Substep
You can adjust your substep parameter by rotating the (CTRL1) knob, and the value will apply
to whichever value is selected at the time when you hit a pad."
The Substep pattern gives you a variety of patterns in the form of a single note hit, double note
hit, triplet note hit, or a quadruplet note hit. This is a quick way to program ratchets and rolls
very quickly into a pattern that can be varied. It should be noted that not every pattern is
available for every combination of notes being on and off, but there are 15 different patterns
which should cover a lot of rhythmic ground."
Pad Select
To select a pad that you want to play, simply hold down |SUB PAD| and then you can switch
Pad banks and select the pad that you want to play next by pressing the pad. To select a pad
without having it play hold down {ENTER}+|SUB PAD| and then press the pad that you would
like to select without playing it."
Do note, that even though you can only do step sequencing for one pad at a time, any MUTE
GROUP or PAD LINK settings you have set will carry over and apply as you would normally
expect on the mk2."
Bar Select
To change the bar that you are editing, you just need to rotate {VALUE} and you can select the
bar that you would like to edit."
Hold
Pressing |REMAIN| will toggle Substep to Hold which allows you to program in how many
steps a note will be help for. This will allow you to play sustained notes that you want to play
longer than a single step and is great for playing a melody or triggering a loop and is adjusted
by rotating the (CTRL1) knob. A hold step value of 1 will hold the pad for a single step, all the
NearTao’s Guide to the SP-404 mk2
Page 85

way up to a value of 32 which will hold the note for up to 32 steps. If you have pads that you
want to be held for a longer amount of time then set the hold step to LAST, and the first event
will trigger the pad to start playing and the second value will trigger stopping the sample from
paying further."
Pitch
The pitch parameter allows you to adjust the pitch of the step added by rotating the (CTRL2)
knob. This can be a quick way to enter a melody by hand and program it into the step
sequencer if you are not comfortable with your timing trying to play it in through Chromatic
mode."
You can adjust the Scale from Chromatic, to Major, Minor, Dorian, or Phrygian by pressing the
knob for {ENTER}. This gives you access to a number of common scales that you may want to
enter. You can change the key by holding {ENTER} while rotating {VALUE}. I find this a little
bit awkward to do, and unfortunately it is not consistent with how you change the key in
Chromatic mode. Be aware of the difference in how you change your key between the two
modes. With both of these set, Chromatic mode will allow you to enter any note tuning value
you would like, and setting any other scale and key will allow you to only set tuning parameters
for valid notes within the selected key and scale."
It’s also worth noting that, similar to what I said for Chromatic mode, if you want to make use
of scales and keys, then you will most likely want to make sure you are tuning the samples on
your pads to C. Otherwise, if you haven’t tuned to C, while the selected pitch changes will
technically be valid, the resulting notes that you play are not going to be in scale."
Velocity
The velocity parameter sets a value from 1 to 127 by rotating (CTRL3) for how loud the pad will
play, and is an absolute value based on what is set. If you turn (CTRL3) fully clockwise it will
change from a numeric value to PAD, which allows you to have the velocity set on each step
based on how hard you hit the pad."
Wether you use a numeric value or use PAD to set velocity, either way can be a quick way to
program out patterns such as high hat build ups, create ghost notes, or even simulate a delay."
BPM
While in TR-REC mode, |SHIFT|+(CTRL1) allows you to modify the BPM. This is the BPM of
your pattern bank, and if you change it, just be aware that it will change the BPM for all of the
other patterns that are in the bank."
Shuffle
The shuffle parameter is adjust by |SHIFT|+(CTRL2) and selecting a value from -50 to 50. This
parameter allows you to adjust the shuffle for playing back a sample per step, and a value of 0
is perfectly on time, a negative value means a sample plays early, and a positive value means a
sample plays late. Since this is set per step, this allows you to get some interesting patterns
where parts of your pattern are on beat, and where others might come in early, late, or perfectly
on time based on your shuffle setting. In generally I’d keep this value consistently the same for
specific samples or discrete elements that you are programming, but you can add a bit of a
more natural or human feel by having slightly different shuffle settings for each instrument that
you program in."
NearTao’s Guide to the SP-404 mk2
Page 86

Start
The start parameter can be adjusted by |SHIFT|+(CTRL3) and selects a value from -50% to
100%. It is a little strange, because similar to Shuffle it is adjusting how early or late a note is
placed on the timeline of the pattern it has two main differences from what I have been able to
tell. First, and most importantly, unlike shuffle which is only applied to even (and not odd)
beats, the start value can be applied to any step in the sequencer. Second, and notes that you
decide to use the start parameter for will not be able to use Substep to apply patterns."
Pattern Record Settings
The Pattern Record Settings allow you to adjust how you go about recording a pattern, and
control things like the BPM, the number of measures, and how notes will or will not be
quantized. I’ve added Count In and Metronome here because this will change how the
recording will stat and if there is a Metronome playing or not."
BPM
Similar to Pattern Edit, BPM here is modified with (CTRL1) and allows you to adjust the beats
per minute that the pattern plays, as well as the speed of the metronome playing if you have it
enabled."
Length
You can adjust Length with (CTRL2), and this allows you to set the number of measures in your
pattern by an increasing factor of two, starting at one measure and ending at a maximum of
sixty four measures. "
This gives a pretty wide range of values, but I do find it odd that you cannot pick any whole
number value of measures between one and sixty four. If you want to do odd measured
lengths, you’re forced to make multiple measures that you would then need to string together
when playing the pattern to get them to line up like you want. This feels a bit awkward to me,
and hopefully this will be adjusted in the future"
Strength
You can adjust Strength with (CTRL3), and it will either adjust the strength of quantization by
moving a note towards either notes or triplet notes with QTZ settings of GRID (32, 16.3, 16,
8.3, 8, 4.3, 4) with a range of 0% (or no quantization) to 100% (full quantization), or shuffle
notes based on their proximity to the even notes QTZ settings of SHUFFLE (16, 8) and a range
of -50 to +50 to adjust how close the even eighth or sixteenth notes are to their odd eight or
sixteenth note neighbor."
Quantize
The Quantize value is adjusted by rotating the {VALUE} knob, and cycles through options of
Off, GRID 32, GRID 16.3, GRID 8.3, GRID 8, GRID 4.3, GRID 4, SHUFFLE 16, and SHUFFLE 8.
This function, based on the strength setting configured will tell the mk2 how much
inconsistency in the user playing pads is acceptable, and how much the notes being played
must meet a certain timing. "
The GRID values will push the notes towards their specific quarter note, eighth note, sixteenth
note, or thirty-second note (and possibly with triplets if a .3 setting), and at 100% strength will
ensure that all notes are on the exact mechanical timing as dictated by the BPM."
NearTao’s Guide to the SP-404 mk2
Page 87

The SHUFFLE values are similar to the GRID values in so much as it requires the notes to land
on specific markers, but shuffle actually adjusts the relationship of the odd and even notes by
moving the even notes closer to the previous note with negative values, or closer to the next
note with positive values. This allows shuffled notes to be played at a specific time, but it will
allow a rhythm to have more of a natural sounding groove to it as the sounds won’t feel so
mechanical on perfectly on time."
Count In
You are unable to adjust the Count In for recording while in the Pattern Record settings, so if
you want to adjust Count In make sure you are not in the menu. To adjust the Count In setting,
press |SHIFT|+[PAD10] to cycle through the various Count In options of COUNTIN-1MEAS,
COUNTIN-2MEAS, COUNTIN-WAIT, and COUNTIN-OFF. This is similar to the record and
resampling use for Count In to adjust how the mk2 will operate once you start to record."
Count In is important for recording patterns, since with it set you’ll get a chance to hear the
metronome for 1 or 2 measures if you’d like with it on, or you can turn it off and the pattern
recording will start immediately after pressing record."
Metronome and Volume
You are unable to directly turn the Metronome on and off while in the Pattern Record settings,
so if you want to make a change, I would suggest existing the Patter Record Settings and
pressing |SHIFT|+[PAD9] to toggle the Metronome on or off."
There is a setting enabling and disabling the Metronome in the Pattern Record Settings menu,
and it can be toggled on or off in a way by holding |SHIFT| and turning the (CTRL3) to adjust
the volume of the Metronome from 0 (effectively off) to 5 (loudest volume). Personally I
wouldn’t use this method to turn off the Metronome, but it is there if you need it."
Pattern Chain
I just have to start by saying that this is a feature on the mk2 I am happy it is here, because it
certainly is helpful and gives another mechanism to construct a song, but the implementation
is not great and the documentation in the manual is incredibly insufficient."
As of firmware 2.0, Pattern Chains are not saved between power cycles. Just
giving you fair warning that this is not a way to save/store songs at this time."
Missing Features
Saving Pattern Chains
I’d like to see the ability to save/maintain pattern chains between power cycles, or an ability to
record a pattern chain back out to a new pattern. Exporting to a new pattern might be difficult
mostly because you could make a song much longer than the 64 bar limit, and… well… just let
us save pattern chains."
NearTao’s Guide to the SP-404 mk2
Page 88

Chapter 8 - DJ Mode
NearTao’s Guide to the SP-404 mk2
Page 89

Introduction
Among all of the new features of the mk2, possibly the most stand out of the bunch is the
addition of DJ Mode. It doesn’t necessarily stand out due to the quality of the implementation,
but more because it just isn’t something that the SP series has ever had, and in this way it is
definitely an area where it differentiates itself from many other products. It certainly sits in the
space of features that you can completely ignore it’s existence and never interface with, or
something to play with as a novelty, but in it’s current state I am not sure many people will
actually use this feature to DJ tracks."
I’m going to admit up front, that this feature has probably been the one thing that I have been
avoiding writing up the most. I keep bouncing it further down in the sections, and keep not
wanting to get to it. Over the last four months I’ve touched it a handful of times, and each time
I’ve loaded it up it just doesn’t work quite the way I want it to. I’ve just assumed it is awkward,
obtuse, and not a huge value add. Years ago I used to DJ house parties fairly often, to the
point that I know how I want things to work. I have the mental map and some muscle memory,
and my skills don’t match well with what the mk2 offers. This is the long way to say, I need to
practice if I want to use DJ Mode on the mk2."
Traditionally as a DJ, you’d need two audio sources such as turn tables, a mixer to be able to
adjust volume levels and tweak track EQs, some speakers to play through, and depending on
the type of work you are doing a microphone to make announcements, call out dance steps, or
rap/sing over the tracks. "
Interestingly the mk2 hits a lot of these marks, as it gives you the ability to effectively work in a
two “deck” setting to play two tracks at the same time, you’ve got two controls to adjust each
tracks volume independently, depending on your Bus FX layout (Type B) you can use Isolator or
other FX to EQ per tracks, and it has a microphone input that you can cut in and out with [EXT
SOURCE]. Most venues are going to be providing a mixing console you’ll plug into and then
go out to the speakers, and hooking up to this kind of environment with the mk2’s line outputs
is almost always going to be dead simple."
Honestly, I can see the appeal of the mk2 vs a DJ coffin with a mixer, two turn tables or cd
players, and then lugging a crate full of vinyl and CDs. As a performer you’re always having to
look over your back as you move gear because you often cannot move all of this stuff by
yourself, and things have a way of disappearing when you are not looking. Any DJ that’s
worked in this space for any length of time will tell you about vinyl, CDs, or USB drives just
disappearing, or having to call your insurance because somebody smashed in your car window
and took your mixer and turn tables out of the back."
There are some real problems with how the interface is setup for DJ Mode at this time. It has
all the right individual ingredients to be a real selling feature, but the way I find them coming
together is missing the mark at this time. If you’re just looking to mix two tracks together or do
some very basic effects work DJ Mode may very well work for you. If you’re trying to do beat
matching or other deck work, want tight control over EQ of both tracks, and need to fade audio
in and out, you’re probably going to be fighting with the interface."
All of that said, I feel like it is in the ballpark, it just needs some additional considerations of
how a DJ would really use this. Seriously, even just an eight or sixteen knob Midi CC interface
that you could map to mk2 controls could fix almost all of my issues incredibly quickly. I’d
even take options to output both tracks separately to the mix/cue outputs and then use a
traditional DJ mixer to do all of the deck work. I suppose you could technically do this with
hard panning tracks or sending to mix/cue… but… as I said, it’s close, but not quite there."
NearTao’s Guide to the SP-404 mk2
Page 90

DJ Mode Setup
This section covers things you’ll want to be aware of in order to setup some critical settings in
DJ Mode. I’ve also tried to put any notes that seem relevant to actually using DJ Mode and
things you’ll want to consider as you setup your session. Just be aware that I am no DJ Mode
master, and am trying to cover things as they make sense to me from when I used to DJ in the
past. It is entirely possible I am missing some key things, but right now I’m trying to focus on
the behavior of the mode as I see it today."
Enter DJ Mode
You can enter DJ Mode from Sample Mode, but are unable to enter DJ Mode from Pattern
Mode. To enter DJ Mode, simply press [D/I]+[E/J] at the same time."
Exit DJ Mode
To exist DJ Mode press |EXIT| and then rotate {CW VALUE} one notch to select OK and then
press {ENTER}. This will put you back into Sample Mode."
Mix and Cue
The Mix and Cue control allows you to adjust what you are hearing in the headphone jacks
while in DJ Mode. The Mix value is determining what the volume you are hearing of your mix is
in the headphones, and the Cue value is determining what the volume you are hearing of
anything assigned to Cue is. This allows parameter allows you to decide if you want to hear
what the audience hears, hear something only in your headphones while you are preparing
your next track, or a mixture of both."
You can modify the ratio of Mix and Cue by adjusting (CTRL3) while in DJ Mode, and this is
displayed on the DJ Mode display in the top right as a slider value with Cue (C) on the left and
Mix (M) on the right. Basically turn (CTRL3) counter clockwise if you want to hear more Cue,
and turn it clockwise if you want to hear mix. In the extreme values you will only hear one or
the other."
When you are loading your next track from a Sample Bank, the only way you can
hear what is on the pad will be through Cue. If you turn (CTRL3) all the way to Mix,
you won’t be able to hear whatever is on the pad you are hitting. Just be aware of
this behavior and you’ll be fine."
Loading Tracks
Whether you are using existing tracks that you have created on your mk2, or if you are
importing tracks you made someplace else on the mk2, you will need to prepare everything
from Sample Mode."
To import a track from SD Card simply press |SHIFT|+[PAD14] to enter the Import/Export
menu, push {ENTER} to select the highlighted IMPORT from SD-CARD, push {ENTER} to
select the highlighted SAMPLE, and then use the {VALUE} encoder to navigate the directory
structure to find the samples that you want to import."
As each track is imported, the mk2 will automatically detect BPM, though be warned that it
may not always detect BPM correctly."
NearTao’s Guide to the SP-404 mk2
Page 91

When you are done importing your tracks and assigning them to pads, press |EXIT| twice to
get back to the Sample Mode menu."
My advice for working with tracks in DJ Mode would be to start small, and assign
all of your tracks into a single Sample Bank so that you have one place for all of
your tracks. Otherwise it may get confusing trying to find where your tracks are
and where your general samples are."
One other thing to note is that any settings that you choose to make for start/end/loop points,
Bus routing, and settings for whether the sample loops or not will be honored, but no other
settings such as pitch/speed, envelope, gate, or reverse will be honored."
Assigning Samples to Channels
In DJ Mode the mk2 has two channels, Channel 1 is displayed on the left and Channel 2 is
displayed on the right. "
To assign a track to Channel 1 press {ENTER} on the value encoder to bring up the DJ Mode
sub menu, press {ENTER} to enter the CH1 SELECT menu option, then select the Bank and
Pad that you want to use for Channel 1, and finish by pressing {ENTER} on the value encoder
to go back to the DJ Mode display."
To assign a track to Channel 2 press {ENTER} on the value encoder to bring up the DJ Mode
sub menu, rotate {CW VALUE 2 notches} to highlight the CH2 SELECT menu option, press
{ENTER} to enter the CH2 SELECT menu option, then select the Bank and Pad that you want
to use for Channel 2, and finish by pressing {ENTER} on the value encoder to go back to the
DJ Mode display."
Practice will make perfect here, and this is the only way to load another track into either of your
two channels. You’ll want to get used to this mechanism because there is no way to create a
track list and pull tracks in from there. On the mk2 your Banks are your track list, and you have
to go through this process to load each and every track into a channel slot."
Editing Samples
In DJ Mode besides loading samples, you have the ability to do basic sample edits similar to
what you have available in Sample Mode under the |START/END| menu."
To edit a track on Channel 1 press {ENTER} on the value encoder to bring up the DJ Mode
sub menu, rotate {CW VALUE 1 notch} to highlight the CH1 EDIT menu option, press {ENTER}
to enter the CH1 EDIT menu."
To edit a track on Channel 2 press {ENTER} on the value encoder to bring up the DJ Mode
sub menu, rotate {CW VALUE 3 notch} to highlight the CH2 EDIT menu option, press {ENTER}
to enter the CH2 EDIT menu."
Once you have entered the CH1 EDIT or CH2 EDIT menu, you will be able to use the following
controls to make adjustments."
NearTao’s Guide to the SP-404 mk2
Page 92

Honestly, I’m not sure how much value this provides, as personally I would want to do most of
this editing in Sample Mode instead of DJ Mode to prepare for a session, but I can imagine
that there might be some interesting sounds you could make by adjusting the start/end/loop
points while a track is playing, or do things by enabling and disabling looping."
Adjusting the start and loop points seem to have the most interesting effect to me as you can
get a somewhat granular/evolving sound as the sound loops and starts over. To my ears,
adjusting the end point is the least interesting as it just causes the start of the sample to re-
trigger continuously. Why, it doesn’t do just about anything else, I don’t know, but I don’t see
adjusting the end point as terribly musical as it works right now."
I’m a little bit bummed at how the use of adjusting (CTRL1) start or (CTRL2) loop
points while adjusting |SHIFT|+{VALUE} adjusts the encoder zoom level and the
Channel level, but doesn’t move the start or loop point. I suspect that this is a
bug because it feels like you should be able to fade in/out this kind of glitchy
effect, but what do I know."
Add Marker
While in the Cue Mode for playing tracks, you can press |SHIFT|+|MARK| to add a marker to
the currently selected Track. This may be helpful if you want to add a Marker “on the fly”
without having to enter Chop Mode."
Chop Mode
As of Firmware 3.0, DJ Mode has added the ability for a loaded sample to gain access to the
first seven markers for the sample. This allows you to quickly change the playback position of
the sample loaded into Track 1 or Track 2 to trigger from the start of the sample, or one of the
seven markers assigned to the sample. To enter Chop Mode, simply press |SHIFT|+|
START\END| as usual."
(CTRL1)
Adjust the start point of the sample loaded into the track edited
(CTRL2)
Adjusts the loop point of the sample loaded into the track edited
(CTRL3)
Adjusts the end of the sample loaded into the track edited
{VALUE}
Adjusts the zoom level of the sample being displayed
|SHIFT|+{VALUE}
Adjust Channel level
|LOOP|
Enable and disable looping for the sample loaded into the track edited
|SHIFT|+|MARK|
Toggles between Start/End Mode and Chop Mode
(CTRL1)
Moves the Cursor in Chop Mode
|MARK|
Adds a Marker to the sample when in Chop Mode
|SHIFT|+|DEL|+[PAD]
Deletes Marker assigned to the Pad
NearTao’s Guide to the SP-404 mk2
Page 93

Mark Playback
To play back a sample from a mark, you can press |SHIFT|+[PAD 1-16] which will start
playback of the sample from the specified mark as outlined in the table below."
You may also press |SHIFT|+|REMAIN| to cause the Mark Playback mode to remain on the
screen. This will allow you to play from the track’s Markers much faster."
Reverse Playback
While in DJ Mode you can now press |BPM SYNC| to switch enable reverse playback for the
track. When reverse playback is activated, you can press |REVERSE| for a 303 style instant
reverse playback from the current play head position of the track. This can be played to
“perform” a track by consistently playing it forward and reverse."
Pad Mode
If you want to play samples that are your pads and not loaded into either Channel 1 or Channel
2, you can press [HOLD] to toggle between DJ Mode and Pad Mode. This allows you to play
any sample that is not currently loaded into either Channel 1 or Channel 2, and they will play as
loops, gated, or any other way for how you set it up. Further, many of the features such as
gate, loop, and reverse can be toggled on or off to adjust how the samples play while you are
in Pad Mode."
I have to say, that this is a great addition to DJ Mode, and allows you to get access to all kinds
of content and sounds. This is a great compromise between DJ Mode and Pad Mode that
almost gives you the best of both worlds, and it works quite well."
Pattern Mode
While in DJ Mode you can now enter and exit pattern mode simply by pressing |PATTERN
SELECT| to toggle between both modes. This will load up the familiar Pattern Mode view
where you can select your Pattern Bank, and then select a Pattern that you would like to play
along with your DJ set."
Once you have loaded the Pattern in DJ Mode, you can switch between your DJ Channel view
and your Pattern Channel view by pressing the |PATTERN EDIT| button. This will give you
some familiar information like BPM, a channel fader for your Pattern, and a Pattern progress
bar that will show you where you are in the pattern."
Interestingly, a lot of the controls for DJ Mode work in Pattern Mode, so if you are comfortable
with SYNC, then you can also do a lot of other things to bend or modify the BPM of the pattern
so that you can keep everything in sync. "
My biggest note here is that you can only load one pattern at a time. If you want to
Pad 1 - Track 1 Start
Pad 2 - Track 1 Mark 1
Pad 3 - Track 2 Start
Pad 4 - Track 2 Mark 1
Pad 5 - Track 1 Mark 2
Pad 6 - Track 1 Mark 3
Pad 7 - Track 2 Mark 2
Pad 8 - Track 2 Mark 3
Pad 9 - Track 1 Mark 4
Pad 10 - Track 1 Mark 5
Pad 11 - Track 2 Mark 4
Pad 12 - Track 2 Mark 5
Pad 13 - Track 1 Mark 6
Pad 14 - Track 1 Mark 7
Pad 15 - Track 2 Mark 6
Pad 16 - Track 2 Mark 7
NearTao’s Guide to the SP-404 mk2
Page 94

be able to crossfade between patterns, you’re going to have to resample them out to audio
first and then use the standard DJ Mode to fade tracks in and out."
Master Effects
At any time while in DJ Mode you can press |SHIFT|+[PAD16] to go into your EFX Settings and
modify your Bus FX Type from A to B, as well as set which favorite you are using, or even edit
your Bus 3 and Bus 4 settings."
Personally I wouldn’t want to be messing with this settings during a set, as many of them will
have immediate and potentially jarring effects on your sound. I would work out how you want
this setup before you began playing your track, or test it while you are working on a practice
session."
Channel Controls
In this section I am going to break down as best I can how the DJ Mode operates to control
each channel independently and how I suspect most people are going to go about using it. All
of these features in this section should be relatively straightforward for anybody who has done
most any form of DJ’ing in the past, as this all maps quite well to how you would work a deck
or mixer."
Adjust Channel Levels
Adjusting the volume of a track is incredibly straight forward. While in DJ Mode you use
(CTRL1) to change the levels of Channel 1, and use (CTRL2) to change the levels of Channel
2. As far as I am aware there are no slopes for the Channel Levels to adjust how quickly the
volume goes to maximum via linear or exponential slopes. One last caution is that there seems
to be a fair amount of dead space on the knobs where no movement changes the value."
The Channel Level controls in DJ Mode appear to only operate as the Catch
option for “Edit Knob Mode” and “EFX Knob Mode”. I have found no controls to
adjust this behavior. This means is that if you set a Channel Level, then adjust an
EFX option, you can only change the Channel Level by catching the knob position
first."
Channel Crossfader
To switch to crossfader mode you simply press the |START/END| button while in DJ mode, and
this will switch (CTRL3) from the master/cue fader to a crossfader."
This allows you to smooth transition between Channel 1 and Channel 2 with a single controller,
instead of requiring you to fade one channel in while you fade the other channel out at the
same time."
I would still like to see some options at some point to get different curves to do faster DJ style
cuts, but this is absolutely a step in the right direction for making DJ mode feel more like a
serious feature and less of an after thought."
Firmware 3.0 added the ability to adjust the Crossfader curve, which can be done by pressing |
RESAMPLE|+{ENTER} on the value knob encoder. This will cycle through linear, square,
cubic, and fast cut, to get you some ability to customize how the cross fader will work while."
NearTao’s Guide to the SP-404 mk2
Page 95

Track Bend
Bending a track is effectively playing a track a little bit faster or a little bit slower by either
increasing or decreasing the pitch of a track. Anybody who has DJ’d with vinyl is likely familiar
with riding the pitch/rpm slider to get two tracks in sync at the same time. On the mk2 the
BEND+/- pads are essentially doing the same thing by temporarily adjusting the speed so that
you can get one track in sync with another."
To bend a track on Channel 1 you press [PAD1] to speed up the track and [PAD5] to slow
down the track while you hold either pad. To bend a track on Channel 2 you press [PAD3] to
speed up the track and [PAD7] to slow down the track while you hold either pad."
Bending the track isn’t limited to just speeding up or slowing down a track though, you can use
these pads to add a bit of wow/flutter to a track that is playing by rhythmically tapping the
pads to get this kind of sound. There doesn’t appear to be any kind of way to adjust the range
of the bend, so you’ve only got what you’ve got for this effect, but it does work."
Firmware 3.0 added a few new features, including Bend Sensitivity as a setting, and a Bend
SYNC setting. The Bend Sensitivity can be found under UTILITY -> SYSTEM -> GENERAL and
is called Bend Sens(DJ), and controls from 10-200 which sets how quickly the pitch bend will
come into effect. The Bend SYNC setting is under UTILITY -> SYSTEM -> GENERAL and is
called Bend SYNC(DJ), and determines if the mk2 will keep external gear in sync when you do
a pitch bend or not."
Track BPM
The track BPM is simply the value that the mk2 believes the track is playing at, and is
displayed on the mk2 as both a BPM value and percentage of the track speed, for each
Channel. "
To adjust the BPM of a track on Channel 1 you press [PAD2] to speed up the track and [PAD6]
to slow down the track while you hold either pad. To adjust the BPM of a track on Channel 2
you press [PAD4] to speed up the track and [PAD8] to slow down the track while you hold
either pad."
Typically if you want to transition from one track to another seamlessly you will want to get
both tracks to play at the same speed and in time with other. This will allow you to then fade
from one to the other as you transition from one track to another. The SYNC button outlined
below will automatically set the BPM of one track to the other, but this assumes that the mk2
has properly detected the BPM of the tracks in the first place."
If you’re going to transition to a track with a vastly different BPM, you might find that while the
current track is playing you want to adjust the BPM slowly over time for the audience to bridge
the BPM gap to the next track. This will help the audience stay in beat, and if you do it well
CURVE LINEAR
I believe this is the default value, with a consistent ratio between channels
CURVE SQUARE
Slower ramp up from channel to channel x-fade
CURVE CUBIC
Slowest ramp between channel to channel x-fade
FAST CUT
Setting if you’ll probably want to use for scratching type effects
NearTao’s Guide to the SP-404 mk2
Page 96

can create a more or less seamless transition that the audience may not consciously register
as a change in energy, but they will definitely feel it."
When combined together, Track Bend and Track BPM will allow a traditional DJ to get two
tracks in sync with each other by ear. Basically you adjust track BPM of one track to get it so
that both tracks are playing at the same tempo, and you use Track Bend to nudge a track to
adjust where notes hit. This might sound complicated, but practice makes perfect and it is a
good skill to develop if you plan to DJ, whether it is with the mk2 or a more traditional setup."
In firmware 3.0 you can press |PITCH\SPEED| multiple times to switch between displaying the
BPM in Integer form, first Decimal place form, or second Decimal place form. This is especially
helpful if you want to know exactly how much change your tracks are getting or if you need to
manually sync the BPM of the mk2 to an external piece of gear."
Track Sync
The mk2 can sync one Channel to another with the push of a button. For Channel 1 you press
[PAD10] to enable or disable sync to Channel 2, and for Channel 2 you press [PAD12] to
enable or disable sync to Channel 1. This will effectively try and sync the sync’d track to the
speed of the currently playing track, and once it is sync’d any adjustments to the BPM of the
currently playing track will also follow to the sync’d track."
If you have a set list with a lot of varied speeds of tracks, I’d suggest organizing the set to
slowly transition tracks from one BPM speed to the next, otherwise it will be hard to go from 80
BPM to 120 BPM, then down to 96 BPM. Assuming you can manage those wide transitions in
BPM, the quality of your audio for the tracks may suffer with extreme time stretching being
necessary."
Just be aware that syncing tracks can introduce artifacts that you may not want, but if it
sounds good it is good!"
Track Play/Pause
It doesn’t get more straightforward than this. For Channel 1 press [PAD13] or for Channel 2
press [PAD15] to toggle between starting the track and pausing the track."
Personally I’d probably just let the track play and use Restart Track to get back to the start
point I set for the track to play from, but with practice you can absolutely use Play/Pause to
cue up specific parts of a track that you could then play when you wanted to drop into that
part of the track."
Track Mute/Unmute
You can press |SHIFT|+|REVERSE|+[PAD 13] to mute or unmute Channel 1, and |SHIFT|+|
REVERSE|+[PAD 15] to mute or unmute Channel 2. This can be particularly useful if you want
to allow your tracks to continue to play in sync with each other and you want to modify some
of the effects on assigned to the channel, or it can also let you do some manual gating effects
if you’re confident enough in your ability to mute and unmute the track in time."
Restart Track
To restart a track from the beginning, for Channel 1 press [PAD9] and for Channel 2 press
[PAD11]. This is a quick way to get a track to play a bit longer, or to get two tracks to be back
in sync with each other."
If I can get two tracks to play at roughly the same BPM I like to play the restart track pad to the
rhythm of the currently playing track sometimes to both get a feel for the currently playing
NearTao’s Guide to the SP-404 mk2
Page 97

track’s rhythm and groove, and to see if I can find good places to drop in the new track. It can
also be a good way to introduce a bit of a track as you can let it start to get some of the sound
in there, but if you keep restarting it keep it in rhythm with the currently playing track."
Cue Channel
The cue channel setting determines if a track plays out to Cue or not. This can allow you to
hear a track playing with Cue enabled but the Channel Level is down so that it is not going out
to the mix. To enable or disable Cue, for Channel 1 press [PAD14], and for Channel 2 press
[PAD16]."
The biggest thing to be aware of is that if you have Cue on, and the Channel Level up on a
Channel, you will double the volume of the audio you hear in the headphones, so the track will
sound louder to you than it is in the Mix output. Make sure you pay attention to your levels for
channel, cue/mix, and cue so that you don’t accidentally end up compensating by playing the
track to the Mix out lower."
Bus Effects
You’ll be able to see which Bus FX each Channel is routed to on the display in DJ Mode by
looking underneath the Channel strip, at the bottom of the display. You can cycle through bus
options of BUS-1, BUS-2, and DRY, by pressing |REMAIN|+[PAD14] for Channel 1, and by
pressing |REMAIN|+[PAD16] for Channel 2."
From here, the Channels will interact with the Bus FX just like they would in Sample Mode, so
remember to check your Bus FX settings to see if you are in TYPE A or TYPE B, and you’ll use
the exact same controls to enable and disable FX and turning knobs to interact with the
parameters."
The biggest thing to note from me is that when the Bus FX screen is displayed to make
parameter adjustments you are unable to make Channel Level adjustments. If you need to get
out of the Bus FX screen quickly just remember to press |EXIT|."
Mixer/EFX Page Swap
In firmware 3.0, we now can press the |MARK| button from the Mixer page to switch to the EFX
page, and then back. This is really handy if you want to be able to see what the settings are for
your effects, and then quickly switch back to the mixer page so that you can make
adjustments to your gain settings for your tracks."
Quick Loop
The |ROLL| button has picked up some functionality in DJ Mode, and now allows you to setup
some loops. This allows you to hold some parts of your track like build ups or breakdowns
that you want to extend, or can be a great technique to keep a track running so you can then
crossfade in some new components for a song. There’s a lot of creative things with this
feature, definitely check it out."
To change the size of the quick loop, you can press |SHIFT|+|ROLL| and it will rotate between a
1/4 note, 1/2 note, 1 bar, and 2 bars option, which will set how long an activated short loop will
be. "
NearTao’s Guide to the SP-404 mk2
Page 98

Activating a quick loop is pretty simple. For channel 1 you press |ROLL|+[PAD13] and for
channel 2 you press |ROLL|+[PAD15] and it will trigger a loop that is the size selected at the
moment in time that you activate the quick loop."
Using this feature effectively will take some practice, and best results will likely require that you
know your songs pretty well so that you have a sense for when a good time to activate it will
be."
Time Stretch Type
Firmware 3.0 allows you to switch out the types of time stretching. As with notes I have listed
in other sections, this is probably something you want to select by your personal taste, but it
does open up the opportunity to get a bit more of the type of sound, or the kinds of artifacts
you may hear, as something you’ve got a bit more control over."
Go to Utility -> System -> General and you can find “DJ mode TS type”. VINYL is going to be
the type of time stretching that you are used to and was the default time stretch type that DJ
Mode used, but we also now have Backing and Ensemble, which will allow you to customize
this value based on the types of tracks you may be intending to play."
Missing Features
I’ve added this section because I think there are just some blatantly obvious features that the
mk2 is missing in DJ Mode. None of it is necessary per se, but I think it would make the
experience better."
Mapping External CC
For DJ Mode, the mk2 really needs some more controls. It is very hard to control all of the
parameters you’re going to want to have at your finger tips when DJ’ing. I get compromises
had to be made, but I just feel like being able to use some external controls over MIDI would
and being able to map them to parameters would be huge."
DJ Style Filter Sweep
Seriously, a |SHIFT|+(CTRL1) and |SHIFT|+(CTRL2) mapped to a center position no filter,
counterclockwise low pass filter sweep, and clockwise high pass filter sweep would probably
make the most sense and shut me up about most of the problems I have with DJ mode’s
difficulty with working with effects."
Channel Level Slopes
Being able to adjust between linear and exponential slopes here at minimum would allow for so
much more control and options for doing DJ style effects. Having to do a full knob throw to cut
volume can be tough if your timing depends on it."
Next Track
I’m okay with loading next track to some extent, but being able to queue up or otherwise chain
tracks would be massively beneficial to making sure that there’s always something playing, or
that you can work your way through a set list without having to use the Value encoder to get
through so much menu cruft."
NearTao’s Guide to the SP-404 mk2
Page 99

BPM relevant loop points
Let me tell you, having to set loop points is hard enough in the interface, but with a track
playing, nobody has time to go through and set a loop point for a track other than to do some
one off effect. The mk2 really needs to learn how to tap a button or button combination so that
you can do a 1/2/4/8 bar loop from your current point based on the BPM you are playing at.
For me to consider the mk2 a valid DJ’ing tool this is practically non-negotiable."
Navigation Markers
I don’t even need them to be named or anything, but just being able to drop even a two or four
markers would open up so much potential for the mk2 so that I could just go straight to an
intro, a drop, buildup, or chorus. I just need a handful of markers for any given track."
Channel Level Knob Mode
Just add a Knob Mode for DJ Mode Channel Levels. #
NearTao’s Guide to the SP-404 mk2
Page 100

Chapter 9 - Utility Menu
NearTao’s Guide to the SP-404 mk2
Page 101

Introduction
Configuration settings are one of the best ways to customize your experience on any new
piece of gear, and the mk2 certainly has plenty to offer. You can change the behavior of how
the mk2 records samples and patterns, how it handles middle, adjust how sensitive the pads
are, and even change the colors of pads for various looks and effects. Frankly, as unimpressed
as I am with the documentation of the settings themselves, I am pretty impressed with what
you can do to configure your mk2 overall."
Utility Menu
To enter the Utility Menu, simply press |SHIFT| and [PAD13] at the same time."
This will bring up a sub menu where you can select SYSTEM, PAD SET, EFX SET, IMPORT,
BACKUP, and FACTORY by rotating the {VALUE} knob and then pressing {ENTER} to get into
the sub menu."
System
The System Menu has the majority of the settings that will adjust the behavior of your mk2, and
is one of the few Utility sub menus that oddly doesn’t have a way to get to it as a shortcut from
your mk2. The System sub menu has tabs labelled General, Click, Midi, Gain, and Version that
are selected by rotating (CTRL3) to navigate between the tabs."
General
The General Tab is kind of a catch all for the behavior of the mk2 for a lot of things that don’t
belong in a broader group. You can navigate through the General settings by rotating the
{VALUE} knob, pressing {ENTER} to edit the selected parameter, and then pressing {ENTER} to
accept the setting."
Edit Knob Mode"
The Edit Knob Mode setting adjusts how the control knobs will react when you are in an edit
menu such as START/END, PITCH/SPEED, CHOP, or ENVELOPE. There are two settings for
Edit Knob Mode, Catch and Direct."
Personally I prefer Direct for Edit Knob Mode, as it makes for instantaneous feedback of
making changes to the parameters on the Edit screen. I have enough experience with the mk2
that I tend to roughly know what knob position I want. If you find yourself struggling with
parameters jumping around, you may find that Catch is a better option as it allows you to move
the knob to get to where the parameter will start to change without having it jump around all
over the place."
Catch
The knob value you must match the parameter value before you can edit it.
Direct
The parameter value will jump to the knob value once the knob is moved.
NearTao’s Guide to the SP-404 mk2
Page 102

EFX Knob Mode"
The EFX Knob Mode setting adjusts how the control knobs will react to your Bus 1 and Bus 2
settings. I was interested to see if these settings might impact Bus 3 and Bus 4, but they seem
to operate as Direct mode in all circumstances. There are three settings for EFX Knob Mode,
Catch, Direct, and Manual."
I prefer Direct for EFX Knob Mode as well, but it’s not always great having your FX parameter
values jump when you turn it on. For this reason, I have used Catch, but I find that this can be
frustrating as you are now having to sweep a knob to hunt for the value so you can move it
which can make it harder to catch a specific timing for a drop or build up. I’ll be honest,
Manual is the value I have the least experience, but I do find it an interesting option because it
means that yes you will get a jump of values as you switch between Buses, but it also means
that your knobs are always reflecting the current value of the EFX which I expect could be a
huge bonus when trying to play live."
My advice, especially for the EFX Knob Mode is for you to just play around with it an see what
makes the most sense to you, and don’t be afraid to practice with different settings to get a
feel for how it may improve your set. Barring Roland letting us send Midi CC controls so that
you can manipulate more knob values, I don’t see another way at this time to get full control
over your values."
Load Project"
The Load Project setting allows you to select which project will be loaded when you start up
your mk2. The setting Last will have the mk2 load up whatever the last project was you were
working on when you powered it off. Otherwise you can set a value from 1 to 16, which will
have the mk2 load the specified project when you power on your mk2."
Currently I have this setting configured to Last, as that way I can quickly get back into the last
project I was working on."
Sub Pad Mode"
Sub Pad Mode allows you to configure what the behavior of the [SUB PAD] is, and it can be set
to either Retrig or Skip Back."
Personally I have not come up with a good use for why I would want Sub Pad set to either
Retrig or Skip Back yet. You can easily retrigger a pad by just playing it again and you can get
into Skip Back by pressing |MARK|. I’ve left Sub Pad Mode set to Retrig simply because I
don’t want to accidentally enter Skip Back mode while I am in the middle of recording. I
Catch
The knob value you must match the parameter value before you can edit it.
Direct
The parameter value will jump to the knob value once the knob is moved.
Manual
The parameter value will always match the knob value of the selected FX Bus.
Retrig
The Sub Pad will play whatever the last pad played was.
Skip Back
The Sub Pad will open up the Skip Back menu.
NearTao’s Guide to the SP-404 mk2
Page 103

suppose there is also some patterns that might be easier to play with the Sub Pad Mode set to
Retrig, I just haven’t stumbled upon them yet."
Auto Trig Level"
The Auto Trig Level setting adjusts how loud the input must be for a sound coming in from your
inputs (MIC/GUITAR/LINE/USB) before it will start recording if you have set COUNT-IN to WAIT.
You can set values from 1-10, and presumably a value of 1 is a quiet sound and a value of 10 is
a very loud sound."
I have kept this value at 5 as this seems to be a good value to trigger recordings. If a sound is
too quiet it will fail to trigger, and will indicate to me that I should turn the volume on my
incoming audio up some."
Screen Saver Time"
The Screen Saver Time adjusts how long it will be before the Screen Saver turns on. The value
range is from 1 min to 10 min and is measured in how many minutes it takes for the Screen
Saver to start on the OLED display."
I have this setting set at 1 minute because for these types of displays you want to make sure
that the pixels are changing frequently enough to avoid burn in on them. Obviously you can
adjust this to taste, but I figure if you aren’t using your mk2 for long periods of time, then it is
best to just set this value lower."
Screen Saver Type"
The Screen Saver Type setting adjusts which type of Screen Saver the mk2 will display. The
settings are Old Rave, Naminori, Custom, and Display Off."
I’ve been enjoying the Naminori screen saver, it’s kind of fun to watch the little guy bounce
around."
BPM Auto Detect"
The BPM Auto Detect setting adjusts whether an imported sample will be auto detected or not.
With the value set to OFF, imported samples will not be auto detected for BPM, and when set
to ON, imported samples will be auto detected using the BPM Detect Range setting."
I have left this value to off, since when I am importing samples I am usually not concerned with
the BPM setting, and will choose to detect it as appropriate for the project I am working on."
Old Rave
3d shapes that bounce around.
Naminori
A slowly evolving wav form, with a bouncing stick figure.
Custom
I believe that this uses the custom images loaded into the project.
Display Off
Turns the display off when the Screen Saver Time is up.
NearTao’s Guide to the SP-404 mk2
Page 104

BPM Detect Range"
The BPM Detect Range setting adjusts the range for auto detecting a sample when imported.
The range values are 100-199, 80-159, 70-139, and 50-99 BPM. "
For BPM values lower than 50, you will have to manually adjust the BPM by hand."
Pad Mute"
The Pad Mute setting adjusts the behavior of Pad Mutes and how they apply to sample output,
and can be set to Master+Phone, or Master."
By setting this value to Master, you will still be able to hear your samples that have been Pad
Muted to your headphones, but the audio will not be going out of your main outputs and
anything Pad Muted will not be recorded during Resampling or seen in your Skip Back. This
can provide some interesting workflows for Resampling, and can allow for some good usage
for live performances so that you can cue sounds to your headphones without the audience
hearing the Pad Muted content until you unmute it."
Although a subtle feature, this is perhaps the most powerful feature of firmware version 1.14
and is one of my favorite additions to the mk2 so far as it helps bridge the gaps between how I
would use an MPC and how I can use the mk2."
Pattern Change Mode"
The Pattern Change Mode adjusts how Pattern Changes trigger, and are set to either MKII or
SX."
Based on how I usually construct songs I usually have this set to MKII, though I can see it
being beneficial for making more melodic sounds where you want a pad to continue playing
through the tail, in which case you likely want to set this parameter to SX."
Pop-up Time"
The Pop-up Time parameter controls how long the pop-up notifications are on screen. The
values are Normal, Short, and Off."
Master+Phone
Pad Mutes will not play audio to Master or Phone outputs.
Master
Pad Mutes will not play to Master outputs.
MKII
Samples stop playing at the end of the pattern when the pattern changes.
SX
Samples keep playing until the finish playing on a pattern change.
NearTao’s Guide to the SP-404 mk2
Page 105

Honestly, unless you really need the on screen notification of what you just did, the best setting
will be to set this parameter to off. It makes the mk2 feel much faster, and will save your sanity
in the long run."
SBS Time"
This value sets your Skipback recording time."
Reverse Type"
The Reverse type setting determines if pressing reverse during playback will start from the end
of the sample (404 style), or from the playback position (303 style)."
USB In"
This setting determines where the input from your USB audio input is sent. You can send it to
Line In so that you can send it through your Input FX, or Mix Out so that it skips your Input FX
and Bus FX."
DJ Mode TS type"
This allows you to configure what type of Time Stretching that you would like when you Time
Stretch a track to beat match it or otherwise alter the pitch and speed of a sample."
Normal
The pop up notification will last for about 2 seconds.
Short
The pop up notification will last for about 1 second.
Off
The pop up notification will not be displayed.
Def (Default)
This gets you a Skipback recording time of 25 seconds max
Long
This gets you a Skipback recording time of 40 seconds max
404 (Default)
Starts reverse from the end of the sample, like the 404.
303
Starts reverse from the playback position of the sample, like the 303.
LINE IN
This will send the USB input through your Input FX and beyond.
MIX OUT
This will send the USB directly to your mix output and skip Input FX/Bus FX.
NearTao’s Guide to the SP-404 mk2
Page 106

Bend Sens(DJ)"
This setting determines how quickly a pitch bend will be applied to change the pitch of a track
when you use Bend. The values go from 10-200."
FileSystem"
Most people probably won’t need to bother with this, but this setting is what allows you to use
the Latin or ANSI character set (essentially the standard letters, numbers, and symbols on an
English or similar keyboard), or Multi-Byte which allows you to use the expanded uuencode or
similar character set, such as Kanji, emoji, and other expanded character set symbols."
Click
The Click sub menu adjusts many of the metronome controls. This will allow you to make
adjustments to where the output of the metronome goes, how loud it is, and how it functions
for different types of recording."
Output Assign"
The Output Assign parameters are grossly mislabelled in my mind. You can set it to either on
or Off, but this doesn’t really indicate what it is doing in my mind."
Personally I tend to have this set to On so that I can hear the metronome through both the
master and headphone outputs, but I can imagine that for live performances this setting would
be important to have turned off so that the audience isn’t hearing the metronome."
Click Level "
The Click Level setting adjusts how loud the metronome is, with a value of 1 being the quietest
and a value of 5 being the loudest."
VINYL
Changes the playback pith and speed at the same time, similar to how this would
work on a Vinyl Record.
BACKING
Allows pitch and speed to be changed separately from each other and is good for
processing sounds that have a noticeable decay to them.
ENSEMBLE
Allows pitch and speed to be changed separately from each other and is good for
processing sounds that have a more sustained sound.
On
The metronome goes out both the master output and headphones.
Off
The metronome only goes out of the headphones.
NearTao’s Guide to the SP-404 mk2
Page 107

Metronome:REC"
The Metronome:REC setting adjusts whether you hear the metronome while recording samples
when the parameter is set to On, or if the metronome is turned off when recording samples."
Metronome:PTN"
The Metronome:PTN setting adjusts whether you hear the metronome while recording patterns
when the parameter is set to On, or if the metronome is turned off when recording patterns."
Count-In: REC"
The Count-In:REC setting adjusts whether there is a count in when recording samples"
I typically switch between either Off or Wait depending on how I am recording, because I am
usually not recording rhythmic content that I want to be able to line up with other content. Off
and Wait both work well for recording one shots or single note stabs, but when you want to
perform something to a click track having a 1 Measure or 2 Measure count in can really help so
that you’re not playing in cold."
Count-In:PTN"
The Count-In:PTN setting adjusts whether there is a count in when recording patterns."
I tend to have this parameter set to Wait so that I can drop in a drum beat while playing, but if
you have a delayed bass hit or other sound that you want to record that doesn’t start on 1.1.1
then you likely want to use a 1 Measure or 2 Measure count in."
MIDI
The MIDI sub menu settings adjust how your mk2 handles Midi data."
Off
There is no count in when recording a sample.
1 Measure
There is a one measure count in before recording a sample.
2 Measure
There is a two measure count in before recording a sample.
Wait
Recording will start once the Auto Trig Level threshold is surpassed.
Off
There is no count in when recording a pattern.
1 Measure
There is a one measure count in before recording a pattern.
2 Measure
There is a two measure count in before recording a pattern.
Wait
Recording will start once a pad is pressed.
NearTao’s Guide to the SP-404 mk2
Page 108

MIDI Sync"
The MIDI Sync setting adjusts where your mk2 will take a Midi Sync signal from. The
parameter can be set to Auto, Internal, Midi, or USB."
I mostly have this setting set to Auto, as most of the time I don’t have it set to any external
devices, and when I do I want the mk2 to sync to the external device. However, if you have an
external device that is spuriously sending Midi Clock and you only want the mk2 to be sync’d
internally, it may be valid to adjust the setting to Internal. Similarly, if you have a sync coming
from both Midi and USB, it may be prudent to adjust the setting to reflect which clock you
want the mk2 to use."
MIDI Sync Out"
The Midi Sync Out settings adjusts if the mk2 will send a Midi Sync Out when set to On, or
does not send a Midi Sync Out when set to Off."
I typically have this set to Off, as I generally want the mk2 to sync to another device instead of
sending clock itself."
SEQ Note Out"
The SEQ Note Out setting adjusts if the mk2 will send pattern sequence data out over Midi.
When set to On it will send pattern sequence data over Midi, and when set to off it will not sent
pattern sequence data out."
SYNC Delay"
Sync delay allows you to configure how much of a delay there is between your mk2 and an
external midi device. This can be set from 0-20ms, and can be used to help pull things into
tighter time if you’ve got something that is just a little slow from sending or receiving midi
information."
Bend SYNC(DJ)"
Bend Sync can be set to On of Off. When set to On, when you use Bend in DJ mode, the mk2
will make sure that it sends midi clock data to keep the mk2 and any external devices in time.
Effectively this will make sure that the external gear will speed up or slow down with the Bend
as necessary. When set to Off, the mk2 will keep sending its clock in accordance with the
BPM, and will allow you to drive a sync clock in and out of sync to an external device. "
Auto
The mk2 will automatically select which Midi Input to Sync to.
Internal
The mk2 will only use its’ internal clock to sync to.
Midi
The mk2 will sync to devices on the Midi Input.
USB
The mk2 will sync to Midi over the USB cable.
NearTao’s Guide to the SP-404 mk2
Page 109

Pad Note Out"
This determines if a pad note will be sent to an external device. When sent to ON a midi event
will be produced when you press a pad, and when sent to OFF no note will be sent."
Soft Through"
The Soft Through setting adjusts whether or not the mk2 will repeat Midi data that it receives
from Midi In to the mk2 Midi Out if set to On, otherwise it will not pass Midi data received to
the Midi Out jack."
Personally I would suggest having this set to off to avoid creating Midi Loops, where you send
a Midi event out, and the next device down the line repeats the Midi event back to the
originating device. If you know what you are doing and are making a chain of Midi devices this
setting can be vital, but otherwise it can create more headaches than it is worth."
USB-MIDI Thru"
TheUSB-MIDI Thru setting adjusts whether or not the mk2 will repeat Midi data that it receives
from Midi In to the mk2 USB if set to On, otherwise it will not pass Midi data received to the
USB connection."
Personally I would suggest having this set to off to avoid creating Midi Loops, where you send
a Midi event out, and the next device down the line repeats the Midi event back to the
originating device. If you know what you are doing and are making a chain of Midi devices this
setting can be vital, but otherwise it can create more headaches than it is worth."
PC Rx"
When this is set to ON, Program Change messages will be received by the mk2, and allows
you to use the Program Changes to select which pattern is playing. When set to OFF, the mk2
will ignore Program Change messages from external gear."
Midi Mode"
MIDI Mode A is the default value for the mk2, where each Pad Bank is assigned a unique Midi
Channel (Bank A to Channel 1, Bank B to Channel 2, etc). When set to MIDI Mode B, Banks A-
E use one Midi Channel, and Banks F-J use a second Midi Channel. Bank Mode B also allows
you to configure Pad MIDI Channels and Note offset as well."
Pad MIDI Channels"
Pad Midi Channels allows you to set which two Midi Channels are used when in Midi Mode B.
You can set the first Midi Channel from 1 to 10, and the second Midi Channel will always be the
next number after your selection."
NearTao’s Guide to the SP-404 mk2
Page 110

Note offset"
Note offset lets you adjust where your Midi Note will start when in MIDI Mode B. This can be
set from -11 to 35, and gives you a broad note range to work with based on this setting."
Gain
The Gain sub menu controls volume gain for some of the inputs and outputs on the mk2. Due
to the limited control options on the mk2, this is one of the few places where you can adjust
levels independently."
Attenuator"
The Attenuator parameter allows you to adjust whether your LINE IN jack volume is lowered by
roughly 14db when this is set to ON, or if the volume is at full incoming volume when this is set
to OFF."
I typically leave this set to OFF, as allowing the volume to come in at full level from your
external device is one way to help reduce your noise floor. That said, some devices do not
have volume control, so you may want to turn this to ON for some use cases where you are
clipping on your recordings."
Noise Gate"
The Noise Gate parameter is set to reduce the noise floor of an incoming signal from the LINE
IN jacks. It has a setting of OFF, -9dB, -12dB, -18dB, and -Inf. Broadly speaking, the Noise
Gate is going to allow an audio signal to pass through if the audio value passes above the
Noise Gate threshold, helping you to remove line noise from your recordings."
In most cases you’ll likely want to avoid Off, as this will allow any line noise through and into
your recordings. However if you’re playing very quite sounds, or finding that you are loosing
the quiet tails of your audio you may want to change your Noise Gate settings."
Line Out"
The Line Out parameter allows you to add gain to the audio on your Line Out Jacks. The
parameters are 0, +6, and +12, and indicate the amount of dB that you will increase your
output signal in relation to the VOLUME control knob."
Off
The noise gate is turned off, you will hear the LINE IN signal, noise and all.
-9dB
Reduces the noise floor by -9dB for the LINE IN signal.
-12dB
Reduces the noise floor by -12dB for the LINE IN signal.
-18dB
Reduces the noise floor by -18dB for the LINE IN signal.
-Inf
Reduces the noise floor by the most possible for the mk2 for the LINE IN signal
NearTao’s Guide to the SP-404 mk2
Page 111

Unless you are not getting a loud enough signal on your Line Outputs, I would suggest keeping
this set to 0dB, as you will likely be also increasing signal noise by amplifying your Line Out
volume."
Phones Out"
The Phones Out parameter allows you to attenuate the signal going to your headphones, and
can be used to increase or decrease your headphone volume. The parameters are -18, -12, -6,
0, +6, +12 and indicate the amount of dB change to your headphone output signal in relation to
the VOLUME control knob."
You can use this setting to overcome some impedance challenges if you have a high
impedance pair of headphones, and if you find that you cannot use your headphones above
the halfway mark on your VOLUME knob it may be worth adjusting this to a negative parameter
setting."
USB Out"
The USB Out parameter allows you to reduce gain to the audio on your USB output. The
parameters are -24, -12, and 0, and indicate the amount of dB that you will decrease your
output signal in relation to the VOLUME control knob."
I find this setting a bit weird, since you’re usually going to use your DAW to adjust the volume
of the USB audio, but I suppose it is a helpful feature if you find it necessary."
Anti Feedback"
This is a nice feature to have on the mk2 if you are planning on using a microphone while also
having active monitors instead of headphones. The feature helps to reduce or eliminate
possible feedback loops from the microphone picking up audio output from the mk2, and then
replaying it. If you want this feature then set the value to ON, otherwise it is not necessary and
you can have this set to OFF."
Version
This menu displays the firmware version of your mk2."
Pad Settings
The Pad Settings Sub Menu allows you to modify the behavior of the pads, and primarily
focusses on how sensitive the pads are to velocity information from pressing them, and the
color that the pads will show for various settings."
Trigger
NearTao’s Guide to the SP-404 mk2
Page 112

The Trigger sub menu has the most direct settings for the behavior of the pads when you press
on them. These settings can be used to alter how the pads will react to trigger the samples
when you play them."
Curve Type"
The Curve Type parameter is the most direct parameter for how the pads will trigger a sample’s
volume based on the velocity that you strike the pad. You can set Lin, Exp, Log, or Fix to
adjust the velocity curve."
I typically have this set to linear curve type myself on most devices that allow you to adjust the
curve so that there is a clear mapping of striking the pads to the velocity of the sample is
played. If you tend to play lighter on the pads you may find that setting to Log is beneficial to
your play style, and if you tend to play harder on the pads you may find that setting to Exp will
give you a bit more variety on the pads."
No matter which setting you go for other than Fix, you should adjust this setting to make sure
that you can get a fair variety of sample volumes so that you can feel how hard you should
strike the pads to get at least light, medium, and loud hits."
Threshold"
The Threshold parameter allows you to set the minimal value of a strike in which the mk2 will
recognize the hit and play a sample. A value of 1 will allow the mk2 to play all pad strikes,
while a value of 100 will only play the hardest pad strikes."
I prefer to set this value low, typically with a setting of 1, but you may find that if you are getting
accidental ghost notes or double triggers it may be worth setting this parameter to a higher
value and seeing if it helps. Honestly though, if you are getting unwanted ghost notes or
double triggers it is probably better to practice playing on the mk2 more, until you can play
without having this happen."
Gain"
The Gain parameter allows you to set the amount of velocity that will be added to the curve
when striking a pad. A value of 0 will not add any velocity to the curve, while a value of 100 will
add the maximum amount of velocity to your strike hit."
This is another parameter that I prefer to keep low, as the higher you set it, there will be a
tendency to play even louder notes which can have an overall impact on how much expression
you can have playing pads on the mk2. That said, if you find that all of your notes are always
playing more softly than you’d expect, it can be beneficial to adjust the Gain until you feel you
are close to or exceeding the maximum velocity of the pad strikes. Similarly, if you feel that
Lin
Linear curve produces the closest mapping of strike value to sample velocity.
Exp
Exponential curve produces a wide range of sample velocity for strong hits.
Log
Logarithmic curve produces a wide range of sample velocity for light hits.
Fix
A registered strike always plays a velocity of 127.
NearTao’s Guide to the SP-404 mk2
Page 113

you are always playing at maximum velocity for samples, you may want to reduce the Gain
parameter and see if it helps you get more expression in the volume of your samples."
Trig Span"
The Trig Span parameter adjusts how sensitive the mk2 will be to repeated pad strikes, and will
ignore an additional strike over a time interval. With a value of 1 the mk2 will detect multiple
pad strikes over the longest interval of time, and with a value of 10 the mk2 will only detect and
ignore repeated note strikes over the shortest period of time. Said another way, set this value
low if you want to be able to play pads as quickly as possible, and set it to high if you expect to
be playing slower and are worried that you might accidentally hit a note two times. "
I typically have this set to 1, but I also like to make sure that I can play notes as fast as I would
like. Definitely play around with this setting and see what feels the most comfortable to you as
you play sounds on your mk2."
LED
The LED sub menu adjusts the overall behavior of all of your pads."
LED Brightness"
The LED Brightness parameter adjusts how bright your pads are when they are highlighted,
such as when you have entered a menu or a pad has been triggered. The value range is from 1
to 10, where a value of 1 is the lowest level of brightness and a value of 10 is the highest
brightness for your buttons and pads."
Personally I have been happy with the value of 8, as it gives me a clear differentiation between
the highlighted and non highlighted pads."
LED Glow"
The LED Glow parameter adjusts how bright your pads are when they are not highlighted, such
as when a button is available to press, but you have not pressed it. For example, if you have
not enabled GATE, the button will still be lit, but it will not be bright or highlighted. The value
range is from 1 to 10, where a value of 1 is the lowest level of brightness and a value of 10 is
the highest brightness for your buttons and pads."
Personally I have been happy with the value of 8, which is still not as bright as the LED
Brightness setting, but is still visible to me in most situations."
Pad LED Mode"
The Pad LED Mode parameter adjusts how the mk2 will color your pads. There are two
settings, BUS, and PAD."
BUS
The pads light up based on “BUS COLOR” settings.
PAD
The pads light up based on “PAD COLOR” settings.
NearTao’s Guide to the SP-404 mk2
Page 114

Although I like both the BUS and PAD setting for different reasons, I tend to go with BUS so
that I can have a quick visual representation of which bus the samples are being routed to
based on the BUS COLOR settings. On the MPC I do like to color my pads based on what
type of sample is on each pad, but for the mk2, since this isn’t something that can be set per
project and per bank like it can on the MPC, I have tended to avoid this."
Bus Color
The Bus Color sub menu allows you to set the color of your sample pads based on when the
Pad LED Mode is set to BUS. There are three parameters, BUS1 Color, BUS2 Color, and DRY
Color, which can all be assigned a value of Default, White, or a number from 1 to 127."
Pad Color
The Pad Color sub menu allows you to set the color of your sample pads based on when the
Pad LED Mode is set to PAD. There are sixteen parameters, one for each of the available
pads, which can all be assigned a value of Default, White, or a number from 1 to 127."
EFX Settings
'
The EFX Settings sub menu focusses on how you can operate effects to some extent on the
mk2. It covers a lot of ground for things that don’t have direct access to or configuration of on
the control panel. Overall it gives you control over how your BUS1 and BUS2 relate to each
other, what mastering effects you have on BUS3 and BUS4, what effects you have assigned to
your effect face buttons, and finally some options for how signals are routed through the
effects. The EFX Settings sub menu is broken down into tabs for Favorite, BUS3, BUS4,
Direct, and Other."
Favorite
The Favorite tab serves dual purposes in that it allows you to configure if BUS1 and BUS2 are
configured as a TYPE A where BUS1 feeds into BUS2, or if it configured as TYPE B where
BUS1 and BUS2 are serial to each other."
This tab also allows you to select your Favorite with options for Bypass where there are no
effects set to BUS3 or BUS4, or settings of 1 through 16 which are saved between power
cycles where you can quickly recall your favorite settings for BUS3 and BUS4."
Personally I tend to avoid using BUS3 and BUS4 until I am ready to consider the mixing and
mastering of my track, as it is easy to keep adding the same effect to a sample through
resampling since BUS3 and BUS4 will always be on. However if this is something that you like,
definitely feel free to leave BUS3 and BUS4 set to whatever you’d like, but if you do find your
recordings and resampling sessions start to sound weird, go into Favorite and see if there
might be something running on BUS3 and BUS4 that you had forgotten that you left on."
Bus 3
The Bus 3 tab lets you set the effect that you’d like to have in place in BUS3, and allows you
visual access to see all of the parameters for the selected effect."
NearTao’s Guide to the SP-404 mk2
Page 115

Bus 4
The Bus 4 tab lets you set the effect that you’d like to have in place in BUS4, and allows you
visual access to see all of the parameters for the selected effect."
Direct
The Direct tab lets you assign any FX that you’d like to the 5 face buttons around the Display
FILTER+DRIVE, RESONATOR, DELAY, ISOLATOR, or DJFX LOOPER. "
For most use cases I would suggest keeping these as is to reduce confusion about what
effects are where, but if you are working on specific live or performance related usages then
being able to configure the effects to your own needs can be very helpful."
Other
The Other tab lets you change settings for Mute Bus, Input FX, and Input Bus, so that you can
change the behavior of these settings."
Mute Bus"
The Mute Bus parameter determines how the Mute Bus options reacts to being triggered. You
can set this to either ALL or BUS."
For most use cases I have this set to ALL, but depending on your personal preference you may
want to experiment with using BUS to be able to quickly mute different buses."
Input FX"
The Input FX parameter determines which effect is enabled for the Line In, Mic/Guitar, and USB
input. If you don’t want any effect on your input then set this to Bypass."
Input Bus"
The Input Bus parameter determines where your audio signal will go after Input FX. You can
set this to DRY to go straight to the mixer, or BUS1/BUS2 to route the input into the bus effect
of your choice."
Import/Export
The Import sub menu allows you to execute import, export, and format operations on the SD-
Card that is inserted into your mk2."
ALL
Will mute audio playing from both BUS1 and BUS2.
BUS
Will mute audio from the current selected by [BUS FX].
NearTao’s Guide to the SP-404 mk2
Page 116

For more information about Importing and Exporting content to your SD-Card you should read
the “Importing/Exporting (Using the SD Card)” section of the Official SP-404mk2 Reference
Manual."
Import from SD-Card
The Import option allows you to import samples or projects from your SD-Card."
As of Firmware 3.0 you can scroll through files faster if you hold down |MARK| while using the
{VALUE} knob."
On your computer you can rename folders in the “EXPORT/PROJECTS” directory
from PROJECT_01 to another name. This can be very helpful if you want to give
the directory a more meaningful name for when you import it later. When importing
you can select a folder from the EXPORT/PROJECTS directory."
Export to SD-Card
The Export option allows you to export samples or projects to your SD-Card."
Format SD-Card
The Format option allows you to format your SD-Card. "
Be careful with this option as it can result in data loss if you have not properly backed up the
contents of your SD-Card to a computer or other device before executing a card format."
Backup/Restore
The Backup sub menu allows you to execute backup and restore options of the full contents of
your mk2. "
For more information about backing up and restoring content to your SD-Card you should read
the “Backing up Your Data (BACKUP)” and “Restoring from Backup Data (RESTORE)” sections
of the Official SP-404mk2 Reference Manual."
Backup
The Backup option allows you to backup the full contents of your internal storage to an SD-
Card."
Restore
The Restore option allows you to restore a backup of your mk2 on an SD-Card back to the
internal storage of your mk2."
NearTao’s Guide to the SP-404 mk2
Page 117

Factory Reset
The Factory Reset sub menu allows you to reset various components of the mk2 back to
factory. It has two options, All Data, and System Data."
All Data
Selecting All Data will initialize all settings, samples, projects, and patterns back to factory
default values."
System Data
Selecting System Data will all settings back to factory default settings. It will have no effect on
samples or patterns that you may have stored on the mk2."
Tips and Tricks#
NearTao’s Guide to the SP-404 mk2
Page 118

Chapter 10 - Midi#
NearTao’s Guide to the SP-404 mk2
Page 119

Introduction
Midi is a pretty old technology, invented way back in 1981. It sends messages from one device
to another that denote things such as when a note is pressed, how much velocity was
generated for the note, the value of knobs that have been turned, and in more advanced
implementations generates system exclusive (or SYSEX) data. The granularity of most midi
data is a value from 0 to 127, which for many purposes is fine, but it should be noted that there
are cases where a change of plus or minus one can in turn have massive changes for some
synthesizers or types of synthesis."
Please notice, I never once said that Midi data contains audio. This is a mistake that is easy to
make when you are new to music, but I want to repeat this, Midi data does not contain actual
audio. This means that if you want to control another device, you will want to use Midi, but if
you want to hear the other device you will also need to route the audio outputs someplace so
that you can hear it."
This Midi section has come as a result of my attempting to make a track with the mk2, and
some external Midi instruments setup on my iPad. You can kind of make some music this way,
but there are a lot of caveats that I found made this more difficult that it should have been. I
am going to do my best to explain the Midi implementation on the mk2, but there isn’t exactly
a whole lot to say about it either since, at least as of firmware 1.15 it is such a short
implementation of Midi."
Midi Mode A/B
Firmware 3.0 has added two modes, Midi Mode A is the old standard on the mk2 where each
bank is associated with it’s own Midi Channel, and Mode B condenses Banks A-E to one Midi
Channel, and Banks F-J to a second Midi channel. !!! I’m going to have to do some work in the
guide to get this better documented !!!"
Midi Cables
An important thing to know about the mk2, is that it uses the newer TRS standard connection
jack. In particular, the mk2 uses the Type A TRS to Midi standard. I purchased an XYPJ brand
cable that is compatible with any other Type A Midi device as well."
Speaking of which, if you have two Type A Midi devices, you don’t need a TRS to Midi adaptor
at all, and can instead use a TRS to TRS cable to directly connect both devices. Just make
sure that you know that they are both Type A Midi jacks before you make this connection."
Midi Note Offset
In Firmware 3.0 we can now adjust the Midi Note that the pads start on, which can be helpful
for very specific applications where you need to send or receive midi notes from or to an
external sequencer that uses different notes than what the mk2 is starting at. It’s not quite as
flexible as being able to assign every single pad to a separate Midi Note, but it definitely helps
get us in the right direction for configuration flexibility. To modify this setting simply go to
UTILITY -> SYSTEM -> Midi and scroll down to Note Offset to adjust the starting position of
your Midi Notes."
NearTao’s Guide to the SP-404 mk2
Page 120

MIDI Channels
The mk2 can transmit Midi data out to Midi Channels 1 through 10, and Midi Channel 16.The
mk2 can receive Midi data in from Midi Channels 1 through 11, and Midi Channel 16."
Sample Banks
The Midi Channel that is transmitted depends on whether you are in a Sample Bank or if you
are in Chromatic Mode. "
Midi Channels associated with Sample Banks are mapped as Bank A through J to Midi
Channel 1 through 10. Thus Bank A is assigned Midi Channel 1, and Bank J is assigned Midi
Channel 10. When sending and receiving midi information on Sample Banks, the pads are
mapped from C2 through Eb3."
EXT SOURCE is assigned to B1, and will respond to any Midi event on Channels 1
through 10, but will only send a Midi Event when pressed to Midi Channel 1. This
can cause some confusion if you have multiple Midi Channels triggering EXT
SOURCE."
A Sample Bank will neither respond to nor send a Midi Note event if there is no content
assigned to the pad. This can lead to a frustrating situation where you want to record or
sequence an external device, and to do so will need to record silence onto the pads so that
you are able to send and receive those Midi events."
Lists Pad #, Midi Note, and Midi Note Number"
Vocoder
The Vocoder under INPUT FX is mapped to MIDI Channel 11. The Vocoder only receives Midi
data and does not send any, so if you want to have a vocal or instrument processed through
the Vocoder input effect with changing pitch, make sure you set your external sequencer to
send Midi data to Channel 11, as the mk2 is (as of firmware 1.15) unable to sequence itself."
Of note, the Vocoder is the only mode that recognizes Pitch Bend Midi data from an external
keyboard, so if you’d like to bend notes, this will be the only place that you have that ability."
Chromatic
As noted elsewhere, you can get into Chromatic Mode by pressing |SHIFT|+[PAD4] which will
allow you to play a single sample as if it were mapped across a keyboard. Chromatic maps to
Midi Channel 16 and both sends and receives Midi data from a note range of C2 to C4, or midi
note number range of 48 to 72."
Pad 1 (C2) 48
Pad 2 (C#2) 49
Pad 3 (D2) 50
Pad 4 (D#2) 51
Pad 5 (G#1) 44
Pad 6 (A1) 45
Pad 7 (A#1) 46
Pad 8 (B1) 47
Pad 9 (E1) 40
Pad 10 (F1) 41
Pad 11 (F#1) 42
Pad 12 (G1) 43
Pad 13 (C1) 36
Pad 14 (C#1) 37
Pad 15 (D1) 38
Pad 16 (D#1) 39
Ext Source (B0) 35
NearTao’s Guide to the SP-404 mk2
Page 121

This can help you perform across a somewhat broader range (24 notes versus the 16 in
Sample Mode), but without the ability to transpose notes it becomes a bit difficult to use this
mode as a keyboard replacement. "
Midi Input
In my mind, the biggest reason you are going to be interested in using Midi Input is so that the
mk2 can be sync’d to, and be sequenced by an external device. Whether you get a dedicated
sequencer, a workstation, or a DAW, the mk2 has a lot to offer as an external hardware
sampler. "
You get quick sampling, which can allow you to try out different sounds, quite a lot of effects
that can allow you the ability to change sounds quickly over time, and the skip back buffer can
let you experiment on things and record them back. I’ve also found that if you have loops and
properly set the BPM that they will typically play right along to your external sequencer quite
nicely."
Firmware 2.0 improved the midi landscape quite a bit, but allowing for external sequencing to
play patterns, and automate effects, and 3.0 has added some new tricks up the mk2’s sleeve.
Honestly, the changes just in 2.0 have solved a lot of complaints and concerns that I had with
the mk2. I’m still holding out that DJ mode will get some fixes and updates, and I am hoping
that some changes will come in time that will allow us to map external controls to DJ mode
functions and features. "
Pattern Selection
To trigger patterns, you need to know two things. Which pad bank the pattern is in, and which
pad number it is associated with. To address a pattern pad bank, there is a similar mapping to
the sample pad bank, so Pad Bank A is addressed by Midi Channel 1, through Pad Bank J
which is addressed by Midi Channel 10. "
Program Change events are then used to address the pattern selected in the desired Pad
Bank, and Program Change #0 will trigger the pattern on Pad 1, through Program Change #15
which will trigger the pattern on Pad 15. Sending Program Change messages to a pad that
does not exist will not trigger a pattern, and similarly sending a Program Change of #16 or
above will not trigger a pattern."
A program change event will not execute until the pattern has ended and will then change to
the valid pad pattern if it exists. If a program change event is sent that does not have a
corresponding Pad Bank/Pad Pattern, then no pattern change will occur. For example, if no
pattern is recorded to Pad Bank A and Pad Pattern 4, and event is sent to Midi Channel 1 with
a Program Change of #3, then no pattern change will occur. Similarly, any Program Change
event of #16 or above cannot have an associated Pad Pattern, and there will be no change to
the currently playing pattern."
Pad Pattern to Program Change (PC) Mapping"
Pad 1 - PC #0
Pad 2 - PC #1
Pad 3 - PC #2
Pad 4 - PC #3
Pad 5 - PC #4
Pad 6 - PC #5
Pad 7 - PC #6
Pad 8 - PC #7
Pad 9 - PC #8
Pad 10 - PC #9
Pad 11 - PC #10
Pad 12 - PC #11
NearTao’s Guide to the SP-404 mk2
Page 122

Effect Control
With the release of firmware 2.0, the mk2 has really blossomed with the ability to use an
external sequencer to automate and control the mk2’s parameters. This give you the ability to
control the Input Bus, Bus 1, Bus 2, Bus 3, and Bus 4, in a straightforward manner, and means
that we can control these effects quite easily even if the parameters are hidden behind menus
and preferences. The important thing to note is that each effect bus is controlled by a distinct
Midi channel, and that the controls for each bus have the same mapping. "
The controls allow you to automate if an effect is on or off, which effect is loaded into the bus,
and what the value of control knobs 1 through 3 are set to for both the main page and the
second page of controls"
As I mentioned, this opens up a lot of options for the mk2 to be able to be automated from an
external device, and allows you to create all kinds of patterns for your filter automation. It can
go from simple filter sweeps, all the way to completely glitchy mayhem if you wanted to
automate the effect selection. Get creative!"
Pad 13 - PC #12
Pad 14 - PC #13
Pad 15 - PC #14
Pad 16 - PC #15
Effect Bus
Midi Channel
Input
Midi Channel 5
Bus 1
Midi Channel 1
Bus 2
Midi Channel 2
Bus 3
Midi Channel 3
Bus 4
Midi Channel 4
Bus 5
Midi Channel 5
Control
Midi CC
EFX on/off
CC#19, Value 0-63 is OFF, and 64-127 is ON
Effect Selection
CC#83 (Manual pg123 fw2.0, pg140 fw3.0)
Control Knob #1
CC#16
Control Knob #2
CC#17
Control Knob #3
CC#18
Control Knob #4 (Sub Knob #1)
CC#80
Control Knob #5 (Sub Knob #2)
CC#81
Control Knob #6 (Sub Knob #3)
CC#82
NearTao’s Guide to the SP-404 mk2
Page 123

One thing I do want to point out, automation of the effect selection will turn on the selected
effect every time it gets the parameter change, which can make it feel like you are fighting the
EFX on/off setting if you try and automate the two in conjunction with each other. "
Midi Output
Midi Output on the mk2 is a nice to have, but it only works well up to a point. Due to the
implementation of the Sample Bank to Midi Channel mapping, and only being able to send
notes from B1 to Eb3, it doesn’t allow for a lot of expression to play a lot of external synths for
Bass, Piano, or other sounds. Worse, the B1 mapping to EXT SOURCE means that if you are
using the B1 note, you’ll also be turning EXT SOURCE on and off a lot, which may not be
something that you are interested in."
The Ability to extend the play range of notes through Chromatic Mode is nice, but I still feel it
doesn’t go far enough. I don’t need to be able to play a full range from Midi C-2 to C7 or C8,
but even extending Chromatic Mode to a range of +/- one more octave would make a huge
improvement in usability of the mk2 with external gear."
Conclusion
Overall I am a bit underwhelmed with the Midi implementation on the mk2 right now. I’m
happy it is able to do both input and output, as this allows for a few more tricks than what the
previous SP line was capable of, but it also shows a lot of gaps where even older devices
where able to operate with other Midi devices."
NearTao’s Guide to the SP-404 mk2
Page 124

Chapter 11 - SP404MKII App
NearTao’s Guide to the SP-404 mk2
Page 125

Introduction
I’m going to say it, the SP-404MKII application is absolutely a nice to have. If you’re going to
be in front of your computer anyways, it gives you quick access to all of the parameters for
each sample across your Sample Banks, and allows you to very quickly import and export
samples without having to either sample or go through import/export through your SD Card. "
Installation
Without getting into deep details about how to install the software, I did want to make sure to
note that in order to install the mk2 companion software you will need a Roland Cloud account,
and you will need to install the Roland Cloud Manager software. "
Creating an account is pretty straight forward, and while they will be consistently hitting you up
for buying subscriptions or lifetime licenses, you do not need any of that to use the mk2
companion application."
Once you’ve installed the Roland Cloud Manager, you just need to look for the SP-404MKII
software and tell it to install. When you have the application installed for the mk2, you can load
it separately without needing to load the Roland Cloud Manager."
That said, you may want to load the Roland Cloud Manager, as this is the only way to get
application updates for the companion application."
Import Samples
Honestly, importing samples is just about as easy as dragging the sample from a folder and
dropping it onto a pad in the application. I have had great success having the application
convert and then import a lot of various sample formats over to the native format of the mk2. I
am sure that there are places where there may be errors or issues with importing, but so far
this has been something that has worked quite well for me."
Export Samples
Exporting samples is just as painless as importing them, though in this case you drag the pad
and will see a Trash icon and a box with an arrow coming out of it icon. Drag the pad to the
box with an arrow and you will be asked where to save your sample."
Import Patterns
Similar to importing samples, for a pattern you simply drag and drop a Midi file onto a Pattern
Bank Pad and it will convert it to a mk2 pattern. "
Unfortunately, when importing a Midi pattern that has notes outside of the range B1-Eb3, the
software will delete this additional Midi information. Likewise, and control data that it does not
recognize is completely removed as part of the importing process."
Export Patterns
Exporting patterns is similar to exporting samples, simply drag and drop the pattern onto the
box with an arrow coming out of it icon. This will then prompt you to ask if you’d like to save
the pattern and the software will export the pattern as a Midi file that you can then bring into
another device to play or edit."
NearTao’s Guide to the SP-404 mk2
Page 126

Settings
The mk2 companion application gives you pretty fast access to both Project Tempo as well as
Bank Tempo and Bank Volume settings. In this tab you can see all of the different values you
can set and rapidly set them as necessary for your project."
Import Projects
Simply click the Import to MKII button, and you will get a dialogue to import a project from your
file system into your mk2."
Export Projects
By clicking the Export to PC button, you will be prompted for where you would like to export all
of your project content to."
Convert SP404SX Projects
??? Still need to try this ???"
Sample Packs
The Roland Cloud Manager has several Sample Packs for sale, but as far as I can tell, this just
downloads a folder of samples, and has no special integration with the mk2 software or
hardware. If you purchase this, you’ll be left to your own devices to load up the samples into
whatever projects you would like."
Conclusion
The mk2 companion application is a decent way to bulk import or change samples on your
mk2. Besides that, it is sparse in how you can manage patterns since it has no pattern editor,
and it doesn’t have a way as of version 1.03 to do a complete system backup or restore, so
you’ll need a SD card anyways if you need to do a full system backup or restoration of your
mk2."
That said, I do find it as yet another nice to have for the mk2, but it doesn’t quite go far enough
for it to be something that I’m going to be reaching for on a regular basis as it doesn’t generally
fit the workflow I have developed for using the mk2.#
NearTao’s Guide to the SP-404 mk2
Page 127

Appendix
NearTao’s Guide to the SP-404 mk2
Page 128

Appendix A - Accessories
Introduction
There’s an awful lot of things you can to go along with your mk2, and I’m going to try and
include things that make the most sense to me as things you’d want to use with your mk2. For
things that I have experience with I will try and add some more notes or context in the section,
and if you have suggestions please feel free to send them my way. "
Batteries
I’ve used a lot of different rechargeable battery technology, and have found the Panasonic
Eneloops to be the best choice overall. Yes, they are more expensive, but you can get very
high capacity, and it can get you a bit more usage out of your mk2 than you might otherwise
get out of standard batteries."
For anybody that is considering getting the batteries that have the USB charger built into them,
my advice is to pass. Yes they can be convenient to charge as they basically have their own
charger built in, but the problem is that the cells are smaller as a compromise. To me it doesn’t
make sense to loose roughly 25-33% of the cell size so that they include their own charger,
when you can get compact chargers these days."
Overall I would say that if you plan on using battery power, please go for rechargeable
batteries, whichever you get. They are much better for the environment, and if you can get in
the habit of keeping them recharged you’ll end up saving quite a bit of money over purchasing
disposable batteries."
I would also suggest when you get a pair fresh of rechargeable batteries, mark them with wash
tape, paint, nail polish, or something else, so that you have a set of six with the same marking.
This will help ensure that you wear level the batteries consistently and then don’t end up with
one battery that has leveled differently from the others."
Panasonic Eneloop Pro AA High Capacity Batteries"
* https://eneloop.panasonic.com/en/products/eneloop-pro.html"
* 2550mAh capacity, pretty much the highest capacity you’re going to get for these cells"
* Notes: Been using these, and the usage time is quite good, 500 recharge cycles though :("
Panasonic Eneloop AA"
* https://eneloop.panasonic.com/en/products/eneloop.html"
* 1900 mAh capacity, should last roughly as long as conventional batteries"
* Notes: Passed on these to get more capacity, but 2100 recharge cycles is good"
Panasonic Eneloop Lite AA"
* https://eneloop.panasonic.com/en/products/eneloop-lite.html"
* 950 mAh capacity, requiring frequent recharges as it is less than 50% capacity of the Pro line"
* Notes: Expect roughly 1 hour usage time on the mk2, but 3000 recharge cycles is nice"
Panasonic BQ-CC65"
* https://eneloop.panasonic.com/en/products/charger-bq-cc65.html"
* Fast charger (approx 1.5h), with display per battery"
* Notes: likely higher spec than what most people will need"
Panasonic BQ-CC17"
NearTao’s Guide to the SP-404 mk2
Page 129

* https://eneloop.panasonic.com/en/products/charger-bq-cc17.html"
* Slower charger (approx 7h), just LED output to show if batteries are charging or not"
* Notes: this is currently what I am using, yes it is slow, but I don’t need fast charge features"
USB Power Banks
TBD - My daughter hasn’t given me my power bank back yet, so haven’t really had time to try it
out."
Headphones
Yes, headphones are a very personal thing, and there are tons of brands, styles, and other
factors to consider. Personally, I am usually concerned with either whether the headphones
will fit in my bag, or is the frequency response consistent enough that I can do some mixing if I
have the time. I’m just going to leave a handful of options as a result, because honestly, the
mk2 can use just about any headphones that you throw at it."
1/8” or 3.5mm Apple Earbuds"
* https://www.apple.com/shop/product/MNHF2AM/A/earpods-with-35-mm-headphone-plug"
* These headphones will fit into the 1/8” jack on the mk2 and get plenty of amplification"
* Notes: Sadly, the mk2 doesn’t have a TRRS jack, so you miss out on using the mic"
Beyerdynamic DT 770 Pro 80 ohm"
* https://north-america.beyerdynamic.com/dt-770-pro.html"
* These closed back headphones sound quite loud and robust to me"
* Notes: I suspect that the 32 ohm should get louder, but these can get painfully loud already"
Right Angle Headphone Jack"
* Cerrxian Right Angle 1/4 Male to 1/8 Female Adapter"
* Notes: Been using this and it helps a lot to use the mk2 on your lap"
SD Cards
The mk2 can manage to use either the original SD style, or the newer SDHC style cards. It is
not compatible with SDXC, and if any newer standards come out, it is unlikely to be compatible
with those either. "
SD cards are able to go up to 2gb of storage, and SDHC are able to go up to 32gb of storage.
While theoretically possible that an SDXC card could be 32gb, I am unaware of any
manufacturers making 32gb SDXC cards that would presumably be incompatible."
You can also use the micro SD card variants with an adaptor, but these have some serious
limitations for speed. While the mk2 isn’t the speediest device, my suggestion would be to use
a full size card instead of the smaller variants if possible."
As of Firmware 3.0, the SP404 mk2 now supports SDXC cards up to 1TB for importing and
exporting, but it only supports up to 32GB drives for updating the firmware. Apparently this is
now only a boot loader limitation, so be mindful if you upgrade your SD Card that for future
firmware updates you’ll still need a 32GB or smaller card to initiate your upgrade."
SandDisk Extreme Pro SDHC 32gb"
* https://www.westerndigital.com/products/memory-cards/sandisk-extreme-pro-uhs-i-sd"
NearTao’s Guide to the SP-404 mk2
Page 130

* Notes: This is what I am using, and it has worked well for backups and import/export"
SanDisk SDHC 32GB Memory Card"
* https://www.westerndigital.com/products/memory-cards/sandisk-sd#SDSDB-032G-B35"
* Notes: Looks like a fine card for backing up your data"
Audio Cables
The SP404 mk2 uses 1/4” TS cables to connect the inputs and outputs on the back. Both the
inputs and outputs operate a line level, which isn’t important for the cable, but of note because
it means that you will typically want to connect to other line level devices. "
Yes you can get 1/4” TS to RCA cables for example, but unless the RCA end is also line level, it
probably won’t work. Of note, most turn tables will output at Phono level, and thus will not
sound correct when connected to the input of the SP404 mk2 without a mixer that can accept
a Phono input. "
Similarly, it is unlikely that you will be able to use an instrument level device such as a guitar to
connect to the back inputs of the SP404 mk2 because the signal will be too quiet, and requires
something to convert the instrument level signal to line level."
Cases
Analog Cases has the Pulse case that fits both the SP-404 and the mk2."
* https://analogcases.com/products/sp404-pulse-case"
* Notes: Has room for the power supply and a good amount of cables"
Magma Bags has the CTRL CASE SP-404 that will fit an SP-404."
* https://www.magma-bags.de/ctrl-case-sp-404.html"
* Notes: Mk2 is not listed as fits. Does not appear to have room for power or cables."
NearTao’s Guide to the SP-404 mk2
Page 131
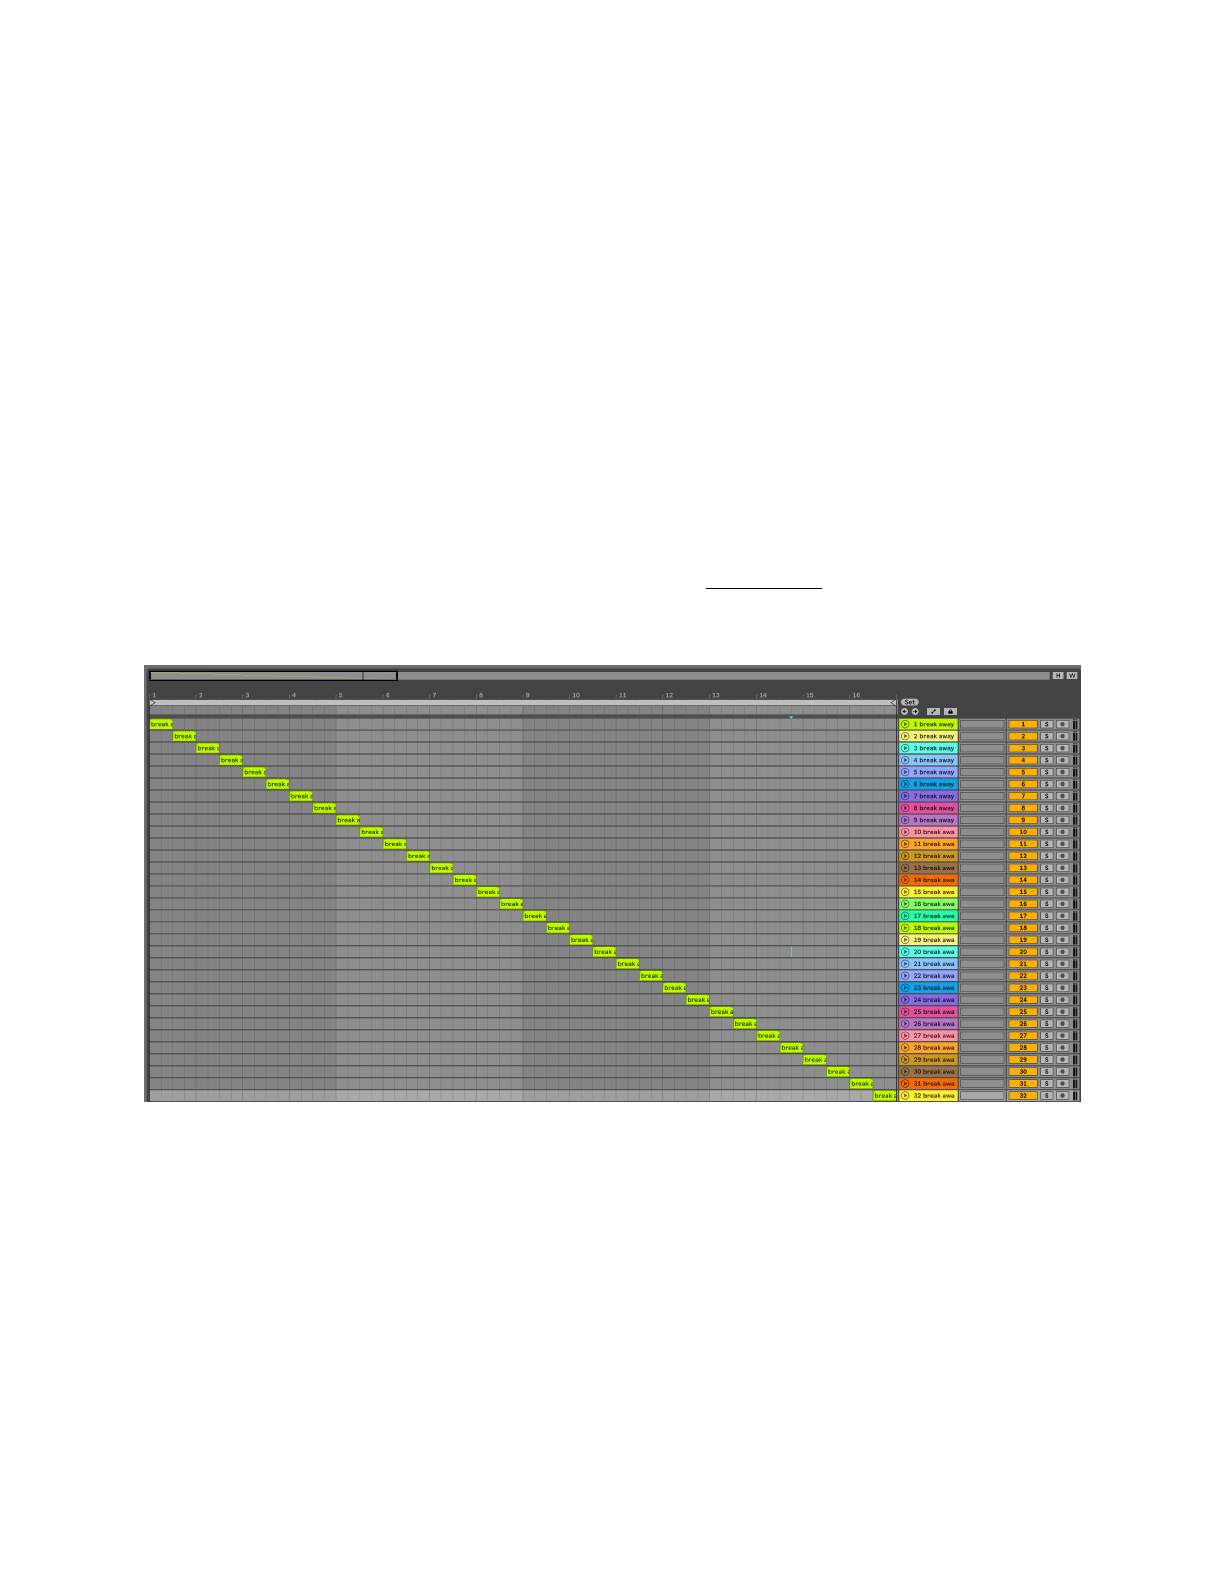
Appendix B - Experiments
Is the mk2 polyphony monophonic or stereo?
Most devices denote polyphony based on how many simultaneous sounds or differing notes
that they can play at the same time. For samplers, this is traditionally how many monophonic
samples can play at the same time. A stereo sample requires playing two monophonic
samples so that you can get one sound for the left channel and one sound for the right
channel."
Theory
I’m not terribly sure here, my hopes and dreams however are that the mk2 is able to play 32
stereo samples at the same time. Time to find out if my hopes and dreams will be crushed or
not."
Method
To actually test this out, I have created a silly 32 track Ableton Live track, where each track
plays half a bar of a Drum n Bass song I wrote years ago Break Away (linked if you actually
want to hear the song). From here I just kept scrubbing from each track just one half bar
section of the song, until I had 16 bars, or 32 half bars. In Ableton Live it looked like this:"
With this done, I then exported each track to a separate stem, leaving me with 32 tracks, each
with 16 bars in length, that only play one small portion of the song, and loaded up the tracks to
my SD card so that I could load them up on the mk2."
Loading them into the mk2 was a little tedious, just because I had to load one stem at a time,
and to keep my sanity I loaded track 1-16 to Bank A Pad 1-16, and track 17-32 to Bank B Pad
1-16. One last pass was to turn GATE off for all of the pads, because even though the samples
were mostly silence, I wanted to make sure that they played the full length of the sequence."
Pattern Sequence #1
NearTao’s Guide to the SP-404 mk2
Page 132

I set the BPM to 84 (which is the BPM of the stems), and created a new 8 bar pattern that
would play all of the Bank A pads. 8 bars is only half of the stems, and requires 16 stereo
polyphony (or 32 monophonic polyphony) to play."
It loops properly, and there are not dropped notes."
Pattern Sequence #2
Similar to Pattern Sequence #1, I set the BPM to 84, but this time I created a 16 bar pattern
that would play all of the Bank A and Bank B pads. 16 bars is the full number of stems, and
requires 32 stereo polyphony (or 64 monophonic polyphony) to play."
You can immediately notice dropped notes, as pads that had been lit up, are now randomly (or
based on event entered order) are stopped to allow other notes to play."
Further Testing
To be really specific, I would consider running almost the same experiment, but output all of
the samples as mono left and right channels. This would give further proof that the mk2 can
handle mono samples, and that it is able to output 32 mono voices at the same time."
Conclusion
Sadly, the mk2 is 32 note polyphonic for mono samples, and 16 note polyphonic for stereo
samples. I am actually fine with this, I was able to make tons of music with 32 note mono
polyphony on the likes of the MPC 500, but my gripe is now that there aren’t any direct ways to
convert stereo samples to mono samples once you have them loaded into the mk2. "
Probably more of a feature request, but I’m marking it as a bug for now (no icon
for feature request), that to fully take advantage of your polyphony within the
mk2, the mk2 needs to have an option to convert samples to mono… probably
under the |START/END| menu that you can to with {PUSH ENTER}."
Does the mk2 have 32 note polyphony with mono samples?
If we use mono samples or convert a sample under |PITCH/SPEED| panning to mono, we’d
like to be able to get access to the full 32 notes of polyphony for the SP404 mk2. This would
open up a lot more room for making different styles of music, and help ensure that we don’t get
the random note dropouts when pushing the polyphony hard. Further, plenty of content such
as drums and bass sounds tend to be perfectly fine as mono samples, perhaps just panned left
or right. "
Theory
Given the previous polyphony based experiment, we know that the mk2 is 16 stereo note
polyphony. My expectation is that we should be able to use |PITCH/SPEED| to convert a note
to mono, and I am really hoping that barring that, importing a mono sample will allow us to get
at that 32 notes of polyphony."
Method
To test the theory, I will be using the samples that I created using the Drum n Bass track above,
with a second version of those samples batch converted using Fission to convert the samples
into mono (single channel) samples."
NearTao’s Guide to the SP-404 mk2
Page 133

To setup the pattern(s), I made them 16 bars, and used TR REC mode to trigger each note to
start on the 1 of the bar, and play until LAST. This ensured that every sample would play the
full length of the pattern, and I could see based on which pads were lit up what notes were or
were not playing for the test."
Stereo Samples Panned to Mono Left
Unfortunately using the stereo samples panned hard left for a 16 bar pattern, the pattern would
only play the first 16 pads, which you can see by visually inspecting the first pad bank having
all of the LEDs lit up for the pads, and the second pad bank having no LEDs lit up for the pads
which shows that those pads are not playing. This indicates that the pan setting under |
PITCH/SPEED| does not in fact convert the sample to mono like I had initially hoped. This
likely means that panning of a sample is post playback, which is good for playing mono
samples as you should be able to pan them without using more polyphony, but it also means
that there is no way within the mk2 to convert a sample from stereo to mono within the box
itself."
Importing Mono Samples
The good news is that importing 32 mono samples in this manner allows everything to play
properly and allows us to unlock 32 notes of sample polyphony on the mk2. I was able to
confirm that all of the 32 pads play, and you can see that everything is playing on both pad
banks, so 32 total notes playing concurrently. "
Further testing
It’s probably worth one last experiment, using the |PITCH/SPEED| panning option to show that
mono samples being panned do not consume up further resources. It would make sense that
the panning is post polyphonic playing, and is part of a software mixer on the mk2, but you
never know, and this would certainly help confirm this."
Conclusion
For now it seems pretty clear that if you are solely sampling or resampling on the mk2, you are
going to be stuck with 16 notes of stereo polyphony, wether you are sampling in mono or
stereo, they come in as stereo samples, and will use 2 notes of polyphony regardless of how
you pan them. It’s not the end of the world, but it can be a bit restrictive, and indicates that
Roland really should add some stereo to mono option, likely in the |START/END| menu,
sometime in the future (post 2.01). "
If you really need 32 notes of polyphony, you’ll have to use the Roland mk2 application, or use
your computer to convert/load samples onto your SD Card and make sure that they are mono.
Right now, those are your two options."
Does EXT SOURCE turning red mean that you are clipping?
Clipping occurs on audio devices when a signal goes over their maximum threshold. On
analog devices, this can sometimes produce interesting results and new harmonics, but on
most digital systems, 0db is the maximum for a sound."
Below is a sketch to illustrate what happens when a signal has been digitally clipped, and is a
result of the input signal being louder than the 0db maximum. If you see flat tops to your
sampled waveforms, unless you are working with square waves, then you’re almost certainly "
experiencing some digital clipping."
Theory
I believe that the mk2 is going to digitally clip on the 1/4” inputs."
NearTao’s Guide to the SP-404 mk2
Page 134

Method
I hooked up my trusty Moog Voyager to the 1/4” inputs on the mk2, and dialed the Moog in to
a single oscillator with a triangle waveform. This allowed me to pretty clearly visually see if the
tips of the triangle were still in tact or not when I was recording samples."
Recording #1
I dialed in the output volume from the Moog Voyager until the EXT SOURCE lit red, and then
dialed it back slowly until it went back to the amber color. I then went into the sample and
visually inspected the points of the triangles, and as far as I could tell everything we nice and
pointy."
Recording #2
For the second recording I adjusted the Moog Voyager output volume until it was just barely
triggering the EXT SOURCE to light red and stay red. This took a little bit of slight adjustments
because it takes a few seconds of not playing a note for the EXT SOURCE pad to change back
to amber, but I was able to dial in the sound where it was staying right on the edge. When I
looked at the second sample, I could see that the tips of the triangle waveform were starting to
flatten. "
As a note, the audible difference is certainly there, but it is barely imperceptible.
Also, there are reasons you may want to intentionally do this to a clip as it can add
some additional intentional artifacts. I wouldn’t do this for a final mix myself, but as
part of sound design and creative process why not have some fun?"
Recording #3
The third recording I just pegged the Moog Voyager to maximum audio output. This caused
some very heavy digital distortion of the audio that was instantly recognizable, and to my ears
not terribly appealing unless you want everything to sound like a square waveform. Although I
did not have to zoom in to hear this, once I did the damage was incredibly perceptible and it
was easy to see just how much of the sound was actually left."
Further Testing
Some more work could be done to export and load the samples into a DAW or audio editor,
this would just further confirm if the signals are clipping, or if there are other headroom
considerations with the mk2 that are not well documented."
Conclusion
NearTao’s Guide to the SP-404 mk2
Page 135

It wasn’t too much of a shock to me to see digital clipping on the 1/4” inputs of the mk2, most
AD convertors take the data straight in and just clip away quite happily. It is confirmed that if
you see red on your EXT SOURCE pad, then you are clipping your incoming signal. Whether
this is desirable or not is up to you to decide."
Does the mic/guitar input produce analog or digital
distortions?
On some old school gear such as the Akai s900/s950, a common way to distort a signal and
add some character was to hook up whatever you wanted to sample into the microphone jack
instead of the line input. This would create an analog clipping effect that some people found
musically interesting."
Theory
I believe that the mk2 is going to digitally clip on the microphone/guitar input just as it did on
the line level input. Still, I think it is worth the experiment just in case this yields something
interesting."
Method
I hooked up the Line Level output of my Moog Voyager to the mic/guitar input of the mk2, and
set the output level of the Voyager all the way down, and the gain on the mic/guitar was set to
0, since the output from the Voyager is definitely going to be hotter than a microphone or
guitar. I then setup the patch on the Voyager to output a single triangle waveform so that it
would be easy to determine if there was digital distortion."
Recording #1
My first recording was with the mk2 set to microphone input, and the gain was set to 0. I
slowly increased the volume output of the Voyager until the EXT SOURCE pad just barely
turned red, and then backed it down so that the pad would stay amber. Visual inspection of
the waveform showed that it was being recorded as expected with no digital distortion."
Recording #2
The second recording had the same setup as Recording #1, but I decided to increase the
volume of the Voyager so that the EXT SOURCE would remain lit while I played a note. With
this change I could immediately hear the tone of the sound change, and when I inspected the
waveform I could clearly see that the audio had been digitally clipped."
Recording #3
For the third recording I set the mic/guitar switch to guitar, and immediately noticed that I had
to increase the output volume of the Voyager to get the EXT SOURCE pad to light up red, and
then back it down again to amber so that I could get my recording. Loading up the waveform
on the mk2 I didn’t notice any distortion or digital clipping."
Recording #4
The final recording was also set to guitar, and I increased the output volume of the Voyager so
that the EXT SOURCE pad would light up red. I could immediately hear the distortion as it
started making the triangle audio sound more like a square wave. Visual inspection showed
that the signal was digitally clipped just like Recording #2."
Further Testing
NearTao’s Guide to the SP-404 mk2
Page 136

I suspect using an actual guitar or microphone would give the same results, but for
completeness it would likely be good to verify the characteristics with other audio sources."
Conclusion
It appears that both the microphone and guitar inputs digitally clip just like the line level inputs.
Other than as a specific type of distortion, I don’t think that people will find it useful in general
to drive their signal to the point that the EXT SOURCE pad lights up red, and causing digital
distortion."
However, with all this said, this was just me listening by ear and visually inspecting the
waveforms on the mk2. Somebody who wants to devote more time, and go use graphic
equalizers or other techniques may find that there is some additional magic that I was unable
to determine."
Do the headphone jack outputs share an amplifier?
The mk2 has two headphone jacks, which opens up the ability for two headphones to be
connected at the same time. This may not be ideal though as both jacks are controlled by the
same volume knob, and traditionally when using splitters for headphones, the overall volume
tends to be lower when two headphones are attached due to the increased power draw."
Theory
My expectation is that Roland only put a single amplifier into the mk2, with the expectation that
most people are only going to use a single pair of headphones."
Method
For this test, I connected multiple sources to the headphone jack outputs at the same time,
and measured the volume output change on a Zoom H6 which was connected to the outputs."
Two Headphones
This was a pretty basic test, and just listening by ear. I connected a pair of DT 770 Pro 8ohm
headphones to the 1/4” jack, and a pair of Apple headphones to the 1/8” jack. By ear, I could
hear a small but noticeable increase in volume when I disconnected one of the pairs, and a
small but noticeable decrease in volume when I connected a second pair of headphones."
DT 770 Pro 8ohm and Zoom H6
For this test, I plugged the Zoom H6 into the 1/4” headphone jack outputs using a TRS to left
and right channel cable splitter. With the H6 and the DTs connected, I then adjusted the gain
on the mk2 until I was reading a -6db output volume from a tone sound being played by the
mk2. When I removed the headphones, the signal went to roughly -3db, meaning that the DT
770 Pro 8ohm was lowering the overall volume output by about 3db."
Further Testing
To be complete, it would probably be worth getting an assortment of headphones and testing
for impedance differences and the impact to the overall output volume. "
Conclusion
Personally I’m satisfied that there is likely only a single amplifier for the headphones on the
mk2, and you’ll just want to be aware of volume changes based on how much of a load you are
putting on the output."
NearTao’s Guide to the SP-404 mk2
Page 137

Is there compression on the MIC/GUITAR inputs?
Description"
Theory
Method
Experiments/Results
Further testing
Conclusion
Experiment Template
Description"
Theory
Method
Experiments/Results
Further testing
Conclusion
NearTao’s Guide to the SP-404 mk2
Page 138

Appendix C - Frequently Asked Questions
Hardware
Does the mk2 support velocity sensitivity on the pads?"
Yes, the 16 sample pads, as well as the sub pad, are all velocity sensitive?"
Does the mk2 support pressure sensitivity?"
For velocity of the initial hit yes, but you cannot adjust the pressure of your hit to bend or effect
the velocity once the note starts playing."
Similarly, when you are triggering a roll, adjusting the pressure of the pad will not adjust the
velocity of future roll events."
Hopefully this will be addressed in a future firmware update."
Does the mk2 have a D-Beam?"
No, the mk2 does not have a D-Beam."
Samples
Does the mk2 autodetect zero point crossings?"
Possibly to some extent when zoomed out, although it is hard to tell from the display."
Not when zoomed in, the mk2 will happily pick points that will clip and click, but you can
typically zoom in far enough to avoid this from being an issue."
If you need to remove a click you can set the attack on the envelope to 1."
Can the mk2 do non destructive slicing?"
No, each pad on the mk2 is a unique sample. You could copy a sample multiple times to
different pads and adjust start/end points to taste so that the sample stays in tact, but the pads
will not all reference the same sample."
NearTao’s Guide to the SP-404 mk2
Page 139

Can the mk2 sync sample playback to MIDI Clock?"
Yes, if BPM SYNC is enabled for the sample, it will sync the samples playback to a MIDI Clock.
If you need time stretching set VINYL MODE to No."
How does the mk2 handle Pitch changes?"
Pitch shifting on the mk2 is more like the SP202, where you had a CTRL knob to adjust the
pitch speed as a somewhat continuous variable, similar to how variable speed controls work
on a cassette player or record player would work. The mk2 also is able to make pitch
adjustments in semitone increments similar to how a modern sampler would adjust the pitch of
a sample to follow a chromatic keyboard."
Can you change the pitch of an entire bank of samples simultaneously?"
No, you cannot change the pitch of an entire bank of samples directly."
However, as of firmware 1.14 there is an operation associated with Mute Groups, where you
can change various settings of pads assigned to the same Mute Group simultaneously in the
|PITCH/SPEED| screen by holding down |COPY| and adjusting the parameter of your choice,
which will also allow you to adjust the pitch of all pads in the same Mute Group."
Does the mk2 have a mute group function?"
Yes, there are 10 mute groups per project. You can assign a pad to any of the 10 mute groups,
and when a pad on a mute group is triggered, it will/mute choke other pads playing in that
mute group."
Can you sample while other samples are playing?"
Yes, this is called resampling. The mk2 can resample while you play samples, whether FX are
on or off."
Further, the Skip Back function is always recording the last 25 seconds of audio on the mk2,
and is another way to get samples from content that has already been played."
Is there a way to assign only some of the chops to pads?"
Yes, once you have chopped your sample to taste push ENTER and choose assign to pad.
Use CTRL2 to cycle through the chops, and when you are on a chop you want hit a green pad
to assign the selected chop to it. When complete, press ENTER again and choose execute."
NearTao’s Guide to the SP-404 mk2
Page 140

Are there apps for creating sample chains?"
OP-1 Drum Utility, Octachainer, and Sample Crate on the app store are worth investigating."
Sample Create outputs samples at consistent intervals which might be extra handy on the
mk2."
Can you resample audio output and line/mic/guitar/usb input at the
same time?"
Yes, set INPUT SETTING and set ROUTING to MIX to record everything."
Can you start sampling when meeting a threshold?"
Yes, press SHIFT+Pad 10 multiple times until you see COUNT-IN WAIT."
Should you normalize your samples?"
Maybe. If a sample is not loud enough often normalize will get it to be much louder, but then
you may need to reduce the VOLUME under PITCH/SPEED to taste because the sample may
now be too loud."
Can you loop pads independently of each other?"
Yes. Pads set to loop will play at through their start, end, and loop points as set, regardless of
BPM that is set."
Where does end snap set the marker?"
End Snap sets the end point of a sample to the previous beat of when the START/END was
pressed. If you have a one measure loop, then you will want to press START/END just after the
beat of the 2.1.1 and before 2.2.1."
How does reverse work for already playing samples?"
Pressing reverse on a sample that is already playing will switch the playback direction and start
it again from either the start or end point of the sample depending on whichever direction it is
going."
NearTao’s Guide to the SP-404 mk2
Page 141

Pads
How many pads can be sent to cue at a time?"
By default you can only send one pad to cue at a time, but as of firmware 1.14 with the proper
setting you are able to have pad mutes continue to send to cue, even if a pad is muted from
going to Master."
Under UTILITY > SYSTEM > GENERAL tab you will find a setting called Pad MUTE. If set to
Master a pad mute will only mute the pad on the master outputs, and if set to Mst+Phn it will
mute the pad on both the master outputs and the phone (or cue) outputs."
Can the mk2 trigger two pads from a single event?"
Yes, pad linking can be setup on the mk2 to trigger one or more pads at the same time."
Are there suggested pad settings?"
A reddit user posted to try: Curve type log, Threshold 1, Gain 10, Trig Span 5, others seem to
be happy with this."
Another poster suggests: Curve Type: Fix; Threshold: 40; Gain: 0; Trig Span: 1"
Is there a way to select a pad without triggering it?"
Hold the {ENTER} on the encoder and then press the pad."
How can you stop a pad from playing?"
Hold EXIT and press the pad that you want to stop playing."
Can pads have a set velocity distinct from other pads?"
Yes, if you enter the |PITCH/SPEED| menu, when you press |SHIFT|+[PAD1] you can toggle
whether an individual pad has a fixed velocity for itself, or a variable velocity based on how
hard the pad is pressed."
Skip Back
Does Skip Back record external inputs too?"
Yes, it records based on your INPUT SETTINGS, whether it is MIX (Outputs, USB-C, MIC/
GUITAR, and Line) or ExtIn (USB-C, MIC/GUITAR, and Line)."
NearTao’s Guide to the SP-404 mk2
Page 142

Can Skip Back be setup to bypass Master FX 3/4?"
No."
Effects
Is it possible to have 5 FX at once?"
Yes, if you use the Input FX, 2 Bus FX, and 2 Master FX you can use 5 FX at the same time."
Can the FX menu to stay on screen instead of going back to BPM?"
Yes, you can get the FX menu to stay on screen by holding REMAIN and then pressing the FX
that you want to stay on screen."
What is the delay buffer trick?"
Essentially it is an effort to keep a delay buffer at or near infinite sustain to bring new elements
into a set, but use the feedback level to adjust how long to keep in elements as well as fade
them out. "
DAKIM Boiler Room"
Ways I Use Cheat Codes"
With the right delay settings you can do this trick or similar. I’ve created a bunch of videos on
YouTube to show some of the ways off."
Start with Session 22.0 (link) of my In Five series, which kicks off some of the ways you can do
this trick."
Can you select an effect by holding MFX and pressing Pad 1-16?"
Yes, holding /MFX/ this will show the first page of MFX and an effect can be selected by
pressing [PAD1-16]."
To view the second page of effects, hold /MFX/+/DJFX LOOPER/ and an effect can be
selected by pressing [PAD1-16]."
Do effects like reverb tail out when a sample is muted?"
Yes, when you play a sample and either Pad Mute it by |SHIFT|+|REVERSE|+[PAD] or Pad
Stop it by |EXIT|+[PAD], the reverb will continue to play."
NearTao’s Guide to the SP-404 mk2
Page 143

Do effects like reverb tail out when the effect is muted?"
No, when you turn off the effect or mute the bus, the reverb effect ends immediately."
Do the BUS FX maintain state being power cycles?"
No, the BUS FX will always revert to off with default settings between power cycles."
Sequencer
Can you play triplets in a roll?"
No, the mk2 currently does not support triplets in a roll, and you create bars that are odd bar
lengths. This makes it much harder to do alternate roll patterns other than what will fit with a
four on the floor style pattern."
Hopefully a future firmware update will enable dotted, triplet, and other roll patterns."
Does the mk2 have an arpeggiator?"
No, although the mk2 has a chromatic mode, this is not currently compatible with pattern
mode, and means that there is no arpeggiator."
Hopefully a future firmware update will add an arpeggiator. "
Is BPM a global setting, or is it tied to something else?"
There are three different BPM values, all of which are used independently."
You can access both the Project BPM and the Bank BPM by pressing |SHIFT|+[PAD11] to
enter the Tap Tempo screen, and you can adjust these separately."
There is also a BPM value under Input Settings that can be adjusted by going pressing both of
the |SHIFT|+[EXT SOURCE] buttons and allows you to adjust the BPM set for samples that
are recorded or resampled."
Does the mk2 have pad mutes?"
Yes, as of firmware 1.14 the mk2 has pad mutes."
Does the mk2 pattern sequencer support parameter locks?"
No, the only information that the pattern sequencer records is pad number, pad velocity, pad
start, and pad end for each event."
NearTao’s Guide to the SP-404 mk2
Page 144

Does the mk2 have a step sequencer?"
No, there is no step sequencer on the mk2."
TR-REC mode gives you a grid based sequencer to work with though."
Can the mk2 export stems from patterns?"
No, the mk2 can only export samples or projects, but does not have a way to export stems to
work in another DAW."
You can manually create your own stems by using pad mutes or using the bank velocity setting
to 0 in order to temporarily remove content, but this is more work required to create stems for
your DAW."
Can you resample a pattern?"
Yes, the mk2 can resample from a pattern now. While older SPs were unable to this, it is
something that has been added to the mk2."
Can the mk2 make events random or have random parameters?"
No, the mk2 does not have the ability to make a specific step or event random."
Does the pattern sequencer send MIDI notes?"
No. Although pressing a pad will send a MIDI note, the pattern sequencer does not send MIDI
notes."
How do you resample a perfect loop from a pattern?"
Set pattern chain repeat to off, then when you resample a pattern sampling will stop at the end
of the chain."
Does instant pattern change play the next pattern from the play head?"
No, when instantly changing to a new pattern it will start playing the next pattern from 1.1.1."
Can you play two patterns at the same time?"
No, the mk2 is only able to play one pattern at a time."
NearTao’s Guide to the SP-404 mk2
Page 145

Can the mk2 work in other timings than 4/4?"
No, the mk2 pattern sequencer and metronome only works in 4/4 timing, but you can record
audio/samples in any timing that you would like."
Polyphony
Is the mk2 32 note mono polyphonic or 32 note stereo polyphonic?"
The mk2 is 32 note mono polyphonic. You can see the Experiments on polyphony above."
NOTE: To get full access to 32 notes of polyphony, you will need to make sure that your
samples are in mono, and this can only be managed through the companion app, or by loading
mono samples off of your SD Card. Panning samples to be mono in the |PITCH/SPEED| menu
does not convert a sample to mono, and instead only plays the left or right channel into the
center channel (both left/right)."
Can an external keyboard play the mk2 polyphonically?"
Yes, an external keyboard can trigger more than one pad at a time. This will be effective for
drum kits, but will likely need a higher level of sampling and pad setup to set an instrument to
work chromatically."
DJ Mode
Do tracks need to be analyzed to play at the correct BPM?"
Technically no, but somehow you want to set the proper BPM, either automatically or manually,
in order to ensure that your tracks play back properly as you use pitch shifting, make BPM
changes, or otherwise interact with DJ Mode."
If the BPM of a track drifts, can you adjust the track?"
Yes, You can use BEND+/- to momentarily drag or push a beat, and BPM+/- to alter the
playback speed of the track."
Can you layer additional samples on top of DJ tracks?"
Yes, a pad performance feature was added to DJ mode that allows you to play samples over
the tracks you are DJ’ing."
NearTao’s Guide to the SP-404 mk2
Page 146

Can you sync tracks in DJ mode to an external Midi track?"
Yes, you can sync to an external clock. Practice this before trying to do it in a live situation
though."
Do you have access to the FX while in DJ mode?"
Yes, you can use your FX and assign them to Bypass/Bus 1/Bus 2, just like you can in Pad
Performance mode."
Are there track markers in DJ mode?"
No, there are no track markers in DJ mode."
Storage
Does the mk2 come with an SD card?"
No, the mk2 currently does not ship with an SD card in the box. Retailers may make special
offers, but Roland is not including an SD card at this time."
What can the mk2 do with an SD card?"
The mk2 can backup and restore, and it can import/export both sample and "
What SD Cards are recommended?"
SDHC cards up to 32gb will work properly with the mk2."
The mk2 does not work with SDXC cards, which are above 32gb."
What format(s) are compatible with the mk2 and SD card?"
Fat32 works."
exFAT and NTFS do not work."
Can the mk2 stream audio from SD like previous SPs?"
No, the mk2 cannot stream audio from SD. It can only import and export samples and
projects, or backup/restore the entire system from SD."
NearTao’s Guide to the SP-404 mk2
Page 147

Can you have a loop playing while you audition samples from SD?"
Yes, as of firmware 1.14, while you have a pad playing or looping on the mk2, you can go into
the IMPORT/EXPORT menu and use SUB PAD to audition samples while the loop continues to
play."
Can I mount the internal storage onto my computer?"
No. The only way to get access to the internal storage through your computer is with the
dedicated SP-404 mk2 application."
Audio
Can the mk2 be used as an audio interface for iOS or a computer?"
As a class compliant audio device, the mk2 is able to be seen as a 4 output and 2 input device
by iOS and computers that support class compliant audio."
When the EXT SOURCE lights up red, is my input clipping?"
Yes, if you see the EXT SOURCE pad light up red, then the mk2 is digitally clipping anything
that goes over the 0db threshold."
Can the mk2 be used as an amplifier for a microphone, bass, or guitar?"
Yes, the mk2 can take the input signal from the MIC/GUITAR jack, amplify the signal, be routed
through FX, and will then output the signal to the 1/4” outputs, headphone, and USB-C port
based on your monitor and cue settings."
Is Thunderbolt compatible with the USB-C connection on the mk2?"
Thunderbolt 3 adopted the USB-C standard, and is directly compatible with the USB-C
connection on the mk2."
Older Thunderbolt connections require a special adaptor, but I don’t know which part of this
will work."
Does the mk2 support bluetooth midi or audio?"
No, the mk2 itself does not support midi or audio over bluetooth. You could invest in wireless
technology that you could plug into the mk2 that would add this functionality though."
NearTao’s Guide to the SP-404 mk2
Page 148

Is there a limiter on the mk2?"
The manual details that from the Master Volume output, for Line/Phones output there is a
limiter that then goes into a clipper. For USB-C audio output the signal goes straight out
bypassing the limiter and clipper."
Can you tell if the mix of the mk2 audio output is peaking?"
No, besides the EXT SOURCE turning red for external input, there does not appear to be any
led or other indicator that the mk2 is peaking overall audio output."
How can you set the input gain for the line level inputs?"
You either need to adjust the volume output of your external device, or go into the INPUT
SETTING menu and adjust LEVEL."
Is it possible to trim a sample in bars/beats to make seamless loops?"
Yes, with the START/END record setting added in firmware 1.14."
No on 1.13, but it’s possible to trim to the exact length in samples. One quarter note = (60/
BPM) * 48000 samples. In START/END mode, hold SHIFT and press ENTER to enter numerical
values."
Alternative formula ((240 * bars) / bpm) * 48000 = length"
Does the MIC/GUITAR input compress the incoming audio?"
There does not appear to be any compression on the incoming audio through the MIC/GUITAR
input, unless you specify a compressor in the INPUT SETTINGS."
Can you use headphones as a microphone on the mk2?"
Yes, many headphones can be used as a microphone in a pinch, as long as you can plug the
headphones into the 1/4” MIC/GUITAR jack. Just set the switch to MIC and adjust the gain
knob to taste. "
MIDI
Does the mk2 transmit note and velocity data to the midi out?"
Yes, it sends midi note and velocity data. Each bank sends a note on it’s associated MIDI
channel, meaning Bank A outputs to MIDI channel 1, Bank B outputs to MIDI channel 2, and so
on."
NearTao’s Guide to the SP-404 mk2
Page 149

Each bank outputs C2-Eb3."
Can the mk2 pass MIDI input/output between MIDI jacks and USB-C?"
Yes, the mk2 will pass MIDI based on your settings under the UTILITY > SYSTEM > MIDI tab."
Can an external sequencer play sounds on the mk2?"
With proper midi connections an external device can sequence and play samples assigned to
pads on the mk2."
Each bank on the mk2 is assigned a midi channel, so Bank A is MIDI channel 1, Bank B is MIDI
channel 2, and so on."
Can the mk2 resample while receiving MIDI in?"
Yes. "
Does the mk2 respond to MIDI CC data?"
No."
Can you quantize MIDI after it has been recorded to a pattern?"
No, the mk2 does not have a way to quantize notes in a pattern once it has been recorded.
You will need to erase the notes you want to quantize and then re-record the parts of your
pattern with quantize turned on."
External Sync
Can the mk2 send sync data to an external looper to keep it in sync?"
Yes, but the external looper needs to be able to accept Sync, Start, and Stop commands to
function properly."
Does the SP-404 mk2 support AIRA link?"
No, the mk2 does not support AIRA link. See the video Introducing the Roland SP-404 mk2
Creative Sampler and Effector."
Does the mk2 receive start, stop, and sync?"
Yes."
NearTao’s Guide to the SP-404 mk2
Page 150

Can the mk2 sync loops to an external clock similar to Ableton Live?"
Yes"
Cables
Will a USB-C to Lightning cable work?"
No, the USB-C to Lighting does not provide power, and it will not allow the mk2 to connect
audio or midi to an iPhone or iPad."
To use a lightning port, you will need a USB-C to USB-A cable, and then the Apple Lightning
Camera Kit to connect USB-C to Lightning. The Camera Kit will allow the mk2 to function as a
class compliant audio and MIDI device, but it will not provide power to the mk2."
Why doesn’t my USB-C to USB-A cable work?"
Some USB-C to USB-A cables only provide power, and are not intended to transfer data.
Confirm that your cable is able to provide both power and data."
Can you hook up two mk2s together over a USB-C cable?"
No, the mk2 cannot function as a host, so they will not be able to communicate."
Power
What rechargeable alternatives are there to batteries?"
MyVolts has created a solution called ReVolt, that powers a device using standard battery sizes
through a USB connection. While similar to USB-C, this may be a good alternative for those
who cannot power the mk2 over USB-C with a power bank because it does not have a USB-C
output."
USB Rechargeable batteries work, but the convenience of USB charging comes with the cost
of additional space for the batteries, so expect a 25% reduction in capacity for your power."
USB Powerbanks."
What USB Powerbanks work?"
Anything that outputs over USB-C and can provide 1,500ma of power or more."
NearTao’s Guide to the SP-404 mk2
Page 151

How long do Eneloop Pro rechargeable batteries last?"
Roughly four hours."
The standard Eneloop rechargeable battery provides 2000ma of power, versus the Eneloop Pro
which provides 2550ma of power."
Can the mk2 be powered over USB-C from an Apple charger?"
Yes, as long as the charger provides 1500ma of power over the USB-C cable."
Firmware Updates
Where do you copy the update files onto the SD card?"
You copy the SP404MKII_APP0.bin and SP404MKII_APP1.bin files into the root folder of the
SD card and NOT the unzipped folder containing the two BIN files."
Will the mk2 have paid firmware updates?"
No, see BEATPPL Podcast 81"
Companion App
Is the companion app available on iOS?"
No, it is only available on Windows and OS X a this time."
Can the companion app run on an M1 Mac?"
Yes, this is confirmed to work."
Do you need your SP connected for the Companion App to work?"
No, the SP is not required to install or launch the Companion App. "
Factory Content
Will restoring to factory content change my firmware version?"
No, your firmware version will stay at whatever is installed. "
NearTao’s Guide to the SP-404 mk2
Page 152

How to restore factory content?"
The factory content is hidden on the internal 16gb of storage. "
To restore to factory defaults with project 1 populated with samples and patterns:"
SHIFT+PAD13 (UTILITY) -> FACTORY -> ALL DATA"
Please note, this will wipe out any other samples and projects you have on your mk2. So you
may need to back that up first if you want to save anything."
NearTao’s Guide to the SP-404 mk2
Page 153

Appendix D - Shortcuts
Sample Mode
Function
Button Combination
Description
Bank Volume
|SHIFT|+|A-J|
Adjusts the volume for all pads in the specified bank.
Bank Protect
|SHIFT|+|COPY|
Enables or disables sample protection for the current
bank. Protection prevents pads in the bank from being
copied, overwritten, deleted, or otherwise edited.
Bank BPM Sync
|SHIFT|+|BPM SYNC|
Enables or disables the BPM SYNC parameter for all
samples in the current bank.
Ping-Pong Looping
|SHIFT|+|LOOP|
Enables or disables ping-pong looping for the current
pad. Ping-pong looping plays the sample forwards and
then backwards repeatedly.
Bank Gate
|SHIFT|+|GATE|
Enables or disables the GATE parameter for all samples
in the current bank.
Sample Chop
|SHIFT|+|START/END|
Enters sample chop mode, to allow a sample to be
chopped up into multiple new samples by adjusting
parameters.
Envelope
|SHIFT|+|PITCH/
SPEED|
Enters the envelope mode, to allow a sample to have
alternative volume playback characteristics without
modifying the sample.
16 Velocity Levels
|SHIFT|+[PAD2]
The currently selected pad will be be assigned to all 16
pads, with each pad being assigned a different velocity
playback volume. This allows fine control of a single
sample’s volume when playing across the 16 pads."
NOTE: The velocity levels can be recorded into a
pattern.
Chromatic
|SHIFT|+[PAD4]
The currently selected pad will be assigned to all 16
pads, with each pad being assigned a different
semitone tuning. This allows the sample to be played
across all 16 pads as if it were an instrument."
NOTE: The semitone changes cannot be recorded into
a pattern.
Exchange
|SHIFT|+[PAD5]
Swaps the samples and associated parameters
between two selected pads.
Initialize Parameters
|SHIFT|+[PAD6]
Initializes the sample parameters for the currently
selected pad.
Pad Link Group
|SHIFT|+[PAD7]
Plays back all pads in the same group simultaneously
when one of the pads in the group is triggered.
NearTao’s Guide to the SP-404 mk2
Page 154

Pattern Mode
Pad Mute Group
|SHIFT|+[PAD8]
When one pad is triggered in the group, any other pads
in the group that were previously playing will stop
playing.
Sample Count-In
|SHIFT|+[PAD10]
Sets the count-in before recording a sample. Count In
options of COUNTIN-1MEAS, COUNTIN-2MEAS,
COUNTIN-WAIT, and COUNTIN-OFF."
NOTE: This setting is independent from the pattern
Count-In.
Pad Mute
|SHIFT|+|REVERSE|+
[PAD1-16]
Enables or disables the pressed pad from playing, by
muting the audio."
NOTE: The muted pad still uses polyphony, as it is still
playing, just not sending audio through the mixer.
Pad Pause
|SHIFT|+[HOLD]
Pauses the playback of the currently selected sample.
Effect Bus Select
|REMAIN|+[PAD1-16]
Assigns the selected pad to either DRY or the currently
selected BUS."
Note: To change busses, press [BUS FX].
Bank Bus Effects
|REMAIN|+|A-J|
Assigns the current bank to either DRY or the currently
selected BUS."
Note: To change busses, press [BUS FX].
Pad Select
{ENTER}+[PAD1-16]
Selects a pad without triggering a sample.
Bank Delete
|DEL|+|EXIT|
Deletes all samples in the current bank.
Bank Copy
|COPY|+|EXIT|
Copy all samples in the current bank.
Pad Stop
|EXIT|+[PAD1-16]
Stops the sample playing on the pad.
Stop All Samples
Press |EXIT| 4 times
Stops the playback of all samples.
One Shot
|REMAIN|+{ENTER}
Once a pad is playing, retriggering will not restart it.
Function
Button Combination
Description
Function
Button Combination
Description
Bank Protect
|SHIFT|+|COPY|
Enables or disables pattern protection for the current
bank. Protection prevents pads in the bank from being
copied, overwritten, deleted, or otherwise edited.
Undo
|SHIFT|+|PATTERN
SELECT|
Undoes the last pad input in a pattern while in pattern
record mode, can be used for up to 16 pad events.
Exchange
|SHIFT|+[PAD5]
Swaps the patterns between two selected pads.
NearTao’s Guide to the SP-404 mk2
Page 155

Effects
DJ Mode
Pattern Count-In
|SHIFT|+[PAD10]
Sets the count-in before recording a pattern. Count In
options of COUNTIN-1MEAS, COUNTIN-2MEAS,
COUNTIN-WAIT, and COUNTIN-OFF."
NOTE: This setting is independent from the sample
Count-In.
Bank Delete
|DEL|+|EXIT|
Deletes all patterns in the current bank.
Bank Copy
|COPY|+|EXIT|
Copy all patterns in the current bank.
Enter Pad Mute
Mode
|SHIFT|+|REVERSE|+|
REMAIN|
Changes pad display to show which Pads are active,
and allows turning Pad Mutes On/Off by pressing pads.
Record Pad Mutes
|SHIFT|+|REVERSE|+|
REMAIN| during REC
Records Pad Mute activity in Pattern Record Mode.
Quantize Pattern
Press |RECORD
SETTING| in Pattern
Edit Mode
Able to change quantization parameters, per selected
pad, and adjust quantization values after a pattern has
been recorded
Function
Button Combination
Description
Function
Button Combination
Description
Effects Screen
|REMAIN|+/MFX/
Keeps the currently selected BUS FX screen on the
display.
Swap Bus FX
|REMAIN|+[BUS FX]
Swap the effects in BUS1 and BUS2.
Temporary Effect
{ENTER}+/EFFECT/
Apples the effect only while holding down the desired /
EFFECT/ button.
Display MFX Page 1
Hold /MFX/
Displays the first page of the MFX.
Display MFX Page 2
Hold /MFX/+/DJFX/
Displays the second page of the MFX.
Save EFX Settings
|SHIFT|+|MARK| for 3
seconds
Saves control 1-3 of all effects.
Function
Button Combination
Description
Enter DJ Mode
[D/I]+[E/J]
Enters DJ Mode
Cue Mix/X-Fade
|START/END|
Switch between Cue Mix Mode and X-Fade Mode.
Cue Mix/EFX
|MARK|
Switch between Cue Mix Mode and EFX Mode.
Channel 1 Bus
|REMAIN|+[PAD14]
Switches the bus effect for Channel 1 from BUS-1, to
BUS-2, to DRY.
NearTao’s Guide to the SP-404 mk2
Page 156

System Settings
Channel 2 Bus
|REMAIN|+[PAD16]
Switches the bus effect for Channel 2 from BUS-1, to
BUS-2, to DRY.
Pad Mode
[HOLD]
Toggles pad behavior between DJ Mode, and Pad
Mode, allowing you to play samples not loaded up into a
channel on DJ Mode.
Marker Playback
|SHIFT|+[PAD]
Allows playback of Markers that embedded into a track
by pressing the pad associated with the Marker.
Fixed Marker
Playback
|SHIFT|+|REMAIN|
Maintains the Marker Playback Mode.
Create Marker
|SHIFT|+|MARK|
Creates a Marker at the point in time of track playback.
Delete Markers
|SHIFT|+|DEL|+[PAD]
Deletes Marker associated with the selected Pad.
Switch Chop and
Start/End Mode
|SHIFT|+|MARK|
Fast switch between the Chop Mode and Start/End
Mode.
Channel 1 Mute
|SHIFT|+[PAD13]
Toggles muting Channel 1 on and off.
Channel 2 Mute
|SHIFT|+[PAD15]
Toggles muting Channel 2 on and off.
Curve
Characteristics
|RESAMPLE|+
{ENTER}
Switches curve characteristics between Curve Linear,
Curve Square, Curve Cubic, and Fast Cut.
BPM Display Toggle
|PITCH/SPEED|
Changes BPM display from Integer, Single Decimal, and
Double Decimal place.
Function
Button Combination
Description
Function
Button Combination
Description
Roll Setting
|SHIFT|+|GATE|
Adjusts the roll timing by cycling through timing
divisions for each button press.
Live Mode
|SHIFT|+|REMAIN|
and hold for 3 or
more seconds
Disables all buttons that are not use when playing live,
such as sampling and edit-related buttons.
Fixed Velocity
|SHIFT|+[PAD1]
All samples will be played at a maximum velocity of 127
when triggered by pressing a pad.
Cue Mix
|SHIFT|+[PAD3]
Adjusts the balance of the audio monitored from the
headphone jack between the Cue and Mix.
Metronome
|SHIFT|+[PAD9]
Toggles wether the metronome will be on or off.
NearTao’s Guide to the SP-404 mk2
Page 157

Tap Tempo
|SHIFT|+[PAD11]
Allows you to adjust either Project tempo or the
currently selected Bank Tempo, by tapping a tempo on
the [SUB PAD]."
To edit the tenths place of the BPM you can hold down
the |SHIFT| button and make adjustments with the
{VALUE} knob.
Gain
|SHIFT|+[PAD12]
Takes you directly to the Utility Menu > System > GAIN
tab, to adjust gain levels on your various inputs and
outputs.
Utility
|SHIFT|+[PAD13]
Takes you to the UTILITY MENU, to adjust system
settings.
Import/Export
|SHIFT|+[PAD14]
Takes you directly to the Utility Menu > IMPORT/
EXPORT screen, to be able to import and export files.
Pad Settings
|SHIFT|+[PAD15]
Takes you directly to the Utility Menu > PAD SETTING
screen, to adjust your pad settings such as sensitivity
and pad LED color profiles.
Effect Settings
|SHIFT|+[PAD16]
Takes you directly to the Utility Menu > EFX SETTING
screen, where you can adjust your bus effect settings.
Mute Bus
|SHIFT|+[BUS FX]
Enables or disables all audio coming out of the Bus 1 &
Bus 2 effects bus.
Input Settings
|SHIFT|+[EXT
SOURCE]
Takes you to the input settings configuration screen.
Project
|SHIFT|+[SUB PAD]
Takes you to the PROJECT screen.
Function
Button Combination
Description
NearTao’s Guide to the SP-404 mk2
Page 158

References
Roland Links
Official SP-404 mk2 Manuals"
Official SP-404 mk2 Firmware 2.0 PDF Manual"
Official SP-404 mk2 Firmware 1.14 PDF Manual"
Official SP-404 mk2 Downloads (firmware and skin template)"
Ultimate Guide to Customizing the SP-404 mk2"
Roland Engineering: Designing the SP-404 mk2"
Unofficial Links
Downloadable SP-404 mk2 Manual in PDF (firmware 1.10)"
Technical
https://minimidi.world - Type A and Type B TRS to Midi resource"
Specifications for TRS Adaptors Adopted and Released - Link to TRS Midi Specification"
Articles
CDM What’s new on Roland SP-404MKII sampler, spec for spec"
DJ Mag Roland’s SP-404 MKII Update is Now Official"
engadget Roland SP-404MKII hands-on "
Sound on Sound Roland SP-404 MkII"
Reviews
JunoDaily Roland SP-404 MKII review"
musicradar Roland SP-404 MKII review"
MusicTech Roland SP-404MKII review"
Forums
NearTao’s Guide to the SP-404 mk2
Page 159

Elektronauts Roland SP-404 Mk2 Thread"
Elektronauts SP-404 Mk2 Production Tips/Tricks/Problem Solving/Bugs"
MPC-Forums SP-404 mk2 Thread"
SP-Forums SP-404 mk2 Sub Forum"
Modwiggler Roland SP 404 mk2 Thread"
Gearspace Roland SP-404 mk2 Thread"
Reddit SP-404 Sub"
Reddit SP-404 mk2 Sub - Seems dead"
Videos
Official Roland SP-404 mk2 Launch Video"
Introducing the Roland SP-404 mk2 Creative Sampler and Effector"
Loopop SP-404 mk2 Review / 9 Tips & Ideas / Tutorial"
Mike Acosta Roland SP-404 mk2 First Look"
Bo Beats Roland SP-404 mk2 - the new king of creative samplers?!"
'
Ave Mcree Roland SP-404 mk2 A Hip Hop Producer Review"
Accurate Beats Roland SP-404 mk2 - Beatmaking and First Impressions"
Nonjuror - Making a Beat on the Sp-404 mk2"
Ski Beatz Chopping samples on Roland SP-404 mk2"
Roland SP-404 mk2 x Lionclad"
Roland SP-404 mk2 is Official! Demo & Feature Rundown with Tarnay"
Roland SP-404 mk2 Vocal Tutorial - Soft Blue Magic"
Roland Cloud How-To: Download SP-404 mk2 App and Beat Maker Sample Packs"
LOFI Hip Hop jams on the SP 404 mk2 - spvidz"
Roland SP-404 mk2 Overview // The Upgrade We’ve All Been Dreaming Of - Jade Wii"
Ave Mcree!! How to make your first beat#
NearTao’s Guide to the SP-404 mk2
Page 160

Index
NearTao’s Guide to the SP-404 mk2
Page 161

Special Thanks
NearTao’s Guide to the SP-404 mk2
Page 162

Acknowledgements
A lot of good information and questions have been pulled from the Elektronauts Forum and the
Gearspace Forum. Thanks everybody for providing your thoughts and information!"
Thanks to the kind people who sent a few dollars over on buymeacoffee.com, greatly
appreciated :D
NearTao’s Guide to the SP-404 mk2
Page 163
