
User Guide
Version 2021.2
Last Revision:2022-07-05
Objectif Lune, Inc.
2030 Pie-IX, Suite 500
Montréal, QC, Canada, H1V 2C8
+1 (514) 875-5863
www.objectiflune.com
All trademarks displayed are the property of their respective owners.
© Objectif Lune, Inc. 1994-2022. All rights reserved. No part of this documentation may be
reproduced, transmitted or distributed outside of Objectif Lune Inc. by any means whatsoever
without the express written permission of Objectif Lune Inc. Inc. Objectif Lune Inc. Inc. disclaims
responsibility for any errors and omissions in this documentation and accepts no responsibility
for damages arising from such inconsistencies or their further consequences of any kind.
Objectif Lune Inc. Inc reserves the right to alter the information contained in this documentation
without notice.

Table of Contents
Table of Contents 4
Welcome to PlanetPress Workflow 2021.2 13
Notes in this guide 13
Installation and setup 15
System requirements 15
Operating System 15
Virtual environments 16
Minimum hardware requirements 16
Recommended hardware requirements 17
Requirements for individual Connect modules 17
Environment considerations 18
Terminal Services 18
Virtual environments 18
32-bit or 64-bit? 19
Antivirus considerations 19
Backup software 21
Microsoft Office compatibility 21
Silent installation 21
Command line parameters 21
Example 22
Setting up the working environment 22
Network considerations 22
Local and network rights 23
Account requirements 23
Mapped drives 23
Network ports used by each service 24
Known Issues 26
Runtime parameter values get reset 26
Custom plugin importation issue in 2021.2 26
NodeJS Server prompts for Connect Server credentials 26
Microsoft patch causing handling of XLS to fail 27
Data Repository error 28
Other known issues 28
Page 4

Basics 32
Related tools and resource files 32
Features 34
About Workflow Configurations 34
Creating a new configuration 35
Open a PlanetPress Workflow configuration file 36
Saving and sending a Workflow Configuration 37
Exit PlanetPress Workflow Configuration program 39
Workflow Configuration resource files 40
Connect resources 41
PlanetPress Design documents 45
PrintShop Mail documents 51
About data 51
About documents and variable data 52
Job file 53
Job file names and output file names 53
Data selections 55
About data emulation 61
Sample Data 72
Metadata 76
Working with JSON 92
Data Repository 96
Structure 97
Accessing the Data Repository 97
Where to find the Data Repository 99
Debugging and error handling 99
About error handling 99
Using the On Error tab 100
Creating and using Error processes 101
Accessing the Logs 103
Resubmit backed up input files to a process 105
Debugging your PlanetPress Workflow process 107
About printing 111
OL Connect print jobs 111
PlanetPress Suite print jobs 112
PlanetPress Workflow printer queues 113
Page 5

Shared printer queue properties 114
Windows Output printer queue 116
LPR Output Printer Queue 117
FTP Output Printer Queue 118
Send to Folder printer queue 120
Load balancing 121
Associating PlanetPress Design documents and PlanetPress printer queues 121
Triggers 123
Objectif Lune Printer Driver (PS) 123
About processes and subprocesses 126
Processes 126
Startup processes 128
Subprocesses 128
Creating a process 128
Importing processes 130
Activating or deactivating a process 132
Process properties 133
About branches and conditions 138
Converting a branch to a subprocess 140
Using Scripts 141
Run Script task 141
APIs 142
The Script Editor and XSLT Editor 143
SOAP Server API Reference 149
The Watch Object 156
Data Repository API 175
Metadata API 197
Attributes 218
Count 218
Fields 218
Index 218
NodeType 218
Parent 219
Selected 219
SelectedCount 219
SelectedState 220
Add(Integer Index) 220
Page 6

AttributeByIndex(Integer Index) 221
AttributeByName(const String Name) 221
Clear() 222
Copy() 222
Cut() 222
DatapageCount() 222
Delete() 223
DocumentCount() 223
FieldByIndex(Integer Index) 223
FieldByName(const String Name) 224
FieldByNameIndex(const String Name, Integer Index) 224
IndexInDocument() 225
IndexInGroup() 225
IndexInJob() 225
Item(Integer Index) 226
PageCount() 226
Paste() 227
PasteAt(Integer Index) 227
Select(TSelectWhat SelectWhat) 228
SelectedDatapageCount() 228
SelectedDocumentCount() 228
SelectedIndexInDocument() 229
SelectedIndexInGroup() 229
SelectedIndexInJob() 229
SelectedPageCount() 229
Sort(const String Name, optional TSortFlags Flags, optional const String Name2,
optional TSortFlags Flags2, optional const String Name3, optional TSortFlags Flags3)
230
Parameters 235
Exceptions 235
Parameters 236
Exceptions 236
Parameters 237
Returns 237
Parameters 237
Exceptions 237
Parameters 237
Returns 238
Page 7

Exceptions 238
Parameters 238
Returns 238
Parameters 238
Returns 239
Exceptions 239
Parameters 239
Returns 239
Exceptions 239
AlambicEdit API reference 243
Stopping execution 276
Special workflow types 278
HTTP Server workflow 279
PDF Workflow 287
PlanetPress Capture Workflow 289
Workflow processes in a Connect Send solution 298
About Tasks 300
Adding tasks 301
Editing a task 302
Task properties 302
Masks 306
Selecting a resource file in task properties 307
Input tasks 309
Action tasks 379
Data splitters 452
Process logic tasks 472
Connector tasks 491
PlanetPress Capture 538
Metadata tasks 560
OL Connect Send 577
OL Connect tasks 591
Output tasks 655
Document Management tasks 682
Connection tab 684
Download tab 686
Connection tab 689
Upload tab 691
Page 8

Advanced properties 699
Advanced properties 702
Email Services 709
Unknown tasks 716
About variables 716
Job Info variables 717
System variables 719
Local variables 724
Global variables 725
Variable task properties 727
Workflow add-ons 729
PlanetPress Capture 730
Capture OnTheGo (COTG) 758
About PlanetPress Fax 758
About PlanetPress Image 759
OL Connect Send 760
ZUGFeRD 761
About related programs and services 762
Available Input services 763
Available Output services 763
Start and stop PlanetPress Workflow Service 764
Users and configurations 765
Workflow Services 767
Preferences 769
Other preferences and settings 770
General appearance preferences 770
Object Inspector appearance preferences 771
Configuration Components pane appearance preferences 772
Colors 772
Options 772
Default configuration behavior preferences 773
Notification Messages behavior preferences 774
Preferences 774
Sample Data behavior preferences 777
Preferences 777
Network behavior preferences 777
Preferences 777
Page 9

PlanetPress Capture preferences 778
PlanetPress Capture Server/Client 779
PlanetPress Document Manager 780
PlanetPress Capture ODBC Settings 782
PlanetPress Capture Pen Management Tool 784
PlanetPress Capture License Management 786
OL Connect preferences 787
PDF text extraction tolerance factors 789
General and logging preferences 791
Messenger plugin preferences 792
Preferences 792
HTTP Server Input plugin preferences 1 793
Preferences 793
HTTP Server Input plugin preferences 2 797
LPD Input plugin preferences 799
Preferences 799
NodeJS Server Input plugin preferences 1 800
NodeJS Server Input plugin preferences 2 802
NodeJS Server Input plugin preferences 3 803
Testing the server 804
Changing the Log in page 804
Setting the duration of the authentication 804
Serial Input plugin preferences 805
Preferences 805
Telnet Input plugin preferences 806
Preferences 806
PlanetPress Fax plugin preferences 807
Preferences 807
OpenText RightFax options 810
FTP Output Service preferences 810
Options 810
PlanetPress Image preferences 811
LPR Output preferences 814
Options 815
PrintShop Web Connect Service preferences 816
Editor Options 816
The user interface 821
Page 10

Customizing the Workspace 822
Dock and undock areas of the Program Window 822
Show or hide areas of the program window 824
Combine and attach areas 824
Resize the program window areas 829
Change the Interface language 830
PlanetPress Workflow Button 831
Options 831
Configuration Components pane 832
Components Area Sections 832
PlanetPress Design document properties 835
Moving and copying configuration components 838
Renaming objects in the Configuration Components Pane 841
Reordering objects in the Configuration Components pane 841
Grouping Configuration Components 842
Expanding and collapsing categories and groups in the Configuration Components
pane
844
Deleting something from the Configuration Components pane 844
Dialogs 845
Access Manager 845
Activate a printer 851
Advanced SQL Statement Dialog 853
Data Repository Manager 854
The Data Selector 857
The File Viewer 861
Data Selector display preferences 861
PDF Viewer 864
Printer utilities 866
Process properties 869
Rule Interface 874
Task Properties dialog 877
Update document 878
Virtual Drive Manager 879
The Debug Information pane 879
The Message Area Pane 880
The Object Inspector pane 881
Editing properties 882
Page 11

The Plug-in Bar 883
Categories 883
Settings and customization 884
The Process area 885
Cutting, copying and pasting tasks and branches 886
Highlight a task or branch 888
Disabling tasks and branches 888
Moving a task or branch using drag-and-drop 889
Redo a command 890
Removing tasks or branches 890
Replacing tasks, conditions or branches 891
Resize the rows and columns of the Process area 892
Collapse and expand branches and conditions 892
Undo a command 893
Zoom in or out within the Process Area 893
The Quick Access Toolbar 893
Adding buttons 894
Removing buttons 894
Moving the toolbar 894
The PlanetPress Workflow Ribbon 894
The Task Comments Pane 898
The PlanetPress Workflow Service Console 898
Controlling Services 898
Viewing log files 899
Knowledge Base 901
Legal Notices and Acknowledgments 902
Copyright Information 908
Page 12
Welcome to PlanetPress Workflow
2021.2
This PDF documentation covers version 2021.2. To view the documentation of previous
versions please refer to the PDF files available in the Downloads section of our website:
http://www.objectiflune.com/OL/Download/DownloadCenter.
Workflow is the heart of all of our solutions. Working in conjunction with PlanetPress Connect,
PlanetPress Capture, CaptureOnTheGO, PlanetPress Imaging, PlanetPress Fax, and a variety
of plugins, it helps improve your communications processes. Processes such as
communication creation, interaction, distribution and even maintenance.
Workflow is the "super dispatcher". It caters for inputs from a huge variety of sources, such as
email, web pages, databases, individual files (PDF, csv, XML, etc), print streams, FTP, Telnet
and ERP systems. This data can then be analyzed, modified, stored, verified, routed and used
as triggers for other processes from entirely within Workflow. Finally it is passed to one of our
other products (or not) to be outputted in multiple ways (printed, emailed, posted, archived, sent
to third party solutions, etc..).
Consider Workflow as a set of buildings blocks that enable you to build your own customized
automated processes which will fit your environment and not the other way around. Create
processes that will save you time and money!
Notes in this guide
Notes are used throughout this guide to draw your attention to certain information.
Note
Important information that deserves your attention.
Page 13

Tip
Information that may help you use PlanetPress Workflow better or that suggests an easier
method.
Warning
Information that is potentially critical to using PlanetPress Workflow.
Page 14

Installation and setup
The installation procedure for Workflow is described in the topic Installing Workflow.
The following topics describe the different considerations that are important in regards to the
installation and use of PlanetPress Workflow.
l "System requirements" below
l "Environment considerations" on page18
l "Setting up the working environment" on page22
l "Known Issues" on page26
System requirements
These are the recommended system requirements for PlanetPress Workflow 2021.2.
Operating System
l Microsoft Windows 2012/2012 R2 Server
l Microsoft Windows 2016 Server
l Microsoft Windows 2019 Server
l Microsoft Windows 8.1
l Microsoft Windows 10 (Pro and Enterprise versions only)
Note
PlanetPress Workflow2021.2 is expected to run on some older operating systems, but
just as Microsoft no longer supports these older operating systems, Objectif Lune Inc. will
not provide support for Objectif Lune Inc. products running on them.
The historic operating systems that it is expectedPlanetPress Workflow2021.2 will
continue to run on include: Microsoft Windows 7; Microsoft Windows 2003 Server; and
Microsoft Windows 2008 Server R2.
Page 15

Note
The NodeJS Server installed with Workflow is not supported in an x86 environment.
Virtual environments
PlanetPress Workflow supports the following virtual environments:
l VMWare Environments. This includes VMWare Player, VMWare Workstation as well as
VMWare ESX Server.
l
VMWare VMotion. This means the virtual machine hosting PlanetPress Workflow can be
automatically moved from one ESX server to another in a clustered installation.
l Microsoft Hyper-V/Azure infrastructure environments.
l Amazon Web Services (AWS)
PlanetPress Workflow is not officially supported on any other virtual machines such as Virtual
PC, Parallels, Bochs, Xen, etc. While running PlanetPress Workflow on these virtual machines
may work finewe have not tested them and cannot offer support for them.
Warning
The PlanetPress Workflow End-User License Agreement (EULA) specifies that a
PlanetPress Workflow software license may only be used on a single virtual or physical
PC at a time. While copying a virtual machine for backup purposes is acceptable, running
two instances of the same machine, using the same serial number, is strictly prohibited.
Minimum hardware requirements
As with any software application, minimum hardware requirements represent the basic
hardware on which the software will run. Note however that settling for the minimum
specification is unlikely to produce the performance you expect from the system. It can be used
when configuring a trial or a development system, however.
l File system: NTFS (FAT32 is not supported)
l CPU:multi-core
Page 16

l RAM: 6GB
l Disk Space:At least 10GB*
1
*
1
: Requirements will depend upon the amount of data you process through PlanetPress
Workflow. For instance, a PostScript file containing several thousands of documents could
easily take up several GBs.
Recommended hardware requirements
Due to its versatility, OL Connect is used for a wide variety of applications. Consequently, it is
difficult to determine which hardware configuration will produce the best results for any given
implementation. The following specs should therefore be viewed as a general guideline that is
most likely to produce expected results for most implementations. You should, however, keep
in mind that it may not represent the optimal setup for your particular application.
l File system: NTFS (FAT32 is not supported)
l CPU:Intel Core i7-4770 Haswell or equivalent
l RAM: 16GB
l Disk Space: 20GB*
l Storage Type: Solid State Drive (SSD)
l Networking: 10Gb Ethernet
*: Requirements will depend upon the amount of data you process through PlanetPress
Workflow. For instance, a PostScript file containing several thousands of documents could
easily take up several GBs.
Requirements for individual Connect modules
OL Connect Products comprises multiple modules that can be operated separately on multiple
PCs. Each module has its own set of requirements that may differ from the other modules.
While the hardware requirements described above are relatively generic when installing all
Connect modules on a single server, they should not be interpreted literally for each individual
module.
When installing on multiple PCs, keep the following rules of thumb in mind:
Page 17

l The Connect Workflow module requires less RAM but fast hard drive access. It also
benefits from fast multi-core CPUs, in order to run processes in parallel.
l The Connect Server module requires more RAM and benefits from fast multi-core CPUs.
Disk access speed is less of a concern.
l The Connect Designer module requires more RAM and fast disk access to provide a
responsive user-experience.
l The back-end database (MySQL by default) benefits from more RAM, speedy disk access
and fast networking as it will be solicited by all modules simultaneously.
Environment considerations
This page provides technical information about the environment in which PlanetPress
Workflow is intended to run.
Terminal Services
PlanetPress Workflow does not support Remote Desktop (Terminal) Services because
Workflow runs on single server and only one user can log on at once.
Terminal Services may also be referred to as Terminal Server or Remote Administration Mode
(Windows Server 2003 and 2008).
Single-User Remote Desktop Protocol (RDP) (where only one person can use RDP at a time)
is supported for PlanetPress Workflow version 6.2 and higher, however it is only supported in
Windows XP or Windows 2003. While later versions of Windows may not cause issues when
accessing PlanetPress Workflow through RDP, these combinations are no longer tested and
may not be functional.
Virtual environments
PlanetPress Workflow supports the following virtual environments:
l VMWare Environments. This includes VMWare Player, VMWare Workstation as well as
VMWare ESX Server.
l
VMWare VMotion. This means the virtual machine hosting PlanetPress Workflow can be
automatically moved from one ESX server to another in a clustered installation.
Page 18

l Microsoft Hyper-V/Azure infrastructure environments.
l Amazon Web Services (AWS)
PlanetPress Workflow is not officially supported on any other virtual machines such as Virtual
PC, Parallels, Bochs, Xen, etc. While running PlanetPress Workflow on these virtual machines
may work finewe have not tested them and cannot offer support for them.
Warning
The PlanetPress Workflow End-User License Agreement (EULA) specifies that a
PlanetPress Workflow software license may only be used on a single virtual or physical
PC at a time. While copying a virtual machine for backup purposes is acceptable, running
two instances of the same machine, using the same serial number, is strictly prohibited.
32-bit or 64-bit?
PlanetPress Suite version 7.1.3 and higher, as well as PlanetPress Connect, support a 64-bit
operating system. However, PlanetPress Workflow remains 32-bits in this environment, which
means that for all intents and purposes there is no difference between those two environments
as far as PlanetPress Workflow is concerned.
Antivirus considerations
PlanetPress Workflow generates a very large amount of temporary data on your hard disk,
especially when manipulating or creating PDF files. This can sometimes cause issues when
any other software is trying to access the temporary files at the same time as PlanetPress
Workflow and its components are trying to read, write, create or delete those files.
If you experience these issues you may want to temporarily disable your antivirus "live", "daily"
or "deep" scans for the following folders and processes:
Warning
Disabling any antivirus scanning permanently on any folder or program is not
recommended, and Objectif Lune cannot be held reliable for any consequence of
Page 19

disabling your antivirus or whitelisting the folders or executables listed here, or any other
change in your antivirus protection setup!
l On Windows 7/2008 and later:
l C:\ProgramData\Objectif Lune\PlanetPress Workflow 8\
l C:\Users\[user]\AppData\Local\Temp\ (where [user] is the user under which
Workflow is configured)
l C:\Users\[user]\Connect (where [user] is the user under which Workflow is
configured)
l On all systems:
l C:\Windows\Temp\
Note
C:\Windows\Temp\ is used by multiple software which may cause risks on
your computer. However, PlanetPress Workflow may use this folder as
temporary storage, especially in the case of creating PDF files. We do not
recommend disabling scan on this folder, unless you notice performance
issues when generating PDFs, and then only as a test.
l Processes:
l FTPPutService.exe
l HTTPService.exe
l LPDService.exe
l LPRService.exe
l PPWatchService.exe
l PSWService.exe
l SerialService.exe
l SMTPService.exe
l TelnetService.exe
l ppNode.exe
l PPFaxService.exe
Page 20

l PPImageService.exe
l MessengerService.exe
Backup software
For similar reasons, it is important to know that backup software can also access files while
copying them to a remote backup location, so you should make sure that no PlanetPress
Workflow process is working during your backups.
Microsoft Office compatibility
The Microsoft Office 2010 line of products, other than Pro and Enterprise, has not been certified
for use with PlanetPress Workflow. Some of its products may not be compatible with the
connectors included in OL Connect.
Silent installation
To perform a silent install of Workflow, the setup executable (Setup.exe) needs to be started
from the command line with the /s parameter, followed by one or more of the following
parameters, each separated by a space.
In all cases, a value of “1” means include the component, while a value of “0” means it will be
skipped. Note that setting a “0” value is usually not necessary as the parameter can simply be
omitted from the command.
Command line parameters
PPPRODUCTION = 0/1 (Workflow component)
PPFAX = 0/1 (Fax Component)
PPIMAGE = 0/1 (Image Component)
PPSEARCH = 0/1 (Search Component)
PPPRINTER = 0/1 (PlanetPress Printer Driver)
UNINSTALL = 1 (Uninstall mode)
Page 21

SHOWLAUNCHPROGRAM = 0 (Do not launch Update Manager after the installation is complete)
CJKFONTS= 0/1 (CJK Fonts Lib)
LASERFICHELIB = 0/1 (Laserfiche Lib)
ICRLIB = 0/1 (ICR LIBRARY)
SP = 0/1 (Sharepoint plugin)
NET40 = 0/1 (Install Microsoft .Net 4.0 redistribuable)
Example
The following performs a silent install of Workflow and the Image and Search modules.
"c:\temp\Setup.exe" /s PPPRODUCTION=1 PPIMAGE=1 PPSEARCH=1
Setting up the working environment
After installation, the working environment needs to be set up before you start using Workflow.
This involves:
l
Configuring PlanetPress Workflow Services (see "Workflow Services" on page767).
l Setting up the Workflow Configuration tool. You can configure a variety of options, from
how the application itself looks or behaves, to plugin specific options. These are
accessible through the Preferences button under the PlanetPress Workflow (W) button,
or via the key combination Ctrl+Alt+P .
Network considerations
While PlanetPress Workflow is typically installed on a server machine that is only accessed by
one single user such as an IT person, multiple users logging on to that machine is a possibility
(except with terminal servers, see "Environment considerations" on page18). Because each
user may have different local and network rights, it may be important to consider the
Page 22

implications in regards to PlanetPress Workflow. To change the service log on information, see
"Workflow Services" on page767.
Local and network rights
Programs, such as PlanetPress Workflow and all its services, must identify themselves in order
to be granted permission to perform operations on the computer on which they run as well as
on other computers accessible via a network connection. On a given workstation, you can
configure your PlanetPress Workflow to use either the local system account or any specific user
account. When you do this, you grant PlanetPress Workflow and all its services the same rights
associated with the selected account.
When you are running PlanetPress Workflow Configuration program on a workstation, if it is
associated with an account that is different from your account, the following icon is displayed in
the lower right corner of PlanetPress Workflow Configuration program: . The icon reminds you
that the logon information is different for the PlanetPress Workflow services, and that some
network resources may not be accessibly by PlanetPress Workflow when running a live
configuration.
Account requirements
PlanetPress Workflow and its services require administrator rights to run on any given
computer and must therefore be associated with an account that has such rights.
We recommend creating a network or domain account specifically for the PlanetPress
Workflow services, which has administrator credentials on the machine where it is installed,
and is given proper rights for any network resources your configuration may request.
Mapped drives
It is strongly recommended to use local folders instead of mapped drives whenever possible.
Mapped drives (for example, drive X: leading to \\server\public\) are always user-specific and
are created at logon. This means that mapped drives are typically not available to the
PlanetPress Workflow services when running a live configuration.
Furthermore, while the mapped drives are not shared, they are still limited to one map per
computer, meaning if one user maps the X: drive, a different user (or a service) will not be able
Page 23

to map it again. This creates a limitation in PlanetPress Workflow: if you create a mapped drive
as a user, you will not have access to this mapped drive while running as a service unless you
log off, and then have PlanetPress Workflow Tools map the drive using a Run Script action
inside a Startup Process.
In addition, the use of network shared drives can cause issues when attempting to capture files
from those locations since the notification process for folder changes on network shares may be
different than that of local folders.
Network ports used by each service
The port configuration for each PlanetPress Workflow Input task or Output task is described in
the following table. The port number assignments comply with Internet standards. If a
PlanetPress Workflow component is not active, the port is not used.
For information about ports used by other PlanetPress components, see Network
Considerations in Connect's Online Help.
Component Protocol Local Port Remote Port
Email Input
(POP3 mode)
TCP Default
1
110
Email Input
(Outlook mode)
TCP see Remote
Port
See Network Ports Used by Key
Microsoft Server Products
(https://msdn.microsoft.com/en-
us/library/cc875824.aspx)
Folder Capture TCP/UDP Default
1
Standard Windows file and printer
sharing ports
2
:
l UDP 137, 138; TCP 139 (NetBIOS
over TCP/IP (NetBT))
l UDP 445; TCP 445 (SMB over
TCP/IP)
LPD Input TCP 515
(listening
N/A
Page 24

Component Protocol Local Port Remote Port
port)
FTP Input TCP Default
1
21
Telnet Input TCP Default
1
9100 (configurable)
FTP Output TCP Default
1
21
Email Output
(SMTP mode)
TCP Default
1
25
Email Output
(Outlook mode)
TCP See Email
Input
(Outlook
mode)
See Email Input (Outlook mode)
Send to Folder
Windows
Queue Output
TCP
Default
1
Standard Windows file and printer
sharing ports
2
:
l 137, 138 and/or 139 (NetBIOS
over TCP/IP (NetBT))
l 445 (SMB Over TCP/IP)
LPR Output TCP Default or
721 to 731
3
515
PlanetPress
Database
TCP or UDP Unknown
4
Unknown
4
SNMP
Condition
UDP Default
1
161
1
Value is greater than 1024 and is assigned by Windows XP. This is the default.
Page 25

2
Windows NT 4.0 uses NetBIOS over TCP/IP for file and printer sharing, while Windows 2000,
Windows XP, and Windows Server 2003 may be configured to use NetBIOS over TCP/IP or
SMB over TCP/IP. The operating system may use additional ports. Refer to the Windows
documentation for further information.
3
If the “No source port range restriction” option is checked (recommended), see footnote 1. If
the option is unchecked, the local port will be chosen from a range going from 721 to 731.
4
Contact your DBMS vendor to determine which ports are used by the ODBC driver for
accessing a network database.
Known Issues
Runtime parameter values get reset
Runtime parameter value settings are not preserved when selecting a different template, data
mapping configuration, or print preset. This affects the following plugins: Execute Data
Mapping, Create Email Content, Create Print Content, Create Web Content, All in One and
Create Job. The issue is fixed in PlanetPress Workflow 2022.1.
Custom plugin importation issue in 2021.2
Issues have been encountered importing custom plugins(such as the "Connection tab" on
page689 and "Connection tab" on page684 plugins) on new clean PlanetPress Workflow
2021.2 installations. The error encountered is "Error Loading DLL: error code 126: The
specified module cannot be found". This error is due to a missing file in the Workflow 2021.2
installation. This issue will be fixed in a subsequent PlanetPress Workflow release.
The workaround is to place a copy of this Indy60.bpl file (the downloaded file will need to be
unzipped) in the C:\Windows\SysWOW64 directory of the target system and then re-import the
plugin.
NodeJS Server prompts for Connect Server credentials
The NodeJS Server prompts the user for credentials if it needs to access the Connect Server
when retrieving a web page that has been produced using the Create Web Content plugin.
The issue will be fixed in a later release.
The workaround is to check the Embed all resources option in the Create Web Content task.
Page 26

Microsoft patch causing handling of XLS to fail
Some Windows updates from Microsoft have impacted the handling of XLS sources in
PReS\PlanetPress Workflow 8.
The Microsoft updates concerned are as follows:
l KB4041693 for Windows 8.1 and Windows Server 2012 R2
l KB4041681 for Windows 7 and Windows Server 2008 R2
l KB4041690 for Windows Server 2012 (no service pack)
Installing these updates may cause the application to fail when attempting to open or load XLS
files via a plugin or in a script. The following error message may appear: “Unexpected error
from external database driver (1). (Microsoft JET Database Engine)".
Suggested resolution
Uninstall the Microsoft patches and wait for the issue to be fixed in a subsequent Microsoft
patch.
Workarounds
l For the Lookup in Microsoft Excel Documents plugin (found in the Connectors tab of the
plugin bar): Open the original .xls file and save it with the .xlsx format. That will force the
Excel Lookup plugin to switch drivers.
l For the Database Query plugin (found in the Actions tab of the plugin bar) and when
using Excel/Access in PlanetPress Design: Change the ODBC driver used for Excel files
from JET to ACE (change the Data Source). As an example: in Windows 10: Change the
Excel File ODBC driver from ODBCJT32.dll to ACEODBC.dll. (Naming may vary from
versions of the OS but the basics stay the same.) Important: Before switching from JET to
ACE, install the latest MS Access Database Engine 2016 Redistributable
(https://www.microsoft.com/en-us/download/details.aspx?id=54920). Otherwise, using
ACE in one or more self-replicating processes in a Workflow configuration can cause
Workflow to crash.
In the meantime Objectif Lune would like to apologize to any customers affected by this
problem and for any inconvenience caused. For more information, please contact your local
support team.
Page 27

Data Repository error
The Push to Repository task, as well as the corresponding repository API calls SetValue() and
SetValueW() may on rare occasions fail with an unexpected error (517), caused by the Write
Ahead Logging (WAL) journal mode.
The workaround is to disable WAL journal mode:
1. Create the "Repository" key in \HKEY_LOCAL_
MACHINE\SOFTWARE\WOW6432Node\Objectif Lune\PlanetSuite\PlanetWatch\8.0\ if it
does not exist.
2. Add a new DWORD32 value in Repository key named SQliteWALJournalMode and
set it to 0.
Switching the registry key from 1 (WAL) to 0 (DELETE) disables the Write Ahead Log.
3. If the Write Ahead Log is disabled, -sham and -wal files should no longer appear in the
Repository folder.
4. Restart the PPWatch service.
Other known issues
l Custom plugins cannot be permanently removed from the Plug-In Bar through the
Workflow tool's user interface.
l Anoto Pen Director 2.8 is not supported on Windows Server 2012 and Windows 10.
l Using the PT-PT setting to perform ICR on AlphaNumeric fields may not work properly. If
you encounter the issue, use the PT-BR setting instead, or use another PlanetPess Field
in your document design.
l Barcode scanner task may have issues reading 2-D barcodes printed/scanned with low
resolution. Make sure the scans and the original printed output are at least 300DPI (600
or better recommended).
l When printing through a Windows printer driver on Windows Server 2008 or Windows
Server 2008 R2, the Job Owner setting is ignored. This is caused by a documented issue
in those two Operating Systems. Microsoft has provided no reason nor workaround for the
problem, therefore PlanetPress Workflow cannot circumvent the issue.
l Under Windows 2000, the SharePoint output task does not work with SharePoint 2010.
Under the same OS, the PlanetPress Capture ICR does not work due to the .NET 3.5
requirement.
l
The SharePoint Output task does not validate the field contents. That's Sharepoint's
responsibility.
Page 28

l
The Metadata to PDI task encodes the XML using the default system encoding, not the
document's. In addition, it does not discriminate between index names written in different
cases (e.g. Name vs. name).
l Printing PDF files in passthrough mode using a Windows Printer Driver task causes jobs
to be processed sequentially rather than in parallel. This is caused by a 3rd party library
used in the printing process. Possible workarounds are to use a PlanetPress document to
call the PDF files as dynamic images, or to use the PDF file as the Data File for a
PlanetPress Document.
l
JobInfo #4 in the Windows Input Queue task (the original document name set by the
printing application) replaces any non-alphanumeric character with underscores in order
to filter out any invalid characters. Consequently, if the path contains slashes or colons,
those will be replaced with underscores.
l
When the PlanetPress Capture database is set to MS Access, it is considered good
practice to have a single process generate Patterns for documents because the Access
engine may lock the other process out of the database as the first process updates it.
l
After the initial installation, the PlanetPress Workflow Configuration tool may display an
error message the first time you launch it if you had already sent a PlanetPress Workflow
Document to it. You can safely ignore this message, you will simply have to manually
start the PlanetPress Messenger service from the Workflow console for this one time only.
To avoid getting the error altogether, make sure you launch the PlanetPress Workflow
tool once before sending any document to it.
l
In the LaserFiche connector, when selecting a different template after filling up the fields
and then going back to the first template, the values entered in the fields are lost. They
have to be entered again.
l When loading a Workflow configuration that includes references to Windows printers, the
output task may fail to recognize the printer if the printer driver has changed between the
moment the configuration was set up and the moment it was loaded. This is unlikely to
occur, but it could, for instance, happen when importing a Version 7 configuration file into
Version 8. To circumvent the issue, open the output task's properties, make sure you
reselect the proper printer, close the task and send the configuration again.
l
The HTTP/SOAP service may fail when both it and the Workflow service are logged on
using 2 non-local users or 2 local users with different privileges. To resolve the issue,
make sure both services use the same logon credentials.
l
The WordToPDF task, when run under the LocalSystem account, may seem to hang if
the installation of MS-Word wasn't properly completed for the LocalSystem account. If the
task seems to take longer than it does when run in Debug mode, this may be the case.
Page 29

You can confirm this behavior by opening up the Windows Task Manager and checking
whether the MSIExec application is running. In order to complete the installation of MS-
Word for the LocalSystem account, follow these steps:
1. Open a command-line window (CMD.exe)
2. Type "AT 10:56 /INTERACTIVE CMD.EXE" (replace 10:56 with the next upcoming
minute on your system)
3. At the specified time, a new command-line window opens. In it, navigate to Word
Installation folder, then type Winword Follow the instructions to complete the
installation
4.
Re-start PlanetPress Workflow and test your process.
l
The WordToPDF task relies on MS-Word to perform its functions. However, MS-Word
sometimes displays confirmation dialogs when it encounters a situation requiring user
input. Such dialog windows cannot be displayed when PlanetPress Workflow runs as a
service. As a result, the process may seem to hang because it is awaiting user input on a
window that isn't displayed. The only way to resolve this situation is to kill the
PlanetPress Workflow service. To avoid these types of issues from occurring, it is
imperative that the configuration for the WordToPDF task be tested thoroughly in Debug
mode prior to sending it into production. In particular, the connection to the database must
be validated.
l
The WordToPDF task requires the default system printer to be set to a queue that uses
the PlanetPress printer driver. If you change the default system printer or if you import a
PlanetPress Workflow configuration file from another PC that includes an instance of the
WordToPDF task, you must review the properties of each instance of the task and click
OK to validate its contents. A new printer queue will be created if required and the default
printer will be reset properly. If you do not perform these steps, running the configuration
will result in several error messages being logged and the task failing.
l The preferences for the PrintShop Mail Web connector may not be saved properly if you
set them and close the PlanetPress Workflow Configuration tool without first sending the
configuration to the service. Make sure you send the configuration before exiting from the
Configuration tool.
l
With Outlook 2010, the Send Email functionality requires that the service be run with
administrative credentials in the domain. In addition, both Outlook and the PlanetPress
Workflow Configuration tool must *not* be running while the service is.
Page 30

l The Microsoft Office 2010/2013/2016 and 365 line of products has not been certified for
use with PlanetPress Workflow. Some of its products may not be compatible with the
connectors included.
l
Barcodes produced in printer-centric mode may have a slightly different aspect from
those produced in Optimized PostScript mode. This is due to the different types of 3rd
party libraries being used to generate the barcodes. However, all barcodes scan correctly.
Page 31

Basics
PlanetPress Workflow is a tool to automate the processing, distribution and printing of your
business documents. Once installed on the server, it can be set up to automate all tasks related
to document processing (see "Setting up the working environment" on page22).
When you're all set up, you can start using the Workflow Configuration tool, assuming that you
have already done research on the processes that need to be automated.
Working with Workflow implies the following basic steps:
1.
Creating a Workflow configuration
A Workflow configuration consists of a number of processes, of which each has an input
task, output task and possibly a number of tasks in between. See: "About Workflow
Configurations" on page34.
2.
Debugging the configuration
Debugging is the act of running through your process, either step by step or as a whole,
directly from the PlanetPress Workflow Configuration Tool, in order to detect and resolve
issues with your process. Debugging a process requires providing a sample data file.
See: "Debugging and error handling" on page99.
3.
Sending it to the Server (and testing it again)
As you are working on your configuration, you can save that configuration file as a file on
your local hard drive. Saving a configuration file never replaces the current PlanetPress
Workflow service configuration. To do this, you must use the Send Configuration
command; see "Sending a configuration" on page38.
Related tools and resource files
Workflow serves as automation tool in a number of distinct products. Some of the tasks that can
be used in a Workflow configuration only work with product-specific files. The tools that you
need in order to produce those files depend on the product that you are using:
l
PlanetPress Connect users will use the other Connect modules - Designer and
DataMapper - to create the templates, data mapping configurations and print presets
used by OL Connect tasks. The user guides of these modules can be found here:
http://help.objectiflune.com/en/PlanetPress-connect-user-guide/2021.2/.
l
PlanetPress Suite users may use documents made with PlanetPRess Design. For the
user guide, see http://help.objectiflune.com/en/planetpress-design-user-guide/.
Page 32


Features
PlanetPress Workflow configurations are input driven applications designed to output data in a
variety of ways through diverse means to various applications and devices. PlanetPress
Workflow can be used as simple go between, passing along input data to output devices, but it
can also perform various types of data processing. You can combine the various PlanetPress
Workflow services to set up versatile automated processes to print jobs as well as generate
other types of output.
PlanetPress Workflow processes act as sorts of dispatchers. On the one hand, they retrieve
data and control plugins that retrieve data from watched locations, and on the other hand they
send data and control plugins that send data to various devices, for printing or to generate
documents that can then be emailed or viewed in a browser. PlanetPress Workflow can also
perform a variety of operations on the data using its action plugins.
In fact, the PlanetPress Workflow plugin based architecture enables almost limitless
customization. You can create or purchase compatible plugins, drop them in any of
PlanetPress Workflow plugin folder and use them to perform other operations. You can even
find free unsupported plugins on the Objectif Lune Web site.
PlanetPress Workflow tasks are service applications, or if you will, applications that
continuously run on a given computer and that perform actions automatically. Those actions are
defined in a PlanetPress Workflow configuration. A given computer can only run one
PlanetPress Workflow configuration at a time. The PlanetPress Workflow Service Console may
be used to monitor the services running on a given computer.
About Workflow Configurations
PlanetPress Workflow Configurations are service applications, or if you will, input driven
applications that continuously run on a given computer and perform actions automatically.
Those actions are defined in a PlanetPress Workflow configuration file. A configuration file
consists of a set of processes, subprocesses, variables, (optional) documents and printer
queues, that work together within the PlanetPress Workflow Service. A process can be used as
simple go between, passing along input data to an output device or folder, but it can also
perform various types of data processing.
You can combine the various PlanetPress Workflow input, action and output tasks to set up
Page 34

versatile automated processes to print jobs as well as generate other types of output (emails,
web pages, files...).
Note
A PlanetPress Workflow configuration must be composed of at least one process, but it
may include as many as 512.
PlanetPress Workflow cannot work without a valid configuration, and a PlanetPress Workflow
session running on a given computer can only use one configuration at a time.
For a configuration created in the PlanetPress Workflow Configuration tool to actually be
executed by PlanetPress Workflow, it must be sent to the PlanetPress Workflow Service. When
you do this, your PlanetPress Workflow forgets its previous configuration and starts executing
the tasks included in the new configuration.
When you start the PlanetPress Workflow Configuration tool, it either opens the configuration
file that is active on the PlanetPress Workflow service, or starts with no configuration at all,
depending on your preferences (see "Configuration Components pane appearance
preferences" on page772).
You can always create a new configuration or open an existing one (see "Creating a new
configuration" below and "Open a PlanetPress Workflow configuration file" on the facing page).
The following pages provide information on different parts of a PlanetPress Workflow
configuration:
l "About processes and subprocesses" on page126
l "About Tasks" on page300
l "About data" on page51
l "About variables" on page716
l "Workflow Configuration resource files" on page40
Creating a new configuration
To create a new configuration, choose New from the PlanetPress Workflow Button.
Page 35

By default, when you create a new configuration, PlanetPress Workflow automatically creates a
process that includes a "Folder Capture" on page320 initial input task and a "Send to Folder"
on page681 output task by default. You can then edit and save your new configuration.
The default input task and output task depend on your preferences ("Default configuration
behavior preferences" on page773).
If the active configuration file is currently opened, and if it includes unsaved modifications,
PlanetPress Workflow asks you whether to send the configuration to the PlanetPress Watch
service before creating the new configuration. Select the Always send without prompting for
confirmation option to automatically send the edited version of the configuration.
If a file that is different from the default configuration file is currently opened, and if it includes
unsaved modifications, PlanetPress Workflow asks you whether to save the configuration
before creating the new configuration. Select the Always save without prompting for
confirmation option to automatically save any unsaved work.
Open a PlanetPress Workflow configuration file
To open a configuration file:
1.
From the PlanetPress Workflow button, choose Open. The Open dialog box appears.
2.
Navigate to the Workflow configuration file you want to open, select it and click Open.
If the currently opened configuration file includes unsaved modifications, the PlanetPress
Workflow Configuration program asks you whether to send the configuration to the PlanetPress
Workflow service before opening the selected configuration.
Select the Always send without prompting for confirmation option to automatically send the
edited version of the configuration to the PlanetPress Workflow Service before opening any
other configuration file (See "Saving and sending a Workflow Configuration" on the next page).
Note
You can also open a configuration file from a previous version of PlanetPress Workflow
by changing the File Type selector to the desired version (for example, .pw7 for
Page 36

PlanetPress Watch /Server configurations from Version 7).
Saving and sending a Workflow Configuration
The core of the PlanetPress Suite workflow tools is the PlanetPress Watch service which, once
started, constantly runs in the background to perform the tasks included in its current
configuration file. The PlanetPress Workflow Configuration tool lets you create, edit, save and
send configuration files.
As you are working on your configuration, you can save that configuration file as a file on your
local hard drive.
Saving a configuration file never replaces the current PlanetPress Watch service configuration.
To do this, you must use the Send Configuration command.
When the PlanetPress Workflow Configuration program sends a configuration, the PlanetPress
Workflow service is stopped and restarted, if it is currently running, and the new configuration
starts being applied immediately.
Saving a configuration
Files created and edited using PlanetPress Workflow can be saved as PlanetPress Workflow
configuration files anywhere on your computer or even a network location.
To save the current configuration:
l
From the PlanetPress button, choose Save.
l If you were editing the current PlanetPress Watch service configuration or if you were
editing a new configuration file, you are prompted with the Save As dialog instead.
To save the current configuration under a new name:
l
From the PlanetPress button, choose Save As.
l Browse to the location where you wanted to save the file, enter the new name of the
configuration in the File name box and click Save.
Page 37

Sending a configuration
PlanetPress Workflow Configuration saves entire configurations in the form of a single file. Like
any other file, configuration files may be saved and reopened, as well as renamed as desired.
Simply saving a configuration has no effect on the configuration actually used by the
PlanetPress Workflow when it is started. To change any currently active configuration, you
must use the Send Configuration command.
When you use the Send command, the PlanetPress Workflow Configuration program uses the
currently opened configuration (Any_name.OL-workflow) to overwrite the PlanetPress Workflow
Service's current configuration (ppwatch.cfg).
Note
.OL-workflow files are equivalent to .pp7 files made with older versions of PlanetPress
Workflow. They contain the processes and such used by Workflow.
If the PlanetPress Workflow Service is running when you send a new configuration, it stops and
restarts automatically with the new configuration. If the service is stopped before sending the
configuration, it will not restart automatically.
Note
When you send a configuration to your PlanetPress Workflow service, all its active
processes are applied; see also:"Activating or deactivating a process" on page132.
Sending a Configuration to the local server
1.
Open the configuration you want to use as PlanetPress Workflow’s new configuration.
2. Edit the configuration, if required.
3.
When the configuration is ready to be used, from the PlanetPress Workflow button,
choose Send Configuration, then Send Local.
Page 38

Sending a Configuration to a remote server
1.
Open the configuration you want to use as PlanetPress Workflow’s new configuration.
2. Edit the configuration, if required.
3.
When the configuration is ready to be used, from the PlanetPress Workflow button,
choose Send Configuration, then Send Remote.
A list of available PlanetPress Workflow servers on the local network appears.
4. Put a checkmark next to each server where the configuration should be sent.
5.
Click OK.
If a server is grayed out, this may mean you do not have access to send a configuration
remotely to it. For more information, please see "Access Manager" on page845.
Note
If PlanetPress Workflow service is paused when you send a new configuration, it will not
stop and restart. Since PlanetPress Workflow service reads its configuration file when it
starts up, when you resume processing, PlanetPress Workflow service will continue
using the old configuration.
Exit PlanetPress Workflow Configuration program
Once you are done using the PlanetPress Workflow Configuration program, you can close it.
Note
Closing PlanetPress Workflow Configuration program does not stop any of PlanetPress
Workflow services or processes.
You may exit the PlanetPress Workflow Configuration program in any of the following ways:
l
From the PlanetPress Workflow Button, choose Exit.
l
Click the X at the top-right corner of PlanetPress Workflow Configuration program.
Page 39

l
Press ALT+F4 on your keyboard.
l
Right-click on the PlanetPress Workflow Configuration program button in your task bar,
and select Close.
If the default configuration file is currently opened, and if it includes unsaved modifications, the
PlanetPress Workflow Configuration program asks you whether to send the configuration to the
PlanetPress Workflow service before exiting. Select the Always send without prompting for
confirmation option to automatically send the edited version of the configuration before exiting.
If the default configuration does not include any active process, the PlanetPress Workflow
Configuration program asks you whether to continue.
If a file different from the default configuration file is currently opened, and if it includes unsaved
modifications, the PlanetPress Workflow Configuration program asks you whether to save the
configuration before exiting. Select the Always save without prompting for confirmation
option to automatically save any unsaved work before exiting.
Workflow Configuration resource files
Workflow serves as automation tool in a number of distinct products. Some of the tasks that can
be used in a Workflow configuration will work with product-specific resource files:
l
PlanetPress Connect Resources are files created with one of the other Connect modules
- the Designer and DataMapper (see "Connect resources" on the next page).
l
PlanetPress Suite users may use PlanetPress Design documents (see "PlanetPress
Design documents" on page45) in PlanetPress Workflow processes.
l
PrintShop Mail Suite users may use PrintShop Mail documents to create output using
the "PrintShop Mail" on page527 task (see "PrintShop Mail documents" on page51).
These product-specific files need to be sent to (or imported into) Workflow before they can be
used in conjunction with a task. This chapter explains how to do that. Imported files become
visible in the "Configuration Components pane" on page832.
Page 40

Connect resources
Connect resources are files created with Connect's Designer or DataMapper (see "Connect
resources" above). They are visible in the "Configuration Components pane" on page832 and
are added by using the Send to Workflow option from the PlanetPress Connect Designer's
File menu.
The available resources are:
l
Data Mapping Configurations: Data mapping configurations are used with the "Execute
Data Mapping" on page629 task to extract data from the job file.
For each data mapping configuration in the list, the following two items appear within
them:
l
Data Model: Displays the data model used in the data mapping configuration.
Double-click on the data model to view it in your default XML viewer (generally,
Internet Explorer).
l
Sample Data File(s): Displays a list of sample files that are included in the data
mapping configuration. (See also: "Sample Data" on page72.)
Tip
Double-click on a sample data file to use it as a sample data file for the active
process.
l
Document Templates: Templates can be used in content creation tasks: "Create Email
Content" on page600, "Create Web Content" on page621 and "Create Print Content" on
page617.
l
Print Presets:
l
Job Presets: Job Presets can be used in the "Create Job" on page605 task to filter
and rearrange print content items.
l
Output Presets: Output Presets contain settings for Print output. They can be used
in the "Create Output" on page608 task.
Page 41

Tip
Drag-and-drop a resource on a process to add the appropriate task.
For more information about the different file types, see Connect's Online Help:
l Data mapping configurations
l Data model
l Templates
l Job Creation Preset
l Output Creation Preset
Importing Connect resource files
Connect resource files are added by using the Send to Workflow option from the PlanetPress
Connect Designer's File menu; see Sending files to Workflow in Connect's Online Help.
They can also be imported into PlanetPress Workflow as follows:
1.
Click the PlanetPress Workflow button.
2.
Choose Import, then Import Connect Content. The Import dialog box appears.
3.
In the File type box, select the desired file type.
4.
Navigate to the document you want to import, select it and click Open.
When you select a package file, the individual resources contained within that package will be
imported.
Tip
You can import multiple files at once.
Resource Save location
Any resource sent to PlanetPress Workflow from PlanetPress Connect is saved locally at the
following location: %PROGRAMDATA%\Objectif Lune\PlanetPress Workflow 8\PlanetPress
Page 42
Watch\OLConnect
Resources are saved in their appropriate folder:
l
DataMapper contains the data mapping configurations (.OL-datamapper)
l
JobCreation contains the Job Creation Presets (.OL-jobpreset)
l
OutputCreation contains the Output Creation Presets (.OL-outputpreset)
l
Template contains the templates (.OL-template)
Note
Package files are not saved anywhere. The individual resources contained within the
package are extracted and placed in the folders noted above.
Tip
To navigate quickly to the Workflow working folders, press the keyboard shortcut
CTRL+ALT+Shift+F4 from within the Workflow configuration tool.
Resource archives
From version 8.2, PlanetPress Workflow maintains an archive of previous versions of
resources, in the following location: %PROGRAMDATA%\Objectif Lune\PlanetPress Workflow
8\PlanetPress Watch\OLConnect\Archive , each in their own folder:
l
datamapper contains archives of the data mapping configurations (.OL-datamapper)
l
jobcreation contains archives of the Job Presets (.OL-jobpreset)
l
outputcreation contains archives of the Output Presets (.OL-outputpreset)
l
template contains archives of the templates (.OL-template)
l
workflow contains archives of Workflow configurations received by the server.
The archives are saved using the template named followed by a timestamp. A maximum of 30
of each instance of a resource is kept (meaning if you have 10 different templates, a maximum
Page 43

of 300 files will be present in the archive\template folder). Older archives are deleted
automatically as new archives are created.
Using Connect Resources in tasks
A number of OL Connect tasks (see "OL Connect tasks" on page591) let you select a Connect
resource file to be used with the task. The selection list will appear on one or more of the tabs in
the Task Properties dialog that appears when you add a task to a process (see "Adding tasks"
on page301).
For information about the options in the selection list, see "Selecting a resource file in task
properties" on page307.
You can drag-and-drop a resource on a process to add the appropriate task.
When dropped on a process:
l
A data mapping configuration adds an "Execute Data Mapping" on page629 task. If
you agree to use the first sample file in the data mapping configuration as the process's
sample data file, the process's emulation will be changed accordingly.
l
A Job Creation Preset creates a "Create Job" on page605 task.
l
An Output Creation Preset creates a "Create Output" on page608 task.
When a template is dropped on a process, you can choose whether it adds a "Create Email
Content" on page600 task, a "Create Preview PDF" on page612 task, a "Create Print Content"
on page617 task, or a "Create Web Content" on page621 task (as an Action or Output task).
Using attached data files
When sending a Connect data mapping configuration from the Designer to PlanetPress
Workflow, all data files used in the document are automatically sent to PlanetPress Workflow
along with the data mapping configuration. These data files appear under the data mapping
configuration in the Connect section of the Configuration Components.
Setting an attached data file as a sample data file in a process
The attached data file can be used as a sample data file in a process. This sets the emulation
of the process ("About data emulation" on page61) and makes it possible to debug it (see
"Debugging your PlanetPress Workflow process" on page107).
Page 44

1.
Make sure the Connect Resources section is visible by clicking the button if it
appears.
2. Expand the data mapping configuration (name.OL-datamapper) by clicking the button.
3.
Right-click on the data file, then click Set as sample data file.
Viewing an attached data file
1.
Make sure the Connect Resources section is visible by clicking the button if it
appears.
2. Expand the data mapping configuration (name.OL-datamapper) by clicking the button.
3. Double-click on the data file to open the data selector (see "The Data Selector" on
page857).
Note
Double-clicking on the data file does the same thing as right-clicking on it an then
selecting Set as sample data file. Clicking Cancel instead of OK after viewing will
prevent this action from being taken.
Saving an attached data file to disk
1.
Make sure the Connect Resources section is visible by clicking the button if it
appears.
2. Expand the document by clicking the button.
3.
Right-click on the data file, then click Save sample data file.
PlanetPress Design documents
A PlanetPress Design document is a file created with the Design module of PlanetPress
Suite.
Design documents are used to produce an output, merged with data (i.e. the job file). They
contain static data such as logos, addresses and graphic formatting, as well as placeholders for
data. Documents may also contain conditions and programming logic.
Page 45

For more information about PlanetPress Design documents, please see the PlanetPress
Design User Guide.
Generating output with PlanetPress Design documents
PlanetPress Design documents are typically selected in certain Output tasks designed to
merge data with a Design document, but they can also appear in other tasks that produce
formatted data such as the Digital Action task and the Add Document task.
If a task lets you select a PlanetPress Design document to be used with the task, the selection
list will appear on one or more of the tabs in the Task Properties dialog that appears when you
add the task to a process (see "Adding tasks" on page301).
For information about the options in the selection list, see "Selecting a resource file in task
properties" on page307.
Printer-centric printing
PlanetPress Design lets you send documents to printers as well as to PlanetPress Workflow
servers.
l
If you send a document to printers only and not to any PlanetPress Workflow server, you
will not be able to see this document in the PlanetPress Workflow Configuration program.
To let PlanetPress Workflow know that the document is available, you will have to add a
printer resident document to your PlanetPress Workflow configuration (see "Adding
printer resident documents to the Configuration Components Pane" on the next page).
l
If you send a document to PlanetPress Workflow servers only and not to any printer, you
will be able to see this document in the Configuration Components Pane of the
PlanetPress Workflow Configuration program, but it will not be directly available on any
printer.
l
If you send a document to PlanetPress Workflow servers and to printers, you will be able
to see this document in the Configuration Components Pane of the PlanetPress Workflow
Configuration program and it will be available on the printers.
Fonts used in Design documents
The fonts used in PlanetPress Design documents installed on PlanetPress Workflow
workstations should be available locally. To install TrueType fonts, use the standard Windows
procedure. To install PostScript fonts, use the Install PostScript Font command in the
Workflow ribbon (see "The PlanetPress Workflow Ribbon" on page894).
Page 46

Adding printer resident documents to the Configuration Components Pane
By default, the Documents group displayed in Configuration Components pane of the
PlanetPress Workflow Configuration program includes all those documents that are available
on your local PlanetPress Workflow server. Those documents that are not available on your
local PlanetPress Workflow server, but that are either available on printers or on other
PlanetPress Workflow servers must be added to the list, otherwise you will not be able to use
them in your PlanetPress Workflow configuration.
To add a resident document to the Configuration Components pane:
1.
In the PlanetPress WorkflowConfiguration Components pane, right-click PPS/PSM
Documents and choose Insert > Insert Resident Document. The Add Resident
Document dialog box is displayed.
2. Enter the document’s name. Note that the name you enter must exactly match the actual
document name or PlanetPress Workflow will not be able to use it on the printer or remote
PlanetPress Workflow server.
3.
Click OK.
Importing PlanetPress Design documents
This procedure describes how to import PlanetPress Design documents into PlanetPress
Workflow. Importing documents can be useful when transferring configurations between
PlanetPress Workflow installations.
To import documents into PlanetPress Workflow:
1.
Click the PlanetPress Workflow button.
2.
Choose Import, then Import PlanetPress Document. The Import PlanetPress Design
Document dialog box appears.
3.
In the File type box, select the desired file type.
4.
Navigate to the document you want to import, select it and click Open.
The document is imported and displayed in the Configuration Components pane under
PPS/PSM Documents. This physically installs the documents to the Documents folder relative
to the install folder of PlanetPress Workflow.
Page 47

Tip
To navigate quickly to the Workflow working folders, press the keyboard shortcut
CTRL+ALT+Shift+F4 from within the Workflow configuration tool.
Using files attached to PlanetPress Design documents
Data files
When sending a PlanetPress Design Document from PlanetPress Design to PlanetPress
Workflow, all data files used in the document are automatically sent to PlanetPress Workflow
along with the Design document. These data files appear under the document in the PPS/PSM
Documents section of the Configuration Components.
Setting an attached data file as a sample data file in a process
The attached data file can be used as a sample data file in a process. This sets the emulation
of the process ("About data emulation" on page61) and makes it possible to debug it (see
"Debugging your PlanetPress Workflow process" on page107).
1.
Make sure the PPS/PSM Documents section is visible by clicking the button if it
appears.
2. Expand the document (name.ptk) by clicking the button.
3.
Right-click on the data file, then click Set as sample data file.
Viewing an attached data file
1.
Make sure the PPS/PSM Documents section is visible by clicking the button if it
appears.
2. Expand the document (name.ptk) by clicking the button.
3. Double-click on the data file to open the data selector (see "The Data Selector" on
page857).
Page 48

Note
Double-clicking on the data file does the same thing as right-clicking on it an then
selecting Set as sample data file. Clicking Cancel instead of OK after viewing will
prevent this action from being taken.
Saving an attached data file to disk
1.
Make sure the PPS/PSM Documents section is visible by clicking the button if it
appears.
2. Expand the document (name.ptk) by clicking the button.
3.
Right-click on the data file, then click Save sample data file.
Metadata
When a Design document uses Metadata, it can also be attached with the document. One
Metadata file is generated for each data file attached to the Design document. Metadata does
not appear in the Configuration Components pane but it follows the data file and can be viewed
from the Metadata tab whenever the data file is viewed through the Data Selector.
Document Preview
When sending a PlanetPress Design document from PlanetPress Design to PlanetPress
Workflow, a PDF Preview of the job's output is automatically sent to PlanetPress Workflow
along with the Design document. This preview appears under the PPS/PSM Documents
section of the Configuration Components pane.
The PDF contains the result of a preview with the active data file (for all data pages) run as an
Optimized PostScript Stream.
Viewing the Document Preview
1.
Make sure the PPS/PSM Documents section is visible by clicking the button if it
appears.
2.
Expand the document (name.ptk) by clicking the button. The Document Preview has
Page 49

the same name as the document but with a PDF extension.
3.
Right-click on the Document Preview, then click Open in PDF Viewer.
Saving the Document Preview to disk
1.
Make sure the PPS/PSM Documents section is visible by clicking the button if it
appears.
2.
Expand the document (name.ptk) by clicking the button. The Document Preview has
the same name as the document but with a PDF extension.
3.
Right-click on the Document Preview, then click Save PDF File.
Viewing PlanetPress Design document properties
To view the properties of a PlanetPress Design document, do one of the following:
l
In the Configuration Components pane, under PPS/PSM Documents, click any Design
document (under PPS/PSM Documents) to display its properties in the Object Inspector.
l
In the Configuration Components pane, under PPS/PSM Documents, double-click any
Design document to display its properties in the PlanetPress Design Document
Options dialog box.
For a list of all properties, see "PlanetPress Design document properties" on page835.
The PlanetPress Workflow Configuration tool lets you view a number of the properties
associated with the PlanetPress Design documents you use, but most of those properties are
set in PlanetPress Design and cannot be edited using the PlanetPress Workflow Configuration
program.
The Document name of printer-resident documents can be changed using PlanetPress
Workflow Configuration program simply because it is initially set using that program.
The properties available via the Printer Settings tab define how documents are printed. They
are also set using the PlanetPress Workflow Configuration program and are retained when
documents are assigned to printer queues. They can be edited by selecting documents within
the PPS/PSM Documents category of the Configuration Components pane, which changes
the document’s default printer settings, or within the Printer Queues category, which changes
the document properties on the selected queue.
Page 50

PrintShop Mail documents
PrintShop Mail documents are documents made with PrintShop Mail (Suite, not Connect).
These documents may be imported into Workflow to create output with the "PrintShop Mail" on
page527 task.
Importing PrintShop Mail documents
This procedure describes how to import variable content documents created in PrintShop Mail
(Suite, not Connect) into PlanetPress Workflow.
1.
Click the PlanetPress Workflow button.
2.
Choose Import, then Import PrintShop Mail Document. The Import PrintShop Mail
Document dialog box appears.
3.
Navigate to the document you want to import, select it and click Open. The document is
imported and displayed in the Configuration Components pane. This physically installs
the documents to the Documents folder relative to the install folder of PlanetPress
Workflow.
Tip
To navigate quickly to the Workflow working folders, press the keyboard shortcut
CTRL+ALT+Shift+F4 from within the Workflow configuration tool.
For help on importing PrintShopMail Connect templates, see "Connect resources" on
page41.
About data
Data is what drives your business, and our software. We define data as anything that is
obtained through an Input task and used within the process itself. Once the data is obtained, it
becomes the job file that is passed from one task to another and generally used to generate
output (see "Job file" on page53).
Page 51

Data can be manipulated using the tasks in the process, used as comparison for conditions and
loops, complemented with data from other sources, and used to generate your output. It
originates from many different sources (as many as the input tasks support), parts of it can be
stored in variables, and it is always accessible by the task that currently handles it.
Data is referred to in tasks using data selections; see "Data selections" on page55. Data
selections let you use data in file names, for example, or store them in a variable or in the Data
Repository for use later on.
While creating a process, you will need a sample data file to make data selections from it and to
debug the process with it. For more information about sample data files see "Sample Data" on
page72.
Note
Null characters present in the data may not be displayed properly when using the
PlanetPress Workflow Configuration tool, and they may also be printed differently by
different printers. To ensure consistency, you should consider filtering out such
characters.
About documents and variable data
"Variable data" is data that is meant to be merged with a document or template.
In PlanetPress Connect, variable data is usually retrieved from a data file (the job file) using
the OLConnect Execute Data Mapping task. This task uses a data mapping configuration file,
created with the DataMapper, to produce a record set. A data mapping configuration contains a
data model. Any Connect template constructed using the same data model can be merged with
the resulting record set by an OLConnect Create Content task.
In PlanetPress Suite, Design documents are typically associated with an Output task.
PlanetPress Workflow dispatches captured data (the job file) to PlanetPress Design documents
directly. It is therefore critical that a process and a document use the same emulation (see
"About data emulation" on page61). PlanetPress Suite users are advised to review the
PlanetPress Design User Guide, especially the Selecting an Emulation section.
Page 52

Job file
Whichever source it may come from, a serial port, an e-mail message, or an LPR request, for
instance, and whatever its format, data entering a PlanetPress Workflow process via an Input
task is always referred to as a data file. When a data file enters a process, it becomes the job
file.
'Job file' however is a more general term, that can refer to data files as well as other types of
files traveling through a process. Image files, for example, can be passed from task to task in
order to be downloaded to a printer. So files traveling within a process are referred to as job
files.
A single job file can be the source of multiple job files. This is the case, for example, when a
process includes multiple branches, as each branch is given a duplicate copy of the job file
(see "About branches and conditions" on page138). This is also the case when a job file is
split into multiple smaller files by a Splitter Action task, for instance (see "Data splitters" on
page452).
It is important to note that job files may be used as a helpful debugging resource (see
"Debugging and error handling" on page99).
Job file names are generated automatically and stored in the %f system variable (see "Job file
names and output file names" below).
Actual data and sample data
The actual data is the dynamic data captured by PlanetPress Workflow at run-time. The sample
data file is a static sampling of the run-time data (see "Sample Data" on page72).
In the PlanetPress Workflow Configuration program, you use sample data files to create, edit
and debug PlanetPress Workflow configurations (see "Debugging your PlanetPress Workflow
process" on page107).
Job file names and output file names
When an Input task sends a new data file down a process, it gives it an internal file name
referred to as the job file name (associated with the %f variable). The new job file typically
keeps the same name until the end of the process.
Page 53

l
If the job file comes to a branch in the process, PlanetPress Workflow makes a copy of the
job file and gives the new file a new job file name.
l If the job file is processed by a Splitter action task, the task typically creates a number of
new files which are all given new job file names.
Since these files are generated and managed by PlanetPress Workflow, you should not
actually pay too much attention to their names.
Many Output tasks, on the other hand, let you determine exactly how you want the files they
generate to be named. In the case of Send to Folder output tasks, for example, output files are
saved under their job file names by default (using the variable %f), but you may use a static
(MyOutput.txt, for example) or variable name (%O_Invoices, for instance) of your choosing.
Variables such as %o (original file name) bring up the issue of file overwriting. If the process
receives two source files with the same name, the second output file may overwrite the first one.
This may be what you want, but otherwise you may consider using another variable, such as
%u (unique 13-character string).
When choosing naming schemes for output files, consider the following:
l For the benefit of users who must identify files, be it in a folder or on a printer queue,
consider using names that are as meaningful and as precise as possible.
l Some devices or applications may use file name extensions to know what to do with
incoming files.
Since variable properties can be entered in the boxes where you specify the folder and file
names, you can use variables (see "About variables" on page716), data selections (see "Data
selections" on the next page) and static text. You could, for example, use the following:
ClientID_@(1,1,1,1,14,KeepCase,Trim)_StatMonth_%m.
One last consideration regarding output file names has to do with standard JPEG and TIFF files
generated by PlanetPress Image. When an output job contains multiple pages, multiple JPEG
or TIFF files are generated (one image per file), each one identified by a sequence number
appended to its name (this is managed by your PlanetPress Workflow). A three page job to be
called Invoice, for example, will generate three JPEGs or TIFFs called Invoice0, Invoice1 and
Invoice2. Note that this does not apply to multiple TIFFs, which can include multiple images in
a single file.
Page 54

Note
You can change the name of a previously named file using a Rename action task (see
"Rename" on page433).
Data selections
A data selection could be compared to an address. It indicates a location within a data file or
database: the job file (see "Job file" on page53), Metadata file (see "Metadata" on page76), or
"Data Repository" on page96.
Data selections can be used in many task property fields and are always evaluated at run-time
so they are always dynamic and depend on the job file that is currently being processed.
There are several types of data selections you can use, depending on which emulation you are
using, whether or not Metadata have been created by a previous task in the process, and
whether or not data have been entered in the Data Repository.
Adding a data selection
A data selection can be used in any task property that may contain a variable (see "Variable
task properties" on page303). These properties are recognizable by their colored field label
(maroon, by default).
Right-click the property field and choose Get Data Location or Get Metadata Location to
open the Data Selector (see "The Data Selector" on page857) or Get Repository Location to
open the Data Repository Manager (see "Data Repository Manager" on page854).
Note
The Get (...) Value options will also open the Data Selector or the Data Repository
Manager, but once selected, the value becomes static and does not change between
each data page and job file.
After opening a sample of the data (see "Choosing a sample data file" on page73) and/or
Metadata, you can easily make a selection.
It is also possible to manually enter a data selection, or to change it after making a selection
with the mouse pointer.
Page 55

Data selections can also be used in a PlanetPress Design document that is being merged with
the data (for example in a printed output); for more information, see PlanetPress Design User
Guide.
Wild card parameter "?"
Data/Metadata selection functions accept a wildcard parameter "?", indicating the function
operates on all nodes (not just one) of a given level.
Examples
l
In a PDF emulation, the format of a selected region could be:
region(?,0.59375,2.21875,1.85416,2.51041,KeepCase,NoTrim)
In this case “?” represents the current physical data page processed by the task.
l
In the following rule, the Metadata selection function loops through all datapages in a job,
comparing their index in the document to a value:
(GetMeta(SelectedIndexInDocument[0], 11, Job.Group[?].Document
[?].Datapage[?]) Equal 0
l
In the following rule, the question mark in the text-based data selection represents the
current page number:
(@(?,1,1,1,9,KeepCase,NoTrim) IS EQUAL TO Page 1 of)
Text-based data selections
Text-based selections are used for text data files such as Line Printer, ASCII and Channel Skip
emulations. The selection refers to a rectangular selection that may contain multiple lines, rows,
columns on a given page.
Syntax
@(page number, from line, to line, from column, to column, case option, trim option)
Here is a breakdown of the syntax (all options are mandatory):
l
@(): Always surrounds a data selection.
l
Page Number: The data page number from which you want the data selection to grab the
data. If you want to get data from each page individually, this has to be done after a
Page 56

splitter.
l
From Line: The starting line of the data selection.
l
To Line: the last line of the data selection.
l
From Column: the leftmost character position of the data selection.
l
To Column: the rightmost character position of the data selection.
l
Case Options: This can be one of three options:
l
KeepCase: Keeps the current uppercase and lowercase letters as they are.
l
UpperCase: Converts all letters to their uppercase equivalent.
l
LowerCase: Converts all letters to their lowercase equivalent.
l
Trim Option: Can either be "Trim" if you want to trim empty spaces before and after the
data selection or "NoTrim" if you want to retain the extra spaces.
Database data selections
These selections are used for database-driven data files such as Database and CSV
emulations. The selection refers to a specific field on any given data page.
Syntax
field(record set number, child number, field name, treatment of character case, treatment of
empty trailing cells)
Here is a breakdown of the syntax (all options are mandatory):
l
field(): Always surrounds database field selections.
l
Record Set Number: The data page (or "record") of the data selection.
l
Child Number: Line Number in the record (if there are multiple lines returned for one
single record).
l
Field Name: The name of the field you want to retrieve.
l
Case Option: This can be one of three options:
l
KeepCase: Keeps the current uppercase and lowercase letters as they are.
l
UpperCase: Converts all letters to their uppercase equivalent.
l
LowerCase: Converts all letters to their lowercase equivalent.
Page 57

l
Trim Option: Can either be "Trim" if you want to trim empty spaces before and after the
data selection or "NoTrim" if you want to retain the extra spaces.
Data Repository lookups
The Data Repository selections are made through the lookup function. Selections are done
from the data located in the "Data Repository Manager" on page854. The lookup function
returns the value of a single key, which is always a string. If the lookup operation fails to find
any data, for any reason, the return value is always "NODATA".
Syntax
lookup(group, return key, lookup key, lookup value)
Here is a breakdown of the syntax (all arguments are mandatory):
l
group: The name of the group in which to retrieve the value. Does not need to be
surrounded by quotes.
l
return key: The name of the key where the information you want to retrieve is located.
Does not need to be surrounded by quotes.
l
lookup key: The name of the key in the group with which to look up the value. The return
key of the KeySet in which the lookup key's value matches the lookup value will be
returned.
l
lookup value: A string surrounded by quotes which will be used in the lookup.
The lookup syntax is akin to a SQL SELECT statement and could be loosely translated to:
SELECT [return key] FROM [group] WHERE [lookup key] = [lookup value];
PDF data selections
These selections are used for PDF data files. The selection refers to a specific area of any
given page of the PDF by using precise region coordinates (in inches).
Note that when adding a metadata field, if you perform a multi-line data selection on a PDF
region, only the first line of that region will be set to the metadata field.
Syntax
region(page, left, top, right, bottom, case option, trim option)
Here is a breakdown of the syntax (all options are mandatory):
Page 58

l
region(): Always surrounds PDF data selections.
l
Page: The page of the PDF from which to retrieve the data.
l
Left: Exact horizontal position (in inches) that defines the left of the selection region.
l
Top: Exact vertical position (in inches) that defines the top of the selection region.
l
Right: Exact horizontal position (in inches) that defines the right of the selection region.
l
Bottom: Exact vertical position (in inches) that defines the bottom of the selection region.
l
Case Option: This can be one of three options:
l
KeepCase: Keeps the current uppercase and lowercase letters as they are.
l
UpperCase: Converts all letters to their uppercase equivalent.
l
LowerCase: Converts all letters to their lowercase equivalent.
l
Trim Option: Can either be "Trim" if you want to trim empty spaces before and after the
data selection or "NoTrim" if you want to retain the extra spaces.
Metadata selections
Metadata selections are used with any type of emulation, as long as a metadata file was
created by a previous task in the process.
Tip
To get a sample of the metadata file, debug your process and step through it until the
option View Metadata gets enabled. This happens when metadata have been created by
a task in the process. Open the metadata viewer and save the metadata file to use it as a
metadata sample file in the Data Selector.
Syntax
GetMeta(Field Name [, Option Flags, Metadata Path])
Here is a breakdown of the syntax:
l
GetMeta(): Always surrounds metadata selections.
l
Field/Attribute Name: specifies the name of the field (or attribute, if the GetAttribute
option flag is set) to retrieve (see "Metadata" on page76).
l
Option Flag (optional): Sets the options for the selection (see table below).
Page 59
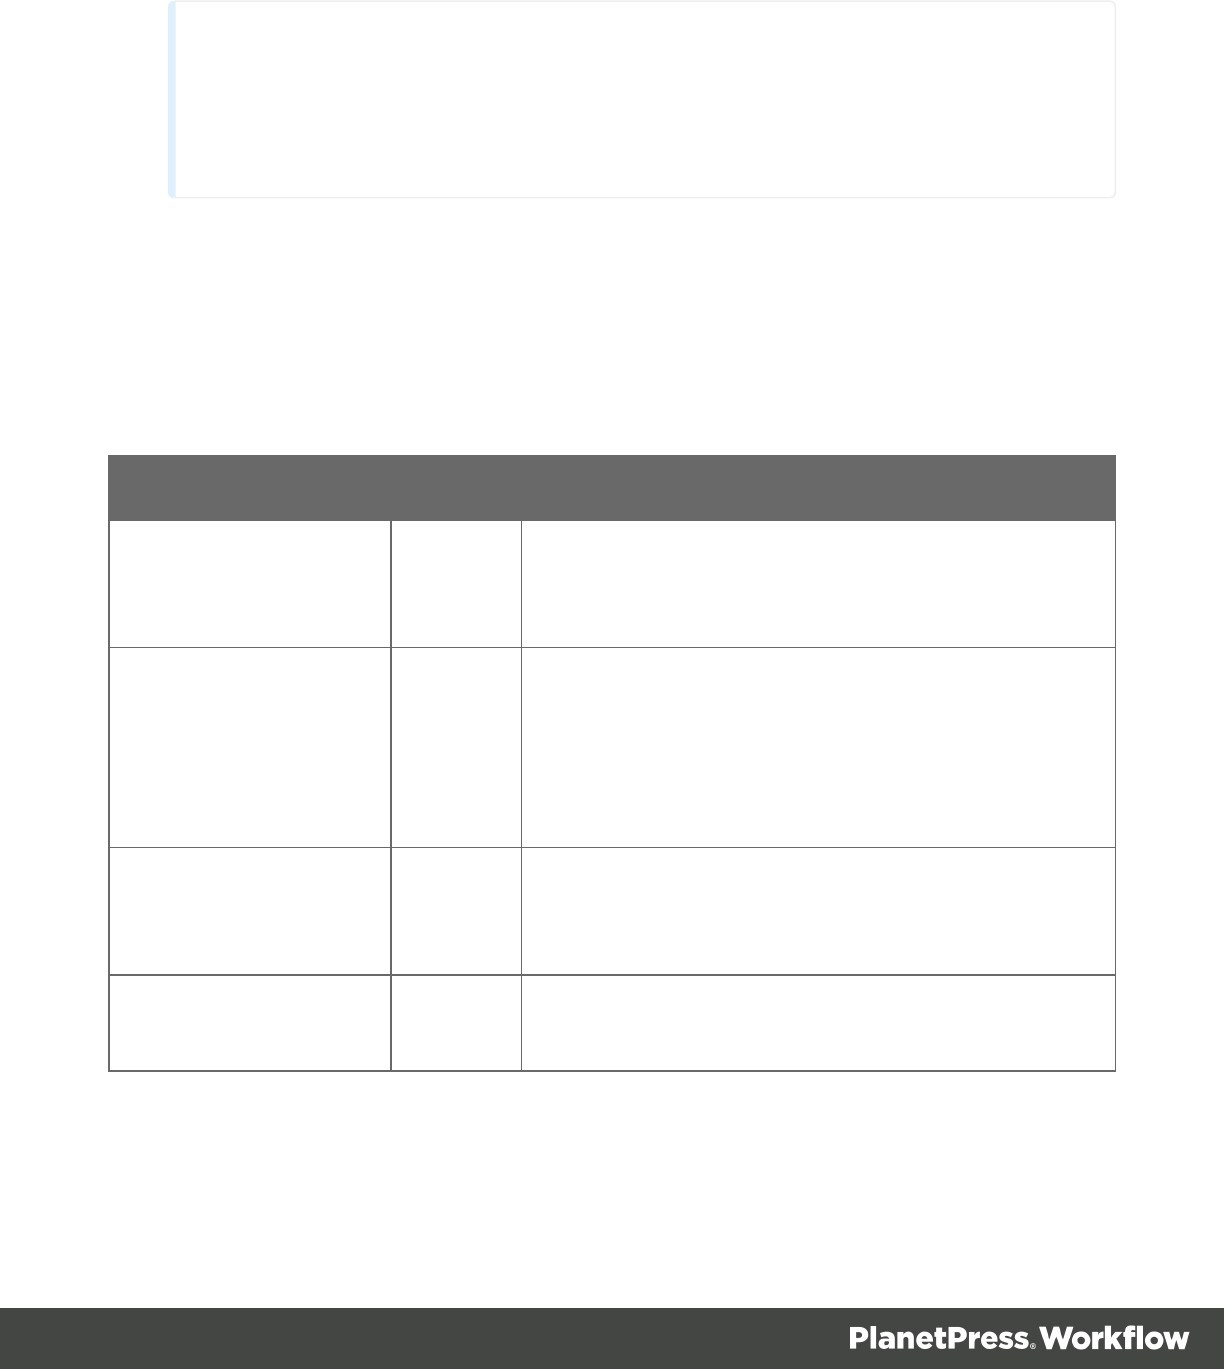
l
Metadata Path (optional): Defines the precise path where the Metadata Field is located.
Note
Metadata Index/Count values are zero-based: the first element in any collection
has an index of 0 and the last element's index corresponds to the collection's length
minus 1.
Option flags
The flag value to enter should be the sum of all desired flags. So, a value of 11, which is 8+2+1,
means that behavior 8, 2 and 1 are applied.
A value of 0 means 'no flag'.
Name Value Behavior
GetAttribute 1 Search for the name argument in the attribute
collection instead of the default field collection. See:
"Metadata" on page76.
NoCascade 2 Search only the level specified by the path argument
(defaults to Page level when path argument is
empty), instead of default behavior, which
recursively goes up from the Page level to the Job
level.
FailIfNotFound 4 Raise an error and crash the job is the specified
name is not found instead of returning an empty
string.
SelectedNodesOnly 8 Returns values from selected nodes only (i.e.
ignores unselected nodes).
XML data selections
XML data selections are used to retrieve an element's name, value or count from an XML file.
Page 60

Syntax
xmlget(XPath[, Value option, Case option, Trim option])
Here is a breakdown of the syntax:
l
xmlget(): Always surrounds a data selection.
l
Value Options:
l
Count: The number of elements on the same level in the same node that have the
same name.
l
Name: The element's name.
l
Value: The element's value.
l
Case Options: This can be one of three options:
l
KeepCase: Keeps the current uppercase and lowercase characters as they are.
l
LowerCase: Converts all characters to their lowercase equivalent.
l
UpperCase: Converts all characters to their uppercase equivalent.
l
Trim Options: Enter "Trim" if you want to trim empty spaces before and after the data
selection or "NoTrim" to retain the extra spaces.
About data emulation
An emulation specifies how to interpret a data file. It is basically the method through which
PlanetPress Workflow parses and displays the data. If the emulation is set to CSV (comma
separated values), for instance, commas encountered in the data will typically be considered as
value separators. The way data selections are made depends on the emulation (see "Data
selections" on page55).
Every Workflow process has its own data emulation setting, which depends on the sample data
file you choose.
A process's data emulation is only visible in the Workflow configuration tool when using the
Data Selector e.g. to select a sample data file, but it is always set to one (Line Printer, by
default).
A process's emulation can be changed either by choosing another sample data file (see
"Choosing a sample data file" on page73) or by inserting a "Change Emulation" on page392
task in the process.
Page 61

Changing the emulation is particularly important if you want to make a data selection in a file
after it has been changed to another format (see "Data selections" on page55).
Note
Even during debugging, selecting a sample data file with a different format will cause the
emulation of a process to change. In order to avoid errors, change the emulation back to
the format of the original input file before using the process again.
Stabilizing data
All emulations, except the database, PDF and XML emulations, let you perform operations on
the data to stabilize it. The following options are available in both the "Change Emulation" on
page392 task and "The Data Selector" on page857.
Add/remove characters: Enter the number of characters to add to, or remove from, the head of
the data stream, or use the spin buttons to increment or decrement the value. Positive values
add characters; negative values remove characters. This is useful when one or more characters
of input data precede the start of the first data page. Note that certain control characters can be
problematic. For example, the NUL character (hexadecimal 00) cannot be removed from the
head of the data stream, and a backspace (hexadecimal 08) can cause unpredictable behavior.
The Hex Viewer can be useful in helping determine the control characters that appear at the
head of the data stream. (To open the Hex Viewer, select Debug > View as Hex, in the menu.)
Note that you cannot add characters in a CSV. Further note that if you remove characters in a
CSV emulation, you should ensure that you do not inadvertently remove field or text delimiters.
Add/remove lines: Enter the number of lines to add to, or remove from, the head of the data
stream, or use the spin buttons to increment or decrement the value. Positive values add lines;
negative values remove lines. This is useful when one or more lines of input data precede the
start of the first data page. Note that you cannot add lines in either a CSV or user defined
emulation.
Lines per page: Enter the number of lines each data page contains, or use the spin buttons to
increment or decrement the value.
Pages in buffer: Enter the number of data pages you want the data page buffer to contain, or
use the spin buttons to increment or decrement the value.
Page 62

Read in binary mode (ASCII emulation only): Select to read the data file in binary mode. You
select this if you intend to run a PlanetPress Design document on a printer queue that is set to
binary mode. In binary mode, the printer reads the end of line characters (CR, LF, and CRLF)
as they appear in the data stream and does not perform any substitution. A printer that does not
support binary mode or is not running in binary mode replaces any CR, LF, or CRLF that
appears at the end of a line of data with a LF. Note, however, that it replaces a line feed
followed by a carriage return (LFCR) with two LFs. Binary mode is the recommended printer
mode when you use an ASCII emulation.
Cut on FF character: Select to have a new data page when a form feed character is
encountered in the data stream. If you select Cut on FF character, you have two conditions that
signal the end of a data page: the form feed character and the number of lines set in the Lines
per page box.
Emulation specific options
Various emulation specific options can be set for most emulations, with the exception of the line
printer and database emulations. For more information about a specific emulation type, see:
l "ASCII emulation" on the facing page
l "Channel skip emulation" on page65
l "CSV emulation" on page66
l "Database emulation" on page67
l "Line printer emulation" on page68
l "PDF emulation" on page69
l "XML Emulation" on page71
Emulations in PlanetPress Design
The Data Selector in Workflow is essentially the same as the one used in PlanetPress Design.
When you create a document in PlanetPress Design, you choose a sample data file and
specify the emulation to use for the chosen data. Within PlanetPress Workflow, the same
emulation tools as in PlanetPress Design are available throughout your process, using the
Data Selector. One notable exception however is that User-Defined Emulation is not available
because it uses PlanetPress Talk code, which is not available within the PlanetPress Workflow
Configuration program.
Page 63

The emulation that is used in your process can change during the process, and can be different
than the one used in any PlanetPress Design document used in your process. PlanetPress
Design Documents use their own emulations, as defined in the document itself from
PlanetPress Design.
For more information about emulations in PlanetPress Design see PlanetPress Design User
Guide.
ASCII emulation
ASCII emulation tells the process to treat the input data as a stream of ASCII characters. The
data stream is read one character at a time, a line is constructed, and that line is added to the
data page buffer.
In this emulation, you can define how to handle carriage returns that are not followed by line
feeds and how to handle tabs. You can also define whether you want any Hewlett Packard
Printer Control Language (HP PCL) escape sequences to be removed.
Note
ASCII emulation is only used when merging ASCII data with a PlanetPress Design
document.
When choosing an ASCII sample data file to be merged with a Connect template, select
Text emulation (see "Text-based emulation" on page70).
Using an ASCII file on a printer
If an ASCII file gets sent to a printer (which is possible in a PlanetPress Suite solution), you
need to know if your printer supports binary mode as this is the recommended mode for ASCII
emulation. On printers that support binary mode, you can switch the printer to binary mode
using the printer keypad or by sending the appropriate PostScript code to the printer.
In binary mode, the printer reads the end of line characters (carriage return [CR], line feed [LF],
and carriage return followed by a line feed [CRLF]) as they appear in the data stream and does
not perform any substitution. A printer that does not support binary mode or is not running in
binary mode replaces any CR, LF, or CRLF that appears at the end of a line of data with a LF.
A form feed signals the end of a data page in ASCII emulation. If no form feed occurs in the data
stream, the emulation adds data to the data page buffer until the buffer is full.
Page 64

ASCII emulation options
l
Tab on carriage return: Select this option to fix formatting problems caused by isolated
CR characters found within the data. When this option is selected, isolated CR characters
are spaces, as defined in the Number of spaces in the tab box below. Note that this option
is available only when the Read in binary mode option is selected.
l
Number of spaces in the tab: Enter the number of spaces you want the application
to use when an isolated carriage return character is found within the data. This
number typically corresponds to the maximum column number. If your data is
formatted so as to occupy a maximum of 120 characters on each line, enter a value
of 120 in this box, so when an isolated CR character is found, the data following the
CR character will appear starting from column 121. Note that this option is available
only when the Tab on carriage return option is selected
l
Number of spaces per tab: Enter the number of spaces you want to use when actual
TAB characters are found within the data.
l
Remove HP PCL escapes: Select if you want all Hewlett Packard Printer Control
Language escape sequences to be removed from the data.
Channel skip emulation
Channel skip emulation is a variant of line printer emulation. It tells the process to read the data
stream one line at a time, and to treat the first character of each line as a code that indicates
how to position the line of data in the data page buffer.
By default, in channel skip emulation, the integer 1 signals the end of a data page. You can
change this default when you set up the emulation.
Note that if a given value is used for multiple channels, the result may be different at design
time, or when a PlanetPress Design document is previewed or printed.
Also note that Split on FormFeed (FF) is not supported with the Channel Skip emulation in
Optimized PostScript Stream mode or when printing using a Windows driver.
Note
Channel skip emulation is only used when merging line printer data with a PlanetPress
Design document.
Page 65

CSV emulation options
l
Text delimiter: Enter the character that starts and ends the data in each field of the
record. If you do not set a text delimiter and the data in a field contains the character you
set as the delimiter, the data is split into two fields. If you want to use a backslash
character (\) as a delimiter, you must precede it with another backslash character (thus
you would enter \\). You can also specify an ASCII character using its octal value
preceded by a backslash (for example, \041 is the exclamation mark character [!]).
l
Force one record per page: Select to force a single record per data page. If you clear
the selection, a record may be split across data pages if necessary. If you want to avoid
splitting a record across data pages, yet have several records in the buffer, select Force
one record per page, and set the Pages in buffer option to the number of records you want
the buffer to hold.
l
Delimiter: Enter the character that separates the fields of each record in the input data. If
you want to use a tab as a delimiter, select Set tab as field delimiter. If you want to use a
backslash character (\) as a delimiter, you must precede it with another backslash
character (thus you would enter \\). You can also specify an ASCII character using its
octal value preceded by a backslash (for example, \041 is the exclamation mark character
[!]).
l
Set tab as field delimiter: Select to define a tab as the character that separates the fields
of each record in the input data. Clear to use the Delimiter box to define that character.
CSV emulation
CSV emulation tells the process to read the input data one line at a time and to treat each line
as a database record. It also specifies the field delimiter used to distinguish the different fields
of a record.
The process reads the data stream one line at a time and puts each field of the database record
on a separate line in the data page buffer, until the buffer is full. You can force a new data page
for each record when you set up the emulation.
Note that a double text delimiter within a field is not considered a normal character when not
using the Optimized PostScript Stream option or when printing using a Windows printer driver.
Page 66

CSV emulation options
l
Text delimiter: Enter the character that starts and ends the data in each field of the
record. If you do not set a text delimiter and the data in a field contains the character you
set as the delimiter, the data is split into two fields. If you want to use a backslash
character (\) as a delimiter, you must precede it with another backslash character (thus
you would enter \\). You can also specify an ASCII character using its octal value
preceded by a backslash (for example, \041 is the exclamation mark character [!]).
l
Force one record per page: Select to force a single record per data page. If you clear
the selection, a record may be split across data pages if necessary. If you want to avoid
splitting a record across data pages, yet have several records in the buffer, select Force
one record per page, and set the Pages in buffer option to the number of records you want
the buffer to hold.
l
Delimiter: Enter the character that separates the fields of each record in the input data. If
you want to use a tab as a delimiter, select Set tab as field delimiter. If you want to use a
backslash character (\) as a delimiter, you must precede it with another backslash
character (thus you would enter \\). You can also specify an ASCII character using its
octal value preceded by a backslash (for example, \041 is the exclamation mark character
[!]).
l
Set tab as field delimiter: Select to define a tab as the character that separates the fields
of each record in the input data. Clear to use the Delimiter box to define that character.
Database emulation
The Database emulation differs from other emulation types. With other emulations, data is
pushed either to PlanetPress Workflow processes running on servers, or to PlanetPress
Design documents residing on a printer. But in the case of the Dababase emulation, data must
be pulled from the data source: a query must be performed on the database to extract the
relevant data.
When generating output from the design tool (which is the Designer in Connect, or Design in
PlanetPress suite) one can open the document and then use the Data Selector to select a
database. By making a connection to the database, its structure can be accessed and it
becomes possible to determine how data is to be pulled into the document.
In a Workflow process, the database query has to be performed automatically. This can be
performed by the "Database Query" on page401 Action task. The task generates a data file
that it passes to the following task, be it another Action task, or any Output task. For help on
setting up the database emulation see: "Choosing a database sample file" on page74.
Page 67

Note
You can also use the PlanetPress Workflow Database Action task to get data from a
database, and output in multiple different formats such as CSV. See "Database Query"
on page401.
Bear the following in mind:
l The person or plugin performing the query must have full access to the database.
l The data is extracted at the time of the query. A new query must be performed whenever
the data needs to be updated.
l Any changes to the structure of the database may have an impact on automated data
querying tasks.
l You must have the proper ODBC driver installed to use this emulation.
Database emulation supports SQL ANSI 92 or higher, and supports the following data types:
string, integer, floating point, all date formats, and text-only MEMO. It does not support any
binary data types such as Binary Large Object (BLOB), images, sound files, and MEMO data
that includes binary data.
Database emulation requires version 2.5 or higher of Microsoft Data Access Components
(MDAC), including JET 4.0, and you can save database emulation configurations to a file.
Database emulation options
For help on setting up a database emulation see: "Choosing a database sample file" on
page74.
Note for PlanetPress Suite users: For information about setting up a database emulation in a
Design document, please see the relevant page in the PlanetPress Design User Guide.
Line printer emulation
Line printer emulation tells the process to treat the input data as data destined for a line printer.
In this emulation, a form feed signals the end of a data page. If no form feed occurs in the data
stream, the emulation adds lines to the data page buffer until the buffer is full.
Line printer emulation offers the best overall performance of all the emulations.
Page 68

Note
Line printer emulation is only used when merging line printer data with a PlanetPress
Design document.
When choosing a line printer sample data file to be merged with a Connect template,
select Text emulation (see "Text-based emulation" on the facing page).
Line printer emulation options
The line printer emulation does not have any options other than the general text-based
emulation options (see "Text-based emulation" on the facing page).
PDF emulation
The PDF emulation allows you to capture data from fully composed documents in a PDF
format.
PDF emulation slightly differs from other emulations: with other emulations, data is read either
one line at a time or one character at a time, while PDF emulation processes the input data
from the PDF file in such a fashion that every PDF page becomes a full data page.
Note
Protected PDF and PDF of versions above 1.7 are not supported by PlanetPress
Workflow.
PDF emulation options
The PDF emulation does not have any options - that is, there is nothing to set up when opening
a PDF data file.
In the Preferences there is a number of options that affect how words, lines and paragraphs are
detected in the PDF when creating data selections. You will find these options when you select
Workflow > Preferences > PDF Text Extractor. For more information see "PDF text extraction
tolerance factors" on page789.
Page 69

Text-based emulation
Text-based emulations display your data in plain text in the Data Selector and the Data Pane,
one line at a time, up to the limit you specify in the emulation properties (by default, 66 lines).
This is especially useful for legacy systems (such as AS/400 computers) that send data as text
meant for older line printers using pre-printed forms. The emulation options are used to make
sure your data is stable.
Stabilizing data is the process of defining the size of the data page and where the first data
page occurs in the data stream. A stable data page is critical to obtain accurate results. When
you stabilize your data, you also need to consider the internal structure of each data page. The
internal structure of each data page must also be stable to make the data selections you use
reliable (see "Data selections" on page55). Ideally, a given piece of data occupies the same
position across all data pages, or provides some stable characteristic that makes it possible to
locate it on every data page.
Text-based emulation options
The following properties are available for the text-based emulations (Line Printer, ASCII,
Channel Skip and CSV) to help stabilize the data:
l
Add/remove characters: Enter the number of characters to add to, or remove from, the
head of the data stream, or use the spin buttons to increment or decrement the value.
Positive values add characters while negative values remove characters. Further note
that if you remove characters in a CSV emulation, you should ensure that you do not
inadvertently remove field or text delimiters.
l
Add/remove lines: Enter the number of lines to add to, or remove from, the head of the
data stream, or use the spin buttons to increment or decrement the value. Positive values
add lines while negative values remove lines.
l
Lines per page: Enter the number of lines each data page contains, or use the spin
buttons to increment or decrement the value. A higher value means more lines will be
displayed on each data page. Note that increasing the value for this setting increases the
amount of RAM used by the application and may exceed the system’s capacity. Since the
Show used cells option also uses up some RAM, consider removing this option (see
"Data Selector display preferences" on page861) to reduce system load.
l
Pages in buffer: Enter the number of data pages you want the data page buffer to
contain, or use the spin buttons to increment or decrement the value. Putting more pages
in the buffer multiples the lines shown and is only useful in specific cases.
Page 70

Note for PlanetPress Suite users: You should also consider using the N-Up Object if you
want to display multiple data pages; see thePlanetPress Design user guide.
l
Cut on FF character: Select to have a new data page when a form feed character is
encountered in the data stream. If you select the Cut on FF character option, there are two
conditions that signal the end of a data page: the form feed character and the number of
lines set in the Lines per page option. Note that the Cut on FF character takes
precedence over the Lines per page option.
l
Read in binary mode: Select this option to force the printer to read the incoming data in
binary mode. Use this option with the ASCII emulation to fix problems related to line
spacing caused by LFCR character pairs found within the data. Use it with the ASCII
emulation and with the Tab on carriage return option to fix problems related to data
formatting caused by isolated CR characters found within the data. This option can only
be used with the ASCII emulation.
Note for PlanetPress Suite users: You cannot select this option if the Design document is
to be installed on a printer that cannot run in binary mode.
l
Data encoding: Select the appropriate encoding for the sample data file. You may look at
the data in the Data Pane (non-English characters especially, if any) to see how the your
selection affects the data.
XML Emulation
XML data emulations allow you to capture data emanating from web databases, e-mail
fulfillment, e-commerce, and general XML database engines. In XML emulation, the data
elements in markup language format are organized in a folder view with a root node and sub-
level nodes.
Note
Characters referenced using the ϧ syntax are limited to values ranging from 000
(�) to 256 (Ā).
Note
When XML data is merged with PlanetPress Design documents on a printer DOCTYPE
and ENTITY tags are ignored.
Page 71

XML emulation options
l
Cache XML data: When this option is selected, PlanetPress Workflow Server only
reloads the data if the size or modified date of the XML file changes. When this option is
not selected, the XML data will be reloaded into memory every time that a plugin works on
the data file. Caching the XML data will make subsequent tasks run faster (as loading an
XML file can take a long time) but will also use up more memory since that memory isn't
released in between tasks. For single runs the performance gain is less noticeable than in
loops (either through a splitter, a Loop task or a Metadata filter) where the XML file would
be loaded repeatedly.
For information about XML emulation options in PlanetPress Design documents, see the
PlanetPress Design user guide.
Sample Data
This topic covers issues relating to the sample data used in your PlanetPress Workflow
configuration.
A sample data file makes it possible to:
l Create a process that retrieves dynamic data from a data file. Once a sample data file is
available, you can use it to make data selections in a process (see "Data selections" on
page55).
l Debug a process (see "Debugging your PlanetPress Workflow process" on page107).
Choosing a sample file sets the process's emulation to the chosen format (see "About data
emulation" on page61). The only other way to change a process's emulation is by inserting a
"Change Emulation" on page392 task in it.
Changing the emulation is particularly important if you want to make a data selection in a file
after it has been converted to another format or when the job file has changed (see "Data
selections" on page55). To interpret a sample data file correctly, a process must have the
corresponding emulation setting.
Page 72

Note
Even during debugging, selecting a sample data file with a different format will cause the
emulation of a process to change. In order to avoid errors, change the emulation back to
the format of the original input file before using the process again.
Choosing a sample data file
In order to create your PlanetPress Workflow process, the sample data you are going to use
has to correspond precisely to the job files that will be treated by that process, at least in terms
of structure.
The sample data file should have a relatively small number of records (generally less than a
hundred) in order to be processed quickly, while your actual data may be much larger and take
more time to process. The sample data file should also contain at least one of every exception
you may want to detect, or data used for a specific condition. For example, if you wanted to filter
out any data for clients in Canada, you would want to use a data file that has at least one client
from Canada, to test whether your process filters it out correctly.
To choose a sample data file:
1.
Click the Debug tab in the PlanetPress Workflow Ribbon.
2.
Click on Select in the Data group.
3.
Use the Data Selector to choose your sample data file and emulation options (see "The
Data Selector" on page857).
4.
Click OK on the Data Selector.
Alternatively, if a resource file available in the configuration contains the necessary data file, it
can be attached to the process easily:
1. Expand the relevant resource files folder (Connect Resources or PPS/PSM Documents)
by clicking the button.
2. Expand the file by clicking the button.
3.
Right-click on the data file, then click Set as sample data file or simply double-click on
the data file.
Page 73

For example, to use a sample data file included in a Connect data mapping configuration:
select Connect Resources > Data Mapping Configurations > [your data mapping
configuration], right-click a data file and choose Set as sample data file.
Tip
Double-clicking on the data file does the same thing as right-clicking on it an then
selecting Set as sample data file. Clicking Cancel instead of OK after viewing will
prevent this action from being taken.
When you drag-and-drop a data mapping configuration on a process, you can choose
to use the first sample file in the data mapping configuration as the process's sample data
file. This also adds an "Execute Data Mapping" on page629 task to the process.
Choosing a database sample file
To choose a database sample file:
1. Open the Data Selector (see "The Data Selector" on page857).
2.
From the Emulation drop-down list, select Database.
3.
Next to the Sample data file field, click the Configure Database button.
4. Associate a database.
l
Microsoft Access Database or dBase file: In Database, enter the path of the
Microsoft Access database or dBase file, or click the Browse button to the right of
the box to navigate to, the database file. Recall that a Microsoft Access database file
bears the extension .mdb, and a dBase file bears the extension .dbf. If the file is a
dBase file, you must specify the folder that contains the .dbf file. The folder in this
case is considered to be the database, while each individual .dbf file is a table in the
database. Once you enter the path, the Table/query name box updates to reflect the
tables and queries available in the selected database.
l
ODBC Data Source: In ODBC Data Source, click to connect to an ODBC Data
Source. Use the Select Data Source dialog box that appears to select an existing
Data Source or set up a new one. When you exit the Select Data Source dialog box,
the Database box updates to display the connection string it uses to connect to the
database, and the Table/query name box updates to reflect the tables and queries
available in the selected database.
Page 74

Note
Since the Workflow tool is a 32-bit application, it can only use 32-bit ODBC
data sources. Make sure you use the proper Windows application (
ODBC
Data Sources (32-bit)
) to create and manage data sources that can be used in
Workflow.
5.
Click Edit SQL to create the SQL query by hand to define the SQL query that retrieves the
data your document requires.
6. Set the properties that define a record set:
l
Condition: Select the condition that signals the end of a record set. Three
possibilities exist: create a new record set for each record, create a new record set
after every x records, or create a new record set when the value of a specific field
changes.
l
Sort on condition field: Select this if the condition you set is to create a new record
set when the value of a specific field changes, and you want to sort the records
before applying that condition.
l
Maximum records per record set: Set either the number of records in each record
set, or the maximum number of records in a record set. An individual record set can
contain a maximum of 4000 records.
7. Set the number of records you want to include in the sample data file. The number of
records you set should provide a reliable sample to ensure your document executes
properly with any of the data it may encounter at runtime.
l
All: Select to include all records in the database in the sample data file.
l
Records: Select to define the range of records you want to include in the sample
data file.
Entering an SQL query
1.
In the Database Connection dialog box, click Edit SQL.
2.
If necessary, click Show Tables to display, in the Tables area, a list of the tables
available in the database.
3. In the SQL Query Entry area, enter the SQL query. The following two sample queries both
retrieve all the fields in the Orders table. The second sorts the resulting records on the
Date field.
SELECT * FROM [Orders]
Page 75

SELECT * FROM [Orders] ORDER BY [Date]
4.
Click Test SQL to verify the query you entered is a valid SQL query.
5. Define whether you want PlanetPress Design to automatically enclose table names and
field names in square brackets.
Alternate syntax(not recommended): Select to prevent PlanetPress Design from
automatically enclosing the names of any database tables and fields that appear in the
SQL query in square brackets when it exits the advanced SQL Statement dialog box.
6.
Client side cursor: Select to download result sets to client computer running the SQL
query. Under some circumstances, client side cursors may be slightly less efficient than
server-side cursors, but they may also provide additional functionality, depending on the
type of query that is issued.
7.
Click OK to return to the Database Connection dialog box.
Opening a previously used data file
PlanetPress Workflow also keeps the last 9 used data files in memory, which you can reopen to
use in the same process, or in a different one.
To reopen a sample data file:
1.
Click the Debug tab in the PlanetPress Workflow Ribbon.
2.
Click on Reopen Data File in the Data group.
3. Click on one of the data files in the list.
4.
Use the Data Selector to change the emulation options if necessary.
5.
Click OK on the Data Selector.
Metadata
Metadata is a hierarchical structure describing a job. Simply put, Metadata is data about data
or, in other words, information tagged to data. Depending on the type of job, the Metadata
includes information about the job, the data file, items in the Connect database, a PlanetPress
Design document, 'User defined information' (sometimes created by regular tasks) and in some
cases page properties and page counts.
Some of the Action and Output tasks produce, alter, or use the Metadata. In addition to that,
PlanetPress Workflow provides a whole series of plugins to create and edit Metadata during a
Workflow process (see "Metadata tasks" on page560). The things that you have to know in
Page 76

order to use the Metadata tasks effectively are set out in another topic: "Working with Metadata"
on page79.
You can also manipulate the Metadata in your process via scripts using the Metadata API. See
Metadata API Reference.
Note
Applications or plugins created in PlanetPress Suite 6 and using Metadata will need to
be updated for use in version 2021.2. No backward compatibility mode is available.
Warning
When a user-defined emulation (created in PlanetPress Design) is used with Metadata,
results and behavior are unknown and unsupported. For instance, refreshing the
Metadata file may cause the document to crash and/or corrupt. For this reason, it is
strongly advised to create backup copies of your documents beforehand.
Metadata structure
The hierarchical structure of the Metadata is composed of a number of basic levels for adding
information to a job. These levels are, from top to bottom:
l
Job: A file that contains one or more groups.
l
Group: A logical and ordered group of documents (ex: all invoices for a specific customer
number; all documents going to the same address, etc.).
l
Document: A group of one or more ordered data pages intended to the same recipient
from the same source (ex: invoice).
l
Data page: One atomic unit of content that produces zero, one or more pages.
l
Page: One side of a physical paper sheet.
When Metadata is produced for a given job, a hierarchical (i.e. tree-like) structure is created,
composed of the above elements in the following order: Job > Group(s) > Document(s) >
Datapage(s) > Page(s). For example:
Page 77

Note
Any operation that modifies the data with regards to the structure (ex: remove pages, alter
the data, etc.) makes the Metadata obsolete and so it must be recreated or refreshed; see
"Working with Metadata" on the next page.
Note: Metadata in OL Connect jobs
In PlanetPress Suite, all levels in the Metadata hold information about an actual job. In
Connect, that isn't the case. The Metadata file created and maintained by OL Connect tasks
looks the same, but contains less information. Only the first three levels in the Metadata hold
information about the job: Job, Group and Document. A Group has information about a
record set in the Connect database and a Document has information about one record in that
set. This information appears under User defined information instead of under Production
information. The Data Model fields are added into the Document level.
Although Data page and Page nodes are visible in the Metadata file, they don't contain any
actual job related information in this case.
The Metadata related plugins (see "Metadata tasks" on page560) can be used in conjunction
with OL Connect tasks nonetheless; see "How Metadata affects the output" on page81.
Page 78

Metadata Attributes and Fields
Each Metadata node (i.e. Job, Group, Document, etc.) is described with a series of elements,
that is, system-defined attributes or user-defined fields holding static or dynamic information
about the node they are attached to. Each element has a name and a value. Here is a definition
of these 2 types of elements:
l
Attribute: A read-only, system-defined element which holds certain information about a
certain node in the Metadata structure. This information can be static (e.g. the size of a
physical page) or evaluated on-the-fly (e.g. the number of documents in a group).
Attributes are non-repetitive (i.e. name is unique) and do not persist through Metadata
recreation. (See also: "Metadata Attributes reference" on page84.)
l
Field: A read-write, user-defined element which holds custom information about a certain
node in the Metadata structure. Fields are repetitive (i.e. the same field may appear
multiple times) and persist through Metadata recreation.
When the Metadata file is viewed through the Data Selector in Workflow, attributes are listed
under Production information; fields are listed under User defined information (see
"Metadata tab" on page859).
In addition to attributes and fields, each Metadata node has a number of properties and
methods. The Boolean property selected indicates whether or not to produce the pages under
that node. By default, this property is set to true for all nodes. This property is not visible in the
Metadata file, but it can be used in a Run Script task via the Metadata API.
Metadata Tools in PlanetPress Design
PlanetPress Suite includes a complete set of Metadata-related functionality, which can be
referred to as Metadata Tools. These tools can be used to generate Metadata, retrieve or define
Metadata elements, and build the Metadata structure of a PlanetPress Design document. For
information about these tools see the Design user guide: PlanetPress Design 7.6 User Guide.
Working with Metadata
A set of special Workflow plugins allows to edit the Metadata during a Workflow process (see
"Metadata" on page76 and "Metadata tasks" on page560). This topic describes what you have
to know about Metadata in order to be able to use these plugins effectively.
Page 79

How data and Metadata influence each other
When Metadata are created, they are based upon a data file. However, modifying one file
doesn't automatically change the other, and Metadata aren't reset by default in a Branch,
Condition or Loop.
l
Modifying Metadata does not immediately modify the data. This is one of the benefits
of Metadata because you can sort it, filter it, sequence it, add data to it, without ever
modifying the data file itself. This is important because if you, for instance, filter out certain
data pages from the Metadata and then save your data file with the Send to Folder task,
the full data file is saved, not the filtered one. However in some cases Metadata does
affect your output directly (see "How Metadata affects the output" on the next page).
l
Modifying data does not immediately modify the Metadata. So, if you have a PDF file
with Metadata and you use a PDF splitter, the Metadata information would still reflect the
original data, not the split. This can generally be resolved by using the Create Metadata
plugin (again).
l
Branches, Conditions and Loops (such as the "PDF Splitter" on page466) do not
reset the Metadata. This is important to know in cases where Metadata does affect your
output (see "How Metadata affects the output" on the next page). Not handling the
Metadata properly in such cases can cause confusing issues because the Metadata and
the Data may become out of sync.
How tasks influence Metadata
As a general rule, only Input tasks and Metadata related tasks modify Metadata. There are,
however, a few notable exceptions:
l "Run Script" on page482 tasks can modify Metadata using the "Metadata API" on
page197 (see "Using Scripts" on page141).
l "Create PDF" on page397 has the option to reset your Metadata according to the new
PDF file.
l "OL Connect tasks" on page591 can add information, such as record IDs, a record set ID
or a print job ID, to the Metadata. They put it under 'User defined information' on the Job,
Group or Document level.
l The "Barcode Scan" on page386 task can add information to the existing Metadata, and
creates it if there is none.
Page 80

l The "Capture Fields Generator" on page543, "Capture Fields Processor" on page546,
"Get Capture Document" on page556 and "Find Capture Documents" on page552 tasks
generate their own Metadata.
l The "Lookup in Microsoft® Excel® Documents" on page499 enhances Metadata fields
with information from an Excel spreadsheet, but does not otherwise change its structure.
How Metadata affects the output
By default the data file is not affected when the Metadata are modified. There are however a
few situations in which Metadata will or may affect the output.
In OL Connect, output is normally created from records in the Connect database, but options in
some "OL Connect tasks" on page591 make it possible to influence the output via the
Metadata.
l The "Execute Data Mapping" on page629 task and "Retrieve Items" on page647 task
can output records in the Metadata.
l The "Create Print Content" on page617 and "Create Email Content" on page600 tasks
have the option to update the records in the Connect database from the Metadata and use
the updated records as input.
In PlanetPress Suite, the Metadata defines the order in which the data is consumed by a
Design template. Changing the order and location of the various items means that the final
output will be different than the original and will follow the order dictated by the Metadata
instead of the order of the physical data.
l When you print a PDF with a Windows Print Queue, the Metadata is inspected to
determine whether pages should print or not (see "Print using a Windows driver" on
page669).
l The "Create PDF" on page397 task also takes the Metadata into account.
Output issues caused by Metadata, and how to avoid them
A Branch, Loop (the "PDF Splitter" on page466, for instance, or the Loop task) and Condition
don't reset the Metadata. This can cause confusing issues if they are used in combination with
a task that takes the Metadata into account.
To avoid such issues, either regenerate your Metadata inside the (condition) branch or loop as
early as possible (see "Create Metadata" on page560), or use the "Metadata File
Management" on page566 to delete the active Metadata file and let the data file be taken into
account instead of the Metadata.
Page 81

Example
Here is an example of an issue that occurs when Metadata is not re-created in a Loop.
In the following process, the Job file is a PDF that contains several invoices. Some (but not all)
of those invoices start with a separator page that you don't want to print. Invoices that don't have
a separator page should be printed as-is.
The process would look something like this (by default):
l Step 2 splits the PDF whenever it encounters a new Invoice Number on the Top Right
corner of a page. From this point on, the rest of the process applies to each split (i.e. each
invoice).
l Step 3 checks if the first page is a separator (presumably by looking for some kind of
keyword on the page).
l If a separator page was found, step 4 creates Metadata for the split PDF…
Page 82

l ...and step 5 filters out the first page (which means the Metadata unselects the first Data
Page, in effect "hiding" it from the Print Output task).
l Step 6 prints the PDF to a printer. When printing a PDF file in passthrough mode, the
Metadata is inspected to determine which pages should print or not. In this case, Page 1
is unselected in the Metadata, therefore the printer receives the job starting from Page 2,
which is exactly what you want.
l Step 7 prints the entire PDF since no separator page was found.
Now here comes the issue:
l The process moves back up to Task 2 in order to process the second split of the original
PDF. The Metadata file still exists in the process! So far, it doesn't impact the rest of the
process… but wait…
l Let's say in step 3 no separator page is found on page 1 of the second split PDF.
l Step 7 prints that second split PDF… but page 1 is unselected in the Metadata (because
the Metadata was carried over from the last split!) so at the very least, you will be missing
one page. If the second split has more pages than the first one, other pages at the end will
get missing as well, as the Metadata doesn't know about it. Or if it has less pages than the
first one, the last pages will be blank.
To avoid running into the issue, you should use the "Create Metadata" on page560 task to re-
create the Metadata immediately after every split, thus ensuring that the process cannot, in
either branch of the condition, be using the Metadata from the previous split.
Page 83

Metadata Attributes reference
An Attribute is a read-only, system-defined element which holds certain information about a
certain node in the "Metadata" on page76 structure. This information can be static (e.g. the size
of a physical page) or evaluated on-the-fly (e.g. the number of documents in a group). Attributes
are non-repetitive (i.e. name is unique) and do not persist through Metadata recreation.
When the Metadata file is viewed through "The Data Selector" on page857, the Attributes are
listed under Production information (see "Metadata tab" on page859).
The Metadata Attributes can be categorized as either Production, Finishing or Index/Count.
l
Production attributes describe the production of the job and/or Metadata (e.g. path and
name of the data file, date at which Metadata was created, etc.)
Page 84

l
Finishing attributes describe the finishing intent (e.g. page dimensions, page orientation,
duplex mode, etc.).
Note
The presence of some finishing attributes depends on the PlanetPress Design
document and target device used when producing the job.
l
Index/Count attributes are not part of the original Metadata file. They are evaluated
dynamically, based on the content of the Metadata.
Note
Metadata Index/Count values are one-based when viewed in the user interface: the
first element in any collection has an index of 1 and the last element's index
corresponds to the collection's length. However, in the API and in Metadata
selections, they are zero-based: the first element in any collection has an index of 0
and the last element's index corresponds to the collection's length minus 1. This
means the zero-based value has to be used when retrieving Metadata (see also:
"Metadata selections" on page59 and "Rule Interface" on page874).
In the following table, the last 5 columns indicate at which level the corresponding attribute is
available. This also depends on the type of job, however.
Note
In the Metadata file created for an OL Connect job:
l Only three levels are filled with actual data about the job: Job, Group and
Document.
l Only Index and Count attributes are used.
Page 85

Attribute Description Categor
y
Jo
b
Grou
p
Docum
ent
Datapa
ge
Pag
e
DataEncoding (optional)
Name of the
character
encoding.
Producti
on
X X X
DataFile (optional)
Path and
name of the
data file used
by the
PlanetPress
Design
Document.
Producti
on
X X X
Date Date the
Metadata was
created in
ISO format.
Producti
on
X X X
Time Time the
Metadata was
created in
ISO format.
Producti
on
X X X
Title Title of the
source
document.
Producti
on
X X X
Producer Name of the
software that
created the
Metadata.
Producti
on
X X X
Creator Name of the
software that
created the
Producti
on
X X X
Page 86

Attribute Description Categor
y
Jo
b
Grou
p
Docum
ent
Datapa
ge
Pag
e
source of the
Metadata.
TargetDevice Name of the
device for
which the
Metadata and
associated
data is
intended.
Producti
on
X X X
Author Name of the
user who
printed the
job initially,
as available
in the spool
file, and as
the first job
info of the
Windows
capture input.
Producti
on
X
Dimension Two floating-
point values
separated by
a colon
indicating the
media size in
typographical
points (ex:
612:792).
Finishin
g
X X X X X
Orientation "Rotate0",
"Rotate90",
"Rotate180"
Finishin
g
X X X X X
Page 87

Attribute Description Categor
y
Jo
b
Grou
p
Docum
ent
Datapa
ge
Pag
e
or
"Rotate270",
indicating
respectively
portrait,
landscape,
rotated
portrait and
rotated
landscape.
Side "Front" or
"Back";
indicates
whether the
page is on
the front or
the back of
the paper
sheet. This
attribute is a
"best effort"
and is device-
dependent.
Finishin
g
X
Duplex "None",
"DuplexTumb
le" or
"DuplexNoTu
mble";
indicates a
change of the
duplex status.
Finishin
g
X X X X X
InputSlot Device-
dependent
Finishin
g
X X X X X
Page 88

Attribute Description Categor
y
Jo
b
Grou
p
Docum
ent
Datapa
ge
Pag
e
identifier of
the media
source.
OutputBin Device-
dependent
identifier of
the media
destination.
Finishin
g
X X X X X
Weight Device-
dependent
weight of the
media.
Finishin
g
X X X X X
MediaColor Device-
dependent
color of the
media.
Finishin
g
X X X X X
MediaType Device-
dependent
type of the
media.
Finishin
g
X X X X X
Index Index/C
ount
X X X X
IndexInDocument Returns the
Absolute
index of the
node within
all the nodes
under the
parent
Document.
Index/C
ount
X X
Page 89

Attribute Description Categor
y
Jo
b
Grou
p
Docum
ent
Datapa
ge
Pag
e
IndexInGroup Returns the
Absolute
index of the
node within
all the nodes
under the
parent Group.
Index/C
ount
X X X
IndexInJob Returns the
Absolute
index of the
node within
all the nodes
under the
parent Job.
Index/C
ount
X X X X
Count Index/C
ount
X X X X
DocumentCount Index/C
ount
X
DatapageCount Index/C
ount
X X
PageCount Index/C
ount
X X X
SelectedCount Index/C
ount
X X X X
SelectedDocume
ntCount
Index/C
ount
X
SelectedDatapag
eCount
Index/C
ount
X X
Page 90

Attribute Description Categor
y
Jo
b
Grou
p
Docum
ent
Datapa
ge
Pag
e
SelectedPageCo
unt
Index/C
ount
X X X
SelectedIndexInD
ocument
Returns the
Absolute
index of the
node within
all the
selected
nodes under
the parent
Document.
Index/C
ount
X X
SelectedIndexInG
roup
Returns the
Absolute
index of the
node within
all the
selected
nodes under
the parent
Group.
Index/C
ount
X X X
SelectedIndexInJ
ob
Returns the
Absolute
index of the
node within
all the
selected
nodes under
the parent
Job.
Index/C
ount
X X X X
NumCopies Indicates how
many times
the job is set
Index/C
ount
X
Page 91

Attribute Description Categor
y
Jo
b
Grou
p
Docum
ent
Datapa
ge
Pag
e
to execute, as
set when
printing using
a Windows
driver.
Working with JSON
In online processes, it is common to send data to and retrieve data from a server. That data is
often exchanged in JSON format. JSON is short for JavaScript Object Notation. It is a way to
store information in a structured and easy-to-read format. It is often referred to as "XML without
nodes" and it is designed for exchanging data.
Refer to the following online resources for more information on JSON and its syntax:
l www.json.org
l www.w3schools.com
JSON support in Workflow tasks and scripts
PlanetPress Workflow offers JSON support in and via the following tasks:
l The "XML/JSON Conversion" on page450 task converts an XML job file to JSON or a
JSON job file to XML.
l
The following OL Connect tasks accept JSON data as input: "Create Email Content" on
page600, "Create Print Content" on page617, "Create Web Content" on page621,
"Render Email Content" on page643, and the "Create Preview PDF" on page612 task.
l When the OL Connect "Execute Data Mapping" on page629 task or the OL Connect
"Retrieve Items" on page647 task is set to output Records in JSON, it outputs a JSON
Record Data List (see "Types of JSON in Workflow" on the next page).
l The OL Connect Send "Get Data" on page577 task can output its results to a JSON file.
In scripts written in any JSON-aware language (including JavaScript), JSON is obviously
supported.
Certain methods in the "Data Repository API" on page175 accept or return JSON data.
Page 92

Types of JSON in Workflow
Workflow tasks that support JSON accept or output one or two of the following types of JSON:
l
a regular JSON string, containing a JSON object or an array of JSON objects
representing records. If a value in a record object is a string, it is considered to be a field
value. If a value in a record object is a JSON object, it is considered to be a nested table
with detail records. For examples, see "JSON string examples" below.
l
a JSON Record Data List (see the REST API Cookbook). A JSON Record Data List is a
proprietary JSON object type. It includes a schema entry with information about the types
of all fields at the beginning of the record, and the data set with values after the schema.
This structure allows for easy handling of REST API return values through scripting in
Workflow or in the Designer; see "JSON Record Data List example" on the facing page.
JSON string examples
The following JSON string samples show various techniques to incorporate data in a JSON
string.
A simple JSON structure holding the first and last name of a person:
{
"first": "Peter",
"last": "Parker"
}
A JSON string with references to local variables and a Job Info variable (see "About
variables" on page716):
{
"first":"%{first}",
"last":"%{last}",
"email":"%2"
}
A JSON string containing a local variable and various Data Repository selections (see "Data
Repository lookups" on page58):
{
"jobid":"%{jobid}",
"account":"lookup(OLCS_jobs, account, jobid, '%{jobid}')",
"datafile_name":"lookup(OLCS_jobs, datafile_name, jobid, '%
Page 93

{jobid}')",
"pages":"lookup(OLCS_jobs, pages, jobid, '%{jobid}')",
"documents":"lookup(OLCS_jobs, documents, jobid, '%{jobid}')",
"recordsetid":"lookup(OLCS_jobs, recordsetid, jobid, '%{jobid}')"
}
An example where the entire JSON string is provided in a Job Info variable:
%1
A JSON string constructed with information retrieved from an XML job data file (see "XML data
selections" on page60):
{
"first":"xmlget('/request[1]/values[1]/first
[1]',Value,KeepCase,NoTrim)",
"last":"xmlget('/request[1]/values[1]/last
[1]',Value,KeepCase,NoTrim)",
"email":"xmlget('/request[1]/values[1]/email
[1]',Value,KeepCase,NoTrim)"
}
A JSON string that contains nested data:
{
"name":"Peter Parker",
"email":"parkerp@localhostcom",
"ExtraData":"foobar",
"detail": [{"id":"inv123","ExtraData":"hello"},
{"id":"456","ExtraData":"world"}]
}
JSON Record Data List example
A JSON Record Data List describes a list of data fields (as name/value pairs), a data table
schema and nested data records (if any) for one or more data records. Below is an example of
such a JSON Record Data List.
[
{
"schema": {
"columns": {
"ID": "STRING",
"Date": "DATETIME"
Page 94

},
"tables" : {
"detail": {
"columns": {
"ItemTotal": "CURRENCY",
"ItemShipped": "FLOAT",
"ItemOrdered": "BOOLEAN"
}
},
"detail2": {
"columns": {
"ItemUnitPrice": "CURRENCY",
"ItemOrdered": "INTEGER"
}
}
}
},
"id": 3678077,
"datasetid": 2392921,
"fields": {
"ID": "CU19762514",
"Date": 1331096400000
},
"tables": {
"detail": [{
"id": 3678078,
"fields": {
"ItemTotal": "2300.00",
"ItemShipped": 2.0,
"ItemOrdered": false
}
},
{
"id": 3678079,
"fields": {
"ItemTotal": "29.99",
"ItemShipped": 1.0,
"ItemOrdered": "false"
}
}],
"detail2": [{
"id": 3678080,
"fields": {
"ItemUnitPrice": "1150.00",
Page 95

"ItemOrdered": 2
}
},
{
"id": 3678081,
"fields": {
"ItemUnitPrice": "29.99",
"ItemOrdered": 1
}
}]
}
}
]
Values could be retrieved in JavaScript as follows:
var foo = record.fields.ID;
var bar = record.tables.detail[0].fields.ItemTotal;
Data Repository
The Data Repository is a permanent structure to store data that can then be reused, modified or
augmented at a later time, by different processes.
This feature was introduced in version 8.5.
The Data Repository is especially useful in situations where data needs to be kept in between
processes. A few examples:
l An HTTP-based authentication process, once it has validated user credentials, could
store session information (unique ID, user name, session starting time) into the repository.
All other related processes could then look into the repository to determine if a new
request is received from an already authenticated user, if the session has expired, what
the user name is, etc.
l Data comes in and is merged into a Capture OnTheGo template and stored in the Data
Repository. The end-user augments the data (using the COTG as a data-entry system).
The process that receives the augmented data could look into the Data Repository to
retrieve the original data (or the ID of the original data records) in order to augment,
modify or delete it.
Page 96

Structure
As can be seen in the "Data Repository Manager" on page854, the Data Repository consists of
Groups, Keys and KeySets.
Feature Name Description Equivalent Database Terminology
Group A Group is defined by its Keys
(columns), and may contain 0 or
more KeySets (rows) within it.
Table
Key A Key is defined only by its name.
The Data Repository only supports
STRING values and any data
inserted into it is converted to
string automatically. The maximum
size of a single key is 1 billion
bytes.
Column/Field
KeySet A group may contain as many
KeySets (rows), which contain
variable data, as necessary. A
KeySet is inserted using the "Push
to Repository" on page431 task.
Row/Record
Lookup A method of retrieving one or more
KeySets from a group in the data
repository.
Query
Accessing the Data Repository
Via plugins
Storing data in the Data Repository
Data can be stored in the Data Repository using the Push to Repository task (see "Push to
Repository" on page431).
Page 97

Retrieving data from the Data Repository
In any Workflow task where variable data is allowed (recognisable by the maroon field labels),
information can be retrieved from the Data Repository using a Lookup function. Right-click a
field with a maroon label and select Get Repository Location. This will bring up the "Data
Repository Manager" on page854. Select a Group, Key and KeySet entry to determine which
value or values should be retrieved at runtime; then click OK. The Lookup Function Syntax,
displayed at the bottom left of the Data Repository Manager, will be copied into the field.
The syntax is of the Lookup function is:
Lookup(Group_Name, Key_To_Retrieve, Key_To_Match, 'Value_To_Match')
Note
Value_To_Matchcan be a static string, a jobInfo or a variable, but not a data selection.
For the Value_To_Match parameter, the single-quotes surrounding the value are
mandatory even if the value is dynamic.
This function may also be used anywhere else where the contextual menu gives access to it.
You could, for example, use it on the General tab of the Create File task, to fill in the value of a
key/value pair in a JSON string.
Tip
The Data Repository Manager displays, at the bottom left, the syntax used for accessing
a specific value.
Note
Lookup()returns NODATA when the group and/or key does not exist.
In previous versions of the software, trying to do a look-up in a non-existent group and/or
key would cause an error. This change in behavior may affect any Workflow configuration
that uses an on error process related to invalid groups/keys.
Page 98

Scripts
In a script you can access the Data Repository using the "Data Repository API" on page175.
For a quick start, turn to this How-to: Interacting with the Data Repository API.
Data Repository Manager
At design-time, the Data Repository Manager may be used to insert or remove Groups, Keys
and KeySets; see "Data Repository Manager" on page854.
Where to find the Data Repository
In case the Repository contains valuable information that must not be lost in case of a hardware
failure, create a backup of the repository.
By default, the Data Repository is located in the following folder:
%ProgramData%\Objectif Lune\PlanetPress Workflow 8\PlanetPress Watch\Repository.
It is also possible to create a Repository at a custom location; see ConnectionString.
Debugging and error handling
This chapter touches on two subjects that are intrinsically linked, though their use is different.
Debugging is the act of running through your process, either step by step or as a whole,
directly from the PlanetPress Workflow Configuration tool, in order to detect and resolve issues
with your process.
Error handling, on the other hand, occurs when your configuration has been sent to
PlanetPress Workflow services, and are running in "production" mode. The automated
handling of errors within your processes will have a large impact on recovering from errors as
they happen during production.
About error handling
When your process is running, or during debugging, it may happen that the task that is currently
running causes an error, and the task fails. For example, when trying to save to a folder that
does not exist, or printing to a printer that cannot be found.
Page 99

When such an error occurs, in most cases you would want to be aware of it and to take certain
actions in order to correct or report the error. This is where our error handling features come in
handy.
Most of the tasks, branches and conditions included in your process can have their own error
handling behavior, with the exception of Comments, the Input Error bin task, and older legacy
tasks from previous versions of Workflow that did not have error handling.
By default, when an error occurs, the task is skipped and the unmodified job file is passed on to
the next task. You can overwrite this behavior by changing the options of the On Error tab of
the process - which sets the default error handling behavior for all the tasks in that process - or
of an individual task.
Using the On Error tab
Whenever an error is triggered either during debugging or when a process runs in production,
the settings specified in the On Error tab of the task that generated the error will be used to
determine a course of action.
On Error Tab
The On Error tab is common to all tasks and processes. It can be found in the"Task Properties
dialog" on page877.
By default, any Action task, Branch, Splitter or Condition that generates an error will simply be
ignored, and the task just under it (not within a branch) will be given control of the job file
without any modification. Any initial input task that generates an error will stop the process from
running as a whole, and Output tasks will not generate output. The On Error tab can be used to
overwrite the default behaviors.
l
Send to Process: Check this option to send the job file to an error management process.
l
Error Process drop-down: Enabled only when the Send to Process option is checked.
Lists any process of which the initial input task is the Input Error Bin task.
l
Action: In the initial input tasks, this group is disabled and defaults to Stop Process. In
all other tasks where the On Error tab is present, the following options are available:
l
Default: By default, the task is ignored as if it did not exist and the error is logged
before continuing the branch or process; the job file is passed on to the next task in
Page 100

the process. When an error occurs in a loop (or in a plugin that acts like a loop), the
loop may log the error, terminate the current iteration and proceed with the next
iteration.
l
Stop Branch: If the task is in a branch of the process, the branch is stopped and the
job file is returned to the process after the branch. The branch will not produce any
output. If the task is not on a branch, the entire process will be stopped.
l
Stop Process: The process is stopped and no more processing is done. No further
output is produced.
l
Log Message: Check this option to enable logging a custom error message in the
PlanetPress Workflow log file and in the Windows Application Events.
l
Message: Enabled only when the Log Message option is checked. Enter a message that
will be logged in the PlanetPress Workflow log file. You can use any variables available
in PlanetPress Workflow to customize the message.
l
Store the message in variable: Select in which jobinfo, local or global variable you
want to store the message content.
l
ID: Enter an error ID. This ID will be visible in the Windows Event Viewer. However, the
ID is not visible in the PlanetPress Workflow log file.
l
Store the ID in variable: Select in which jobinfo, local or global variable you want to
store the error ID.
l
Reset to defaults: Resets all options in this tab to their default values.
When storing the message or ID, if they are stored in a jobinfo they will be available in any
error handling process where errors are being forwarded. If your process continues after the
error, the contents of the variables selected in this window will be available to the rest of your
process, or as long as they are not overwritten.
All error codes are listed in the knowledge base of PlanetPress Workflow. Though some error
messages are specific to a task in particular, others may apply to any and all tasks because
they are related more to the system than to PlanetPress Workflow itself. Some examples would
be W3813, W3830, W3991, W4005. These correspond to issues such as not having any space
to write files, permission errors on folders or files, etc.
Creating and using Error processes
An Error process is a special type of process that never runs on its own, and cannot be called
using the GoSub or Send to Process tasks. It can only be used in the On Error tab of a task in
Page 101

your process, and will be triggered if the Send to Process option is checked in that tab and an
Error process is selected in the drop-down list.
To create an Error process, simply replace the initial input task by the InputErrorBin Input task,
and that process automatically becomes able to handle error jobs sent to it. It is up to you,
however, to decide how that error job will be handled.
For example, you could place the job file in a specific folder, then send an email to a supervisor
indicating that a job has failed. Or you could update a database with an error status so that it
appears on a customer's online order. You could also zip the order up and send it to an
administrator, while simultaneously advising the person that sent the job that it failed.
You can have as many error processes as you can normal processes - that is, you are limited to
512 processes, subprocesses, startup processes and error processes combined.
Information available in an Error process
The following information is available from within your Error process when it is triggered.
l A series of variables containing information about the error, the task that triggered it and
the process that contained it (see below). These are "System variables" on page719.
l "Job Info variables" on page717 (%1 to %9).
l The data file as it was before starting the task.
l Global variables (which are, of course, available anywhere).
Note
Local variables in the process are not sent to error processes, even if the error process
has a variable of the same name.
Error handling variables
The error handling variables are read only and are filled by the On Error mechanism.
They can be accessed anywhere, but they only appear in the contextual menu of a task
property field when the current process is an error-handling process (that starts with the Error
Bin Input task). See also: "Variable task properties" on page727.
Page 102

Variable Name
%{error.process} Name of the process where the error was triggered.
%{error.tasktype} The type of task that triggered the error
%{error.taskname} The name of the task that triggered the error
%{error.taskindex} The position of the task in the process
%{error.errormsg} The error message, as entered in the OnError tab of the task.
This is the same message as appears in PlanetPress Workflow Log
file.
%{error.errorid} The error ID, as entered in the OnError tab of the task.
This is the same ID that appears in the Windows Event Viewer.
%{error.errorlog} A string containing the logged error message(s) from a task. Multiple
error messages are delimited by a "|" (vertical bar) character.
Accessing the Logs
If your process is running live in the PlanetPress Workflow Service, you have two ways of
seeing what is happening now or what has happened in the past.
Viewing running processes
To view what processes are running and processing data as it happens:
1.
In the PlanetPress Workflow Ribbon, click on the Tools tab, then select Service Console
in the Services group. The PlanetPress Workflow Service Console opens.
2. Click on the service you want to check, including:
l
PlanetPress Workflow
l LPD Server
l Telnet Capture
l Serial Capture
Page 103

l HTTP/SOAP Server
l LPR Client
l FTP Client
l
PlanetPress Image
l
PlanetPress Fax
l
PlanetPress Messenger
3. When any job or file is processed by the selected service, the processing logs will be
displayed in the window on the right.
Note
The information that is displayed here is the same as in PlanetPress Workflow logs and
depends on the logging level that you set in the "General and logging preferences" on
page791 and on the 'Minimal logs' option in the "Process properties" on page869.
Viewing logs for jobs that have already processed
The logs for jobs that have already processed are available in the following folder:
C:\ProgramData\Objectif Lune\PlanetPress Workflow 8\PlanetPress Watch\Log
You can access this folder more quickly by using this procedure:
1. Open the Workflow Configuration tool and then press CTRL+SHIFT+ALT+F4
simultaneously. This macro keyboard shortcut opens the PlanetPress Workflow working
folders.
2.
Double-click on the folder called Log.
3. There are multiple logs displayed here, including:
l
ppwYYYYMMDD.log - PlanetPress Workflow logs, including the year, month and
day of the log (from midnight to midnight).
Page 104

Note
The PlanetPress Image and PlanetPress Fax logs are available in different folders. From
the Watch folder, go up one level then go in either folders, under which you will find the
Log folder for that specific software within the suite.
Resubmit backed up input files to a process
Each Input task includes an option that lets you back up input files. This option is not selected
by default, since it has the potential to generate a very large number of backup files. To turn on
the backup option of an Input task, simply open its properties, go to the Other tab and check the
Backup input files option, then type in a unique file name for the backup file (this should be
variable; see "Variable task properties" on page303).
But if, for a given input task, you did select this option and something goes wrong and an
original input file is lost or corrupted, you will have the option to use the Resubmit Job
command to pull the backed up input file into the process.
Granted that you have backup copies of the files polled by an Input task, you may resubmit
them as required. The PlanetPress Workflow Configuration tool gives you the option to
resubmit them as they were submitted originally (polled by the initial input task) or to submit
them to those tasks located on the index you select.
The numbers on the left in the Process area indicate the task index.
In the above image, the Folder Capture task is on level 1 and the Text condition is on level 4.
Page 105
Here's how to resubmit backed up input data files.
Note
The resubmit option is triggered through the Workflow configuration tool, but the job being
resubmitted is actually handled by the Workflow Service, using that service's credentials.
The service must therefore be running in order to resubmit jobs.
1.
In the PlanetPress Workflow Ribbon, go to the Tools tab then click Resubmit Job in the
Services group. The File Resubmission dialog box is displayed.
2.
From the Process box, select the process for which you want to resubmit the backed up
input files.
3.
From the Task index box, select the index level to which you want the data to be sent.
The index is the position in the process where you want to submit the job file. The
numbers on the left in the Process area indicate the task index.
4. In the list of backed up input files, select the file you want to resubmit (see "Knowing what
to resubmit" on the next page).
5.
Using the From page and To page boxes, select the data pages that you want to
resubmit. (Data pages refers to blocks of data between natural delimiters in a data file,
such as lines in a CSV file.) If you want to resubmit all the data pages from the selected
input file, enter 0 in both boxes.
Warning
The From page and To page boxes are only useful for Printer Queue (or printer
capture) Input tasks. They will not function for other types of inputs. In these cases,
the complete backup job is submitted.
6.
Click Send to resubmit the data.
7. To resubmit backed up input files for the same process or for a different one, repeat step 2
to step 6.
8.
To close the File Resubmission dialog box, click Close.
Page 106

Knowing what to resubmit
When something goes wrong with an output job, a print job for instance, and printouts are lost,
you need to know the name of the job in order to resubmit the input. This refers to the name
used internally by PlanetPress Workflow and generated by the Input task using parameters
defined within the task. The name of the job file can be found in the logs (see The PlanetPress
Workflow Service Console). To simplify file identification, you should consider using names
that include both the name of the original input file (if any) plus some details such as the current
date and time.
In addition it may be useful to know the number of each failed page. If a job contains 1000
documents and if documents 1 to 950 were printed correctly, you might not need to resubmit the
entire job, but only the input data for the 50 last documents. However this is only useful if the
relationship between the input data and actual output documents is easy to determine.
For help on how to include (data) page numbers in a PlanetPress Suite Design document, or
page numbers in a Connect template, please see PlanetPress Design User Guide or Connect
Online Help, respectively.
Debugging your PlanetPress Workflow process
After designing a process, which is to add the different tasks, branches and conditions to the
process and configuring them (see "About processes and subprocesses" on page126), you
can test whether or not the process and configuration actually work.
Once you have created and fully debugged all your processes, you will be ready to send it to
PlanetPress Workflow service. See "Saving and sending a Workflow Configuration" on
page37.
Prerequisites
Before you can start debugging, these are the prerequisites.
l There must not be any "Unknown tasks" on page716 in the process.
l A sample data file must be selected; see "Choosing a sample data file" on page73.
Page 107

Note
The sample job file should generally be the exact same format as the data that the
process will receive when PlanetPress Workflow is processing the job at run-time.
About the Debug mode
When debugging your process, it is important to keep in mind that:
l
The initial Input task is never executed. The sample data file is used instead of the initial
run. This is to prevent "live" data from being retrieved by the initial input task while
debugging is being done. If, however, the initial task is critical to the process, it can be
executed by copying the initial input task and pasting it as a secondary input task (the first
Action task to actually run in the process). Do not forget, however, to remove this
duplicate task before saving the configuration!
l If any task makes an operation on the system (for example, capturing files, sending data,
printing, etc), it is actually executed, not simulated.
l
Any task is executed with the permissions of the user that is currently running the
PlanetPress Workflow Configuration tool. When running in Service mode, the user
configured in the Configure Services dialog is used instead. If the credentials are
different, a job that runs in debug mode may fail at run-time if the permissions are not
available to the Service. Please see "Workflow Services" on page767 for more details.
Running in Debug mode
Debugging can be run in different ways:
l
From the Debug tab, click on Run. This executes the complete process, step by step,
until it is completed.
l
From the Debug tab, click on Step. This executes only the first task in the process and
waits for further action. While stepping through a process (using Step, not Run),
breakpoints may be used and given steps may be passed, using the buttons on the
Debug ribbon (see below).
l
Right-click on any task in the process and click Run from Here or Step from Here.
These actions are the same as using the debug Step and Run buttons, but will execute
the process only starting from that task forward.
Page 108

Double-click on any task to change its properties. If you change the properties of a task before
you step through it, those new properties will be used when the task is executed. Note that you
cannot modify the process itself while in debug mode (you cannot add, delete or move tasks,
change branches and conditions, etc).
Look at the Messages Area pane to see any message generated by the tasks that run (See "
The Message Area Pane" on page880).
Use the Debug Information pane to see the current value of any variable in your process or
globally, or to evaluate custom expression. See "The Debug Information pane" on page879.
Use the Object Inspector - one of the panes alongside the Debug Information pane - on the
process to enter sample job information as required.
The Debug ribbon provides the following buttons:
l
Click on Skip to ignore the next task or branch and go to the subsequent one. The job file
is not modified in any way.
l
Click on View as Text in the Data group of the Debug tab to view the current job file
using a text editor (Notepad by default).
l
Click on View as PDF to view the current job file in Adobe Acrobat if it is present (this will
work only for PDF job files).
l
Click on View Metadata to open the data selector and see the current state of the
process' Metadata.
l
Click on View as Hex to view the current job file in the internal Hex editor.
l
Click on the Stop button to stop the debugging process. If you use Run, Step or Skip
after stopping the process, debugging starts over from the top.
l
Use the Set Breakpoint button to tag the currently selected task, branch or condition as a
breakpoint. When you click Run in your process, the process will execute every task until
it reaches a breakpoint and will stop just before the task that is set as a breakpoint.
l
Use the Ignore button to disable the task, branch or condition that is currently selected. If
you disable a branch or condition, all tasks inside that branch or condition are ignored
including the output. Note that if you set a task, branch or condition to be ignored, it will
also be ignored at run-time, providing you sent the configuration to the service.
Page 109

Debugging and Emulation changes
One of the cases where debugging is most useful is whenever the job file is converted to
another type of emulation, or if a new data file of a different emulation is used somewhere in the
process. For example, if a process starts with a Line Printer data file and then converts it into a
PDF, it is not possible to select anything from the PDF to be used as (variable) task property,
because the Line Printer emulation is active by default. The debugging features can easily
resolve this limitation.
The first method is used if your process has all the required tasks, but data selections after an
emulation change are necessary.
l Step through the process until you have reached the point after the emulation or data
change.
l Make the necessary data selections (see "Data selections" on page55). Any data
selection used in task properties after this point will use the new emulation.
l Continue stepping through each task until the end of the process to debug it.
This method does not allow you to add, remove or move tasks, however.
The second method can be used when that is required.
l Step through the process in Debug mode until you reach the emulation or data change.
l
Click on View as Text (or View as PDF if your data is PDF at this point) in the Data group
of the Debug tab.
l In the viewer that appears, save the file to a location on your hard drive.
l Stop the process, and select the file you saved as your process's sample data file (see
"Choosing a sample data file" on page73).
l If you need to continue debugging your process after the emulation change, you can still
do it by using Skip on all the tasks until the emulation change, inclusively. Then use Step
or Run to continue debugging.
Lastly, PlanetPress Workflow has an option that can be used in conjunction with the previous to
avoid skipping through large processes:
l
Step through the process until the emulation or data change, as in the first method.
l
Save the data file locally and then select it as your sample data file, as with the second
method.
Page 110

l
Instead of skipping through each task, use the Run from here or Step from here options,
either from the Debug tab or by right-clicking on the task where you want to start the
process.
About printing
To print a document you can either use an Output task, or a combination of "PlanetPress
Workflow printer queues" on page113 and the Printer Queue Output task. Decisive factors, in
addition to the printer that you're using, are:
l The type of job (Connect, or PlanetPress Suite).
l
The features that you want to use. When you associate a single Printer Queue Output
task with multiple printer queues, you have the option of using load balancing or not (see
"Load balancing" on page121).
l The file type. Printer Queues can only handle PostScript and PDF files.
Printing can be done locally or remotely. The spool file is sent to the printer by the Output task
itself, or by Workflow if the file is placed in a Workflow Printer Queue.
Printer-centric printing - which means that a document and data are merged on a printer - is
only supported with PlanetPress Design documents, and requires that this feature be available
on the printer.
OL Connect print jobs
There are two OL Connect tasks designed to create print output based on a Connect Designer
template: the "Create Output" on page608 task, and the "All In One" on page591 task, which
combines 4 different OL Connect tasks, including the Create Output task, within a single one.
Both tasks can produce many different types of files and distribute them to many different
printers, or to a folder.
Print options
The file type, printer model, output type (a folder, LPR queue or Windows printer), and print
options and settings are normally contained in an Output Creation Preset. Output Creation
Presets are created in the Connect Designer and can be used with any Connect template (see
Output Creation Preset and Print Options in Connect's Online Help). For some options, such as
grouping documents and splitting jobs, a Job Creation Preset is required as well (see Job
Creation Preset in the Connect Online Help).
Page 111

Presets have to be sent to or imported into Workflow before they can be used in a Workflow
process.
Alternatively, the All in One and Create Output tasks can send the spool file back to the
Workflow process, instead of to the destination defined in the Output Creation Preset. (To
achieve this, select the Handle through Workflow option in the task properties.)
Back in the process the output file may be sent to a folder using the Send to Folder task, or to a
Workflow Printer Queue via the Output to Printer Queue task.
Here are a few reasons why you might want to use the Handle through Workflow option:
l Additional flexibility. Printer Queues have load balancing options that allow to distribute
the printing load and make the process faster and more efficient. Print jobs may, for
example, be split equally among several printers, or they may be split according to each
printer’s capacity and speed. (See "PlanetPress Workflow printer queues" on the next
page.)
l Archiving. If the output file is a PDF, the file can be sent to an Archiving solution before it
is sent to the printer.
l Easier debugging. If the output file is a PDF, for example, you can open it inside Workflow
once it has been sent back to the process (see "Debugging your PlanetPress Workflow
process" on page107).
Using a Printer Queue requires creating the appropriate Printer Queue in the Workflow
Configuration tool first.
In the Output to Printer Queue task, select No document to let the spool file pass through it.
PlanetPress Suite print jobs
In PlanetPress Suite, the printer model and settings are defined in the Design document itself
(see "PlanetPress Design documents" on page45).
Print output is normally generated by an Output task that merges a PlanetPress Design
document with a data file (i.e. the job file). This can be either the "Print using a Windows driver"
on page669 Output task, or the "Printer Queue Output" on page671 Output task.
The latter has to be combined with at least one Printer Queue, and to ensure that the print
output is actually sent to the intended printer, you also have to:
l Create a matching Printer Queue in Workflow (see "PlanetPress Workflow printer
queues" on the next page).
l Associate the document with that Printer Queue (see "Associating PlanetPress Design
documents and PlanetPress printer queues" on page121).
Page 112

Note that the Printer Queue Output task requires printer licenses, unless you have the
“Optimized Output” add-on in your Connect license, which grants you the equivalent of
PlanetPress Production in Connect Workflow. Even then, doing “printer-centric” output requires
a printer license (see "Activate a printer" on page851).
Printer-centric printing
Alternatively the merging of the document and data can take place inside a printer (if the printer
is suitable for it). In that case, PlanetPress Workflow sends one of two things to a printer: a file
that contains only the data to the selected Printer Queue, along with a trigger that specifies
which document the printer should use to merge the data. The document must already be
present on the printer’s hard disk or memory, otherwise printing will fail; ora file that contains
the data and the document to the selected Printer Queue. Since the data and the document with
which it must be merged are both sent to the printer, printing should never fail.
PlanetPress Workflow printer queues
The printer queues displayed in the Configuration Components pane of the PlanetPress
Workflow Configuration program are not to be confused with Windows printer queues. When
you start building a PlanetPress Workflow configuration it contains no printer queues. If you
want Workflow to dispatch spool files to printer queues, you have to create queues in Workflow
and set each one’s properties.
Printer Queue types
The PlanetPress Workflow Configuration program lets you create four types of printer queues:
l Windows Output printer queues are used to send print jobs to local or network printers.
See "Windows Output printer queue" on page116.
l LPR Output printer queues are used to send print jobs to printers via the LPR/LPD
protocol. See "LPR Output Printer Queue" on page117.
l FTP Output printer queues are typically used to send print jobs to FTP sites. See "FTP
Output Printer Queue" on page118.
l Send to Folder printer queues are typically used to send print jobs to local or network
folders. See "Send to Folder printer queue" on page120.
The properties associated with each queue will differ depending on the queue type. In the case
of an FTP Output printer queue, for example, the properties include the IP address of the FTP
Page 113

server. In the case of a Windows Output printer queue, on the other hand, you will specify the
name of a local or shared Windows printer queue.
Using Printer Queues
To send print jobs to any of those PlanetPress Workflow printer queues, you must use a
"Printer Queue Output" on page671 task. Note that with a single task, you can send print jobs
to multiple Workflow printer queues simultaneously, regardless of queue types.
Workflow printer queues have a number of unique features that make it possible to design very
flexible Workflow printing solutions. A few examples:
l You could send big output files to a production printer and smaller files to the office
printer, using a Condition in the print process, for example.
l These printer queues offer various automatic load balancing options; see "Load
balancing" on page121.
l Printer-specific commands can be added after the output has been created, to be
executed before or after printing.
Shared printer queue properties
The options on a printer queue’s Advanced properties tab are common to all printer queues.
They include the printer’s speed and any special pre- or post-job commands required for printer
specific reasons. Pre-job commands are added right before the data in the data file, while post-
job commands are placed at the end of the data file.
Advanced tab
l
Print speed: Enter the speed, in pages per minute (PPM), of the printer associated with
the printer queue. This value is used to determine how to divide jobs when you use the
Queue Balancing option for load balancing.
l
Commands: The list of available commands appears in this box. Select either Pre-job
commands or Post-job commands in the Selected box, and double-click a command
from this list to add it to the appropriate list.
l
Selected: Select either Pre-job commands or Post-job commands to add new
commands to the appropriate list and to see those commands that have already selected.
Double-click a command to remove it from the selected list.
Page 114

l
Add: Click to add a new command to the list displayed in the Commands box. You must
then edit the new command’s description and value. Note that new commands are shared
by all printer queues.
l
Delete: Click to remove a command from the Commands box.
l
Command description: Use this box to edit the description of the command currently
selected in the Commands box.
l
Command value: Use this box to edit the code of the command currently selected in the
Commands box. Use the right-click menu for a list of standard printer control characters.
(See also: "Frequently used printer control characters" below.)
Frequently used printer control characters
Character name: Character
code:
Typical use in printing context:
End-Of-Job \004 Indicates the end of a print job
Backspace \b Moves a character space backwards
Horizontal Tab \t Adds a horizontal tab
Line Feed \012 Moves to the next line
Form Feed \f Moves to the next page
Carriage Return \r Moves to the beginning of the current line
DOS End-Of-File \032 Indicates the end of a print job in a DOS
environment
Escape \033 Adds an escape character
New Line
(CRLF)
\n Goes to a new line
Page 115

Windows Output printer queue
Windows output printer queues send print jobs to local or network printer queues set up in the
Windows session in which PlanetPress Workflow is running. Note that jobs sent to those
queues completely bypass the printer driver.
Properties
General tab
l
Printer queue: Select the Windows printer queue to which you want to send print jobs.
l
Job name: Enter the job’s file name. By default, the variable %f (Job File Name; see
"System variables" on page719) is used. You may use a different variable, but you may
not use a data selection. This information may be used for the printer’s banner page.
l
Job owner name: Enter the job owner name. You may use a PlanetPress Workflow
variable. The field is empty by default, which is equivalent to use the default print job
owner name, i.e. the current logged in user name.
Advanced tab
l
Print speed: Enter the speed, in pages per minute (PPM), of the printer associated with
the printer queue. This value is used to determine how to divide jobs when you use the
Queue Balancing option for load balancing.
l
Commands: The list of available commands appears in this box. Select either Pre-job
commands or Post-job commands in the Selected box, and double-click a command
from this list to add it to the appropriate list.
l
Selected: Select either Pre-job commands or Post-job commands to add new
commands to the appropriate list and to see those commands that have already selected.
Double-click a command to remove it from the selected list.
l
Add: Click to add a new command to the list displayed in the Commands box. You must
then edit the new command’s description and value. Note that new commands are shared
by all printer queues.
l
Delete: Click to remove a command from the Commands box.
l
Command description: Use this box to edit the description of the command currently
selected in the Commands box.
Page 116

l
Command value: Use this box to edit the code of the command currently selected in the
Commands box. Use the right-click menu for a list of standard printer control characters.
(See also: "Frequently used printer control characters" on page115.)
LPR Output Printer Queue
LPR output printer queues send print jobs to LPD-compatible printers using the LPD/LPR
protocol. Note that most of the settings associated with LPR output are configured via the
PlanetPress Workflow user options (See "LPR Output preferences" on page814).
Properties
General tab
l
Printer address: Enter the IP address or host name of the printer receiving LPR jobs.
l
Queue name: Enter the printer queue name. Based on printer and network requirements,
this property may not be required.
l
Data type: Select the proper data type. Select:
l (l) Binary data if the job file is a standard binary file.
l (f) Formatted text to interpret the first character of each line of text as a standard
FORTRAN carriage control character.
l (d) DVI file if the job file contains data in the TeX DVI format.
l (o) PostScript file if the job file is a PostScript file.
l (n) Ditroff format if the job file contains data in device independent troff.
l (t) Troff format if the job file contains data in troff.
l (v) Sun raster file if the job file contains raster images. This ensures that the printer
uses the correct filter to interpret the data.
l
Job name: Enter the job’s file name. By default, the variable %f (Job File Name) is used.
You may use a different variable, but you may not use a data selection. This information
may be used for the printer’s banner page.
l
Job owner name: Enter the job owner name. You may use a PlanetPress Workflow
variable.
Page 117

Advanced tab
l
Print speed: Enter the speed, in pages per minute (PPM), of the printer associated with
the printer queue. This value is used to determine how to divide jobs when you use the
Queue Balancing option for load balancing.
l
Commands: The list of available commands appears in this box. Select either Pre-job
commands or Post-job commands in the Selected box, and double-click a command
from this list to add it to the appropriate list.
l
Selected: Select either Pre-job commands or Post-job commands to add new
commands to the appropriate list and to see those commands that have already selected.
Double-click a command to remove it from the selected list.
l
Add: Click to add a new command to the list displayed in the Commands box. You must
then edit the new command’s description and value. Note that new commands are shared
by all printer queues.
l
Delete: Click to remove a command from the Commands box.
l
Command description: Use this box to edit the description of the command currently
selected in the Commands box.
l
Command value: Use this box to edit the code of the command currently selected in the
Commands box. Use the right-click menu for a list of standard printer control characters.
(See also: "Frequently used printer control characters" on page115.)
Note
If you plan to use an LPR output printer queue to send PlanetPress Design documents
generated using the Optimized PostScript Stream option, you should not enter data
selections in the Printer address and Queue name variable property boxes. If you do
need to use information stored in the data to configure the LPR output printer queue, you
should first use Job info variables to store the information, and then use these variables in
the Printer address and Queue name variable property boxes.
FTP Output Printer Queue
Unlike FTP output tasks, which are typically used to send data files to FTP sites, FTP output
printer queues are mostly used to send print jobs to FTP sites.
FTP output printer queue properties are as follows:
Page 118

General tab
l
FTP Server: Enter the IP address or host name of the FTP server.
l
User name: Enter an FTP server user name.
l
Password: Enter a password associated with the FTP server user name entered above.
l
Use FTP Client default port number: Forces the FTP connection on port 21, the default
FTP port.
l
FTP Port: Enter the FTP port to use. This option is disabled if Use FTP Client default port
number is checked. The port should always correspond with the server's port number.
l
Directory: Enter the directory to which the print jobs are to be uploaded. If you leave this
box empty, the job files are sent to the root directory of the FTP server.
l
File name: Enter the name under which the print jobs will be saved. Consider using a
dynamic name, since using a static name will cause every new file to overwrite the
previous one.
l
Connection mode group
l Active: Select to prompt the FTP client to use active mode when sending files to the
FTP server.
l Passive: Select to prompt the FTP client to use passive mode when sending files to
the FTP server.
Advanced tab
l
Print speed: Enter the speed, in pages per minute (PPM), of the printer associated with
the printer queue. This value is used to determine how to divide jobs when you use the
Queue Balancing option for load balancing.
l
Commands: The list of available commands appears in this box. Select either Pre-job
commands or Post-job commands in the Selected box, and double-click a command
from this list to add it to the appropriate list.
l
Selected: Select either Pre-job commands or Post-job commands to add new
commands to the appropriate list and to see those commands that have already selected.
Double-click a command to remove it from the selected list.
l
Add: Click to add a new command to the list displayed in the Commands box. You must
then edit the new command’s description and value. Note that new commands are shared
by all printer queues.
Page 119

l
Delete: Click to remove a command from the Commands box.
l
Command description: Use this box to edit the description of the command currently
selected in the Commands box.
l
Command value: Use this box to edit the code of the command currently selected in the
Commands box. Use the right-click menu for a list of standard printer control characters.
(See also: "Frequently used printer control characters" on page115.)
Send to Folder printer queue
Unlike Send to Folder output tasks, which are typically used to send data files to local or
network folders, Send to Folder printer queues are mostly used to send print jobs. The files
generated will always be PostScript files.
Properties
General tab
l
Folder: Enter the path of the folder to which the print jobs are to be saved.
l
File name: Enter the name of the print jobs sent to this queue. To prevent each new file
from overwriting the previous one, you should use variable names. This variable property
box lets you use a combination of text, variables and data selections.
l
Concatenate files: If this option is selected, when PlanetPress Workflow tries to save the
print job under an existing name, it appends the content of the new print job file to that of
the existing file, instead of overwriting it.
l
Separator string: This option is used to add a separator string between the content of
each file when the Concatenate files option is selected.
Advanced tab
l
Print speed: Enter the speed, in pages per minute (PPM), of the printer associated with
the printer queue. This value is used to determine how to divide jobs when you use the
Queue Balancing option for load balancing.
l
Commands: The list of available commands appears in this box. Select either Pre-job
commands or Post-job commands in the Selected box, and double-click a command
from this list to add it to the appropriate list.
Page 120

l
Selected: Select either Pre-job commands or Post-job commands to add new
commands to the appropriate list and to see those commands that have already selected.
Double-click a command to remove it from the selected list.
l
Add: Click to add a new command to the list displayed in the Commands box. You must
then edit the new command’s description and value. Note that new commands are shared
by all printer queues.
l
Delete: Click to remove a command from the Commands box.
l
Command description: Use this box to edit the description of the command currently
selected in the Commands box.
l
Command value: Use this box to edit the code of the command currently selected in the
Commands box. Use the right-click menu for a list of standard printer control characters.
(See also: "Frequently used printer control characters" on page115.)
Load balancing
PlanetPress Workflow offers various load balancing options to distribute the printing load and
to make the process faster and more efficient. Print jobs may, for example, be split equally
among several printers, or they may be split according to each printer’s capacity and speed.
Load balancing can only be used for jobs sent to Printer Queue output tasks and it only
applies when multiple Workflow Printer Queues are selected.
In the General tab of the Printer Queue Output Properties dialog box, you may select multiple
printers, and in the Advanced tab, you can set the load balancing options for the selected
printers.
Associating PlanetPress Design documents and
PlanetPress printer queues
One of the resources stored in a PlanetPress Workflow printer queue is the list of PlanetPress
Design documents associated with it. Also stored in the printer queue are the properties of each
document associated with the queue.
Note that Workflow printer queues are different from normal printer queues; see "PlanetPress
Workflow printer queues" on page113.
For more information about PlanetPress Design documents, see "PlanetPress Design
Page 121

documents" on page45.
For information about printing, see "About printing" on page111.
Assigning documents to a Workflow printer queue
To assign PlanetPress Design documents to PlanetPress Workflow printer queues:
1.
In the PPS/PSM Documents group of the Configuration Components pane, select
either a single document or a group of documents.
2.
Drag the selected documents over a PlanetPress Workflow printer queue. The selected
document or the group of documents is associated with the printer queue. Each document
keeps its default properties.
Breaking the association between documents and a Workflow printer queue
To break the association between a PlanetPress Design document and a given Workflow
printer queue:
l
Select the document as displayed under the printer queue in question and press Delete.
To break the association between a PlanetPress Design document and multiple Workflow
printer queues:
1. Select the document as displayed under one of the printer queues in question and from
the right-click menu choose Delete Instances.
The Delete Document Instances dialog box appears.
2.
In the Printer Queue list, select all those Workflow printer queues for which you want
unlink the document.
3. Click OK.
Modifying Design document settings
To modify the settings of a PlanetPress Design document assigned to a Workflow printer
queue:
l
Double-click on the document located within a printer queue. The Document Properties
dialog appears.
Page 122

The settings available in this window are the same as the Printer Settings dialog of a
document's properties in the Documents list of the Configuration Components pane, but they
are specifically for this document on this printer queue. See "PlanetPress Design document
properties" on page835 for more details.
Triggers
In PlanetPress Workflow, a trigger is typically a two line piece of PostScript code placed just
before the data. Triggers tell the printer to turn on PostScript mode and specify which document
should be used in the merging process (PlanetPress Design document+data).
Triggers are used in two situations:
l
When the server running PlanetPress Workflow sends a PlanetPress Design document
along with the data to the printer, it adds a trigger before the document
(trigger+document+data).
l
When the server running PlanetPress Workflow only sends the data to the printer,
because the document is already present on the printer, it adds a trigger before the data
(trigger+data).
PlanetPress Workflow adds the trigger code automatically, but you may want to use custom
triggers. You would do this, for example, to use special printer functions. For more on custom
triggers, see the PlanetPress Design User Guide.
Objectif Lune Printer Driver (PS)
Introduction
The Objectif Lune Printer Driver (PS) allows end-users to print directly to PlanetPress Workflow
from any Windows application, by using the familiar File|Print option. At the other end,
PlanetPress Workflow can capture the incoming stream and optionally convert it to a PDF file
along with its metadata.
Although it is available with every PlanetPress Workflow instance, this feature becomes even
more useful in environments where the Document Input emulation is available (with
PlanetPress Workflow).
Page 123

Install a Objectif Lune Printer Driver (PS)
The Objectif Lune Printer Driver (PS) is automatically installed during the PlanetPress
Workflow setup, along with a default Windows Printer Queue called PlanetPress Printer.
Install a Windows Printer Queue using the Objectif Lune Printer Driver (PS)
A Windows Printer Queue using the Objectif Lune Printer Driver (PS) can be installed from
PlanetPress Workflow WinQueue Input plugin properties.
To create a new Windows printer queue from any PlanetPress Workflow:
1.
Start your PlanetPress Workflow Configuration program.
2. Insert a WinQueue Input plugin.
3. In the WinQueue Input plugin properties, click New.
4. Enter a Name for the printer queue.
5. Click OK.
Every new Windows printer queue using the Objectif Lune Printer Driver (PS) is shared by
default. Once such a shared queue is created, end-users can install it on their own computer by
going through the same steps they would when installing a new remote printer in their
Operating System. By default, connecting to a shared printer will automatically result in the
Objectif Lune Printer Driver being downloaded to the connecting host.
Printer Properties setup
PlanetPress Workflow WinQueue Input task can be configured to set a Windows printer queue
using Objectif Lune Printer Driver (PS) to produce one of 3 different types of data files: EMF,
PostScript, or PDF.
Printer properties settings
Spool Print Jobs in EMF Format
l This will create an EMF data file.
l This format is usually reserved for use with the Windows Print Converter action plugin.
Page 124

Spool Print Jobs in RAW Format
l This will create a PostScript data file when the option Create Composed Document
Stream (with Medatada) is unchecked.
l This will create a PDF data file when the option Create Composed Document Stream
(with Medatada) is checked.
Create Composed Document Stream
By default, the Create Composed Document Stream option is:
l Checked if the incoming stream has been produced with the Objectif Lune Printer Driver.
l Unchecked if the incoming stream comes from some other PostScript Driver.
l Grayed out and unchecked if the incoming stream is not PostScript.
Data Capture from PlanetPress Workflow
Once a shared Windows printer queue using Objectif Lune Printer Driver (PS) is installed on
both the server and the client sides, data capture can be achieved the same way as with any
other Windows printer queues.
1.
Open your PlanetPress Workflow Configuration program.
2. Insert a new process.
3. Select WinQueue Input from the Plugin Bar and insert it in the new process.
4. In the WinQueue Input properties, select a Windows print queue using the Objectif Lune
Printer Driver (PS) from the drop-down list.
5. Click OK.
6.
Send the configuration and start your PlanetPress Workflow service.
7. Start the windows application from which you want to capture data.
8. Open your selected document.
9. Click File | Print.
10. Choose the same Windows print queue as in step 4.
Page 125

Note
Steps 6-8 can be performed at any time, even if PlanetPress Workflow is not yet started.
This is because every Windows printer queue using Objectif Lune Printer Driver (PS) is
paused by default. Once the service has started, it captures every queued job.
PDF creation parameters
PDF files retrieved from a Windows print queue using Objectif Lune Printer Driver (PS) have
the following properties:
l PDF 1.4
l Optimized PDF (subject to change)
l No down-sampling of images
These settings are pre-configured and cannot be changed by the user.
About Metadata
Metadata files are files containing information on the job itself rather than containing the job per
se. A job sent to the Objectif Lune Printer Driver (PS) creates its own Metadata, allowing users
to retrieve relevant information, such as, for instance, the time and date the print request was
sent and how many pages it contains. For more on this, see the Metadata documentation pages
("Metadata" on page76).
About processes and subprocesses
Processes
A process is a single workflow within a configuration (see "About Workflow Configurations" on
page34). A process begins with a single input task, contains one or more tasks and/or
branches, and terminates with one or more output tasks. In its simplest form, a process can
retrieve data from a given folder and save it in a different folder. In most cases, though,
processes are more elaborate and configurations, which may include many processes, can be
extremely complex.
Page 126

PlanetPress Workflow processes act as dispatchers: on the one hand, they retrieve data and
control plugins that retrieve data from watched locations, and on the other hand they can
perform a variety of operations on the data and send data to various devices.
A given process may include Output tasks that generate files used by Input tasks from other
processes.
Each process’s schedule determines when its initial input task can be performed. Other tasks
included in the process are performed regardless of schedule, granted that the previous task
was performed.
The available processes in your PlanetPress Workflow Configuration are listed in the
"Configuration Components pane" on page832.
There are several types of processes available to you:
l
A regular process will run as soon as an input file is available through its input task or, if it
is scheduled not to run at that time, will start processing as soon as the schedule permits
it. To learn how to create a process see: "Adding a process" on the facing page.
l
Startup processes run only once before every other process in a given configuration
(see "Startup processes" on the facing page).
l
Subprocesses can be called by any other process (see "Subprocesses" on the facing
page).
l
Error processes can only be used in the On Error tab of a task in your process (see
"Creating and using Error processes" on page101).
Self-replicating processes are in fact regular processes that replicate themselves in the
background when multiple input files are received simultaneously. The input task in a self-
replicating process polls its source once, determines the number of files to process, then
replicates itself up to the maximum allowed and treats the files simultaneously. The initial
process runs again once it has completed itself and replicates again as necessary, until all files
have been processed.
You can either create a regular process that is set to be self-replicating from the start (see
"Creating a process" on the facing page) or change a regular process into a self-replicating
process and vice versa (see "Process properties" on page869).
Processes in a configuration (except startup processes) will always run concurrently. You can
schedule processes to run only at certain times or intervals via their properties (see "Process
properties" on page869).
Page 127

Regular and startup processes can be set to be Active (process runs normally) or Inactive
(process will not run at all); see "Activating or deactivating a process" on page132.
Startup processes
Startup processes run only once before every other process in a given configuration. They can
be used to perform operations that need to be completed once before the configuration can
actually be run, such as to map network drives.
The order in which the Startup processes are arranged in the Configuration Components pane
determines, from top to bottom, the order in which the Startup processes are executed when the
Workflow Service launches. To learn how to reorder processes see: "Reordering objects in the
Configuration Components pane" on page841.
Startup processes always run sequentially.
To learn how to create a startup process see: "Adding a startup process" on the next page.
Subprocesses
Subprocesses are special processes that can be called by any other process. Subprocesses
act exactly as subroutines in programming languages, allowing users to reuse existing
processes by sharing them to the whole configuration file. They can thus be used to perform
redundant operations that may need to be executed numerous times; for instance, archiving a
copy of a zipped file received as the input job file, then decompressing it before sending the
unzipped version of it back to the calling process.
To learn how to create a subprocess see: "Adding a subprocess" on the next page.
To call a subprocess from another process, use the "Go Sub" on page479 Process logic task.
Whenever a process calls a subprocess, the main process (the caller) will wait for the called
subprocess to finish its execution before carrying on with its own. This means the subprocess
feature is synchronous with the main process. This also means the calling process actually
appends the subprocess to its own workflow.
Creating a process
Adding a process
There are two different ways to create a new regular process.
Page 128

l
In the Ribbon, go to the Home tab and click the Process button in the Processes group.
l
In the Configuration Components pane, right-click on any process or the Processes
folder and select Insert > Insert Process or Insert Self Replicating Process.
Regardless of the method, a new process is created with a default name (Process1, Process2,
etc), an Input task and an Output task. The defaults are configurable in the "Default
configuration behavior preferences" on page773 screen.
Note
While a configuration is limited to a maximum of 512 processes, any given process can
have as many tasks as necessary (see: "About Tasks" on page300).
Adding a startup process
You may create a startup process in two different ways.
l
In the Ribbon, go to the Home tab and click the Startup Process button in the
Processes group.
l
In the Configuration Components pane, right-click on any process or the Processes
folder and select Insert > Insert Startup Process.
In addition, you may convert a regular process into a startup process:
l
Right-click a regular process and select Startup to convert the process into a startup
process.
Note that a self-replicating process can't be converted into a startup process.
Adding a subprocess
To add a PlanetPress Workflow subprocess:
l
In the Ribbon, go to the Home tab and click the Subprocess button in the Processes
group.
l
In the Configuration Components pane, right-click on the Subprocesses folder and
select Insert > Insert Subprocess.
Page 129

Tip
A branch in a process can be converted into a subprocess; see "Converting a branch to a
subprocess" on page140.
Editing a process
Designing a process is done by dragging tasks from the Plug-In Bar onto the process in the
Process area. Each task then needs to be configured via the Task properties dialog (see
"About Tasks" on page300). For a list of all operations you can perform on tasks in the Process
area, please refer to "The Process area" on page885.
Processes can be deleted, duplicated, renamed, disabled, grouped etc. via the
Configuration Components pane. For a list of all operations that can be performed on
processes in the Configuration Components pane, please refer to "Configuration Components
pane" on page832.
Special workflow types
PlanetPress Workflow supports multiple input and output types, in so many different
combinations that it would be hard to give example processes for each possibility. However,
some types of processes like HTTP and PDF processes will probably be used more often than
other types of processes. You will find a description of each of these special workflow types
and at least one example of an implementation that uses them in the chapter: "Special workflow
types" on page278.
Importing processes
You can import individual processes or groups of processes from another PlanetPress
Workflow configuration file without having to import the contents of the entire configuration file.
The PlanetPress Workflow Configuration tool imports everything necessary to run the
processes, including configured tasks and some configuration components.
Note
Resource files must be imported separately; see "Importing Connect resource files" on
page42, "Importing PlanetPress Design documents" on page47 and "Importing
Page 130

PrintShop Mail documents" on page51.
To import processes and other components from a configuration file:
1.
From the PlanetPress Workflow Button, choose Import | Configuration Components.
The Import dialog appears.
2.
Navigate to the PlanetPress Workflow configuration file containing the processes or
groups of processes you want to import.
3.
Select the file, then click Open. The Import Configuration dialog appears displaying all
the processes and/or process groups, as well as the subprocesses, variables,
PlanetPress Design documents and printer queues in the selected configuration file.
4.
In the list, select the components you want to import. The PlanetPress Workflow
Configuration program lets you open and import any of the following:
l
Complete PlanetPress Watch 4 to 6 configurations, as well as PlanetPress
Workflow 7 and 8 configurations.
l Specific processes from Version 6, 7 and 8 configurations, including their local
variables.
l
Specific subprocesses from any PlanetPress Workflow 7 and 8 Tools
configurations.
l
Specific global variables from PlanetPress Workflow 7 and 8 Tools configurations.
l
References to specific PlanetPress Design or PrintShop Mail documents. Note that
the documents themselves must be imported separately.
l Specific printer queues.
5.
Check Overwrite existing components with same name if you want processes with
existing names to be overwritten by those in the imported configuration, or uncheck it to
duplicate those processes under a new automatically generated name.
6.
Click OK to start the import.
PlanetPress Workflow Configuration imports the selected objects and automatically
renames duplicate items in the imported configuration.
Page 131

Important considerations
l
When importing a PlanetPress Workflow configuration file, resource files like Connect
templates, PlanetPress Design documents and PrintShop Mail documents are not
physically imported as they are not part of the configuration file itself. In order for the
documents to be available, you will need to send each document from Connect Designer,
PlanetPress Design or PrintShop Mail (see their respective documentation for details).
l
If you import a PlanetPress Workflow configuration that contains a PlanetPress Fax
output task, you must update the task’s properties and refresh the host name. Otherwise,
when PlanetPress Workflow will attempt to output the file, an error will be generated.
Activating or deactivating a process
All processes are Active by default, but you may make any PlanetPress Workflow process
Inactive as required.
An inactive process will display in the Configuration components as red and strike-through.
Inactive processes can be useful for designing new processes in a live configuration. As the
process does not execute there is no danger of submitting it to a PlanetPress Workflow Service.
To activate or deactivate a process:
1.
Right-click the process in question in the Configuration Components pane
2.
Click Active to disable or enable the process.
3. Send the configuration. Because making a process active or inactive is a change in the
configuration, to make the change effective in the PlanetPress Workflow Service, you will
have to send the edited configuration to your PlanetPress Workflow Service (see
"Sending a configuration" on page38).
Note
If you try to send a configuration that contains only inactive processes, the PlanetPress
Workflow Configuration program will ask you to confirm the operation (this can be
changed in the Notification User Options).
Page 132

Process properties
To have access to the properties of a process or subprocess:
l
Right-click on the process in the Configuration Components pane.
l
Select Properties.
You can also double-click on the process to show its options.
Note
Subprocesses do not have the General tab which is only used for scheduling, but they do
have the Information tab.
Options
General tab
l
Active: Select to make the process active. Clear to prevent this process from running
when you send the configuration to PlanetPress Workflow.
l
Startup: Select to make this process a startup process (see: "Startup processes" on
page128). This option is not available for self-replicating processes and error processes.
The order in which the Startup processes are arranged in the Configuration Components
pane determines, from top to bottom, the order in which the Startup processes are
executed when the Workflow Service launches. To change the order you may drag and
drop them (see "Moving and copying configuration components" on page838).
l
Self Replicating: Check this if you want the process to replicate itself in the background
when multiple input files are received simultaneously. When this is checked, the input
task polls its source once, determines the number of files to process, then replicates itself
up to the maximum allowed and treats the files simultaneously. The initial process runs
again once it has completed itself and replicates again as necessary, until all files have
been processed.
l
Max percentage of threading (%): Determines how many processes you may have
running at the same time. This is a percentage of the maximum number of threads
specified in the "Messenger plugin preferences" on page792. For example if the
Page 133

maximum number of threads is 10 and you specify 50% here, a maximum of 5 replications
will occur (the original process + 4 copies).
l
As soon as possible: Select to have the process run continuously. Clear to enable the
Time Grid to fine-tune the schedule of the process.
Tip
Non-startup processes starting with the HTTP Server Input, NodeJS Server Input,
LPD Input or SMTP Input task will run trigger-based if they are set to run As soon
as possible with a Polling interval of 0. This reduces CPU usage.
l
Day(s) to keep backup: Indicate the number of days to keep backups of jobs processed
by input tasks. Note that backups will only be kept for those input tasks that have the
Keep backup file option selected and that they are required to resubmit input files.
l
Polling interval: Enter the frequency (in seconds) at which the process should verify if
there are new jobs to process. The polling interval also applies to scheduled tasks that
only run on certain times. For example, if your process polls every 30 seconds on a task
that's only scheduled to run one hour per week, it will capture the input 120 times during
that period.
Note
The polling interval is ignored when multiple files are present in the input and will
be used only when there are no longer any files to process.
l
Month: Select the month of the year when the process should be run or select All months
to have the process run all year long. This option is disabled when "As soon as possible"
is checked.
l
Week of month / by date: Select the desired option for the time grid. Note that any
selection you make in this box will be interpreted based on the selection made in the
Month box. If you chose All months in the Month box and Last in the Week of month / by
date box, then the process will run on the last week of every month. If you chose January
in the Month box and First in the Week of month / by date box, then the process will run
only on the first week of January.
Page 134

l Select Date to display dates on the grid’s top ruler.
l Select any of the other options to display days on the top ruler.
l Select All weeks to have the process run every week.
l Select First, Second, Third or Fourth to have the process run on the first, second,
third or fourth week.
l Select Last to have the process run only on the last week.
l
Time division: Select the duration of each daily segment in the time grid. If you select
00:15, each segment will represent only 15 minutes and each day will be made up of 96
blocks (4 blocks per hour times 24 hours). If you select 24:00, each segment will
represent an entire day.
l
Poll once per activity period: Select to perform this process’ initial input task no more
than once for each set of contiguous blocks (blocks that are on the top of one another).
Choosing this option overrides the polling interval option. By default since the Time Grid
blocks are divided by hours, this option will make your polling happen once every hour.
l
Minimal logs: With this option enabled, the process will only log its Start time and the
End time (along with the Time Spent), if no error was encountered during execution of the
process. In case of an error, the entire process information is logged.
The Time Grid
The PlanetPress Workflow Process Options dialog box includes a time grid that lets you set
exactly when you want a process to poll. The grid is composed of blocks that represent time
periods on a given day. To activate the Time Grid, the "As soon as possible" option must be
unchecked.
In the Time Grid, a blue block will indicate that the process is active within that time block.
White blocks mean the process will not poll.
Note that when multiple files are present in the input, these may continue to be processed after
the period set in the time grid. The "Folder Listing" on page323 plugin in combination with a
"Time of Day Condition" on page489 could be used to prevent further processing of those files.
Page 135

l Click on any block to select / deselect it.
l Click and drag from one block to another to toggle all blocks between the two.
l Shift-click on any block to toggle all blocks from the top-left corner of the grid to the block
you click.
Page 136

l To select all of the time segments for a given day or date, click the day or date on the top
grid ruler. To deselect all of the time segments for a given day or date, CTRL+click the
day or date on the top grid ruler.
l To select all the days or dates for a given time segment, click the time segment on the left
grid ruler. To deselect all the days or dates for a given time segment, CTRL+click the time
segment on the left grid ruler.
l
To select the entire grid, use the Select All button located below the grid. To deselect the
entire grid, use the Clear All button located below the grid.
Note
"Toggle" means turn on when it's off and vice versa, when selecting multiple blocks in
one command. This means if you select a certain number of blocks in the Time Grid and
then use the shift+click or drag method, blocks that are on will turn off.
Warning
Changes made to the system time can have adverse effects on the processes managed
by PlanetPress Workflow. When changing from daylight saving time to standard time, for
example, if PlanetPress Workflow starts a given process at 2:00 AM, and if the system
time is then taken back to 1:00AM, the application will start a new instance of the same
process when the system time reaches 2:00 AM for a second time. So, when you
manually change the system time, be aware that it may have an effect on PlanetPress
Workflow and its processes. And for those cases when you know the system time will
change automatically, you may consider creating special schedules.
Information tab
The Information tab lets you enter information that is not critical to your process but may help
others (or yourself in the future) to understand what the process does. It offers two boxes:
l
Description: A one-line box to give a title or short description to your process.
l
Comments: A multi-line box to give more detailed information, for example the file format
expected, explanation of the system in general.
Page 137

On Error Tab
A process’s On Error tab specifies the default values for error handling of all of the tasks in that
process.
When a task has its own error handling settings, those settings overwrite the process's default
error handling settings. The Set All Tasks button resets the On Error properties of all the tasks
included in the current process to the On Error properties of the process itself.
All other options in the On Error tab of the Process Properties dialog are the same as in the On
Error tab in the Task Properties dialogs; see "Using the On Error tab" on page100.
About branches and conditions
While some processes can simply start with an input task, manipulate the data with a few action
tasks and finish with an output task, in some cases you may want to have more control over the
flow of your process. For example, you may want multiple outputs, such as printing to multiple
printers as well as generating a PDF and emailing it. To do this, you will need branches. You
may also want to detect certain criteria in your data and act differently depending on that data,
such as sending an email only when an email address is found, or printing to a different printer
depending on who sent you a print job. To do this, conditional branches ("conditions") are
used.
For the list of operations you can perform on Branches and Conditions, please refer to "The
Process area" on page885.
Branches
A branch is effectively a doubling of your job file (see "Job file" on page53). As your job file
goes down the process, when a branch is encountered, a copy of the job file will go in that
branch. In the branch, all tasks up to the Output task will be performed, before returning to the
main trunk to continue processes. You can have branches within branches, and all branches
must have an Output task. For more information on branches, see "Branch" on page474.
A branch is represented as a crossing:
Conditions
A condition will either execute the branch it creates or the main trunk, but never both. As your
job file goes down the process, when it encounters a condition it will verify whether that
Page 138

condition results in a "true" or "false" value. If the result is true, it goes in the branch, processes
all tasks up to the output, and the process finishes. If the result is false, it goes down the main
trunk and continues processing until the process finishes.
A conditional branch (or condition) is shown as a crossing with a diamond over it, for example:
There are several Condition tasks:
l "File Name Condition" on page478
l "File Size Condition" on page479
l "File/Folder Condition" on page478
l "Run Script" on page482
l "SNMP Condition" on page485
l "Text Condition" on page488
l "Time of Day Condition" on page489
Adding a branch or condition
The PlanetPress Workflow Configuration program offers two different commands when it
comes to adding new branches to a process.
l You can add a new branch by dragging and dropping a Branch task or one of the
Condition tasks from the Process Logic category of the Plug-in Bar, into your process.
Branches as well as conditions can thus be added like a task; see "Adding tasks" on
page301.
l You can add a new branch that contains all of the tasks below the point where you insert
the branch. To do this, right-click on the first task that you want to include in the branch,
and select Branch From Here....
The default output task of a new branch or condition is configurable in the "Default
configuration behavior preferences" on page773.
Page 139

Converting a branch to a subprocess
To allow for maximum flexibility and backward compatibility with the subprocess feature, the
Convert to subprocess option lets users transform existing processes easily. This option is
available whenever a Branch task is selected; right-clicking on it will display the contextual
menu, which holds the Convert to subprocess option.
Selecting this option automatically creates a new subprocess, takes the branch and all of its
tasks and inserts it in the new subprocess, including the Branch task itself. In the main process,
the branch is removed and replaced with a GoSub action task referring to the newly created
subprocess.
Note
The Branch task's options Backup job file, Backup job information and Backup
emulation are also automatically passed to the subprocess, which means that, if the
subprocess needs to use a different emulation than the calling process, a Change
Emulation task is required.
If any task converted into a subprocess was previously using local variables, these variables
must be removed or transferred to global variables or Job Information variables to be usable in
the newly created subprocess (see "About variables" on page716).
Page 140
Using Scripts
Scripts can be used to perform various operations, such as to manipulate data, for example.
PlanetPress Workflow can perform scripts written in four different scripting languages and also
provides an interface for editing scripts.
Note
While this chapter provides some very useful and detailed information about scripting
within PlanetPress Workflow, its focus is to inform you about the features, variables and
functions unique to this environment. This chapter assumes that you have a working
knowledge of the scripting language you wish to use and does not purport to teaching
you anything about this language that you don't already know. Learning any of these
language is beyond the scope of this documentation.
Run Script task
Scripts are incorporated in a process via the Run Script task (see "Run Script" on page482).
When using the Run Script task as a condition, you need a way to tell your process whether
the result is true or false. The condition result is returned by the "Script.ReturnValue" on
page174 variable. If the return value is zero (the default), the condition is false. Otherwise, it is
true.
When using the Run Script as an action task, the job file going out of the Run Script action task
will be the same as the one coming in, unless you have specifically changed it within your
script by writing to the file that is the target of the "Watch.GetJobFileName" on page165
function. The same goes for any Job Info, local or global variables, unless you use the
"Watch.SetJobInfo" on page172 or "Watch.SetVariable" on page173 functions to modify them.
Scripting languages
There are four scripting languages available through the Run Script task: JavaScript (JScript
and Enhanced JScript), VBScript, Python and Perl. Each language has its own strengths and
weaknesses which we will not cover in this documentation. While VBScript is the most used
language at the moment, the examples provided in this chapter are presented in all supported
languages.
Page 141

Note
l
The JScript engine is Microsoft’s JScript 5.8, which is the equivalent of JavaScript
1.5 (ECMA-262 3rd edition + ECMA-327 (ES-CP) + JSON).
Enhanced JScript allows the use of more recent JavaScript syntax. Many methods
- basic methods like Date.now(), String.trim(), btoa()/atob() and more
advanced methods like Array.forEach() - are added to the JScript engine via
the polyfill.js library.
l While JavaScript and VBScript are natively available on Windows operating
systems, Python and Perl require third-party tools to be functional. For Perl,
ActivePerl can be installed. For Python ActivePython (version 2.7.13 ) can be
installed.
APIs
Multiple APIs (methods of communicating with PlanetPress Workflow scripting tools) are
available through the scripting engine, in all languages.
l
The Watch object is used to communicate with your current process and configuration.
See "The Watch Object" on page156.
l
The PlanetPress Connect REST API consists of many services that expose access to a
number of areas including Workflow, data entity management and file store operations.
See the Connect REST API Cookbook.
l
You can manipulate PDF files using the PlanetPress Alambic API. See "AlambicEdit API
reference" on page243. Note that in PlanetPress Suite, the PlanetPress Alambic API is
part of the PDF Tools.
l
You can manipulate the Metadata in your process using the Metadata API. See the
"Metadata API" on page197.
l
You can communicate with a SOAP server using the SOAP API. See "SOAP Server API
Reference" on page149.
l
You can communicate with the PlanetPress Capture Database using the Capture API.
See Capture API Reference.
l
You can communicate the with the Data Repository using the Data Repository API. See:
"Data Repository API" on page175.
Page 142

The Script Editor and XSLT Editor
The Script Editor is used to edit scripts in Run Script tasks and the XSLT Editor is used to
edit scripts in Open XSLT action tasks. You can open either editor using the Open Editor
button from the task's Properties dialog. When you do so, the script currently displayed in the
dialog box is pasted to the editor’s scripting box.
Both editors are visually identical and share almost exactly the same commands. They let you
import and export scripts, perform common editing, such as search and replace, and feature
syntax highlighting and formatting.
You can use the Script Editor to edit scripts written in VBScript, JavaScript (JScript, Enhanced
JScript), Perl, and Python.
You can use the XSLT Editor to edit scripts written in XSLT 1.0 and 2.0.
Note
l
The JScript engine is Microsoft’s JScript 5.8, which is the equivalent of JavaScript
1.5 (ECMA-262 3rd edition + ECMA-327 (ES-CP) + JSON).
Enhanced JScript allows the use of more recent JavaScript syntax. Many methods
- basic methods like Date.now(), String.trim(), btoa()/atob() and more
advanced methods like Array.forEach() - are added to the JScript engine via
the polyfill.js library.
l While JavaScript and VBScript are natively available on Windows operating
systems, Python and Perl require third-party tools to be functional. For Perl,
ActivePerl can be installed. For Python ActivePython (version 2.7.13 ) can be
installed.
For information on the available editor options, refer to "Editor Options" on page816.
Import and export scripts
Both the Script Editor and XSLT Editor let you import and export scripts.
Note
When you import a script, it replaces any script currently displayed in the editor.
Page 143

Importing a script
To import a script:
1.
In the editor, choose File > Import. The Open dialog box appears.
2. To import a script that uses a different scripting language or that was saved under a
different file format, make a selection in the Files of type drop-down list.
3. Navigate to the script you want to import and select it.
4.
Click OK. The script is imported, displayed and formatted according to the syntax of the
language selected in the editor. If the imported file had the extension of a recognized
scripting language (.vbs or .js, for example), the editor language is automatically changed.
Exporting a script
To export a script:
1.
In the editor, choose File > Export. The Save As dialog box appears.
2. To save the script using a different scripting language or under a different file format,
make a selection in the Save as type drop-down list.
3. Navigate to the location where you want to save the exported script.
4.
Enter the name of the script in the File name box.
5. To save the script using a different scripting language or under a different file format,
make a selection in the Save as type drop-down list.
6.
Click OK.
Find Strings in a Script
The Find Text dialog box allows you to search for text strings in the editor. The available
options help you limit the search, making searches quicker and easier.
To find strings in a script:
Note
If you only want to search a particular section of the script, you should select it before
performing the following procedure.
Page 144

1.
Choose Search | Find, or press CTRL+F. The Find Text dialog box appears. The last
used string is displayed in the Text to find drop-down list box.
2. Set the search settings and options.
l
Text to find: Enter a new search string or select a previous search from the drop-
down list.
l
Case sensitive: Select to limit the search to instances of text with the same case as
the text in the Text to find box.
l
Whole words only: Select to limit the search to complete words matching the text in
the Text to find box. Whole words are defined as strings that have a space or
punctuation before and after the word.
l
Regular expressions: Select to treat the regular expressions of the scripting
language as text to search. If you clear this option, the regular expressions of the
language are not included in the search.
l
Global: Select to search the entire content of the script.
l
Selected text: Select to find matching text within the text block you select. A portion
of text must be selected before you run the search.
l
Forward: Select to search the script forward, from the location of the cursor or from
the beginning of the script, depending on what you choose as the origin (From
cursor begins where the cursor is currently located in the script, Entire scope begins
from the beginning of the script or beginning of script selection). If you limit the
scope to selected text, you move forward only within the selection. When the search
reaches the end of the script or script selection, the search finishes. It does not loop
back to the beginning.
l
Backward: Select to search the script backward, from the location of the cursor or
from the end of the script, depending on what you choose for the origin (From cursor
begins where the cursor is currently located in the script, Entire scope begins from
the beginning of the script or beginning of script selection). If you limit the scope to
selected text, you move backward only within the script selection. When the search
reaches the beginning of the script or script selection, the search finishes. It does
not loop back to the beginning.
l
From cursor: Select to start the search from the position of the cursor.
l
Entire scope: Select to search the entire script or a script selection. The scope
croplands to a script selection if you make a selection before executing the Find.
3.
Click OK. The first matching string is highlighted in the script.
Page 145

4.
To find the next matching string, choose Search | Find Again or press F3.
Find and replace Strings in a Script
The Replace With dialog box lets you search for and replace text strings in the editor. The
available options help you limit the search, making replacements quicker and easier.
To find and replace strings in a script:
1.
Choose Search | Replace, or press CTRL+R. The Replace With dialog box appears.
The last used strings are displayed in the Text to find and Replace with boxes.
2. Set the replacement settings and options.
l
Text to find: Enter a new search string or select a previous search from the drop-
down list.
l
Replace with: Enter the string that will replace the string displayed in the Text to
find box.
l
Case sensitive: Select to limit the search to instances of text with the same case as
the text in the Text to find box.
l
Whole words only: Select to limit the search to complete words that match the text
in the Text to find box. Whole words are defined as strings that have a space or
punctuation before and after the word.
l
Regular expressions: Select to treat the regular expressions of the scripting
language as text. If you clear this option, the regular expressions of the language
are blocked from the search.
l
Prompt on replace: Select to have PlanetPress Workflow display a prompt before it
replaces text. When you use the Replace All function, you are prompted each time
matching text is found. The prompt includes an All button for replacing all matching
text. This suppresses any further prompting.
l
Global: Select to search the entire content of the script.
l
Selected text: Select to find matching text only within a text block you select. The
text must be selected before you run the search.
l
Forward: Select to search the script forward, from the location of the cursor or from
the beginning of the script, depending on what you choose as the origin (From
cursor begins where the cursor is currently located in the script, Entire scope begins
from the beginning of the script or beginning of script selection). If you limit the
scope to selected text, you move forward only within the selection. When the search
Page 146

reaches the end of the script or script selection, the search finishes. It does not loop
back to the beginning.
l
Backward: Select to search the script backward, from the location of the cursor or
from the end of the script, depending on what you choose for the origin (From cursor
begins where the cursor is currently located in the script, Entire scope begins from
the beginning of the script or beginning of script selection). If you limit the scope to
selected text, you move backward only within the script selection. When the search
reaches the beginning of the script or script selection, the search finishes. It does
not loop back to the beginning.
l
From cursor: Select to start the search from the position of the cursor.
l
Entire scope: Select to search either the entire script, or a script selection. The
scope corresponds to a script selection if you make a selection before executing the
Find.
3. Do one of the following:
l
Click OK to replace the first string encountered. If you selected Prompt on replace,
a dialog box opens to ask you whether to proceed with the replacement. You can
OK to replace the first string only, or you can click All to replace that string as well
as every other string that matches the replacement settings.
l
Click Replace All to replace all the strings that match the replacement settings.
4.
To find and replace the next matching string, choose Search | Find Again or press F3.
Once again, if you selected Prompt on replace, a dialog box opens to ask you whether
to proceed with the replacement. You can OK to replace that string only, or you can click
All to replace that string as well as every other string that matches the replacement
settings.
Go to a line in a script
The Go To Line dialog box lets you jump to a specific line within your script. It works whether
or not the line numbers are displayed on the left side of the editor window. (To learn how to
toggle the line number display settings, see "Editor Options" on page816).
To go to a line in a script:
1.
Click anywhere in the Script Editor, then choose Search > Go To Line, or press Alt+G.
The Go To Line dialog box appears. The last used line numbers are displayed in the
Enter new line number drop-down list box.
Page 147

2.
Enter a new line number in the Enter new line number box or select one from drop-down
list.
3.
Click OK.
Bookmarks in a script
Bookmarks help you identify and jump to specific places within your script.
Bookmarks are displayed in the editor’s gutter, so you will not be able to see them unless the
gutter is both visible and sufficiently wide. If line numbers are also displayed in the gutter,
bookmarks may be harder to see. To control line number and gutter display, see "Editor
Options" on page816.
Note
Bookmarks are not preserved when you close the editor.
Toggling bookmarks
To toggle bookmarks:
l Place the cursor on a line in your script and, from the editor’s pop-up menu, choose
Toggle Bookmark and a given bookmark number.
If the bookmark you selected was not displayed on any line, it is added to the line where you
placed the cursor. If the bookmark you selected was displayed on the line where you placed the
cursor, it is removed. If the bookmark you selected was displayed on a different line, it is moved
to the line where you placed the cursor.
Jumping to a bookmark
Before you can jump to bookmarks, you must add bookmarks to specific lines in your script (see
above).
To jump to a bookmark:
l
From the editor’s pop-up menu, choose Go To Bookmark and a given bookmark
number.
If the bookmark you selected was displayed on a line, the cursor jumps to that line.
Page 148

SOAP Server API Reference
PlanetPress Workflow offers a SOAP Server API Reference allowing jobs to be submitted from
a third party application using the SOAP protocol. SOAP is short for Simple Object Access
Protocol.
While there are multiple possibilities for solutions using a SOAP server implementation, the
SOAP Server API Reference is specifically for submitting jobs from a SOAP client. It
implements methods that will allow SOAP clients to submit jobs and get information from
PlanetPress Workflow executing them.
Methods, structures Description
"GetProcessList" on the
next page
Allows SOAP clients to request the list of available
PlanetPress Workflow processes, based on their
authentication credentials.
"GetProcessTaskList" on
page151
Allows a user to remotely request the tasks list of a process.
This will be useful with the PostJob method since it needs a
TaskIndex.
"GetSOAPProcessList" on
page152
Allows users to request the list of PlanetPress Workflow
processes that contain a SOAP Input plugin with the SOAP
action name. This is useful when working with the SubmitJob
method since it requires a SOAPActionName.
"PostJob" on page153 Allows users to remotely submit files to PlanetPress Workflow
by using the Resubmit from here feature, which lets a user
specify a starting task index from which the File is to be
processed.
"PostJobInfoStruc" on
page154
Structure containing any required information to prepare the
file for resubmission into a PlanetPress Workflow process.
"SubmitJob" on page154 Allows users to remotely submit files to their PlanetPress
Workflow from a SOAP client. The SOAP client has the option
to wait for a response file from PlanetPress Workflow SOAP
Page 149

server.
"SubmitJobInfStruc" on
page156
Structure containing any required information to prepare the
file for a valid insertion into a PlanetPress Workflow process.
Note
With the SOAP API reference, new SOAP plugins have been introduced. The old plugin,
which could be used as an Input, Action or Output task, was renamed Legacy SOAP
Client and has become obsolete.
GetProcessList
The GetProcessList function allows SOAP clients to request the list of available PlanetPress
Workflow processes, based on their authentication credentials.
Syntax
GetProcessList (user name, Password) : GetProcessListResult
Parameters
l
user name: String containing the user name.
l
Password: String containing the password. This is case sensitive.
Return Value
l
GetProcessListResult: Structure containing the following information:
l
Success: Integer indicating the system-defined Success/Error level of the
operation. A result of 0 means that the operation was successful.
l
Message: String containing text information about the Success status.
l
ProcessList: Structure containing the following information details.
l
ProcessName: String containing the process name.
l
Active: Boolean value specifying whether the process is currently active.
Page 150

Note
To obtain access to the complete list of processes for all users, the end-user must have
administrator privileges.
GetProcessTaskList
The GetProcessTaskList function will allow a user (a SOAP client) to remotely request the
tasks list of a process. This will be useful with the PostJob method since it needs a TaskIndex.
Syntax
GetProcessTaskList (ProcessName, user name, Password) :
GetProcessTaskListResult
Parameters
l
ProcessName: The Name of the PlanetPress Workflow process.
l
user name: String containing the user name.
l
Password: String containing the password. This is case sensitive.
Return Value
l
GetProcessTaskListResult – Structure containing the following information:
l
Success: Integer indicating the system-defined Success/Error level of the
operation. A result of 0 means that the operation was successful.
l
Message: String containing text information about the Success status.
l
TaskNames: Structure containing the following information details:
l
TaskName: String containing the name of the task
l
TaskIndex: Integer: 1 based index of the task.
l
TaskDepth: Integer: 1 based depth of the task.
Page 151

Note
The TaskNames array will be sorted by the execution order of the process with the
primary input of the process having an index of 1.
GetSOAPProcessList
The GetSOAPProcessList function will allow users to request the list of PlanetPress Workflow
processes that contain a SOAP Input plugin with the SOAP action name. This is useful when
working with the SubmitJob SOAPAPI method since it requires a SOAPActionName.
Syntax
GetSOAPProcessList (user name, Password) : GetSOAPProcessListResult
Description
Parameters
l
user name: String containing the user name.
l
Password: String containing the password. This is case sensitive.
Return Value
l
GetSOAPProcessListResult: Structure containing the following information:
l
Success: Integer indicating the system-defined Success/Error level of the
operation. A result of 0 means that the operation was successful.
l
Message: String containing text information about the Success status.
l
ProcessList: Structure containing the following information details.
l
SOAPActionName: String containing the name of the process as seen in
your PlanetPress Workflow.
l
Active – Boolean value indicating if the process is active in your PlanetPress
Workflow.
Page 152

Note
If a user has administrator privilege, he will have access to all processes and therefore he
will see all the processes.
PostJob
The PostJob method allows a user (a SOAP client) to remotely submit files to PlanetPress
Workflow by using the Resubmit from here feature. The main advantage of this feature is that it
allows a user to specify a starting task index from which the File is to be processed.
Syntax
PostJob (File, PostJobInfStruc , user name, Password) :
PostJobResult
Description
Parameters
l
File: base64Binary. This is an array of byte base64 encoded (see
http://en.wikipedia.org/wiki/Base64).
l
PostJobInfStruc: Structure containing any required information to prepare the file for
resubmission into a PlanetPress Workflow process (see "PostJobInfoStruc" on the next
page).
l
User name: String containing the user name.
l
Password: String containing the password. This is case sensitive.
Return Value
PostjobResult: Structure containing the following information:
l
Success: Integer indicating the system-defined Success/Error level of the operation. A
result of 0 means that the operation was successful.
l
Message: String containing text information about the Success status.
l
PostjobInfStruc: Structure containing any required information to prepare the file for
resubmission into a PlanetPress Workflow process (see "PostJobInfoStruc" on the next
page).
Page 153

Note
The task index can be retrieved by using the GetProcessTaskList method. See point
GetProcessTaskList for details.
Note
The PostJob method can never return a file to the calling application.
PostJobInfoStruc
Structure containing any required information to prepare the file for resubmission into a
PlanetPress Workflow process using a SOAP client.
l
VariableList: Array of complex type, containing pairs of variable names and variables
value. The list also contains the Job Info variables.
l
VariableName: String
l
VariableValue: String
l
ProcessName: String: name of the PlanetPress Workflow process.
l
TaskIndex: Integer: 1 based index of the task where the resubmission should start.
l
FirstPage: Integer: first page of data to process.
l
LastPage: Integer: Last page of data to process.
Note
If both FirstPage and LastPage are set to 0, the entire data file is used.
SubmitJob
The SubmitJob method allows a user to remotely submit files to their PlanetPress Workflow
from a SOAP client. The SOAP client has the option to wait for a response file from PlanetPress
Workflow SOAP server.
Page 154

Syntax
SubmitJob (File, SubmitJobInfStruc , ReturnJobFile, user name,
Password) : SubmitJobResult
Arguments
l
File – base64Binary. This is an array of byte base64 encoded (see
http://en.wikipedia.org/wiki/Base64).
l
SubmitJobInfStruc – Structure containing any required information to prepare the file for
a valid insertion into a PlanetPress Workflow process (see "SubmitJobInfStruc" on the
next page).
l
ReturnJobFile – Boolean value. When true, PlanetPress Workflow SOAP server returns
the job file. When false, there no file is returned to the SOAP client. (For example: when
submitting a job for print, there is no need to return a file)
l
user name: String containing the user name.
l
Password: String containing the password. This is case sensitive.
Return Value
SubmitJobResult: Structure containing the following information:
l
Success: Integer indicating the Success/Error level of the operation. A result of 0 means
the operation was successful.
l
Message: String containing text information about the Success/Failure status.
l
SubmitJobInfStruc: Structure containing any required information to prepare the file for a
valid insertion into a PlanetPress Workflow process (see "SubmitJobInfStruc" on the next
page).
l
ResultFile: base64Binary. If Success is different than 0 or the ReturnJobFile was set to
False in the initial call, no file is returned. Otherwise, ResultFile contains the job file, as it
existed at the completion of the PlanetPress Workflow process (for instance, if the
process creates a PDF and sets it as the current job file, the PDF is the file that gets
returned to the calling SOAP client).
Page 155

Note
The SubmitJob method only returns a file if the PlanetPress Workflow process contains
a SOAP Input task.
Note
If ReturnJobFile is set to true, the schedule options of the process should be set to a
pooling lower than four seconds, so the client application gets a timely response.
Note
To return the file, the process must be completed before the timeout of the server occurs.
The Timeout option can be set in your PlanetPress Workflow preferences.
SubmitJobInfStruc
Structure containing any required information to prepare the file for a valid insertion into a
PlanetPress Workflow process using SOAP.
l
VariableList: Array of complex type, containing pairs of variable name and variable
value. The list also contains the JobInfo variables.
l
VariableName: String
l
VariableValue: String
l
SOAPActionName: String containing the name of the Input SOAP task’s action name.
The Watch Object
PlanetPress Workflow scripting offers a number of methods of communicating with your
process by means of PlanetPress Workflow automation object's methods and functions. The
automation object is available in all 4 languages through their own syntax - the examples
provided here are for JavaScript.
Page 156

Note
While the functions here are in mixed case to simplify reading, it's important to note that
some languages (especially JavaScript) are case-sensitive and will require the proper
case. Examples in this chapter will always use the proper case when relevant.
Here is a list of the methods and functions that are available to you through the automation
object (or "Watch" object). While these examples are all in JavaScript, you can click on any
variable name to open a page to see examples for each supported language.
Variable Name Description
Example Usage (VBScript)
"Script.ReturnValue" on page174 Returns a boolean True or False value to a
Workflow scripted condition
Example usage:
Script.ReturnValue = 1;
"Watch.ExecuteExternalProgram" on
page160
Calls and executes an external program in the
command line.
Example usage:
Watch.ExecuteExternalProgram("lpr -S
192.168.100.001 -P auto
c:\\myfile.ps", "c:\\", 0, true);
"Watch.ExpandResourcePath" on
page162
Expands a Connect resource file name (e.g.
invoice.OL-template) to its fully qualified path (e.g.
C:\ProgramData\Objectif Lune\PlanetPress
Workflow\Documents\invoice.OL-template).
Example usage:
var fullPath =
Watch.ExpandResourcePath
("invoice.OL-template");
"Watch.ExpandString" on page162 Retrieves the content of any Workflow string,
Page 157

Variable Name Description
Example Usage (VBScript)
containing any variable available to Watch,
including data selections.
Example usage:
var watchDate = Watch.ExpandString
("%y-%m-%d");
"Watch.GetConnectToken" on
page163
Uses the default Connect Server host as defined in
the Workflow preferences to log into the Connect
Server and retrieve an authorization token.
Example usage:
var tokenConnect =
Watch.GetConnectToken();
"Watch.GetConnectTokenEx" on
page164
Uses the arguments passed to it to log into the
Connect Server and retrieve an authorization token.
Example usage:
var tokenConnect =
Watch.GetConnectTokenEx("localhost",
1234, "myUser", "secret");
"Watch.GetJobFileName" on
page165
Retrieves a string containing the job path and file
name located in the job spool folder.
Example usage:
var s = Watch.GetJobFilename();
"Watch.GetJobInfo" on page166 Retrieves the content of a numbered job info (%1 to
%9).
Example usage:
var s = Watch.GetJobInfo(9);
"Watch.GetMetadataFilename" on
page167
Retrieves a string containing the job's metadata
path and filename. This is useful when using the
Metadata API in your script. (See Metadata API.)
Page 158

Variable Name Description
Example Usage (VBScript)
Example usage:
var s = Watch.GetMetadataFileName();
"Watch.GetOriginalFileName" on
page167
Retrieves a string containing the job's original path
and filename. Note: this filename is generally no
longer available if it has been captured by Watch.
Example usage:
var s = Watch.GetOriginalFileName();
Watch.GetPDFEditObject Is used to manipulate PDF files using the
AlambicEdit API. The AlambicEdit library allows
Workflow to access, create or modify PDF files.
"Watch.GetResources" on page168 Retrieves a specific type of Connect resources
when it is passed a file extension (e.g. "OL-
template") or all Connect resources when it is
passed an empty string.
Example usage:
var allTemplates =
Watch.GetResources("OL-template");
"Watch.GetVariable" on page169 Retrieves the content of a local or global variable
by name.
Example usage:
var s = Watch.GetVariable
("MyVariable");
"Watch.InstallResource" on
page169
Is used to copy or unpack resources, such as a
Connect Designer template, Data Mapping
Configuration, package file, etc., from the supplied
path to the Connect Documents folder.
Example usage:
Watch.InstallResource("c:\myfile.ol-
package");
Page 159

Variable Name Description
Example Usage (VBScript)
"Watch.Log" on page170 Writes to the Workflow log file, or the message
window when in debug - can accept multiple log
levels from 1 (red) to 4 (gray).
Example usage:
Watch.Log("Hello, World!", 3);
"Watch.SetJobInfo" on page172 Writes the value of a string to a numbered job info.
Example usage:
Watch.SetJobInfo(9, "Job info 9
Value");
"Watch.SetVariable" on page173 Writes the value of a string to a local or global
variable by name.
Example usage:
Watch.SetVariable("MyVariable",
"Hello World!");
"Watch.Sleep" on page173 Pauses all processing for X milliseconds.
Example Usage:
Watch.Sleep(1000);
Watch.ExecuteExternalProgram
Calls and executes an external program through a specified command line. The program's
execution will be directed by the appropriate flags specified as this method's parameters.
Syntax
Watch.ExecuteExternalProgram const CommandLine: WideString; const WorkingDir:
WideString; ShowFlags: Integer; WaitForTerminate: WordBool: integer;
const CommandLine
The command line to execute as a widestring.
const WorkingDir
Page 160

The working directory for the execution of the command line as a widestring.
ShowFlags
Integer value representing the flag to use during the execution of the command line. These
flags have an effect on the execution window opened by the ExecuteExternalProgram
procedure.
Flag Effect
0 Hide the execution window.
1 Display the window normally.
2 Display the window minimized.
3 Display the window maximized.
4 Makes the window visible and brings it to the top, but does not make it the active
window.
WaitForTerminate
A Boolean value that, if true, pauses the script until the command line has been fully
executed.
Examples
JavaScript
Watch.ExecuteExternalProgram("lpr -S 192.168.100.001 -P auto
c:\\myfile.ps", "c:\\", 0, true);
VBScript
Watch.ExecuteExternalProgram "lpr -S 192.168.100.001 -P auto
c:\myfile.ps", "c:\", 0, true
Python
Watch.ExecuteExternalProgram("lpr -S 192.168.100.001 -P auto
c:\\myfile.ps", "c:\\", 0, True)
Page 161

Perl
$Watch->ExecuteExternalProgram("lpr -S 192.168.100.001 -P auto
c:\\myfile.ps", "c:\\", 0, true);
Watch.ExpandResourcePath
The Watch.ExpandResourcePath method expands a Connect resource file name (e.g.
invoice.OL-template) to its fully qualified path (e.g. C:\ProgramData\Objectif Lune\PlanetPress
Workflow\Documents\invoice.OL-template). It returns empty ('') if the resource does not exist,
and will log an empty line next to the task number if logged.
Files in the Connect resources folder are visible in Workflow's Configuration Components pane
under Connect Resources (see "Connect resources" on page41).
Syntax
Watch.ExpandResourcePath(filename)
filename
A string containing the file name.
Examples
JavaScript
Watch.ExpandResourcePath("invoice.OL-template");
VBScript
Watch.ExpandResourcePath "invoice.OL-template"
Python
Watch.ExpandResourcePath("invoice.OL-template");
Perl
$Watch->ExpandResourcePath("invoice.OL-template");
Watch.ExpandString
Provides access to the emulated job file and to all variables. This function returns a string that
is the expanded version of the input string.
Page 162

Syntax
Watch.ExpandString(StringToExpand)
StringToExpand
A regular parseable string that may contain system variables (%u, %f), user variables (%1 to
%9), octal codes, and data selections.
Example
This example results in expanding the string of the variables to the date value in the following
format: “YYYY-MM-DD”.
JavaScript
var s;
s= Watch.ExpandString("%y-%m-%d");
Watch.Log("Current Date is: " + s, 2);
VBScript
Dim s
s= Watch.ExpandString("%y-%m-%d")
Watch.Log "Current Date is: " + s, 2
Python
s= Watch.ExpandString("%y-%m-%d")
Watch.Log("Current Date is: " + s, 2)
Perl
$s = $Watch->ExpandString("%y-%m-%d");
$Watch->Log("Current Date is: " . $s,2);
Watch.GetConnectToken
The Watch.GetConnectTokenmethod uses the default Connect Server host as defined in the
Workflow preferences (see "OL Connect preferences" on page787) to log into the Connect
Server and retrieve an authorization token.
Syntax
Watch.GetConnectToken()
Page 163

Return value
The method returns a JSON structure like the following:
{
"host": "localhost",
"port": 1234,
"token": "fdjhfds89r378cm034573890mc3y893r092p",
"method": "basic"
}
where:
l host is the host or IP address of the server.
l port is the TCP port number.
l token is the authentication token.
l method is the authentication method; currently, only basic is supported.
Examples
JavaScript
Watch.GetConnectToken();
VBScript
Watch.GetConnectToken
Python
Watch.GetConnectToken();
Perl
$Watch->GetConnectToken();
Watch.GetConnectTokenEx
The Watch.GetConnectTokenEx method uses the arguments passed to it to log into the Connect
Server and retrieve an authorization token.
Syntax
Watch.GetConnectTokenEx(host, port, username, password)
Page 164

The arguments contain the Connect Server settings (see "OL Connect preferences" on
page787), in the form of strings (host, username and password) and a number (port).
Return value
The method returns a JSON structure containing the host, port, token and authentication
method. For example:
{
"host": "localhost",
"port": 1234,
"token": "fdjhfds89r378cm034573890mc3y893r092p",
"method": "basic"
}
l host is the host or IP address of the server.
l port is the TCP port number.
l token is the authentication token.
l method is the authentication method; currently, only basic is supported.
Examples
JavaScript
Watch.GetConnectTokenEx("localhost", 1234, "myUser", "secret");
VBScript
Watch.GetConnectTokenEx "localhost", 1234, "myUser", "secret"
Python
Watch.GetConnectTokenEx("localhost",1234,"myUser","secret");
Perl
$Watch->GetConnectTokenEx("localhost",1234,"myUser","secret");
Watch.GetJobFileName
Returns the complete path and file name of the job. This method is the same as PW_
GetJobFileName. getjobfilename() obtains the file name of a PlanetPress Workflow process.
This is useful for manipulating the job file, for example to replace data within it. If your script
writes to this file, the modified contents will be used by the next plugin in your process.
Page 165

Example
In the following example, GetJobFileName() retrieves the name of the job file, which is then
logged using "Watch.Log" on page170.
JavaScript
var s;
s = Watch.GetJobFilename();
Watch.Log("The job filename is: " + s, 3);
VBScript
Dim s
s = Watch.GetJobFileName
Watch.Log "The job filename is: " + s, 3
Python
s = Watch.GetJobFileName()
Watch.Log("The job filename is: " + s, 3)
Perl
$s = $Watch->GetJobFileName;
$Watch->Log("The job filename is: " + $s, 3);
Watch.GetJobInfo
Returns the job information corresponding to the specified index. Index is an integer from 1 to 9.
(See also: "Job Info variables" on page717.)
Syntax
Watch.GetJobInfo(Index: integer): string
Example
JavaScript
var s;
s = Watch.GetJobInfo(3);
Watch.Log("Jobinfo 3's value is: " + s, 2);
Page 166

VBScript
Dim s
s = Watch.GetJobInfo(3)
Watch.Log "Jobinfo 3's value is: " + s, 2
Python
s = Watch.GetJobInfo(3)
Watch.Log("Jobinfo 3's value is: " + s, 2)
Perl
$s = $Watch->GetJobInfo(3);
$Watch->ShowMessage("Jobinfo 3's value is: " . $s, 2);
Watch.GetMetadataFilename
Returns the complete path and file name of the metadata file associated with the current job file.
Example
JavaScript
Watch.GetMetadataFileName();
VBScript
Watch.GetMetadataFileName
Python
Watch.GetMetadataFileName()
Perl
$Watch->GetMetadataFileName();
Watch.GetOriginalFileName
Returns the original name of the file, when it was captured. This method is the same as PW_
GetOriginalFileName.
Example
JavaScript
Watch.GetOriginalFileName();
Page 167

VBScript
Watch.GetOriginalFileName
Python
Watch.GetOriginalFileName()
Perl
$Watch->GetOriginalFileName();
Watch.GetResources
The Watch.GetResources method retrieves a specific type of Connect resources when it is
passed a file extension (e.g. "OL-template") or all Connect resources when it is passed an
empty string.
Files in the Connect resources folder are visible in Workflow's Configuration Components pane
under Connect Resources (see "Connect resources" on page41).
For the file types see: Connect file types.
Syntax
Watch.GetResources(resourcetype)
resourcetype
A string containing a file extension (e.g. "ol-template") to get a specific type of resource, or an
empty string to get all resources.
Examples
JavaScript
Watch.GetResources("OL-template");
VBScript
Watch.GetResources "OL-template"
Python
Watch.GetResources("OL-template");
Perl
$Watch->GetResources("OL-template");
Page 168

Watch.GetVariable
Returns the string value of the corresponding variable name. Note that if an undeclared
variable is called using this method, an error will be generated.
Syntax
Watch.GetVariable(Name: String): String
Example
JavaScript
var s;
s = Watch.GetVariable("MyVariable");
Watch.Log("MyVariable's value is: " + s, 2);
s = Watch.GetVariable("global.MyVariable");
Watch.Log("Jobinfo 3's value is: " + s, 2);
VBScript
Dim s
s = Watch.GetVariable("MyVariable")
Watch.Log "MyVariable's value is: " + s, 2
s = Watch.GetVariable("global.MyVariable")
Watch.Log "global.MyVariable's value is: " + s, 2
Python
s = Watch.GetVariable("MyVariable")
Watch.Log("global.MyVariable's value is: " + s, 2)
Perl
$s = $Watch->GetJobInfo(3);
$Watch->ShowMessage("global.MyVariable's value is: " . $s, 2);
Watch.InstallResource
The Watch.InstallResource(path) method copies or unpacks a resource, such as a Connect
Designer template, Data Mapping Configuration, or package file, from the supplied path to the
Connect resources folder (%PROGRAMDATA%\Objectif Lune\PlanetPress Workflow
8\PlanetPress Watch\OLConnect).
If a file already exists, it will be overwritten.
Page 169

The original resource file, which is processed by this functionality, will not be deleted or altered
in any way.
The Workflow process will wait for the file(s) to be unpacked or copied to the Connect
resources folder, so that the next plugin in line that uses an installed resource will have the
latest, up-to-date version of the file.
Files in the Connect resources folder are visible in Workflow's Configuration Components pane
under Connect Resources (see "Connect resources" on page41).
Syntax
Watch.InstallResource(path)
path
A string containing the resource path.
Examples
JavaScript
Watch.InstallResource("c:\\myfile.ol-package");
VBScript
Watch.InstallResource "c:\myfile.ol-package"
Python
Watch.InstallResource("c:\\myfile.ol-package");
Perl
$Watch->InstallResource("c:\\myfile.ol-package");
Watch.Log
Creates messages that are added to PlanetPress Workflowwatch.log file. The PlanetPress
Workflow watch.log file is located in the following folder:
%PROGRAMDATA%\Objectif Lune\PlanetPress Workflow 8\PlanetPress Watch\Log
Page 170

View error messages in the Services Console while PlanetPress Workflow is in Run mode by
choosing Tools | Services | Service Console. In the Service Console, error messages appear
with colors that correspond to the message level.
Level Type Text Color in Service Console
1 Error Red
2 Warning Orange
3 Information Black
4 Debug Grey
Arguments
Message
A string representing the message that is logged in the log file. Note that the text of the
message must use the locale encoding of the system where the PlanetPress Workflow
software will be running, otherwise it will be unreadable.
Level
An integer between 1 and 4, specifying the severity level of the error message. Set message
levels as follows.
Level Description
1 The message is logged as an Error in the log file.
2 The message is logged as a Warning in the log file.
3 The message is logged as Information in the log file.
4 The message only appears when the application runs in Debug mode.
Page 171

Examples
In the following example, log() will write an information entry in the watch log that says "this is a
log"
VBScript
Watch.Log "this is a log", 3
JavaScript
Watch.Log("this is a log", 3);
Python
Watch.Log("this is a log",3)
Perl
$Watch->Log("this is a log",3);
Watch.SetJobInfo
Sets the job information at the specified index to a specified string value. (See also: "Job Info
variables" on page717.)
Syntax
Watch.SetJobInfo(Index: Integer; Value: String)
Example
JavaScript
Watch.SetJobInfo(3, "Job info 3 Value");
VBScript
Watch.SetJobInfo 3, "Job info 3 Value"
Python
Watch.SetJobInfo(3, "Job info 3 Value")
Perl
$Watch->SetJobInfo(3, "Job info 3 Value");
Page 172

Watch.SetVariable
Sets the variable to a specified string value. Note that if an undeclared variable is called using
this method, an error will be generated.
Syntax
Watch.SetVariable (Name: String; Value: String)
Example
JavaScript
Watch.SetVariable("MyVariable", "Desired value");
Watch.SetVariable("global.MyVariable", "Desired value");
VBScript
Watch.SetVariable "MyVariable", "Desired value"
Watch.SetVariable "global.MyVariable", "Desired value"/
Python
Watch.SetVariable("MyVariable", "Desired value")
Watch.SetVariable("global.MyVariable", "Desired value")
Perl
$Watch->SetVariable("MyVariable", "Desired value");
$Watch->SetVariable("global.MyVariable", "Desired value");
Watch.Sleep
Pauses the process for the specified number of milliseconds. This can be used while waiting
for something else to happen when the delay is known.
Syntax
Watch.Sleep(milliseconds: integer)
Example
In the following example, Sleep() pauses the process for 1 second (1000 milliseconds)
JavaScript
Watch.Sleep(1000);
Page 173

VBScript
Watch.Sleep 1000
Python
Watch.Sleep(1000)
Perl
$Watch->Sleep(1000);
Script.ReturnValue
Set this variable to 1 (true) or 0 (false) in order to return a true or false status to PlanetPress
Workflow, when using your script as a conditional branch. This variable will have no effect if the
script is run as an action.
If the property is not set, the default value is false.
Example
This example will always return true, as the condition is static. It is, after all, simply an example.
You get the idea.
JavaScript
var everythingOK;
everythingOK = true;
if(everythingOK){
Script.ReturnValue = 1;
} else {
Script.ReturnValue = 0
}
VBScript
Dim everythingOK
everythingOK = true
if (everythingOK = true) then
Script.ReturnValue = 1
else
Script.ReturnValue = 0
end if
Page 174

Python
everythingOK = True
if everythingOK:
Script.ReturnValue = 1
else:
Script.ReturnValue = 0
Perl
$everythingOK = 1;
if ($everythingOK) {
$Script->{ReturnValue} = 1;
} else {
$Script->{ReturnValue} = 0;
}
Data Repository API
The Data Repository is a permanent structure to store data that can then be reused, modified or
augmented at a later time, by different processes.
The Data Repository can be accessed at runtime by the Push To Repository plugin and other
tasks (see "Data Repository" on page96) and at design time via the "Data Repository
Manager" on page854.
This topic explains how to access the Data Repository in script.
For a quick start, turn to this How-to: Interacting with the Data Repository API.
Warning
All operations on the Repository must be performed through this API - rather than directly
accessing the physical file - since the Repository's underlying file structure may change
over time. This API is guaranteed to remain compatible with future versions of the Data
Repository. It is used by all Workflow tasks dealing with the Repository.
Data repository structure
The table below lists the different levels in the repository and what their names corresponds to:
Page 175

The term ... ... is the same as an Excel ...
... is the same as a Database ...
Group Sheet Table
Key Column Field
KeySet Row Record
Note
Group and key names are case-insensitive.
API Reference
Obtaining an instance of the Repository Object
The Data Repository is accessed via a COM object that exposes methods to store and retrieve
data within the Repository.
JavaScript
var repoObject = new ActiveXObject
("RepositoryLib.WorkflowRepository");
VB Script
set repoObject = CreateObject("RepositoryLib.WorkflowRepository")
In each example in this documentation, the object repoObject is deemed having been obtained
through the above call to the COM object.
The default Repository is always stored at the same location (see "Where to find the Data
Repository" on page99).
The ConnectionString property allows to create an instance of the Repository at another
location; see ConnectionString.
Page 176

Using a JSON parameter or return value
Whenever a parameter or return value is defined as a JSONStringArray type, that JSON array
is itself a string. Since a JSON array internally defines double quotes as the delimiter for each
element, you must enclose the entire string in single quotes. Alternatively, you can escape the
double quotes inside the JSON Array.
For instance, the following calls to AddGroup() are correct:
repoObject.AddGroup("MyGroup",'["FirstKey", "SecondKey"]');
repoObject.AddGroup("MyGroup","[\"FirstKey\", \"SecondKey\"]");
But the following is incorrect:
repoObject.AddGroup("MyGroup","['FirstKey', 'SecondKey']");
Many methods require using the JSONStringArray type but JSON is not natively supported in
VB Script. Therefore, for those methods, only JavaScript sample code is provided. There are
many resources on the Web that propose ways of implementing JSON parsing in VB Script so
you can implement whichever you see fit. However, using JavaScript is highly recommended.
Repository management methods
Name Description
"CheckRepository" on page185 Verifies the integrity of the repository and recovers
unused space left by deleted keysets. Similar to
packing a database, the operation is non-destructive
but it does require exclusive access to the Repository.
You should therefore only perform this operation when
you know for sure no other process is accessing the
Data Repository.
"ClearRepository" on page186 Deletes all groups, keys and keysets from the
repository, returning it to a blank state. Use with
caution!
"ClearGroupData" on page185 Deletes all keysets inside GroupName while retaining
the existing key structure.
Page 177

Name Description
"ClearAllData" on page185 Delete all keysets in all groups, while retaining the
existing key structure.
ConnectionString Creates/opens a Repository to read from and write to at
a custom location. Set ConnectionString to a
string containing a full path and file name.
"Version" on page196 Returns the version of the DLL library used by the
Repository.
Group methods
Name Description
"AddGroup" on page182 Creates a group named GroupName and optionally
creates keys listed in keyNames. The keyNames
parameter may be empty.
"ListGroups" on page189 Retrieves the list of all group names in the Repository,
stored in a JSONStringArray..
"RemoveGroup" on page190 Deletes the group named GroupName, along with all its
keysets and keys.
"RenameGroup" on page193
Renames group oldName to newName. While this
operation has no impact on the data stored in the
specified group, it does require any plugin and/or script
that uses oldName to be modified to refer to newName.
Key Methods
Name Description
"AddKey" on page183 Adds key KeyName to group GroupName. KeyName
Page 178

Name Description
must not already exist in the specified group. Note that this
method only adds a key name to the group, not a key
value. See "AddValue" on page184 for information on
how to set a value for a key.
"ListKeys" on page189 Retrieves the list of all Key names and data types in Group
GroupName, stored in a JSONStringObject. You should
use JSON.Parse() to convert the string into an actual
JavaScript object. You can then use the for…in construct
to list the different properties for that object (i.e. the keys in
the group).
"RemoveKey" on page191 Removes existing key KeyName from group
GroupName. The key to remove must exist in the group,
otherwise an error is raised. All values for the key, in all
keysets for the group, are removed. Note that when the
Group contains a large number of KeySets, this operation
may take a while.
"RenameKey" on page193
Renames key oldName to newName in group
GroupName. While this operation has no impact on the
data stored in that Group, it does require any plugin and/or
script that uses oldName to be modified to refer to
newName.
Value Methods
Name Description
"AddValue" on page184 Creates a new KeySet by assigning Value to the key
KeyName in Group GroupName. Note that KeyName
must exist in GroupName, otherwise an error is raised.
See "AddKey" on page183 for information on adding a
key to a group. Upon successful completion, the method
Page 179

Name Description
returns the ID of the newly created KeySet.
"GetValue" on page187 Performs a lookup in group GroupName and retrieves
the first value for key KeyName that matches Condition.
The condition is specified using basic SQL WHERE
syntax. The Condition may be left empty in which case
the very first value found for the specified KeyName is
returned.
"SetValue" on page194 Updates multiple keysets in group GroupName by
setting the key KeyName to Value for all keysets that
match Condition. The condition is specified using basic
SQL WHERE syntax. The Condition may be left empty in
which case all keysets in GroupName are updated. Note
that KeyName must exist in GroupName, otherwise an
error is raised. The method returns an array of the keyset
ID's that were updated ([1,2] ), or an empty array ([] ) if no
keysets were updated.
"SetValueByID" on page195
Updates KeyName with Value in group GroupName,
where the keyset's ID matches the ID parameter.
KeyName must exist in GroupName, otherwise an error
is raised. The method returns the ID of the keyset that
was updated or -1 if the keyset was not updated.
Note that this method is functionally equivalent to using
"SetValue" on page194 with its Condition parameter set
to "ID=ID".
KeySet methods
Name Description
"AddKeySets" on page183 Inserts a new keyset inside
Page 180

Name Description
GroupName and assigns values to
keys as specified in KeyValues. Every
key specified in KeyValues must exist
otherwise an error is raised. However, it
is not required to specify all available
keys in KeyValues. Only the keys
specified are updated in GroupName
while unspecified keys are set to an
empty string.
"GetKeySets" on page186 Retrieves Keys values in GroupName
for keysets that match Condition. When
an asterisk * is passed as the Keys
parameter, all keys are retrieved. When
Condition is left empty, all keysets are
retrieved.
"RemoveKeySets" on page192 Deletes all keysets in GroupName that
match Condition. The condition is
specified using basic SQL WHERE
syntax. Condition may be left empty, in
which case all keysets in GroupName
are deleted. The method returns the
number of keysets that were deleted.
Skin/Formats/CrossReferencePrintFormat
("RemoveKeySetByIDDeletes the keyset whose
ID equals ID from GroupName. Returns 1 if
successful, 0 otherwise. This method is
functionally equivalent to using RemoveKeySets
with its Condition parameter set to "ID=ID".
SyntaxRemoveKeySetByID(GroupName: string,
ID: integer): integer ExamplesIn each of these
examples, the object repoObject is deemed
having been obtained through a call to the COM
Deletes the keyset whose ID equals ID
from GroupName. Returns 1 if
successful, 0 otherwise.
Note that this method is functionally
equivalent to using "RemoveKeySets"
on page192 with its Condition
parameter set to "ID=ID".
Page 181

Name Description
object "RepositoryLib.WorkflowRepository" (see
Obtaining an instance of the Repository
Object).JavaScript/* both methods perform the
same task */repoObject.RemoveKeySetByID
("Users", 10);repoObject.RemoveKeySets
("Users", "ID=10");VB Script/* both methods
perform the same task
*/repoObject.RemoveKeySetByID "Users",
10repoObject.RemoveKeySets "Users",
"ID=10"" on page1)
AddGroup
Creates a group named GroupName and optionally creates keys listed in keyNames. The
keyNames parameter may be empty.
Syntax
AddGroup(GroupName: string, keyNames: JSONStringArray)
Examples
In each of these examples, the object repoObject is deemed having been obtained through a
call to the COM object "RepositoryLib.WorkflowRepository" (see "Obtaining an instance of the
Repository Object" on page176).
JavaScript
repoObject.AddGroup("Users", '["FirstName", "LastName"]');
repoObject.AddGroup("Users", '');
VB Script
repoObject.AddGroup "Users", "[""FirstName"", ""LastName""]"
repoObject.AddGroup "Users", ""
Page 182

AddKey
Adds key KeyName to group GroupName. KeyName must not already exist in the specified
group. Note that this method only adds a key name to the group, not a key value. See
"AddValue" on the next page for information on how to set a value for a key.
Syntax
AddKey(GroupName: string, KeyName: string)
Examples
In each of these examples, the object repoObject is deemed having been obtained through a
call to the COM object "RepositoryLib.WorkflowRepository" (see "Obtaining an instance of the
Repository Object" on page176).
JavaScript
repoObject.AddKey("Users", "email");
VB Script
repoObject.AddKey "Users", "email"
AddKeySets
Inserts a new keyset inside GroupName and assigns values to keys as specified in
KeyValues. Every key specified in KeyValues must exist otherwise an error is raised.
However, it is not required to specify all available keys in KeyValues. Only the keys specified
are updated in GroupName while unspecified keys are set to an empty string.
Syntax
AddKeySets(GroupName: string, KeyValues: JSONObjectArrayString):
JSONIntegerArray
Examples
Basic examples
In each of these examples, the object repoObject is deemed having been obtained through a
call to the COM object "RepositoryLib.WorkflowRepository" (see "Obtaining an instance of the
Repository Object" on page176).
Page 183

JavaScript
repoObject.AddKeySets("Users", '[{"FirstName": "John","LastName":
"Smith"},{"FirstName": "Richard", "LastName": "Doe"}]');
VB Script
repoObject.AddKeySets "Users","
[{""FirstName"":""John"",""LastName"":""Smith""},
{""FirstName"":""Richard"",""LastName"": ""Doe""}]"
Inserting a row
In most cases, you won't need to insert or update a row in a script, as this can be easily done
through the the Push to Repository action task. However, in some cases you might want to
script it for simplicity's sake.
This JavaScript example inserts 2 different rows into the Users group.
var repoObject = new ActiveXObject
("RepositoryLib.WorkflowRepository");
repoObject.AddKeySets("customers", '[{"CustomerID": "CUJS123456",
"FirstName": "John","LastName": "Smith"},
{"CustomerID": "CURD654321", "FirstName": "Richard", "LastName":
"Doe"}]');
Tip: to update a row instead of adding it, use the GetValue() function to get the KeySet ID; then
update each individual value using SetValueByID() (see "GetValue" on page187 and
"SetValueByID" on page195).
Sample return value
The method returns a JSONIntegerArray containing the ID's of all keysets inserted into
GroupName:
'[131,132]'
AddValue
Creates a new KeySet by assigning Value to the key KeyName in Group GroupName. Note
that KeyName must exist in GroupName, otherwise an error is raised. See "AddKey" on the
previous page for information on adding a key to a group. Upon successful completion, the
method returns the ID of the newly created KeySet.
Page 184

Syntax
AddValue(GroupName: string, KeyName: string, Value: string):
integer64
Examples
In each of these examples, the object repoObject is deemed having been obtained through a
call to the COM object "RepositoryLib.WorkflowRepository" (see "Obtaining an instance of the
Repository Object" on page176).
JavaScript
repoObject.AddValue("Users", "LastName", "Smith");
VB Script
repoObject.AddValue "Users", "LastName", "Smith"
CheckRepository
Verifies the integrity of the repository and recovers unused space left by deleted keysets.
Similar to packing a database, the operation is non-destructive but it does require exclusive
access to the Repository. You should therefore only perform this operation when you know for
sure no other process is accessing the Data Repository.
Syntax
CheckRepository()
ClearAllData
Delete all keysets in all groups, while retaining the existing key structure.
Syntax
ClearAllData()
ClearGroupData
Deletes all keysets inside GroupName while retaining the existing key structure.
Syntax
ClearGroupData(GroupName: string)
Page 185

ClearRepository
Deletes all groups, keys and keysets from the repository, returning it to a blank state. Use with
caution!
Syntax
ClearRepository()
GetKeySets
Retrieves Keys values in GroupName for keysets that match Condition.
When an asterisk * is passed as the Keys parameter, all keys are retrieved.
To ensure backward compatibility with versions prior to 2018.1, all keys are retrieved when the
Keys parameter is left empty. It is however recommended to use an asterisk instead.
When Condition is left empty, all keysets are retrieved, which is useful for reports, cleanup, or
custom filters based on more complex conditions.
GetKeySets() converts the results coming from the Repository from UTF8 to Ansi, in order to
make results with special characters like 'éèêë?æ' compatible with scripting.
To obtain the UTF8 value, without conversion, use GetKeySetsW().
Syntax
GetKeySets(GroupName: string, Keys: JSONStringArray, Condition:
string): JSONStringArray
Examples
Basic examples
In each of these examples, the object repoObject is deemed having been obtained through a
call to the COM object "RepositoryLib.WorkflowRepository" (see "Obtaining an instance of the
Repository Object" on page176).
JavaScript
repoObject.GetKeySets("Users", '["FirstName","LastName"]',
"Gender='M'");
VB Script
Page 186

myKeySet = repoObject.GetKeySets("Users", "
[""FirstName"",""LastName""]", "Gender='M'")
Querying a single row
This JavaScript example shows how to get one or more rows from the repository and use them
in the process. The script gets 3 fields ("firstname", "lastname" and "email") from the
CustomerID field. It assumes there's a local variable called %{CustomerID} set in the workflow
process.
var CustomerID = Watch.GetVariable("CustomerID");
var repoObject = new ActiveXObject
("RepositoryLib.WorkflowRepository");
var customer = repoObject.GetKeySets("customers",'
["firstname","lastname", "customerID"]',"customerID = '" +
CustomerID + "'");
Watch.SetJobInfo(9,customer);
By replacing the last option from GetKeySets (the filter on CustomerID) with an asterisk, you
can get all the rows from the data repository.
Return value: JSONStringArray
The method returns a JSONStringArray of key-value pairs, for example:
'[{"FirstName": "John","LastName": "Smith"},{"FirstName":
"Richard", "LastName": "Doe"}]'
The return value (saved for example in the %9 JobInfo variable, as the above example does)
can be used in a number of ways:
l It can be returned to a web page that's making an HTTP request to Workflow. JSON is the
simplest way to transfer information between any system that supports JavaScript.
l It can be passed to Designer and loaded up directly as an object in a script there.
l The JSON can be converted to XML, which makes it useable in the DataMapper module.
This can be easily done in a preprocessor script in the DataMapper (see DataMapper
online help).
GetValue
Performs a lookup in group GroupName and retrieves the first value for key KeyName that
matches Condition. The condition is specified using basic SQL WHERE syntax. The
Page 187

Condition may be left empty in which case the very first value found for the specified
KeyName is returned.
Syntax
GetValue(GroupName: string, KeyName: string, Condition: string)
Examples
In each of these examples, the object repoObject is deemed having been obtained through a
call to the COM object "RepositoryLib.WorkflowRepository" (see "Obtaining an instance of the
Repository Object" on page176).
JavaScript
var myValue = repoObject.GetValue("Users", "email", "
LastName='Smith' AND FirstName='John' "); /* retrieves email for
John Smith */
var myValue = repoObject.GetValue("Users", "email", "
LastName='Smith' "); /* retrieves email for first user named Smith
*/
var myValue = repoObject.GetValue("Users", "email", ""); /*
retrieves email for first user */
VB Script
myValue = repoObject.GetValue("Users", "email", "
LastName=""Smith"" AND FirstName=""John"" ") /* retrieves email for
John Smith */
myValue = repoObject.GetValue("Users", "email", "
LastName=""Smith"" ") /* retrieves email for first user named Smith
*/
myValue = repoObject.GetValue("Users", "email", "") /* retrieves
email for first user */
Retrieving a KeySet ID
This JavaScript example retrieves the KeySet ID, which is then used to update values in the
row.
/* Get KeySet ID */
var repoObject = new ActiveXObject
("RepositoryLib.WorkflowRepository");
var keySetID = repoObject.GetValue("customers", "ID",
Page 188

"CustomerID='CURD654321'");
/* Update Values */
repoObject.SetValueByID("customers", "FormOfAddress", "Mr.",
keySetID);
repoObject.SetValueByID("customers", "Country", "US", keySetID);
repoObject.SetValueByID("customers", "Language", "EN", keySetID);
ListGroups
Retrieves the list of all group names in the Repository, stored in a JSONStringArray.
Syntax
ListGroups(): JSONStringArray
Example
In each of these examples, the object repoObject is deemed having been obtained through a
call to the COM object "RepositoryLib.WorkflowRepository" (see "Obtaining an instance of the
Repository Object" on page176).
JavaScript
var repoObject = new ActiveXObject
("RepositoryLib.WorkflowRepository");
var myList = JSON.parse(repoObject.ListGroups());
for (var i=0; i<myList.length; i++) {
/* Log all group names to the console */
Watch.Log(myList[i],2);
}
Sample return value
'["Users","Cart","Orders"]'
ListKeys
Retrieves the list of all Key names and data types in Group GroupName, stored in a
JSONStringObject. You should use JSON.Parse() to convert the string into an actual
JavaScript object. You can then use the for…in construct to list the different properties for that
object (i.e. the keys in the group).
Syntax
ListKeys(GroupName: string):JSONStringArray
Page 189

Examples
In each of these examples, the object repoObject is deemed having been obtained through a
call to the COM object "RepositoryLib.WorkflowRepository" (see "Obtaining an instance of the
Repository Object" on page176).
JavaScript
var repoObject = new ActiveXObject
("RepositoryLib.WorkflowRepository");
var myList = JSON.parse(repoObject.ListKeys("Internal"));
for (var Property in myList) {
/* Log all key names for group Users to the console */
Watch.Log(Property,2);
}
Sample return value
'{"ID": "meta", "FirstName": "string", "LastName": "string", "email": "string", "DateC": "meta",
"DateM": "meta"}'
As shown in the sample, the value associated with each key name is actually the data type for
that key. Only two values are currently possible: string and meta, where meta denotes an
internally generated key.
RemoveGroup
Deletes the group named GroupName, along with all its keysets and keys.
Syntax
RemoveGroup(GroupName: string)
Examples
In each of these examples, the object repoObject is deemed having been obtained through a
call to the COM object "RepositoryLib.WorkflowRepository" (see "Obtaining an instance of the
Repository Object" on page176).
JavaScript
repoObject.RemoveGroup("Users");
Page 190

VB Script
repoObject.RemoveGroup "Users"
RemoveKey
Removes existing key KeyName from group GroupName. The key to remove must exist in the
group, otherwise an error is raised. All values for the key, in all keysets for the group, are
removed. Note that when the Group contains a large number of KeySets, this operation may
take a while.
Syntax
RemoveKey(GroupName: string, KeyName: string)
Examples
In each of these examples, the object repoObject is deemed having been obtained through a
call to the COM object "RepositoryLib.WorkflowRepository" (see "Obtaining an instance of the
Repository Object" on page176).
JavaScript
repoObject.RemoveKey("Users", "email");
VB Script
repoObject.RemoveKey "Users", "email"
RemoveKeySetByID
Deletes the keyset whose ID equals ID from GroupName. Returns 1 if successful, 0 otherwise.
Note
This method is functionally equivalent to using "RemoveKeySets" on the next page
with its Condition parameter set to "ID=ID".
Syntax
RemoveKeySetByID(GroupName: string, ID: integer): integer
Page 191

Examples
In each of these examples, the object repoObject is deemed having been obtained through a
call to the COM object "RepositoryLib.WorkflowRepository" (see "Obtaining an instance of the
Repository Object" on page176).
JavaScript
/* both methods perform the same task */
repoObject.RemoveKeySetByID("Users", 10);
repoObject.RemoveKeySets("Users", "ID=10");
VB Script
/* both methods perform the same task */
repoObject.RemoveKeySetByID "Users", 10
repoObject.RemoveKeySets "Users", "ID=10"
RemoveKeySets
Deletes all keysets in GroupName that match Condition. The condition is specified using
basic SQL WHERE syntax. The method returns the number of keysets that were deleted.
When passing 'ID' as the Condition, all keysets in GroupName will be deleted.
Syntax
RemoveKeySets(GroupName: string, Condition: string): integer
Examples
Basic examples
In each of these examples, the object repoObject is deemed having been obtained through a
call to the COM object "RepositoryLib.WorkflowRepository" (see "Obtaining an instance of the
Repository Object" on page176).
JavaScript
repoObject.RemoveKeySets("Users", 'Gender="M"');
VB Script
repoObject.RemoveKeySets "Users", "Gender='M'"
Page 192

Deleting a row
This script attempts to delete a client from the rows, then returns "true" or "false" in JobInfo
variable %9 as a response.
var CustomerID = Watch.GetVariable("CustomerID");
var repoObject = new ActiveXObject
("RepositoryLib.WorkflowRepository");
var deletedCount = JSON.parse(repoObject.RemoveKeySets
("customers","customerID = '" + CustomerID + "'"));
var answer = (deletedCount > 0) ? "true" : "false";
Watch.SetJobInfo(9, answer);
RenameGroup
Renames group oldName to newName. While this operation has no impact on the data stored
in the specified group, it does require any plugin and/or script that uses oldName to be
modified to refer to newName.
Syntax
RenameGroup(oldName, newName: string)
Examples
In each of these examples, the object repoObject is deemed having been obtained through a
call to the COM object "RepositoryLib.WorkflowRepository" (see "Obtaining an instance of the
Repository Object" on page176).
JavaScript
repoObject.RenameGroup("Users", "Customers");
VB Script
repoObject.RenameGroup "Users", "Customers"
RenameKey
Renames key oldName to newName in group GroupName. While this operation has no
impact on the data stored in that Group, it does require any plugin and/or script that uses
oldName to be modified to refer to newName.
Page 193

Syntax
RenameKey(GroupName: string, oldName: string, newName: string)
Examples
In each of these examples, the object repoObject is deemed having been obtained through a
call to the COM object "RepositoryLib.WorkflowRepository" (see "Obtaining an instance of the
Repository Object" on page176).
JavaScript
repoObject.RenameKey("Users", "LastName", "SurName");
VB Script
repoObject.RenameGroup "Users", "LastName", "SurName"
SetValue
Updates multiple keysets in group GroupName by setting the key KeyName to Value for all
keysets that match Condition. The condition is specified using basic SQL WHERE syntax. The
Condition may be left empty in which case all keysets in GroupName are updated. Note that
KeyName must exist in GroupName, otherwise an error is raised. The method returns an array
of the keyset ID's that were updated ([1,2] ), or an empty array ([] ) if no keysets were updated.
Note
There is currently no Update feature in the API for a whole KeySet (a row).
Syntax
SetValue(GroupName: string, KeyName: string, Value: string,
Condition: string): string
Examples
In each of these examples, the object repoObject is deemed having been obtained through a
call to the COM object "RepositoryLib.WorkflowRepository" (see "Obtaining an instance of the
Repository Object" on page176).
JavaScript
Page 194
repoObject.SetValue("Users", "FormOfAddress", "Mr.", "Gender='M'"
);
repoObject.SetValue("Users", "FormOfAddress", "Ms.", "Gender='F'
AND MaritalStatus='Married'" );
repoObject.SetValue("Users", "FormOfAddress", "Miss", "Gender='F'
AND MaritalStatus=''" );
VB Script
repoObject.SetValue "Users", "FormOfAddress", "Mr.", "
Gender=""M"" "
repoObject.SetValue "Users", "FormOfAddress", "Ms.", "
Gender=""F"" AND MaritalStatus=""Married"" "
repoObject.SetValue "Users", "FormOfAddress", "Miss", "
Gender=""F"" AND MaritalStatus="""" "
SetValueByID
Updates KeyName with Value in group GroupName, where the KeySet's ID matches the ID
parameter. KeyName must exist in GroupName, otherwise an error is raised. The method
returns the ID of the keyset that was updated or -1 if the keyset was not updated.
The KeySet ID can be retrieved with GetValue() ("GetValue" on page187).
Note
There is currently no Update feature in the API for a whole KeySet (a row).
Syntax
SetValueByID(GroupName: string, KeyName: string, Value: string, ID:
integer): integer64
Note
This method is functionally equivalent to using "SetValue" on the previous page with its
Condition parameter set to "ID=ID".
Page 195

Examples
In each of these examples, the object repoObject is deemed having been obtained through a
call to the COM object "RepositoryLib.WorkflowRepository" (see "Obtaining an instance of the
Repository Object" on page176).
JavaScript
/* both methods perform the same task */
repoObject.SetValueByID("Users", "FormOfAddress", "Mr.", 10);
repoObject.SetValue("Users", "FormOfAddress", "Mr.", "ID=10" );
VB Script
/* both methods perform the same task */
repoObject.SetValueByID "Users", "FormOfAddress", "Mr.", 10
repoObject.SetValue "Users", "FormOfAddress", "Mr.", "ID=10"
Updating a row
There is currently no 'update' feature in the API for a whole KeySet. This JavaScript example
retrieves the KeySet ID, which is then used to update values in the row.
/* Get KeySet ID */
var repoObject = new ActiveXObject
("RepositoryLib.WorkflowRepository");
var keySetID = repoObject.GetValue("customers", "ID",
"CustomerID='CURD654321'");
/* Update Values */
repoObject.SetValueByID("customers", "FormOfAddress", "Mr.",
keySetID);
repoObject.SetValueByID("customers", "Country", "US", keySetID);
repoObject.SetValueByID("customers", "Language", "EN", keySetID);
Version
Returns the version of the DLL library used by the Repository.
Syntax
Version(): string
Page 196

Metadata API
The "Metadata" on page76 is a hierarchical structure describing the data in a job. It is
composed of 5 basic levels, from top to bottom: Job, Group, Document, Datapage, and Page.
There is a set of plugins that allow to edit the Metadata during a Workflow process (see
"Metadata tasks" on page560), but you can also manipulate the Metadata in your process via
scripts using the Metadata API.
In the Metadata API, each unit, on all levels in the hierarchy, is represented by an object called
a "Node" on page215.
A Node item is a collection of its lower level node type items. At the top of this tree sits a single
Node object named "MetaJob" on page200. The MetaJob is a collection of "MetaGroup" on
page203 objects, where each MetaGroup is a collection of one or more "MetaDocument" on
page206 objects. In turn, MetaDocument objects hold "MetaDatapage" on page210 objects,
which have "MetaPage" on page213 objects.
In addition, a Node contains a collection of "Attributes" on page232 and can contain any
number of "Fields" on page233.
All of these objects are contained in a "MetaFile" on the next page object, and they are
obtained, directly or indirectly, through methods of this object.
Note
In an OLConnect job, only the first three levels in the Metadata hold information about
the job: Job, Group and Document. A Group has information about a record set in the
Connect database and a Document has information about one record in that set. This
information appears in the Fields collection of the respective Node object. (When viewing
the Metadata file, this information is visible under 'User defined information'.) The Data
Model fields are added into the Document level.
Note
Be aware that changing the order and location of the various Node objects (except for the
Page object) within the Metadata structure, and/or setting the "Selected" on page219
property of a Node, may affect the output of a job (see "Including or excluding nodes from
the output" on page216 and "How Metadata affects the output" on page81).
Page 197

MetaFile
The MetaFile object represents the physical Metadata file and is used to load and save the
Metadata from and to the file system. It also publishes the "MetaJob" on page200 object, which
is the root node of the Metadata structure.
The MetaFile object is the only object that is formally published to the user. All the other objects
are obtained, directly or indirectly, through methods of this object.
A standalone, empty MetaFile object can be created using CreateObject
("MetadataLib.MetaFile") in any script program, even outside of Workflow, or the {145E89F9-
C2DF-4604-821A-9BD6C4B468DA} CLSID with CoCreateInstance.
The current job's Metadata file name can be obtained using the Watch.GetMetadataFilename
method (see "Watch.GetMetadataFilename" on page167) when using the "Run Script" on
page482 task. Note that the exact syntax may vary according to the selected script language.
When writing a plugin using the plugin SDK the current job's Metadata file name can be
obtained by calling the IWatchJob::MetadataFilename method from within
IWatchPlugin::Execute.
Warning
Under no circumstances should any other objects of this library be created directly.
Always use the published APIs to create new objects.
Warning
The Metadata objects point to an underlying persistent data store. This means that if there
are live references to Metadata objects and the underlying data is destroyed (e.g. a new
file is loaded), the objects would point to invalid data. The effect of calling any object
method in these circumstances is undefined and may result in memory corruption, crash
or loss of data.
Methods
Name Description
Page 198

Job() Returns the "MetaJob" on the next page node, which
sits at the top of the Metadata tree structure.
"LoadFromFile(const String
Filename )" below
Loads a Metadata file from the file system.
"SaveToFile(const String
Filename)" below
Saves a Metadata file to the file system.
"Export(const String Filename,
TExportFormat Format)" below
Exports the Metadata in a non-native format.
LoadFromFile(const String Filename )
Loads a Metadata file from the file system. This function throws an error when the Metadata file
is invalid or when it can't be found. Note that this error should be caught in a try-catch block.
Filename
Name of the file to load.
Exceptions
l EOleException: Invalid Metadata file or other error while loading.
SaveToFile(const String Filename)
Saves the current Metadata structure in a file.
Filename
Name of the file to save into. If the file already exists, the file is overwritten and its current
contents is lost.
Export(const String Filename, TExportFormat Format)
Exports the Metadata in a non-native format.
Filename
Name of the file to save to. If the file already exists, the file is overwritten and its current
content is lost.
Page 199

Format
Format in which to save the file. The only value currently supported is efXml21 (value = 0),
which is an XML format corresponding to the former Metadata native file format.
Exceptions
l EOleException: The specified export format is invalid.
MetaJob
Properties
Name Type Description
"Attributes" on
page232
MetaCollection Returns the node's attribute collection. (See
the "Metadata Attributes reference" on
page84.)
"Count" on
page218
Integer Returns the number of child nodes.
"Fields" on
page233
MetaCollection
Returns the node's field collection.
"NodeType" on
page218
TNodeType Returns the node type of the current Node.
Note that the TNodeType type is not defined in
an Active Script environment, such as the Run
Script task. See the detailed reference for the
numerical values to use.
"Selected" on
page219
Bool Indicates whether or not the Node is set to be
printed.
"SelectedCount" on
page219
Integer Returns the number child nodes selected to be
output. (See also: "Including or excluding
nodes from the output" on page216.)
"SelectedState" on
page220
Integer Returns an integer indicating whether the node
is selected or not, taking its parents into
Page 200

account.
0: The node is not selected.
1: The node is selected but one of its parents is
not.
2: The node and all of its parents are selected.
Methods
Name Return
type
Description
"Add(Integer Index)" on page220
Node
Adds a new child node to the
current node.
"AttributeByIndex(Integer Index)" on
page221
String Returns the specified attribute's
value.
"AttributeByName(const String Name)" on
page221
String Returns the value of the
attribute of the specified name.
"Clear()" on page222 Deletes all the child nodes as
well as the attributes and fields.
"DatapageCount()" on page222
Integer Returns the total number of
datapages present underneath
this node.
"DocumentCount()" on page223 Integer Returns the total number of
documents in all groups.
"FieldByIndex(Integer Index)" on page223 String Returns the specified field's
value.
"FieldByName(const String Name)" on
page224
String Returns the value of field of the
specified name.
"FieldByNameIndex(const String Name, String Returns the value of the N'th
Page 201

Integer Index)" on page224 field of the specified name.
"Item(Integer Index)" on page226 Node Returns the child (node) item
located at the specified index.
Group(Integer Index), see "Item(Integer
Index)" on page226
Node Returns the MetaGroup at the
specified index.
"PageCount()" on page226 Integer Returns the total number of
pages present underneath this
node.
"Paste()" on page227
Node Inserts the clipboard's content
as the last child of the current
node.
"PasteAt(Integer Index)" on page227 Node Inserts the clipboard's content
as a child node at the specified
index.
"Select(TSelectWhat SelectWhat)" on
page228
Selects the child nodes
according to the SelectWhat
parameter.
The TSelectWhat type is not
defined in an Active Script
environment, such as the Run
Script task. See the detailed
reference for the numerical
values to use.
"SelectedDatapageCount()" on page228 Integer Returns the number of
datapages selected to be output
that are underneath this node.
"SelectedDocumentCount()" on page228 Integer Returns the number of
documents selected to be
output that are underneath this
node.
Page 202

"SelectedPageCount()" on page229 Integer Returns the number of pages
selected to be output that are
underneath this node.
"Sort(const String Name, optional
TSortFlags Flags, optional const String
Name2, optional TSortFlags Flags2,
optional const String Name3, optional
TSortFlags Flags3)" on page230
Sorts the sub-nodes according
to a number of criteria.
MetaGroup
Properties
Name Type Description
"Attributes" on
page232
MetaCollection Returns the node's attribute collection. (See
the "Metadata Attributes reference" on
page84.)
"Count" on
page218
Integer Returns the number of child nodes.
"Fields" on
page233
MetaCollection
Returns the node's field collection.
"Index" on
page218
Integer Gets the index of the node in its parent.
"NodeType" on
page218
TNodeType Returns the node type of the current Node.
Note that the TNodeType type is not defined in
an Active Script environment, such as the Run
Script task. See the detailed reference for the
numerical values to use.
"Parent" on
page219
Node Returns the parent node of the current node.
Page 203

"Selected" on
page219
Bool Indicates whether or not the Node is set to be
printed.
"SelectedCount" on
page219
Integer Returns the number child nodes selected to be
output. (See also: "Including or excluding
nodes from the output" on page216.)
"SelectedState" on
page220
Integer Returns an integer indicating whether the node
is selected or not, taking its parents into
account.
0: The node is not selected.
1: The node is selected but one of its parents is
not.
2: The node and all of its parents are selected.
Methods
Name Return
type
Description
"Add(Integer Index)" on page220
Node
Adds a new child node to the
current node.
"AttributeByIndex(Integer Index)" on
page221
String Returns the specified attribute's
value.
"AttributeByName(const String Name)" on
page221
String Returns the value of the
attribute of the specified name.
"Clear()" on page222 Deletes all the child nodes as
well as the attributes and fields.
"Copy() " on page222 Places a copy of the node in the
metadata clipboard.
"Cut()" on page222 Removes the node and places
it in the metadata clipboard.
Page 204

"DatapageCount()" on page222
Integer Returns the total number of
datapages present underneath
this node.
"Delete()" on page223 Deletes the node.
"FieldByIndex(Integer Index)" on page223 String Returns the specified field's
value.
"FieldByName(const String Name)" on
page224
String Returns the value of field of the
specified name.
"FieldByNameIndex(const String Name,
Integer Index)" on page224
String Returns the value of the N'th
field of the specified name.
"IndexInJob()" on page225 Integer Returns the index of this page
in the job, taking all the pages
from all the datapages from all
the documents from all the
groups into account.
"Item(Integer Index)" on page226 Node Returns the child (node) item
located at the specified index.
Document(Integer Index), see "Item
(Integer Index)" on page226
Node Returns the MetaDocument at
the specified index.
"PageCount()" on page226 Integer Returns the total number of
pages present underneath this
node.
"Paste()" on page227
Node Inserts the clipboard's content
as the last child of the current
node.
"PasteAt(Integer Index)" on page227 Node Inserts the clipboard's content
as a child node at the specified
index.
Page 205

"Select(TSelectWhat SelectWhat)" on
page228
Selects the child nodes
according to the SelectWhat
parameter.
The TSelectWhat type is not
defined in an Active Script
environment, such as the Run
Script task. See the detailed
reference for the numerical
values to use.
"SelectedDatapageCount()" on page228 Integer Returns the number of
datapages selected to be output
that are underneath this node.
"SelectedPageCount()" on page229 Integer Returns the number of pages
selected to be output that are
underneath this node.
"SelectedIndexInJob()" on page229 Integer Index of the page among all the
selected pages in the Job.
"Sort(const String Name, optional
TSortFlags Flags, optional const String
Name2, optional TSortFlags Flags2,
optional const String Name3, optional
TSortFlags Flags3)" on page230
Sorts the sub-nodes according
to a number of criteria.
MetaDocument
Properties
Name Type Description
"Attributes" on
page232
MetaCollection Returns the node's attribute collection. (See
the "Metadata Attributes reference" on
page84.)
"Count" on Integer Returns the number of child nodes.
Page 206

page218
"Fields" on
page233
MetaCollection
Returns the node's field collection.
"Index" on
page218
Integer Gets the index of the node in its parent.
"NodeType" on
page218
TNodeType Returns the node type of the current Node.
Note that the TNodeType type is not defined in
an Active Script environment, such as the Run
Script task. See the detailed reference for the
numerical values to use.
"Parent" on
page219
Node Returns the parent node of the current node.
"Selected" on
page219
Bool Indicates whether or not the Node is set to be
printed.
"SelectedCount" on
page219
Integer Returns the number child nodes selected to be
output. (See also: "Including or excluding
nodes from the output" on page216.)
"SelectedState" on
page220
Integer Returns an integer indicating whether the node
is selected or not, taking its parents into
account.
0: The node is not selected.
1: The node is selected but one of its parents is
not.
2: The node and all of its parents are selected.
Methods
Name Return
type
Description
Page 207

"Add(Integer Index)" on page220
Node
Adds a new child node to the
current node.
"AttributeByIndex(Integer Index)" on
page221
String Returns the specified attribute's
value.
"AttributeByName(const String Name)" on
page221
String Returns the value of the
attribute of the specified name.
"Clear()" on page222 Deletes all the child nodes as
well as the attributes and fields.
"Copy() " on page222 Places a copy of the node in the
metadata clipboard.
"Cut()" on page222 Removes the node and places
it in the metadata clipboard.
"Delete()" on page223 Deletes the node.
"FieldByIndex(Integer Index)" on page223 String Returns the specified field's
value.
"FieldByName(const String Name)" on
page224
String Returns the value of field of the
specified name.
"FieldByNameIndex(const String Name,
Integer Index)" on page224
String Returns the value of the N'th
field of the specified name.
"IndexInGroup()" on page225 Integer Returns the index of this page
in its parent group, taking all the
pages from all the datapages
from all documents into
account.
"IndexInJob()" on page225 Integer Returns the index of this page
in the job, taking all the pages
from all the datapages from all
Page 208

the documents from all the
groups into account.
"Item(Integer Index)" on page226 Node Returns the child (node) item
located at the specified index.
Datapage(Integer Index), see "Item(Integer
Index)" on page226
Node Returns the MetaDatapage at
the specified index.
"PageCount()" on page226 Integer Returns the total number of
pages present underneath this
node.
"Paste()" on page227
Node Inserts the clipboard's content
as the last child of the current
node.
"PasteAt(Integer Index)" on page227 Node Inserts the clipboard's content
as a child node at the specified
index.
"Select(TSelectWhat SelectWhat)" on
page228
Selects the child nodes
according to the SelectWhat
parameter.
The TSelectWhat type is not
defined in an Active Script
environment, such as the Run
Script task. See the detailed
reference for the numerical
values to use.
"SelectedPageCount()" on page229 Integer Returns the number of pages
selected to be output that are
underneath this node.
"SelectedIndexInGroup()" on page229 Integer Index of the page among all the
selected pages in its parent
Group.
Page 209

"SelectedIndexInJob()" on page229 Integer Index of the page among all the
selected pages in the Job.
"Sort(const String Name, optional
TSortFlags Flags, optional const String
Name2, optional TSortFlags Flags2,
optional const String Name3, optional
TSortFlags Flags3)" on page230
Sorts the sub-nodes according
to a number of criteria.
MetaDatapage
Properties
Name Type Description
"Attributes" on
page232
MetaCollection Returns the node's attribute collection. (See
the "Metadata Attributes reference" on
page84.)
"Count" on
page218
Integer Returns the number of child nodes.
"Fields" on
page233
MetaCollection
Returns the node's field collection.
"Index" on
page218
Integer Gets the index of the node in its parent.
"NodeType" on
page218
TNodeType Returns the node type of the current Node.
Note that the TNodeType type is not defined in
an Active Script environment, such as the Run
Script task. See the detailed reference for the
numerical values to use.
"Parent" on
page219
Node Returns the parent node of the current node.
"Selected" on Bool Indicates whether or not the Node is set to be
Page 210
page219 printed.
"SelectedCount" on
page219
Integer Returns the number child nodes selected to be
output. (See also: "Including or excluding
nodes from the output" on page216.)
"SelectedState" on
page220
Integer Returns an integer indicating whether the node
is selected or not, taking its parents into
account.
0: The node is not selected.
1: The node is selected but one of its parents is
not.
2: The node and all of its parents are selected.
Methods
Name Return
type
Description
"Add(Integer Index)" on page220
Node
Adds a new child node to the
current node.
"AttributeByIndex(Integer Index)" on
page221
String Returns the specified attribute's
value.
"AttributeByName(const String Name)" on
page221
String Returns the value of the
attribute of the specified name.
"Clear()" on page222 Deletes all the child nodes as
well as the attributes and fields.
"Copy() " on page222 Places a copy of the node in the
metadata clipboard.
"Cut()" on page222 Removes the node and places
it in the metadata clipboard.
Page 211

"Delete()" on page223 Deletes the node.
"FieldByIndex(Integer Index)" on page223 String Returns the specified field's
value.
"FieldByName(const String Name)" on
page224
String Returns the value of field of the
specified name.
"FieldByNameIndex(const String Name,
Integer Index)" on page224
String Returns the value of the N'th
field of the specified name.
"IndexInDocument()" on page225 Integer Returns the index of this page
in its parent document, taking
all the pages from all the
datapages into account.
"IndexInGroup()" on page225 Integer Returns the index of this page
in its parent group, taking all the
pages from all the datapages
from all documents into
account.
"IndexInJob()" on page225 Integer Returns the index of this page
in the job, taking all the pages
from all the datapages from all
the documents from all the
groups into account.
"Item(Integer Index)" on page226 Node Returns the child (node) item
located at the specified index.
Page(Integer Index), see , see "Item
(Integer Index)" on page226
Returns the MetaPage at the
specified index.
"Paste()" on page227
Node Inserts the clipboard's content
as the last child of the current
node.
"PasteAt(Integer Index)" on page227 Node Inserts the clipboard's content
Page 212

as a child node at the specified
index.
"Select(TSelectWhat SelectWhat)" on
page228
Selects the child nodes
according to the SelectWhat
parameter.
The TSelectWhat type is not
defined in an Active Script
environment, such as the Run
Script task. See the detailed
reference for the numerical
values to use.
"SelectedIndexInDocument()" on
page229
Integer Index of the page among all the
selected pages in its parent
Document.
"SelectedIndexInGroup()" on page229 Integer Index of the page among all the
selected pages in its parent
Group.
"SelectedIndexInJob()" on page229 Integer Index of the page among all the
selected pages in the Job.
"Sort(const String Name, optional
TSortFlags Flags, optional const String
Name2, optional TSortFlags Flags2,
optional const String Name3, optional
TSortFlags Flags3)" on page230
Sorts the sub-nodes according
to a number of criteria.
MetaPage
Properties
Name Type Description
"Attributes" on
page232
MetaCollection Returns the node's attribute collection. (See the
"Metadata Attributes reference" on page84.)
Page 213

"Fields" on
page233
MetaCollection
Returns the node's field collection.
"Index" on
page218
Integer Gets the index of the node in its parent.
"NodeType" on
page218
TNodeType Returns the node type of the current Node.
Note that the TNodeType type is not defined in an
Active Script environment, such as the Run Script
task. See the detailed reference for the numerical
values to use.
"Parent" on
page219
Node Returns the parent node of the current node.
Methods
Name Return
type
Description
"AttributeByIndex(Integer
Index)" on page221
String Returns the specified attribute's value.
"AttributeByName(const String
Name)" on page221
String Returns the value of the attribute of the
specified name.
"Copy() " on page222 Places a copy of the node in the metadata
clipboard.
"Cut()" on page222 Removes the node and places it in the
metadata clipboard.
"Delete()" on page223 Deletes the node.
"FieldByIndex(Integer Index)"
on page223
String Returns the specified field's value.
Page 214

"FieldByName(const String
Name)" on page224
String Returns the value of field of the specified
name.
"FieldByNameIndex(const
String Name, Integer Index)"
on page224
String Returns the value of the N'th field of the
specified name.
"IndexInDocument()" on
page225
Integer Returns the index of this page in its parent
document, taking all the pages from all the
datapages into account.
"IndexInGroup()" on page225 Integer Returns the index of this page in its parent
group, taking all the pages from all the
datapages from all documents into account.
"IndexInJob()" on page225 Integer Returns the index of this page in the job,
taking all the pages from all the datapages
from all the documents from all the groups
into account.
"Item(Integer Index)" on
page226
Node Returns the child (node) item located at the
specified index.
"SelectedIndexInDocument()"
on page229
Integer Index of the page among all the selected
pages in its parent Document.
"SelectedIndexInGroup()" on
page229
Integer Index of the page among all the selected
pages in its parent Group.
"SelectedIndexInJob()" on
page229
Integer Index of the page among all the selected
pages in the Job.
Node
Node objects are items in the Metadata's single-rooted tree-like structure. Each Node item is a
collection of its lower level Node type. There are 5 types of Metadata Node objects:
l "MetaJob" on page200
l "MetaGroup" on page203
Page 215

l "MetaDocument" on page206
l "MetaDatapage" on page210
l "MetaPage" on page213
The MetaJob is a collection of MetaGroup objects, where each MetaGroup is a collection of one
or more MetaDocument objects, and so on, except for the MetaPage which does not have child
nodes.
Properties and methods
All Node objects share a number of properties and methods that are common to all Node
object types. There are also properties and methods that are either unique to a specific Node
object type, or shared between only a few of them.
Each Node object type provides methods to access its children (in other words, Nodes that are
located underneath that Node item in the tree structure). The method's name varies to match
the type of Node. For example, the child accessor method in a MetaDocument node is named
Datapage.
There is also a generic accessor method named Item that is common across all Node object
types. The Item method of the MetaGroup returns a MetaDocument, while the same method for
a MetaDatapage returns a MetaPage.
Note: The "MetaPage" on page213 object does not have a child accessor method as it does
not contain any Node objects.
For the available properties and methods see the Node type's documentation: "MetaJob" on
page200, "MetaGroup" on page203, "MetaDocument" on page206, "MetaDatapage" on
page210, and "MetaPage" on page213.
Including or excluding nodes from the output
The Selected property of any Node object is used to select whether the node - and all of its
children, down to the smallest unit - are to be included in the final output or not.
If a node has its Selected property set to true, all of its children that also have their own
Selected property set to true will print.
If Selected is false, its children will not print, regardless of their Selected status.
Methods like Count, Index or PageCount work on all nodes, regardless of their Selected
attributes.
Methods whose names start with "Selected" however are meant to work with selected nodes. In
other words, "Selected..." methods only consider nodes that are set to be part of the output.
Page 216

SelectedCount only considers child nodes that have their Selected property set to true, but also
checks if their parents also have their Selected property to true. It is therefore possible that a
node is selected but is not counted.
The SelectedState property can be used to verify the effective selection state of a node, i.e.
whether or not a node will be part of the output and, if not, whether it is because it is itself not
selected or one of its parents is not.
Attributes and Fields
In addition to being a collections of objects, a Metadata Node also contains two types of
elements, called "Attributes" on page232 and "Fields" on page233. These are name/value
pairs, where the name is case-insensitive.
l
An Attribute is a read-only, system-defined element which holds certain information
about a certain node in the Metadata structure. This information can be static (e.g. the size
of a physical page) or evaluated on-the-fly (e.g. the number of documents in a group).
Attributes are non-repetitive (i.e. name is unique) and do not persist through Metadata
recreation.
For an overview of Attributes and in which Node objects they are available, see the
"Metadata Attributes reference" on page84.
l
A Field is a read-write, user-defined element which holds custom information about a
certain node in the Metadata structure. Fields are repetitive (i.e. the same field may
appear multiple times) and persist through Metadata recreation.
They are each stored in a collection container object (a MetaAttributeCollection and a
MetaFieldCollection, respectively).
As is the case with Nodes, both collections share a number of methods and properties. The
Fields collection however has additional methods to support multiple entries with the same
name, which is forbidden with attributes.
Node properties and methods reference
This topic gives detailed information about all properties and methods of the Node object. The
availability of a property or method with an actual Node object, however, depends on the type
of the Node: "MetaJob" on page200, "MetaGroup" on page203, "MetaDocument" on
page206, "MetaDatapage" on page210, and "MetaPage" on page213.
Page 217

Properties
Attributes
Returns the attribute collection (MetaCollection) of the current node. See "Attributes" on
page232.
Count
Not available in MetaPage
Returns the number of child nodes in the current node.
Fields
Returns the field collection (MetaCollection) of the current node. See "Fields" on page233.
Index
Not available in MetaJob
Gets the index of the node in its parent.
Returns:
The index (0-based) at which the current node is found in the parent's node list.
Exception:
l EOleException: Index is lower than 0 or higher than Count-1.
NodeType
Returns a value representing the type (TNodeType) of the current node.
Return value Node type
0 Job
2 Group
Page 218

3 Document
5 Datapage
6 Page
Note
In an Active Script environment, such as the Run Script task, the return value is a
numerical value.
However, in environments where the TNodeType type is defined, the node types are
ntJob, ntGroup, ntDocument, ntDatapage, and ntPage.
Parent
Not available in MetaPage
Returns the parent node of the current node.
Selected
Not available in MetaPage
Indicates whether or not the node is set to be printed (see "Including or excluding nodes from
the output" on page216). If a node has its Selected property set to true, all of its child that also
have their own Selected property set to true will print. If Selected is false, its child will not print,
regardless of their Selected status.
(reading) Returns:
True if the node is selected, false otherwise.
(writing) Parameters:
Select True to mark as selected to be printed, false if it is not to be printed.
SelectedCount
Not available in MetaPage
Page 219

Returns the number of child nodes in the current node that are set to be output, meaning that
they have their Selected property set to true, taking the parents into account.
Returns:
The number (integer) of child nodes that will be included in the output. If the current node and
all of its parents have their Selected property set to true, this amounts to the number of child
nodes that are selected. If any parent is not selected, returns 0.
SelectedState
Indicates whether the node is selected or not, taking its parents into account.
Returns:
Returns an integer indicating the selected state of the node. If the node and all of its parents are
selected, the method returns ssTrue (2). If the node is selected but one of its parents is not, the
return value is ssDisabled (1). If the node is not selected, the return value is ssFalse (0).
Return value State
0 False: The node is not selected.
1 Disabled: The node is selected but one of its parents is not.
2 True: The node and all of its parents are selected.
Note
In an Active Script environment, such as the Run Script task, the return value is a
numerical value.
However, in environments where the Selected State type is defined, the types are
ssFalse (= 0), ssDisabled (= 1), and ssTrue (= 2).
Methods
Add(Integer Index)
Not available in MetaPage
Adds a new Node as a child of the current node.
Page 220

Parameters:
Index
Specifies where in the child list to add the node. The node is inserted before the node at the
specified index. In other words, the node being inserted becomes the node found at Index. To
add a node at the start of the collection, use 0. To add it at the end, use Node.Count.
Returns:
Reference to the Node that was added.
Exception:
l EOleException: The value of Index is invalid.
AttributeByIndex(Integer Index)
Returns the value of the Metadata attribute at the specified index.
Parameters:
Index
0-based index of the attribute value to retrieve. The index of the first element is 0 and the
index of the last is Count-1.
Returns:
The value of the attribute as a string.
Exception:
l EOleException: Index is lower than 0 or higher than Count-1.
AttributeByName(const String Name)
Returns the value of the metadata attribute of the specified name.
Parameters:
Name
Name of the attribute to retrieve.
Page 221
Returns:
The value of the attribute as a string. If an attribute named Name is not found, an empty string is
returned.
Clear()
Not available in MetaPage
Deletes all the child nodes of the current node, as well as all of its attributes and fields.
Copy()
Not available in MetaJob
Places a copy of the current node, along with all of its children, attributes and fields, in the
metadata clipboard. Modifying the original node after the copy is made does not modify the
copy in the clipboard.
Cut()
Not available in MetaJob
Places a copy of the current node, along with all of its children, attributes and fields, in the
metadata clipboard and immediately removes the original from the Metadata structure.
Warning
The node being cut is removed immediately. Any reference to it or its child nodes
becomes invalid. The results of calling methods of such references is undefined.
DatapageCount()
MetaJob and MetaGroup only
Page 222

Returns the number of MetaDatapage nodes in all child nodes. This methods recursively goes
through all child nodes to count the total number of MetaDatapage that are contained
underneath the current node.
Returns:
Total number (integer) of MetaDatapage nodes found under the current node.
Delete()
Not available in MetaJob
Removes the current node, along with all of its children, attributes and fields, from the metadata
structure.
Warning
The node being deleted is removed immediately. Any reference to it or its child nodes
becomes invalid. The results of calling methods of such references is undefined.
DocumentCount()
MetaJob only
Returns the number of MetaDocument in all child nodes. This method recursively goes through
all child nodes to count the total number of MetaDocument nodes that are contained
underneath the current node.
Returns:
Total number (integer) of MetaDocument nodes found under the current node.
FieldByIndex(Integer Index)
Returns the value of the Metadata Field at the specified index. (See: "Fields" on page233.)
Parameters:
Index
Page 223

0-based index of the field value to retrieve. The index of the first element is 0 and the index of
the last is Count-1.
Returns:
The value of the field as a string.
Exception:
l EOleException: Index is lower than 0 or higher than Count-1.
FieldByName(const String Name)
Returns the value of the Metadata Field of the specified name. (See: "Fields" on page233.) If
more than one field has the same name, this method returns the value of the first one it finds,
starting at the first field in the list.
Parameters:
Name
Name of the field to retrieve.
Returns:
The value of the field as a string. If an field named Name is not found, an empty string is
returned.
FieldByNameIndex(const String Name, Integer Index)
Returns the value of the n'th metadata field of the specified name. This method can be used to
retrieve the value of a specific field when more than one field has the same name.
Parameters:
Name
Name of the field to retrieve.
Index
Ordinal of the field to retrieve. To retrieve the value of the first field named Name, use 0. For
the second field, use 1, and so on.
Page 224

Returns:
The value of the specified field as a string. If an field named Name is not found, or Index is
higher or equal to the number of fields named Name (in other words, you specify 4 to get the
fifth but there are only three), an empty string is returned.
Exception:
l EOleException: Index is lower than 0.
IndexInDocument()
MetaPage and MetaDatapage only
Returns the index of this page in its parent document, taking all the pages from all the
datapages into account.
Returns:
Absolute index (integer, 0-based) of the page within all the pages under the parent document.
IndexInGroup()
MetaDocument, MetaDatapage and MetaPage only
Returns the index of this page in its parent group, taking all the pages from all the datapages
from all documents into account.
Returns:
Absolute index (integer, 0-based) of the page within all the pages under the parent group.
IndexInJob()
Not available in MetaJob
Returns the index of this page in the job, taking all the pages from all the datapages from all the
documents from all the groups into account.
Page 225

Returns:
Absolute index (0-based) of the page within all the pages in the job.
Item(Integer Index)
Group (Integer Index ) MetaJob only
Document (Integer Index ) MetaGroup only
Datapage (Integer Index ) MetaDocument only
Page (Integer Index ) MetaDatapage only
Returns the child node located at the specified index.
Parameters:
Index
0-based index of the node to retrieve. The index of the first node is 0 and the index of the last
is Count-1.
Returns:
Reference to the specified node.
Exception:
l EOleException: Index is lower than 0 or higher than Count-1.
PageCount()
MetaJob, MetaGroup and MetaDocument only
Returns the number of MetaPage in all child nodes. This methods recursively goes through all
child nodes to count the total number of MetaPage that are contained underneath the current
node.
Returns:
Total number of MetaPage found under the current node.
Page 226

Paste()
Not available in MetaPage
Inserts the contents of the metadata clipboard as the last child node of the current node. This
removes the node from the clipboard, making it empty after the paste operation.
Returns:
Reference to the top node being pasted.
Exception:
l EOleException: The node type of the clipboard and the current node don't match. For
example, trying to paste a MetaGroup in a MetaGroup or a MetaPage in a MetaDocument.
PasteAt(Integer Index)
Not available in MetaPage
Inserts the contents of the metadata clipboard at the specified index in the current node. This
removes the node from the clipboard, making it empty after the paste operation.
Parameters:
Index
Specifies where in the child list to add the node. The node is inserted before the node at the
specified index. In other words, the node being inserted becomes the node found at Index. To
add a node at the start of the collection, use 0. To add it at the end, use Node.Count.
Returns:
Reference to the top node being pasted.
Exceptions:
l EOleException: The node type of the clipboard and the current node don't match. For
example, trying to paste a MetaGroup in a MetaGroup or a MetaPage in a MetaDocument.
l EOleException: The value of Index is invalid.
Page 227

Select(TSelectWhat SelectWhat)
Not available in MetaPage
Changes the "selected" status of the current node as well as all of its child nodes according to
the SelectWhat parameter.
Parameters:
SelectWhat
Indicates what to select. The value swNone changes the Selected property of the current
node and all child nodes to false, while swAll changes it to true.
Script users: use 0 for swNone, 1 for swAll.
SelectedDatapageCount()
MetaJob and MetaGroup only
Returns the number of datapages under the current node that are set to be part of the output, i.e.
that have their Selected property set to true, as well as all of their parents.
Returns:
The number of such nodes, if any. If the current node is not selected or one of its parents is not,
it returns 0.
SelectedDocumentCount()
MetaJob only
Returns the number of documents under the current node that are set to be part of the output,
i.e. that have their Selected property set to true, as well as all of their parents.
Returns:
The number of such nodes, if any. If the current node is not selected or one of its parents is not,
it returns 0.
Page 228

SelectedIndexInDocument()
MetaDatapage and MetaPage only
Returns the index of this page in its parent document, taking only the selected pages into
account.
Returns:
Absolute index (0-based) of the page within all the selected pages under the parent document.
If the page is not set to be output (i.e. its SelectedState is different than ssTrue), it returns -1.
SelectedIndexInGroup()
MetaDocument, MetaDatapage and MetaPage only
Returns the index of this page in its parent group, taking only the selected pages from all the
datapages from all documents into account.
Returns:
Absolute index (0-based) of the page within all the selected pages under the parent group. If
the page is not set to be output (i.e. its SelectedState is different than ssTrue), it returns -1.
SelectedIndexInJob()
Not available in MetaJob
Returns the index of this page in the job, taking only the selected pages from all the datapages
from all the documents from all the groups into account.
Returns:
Absolute index (0-based) of the page within all the selected pages in the job. If the page is not
set to be output (i.e. its SelectedState is different than ssTrue), it returns -1.
SelectedPageCount()
MetaJob, MetaGroup and MetaDocument only
Page 229

Returns the number of pages under the current node that are set to be part of the output, i.e. that
have their Selected property set to true, as well as all of their parents.
Returns:
The number of such nodes, if any. If the current node is not selected or one of its parents is not,
it returns 0.
Sort(const String Name,
optional TSortFlags Flags,
optional const String Name2,
optional TSortFlags Flags2,
optional const String Name3,
optional TSortFlags Flags3)
Not available in MetaJob
Sorts the sub-nodes contained in the node according to a number of sort criteria. Unselected
sub-nodes will be placed at the end, after all the selected sub-nodes, in the order in which they
were placed prior to the sort.
Each of the three sort criteria can be modified by specifying one or more flags.
Value Meaning
1 The name refers to an Attribute rather than a field.
2 The sort is done in descending order (i.e. the highest to the lowest).
4 The field is an integer numeric value.
Note
In an Active Script environment, such as the Run Script task, you must work with the
numerical values.
In environments where the flags are defined, you may instead use sfAttribute (= 1),
sfDescending (= 2), and sfNumeric (= 4).
Page 230

All the parameters to this method except for the first one are optional. If a Name is specified, it
must be valid for every sub-node. If, for example, the specified field is not found in a sub-node,
or a numeric sort is performed and one of the values is not numeric (i.e. consists of only decimal
characters, no thousand or decimal separator allowed), the method will fail.
If a sub-node contains multiple occurrences of fields with the specified name, only the first
occurrence will be considered.
String comparisons are done without regards to the case (case-insensitive) using the Windows
Win32 API function CompareString(LOCALE_USER_DEFAULT, NORM_IGNORECASE, ...).
Parameters:
Name
Name of the field or attribute contained in each sub-node whose value will be used as the first
sort criteria. If it is an attribute instead of a field, this needs to be specified in the Flags
parameter.
Flags (optional)
Set of flags that modify how the sorting on Name is done.
Name2 (optional)
Name of the field or attribute contained in each sub-node whose value will be used as the
second sort criteria. If it is an attribute instead of a field, this needs to be specified in the
Flags2 parameter.
Flags2 (optional)
Set of flags that modify how the sorting on Name2 is done.
Name3 (optional)
Name of the field or attribute contained in each sub-node whose value will be used as the
third sort criteria. If it is an attribute instead of a field, this needs to be specified in the Flags3
parameter.
Flags3 (optional)
Set of flags that modify how the sorting on Name3 is done.
Page 231

Exceptions:
l EOleException: Specified field or attribute does not exist in one of the sub-nodes.
l EOleException: A numeric sort is specified and one of the fields or attributes does not
contain a valid numeric integer value.
l EOleException: An error occurred while comparing two strings.
Attributes
An Attribute is a read-only, system-defined element: a name/value pair, where the name is
case-insensitive. It holds certain information about a certain "Node" on page215 in the
Metadata structure. This information can be static (e.g. the size of a physical page) or evaluated
on-the-fly (e.g. the number of documents in a group).
Attributes are non-repetitive (i.e. name is unique) and do not persist through Metadata
recreation.
For an overview of Attributes and the Node types in which they are available, see the
"Metadata Attributes reference" on page84.
Attributes are stored in a collection container object, just like the Node's "Fields" on the facing
page. As is the case with the different types of Nodes, both collections share a number of
methods and properties. The Fields collection however has additional methods to support
multiple entries with the same name, which is forbidden with attributes.
Warning
Attributes are intended for system-defined data. Please restrict user-defined data to
Fields, and do not modify the Attributes.
Properties
Name Type Description
Count Integer Returns the number of elements in the collection.
Page 232

Methods
Name Return
type
Description
"Add(const String Name, const
String Value)" on page235
Adds a new element to the collection
or overwrites its value.
Clear() Clears all elements from the
collection.
"CountByName(const String Name)"
on page237
Integer Returns the number of elements with
the specified name.
"Delete(Integer Index)" on page237 Deletes the element at the specified
index.
"Item(Integer Index)" on page237 String Returns the value of the element
stored at the specified index.
"ItemByName(const String Name)"
on page238
String Returns the value of the element of
the specified name.
"Name(Integer Index)" on page239 String Returns the name of the element
stored at the specified index.
Fields
A Field is a read-write, user-defined element: a name/value pair, where the name is case-
insensitive. It holds custom information about a certain "Node" on page215 in the Metadata
structure. Fields are repetitive (i.e. the same field may appear multiple times) and persist
through Metadata recreation.
Fields are stored in a collection container object, just like "Attributes" on the previous page. As
is the case with the different types of Nodes, both collections share a number of methods and
properties. The Fields collection however has additional methods to support multiple entries
with the same name, which is forbidden with attributes.
Page 233

Properties
Name Type Description
Count Integer Returns the number of elements in the collection.
Methods
Name Return
type
Description
"Add(const String Name, const
String Value)" on the facing
page
Adds a new element to the collection or
overwrites its value.
"Add2(const String Name,
const String Value, TAddFlags
Flags, Integer Index (optional))"
on the facing page
Adds a new element with a customizable
behavior if the name already exists.
Note that the TAddFlags type is not defined
in an Active Script environment, such as
the Run Script task. See the detailed
reference for the numerical values to use.
Clear() Deletes all the elements of the collection.
"CountByName(const String
Name)" on page237
Integer Returns the number of elements with the
specified name.
"Delete(Integer Index)" on
page237
Deletes the element at the specified index.
"Item(Integer Index)" on
page237
String Returns the value of the element stored at
the specified index.
"ItemByName(const String
Name)" on page238
String Returns the value of the element of the
specified name.
"ItemByNameIndex(const
String Name, Integer Index)" on
String Returns the value of the n'th element of the
specified name.
Page 234

page238
"Name(Integer Index)" on
page239
String Returns the name of the element stored at
the specified index.
Attributes and Fields methods
This topic lists the methods of the "Attributes" on page232 and "Fields" on page233 collection
container objects.
Note that the Add2() and the ItemByNameIndex() functions are only available with Fields. Fields
support multiple entries with the same name, which is forbidden with Attributes.
Add(const String Name, const String Value)
Adds a new element to the collection. If the specified name already exists in the collection, the
new value overwrites the previous one.
Parameters
Name
Name of the element to add. The name must adhere to this syntax rules: start with a letter,
followed by zero or more letters, numbers, underscore or dash. The name is not case-
sensitive.
Value
Value of the element. There is no restriction on the content, although binary is discouraged.
Exceptions
l EOleException The name is empty or invalid.
Add2(const String Name, const String Value, TAddFlags Flags, Integer Index (optional))
Fields only
Adds a new field to the collection. The behavior of the method when the specified name
already exists in the collection is determined by the Flags argument.
Page 235

Parameters
Name
Name of the field to add. The name must adhere to this syntax rules: start with a letter,
followed by zero or more letters, numbers, underscore or dash. The name is not case-
sensitive.
Value
Value of the element. There is no restriction on the content, although binary is discouraged.
Flags
Additional flags for the method. This determines how the method behaves when the specified
name already exists.
afReplace 0 Overwrites the previous value with the new
afAppend 1 Appends the new value at the end of the previous one
afDuplicate 2 Creates a new field with the same name
afFail 3 Raise an error
Note
In an Active Script environment, such as the Run Script task, you must use the numerical
value, since the TAddFlags type is not defined in an Active Script environment.
Index (optional)
Instance of the field to modify. This must be a numeric value equal to 0 or greater and can
only be used with the afReplace flag.
Exceptions
l EOleException The name is empty or invalid.
l EOleException The flags value is invalid.
l EOleException The name already exists and the afFail flag was specified.
Page 236

l EOleException The index is invalid.
l EOleException An index is specified but afReplace is not specified.
CountByName(const String Name)
Returns the number of attributes or fields (integer) with the specified name.
Parameters
Name
Name of the element to count.
Returns
Number of occurrences of elements with the specified name.
Note that when counting an attribute by name, the only possible values are 1 and 0 because
attributes can only occur once.
Delete(Integer Index)
Delete a specified element from the collection.
Parameters
Index
0-based index of the element to delete. The first element in the collection is at index 0 and the
last is at Count-1.
Exceptions
l EOleException Index is lower than 0 or higher than Count-1.
Item(Integer Index)
Returns the value of the element at the specified index in the collection.
Parameters
Index
Page 237

0-based index of the element to delete. The first element in the collection is at index 0 and the
last is at Count-1.
Returns
The value of the specified element as a string.
Exceptions
l EOleException Index is lower than 0 or higher than Count-1.
ItemByName(const String Name)
Returns the value of the element of the specified name.
Parameters
Name
Name of the element to retrieve.
Returns
The value of the element as a string. If no element is found, an empty string is returned.
Fields only: If more than one field has the specified name, the value of the first one in the list is
returned.
ItemByNameIndex(const String Name, Integer Index)
Fields only
Returns the value of the n'th field of the specified name. This method can be used to retrieve
the value of a specific field when more than one field has the same name.
Parameters
Name
Name of the field to retrieve.
Index
Page 238

Ordinal of the field to retrieve. To retrieve the value of the first field named Name, use 0. For
the second field, use 1, and so on.
Returns
The value of the specified field as a string. If an field named Name is not found, or Index is
higher or equal to the number of fields named Name (in other words, you specify 4 to get the
fifth but there are only three), an empty string is returned.
Exceptions
l EOleException Index is lower than 0.
Name(Integer Index)
Returns the name of the element at the specified index.
Parameters
Index
0-based Index of the element value to retrieve. The first element in the collection is at index 0,
and the last is at Count-1.
Returns
The name of the element as a string.
Exceptions
l EOleException Index is lower than 0 or higher than Count-1.
StringSort
StringSort is a convenience class that provides a generic sorting class for ActiveScript-
compatible languages. It is a non-trivial task to sort data in scripting, especially in VBScript
where there is no equivalent for the JScript sort function. It is designed as a list of strings. Each
string in the list is a key based on which the sort is done. Each key can have an optional integer
value that can be used, for example, to retrieve a record in an array.
Page 239

To create a StringSort object, use CreateObject("MetadataLib.StringSort") or the {A07730B7-
4100-457E-91E2-31BFF24E1EC4} CLSID. Although the object is published by the metadata
library, it is completely independent of the metadata and can be used in any script, including
those run outside of PlanetPress Suite.
Methods
Name Returns Description
"Add(const String Key, Integer Value)"
on the facing page
Integer Adds a new item in the sort list.
Clear() Empties the sort list, removing all
the strings.
"Count()" on the facing page Integer
Returns the number of elements
in the list.
"Delete(Integer Index)" on the facing
page
Removes an item from the sort
list.
"Find(const String Key)" on the facing
page
Integer Finds an item in the list and
returns its index.
"Key(Integer Index)" on page242 String Returns the key at the specified
index.
"Sort()" on page242 Sorts the list.
"SortByValue()" on page242 Sorts the list based on the value
instead of the key.
"Value(Integer Index )" on page242 Integer Returns the value at the specified
index.
Page 240

Add(const String Key, Integer Value)
Adds a new string key in the list, with an optional associated integer Value.
Key
String on which the sort will be performed.
Value (optional)
Integer associated with the string. This value is not used and will not be changed by the sort
class. If the string goes to another position in the list after the sort, this value will move as well
to the new index of the string.
Return value: 0-based index (integer) of the newly added string. It is therefore always equal to
Count-1.
Count()
Returns the number of strings in the list.
Return value: Integer. Number of strings in the list. If the list does not contain any string, the
return value is 0.
Delete(Integer Index)
Removes a single string from the list.
Index
0-based index of the string to remove.
Exceptions
l EOleException Index is lower than 0 or higher than Count-1.
Find(const String Key)
Finds a string and returns its position in the list.
Key
String to find.
Page 241

Return value: 0-based index (integer) of the string. If the string is not found, the method returns
-1.
Key(Integer Index)
Returns the key at the specified index.
Index
0-based index (integer) of the string to retrieve.
Return value: String. Value of the key at the specified index.
Exceptions
l EOleException Index is lower than 0 or higher than Count-1.
Sort()
Sorts the items in the list according to their key. The sort performed is a simple alphabetical
string sort: 30 comes after 200. The strings are expected to be formatted correctly to return the
desired order (ex: "030", "200" will be sorted with 30 first and then 200).
SortByValue()
Sorts the items in the list according to their value instead of the key.
Value(Integer Index )
Retrieves the value of the optional integer at the specified index.
Index
0-based index (integer) of the value to retrieve.
Return value: The integer value at the specified index.
Exceptions
l EOleException: Index is lower than 0 or higher than Count-1.
Page 242

AlambicEdit API reference
The AlambicEdit library allows Workflow to access, create or modify PDF files. It does so by
wrapping Adobe PDF Library API calls in an object-oriented COM API. The use of COM as the
underlying technology allows Workflow's scripting environment to create an instance of that
COM object through the Watch.GetPDFEditObject method (see "The Watch Object" on
page156).
The object's hierarchy is modeled on the PDF document structure:
l The PDF object implements the IPDF interface. This interface defines methods to open,
close and save files, as well as to access meta information such as the XMP attachment.
The interface also implements a Pages collection object to access the list of pages in the
PDF. (See "PDF object" on page245.)
l The Pages collection object implements the IPages interface. This interface defines
methods to add, import, move or delete pages as well to access individual Page items.
(See "Pages collection object" on page257.)
l The Page object implements the IPage interface. This interface defines methods to
retrieve information from a page or modify it. A page may also be drawn on a Windows
Device Context (DC), but note that access to DCs may not be available in all scripting
languages. (See "Page object" on page262.)
"IPdfInfos" on page273, "IPdfPrintParams" on page274 and "IPdfRect" on page275 are the
structures used.
Note
In OL Connect, PDF files are normally best handled by "OL Connect tasks" on page591.
However, the AlambicEdit API can provide a solution in special situations; see for
example Stamping one PDF file on another PDF file.
Syntax conventions
The syntax for methods, properties and structures is as follows.
Page 243

Methods
Syntax
RETURN_VALUE_TYPE methodName( [ARGUMENT_TYPE arg1[, ARGUMENT_TYPE
arg2[,...]]] )
Methods with a RETURN_VALUE_TYPE of VOID do not have a return value.
In case of failure, methods raise an exception.
Examples
VOID Open( STRING fileName, BOOLEAN doRepair )
STRING GetXYML()
JavaScript implementation:
myPDF.Open("C:\\PDFs\\SomeDocument.pdf", false);
var myXYML = myPDF.GetXYML();
Note: In JavaScript, all method calls must include parentheses, even for methods that do not
require arguments (e.g. Watch.GetPDFEditObject(), myPDF.Pages() ).
VBScript implementation:
myPDF.Open "C:\\PDFs\\SomeDocument.pdf", false
myXYML = myPDF.GetXYML
Properties
Syntax
PROPERTY_TYPE propName
Examples
INTEGER Orientation
JavaScript implementation:
var currentOrientation = myPDF.Pages(0).Orientation;
myPDF.Pages(0).Orientation = 180;
Page 244

VBScript implementation:
currentOrientation = myPDF.Pages(0).Orientation
myPDF.Pages(0).Orientation = 180;
Structures
Syntax
STRUCT_NAME {
FIELD_TYPE fieldName1[,
FIELD_TYPE fieldName2[,
...]]
}
Examples
IPDFRect {
LONG left,
LONG top,
LONG right,
LONG bottom
}
JavaScript implementation:
var pdfRect = myPDF.Pages(0).Size();
var pageWidth = pdfRect.right - pdfRect.left;
VBScript implementation:
set pdfRect = myPDF.Pages(0).Size
pageWidth = pdfRect.right - pdfRect.left
PDF object
The PDF object implements the IPDF interface. This interface defines methods to open, close
and save files, as well as to access meta information such as the XMP attachment. The
interface also implements a Pages collection object to access the list of pages in the PDF.
To instantiate the PDF object, call the Watch.GetPDFEditObject method in Workflow's scripting
environment.
Javascript implementation: var myPDF = Watch.GetPDFEditObject();
Page 245

VBScript implementation: set myPDF = Watch.GetPDFEditObject
IPDF methods
Name Return type Description
"Close()" on page248 Closes the PDF file. If changes were
made but not saved, they are silently lost.
All IPage objects must be released before
closing a PDF.
"Create(filename)" on
page249
Creates a new empty PDF file.
"GetInfos()" on page249 "IPdfInfos" on
page273
Retrieves the contents of the Document
Information Dictionary from the PDF.
"GetVersion(*major, *minor)"
on page250
Returns the version of the underlying PDF
file format. For example, for PDF 1.7, 1 is
returned in major and 7 is returned in
minor.
Note that this method is not available in
scripts.
"GetXMP()" on page250 STRING Retrieves the XMP attachment embedded
in the PDF.
"GetXYML()" on page250 STRING Retrieves the entire extractable text from
the PDF in XYML format.
"IsProtected(filename)" on
page251
BOOL Returns True if the PDF file is password-
protected. When a file is password-
protected, the OpenEx() method must be
used instead of the Open() method.
"MergeWith(pdfFilename)"
on page251
Merges the pages of pdfFilename (the
source) with the pages of the current PDF
(the destination).
Page 246

"MergeWith2(pdfFilename,
xnum, ynum, xoffset, yoffset,
scaleFactor)" on page251
Overlays each page of pdfFilename (the
source) onto pages of the current PDF (the
destination) in a grid whose size is
specified by xnum and ynum. The pages
are laid from left to right and then from top
to bottom.
"Open(filename, doRepair)"
on page252
Opens an existing PDF, optionally
repairing it.
"OpenEx(filename,
password, doRepair)" on
page253
Opens an existing, password-protected
PDF, optionally repairing it.
"Pages()" on page253 IPages (see
"Pages
collection
object" on
page257)
Provides access to the Pages collection of
the PDF.
"Print(printername)" on
page254
Prints a range of PDF pages to the
specified Windows printer with default
options.
"PrintEx(printername,
*PdfPrintParams)" on
page254
Prints a range of PDF pages to the
specified Windows printer with specific
printer options stored in an
"IPdfPrintParams" on page274 structure.
"Save()" on page255 Saves changes to the PDF file. The
version of the PDF file format is the
highest possible for a newly created file
and is unchanged when saving an
existing file, unless the SetVersion method
was called in which case the file format
used will be the one set by SetVersion.
"SetInfos(Infos)" on
page255
Sets the contents for the PDF's Document
Information Dictionary.
Page 247

"setTolerances
(tolerableDeltaWidth,
tolerableDeltaHeight,
tolerableDeltaFontHeight,
tolerableGap)" on page256
Sets the floating point values for the
tolerable factors.
"SetVersion (major, minor)"
on page256
Sets the version of the underlying PDF file
format. This is applied when the file is
saved.
"SetXMP(xmpPacket)" on
page257
Sets the XMP attachment by replacing the
existing one with xmpPacket.
IPDF methods reference
Close()
Closes the PDF file. If changes were made but not saved, they are silently lost. All IPage
objects must be released before closing a PDF.
Syntax
VOID Close ()
Note: Before using Close() in Javascript, you should call the CollectGarbage() global method to
ensure all references to pages are properly discarded. This additional statement is not required
with other languages. For instance:
var objPDF = Watch.GetPDFEditObject();
objPDF.Open(Watch.GetJobFileName(), false);
var objPages = objPDF.Pages();
var objPage = null;
for(var i=0; i<objPages.Count(); i++) {
objPage = objPages.Item(i);
}
objPage=null;
objPages=null;
CollectGarbage();
objPDF.Close();
Page 248

If you run the above code without calling the CollectGarbage() method, the Close() method will
error out.
Create(filename)
Creates a new empty PDF file. See also: "Save()" on page255.
Syntax
VOID Create (STRING filename)
filename
Name of the file to create. The file is not physically written to disk until IPDF.Save() is called.
ConvertToVDX(pdfFilename, ppmlFilename)
Converts a PDF file to a VDX file by adding the necessary entries in the catalog and root
dictionaries as well as embedding a PPML file as a stream object in the PDF. The validity of
the PPML is left to the caller.
This method opens, modifies, saves and closes the specified PDF file. This means that,
contrary to the other methods of the IPDF interface, this method works on - and only on - the
PDF file specified by the first argument; IPDF.Open() or .Create() do not need to be called
beforehand. If they were called, the file opened or created by these methods is untouched
(unless of course pdfFilename specifies the same filename as Open()).
Syntax
VOID ConvertToVDX (STRING pdfFilename, STRING ppmlFilename)
pdfFilename
Name of the file to convert.
ppmlFilename
Name of the PPML file to embed.
GetInfos()
Retrieves the contents of the Document Information Dictionary from the PDF.
Syntax
IPdfInfos GetInfos ()
Page 249

Return value
An "IPdfInfos" on page273 structure containing the PDF properties. Cannot be NULL.
GetVersion(*major, *minor)
Returns the version of the underlying PDF file format.
Note: This method is not available in all scripting environments.
Syntax
GetVersion(LONG *major, LONG *minor)
major
Pointer to a LONG that receives the major version number.
minor
Pointer to a LONG that receives the minor version number.
GetXMP()
Retrieves the XMP attachment embedded in the PDF.
Syntax
STRING GetXMP ()
Return value
String containing the complete text of the PDF's XMP attachment.
GetXYML()
Retrieves the entire extractable text from the PDF in XYML format.
Syntax
STRING GetXYML ()
Return value
A string containing the complete text of the PDF in XYML format.
Page 250

IsProtected(filename)
Returns True if the PDF file is password-protected. When a file is password-protected, the
OpenEx() method must be used instead of the Open() method. See also: "OpenEx(filename,
password, doRepair)" on page253.
Syntax
BOOL IsProtected (STRING filename)
filename
Name of the file to check for password-protection.
Return value
True if the file is password-protected, False otherwise.
MergeWith(pdfFilename)
Merges the pages of pdfFilename (the source) onto the pages of the current PDF (the
destination ). Each page of the source is overlaid transparently onto the corresponding
destination page, 1 on 1, 2 on 2, 3 on 3, etc. The source must have the same number of pages
than the destination and each pair of pages should have the same size. The resulting file is not
optimized.
This method is the same as calling: PDF.MergeWith2(pdfFilename, 1, 1, 0, 0, 1.0); (see
"MergeWith2(pdfFilename, xnum, ynum, xoffset, yoffset, scaleFactor)" below).
Syntax
VOID MergeWith (STRING pdfFilename)
pdfFilename
Name of the source PDF from which pages are taken to be overlaid on the pages of the
destination PDF.
MergeWith2(pdfFilename, xnum, ynum, xoffset, yoffset, scaleFactor)
Merges the pages of pdfFilename (the source) onto the pages of the current PDF (the
destination). Each page of the source is overlaid transparently onto a destination page in a grid
whose size is specified by xnum and ynum. The pages are laid from left to right and then from
top to bottom. The resulting file is not optimized.
Page 251

In PlanetPress Suite, this method is useful for n-Up imposition. For example, (xnum=1, ynum=1,
scaleFactor=1.0) means that each source is overlaid on the corresponding destination page, 1
on 1, 2 on 2, 3 on 3, etc. Having (xnum=3, ynum=2) with xoffset, yoffset and scaleFactor set
accordingly results in a 3x2 mosaic looking like this:
1 2 3
4 5 6
There is no separator between the source pages on the destination page. A space can be
obtained by using an offset bigger than the size of the scaled source page.
Syntax
VOID MergeWith2 (STRING pdfFilename, LONG xnum, LONG ynum, LONG xoffset, LONG
yoffset, FLOAT scaleFactor)
pdfFilename
Name of the source PDF from which pages are taken.
xnum
Number of columns.
ynum
Number of rows.
xoffset
Horizontal space to put between the top left corner of each source page, in points.
yoffset
Vertical space to put between the top left corner of each source page, in points.
scaleFactor
Scale at which to draw on source pages on the destination. Use 1.0 to draw the page at its
nominal size.
Open(filename, doRepair)
Opens an existing PDF, optionally repairing it.
Syntax
Page 252

VOID Open (STRING filename, BOOL doRepair)
filename
Name of the file to open.
doRepair
Boolean. If true, the software automatically attempts to repair the file if it is found to be
damaged or corrupt. Otherwise, the operation fails if the file is damaged.
OpenEx(filename, password, doRepair)
Opens an existing, password-protected PDF, optionally repairing it. See also: "IsProtected
(filename)" on page251.
Syntax
VOID OpenEx (STRING filename, STRING password, BOOL doRepair)
filename
Name of the file to open.
password
Password to open the file.
doRepair
Boolean. If true, the software automatically attempts to repair the file if it is found to be
damaged or corrupt. Otherwise, the operation fails if the file is damaged.
Pages()
Provides access to the Pages collection of the PDF.
Syntax
IPages Pages ()
Return value
An IPages collection object. Each page in the zero-based collection can be accessed through
the IPages.Item() method. Note that since Item() is the collection's default method, it can be
omitted altogether (e.g. IPages(0) is the same as IPages.Item(0)).
Page 253

Print(printername)
Prints a range of PDF pages to the specified Windows printer with default options. See also:
"PrintEx(printername, *PdfPrintParams)" below.
Syntax
VOID Print (
STRING printerName,
LONG fromPage,
LONG toPage
)
printerName (optional)
Name of the printer to print to. The default options of the printer will be used. If NULL, the
default printer is used.
fromPage
0-based index of the first page to print.
toPage
0-based index of the last page to print. To print all pages from fromPage to the end, use -1.
PrintEx(printername, *PdfPrintParams)
Prints a range of PDF pages to the specified Windows printer with specific printer options
stored in an "IPdfPrintParams" on page274 structure. See also: "Print(printername)" above.
Syntax
VOID PrintEx (
STRING printerName,
IPdfPrintParams * PdfPrintParams
)
printerName (optional)
Name of the printer to print to. The default options of the printer will be used. PdfPrintParams ,
if non-NULL, may override some of them. If NULL, the default printer is used.
PdfPrintParams (optional)
Page 254

Pointer to an "IPdfPrintParams" on page 274 structure that specifies various print options. If
NULL , default values are used.
Save()
Saves changes to the PDF file. The version of the PDF file format is the highest possible for a
newly created file and is unchanged when saving an existing file, unless the SetVersion
method was called in which case the file format used will be the one set by SetVersion. See
also: "SetVersion (major, minor)" on the next page.
Syntax
VOID Save (BOOL optimize)
optimize
If true, the file is optimized before being written to disk, i.e. objects are garbage-collected
and/or regenerated, the PDF is linearized, etc.
SetInfos(Infos)
Sets the contents for the PDF's Document Information Dictionary.
Syntax
VOID SetInfos ( IPdfInfos Infos )
Infos
"IPdfInfos" on page 273 structure containing the new values.
setPageCacheSize(cacheSize)
Sets the maximum number of IPage objects in the cache. Calling this method flushes the
cache.
Syntax
VOID setPageCacheSize ( UNSIGNED LONG cacheSize )
cacheSize
Maximum number of IPage pointers that the cache can hold, between 1 and 1000.
Page 255

setTolerances(tolerableDeltaWidth, tolerableDeltaHeight, tolerableDeltaFontHeight,
tolerableGap)
Sets the floating point values for the tolerable factors.
Syntax
VOID setTolerances (
FLOAT tolerableDeltaWidth,
FLOAT tolerableDeltaHeight,
FLOAT tolerableDeltaFontHeight,
FLOAT tolerableGap
)
tolerableDeltaWidth
Tolerable delta width factor value.
tolerableDeltaHeight
Tolerable delta height factor value.
tolerableDeltaFontHeight
Tolerable delta font height factor value.
tolerableGap
Tolerable delta gap between words factor value.
SetVersion (major, minor)
Sets the version of the underlying PDF file format. This is applied when the file is saved. See
also: "Save()" on the previous page.
Syntax
VOID SetVersion ( LONG major, LONG minor )
major
Major version number.
minor
Minor version number.
Page 256

SetXMP(xmpPacket)
Sets the XMP attachment by replacing the existing one with xmpPacket.
Syntax
VOID SetXMP ( STRING xmpPacket )
xmpPacket
New XMP attachment to use instead of the existing one.
Pages collection object
The Pages collection object implements the IPages interface. This interface defines methods to
add, import, move or delete pages as well to access individual Page items.
It is accessed via the "PDF object" on page245.
IPages methods
Name Return type Description
"Count()" on the
next page
LONG Returns the number of items in the Pages collection,
in other words the number of pages in the PDF.
"Delete()" on the
next page
Deletes a page from the PDF.
"ExtractTo
(destFilename,
srcIndex, srcCount,
optimize)" on
page259
Extracts pages from the PDF and creates a new file
with these pages.
"Insert(index,
*mediaSize)" on
page259
Inserts a new blank page in the PDF file.
"InsertFrom
(srcFilename,
Inserts pages from another PDF file into this one. All
relevant resources are copied with the pages.
Page 257

srcIndex, srcCount,
destIndex)" on
page260
"InsertFrom2
(srcPages,
srcIndex, srcCount,
destIndex)" on
page260
Inserts pages from another IPages object into this
one. All relevant resources are copied with the
pages.
"Item(index)" on
page261
IPage (see
"Page
object" on
page262)
Returns a Page object from the PDF. Note that
sinceItem() is the collection's default method, it
can be omitted altogether (e.g. IPages(0) is the
same as IPages.Item(0)).
"Move(index, count,
offset)" on page261
Moves a range of pages within the same PDF.
IPages methods reference
Count()
Returns the number of items in the Pages collection, in other words the number of pages in the
PDF.
Syntax
LONG Count ( )
Return value
The number of pages in the PDF.
Delete()
Deletes a page from the PDF.
Syntax
VOID Delete ( LONG index )
index
Page 258

0-based index of the page to delete.
ExtractTo(destFilename, srcIndex, srcCount, optimize)
Extracts pages from the PDF and creates a new file with these pages. All relevant resources
are copied with the pages. If the target file already exists, it is overwritten.
Syntax
VOID ExtractTo (
STRING destFilename,
LONG srcIndex,
LONG srcCount,
BOOL optimize
)
destFilename
Name of the PDF to create with the specified pages.
srcIndex
0-based index of the first page to copy.
srcCount
Number of contiguous pages starting from srcIndex to extract.
optimize
If true, optimize (linearize and garbage-collect) the output file.
Insert(index, *mediaSize)
Inserts a new blank page in the PDF file. See also: "Count()" on the previous page.
Syntax
VOID Insert (
LONG index,
IPdfRect * mediaSize
)
index
Page 259

0-based index at which to insert the page. The page is inserted *before* the page at index
"index ". To insert a page at the end, use IPages.Count().
mediaSize
"IPdfRect" on page 275 structure containing the rectangular dimensions of the new page, in
points. Cannot be NULL.
InsertFrom(srcFilename, srcIndex, srcCount, destIndex)
Inserts pages from another PDF file into this one. All relevant resources are copied with the
pages. See also: "Count()" on page258.
Syntax
VOID InsertFrom (
STRING srcFilename,
LONG srcIndex,
LONG srcCount,
LONG destIndex
)
srcFilename
Name of the PDF from which pages are retrieved.
srcIndex
0-based index of the first page to copy.
srcCount
Number of contiguous pages starting from srcIndex to insert. If srcCount is -1, all pages from
srcIndex up to the end are inserted.
destIndex
0-based index of the position where to insert the pages. They will be inserted before the page
at index destIndex. To insert the pages at the end, use IPages.Count().
InsertFrom2(srcPages, srcIndex, srcCount, destIndex)
Inserts pages from another IPages object into this one. All relevant resources are copied with
the pages. See also: "Count()" on page258.
Syntax
Page 260

VOID InsertFrom2 (
IPages srcPages,
LONG srcIndex,
LONG srcCount,
LONG destIndex
)
srcPages
IPages collection from which the pages are retrieved.
srcIndex
0-based index of the first page to copy.
srcCount
Number of contiguous pages starting from srcIndex to insert. If srcCount is -1, all pages from
srcIndex up to the end are inserted.
destIndex
0-based index of the position where to insert the pages. They will be inserted before the page
at index destIndex. To insert the pages at the end, use IPages.Count().
Item(index)
Returns a Page object from the PDF. Note that since Item() is the collection's default method, it
can be omitted altogether (e.g. IPages(0) is the same as IPages.Item(0)).
Syntax
IPage Item ( LONG index )
index
0-based index of the page to acquire.
Return value
An IPage object for the specified page. (See "Page object" on the next page.)
Move(index, count, offset)
Moves a range of pages within the same PDF.
Syntax
Page 261

VOID Move (
LONG index,
LONG count,
LONG offset
)
index
0-based index of the first page of the range.
count
Number of contiguous pages to move.
offset
Number of hops to move the pages. If negative, the pages are moved towards the beginning
of the file. If positive, towards the end.
Page object
The Page object implements the IPage interface. This interface defines methods to retrieve
information from a page or modify it. A page may also be drawn on a Windows Device Context
(DC), but note that access to DCs may not be available in all scripting languages.
IPage properties
Name Type Description
Orientation Integer Gets/sets the orientation of the page, in degrees. The value
is always a multiple of 90 and is the number of degrees the
page should be rotated clockwise when displayed or printed.
IPage methods
Name Return type Description
"ExtractText(left, bottom,
right, top)" on page265
String
Deprecated. Returns the text located
inside the region bounded by the left,
bottom, right and top parameters. If
multiple lines are found, they are
Page 262

separated by a CR-LF pair.
"ExtractText2(left, top, right,
bottom)" on page267
String Returns the text located inside the region
bounded by the left, top, right and bottom
parameters. If multiple lines are found,
they are separated by a CR-LF pair.
"MediaSize()" on page268 "IPdfRect" on
page275
Returns the size of the actual media, i.e.
the sheet of paper.
"setIncludeBorders
(pbIncludeBorders)" on
page268
Sets whether or not borders are included
for IPage.ExtractText2(). If true, a character
is considered to be inside the region using
the 30% rule (i.e. at least 30% of the
character must be enclosed in the region).
Otherwise, the character must be entirely
enclosed in the region to be returned.
"setTolerances
(tolerableDeltaWidth,
tolerableDeltaHeight,
tolerableDeltaFontHeight,
tolerableGap)" on page268
Sets the floating point values for the
tolerable factors.
"Merge(imageFile, left, top,
rotateAngle, scaleFactor)"
on page269
Inserts an image file and places it on the
page at a specific location.
Supported image types are: JPG and
PNG.
"Merge2(srcPage, left, top,
rotateAngle, scaleFactor)"
on page270
Transparently places a PDF page on top
of the current page at a specific location.
"MergeToLayer(imageFile,
left, top, rotateAngle,
scaleFactor, layerName)" on
page271
This method behaves the same as Merge()
but allows to insert the image as a layer
(aka an Optional Content Group).
Supported image types are JPG and PNG.
"MergeToLayer2(srcPage, This method behaves the same as Merge2
Page 263

left, top, rotateAngle,
scaleFactor, layerName)" on
page272
() but allows to put the source page as a
layer (aka an Optional Content Group).
"Size()" on page273 "IPdfRect" on
page275
Returns the size of the rectangle that is
used to clip (crop) the content of the page
before applying it to the medium, in points.
IPage methods reference
Draw(context, scale, offsetX, offsetY)
Draws the page onto the device context. This method is highly dependent on the state of the
device context and there are a few interaction pitfalls to lookout for. See below for details.
Note: This method is not available in all scripting environments.
Syntax
VOID Draw (
HDC context,
FLOAT scale,
LONG offsetX,
LONG offsetY
)
context
Device context on which to draw the page.
scale
Scale at which to draw. To draw at the 100% size, use a scale of device_dpi / 72. Do not use
the DC to do the scaling; this will result in scaling artifacts being drawn.
offsetX
Horizontal offset from the left edge of the DC surface, in *device* units, at which to start the
drawing.
offsetY
Page 264

Vertical offset from the top edge of the DC surface, in *device* units, at which to start the
drawing.
The drawing is done in PDF user space units (72th of an inch). In order to have a smooth
drawing of the page, the device context must have its mapping mode set to MM_TEXT with a
1:1 mapping between logical space (SetWindowExtEx) and device space (SetViewportExtEx).
Since MM_TEXT has its origin at the top instead of the bottom, the drawing is done vertically
mirrored; this means that the other mapping modes may not work because they are based at
the bottom. A 100% zoom is obtained by setting the scale to the ratio of the device dpi divided
by 72.
The Acrobat library automatically clips the drawing based on the viewable portion of the DC. If
the DC is translated or scaled, either by a world transform (SetWorldTransform) or a logical-to-
device space transform (SetWindowOrgEx or SetViewportOrgEx ), the *untransformed* space
is used. As a result, all scaling and translation operation must be done by the library itself to
work correctly. Otherwise, unwanted scaling artifacts or clipping will occur.
As such, the drawing code of the caller should look similar to this to obtain the same result as
what Acrobat does:
1. Fill the entire drawing area with gray.
2. Determine the origin (orgx, orgy) (for example, at (0, 0), or as indicated by scroll bars).
3. Draw a white rectangle of size (CropBox.width * zoom, CropBox.height * zoom) at (orgx,
orgy) representing the page (optional; Acrobat does not do that, and this method already
draws the white page background).
4. Call the IPage.Draw() method to draw the page at (orgx, orgy).
Note that extra care must be taken when filling rectangles as to whether the boundary pixel will
be inside or outside the region.
ExtractText(left, bottom, right, top)
Returns the text located inside the region bounded by the left, bottom, right and top parameters.
If multiple lines are found, they are separated by a CR-LF pair.
Page 265

Warning
This method is subject to many limitations (see below) and exists for backward-
compatibility and debugging purposes only. For production purposes, use ExtractText2()
instead.
Syntax
VOID ExtractText (
FLOAT left,
FLOAT bottom,
FLOAT right,
FLOAT top
)
left
Distance in inches of the left limit of the region from the left edge of the /CropBox.
bottom
Distance in inches of the bottom limit of the region from the bottom edge of the /CropBox.
right
Distance in inches of the right limit of the region from the left edge of the /CropBox.
top
Distance in inches of the top limit of the region from the bottom edge of the /CropBox.
Return value
A string containing the text extracted from the specified region.
Limitations
l No Unicode support.
l A word is extracted only if it fits entirely in the region.
l Empty lines are not supported.
l A maximum of 4096 chars is returned.
l A word can contain a maximum of 128 chars.
Page 266

l Horizontal moveto is not considered as a space.
l /CropBox size is not taken into account (an object whose left is at 144 is considered to be
2 inches from the edge even if the /CropBox starts at 72).
l Only horizontal text is supported; vertical or rotated text is undefined.
l Rotated pages are unsupported.
l /UserUnit is not supported.
ExtractText2(left, top, right, bottom)
Returns the text located inside the region bounded by the left, top, right and bottom parameters.
If multiple lines are found, they are separated by a CR-LF pair.
Syntax
VOID ExtractText2 (
FLOAT left,
FLOAT top,
FLOAT right,
FLOAT bottom
)
left
Distance in inches of the left limit of the region from the left edge of the /CropBox. Must be
between 0 and 5000.
top
Distance in inches of the top limit of the region from the top edge of the /CropBox. Must be
between 0 and 5000.
right
Distance in inches of the right limit of the region from the left edge of the /CropBox. Must be
between 0 and 5000.
bottom
Distance in inches of the bottom limit of the region from the top edge of the /CropBox. Must be
between 0 and 5000.
Return value
A string containing the text extracted from the specified region.
Page 267

MediaSize()
Returns the size of the physical medium on which the page is intended to be placed, in points.
This corresponds to the /MediaBox entry of the /Page object in the PDF. See also: "Size()" on
page273.
Syntax
IPdfRect MediaSize ( )
Return value
An "IPdfRect" on page275 structure containing the dimensions, in points, of the media size.
Cannot be NULL.
setIncludeBorders(pbIncludeBorders)
Sets whether or not borders are included for IPage.ExtractText2(). If true, a character is
considered to be inside the region using the 30% rule (i.e. at least 30% of the character must be
enclosed in the region). Otherwise, the character must be entirely enclosed in the region to be
returned. See also: "ExtractText2(left, top, right, bottom)" on the previous page.
Syntax
VOID setIncludeBorders ( LONG pbIncludeBorders )
pbIncludeBorders
If zero, the char must be completely inside the region. Otherwise, the 30% rule applies.
setTolerances(tolerableDeltaWidth, tolerableDeltaHeight, tolerableDeltaFontHeight,
tolerableGap)
Sets the floating point values for the tolerable factors.
Syntax
VOID setTolerances (
FLOAT tolerableDeltaWidth,
FLOAT tolerableDeltaHeight,
FLOAT tolerableDeltaFontHeight,
FLOAT tolerableGap
)
tolerableDeltaWidth
Page 268

Tolerable delta width factor value.
tolerableDeltaHeight
Tolerable delta height factor value.
tolerableDeltaFontHeight
Tolerable delta font height factor value.
tolerableGap
Tolerable gap between words factor value.
Merge(imageFile, left, top, rotateAngle, scaleFactor)
Inserts an image file and places it on the page at a specific location.
Supported image types are: JPG and PNG. It calls MergeToLayer internally.
Syntax
VOID Merge (
STRING imageFile,
FLOAT left,
FLOAT top,
FLOAT rotateAngle,
FLOAT scaleFactor
)
imageFile
Full name of the image to insert on the current page.
left
Coordinate at which to place the left edge of the image from the left edge of the page, in
points.
top
Coordinate at which to place the top edge of the image from the top of the page, in points.
rotateAngle
Angle at which to rotate counter-clockwise the inserted image, in degrees. The rotation is
done after the image is placed at (left, top) and centered around that point.
Page 269

scaleFactor
Scale at which to display the image. For bitmaps, this is based on a 72 dpi resolution. Use 1.0
for the nominal size.
Merge2(srcPage, left, top, rotateAngle, scaleFactor)
Transparently places a PDF page on top of the current page at a specific location. The source
page can be either from the same PDF or another opened file. If the source is from the same
PDF file, the source page is not modified. This allows to have the same behavior as
IPDF.MergeWith() by first inserting the pages from an external file, merging them and then
deleting them, but with more flexibility.
Syntax
VOID Merge2 (
IPage srcPage,
FLOAT left,
FLOAT top,
FLOAT rotateAngle,
FLOAT scaleFactor
)
srcPage
IPage object to overlay on the current page.
left
Coordinate at which to place the left edge of the image from the left edge of the page, in
points.
top
Coordinate at which to place the top edge of the image from the top of the page, in points.
rotateAngle
Angle at which to rotate counter-clockwise the inserted image, in degrees. The rotation is
done after the image is placed at (left, top) and centered around that point.
scaleFactor
Scale at which to display the image. For bitmaps, this is based on a 72 dpi resolution. Use 1.0
for the nominal size.
Page 270

MergeToLayer(imageFile, left, top, rotateAngle, scaleFactor, layerName)
This method behaves the same as Merge() but allows to insert the image as a layer (aka an
Optional Content Group).
Supported image types are JPG and PNG. If the input file is a PNG with an alpha channel, the
PNG is alpha blended with the page underneath. Monochrome PNG files are drawn
transparently, with the white used as the transparent color.
Syntax
VOID MergeToLayer (
STRING imageFile,
FLOAT left,
FLOAT top,
FLOAT rotateAngle,
FLOAT scaleFactor,
STRING layerName
)
imageFile
Full name of the image to insert on the current page.
left
Coordinate at which to place the left edge of the image from the left edge of the page, in
points.
top
Coordinate at which to place the top edge of the image from the top of the page, in points.
rotateAngle
Angle at which to rotate counter-clockwise the inserted image, in degrees. The rotation is
done after the image is placed at (left, top) and centered around that point.
scaleFactor
Scale at which to display the image. For bitmaps, this is based on a 72 dpi resolution. Use 1.0
for the nominal size.
layerName
Page 271

Name of an Optional Content Group in which to put the layer containing the image. The string
cannot be empty but can be NULL if no layer is required.
MergeToLayer2(srcPage, left, top, rotateAngle, scaleFactor, layerName)
This method behaves the same as Merge2() but allows to put the source page as a layer (aka
an Optional Content Group).
Syntax
VOID MergeToLayer2 (
IPage srcPage,
FLOAT left,
FLOAT top,
FLOAT rotateAngle,
FLOAT scaleFactor,
BSTRlayerName
)
srcPage
IPage object to overlay on the current page.
left
Coordinate at which to place the left edge of the image from the left edge of the page, in
points.
top
Coordinate at which to place the top edge of the image from the top of the page, in points.
otateAngle
Angle at which to rotate counter-clockwise the inserted image, in degrees. The rotation is
done after the image is placed at (left, top) and centered around that point.
scaleFactor
Scale at which to display the image. For bitmaps, this is based on a 72 dpi resolution. Use 1.0
for the nominal size.
layerName
Page 272

Name of an Optional Content Group in which to put the layer created from the source page. The
string cannot be empty but can be NULL if no layer is required.
layerName
Name of an Optional Content Group in which to put the layer created from the source page.
The string cannot be empty but can be NULL if no layer is required.
Size()
Returns the size of the rectangle that is used to clip (crop) the content of the page before
applying it to the medium, in points. This corresponds to the /CropBox entry of the /Page PDF
object. It can be seen as the bounding box of the page since by definition, anything outside of it
should be left out of the drawing, although there may be empty areas within it.
See also: "MediaSize()" on page268.
Syntax
IPdfRect Size ( )
Return value
An "IPdfRect" on page275 structure containing the dimensions, in points, of the page size.
Cannot be NULL.
IPdfInfos
The IPdfInfos structure contains the same basic information that can be found in Acrobat
Reader's™ File Properties . To instantiate the IPdfInfos structure, create the
AlambicEdit.PdfInfos object in Workflow's scripting environment.
Javascript implementation:
var pdfInfos = new ActiveXObject("AlambicEdit.PdfInfos");
VBScript implementation:
set pdfInfos = CreateObject("AlambicEdit.PdfInfos")
Page 273

Structure
iPdfInfos {
STRING Title
The document's title.
STRING Author
The name of the person who created the document.
STRING Subject
The subject of the document.
STRING Keywords
Keywords associated with the document. Multiple keywords are
separated with semi-colons.
STRING Creator
If the document was converted to PDF from another format, the
name of the application that created the original document from
which it was converted.
STRING Producer
If the document was converted to PDF from another format, the
name of the application that converted it to PDF.
STRING CreationDate
The date and time the document was created, in human-readable
form.
)
IPdfPrintParams
The IPdfPrintParams structure contains information used to control the printing of the file. To
instantiate the IPdfPrintParams structure, create the AlambicEdit.PdfPrintParams object in
Workflow's scripting environment.
Javascript implementation:
var pdfPrintParams= new ActiveXObject("AlambicEdit.PdfPrintParams");
VBScript implementation:
set pdfPrintParams = CreateObject("AlambicEdit.PdfPrintParams")
Page 274

Structure
IPdfPrintParams {
STRING docName
Name of the document; this is the name displayed in the Windows
spooler window.
STRING pageRange
Pages to print and/or page ranges separated by commas; e.g.
"0,3,5-12". Page numbers are 0-based. Leave empty to print all
pages.
LONG copies
Number of copies to print.
BOOL shrinkToFit
If true, the page will be resized (shrunk or expanded) and
rotated to fit to the physical media on which it is being printed.
BOOL printAnnotations
If true, annotations will be printed.
)
IPdfRect
The IPdfRect structure defines a rectangular region within a PDF page. To instantiate the
IPdfRect structure, create the AlambicEdit.PdfRect object in Workflow's scripting environment.
Javascript implementation:
var pdfRect = new ActiveXObject("AlambicEdit.PdfRect");
VBScript implementation:
set pdfRect = CreateObject("AlambicEdit.PdfRect")
Structure
IPdfRect {
LONG left
Left edge of the rectangle.
LONG top
Top edge of the rectangle.
LONG right
Right edge of the rectangle.
LONG bottom
Bottom edge of the rectangle.
)
Page 275

All values are expressed in points (72 points per inch).
NOTE: the PDF's coordinate system has its origin on the bottom left corner of the page,
extending up and to the right. Therefore, a Letter-sized page has the following rectangular
values:
Stopping execution
When using a script, you may come to a point where you'd like the task to fail (raise an error)
and trigger your On Error tab under certain conditions (see "Using the On Error tab" on
page100). This can be done by using the scripting language's built-in error features, described
here.
Note that the value or description of the error will not be available to your error process if one is
used. However, when available, a description of the error message will be logged in the Watch
log.
VBScript
In VBSCript, the Err.Raise method will halt the execution of the script and trigger the On Error
tab unless you previously specified On Error Resume Next. See MSDN for the Raise method
properties and this page for a list of available errors to raise. In the case of VBScript, the error
number used will determine the message shown in the log. You can also override the standard
error message by providing your own:
Dim s
s = Watch.GetJobInfo(9)
Page 276

If (s = "") Then
Err.Raise 449 ' Raises Error #449: "Argument is not optional" '
Err.Raise 1999,"My Plugin","Custom error" ' Raises error #1999:
"Custom error"
Else
' Do something with Job Info 9!
Watch.Log "Job Info 9's value is: " + s, 4
End If
JavaScript
JavaScript uses the throw statement to create an exception which, if not nested inside a catch
() construct, will cause the script execution to stop and the On Error tab to be triggered.
var s;
s = Watch.GetJobInfo(9);
if (!s) {
throw 449;
} else {
// Do something with Job Info 9!
Watch.Log("Job Info 9's value is: " + s,4);
}
See also: throw on developer.mozilla.org.
Python
In Python, the raise statement is similar to JavaScript and will stop processing and trigger the
On Error tab unless an except statement is used. See the python documentation.
s = Watch.GetJobInfo(9)
if not s:
raise NameError('Value cannot be empty')
else:
# Do something with Job Info 9!
Watch.Log("Job Info 9's value is: " + s,5)
Perl
In PERL, die stops execution of the script unless the unless command is used, but in order to
raise an exception and trigger the On Error tab, you must nest the die command inside an eval
statement. See the perl documentation.
Page 277

$s = $Watch->GetJobInfo(9);
if ($s eq "") {
eval {die "Value cannot be empty!"};
} else {
# Do something with Job Info 9!
$Watch->Log("Job Info 9's value is: ${s}",4);
}
Special workflow types
PlanetPress Workflow supports multiple input and output types, in so many different
combinations that it would be hard to give example processes for each possibility. However,
some types of processes like PDF and HTTP processes, and processes related to another
product, are important enough to pay some attention to them.
This chapter will describe each of these special workflow types and give at least one example
of an implementation that uses them.
Note
Typical OL Connect workflows are described in PlanetPress Connect's Online Help;
see Workflow processes in OL Connect projects.
HTTP Server workflow
An HTTP workflow receives requests from a client via a GET or POST request, sometimes only
with information, sometimes with attached files. An HTTP workflow is basically an XML
workflow since that is the type of file created by the HTTP Server Input task. See the "HTTP
Server workflow" on the facing page page for more details.
OL Connect Send processes
Connect Send allows for PostScript files to be received over the internet from any Windows
Desktop application. It is in fact an application with two components. The first is a Windows
printer driver while the other is a group of Workflow plugins (Job Processor, Get Job Data and
Get Data). These two components work together indiscriminately, each needing the other to
function.
Page 278

OL Connect Send (see "OL Connect Send" on page760) needs one Workflow process to
handle the job transfer, and in licensed mode it needs at least one other process to interact with
the user. Reports about the use of OL Connect Send might be produced in yet another
Workflow process. For examples of these processes see "Workflow processes in a Connect
Send solution" on page298.
PDF workflow
A PDF workflow uses a PDF as its job file and manipulations are generally made in the
Metadata instead of the PDF itself, since PDF files are much larger than most other data files
compatible with PlanetPress Workflow. The Metadata Tools are extensively used in the
example presented, which is a weekly sales report sent to all the sales associates of a
particular company branch. See the "PDF Workflow" on page287 for more details.
PlanetPress Capture workflow (PlanetPress Suite only)
A Capture workflow is divided in two steps: Creating an output of documents containing the
PlanetPress Capture Fields, and retrieving the information from the Anoto Digital Pen to merge
it with the original documents. See "PlanetPress Capture Workflow" on page289 for more
details.
SOAP workflow
As SOAP can be either a client or a server, two workflows will be presented. The SOAP Client
workflow presents PlanetPress Workflow as the client and will explore how to retrieve WSDL
information and how to make a SOAP request as a client. The SOAP Server workflow will show
how to create a process that responds to SOAP requests, and where our own WSDL is located.
HTTP Server workflow
An HTTP Server workflow is one that has one or more processes that always start with the
HTTP Server Input task and returns something to a client using a web browser. Each process
would have a specific task referred to as an "action", called from the browser itself.
HTTP Server Input tasks are typically used in one of the two following situations:
l
HTML Form Action: An HTML Form in the browser that may contain text and attached
files can be filled and sent to a process with the HTTP Server Input task.
Page 279

l
HTTP Data Submission: A custom application or a server sends the request to
PlanetPress Workflow using either a POST or GET command. The application or server
then waits for a response from PlanetPress Workflow.
PlanetPress Workflow can serve both static and dynamic resources to a web browser, however
it is not meant to be used as a fully featured web server, as it is not built for responsiveness nor
guaranteed uptime. It is much better to have a common web server (for example, IIS or Apache)
to serve your contents and to have PlanetPress Workflow available only to process things only
it can do. For more information on how to serve HTML and PDF generated by Connect through
IIS, watch the Connect with Evie - IIS series.
Tip
Essentially the "NodeJS Server Input" on page352 task does the same as the HTTP
Server Input task, but it uses a NodeJS Server (installed by Workflow) instead of
Workflow's custom server component. The NodeJS Server Input task is more secure,
more up to date and more standardized.
It is configured using its three settings dialogs in the Preferences (Workflow button
>Preferences).
Note
You can control access to the PlanetPress Workflow Tools HTTP Server via the Access
Manager.
Important configuration, setup and options
Before starting to work with HTTP workflows, there are a few key points to keep in mind in
terms of configuration.
First of all, the following options are available in the PlanetPress Workflow Preference screen,
under the HTTP Server Input 1 and HTTP Server Input 2 sections:
l
Port (default value: 8080 recommended): The port number is the one in which a
browser needs to make a request to PlanetPress Workflow. By default in most web
servers, port 80 is used and, when this is the case, it is not necessary to include it. For
Page 280

example, if I type http://www.objectiflune.com/ in my browser, it is actually accessing the
address http://www.objectiflune.com:80/ , but port 80 is always hidden. The reason port
8080 is used by default is to prevent any interference with existing web servers installed
or activated on the same server as PlanetPress Workflow.
l
Time-out (seconds): This determines how long the HTTP Server service will wait for the
process to finish, before returning a time out error back to the client browser. This means
that if a process takes more than 120 seconds (by default) to complete, the browser will
time out. While you can change this value, it is recommended to always keep your
processing to a minimum, since both browsers and users generally frown upon being
stopped for more than a minute, unless they are well aware of this processing time (and
even then...)
l
Enable server for SSL requests: This enables secure communication between the
browser and the server via HTTPS. By enabling this option, you will need to provide for
the proper certificates, key and password. While this configuration is beyond the scope of
this topic, there are plenty of resources on the Internet to explain these systems.
l
Serve HTTP resources: This is where you enable static resources in PlanetPress
Workflow. When enabling this option, the HTTP server will always look in the Resource
Folder for files requested inside of the Resource action name as a folder. This means
that, if your Resource folder is c:\PlanetPress\http and your Resource action name
is static, pointing your browser to
http://127.0.0.1:8080/static/css/style.css will immediately load and
return the file c:\PlanetPress\http\css\style.css . This does not require any
process to work - everything is handled directly by the HTTP Server Input and files are
returned immediately. This feature is very useful when dealing with stylesheets, images,
browser JavaScript, or static HTML files that do not require any processing.
Note
It is possible to serve a default HTML file when no action is specified, for example
http://localhost:8080/ . This is done by creating an index.html file in the Resource
Folder defined above. However, resources called by this index.html must still use the
Resource action name, for example a stylesheet would still point to
http://127.0.0.1:8080/static/css/style.css or more simply static/css/style.css.
Page 281

You also need to take into consideration the options inside each of your processes that start
with the HTTP Server Input task, as they will greatly impact how this process responds. In the
process's properties, the following options will modify HTTP behavior:
l
Self-Replicating Process: This option is critically important when dealing with HTTP
processes. Basically, this means that when HTTP requests are received, the process will
duplicate itself up to the specified maximum number, in order to simultaneously (and
asynchronously) handle multiple requests. See "Process properties" on page869 for
more details.
l
As soon as possible: This option needs to be checked, otherwise requests will not be
handled as they come in (this option is meant to be used on scheduled processes that run
at intervals).
l
Polling Interval (sec): This option determines how much time the HTTP Server Input
waits between the moment it finishes processing a request and the moment it picks up a
new request. This should be put at 0 in order to process requests as soon as possible,
meaning immediately.
And finally, the HTTP Server Input task properties. While these are described in the "HTTP
Server Input" on page330 task properties page, here are a few considerations to keep in mind
when using this task:
l
The HTTP Action corresponds precisely to the name immediately following the first slash
of your address. That is to say, placing the action myaction here means the process
would be triggered by opening http://127.0.0.1:8080/myaction in your
browser.
l The HTTP service accepts both POST and GET requests. Other than the presence of file
attachments, there is little difference in how these are handled. This means that visiting
/myaction?id=12345&q=test would be the same as having a form with two <input>
fields named, respectively, id and q, and submitting them with the information "12345"
and "test". In both cases, this information is located in the XML envelope that is the
original input file of a process that starts with a Server Input task.
l When doing POST requests and uploading files, always make sure to include the
"multipart" option in the <form> tag:
<form action="http://127.0.0.1:8080/myaction" method="POST"
enctype="multipart/form-data">
Otherwise, file attachments will not be received, only their file names.
l The Mime Type option is better left at Auto-Detect unless the process requires it to be
forced to a specific type. This means that if a process can either return a PDF when
Page 282

successful or an HTML page with an error message, it will not attempt to send an HTML
with a PDF mime type (which, obviously, would cause confusion).
l
There is no HTTP Server Output task (see below on how to end your process)
Request/process/response cycle
Once a process using the HTTP Server Input task is created, it is important to understand the
cycle that is triggered when such a process runs. Note that this is the process when the default
HTTP Server Input task options are used (more on how that behavior changes later):
1. A request is received by the HTTP service.
2. This request is converted into an XML request file along with one or more attachments
when present.
3. The XML request file and attachments are saved in a local folder, if the HTTP Action is a
valid one (otherwise, the files are deleted).
4. The HTTP service keeps the request from the client open (it does not yet respond to it),
and waits.
5. The HTTP process corresponding to the HTTP Action captures the XML file and
attachments and the process begins.
6. The process runs its course just like any other process would (including subprocesses,
send to process, etc).
7. The very last job file that is active when the process finishes is then returned to the HTTP
service.
8. The HTTP service returns the file to the client and then closes the connection.
9. If, during this time, the timeout has expired (if the process takes more than 120 seconds),
the HTTP service returns a "timeout" to the client, but the process stills finishes on its
own. When the process finishes, the return file is ignored by the HTTP service.
Point 7 is critical to understand, as it has an impact on what the client receives. If a process
receives a file that is split into multiple parts and each of these parts generates and output, the
last split's output will be sent to the client. If the last output task generates a PostScript file for
printing, this PostScript is returned to the client.
In most cases, what is returned is what remains after the last task, but only if this task's
processing is done in PlanetPress Workflow. For example, if the data file is a text file and this
file is sent to PlanetPress Image using the Image connector, it is a text file that is returned, not
Page 283

the output of the Imaging. Similarly, ending a process with the Delete task does not return an
empty file, it returns the actual data file.
Actually the most used way of returning a response is this: generate an HTML file using either
"Create File" on page312 or "Load External File" on page422, then use the "Delete" on
page656 task as a last output. The HTML is thus returned to the client.
Example HTTP Workflows
l "HTTP PDF Invoice Request" below (GET)
l "HTTP brochure request" on page286 (Customer Information+ POST)
l "Capture Web Manager Workflow" on page296 (Capture + HTTP)
HTTP PDF Invoice Request
This straightforward workflow simply receives a GET request from a browser, loads an existing
PDF invoice from a folder on the hard drive, and returns it to the browser. To do this, a client (or
a web service) would request the following page:
http://ppworkflowserver:8080/getinvoice?in=INV999999
Breakdown of this URL:
l
http:// : transfer protocol. This could be HTTPS if the SSL certificates are activated in the
preferences.
l
ppworkflowserver : name of the machine. This could also be an IP (192.168.1.123) or a
full domain name (www.myserver.com), depending on the connectivity between the client
and PlanetPress Workflow Server.
l
:8080 : The default PlanetPress Workflow HTTP Port, set in the preferences.
l
/getinvoice : The HTTP Action Name, as set in the HTTP Server Input task.
l
?in=INV999999 : A GET Variable, specifying that the variable named invoicenum
(invoice number) would have a value of INV999999 , or any other "valid" invoice number.
Page 284

Process illustration
Task breakdown
l
The HTTP Server Input task receives a request through the /getinvoice HTTP Action.
Because this task either returns an HTML page with an error message or a PDF, the
MIME type is Auto-Detect.
l It checks whether the invoice request exists by checking if the size of the file is less than
1kb using "File Size Condition" on page479. The condition returns "true" if the file is not
found:
c:\PlanetPress\archives\pdf\invoices\xmlget('/request[1]/values[1]/invoicenum
[1]',Value,KeepCase,NoTrim).pdf
Here, the xmlget() function grabs the invoicenum variable from the GET request, which
would be INV999999.pdf in the specified folder.
l If the file is not found, then a simple, basic HTML page is created indicating the invoice
was not found. For this, a "Create File" on page312 task will suffice, followed by the
"Delete" on page656 output task. As mentioned in "HTTP Server workflow" on page279,
deleting the data file only means you are not doing anything with it locally - it is still
returned to the client.
Page 285

Tip
Instead of creating a web page from scratch, you could create a web page from a
Connect Web template; use the "Create Web Content" on page621 task.
l If, however, the file is found, then it is loaded with the "Load External File" on page422
task, and then deleted (for the same reasons).
HTTP brochure request
This workflow builds on the knowledge acquired in "HTTP PDF Invoice Request" on page284
and uses a single process, but in this case it also uses a PlanetPress Design document (see
"PlanetPress Design documents" on page45) which merges the data received from a browser
form with the document to generate a PDF brochure, which is sent via email.
Resources
l
HTTPBrochureRequest.zip (PlanetPress Workflow Configuration)
l InformationBrochure.zip (PlanetPress Design Document)
Installation
l Download both files and unzip them.
l
Open InformationBrochure.pp7 and send it to PlanetPress Workflow.
l
Open HTTPBrochureRequest.pw7 and send the configuration to your local PlanetPress
Workflow service.
l Open your browser to http://localhost:8080/generatebrochure
Task breakdown
l
The HTTP Server Input receives the initial request from the browser.
l Because this is a demonstration, a backup is made of the XML request. It's not suggested
to do this every time, especially on servers receiving a large number of requests, as these
files do take some amount of space for each request.
Page 286

l A condition checks whether the form has been submitted, by verifying that one of the
required fields is empty. If it is, it means this is the initial request, so the condition
becomes true.
l If this is the initial request, an HTML page is created which contains a form asking
the client for a required full name and email, and optional company name. A
checkmark also offers to subscribe to a newsletter (it is unchecked by default!). The
form submits back to the same URL, meaning it is handled by the same process.
l The file is renamed with the .html extension, so that both the HTTP service and the
browser will recognize it as an HTML page. And then, as usual, it is deleted (but still
returned to the browser).
l When the condition is false, it means that there is something in the Full Name field. In this
case, we know that the form was filled and submitted back to the process, and we handle
the request as such.
l First, we add the full name, email and company information to job informations, in order
for them to be available for the rest of the process.
l Then, we have a small condition that verifies if the user checked the "Newsletter" box. If
so, the conditional branch is triggered. Note that this condition is put inside its own branch
because otherwise, the rest of the process would not run when the newsletter is selected.
Since we want both to happen, the branch is there with a "stub" if the condition is false.
PDF Workflow
A PDF workflow, in essence, is one that does not contain any Connect template or Design
document and only uses PDF files as data files. The idea is that a PDF file, because it is a
formatted document in and of itself, doesn't need to go through a merge process before it can
be printed.
PlanetPress Workflow provides a few tasks specifically designed to work with PDFs:
l "Merge PDF Files" on page341
l "PDF Splitter" on page466
l "Create PDF" on page397
In most cases, this kind of workflow also implies the use of Metadata tasks (see "Metadata
tasks" on page560).
You can use Metadata tasks to group, sort and sequence (split) the PDF data. The Create PDF
task will apply the active Metadata to the PDF data file before creating the PDF output.
Page 287

Things to keep in mind while working with Metadata are set forth in another topic: "Working with
Metadata" on page79.
Note
In Connect it is also possible to group, sort and split PDF data using "OL Connect tasks"
on page591.
Example: Daily sales report from PDF files
This workflow makes heavy use of PDF tasks and Metadata, and assumes that you are using
PlanetPress Workflow version 7.3 or higher.
This single process workflow generates a daily sales report for any sales representative inside
of a company which made at least one sale. It does this by capturing the invoices generated
within a specific day, putting all the invoices for each sales representative in a single PDF and
then sending it to the sales representative. It does this using several specific Metadata tasks as
well as a quick lookup in an external Excel spreadsheet.
Resources
l PDF-DailySalesReport-Workflow.zip
Task breakdown
l The initial input is the "Merge PDF Files" on page341, which retrieves and merges all the
PDF files inside of the specified folder. Once a single PDF is created, the task also
optimizes the PDF (to avoid duplicating images and font definitions for each page) as well
as generates a basic Metadata structure containing a single document with one Data
Page per captured PDF.
l The "Metadata Level Creation" on page569 creates the Document level of the Metadata
by placing each PDF data file in its own Document level. It does this by detecting when
the Address in the document changes.
l Then, the "Metadata Fields Management" on page563 adds a few fields at the Document
level in order to properly tag each document with the appropriate information, in this case
the Customer ID, Country and Rep ID. These fields are used for the following Metadata
tasks.
Page 288

l The "Metadata Filter" on page567 follows by removing any invoice that is not in the US.
Note that the Metadata filter is an *inclusive* filter, meaning that the filter includes the
parts of the Metadata where the result of the filter is true, and filters out anything else.
l The "Metadata Sorter" on page572 then re-orders the Metadata documents by Rep ID, so
that all of the invoices for any particular sales representative are all together.
l "Lookup in Microsoft® Excel® Documents" on page499 then uses the Rep ID field to
retrieve each sales representative's email from a specific Excel spreadsheet.
l The "Metadata Sequencer" on page571 acts like a splitter, where the separation
happens whenever the Rep ID changes. Since documents are sorted with that field, each
sequence can contain one or more document, but they will all be for the same Rep ID.
l "Create PDF" on page397 is then used to generate a single PDF for each sales
representative. Because Create PDF works in conjunction with Metadata and because it
can be used in pass-through mode, in this instance it will only take the relevant PDF
pages from the original data file in order to create a single PDF file. Other than the
extraction of these pages, the original concatenated data file is untouched.
l Finally, the output is done using a "Send to Folder" on page681 in this case. Obviously,
this should be a "Send Email" on page677 output, but since we don't want to spam
anyone, instead we place the PDF in a folder with the Rep ID's email as a folder name.
PlanetPress Capture Workflow
PlanetPress Capture, introduced in PlanetPress 7.2 and enhanced ever since, is a set of tools
that is used to simplify digital archiving processes by capturing information from a special pen
which records everything it writes on paper, as long as this paper contains special Anoto
Patterns.
Warning
There are important considerations to keep in mind when dealing with PlanetPress
Capture. Please review them in "PlanetPress Capture Implementation Restrictions" on
page745.
In order to properly build a PlanetPress Capture workflow, it is very important to understand the
terminology, implications and limitations of the technology. This is the first part of this section:
l "PlanetPress Capture Glossary" on page731
l "General considerations" on page734
Page 289

l "Security Considerations" on page736
l "20,000 Patterns" on page738
l "PlanetPress Capture Implementation Restrictions" on page745
There are also 2 external tools that are used to communicate the pen's data to PlanetPress
Workflow:
l "Anoto penDirector" on page743
l "PlanetPress Mobile Application" on page745
Creating a Capture-Ready document
This is done when creating your PlanetPress Design document. Adding one or more
PlanetPress Capture fields to a PlanetPress Design document creates a capture-ready
document, which can be used in the workflow. For more information, see the PlanetPress
Design User Guide.
Generating the Capture Patterns
Once your document is created, the Capture Fields Generator action task is used to apply the
capture patterns to each of your documents and send them to the printer. This printing process
will consist of:
l Retrieving your data file.
l Creating metadata (See "Create Metadata" on page560).
l Separating each individual document in the metadata (this can be done in your Design
document or through the "Metadata Level Creation" on page569 action task).
l Using the "Capture Fields Generator" on page543 action task to generate the capture
patterns
l Printing your documents.
Capturing and Archiving
After the printed documents have been inked with the Anoto Digital Pen, the PGC files from the
pen must be processed and merged with the appropriate documents in the PlanetPress
Capture Database. A workflow process that receives PGC files and reads them in turn consists
of the following actions:
Page 290

l An "HTTP Server Input" on page330 task or "Folder Capture" on page320 task that
receives the PGC.
l The "Capture Fields Processor" on page546, which converts each PGC in an EPS layer,
adds this layer to the PDF in the database, releases patterns and closes documents.
l Optionally, a "Capture Condition" on page538 task to do post-processing using the
Capture Fields data.
l A "Get Capture Document" on page556 action task to retrieve each document in the
database and output a PDF file
l Any existing output such as Output to Folder, email, ftp, etc.
Technical
Because of timeout limitations, it is generally a good idea to use the Send immediate
response to client option of the HTTP Server Input task, especially when processing a
large amount of documents from the pen. Additionally, HTTP Server Processes should
always be self-replicating and have a short polling interval set in their properties.
Managing and Post-Processing
There are a couple of things that can be done even after documents have been inked. As long
as a document remains open, it is still present in the Capture database and be used in a
process:
l The "Find Capture Documents" on page552 input task is used to retrieve a list of
documents under specific criteria.
l
The Capture Condition and Get Capture Document tasks are used to effect post-
processing and retrieve document from the Capture database.
Error Handling
Whenever an error occurs during the Capture Field Processor phase, it is of course important to
be able to handles these errors. For this purpose, the "PGC to PDF Converter" on page558
task was added with PlanetPress 7.4, adding the ability to quickly and directly convert a PGC
file to a blank PDF file containing the ink data as an EPS layer. This is useful when, for
example, data is received for a document that's already been closed.
Page 291
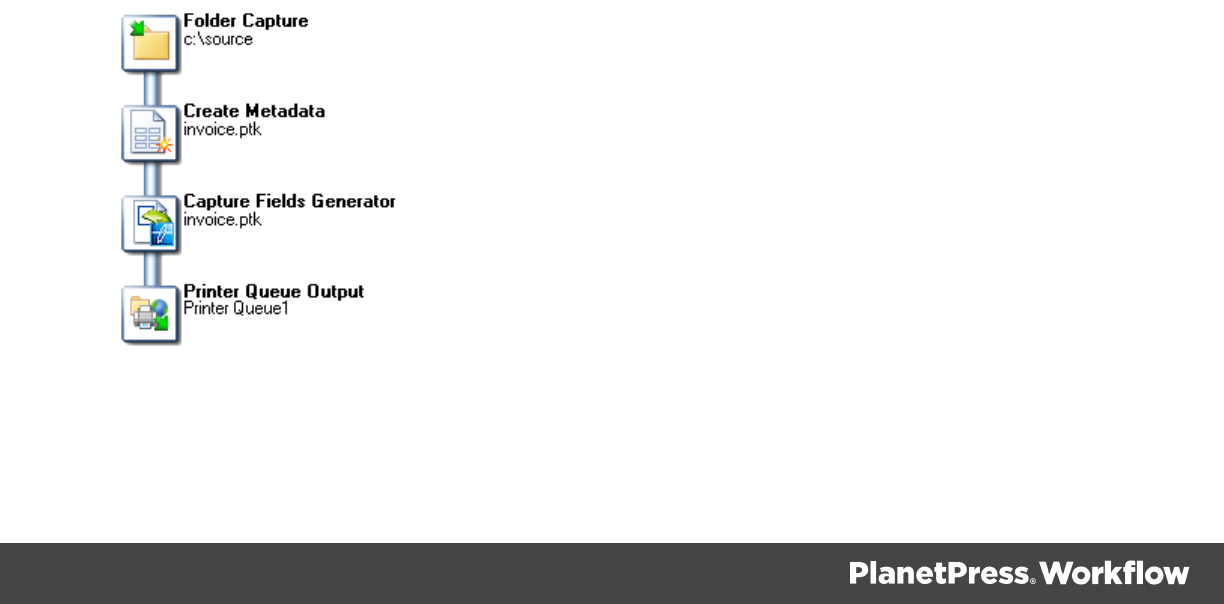
l The "Input Error Bin" on page335 input task is triggered when the process sends data to
the error process.
l A "PGC to PDF Converter" on page558 task converts the PGC to a PDF
l Any existing output is used here, for example an email notification.
The Examples
l "Basic Functional Capture Workflow" below
l "Capture Post Processing Workflow" on the facing page
l "Capture Web Manager Workflow" on page296
Basic Functional Capture Workflow
This workflow is the most basic and simple workflow that you can use with PlanetPress
Capture. In small implementations with only one simple document, this may be the only thing
required for a functional workflow since, even in this simple state, it can be enough to automate
the archive of your digital documents.
Generator Process
The workflow requires two separate processes that will be triggered at different times. The first
process, the generator process, produces printable output by merging a data file with a
Capture-Ready PlanetPress Design document. For each document page produced, an Anoto
Pattern is assigned to the document and locked, and a page is produced in the output.
Depending on the setup used, this may produce on or more print jobs or PDFs as an output.
Page 292

l Any input task
l "Create Metadata" on page560
l "Capture Fields Generator" on page543
l Print output
PGC Handling Process
The second process is the PGC Handling process. It receives data from the Anoto Digital pen,
updates the Capture database and releases patterns as appropriate.
l "HTTP Server Input" on page330 or "Folder Capture" on page320 input task
l "Capture Fields Processor" on page546
l "Get Capture Document" on page556
l Archive or Print output
Capture Post Processing Workflow
Though the "Basic Functional Capture Workflow" on the previous page is minimal functional
one, it will most likely not be enough for most actual implementations. The goal with
PlanetPress Capture (and PlanetPress Workflow in general) being to automate as much as
possible, there are some tools within the PlanetPress Capture tasks that can greatly help with
this goal.
There are two places where post-processing can happen: after the "Capture Fields Processor"
on page546 while handling incoming ink data, or after the "Find Capture Documents" on
page552 task that is part of an automated process or after a user request.
Page 293

Post-Processing is generally done using the "Capture Condition" on page538 task, which
verifies the presence or state of the ink on the document or on specific fields.
After PGC Handling
Here is an example of a process that receives ink data, updates the database, and then verifies
whether or not a field that indicates manager attention is required (for example, a box noting the
wrong number of items in a delivery slip). If attention is required, the document is sent via email
to the manager. Otherwise, the document is simply archived.
Task Breakdown:
l The HTTP Server Input receives a POST request sent either by the Anoto penDirector or
the PlanetPress Mobile Application. This requests contains information sent by the pen
as well as a PGC file as an attachment. Because we're only concerned about the PGC,
the task is configured to ignore the XML envelope as well as loop through each
attachments (of which there is only one). So, the output of the task is the PGC file alone.
Page 294

l The Capture Fields Processor then uses the PGC file to update any documents in the
database that the pen wrote on, and closes those documents in the database when they
are complete.
l Capture Condition is where we can check whether a specific field (a "RequireManager"
field) has ink contained in it, and if it does, the branch on the right is triggered.
l In the branch, Get Capture Document retrieves a PDF version of the document and
sends it as an attachment to an email sent directly to a manager using Send Email.
l Otherwise, Get Capture Document is used again, but this time the PDF is stored in a
SharePoint Server using the Output to SharePoint connector.
After Retrieving Information from the Capture Database
There are two basic ways in which the Find Capture Document task can be used. First, in an
automated process that runs at specified intervals. For example, the following process which
sends a daily report of all incomplete and "in error" documents to an agent who would
presumably take action on each document through the document manager.
Page 295

Capture Web Manager Workflow
This example is both a more involved workflow for Capture, and an interesting implementation
of an HTTP Workflow. Before looking at this example, it would be best to become familiar with
both "PlanetPress Capture Workflow" on page289 and "HTTP Server workflow" on page279.
Page 296

The example is too complex to display as images in this guide, so it is rather available for
download.
Resources
l Capture Web Manager Workflow Configuration (PW7)
l Capture Web Manager PlanetPress Design Document (PP7)
Note
This example is compatible with PlanetPress Workflow 7.4 and higher and will not work
in older versions.
Installation
1. Download both resource files
2.
Create a folder on your disk called c:\PlanetPress
3.
Import the invoice.pp7 Design document into Workflow, or open it in PlanetPress Design
and send it towards your local PlanetPress Workflow server (localhost or 127.0.0.1).
4.
Open the configuration file CaptureExampleProcess.pw7
5.
Click the PlanetPress Workflow button (File menu) and go in Preferences.
6.
In the HTTP Server Input 2 section, check the Serve HTTP resources option, change
the Resource action name box to static , and the Resource folder to
c:\PlanetPress\http . Then, click OK.
7.
Send the configuration to your local PlanetPress Workflow server.
8.
Start PlanetPress Workflow services (see "Start and stop PlanetPress Workflow Service"
on page764).
9. Open your browser and point it to http://127.0.0.1:8080/documentlist, assuming you have
not changed the default HTTP port in the HTTP Server Input 2 section.
Explanation
You can follow along the process by looking at the comments available in each process of the
workflow file. Each comment explains both what the following plugins do, but also how it
Page 297

integrates into the workflow in general and what to keep in mind when doing an actual
implementation of such a process.
Considerations
l The workflow itself is a standalone system that does not interact with any third-party
systems, which of course does not correspond to real customer implementation. A client
will most likely need to communicate with both an ERP system that generates documents
as well as an archive software to store completed documents.
l The HTML, CSS and data file are generated whenever the process starts, in a specified
location, in order to avoid having to distribute multiple static files which would need to be
extracted and moved to a specific folder. In an actual implementation, these files would
probably be edited externally and loaded from a location on the hard drive. However, the
method of using a template to generate output is not so alien to PlanetPress Workflow so
it is not condemned to do so.
l The example doesn't use any advanced coding such as JavaScript, Ajax and caching. It's
easier to follow, but is less optimized in its use than a complex workflow that would use
such features.
Workflow processes in a Connect Send solution
OL Connect Send (see "OL Connect Send" on page760) needs one Workflow process to
handle the job transfer, and in licensed mode it needs at least one other process to interact with
the user. Reports about the use of OL Connect Send might be produced in yet another
Workflow process.
Each OL Connect Send solution will require the Workflow processes to be configured
differently, but certain plugins will always be part of the solution.
Job transfer process
The Workflow process that handles the job transfer starts with an HTTP Input task. The action
name of this HTTP Input task must match the last part of the URL for print job submission set in
the printer driver installer (by default: olcs_transfer).
The Job Processor plugin is the only other task in this Workflow process (see "Job Processor"
on page586).
Page 298

Interactive process
When a job is received in licensed mode, an interactive process is started. This process, which
may consist of several Workflow processes, serves web pages to the customer and handles the
customer's response, changing (settings for) the print job.
A few of the key components in this process are:
l
The HTTP Server Input plugin. The interactive process start with this plugin. The action
name of this HTTP Input task must match the HTTP action for interaction given in the
Connect Send Printer Driver installer (by default: olcs_interaction). (See HTTP Server
Input.)
l
The Get Job Data plugin. Creating interactive processes for incoming print jobs requires
that the relevant information about the respective job is available and can be used in
Workflow. This is what the OL Connect Send Get Job Data plugin is made for. (See "Get
Job Data" on page582.)
l
The Create Web Content plugin. Each web page served by an interaction process is
generated by this plugin. (See Create Web Content.)
l
The Create Preview PDF plugin generates a PDF preview for a single record as fast as
possible. It is typically used for previews embedded in web pages. (See Create Preview
PDF.)
Production report process
The key plugin in a process that produces reports about jobs received with OL Connect Send is
the Get Data plugin. It allows to query the OL Connect Send database. (See "Get Data" on
page577.)
Sample project
The Ad Hoc Mail Consolidation sample project may help you understand the Workflow
processes for OL Connect Send and configure your own.
l
Watch the sample in action on demo.objectiflune.com. Under Ad Hoc Mail
Consolidation, click Demo and follow the instructions. (If you have already installed the
printer driver, you don't have to do that again.) Add a Connect Send printer with the given
settings and print the provided Word file to that printer. The printer will trigger an
interactive process on demo.objectiflune.com.
l Download the sample files from OL's Resource Center:
http://help.objectiflune.com/en/#csend.
Page 299

About Tasks
A task is a plugin or a block that is used to build PlanetPress Workflow processes. Tasks can
do multiple things depending on the type of task and where they are placed. You can add as
many tasks as you like to your processes and order them in any way you can.
There are different types of tasks:
l
Input Task: Will either capture data from a specific location, or wait for input from a
service or other computer to start processing.
l
Action Task: Will manipulate the data in any number of ways. An action task is any task
that is not an input or output task or a branch or condition.
l
Output Task: Will output data to a specific location or send to a different service or
computer.
Some tasks are multipurpose and can be used as either an input, action or output task or any
combination. These multipurpose tasks are indicated as such in the task description and can
be found in the most relevant section of the available tasks.
All plugins can be found in "The Plug-in Bar" on page883.
For more information on the tasks that are by default available to you in PlanetPress Workflow,
see the following pages:
l "Input tasks" on page309
l "Action tasks" on page379
l "Data splitters" on page452
l "Process logic tasks" on page472
l "Connector tasks" on page491
l "PlanetPress Capture" on page730
l "Metadata tasks" on page560
l "OL Connect tasks" on page591
l "OL Connect Send" on page760
l "Document Management tasks" on page682
Page 300

l "Output tasks" on page655
l "Unknown tasks" on page716
Note
Completely empty files (0 bytes) cannot be processed by Workflow.
In fact, the PlanetPress Workflow plugin based architecture enables almost limitless
customization. You can create or purchase compatible plugins, drop them in PlanetPress
Workflow's Plug-In Bar and use them to perform other operations.
Adding tasks
You can add as many tasks as you want to your process by using the Plug-in Bar in
PlanetPress Workflow program.
To insert a task:
1.
Open the Plug-in Bar by clicking on its tab. If you can't see the Plug-in Bar tab, click on
the View tab in the Ribbon and make sure the Plug-in Bar is highlighted in the
Show/Hide section.
2. Locate the task you want to add to your process. You can navigate between the different
task categories by clicking the icons at the bottom of the Plug-in Bar.
3. Using your mouse, click and drag the task in your process at the place you want to insert
it.
4. Depending on where you place your mouse, you may see that you can replace or insert
existing tasks, or not place it at that location at all.
5. When you drop the task in the desired location, a dialog box containing the available task
properties is displayed.
6. Set the task properties as required and click OK to close the dialog box.
There are a few things to keep in mind when dropping tasks:
Page 301

l You can insert input tasks anywhere in the process except in output task locations.
l When you add an output task, a new branch leading to that new task is added above the
selected task or branch, except when replacing an existing output task.
l Dropping a task on top of another one replaces it.
l Dropping a task between two tasks will insert it at that location.
l You cannot add a task above the initial input task of a process, since new tasks are
always added above a selected task or branch.
Editing a task
To edit a task, you simply need to access and change its properties (see "Task properties"
below). You may even do it while your process is in Debug mode (See "Debugging your
PlanetPress Workflow process" on page107).
To edit a task:
1.
In the PlanetPress Workflow Process area, double-click the Task icon. A dialog box
containing the available task properties is displayed.
2. Edit the task properties as required. Click specific tabs to see all the properties associated
with the task.
3.
Click OK to close the dialog box and save the new properties.
Note
For the list of operations you can perform on tasks in a process via the Process area,
please refer to "The Process area" on page885.
Task properties
Any task you add to your PlanetPress Workflow process must be configured using its
Properties dialog. It appears as soon as you add a task to a process, or when you double-click
on a task.
Each task's Properties dialog will give you the options to configure that specific, individual task.
Properties of one task do not directly affect the properties of another task, however there are
some software preferences that may affect tasks in one way or another (see "Preferences" on
page769).
Page 302

Each task has its own set of tabs available, though some tabs are common to most tasks.
l
Most tasks have the General tab which lets you configure the main task properties for that
specific task.
l
All tasks except for the InputErrorBin, Run Script, Open XLST and Comment tasks
have an On Error tab that lets you manage errors generated by the task. For a description
of the options that it contains, see "Using the On Error tab" on page100.
The error management system (the On error tab and the Error Bin Input task), however,
is only triggered when there is an error within the task functionality - that is, a plugin error.
These kinds of errors are triggered if the plugin cannot communicate with a service,
another task, if the plugin crashes, etc.
l
All initial Input tasks have the Other tab which lists Job Infos (see "Job Info variables" on
page717) and lets you back up the job file (see "Job file" on page53).
l
The Comments tab is common to all tasks. It contains a text area (Task comments) that
lets you write comments about the task. These comments are saved when the dialog is
closed with the OK button, and are displayed in "The Task Comments Pane" on
page898.
Some Action, Create Content and Output tasks let you select a resource file to use with the
task; for more information see "Selecting a resource file in task properties" on page307.
Variable task properties
When you edit tasks, you may notice that some of the properties that you can modify have a red
(or more precisely, a maroon) title. This means that the property can be dynamically determined
whenever your process runs, that is to say it will not remain static. This can be extremely useful
when, for example, you want to determine how many copies you will print out depending on
your data, or what document will be used in the printout depending on the department it came
from.
Variable properties may include:
l Static data.
l System variables. See "System variables" on page719.
l Local and Global Variables. See "Local variables" on page724.
l Job Infos. See "Job Info variables" on page717.
l Data and Metadata Selections. See "Data selections" on page55.
Page 303

l Printer Control Characters. See "Shared printer queue properties" on page114. These
are normally only used in printer outputs.
Variable properties can also be used in these special locations:
l In the Set Job Infos and Variables Action Task. See "Set Job Infos and Variables" on
page441.
l In Scripts. See the chapter on "Using Scripts" on page141.
l In the Create File Input Task. See "Create File" on page312.
l Within a PlanetPress Design Document, using the ExpandString() function. See the
PlanetPress Design User Guide and PlanetPress Talk Reference Guide.
Variable properties can also be mixed, meaning you can combine, within a single variable
property box, any number and order of variable types. You can, for example, do the following for
an output file name: %O_@(1,1,1,30, KeepCase,Trim)_%y-%m-%d.txt. This would translate in
the original file name, followed by part of the first line of a text data file, then the current date.
Inserting variables in task properties
In any variable properties box, you may use the contextual (right-click) menu to add variables
and control characters, as well as to get data and make data selections. The lower part of the
contextual menu is divided into 4 items that provide variable properties:
l
Variables
l
System: Contains standard system variables, see "System variables" on page719.
l
Job Info: Contains Job Info variables from %1 to %9
l
Local Variables: Contains a list of local variables in this process. If no local
variables exist, this item is disabled.
l
Global Variables: Contains a list of global variables in this configuration. If no
global variables exist, this item is disabled.
l
Control Characters: Contains a list of control characters that can be used in printers.
l
Get Data Value: Brings up the Data Selector, retrieves the value you select and places it
in the variable properties box. This information becomes static and does not change
between each datapage and job file.
l
Get Data Location: Brings up the Data Selector and records your selection. The data
selection is dynamic, meaning it will get the data located in the area you choose, every
Page 304

time a new data file passes through it. This is indicated by a data selection (see "Data
selections" on page55).
l
Get Metadata Value: Brings up the Data Selector with only the Metadata tab visible and
lets you select the value (contents) of a Metadata attribute or field. The result is static and
does not change between jobs.
l
Get Metadata Location: Brings up the Data Selector with only the Metadata tab visible
and lets you select the location of the data. The result is variable and changes between
jobs.
l
Get Repository Value: Brings up the "Data Repository Manager" on page854 dialog to
select the value (contents) of a specific key. The result of the lookup is static.
l
Get Repository Location: Brings up the Data Repository Manager dialog to select the
location of the key to lookup every time this task is executed.
You can quickly identify variable information that is already present in your variable properties
as such:
l
A percentage sign identifies system variables, as well as standard and custom job info
variables — %f, for example.
l
A backslash indicates a control character — \004, for example.
l
An at sign (@) indicates a data selection for emulations other than database — @
(1,1,1,1,17,KeepCase,Trim), for example.
l
Field indicates a data selection for a database emulation — field(1,0,0,'Billing_
Email',KeepCase,NoTrim), for example.
l
The lookup() function indicates a lookup in the "Data Repository Manager" on page854.
Masks
Certain tasks, such as the Folder Capture Input task and the File Name Condition task, allow
for entering a mask instead of a file name. See "Masks" on the next page.
Date and Time Format
To simplify things and to prevent errors, date and time formats have been standardized.
l Dates are entered and displayed as yyyy/MM/dd (2007/06/13, for example).
l Times are entered and displayed using the 24 hour format as HH:mm:ss (3:38:54 PM, for
example, is entered and displayed as 15:38:54).
Page 305

Masks
A file name that includes characters meant to be replaced at run-time is referred to as a mask.
Masks can be used in many edit boxes and can be used, for instance, to select multiple files.
File selection is typically limited by fixed characters or special wildcard characters. If you create
a Folder Capture Input task and enter *.* in the Masks box, the Input task will grab all the files
that are put in the source folder. If you enter *.mdb instead, the task will only take those
database files that have an mdb extension. You can use any standard wildcard character in
PlanetPress Workflow.
Note
Masks are case-insensitive, since the Windows platform does not support case-sensitive
file names (yes, you can have mixed case in a file name but that's visual fluff - the OS
itself does not care).
Tip
You can specify multiple masks in one edit box if you separate them with a semicolon (;).
For example: *.xml;*.pdf.
Mask Format
Here are the different mask formats available.
l
Literal characters: Any alphanumerical character is considered a literal character and
must appear. For example, a mask of "trigger.txt" will not capture any other files than that
name.
l
Wildcards: Two wildcards are available in masks.
l
Asterisk (*): Supports any number of characters. *.txt would pick up any text file,
file*.txt would pick up any file starting with file and any characters: file1.txt,
filetest.txt.
l
Question Mark (?): Supports a single character. file?.txt would pick up File1.txt or
filea.txt, but not file13.txt or filetest.txt.
Page 306

l
Brackets: Specifies a set of supported characters, or range of characters. Only one
character from the range is accepted, making this a subset of the ? wildcard.
l
Sets: [13ab] defines support for one of these 4 characters; file[13ab].txt would pick
up file1.txt , filea.txt , but not file13.txt or filea3.txt.
l
Negative Sets: [!13ab] indicates the character should NOT be part of the set. file
[!13ab].txt would pick up file2.txt and filec.txt but not file1.txt or fileb.txt (nor would
it pick up file13.txt or filea3.txt).
l
Ranges: [1-5] , [a-d] define ranges between the characters. file[1-5].txt would pick
up file1.txt and file4.txt but not file6.txt or file13.txt.
l
Negative Ranges: Negative ranges such as [!2-4] are also possible.
Note
File names containing brackets can be a hassle when attempting to capture them with a
mask and using sets or ranges. You can capture a set that contains an opening bracket (
[[] ) , but not a closing bracket as the closing bracket always ends the set or range. There
is no escape character available in masks.
Selecting a resource file in task properties
The Properties dialog of some Action, Create Content and Output tasks lets you select a file.
Depending on where the selection list appears you will have access to the Connect Resources
("Connect resources" on page41), all PlanetPress Design documents ("PlanetPress Design
documents" on page45) or only to the PlanetPress Design documents installed on a printer
queue.
In most cases, you have three options:
l You can choose a specific file from the list of installed documents (see "Workflow
Configuration resource files" on page40); these will be either Connect resources, or
PlanetPress Design documents, depending on the task.
l You can choose a variable file (see below).
l You can choose not to use any document (only in certain cases). If an Output task was
originally designed to merge a PlanetPress Design document with data, this means no
document is merged with the data and the job file is sent as is.
Page 307

Variable file name
The variable file name feature is used to dynamically determine which file is used with the
task. The file name can be constructed using any variable (see "Variable task properties" on
page727).
To insert a variable file name:
1. Click on the %o entry in the document list
2. Right-click to insert variables using the contextual menu, or type the variables.
3.
Click OK on the dialog.
Note
At run-time, if PlanetPress Workflow cannot find the document name generated by those
variables, the task will fail.
Page 308

Input tasks
Input tasks are the starting point to any process and determine what file this process will being
with. Each process must begin with an Input task, and although a given process may have
multiple Input tasks, no task can have more than one initial Input task.
Initial Input tasks
Initial Input tasks are always at the beginning of a process and are always triggered when the
process starts. The process itself may start on a schedule or poll at regular intervals, which
means the initial Input task only runs whenever the process is set to run. For more information
about what happens outside of the process scheduled times and to learn how to set the
schedule, see "Process properties" on page869.
Note
If an error occurs during an initial Input task, the On Error tab is never triggered. See
"Using the On Error tab" on page100.
Input tasks may either poll a specific location, or wait for jobs to be sent to a specific
PlanetPress Workflow Service. It is not recommended to have two Initial Input tasks capturing
the same input location, for the following reasons:
l It is a "hit and miss" to know which of the two tasks will pick up the file. This is an issue if
the two processes are different.
l One of the processes may process a file quicker than another and finish first, which may
be an issue if the processing relies on FIFO (First In, First Out).
l One process may error out as it's trying to capture an input that's currently being read by
another one. This causes issues if the process is on a schedule and only runs once per
period.
It is important to note that Initial Input tasks process files one at a time, and will return to the
Input task once the current file has finished processing. Each time it returns to the Input task, it
again only captures one single file. It does this until there are no more files in the folder and will
also capture any new file that was added during the time it processed other files. Once no more
files are found, it stops processing until it is scheduled to run again.
Page 309

This is an important consideration when scheduling a task, as the Folder Capture task will keep
capturing files as long as new files are added, even if it means continuing to capture and
process outside its scheduled time. It is also important that while the Folder Capture input task
is processing files it keeps a copy of each file in a temporary folder, and will not delete any of
these files until it has finished processing all of them. This may cause issues with running out of
disk space.
Secondary Input tasks
Secondary Input tasks are placed in the process like an Action task would and will replace the
job file in the process with the file they retrieve. Since they are part of the process, they can use
data from previous tasks to pull data from a variable location. Secondary Inputs do not follow a
separate schedule from the process - they are automatically run when the process triggers
them.
Considerations
l If your initial Input task does not start, either because there is no data to capture or
because the process is out of its schedule, any secondary Input task will not run either.
l Secondary Input tasks replace both the job file and the job info variables. They do not
change local and global variables.
l If your secondary Input task creates a job file using a different emulation, you will need to
use a "Change Emulation" on page392 task after the secondary Input task to correctly
change to that emulation. (For more information about emulations, see "About data
emulation" on page61.)
Properties common to all input tasks
The Other tab in the Task Properties dialog (see "Task properties" on page302) is common to
all Input tasks.
"Other" Tab
l
Job Information group
l
Information elements: Indicates what Job Info variables are automatically created
by the input task.
l
Add lines before first data page: Using the arrows keys you can add any job
information directly at the beginning of your data file.
Page 310

l
Backup input files: Check this to save a copy of each data file that is captured by your
input. These files are saved in the PlanetPress Workflow Tools working folders under
the "Backup" folder.
To navigate quickly to the Workflow working folders, press the keyboard shortcut
CTRL+ALT+Shift+F4 from within the Workflow configuration tool.
The number of days to keep backups of jobs processed by input tasks is set per process;
see "Process properties" on page869.
l
Backup filename: Enter the file name that you wish the input data file backup to be saved
under.
l
Delete Existing Metadata: Check to remove any Metadata from memory. This option is
disabled on initial input tasks, and is checked by default on secondary input tasks.
Available Input tasks
l "Create File" on the next page
l "Email Input" on page314
l "File Count" on page475
l "Folder Capture" on page320
l "Folder Listing" on page323
l "FTP Input" on page326
l "HTTP Client Input" on page328
l "HTTP Server Input" on page330
l "Input Error Bin" on page335
l "Input SOAP" on page337
l "LPD Input" on page339
l "Merge PDF Files" on page341
l "Microsoft 365 Email Input" on page344
l "Microsoft 365 OneDrive Input" on page349
l "NodeJS Server Input" on page352
l "PrintShop Web Connect" on page360
l "Secure Email Input" on page362
l "Serial Input" on page366
l "SFTP Input" on page368
l "SMTP Input" on page372
Page 311

l "Telnet Input" on page375
l "WinQueue Input" on page377
The SFTP Input task also appears in the Input category when it is installed. (It isn't installed by
default.)
Create File
Create File input tasks are different from other input tasks in that they do not pull in data from a
source location. The data that this task passes along to other task is its own: text or values from
variables entered when the task was created or last edited.
Since Create File input tasks are not dependent on data from external sources, they are
performed at every polling interval and the process is thus started every time.
This task is put into effect in the following use cases and example processes:
l HTTP PDF Invoice Request
l HTTP Brochure Request
Input
Create File does not capture any file and, if it is a secondary input task, discards the current
data file.
Processing
Create File generates a job file with the contents of its text. If variables and control characters
are present, they are evaluated at run-time when the task is executed.
A file created with the Create File plugin will be encoded with the ISO 8859-1 (ISO Latin-1)
table.
Output
The output is the job file. No metadata is generated by the task itself, however if metadata is
present in the job and it is not deleted (in the "Other" tab), it will remain active.
Page 312

Task properties
General Tab
l
Create File: Enter the text to use as the data. The Create File box is a Variables
Properties box, so you can use any of the variables, control characters or data selections
as noted in "Variable task properties" on page727.
l
Add CRLF after last line: Check if you want the plugin to automatically add a new line at
the end of the file. Remove the checkmark to leave the file as-is, useful in the creation of
CSV files for example.
l
Delete Metadata: Check to delete any metadata attached to your data file.
"Other" Tab
l
Job Information group
l
Information elements: Indicates what Job Info variables are automatically created
by the input task.
l
Add lines before first data page: Using the arrows keys you can add any job
information directly at the beginning of your data file.
l
Backup input files: Check this to save a copy of each data file that is captured by your
input. These files are saved in the PlanetPress Workflow Tools working folders under
the "Backup" folder.
To navigate quickly to the Workflow working folders, press the keyboard shortcut
CTRL+ALT+Shift+F4 from within the Workflow configuration tool.
The number of days to keep backups of jobs processed by input tasks is set per process;
see "Process properties" on page869.
l
Backup filename: Enter the file name that you wish the input data file backup to be saved
under.
l
Delete Existing Metadata: Check to remove any Metadata from memory. This option is
disabled on initial input tasks, and is checked by default on secondary input tasks.
Job Information definitions
This task does not generate any job information.
Miscellaneous Tab
The Miscellaneous tab is common to all tasks.
Page 313
Check the option Use as step description to display the text next to the icon of the plugin in
the Process area.
Email Input
The Email Input task retrieves email data through a Microsoft Outlook or POP3 connection.
Note
If Microsoft Outlook connection is used, Microsoft Outlook 2000 or higher must be
installed on the computer where PlanetPress Workflow is located.
Input
Email Input captures all emails and their attachments from the selected inbox, when those
emails correspond to the rules defined in the General tab. If no rule is defined, all emails in the
inbox are retrieved. Emails retrieved using POP3 are deleted from the server, emails retrieved
from an Outlook inbox are moved to the Deleted Items folder by default.
Processing
Depending on the options selected below, each email is converted into a text-only data file, and
each attachment is separated from the email.
Output
Depending on the options, each email is sent as a data file, followed by each of its attachments
sequentially.
Note
If you use Email Input tasks to capture data encoded using a Double-Byte character set
(such as those used for Japanese or Chinese, for instance), it is preferable to use
attachments rather than the email body to carry the data from its source to the input task,
as data corruption is less likely to occur using this method.
Page 314

Task properties
General Tab
l
Data Location group
l
Message body: Select to use the data found in the body of the email.
l
Attached file: Select to use the data found in the email’s attachment. If both the
Message body and Attached files options are selected, the message’s body and the
message’s attachment are treated as separate data files and processed one after
the other.
l
Unzip attached file: Select to unzip the attached files.
l
Zip password: Enter the password required to unzip the attached files (if any).
Note that you can use variables and data selections.
l
Conditions group
l
“Subject” contains: Select to limit those messages used by this task to those with
a specific subject. The subject you enter in the box below can include variables.
Note
Since characters '?' and '*' are considered valid to define the subject of an
email, their use as wildcards is not supported .
l
Nothing: Select to limit those messages used by this task to those that do not
specify any subject.
l
“From” contains: Select to limit those messages used by this task to those that are
sent from a specific address. The address you enter in the box below can include
variables.
l
“To” contains: Select to limit those messages used by this task to those that are
sent to a specific address. The address you enter in the box below can include
variables.
Page 315

Login Tab
l
Use Microsoft Outlook: Select to use the Microsoft Outlook email account of the current
user to receive emails. The current user is the one defined in PlanetPress Workflow
Service Logon.
l
Move message after processing to folder: Enter the name of an Outlook Folder to
keep copies of the emails taken by this email input task. You should enter only the
name of the folder as it appears in Outlook’s Folder List area, regardless of whether
it is a child of another folder. For example, if you want to use a folder named Bills
that is listed under another folder named PassedDue, only enter Bills in the text box.
Make sure no two folders have the same name, even if they are under different
parent folders, as this could generate errors. Consider creating a special folder in
Outlook (perhaps a child of the Deleted Items folder named Watch) and then using
that folder as your backup folder.
l
Use POP3 mail group
l Select this option to use a POP3 mail server and to activate this group. Note that
emails retrieved via POP3 are always deleted from the server.
l
Incoming mail (POP3): Enter the address of the incoming POP3 mail server. This
box is only enabled when the Use POP3 mail option is selected.
l
Account name: Enter the email account name on the POP3 mail server. This box is
only enabled when the Use POP3 mail option is selected.
l
Password: Enter the password required to unlock the selected account on the
POP3 mail server. This box is only enabled when the Use POP3 mail option is
selected.
"Other" Tab
l
Job Information group
l
Information elements: Indicates what Job Info variables are automatically created
by the input task.
l
Add lines before first data page: Using the arrows keys you can add any job
information directly at the beginning of your data file.
l
Backup input files: Check this to save a copy of each data file that is captured by your
input. These files are saved in the PlanetPress Workflow Tools working folders under
the "Backup" folder.
To navigate quickly to the Workflow working folders, press the keyboard shortcut
Page 316

CTRL+ALT+Shift+F4 from within the Workflow configuration tool.
The number of days to keep backups of jobs processed by input tasks is set per process;
see "Process properties" on page869.
l
Backup filename: Enter the file name that you wish the input data file backup to be saved
under.
l
Delete Existing Metadata: Check to remove any Metadata from memory. This option is
disabled on initial input tasks, and is checked by default on secondary input tasks.
Job Information definitions
l
%1 - Date received. Contains the date of the reception of the email (and not the date of
retrieval by PlanetPress Workflow). The format is YYYY/MM/DD HH:MM:SS.
l
%2 - Sender's name: Contains the name of the sender as defined by the sender himself
(or, if the sender is using Exchange, by the name defined in his Exchange server).
l
%3 - Sender's address: Contains the email address of the sender as defined by the
sender himself.
l
%4 - Subject: Contains the subject of the received email (may be blank).
l
%5 - Recipients:Contains a list of the names of all the recipients of the email, separated
by a semicolon (;).
l
%6 - Header: Contains the header of the received email.
l
%7 - Attachment Count: Contains the number of attachments of the email. A ZIP file is
counted as 1 attachment. Some embedded images may be counted as attachment. The
body of the email does not count as an attachment.
Note
Because of the way Microsoft Exchange works, when receiving an email from a user on
the same local Exchange server, the email address may not be available. See FAQ-1509
in the Knowledge Base of PlanetPress Workflow.
Miscellaneous Tab
The Miscellaneous tab is common to all tasks.
Page 317

Check the option Use as step description to display the text next to the icon of the plugin in
the Process area.
File Count
File Count tasks check if a target folder contains a specified number of files. They can be used
as Condition task or as Input task.
When used as Input task, the task triggers the process to run only when the condition is true. As
long as the condition is false, it does nothing (except log any errors).
Setting the file count to 0 allows to take action, for example, when a scheduled process is
expected to have files but it doesn't.
Processing
At run time, the number of files in the folder is compared to the specified value, using the
specified operator.
If the folder or file count value is invalid and the task is used as Input task, the process does not
run. If it is a Condition task, it returns False. No error is generated.
Output
Job Information definitions
When used as Input task, the File Count task sets the following Job Info variables.
l
%1 - FolderName. The target folder.
l
%2 - Mask. The specified mask.
l
%3 - FileCount: The specified file count.
Task properties
General Tab
l
Target folder: Enter the full path of the folder from which the input files are to be taken, or
use the Browse button to select it. Note that subfolders are not processed.
This is a variable property field. You can use any combination of text, variables and data
Page 318

selections; see "Variable task properties" on page303.
l
Masks: Enter a single or multiple file names or use file name masks (see "Masks" on
page306). Multiple filters are separated by a semicolon (e.g. *.csv;.xls*).
This is a variable property field. (See "Variable task properties" on page303.)
l
Treat as regular expressions: When ticked, the contents of the Mask field are
deemed to be a regular expression . You can specify multiple masks based on
regular expressions, separating the regular expressions by a semicolon.
Please refer to Regular Expressions for more information.
Note
No Variable Data can be used inside this field if the Treat as regular expressions
option is ticked. The percent sign, the curly brackets and the period are all key
elements of the RegEx syntax, therefore they cannot be mixed and matched with
Workflow variable data syntax (e.g. %1, ${global.myvar}, etc.). Also, there is no
validation of the RegEx being specified.
l
File count: Select whether the condition is to check if the file count is equal to, less than,
greater than, less than or equal to, or greater than or equal to the specified value.
l
Value: Enter the desired file count. This is a variable property field. (See "Variable task
properties" on page303.)
Advanced properties
To get access to the following properties tabs, right-click the plugin in the process and select
Advanced Properties.
"Other" Tab
l
Job Information group
l
Information elements: Indicates what Job Info variables are automatically created
by the input task.
l
Add lines before first data page: Using the arrows keys you can add any job
information directly at the beginning of your data file.
l
Backup input files: Check this to save a copy of each data file that is captured by your
input. These files are saved in the PlanetPress Workflow Tools working folders under
Page 319

the "Backup" folder.
To navigate quickly to the Workflow working folders, press the keyboard shortcut
CTRL+ALT+Shift+F4 from within the Workflow configuration tool.
The number of days to keep backups of jobs processed by input tasks is set per process;
see "Process properties" on page869.
l
Backup filename: Enter the file name that you wish the input data file backup to be saved
under.
l
Delete Existing Metadata: Check to remove any Metadata from memory. This option is
disabled on initial input tasks, and is checked by default on secondary input tasks.
Miscellaneous Tab
The Miscellaneous tab is common to all tasks.
Check the option Use as step description to display the text next to the icon of the plugin in
the Process area.
Folder Capture
Folder Capture input tasks retrieve files corresponding to a specified file mask, from a
specified folder.
Input
Folder Capture retrieves all files corresponding to the specified mask. These files may be of
any format, even formats that are not readable by PlanetPress Workflow.
Note
As with any task that can refer to network resources, it is important to understand the
considerations involved with paths and permissions of these resources. Please refer to
the "Network considerations" on page22 page.
Page 320

Warning
If you create a Folder Capture input task that takes any file it finds in the root folder of
one of your hard disks, then PlanetPress Workflow will try to remove all the files located
in that folder, including all the system and hidden files. So when using a Folder Capture,
be aware of where you are capturing.
Processing
Each file capture by the input is sent down through the process, one at a time. When the file is
finished, the process goes back to the input which feeds another file down, as long as there are
files in the queue. Once all the files are gone, the task polls the input folder again to see if new
files are present and, if so, the process continues with these files. Otherwise, the process ends.
Output
The output to this task is a series of individual files, one after the other. These files are not
modified in any way from when they are captured from the source folder.
Task properties
General Tab
l
Folder list: Enter the full path of the folder from which the input files are to be taken.
l
Masks: Enter a single or multiple file names or use file name masks. See "Masks" on
page306.
l
Treat as regular expressions: When ticked, the contents of the Mask field are
deemed to be a regular expression . You can specify multiple masks based on
regular expressions, separating the regular expressions by a semicolon.
The checkbox is not ticked by default. Please refer to Regular Expressions for more
information.
Note
No Variable Data can be used inside this field if the Treat as regular expressions
Page 321

option is ticked. The percent sign, the curly brackets and the period are all key
elements of the RegEx syntax, therefore they cannot be mixed and matched with
Workflow variable data syntax (e.g. %1, ${global.myvar}, etc.). Also, there is no
validation of the RegEx being specified.
l
Sort files by: Select a given sorting method to prompt PlanetPress Workflow to sort the
files in the source folder before taking them (and thus to take them in a specific order).
Select None to let PlanetPress Workflow take the files without sorting them first.
l
Sort order: If you selected a sorting method in the Sort files by box, select the order in
which you want the files to be sorted.
l
Use archive attribute: Select to turn on the archive attribute of the data files found in the
source folder and to leave them in their original location (i.e. to take copies of the source
files). Note that PlanetPress Workflow never takes source files that have their archive
attribute turned on (so the source files will not be taken again and again). When this
option is turned off, PlanetPress Workflow removes data files from the source location.
l
Capture files in subfolders: Select to capture files from child folders of the source folder
as well.
l
Sort directories first: If you selected a sorting method in the Sort files by box, and if you
want the folders present in the source folder to be sorted first, select this option. When this
option is selected, the chosen Sort order is applied to each separate folder, not across
folders. The subfolders themselves are always processed in alphabetical order,
regardless of the sort order.
l
Include hidden files: Select if you want any hidden folders or files present in the source
folder to be taken as well.
l
Include empty files: Select if you want any empty folders or files present in the source
folder to be taken as well.
"Other" Tab
l
Job Information group
l
Information elements: Indicates what Job Info variables are automatically created
by the input task.
l
Add lines before first data page: Using the arrows keys you can add any job
information directly at the beginning of your data file.
Page 322

l
Backup input files: Check this to save a copy of each data file that is captured by your
input. These files are saved in the PlanetPress Workflow Tools working folders under
the "Backup" folder.
To navigate quickly to the Workflow working folders, press the keyboard shortcut
CTRL+ALT+Shift+F4 from within the Workflow configuration tool.
The number of days to keep backups of jobs processed by input tasks is set per process;
see "Process properties" on page869.
l
Backup filename: Enter the file name that you wish the input data file backup to be saved
under.
l
Delete Existing Metadata: Check to remove any Metadata from memory. This option is
disabled on initial input tasks, and is checked by default on secondary input tasks.
Job Information definitions
l
%1 - Source File Name. Contains the file name (including the path and extension) of the
file name that is captured.
l
%2 - Folder: Contains the folder from which the data was captured.
Miscellaneous Tab
The Miscellaneous tab is common to all tasks.
Check the option Use as step description to display the text next to the icon of the plugin in
the Process area.
Folder Listing
Folder Listing input tasks list the files present in a selected folder and give you the option to
use filename masks, to sort files by name or date, and to list the files present in the selected
folder’s subfolders. The lists it generates are in XML format.
Input
Folder Listing captures nothing, however it does read the input folders (and, if selected,
subfolders) and gathers information about each file in that folder.
Page 323

Processing
Folder Listing loops through the files and, for each file, generates an XML node with information
about the file.
Output
The output is an XML file containing information about each file. If the Sub-directories option
was checked, the structure of the XML also contains the folder structure as it is present on the
drive.
Here is a sample of the XML that is generated:
<?xml version="1.0" encoding="windows-1252"?>
<files count="3" filemask="*.*">
<folder>C:\Samples\<file>
<filename>invoice.pdf</filename>
<path>C:\Samples\</path>
<time>2012/06/01 16:14:40</time>
<size>81452</size>
</file>
<file>
<filename>test1.pdf</filename>
<path>C:\Samples\</path>
<time>2013/01/17 09:13:50</time>
<size>20197</size>
</file>
</folder>
<folder>C:\Samples\manuals\<file>
<filename>usermanual.pdf</filename>
<path>C:\Samples\manuals\</path>
<time>1999/10/06 09:52:04</time>
<size>644037</size>
</file>
</folder>
</files>
Page 324

Note
The <time> tag is independent of the OS locale, language or settings. The format is
always
YYYY/MM/DD 23:59:59
.
Task properties
General Tab
l
Input folder: Enter the path of the folder that contains the files you want listed.
l
Sorted by: Select either Name or Modified date, depending on how you want the list top
be sorted.
l
File mask: Edit the default file name mask (*.*) if you want only some of the files present
in the folder to appear in the list. See "Masks" on page306.
l
List files in sub-directories also: Select this option if you want the task to list any files
present in subfolders of the selected input folder.
"Other" Tab
l
Job Information group
l
Information elements: Indicates what Job Info variables are automatically created
by the input task.
l
Add lines before first data page: Using the arrows keys you can add any job
information directly at the beginning of your data file.
l
Backup input files: Check this to save a copy of each data file that is captured by your
input. These files are saved in the PlanetPress Workflow Tools working folders under
the "Backup" folder.
To navigate quickly to the Workflow working folders, press the keyboard shortcut
CTRL+ALT+Shift+F4 from within the Workflow configuration tool.
The number of days to keep backups of jobs processed by input tasks is set per process;
see "Process properties" on page869.
l
Backup filename: Enter the file name that you wish the input data file backup to be saved
under.
l
Delete Existing Metadata: Check to remove any Metadata from memory. This option is
disabled on initial input tasks, and is checked by default on secondary input tasks.
Page 325

Job Information definitions
l
%1- Folder: Contains the full path of the base folder from which the files are listed.
Miscellaneous Tab
The Miscellaneous tab is common to all tasks.
Check the option Use as step description to display the text next to the icon of the plugin in
the Process area.
FTP Input
FTP Input tasks retrieve files from FTP sites using the FTP protocol. Masks are typically used
to select multiple files to be retrieved from the server.
Input
FTP Input connects to the specified FTP server and path, and retrieves all files corresponding
to the specified mask. These files may be of any format, even formats that are not readable by
PlanetPress Workflow.
Processing
Each file capture by the input is sent down through the process, one at a time. When the file is
finished, the process goes back to the input which feeds another file down, as long as there are
files in the queue. Once all the files are gone, the task polls the FTP folder again to see if new
files are present and, if so, the process continues with these files. Otherwise, the process ends.
Output
The output to this task is a series of individual files, one after the other. These files are not
modified in any way from when they are captured from the source FTP server.
Task properties
General Tab
l
FTP Server: Enter the IP address or host name of the FTP server to poll.
l
User name: Enter the name of a user account on the FTP server.
Page 326

l
Password: If account named in the User name box is password protected, enter the
password here.
l
Port number: Set to use a specific port number. Note: There is no validation to ensure
the port is available. It is the user's responsibility to ensure the selected port is available
and not being monitored by another application or another PlanetPress Workflow task.
l
Directory (optional): Enter the path of the folder to poll on the FTP server. If this box is
left empty, PlanetPress Workflow will poll the root directory.
l
Mask: Enter a single file name mask. Multiple entries are not allowed in this box.
l
Search in subfolders: Select to search in child folders of the source folder as well.
l
include empty files: Check this option to accept empty files.
l
Connection mode group
l
Active: Select to prompt the ftp client to use the active mode when retrieving files
from the FTP server.
l
Passive: Select to prompt the ftp client to use the passive mode when retrieving
files from the FTP server.
"Other" Tab
l
Job Information group
l
Information elements: Indicates what Job Info variables are automatically created
by the input task.
l
Add lines before first data page: Using the arrows keys you can add any job
information directly at the beginning of your data file.
l
Backup input files: Check this to save a copy of each data file that is captured by your
input. These files are saved in the PlanetPress Workflow Tools working folders under
the "Backup" folder.
To navigate quickly to the Workflow working folders, press the keyboard shortcut
CTRL+ALT+Shift+F4 from within the Workflow configuration tool.
The number of days to keep backups of jobs processed by input tasks is set per process;
see "Process properties" on page869.
l
Backup filename: Enter the file name that you wish the input data file backup to be saved
under.
l
Delete Existing Metadata: Check to remove any Metadata from memory. This option is
disabled on initial input tasks, and is checked by default on secondary input tasks.
Page 327

Job Information definitions
l
%1 - User name: Contains the user name that was used to connect to the FTP server.
This is useful if this task is used as a secondary input and the information is defined
dynamically.
l
%2 - FTP Server: Contains the FTP address of the server from which the files were
retrieved.
l
%3 - Source file name: Contains the name of the current file that was retrieved from the
server.
l
%4 - Folder: Contains the FTP folder from which the current file was retrieved.
Miscellaneous Tab
The Miscellaneous tab is common to all tasks.
Check the option Use as step description to display the text next to the icon of the plugin in
the Process area.
HTTP Client Input
HTTP Client Input tasks use the HTTP protocol to issue HTTP GET commands (queries) to
HTTP servers. Replies received from the HTTP servers are used as jobfiles and are thus
passed on to following tasks.
Input
This initial input task retrieves a single file as specified in the URL option. This file may be of
any format, even formats that are not readable by PlanetPress Workflow.
Processing
No processing is done by this task. The file retrieved is not changed in any way.
Output
HTTP Client Input will output a single file which was retrieved from the web. Metadata is not
generated by this task.
Page 328

Task properties
General Tab
l
URL: Enter the URL of the HTTP server from which the file must be downloaded. Since
this is a variable property box, variables may be used, as well as the Get Data and Select
Data commands (see "Variable task properties" on page303). Note that when
PlanetPress Workflow connects to a secure page, an SSL (Secure Socket Layer)
connection is automatically used.
Note
The connection to remote HTTPS is done through TLS v1 encryption. Prior to
version 2019.2, this was done through SSL v2.3.
Secure connections (SSL) made with the HTTP Input Client are known to
experience issues when connecting to site bindings using the Server Name
Indication (SNI). Disabling SNI through the server's site bindings configuration will
allow proper SSL connection through the HTTP Input Client.
l
Server requires authentication: Check this option if the HTTP server requires user
authentication. This enables the following options.
l
User name: A user name known to the Web server.
l
Password: The password associated with the user name entered above.
"Other" Tab
l
Job Information group
l
Information elements: Indicates what Job Info variables are automatically created
by the input task.
l
Add lines before first data page: Using the arrows keys you can add any job
information directly at the beginning of your data file.
l
Backup input files: Check this to save a copy of each data file that is captured by your
input. These files are saved in the PlanetPress Workflow Tools working folders under
the "Backup" folder.
To navigate quickly to the Workflow working folders, press the keyboard shortcut
Page 329

CTRL+ALT+Shift+F4 from within the Workflow configuration tool.
The number of days to keep backups of jobs processed by input tasks is set per process;
see "Process properties" on page869.
l
Backup filename: Enter the file name that you wish the input data file backup to be saved
under.
l
Delete Existing Metadata: Check to remove any Metadata from memory. This option is
disabled on initial input tasks, and is checked by default on secondary input tasks.
Job Information definitions
l
%1 - URL address: Contains the full URL that was requested by the task. This includes
any GET variables in the URL.
Miscellaneous Tab
The Miscellaneous tab is common to all tasks.
Check the option Use as step description to display the text next to the icon of the plugin in
the Process area.
HTTP Server Input
HTTP Server Input tasks are used to receive HTTP requests made via GET or POST
commands and to send replies to the servers from which the requests were made. The HTTP
server supports both HTTP and HTTPS. For HTTPS Support information, see "HTTP Server
Input plugin preferences 1" on page793.
Instead of using the HTTP Server Input task, you should consider using the NodeJS Server
Input task which is more secure, more up-to-date and more standardized. For more information
see: "NodeJS Server Input" on page352.
Note
While you can insert the HTTP Server Input task anywhere in your process as a
secondary input task, in reality the HTTP Server Input task will only function when used
as the initial input, as it is triggered when PlanetPress Workflow HTTP Server receives a
request and passes it on to the correct task.
Page 330

Note
Athough Workflow can serve both static and dynamic resources to a web browser, it is
not meant to be used as a fully featured web server as it is not built for responsiveness
nor guaranteed uptime. It is recommended to use a common web server (for example, IIS
or Apache) to serve your contents and to let Workflow process things only it can do.
For more information on how to serve HTML and PDF generated by Connect through IIS,
watch the Connect with Evie - IIS series.
Warning
It is highly recommended to make all processes using the HTTP Server Input task self-
replicating and to reduce their polling interval in the "Process properties" on page869.
Examples
This task is put into effect in the following example processes:
l HTTP PDF Invoice Request
l HTTP Brochure Request
l Capture Web Manager Workflow
Note that Capture can only be used with PlanetPress Suite.
Input
The HTTP Server Input task does not, by itself, capture any files. Neither does it directly wait
for requests to be received. Actually, it is the HTTP service that receives the requests and
places them in a specific location on the drive. When a request is received, the HTTP Server
Input polls that location and finds the requests and all attachments. It will always pick up the
"oldest" request received.
The request can contain one or more files, one being an XML file containing the request
information as well as any GET or POST variables that were received within this request. Other
files are POST attachments.
Page 331

Note
By default, the request XML also contains a CDATA section which contains the raw
input data, effectively doubling the size of the incoming file. Due to technical restrictions,
the incoming XML file cannot be more than 400MB, which because of CDATA is reduced
to around 200MB. To help in this situation, you may elect to omit from the attachment,
which can be changed in HTTP Server Input User Options. Please note that incoming
binary files (sent through file upload in a form) can never be larger than 400 MB.
Processing
Depending on the options chosen in the HTTP Server Input task properties, the task may
choose to ignore some of the files. For example, using the "Do not include XML envelope"
means that only the POST attachments will be used in the process, the XML file will be
discarded. Attachments are always saved on disk in a specific location, which is accessible
either directly in the XML or directly as a data file through the "Loop each attachment as data
file" option.
Output
At first, the output inside the process itself is, depending on the selected options, an XML
request file, POST Attachments files, either one or both.
If the Send Immediate Response to client option is selected, the response file is sent back
right away and the involvement of the input task ends then.
However, if this option is not checked, it means there is a second output that comes out of the
HTTP Server Input task: The last output generated by PlanetPress Workflow is sent back to
the initial input, which is returned back to the client (see "Request/process/response cycle" on
page283).
Even if the process ends with a "Delete" on page656 task, it is still returned to the client;
deleting the job file only means you are not doing anything with it locally.
Note
You can serve static resources through PlanetPress, which is especially useful for
images, CSS and JavaScript files. See "HTTP Server Input plugin preferences 2" on
Page 332

page797.
Task properties
General Tab
l
HTTP action: Enter the name of the action requested of PlanetPress Workflow by the
client. This name corresponds to the URL that the client will be accessing. For example, if
you enter "MakePDF" here, you could trigger the process by accessing
http://127.0.0.1:8080/MakePDF . This is also what your HTML Form's action should be.
l
MIME Type: Select the MIME type of the file that will be returned by the plugin.
l
Loop each attachment as a data file: When receiving attachments through a POST
request (HTML Form), this option will make the HTTP Server Input task loop through
each attachment. Each data file is an XML with the accompanied file.
l
Do not include XML envelope: Only active when the previous Loop option is
checked. When checked, the XML file containing the request data will not be
available. Only the attachment itself is sent as a data file.
l
Respond on error: Enter a message to be sent to the client as the output file if the
process encounters an error and is unable to send a reply that includes the actual output
file. The information can be in any desired format such as HTML or plain text. However, if
it must be displayed in a browser, the format should match the selected MIME type.
This is a variable property box. You can use any combination of text, variables and data
selections; see "Variable task properties" on page303.
Note
This option requires every plugin in the process to be explicitly set to "On Error:
Stop process" (see ), even if the process itself is set to "On Error: Stop process".
l
Send immediate response to client: Do not wait for the process to finish and send a
static HTML or Text file back to the client instead. This prevents any timeout from
occurring. When checking this option, the field under the option is used to select which
file to return.
Page 333

l
Use custom HTTP server response code: When the process ends and a response is
sent to the requesting client, a custom response code can be specified depending on how
the process goes. While in previous versions the "200 OK" code was always used, this
option overrides it to, for example, "404 Not Found" or "401 Unauthorized".
Note
The response code must start with 3 digits, followed by a space and then the error
message. If the first few characters can't be converted to a valid number, the server
automatically returns "500 Internal Server Error", regardless of the actual response
code provided by the process.
l
Variable containing the response code: The contents of the job information or
local variable selected in this drop-down, presumed to be a valid response code,
will be returned in the response header. This is the value that is present at the end
of the process, not the beginning.
Note
In order to make the Capture OnTheGo app delete the submitted form from the
device's library upon successful transmission of the data, the Workflow process
must return status code 291. The standard 200 response leaves this up to the
COTG user or the expiry date of the form.
"Other" Tab
l
Job Information group
l
Information elements: Indicates what Job Info variables are automatically created
by the input task.
l
Add lines before first data page: Using the arrows keys you can add any job
information directly at the beginning of your data file.
l
Backup input files: Check this to save a copy of each data file that is captured by your
input. These files are saved in the PlanetPress Workflow Tools working folders under
the "Backup" folder.
To navigate quickly to the Workflow working folders, press the keyboard shortcut
Page 334

CTRL+ALT+Shift+F4 from within the Workflow configuration tool.
The number of days to keep backups of jobs processed by input tasks is set per process;
see "Process properties" on page869.
l
Backup filename: Enter the file name that you wish the input data file backup to be saved
under.
l
Delete Existing Metadata: Check to remove any Metadata from memory. This option is
disabled on initial input tasks, and is checked by default on secondary input tasks.
Job Information definitions
l
%1 - Client IP Address: Contains the IP address of the HTTP client requesting a
response.
l
%2 - Request Header: Contains the headers of the request, which can contain
information such as the Browser and Operating System, languages, etc.
l
%3 - Filename: Contains the local file name of the job file created by this task (and XML
file). This is equivalent to %o.
l
%4 - Attachment Index: Contains the index number of the current attachment while
looping the attachments as data files (zero based; when processing the request file, the
Attachment Index is 0; with the first attachment it is 1, etc.). When the option Loop each
attachment as a data file is not checked, the Attachment Index is 0.
Miscellaneous Tab
The Miscellaneous tab is common to all tasks.
Check the option Use as step description to display the text next to the icon of the plugin in
the Process area.
Input Error Bin
The Input Error Bin task is used specifically and only to create error management processes.
These processes do not run on their own but are rather triggered by the On Error tab of tasks in
other processes, when that task fails.
Input
This task receives a data file from a task that generated an error. Accompanying this data file is
the current Job Infos of the process that triggered the error. This means that this input does not
Page 335

generate its own job infos!
No Metadata is received by this task, and none is generated.
The following error information is generated by the Input Error Bin starting version 7.5, and is
accessible throughout the process:
l
%{error.process}: the process name where the error occurred.
l
%{error.tasktype}: the type of the failed task, can be Action, Input, Output, Printer,
Comment and Branch.
l
%{error.taskname}: the name of the plugin (the Display Name as seen in the plugin bar).
l
%{error.taskindex}: the index of the task in the process (its position in the process).
l
%{error.errormsg}: the "Message" specified on the OnError tab of the failed task.
l
%{error.errorid}: the error "ID" specified on the OnError tab of the failed task.
Processing
No processing is done by this task.
Output
The output of this task is the same as the input - a data file and job infos that are sent from a
task that generated an error.
Task properties
General Tab
l
The Input Error Bin task does not have any specific properties unique to it, since it only
receives input directly from tasks in other processes when an error is generated. For more
information, see the chapter on "Debugging and error handling" on page99.
"Other" Tab
l
Job Information group
l
Information elements: Indicates what Job Info variables are automatically created
by the input task.
Page 336

l
Add lines before first data page: Using the arrows keys you can add any job
information directly at the beginning of your data file.
l
Backup input files: Check this to save a copy of each data file that is captured by your
input. These files are saved in the PlanetPress Workflow Tools working folders under
the "Backup" folder.
To navigate quickly to the Workflow working folders, press the keyboard shortcut
CTRL+ALT+Shift+F4 from within the Workflow configuration tool.
The number of days to keep backups of jobs processed by input tasks is set per process;
see "Process properties" on page869.
l
Backup filename: Enter the file name that you wish the input data file backup to be saved
under.
l
Delete Existing Metadata: Check to remove any Metadata from memory. This option is
disabled on initial input tasks, and is checked by default on secondary input tasks.
Job Information definitions
l This task does not generate any job information.
Miscellaneous Tab
The Miscellaneous tab is common to all tasks.
Check the option Use as step description to display the text next to the icon of the plugin in
the Process area.
Input SOAP
The Input SOAP task is used to answer calls from a remote SOAP client and to return a
response to that request. It is similar in functionality to the "HTTP Server Input" on page330
task.
Note
SOAP communication is non-trivial and requires a certain understanding of XML and the
SOAP protocol. Using the SOAP tasks pre-supposes this knowledge and this
documentation does not attempt to provide it.
Page 337

The Input SOAP Task only responds to a single SOAP action by the client: SubmitJob. Within
this request however, a secondary action (SubmitSOAPActionName) can be specified - this is
what the SOAP Action corresponds to in this task properties.
Input
This task does not poll any location by itself. It sits there waiting for requests coming in through
WSDL (SOAP communication) and, when it receives a request, runs the process and returns
the last output generated by the process to the client.
Processing
No processing is done. The request that is received by this task is XML and it is maintained as
such.
Output
As with the HTTP Server Input, this task has a dual-output purpose. First, when the initial input
task is run, the XML request is output onto the process. Then, when the process is finished, the
last job file generated by the process is returned to the requesting client.
Task properties
General Tab
l
SOAP Action: The SOAP action is used with the SubmitJob action. It’s the equivalent of
the process name. The difference is that more than one processes can share the same
SOAP action. That way more than 1 CPU can be used to process all the incoming
requests however this means that all process sharing the same SOAP action must be
identical because there is no way to decide the execution order of all the process.
"Other" Tab
l
Job Information group
l
Information elements: Indicates what Job Info variables are automatically created
by the input task.
l
Add lines before first data page: Using the arrows keys you can add any job
information directly at the beginning of your data file.
Page 338

l
Backup input files: Check this to save a copy of each data file that is captured by your
input. These files are saved in the PlanetPress Workflow Tools working folders under
the "Backup" folder.
To navigate quickly to the Workflow working folders, press the keyboard shortcut
CTRL+ALT+Shift+F4 from within the Workflow configuration tool.
The number of days to keep backups of jobs processed by input tasks is set per process;
see "Process properties" on page869.
l
Backup filename: Enter the file name that you wish the input data file backup to be saved
under.
l
Delete Existing Metadata: Check to remove any Metadata from memory. This option is
disabled on initial input tasks, and is checked by default on secondary input tasks.
Job Information definitions
l This task does not generate any job information.
Miscellaneous Tab
The Miscellaneous tab is common to all tasks.
Check the option Use as step description to display the text next to the icon of the plugin in
the Process area.
LPD Input
LPD (Line Printer Daemon) Input tasks retrieve data in the form of print files sent from remote
computers using the LPD/LPR protocol. The PlanetPress Workflow LPD server starts
automatically when a configuration that includes at least one active LPD Input task is started.
To prevent conflicts between competing LPD servers, you must not run any other LPD server
than the PlanetPress Workflow LPD server on PlanetPress Workflow workstation.
LPD Input tasks are configured primarily through user options (see "LPD Input plugin
preferences" on page799). The only LDP information you enter in each LPD task is the queue
name.
Page 339

Input
This task does not poll an input, it sits there and waits for a job file to be sent through the LPR
port.
Processing
When the job is received through LPR, it is saved as a job file. No further processing is done on
the file.
Output
The task outputs the job file as is, with no evaluation or modification.
Task properties
General Tab
l
LPD queue names: Enter the queue name (or names, one per line) specified in the
printer queue on the remote computer or computers.
l
Allow empty queue names: Check this option to accept LPR jobs that don't specify a
queue name.
l
Create PDF (With Metadata): Select to output a PDF. This will only work with PostScript
input.
l
Optimize Resulting PDF: The resulting PDF is optimized for size and caching
options are enabled. This reduces the size of the PDFs (depending on some
factors), but may take more time to output the PDF.
"Other" Tab
l
Job Information group
l
Information elements: Indicates what Job Info variables are automatically created
by the input task.
l
Add lines before first data page: Using the arrows keys you can add any job
information directly at the beginning of your data file.
l
Backup input files: Check this to save a copy of each data file that is captured by your
input. These files are saved in the PlanetPress Workflow Tools working folders under
Page 340

the "Backup" folder.
To navigate quickly to the Workflow working folders, press the keyboard shortcut
CTRL+ALT+Shift+F4 from within the Workflow configuration tool.
The number of days to keep backups of jobs processed by input tasks is set per process;
see "Process properties" on page869.
l
Backup filename: Enter the file name that you wish the input data file backup to be saved
under.
l
Delete Existing Metadata: Check to remove any Metadata from memory. This option is
disabled on initial input tasks, and is checked by default on secondary input tasks.
Job Information definitions
l
%1 - User name: Contains the user name of the user who sent the job to the printer, or
the user for which a software sending the job was logged in under.
l
%2 - Host computer: Contains the name of the computer from which the job was sent.
l
%3 - Job name: Contains the name of the job as specified by the software that sent the
job.
l
%4 - Source file name: Contains the name of the job file as specified by the software that
sent the job.
l
%5 - Sender's IP address: Contains the IP address from which the job was sent.
l
%6 - 6 Queue name: The name of the queue from which the job was captured. It will be
empty if the queue name was empty.
Miscellaneous Tab
The Miscellaneous tab is common to all tasks.
Check the option Use as step description to display the text next to the icon of the plugin in
the Process area.
Merge PDF Files
The Merge PDF Files Input task (formerly named "Concatenate PDF Files") captures all PDF
files in a given folder and merges them into a single PDF file.
This task is put into effect in the following example process: "Example: Daily sales report from
PDF files" on page288.
Page 341

Input
This task captures all of the PDF files present in a specific folder, in one operation.
The Merge PDF Files Input task performs just like any other Input task: once the process has
completed, control is transferred back to the Input task one last time to check if new files
meeting the mask have come in. This means that the merging of PDF files that are not all
present at the start of the process may take several passes, which may have an adverse effect
on the overall performance and the size of the resulting PDF.
Processing
Once all PDF files are captured, their original copies are deleted from the input folder (or
tagged as Archive if this option is selected) and they are merged into a single PDF. This is
done in a single operation, not incrementally, meaning the file is built once and, if the option is
chosen, optimized once.
Output
A single PDF containing as many pages as all the combined input PDFs is generated. If the
option is selected, this PDF is optimized. An optional Metadata file is also created, containing
information about the PDFs. This Metadata is divided in such a way that each PDF file is its
own document, which can contain multiple data pages.
Task properties
General Tab
l
Folder: Enter the full path of the folder from which the input files are to be taken.
l
Masks: Enter a single or multiple file names or use file name masks. See "Masks" on
page306. Since this task only supports PDF files, make sure your extension remains
.PDF for all your masks.
l
Sort files by: Select a given sorting method to prompt PlanetPress Workflow to sort the
files in the source folder before taking them (and thus to take them in a specific order).
Select None to let PlanetPress Workflow take the files without sorting them first.
l
Sort order: If you selected a sorting method in the Sort files by box, select the order in
which you want the files to be sorted.
Page 342

l
Use archive attribute: Select to turn on the archive attribute of the data files found in the
source folder and to leave them in their original location (i.e. to take copies of the source
files). Note that PlanetPress Workflow never takes source files that have their archive
attribute turned on (so the source files will not be taken again and again). When this
option is turned off, PlanetPress Workflow removes data files from the source location.
l
Capture files in sub-directories also: Select to capture files from child folders of the
source folder as well. When this option is selected, the chosen Sort order is applied to
each separate folder, not across folders. The subfolders themselves are always
processed in alphabetical order, regardless of the sort order.
l
Sort directories first: If you selected a sorting method in the Sort files by box, and if you
want the folders present in the source folder to be sorted first, select this option.
l
Optimize resulting PDF: Select to specify whether the resulting PDF should be
optimized. Optimization can lead to a significant reduction in the size of the PDF, but it
may also add a certain amount of time to the process. This option should only be
unchecked if the timing of the process is critical and needs to be done quickly, but keep in
mind that the resulting PDF may be much larger than it should be and may even be too
large for PlanetPress Workflow to handle.
l
Create Metadata: Select to specify that a basic metadata structure should be created for
the resulting PDF file. The metadata structure created will contain a single Job separated
by one Document per captured PDF file. Within each Document, one Data Page
containing a single Page is created for each page of the PDF file.
Note
Metadata can be manipulated with Metadata tasks; see "Metadata tasks" on page560.
"Other" Tab
l
Job Information group
l
Information elements: Indicates what Job Info variables are automatically created
by the input task.
l
Add lines before first data page: Using the arrows keys you can add any job
information directly at the beginning of your data file.
l
Backup input files: Check this to save a copy of each data file that is captured by your
input. These files are saved in the PlanetPress Workflow Tools working folders under
Page 343

the "Backup" folder.
To navigate quickly to the Workflow working folders, press the keyboard shortcut
CTRL+ALT+Shift+F4 from within the Workflow configuration tool.
The number of days to keep backups of jobs processed by input tasks is set per process;
see "Process properties" on page869.
l
Backup filename: Enter the file name that you wish the input data file backup to be saved
under.
l
Delete Existing Metadata: Check to remove any Metadata from memory. This option is
disabled on initial input tasks, and is checked by default on secondary input tasks.
Job Information definitions
l
%1 - PDF Directory: Contains the folder from which the data was captured.
Miscellaneous Tab
The Miscellaneous tab is common to all tasks.
Check the option Use as step description to display the text next to the icon of the plugin in
the Process area.
Microsoft 365 Email Input
The Microsoft 365 Email Input task allows the processing of emails from any of the
organization's Microsoft 365 accounts, without having to specify a user's credentials. This way,
privacy is maintained while allowing a process to handle email messages and attachments for
any user. The task communicates through HTTPS. However, the real protection scheme (like
certificates) is configured in Azure Active Directory by the IT administrators.
This task uses the Microsoft Graph API.
For this task to function correctly, Workflow needs to be granted application permissions for
Microsoft Graph in the organization’s Azure instance.
It needs read access to the Users category (User.Read.All) so that the task can identify the
users in the organization.
In addition, in order to be able to read emails through the Microsoft 365 Email Input task, it
needs the Mail.Read permission; the Mail.ReadBasic permission is insufficient as it does not
grant access to the email’s body or attachments.
For more information on setting application permissions for Microsoft Graph, see
https://docs.microsoft.com/en-us/graph/auth-v2-service.
Page 344

Input
The Microsoft 365 Email Input task captures an email and its attachments from the selected
inbox when it corresponds to the rules defined in the General tab.
It will process one email at a time (unless the process is self-replicating; see "Process
properties" on page869) and it will capture the emails as long as there is unread email in the
selected inbox.
Processing
The task accesses Inbox folders in the organization through the Microsoft Graph API (subject to
that organization's IT policies) .
Filtering is done at the mail server. Only the first unread email matching the conditions is
retrieved from the mail server, along with its attachments. Captured emails can either be
deleted or marked as read.
Note
The MS Graph REST API is limited to a certain number of requests within a certain
period of time. This is called throttling. When throttling comes into play, the plugin
receives HTTP response 429. The plugin will log the error and retry, but it exits with an
error after 15 unsuccessful attempts.
Output
Once the plugin is done processing, an XML file is created with the email’s details and location
of the body and any attachments. The encoding of the XML file is UTF-8.
The body and attachments are located in the job's Temp folder of Workflow. Within the same
process, those files must be moved to another location, otherwise they will be deleted at the
end of the process (as expected for all files in Workflow's Temp folder).
Retrieving and moving the body and attachment files may be done using an "XML Splitter" on
page469.
Example output file
<?xml version="1.0"?>
<Email>
<FromName>Anny One</FromName>
<FromEmail>onea@ca.objectiflune.com</FromEmail>
Page 345

<Subject>Your Subscription</Subject>
<DateTime>2020-01-22T14:03:38Z</DateTime>
<To>someone@ca.yourcompany.com</To>
<CC/>
<BCC/>
<Files>
<File>
<Type>Body</Type>
<Folder>C:\ProgramData\Objectif Lune\PlanetPress Workflow
8\PlanetPress Watch\Debug\0106HBKO3IODK3F\</Folder>
<Filename>0106HBKO3IODK40.html</Filename>
</File>
<File>
<Type>Attachment</Type>
<Folder>C:\ProgramData\Objectif Lune\PlanetPress Workflow
8\PlanetPress Watch\Debug\0106HBKO3IODK3F\</Folder>
<Filename
OriginalName="SubscriptionDetails.pdf">0106HBKO3X2KK41.pdf</Filenam
e>
</File>
<File>
<Type>Attachment</Type>
<Folder>C:\ProgramData\Objectif Lune\PlanetPress Workflow
8\PlanetPress Watch\Debug\0106HBKO3IODK3F\</Folder>
<Filename OriginalName="20171005_
124920.jpg">0106HBKO4J5U342.jpg</Filename> </File>
</Files>
</Email>
The most pertinent information is located at the top level, under <Email>.
The sub node <Files> contains all the files for the email.
For each file, the type (body or attachment), folder and filename is provided. A file of type Body
is always present and contains the body of the email.
The <Folder> information is the same for all files and is repeated to facilitate the selection when
using an "XML Splitter" on page469.
If multiple attachments have the same name, they will be appended with a numeric suffix, for
example: File.pdf, File (1).pdf, File (2).pdf.
Page 346

Job Information definitions
l
%1 - Date received. Contains the date of the reception of the email (and not the date of
retrieval by PlanetPress Workflow). The format is YYYY/MM/DD HH:MM:SS.
l
%2 - Sender's name: Contains the name of the sender as defined by the sender himself
(or, if the sender is using Exchange, by the name defined in his Exchange server).
l
%3 - Sender's address: Contains the email address of the sender as defined by the
sender.
l
%4 - Subject: Contains the subject of the received email (may be blank).
l
%5 - Recipients:Contains a list of the names of all the recipients of the email, separated
by a semicolon (;).
l
%6 - Attachment count: Contains the number of attachments of the email. A ZIP file is
counted as 1 attachment. Some embedded images may be counted as attachment. The
body of the email does not count as an attachment.
Task properties
General Tab
Condition
Enter the condition(s) that must be met for an unread email to be captured.
l
First found (no conditions): When no conditions are specified, the first unread email that
is found will be processed (for each iteration of the plugin). In any other case, all
conditions must be met for the email to get processed.
l
“From/To/CC/Subject/Body” contains: Select one or more options and enter the search
text. "Contains" means that the search text can be surrounded by other text; for example,
when looking for “world” in the “Subject” field, an email with the subject “Hello world, my
name is Peter” will be captured.
These condition fields are variable property fields. You can use any combination of text,
variables and data selections; see "Variable task properties" on page303. The use of the
characters ? and * as wildcards is not supported in these fields.
Note that it is not possible to specify multiple values in any of the fields and that
conditions are case-insensitive.
Page 347

Connection
l
Application ID: Enter the application ID provided by Azure for this specific application.
This value is static and cannot contain variables.
l
Application Password: Enter the client secret (key) for the Azure app. This value is static
and cannot contain variables.
l
Tenant ID: Enter the Tenant ID as specified in Azure. This value is static and cannot
contain variables.
l
User ID: This is the user's ID or email address. This value is dynamic. You can use any
combination of text, variables and data selections; see "Variable task properties" on
page303.
Post-processing
l
Select what to do when an email is processed: mark as read or delete the captured
email from the account's Inbox.
Advanced properties
To get access to the following properties tabs, right-click the plugin in the process and select
Advanced Properties.
"Other" Tab
l
Job Information group
l
Information elements: Indicates what Job Info variables are automatically created
by the input task.
l
Add lines before first data page: Using the arrows keys you can add any job
information directly at the beginning of your data file.
l
Backup input files: Check this to save a copy of each data file that is captured by your
input. These files are saved in the PlanetPress Workflow Tools working folders under
the "Backup" folder.
To navigate quickly to the Workflow working folders, press the keyboard shortcut
CTRL+ALT+Shift+F4 from within the Workflow configuration tool.
The number of days to keep backups of jobs processed by input tasks is set per process;
see "Process properties" on page869.
Page 348

l
Backup filename: Enter the file name that you wish the input data file backup to be saved
under.
l
Delete Existing Metadata: Check to remove any Metadata from memory. This option is
disabled on initial input tasks, and is checked by default on secondary input tasks.
Miscellaneous Tab
The Miscellaneous tab is common to all tasks.
Check the option Use as step description to display the text next to the icon of the plugin in
the Process area.
Microsoft 365 OneDrive Input
Microsoft 365 OneDrive Input tasks allow the processing of files from any of the organization's
Microsoft 365 OneDrive accounts.
This task uses the Microsoft Graph API.
For this task to function correctly, Workflow needs to be granted application permissions for
Microsoft Graph in the organization’s Azure instance.
It needs read access to the Users category (User.Read.All) so that the task can identify the
users in the organization.
In addition, the Files.ReadWrite.All permission is required so that the task can create the folder
if it doesn't already exist.
For more information on setting application permissions for Microsoft Graph, see
https://docs.microsoft.com/en-us/graph/auth-v2-service.
Input
The Microsoft 365 OneDrive Input task retrieves files corresponding to a specified file mask,
from a specified OneDrive folder. These files may be of any format, even formats that are not
readable by PlanetPress Workflow.
Processing
The task uses the Microsoft Graph API to access OneDrive folders in the organization (subject
to that organization's IT policies).
Each file captured by the input is sent down through the process, one at a time. When the file is
finished, the process goes back to the input which feeds another file down, as long as there are
Page 349

files in the queue. Once all the files are gone, the task polls the input folder again to see if new
files are present and, if so, the process continues with these files. Otherwise, the process ends.
Note
The MS Graph REST API is limited to a certain number of requests within a certain
period of time. This is called throttling. When throttling comes into play, the plugin
receives HTTP response 429. The plugin will log the error and retry, but it exits with an
error after 15 unsuccessful attempts.
Output
The output to this task is a series of individual files, one after the other. These files are not
modified in any way from when they are captured from the source folder.
Job Information definitions
l
%1 - User. This is the OneDrive user's ID.
l
%2 - Source File Name. Contains the file name (excluding path but including extension)
of the file name that is captured. Equivalent to using the %o system variable.
l
%3 - Folder: Contains the folder from which the data was captured.
Task properties
General Tab
l
Folders: Enter the full path of a folder from which the input files are to be taken. The first /
refers to the root folder. For its subfolders, the first / is optional.
This is a variable property field. You can use any combination of text, variables and data
selections; see "Variable task properties" on page303.
Click the Add button to add the folder to the list. Note that subfolders of the given folders
are not taken into account; if they need to be monitored, they must be added to the list
separately.
When a folder doesn't exist in the system it will be created at runtime.
l
Masks: Enter a single or multiple file names or use file name masks (separated by a
semicolon). See "Masks" on page306.
Page 350

l
Treat as regular expressions: When ticked, the contents of the Mask field are
deemed to be a regular expression . You can specify multiple masks based on
regular expressions, separating the regular expressions by a semicolon.
The checkbox is not ticked by default. Please refer to Regular Expressions for more
information.
Note
No Variable Data can be used inside this field if the Treat as regular expressions
option is ticked. The percent sign, the curly brackets and the period are all key
elements of the RegEx syntax, therefore they cannot be mixed and matched with
Workflow variable data syntax (e.g. %1, ${global.myvar}, etc.). Also, there is no
validation of the RegEx being specified.
Connection
l
Application ID: Enter the application ID provided by Azure for this specific application.
This value is static and cannot contain variables.
l
Application Password: Enter the client secret (key) for the Azure app. This value is static
and cannot contain variables.
l
Tenant ID: Enter the Tenant ID as specified in Azure. This value is static and cannot
contain variables.
l
User ID: This is the OneDrive user's ID. This value is dynamic. You can use any
combination of text, variables and data selections; see "Variable task properties" on
page303.
Advanced properties
To get access to the following properties tabs, right-click the plugin in the process and select
Advanced Properties.
"Other" Tab
l
Job Information group
l
Information elements: Indicates what Job Info variables are automatically created
by the input task.
Page 351

l
Add lines before first data page: Using the arrows keys you can add any job
information directly at the beginning of your data file.
l
Backup input files: Check this to save a copy of each data file that is captured by your
input. These files are saved in the PlanetPress Workflow Tools working folders under
the "Backup" folder.
To navigate quickly to the Workflow working folders, press the keyboard shortcut
CTRL+ALT+Shift+F4 from within the Workflow configuration tool.
The number of days to keep backups of jobs processed by input tasks is set per process;
see "Process properties" on page869.
l
Backup filename: Enter the file name that you wish the input data file backup to be saved
under.
l
Delete Existing Metadata: Check to remove any Metadata from memory. This option is
disabled on initial input tasks, and is checked by default on secondary input tasks.
Miscellaneous Tab
The Miscellaneous tab is common to all tasks.
Check the option Use as step description to display the text next to the icon of the plugin in
the Process area.
NodeJS Server Input
NodeJS Server Input tasks are used to receive HTTP requests and to send replies to the
servers from which the requests were made.
Essentially this task does the same as the HTTP Server Input task, but it uses a NodeJS Server
(version 12.13.1, installed by Workflow) instead of Workflow's custom server component. The
NodeJS Server is more secure, more up to date and more standardized.
For instance:
l PUT and DELETE actions can be posted to the server.
l The NodeJS Server can serve multiple static resources at once.
l Port numbers > 9999 are allowed.
l You can specify a HTTPS port separately.
l A Proxy list can be used to setup end points for redirecting requests to another server.
This could be useful if for example the Connect server is on another server which could
Page 352

change; when it changes you’d only have to modify the proxy list instead of the
configuration.
l You can enable or disable authentication using users from an Active Directory server.
The NodeJS Server is only started automatically by Workflow when NodeJS input plugins are
detected in the configuration. If no NodeJS input plugins are present, the service ("ppNode") is
not started by Workflow; it can still be started manually, but will only serve static resources and
redirect requests to other servers.
Note
The NodeJS Server installed with Workflow is not supported in an x86 environment.
Before using this plugin
1. Configure the NodeJS Server using its three settings dialogs in the Preferences
(Workflow button >Preferences): "NodeJS Server Input plugin preferences 1" on
page800, "NodeJS Server Input plugin preferences 2" on page802 and "NodeJS Server
Input plugin preferences 3" on page803.
2. In order to serve resources that come from the Connect Server the ppNode service needs
to know the credentials and communication protocol to use for communication to the
Connect Server.
These must be entered in a file named default.js that is by default found in C:\Program
Files (x86)\Objectif Lune\ppnode\src\constants\.
Find the following line:
export const DEFAULT_CONNECT_CREDS:{ auth: string; protocol: string } = { auth:
"ol-admin:secret", protocol: "http" }; //Default user/pass and protocol for the
Connect Server
Enter the credentials and protocol (either http or https) in the auth and protocol entries.
Once the file has been changed, the ppNode service needs to be restarted for the change
to take effect.
Page 353
Note
Although Workflow can serve both static and dynamic resources to a web browser, it is
not meant to be used as a fully featured web server as it is not built for responsiveness
nor guaranteed uptime. It is recommended to use a common web server (for example, IIS
or Apache) to serve your contents and to let Workflow process things only it can do.
For more information on how to serve HTML and PDF generated by Connect through IIS,
watch the Connect with Evie - IIS series.
Note
While you can insert the NodeJS Server Input task anywhere in your process as a
secondary input task, in reality the NodeJS Server Input task will only function when used
as the initial input, as it is triggered when Workflow's NodeJS Server receives a request
and passes it on to the correct task.
Warning
It is highly recommended to make all processes using the NodeJS Server Input task
self-replicating and to reduce their polling interval in the "Process properties" on
page869.
Note
The NodeJS Server Input plugin is not compatible with PlanetPress Capture.
Input
The NodeJS Server Input task does not, by itself, capture any files. Neither does it directly
wait for requests to be received. Actually, it is the NodeJS service that receives the requests
and places them in a specific location on the drive. When a request is received, the NodeJS
Server Input polls that location and finds the requests and all attachments. It will always pick up
the "oldest" request received first.
Page 354

The request can contain one or more files, one being an XML file containing the request
information as well as any GET, POST, PUT or DELETE variables that were received within
this request. Other files are POST or PUT attachments.
The NodeJS Server Input task supports basic content-types: multipart/form-data, application/x-
www-urlencoded, and application/octet-stream, as well as raw body content-types:
l text/plain (.txt)
l application/xml, text/xml (.xml)
l text/html (.html)
l application/xhtml+xml (.xhtml)
l text/css (.css)
l text/csv (.csv)
l application/json (.json)
l application/javascript (.js)
Note that the maximum number of multipart form data fields is 1000 by default.
Processing
Depending on the options chosen in the NodeJS Server Input task properties, the task may
choose to ignore some of the files. For example, using the "Do not include XML envelope"
means that only the POST attachments will be used in the process; the XML file will be
discarded. Attachments are always saved on disk in a specific location, which is accessible
either directly in the XML or directly as a data file through the "Loop each attachment as data
file" option.
How arrays in input data are interpreted
When the names of Form inputs in an incoming POST request contain two pairs of square
brackets: [..][..], the data are interpreted as an array. The value between the first pair of square
brackets is expected to consist of two parts, separated by an underscore (e.g. row_0). The first
part is considered to be the element's name. All content after the first underscore (preferably an
integer) will be used as index, which is given as an attribute of the element (e.g. <row _idx=0>).
This makes it easy to select all elements on the same level in a data mapping configuration,
and to convert the XML to a JSON object.
For an example see "Incoming HTML" on page796 and "Resulting XML structure with
Enhanced PHP-like arrays" on page797.
Page 355

Output
First, the output inside the process itself is, depending on the selected options, an XML request
file, POST Attachments files, either one or both.
If the Send Immediate Response to client option is selected, the response file is sent back
right away and the involvement of the input task ends then.
However, if this option is not checked, it means there is a second output that comes out of the
NodeJS Server Input task: the last output generated by PlanetPress Workflow is sent back to
the initial input, by which it is returned to the client.
Even if the process ends with a Delete task, it is still returned to the client; deleting the job file
only means you are not doing anything with it locally.
If the requested HTTP action is not available, a '404 not found' HTML page will be returned.
Note
You can serve static resources through PlanetPress Workflow, which is especially useful
for images, CSS and JavaScript files. See "NodeJS Server Input plugin preferences 2"
on page802.
Task properties
General Tab
l
HTTP action: Enter the name of the action requested of PlanetPress Workflow by the
client. This name corresponds to the URL that the client will be accessing. For example, if
you enter "MakePDF" here, you could trigger the process by accessing
http://127.0.0.1:9090/MakePDF. This is also what your HTML Form's action should be.
Note
The following characters are not allowed in an action name: $* ? #, spaces, and
any characters that are not permitted in Windows folder names, such as \ / : ? ” < > |
.
Page 356

Action names are not case sensitive.
l
MIME Type: Select the MIME type of the file that will be returned by the plugin.
l
Form Data Encoding: Specifies how this endpoint will interpret any form data received
by the web server.
Even though it is strongly recommended to use the <meta charset="utf-8"/> element in
web pages, some might use another encoding or not have the element at all, affecting the
character set used by the browser to send the parameters and file names.
l
System language: Sets the encoding attribute in the request XML file to the system
codepage (e.g. Windows-1252).
l
UTF-8: Causes all parameters as well as file names from the request to be
interpreted as a UTF-8 text stream.
With this option enabled, POST attachment file names will be randomized on disk to
avoid misinterpretation. If the original file name is needed, it can be found in the
original attribute of the file tag in the request XML.
Note
If form data are submitted from HTML files that are made with the OLConnect
software, you can expect them to be UTF-8 encoded.
Warning
Don't use any non-ASCII characters in Workflow's working directories path (in
the V8WorkingDirectory registry key). Combined with the UTF-8 Form
Data Encoding setting, this might make it impossible for Workflow to retrieve
files from that path, depending on the actual path name and the system locale.
l
Loop each attachment as a data file: When receiving attachments through a POST
request (HTML Form), this option will make the NodeJS Server Input task loop through
each attachment. Each data file is an XML with the accompanied file.
Page 357

l
Do not include XML envelope: Only active when the previous Loop option is
checked. When checked, the XML file containing the request data will not be
available. Only the attachment itself is sent as a data file.
l
Respond on error: Enter a message to be sent to the client as the output file if the
process encounters an error and is unable to send a reply that includes the actual output
file. The information can be in any desired format such as HTML or plain text. However, if
it must be displayed in a browser, the format should match the selected MIME type.
This is a variable property box. You can use any combination of text, variables and data
selections; see "Variable task properties" on page303.
Note
This option requires every plugin in the process to be explicitly set to "On Error:
Stop process" (see ), even if the process itself is set to "On Error: Stop process".
l
Send immediate response to client: Do not wait for the process to finish and send a
static HTML or Text file back to the client instead. This prevents any timeout from
occurring.
l
Response file: Select which file to return. Note that the file name doesn't have to be
static. You can use any combination of text, variables and data selections; see
"Variable task properties" on page303.
l
Use custom HTTP server response code: When the process ends and a response is
sent to the requesting client, a custom response code can be specified depending on how
the process goes; for example: "200 OK", "404 Not Found" or "401 Unauthorized".
Choose a response code between 100 and 599. (See: List of HTTP status codes on
Wikipedia.) If the response isn't currently handled by any HTTP response code, you may
use an unused code in that range.
Note
The response code must start with 3 digits, followed by a space and then the error
message. If the first few characters can't be converted to a valid number, the server
automatically returns "500 Internal Server Error", regardless of the actual response
Page 358

code provided by the process.
l
Variable containing the response code: The contents of the Job Info variable or
local variable (see "About variables" on page716) selected in this drop-down,
presumed to be a valid response code, will be returned in the response header.
This is the value that is present at the end of the process, not the beginning.
l
Ignore global authentication settings: Disable authentication for this particular URL,
regardless of the global authentication settings. 'Global authentication settings' refers to
the authentication settings of the NodeJS Server, set in the preferences: "NodeJS Server
Input plugin preferences 3" on page803. If authentication is not enabled in the
preferences, this option has no effect.
"Other" Tab
l
Job Information group
l
Information elements: Indicates what Job Info variables are automatically created
by the input task.
l
Add lines before first data page: Using the arrows keys you can add any job
information directly at the beginning of your data file.
l
Backup input files: Check this to save a copy of each data file that is captured by your
input. These files are saved in the PlanetPress Workflow Tools working folders under
the "Backup" folder.
To navigate quickly to the Workflow working folders, press the keyboard shortcut
CTRL+ALT+Shift+F4 from within the Workflow configuration tool.
The number of days to keep backups of jobs processed by input tasks is set per process;
see "Process properties" on page869.
l
Backup filename: Enter the file name that you wish the input data file backup to be saved
under.
l
Delete Existing Metadata: Check to remove any Metadata from memory. This option is
disabled on initial input tasks, and is checked by default on secondary input tasks.
Job Information definitions
l
%1 - Client IP Address: Contains the IP address of the HTTP client requesting a
response.
Page 359

l
%2 - Request Header: Contains the headers of the request, which can contain
information such as the Browser and Operating System, languages, etc.
l
%3 - Filename: Contains the local file name of the job file created by this task (and XML
file). This is equivalent to %o.
l
%4 - Attachment Index: Contains the index number of the current attachment while
looping the attachments as data files. When the option Loop each attachment as a data
file is not checked, the Attachment Index is 0.
Miscellaneous Tab
The Miscellaneous tab is common to all tasks.
Check the option Use as step description to display the text next to the icon of the plugin in
the Process area.
PrintShop Web Connect
The PrintShop Web Connect Input task allows the use of a PlanetPress Workflow in order to
drive PrintShop Mail Web requests. A Send to PlanetPress printer is available to PrintShop
Mail Web operators selecting Generate Output in the PrintShop Mail Web Order Manager,
providing an easy way to send jobs toward the PrintShop Web Connect Input task, in order to
take full advantage of PlanetPress Workflow's built-in automation tasks.
Note
PrintShop Mail Web and PlanetPress Workflow must be installed on the same server in
order to make the PrintShop Web Connect Input task available in your PlanetPress
Workflow.
Input
This task does not poll an input, it sits there and waits for a job file to be sent by the local
PrintShop Mail Web installation.
Processing
When the job is received from PrintShop Mail Web, it is saved as a job file. No further
processing is done on the file.
Page 360

Output
The task outputs the job file as is, with no evaluation or modification. The format of the job is
PostScript generated by PrintShop Mail Web.
PrintShop Web Connect Preferences
A PrintShop Web Connect preferences page, accessible via the PlanetPress Workflow Button |
Preferences | PrintShop Web Connect, allows to provide operator credentials to your
PlanetPress Workflow configuration.
It is mandatory to fill both the user name and password fields (with the values of an existing
user on the PrintShop Web server) in order to use the PrintShop Web Connect Input task.
Note
It is also mandatory to send your configuration to your PlanetPress Workflow service
since the PrintShop Web credentials are included in the *.cfg file (See "Sending a
configuration" on page38), which is updated every time the configuration is sent to the
service via the Send Configuration button.
General Tab
l
All documents: Lists, in a hierarchical view (Company -> Publication Types ->
Documents), the PrintShop Mail documents already existing on the PrintShop Web
server.
l
Refresh: Click to update the list of PrintShop Mail documents available on the PrintShop
Web server.
"Other" Tab
l
Job Information group
l
Information elements: Indicates what Job Info variables are automatically created
by the input task.
l
Add lines before first data page: Using the arrows keys you can add any job
information directly at the beginning of your data file.
Page 361

l
Backup input files: Check this to save a copy of each data file that is captured by your
input. These files are saved in the PlanetPress Workflow Tools working folders under
the "Backup" folder.
To navigate quickly to the Workflow working folders, press the keyboard shortcut
CTRL+ALT+Shift+F4 from within the Workflow configuration tool.
The number of days to keep backups of jobs processed by input tasks is set per process;
see "Process properties" on page869.
l
Backup filename: Enter the file name that you wish the input data file backup to be saved
under.
l
Delete Existing Metadata: Check to remove any Metadata from memory. This option is
disabled on initial input tasks, and is checked by default on secondary input tasks.
Miscellaneous Tab
The Miscellaneous tab is common to all tasks.
Check the option Use as step description to display the text next to the icon of the plugin in
the Process area.
Secure Email Input
The Secure Email Input task captures a POP3 or IMAP email message with SSL (2.0, 2.3 or
3.0) or TLS (1.0, 1.1 or 1.2) encryption.
Note that this plugin cannot be used on a Windows instance that uses a multi-byte language
(e.g. Japanese, Chinese). The workaround is to either use a different Windows language or use
the standard Email Input/Output plugins.
Input
Secure Email Input captures an email and its attachments from the selected inbox when it
corresponds to the rules defined in the General tab.
It will process one email at a time (unless the process is self-replicating; see "Process
properties" on page869) and it will capture the emails as long as there is unread email in the
selected inbox.
Processing
When using the IMAP protocol, filtering is done at the server level and only the first email
matching the conditions is retrieved from the mail server, along with its attachments.
Page 362

When using the POP3 protocol, filtering is done at the client level. The plugin loops through
every single email located in the inbox, retrieves the email’s header and applies the conditional
logic. The plugin stops that loop when a header corresponds to the conditions. Only at that
point the email's body and attachments are retrieved, and the email that corresponds to the
conditions is deleted from the mail server.
Note
When using the POP3 method, the plug-in will run very slowly if the inbox contains a
large number of emails. Always use IMAP when possible.
Emails retrieved using POP3 are deleted from the server; emails retrieved using IMAP can
either be deleted or marked as read.
Output
Once the plugin is done processing, an XML file is created with the email’s details and location
of the body and any attachments. The encoding of the XML file is Windows-1252.
The body and attachments are located in the job's Temp folder of Workflow. Within the same
process, those files must be moved to another location, otherwise they will be deleted at the
end of the process (as expected for all files in the Temp Workflow folder).
Retrieving and moving the body and attachment files may be done using an "XML Splitter" on
page469.
Example output file
<?xml version="1.0" encoding="windows-1252"?>
<Email>
<FromName>Peter Parker</FromName>
<FromEmail>parkerp@ca.objectiflune.com</FromEmail>
<Subject>Bill of Lading</Subject>
<DateTime>2018-03-29 15:52:54</DateTime>
<To>starkt@ca.objectiflune.com</To>
<CC></CC>
<BCC></BCC>
<Files>
<File>
<Type>Body</Type>
<Folder>C:\ProgramData\Objectif Lune\PlanetPress Workflow
Page 363

8\PlanetPress Watch\Debug\0103W5GQXZR2F0A\</Folder>
<Filename>Body.html</Filename>
</File>
<File>
<Type>Attachment</Type>
<Folder>C:\ProgramData\Objectif Lune\PlanetPress Workflow
8\PlanetPress Watch\Debug\0103W5GQXZR2F0A\</Folder>
<Filename>Priorities.xlsx</Filename>
</File>
<File>
<Type>Attachment</Type>
<Folder>C:\ProgramData\Objectif Lune\PlanetPress Workflow
8\PlanetPress Watch\Debug\0103W5GQXZR2F0A\</Folder>
<Filename>Bill of Lading (BOL).pdf</Filename>
</File>
</Files>
</Email>
The most pertinent information is located at the top level, under <Email>.
The sub node <Files> contains all the files for the email.
For each file, the type (body or attachment), folder and filename is provided. A file of type Body
is always present and contains the body of the email.
The <Folder> information is the same for all files and is repeated to facilitate the selection when
using an "XML Splitter" on page469.
If multiple attachments have the same name, they will be appended with a numeric suffix, for
example: File.pdf, File (1).pdf, File (2).pdf.
Task properties
General Tab
Enter the condition(s) that must be met for an email to be captured.
l
First found (no conditions): If this option is selected, the first email that is found will be
processed (for each iteration of the plugin). In any other case, all conditions must be met
for the email to get processed.
l
“From/To/CC/Subject/Body” contains: Select one or more options and enter the search
text. "Contains" means that the search text can be surrounded by other text; for example,
when looking for “world” in the “Subject” field, an email with the subject “Hello world, my
Page 364

name is Peter” will be captured.
These condition fields are variable property fields. You can use any combination of text,
variables and data selections; see "Variable task properties" on page303. The use of the
characters ? and * as wildcards is not supported in these fields.
Note that it is not possible to specify multiple values in any of the fields.
Login Tab
Specify the connection information and options.
l
Login:
l
Enter the address of the incoming mail server (POP3 or IMAP), the port (the
default port is 993 for IMAP and 995 for POP), protocol (POP3 or IMAP), and
encryption method (SSL 2.0, 2.3, 3.0 or TLS 1.0, 1.1, 1.2) used.
The usual server name for an Office365 server is outlook.office365.com
while the usual server name for GMail is imap.gmail.com. Note that these
values may be different for some implementations or may change in the future.
Note that emails retrieved using POP3 are always deleted from the server.
l
Enter the account credentials: the email account name on the mail server, and the
password required to unlock the selected account.
Note
By default, GMail may not allow Workflow to access the account’s mail boxes
unless that account specifically allows automated systems to access the
inbox. Please refer to GMail documentation to learn how to do that
(https://support.google.com/accounts/answer/6010255?hl=en).
l
Options:
l
Enter the name of the inbox to monitor. This is useful if the email account has
defined rules to automatically store certain incoming messages in a specific mail
box.
l
Select what to do when an email is processed: mark the retrieved item as read or
delete the retrieved item from the mail server. Note that when using POP3, you
cannot specify the inbox, and a retrieved email is always deleted from the mail
server.
Page 365

l
Use temporary filenames for attachments:Check this option to save each
attachment in the Temp folder with a unique temporary filename (the system
variable %u is used to generate a name). You will still be able to access the original
attachment names when processing them.
If the original filenames are used and multiple attachments have the same name,
they will be appended with a numeric suffix, for example: File.pdf, File (1).pdf, File
(2).pdf.
"Other" Tab
l
Job Information group
l
Information elements: Indicates what Job Info variables are automatically created
by the input task.
l
Add lines before first data page: Using the arrows keys you can add any job
information directly at the beginning of your data file.
l
Backup input files: Check this to save a copy of each data file that is captured by your
input. These files are saved in the PlanetPress Workflow Tools working folders under
the "Backup" folder.
To navigate quickly to the Workflow working folders, press the keyboard shortcut
CTRL+ALT+Shift+F4 from within the Workflow configuration tool.
The number of days to keep backups of jobs processed by input tasks is set per process;
see "Process properties" on page869.
l
Backup filename: Enter the file name that you wish the input data file backup to be saved
under.
l
Delete Existing Metadata: Check to remove any Metadata from memory. This option is
disabled on initial input tasks, and is checked by default on secondary input tasks.
Miscellaneous Tab
The Miscellaneous tab is common to all tasks.
Check the option Use as step description to display the text next to the icon of the plugin in
the Process area.
Serial Input
Serial Input tasks receive files sent to a serial port on the computer running PlanetPress
Workflow. All the Serial Input tasks in a PlanetPress Workflow configuration share the same
Page 366

general properties, which are configured through user options (see "Serial Input plugin
preferences" on page805). Only the properties set in the Other and Error tabs are specific to
individual tasks.
Input
This task does not poll an input, it sits there and waits for a job file to be sent through the Serial
connection.
Processing
When the job is received through the Serial connection, it is saved as a job file. No further
processing is done on the file.
Output
The task outputs the job file as is, with no evaluation or modification.
Task properties
General Tab
l
Since Serial Input tasks have no specific task configurable properties, this section
contains no property information.
"Other" Tab
l
Job Information group
l
Information elements: Indicates what Job Info variables are automatically created
by the input task.
l
Add lines before first data page: Using the arrows keys you can add any job
information directly at the beginning of your data file.
l
Backup input files: Check this to save a copy of each data file that is captured by your
input. These files are saved in the PlanetPress Workflow Tools working folders under
the "Backup" folder.
To navigate quickly to the Workflow working folders, press the keyboard shortcut
CTRL+ALT+Shift+F4 from within the Workflow configuration tool.
Page 367

The number of days to keep backups of jobs processed by input tasks is set per process;
see "Process properties" on page869.
l
Backup filename: Enter the file name that you wish the input data file backup to be saved
under.
l
Delete Existing Metadata: Check to remove any Metadata from memory. This option is
disabled on initial input tasks, and is checked by default on secondary input tasks.
Job Information definitions
l
%1 - Source file name: Contains the name of the job file as specified by the software that
sent the job.
Miscellaneous Tab
The Miscellaneous tab is common to all tasks.
Check the option Use as step description to display the text next to the icon of the plugin in
the Process area.
SFTP Input
The SFTP Input task retrieves files from a secure FTP site through an encrypted connection.
Masks are typically used to select multiple files to be retrieved from the server.
The SFTP Input and "SFTP Output" on page664 tasks are part of a separate installer and are
not included in the Workflow installer. The SFTP plugin installer can be downloaded from the
Resource Center, under 'Plugins' in PlanetPress Connect.
Input
The SFTP Input connects to the specified FTP server and path, and retrieves a list of all files
corresponding to the specified mask. These files may be of any format, even formats that are
not readable by PlanetPress Workflow. The files are not deleted from the server when they are
downloaded. They are added to a list of processed files for this server. These lists are located
under C:\ProgramData\Objectif Lune\.
Page 368

Processing
Each file captured by the input is sent down through the process, one at a time. When the file is
finished, the process goes back to the input which feeds another file down, as long as there are
files in the queue. Once all the files are gone, the task polls the FTP folder again to see if new
files are present and, if so, the process continues with these files. Otherwise, the process ends.
Output
The output of this task is a series of individual files, one after the other. These files are not
modified in any way from when they are captured from the source FTP server.
Task properties
General Tab
l
Server Settings group
l
FTP Server: Enter the IP address or host name of the FTP server to poll.
l
User name: Enter the name of a user account on the FTP server.
l
Password: If account named in the User name box is password protected, enter the
password here.
l
Parse password: Checkbox to determine if the password should be parsed or
used as a literal string. This option is checked by default (parsed) for
backwards comparability with SFTPI/O plugin versions earlier than 1.3.
l
Protocol group
l
SFTP: Select if the FTP server uses SFTP (SSH).
l
FTPS: Select if the FTP server uses FTPS (SSL/TSL)
l
Port Number Group
l
Use default port: Check to use the default port used by the protocol selected
above.
l
Port number: Set to use a specific port number. Note: There is no validation to
ensure the port is available. It is the user's responsibility to ensure the selected port
is available and not being monitored by another application or another PlanetPress
Workflow task.
Page 369

l
File Options group
l
Directory: Enter the path of the folder to poll on the FTP server. If this box is left
empty, PlanetPress Workflow will poll the root directory.
Note
The given directory will be looked up from the user's home directory. Such a
home directory is usually under the server main user directory and generally
includes the user’s name. For example, if "/tmp/temp/copy_pending" is
entered, it does not point to the "/tmp/temp/copy_pending" directory but to the
"/users/support/tmp/temp/copy_pending" directory.
l
Masks: Enter a single file name mask. Multiple entries are not allowed in this box.
l
Delete remote file: Check this option to delete the file after it has been retrieved by
Workflow.
l
Connection mode group: This group is only relevant to the FTPS protocol and appears
when it is selected. SFTP uses a single connection to download all files.
l
Active: Select to prompt the ftp client to use the active mode when retrieving files
from the FTP server.
l
Passive: Select to prompt the ftp client to use the passive mode when retrieving
files from the FTP server.
l
Reset Download List:
Security Tab
This tab defines the certificates used to connect to the secured FTP servers.
l
Accept all certificates: Check this option to automatically accept the certificates returned
by the FTP server. Otherwise, in order for a connection to work, you have to establish a
connection first and then accept a certificate from the List of known servers up to the
Approved server list.
l
Approved Server list: Displays a list of servers that were approved for connection:
l
Server: The name of the server the certificate belongs to.
l
Fingerprint: The RSA fingerprint of the server.
Page 370

l
Remove: Click to remove the server from the approved list.
l
List of known servers: Displays a list of servers that were connected to, whether they
are approved or not.
l
Server: The name of the server the certificate belongs to.
l
Fingerprint: The RSA fingerprint of the server.
l
Approve: Click to add the server to the list of approved servers.
l
Refresh: Click to refresh the list of known servers
"Other" Tab
l
Job Information group
l
Information elements: Indicates what Job Info variables are automatically created
by the input task.
l
Add lines before first data page: Using the arrows keys you can add any job
information directly at the beginning of your data file.
l
Backup input files: Check this to save a copy of each data file that is captured by your
input. These files are saved in the PlanetPress Workflow Tools working folders under
the "Backup" folder.
To navigate quickly to the Workflow working folders, press the keyboard shortcut
CTRL+ALT+Shift+F4 from within the Workflow configuration tool.
The number of days to keep backups of jobs processed by input tasks is set per process;
see "Process properties" on page869.
l
Backup filename: Enter the file name that you wish the input data file backup to be saved
under.
l
Delete Existing Metadata: Check to remove any Metadata from memory. This option is
disabled on initial input tasks, and is checked by default on secondary input tasks.
Job Information definitions
l
%1 - User name: Contains the user name that was used to connect to the FTP server.
This is useful if this task is used as a secondary input and the information is defined
dynamically.
l
%2 - FTP Server: Contains the FTP address of the server from which the files were
retrieved.
Page 371

l
%3 - Source file name: Contains the name of the current file that was retrieved from the
server.
l
%4 - Folder: Contains the FTP folder from which the current file was retrieved.
Miscellaneous Tab
The Miscellaneous tab is common to all tasks.
Check the option Use as step description to display the text next to the icon of the plugin in
the Process area.
SMTP Input
SMTP Input tasks are used to receive SMTP requests made by any email client or other SMTP
commands and can act as an SMTP proxy, processing emails before they are sent to another
SMTP server. In order for this task to receive files, the SMTP Server (also called "Outgoing
Email Server") in the email client must point to PlanetPress Workflow server's IP or hostname.
Warning
Emails received through this task will not reach their intended destination if the process
does not end with a Send Email Output Task, or contain the PlanetPress Connect
"Create Email Content" on page600 task.
Example
In this example, the SMTP Input plugin is used to capture incoming emails data that must meet
certain conditions as the subject that contains "Work to do" and the sender that contains
"client@company.com ". The process then redirects the content of those emails to an extraction
and finally to a PDF printing.
Input
The SMTP Input task does not, by itself, capture any files. Neither does it directly wait for
requests to be received. Actually, it is the SMTP Server service that receives the requests and
places them in a specific location on the drive. When a request is received, the SMTP Input
polls that location and finds the requests and all attachments. It will always pick up the "oldest"
request received.
Page 372

Warning
Due to a technical limitation the SMTP Input task does NOT receive the BCC addresses
from most emails sent to it.
Processing
The task reads the incoming SMTP request and provides the data within its body.
Output
Depending on the Data Location option, the output is different:
l
Envelope: The request file in XML format, including all email fields (from, to, cc, bcc,
subject, body) as well as additional header fields (email client information, attachments,
etc). The message body and attachments are available through specific XML attributes.
These files do not have the full path, but you can use the %t%O variable to get the current
temporary folder where they are located.
Tip
Suppose we have two files named in the XML file under /ppemail[1]/@rawemail
and /ppemail[1]/body[1]/@html respectively.
With
%t%O\xmlget('/ppemail[1]/body
[1]/@html',Value,KeepCase,NoTrim)
and
%t%O\xmlget('/ppemail[1]/@rawemail',Value,KeepCase,NoTrim)
we get both the body and the whole raw email.
l
Attachments: The input task loops through each attachment and sends them down
through the process. While the Envelope is not available, the Job Infos contain pretty
much all of the information you would get from it.
Page 373

Task properties
General Tab
l
Data location: Determines what files are sent into the process:
l
Envelope: Only the request envelope is sent to the process (see above).
l
Attachments: Each attachment is sent down the process (see above).
l
Unzip attached file: Select to unzip the attached files.
l
Zip password: Enter the password required to unzip the attached files (if any). Note
that you can use variables and data selections.
l
Conditions: Defines a filter on capturing files from the SMTP Service's hot folder. When a
condition is added, only files that match this filter are captured, the rest remain untouched.
l
“Subject” contains: Select to limit those messages used by this task to those with
a specific subject. The subject you enter in the box below can include variables and
wildcards.
l
Nothing: Select to limit those messages used by this task to those that do not
specify any subject.
l
“From” contains: Select to limit those messages used by this task to those that are
sent from a specific address. The address you enter in the box below can include
variables and wildcards.
l
“To” contains: Select to limit those messages used by this task to those that are
sent to a specific address. The address you enter in the box below can include
variables and wildcards.
"Other" Tab
l
Job Information group
l
Information elements: Indicates what Job Info variables are automatically created
by the input task.
l
Add lines before first data page: Using the arrows keys you can add any job
information directly at the beginning of your data file.
l
Backup input files: Check this to save a copy of each data file that is captured by your
input. These files are saved in the PlanetPress Workflow Tools working folders under
the "Backup" folder.
To navigate quickly to the Workflow working folders, press the keyboard shortcut
Page 374

CTRL+ALT+Shift+F4 from within the Workflow configuration tool.
The number of days to keep backups of jobs processed by input tasks is set per process;
see "Process properties" on page869.
l
Backup filename: Enter the file name that you wish the input data file backup to be saved
under.
l
Delete Existing Metadata: Check to remove any Metadata from memory. This option is
disabled on initial input tasks, and is checked by default on secondary input tasks.
Miscellaneous Tab
The Miscellaneous tab is common to all tasks.
Check the option Use as step description to display the text next to the icon of the plugin in
the Process area.
Telnet Input
The Telnet Input task (also known as the Raw Socket Printing Input) receives files sent to a
specific port. If you want PlanetPress Workflow to receive data using multiple ports, you must
use multiple Telnet input tasks. To turn on or off the Telnet logging option, see the user options
(see "Telnet Input plugin preferences" on page806).
Input
This task does not poll an input, it sits there and waits for a job file to be sent through the Telnet
port.
Processing
When the job is received through Telnet, it is saved as a job file. No further processing is done
on the file.
Output
The task outputs the job file as is, with no evaluation or modification.
Page 375

Task properties
General Tab
l
Port: Enter the number of the port on which PlanetPress Workflow is to listen for Raw
Socket communications. The default port number is 9100. Bear in mind that no two input
tasks, whatever their type (Telnet, serial, LDP, etc.), should be listening to the same port.
l
Description: PlanetPress Workflow displays the name of the service or process assigned
to the port number entered in the Port box. Note that these are standard Internet Assigned
Numbers Authority (IANA) descriptions.
"Other" Tab
l
Job Information group
l
Information elements: Indicates what Job Info variables are automatically created
by the input task.
l
Add lines before first data page: Using the arrows keys you can add any job
information directly at the beginning of your data file.
l
Backup input files: Check this to save a copy of each data file that is captured by your
input. These files are saved in the PlanetPress Workflow Tools working folders under
the "Backup" folder.
To navigate quickly to the Workflow working folders, press the keyboard shortcut
CTRL+ALT+Shift+F4 from within the Workflow configuration tool.
The number of days to keep backups of jobs processed by input tasks is set per process;
see "Process properties" on page869.
l
Backup filename: Enter the file name that you wish the input data file backup to be saved
under.
l
Delete Existing Metadata: Check to remove any Metadata from memory. This option is
disabled on initial input tasks, and is checked by default on secondary input tasks.
Job Information definitions
This task does not generate any job information.
Miscellaneous Tab
The Miscellaneous tab is common to all tasks.
Page 376

Check the option Use as step description to display the text next to the icon of the plugin in
the Process area.
WinQueue Input
WinQueue Input tasks capture print jobs received by a Windows printer queue.
Note
Before configuring this task, on the computer running PlanetPress Workflow you will
need to create a local printer queue that will be used to receive data files in the form of
print jobs. This queue can be shared, so as to be able to receive jobs sent from local as
well as remote users.
To ensure that the spooled files created by PlanetPress Workflow remain in the spool
folder, the printer queue must be paused.
Input
The WinQueue input regularly polls the selected printer queue for new jobs. When a new job is
available, it is captured automatically by this task.
Processing
The print job, by default, is in EMF format. If this option is selected, no action is taken on the
data file. However, if the RAW format is selected, the job is converted to RAW. Furthermore, if
the Create PDF option is selected, the file is converted to a PDF, including metadata.
Output
Either one of 3 formats is output from this task:
l An EMF job format
l A RAW job format
l A PDF with attached metadata.
Page 377

Task properties
General Tab
l
Printer queue: Select the PlanetPress Workflow Printer Queue (the one to which data
files are going to be sent; see: "PlanetPress Workflow printer queues" on page113).
l
Printer properties group
l
Spool Print Job ins EMF Format (Advanced printing features): Select to create
EMF files for Windows Print Converter action tasks (see "Windows Print Converter"
on page447). Note that this option must not be selected when capturing generic text
type data.
l
Spool Print Jobs in RAW Format: Select to output in RAW format, which is the
exact data that the computer receives (and is not converted in any way).
l
Create PDF (With Metadata): Select to output a PDF.
l
Optimize Resulting PDF: The resulting PDF is optimized for size and
caching options are enabled. This reduces the size of the PDFs
(depending on some factors), but may take more time to output the PDF.
l
Include empty files: Check to process empty incoming jobs. The output will be empty,
the job is deleted from the print queue, but the job information is available in the process
(sending computer and user name, etc).
"Other" Tab
l
Job Information group
l
Information elements: Indicates what Job Info variables are automatically created
by the input task.
l
Add lines before first data page: Using the arrows keys you can add any job
information directly at the beginning of your data file.
l
Backup input files: Check this to save a copy of each data file that is captured by your
input. These files are saved in the PlanetPress Workflow Tools working folders under
the "Backup" folder.
To navigate quickly to the Workflow working folders, press the keyboard shortcut
CTRL+ALT+Shift+F4 from within the Workflow configuration tool.
The number of days to keep backups of jobs processed by input tasks is set per process;
see "Process properties" on page869.
Page 378

l
Backup filename: Enter the file name that you wish the input data file backup to be saved
under.
l
Delete Existing Metadata: Check to remove any Metadata from memory. This option is
disabled on initial input tasks, and is checked by default on secondary input tasks.
Job Information definitions
l
%1 - User name: Contains the user name of the user who sent the job to the printer, or
the user un which a software sending the job was logged in under.
l
%2 - Host computer: Contains the name of the computer from which the job was sent.
l
%3 - Printer name: Contains the name of the printer in which the job was received. Is the
same for all jobs received on any given printer.
l
%4 - Document name: Contains the name of the job as seen in the printer queue from
which it is captured. This name is defined by the software that creates the print job.
Miscellaneous Tab
The Miscellaneous tab is common to all tasks.
Check the option Use as step description to display the text next to the icon of the plugin in
the Process area.
Action tasks
Use action tasks in PlanetPress Workflow to perform a wide variety of operations. PlanetPress
Workflow includes more Action tasks than Input and Output tasks combined. Action tasks can
even be used to input data and to output data.
The difference between an Action task and an Input task is that an Action task can never be the
first task of a process. In the same fashion, the difference between an Action task and an Output
task is that an Action task can never appear at the end of a process. In other words, Action
tasks are always placed between other tasks.
This section covers all the Action tasks available in PlanetPress Workflow:
l "Add Document" on the next page
l "Add/Remove Text" on page381
Page 379

l "Advanced Search and Replace" on page383
l "Barcode Scan" on page386
l "Change Emulation" on page392
l "Create PDF" on page397
l "Database Query" on page401
l "Decompress File(s)" on page407
l "Digital Action" on page408
l "Download to Printer" on page418
l "External Program" on page419
l "Load External File" on page422
l "Logger" on page423
l "Mathematical Operations" on page424
l "Open XSLT" on page425
l "PDF/A-3 Attachments" on page427
l "PDF to Bitmap" on page641
l "Push to Repository" on page431
l "Rename" on page433
l "Run Script" on page482
l "Search and Replace" on page436
l "Send Images to Printer" on page438
l "Send to Folder" on page440
l "Set Job Infos and Variables" on page441
l "SOAP Client plugin" on page666
l "Standard Filter" on page445
l "Translator" on page446
l "Windows Print Converter" on page447
Add Document
The Add Document action task prepares a printer-centric PostScript job by adding a
PostScript version of a selected PlanetPress Connect document and the trigger to execute it
before the active data file.
For more information about printer-centric printing see "Printer-centric printing" on page113.
Page 380

Input
This task can support files in any emulation, however, the actual file that should be used is one
that is compatible with the selected PlanetPress Design document.
Processing
This task takes the PostScript version of the document (.ps7), adds the trigger and then the
active data file to it. If Metadata is present, the output is based on this Metadata (unselected
data pages will not generate output, the sort order will be respected, etc). Otherwise the
complete data file is merged.
Output
The output is a PostScript job that can be sent to any output task in "passthrough" mode, for
example Create PDF, PlanetPress Image, etc. Metadata is not generated by this task.
Task properties
General tab
l
Documents: Select a specific PlanetPress Design document if you want all the jobs to be
merged with that document (see "PlanetPress Design documents" on page45).
l
Add job information to the document: Select to prompt your PlanetPress Workflow to
add the available job information elements in the header of the generated file. Note that
this option is only enabled if a document was selected.
Miscellaneous Tab
The Miscellaneous tab is common to all tasks.
Check the option Use as step description to display the text next to the icon of the plugin in
the Process area.
Add/Remove Text
Add/Remove Text action tasks can be used to perform the following actions on the data file
they receive:
Page 381

l Add or remove characters.
l Add or remove lines of data.
l Add the content of a text file.
Note that the content must be located at the beginning or the end of the data file.
Input
Any text-based file can be used in this task, even formats that are not directly compatible with
PlanetPress. As long as the text is visible in a text-based editor (such as Notepad), it is
readable and supported by this task.
Processing
The selected operation (adding or removing lines, text or pages) is made on the data file.
Output
The modified data file is output from this task. Metadata is not modified in any way if it is
present.
Task properties
General tab
l
Action group
l
Add: Select if you want the task to add content to the job file.
l
Remove: Select if you want the task to remove content from the job file.
l
Content: Select what the task will actually add or remove. Select Text file to add the
whole content of a text file to the beginning or end of the job file. Select Characters to add
the string of characters entered in the Characters box to the beginning or end of the job
file, or to remove a given number of characters from the beginning or end of the job file.
Select Lines to add the lines of text entered in the Lines box to the beginning or end of the
job file, or to remove a given number of lines from the beginning or end of the job file.
l
Position: Select whether you want the task to add or remove content from the beginning
or end of the job file.
Page 382

l
Add CRLF after last line: Select if you want to add a CRLF (carriage return/line feed)
character after the last line of text added to the job file. This option is only available when
you choose to add lines of text to the job file.
l
ASCII file: Enter the path and name of the text file to be added to the job file, or use the
Browse button to navigate to this file. This box is only displayed when the Text file option
is selected in the Content box.
l
Characters: Enter the string of characters to be added to the job file. This box is only
displayed when the Characters option is selected in the Content box.
l
Lines: Enter the lines of text to be added to the job file. This box is only displayed when
the Lines option is selected in the Content box.
l
Remove: Enter the number of characters or lines to be removed from the job file. This box
is only displayed when Remove is selected in the Action group and when the Characters
or Lines option is selected in the Content box.
Miscellaneous Tab
The Miscellaneous tab is common to all tasks.
Check the option Use as step description to display the text next to the icon of the plugin in
the Process area.
Advanced Search and Replace
Advanced Search and Replace action tasks are used to locate and replace strings of data
within the job file and to replace them with other strings of data. Contrary to Search and
Replace action tasks, they allow the use of regular expressions.
Using regular expressions, it is possible to search for patterns rather than specific strings. For
instance, a pattern can be specified to find all valid email addresses or phone numbers within
the data stream.
In a regular expression, substrings can be captured as groups using parentheses. Values of
capturing groups - the matched substrings - can then be included in the replacement string
using the dollar sign syntax: $1 ... $9. The numbering follows the order in which groups appear
in the search string.
For example, in order to replace all instances of "Page x/y" (Page 1/3, Page 2/3, etc.) in a
document with "Page x of y total pages", the regular expression would have to contain
parentheses to capture the values of x and y: Page\s(\d*)\/(\d*). The first capturing group,
Page 383

(\d*), contains the value of x, the second the value of y.
The replacement string would then be: Page $1 of $2 total pages (where $1 contains x, and
$2 contains y).
For more information about regular expressions, visit a website like https://www.regular-
expressions.info/.
To test out your regular expressions go to: https://regex101.com/.
Input
Any text-based file can be used in this task, even formats that are not directly compatible with
PlanetPress Workflow. As long as the text is visible in a text-based editor (such as Notepad), it
is readable and supported by this task.
Processing
The appropriate changes are made to the data file (replacing text).
Output
The modified data file is output from this task. Metadata is not modified in any way if it is
present.
Task properties
General tab
l
Search mode group: Select your chosen search mode within this group.
l
Search line by line: Select if you want each line in the data stream to be searched
separately. When this option is selected, PlanetPress Workflow considers each line
as an individual data stream (lines are separated by Line Feed characters). It
minimizes memory requirements but may also limit hits, since lines are considered
separately. Note that it is not possible to use search expressions that specify
multiple data lines when this option is selected.
l
Search whole file: Select if you want the entire data stream to be searched as if it
were a single string of text. When this option is selected, PlanetPress Workflow
loads the entire file in memory. It offers more flexibility, since search expressions
may span across multiple lines and may result in more successful hits. Note that
since this option uses more memory, it may affect performance.
Page 384

l
String to search: Enter your search string or regular expression in this variable
property box. To enter multiple strings or expressions, press Enter after each one.
(Note that only one string can be entered in the Replace with box.)
l
Treat as regular expression: Select to specify that the string or strings entered above
are to be interpreted as regular expressions rather than ordinary text strings. This option
disables all position options as well as the Whole words only option.
l
Search options group
l
Case sensitive: Select to force the plugin to match the character casing of the
search string above with the characters found in the file. If this option is selected,
“DAY” and “Day” will not be considered as matching the search string “day”.
l
Whole word only: Select force the plugin to search only for strings that match the
search string from beginning to end (cannot be used with regular expressions). If
this option is selected, “DAY” and “DAYS” will not be considered as matching
strings.
l
Position options group: Specify the location where the string must be found using this
group. Note that this whole group is disabled when the Treat as regular expression
option is selected.
l
Anywhere on the line: Select to indicate that the search string can be anywhere on
the line.
l
At the beginning of a line: Select to indicate that the search string must be the first
string on the line.
l
At the end of a line: Select to indicate that the search string must be the last string
on the line.
l
At column: Select to indicate that the search string must be in a specific column.
Specify the column number (the value must be greater then 0) in the Column value
box below.
l
Between specific words: Select to indicate that the search string must be between
specific words. Specify these words in the Word before and Word after boxes
below.
l
Occurrence related: Select to indicate that the search string must be found a
specific number of times before a string replacement is performed. If the Search line
by line option is selected in the Search mode group, the search counter is reset for
every line. If the Search whole file option is selected in the Search mode group,
the search counter is not reset before the end of the file. Select one of the
Page 385

occurrence options (described below) in the list box below and enter a value in the
Occurrence value box besides it.
l
At occurrence: The replacement will take place only when the specified
number of occurrences has been reached. Specifying 2 occurrences, for
instance, means that only the second occurrence will be replaced.
l
At every specified occurrence: The replacement will take place every time
the specified number of occurrences is reached. Specifying 2 occurrences, for
instance, means that the second, the fourth and the sixth (and so on)
occurrence will be replaced.
l
All after occurrence: All occurrences of the search string will be replaced
once the specified number of occurrences has been reached. Specifying 2
occurrences, for instance, means that all occurrences after the second one will
be replaced.
l
All before occurrence: All occurrences of the search string will be replaced
until the specified number of occurrences has been reached. Specifying 5
occurrences, for instance, means that the four first occurrences will be
replaced.
l
Replace with: Enter the string that must be used as the replacement string when a match
is found. If the search string is a regular expression that captures groups, the values of
groups - the matched substrings - can be accessed using the dollar sign syntax: $1 ... $9.
The numbering follows the order in which groups appear in the search string. For
example: "Page $1 of $2 total pages".
Miscellaneous Tab
The Miscellaneous tab is common to all tasks.
Check the option Use as step description to display the text next to the icon of the plugin in
the Process area.
Barcode Scan
The Barcode Scan task is used to convert barcode data from multiple image formats into text-
readable information. This information is placed in the Metadata and can be used by the rest of
the process.
Input
Image formats supported by the Barcode Scan task are:
Page 386

l Tag Image File Format (TIFF)
l Portable Document Format (PDF)
l Joint Photographic Experts Group (JPEG and JPG)
l Portable Network Graphics (PNG)
l Bitmap (BMP)
Processing
The task reads the image and detects the presence of the selected supported barcode types.
When a barcode is detected, the data it contains is read and added to the Data Page level of
the Metadata.
Note
This task does not recognize more than one level of the Metadata Document. This means
that if you are intending to define separate documents, you should use the Metadata
Level Creation task after the Barcode Scan.
Output
This task outputs the original data file but with modified (or created) Metadata. The format
should be the same as the input.
Supported barcode types
The following types of barcodes are supported:
Barcode
types
Description
EAN13 EAN13 symbology. Used with consumer products internationally, 13
characters.
EAN8 EAN8 symbology. Short version of EAN-13, 8 characters.
UPCA UPCA symbology. Used with consumer products in U.S., 12 characters.
Page 387

Barcode
types
Description
UPCE UPCE symbology. Short version of UPC symbol, 6 characters.
Code11 Code 11 symbology. Used to identify telecommunications equipment
Code39 Code 39 symbology. U.S. Government and military use, required for DoD
applications
Code93 Code 93 symbology. Compressed form of Code 39.
Code128 Code128 symbology. Very dense code, used extensively worldwide.
Codabar Codabar symbology. Used in libraries and blood banks.
Inter2of5 Interleaved 2 of 5 symbology. Used in warehouse, industrial applications.
Add2 2 additional digits code for UPC-based symbologies. Used to indicate
magazines and newspaper issue numbers.
Add5 5 additional digits code for UPC-based symbologies. Used to mark
suggested retail price of books.
PDF417 Portable Data File is a 2-dimensional barcode (also known as matrix code)
used in a variety of applications, including Transport, Identification cards,
and Inventory management. It is best suited for cases where information
needs to move with an item or document.
DataMatrix DataMatrix is a two-dimensional barcode which can store from 1 to about
2,000 characters. DataMatrix is being used to encode product and serial
number information on electrical rating plates; to mark of surgical
instruments in Japan; to identify lenses, circuit boards, and other items
during manufacturing.
QRCode The QR Code (Quick Response Code) is a 2-dimensional matrix code. It
can encode up to 2509 numeric or 1520 alphanumeric characters.
PostNet PostNet symbology. Used by the United States Postal Service to assist in
directing mail.
Page 388

Barcode
types
Description
RM4SCC RM4SCC symbology. Used by the Royal Mail.
Note
The fewer barcode types are selected, the faster the plugin performs. Selecting only the
expected barcodes is therefore a good practice.
Barcode orientations
Barcode orientations represent a barcode orientation on an image. For example, when the left-
to-right option is checked, the task will try to read the barcode value assuming that the barcode
data should be read in a left-to-right fashion.
Note
The fewer orientations are selected, the faster the task performs.
Settings
l
Force checksum validation: Select to define whether the checksum validation is
required for symbologies in which a checksum character is optional. The goal of
checksum is to detect accidental modification such as corruption to stored data or errors
in a barcode values. By default it is set to false. Note: If barcodes using symbologies with
optional checksum do not show the checksum and the option Force checksum validation
is checked, no barcode will be detected on the page
l
Process by: Select to define whether to process the image by page or by file:
l
Process by Page: The task is able to handle single or multiple page files (Tiff and
PDF) and act as a loop to process each page independently and sequentially. The
Metadata file will be created separately for each page if it does not exist or will be
enhanced with the values on processed Datapage level if it already exists. All
supported images will be converted to tiff format.
Page 389

l
Process by File: The task will process the file once and will insert the barcode
information in one Metadata file. Metadata will be created if it does not exist or will
be enhanced with the values if it already exists.
l
Replace non-printable character with: Enter a character that will be used as a
replacement for all non-printable characters read from the barcode.Some barcode types
like Data Matrix can store non-printable characters that Metadata does not support. The
Barcode Scan task character replacement option will allow successful barcode reading
of all non-printable characters in a given barcode. The value specified in the Replace
non-printable character with option will be found in place of any non-printable character in
the BarcodeValue and Barcode_x_Value Metadata fields, while the original barcode
value (i.e. with non-printable characters) will be available in the BarcodeBase64_x_value
Metadata field. This option allows only one printable replacement character. By default,
this character is an empty space. Note: Non-printable characters are the first 32
characters in ASCII character table (Ex.: form-feed, newline, carriage return characters)
l
Scan Interval: Set a scan interval in pixels of image scanning. This property directly
affects the performance and quality of the recognition. A greater interval value means
better performance, but a lower recognition confidence level, and vice versa. For
example, a value of 1 means that every image line will be scanned. By default, the Scan
Interval is set to 1.
l
Threshold level [0..255]: Set to represent the color threshold level in order to distinguish
foreground pixels from background pixels in color or gray scale images. Value can be
between 0 and 255, corresponding to the pixel intensity value, from 0 (black) to 255
(white). Therefore, defining a threshold value of 128 means that the pixels with an
intensity greater than 128 will be considered as white, while those less than 128 will be
considered black. The value 0 means that the color threshold level will be calculated
automatically depending on the image. By default Threshold level [0..255] is 0. This
parameter is ignored with binary images (black and white images).
Miscellaneous Tab
The Miscellaneous tab is common to all tasks.
Check the option Use as step description to display the text next to the icon of the plugin in
the Process area.
Metadata implementation
The Barcode Scan task reads each scanned file and outputs the values read from barcode(s)
on the page(s) into Metadata depending of the selected Process by option:
Page 390

l If the selected option is process by page, then the Metadata file is created and overwritten
for each new scanned page.
l If the selected option is process by file, then only one Metadata file will be created (or
updated).
Note
If Metadata was created previously in the process, the task only adds new fields to the
existing Metadata at the datapage level.
Metadata fields
The barcode values are stored at the datapage level of the Metadata. In the following
definitions, the first 2 Metadata fields are for standard use, while the next 8 fields contain '_1_'
in their name. This number represents the barcode index on the page. If there is more than one
barcode on the same page, these Metadata fields will be defined as many times as there are
barcodes on the page, except that the middle number (..._X_...) will increment according to the
barcode index (e.g. Barcode_2_Value, Barcode_3_Value, etc.).
l
BarcodeValue: Metadata field representing the value of the barcode. When multiple
barcodes are present on the page, this field is present multiple times.
l
BarcodeCount:: Metadata field representing the number of barcodes on the page.
l
Barcode_1_Value: Metadata field representing the value of the first barcode on the page.
Note that this field (Barcode_1_Value) contains the same value as the first occurrence of
BarcodeValue.
l
BarcodeBase64_1_Value: Metadata field containing the value of the first barcode,
encoded in Base64.
l
Barcode_1_Type: Metadata field containing the type of the first barcode (ex. EAN13,
UPCA …).
l
Barcode_1_Orientation: Metadata field containing the orientation of the first barcode.
l
Barcode_1_Top: Metadata field providing the distance (in pixels) from the top of the
page to the top of the first barcode.
l
Barcode_1_Bottom: Metadata field providing the distance (in pixels) from the top of the
page to the bottom of the first barcode.
Page 391

l
Barcode_1_Left: Metadata field providing the distance (in pixels) from the left of the page
to the left side part of the first barcode.
l
Barcode_1_Right: Metadata field providing the distance (in pixels) from the left of the
page to the right side part of the first barcode.
Accessing a barcode value from the Workflow tool
One method to access a barcode value from the Workflow configuration tool is to use a
VBScript with the Open Script task, using the Watch.ExpandString command with a Metadata
command as its input parameter, in between double quotes. For example, the following script
line gives the value of the first BarcodeValue Metadata field of the first datapage:
watch.expandstring("GetMeta(BarcodeValue[0],0,Job.Group[0].Document[0].Datapage[0])")
Another method is to use a Set Job Infos and Variables task to copy a Metadata field into a
Workflow variable.
Limitations
l
Some barcodes created with PlanetPress 5 could not be read by the Barcode Scan task,
so please use PlanetPress version 6 or 7 to create barcoded documents.
l When using a secondary input, a known issue of the Workflow Tool can cause some
unexpected behavior, like having the same Metadata file reused instead of a new one
being created for each data file captured. To work around this issue, simply add a
Rename action task to set a unique file name (Ex. %u) to each new file before the
Barcode Scan task, after each secondary input.
Change Emulation
Change Emulation action tasks are used to tell the tasks that follow them to use a different
emulation to format the data they receive (see: "About data emulation" on page61). These
tasks do not perform any operation as such on the data, but rather they modify the way
subsequent tasks process the data they receive.
Change Emulation action tasks are typically used when a secondary input task brings new
data that is not structured like the initial data into the process. By default, every task included in
a process uses the emulation associated with the sample data file to structure the data before
processing it. Any task that must use a different emulation must be preceded by a Change
Page 392

Emulation action task. All the tasks that follow on the same branch will use the emulation
chosen in the Change Emulation task.
Input
Any data file.
Processing
The emulation for the following tasks is changed to the selected emulation.
Output
The original data file, metadata and job infos are not modified. Only the emulation is changed.
Task properties
Note
Note to PlanetPress Suite users: The options of this task are basically the same as the
Data Selector in PlanetPress Design; see PlanetPress Design User Guide.
General Tab
Add/remove characters: Enter the number of characters to add to, or remove from, the head of
the data stream, or use the spin buttons to increment or decrement the value. Positive values
add characters; negative values remove characters. This is useful when one or more characters
of input data precede the start of the first data page. Note that certain control characters can be
problematic. For example, the NUL character (hexadecimal 00) cannot be removed from the
head of the data stream, and a backspace (hexadecimal 08) can cause unpredictable behavior.
The Hex Viewer can be useful in helping determine the control characters that appear at the
head of the data stream. (To open the Hex Viewer, select Debug > View as Hex, in the menu.)
Note that you cannot add characters in a CSV. Further note that if you remove characters in a
CSV emulation, you should ensure that you do not inadvertently remove field or text delimiters.
Add/remove lines: Enter the number of lines to add to, or remove from, the head of the data
stream, or use the spin buttons to increment or decrement the value. Positive values add lines;
negative values remove lines. This is useful when one or more lines of input data precede the
Page 393

start of the first data page. Note that you cannot add lines in either a CSV or user defined
emulation.
Lines per page: Enter the number of lines each data page contains, or use the spin buttons to
increment or decrement the value.
Pages in buffer: Enter the number of data pages you want the data page buffer to contain, or
use the spin buttons to increment or decrement the value.
Read in binary mode (ASCII emulation only): Select to read the data file in binary mode. You
select this if you intend to run a PlanetPress Design document on a printer queue that is set to
binary mode. In binary mode, the printer reads the end of line characters (CR, LF, and CRLF)
as they appear in the data stream and does not perform any substitution. A printer that does not
support binary mode or is not running in binary mode replaces any CR, LF, or CRLF that
appears at the end of a line of data with a LF. Note, however, that it replaces a line feed
followed by a carriage return (LFCR) with two LFs. Binary mode is the recommended printer
mode when you use an ASCII emulation.
Cut on FF character: Select to have a new data page when a form feed character is
encountered in the data stream. If you select Cut on FF character, you have two conditions that
signal the end of a data page: the form feed character and the number of lines set in the Lines
per page box.
View Selector: Click to go to the Data Selector to set the properties of this task.
Emulation. The available emulations are:
l
Line printer. (Nothing to configure.)
l
ASCII.
l
Tab on CR: Select to have the document insert a tab after each carriage return
character it encounters. Set the number of spaces in the tab using the Number of
spaces in the tab box. This option is available only if you selected the Read in
binary mode option. If you cleared Read in binary mode, the printer replaces any
end of line characters (CR, LF, or CRLF) it encounters with a LF.
l
Number of spaces per tab: Enter the number of spaces you want the document to
use for a tab, or use the spin buttons to adjust the value.
Page 394

l
Remove HP PCL escapes: Select to have the document remove any Hewlett
Packard Printer Control Language (HP PCL) escape sequences it encounters.
l
CSV (comma separated values).
l
Text delimiter: Enter the character that starts and ends the data in each field of the
record. If you do not set a text delimiter and the data in a field contains the character
you set as the delimiter, the document splits that data into two fields. If you want to
use a backslash character (\) as a delimiter, you must precede it with another
backslash character (thus you would enter \\). You can also specify an ASCII
character using its octal value preceded by a backslash (for example, \041 is the
exclamation mark character [!]).
l
Force one record per page: Select to force a single record per data page. If you
clear the selection, the document fills the data page completely, splitting a record
across data pages if necessary. If you want to avoid splitting a record across data
pages, yet have several records in the buffer, select Force one record per page,
and, when you stabilize your data, set Pages in buffer to the number of records you
want the buffer to hold.
l
Delimiter: Enter the character that separates the fields of each record in the input
data. If you want to use a tab as a delimiter, select Set tab as field delimiter. If you
want to use a backslash character (\) as a delimiter, you must precede it with
another backslash character (thus you would enter \\). You can also specify an
ASCII character using its octal value preceded by a backslash (for example, \041 is
the exclamation mark character [!]).
l
Set tab as field delimiter: Select to define a tab as the character that separates the
fields of each record in the input data. Clear to use the Delimiter box to define that
character.
l
Channel skip.
l
Skip page: Enter the channel skip code that, in your data, signals the start of a new
data page. In standard channel skip emulation, a 1 (one) signals the start of a new
data page. If a 1 appears in the first column of your data, it is likely the channel skip
codes are standard, and that only minor adjustments to the other codes, if any, will
be necessary.
l
No line feed: Enter the channel skip code that tells the document to ignore any line
feed character (LF) that appears at the end of the line. This causes the next line to
print over the current line, and is a technique impact printers use to print a line, or
elements of a line, in bold or with underlining. For example, the input data for an
impact printer might underline text by placing the text to underline on one line, and
Page 395

the underscore characters of the underline on the following line. The first character
of the line with the text is a code that tells the printer to ignore the LF at the end of
that line. The result is underlined text.
It is important to understand what happens when you tell the channel skip emulation
in PlanetPress Design to ignore the LF at the end of a line. Recall that the emulation
stores each line of data in the data page buffer, and that each cell of the data page
buffer can contain at most a single character. If the emulation ignores the LF at the
end of a line, it must determine whether to overwrite the cells of the last line of data it
stored. In this case, it compares the character in each cell in the line with the one in
the new line destined for that cell. If the character in the cell is a space or an
underscore, it overwrites that character with the one from the new line. If the
character in the cell is not a space or an underscore, it leaves it intact.
l
Skip x lines: Use these boxes to enter any channel skip codes in your data that tell
the document to skip a specific number of lines. If you want to enter a backslash
character (\) as a code, you must precede it with another backslash character (thus
you would enter \\). You can also specify an ASCII character as a code using its
octal value preceded by a backslash (for example, \041 is the exclamation mark
character [!]).
l
Char, Skip to line: Use these boxes to enter any channel skip codes in your data
that tell the document to skip to a specific line. Enter the code in the Char box; enter
the line number in the Skip to line box or use the spin buttons to adjust its value. If
you want to use a backslash character (\) as a code, you must precede it with
another backslash character (thus you would enter \\). You can also specify an
ASCII character as a code using its octal value preceded by a backslash (for
example, \041 is the exclamation mark character [!]).
l
Go to column: Use this to enter the channel skip code in your data that tells the
document to advance to a specific column. Enter the code in the Char box to the left
of the Go to column label, and use the box on the right of the Go to column label to
set the column number. This is useful when your data contains redundant lines that
were originally created to bold a line on a line printer. By entering a Go to column
value that is greater than the width of the data page, you can remove the second
line by shifting the contents of the second line outside the data page.
l
Database. (Nothing to configure.)
l
XML.
l
Cache XML data: When this option is selected, PlanetPress Watch/Server only
reloads the data if the size or modified date of the XML file changes. When this
option is not selected, the XML data will be reloaded into memory every time that a
Page 396

plugin works on the data file. Caching the XML data will make subsequent tasks run
faster (as loading an XML file can take a long time) but will also use up more
memory since that memory isn't released in between tasks. For single runs the
performance gain is less noticeable than in loops (either through a splitter, a Loop
task or a metadata filter) where the XML file would be loaded repeatedly.
l
PDF. (Nothing to configure.)
Miscellaneous Tab
The Miscellaneous tab is common to all tasks.
Check the option Use as step description to display the text next to the icon of the plugin in
the Process area.
Create PDF
The Create PDF Action task creates simple PDF files using the default quality. It is very similar
to the Digital Action task (see "Digital Action" on page408) but is more limited. It does not
contain the advanced PDF options that are offered by the PlanetPress Image solution (see
"About PlanetPress Image" on page759).
In PlanetPress Suite, this task can be used to merge a data file with a specific Design
document and output the result as PDF.
In Connect, merging a data file with a Connect template and outputting PDF is done using OL
Connect Print tasks (see "OL Connect tasks" on page591).
Alternatively this task may be part of a "PDF workflow": a workflow in which both input and
output are PDF and in which Metadata tasks are used to group, sort and sequence (split) the
PDF data. (See "PDF Workflow" on page287 for more information on this.) The Create PDF
task will apply the active Metadata to the PDF data file.
PDFs created with the Create PDF action task will effectively replace the current data file in
any given process using such a task.
Input
Any data file supported by PlanetPress Workflow, or a PostScript file.
Page 397

Processing
A PostScript file can be converted straight into PDF.
A regular data file needs to be merged with a PlanetPress Design document first, except for a
PDF file, which may or may not be merged with a PlanetPress Design document.
When a PDF file is used as-is, the Create PDF task will apply the active Metadata to the PDF
data file (for more information on this see "PDF Workflow" on page287 and "Working with
Metadata" on page79).
Output
The output of this task is always, exclusively, a PDF file, optionally optimized and optionally
with fresh Metadata.
For the PDF values for files generated with this plugin, see "PDF Values" on page400.
Task properties
General tab
l
Documents: Select None to use the job file as-is. Alternatively, select a specific
PlanetPress Design document if you want all the jobs to be generated with that
document.
l
Run mode group (only with a PlanetPress Design document):
l
Printer centric: Select to send the document along with the trigger and data to the
PDF RIP.
l
Optimized PostScript Stream: Select to merge the selected document with the
data received by this task before sending it to the PDF RIP. Note that some features,
such as the Time and Date require that this option be selected.
l
Options group
l
Add job information to the document: Select to add the available Job Info
variables in the “header” of the generated output file.
l
Optimize resulting PDF: Select to specify whether the resulting PDF should be
optimized. Optimization can lead to a significant reduction in the size of the PDF,
but it may also add a certain amount of time to the process. This option should only
be unchecked if the timing of the process is critical and it needs to be done quickly,
Page 398

but keep in mind that the resulting PDF may be much larger than it should be and
may even be too large for PlanetPress Workflow to handle.
l
Reset Metadata according to new PDF: The Metadata is updated to include only
the selected nodes from the current Metadata, and sequential indexes are re-
created.
ll
Security group
l
Set document permissions: Select to enter the Permissions password.
l
Permissions password: Enter a password in this box only if you want to
prevent users who does not have this password from changing the security
options of the generated PDF files.
l
Allow printing: Select to let users print the generated PDF files.
l
Allow changing the document: Select to let users edit the generated PDF files.
l
Allow content copying: Select to let users copy content from the generated PDF
files.
l
Allow form filling: Select to let users enter information in the form fields included in
the generated PDF files.
ll
PDF open password: Enter a password in this box only if you want to prevent
users who does not have this password from opening the generated PDF files.
l
Security Level: The password protection for PDF can be encrypted using one of
the available encryption methods (RC4, AES-256 and AES-128). It gives the task
the ability to take an existing PDF in input and apply the selected password to the
PDF without any change to the quality level of the original PDF.
l
Font group
l
Embed all: Select to embed the entire font of all fonts used in the variable content
document within the generated PDFs. Using this option may result in large PDFs,
especially if many fonts are used. Note that those fonts installed by default with the
Adobe Acrobat and Adobe Reader are never embedded. If a font is not embedded
in your PDF, opening it on another computer or printing it may cause it to be
substituted by another default font.
l
Subset: Select to embed only a subset of the Type 1 and TrueType fonts used in
the document. A font subset is in fact composed of only those characters that are
actually used in the document. This option can only be used if the Embed all fonts
option is selected. Note that if more than 35% of the characters included in a font are
Page 399

used in the document, the entire font is embedded. This option often produces
smaller PDF files and ensures proper PDF display.
l
Initial view group
l
Zoom factor: Select the magnification at which you want Adobe Acrobat or Adobe
Reader (or other PDF viewer) to open the generated PDF. Choose the Fit in
window option to display the entire page using the available screen space, or
choose a percentage of the actual document size.
l
Show: Select the information you want Adobe Acrobat or Adobe Reader (or other
PDF viewer) to display with the generated PDF. Select Page only to leave the tabs
area to the left of the PDF pages empty. Select Bookmarks and page to display the
contents of the Bookmarks tab (you use data selection objects to create bookmarks
in PlanetPress) alongside the PDF pages. Select Page tab and Page to display the
content of the Pages tab (thumbnails of each PDF pages) alongside the PDF
pages. Select Full screen to hide all screen contents except the PDF page, and
expand the PDF page to the maximum size it can occupy onscreen.
Miscellaneous Tab
The Miscellaneous tab is common to all tasks.
Check the option Use as step description to display the text next to the icon of the plugin in
the Process area.
PDF Values
Here's a list of the hard-coded PDF values for files generated with this plugin. Basically, these
settings correspond to Digital Action and PlanetPress Image settings for Standard Quality (see
"About PlanetPress Image" on page759).
l
PDF version: 1.4
l
Job option: Standard quality
l
General:
l Compress text and line art
l Auto-rotate pages
l Optimize for fast web view
l
Author: PlanetPress
Page 400

l
Keywords: PlanetPress; Create PDF plugin
l
Monochrome images:
l
Compression: CCITT
l
Pixels per inch: 1200
l
Grayscale images:
l
Compression: Auto
l
down sampling: Bicubic
l
Pixels per inch: 300
l
Color images:
l
Compression: Auto
l
down sampling: Bicubic
l
Pixels per inch: 150
l
Security:
l Allow printing
l Allow changing the document
l Allow content copying
l Allow form filling
l
Font:
l Embed all fonts
l Subset embedded fonts
l
Open options:
l
Zoom factor: Fit in window
l
Default view: Page only
Database Query
The Database Query action task retrieves data from various databases to use as input data.
The data received by the task may be kept as is or converted to the CSV, Fixed Length
Columns or XML format.
Database Query action tasks are not considered input tasks as such, because they cannot be
used to start a process. Although they cannot be used to get the process’s initial input, they can
Page 401
be used to gather secondary input (see "Input tasks" on page309). In cases where all your data
comes from databases, you can use a Create File input task as a dummy task at the beginning
of your process, and then use a PlanetPress Workflow Database action task to gather your
actual data.
Note
Database Query action tasks require version 2.5 or higher of the Microsoft Data Access
Components (MDAC), including JET 4.0.
When adding a Database Query action task, you have two options:
l You can use static properties (properties that will remain the same regardless of the data
processed at run-time). This option lets you use an Open DataBase Connectivity (ODCB)
compliant data source. You can also edit the SQL statement that assembles the database
table. Note that you can import a database connection configuration that you previously
exported from PlanetPress Design (when you created a document) or from PlanetPress
Workflow (when you set up a sample data file for a process).
l You can use dynamic properties (properties that include variables or data available at
run-time). This option lets you create a dynamic database connection string as well as an
SQL statement that changes based on the data processed by PlanetPress Workflow.
Note that this option will not let you test the query performed by this task before it is
performed with actual data.
Input
Any data file. The data file will be discarded by the task.
Processing
A connection to the selected database is made, the data is retrieved, and an output in the
selected emulation format is generated.
Output
The result of the query is output in the selected data format. The current emulation is changed
to the selected format. Metadata and Job Info variables are not modified in any way.
Page 402

Task properties
Database Connection Tab
l
Database group
l
Location: Enter either the path and name of the database or a database connection
string in this box. You may click to navigate to the database and paste the database
path and name automatically to this box. You may also click create an ODBC
connection string to the data source and paste the string automatically to this box. If
a login name and password are required to connect to the database, a dialog box is
displayed and the information you enter is saved in the configuration of the
PlanetPress Workflow Database action task.
l
Table/Query: Select the table or query containing the information you need as your
input data.
l
Range group
l
All: Select this option use all the records included in the database.
l
Records: Select this option use only some of the records in the database. Indicate
the range by entering the number of the first record followed by a dash and the
number of the last record. To use records 50 to 75, for example, enter 50-75. Note
that this option is intended mostly for testing purposes, since in real life scenarios,
you typically want to use all the records stored in a database.
l
Emulation group: Use options from this group to customize the data file generated by the
PlanetPress Workflow Database action task.
l
Output file emulation: Select the emulation corresponding to the type of output file
you want the PlanetPress Workflow Database action task to generate.
l
CR-LF replacement: If you want CR-LF (Carriage Return-Line Feed) characters
within the data file to be replaced by another character, use this box to indicate
which character to use. You may select the replacement character from the list or
type your own.
l
Emulation options group: Options from this group change based on the selected
output file emulation.
l
PlanetPress Workflow Database Emulation: If you selected PlanetPress Workflow
Database in the Output file emulation box, the following options are available:
l
Create data pages as follows: Select the option that will be used to generate
the data pages. Each data page created using the table or query selected
Page 403

above (Table/Query box) can contain a single record, a fixed number of
records, or a variable number of records. To choose the last option, select one
of the When [field name] changes listed in this box.
l
Sort on conditional field: Select this option if you want the table to be sorted
using the field selected in the Create data pages as follows box before the
data page creation process is started.
l
Maximum number of records per page: For data pages that contain multiple
records (a fixed or variable number of records), enter a maximum number of
records per page in this box. Note that this value cannot exceed 4,000.
l
CSV Emulation: If you selected CSV in the Output file emulation box, the following
options are available:
l
Sort on field: If you want the table to be sorted before the data page creation
process is started, select the sort field from this box.
l
Text delimiter: Select the text delimiter to be used in the generated file.
l
Field separator: Select the field separator to be used in the generated file.
l
Add a header record with field names: Select this option if you want the
generated file to have a header record (a record that includes the field names
only).
l
Fixed Length Columns Emulation: If you selected Fixed length columns in the
Output file emulation box, the following options are available:
l
Sort on field: If you want the table to be sorted before the data page creation
process is started, select the sort field from this box.
l
Default width: This box is used to set the default width for all fields. It is set to
60 by default, but can be set to any value between 1 and 65535. This value is
applied to all the fields in the generated file. To set different widths for each
field, use the Configure Width button. Doing this disables the Default width
box.
l
Configure Width: Click to set the width of each field in the generated file. The
displayed Configure Width dialog box lists all the fields in the file that will be
generated and indicates their widths. To change the indicated widths, simply
click the values displayed in the Width column and enter new values. Click
OK when you are done to close the dialog box. You will then no longer be
able to use the Default width box.
Page 404

l
XML Emulation: If you selected XML in the Output file emulation box, the following
options are available:
l
Create data pages as follows: Select the option used to generate the data
pages. Each data page created using the table or query selected above
(Table/Query box) can contain a single record, a fixed number of records, or a
variable number of records. To choose the last option, select one of the When
[field name] changes listed in this box.
l
Sort on conditional field: Select this option if you want the table to be sorted
using the field selected in the Create data pages as follows box before the
data page creation process is started.
l
Data encoding: Select the encoding used in the generated XML file. By
default, this option is set to the default encoding of the computer used to create
or edit the configuration. You may choose any encoding listed in the drop-
down list or enter your own.
l
Maximum records per page: Select this option if you want to limit the number
of records per page. This option is only available if you indicated that you
wanted each data page to contain several records in the Create data pages as
follows box.
l
XML for PrintShop Mail: This emulation is specifically for use with merging your
data with a PrintShop Mail document, using the PrintShop Mail task (see PrintShop
Mail). No options are offered, as this format is static and should not be modified.
l
Alternate syntax: Select to prevent automatically enclosing the names of any database
tables and fields that appear in the SQL query in square brackets when it exits the
Advanced SQL Statement dialog box. The alternate syntax may be required for some
database types.
l
Edit SQL: Click to create and test an advanced SQL query; see "Advanced SQL
Statement Dialog" on page853.
l
Import Config: If you previously created and exported a PlanetPress Workflow Database
Connection configuration, click this button to import it. This saves you the trouble of
configuring the connection every time.
l
Client-side Cursor: When this option is enabled, the complete result set is downloaded
before processing starts, and changing records is done by PlanetPress Workflow. This is
generally faster for queries returning a small number of results ; otherwise the start of the
record processing can be delayed since the whole record set must be downloaded.
Page 405

Note
MySQL, using ODBC 5.0, must be set to use a client-side cursor.
Microsoft Access will always work better when using a Server-Side cursor.
l
Include password in config: Select to save an encrypted version of the database
password (if any) within the exported configuration.
l
Export Config: Click to export the currently displayed properties of the PlanetPress
Workflow action task. The exported configuration can then be reused on other
PlanetPress Workflow workstations.
Dynamic SQL Tab
l
Use dynamic values at run-time: Select to use a dynamic database connection string
and / or SQL statement at run-time. Check this box to enable the options included in this
group (this disables the corresponding options in the General tab).
l
Parse normally: Select to interpret any backslashes included in the database
connection string as backslashes. If this option is not selected, any backslash that is
not doubled will be disregarded.
l
Expect record set: Check if you are expecting a result from the database after
executing the SQL query. If the query is expecting a record set in return and does
not return one, the task will trigger an error.
l
Database connection string: Enter a variable connection string in this box. To do
this you may begin by clicking to create an ODBC connection string to the data
source and paste the string automatically to this box. Note that if a login name and
password are required to connect to the database, a dialog box is displayed and the
information you enter is saved in the configuration of the PlanetPress Workflow
Database action task. Another option, if a database connection string (not a
database path and name) was already entered in the Database Connection tab, is ti
simply copy and paste it to this box. Bear in mind that if the Parse normally option is
not selected, any backslashes included in the connection string that is not doubled
will be disregarded. Once your connection string is displayed in this box, you can
edit it by adding variables or data selections.
l
SQL statement: Enter your SQL statement. Remember that you may use variables
and data selections in your statement.
Page 406

Miscellaneous Tab
The Miscellaneous tab is common to all tasks.
Check the option Use as step description to display the text next to the icon of the plugin in
the Process area.
Decompress File(s)
Decompress File action tasks decompress zipped job files (files compressed as zip files).
Input
This task only accepts ZIP files, however it is not necessary that the job file be the ZIP, since
this file path and name can be specified in the task itself.
Processing
Every file in the ZIP is extracted to the specified location. If a folder structure exists in the ZIP, it
is respected in the output folder.
Output
This task outputs the data file it received with no modification. Metadata and job files are not
touched either.
Task properties
General Tab
l
Zip file name: Enter the name of the zipped file. In this variable property box, you may
enter static characters, variables, job information elements, data selections, or any
combination of these.
l
Output folder: Enter the name of the folder in which you want the decompressed files to
be stored.
l
File mask: Enter a file name mask to specify which files must be decompressed. Leave
the default value of *.* to decompress all the files found within the zip.
l
Password: Enter a password if the zip file is password protected.
Page 407

l
Restore path structure: Select if you want the complete file structure to be rebuilt from
the output folder to the decompressed files.
l
Force directories: Select if you want to allow the system to create new folders when
required. If this option is not select and the Decompress file action task tries to save a file
to a folder that does not exist, the task will fail.
l
Overwrite existing files: Select if you want decompressed files that have the same name
as existing files to overwrite the existing files.
Miscellaneous Tab
The Miscellaneous tab is common to all tasks.
Check the option Use as step description to display the text next to the icon of the plugin in
the Process area.
Digital Action
Digital Action Action tasks generate the same types of documents as generated by
PlanetPress Image output tasks (see "PlanetPress Image" on page514). Since Digital Action
tasks are not Output tasks, the documents they create are typically passed on to the following
task. The image files they generate are always saved, along with their index files (if any), to an
archive folder.
Note
The Digital Action task requires a PlanetPress Image license to be present on the same
IP Subnet as PlanetPress Workflow, either on the same server or a different one with
PlanetPress Image installed and activated.
Differences between Digital Action and Image tasks
l Digital Action is an Action task and cannot be the last task in a branch or process. Image
is an Output task, and has to be placed at the end of a process or branch.
l Digital Action can accept PDF/VT and PostScript (.ps) files as an input, even if they are
not generated by any PlanetPress Workflow tools.
Page 408

Task properties
General Tab
l
Host: Select the IP address of the PlanetPress Image host to which you want the request
to be sent.
l
Refresh: Click to update the list of IP addresses displayed in the Host drop-down list box.
l
Documents: Select None (Do not use a document (passthrough) in order to generate
an image with a PDF/VT or PostScript file in passthrough mode.
Note
For an explanation of how to generate specific tags and indexes for the Image and
Digital Action tasks, in a PDF/VT file created with Connect, see the Connect Online
Help: Generating tags for Image output.
Alternatively, select a PlanetPress Design document if you want all the jobs to be
generated with that document. To use a document chosen at run-time for each job, enter a
dynamic document name using a combination of text, variables and data selections. To
enable the dynamic document name box, click inside it. To disable it, press Enter. Note
that in the latter case, you must be certain that the documents that will be chosen at run-
time will in fact be available locally or at the selected host.
l
List only documents using VDX compilation: Check to ensure that only documents
that are compatible with the VDX compilation method are shown in the list, if producing
VDX output.
l
Run mode group
l
Printer centric: Select to send the document along with the trigger and data to
PlanetPress Image.
l
Optimized PostScript Stream: Select to merge the selected document with the
data received by this task before sending it to PlanetPress Image. Note that some
features, such as the Time and Date require that this option be selected.
l
Add job information to the document: Select to add the available job info variables in
the “header” of the generated output file.
Page 409

l
Output type: Select the output file type that you want.
l
PDF: The output will be a PDF file. If you select PDF, the DPI and Color Depth
options (see below) are disabled and the options available in the PDF tab are
enabled.
l
JPEG: The output will be a JPEG file. JPEG is a lossy compression image format
that creates small files, compressing continuous tone images (such as scanned
photographs) well.
l
TIFF: The output will be a TIFF file. TIFF is a higher quality format that is one of the
standards for document exchange, useful for eventual printing or archiving. You
have a choice of the following compressed TIFF formats: TIFF Group 3, TIFF Group
4, and TIFF Packed bits. You can also use the uncompressed TIFF format, which
produces the largest files with the highest quality. TIFF is a versatile and platform-
independent format. It is used in many digitizing projects as the format of choice for
the digital masters. The TIFF Group 3 and Group 4 formats are efficient for
document storage.
l
The AutoStore, DocAccel and KYOcapture formats also generate TIFF files along
with special XML that are meant for these specialized systems.
l
VDX: The output will be a VDX file, which is a PDF file with some PPML code
inside of it to enhance performance by doing caching/image reusing. The output can
only be used on devices that support the VDX technology.
l
DPI: Enter the dots per inch (dpi) resolution of the output image. This property is enabled
for all output types except PDF.
l
Color depth: Enter the color depth of the output image in bits per pixel (bpp). The color
depth is measured in bits, because each pixel of the output image can be described with
a varied number of bits. A higher bit number allows for more colors. It also increases the
image file size. A 1-bit color depth produces monochrome images. 8-bits produce
grayscale images (in PlanetPress Design you can have 8-bit color images, but these are
reduced to grayscale if you select 8-bit here), while 24-bits produce full color images. For
JPEG output, you cannot select a monochrome (1 bpp) color depth. For TIFF G3 and
TIFF G4, monochrome (1 bpp) is the only Color depth option you can select. This property
is enabled for all output types except PDF.
l
Multi-page: Select to generate a single file containing multiple pages. When this option is
not selected, PlanetPress Image creates a file for each page included in the output file.
This property is enabled for all output types except PDF and JPEG.
Add page number: Select to put a page number on each page included in the output file.
Page 410

This option goes with the Multiple TIFF option and is only visible if either the AutoStore,
DocAccel or KYOcapture format is selected.
l
Data Stream group: Determines what is output by the Digital Action task:
l
Use Digital as new data stream: Use the file generated by the task for the rest of
the process.
l
Use original data stream (without document): Use the same data file as what
was input to this task.
l
Use original data stream (with document): Uses the PostScript data generated
before image is created.
l
Save a copy: Optional when the "Use Digital as the new data stream" option is checked,
otherwise is always checked. Keeps a copy of the digital output onto the specified folder.
l
Folder and filename: Enter the path of the folder to which output files generated by this
task are to be archived. PDF index files (PDI and XML) are also put in this folder. This edit
box is enabled when the Save a copy option is selected. To prevent each new file from
overwriting the previous one, you should use variable names. As with any variable
property box, you can use any combination of text, variables and data selections. When
multiple files are generated for a single job (such as for multiple TIFFs), each file name
includes a sequence number, such as in Invoice0, Invoice1, Invoice2. If you use file name
masks that include dots, such as Statement.%y.@(1,1,1,1,25,KeepCase,Trim) or Job.%f,
for example, you must add quotation marks at the beginning and end of the file name
(“Statement.%y.%m.@(1,1,1,1,25,KeepCase,Trim)” or ”Job.%f”). Otherwise, when the file
is saved, anything appearing after the last dot is replaced by the file’s extension
characters (and the file name thus becomes Statement.2005.pdf instead of
Statement.2005.255842.pdf, or Job.tif instead of Job.544872.tif). Failing to add the
quotation marks may result in files being overwritten.
l
Automatically Add Extension: Check if you want the correct extension for the image
type to be appended to the filename automatically, rather than having to add it in the
Filename box. The Output Type determines the extension to be used.
l
Add PDF to PlanetPress Search database: Check to update the PlanetPress Search
database with each new PDF generated.
l
Index group: This group lets you specify which type of index must be created for each
document generated by this task. PDI files are used by PlanetPress Search as indexing
information.
l
None: Select if you do not want this task to add an index file to the generated
document.
Page 411

l
PDI: Select if you want this task to add a PDI index file to the generated document.
l
XML and PDI: Select if you want this task to add both an XML and a PDI index file
to the generated document.
ll
Use Title as FormName for PDF/VT document: Check to use the Title (defined on the
Job Options tab) as the PDF's FormName in the PDI, instead of the incoming PDF/VT
document's dc.title meta data tag. If the Title is empty, a warning is logged and the
FormName is not changed.
Job Options Tab
If you chose PDF as the output type in the General tab, use this tab to choose the appropriate
PDF options. Note that all the options available in this tab are only used with PDF files.
l
Job options: Select the PDF output option that best describes your needs. This loads all
the standard settings for the selected usage scenario. These settings can be changed as
required. Note that if you make changes and then select a different output option, your
changes will be lost. PlanetPress Image supports numerous PDF standards: Standard,
High Quality, Custom, and a variety of PDF/VT, PDF/A and PDF/X formats.
Note
PDF/A output created from a template that uses CMYK colors will be much bigger
than PDF/A output created from a template that uses RGB colors, because PDF/A
needs to contain a color profile and the CMYK color profile is rather big compared
to a RGB color profile. If the output size matters it is recommended to avoid using
CMYK colors.
l
General group
l
ASCII format: Select to create the PDF file using ASCII characters (instead of the
usual 8-bit binary format). This option produces a file suitable for transmission over
a 7-bit ASCII link. This option is useful if the PDFs need to be opened in a text
editor, sent across networks, or sent via email using a program that does not support
binary files. This option also generates smaller files.
l
Compress text and line art: Select to compress the text and line work in the file
using the Flate compression filter. Flate is a compression method that works well on
Page 412

elements with large areas of single colors or repeating patterns, as well as on black-
and-white elements that contain repeating patterns.
l
Auto-rotate pages: Select to automatically rotate pages based on the orientation of
the text or DSC comments.
l
Optimize for fast web view: Select to minimize file size and facilitate page
downloading.
l
Title: Enter a title for the document. If you leave this box empty, the document’s
name will be used as the document’s title. Since this is a variable property box, you
may use variables and data selections and let PlanetPress Workflow interpret this
information at run-time.
l
Author: You may enter the name of the author of the document. Since this is a
variable property box, you may use variables and data selections and let
PlanetPress Workflow interpret this information at run-time.
l
Subject: You may enter the subject of the document. Since this is a variable
property box, you may use variables and data selections and let PlanetPress
Workflow interpret this information at run-time. Note that if you use a data selection
in this box, you must be sure that the data that will be selected at run-time will not
contain any parentheses, as this would cause the task to fail. If you suspect that the
data may contain parentheses, you should use a Run script action task (see Run
Script Action Task Property) with a Strip() function to strip them out.
l
Keywords: You may enter keywords for the document. Since this is a variable
property box, you may use variables and data selections and let PlanetPress
Workflow interpret this information at run-time.
l
Monochrome images group
l
Monochrome compression: Select the compression to use for the monochrome
images. Flate compression is lossless, so no data is lost during compression. Flate
Mono works well on images with large areas of solid shades or repeating patterns,
such as screen shots and simple images created with paint or drawing programs.
CCITT typically yields the best compression of monochrome images. It is the
compression method developed for fax transmissions. Note that configurations that
were created with an earlier version of PlanetPress Workflow and that included
tasks set not to use any compression will by default be set to use the Flat
compression method.
l
Monochrome resolution: Select the resolution to use for monochrome images.
Page 413

l
Grayscale images group
l
Grayscale compression: Select the compression to use for the grayscale images.
Flate is a lossless compression method, so no data is lost in the process. It works
well on images with large areas of single shades or repeating patterns, such as
screen shots and simple images created with paint or drawing programs. JPEG
removes image data and may reduce image quality, but may be suitable for
continuous-tone photographs containing more detail than can be reproduced
onscreen or in print. Since JPEG eliminates data, it can achieve much smaller file
sizes than Flate compression. Select Auto to let the application choose the best
compression method automatically. Note that configurations that were created with
an earlier version of PlanetPress Workflow and that included tasks set not to use
any compression will by default be set to use the Flate compression method.
l
Grayscale down sampling: Select the down sampling option. down sampling
reduces image size by breaking images down into small areas in which multiple
pixels are replaced by single pixels. The Grayscale resolution you enter in the
following box is used to control the down sampling process. Select None to prevent
grayscale down sampling . Select Average to average pixel shades in each sample
area and to replace the entire area with a pixel of the average shade. Select
Subsample to use a pixel in the center of the sample area and replace the entire
area with that pixel value. This method is significantly faster, but results in images
that are less smooth. Select Bicubic to use a weighted average to determine pixel
shades. This method is the slowest but most precise and results in the smoothest
tonal gradations.
l
Grayscale resolution: Select the resolution to use for grayscale images. Note that
this setting has an impact on the grayscale down sampling process.
l
Color images group
l
Color compression: Select the compression to use for the color images. Flate is a
lossless compression method, so no data is lost in the process. It works well on
images with large areas of single shades or repeating patterns, such as screen
shots and simple images created with paint or drawing programs. JPEG removes
image data and may reduce image quality, but may be suitable for continuous-tone
photographs containing more detail than can be reproduced onscreen or in print.
Since JPEG eliminates data, it can achieve much smaller file sizes than Flate
compression. Select Auto to let the application choose the best compression
method automatically. Note that configurations that were created with an earlier
version of PlanetPress Workflow and that included tasks set not to use any
compression will by default be set to use the Flate compression method.
Page 414

l
Color down sampling: Select the down sampling option. down sampling reduces
image size by breaking images down into small areas in which multiple pixels are
replaced by single pixels. The Color resolution you enter in the following box is
used to control the down sampling process. Select None to prevent grayscale down
sampling. Select Average to average pixel color in each sample area and to replace
the entire area with a pixel of the average color. Select Subsample to use a pixel in
the center of the sample area and replace the entire area with that pixel value. This
method is significantly faster, but results in images that are less smooth. Select
Bicubic to use a weighted average to determine pixel shades. This method is the
slowest but most precise and results in the smoothest tonal gradations.
l
Color resolution: Select the resolution to use for color images. Note that this setting
has an impact on the color down sampling process.
ll
Security group
l
Set document permissions: Select to enter the Permissions password.
l
Permissions password: Enter a password in this box only if you want to
prevent users who does not have this password from changing the security
options of the generated PDF files.
l
Allow printing: Select to let users print the generated PDF files.
l
Allow changing the document: Select to let users edit the generated PDF files.
l
Allow content copying: Select to let users copy content from the generated PDF
files.
l
Allow form filling: Select to let users enter information in the form fields included in
the generated PDF files.
l
PDF open password: Enter a password in this box only if you want to prevent
users who does not have this password from opening the generated PDF files.
l
Security Level: The password protection for PDF can be encrypted using one of
the available encryption methods (RC4, AES-256 and AES-128). It gives the task
the ability to take an existing PDF in input and apply the selected password to the
PDF without any change to the quality level of the original PDF.
l
Font group
l
Embed all: Select to embed the entire font of all fonts used in the variable content
document within the generated PDFs. Using this option may result in large PDFs,
especially if many fonts are used. Note that those fonts installed by default with the
Adobe Acrobat and Adobe Reader are never embedded. If a font is not embedded
Page 415

in your PDF, opening it on another computer or printing it may cause it to be
substituted by another default font.
l
Subset: Select to embed only a subset of the Type 1 and TrueType fonts used in
the document. A font subset is in fact composed of only those characters that are
actually used in the document. This option can only be used if the Embed all fonts
option is selected. Note that if more than 35% of the characters included in a font are
used in the document, the entire font is embedded. This option often produces
smaller PDF files and ensures proper PDF display.
l
Initial view group
l
Zoom factor: Select the magnification at which you want Adobe Acrobat or Adobe
Reader (or other PDF viewer) to open the generated PDF. Choose the Fit in
window option to display the entire page using the available screen space, or
choose a percentage of the actual document size.
l
Show: Select the information you want Adobe Acrobat or Adobe Reader (or other
PDF viewer) to display with the generated PDF. Select Page only to leave the tabs
area to the left of the PDF pages empty. Select Bookmarks and page to display the
contents of the Bookmarks tab (you use data selection objects to create bookmarks
in PlanetPress) alongside the PDF pages. Select Page tab and Page to display the
content of the Pages tab (thumbnails of each PDF pages) alongside the PDF
pages. Select Full screen to hide all screen contents except the PDF page, and
expand the PDF page to the maximum size it can occupy onscreen.
l
Font group
l
Embed all: Select to embed the entire font of all fonts used in the variable content
document within the generated PDFs. Using this option may result in large PDFs,
especially if many fonts are used. Note that those fonts installed by default with the
Adobe Acrobat and Adobe Reader are never embedded. If a font is not embedded
in your PDF, opening it on another computer or printing it may cause it to be
substituted by another default font.
l
Subset: Select to embed only a subset of the Type 1 and TrueType fonts used in
the document. A font subset is in fact composed of only those characters that are
actually used in the document. This option can only be used if the Embed all fonts
option is selected. Note that if more than 35% of the characters included in a font are
used in the document, the entire font is embedded. This option often produces
smaller PDF files and ensures proper PDF display.
Page 416

l
Initial view group
l
Zoom factor: Select the magnification at which you want Adobe Acrobat or Adobe
Reader (or other PDF viewer) to open the generated PDF. Choose the Fit in
window option to display the entire page using the available screen space, or
choose a percentage of the actual document size.
l
Show: Select the information you want Adobe Acrobat or Adobe Reader (or other
PDF viewer) to display with the generated PDF. Select Page only to leave the tabs
area to the left of the PDF pages empty. Select Bookmarks and page to display the
contents of the Bookmarks tab (you use data selection objects to create bookmarks
in PlanetPress) alongside the PDF pages. Select Page tab and Page to display the
content of the Pages tab (thumbnails of each PDF pages) alongside the PDF
pages. Select Full screen to hide all screen contents except the PDF page, and
expand the PDF page to the maximum size it can occupy onscreen.
PlanetPress Search Database Tab
If PlanetPress Workflow is configured to automatically update a PlanetPress Search database
(See "PlanetPress Image preferences" on page811), this tab can be used to override the
global settings so that the task updates a different database than the one set in that global
configuration. In order for the settings to work, the Add PDF to PlanetPress Search database
must be checked. However, you can override which database will be updating using the option
in this window, Override global PlanetPress Search Database settings. The database options
then activate.
l
Database type: Select the type of the database in which you want to create a table
(Access, or SQL Server).
l
Connection time-out: Enter the time, in seconds, that the connection to the database is
maintained while no action is taking place before the connection is severed.
l
Database directory: Enter the path of the directory in which the Access database is
located, or use the Browse button to navigate to, and select, the directory. This option is
available only when you select Access database in the Database type box.
l
Data source name: Enter the name of the computer on which the database runs. This
option is available only when you select SQL Server database or Oracle database in the
Database type box.
l
Use default database: Select to use the default database associated with your user
profile on that SQL Server or Oracle database. Clear to enter the name of the database in
the box that appears.
Page 417

l
Use Windows NT Integrated security: Select to use your Windows user name and
password to log onto the SQL database.
l
User ID: Enter the user id required to access the database to which you are adding new
PDI files from the generated PDF files. If you are using an SQL database, enter the login
name you chose when you configured the SQL database (refer to the “Using
PlanetPressSearch with an SQL Server Database” section of the PlanetPress Search
User Guide).
l
Password: Enter the password required to access the database.
l
Test Connection: Click to verify that PlanetPressImage can connect to the specified
database.
l
Enforce global table creation: Select this option, as it ensures that all database users
are granted access to the database. This option is available only when you select SQL
database in the Database type box.
Download to Printer
Download to Printer Action tasks are used to warn printers that the files that will be sent to
them are to be stored to a specific location rather than printed. Note that each Download to
Printer Action task must be followed by a Printer Queue Output task set to "pass-through", in
order for it to be sent to the printer and not merged with a PlanetPress Design document.
You can use Download to Printer action tasks to send various types of files, such as
attachments, documents and fonts that are used in PlanetPress Design documents that are
executed directly on the printers (see "PlanetPress Design documents" on page45 and "About
printing" on page111).
For images you should rather use Send Images to Printer action tasks (See "Send Images to
Printer" on page438), as they provide image quality and conversion options.
Input
Any file that you wish to upload to the printer. Note that this task does not attempt to verify that
the type of file being sent is compatible with the printer, or is in a supported file format.
Processing
The currently active data file is converted into PostScript.
Page 418

Output
A PostScript file containing the necessary code to save the data file on the hard drive.
Task properties
General Tab
l
Hard disk name and path (as required): Enter the name and path of the hard disk to
which the file is to be saved (enter “%disk0%/PPFiles/Resources”, for example, to save
the file to the folder [ROOT]/PPFiles/Resources located on a hard disk identified internally
as “disk0”). Leave blank to save the printer’s default hard disk and path.
l
File name: Enter the name under which you want the file to be saved. By default, this
property is set to “%o”, so the file is saved under its original name (this is often the best
choice, for items such as font files, for instance).
l
File name case:
l
Do not modify: keeps the character casing of the file name as is.
l
All uppercase: changes all characters to upper case (README.TXT, for example).
l
All lower case: changes all characters to lowercase (readme.txt, for example).
l
Keep file extension: Select to use extensions when saving files. When this option is
selected, if the task receives a file with the “txt” extension, for example, it will keep this
extension even if it renames the file (as specified in the File name box).
l
Print confirmation page: Select to print the Variable content document download
confirmation page when the download is successful.
Miscellaneous Tab
The Miscellaneous tab is common to all tasks.
Check the option Use as step description to display the text next to the icon of the plugin in
the Process area.
External Program
External Program action tasks are used to launch and execute other programs, which can be
useful when you wish to process your job file in a way that is not possible with the standard
PlanetPress Workflow tasks.
Page 419

Note
As with any task that can refer to network resources, it is important to understand the
considerations involved with paths and permissions of these resources. Please refer to
the "Network considerations" on page22 page.
There are some important things to consider when using the External Program task:
l
The executable file must accept so-called "command-line options" and be able to run
without any sort of user interaction. Only certain programs are able to do this and may
refer to it as "command-line" or "automation" features.
l The process will always wait for the executable file to finish before it continues to the next
task, and does not have any timeout setting. This mean that if your program fails to exit for
any reason, your process will hang.
Input
Any active data file, in any format.
Processing
The external program is executed using the parameters provided. Note that the current data file
is not "sent" to the executable file, however you can refer to the full path of the data file using
%F.
Output
If the external program modifies the job file using the full path, the modified file is the output of
this software. Otherwise, the output is the same as the input. Metadata is not modified in any
way. Job Infos may be modified, depending on the options set in the task's properties.
Task properties
General Tab
l
Program group
l
Executable file: Enter the name and path of an executable file (exe or com
extension), batch file (bat extension), or command script (cmd extension) that can
Page 420

run in command mode. Note that the program will be run without user interaction.
Although it may display progress information, it is better if the application has no
user interface.
l
Parameters: Enter parameters that will be passed to the external program when it is
launched. Each parameter should be enclosed in quotation marks and separated by
a space ("Param1" "Param2" "Param3") except command line options (such as -f,
/n). The exact parameters accepted are unique to the executable and defined in its
documentation if it exists.
l
Start in: Enter the folder in which the external program is to run. This is important,
for example, if the program is to generate files that are to be picked up in a specific
location for further processing, or if it requires resources that are located in a specific
folder. Leave blank to run the program in the folder of the executable file.
l
Run minimized: Select to prevent a window (a DOS box, for instance) from being
displayed on the desktop. When selected, the program runs in a background
window.
l
Program output capture group
l
Log the program output: Check to store the program output (messages generated
by the execution of the external program) inside of a job info or variable.
l
Store the program output in variable: Use the drop-down to select which variable
or job info to will be used to store the program output.
l
Exit Code group
l
Store the exit code in job info: Use the drop-down to select which variable or job
info will be used to store the program's exit code. The exit code is a numerical value
generated by the program which will indicate whether its execution was a success
or if errors were encountered.
l
Verify return value: Check to enable the group and react whenever specific exit
codes are returned by the software.
l
If exit code is: Use the drop-down to select how to compare to the exit code. This
numerical comparison is either equal, greater than or lower than.
l
Value: The numerical exit code that will be verified.
l
Return: Use the drop-down to select whether this exit code should define a success
or a failure of the external program. If "Failure" is chosen, exit codes that match the
condition set will cause the On Error tab to be triggered and any other exit code will
be considered a success. Inversily, if Success is chosen, exit codes that match the
Page 421

condition set will cause be considered a success and any other exit code will cause
the On Error tab to be triggered.
Miscellaneous Tab
The Miscellaneous tab is common to all tasks.
Check the option Use as step description to display the text next to the icon of the plugin in
the Process area.
Load External File
Load External File action tasks are used to replace the current job file by the designated text
file. Loading an external file does not delete the original file or modify it in any way.
This task is put into effect in the following example process:
l "HTTP PDF Invoice Request" on page284
Input
The current data file in the process will be discarded.
Processing
The external file specified in the task's properties is loaded and replaces the current data file.
Output
The loaded file is output. Metadata is not modified in any way, neither are Job Info variables.
Task properties
General Tab
l
External file: The path to the file you want the job file to be replaced with. You may
browse to the file using the browse button on the right of the field.
Miscellaneous Tab
The Miscellaneous tab is common to all tasks.
Page 422

Check the option Use as step description to display the text next to the icon of the plugin in
the Process area.
Logger
Logger action tasks can be used to create a custom event in a Windows event log (using the
APPLICATION or SYSTEM parameter) or in the Workflow log (using the WORKFLOW
parameter).
Note that this requires administrator rights.
Input
Any text-based file can be used in this task, even formats that are not directly compatible with
PlanetPress. As long as the text is visible in a text-based editor (such as Notepad), it is
readable and supported by this task.
Processing
The selected operation (adding or removing lines, text or pages) is made on the data file.
Output
The modified data file is output from this task. Metadata is not modified in any way if it is
present.
Task properties
General tab
l
Level {APPLICATION | SYSTEM | WORKFLOW }: Specifies the name of the event log in
which the event will be created.
l
Type {SUCCESS | ERROR | WARNING | INFORMATION }: Specifies the type of event
to create.
l
Source Name: Specifies the source to use for the event. A valid source can be any string
and should represent the application or component that is generating the event (e.g.
PPWorkflow).
l
EventID: Specifies the event ID for the event. A valid ID is any number from 1 to 1000.
l
Description: Specifies the description to use for the newly created event.
Page 423

Miscellaneous Tab
The Miscellaneous tab is common to all tasks.
Check the option Use as step description to display the text next to the icon of the plugin in
the Process area.
Mathematical Operations
The Mathematical Operations action task resolves a mathematical expression and stores the
result in an existing Job Information or other type of variable (see "About variables" on
page716).
Note
When adding this task to your process, you will be asked if you want to add the task as an
Action or a Condition. This task should only be used as an Action. If used as a condition,
it will always return False.
The task does not modify the job file in any way, its only output is the change in the specified
variable where the result is stored.
Input
Any active data file, in any format. This data file is ignored by the task and is not modified in any
way.
Processing
The task executes the mathematical operation and stores the result in the selected job info or
variable.
Output
The input data file is returned with no modifications. Metadata is not modified. A single job info
or variable is modified by this task.
Page 424
Task properties
General Tab
l
Mathematical Expression: Variable data field containing the expression to be evaluated.
This expression may combine any combination of standard PlanetPress Workflow
variables and VBScript mathematical expressions. For example, to multiply Job Info 9 by
2, the expression would be %9*2 .
Note
The expression itself must be written in a format understood by the VBSCript
scripting language. For more information, please see Mathematical Functions in
VBSCript and VBSCript Math Operators.
l
Store result in: Variable data field containing the job information, local or global variable
in which to store the result. For job information use %1 through %9, for local variables use
%{variable} and for global variables use %{global.variable}.
l
Use value of Variable/JobInfo # expression: Use the contents of the variable entered in
Store result in:, which is assumed to be a digit between 1 and 9. This digit determines in
which job info the result of the mathematical expression is store. For example, if %
{myvariable} is equal to 9, job information 9 will store the result of the mathematical
operation.
Note
This task was built using a custom plugin system and does not display the On Error tab in
the regular view. To access the On Error tab, right-click on the task and select Advanced
Properties...
Open XSLT
The Open XSLT action task takes an XML file as input and executes the XSLT code as
parameter to rearrange the content of the XML file.
XSLT (or XSL Transformation) is a style sheet that describes how an XML document is to be
transformed into another XML document. The reason to transform an XML document into
Page 425

another XML document is simply to rearrange the information it contains in order to make the
data structure more convenient for your needs.
Input
A valid XML file.
Processing
The XSLT is applied to the XML data file.
Output
The modified XML data file is output. Metadata and Job Info variables are not modified.
l
File
l
Import: Lets you open an existing XSLT script from an XSL, XSLT or TXT file.
l
Export: Lets you save the current XSLT script as a file.
l
Print: Prints the current XSLT script.
l
Edit
l
Undo: Undo the last edit.
l
Cut: Cut the current selection (only available if there is selected text in the editor).
l
Copy: Copy the current selection (only available if there is selected text in the
editor).
l
Paste: Paste the last selection that was cut or copied in the location of the cursor in
the text editor.
l
Delete: Delete the current selection (only available if there is selected text in the
editor).
l
Select All: Select all of the contents of the editor.
l
Search
l
Find: Brings up the Find dialog.
l
Find Again: Repeats the previous search and finds the next occurrence.
l
Replace: Brings up the Replace dialog.
Page 426

l
Go To Line: Brings up the Go To Line dialog where you can enter a line number
and jump directly to that line.
l
XSLT Version
l
XSLT 1.0: Select if you will be entering or pasting XSLT version 1.0 code.
l
XSLT 2.0: Select if you will be entering or pasting XSLT version 2.0 code.
l
Tools
l
Editor Options...: Opens the "Editor Options" on page816.
l
Help
l
Contents and Indexes: Opens the Editor Help (this page)
The other options of the window are:
l
The script editor text box: This is where you enter your XSLT Script that will be used. If
you use an external script file, this will display the content of the file (note however that
modifying the script in this case does not modify the external file and changes are not
saved).
l
Script running from: Choose if the script should be run from the editor text box, or from
an external script file.
l
Script filename and path: Either enter the full path of the XSLT Script, or click the
Browse button to navigate to the file. This option is only available if you choose external
script file in the Script running from option.
PDF/A-3 Attachments
The PDF/A-3 Attachments task is used to add external files as attachments to a PDF/A-3 job
file, or to attach files - the job file and/or other files - to an external PDF/A-3 file. Optionally,
some e-invoicing metadata can be added.
Several e-invoicing standards, such as ZUGFeRD in Germany and Factur-X in France, require
the (XML) invoice data to be attached to a PDF/A-3 file.
PDF/A-3 files with attachments can also be used for hybrid archiving: the PDF/A serves as the
version that is suitable for long term storage, and alternate forms and/or the source document
can be added as attachments.
Page 427

Licensing
This plugin requires the OL Connect Workflow Imaging license.
Workflow Imaging is an add-on license bundle for OL Connect Workflow that includes the
Image and Fax plugins; see "About PlanetPress Image" on page759 and "About PlanetPress
Fax" on page758.
Without a valid Imaging license, the plugin will fail with an error. In the trial version, the plugin
will work, but the resulting PDF file will be watermarked.
Input
This task accepts any job file as input.
If the job file is the target file to which the attachments must be added, it should be a PDF/A-3
file. Note, however, that the task doesn't verify that the input file is PDF/A-3 compliant.
Processing
The task reads each of the files that are listed as attachments and adds it to the target PDF with
the name that was specified for that attachment.
The target file can be either the job file or an external PDF/A-3 file.
The job file can also be used as one of the attachments.
Output
This task outputs the target PDF/A-3 file, with the attachments added to it, as the job file.
Properties
General Tab
l
Target PDF/A-3: Specify the file to which the attachments and (optional) metadata must
be added.
l
Job file: When this option is checked the attachments are added to the current job
file. The job file should be PDF/A-3 compliant.
Page 428

l
External file: Adds the attachments to an external file. Use the Browse button to
select a PDF/A-3 compliant file.
Note that the task doesn't verify that the target file is PDF/A-3 compliant. If it is a
PDF file that is non-PDF/A-3 compliant, the task will add the attachments to it, but it
will not convert the file into a PDF/A-3 compliant file.
l
Attachments: Specify which files should be attached to the target file. Use the buttons at
the bottom to add and delete attachments and to change their order.
Note
All of the Attachments properties can be variable (see "Variable task properties" on
page727). You can right-click on a field to open the contextual menu and select
variables, data, and lookup functions. The property will be dynamically determined
whenever the process runs.
l
Filename: The file that should be used as an attachment.
You can enter %F to attach the current job file to the target file (see "System
variables" on page719).
Note
The target file cannot be attached to itself.
l
Attachment Name: The name by which the attached file will go in the target file. If
you want it to have a file extension, include that in the attachment name.
Warning
If the target PDF already has an attachment with the same name, the existing
attachment will be replaced without any error.
l
Mime Type: Enter the mime type of the attachment, e.g. text/xml, image/gif.
Page 429

l
Relationship: Specifies what the attachment is in relation to the (entire) PDF
document:
l
Alternative: An alternative representation of the PDF document; for instance,
an XML version of the invoice in the PDF.
l
Data: Data that is visually represented in the PDF; a CSV file with the detail
lines of the invoice, for example.
l
Source: The source that the PDF was created from. If the target PDF was
created from a Word file, that Word file would be the source.
l
Supplement: A supplemental representation of the PDF content or data.
l
Unspecified: The relationship is not known or cannot be described using one
of the other values.
e-Invoicing metadata Tab
Optionally, the PDF/A-3 file can be extended with metadata that describe the PDF as an
invoice that conforms to a certain standard. This is either the (Thai) Electronic Tax Invoice
PDFA, ZUGFeRD 1.0 or the Factur-X/ZUGFeRD 2.0 standard.
The plugin doesn't verify that the resulting PDF/A-3 file and attachment conform to the chosen
standard; it is up to you to ensure that it does.
Note
The ZUGFeRD and Factur-X standards require XML invoice data to be attached to the
PDF/A-3 document. The name of the XML attachment should be the same as the
DocumentFileName in the metadata.
l
Add PDF/A-3 conforming metadata: Check this option to add XMP metadata to the
PDF/A-3 file.
l
Extension schema: Select the standard to which the PDF and the XML invoice data
conform. The standard's extension schema specifies which properties should be added
as metadata.
l
Uri: The value of the namespace URI in the selected extension schema (read-only).
Page 430

l
Properties:
l
The DocumentFileName, DocumentType and Version are read-only.
l
ConformanceLevel: Each standard specifies a number of different levels a file can
conform to. For information about these levels please refer to the specifications of
the standard.
Miscellaneous Tab
The Miscellaneous tab is common to all tasks.
Check the option Use as step description to display the text next to the icon of the plugin in
the Process area.
Push to Repository
The Push to Repository Action task adds data to the PlanetPress Workflow "Data Repository"
on page96. The task may only add one KeySet per action. If more than one insert is needed, a
loop must be established first.
The Push to Repository task can also be used to update an existing KeySet if a lookup is
provided.
Input
Any data file, in any format.
Processing
A new KeySet is added to the Data Repository, or updated, using the data provided.
Output
The unmodified input file. This task does not change the data file in any way. The only
modification is a single variable or Job Info variable, if the Store Result option is selected.
Page 431

Task properties
General tab
l
Group: Use the drop-down to select into which group the KeySet is inserted, or in which
group the KeySet should be updated.
l
Key set: Displays a list of keys for the selected group.
l
Key: Displays the key name in the group.
l
Value: Enter a value for the key, which will be inserted in the KeySet. This value
can be dynamic, including data selections, metadata selections, variables and other
data.
l
Update: Check to update the key with new data. For the Update column to be
active, the Update base on option must be checked. Key values will only change in
the KeySet if the Update checkmark is checked for that key, otherwise it is left
unchanged.
l
Create Group and Key(s) if they don't exist: Check this option to force the creation of a
new group and/or keys, if they do not exist. This is useful for portability: if a configuration
with this task is sent to a new Workflow server that does not contain this group or is
missing keys, the task will create them automatically.
l
Update based on: Check this option to update an existing KeySet instead of creating a
new one. The value of the Condition field is used to filter the KeySets to only obtain one
or more. Here are some valid conditions:
l last_name = 'Jones'
l id = 237
l age IS NOT NULL
l last_name LIKE 'La%'
l province IN ('QC', 'ON', 'AB')
l
Add KeySet when condition is false: If the update condition above is false, a new
KeySet is added to the group. If unchecked, no data is changed in the repository.
l
Store the result ID in variable: Select a variable or Job Info in which an array of inserted
or updated IDs will be placed. The array of IDs in the form of [1, 2, 3, 4, 2443, 532, 5457,
...]
Miscellaneous Tab
The Miscellaneous tab is common to all tasks.
Page 432

Check the option Use as step description to display the text next to the icon of the plugin in
the Process area.
Rename
Rename action tasks are used to rename the job files they receive. Note that you can see how
each file is renamed via the Object Inspector when stepping through a process in Debug mode.
Input
Any job file, in any format.
Processing
The task renames the job file to the desired name, and changes the value of %f and %F to
reflect the new name.
Output
The input data file is output, with the new name.
Task properties
General Tab
l
New file name: Enter the job file’s new name.You can use any combination of text,
variables and data selections; see "Variable task properties" on page303.
Miscellaneous Tab
The Miscellaneous tab is common to all tasks.
Check the option Use as step description to display the text next to the icon of the plugin in
the Process area.
Run Script
Run Script tasks are used to run scripts that typically perform some kind of processing on the
job file received by the task. Scripts are often simpler to write than programs added with the
External Program action (see "External Program" on page419). However, they can be slower
to execute.
Page 433

The Run Script task can be used either as an Action or a Condition. When dragging and
dropping a Run Script task on a given process, you select whether to use this task as an Action
or a Condition from a contextual menu. (See also: "About branches and conditions" on
page138.)
For more information on scripts, what languages are supported and how to write scripts and
conditions, please see the related chapter, "Using Scripts" on page141.
Input
Any data file, in any format.
Processing
The script is executed. The script can modify anything such as the data file, Job Info variables,
Metadata, or even other files on the operating system.
Output
Whatever file the Run Script action generates, Metadata it modifies or creates, etc.
Note
When using Run Script as a Condition, the output of the task can be within the branch or
on the main trunk. To control the output, use the "Script.ReturnValue" on page174
variable in your script.
Properties
The Script Editor menu options are as follows.
l
File
l
Import: Lets you open an existing script from an external file. This can be a .vbs, .js,
.pl or .py file for language-specific scripts, or .txt for any of them.
l
Export: Lets you save the current script as a file.
l
Print: Prints the current script.
Page 434

l
Edit
l
Undo: Undo the last edit.
l
Cut: Cut the current selection (only available if there is selected text in the editor).
l
Copy: Copy the current selection (only available if there is selected text in the
editor).
l
Paste: Paste the last selection that was cut or copied in the location of the cursor in
the text editor.
l
Delete: Delete the current selection (only available if there is selected text in the
editor).
l
Select All: Select all of the contents of the editor.
l
Search
l
Find: Brings up the Find dialog.
l
Find Again: Repeats the previous search and finds the next occurrence.
l
Replace: Brings up the Replace dialog.
l
Go To Line: Brings up the Go To Line dialog where you can enter a line number
and jump directly to that line.
l
Language: Select the language in which your script is written. Choices are VBScript,
JavaScript, Perl or Python.
l
Tools
l
Editor Options...: Opens the "Editor Options" on page816.
l
Help
l
Contents and Indexes: Opens the Editor Help (this page)
The other options of the window are:
l
The script editor text box: This is where you enter your script that will be used. If you
use an external script file, this will display the content of the file (note however that
modifying the script in this case does not modify the external file and changes are not
saved).
l
Script running from: Choose if the script should be run from the editor text box, or from
an external script file.
Page 435

l
Script filename and path: Either the full path of the script, or click the Browse button to
navigate to the file. This option is only available if you choose external script file in the
Script running from option.
Warning
With the Run Script action, the On Error tab is accessible by right-clicking on the action
in your process and clicking Advanced Properties.
The On Error tab will be triggered if your script has an execution error (such as syntax
error, etc) as well as when raising an error from within your script.
Advanced properties
To get access to the following properties tabs, right-click the plugin in the process and select
Advanced Properties.
Miscellaneous Tab
The Miscellaneous tab is common to all tasks.
Check the option Use as step description to display the text next to the icon of the plugin in
the Process area.
Search and Replace
Search and Replace Action tasks are used to locate and replace strings of data within the job
file and to replace them with other strings of data. Note that this Action task cannot be used with
binary files.
For more advanced search and replace functionality, see "Advanced Search and Replace" on
page383.
Input
Any text-based file can be used in this task, even formats that are not directly compatible with
PlanetPress. As long as the text is visible in a text-based editor (such as Notepad), it is
readable and supported by this task.
Page 436
Processing
The appropriate changes are made to the data file (replacing text).
Output
The modified data file is output from this task. Metadata is not modified in any way if it is
present.
Task properties
General Tab
l
Find: Enter the string of data for which to search. You can use any combination of text,
variables and data selections; see "Variable task properties" on page303.
l
Replace with: Enter the string of data to use as a replacement. Since this is also a
variable property box, the same as above applies.
l
List of words to find and replace: Lists each string to find, and its replacement. These
are executed in order, from top to bottom.
l Find: Enter the string of data for which to search. In this variable property box, you
may enter static characters, variables, job information elements, data selections, or
any combination of these.
l Replace with: Enter the string of data to use as a replacement. Since this is also a
variable property box, the same as above applies.
l
button: Click to add a new line to the list of words to find and replace.
l
button: Click to remove the currently selected line from the list.
l
button: Move the currently selected line up one position.
l
button: Move the currently selected line down one position.
Miscellaneous Tab
The Miscellaneous tab is common to all tasks.
Check the option Use as step description to display the text next to the icon of the plugin in
the Process area.
Page 437

Send Images to Printer
The Send Images to Printer Action task is used to send images to a printer so they can be
used as resources by PlanetPress Suite (Design) documents run on the printer. It is
comparable to the Download to Printer Action task (see "Download to Printer" on page418),
but includes image specific options. Furthermore, this task can be used to send images not only
to printers, but also to the virtual drive of other computers running PlanetPress Workflow
applications. Note that each Sent Images to Printer Action task must be followed by a Printer
Queue Output task set to 'pass-through' (No document), in order for the images to be actually
sent to that printer.
Note
Images sent to a printer are stored in the root folder of the printer’s hard disk, while
images sent to the virtual drive of another computer are stored in a sub-folder of the
PlanetPress Workflow folder.
Input
Any image file that you wish to upload to the printer.
Processing
The currently active image data file converted to PostScript. The image's resolution, scan
orientation, and quality can be modified, depending on the selected option. All files are
converted into PostScript format for storage on the printer. If a virtual drive, the file is
automatically sent to it.
Output
A PostScript file containing the necessary code to save the data file on the hard drive.
Task properties
General Tab
l
Scan orientation: Select Side to side for images that will be printed in their original
orientation on a portrait oriented page, or in a rotated orientation on a landscape page.
Page 438

Select Top to bottom for images that will be printed in a rotated orientation on a portrait
oriented page, or in a rotated orientation on a portrait oriented page. Note that images that
are meant to be printed in various ways can be stored twice on the printer as two identical
copies of the same file that bear different names (Image_Original.tif and Image_
Rotated.tif, for example). The first copy can be processed using a Send Images to
Printer action task with the scan orientation set to Side to side, the second one with a
different Send Images to Printer action task with the scan orientation set to Top to
bottom, each one typically being included on two different branches of the same process.
l
Color conversion: Select As is to keep the color information included in the images.
Select Grayscale to convert color images to gray scale.
l
Naming convention: Select ’File name, original’ to store the file under its original file
name. Select ’File name, no extension’ to store the file without its original file name
extension. Note that all characters are converted to uppercase and that extended
characters (characters, such as é, for example) are not recommended in image file
names.
l
Image quality: Select the same image quality chosen in the PlanetPress Design
documents that reference the image files you are sending. In PlanetPress Design, this
setting is included in the document’s resource options.
l
Image compression level: Select the level at which you want images to be compressed.
Values can range from 1 (compress up to 1% of the image’s original size) to 100 (do not
compress). For example if you set this box to 75, the Image Downloader compresses all
images by 75% when it converts those image to PostScript. The default compression
level is 70%.
l
Send to Virtual Drive of: Select the computers and / or printers to which the images are
to be sent.
l
Refresh: Click to prompt PlanetPress Workflow to look again for available printers and
computers.
l
Hard disk name and path: You may enter the name and path of the hard disk to which
you want to send the images. Needless to say that this option is used if the device to
which you are sending the images has multiple hard drives.
l
Print confirmation page: Select to print a confirmation page on each one of the selected
printers after an image has been successfully received.
Miscellaneous Tab
The Miscellaneous tab is common to all tasks.
Page 439

Check the option Use as step description to display the text next to the icon of the plugin in
the Process area.
Send to Folder
Send to Folder Action tasks send the files they receive to a local folder. They perform the
same function as Send to Folder Output tasks, with the only difference being that in this case
PlanetPress Workflow will wait for the task to be completed before going on to the next task in
the configuration.
Note
As with any task that can refer to network resources, it is important to understand the
considerations involved with paths and permissions of these resources. Please refer to
the "Network considerations" on page22 page.
Input
Any data file in any format.
Processing
A copy of the data file is saved on the hard drive at the specified location.
Output
The original data file, Metadata and Job Info variables are not modified, they are passed on to
the next task.
Task properties
General Tab
l
Folder: Enter the path of the folder to which the files are to be saved.
l
File name: Enter the name of the output files generated by this task. To prevent each new
file from overwriting the previous one, you should use variable names. You can use any
combination of text, variables and data selections; see "Variable task properties" on
page303.
Page 440

l
Concatenate files: If this option is selected, when PlanetPress Workflow tries to save a
file under a given name, if a file under that same name already exists, instead of
overwriting it, PlanetPress Workflow will append the content of the new file to that of the
existing file. This appending process will go on until the file is removed from the folder.
l
Separator string: This option is used to add a separator string between the content of
each file when the Concatenate files option is selected.
Miscellaneous Tab
The Miscellaneous tab is common to all tasks.
Check the option Use as step description to display the text next to the icon of the plugin in
the Process area.
Set Job Infos and Variables
Add Set Job Infos and Variables action tasks to set Job Info elements as well as custom
variables (see "About variables" on page716). You can set multiple variables and Job Info
values in a single task. Be aware that lines are processed from top to bottom.
Input
Any data file in any format.
Processing
This task assigns the defined values to local or global variables or Job Info variables. It does
not modify the data file nor the Metadata.
Output
The original data file, Metadata and other Job Info variables are not modified, they are passed
on to the next task.
Task properties
General Tab
l
Var/Info#: Lists all Job Info variables, local variables in the current process and global
variables in the configuration. Click on the variable you want to change.
Page 441

l
Value: Enter the value that you want to associate with the selected Job Info variable or
custom variable.
l
button: Adds a new line and lets you define the variable and value to set.
l
button: Removes the line that is currently selected (highlighted).
l
button: Moves the line up so it is processed before.
l
button: Moves the line down so it is processed after.
Miscellaneous Tab
The Miscellaneous tab is common to all tasks.
Check the option Use as step description to display the text next to the icon of the plugin in
the Process area.
SOAP Client plugin
SOAP Client plugin tasks can be used as Input, Output and Action tasks, although their basic
function is to generate output. SOAP (Simple Object Access Protocol) is a light protocol that
defines a standard XML format used to communicate among systems across different
architectures, languages, and operating systems.
A SOAP request is an XML-based Remote Procedure Call (RPC) sent using the HTTP
transport protocol. The payload of the SOAP packet is an XML document that specifies the call
being made and the parameters being passed.
Web services, a SOAP class of applications, expose their services via the Internet in a manner
that lets other applications access them, as well as use and combine them as required.
In order to access and successfully use Web services, client applications must know how to get
them, what operations they support, what parameters they expect, as well as what they return.
SOAP servers make this information available via WSDL (Web Service Description Language)
files.
To configure a given SOAP Client plugin task in the PlanetPress Workflow Configuration
program, you must first get its WSDL file (note that you cannot download the WSDL file over an
HTTPS connection, so you should use an HTTP connection to get the file and then switch back
to a secure connection). This lets you know which services the SOAP server provides, as well
as each service’s methods and name spaces.
Page 442

If firewalls control communication between the SOAP client and the Web servers, they must be
configured so as not to block client-server communication.
In the case of "string" type data, SOAP Client plugin tasks normalize all line endings to a
single line feed character.
Timeout
By default the SoapClient plugin waits 100 seconds before returning an error if it doesn't get a
response. To change the time the Soap Client plugin should wait, a Timeout registry key can
be set in:
HKEY_LOCAL_MACHINE\SOFTWARE\WOW6432Node\Objectif
Lune\PlanetSuite\PlanetWatch\TimeoutVal (DWORD)
The value can be set to anything, in seconds. To wait indefinitely for a response, -1 can be
used. However, this could cause the process to hang if the Soap Server never responds nor
closes the connection.
Task properties
General Tab
l
WSDL address: Enter the URL address of the WSDL file, or choose a previously
selected address from the drop-down list.
Note
The WSDL Address of a PlanetPress Workflow SOAP server is the following:
http://127.0.0.1:8080/wsdl/isoapact (assuming you are on the same machine
and did not change the default HTTP port).
l
Get: Click to get the WSDL file from the SOAP server and populate the Service box
below.
l
Service: Choose an available Web service from this drop-down list to populate the
Method box below. You may also enter the service name directly if the WSDL file cannot
be found.
l
Method: Choose an available method from this drop-down list. This populates the
Namespace box below. You may also enter the method name directly.
Page 443

The following three options are only available in the Legacy SOAP Client plugin:
l
Namespace: You may choose an available namespace to prevent ambiguity between
identically named elements or attributes. You may also enter a namespace directly.
l
Resolve: Click to apply the options you chose above and to display the arguments of the
chosen method in the Arguments box below.
l
As script: Click to apply the options you chose above and to display information on the
chosen Web service in JavaScript format in a script viewer. You should use this option if
the Web service is too complex to be interpreted correctly by the SOAP Client plugin.
l
Name: Displays the name of the arguments associated with the selected method. Note
that you may also manually enter new arguments, change or delete existing ones, as well
as change their order if needed.
l
Type: Displays the argument type.
l
Value: Lets you enter fixed or variable values. To exchange variable information between
the Web service and PlanetPress Workflow, you must use job information variables %1 to
%9 or variable %c (which contains the entire job file). Note that return values (arguments
which are used to return information to the SOAP Client) are displayed in bold font.
l
Namespace: Displays the namespace of the arguments associated with the selected
method.
l
Use returned raw SOAP packet as new data file: Check to use the complete SOAP
packet (including the passed parameters) instead of the parameters only. This option
overrides any return value set to %c in the Arguments box. You should use this option
when the SOAP Client plugin is not able to fully support the syntax of the response.
Advanced Tab
l
Domain: Enter the domain for the authentication on the SOAP server. The Domain is
optional even when authentication is used.
l
Username: Enter the user name for the authentication, if required.
l
Password: Enter the password for the above user name.
l
Allow invalid security certificate: Check to ignore SSL certificates that are invalid.
Miscellaneous Tab
The Miscellaneous tab is common to all tasks.
Page 444

Check the option Use as step description to display the text next to the icon of the plugin in
the Process area.
Standard Filter
Standard Filter Action tasks can be used to remove HP Escape characters from data files, as
well as to eliminate spacing problems caused by LF-CR end-of-line sequences.
HP escape characters are used in the Hewlett Packard Printer Control Language (HP PCL) to
communicate basic page formatting and font selection information from print jobs to HP or HP-
compatible printers.
These characters, like other printer control characters that control how printers interpret and
print jobs, are not meant to be printed.
If your print job is bound for an HP compatible printer, it may include these characters even
when printing to a PostScript printer that does not recognize them. PlanetPress Workflow
provides an easy way to automatically filter these characters through its Standard Filter task.
Input
Text-based data files such as line printer data (see "Line printer emulation" on page68) and
ASCII data files (see "ASCII emulation" on page64) data files, which contain HP PCL control
characters.
Processing
All HP PCL characters are removed from the data file. Note that these characters are not
interpreted, only stripped out.
Output
The modified data file, with stripped characters, is output from this task. Metadata, Job Info
variables and other variables are not modified.
Task properties
General Tab
l
Process job using ASCII emulation: Select to use the ASCII emulation to process the
job file. This reverses LF-CR end-of-line sequences that may result in unwanted double-
spacing.
Page 445

l
Remove and convert HP escape characters: Select to filter HP escape character
sequences from the job file.
Miscellaneous Tab
The Miscellaneous tab is common to all tasks.
Check the option Use as step description to display the text next to the icon of the plugin in
the Process area.
Translator
Translator action tasks can convert your data from its current encoding to a different encoding.
The same data may be converted back and forth as required.
The Translator action task is useful for data files using foreign languages, as well as to convert
Unicode data files so that they can be manipulated within Workflow.
Note that if Workflow's only job is to pass the data file to a task, there's no need to convert the
data file. The OL Connect Server does support Unicode data files.
Codepage 1252 (ANSI - Latin 1) is used for many Latin language documents, since it can be
used for Afrikaans, Basque, Catalan, Danish, Dutch, English, Faroese, Finnish, French,
Galician, German, Icelandic, Indonesian, Italian, Malay, Norwegian, Portuguese, Spanish,
Swahili and Swedish.
Codepage 932 is often used for Japanese.
Note
You can create your own translation matrix files for the Translation action task by adding
them to the following folder:
%COMMONPROGRAMFILES(X86)%\Objectif Lune\PlanetPress Workflow
8\Plugins\Translator
Two examples are already present, converting ASCII to and from IBMEBCDIC.
Input
Any text-based data file.
Page 446

Processing
The characters in the data file are converted from the old encoding to the new one.
Output
The data file in its new encoding format. Metadata, Job Info variables and other variables are
unchanged.
Task properties
General Tab
l
Source encoding: Select the current data encoding. Note that the source encoding is not
selected automatically and you must therefore select the proper encoding from this list in
order for the conversion process to be performed successfully.
l
Target encoding: Select the encoding to which you want the data to be converted.
l
Include target encoding signature: This option is only available when converting to
UTF-8 (Windows code page 65001) or UCS-4 (code page 12000 or 12001). Select to
include the character encoding signature—also known as the byte order mark—at the
beginning of the target string.
l
Default character on translation: You may enter a character to be used to replace all
those characters that cannot be found in the source encoding. If you leave this box empty,
they will be simply stripped from the data, so you may consider using a space as a place
holder for unidentified characters.
Miscellaneous Tab
The Miscellaneous tab is common to all tasks.
Check the option Use as step description to display the text next to the icon of the plugin in
the Process area.
Windows Print Converter
The Windows Print Converter action tasks are designed to convert Windows print files into
Line Printer files, that can then be used in a variety of other PlanetPress Workflow tasks.
Typically, Windows Print Converter action tasks are located below WinQueue input tasks (note
that the latter include options specific to Windows Print Converter action tasks).
Page 447

The full conversion process is performed in two phases:
l The Windows print file is first converted into an XML file in which each printable character
appears with its horizontal and vertical coordinates.
l The XML file is then converted into a standard Line Printer file.
Note
Although it is more common to perform both phases in a single pass, each phase can be
performed selectively, as required.
Input
A print job in EMF format, generally captured from a WinQueue input task.
Processing
The EMF job is converted into a text-only, "Line printer emulation" on page68 data file.
Output
A Line Printer file. Metadata, Job Info variables and other variables are not changed.
Task properties
General Tab
l
EMF to XY group: Select this option if the file received by this task is a Windows print
file. This will prompt the task to perform the first phase of the process, and thus convert the
file to an XML file. If this option is not selected, the input file will not be converted to an
XML file (note that the task will fail if the file it receives is not an XML file). The settings
included in this group fine tune the process. They let you control precisely which text
blocks are recognized as belonging together in one line. This has particular affect when
dealing with font size differences between consecutive passages of text, the distance
from one text passage to another (word distance) as well as the base line offset (vertical
distance). To find out if one text passage belongs to the one found before it, first the
vertical distance, second the horizontal distance and finally, the font size difference are
checked. Only if all three values lie within the tolerance are the two blocks recognized as
Page 448

belonging together. Additionally, you can control text passages whose horizontal distance
has been recognized as out of the tolerance, but whose type size difference and vertical
distance lie within the tolerance, outputting it in one line. At the output, these text
passages are separated by a tabulator (ASCII code 9).
l
Font size difference: Indicates the smallest acceptable factor between maximum
and minimum font size within one line. A value of 0.60 means that with a ratio from
maximum to minimum font size (in points), that is less than 0.60, two text passages
are not recognized as belonging together. For example, if two text passages are
formatted with different font sizes. Passage 1 with 10, passage 2 with 18 point. The
ratio 0.56 is smaller than the adjusted value 0.60. Therefore those two text
passages are recognized as not belonging together.
l
Word distance: Indicates the largest acceptable distance between two text
passages, so that they are still recognized as belonging together. This the factor the
font's mean character width is multiplied with. The value for the mean character
width is taken from the corresponding font's attributes (for texts which are printed
justified, it is suggested to raise this value up to about 2). For example, if the mean
character width of the font example shown here corresponds to the width of the
blank character (for other fonts it may be another sign). There is another text
passage found whose horizontal distance is even bigger than the first one's mean
character width, multiplied by factor 1.0. The two text passages are found to not
belong together.
Page 449

l
Vertical distance: Indicates the biggest acceptable vertical distance between two
text passages so that they're still recognized as belonging together. This is the
factor the font's height and size is multiplied with. The value for the font's height
therefore is taken from the corresponding font's attributes. For example, if the height
of that font example in 10 point size is 0.32 cm. There is a passage found that is
positioned 0.15 cm above - which means 0.15/0.31 = 0.48 < 0.50 - the previous text
passage. So the two passages are not recognized as belonging together.
l
Windows Print Converter: Select this option if the task is to generate a Line Printer file.
This will prompt the task to perform the second phase of the process, and thus convert the
XML file to a Line Printer file. If this option is not selected, the output file will thus be an
XML file. The settings included in this group determine the format settings of the
generated Line Printer file.
l
Character per inch (CPI): The number of individual characters per inch on a line of
text.
l
Line per inch (LPI): The number of lines of text per inch.
XML/JSON Conversion
The XML/JSON Action task converts an XML job file to JSON or a JSON job file to XML.
This task makes parsing XML/JSON files much simpler in a JavaScript environment and also
allows processes to natively send JSON to a Connect template or data mapping configuration.
Page 450

Input
The current job file.
Processing
The current job file is converted from XML to JSON or from JSON to XML. When converting
from JSON to XML, the encoding of the resulting XML file is always set to UTF-8 (which is the
default format for JSON).
The converted job file gets the appropriate extension (.JSON or .XML).
If the current job file isn't JSON or XML (depending on the type of conversion requested), or if
the conversion fails for any reason, the task raises an error and the current job file and
metadata remain unchanged.
JSON to XML conversion
When a JSON source file contains a single JSON object, that object's key will be used as the
root node name in the resulting XML file, and the root node will be populated with the data
inside of the JSON object. In all other cases, a root node named 'root' will be added to the XML.
It has the property "OL" with the value "RootObject" to define it as an array container. This
property will be ignored when converting from XML to JSON.
Note
In addition to being valid, the JSON should follow naming rules for XML elements. For
example, "adress_line_1:" is a valid key name in JSON, but it cannot be converted to a
valid element name in XML because the colon is reserved for namespaces. For XML
naming rules and best naming practices, see: XML elements on W3Schools.
Output
The output is the modified job file, which replaces the input job file. The metadata are reset.
Page 451

Task properties
General tab
l
Automatic detection: By default, the format of the job file is detected automatically. If the
source file is a JSON file, it will be converted to XML. If it is an XML file, it will be
converted to JSON.
Uncheck this option to limit the task to one type of conversion.
l
JSON to XML: the task only converts JSON files to XML.
l
XML to JSON: the task only converts XML files to JSON.
Miscellaneous Tab
The Miscellaneous tab is common to all tasks.
Check the option Use as step description to display the text next to the icon of the plugin in
the Process area.
Data splitters
Splitter action tasks are used to split single data files into multiple data files.
Splitters initiate a recurring cycle that stops only when the original file has been completely
processed. When a given splitter creates a file, it hands it down to the task that follows, and all
the tasks on the same branch are performed until the output task. Then the splitter task creates
yet another file that is again handed down to the next task, and so forth until the cycle ends
(when there is no more data in the original file).
In PlanetPress Suite, such tasks can be used, for example, to split files that contain statements
for multiple clients into smaller files that each contain a single client statement. Each statement
can then be printed and sent by snail mail, or emailed directly from PlanetPress Workflow, to
each individual client.
Note that if the process merges the split data with a PlanetPress Design document, the splitter
must not alter the structure of the data file. In other words, each split file must have the same
structure as the original files, otherwise the Design documents to which they will be sent will
not be able to extract the data correctly and the merging process will fail.
Page 452

In OL Connect jobs, data is normally extracted from a data file using the "Execute Data
Mapping" on page629 task. That task stores the extracted data in records which can then be
merged with a template.
Warning
Splitters do not modify the Metadata that is currently active within your process. This
means that, if you are intending to use Metadata along with a process using splitters, you
can either use the "Metadata Sequencer" on page571 instead of a splitter, or (re)create
the Metadata after the splitter.
About using emulations with data splitters
An emulation specifies how to interpret a data file (see "About data emulation" on page61.)
When an emulation is used with a splitter action task, the job file is emulated, cut to pieces and
de-emulated. Most times, the emulation/de-emulation process is completely transparent.
However, in some cases, there may be minute differences.
When using the ASCII or Channel Skip emulation, if there are missing line feed characters
(when lines end with a single carriage return in ASCII, or when lines start with a No line feed
channel in Channel Skip), the output data will be different from the input data, but the change
will not be significant.
Let us imagine that a splitter action task processes the following data file using the ASCII
emulation:
Data line1 of page 1<cr><lf>
Data line2 of page 1<cr>
Last data line of page 1<cr><lf>
Data line1 of page 2<cr><lf>
...and so forth...
Once split, the first file generated by the action task would look like this:
Data line1 of page 1<cr><lf>
Data line2 of page 1<cr>
Data line2 of page 1<cr><lf>
Last data line of page 1<cr>
Page 453

But when opened with PlanetPress Design or a PlanetPress Workflow using the ASCII
emulation, the data in the generated file would look exactly like the data in the original. The
same would hold true for the Channel Skip emulation.
Note the following details about emulations and their options:
l With most emulations, if a file is split on a form feed, the form feed will not be appended to
the output file.
l With the ASCII emulation, tabs within the input data file are replaced by spaces (the
number of spaces is determined within the configuration of the emulation).
l
With the ASCII emulation, if the Remove HP PCL Escapes option is selected, the data
coming out of the splitter will have no escape sequences.
l
The Goto column option of Channel Skip emulation is not supported.
Database Splitter
The Database Splitter is used to split database files into multiple data files that are passed to
subsequent tasks in the process.
Input
Database data (see "Database emulation" on page67).
Processing
The file is separated into multiple chunks according to the rules set in the task's properties.
Output
Multiple data files, sent one after the other to the rest of the tasks in the process. Metadata, job
infos and user variables are not modified by this task.
Task properties
General Tab
l
Split group: Use this group to indicate how you want the file to be split.
l
Field value change: Select if you want the file to be split based on changes in the values
of a selected database field (the value in the ClientID field changes, for example).
Page 454

l
Field value condition: Select if you want the file to be split based on a condition set for
the values of a selected database field (the value in the Order field equals 1, for example).
l
Field count: Select if you want the file to be split whenever a given number of pages or
data pages has been reached.
The following options are only displayed when the Field value change or the Field value
condition option has been selected at the top of the dialog box.
l
Field: Enter the name of the field upon which to base the splitter condition. Note that you
can use the popup menu's Get Data command to select the field and populate this box
automatically.
The following options are only displayed when the Field value condition option has been
selected at the top of the dialog box.
l
Operator: Select the condition to fulfill for the condition to be true and thus for the splitting
process to take place.
l
Value: Enter the condition value. Note that you can use the popup menu's Get Data
command to select the value and populate this box automatically
l
Match case: Select to force the splitter to match the character casing when resolving the
Field value change or Field value condition. If this option is selected, a change from
“DAY” to “Day” will be considered as a valid field value change, and “DAY” and “Day” will
not be considered as equal values.
l
Where to split group: Options from this group are used to define a number of pages or
records before or after which the file is to be split.
l
Pages or records: Enter the number of pages or records before or after which the file is
to be split. Enter 0 if you want the file to be split right before or after the page or record that
matches the set condition.
l
Before or after: Options from this list box are used to define exactly how the file is to be
split. Select Records before if you want the file to be split a given number of records
before the field that matches the set condition. Select Records after if you want the file to
be split a given number of records after the field that matches the set condition. Select
Pages before if you want the file to be split a given number of pages before the field that
matches the set condition. Select Pages after if you want the file to be split a given
number of pages after the field that matches the set condition.
l
Split when condition is found group: Use this group if you want the condition to be met
a multiple number of times before splitting the file. Leave the default value of 1 in the
Page 455

Times box if you want to split the file every time the condition is met, but enter a value of
2, for example, if you want to split the file every second time the condition is met.
l
Time(s): Enter the number of times the condition must be met before the file is to be split.
The following options are only displayed when the Field count option has been selected
at the top of the dialog box.
l
Maximum records per file: Enter the maximum number of records to include in each file.
Enter 0 for no limit.
l
Maximum pages per file: Enter the maximum number of pages to include in each file.
Enter 0 for no limit.
Miscellaneous Tab
The Miscellaneous tab is common to all tasks.
Check the option Use as step description to display the text next to the icon of the plugin in
the Process area.
Emulated Data Splitter
Emulated Data Splitter action tasks are used to split emulated data files (with the exception of
XML and database data files - refer to "XML Splitter" on page469 or "Database Splitter" on
page454) into multiple data files that are passed to subsequent tasks in the process.
The data received by the process is typically prepared for a given output device using a pre-set
emulation. In some cases, the data’s original emulation may also have been changed by a
Change Emulation action task (See "Change Emulation" on page392 and "About data
emulation" on page61).
Using an emulation to format the data before splitting provides the most splitting options, but
slows down the process. Splitting a data file containing a few hundred thousand pages may
take several hours. So you may choose to use non-emulated data to speed up the splitting
process (See "In-Stream Splitter" on page464).
Example
This task is put into effect in the following example process:
l Capture Web Manager Workflow
Note that Capture can only be used with PlanetPress Suite.
Page 456

Input
Any emulated data file.
Processing
The file is separated into multiple chunks according to the rules set in the task's properties.
Output
Multiple data files, sent one after the other to the rest of the tasks in the process. Metadata, job
infos and user variables are not modified by this task.
Task properties
General Tab
l
Split data file on emulated page group: Select to split the data file based on pages
(rather than on a word found within the emulated data) and to activate the option from this
group, which is used to tailor exactly how you want the page based splitting process to
take place.
l
Page(s) per output: Enter the number of pages to include in the file generated by
the splitter in this edit box below or use the spin buttons.
l
Split data file on a word group: Select to split the data file whenever a given word is
found within the emulated data file (rather than on based on pages), or whenever the
word found at a given location changes, and to activate the options from this group, which
are used to tailor exactly how you want the word based splitting process to take place.
l
Word change: Select if you want the data file to be split when the word found at a
given location changes.
l
Get: Click to go to the Data Selector and select the location associated with the
Word change option.
l
Specific word: Enter the word to use as the splitting criteria. In this variable property
box, you may enter static characters, variables, job information elements or any
combination of these. You may also use the Get Data button to get a static string of
characters from the sample data file. If you use this option, the coordinates of the
data you will select will be added to the From line, To line, From column and To
column boxes below.
Page 457

l
From line: Enter a value corresponding to the first line on which the splitter must
start searching for the word.
l
To line: Enter a value corresponding to the last line on which the splitter must start
searching for the word.
l
From column: Enter a value corresponding to the first column in which the splitter
must start searching for the word.
l
To column: Enter a value corresponding to the last column in which the splitter
must start searching for the word.
l
Match case: Select to force the splitter to match the character casing. Note that this
setting applies both to the Specific Word and Word change options. If this option is
selected, “DAY” and “Day” will not be considered as matching the search string
“day”.
l
Trim selection: Select to force the splitter to strip empty trailing characters. When
this option is not selected, blank trailing characters, if any, are considered in the
matching process, so the word “DAY” will not be considered as matching the word
“DAY”. Note that this setting applies only to the Word change option.
l
Where to split: By default, the task splits the file at the beginning of the line on
which the condition is met (the default value is 0). If you want the task to split the file
a certain number of lines before or after that line, enter a value other than 0 in this
box. Enter 1, for example, to split the file at the beginning of the line that precedes
the line on which the condition is met.
l
Before: If you entered a value other than 0 in the Where to split box, select this
option if you want to split the file a given number of lines before the line on
which the condition is met.
l
After: If you entered a value other than 0 in the Where to split box, select this
option if you want to split the file a given number of lines after the line on
which the condition is met.
l
When condition is found: By default, the task splits the file every time the condition
is met (the default value is 1). If you want the task to split the file only when the
condition has been met twice, for example, enter the number 2 in this box.
l
CSV Emulation Group
l
Add header to each output file: This option should only be checked if you are
using CSV emulation, and will copy the first line of your data file as the first line of
each split file afterward. This is useful only if your first line is a Header line that
contains your field names.
Page 458

Miscellaneous Tab
The Miscellaneous tab is common to all tasks.
Check the option Use as step description to display the text next to the icon of the plugin in
the Process area.
Generic Splitter
The Generic Splitter is a legacy task which is kept for backwards compatibility. In previous
versions of PlanetPress Workflow, it was the only splitter available. While this splitter seems to
have more options than the other ones, this is only because it contains combined features from
these other splitters.
Warning
The Generic Splitter, while seemingly more feature-rich, is slower than the other splitters
by an order of magnitude. Whenever encountering the Generic Splitter, it is always
recommended to replace it with a more appropriate splitter instead.
Input
Any data file.
Processing
The file is separated into multiple chunks according to the rules set in the task's properties.
Output
Multiple data files, sent one after the other to the rest of the tasks in the process. Metadata, Job
Infos and other variables are not modified by this task.
Task properties
General Tab
l
Split data file on: Use this box to choose the item on which top split the file. The options
available depend on whether or not the Use emulation box is checked (see below).
Page 459

l
Use emulation: Check to emulate the data before splitting the file. This lets you split the
file on a word, a word change, a page number, a database field value or a database field
change.
When this option is not checked, you can only split the file on a form feed, a specific
number of lines, or a chain of characters. See below for detailed information on any of
these splitting methods.
With this option unchecked, data selections are done with the File Viewer. The File
Viewer is like a Data Selector (see "The Data Selector" on page857) without any data
related options, such as emulation settings. The only data formatting codes to which the
File Viewer responds are line breaks.
l
A word: If you choose “A word” in the Split data file on list box (the Use emulation option
must be selected), the following boxes are displayed:
l
Word: Enter the string of characters to search for as the splitting criteria. In this
variable property box, you may enter static characters, variables, job information
elements or any combination of these.
l
Get: Click to get a static string of characters from the sample data file. If you use this
button, the coordinates of the data you will select will be added to the Word is
between lines and Word is between columns groups below.
l
Word is between lines
l
From and To: Enter a vertical search region defined as starting from a given
line and ending at a given line. If you enter 1 in the From box and 1 in the To
box, the Generic Splitter will search for the string of characters entered above
only in the first line of every page. If you enter 1 in the From box and 10 in the
To box, the Generic Splitter will search in the ten first lines of every page. Note
that the actual search region is a combination of the vertical and horizontal
search regions.
l
Word is between columns
l
From and To: Enter a horizontal search region defined as starting from a
given column and ending at a given column. If you enter 1 in the From box and
5 in the To box, the Generic Splitter will search for the string of characters only
in the first five column (five first characters of every line selected above).
l
Consider case: Select to force the Generic Splitter to match the character
casing of the string of characters entered above with the characters found in
the file. If this option is selected, “DAY” and “Day” will not be considered as
matching the search string “day”.
Page 460

l
Where to split group
l
Pages: Enter exactly where to split the file. Enter 1 to split the file 1 page
before or after the string, 2 to split the file 2 pages before or after the string, or 0
to split the file immediately before or after the string.
l
Before or after: In the previous box, you entered exactly where you wanted to
split the file, here is where you specify whether you want the split before or
after.
l
Split when word found: You may not want to split the file every time the string of
characters entered above is found, but only every other time, or every third time. If
so, enter the number of times in this box.
l
A word change: If you choose A word change in the Split data file on list box (the Use
emulation option must be selected), the following boxes are displayed.
l
Get: Click to select a search region. The coordinates of the selected region will be
added to the Word is in line box and the Word is between columns group below.
The Generic Splitter will look for changes in the string of characters appearing in
that region.
l
Word is in line: Enter the line on which to search for the word change. If you enter
1, the Generic Splitter will consider only in the first line of every page. Note that the
actual search region is a combination of the vertical and horizontal search regions.
l
Word is between columns group
l
From and To: Enter a horizontal search region defined as starting from a
given column and ending at a given column. If you enter 1 in the From box and
1 in the To box, the Generic Splitter will search for the string of characters
entered above only in the first column of the line selected above. If you enter 1
in the From box and 10 in the To box, the Generic Splitter will search in the ten
first columns of the line selected above.
l
Consider case: Select to force the Generic Splitter to consider a change in
character casing as a word change. If this option is selected, “DAY” will be
considered as different from “day”.
l
Trim selection: Select to force the Generic Splitter to trim empty characters at
the beginning and end of the data found in the search region. If this option is
not selected, “DAY” will be considered as different from “DAY”.
Page 461

l
Where to split group
l
Pages: Enter exactly where to split the file. Enter 1 to split the file 1 page
before or after the string, 2 to split the file 2 pages before or after the string, or 0
to split the file immediately before or after the string.
l
Before or after: In the previous box, you entered exactly where you wanted to
split the file, here is where you specify whether you want the split before or
after.
l
Split when word changed: You may not want to split the file every time the string of
characters entered above changes, but only every other time, or every third time. If
so, enter the number of times in this box.
l
A page number: If you choose A page number in the Split data file on list box (the Use
emulation option must be selected), the following boxes are displayed.
l
Pages per output file: Enter a number of pages after which to split the file. If you
enter 3, for example, the Generic Splitter will split the file every time it has counted
three pages. A 10 page file would be split in 4 files, the first three being three pages
long and the last one only 1 page long.
l
View data file: Click to view the sample data file and to cycle through the pages.
l
A database field value: If you choose A database value in the Split data file on list box
(the Use emulation option must be selected), the following box is displayed.
l
Field: Enter the name of the field that the Generic Splitter must check (only
alphanumeric fields can be used—selecting a binary field, for instance, will cause
the job to fail). If you enter “ID”, for example, the Generic Splitter will only look in the
field named “ID” for the value entered below. In this variable property box, you may
enter static characters, variables, job information elements or any combination of
these.
l
Operator: Select the appropriate comparison operator. If you select Equals, the
Generic Splitter will only consider that the condition is met when it finds a perfect
match (“day“and “day“, for example). If you select Contains, the Generic Splitter will
consider that the condition is met whenever it finds the string of characters entered
in the Value box, even if the database field contains additional characters (“day“and
“days“, for example, would be considered a match).
l
Value: Enter the string of characters to search for as the splitting criteria. Like the
Field box, this is also a variable property box.
Page 462

l
Consider case: Select to force the Generic Splitter to match the character casing of
the string of characters entered in the Value box with the characters found in the file.
If this option is selected, “DAY” and “Day” will not be considered as matching the
search string “day”.
l
Where to split group
l
Pages or records: Enter exactly where to split the file. Enter 1 to split the file
1 page or record before or after the string, 2 to split the file 2 pages or records
before or after the string, or 0 to split the file immediately before or after the
string.
l
Before or after: In the previous box, you entered where you wanted to split
the file. Here is where you specify whether you want the Generic Splitter to
split the file X number of pages or records before or after the string. Choose 5
in the Pages or records box and “Records after” in this box, for example, to
split the file 5 records after the record that matches the condition.
l
Split when condition found: You may not want to split the file every time the string
of characters entered in the Value box is found, but only every other time, or every
third time. If so, enter the number of times in this box.
l
A database field change: If you choose A database field change in the Split data file
on list box (the Use emulation option must be selected), the following box is displayed.
l
Field name: Enter the name of the field that the Generic Splitter must check. If you
enter “ID”, for example, the Generic Splitter will only look in the field named “ID” for
the value entered below. In this variable property box, you may enter static
characters, variables, job information elements or any combination of these.
l
Consider case: Select to force the Generic Splitter to match the character casing of
the string of the values appearing in the selected database field. If this option is
selected, “DAY” and “Day” will not be considered as matching the search string
“day”.
l
Where to split group
l
Pages or records: Enter exactly where to split the file. Enter 1 to split the file
1 page or record before or after the string, 2 to split the file 2 pages or records
before or after the string, or 0 to split the file immediately before or after the
string.
l
Before or after: In the previous box, you entered where you wanted to split
the file. Here is where you specify whether you want the Generic Splitter to
split the file X number of pages or records before or after the string. Choose 5
Page 463

in the Pages or records box and “Records after” in this box, for example, to
split the file 5 records after the record that matches the condition.
l
Split when condition found: You may not want to split the file every time the string
of characters changes, but only every other time, or every third time. If so, enter the
number of times in this box.
Miscellaneous Tab
The Miscellaneous tab is common to all tasks.
Check the option Use as step description to display the text next to the icon of the plugin in
the Process area.
In-Stream Splitter
In-Stream Splitter action tasks are used to split non-emulated data files into multiple data files
that are passed to subsequent tasks in the process.
Note
Performing the splitting process on raw, non-emulated data speeds up the splitting
process.
Task properties
General Tab
l
Split data file on page group: Select to split the data file based on pages (rather than on
a word found within the data stream) and to activate the options from this group, which are
used to tailor exactly how you want the page based splitting process to take place.
l
Page breaks on form feed: Select if you want to start a new data page whenever a
form feed character is found.
l
Page breaks on a number of lines: Select if you want start a new data page
whenever a given number of lines has been counted. Enter the number of lines in
the edit box below or use the spin buttons.
Page 464

l
Page(s) per output: Select if you want the file generated by the splitter to include
multiple data pages. Enter the number of pages in the edit box below or use the spin
buttons.
l
Split data file on a word group: Select to split the data file based on a word found within
the data stream (rather than on based on pages) and to activate the options from this
group, which are used to tailor exactly how you want the word based splitting process to
take place.
l
Word: Enter the word to use as the splitting criteria. In this variable property box,
you may enter static characters, variables, job information elements or any
combination of these. You may also use the Get Data button to get a static string of
characters from the sample data file. If you use this option, the coordinates of the
data you will select will be added to the From column and To column boxes below.
l
From column: Enter a value corresponding to the first column in which the splitter
must start searching for the word.
l
To column: Enter a value corresponding to the last column in which the splitter
must start searching for the word.
l
Match case: Select to force the splitter to match the character casing of the string of
characters entered above with the characters found in the file. If this option is
selected, “DAY” and “Day” will not be considered as matching the search string
“day”.
l
Where to split: By default, the task splits the file at the beginning of the line on
which the search word is found (the default value is 0). If you want the task to split
the file a certain number of lines before or after that line, enter a value other than 0 in
this box. Enter 1, for example, to split the file at the beginning of the line that
precedes the line on which the search word is found.
l
Before: If you entered a value other than 0 in the Where to split box, select this
option if you want to split the file a given number of lines before the search word.
l
After: If you entered a value other than 0 in the Where to split box, select this option
if you want to split the file a given number of lines after the search word.
l
When word is found: By default, the task splits the file every time the search word
is found (the default value is 1). If you want the task to split the file only when the
search word has been found twice, for example, enter the number 2 in this box.
Miscellaneous Tab
The Miscellaneous tab is common to all tasks.
Page 465

Check the option Use as step description to display the text next to the icon of the plugin in
the Process area.
PDF Splitter
PDF Splitter Action tasks are used to split emulated PDF data files into multiple data files that
are passed to subsequent tasks in the process.
When using a PlanetPress Design document, the PDF Splitter will do the job quicker than the
Metadata Sequencer task that can also be used to split PDFs. However, when using a PDF as
input, the Metadata Sequencer might perform better. For more information and some test
results, see this How-to: Performance testing grounds.
In the case of Connect Print output, using Print Presets to separate the output is preferable to
using the PDF Splitter. How to separate Print output in Connect is explained in the Connect
Online Help: How to split print output into multiple files.
Input
A PDF data file (see "PDF emulation" on page69).
Processing
The file is separated into multiple chunks according to the rules set in the task's properties.
Output
Multiple data files, sent one after the other to the rest of the tasks in the process. Metadata, job
infos and user variables are not modified by this task.
Note
The Metadata is not reset at the time the next data file is sent to the rest of the process.
See also: "Output issues caused by Metadata, and how to avoid them" on page81.
Page 466

Task properties
General Tab
l
Split on page: Select to split the data file based on pages (rather than on a word found
within the PDF data) and to activate the option from this group, which is used to tailor
exactly how you want the page based splitting process to take place.
l
Page(s) per output: Enter the number of pages to include in the file generated by
the splitter in this edit box below or use the spin buttons.
l
Split PDF file on a word: Select to split the data file whenever a given region is found
within the PDF data file (rather than on based on pages), or whenever the region found at
a given location changes, and to activate the options from this group, which are used to
tailor exactly how you want the region based splitting process to take place.
l
On region content change: Select if you want the data file to be split when the
word found at a given location changes.
l
Get button: Click to go to the Data Selector and select the location associated with
the On region change option.
l
Specific word: Enter the word to use as the splitting criteria. In this variable property
box, you may enter static characters, variables, job information elements or any
combination of these. You may also use the Get Data button to get a static string of
characters from the sample data file. If you use this option, the coordinates of the
data you will select will be added to the Left, Right, Top and Bottom boxes below.
l
Left: Enter a value corresponding to the left coordinate on which the splitter must
start searching for the region.
l
Right: Enter a value corresponding to the right coordinate on which the splitter must
start searching for the region.
l
Top: Enter a value corresponding to the top coordinate on which the splitter must
start searching for the region.
l
Bottom: Enter a value corresponding to the bottom coordinate on which the splitter
must start searching for the region.
l
Match case: Select to force the splitter to match the character casing. Note that this
setting applies both to the On region change and Specific word options. If this option
is selected, “DAY” and “Day” will not be considered as matching the search string
“day”.
Page 467

l
Trim selection: Select to force the splitter to strip empty trailing characters. When
this option is not selected, blank trailing characters, if any, are considered in the
matching process, so the word “DAY” will not be considered as matching the word
“DAY”. Note that this setting applies only to the On region change option.
l
Where to split: By default, the task splits the file at the beginning of the line on
which the condition is met (the default value is 0). If you want the task to split the file
a certain number of lines before or after that line, enter a value other than 0 in this
box. Enter 1, for example, to split the file at the beginning of the line that precedes
the line on which the condition is met.
l
Before: If you entered a value other than 0 in the Where to split box, select this
option if you want to split the file a given number of lines before the line on which
the condition is met.
l
After: If you entered a value other than 0 in the Where to split box, select this option
if you want to split the file a given number of lines after the line on which the
condition is met.
l
When condition is found: By default, the task splits the file every time the condition
is met (the default value is 1). If you want the task to split the file only when the
condition has been met twice, for example, enter the number 2 in this box.
l
Split PDF file based on Metadata group:
l
Metadata Level: Determines on which level of the Metadata the split occurs. This
can be Group, Document to Data page.
l Sequencing based on:
l
The following number of occurrences of the level: Determine a sequence
based on the number of instances found for the Metadata level currently
processed. For example, if the Metadata level is set to Group, and this value is
set to 3, each sequence contains 3 groups (except, possibly, the last one,
depending on the number of groups left in the last sequence). The next loop
starts with the next group after this sequence.
l
The following number of sequences in the job: Divides the Metadata into a
set number of sequences and equally distributes the number of levels
between the sequences. For example, it the Metadata level is set to
Document, and this value is set to 5, a 100 document job file will be divided
into 5 sequences of 20 documents each.
l
The following rule: Determine if a new sequence starts or if the current one
ends. For each Metadata level, the current value of the specified Metadata
Page 468

attribute / field is compared with the one in memory. If they are different, either
a new sequence starts or the current sequence is ended. The next sequence
starts with the next Metadata level being processed. For details see the "Rule
Interface" on page874.
l
Optimize resulting PDF: Select to specify whether the resulting PDF should be
optimized. Optimization can lead to a significant reduction in the size of the PDF, but it
may also add a certain amount of time to the process. This option should only be
unchecked if the timing of the process is critical and needs to be done quickly, but keep in
mind that the resulting PDF may be much larger than it should be and may even be too
large for PlanetPress Workflow to handle.
l
Reset Metadata according to new PDF: Metadata will be recreated according to the
new PDF that was created, including page numbering, etc.
Miscellaneous Tab
The Miscellaneous tab is common to all tasks.
Check the option Use as step description to display the text next to the icon of the plugin in
the Process area.
XML Splitter
XML Splitter action tasks use the XSLT language to split XML data files into multiple XML data
files that are passed to subsequent tasks in the process. The XML splitter includes options to
add a new root node within the generated files, as well as to change the original file’s encoding
to UTF8. Note that the XML Splitter cannot process files larger than 30 megabytes.
Input
An XML file (see "XML Emulation" on page71).
Processing
The file is separated into multiple chunks according to the rules set in the task's properties.
Output
Multiple data files, sent one after the other to the rest of the tasks in the process. Metadata, Job
Info variables and user variables are not modified by this task.
Page 469

Task properties
General Tab
This tab lets you choose the splitter settings for the default PlanetPress Workflow XSLT engine.
If you want to use your own XSLT engine, click the Alternate XSLT Engine tab.
l
Split method: Use this box only if you want to edit the standard XSLT script that will be
used to split the XML file. First use the Standard XML splitter option to define the standard
settings. Then, to change the standard XSLT script, select Advanced XML splitter and edit
the script as required.
l
Standard XML splitter
The following options are only displayed when the Standard XML splitter option is
selected in the Split method box.
l
Condition node path: In the tree view, select the XML node to consider to
determine when to split the file. To indicate whether you want the file to be
split whenever this node is encountered or whenever the information in this
node changes, see the Condition group below.
l
Condition group: Use this group to indicate whether you want the file to be
split whenever this node is encountered or whenever the information in this
node changes.
l
When condition node is found: Select if you want the file to be split
whenever the node selected in the Condition node path box is encountered.
l
When condition node content changes: Select if you want the file to be split
whenever the information stored in node selected in the Condition node path
box changes. When this option is selected, the split files typically contain more
information (all the orders for a given customer, for example).
l
New file root structure group: Use this group to tailor the structure of the
generated XML files.
l
Keep XML structure: Select if you want the generated files to have the exact
same structure as the original XML file (all the way to the root node).
l
Add new root node: Select this option and enter a root node name in the box
to the right, if you want the generated files to have a structure that begins with
a new root name and that then goes directly to the node on which the file was
split, as indicated in the Split on node box below.
Page 470

l
Encoding group: This group lets you indicate whether you want the splitter to
use the file’s own encoding or the universal encoding UTF8 to process the
file. Note that if the file contains no indication as to which encoding should be
used, the default system encoding will be used. This may result in errors being
generated or split files that contain bad data. Using the UTF8 encoding can
prevent such errors.
l
Use UTF8 encoding: Select if you want to use the UTF8 encoding to process
the file.
l
Use file’s encoding: Select if you want to use the XML file’s own encoding to
process the file.
l
Advanced XML splitter: The following options and buttons are only displayed
when the Advanced XML splitter option is selected in the Split method box. Note
that you should not use this option before you have completed all the required
settings using the Standard XML splitter option.
l
Refresh XSLT button: Once you have made all the required settings using the Standard
XML splitter option, click this button to display the XML code generated by the XML
splitter. You can then use the box below to edit the code as required.
l
{WATCHTEMPFOLDER} file separator: Use this box to edit the default XML file
separator (/).
Alternate XSLT Engine tab
This tab lets you choose the splitter settings for your own XSLT engine. If you want to use the
default PlanetPress Workflow XSLT engine, click the General tab.
l
Use alternate XSLT engine group: Select this option to enable the box and the buttons
included in this group.
l
Path and parameters for the alternate engine: Enter your XSLT engine’s absolute path
(use quotes for non DOS 8.3 compliant paths) followed by its required operators and
parameters (you must know exactly which operators and parameters your XSLT engine
requires and in which order they must appear in the command prompt used to launch the
engine). Note that you should not enter fixed values for the following parameters: the
XSLT stylesheet parameter, the source XML data file parameter or the output file
parameter. When you click the buttons below, the corresponding parameters are
automatically added at the current cursor position. These variables will be replaced by the
correct information at run-time.
Page 471

l
XSLT file button: Click to add the {XSLTFILE} variable to the command prompt displayed
in the box above.
l
Data file button: Click to add the {DATAFILE} variable to the command prompt displayed
in the box above.
l
Output file(s) button: Click to add the {OUTPUTFILE} variable to the command prompt
displayed in the box above.
l
Browse button: Click this button and browse to select the XSLT engine you want the XML
splitter to use.
Miscellaneous Tab
The Miscellaneous tab is common to all tasks.
Check the option Use as step description to display the text next to the icon of the plugin in
the Process area.
Process logic tasks
A process is like a flowchart. The data files captured by the Input tasks become job files (see
"Job file" on page53) that travel down the process. Many processes include multiple process
logic tasks.
In the Process area, conditional branches appear with their associated condition, allowing you
to understand the logic of the whole process at a glance. When PlanetPress Workflow comes to
a condition, it tests the condition and sends the job file down one of the two branches based on
the test result. So every time a job file travels down the process, it is either routed down the
True or False branch.
A "Branch" on page474 is effectively a doubling of your job file (see "Job file" on page53).
As your job file goes down the process, when a branch is encountered, a copy of the job file will
go in that branch. In the branch, all tasks up to the Output task will be performed, before
returning to the main trunk to continue processes. You can have branches within branches, and
all branches must have an Output task. For more information on branches, see "About
branches and conditions" on page138.
A "Loop" on page481 is a task that will cause anything after it to repeat a certain number of
times. You can indicate a static number of loops or dynamically determine the number via a
Page 472

variable or information from your job file, and store the iteration of the loop in a Job Info
variable.
The "Send to Process" on page484 and "Go Sub" on page479 tasks are used to send the
job file to another process or subprocess and, in the case of the GoSub, to get information back
from the subprocess.
Note
Branches, Loops and other Process logic tasks do not generally modify the job file,
though some may change system variables. The only exception is the Run Script action,
which can be a condition that also modifies the data.
Warning
Branches, Loops and Conditions do NOT modify metadata in any way. Furthermore,
even if a branch does a backup of Job Info variables and the data file, it does not back up
the metadata. Keep this in mind when designing a process.
Available Process logic tasks
l "Branch" on the next page
l "Comment" on page475
l "File Count" on page475
l "File Name Condition" on page478
l "File Size Condition" on page479
l "File/Folder Condition" on page478
l "Go Sub" on page479
l "Loop" on page481
l "Run Script" on page482
l "Send to Process" on page484
l "SNMP Condition" on page485
l "Text Condition" on page488
l "Time of Day Condition" on page489
Page 473

Branch
A Branch duplicates your job file along with accompanying information. Branches do not
execute in parallel - the branch is executed, and then the trunk (or the following branch)
continues.
For more information about branching see "About branches and conditions" on page138.
Task properties
Backup Tab
l
Backup job file: Select if you want PlanetPress Workflow to use identical copies of the
job file for the main and secondary branches. When this option is not selected, the file
generated by the output task located at the end of the secondary branch is used as the job
file for the main branch. Note that if the secondary branch ends with a Delete output task,
the main branch will receive the job file in the state it was just before the delete. If the
secondary branch includes a splitter task, the main branch will receive the last part of the
job file (as split by the splitter task). If the secondary branch ends with a PlanetPress Fax
or PlanetPress Image output task, the main branch will receive a PostScript file.
l
Backup job information: Select if you want PlanetPress Workflow to use identical
copies of the job file information for the main and secondary branches. When this option
is not selected, the job file information that reaches the output task located at the end of
the secondary branch is used for the main branch. Any modification performed on the
secondary branch thus has an impact on the main branch.
l
Backup emulation: Select if you want PlanetPress Workflow to use the emulation
selected when the job file reaches the secondary branch for the main branch as well.
When this option is not selected, the emulation selected when the job file reaches the
output task located at the end of the secondary branch is used for the main branch. If the
secondary branch includes a secondary input task or a Change Emulation action task,
then the last emulation selected in the secondary branch will be the one used for the main
branch.
l
Backup local variables: Select if you want PlanetPress Workflow to use identical copies
of the local variables for the main and secondary branches. When this option is not
selected, the local variables that reach the output task located at the end of the secondary
branch are used for the main branch. Any modification performed on the secondary
branch thus has an impact on the main branch.
Page 474

In case of the failure of a Branch task (the branch itself, not the other tasks contained within),
by default the process will ignore the branch and simply go down the main trunk. You can
overwrite this in the On Error tab.
Miscellaneous Tab
The Miscellaneous tab is common to all tasks.
Check the option Use as step description to display the text next to the icon of the plugin in
the Process area.
Comment
Comments can be used to clarify your process either for yourself or others, to explain branches
and scripts, or add information for anyone editing the configuration in the future.
Comments do not open, modify or otherwise process the job file in any way, and are simply
ignored at run-time. They do not have an On Error tab because of this, since they cannot
generate an error in any situation.
Comments have a single property in the General tab, which is the box where you enter the
comment itself. This box does not process variables (it is not a "variable property"), since that
would be of no use at run-time.
File Count
File Count tasks check if a target folder contains a specified number of files. They can be used
as Condition task or as Input task.
When used as Input task, the task triggers the process to run only when the condition is true. As
long as the condition is false, it does nothing (except log any errors).
Setting the file count to 0 allows to take action, for example, when a scheduled process is
expected to have files but it doesn't.
Processing
At run time, the number of files in the folder is compared to the specified value, using the
specified operator.
Page 475

If the folder or file count value is invalid and the task is used as Input task, the process does not
run. If it is a Condition task, it returns False. No error is generated.
Output
Job Information definitions
When used as Input task, the File Count task sets the following Job Info variables.
l
%1 - FolderName. The target folder.
l
%2 - Mask. The specified mask.
l
%3 - FileCount: The specified file count.
Task properties
General Tab
l
Target folder: Enter the full path of the folder from which the input files are to be taken, or
use the Browse button to select it. Note that subfolders are not processed.
This is a variable property field. You can use any combination of text, variables and data
selections; see "Variable task properties" on page303.
l
Masks: Enter a single or multiple file names or use file name masks (see "Masks" on
page306). Multiple filters are separated by a semicolon (e.g. *.csv;.xls*).
This is a variable property field. (See "Variable task properties" on page303.)
l
Treat as regular expressions: When ticked, the contents of the Mask field are
deemed to be a regular expression . You can specify multiple masks based on
regular expressions, separating the regular expressions by a semicolon.
Please refer to Regular Expressions for more information.
Note
No Variable Data can be used inside this field if the Treat as regular expressions
option is ticked. The percent sign, the curly brackets and the period are all key
elements of the RegEx syntax, therefore they cannot be mixed and matched with
Workflow variable data syntax (e.g. %1, ${global.myvar}, etc.). Also, there is no
validation of the RegEx being specified.
Page 476

l
File count: Select whether the condition is to check if the file count is equal to, less than,
greater than, less than or equal to, or greater than or equal to the specified value.
l
Value: Enter the desired file count. This is a variable property field. (See "Variable task
properties" on page303.)
Advanced properties
To get access to the following properties tabs, right-click the plugin in the process and select
Advanced Properties.
"Other" Tab
l
Job Information group
l
Information elements: Indicates what Job Info variables are automatically created
by the input task.
l
Add lines before first data page: Using the arrows keys you can add any job
information directly at the beginning of your data file.
l
Backup input files: Check this to save a copy of each data file that is captured by your
input. These files are saved in the PlanetPress Workflow Tools working folders under
the "Backup" folder.
To navigate quickly to the Workflow working folders, press the keyboard shortcut
CTRL+ALT+Shift+F4 from within the Workflow configuration tool.
The number of days to keep backups of jobs processed by input tasks is set per process;
see "Process properties" on page869.
l
Backup filename: Enter the file name that you wish the input data file backup to be saved
under.
l
Delete Existing Metadata: Check to remove any Metadata from memory. This option is
disabled on initial input tasks, and is checked by default on secondary input tasks.
Miscellaneous Tab
The Miscellaneous tab is common to all tasks.
Check the option Use as step description to display the text next to the icon of the plugin in
the Process area.
Page 477

File/Folder Condition
The File/Folder Condition tasks checks if the specified file or folder exists and returns true if it
exists, or false if it doesn't exist.
Task properties
General Tab
l
File or folder to check: Enter one file or folder name. The name may contain text,
variables and data selections (see "Variable task properties" on page303). The Browse
button allows to select a file or folder on disk.
Advanced properties
Right-click the task in the Workflow process and select Advanced Properties... to make
settings on the On Error and Miscellaneous tabs.
Miscellaneous Tab
The Miscellaneous tab is common to all tasks.
Check the option Use as step description to display the text next to the icon of the plugin in
the Process area.
File Name Condition
File Name Condition tasks test the original name of the job file traveling down the process
branch, or in other words, the name of the file received by the last input task appearing above
the condition.
Task properties
General Tab
l
File name mask: Enter one file name mask or multiple masks separated by a semicolon
(;). See "Masks" on page306. The condition will be tested True only in the case of an
exact match, so consider using wildcard characters.
l
Invert condition result: Select to toggle the result of the condition (true becomes false
and vice versa).
Page 478

Miscellaneous Tab
The Miscellaneous tab is common to all tasks.
Check the option Use as step description to display the text next to the icon of the plugin in
the Process area.
File Size Condition
File Size conditions test the size of the job file they receive. Note that the job file may include
data selections, attachments and documents that were added by other tasks. If a file does not
exist, it's file size will be 0kb.
This task is put into effect in the following example process:
l "HTTP PDF Invoice Request" on page284
Task properties
General Tab
l
File size is: Select whether the condition is to check if the job file is smaller (less than) or
larger (more than) than the specified value.
l
Kbytes: Enter the minimum (more than) or maximum (less than) size setting in kilobytes.
l
Invert condition result: Select to toggle the result of the condition (true becomes false
and vice versa).
Miscellaneous Tab
The Miscellaneous tab is common to all tasks.
Check the option Use as step description to display the text next to the icon of the plugin in
the Process area.
Go Sub
The GoSub action task transfers the execution of the calling process to the specified
subprocess (see "About processes and subprocesses" on page126). When a process
encounters a GoSub action, it halts its own execution, start the subprocess and waits for it to
complete before resuming its workflow with the next task.
Page 479

Every subprocess starts with a BeginSub input task and ends with a EndSub output task, both
of which have nothing to configure and cannot be replaced or deleted. The simply represents
entry and exit points for the subprocess.
Note
While it is possible to place a GoSub action within a subprocess, doing so will hide the
subprocess from any GoSub action, in order to avoid circular referencing (aka an infinite
loop).
Task properties
General Tab
l
Subprocess: Drop down list containing all the available subprocesses in the current
configuration.
l
Backup job file: Select if you want to use identical copies of the job file for the main
process and the subprocess.
l
Backup job information: Select if you want to use identical copies of the job file
information for the main process and subprocess. Once the subprocess completes its
execution, the main process will retrieve the original job information values.
l
Backup emulation: Select if you want to use the emulation selected when the job file
reaches the subprocess for the main process as well. Note that the emulation is not
passed from a main process to a subprocess or vice versa.
l
Retrieve subprocess error: Select if you want to receive error(s) from the subprocess in
order to handle them on its own.
Miscellaneous Tab
The Miscellaneous tab is common to all tasks.
Check the option Use as step description to display the text next to the icon of the plugin in
the Process area.
Page 480

Loop
Loop action tasks are used to repeat those tasks that are located after it on a given process
branch. The number of repeats can be fixed or variable, as required.
Note
The Metadata is not reset at the start of each iteration. See also: "Output issues caused
by Metadata, and how to avoid them" on page81.
Task properties
General Tab
l
Number of iterations: The number of times the loop should be repeated. Every task after
the Loop action task will be repeated this number of times. The number may be static, or
use a variable (see "Variable task properties" on page727).
l
Store current iteration in Job Info #: The Job Info in which the loop's iteration should be
stored. Useful for sequential file names or conditions based on the iteration. The value of
this Variable Properties box should be a digit between 1 and 9 (see "Job Info variables"
on page717).
l
Use value of Variable/Job Info # expression: If the contents of the previous option is a
variable, its content (which is assumed to be a number between 1 and 9) will be used to
determine which Job Info number to use for the iteration number. For example if %
{myvariable} is used and contains the value 9, then Job Info 9 will store the value of the
loop's iteration.
l
Use original Data Stream every time: Select to reuse the original job file received by the
Loop action task at every iteration. If this option is not selected and if the process ends
with a Printer Queue Output task, for example, the second time the Loop action task will
be performed, it will use the PostScript file generated by the output task.
Miscellaneous Tab
The Miscellaneous tab is common to all tasks.
Check the option Use as step description to display the text next to the icon of the plugin in
the Process area.
Page 481

Run Script
Run Script tasks are used to run scripts that typically perform some kind of processing on the
job file received by the task. Scripts are often simpler to write than programs added with the
External Program action (see "External Program" on page419). However, they can be slower
to execute.
The Run Script task can be used either as an Action or a Condition. When dragging and
dropping a Run Script task on a given process, you select whether to use this task as an Action
or a Condition from a contextual menu. (See also: "About branches and conditions" on
page138.)
For more information on scripts, what languages are supported and how to write scripts and
conditions, please see the related chapter, "Using Scripts" on page141.
Input
Any data file, in any format.
Processing
The script is executed. The script can modify anything such as the data file, Job Info variables,
Metadata, or even other files on the operating system.
Output
Whatever file the Run Script action generates, Metadata it modifies or creates, etc.
Note
When using Run Script as a Condition, the output of the task can be within the branch or
on the main trunk. To control the output, use the "Script.ReturnValue" on page174
variable in your script.
Properties
The Script Editor menu options are as follows.
Page 482

l
File
l
Import: Lets you open an existing script from an external file. This can be a .vbs, .js,
.pl or .py file for language-specific scripts, or .txt for any of them.
l
Export: Lets you save the current script as a file.
l
Print: Prints the current script.
l
Edit
l
Undo: Undo the last edit.
l
Cut: Cut the current selection (only available if there is selected text in the editor).
l
Copy: Copy the current selection (only available if there is selected text in the
editor).
l
Paste: Paste the last selection that was cut or copied in the location of the cursor in
the text editor.
l
Delete: Delete the current selection (only available if there is selected text in the
editor).
l
Select All: Select all of the contents of the editor.
l
Search
l
Find: Brings up the Find dialog.
l
Find Again: Repeats the previous search and finds the next occurrence.
l
Replace: Brings up the Replace dialog.
l
Go To Line: Brings up the Go To Line dialog where you can enter a line number
and jump directly to that line.
l
Language: Select the language in which your script is written. Choices are VBScript,
JavaScript, Perl or Python.
l
Tools
l
Editor Options...: Opens the "Editor Options" on page816.
l
Help
l
Contents and Indexes: Opens the Editor Help (this page)
The other options of the window are:
l
The script editor text box: This is where you enter your script that will be used. If you
use an external script file, this will display the content of the file (note however that
Page 483

modifying the script in this case does not modify the external file and changes are not
saved).
l
Script running from: Choose if the script should be run from the editor text box, or from
an external script file.
l
Script filename and path: Either the full path of the script, or click the Browse button to
navigate to the file. This option is only available if you choose external script file in the
Script running from option.
Warning
With the Run Script action, the On Error tab is accessible by right-clicking on the action
in your process and clicking Advanced Properties.
The On Error tab will be triggered if your script has an execution error (such as syntax
error, etc) as well as when raising an error from within your script.
Advanced properties
To get access to the following properties tabs, right-click the plugin in the process and select
Advanced Properties.
Miscellaneous Tab
The Miscellaneous tab is common to all tasks.
Check the option Use as step description to display the text next to the icon of the plugin in
the Process area.
Send to Process
The Send to Process task transfers job file(s), job information and all related files (Metadata,
sorted Metadata, etc.) to a selected process. This Action task is asynchronous, meaning the
current process will continue running in parallel to the process chosen in this task and will not
wait for it to finish.
This task is dual-purpose: it can be used either as an Action task, or as an Output task. In either
case, it does not directly produce an output, though the process it calls may produce one or
more outputs.
Page 484

In either case, the called process will ignore the input task along with its Job Info variables and
schedule, and use the job file, Job Info variables, Metadata and variables from the current
process.
Note that a process called through the Send To Process plugin will not self-replicate, even if
the process' preferences specify that it should. The initial Input task is being bypassed, and
since it's the Input task that initiates the self-replication procedure, self-replication cannot occur.
Task properties
General Tab
l
Process: The name of the target process to send the current job to. Note that startup
processes and subprocesses are not available. You can either enter the name of a
process (or use variable properties) or use the drop-down to list existing processes.
Miscellaneous Tab
The Miscellaneous tab is common to all tasks.
Check the option Use as step description to display the text next to the icon of the plugin in
the Process area.
SNMP Condition
SNMP is a communication protocol for helping network administrators manage devices and
peripherals on their network. It is useful for verifying the status of network printers, as you can
retrieve error and other status messages that printers send out, such as being out of paper or
having low toner.
PlanetPress Workflow uses the SNMP protocol in the form of an SNMP Condition, in two ways:
l To check the status of printers on your network against values you set in a condition, and
to return a true or false value. This is called setting a Printer condition in the SNMP
condition's Properties dialog box.
l To check different values of printers or other SNMP compatible devices against
conditions you set, to return a true or false value. This is called setting a User defined
condition in the SNMP condition's Properties dialog box. You indicate what is called
Page 485

management information bases (MIB) and object identifiers (OID) that are extensible and
can be vendor specific.
Management Information Base Object Identifiers
A Management Information Base (MIB) is a database of Object Identifiers (OIDs) that can be
used to monitor device objects using SNMP. An MIB OID can point be a printer tray, cartridge or
hard disk, or to modem mode. Using an SNMP condition, PlanetPress Workflow can
communicate with a device located at a given IP address and request the status of the object
identified by a given MIB OID number. Object Identifiers are typically assigned and registered
by device manufacturers. They are based on a standard known as Abstract Syntax Notation
One (often referred to as the ASN.1 standard).
Task properties
General Tab
l
Parameters group
l
Community: Enter the community name for the printer or other SNMP compliant
device you want to monitor. A community acts like a combination of a user and
password granting you access to an SNMP device. Depending on the community
name, the device knows what rights to grant, for example, read-only or read-write.
Community names serve as a form of organization and security used with SNMP.
The community name must allow sufficient access to the SNMP device to monitor it
with the condition. Most SNMP devices come with a public community name that
usually gives you read-only and/or read-write access. It is recommended to increase
security on your network by entering community names allowing varying levels of
access depending on the particular device, its users, etc. The community name tells
the device which rights to grant PlanetPress Workflow (required to perform the test).
l
IP address: Enter the IP address of the network printer (or other device) whose
status is to be checked via SNMP.
l
Get info: Click to retrieve information corresponding to the IP address you entered.
If the information is successfully retrieved and it corresponds to a printer, the Host
name and Description of the printer (or other device) appears in the corresponding
boxes.
l
Host name: When you click Get info, if PlanetPress Workflow is able to
communicate with the device, it displays its name here.
Page 486

l
Description: When you click Get info, if PlanetPress Workflow is able to
communicate with the device, it displays its description here.
l
Condition type: Select Printer Queue to test a standard printer status condition or
User Defined to test a status identified using a printer specific identification code.
Bear in mind that the failure to comply with any of the test conditions selected below
will make the whole condition False.
l
Printer Queue group (displayed when Printer Queue is selected in the Condition Type
box)
l
Printer status: Select Idle or Printing to test whether the printer is currently idle or
printing. Select Do not test if you only want to test the printer’s alert status (below).
l
Alert status: Select No alert to make the condition False whenever an alert
situation is detected, regardless of its type or severity. Select No critical alert to
make the condition False whenever a critical alert is detected, regardless of its type.
Select Non-critical alert to choose a specific non-critical alert in the Detected error
box. Select Critical alert to choose a specific critical alert in the Detected error box.
Select Do not test if you only want to test the printer status (above).
l
Detected error: Select a specific non-critical or critical alert. Note that this box is
only displayed if you selected either Non-critical alert or Critical alert in the Alert
Status box.
l
User Defined (displayed when User Defined is selected in the Condition Type box)
l
MIB OID number: Enter the Management Information Base Object Identifier
corresponding to the object you want to test. Vendors of SNMP compliant devices
sometimes list MIB OIDs in their documentation.
l
Test: Click to test communication with the device and the MIB OID number.
l
Operator: Select the operator used to test the condition.
l
Value: Enter a specific object status. Vendors of SNMP compliant devices
sometimes list possible object states in their documentation.
l
Invert condition result: Select to toggle the result of the whole SNMP condition
(true becomes false and vice versa).
Miscellaneous Tab
The Miscellaneous tab is common to all tasks.
Check the option Use as step description to display the text next to the icon of the plugin in
the Process area.
Page 487

Text Condition
Text Condition tasks can be used to perform two different types of tests:
l
To test the presence of a string within the job file. You can, for example, search for the
string “Gold member” on the first line of the job file. As another example, you could search
for a variable string retrieved via a job info variable or a data selection in a given location
in the job file.
l
To compare two strings. As with the test above, this test can also be used to search for
a string in a given location. The difference with this test is that it gives you comparison
options. Using the “Contains” operator, you can test the presence of the string “Gold
member” at a given location in the job file (using a data selection), but the other operators
can be used to test whether or not the first string is equal to the second one, whether it is
equal or lower than the second one, etc.
The logic of text conditions can sometimes be tricky, especially if it includes variable strings, so
you should test it thoroughly.
Task properties
General Tab
l
String: If you want to test the presence of a given string at a given location, enter the
string in this box. If you want to compare two strings or perform a numeric comparison,
enter the first string in this box. Note that you can enter either a static string, a variable or a
data selection in this box. If you enter a variable, PlanetPress Workflow will retrieve the
string from the variable before performing the comparison. If you enter a data selection,
PlanetPress Workflow will search the job file and retrieve the string found at the
referenced location before performing the comparison.
l
Operator: Select the desired operator. Note that neither the “Is found” nor the “Is not
found” operator can be used to test XML data.
l
Convert data to uppercase before comparison: This option is only displayed when
either “Is found” or “Is not found” is selected in the Operator box. Select to prompt
PlanetPress Workflow to convert the string to uppercase before performing the
comparison.
l
Numeric comparison: This option is not displayed when either “Is found” or “Is not found”
is selected in the Operator box. Select to convert the strings from the String and
Comparison string boxes to their corresponding numeric values before performing the
Page 488

comparison. If you chose an operator that compares numeric values, you should select
this option.
l
On numeric error: This option is only available when the Numeric comparison option is
selected. Select the behavior you prefer when PlanetPress Workflow is unable to
successfully perform a numeric comparison. Select ”Return the error”, if you want the Text
condition to fail altogether. Select ”Return true”, if you want the condition to be considered
True. Select ”Return false”, if you want the condition to be considered False.
l
Location: You can only enter a location when either ”Is found” or ”Is not found” is selected
in the Operator box. If you select “at”, you also have to enter a specific line and column. If
you select “on line”, you have to enter a given line. If you select “in area”, you have to
enter a range of lines and columns. If you select “on the page”, the search area will cover
the whole data page (as defined below).
l
Compare to string: You cannot enter a comparison string when either “Is found” or “Is not
found” is selected in the Operator box. Enter the second string of the comparison in this
box. As with the String box, you can enter a static string, a variable or a data selection in
this box.
l
Page range: Select Any page if you do not want to specify a precise data page. Select
Pages to specify individual pages or page ranges. The page range setting is only
considered when either ”Is found” or ”Is not found” is selected in the Operator box.
l
Range: Entries must be separated by commas. Page ranges are entered using a starting
page and an ending page, separated by a dash. For pages 1, 3 and 5 to 7, you would
enter the following: 1,3,5-7.
l
Invert condition result: Select to toggle the result of the condition (true becomes false
and vice versa).
Miscellaneous Tab
The Miscellaneous tab is common to all tasks.
Check the option Use as step description to display the text next to the icon of the plugin in
the Process area.
Time of Day Condition
Time of Day Condition tasks test the current time and day. Using a time and day grid, you can
select blocks that correspond to time and day coordinates. Various settings can be used to
change time intervals, for instance, that range from 15 minutes to 24 hours. You may choose to
use days or dates, and you may also select specific weeks or months.
Page 489

The Time of Day Condition differs from the process schedule in the fact that you could put this
condition after generating some output, and you can also run tasks when the condition itself is
false, which is not the case for a process outside of schedule.
You can choose contiguous as well as separate time blocks as required. The condition is
tested True every time the current time and date corresponds to a selected time block.
Task properties
General Tab
l
Month: Select All months if you want the selected time blocks to be valid every month of
the year. Select a specific month if you want the selected time blocks to be valid only on
that month.
l
Week of month / by date: Select Date if you want the selected time blocks to be valid
only on specific dates. Select All weeks if you want the selected time blocks to be valid
every week of the month. Select a specific week of the month if you want the selected
time blocks to be valid only on that week (the first, second or last week of the month, for
instance).
l
Time division: Select the desired time interval. Each block in the grid corresponds to the
selected time interval.
l
Invert condition result: Select to toggle the result of the condition (true becomes false
and vice versa).
l
Grid: Select separate or contiguous time blocks. Click a block to toggle it on or off. Click
and drag to toggle multiple blocks on or off. Click date or day at the top of the grid to
toggle the whole date or day on or off. Click a time interval on the left margin of the grid to
toggle the whole time interval on or off.
l
Select All: Click to toggle all the time blocks on.
l
Clear: Click to toggle all the time blocks off.
Miscellaneous Tab
The Miscellaneous tab is common to all tasks.
Check the option Use as step description to display the text next to the icon of the plugin in
the Process area.
Page 490

Connector tasks
A Connector, as the name implies, is a task that connects to something outside of PlanetPress
Workflow itself. In some cases those are other parts of the PlanetPress Workflow, but in other
cases we offer connectors for third-party applications or systems.
Available Connector tasks
l "Create MRDX" below
l "Laserfiche Repository Output" on page497
l "Lookup in Microsoft® Excel® Documents" on page499
l "Microsoft® Word® Documents To PDF Conversion" on page502
l "Output to Capture OnTheGo" on page505
l "PlanetPress Fax" on page512
l "PlanetPress Image" on page514
l "PReS Print Controls" on page523
l "PrintShop Mail" on page527
l When installed, the "ZUGFeRD plugin" on page530 also appears in the Connector
category. It is bound to the Connect Workflow Imaging license and provided separately.
Create MRDX
The Create MRDX Action task is used to register a job on a SureTrac server using an MRDX
file. The MRDX contains information about the job and its finishing, as well as integrity features
use by SureTrac. This task requires a PDF file as an input, along with metadata generated
through a document that contains PitneyBowes Scan Codes.
Task properties
General Tab
l
Register Job to the SureTrac Server group: Check this option to enable the group.
l
Server Name: The complete URL of the SureTrac server.
l
Process Verification Job Name: The SureTrac job that this PDF should fall under.
Use the button next to the list to retrieve a list of available SureTrac jobs from the
server.
Page 491

l
Mailrun ID: A unique identification for the current job. This ID must never be the
same between two mail runs - we suggest using either %f or %u , which are both
always unique as they are based on date and time.
l
Use Job ID: Check to send the Job ID chosen in the PitneyBowes Scan Code utility
along with the job.
l
Use External MRDX and PDF: Check this option to ignore the MRDX creation and use
an existing PDF and MRDX instead.
l
Files Location: Enter the path and file name (without extension) of the PDF and
MRDX file, or use the Browse button to select either. The PDF and MRDX file must
have the exact same name apart from the extension.
l
Use MRDX as new data file: Ignore the PDF file and use the MRDX as a job file after this
task. The PDF is discarded. If this is unchecked, the PDF and metadata are used.
Miscellaneous Tab
The Miscellaneous tab is common to all tasks.
Check the option Use as step description to display the text next to the icon of the plugin in
the Process area.
Delete Capture OnTheGo Document
The Delete Capture OnTheGo Document deletes a document from a Capture OnTheGo
Repository, which stores documents that can then be retrieved by the Capture OnTheGo
mobile application. It can be used, for example, to delete a document that has its expiration
date set in the distant future but needs to be deleted as soon as an app user has submitted it.
This task can be added as an Action task (see "Action tasks" on page379) or as a Condition
Task. When used as a Condition task, the success of the delete operation determines whether
the condition returns True or False.
Input
This task doesn't require an input file. It does need a Repository ID and password, and the ID of
the document to delete.
Page 492

Processing
This task connects to a Capture OnTheGo Repository and requests removal of a document with
a given document ID.
The protocol used is SSL 2.3.
Output
When used as a Condition task, the success of the delete operation determines whether the
task returns True or False.
Task properties
General Tab
The General tab is where you enter the connection information necessary to log on to the
Repository to request removal of the specified the document.
l
Server URL: Select the address of the COTG Server that you want the plugin to
communicate with. (This option is only available if more than one COTG Server address
has been defined.)
l
Repository ID: Enter a valid Capture OnTheGo Repository ID.
l
Password: Enter the password that corresponds to the Repository ID entered above.
l
Document ID: Enter the ID of the document to delete from the Repository.
l
Invert result: When the task is used as a Condition task, the success of the delete
operation determines whether the condition returns True or False. Check this option to
invert the result.
Miscellaneous Tab
The Miscellaneous tab is common to all tasks.
Check the option Use as step description to display the text next to the icon of the plugin in
the Process area.
Page 493

Input from SharePoint
The Input from SharePoint task can be used to retrieve files from a SharePoint server on your
network, filtering on your template fields and creating Metadata to use in your process.
When the Input from SharePoint task runs, it first lists all of the files to download then runs the
process once for each file in the list. If any new files are added during the process, they will not
be touched until the next time the process is scheduled.
This task works with many of the available SharePoint servers:
l Microsoft SharePoint 2007
l Microsoft SharePoint 2010
l Windows SharePoint Services 3.0 SP2
l SharePoint Foundation 2010
l SharePoint 2013
It may work but has not been certified with other SharePoint server versions.
Licensing
This plugin requires the OL Connect Workflow Imaging license.
Workflow Imaging is an add-on license bundle for OL Connect Workflow that includes the
Image and Fax plugins; see "About PlanetPress Image" on page759 and "About PlanetPress
Fax" on page758.
Without a valid Imaging license, the plugin will fail with an error. In the trial version, the plugin
will work.
Input
Any data file present on a SharePoint document store, even those not compatible with
PlanetPress Workflow emulations, and the properties of these files.
Processing
The task connects to the selected Document store and retrieves a copy of files according to the
specified rules. The files may be deleted or marked as checked out depending on the options
Page 494
selected, otherwise they are untouched.
Output
The output to this task is a series of individual files, one after the other.
Task properties
General Tab
Note
For this tab to work, you must have entered your SharePoint Connection information in
the Connection Tab.
l
SharePoint Site: The name of the SharePoint site from where you want to retrieve
documents. You can click on the Refresh button to display a list of sites on your
SharePoint server.
l
Document Library: The document library where you want to retrieve the files. You can
click on the Refresh button to display a list of libraries on the SharePoint site selected
previously.
l
Folder: The folder in the document library where your files are located. You can click the
Browse button to display your folder structure. In the Browse Folders dialog, click on the
folder you want to use and click OK.
l
Input Rule: Lets you define rules to filter incoming files on certain variables, for example
the file name, size, etc. Clicking the ... button brings up the "Rule Interface" on page874.
l
Download files from sub-directories also: Check to also look into subdirectories of the
specified Folder.
l
Do not download checked out documents: If the document is set as "Checked Out" in
SharePoint, it will be ignored.
l
Action Group
l
Download the document: Simply download the document and do not modify it in
SharePoint.
Page 495

l
Download the document and mark it as checked out in SharePoint: Download
the document and mark it as Checked Out in SharePoint. This is useful for
preventing files to be downloaded more than once.
l
Download the document and delete it from SharePoint: Download the document
and delete it from the SharePoint server.
Connection Tab
l
Server Name: The name of the SharePoint server. This can either be a server name (e.g.
http://SharePoint2003 ) or an IP address (e.g. http://192.168.1.123 ). Both http:// and
https:// (secure) connections are accepted.
l
Domain: The active directory domain for the logon credentials. This is not necessary if
the SharePoint server is not part of a domain.
l
User Name: A valid user name that has access to the SharePoint site and is able to read
and write to document libraries.
l
Password: The correct password for the user name.
"Other" Tab
l
Job Information group
l
Information elements: Indicates what Job Info variables are automatically created
by the input task.
l
Add lines before first data page: Using the arrows keys you can add any job
information directly at the beginning of your data file.
l
Backup input files: Check this to save a copy of each data file that is captured by your
input. These files are saved in the PlanetPress Workflow Tools working folders under
the "Backup" folder.
To navigate quickly to the Workflow working folders, press the keyboard shortcut
CTRL+ALT+Shift+F4 from within the Workflow configuration tool.
The number of days to keep backups of jobs processed by input tasks is set per process;
see "Process properties" on page869.
l
Backup filename: Enter the file name that you wish the input data file backup to be saved
under.
l
Delete Existing Metadata: Check to remove any Metadata from memory. This option is
disabled on initial input tasks, and is checked by default on secondary input tasks.
Page 496

Job Information definitions
l
%1 - Source file name: Contains the name of the current captured file.
l
%2 - Directory: Contains the name of the SharePoint director from which the current file
was captured.
Laserfiche Repository Output
The Laserfiche Repository Output task publishes files - and optionally sets index values -
into a Laserfiche server. This task uploads any documents in a Laserfiche repository, optionally
filling the index information on the Laserfiche server with dynamic information that can be taken
from PlanetPress Workflow PDI files (for PlanetPress Workflow archives only).
Note
The Laserfiche Repository Output requires the Laserfiche run-time version 8.1 or higher
and will not work with previous versions. It also requires a valid PlanetPress license.
About Laserfiche
Laserfiche is a provider of digital document and record management systems. Laserfiche has
two components: the Laserfiche server, which hosts the repository, and the Laserfiche client,
which serves as the user’s interface with the repository. For more information see the
Laserfiche website: https://www.laserfiche.com/.
Input
Any file that is compatible with Laserfiche (see the Laserfiche user manual for more information
on supported files types)
Processing
A connection is established with the Laserfiche server, the file is uploaded and the metadata in
the Laserfiche server is generated correctly.
Output
The output from this task is the specified file along with the metadata within the Laserfiche
server. The file is not directly modified by this task.
Page 497

Task Properties
General Tab
l
Laserfiche configuration group
l
Folder: Enter the Laserfiche client repository folder where the documents will be
exported. The user can specify the remote folder by clicking the Browse… button.
Note: If the Folder field is empty, the documents will be exported by default to the
root folder
l
Import Format group
l
Laserfiche Pages: Converts all images files (*.bmp, *.gif, *.jpeg, *.pcx, *.png,
*.tif, *.tiff, *.txt) into the Laserfiche internal TIFF format on the server. When
double-clicking on the document in Laserfiche the image will be opened in the
Laserfiche Image Viewer.
l
Electronic files: All files will be stored in their original format in Laserfiche.
When double-clicking on the document in Laserfiche the native Windows
application associated with the file extension of the archive will be opened.
l
Force folder creation: Select to force the folder creation if it does not already exist
on the Laserfiche server.
l
Volume: A list allowing to choose among available Laserfiche volumes.
l
Configure Tags: Click to open the Configure Tags dialog. See LaserFiche
Repository Output - Configure Tags.
l
Configure Templates: Click to open the Configure Templates dialog. See
LaserFiche Repository Output - Configure Templates.
l
PlanetPress archive folder: Folder path of the folder capture of the current process. This
field is optional and should only be set when publishing PlanetPress Workflow archives
that have PDI files.
l
If the PlanetPress Image archive folder field is empty and the option “Use
PlanetPress PDF/A” is selected, a warning message will be displayed: "You should
insert PlanetPress Image archive folder source".
l The indexes in the PlanetPress Design document must match the ones in the
Laserfiche server.
Page 498

Connection Tab
l
Server Name: The server name or IP address of the server you wish to connect to.
l
Repository: The name of the repository you wish to send the files to.
l
User name: A user name in Laserfiche that has access to the above repository.
l
Password: The password for the above user name.
l
Test Connection: Click to verify that the information entered in this tab is correct and the
server accepts it.
Restrictions
l
Each Laserfiche Repository Output task uses a connection to Laserfiche. You can use
as many Laserfiche Repository Output tasks at the same time as your Laserfiche
license allows. If you see the error message ‘The session number was exceeded’ in the
PlanetPress Workflow Service Console, it means you have exceeded your allowed
number of connections.
l
To use the “Use PlanetPress PDF/A archives” option, make sure to:
l Check the field as Multiple, select CHAR type and enter the width fields in
Laserfiche administration console as long as your PlanetPress fields.
l
Insert a folder path to your PDI source files in the PlanetPress Image archive folder.
l If a field is checked as Required in Laserfiche administration console, fill the field value.
l If you want to assign an Informational Tag, do not check the Security tag option in the
Laserfiche administration console.
l If the output repository folder does not have access rights to read and create documents,
the task will not be able to export documents to the selected Laserfiche folder.
l If you intend to use PDI for number type, your decimal separator in both your Regional
and Language Options and in PlanetPress Index (PDI) numbers should be a dot (".").
l
The Laserfiche output task will only work if an activated PlanetPress Image is found,
either locally or on the network.
Lookup in Microsoft® Excel® Documents
The Lookup in Microsoft® Excel® Documents action task is used to complement your job
file's Metadata by retrieving data from a Microsoft® Excel® spreadsheet on your system. The
Page 499

data retrieved is based on existing data in your Metadata, and it will either be added to your
Metadata or will append or replace your existing Metadata if it exists.
Fields on any level (Page, Datapage, Document, Group, Job) can be used, and the result field
will be added on the same level as the lookup field.
Note
This task will automatically "loop" through the Metadata and repeat its action for each of
your Metadata's data pages. This task should not be placed after a Metadata Sequencer
task, otherwise it will run as many times as there are Metadata sequences, which will
result in decreased performance.
Use cases
Here are some examples of how the Lookup in Microsoft® Excel® Documents task could be
used in combination with PlanetPress Design documents.
Use case 1: Send personalized emails with promotional document attached
A PlanetPress Design document takes a PDF file as the input data file, and reproduces it
exactly as it enters. The document also contains a custom data selection set to hold an email
address. The data selection's value is given by a Metadata Field called 'Email'. The value of
this Email Metadata field is a region from the sample data file representing the customer
number. At production time, the Lookup in Microsoft® Excel® Documents action task will
replace the value of this Metadata field with the corresponding customer email.
Use Case 2: Translate a list of line items descriptions into a given language
A PlanetPress Design document takes as input a transactional PDF file, and reproduces it
exactly as it enters. Metadata fields called ItemDesc are created, one for each line item
description, at the data page level. Each ItemDesc Metadata field is given the value of a line
item description as found on a region of the current data page. The line item descriptions
appearing on the resulting page produced by the design tool are custom data selections whose
value come from the corresponding ItemDesc Metadata fields. The Lookup in Microsoft®
Excel® Documents action task updates the value of all 'ItemDesc' Metadata fields with their
corresponding foreign language descriptions.
Page 500

Input
Any compatible data file. This task requires Metadata to be present.
Processing
The task parses each level of the Metadata and, for each field of the specified name it finds, a
lookup is made. If a field of the same name appears on multiple levels, the lookup will happen
for all fields, on all levels, individually.
Output
The original data file is unchanged. Metadata is updated according to the specified criteria.
Task properties
General Tab
l
Excel group
l
Excel workbook: The full path and file name of a Microsoft® Excel® workbook (.xls
or .xslx file). You can use the Browse button on the right to browse to the file on
your computer.
l
Excel worksheet: The name of the worksheet you want to use. Once a workbook is
open, this drop-down will automatically list all the available worksheets.
l
Refresh button: If you have modified the original Microsoft® Excel® workbook to
add a sheet, click this button to refresh the list of worksheets.
l
Metadata group
l
Lookup Field: The name of the Metadata field that will be used to determine which
row should be returned. The Metadata field can be on any level.
l
Lookup Column: The name of the column in the Microsoft® Excel® worksheet that
corresponds to the contents of the Lookup Field.
l
Action: What to do with the resulting data from the Microsoft® Excel® worksheet.
This can be:
l
Add Field: Creates a new field with the data. This may cause multiple fields to
be created.
Page 501

l
Replace field value: Replaces any existing field with the new content. Only
the last result will be displayed. If the field does not exist, it will create it.
l
Append field value: Ads the data to the existing field within the same one. No
"separator" is added. If the field does not exist, it will create it.
l
Result Field: The Metadata field name in which the result should be stored. This
field will appear in the same Metadata level as the Lookup Field.
l
Result Column: The name of the column where the information you want to retrieve
is located. For example, this could be a client email or full name.
l
button: Ads a new lookup line. You can have as many lines as you want. The
lines will be executed in order from top to bottom, so you can rely on a previous line
to bring additional information.
l
button: Removes the currently selected (highlighted) line.
l
button: Moves the currently selected line up one place.
l
button: Moves the currently selected line down one place.
l
Search option group
l
Match case: Will force the lookup column names to be in exactly the same case as
the Lookup column name. This means if you type in "CustomerID" in the lookup
column and the actual column is named "customerid", it would not return any result.
Miscellaneous Tab
The Miscellaneous tab is common to all tasks.
Check the option Use as step description to display the text next to the icon of the plugin in
the Process area.
Microsoft® Word® Documents To PDF Conversion
The Microsoft® Word® Documents to PDF Conversion action task can be used to convert a
Word® document into a PDF file that can be used in your PlanetPress Workflow process. It can
also do a Mail Merge as it runs the task.
Warning
As of Microsoft Office 2010, running an Office application in a service context is no longer
Page 502

supported by Microsoft. When used with Word 2010 or a later version, the Microsoft®
Word® Documents To PDF Conversion plugin is expected to run into issues related to
Word being run as a service.
Notes
l This plugin requires a license with the Optimized Output option.
l Microsoft® Word® needs to be installed for this task to be functional and to test the
connection.
l Microsoft Word must not be currently opened when the automation task runs.
l Microsoft Word 2003 up to Word 2007 are supported.
l While debugging this task, the printer shows the message that the document can not be
printed. This message is normal and will not appear when running a live configuration.
l
The task uses a printer queue set with the “PlanetPress Word to PDF Printer” driver,
which is created and set by default on-the-fly the first time a Microsoft® Word®
Documents to PDF Conversion action task is run. This printer cannot be shared on the
network in order to avoid confusion from network users, however it is shared between all
Microsoft® Word® Document to PDF action tasks on the same system.
l If using a Microsoft® database such as Access® or Excel®, each software must be
installed in the same version. For example, using Microsoft® Word® 2007 with a
Microsoft® Access® 2003 database will cause the task to fail.
l If the database path is specified in the Microsoft® Word® document, the mail merge has
to be performed with the settings specified in the document, otherwise the database path
provided in the task is ignored and can cause different conflicts. To use custom settings,
the Microsoft® Word® document should contain only mail merge fields with no database
path entered. The Microsoft® Word® to PDF action task allows specifying the path of the
database and the query to use. The Use custom settings option is very usefully for using
different databases and queries in a single process.
l If the database is the same for 2 processes, one of two processes aborts. Each process
has to use different databases, or no more than one process with a Microsoft® Word® to
PDF task.
Input
A compatible Microsoft Word Document.
Page 503

Processing
The Word document is converted into a PDF file. If a Mail Merge is made, the mail merge is
done in the document before the document is converted into a PDF file. The conversion is done
through the use of a printer queue - the document is printed to this queue and the print job is
converted to PDF. This is the same technique as used in the "WinQueue Input" on page377
when generating PDF files.
Output
The output is either:
l A PDF file accompanied with basic PDF metadata. This is the default output. The
Metadata contains one Document level, and one Data page (and Page) level for each
PDF page generated by the document. When Mail Merge is not selected, this is the only
available choice.
Note
The Objectif Lune Printer Driver will naturally add a margin to the PDF generated
by this task. If your PDF is full bleed you will not get the desired results using this
option.
l A DOC (Word Document) file which is the result of the mail merge. This output is only
available when doing a mail merge.
Task properties
General Tab
l
Microsoft Word Document: Enter a Microsoft® Word® document or template, or click
the browse button to navigate to the location of the document. The supported extensions
are: *.doc, *.docx, *.dot and *.dotx.
l
Perform Mail Merge: Check when providing a Microsoft® Word® document or template
configured for mail merge.
l
Use settings specified in document: Selected to instruct the task to use the
connection string and SQL statements stored in the DOC file. There is no guarantee
Page 504

that the database, connection string or statement are still valid, especially if the
DOC file was moved or sent to someone else.
l
Use custom settings: Override the mail merge settings in the Microsoft® Word®
document and lets you specify your own.
l
Connection String: The connection string to any ODBC database supported by
PlanetPress Workflow. You can use the Browse button to open an existing File
DSN, or use the Database Button to open the ODBC connection interface.
l
SQL Statement: An SQL statement that is understood by the database you are
using and that will return a series of records that the Microsoft® Word® template is
expecting. Note that no validation is made on SQL statements except if they are for
Microsoft Access and Excel data files. You can use the Test Connection button to
test the SQL and connection string.
l
Test connection: Checks if the Connection String and SQL Statement are valid,
and if the resulting recordset is understood by the Microsoft® Word® document.
This is optional, though highly recommended.
l
Output Type:
l
.PDF File (with metadata): The result will be a PDF file with the number of pages
generated by the combination of the template and record set. Metadata is also
included that complement the PDF.
l
.DOC file: The result is a Microsoft® Word® document in .doc format. Note that this
format is not supported by PlanetPress Workflow as a data file or job file, so this
option is only useful if you are simply planning to save the Word document in a
specific location.
Miscellaneous Tab
The Miscellaneous tab is common to all tasks.
Check the option Use as step description to display the text next to the icon of the plugin in
the Process area.
Output to Capture OnTheGo
The Output to Capture OnTheGo task sends document information to the Capture OnTheGo
online repository. These documents can then be retrieved by the Capture OnTheGo mobile
application.
Page 505

This task can be added as an Action task (see "Action tasks" on page379) or as an Output task
(see "Output tasks" on page655). Adding it as an Action task enables the process or branch to
continue after this task. An Output task is always located at the end of a process or branch.
Input
This task ignores the input data file and any Metadata unless data selections are used in the
variable data fields.
Processing
This task does not process the data or Metadata file. The information entered in the Deposit tab
of this task is sent to the repository configured in the Repository tab.
Output
The output that this task produces is the information sent to the Capture OnTheGo online
repository (the document ID).
Task properties
Repository Tab
The Repository tab is where you enter the connection information necessary to create the link
between OL Connect or PlanetPress and CaptureOnTheGo.
l
Server URL: Select the address of the COTG Server that you want the plugin to
communicate with. (This option is only available if more than one COTG Server address
has been defined.)
l
Repository ID: Enter a valid Capture OnTheGo Server user name (mandatory).
l
Password: Enter the password (mandatory) that corresponds to the Repository ID
entered above.
l
Show password: Check this box if you want to see the password you type in the
Password box.
Deposit Tab
In the Deposit tab, you enter information regarding the document you are making available to
Capture OnTheGo users.
Page 506

l
Document to Publish group: This is where you specify the document location and type.
It is mandatory to enter valid information in all the boxes included in this group.
l
USE URL: Enter a URL corresponding to the document location and name (note
that the URL must begin with either HTTP: // or HTTPS: //). The document would
typically be available from the PlanetPress HTTP Server or a regular Web server.
l
File Type: Select the appropriate document type. HTML for forms that users can fill
out, and PDF for documents users can read.
l
Cover Image: Enter the path to a cover image that is shown in the repository and
library list, as well as the document property. The maximum image size is 512x512
px and it is required to be in JPG or PNG format. Use the Browse button to locate
an image on the local drive. The Cover Image is optional and, if omitted, displays a
default image based on the file type.
l
Document Information group: In this group, you enter information that will help users
identify the document. It is mandatory to enter valid information in all the boxes included
in this group.
l
Title: Enter the document name that Capture OnTheGo users will see on their
device. Choose a name that will let users clearly identify the document.
l
Author(s): Enter a name identifying the document’s creator(s).
l
Description: Enter a description helping users identify the document.
l
Metadata group: This group lets you determine which Capture OnTheGo users can see
the document and where they will see it.
l
Recipients: Enter valid Capture OnTheGo user names separated by a semicolon
as a group entry, or individual user names as a single user entry in this box. These
names determine which users can have access to the document. Click the button
marked with a plus sign to add groups of users or individual users to this list box.
The list must include at least one entry (otherwise, no one will be able to see the
document). Note that a group here is defined by having multiple names on a single
line, granted that you use a semi-colon to separate each one. Also note that there
cannot be any spaces before or after each group or user name and that the names
are case insensitive. Click any given line to edit the information appearing on this
line. To remove a group of users or a single user, make a selection in the list and
then click the button marked with an X.
l
Categories: Enter at least one valid Capture OnTheGo document category in this
box. Capture OnTheGo documents are listed by categories (Reference, Delivery
bills, Satisfaction Polls, for instance) on Capture OnTheGo app. These categories
Page 507

are typically managed via the Capture OnTheGo Repository Management page.
Note that there cannot be any spaces before or after each category name and that
the names are case insensitive. Click the button marked with a plus sign to add a
category to this list box. To remove a category, make a selection in the list and then
click the button marked with an X.
l
Fail process if any of the categories does not exist: Check this box if you want
the process to fail if any of the categories listed above does not exist on the Capture
OnTheGo Server. If this option is not selected, and if some of the listed categories
are not present on the Capture OnTheGo Server, the process will go through and
the listed categories will be added to the Server.
Advanced Tab
The Advanced tab is where you specify the document's time to live either in the repository or
the user's device.
l
Document Handling Options group:
l
Customize: You must check this box if you want the options included in this group
to be used. When this option is not checked, the other boxes included in this group
are faded.
l
Auto-Download: This option determines whether the document is to be
automatically downloaded to the users’ devices (documents that are not
automatically downloaded are first listed on users’ devices – users must then tap
the Download button, if they want to have the document on their device). You may
enter ‘Yes’, ‘No’, or a variable. The document will be automatically downloaded if
the value is ‘Yes’ (whether entered manually or returned by the variable) and if the
recipients list includes only individual user names. In any other case, the document
will need to be manually downloaded by the users.
l
Stored on a User Device for: Enter the number of days for which the document is
to remain on a user’s device once downloaded. If you leave this box empty or enter
a value of 0, the document will never automatically expire on the devices.
l
Keep in repository group: The boxes found in this group let you specify how long
the document is to remain in the repository (even if they are not downloaded to the
user's device).
l
For: If you want the document to remain in the repository for a given number of
days, select this option and enter the number of days in the corresponding
box. If you leave the box empty or enter a value of 0, the document will not be
Page 508

removed from the repository based on this setting. Note that any positive
number you enter will automatically be reflected in the Until box below.
l
Until: If you want the document to remain in the repository until a given date,
select this option and enter a date in the corresponding box (the date format
must be “YYYY-MM-DD” - note that you can use the date picker). The date
entered corresponds to the last day of validity (the document is valid until
11:59:59 PM on the date you entered). If you leave the box empty, the
document will not be removed from the repository based on this setting. Note
that the date you enter will automatically be reflected in the For box above.
l
Time zone: When you enter a number of days in the For box or a date in the
Until box above, the computer’s time zone appears in this box. You may select
a different time zone if required.
l
Document Tracking:
l
Track documents sent: Check this option to track documents sent to the
Capture OnTheGo Server. This tracking is done through the
COTGDefaul.mdb database located in %ProgramData%\Objectif
Lune\PlanetPress Workflow 8\PlanetPress Watch\COTG , and includes most
of the information set in this task, as well as information returned from the
server.
l
Store the result ID in variable: Use the drop-down to select the variable in
which you want the document ID to be stored, so that it can be used in one of
the following tasks (if the Output to Capture OnTheGo task has been added as
an Action).
l
Blank Forms group: Check the This is a blank form option to make the form reusable.
The Form will not be deleted from the app's form library when it is submitted, so it can be
used over and over again. It will only be deleted from the app's form library after the
number of days set in Days to keep each instance.
Output to SharePoint
The Output to SharePoint action task can be used to send files to an existing Microsoft
SharePoint server.
Example Workflow process
This task is put into effect in the following use cases and example processes:
l Capture Post Processing Workflow
Page 509

Note that Capture is only available with PlanetPress Suite.
Licensing
This plugin requires the OL Connect Workflow Imaging license.
Workflow Imaging is an add-on license bundle for OL Connect Workflow that includes the
Image and Fax plugins; see "About PlanetPress Image" on page759 and "About PlanetPress
Fax" on page758.
Without a valid Imaging license, the plugin will fail with an error. In the trial version, the plugin
will work.
Input
Any data file, with optional Metadata.
Processing
The task connects to the selected Document store and uploads the current data file. If the file
already exists, it will be overwritten and, if this option is selected, marked as "checked in". The
information accompanying the file (the SharePoint Metadata) is either updated or created.
Output
The output of this task is the original data file.
Task properties
General Tab
l
SharePoint Site: The name of the SharePoint site where you want to send the files. You
can click on the Refresh button to display a list of sites on your SharePoint server.
l
Document Library: The document library where you want to send the files. You can click
on the Refresh button to display a list of libraries on the SharePoint site selected
previously.
l
Folder: The folder location in the document library where your files will be sent. You can
click the Browse button to display your folder structure. In the Browse Folders dialog,
click on the folder you want to use and click OK.
Page 510

l
Force folder creation: If the folder does not exist, it will be created.
l
Error if the file name exists: Task will generate an error if the file name is already there.
l
Mark the document as checked in: Sets the "Checked in" property of the document on
the SharePoint server.
l
Configure Fields: Opens the Configure SharePoint Metadata Fields dialog.
Configure SharePoint Metadata Fields dialog
This dialog lets you setup the information you want to assign to the SharePoint Metadata
information. It contains one line for each field present in the SharePoint document library.
l
Field Name: Name of the field as set in SharePoint Document Library.
l
Field Information: The information to enter in the SharePoint Document's Metadata for
this field.
l
Use PDF/A: Check to use the information contained within an PDF. This PDF must have
been created with PlanetPress Image and contain an Index field (data selection) of which
the name corresponds exactly to the Field Name in the SharePoint Document Library. If
this option is checked, the Field Information will change to "Use PlanetPress Index
(PDF/A)".
l
Field Type: The type of field as set in the SharePoint Document Library. The following
SharePoint field types are supported by the SharePoint output task:
l
Single line of text: This type may contain a string of any type of characters. This is
the most flexible type of field. Use this type when you are not sure if the constraints
of the other types of fields will be appropriate.
l
Multiple line of text: This type may contain multiple lines of text.
l
Choice: This type contains the menu to choose from.
l
Number: This type may contain a number (1, 1.0, 100). The decimal separator is “.”
in the plugin.
l
Currency: This type contains the currency ($…).
l
Date/Time: Date/Time fields contain a date and time
l
Yes/No: Yes/No (menu to choose from). If passing a variable, has to be either "Yes"
or "No".
l
Hyperlink or Picture: This type contains an html hyperlink or picture.
Page 511

Note
Document libraries using the Content Type system in SharePoint 2007 and higher (as
well as Windows SharePoint Services 3.0 and higher) are supported in PlanetPress
Workflow 7.4 and higher only.
Connection Tab
l
Server Name: The name of the SharePoint server. This can either be a server name (e.g.
http://SharePoint2003 ) or an IP address (e.g. http://192.168.1.123 ). Both http:// and
https:// (secure) connections are accepted.
l
Domain: The active directory domain for the log-on credentials. This is not necessary if
the SharePoint server is not part of a domain.
l
User Name: A valid user name that has access to the SharePoint site and is able to read
and write to document libraries.
l
Password: The correct password for the user name.
Miscellaneous Tab
The Miscellaneous tab is common to all tasks.
Check the option Use as step description to display the text next to the icon of the plugin in
the Process area.
PlanetPress Fax
PlanetPress Fax Output tasks are used to make request to PlanetPress Fax, which creates
faxes and sends them to a faxing program. For more information, see "About PlanetPress Fax"
on page758.
In addition to the job-specific PlanetPress Fax properties you configure in the task’s Properties
dialog box, there are configurable options common to all PlanetPress Fax outputs processed
by a given computer (See "PlanetPress Fax plugin preferences" on page807). Note that those
options are specific to each PlanetPress Fax installation and that they are immediately applied.
Page 512

Input
Any data file with a valid emulation (see "About data emulation" on page61). Metadata is
optional and can be used to specify the fax number and information to send the file.
Alternatively, a TIFF file in the proper page size and compression (CCITT Group 4) can be
used.
Processing
If a data file with metadata is used, the data file is merged with the selected PlanetPress Design
document, converted into a multi-page TIFF file with CCITT Group 4 compression, and sent to
the PlanetPress Fax host specified in the properties. If the file is a TIFF file in the proper format
and the "Pass-through" option is selected, no processing is done, the file is sent as-is.
Output
A TIFF in the CCITT Group 4 compression, and information for the FAX server to know where
to send the file.
Task properties
General Tab
l
Host: Select the IP address of the PlanetPress Fax host to which you want the request to
be sent. The Fax configuration is set in the PlanetPress Fax User Options on the target
host.
l
Refresh: Click to update the list of IP addresses displayed in the Host drop-down list box.
l
Documents: Select a specific PlanetPress Design document if you want all the jobs to be
faxed with that document. You must select a document, pass-troughs are not available.
l
Add job information to the document: Select to add the available job info variables in
the “header” of the generated output file.
l
Run mode group
l
Printer centric: Select to send the document along with the trigger and data to the
component that generates fax documents.
l
Optimized PostScript Stream: Select to merge the selected document with the
data received by this task before sending it to the component that generates fax
documents. Some PlanetPress Design features, such as the Time and Date
functions, require that this option be selected.
Page 513

PlanetPress Image
PlanetPress Image Output tasks are used to make requests to PlanetPress Image, which
creates image files which it then archives or emails. For more information about this product,
see "About PlanetPress Image" on page759.
Since this task is an Output, it is not possible to immediately act on the generated image before
continuing. When necessary to immediately retrieve the generated file, the "Digital Action" on
page408 task should be used instead.
In addition to the job-specific PlanetPress Image properties you configure in the task’s
Properties dialog box, there are configurable options common to all PlanetPress Image
outputs processed by a given computer (see "PlanetPress Image preferences" on page811).
Note that those options are specific to each PlanetPress Image installation and that they are
immediately applied.
The following describes the properties specific to PlanetPress Image Output tasks.
Note
In some combinations of Microsoft Outlook and Windows versions, it is not possible for
Outlook to be opened while PlanetPress Workflow is running, so emails are not sent out
automatically. To correct this, make sure to log on to Windows on the PlanetPress
Workflow server using the same login that PlanetPress Workflow is using, and open
Outlook before starting the PlanetPress Workflow services. You could also use a startup
process to start Outlook before the rest of the services.
Input
The input file can be:
l Any data file with a valid emulation (see "About data emulation" on page61).
l A PDF/VT file.
l
An Optimized PostScript Stream file (.ps) generated by PlanetPress Workflow. The .ps file
must be the result of the merge between a PlanetPress Design document and a data file,
and can be generated either with the use of "Add Document" on page380, or a printer
queue using a "Send to Folder printer queue" on page120. Postscript generated using
Page 514

any other way will fail, as PlanetPress Image requires knowledge of the number of pages
in the document, which is not available in output generated using any other means. Note
however that "Digital Action" on page408 does have the ability, in most cases, to
generate output using third-party PostScript files.
Processing & Output
Multiple things can happen, depending on the options chosen and the type of data this task
receives:
l
If the data file and a document are selected, and Printer Centric mode is used, the data
file is sent to the PlanetPress Image host which merges the data and document to
produce output.
l
If the data file and a document are selected, and Optimized PostScript Stream mode is
used, the data file is merged with the document and the resulting OPS job is sent to the
PlanetPress Image host to produce output.
l If the data file is a postscript file and either mode is used, the postscript file is sent to the
PlanetPress Image host which generates output (since this is already Optimized
PostScript, it is not regenerated).
Task properties
General Tab
l
Host: Select the IP address of the PlanetPress Image host to which you want the request
to be sent.
l
Refresh: Click to update the list of IP addresses displayed in the Host drop-down list box.
l
Documents: Select None (Do not use a document (passthrough) in order to generate
an image with a PDF/VT or PostScript file in passthrough mode.
Note
For an explanation of how to generate specific tags and indexes for the Image and
Digital Action tasks, in a PDF/VT file created with Connect, see the Connect Online
Help: Generating tags for Image output.
Alternatively, select a PlanetPress Design document if you want all the jobs to be
generated with that document. To use a document chosen at run-time for each job, enter a
Page 515

dynamic document name using a combination of text, variables and data selections. To
enable the dynamic document name box, click inside it. To disable it, press Enter. Note
that in the latter case, you must be certain that the documents that will be chosen at run-
time will in fact be available locally or at the selected host.
l
List only documents using VDX compilation: Check to ensure that only documents
that are compatible with the VDX compilation method are shown in the list, if producing
VDX output.
l
Run mode group (only with PlanetPress Design document)
l
Printer centric: Select to send the document along with the trigger and data to
PlanetPress Image.
l
Optimized PostScript Stream: Select to merge the selected document with the
data received by this task before sending it to PlanetPress Image. Note that some
features, such as the Time and Date functions, require that this option be selected.
l
Add job information to the document: Select to add the available job info variables in
the “header” of the generated output file.
l
Output type: Select the output file type that you want.
l
PDF: The output will be a PDF file. If you select PDF, the DPI and Color Depth
options (see below) are disabled and the options available in the PDF tab are
enabled.
l
JPEG: The output will be a JPEG file. JPEG is a lossy compression image format
that creates small files, compressing continuous tone images (such as scanned
photographs) well.
l
TIFF: The output will be a TIFF file. TIFF is a higher quality format that is one of the
standards for document exchange, useful for eventual printing or archiving. You
have a choice of the following compressed TIFF formats: TIFF Group 3, TIFF Group
4, and TIFF Packed bits. You can also use the uncompressed TIFF format, which
produces the largest files with the highest quality. TIFF is a versatile and platform-
independent format. It is used in many digitizing projects as the format of choice for
the digital masters. The TIFF Group 3 and Group 4 formats are efficient for
document storage.
l
The AutoStore, DocAccel and KYOcapture formats also generate TIFF files along
with special XML that are meant for these specialized systems.
Page 516

l
VDX: The output will be a PDF file with some PPML code inside of it to enhance
performance by doing caching/image reusing. The output can only be used on
devices that support the VDX technology.
l
DPI: Enter the dots per inch (dpi) resolution of the output image. This property is enabled
for all output types except PDF.
l
Color depth: Enter the color depth of the output image in bits per pixel (bpp). The color
depth is measured in bits, because each pixel of the output image can be described with
a varied number of bits. A higher bit number allows for more colors. It also increases the
image file size. A 1-bit color depth produces monochrome images. 8-bits produce
grayscale images (in PlanetPress Design you can have 8-bit color images, but these are
reduced to grayscale if you select 8-bit here), while 24-bits produce full color images. For
JPEG output, you cannot select a monochrome (1 bpp) color depth. For TIFF G3 and
TIFF G4, monochrome (1 bpp) is the only Color depth option you can select. This property
is enabled for all output types except PDF.
l
Multi-page: Select to generate a single file containing multiple pages. When this option is
not selected, PlanetPress Image creates a file for each page included in the output file.
This property is enabled for all output types except PDF and JPEG.
l
Add page number: Select to put a page number on each page included in the output file.
This option goes with the Multiple TIFF option and is only visible if either the AutoStore,
DocAccel or KYOcapture format is selected.
l
Archive output: Select to archive generated files. If you select this option, you must enter
a folder path in the Archive folder box and a name in the File name box.
l
Send Email: Select to send the generated file via email. You enter the emailing
properties in the Login, Recipients, and Attachment(s) tabs. Note that the generated file
will only be sent if you select the Attach output file(s) option in the Attachment(s) tab.
l
Archive folder: Enter the path of the folder to which output files generated by this task are
to be archived. PDF index files (PDI and XML) are also put in this folder. This edit box is
enabled when the Archive output option is selected.
l
Filename : Enter the name of the output files generated by this task. To prevent each new
file from overwriting the previous one, you should use variable names. As with any
variable property box, you can use any combination of text, variables and data selections.
When multiple files are generated for a single job (such as for multiple TIFFs), each file
name includes a sequence number, such as in Invoice0, Invoice1, Invoice2. If you use file
name masks that include dots, such as Statement.%y.@(1,1,1,1,25,KeepCase,Trim) or
Job.%f, for example, you must add quotation marks at the beginning and end of the file
name (“Statement.%y.%m.@(1,1,1,1,25,KeepCase,Trim)” or ”Job.%f”). Otherwise, when
Page 517

the file is saved, anything appearing after the last dot is replaced by the file’s extension
characters (and the file name thus becomes Statement.2005.pdf instead of
Statement.2005.255842.pdf, or Job.tif instead of Job.544872.tif). Failing to add the
quotation marks may result in files being overwritten.
l
Automatically Add Extension: Check if you want the correct extension for the image
type to be appended to the file name automatically, rather than having to add it in the
Filename box. The Output Type determines the extension to be used.
l
Index group: This group lets you specify which type of index must be created for each
document generated by this task. PDI files are used by PlanetPress Search as indexing
information.
l
None: Select if you do not want this task to add an index file to the generated
document.
l
PDI: Select if you want this task to add a PDI index file to the generated document.
l
XML and PDI: Select if you want this task to add both an XML and a PDI index file
to the generated document.
l
Use Title as FormName for PDF/VT document: Check to use the Title (defined on the
Job Options tab) as the PDF's FormName in the PDI, instead of the incoming PDF/VT
document's dc.title meta data tag. If the Title is empty, a warning is logged and the
FormName is not changed.
Job Options tab
If you chose PDF as the output type in the General tab, use this tab to choose the appropriate
PDF options. Note that all the options available in this tab are only used with PDF files.
l
Job options: Select the PDF output option that best describes your needs. This loads all
the standard settings for the selected usage scenario. These settings can be changed as
required. Note that if you make changes and then select a different output option, your
changes will be lost. PlanetPress Image supports numerous PDF standards: Standard,
High Quality, Custom, and a variety of PDF/VT, PDF/A and PDF/X formats.
l
General group
l
ASCII format: Select to create the PDF file using ASCII characters (instead of the
usual 8-bit binary format). This option produces a file suitable for transmission over
a 7-bit ASCII link. This option is useful if the PDFs need to be opened in a text
editor, sent across networks, or sent via email using a program that does not support
binary files. This option also generates smaller files.
Page 518

l
Compress text and line art: Select to compress the text and line work in the file
using the Flate compression filter. Flate is a compression method that works well on
elements with large areas of single colors or repeating patterns, as well as on black-
and-white elements that contain repeating patterns.
l
Auto-rotate pages: Select to automatically rotate pages based on the orientation of
the text or DSC comments.
l
Optimize for fast web view: Select to minimize file size and facilitate page
downloading.
l
Title: Enter a title for the document. If you leave this box empty, the document’s
name will be used as the document’s title. Since this is a variable property box, you
may use variables and data selections and let PlanetPress Workflow interpret this
information at run-time.
l
Author: You may enter the name of the author of the document. Since this is a
variable property box, you may use variables and data selections and let
PlanetPress Workflow interpret this information at run-time.
l
Subject: You may enter the subject of the document. Since this is a variable
property box, you may use variables and data selections and let PlanetPress
Workflow interpret this information at run-time. Note that if you use a data selection
in this box, you must be sure that the data that will be selected at run-time will not
contain any parentheses, as this would cause the task to fail. If you suspect that the
data may contain parentheses, you should use a Run Script action task (see Run
Script Action Task Property) with a Strip() function to strip them out.
l
Keywords: You may enter keywords for the document. Since this is a variable
property box, you may use variables and data selections and let PlanetPress
Workflow interpret this information at run-time.
l
Monochrome images group
l
Compression: Select the compression to use for the monochrome images. Flate
compression is lossless, so no data is lost during compression. Flate Mono works
well on images with large areas of solid shades or repeating patterns, such as
screen shots and simple images created with paint or drawing programs. CCITT
typically yields the best compression of monochrome images. It is the compression
method developed for fax transmissions. Note that configurations that were created
with an earlier version of PlanetPress Workflow and that included tasks set not to
Page 519

use any compression will by default be set to use the Flate compression method.
l
Resolution: Select the resolution to use for monochrome images.
l
Grayscale images group
l
Compression: Select the compression to use for the grayscale images. Flate is a
lossless compression method, so no data is lost in the process. It works well on
images with large areas of single shades or repeating patterns, such as screen
shots and simple images created with paint or drawing programs. JPEG removes
image data and may reduce image quality, but may be suitable for continuous-tone
photographs containing more detail than can be reproduced onscreen or in print.
Since JPEG eliminates data, it can achieve much smaller file sizes than Flate
compression. Select Auto to let the application choose the best compression
method automatically. Note that configurations that were created with an earlier
version of PlanetPress Workflow and that included tasks set not to use any
compression will by default be set to use the Flate compression method.
l
Downsampling: Select the down sampling option. Down sampling reduces image
size by breaking images down into small areas in which multiple pixels are
replaced by single pixels. The Grayscale resolution you enter in the following box is
used to control the down sampling process. Select None to prevent grayscale down
sampling. Select Average to average pixel shades in each sample area and to
replace the entire area with a pixel of the average shade. Select Subsample to use
a pixel in the center of the sample area and replace the entire area with that pixel
value. This method is significantly faster, but results in images that are less smooth.
Select Bicubic to use a weighted average to determine pixel shades. This method is
the slowest but most precise and results in the smoothest tonal gradations.
l
Resolution: Select the resolution to use for grayscale images. Note that this setting
has an impact on the grayscale down sampling process.
l
Color images group
l
Compression: Select the compression to use for the color images. Flate is a
lossless compression method, so no data is lost in the process. It works well on
images with large areas of single shades or repeating patterns, such as screen
shots and simple images created with paint or drawing programs. JPEG removes
image data and may reduce image quality, but may be suitable for continuous-tone
photographs containing more detail than can be reproduced onscreen or in print.
Since JPEG eliminates data, it can achieve much smaller file sizes than Flate
compression. Select Auto to let the application choose the best compression
method automatically. Note that configurations that were created with an earlier
Page 520

version of PlanetPress Workflow and that included tasks set not to use any
compression will by default be set to use the Flate compression method.
l
Downsampling: Select the down sampling option. Down sampling reduces image
size by breaking images down into small areas in which multiple pixels are
replaced by single pixels. The Color resolution you enter in the following box is
used to control the down sampling process. Select None to prevent grayscale down
sampling. Select Average to average pixel color in each sample area and to replace
the entire area with a pixel of the average color. Select Subsample to use a pixel in
the center of the sample area and replace the entire area with that pixel value. This
method is significantly faster, but results in images that are less smooth. Select
Bicubic to use a weighted average to determine pixel shades. This method is the
slowest but most precise and results in the smoothest tonal gradations.
l
Resolution: Select the resolution to use for color images. Note that this setting has
an impact on the color down-sampling process.
ll
Security group
l
Set document permissions: Select to enter the Permissions password.
l
Permissions password: Enter a password in this box only if you want to
prevent users who does not have this password from changing the security
options of the generated PDF files.
l
Allow printing: Select to let users print the generated PDF files.
l
Allow changing the document: Select to let users edit the generated PDF files.
l
Allow content copying: Select to let users copy content from the generated PDF
files.
l
Allow form filling: Select to let users enter information in the form fields included in
the generated PDF files.
ll
PDF open password: Enter a password in this box only if you want to prevent
users who does not have this password from opening the generated PDF files.
l
Security Level: The password protection for PDF can be encrypted using one of
the available encryption methods (RC4, AES-256 and AES-128). It gives the task
the ability to take an existing PDF in input and apply the selected password to the
PDF without any change to the quality level of the original PDF.
l
Font group
l
Embed all: Select to embed the entire font of all fonts used in the variable content
document within the generated PDFs. Using this option may result in large PDFs,
Page 521

especially if many fonts are used. Note that those fonts installed by default with the
Adobe Acrobat and Adobe Reader are never embedded. If a font is not embedded
in your PDF, opening it on another computer or printing it may cause it to be
substituted by another default font.
l
Subset: Select to embed only a subset of the Type 1 and TrueType fonts used in
the document. A font subset is in fact composed of only those characters that are
actually used in the document. This option can only be used if the Embed all fonts
option is selected. Note that if more than 35% of the characters included in a font are
used in the document, the entire font is embedded. This option often produces
smaller PDF files and ensures proper PDF display.
l
Initial view group
l
Zoom factor: Select the magnification at which you want Adobe Acrobat or Adobe
Reader (or other PDF viewer) to open the generated PDF. Choose the Fit in
window option to display the entire page using the available screen space, or
choose a percentage of the actual document size.
l
Show: Select the information you want Adobe Acrobat or Adobe Reader (or other
PDF viewer) to display with the generated PDF. Select Page only to leave the tabs
area to the left of the PDF pages empty. Select Bookmarks and page to display the
contents of the Bookmarks tab (you use data selection objects to create bookmarks
in PlanetPress) alongside the PDF pages. Select Page tab and Page to display the
content of the Pages tab (thumbnails of each PDF pages) alongside the PDF
pages. Select Full screen to hide all screen contents except the PDF page, and
expand the PDF page to the maximum size it can occupy onscreen.
PlanetPress Search Database tab
If PlanetPress Workflow is configured to automatically update a PlanetPress Search database
(See "PlanetPress Image preferences" on page811), this tab can be used to override the
global settings so that the task updates a different database than the one set in that global
configuration. In order for the settings to work, the Add PDF to PlanetPress Search database
must be checked. However, you can override which database will be updating using the option
in this window, Override global PlanetPress Search Database settings. The database options
then activate.
l
Database type: Select the type of the database in which you want to create a table
(Access, or SQL Server).
Page 522

l
Connection time-out: Enter the time, in seconds, that the connection to the database is
maintained while no action is taking place before the connection is severed.
l
Database directory: Enter the path of the directory in which the Access database is
located, or use the Browse button to navigate to, and select, the directory. This option is
available only when you select Access database in the Database type box.
l
Data source name: Enter the name of the computer on which the database runs. This
option is available only when you select SQL Server database or Oracle database in the
Database type box.
l
Use default database: Select to use the default database associated with your user
profile on that SQL Server or Oracle database. Clear to enter the name of the database in
the box that appears.
l
Use Windows NT Integrated security: Select to use your Windows user name and
password to log onto the SQL database.
l
User ID: Enter the user id required to access the database to which you are adding new
PDI files from the generated PDF files. If you are using an SQL database, enter the login
name you chose when you configured the SQL database (refer to the “Using
PlanetPressSearch with an SQL Server Database” section of the PlanetPress Search
User Guide).
l
Password: Enter the password required to access the database.
l
Test Connection: Click to verify that PlanetPressImage can connect to the specified
database.
l
Enforce global table creation: Select this option, as it ensures that all database users
are granted access to the database. This option is available only when you select SQL
database in the Database type box.
Login, Recipient, Attachments
l
For the Login, Recipient and Attachment tabs, please see the "Send Email" on
page677 task properties.
PReS Print Controls
The PReS Print Controls task is used for running PReS Classic jobs through Connect
Workflow.
Page 523

Limitations
In order for PReS Print Control tasks to be functional, some pre-requisites must first be met:
l PReS Classic 6.3.0 or higher must be installed on the same system.
l A valid PReS Classic license (either dongle or software based) must be available on the
same system.
Note
All PReS Classic licenses are issued and controlled by the PReS License Server
and not Connect. Thus a separate PReS Classic license is required.
Input
A PReS Classic job and the resources it needs.
These resources include the data file to run against the job, plus any graphic or font resources
the jobs needs, along with any required PReS Classic specific resources, such as TRF or PDI
files.
Processing
The selected data file is merged with the selected PReS Classic job to create a print output
stream.
If the PReS Classic job selected is an uncompiled PReS Classic script (PDS), it will first be
compiled on the fly and then run using the selected data file.
If the PReS Classic job selected is a pre-compiled PReS job (PDC) file, then the pre-compiled
job will run with the selected data file.
Output
The available output print stream options are AFPDS, GOPReS (Graphic Output), IJPDS, PCL,
PDF and PostScript (PS) outputs.
Page 524

Task properties
General Tab
l
PDC File: Select either an un-compiled PReS Classic script file (PDS) which will need to
be compiled on the fly, or a pre-compiled PReS Classic job file (PDC).
The job needs to be specified exactly. If you want to compile the job at run time, then you
must select a PDS file. If you wish to use a pre-compiled PReS Classic job, then select
the PDC file, rather than the PDS.
If a PReS Classic script file (PDS) is selected, Connect Workflow will use PReS Classic
to compile the selected file and then run the resultant PDC file, regardless of whether
there was an existing PDC file within the folder already. Any existing PDC file in that
folder will be overwritten by the new compilation.
Note that the PDS or PDC file can be explicitly selected, or it could be set via a Connect
Workflow variable; see "Variable task properties" on page303.
Note
The use of pre-compiled PReS Classic jobs is heavily recommended, as this
greatly reduces the scope for run-time errors.
l
Data File: The data file to use in the run. This file can be explicitly selected, or it could be
set via a Connect Workflow variable; see "Variable task properties" on page303.
Note
Note: If the Data File selection does not include the data file folder path, then the
folder entered into the Working Folder entry will be used for determining the path.
l
Working Folder: Select the folder that contains the PReS Classic job and associated
resources.
This entry can either be explicitly selected or it could be set via Connect Workflow
variable; see "Variable task properties" on page303.
If the PDC File selection contains a full folder path along with the filename, then the
Working Folder does not need to be selected, as Connect Workflow will use the path
contained in the PDC File entry.
Page 525

Note
If the PDC File selection contains a folder path and the Working Folder also has
an entry, then the PDC File entry will be appended to the Working Folder entry.
One should be very cautious doing this, as it could easily lead to errors.
l
PDL Type: Select the desired PReS Classic output type for the job.
Note
Not all PReS Classic jobs can be swapped between output types. Jobs designed
for certain output types (such as AFPDS) will likely have settings specific to the
original output type.
Changing the output type at this point will likely lead to errors or require job
modifications to suit the changed output type.
l
Log level: Specifies the verboseness of messages returned by job processing. The
available levels are Error, Warning, Information and Debug.
Connect Workflow logs a successful PReS Classic job processing with a “Job Status:
Finished” status, followed shortly after by “Exec Status: 1”.
A successful PReS Classic job usually returns a zero value, but non-zero return values
do not necessarily signal job failure, as PReS Classic jobs can be set to return specific
values as part of job processing.
If the job still finishes with a Job Status of “Finished” and Exec Status “1” then the job
completed without error.
l
Instance: Used for specifying the PReS Classic Print Control instance. PReS allows up
to four instances of the same Print Control type (license dependent), and any one of those
instances can be selected here.
Selecting 1 would force Connect Workflow to use Print Control PRN1, whilst selecting 2
would launch PRN2, and so on. This is useful if you have a variety of Print Control
license speeds, and each license is assigned to a different PRNx instance. This allows
for manual load balancing, by selecting specific Print Control speeds for different jobs,
based upon your own criteria. Such as the size or urgency of the job being processed.
The default Auto option lets Connect Workflow choose whichever instance is available.
Page 526

Note
It is heavily recommended that this setting be left as ‘Auto’, as PReS Classic
licenses being assigned to different PRNx instances is extremely rare.
l
Time-out: The time in seconds that the Connect Workflow waits for a response from the
PReS Print Control to make sure it is running. If Connect Workflow does not receive a
response in the allotted time it will terminate the Print Control and continue to the next
step in the workflow.
PrintShop Mail
Once you have imported PrintShop Mail documents to your PlanetPress Workflow workstation
(see "Importing PrintShop Mail documents" on page51), you can use PrintShop Mail action
tasks to output the job file with a selected PrintShop Mail document. PrintShop Mail action
tasks let you print as well as generate PostScript or PDF files. The PrintShop Mail and
PrintShop Mail 7 action tasks are essentially the same. The only differences are:
l The version supported: PrintShop Mail only supports 6.1 documents, while PrintShop
Mail 7 supports 7.0, 7.1 and 7.2 documents.
l PrintShop Mail 7 can output PDF/VT and PPML/VDX.
Limitations
In order for the PrintShop Mail tasks to be functional, some pre-requisites must be met:
l PrintShop Mail version 6.1 or higher must be installed on the same system, and an
activated PrintShop Mail production dongle must be plugged in to the system.
l You must have at least one printer using a PostScript driver on your system in order to
produce PDF output. It is highly recommended that a PostScript printer be set as the
default system printer in order to act as a fallback if the selected printer is unreachable.
l
PlanetPress Workflow Service must be configured with a user name and password that
have access to the required printer(s). The Local System Account setting will not work.
Input
A data file compatible with a PrintShop Mail Document. Metadata is ignored by this task.
Page 527

Processing
The data file is merged with the selected PrintShop Mail Design document, producing the
number of records selected in the task properties. This merging uses the PrintShop Mail engine
(PSMail.exe) to generate the output.
Output
The output produced by this task is dependent on the options selected: it can be PDF, a
Windows EMF print job, a PostScript print job or a JPG file. PrintShop Mail 7 can also output
PDF/VT and PPML/VDX.
Note that the Preflight output type doesn't actually produce printable or viewable output. The
Preflight option does a cursory verification of the job and will generate an XML file that contains
a list of all warnings and errors.
Task properties
PSMail Tab
l
File name: Select a specific PrintShop Mail document if you want all the jobs to be
printed with that document.
l
Output type group
l
Output type: Select the type of output you want the task to generate.
l Select PDF to generate a PDF file.
l
Select Windows PostScript driver (PrintShop Mail)/Direct to printer
(PrintShop Mail 7) to send the output to a printer that is available via Windows.
l
Select Preflight to check if the merging of the data file and document would
generate warnings or errors. This does not actually produce output, only an
XML file containing a list of warnings and errors, including on which record
and layout the warning or error occurred, and a description.
l
Select Produce PostScript (PrintShop Mail 7 task: PostScript) to generate a
standard PostScript file that can then be sent to any PostScript printer.
l
Select JPG to generate a JPG image file.
l
Data file type: Select the data file type that is sent to this task, and used as a
database for the PrintShop Mail document.
Page 528

l
Distilling options file: Enter the name and path of a distilling options file (or
"joboptions" file) or use the Browse button to navigate to that file. This option is only
available when PDF is selected in the Output type box.
l
PDF Type: Select Preview or Print to select which type of PDF should be
generated. This option is only available when PDF is selected in the Output type
box.
l
PostScript Driver: Select which driver to use to generate the job. This should be
the same as the printer selected in your PrintShop Mail document when designing
it. This option only appears in the PDF and Produce PostScript output types.
l
Windows Printer: Select the print driver of the printer to which you want the print
job to be sent. This option is only available when Direct to Printer/Windows
PostScript driver is selected in the Output type box.
l
Print Technology (PrintShop Mail 7 task): Select the PrintShop Mail print
technology to use when generating the output. For a list of available job
technologies, consult the PrintShop Mail User Guide. This option is only available
when Direct to printer is selected in the Output type box.
l
Layout: Select which layout to use to produce the JPG file (output is limited to a
single image). This option is only available when JPG is selected in the Output type
box.
l
User generated file as output: The output from the plugin will be the file generated
by the merging (depending on the output type selected). This option is not available
in the Direct to printer/Windows PostScript Driver output type.
l
User original data as output: The output from the plugin will be original data file.
When this option is selected, a box is enabled under the option, letting you specify a
full path where the output should be saved. This option is not available in the
Windows Direct to printer/PostScript Driver output type.
l
Record Range group
l
All records: Select if you want to print all the records included in the job file.
l
Use Record Range: Select if you want to print only some of the range included in
the job file. Use the From and To boxes to indicate the record range.
Miscellaneous Tab
The Miscellaneous tab is common to all tasks.
Page 529

Check the option Use as step description to display the text next to the icon of the plugin in
the Process area.
ZUGFeRD plugin
The ZUGFeRD plugin provides a way to enrich German PDF invoices with data specific to the
invoice. This is done by embedding the data in a standardized XML format within the PDF
itself.
For general information on the Plugin, see "ZUGFeRD" on page761.
Input
A PDFfile that is PDF/Acompliant. The PDF/Aconformity level doesn't matter. It may be 1, 2
or 3.
Processing
The plugin first checks that the PDF is PDF/A compliant, and doesn't already contain
ZUGFeRD data. If it is, then the PDFis processed.
Output
A PDF/A-3file with the selected ZUGFeRD data included.
If the incoming PDF is not PDF/A compliant, the plugin will not touch it but will instead forward
the untouched PDF as the Job File.
If the incoming PDF already contains ZUGFeRD data, the plugin will not touch it but will
instead forward the untouched PDF as the Job File.
Properties
ZUGFeRD I Tab
The ZUGFeRD data entry options are too large to fit within a single entry tab, so the data entry
options have been split over two tabs. ZUGFeRD Iis the first of these.
All the entry fields with a maroon field name support the use of variable data. You can right-
click within these fields to insert a Workflow data selection. This provides an easy option for
Page 530

including Workflow information that relates to the currently processing invoice (such as
Metadata and variables) into the ZUGFeRD fields.
For more information on Workflow context menu data selection options, see this page:
Workflow Variable Properties
l
Zu verwendendes PDF group: Allows selection of the PDF file to process and enrich
with the ZUGFeRD-XML information. Select from:
l
Workflow Jobdatei: Use the incoming Workflow Job File.
l
Datei: Specify a specific PDF. Use the browse button to select a file, or paste
the file path and name into the edit box.
The file path and name can be given and defined via variables, so the file selection
can be dynamic.
Note
The PDF selected must already be PDF/A compliant. The conformity level
doesn't matter (it may be 1, 2 or 3).
If the incoming PDF is not PDF/A compliant, the plugin will not touch it but will
instead forward the untouched PDF as the Job File.
If the incoming PDF already contains ZUGFeRD data, the plugin will not
touch it but will instead forward the untouched PDF as the Job File.
l
Rechnung group contains invoice related information.
l
Rechnungsnummer: The invoice number.
This field supports alphanumeric strings and can be set via Workflow data and/or
variables.
l
Dokumentenart: The document type. This field will always be set to "RECHNUNG"
(invoice), to cater for BASICinvoices.
l
Rechnungsdatum: The invoice date.
This entry can be set directly, or through the date selection pop-up that appears
Page 531

when the drop down icon is selected.
Note
The date entry must be formatted in standardized UTC format:yyyy-mm-dd
Any other formatting will lead to a run-time error.
l
Lieferant group contains all the required values and information related to the seller,
delivery and/or the invoicing party.
l
Name: The individual or company name.
This field supports alphanumeric strings and can be set via Workflow data and/or
variables.
l
Adresse: The postal address (sans post code and city entries). Two address lines
can be included in this entry.
This field supports alphanumeric strings and can be set via Workflow data and/or
variables.
l
Postleitzahl: The postal address post/ZIP code.
Note
No postal code validation is done by the plugin, so it is up to the user to make
sure that the postal code entry is valid and in the correct format for the
indicated country.
This field can be set via Workflow data and/or variables.
l
Ort: The postal address city/town.
This field supports alphanumeric strings and can be set via Workflow data and/or
variables.
l
Ländercode: A 2-letter country code as defined by the industry standard ISO 3166-
1 alpha-2.
The plugin provides some common predefined country codes in the pull-down list.
Codes other than those provided can be entered either manually or through
Page 532

variables.
However, the country code must always follow the standard of exactly two
uppercase letters only.
Note
The plugin does not check if a given country code is in the list of valid country
codes.
It is the responsibility of the user to ensure that only valid country codes are
entered.
This field can be set via Workflow data and/or variables.
l
Art der Steuernummer: The two letter code for the tax identity number. Select from
the drop down list box.
The choices are either "VA" (Umsatzsteueridentifikationsnummer (UStID)) or "FC"
(Steuernummer (national)).
This field can be set via Workflow data and/or variables.
l
Steuernummer: The tax identity number. This number must match with the tax type
specified in the "Art der Steuernummer" selection.
Note
The plugin does not check if a given tax ID number conforms to any rules. It is
the responsibility of the user to ensure that only valid tax ID numbers are
entered.
This field can be set via Workflow data and/or variables.
l
Käufer group contains all the required values and information related to the buyer.
l
Name: The individual or company name.
This field supports alphanumeric strings and can be set via Workflow data and/or
variables.
l
Adresse: The postal address (sans post code and city entries). Two address lines
can be included in this entry.
This field supports alphanumeric strings and can be set via Workflow data and/or
Page 533

variables.
l
Postleitzahl: The postal address post/ZIP code.
Note
No postal code validation is done by the plugin, so it is up to the user to make
sure that the postal code entry is valid and in the correct format for the
indicated country.
This field can be set via Workflow data and/or variables.
l
Ort: The postal address city/town.
This field supports alphanumeric strings and can be set via Workflow data and/or
variables.
l
Ländercode: A 2-letter country code as defined by the industry standard ISO 3166-
1 alpha-2.
The plugin provides some common predefined country codes in the pull-down list.
Codes other than those provided can be entered either manually or through
variables.
However, the country code must always follow the standard of exactly two
uppercase letters only.
Note
The plugin does not check if a given country code is in the list of valid country
codes.
It is the responsibility of the user to ensure that only valid country codes are
entered.
This field can be set via Workflow data and/or variables.
ZUGFeRD II Tab
The ZUGFeRD data entry options are too large to fit within a single entry tab, so the data entry
options have been split over two tabs.ZUGFeRD II is the second of these. All the entry fields on
the ZUGFeRD II tab support the use of variable data. You can right-click within these fields to
insert a Workflow data selection.
Page 534

For more information on Workflow context menu data selection options, see this page:
Workflow Variable Properties
l
Zahlungsinformationen group contains payment related information.
l
Zahlungsreferenz: The payment reference, purpose, or payment number serving
as identifier for the payment.
This field supports alphanumeric strings and can be set via Workflow data and/or
variables.
l
Währung: This is a 3-letter currency code, as defined in the ISO 4217 3A standard.
The plugin offers some predefined common currency codes in the pull down list
box. Other codes can be entered manually or via variables. However, the currency
code must follow the ISO standard of exactly three uppercase letters only.
Note
The plugin does not check if a given currency code is in the list of valid
currency codes in the mentioned ISO. It is the responsibility of the user to
ensure, that only valid currency codes are entered.
This field can be set via Workflow data and/or variables.
l
IBAN: A bank account number following the International Bank Account Number
(IBAN) standard.
The IBAN consists of an alphabetical country code, followed by two check digits,
and then up to thirty five characters for the bank account number. The bank account
number can include the domestic bank account number, the branch identifier, and
potential routing information.
Note
The plugin does not validate bank IBAN/BICcodes. It is the responsibility of
the user to ensure that valid codes are entered.
This field can be set via Workflow data and/or variables.
Page 535

l
BIC: This is an international bank code that identifies particular banks worldwide,
using the Bank Identifier Code (BIC) standard. The standard consists of a 4-letter
institution or bank code, a 2-letter country code (following the ISO 3166-1 alpha-2
standard), a 2-character (letter or digits) location code and an optional 3-character
(letter or digits) branch code.
Note
The plugin does not validate bank IBAN/BICcodes. It is the responsibility of
the user to ensure that valid codes are entered.
This field can be set via Workflow data and/or variables.
l
Allgemeine steuerliche Informationen group contains taxation related general
information.
l
Steuerart: The trade tax code following the international UNCL 5153 standard.
Generally this is "VAT" (Umsatzsteuer, value added tax).
Note
The plugin will accept any string. The user needs to take care to only enter
valid tax codes as defined in the UNCL 5153 (see
http://www.unece.org/trade/untdid/d97b/uncl/uncl5153.htm ).
This field can be set via Workflow data and/or variables.
l
Steuerprozentsatz: The tax rate entry. This is the percentage that applies for the
taxation calculation.
This entry should be a numeric currency entry, which can be set via Workflow data
and/or variables.
l
Basisbetrag: The base amount entry, upon which the tax is calculated.
This entry should be a numeric currency entry, which can be set via Workflow data
and/or variables.
l
Steuerbetrag: The taxation amount.
Page 536

This entry should be a numeric currency entry, which can be set via Workflow data
and/or variables.
l
Detaillierte steuerliche Informationen group contains detailed taxation information.
l
Gesamtbetrag der Positionen: The total amount.
This entry should be a numeric currency entry, which can be set via Workflow data
and/or variables.
l
Bruttosumme: The grand total amount.
This entry should be a numeric currency entry, which can be set via Workflow data
and/or variables.
l
Gesamtbetrag der Zuschläge: The charge amount.
This entry should be a numeric currency entry, which can be set via Workflow data
and/or variables.
l
Steuerbasisbetrag: The basic amount, upon which tax is drawn.
This entry should be a numeric currency entry, which can be set via Workflow data
and/or variables.
l
Gesamtbetrag der Abschläge: The total amount of discounts and allowances.
This entry should be a numeric currency entry, which can be set via Workflow data
and/or variables.
l
Steuergesamtbetrag: The total tax amount.
This entry should be a numeric currency entry, which can be set via Workflow data
and/or variables.
Bei Fehler/ On Error Tab
For a description of the options on the On Error tab see "Using the On Error tab" on page100.
Anmerkungen/ Comments Tab
The Comments tab is common to all tasks. It contains a text area (Task comments) that lets
you write comments about the task. These comments are saved when the dialog is closed with
the OK button, and are displayed in the Task Comments Pane.
Check the option Use as step description to display the text next to the icon of the plugin in
the Process area.
Page 537

PlanetPress Capture
Note
PlanetPress Capture is only available in version 7.2 and higher of PlanetPress Suite
Production. It is not available in older versions, nor is it available in the Office and Watch
versions of PlanetPress Suite.
PlanetPress Capture is not compatible with OL Connect Designer templates.
PlanetPress Capture is a set of tools available in PlanetPress Workflow that enable output and
input for interaction with an Anoto Digital Pen. Anoto Digital Pens are electronic devices
containing a camera, processor, memory and communication capabilities and they can
recognize their location on any paper where a special Anoto pattern is printed.
For more information on building and using PlanetPress Capture processes, please see
"PlanetPress Capture Workflow" on page289.
"Anoto" and the Anoto logotype are trademarks owned by Anoto AB.
PLANETPRESS CAPTURE is based on Anoto Digital Pen and Paper Technology,
which is covered by over 200 patents worldwide, including but not limited to
US6663008, US7172131, US7248250, US7281668, JP3872498, JP3842283,
CN1595440, SE517445, RU2256225, and AU773011.
Capture Condition
The Capture Condition task checks the status or field contents of a Capture document that has
been processed by the Capture Field Processor action task.
This task is put into effect in the following use cases and example processes:
l Capture Post Processing Workflow
l Capture Web Manager Workflow
Input
A data file in PGC or PDF format that is accompanied by valid Metadata. This Metadata must
contain Capture information and is generally available after a "Capture Fields Processor" on
Page 538

page546 or "Find Capture Documents" on page552 task. However, it is also possible to
directly retrieve the required information from a specific Document ID. When a specific ID is
used, the data file and Metadata are completely ignored by this task's condition rules, and the
database information is used instead.
Processing
The condition is evaluated using the specified rules, combination (condition is true when...) and
scope (condition scope).
Output
The original data file and Metadata is output by this task. If the rules used in the condition return
True, the data and Metadata is sent down in the condition's branch. Otherwise, this same
information is sent in the trunk.
Task properties
General Tab
l
Document Origin:
l
Document to process: Determines where the document information is read
l
From Metadata: Select to use the current document available in the Metadata
generated by the Capture Field Processor.
l
From Specific ID: Select to specify an exact Document ID from the database.
This document does not need to be loaded as a data file or its Metadata
manually obtained, as this task simply looks up the information directly in the
PlanetPress Capture database.
l
Condition based on Document Status: Select this to base the condition on the state of
the document
l
Document is open: Condition will be true if the document is open (not all Capture
fields are filled).
l
Document is closed: Condition will be true if the document is closed (all relevant
Capture Fields are filled).
l
Document is complete: Condition will be true if the document is still open, but all
appropriate Capture Fields are filled.
Page 539

l
Document is partial: Condition will be true if the document is still open but only part
of the appropriate Capture Fields are filled.
l
Document is empty: Condition will be true if the document is open but no Capture
Field is filled.
l
Document is on error: Condition will be true if a logical error was triggered while
processing the PGC. This can happen, for example, if a field was re-written when it
should not, a List Field set to only accept one option contains ink in both options,
etc.
l
Condition based on Pattern Availability : Select to base the condition on the availability
or non availability of patterns in a specific pattern sequence.
l
For Pattern Sequence: The name or identification of the pattern sequence to
check. Leave blank if no pattern sequence is used.
l
Number of Patterns available are: The operator for the comparison. Numeric
comparison with the number of available patterns in the specified pattern sequence.
l
This number of Patterns: The number to use as a comparison to the available
number of patterns in the pattern sequence.
l
Capture Field-based condition: Select to base the condition on the state of one or more
fields of your document.
l
Field Name: The name of the field on which to base your condition. This is
equivalent to the name of the Capture Field Object in PlanetPress Design.
Note
In this field in particular, the right-click menu displays a unique option, 'Open
Document Preview'. This option displays a list of existing documents. When
clicking on a document, the "PDF Viewer" on page864 appears and displays
all of the Capture fields. Double-click on a Capture field to automatically add
its name to the Field Name box.
Page 540

l
Condition: Defines what should trigger the condition:
l
Ink is Present: Triggered by the presence or absence of ink in the field.
l
None: No ink should be present in any field with this name.
l
Any: Ink should be present in at least one field of this name in your
document.
l
All: Ink should be present in all fields of this name in your document.
l
Index: The specified index of the Capture Field of this name should
contain ink. The Index property is generated when a Capture Field
object is repeated or is part of a runpage. This index is 1-based.
l
Pidget setting: Triggered by specific pidget settings.
l Every pidget setting (such as stroke color and stroke thickness) is listed
here. If the specific pidget was triggered before ink was applied to the
Capture Field, the conditions becomes true.
l
Start timestamp: Triggered when the first ink is applied in the field.
l
Before: If the first stroke found in the Capture Field was made earlier
than the specified date and time, the condition becomes true.
l
After: If the first stroke found in the Capture Field was made later than
the specified date and time, the condition becomes true.
l
In the last: If the first stroke found in the Capture Field was made within
the specified number of Hour(s), Day(s) or Week(s) counting backwards
from the moment the PGC is received, the condition becomes true.
l
End timestamp: Triggered when the last stroke finishes in the field. (see Start
Timestamp for detailed options)
l
Pen Id: Triggered by the ID (serial number) of the pen. A box provides a way
to specify which Pen ID will trigger this condition to be true.
l
Field List Value: Triggered only on Field List Capture Fields. A box provides
a way to specify which value will trigger this condition to be true.
l
Content Status: Triggered when the field is in a specific status. A Drop-down
provides a way to select which status will trigger this condition to be true.
l
Complete: The field contains ink and no error was detected.
l
Empty: No ink was found in the field.
Page 541

l
Error: A logical error was detected in the field. This can happen, for
example, if a field was re-written when it should not, a List Field set to
only accept one option contains ink in both options, etc.
l
ICR Value: Triggered when the value given by the ICR engine compares with
the specified value. Operators are available for the comparison (such as
Equal, Not Equal, Lower or Higher Than, Contains and etc). It is also possible
to select which Index of the field to use (See Ink is Present" above).
l
ICR Confidence: Triggered when the confidence percentage the ICR engine
gave to the ICR value compares with the value determined in the
"Confidence" box, using the chosen comparison operator.
l
ICR Resemblance: Triggered then the resemblance percentage the ICR
engine gave to the ICR value in relation to its recognition database compares
with the value determined in the "Resemblance" box, using the chosen
comparison operator. For more information on ICR, see PlanetPress Capture
ICR.
l
button: Add a new field and action line.
l
button: Remove the currently selected line.
l
The condition is true when: Specifies how to react when more than one Capture Field
based condition is present
l
All items are met: The task will return true if ALL the combined conditions are true.
l
At least one item is met: The task will return true if ANY of the combined conditions
is true.
l
Condition Scope: Determines whether the conditions need to be true for all the pages of
the document, or any one of them.
l
In the document (occurrence): The task will return true if the condition set it true
for any page of the document.
l
On each pages: The task will return true only if the condition set is true for all of the
pages of the document.
l
Invert condition: Inverts the result of the task.
Miscellaneous Tab
The Miscellaneous tab is common to all tasks.
Page 542

Check the option Use as step description to display the text next to the icon of the plugin in
the Process area.
Capture Fields Generator
The Capture Fields Generator action task is used to generate Capture patterns in your job,
which will then be printed for use with an Anoto Digital Pen. It also interacts with the Capture
database and does some operations.
Warning
PlanetPress Capture Fields cannot simply be inserted into an existing document as-is
and expected to work properly, efficiently or consistently. In order to design a document
with Capture Fields, you must review and understand the Critical PlanetPress Capture
Implementation Restrictions.
This task is put into effect in the following use cases and example processes:
l Basic Functional Capture Workflow
l Capture Web Manager Workflow
Input
The Capture Field Generator action task expects to receive a regular data file that
corresponds to the Capture-Ready document that uses it, along with Metadata generated using
the same data file and document. This means that this task must be preceded by at least the
Create Metadata task.
This metadata must also be correctly separated at the documents level, either in the Capture-
Ready document's properties or through the Metadata Level Creation task.
You may also use a Metadata Sequencer task in order to split the job into multiple parts. This
both creates multiple smaller outputs, as well as multiple smaller PDFs in the Capture
database. While it is not recommended to separate each document on its own as it removes all
optimization and makes the database much larger, you may split into document batches such
as 250, 1000 or 2500 documents.
Page 543

If using the Metadata Sequencer it is generally recommended to place the Sequencer and the
Capture Fields Generator tasks within a branch and, within the Capture Field Generator's On
Error properties tab, to set it to stop the branch if any errors occur. This is to ensure that if such
an error occurs most of your document sequences will get generated and you will not have to
start the job over from the beginning.
Processing
The Capture Fields Generator action task uses an existing PlanetPress Design document
containing Capture fields and assigns a unique Capture pattern to each printed page. The task
then locks each pattern that it used so it cannot be reassigned to any other document.
The whole job is then converted into a PDF file which is stored, without the patterns, in the
Capture Database. This PDF file is later used by the "Capture Fields Processor" on page546
to be merged with ink from the pen. At the same time the output is generated, either as a PDF
(including the patterns) or an Optimized PostScript Stream file. This means that regardless of
the output, a PDF is always generated in the database.
Note
If any error occurs during processing, such as running out of patterns while generating the
job, every action made by this task will be rolled back as if they hadn't happened.
Output
The Capture fields Generator action task will output either a PDF and Metadata, or an
Optimized PostScript Stream file without Metadata.
Task properties
Pattern Generator action task properties are as follows:
l
Capture Document: Choose the PlanetPress Design capture ready document that will
be used to generate the output including the capture fields.
l
Document Title: Enter a name for the document that will be saved inside the PlanetPress
Capture Database. This name should be unique and recognizable and will be used later
to retrieve the document form using the Get Capture Document action task.
Page 544

l
Document Title group: Determines a Title for the document. This title is accessible in the
Capture Database and can be used to search for a document or retrieve a list of
document using other tasks.
l
From metadata: Use the Document Title property as set in the PlanetPress
Capture section of a PlanetPress Design document's properties.
l
Custom: Use the title in the input field as set by the user. The field is variable so the
title can be set on a per-document basis using data or metadata selections.
l
Output Format group
l
Continue process with optimized postscript (no metadata): The job file coming
out of the task will be a PostScript file that can be sent to any postscript printer or
saved locally.
l
Continue process with PDF (with new metadata): The job file coming out of the
task will be a PDF with accompanying metadata for that PDF (previous metadata is
lost).
l
Override document pattern sequence: Check to override the pattern sequence as
entered in your PlanetPress Design document properties. Once checked, enter a new
pattern sequence in the Pattern Sequence box.
l
Fail if document doesn't contain at least one capture field: If the static or dynamic
document that tries to pass through this task does not contain any capture fields, an error
will be generated.
l
Simulate pattern area on final document: When retrieving the document from the
database with the Get Capture Document, each Capture Field is simulated using a grey
box. This box is not a pattern and cannot be used with the Anoto Digital Pen, however
this option can be used to keep the same overall design of your document.
Miscellaneous Tab
The Miscellaneous tab is common to all tasks.
Check the option Use as step description to display the text next to the icon of the plugin in
the Process area.
"Anoto" and the Anoto logotype are trademarks owned by Anoto AB.
PLANETPRESS CAPTURE is based on Anoto Digital Pen and Paper Technology,
which is covered by over 200 patents worldwide, including but not limited to
US6663008, US7172131, US7248250, US7281668, JP3872498, JP3842283,
Page 545

CN1595440, SE517445, RU2256225, and AU773011.
Capture Fields Processor
The Capture Fields Processor action task is used to update the Capture database using
information received from an incoming PGC file, which generally originates from a
communication by the Anoto penDirector.
This task is put into effect in the following use cases and example processes:
l Basic Functional Capture Workflow
l Capture Web Manager Workflow
Input
This task requires a PGC file that has been obtained from an Anoto Digital Pen that was used
to write on documents generated from the same PlanetPress Workflow installation.
Processing
The PlanetPress Capture Fields Processor action task receives and processes the
information sent by the Anoto digital pen and updates all the documents in the PlanetPress
Capture Database using the information from the pen. Any ink in the pen is added as an EPS
(image) layer on the PDF inside the Capture Database. If a specific document needs to be
closed to release its pattern, this task does so.
During processing, ink is always applied to the document first and then the logic is applied for
releasing patterns. This means that even if a document is closed by a field set as Final that was
checked first, ink present in other fields will still be applied to the document.
From version 7.5 and onwards, ICR is done on the ink, if the "Perform ICR Recognition" option
is checked.
Error handling
If the Capture Fields Processor generates a critical error during the processing of any document
in the PGC file, all of its actions will be reverted. If your PGC file contains multiple documents,
even those documents that were processed before will revert. It is strongly suggested to backup
your PGC file before using this task and to create an error handling process to capture these
errors.
Page 546

Logical errors do not cause this task to exit. For example, if a List Item Capture Field is set to
only accept a single option but contains ink in more than one option, or if a Capture Field that
does not accept re-writing receives more ink, the task will still complete. The inks that are
relevant to logical errors are still added to the PDF document, but they are added on a separate
"error" layer.
Output
This task outputs the PGC file it received along with Metadata that contains the documents that
have been updated by this task. The Metadata can be used to do post-processing of the file
using Capture Conditions, or directly through other Metadata tools. The structure of the output
Metadata added by Capture is the following:
l
Document Level
l
CapCloseDate: Date at which the document was closed by Capture Field
Generator. Blank if the document is still open.
l
CapDocID: The database ID of the document. This field is useful especially if using
the Capture API since the ID corresponds to the itembyID function.
l
CapDocName: The name of the document as specified in the Capture Field
Generator.
l
CapOpenDate: The date at which the document was created by the Capture Field
Generator.
l
CapPatternSequence: The value of the pattern sequence assigned to the
document.
l
CapPGCName: The name of each PGC file that was used to update this document
(will repeat for each PGC file)
l
CapStatus: Current status of the document:
l 0: Open
l 1: Closed by an optional field
l 2: Closed by a mandatory field
l 3: Closed by a final field
l
CapTemplateName: Name of the PlanetPress Connect document used to generate
the document.
Page 547

l
Page Level:
l
CaptureField: Information on each capture field on the page. Repeated for each
capture field that is present.
Note
There is no method of obtaining the information from a PGC except through a successful
processing of this task, or via the use of the PlanetPress Capture API within a Script (see
"Using Scripts" on page141).
Task properties
Capture Fields Processor action task properties are as follows:
l
PGC Name: This value will be added to the output Metadata, as well as the Capture
Database, to link the PGC to the document it updates.
l
Pattern sequence group
l
Type: Specify from where the Pattern Sequence should be taken.
l
None: Do not use a Pattern Sequence.
l
Pen Information: Use the Pattern Sequence assigned to the pen in the
PlanetPress Capture Database.
l
Custom: Overwrite the pen's information and specify a Pattern Sequence
manually or use a data selection.
l
Custom Pattern Sequence: If you choose Custom in the Type drop-down, enter a
manual Pattern Sequence or a data selection that contains the Pattern Sequence to
be used.
l
ICR Settings group
l
Perform ICR Recognition: Triggers the PlanetPress Capture ICR engine. For more
information, see PlanetPress Capture ICR.
l
Engine Language: Define the language the ICR engine will use for text
recognition. This has a major effect on the way text is recognized, as different
languages use different databases to recognize letters, numbers and characters.
For example, accented letters are not correctly recognized in the English ICR
database.
Page 548

l
Fail if new ink is found on non-rewritable fields: Check to trigger the On Error tab if
and when a field set as Disable Rewriting receives ink in a new session.
l
Ignore out of bounds ink data: Check to continue processing even if receiving a PGC
that causes ink to be outside of any Capture Field to appear. This may happen if
updating the wrong document. When out of bounds ink is found, the document will be set
in the "Error" status. (see note below)
l
Split PGC by document: Check to treat each document as a separate PGC file. This
removes the need to use a Capture PGC splitter before this task, however the PGC
Splitter remains useful when using self-replicating processes to accelerate PGC
processing.
l
Add pattern information to the Metadata: Adds advanced information in the Metadata
for post-processing:
l At the Document node, timestamp information such as ink start/end time
l At the Page node, information about each Capture Field such as its name,
dimensions, style, index, mask, timestamp and content status.
Note
When the Ignore out of bounds ink data option is checked, this option modifies the way
that the On Error tab reacts. When a single split is processed and generates an error,
only that split triggers the On Error tab. The other splits continue processing as usual. If
another split generates an error, it also triggers the On Error tab.
Miscellaneous Tab
The Miscellaneous tab is common to all tasks.
Check the option Use as step description to display the text next to the icon of the plugin in
the Process area.
Capture PGC Splitter
The Capture PGC Splitter task can be used to separate each document into its own PGC file
so they can be processed separately. The splitter then sends each document PGC to the next
action, which should be the Capture Fields Processor task. Note that using the Capture PGC
Page 549

Splitter will cause your process to take more time, since each PGC must pass through the
Capture Fields Processor and then the Get Capture Document task.
Note
Due to the fact that the Capture PGC Splitter task modifies the original PGC, in some
cases the legality of the PGC signature may be compromised. This depends on your
country or region's laws, so if your implementation of Capture requires signatures to be
authenticated please consult a legal advisor for more details.
Input
A PGC file received from an Anoto digital pen.
Processing
The PGC file is split by document, if a document can be matched for each pattern ID found in
the PGC. The match is made by comparing each Pattern ID with the information found in the
Capture database. If more than one pattern is used in a document (pattern on multiple pages of
the document), all of the information for this document (more than one Pattern ID) is sent down
as a split. Patterns that do not match any document are sent individually, one Pattern ID per
split.
Output
One or more PGC file, separated as described above.
Task properties
General tab
l
Pattern sequence group: Determines what Pattern Sequence will be assigned to each
PGC file.
l
Type: Specify from where the Pattern Sequence should be taken.
l
None: Do not use a Pattern Sequence.
l
Pen Information: Use the Pattern Sequence assigned to the pen in the
PlanetPress Capture Database.
Page 550

l
Custom: Overwrite the pen's information and specify a Pattern Sequence
manually or use a data selection.
l
Custom Pattern Sequence: If you choose Custom in the Type drop-down, enter a
manual Pattern Sequence or a data selection that contains the pattern sequence to
be used.
Miscellaneous Tab
The Miscellaneous tab is common to all tasks.
Check the option Use as step description to display the text next to the icon of the plugin in
the Process area.
"Anoto" and the Anoto logotype are trademarks owned by Anoto AB.
PLANETPRESS CAPTURE is based on Anoto Digital Pen and Paper Technology,
which is covered by over 200 patents worldwide, including but not limited to
US6663008, US7172131, US7248250, US7281668, JP3872498, JP3842283,
CN1595440, SE517445, RU2256225, and AU773011.
Extract ICR Data
The Extract ICR Data task retrieves the ICR data from the specified document ID from the
Capture Database and adds this information to the current Metadata in the process, at the
specified level.
Input
Any data file, but generally one associated with the document in question (either a PGC or a
PDF), along with an associated Metadata file.
Processing
A query is made to the Capture database and the ICR data is retrieved. The document that is
queried must be available in the database (must not have been closed and retrieved
previously).
Page 551

Output
The original data file is output by this task, along with the original Metadata file that has been
enhanced with the ICR data at the selected level.
Task properties
General Tab
l
Document ID: A variable data field that corresponds to the database ID of the document
from which you want to retrieve ICR data. The Document ID is generated by the system
through the Capture Fields Generator. The ID must correspond to a document in the
Capture database, or the task will fail with an error.
l
Metadata Level: A drop-down list containing all of the levels of Metadata. Choose the
one where the ICR data will be added.
Miscellaneous Tab
The Miscellaneous tab is common to all tasks.
Check the option Use as step description to display the text next to the icon of the plugin in
the Process area.
Find Capture Documents
The Find Capture Document task retrieves a list of pertinent information about Capture
documents present in the Capture database according to a specified set of rules.
This task is most often useful as the beginning of an automated process using a series of
Capture documents, for example one that removes old documents to unlock patterns. However,
it can also be used as a secondary input in order to retrieve one or more documents after some
operations.
Note
The Find Capture Document task makes multiple simultaneous statements to the
database when requesting a list of documents. For this task to work, the Allow multiple
statements option must be checked in the ODBC connection setup done in the control
Page 552

panel.
This task is put into effect in the following use cases and example processes:
l Capture Post Processing Workflow
l Capture Web Manager Workflow
Input
Because this task in an Input task, it does not use the current job file in your process, even
when used as a secondary input task.
Processing
This task connects to the Capture database and looks up all available documents that meet the
criteria specified in the plugin. Then it does further processing to retrieve relevant information
about each document and places the information in the data file it generates.
Output
The data file generated by this task is an XML structure containing the data about each
document. It also generates Metadata that is compatible with post-processing tasks such as the
"Capture Condition" on page538 and "Get Capture Document" on page556 tasks.
Task properties
General Tab
l
Document-ID Based Condition: Select this option for this task to filter its results using a
specific Document ID.
l
Document ID: Enter the ID on which you want to filter. The Document ID is a
unique identifier of the document when it is stored in the database. It is attributed to
the job metadata when the "Capture Fields Generator" on page543 ads it to the
Capture database.
l
Document-Based Condition: Select this option to set up an advanced filter containing
one or more conditions.
Page 553

l
Condition Grid: Displays the list of current condition criteria that were set for
document retrieval.
l
Filter: The selected filter type. This can be any of the following:
l
Document Name: The name of the document, as specified in the
Document Name property of the "Capture Fields Generator" on
page543.
l
Date Generated: The date, in YYYY-MM-DD format, when the
document was generated through the Capture Field Generator.
l
Date Closed: The date, in YYYY-MM-DD format, when the document
was closed by the Capture Field Processor or Get Capture Document
tasks. This field is empty in documents that are still open.
l
Pen user (by description): The description of the pen, as entered in the
"PlanetPress Capture Pen Management Tool" on page784. Generally,
this is the name of the owner of the pen.
l
Pen user (by serial number): The serial number of the pen (aka Pen
ID)
l
Pattern Sequence: The Pattern Sequence in which a document is
entered.
l
Template name: The name of the PlanetPress Design document used
to generate the Capture document. This is set in the document's
properties, in PlanetPress Design.
l
Pattern ID: The exact ID of the Anoto Pattern used. This is also called
"Pattern Trace Code".
l
Content Status: The status of the document as a whole. A document
can be Empty (no ink), Partial (some ink but still open), Complete (all
mandatory ink is present) or in Error (logical or process error).
l
Operator: The choice of the condition operator. The available choices are
variable depending on the filter but will be part of the following choices:
l
Equal: Inclusive filter, where anything equal (either by string or numeric
comparison) is included in the results.
l
Not Equal: Exclusive filter, where anything not equal to the condition is
included in the results.
Page 554

l
Less Than: Numerical comparison, where anything lower than the
specified value is included.
l
Greater Than: Numerical comparison, where anything higher than the
specified value is included.
l
Less than or equal to: Numerical comparison, where anything lower or
equal to than the specified value is included.
l
Greater than or equal to: Numerical comparison, where anything
higher or equal to than the specified value is included.
l
Contains: Inclusive string comparison, documents where the specified
value is present within the chosen filter are included.
l
Does not contain: Exclusive string comparison, documents where the
specified value is not present within the chosen filter are included.
l
Before: Date comparison, documents of which the date is previous to
the specified value are included (Date Generated and Date Closed
filters only).
l
After: Date comparison, documents of which the date is closer than the
specified value are included (Date Generated and Date Closed filters
only).
l
Last: Date comparison, documents of which the date is within the
specified interval are included (Date Generated and Date Closed filters
only).
l
Older than: Date comparison, documents of which the date is older than
the specified interval are included (Date Generated and Date Closed
filters only).
l
Condition: The condition or value the document needs to meet. The condition
is variable dependent on the chosen filter. It can be a drop-down of values, an
alphanumerical or numerical value.
l
Add button: Click to add a condition row to the grid.
l
Remove button: Click to remove the currently selected condition from the grid. To
select a row, simply click on any of its 3 components.
l
Condition Operator: Select either "All items are met" to force all conditions to be
true for a document to be included, or "At least one item is met" to include
documents where a minimum of 1 condition is true.
Page 555

l
Create Advanced Data File: Click to retrieve additional information about each
document in the result list. These information include each field, the presence of ink on
each of them, time stamps, etc. Please refer to Find Capture Document for an example of
the XML file.
Warning
The Advanced Data File option will generate a high number of queries into the Capture
Database, and will be slower than a regular data file by orders of magnitude. Do not use
this option unless you are aware of the loss of performance and actually need to access
each field's properties individually!
Miscellaneous Tab
The Miscellaneous tab is common to all tasks.
Check the option Use as step description to display the text next to the icon of the plugin in
the Process area.
Get Capture Document
The Get Capture Document action task is used after the Capture Fields Processor to
retrieve all documents that have been updated.
This task is put into effect in the following use cases and example processes:
l Basic Functional Capture Workflow
l Capture Post Processing Workflow
l Capture Web Manager Workflow
Input
A data file in PGC or PDF format that is accompanied by valid Metadata. This Metadata must
contain Capture information and is generally available after a "Capture Fields Processor" on
page546 or "Find Capture Documents" on page552 task. However, it is also possible to
directly retrieve the required information from a specific Document ID. When a specific ID is
used, the data file and Metadata are completely ignored by this task's condition rules, and the
database information is used instead.
Page 556

Processing
One PDF, corresponding to the information present either in the Metadata or specified in the
task, is extracted from the Capture database.
When retrieving documents from the database, the PDF from which the document is obtained
will remain in the database until each document contained in it is retrieved from it. For example,
if a 10-page PDF contains 5 documents, the 10 pages remain in that PDF until all 5 documents
have received ink, been closed and retrieved from the database. This may mean space issues
if too many PDF files remain in your database.
Note
Performance-wise, when this plugin retrieves a document from a 10,000 page PDF in the
database, it will take more time then if it retrieved it from a 100 page PDF.
Output
The Get Capture Document action task is a loop that outputs a PDF version of the Capture
Document. The PDF contains the original document, any ink added by the "Capture Fields
Processor" on page546 action task.
In addition, any ICR information available (when using PlanetPress Capture ICR) will be
placed at the Page Level, as follows:
l
ICR_[FieldName]_Val : The value of the text that was recognized by the ICR engine, for
the field named [FieldName]. If the field is not and ICR field or if that field contains no ink,
the value will be empty.
l
ICR_[FieldName]_Cfd : The confidence value (in percentage) of the engine for the value
provided.
Page 557

Task properties
General Tab
l
Document Origin group:
l
Document to process: Determines where the document information is read
l
From Metadata: Select to use the current document available in the Metadata
generated by the Capture Field Processor.
l
From Specific ID: Select to specify an exact Document ID from the database.
This document does not need to be loaded as a data file or its Metadata
manually obtained, as this task simply looks up the information directly in the
PlanetPress Capture database.
l
Document Type group
l
Get all documents: Get all the documents that have been updated, according to the
Metadata.
l
Get closed documents only: Get only the documents that have been closed in this
process, according to the Metadata.
l
Close document after retrieval: Once the task has retrieved the document from the
Capture database, the document will be closed even if it is incomplete.
l
Annotate PDF: Add annotations to the PDF that describe each Capture field and the ink
that is included in those fields. Note that not all PDF readers support annotations.
Miscellaneous Tab
The Miscellaneous tab is common to all tasks.
Check the option Use as step description to display the text next to the icon of the plugin in
the Process area.
PGC to PDF Converter
The PGC to PDF Converter task extracts the digital ink located in a PGC file and adds it to a
blank PDF, creating one page per document in the PGC. It's main use is to process PGCs that
generated errors when processing them, as part of an Error Handling process.
Page 558

Note
When adding this task to your process, you will be asked if you want to add the task as an
Action or a Condition. This task should only be used as an Action. If used as a condition,
it will always return False.
This task is put into effect in the following use cases and example processes:
l PlanetPress Capture Workflow
Input
A PGC file received from an Anoto digital pen.
Processing
The ink contained in the PGC file is converted into an EPS layer, which is then applied on an
blank, empty PDF file of the size specified in the task's properties. If more than one Pattern ID is
found in the PGC file, each separate Pattern ID will generate a new page on which its ink is
applied.
Output
A PDF file with a blank background and only the ink data found in the PGC file.
Task properties
General Tab
l
PDF page size: Choose the page size of the output PDF. The default size is A2, and
changing the format does not scale the digital ink. Ink appearing outsize of the selected
page size will not be visible.
Note
This task was built using a custom plugin system and does not display the On Error tab in
the regular view. To access the On Error tab, right-click on the task and select Advanced
Page 559

Properties...
Miscellaneous Tab
The Miscellaneous tab is common to all tasks.
Check the option Use as step description to display the text next to the icon of the plugin in
the Process area.
Metadata tasks
Metadata tasks are plugins that can create or edit metadata for a job file. For more information
about the metadata structure and elements, see "Metadata" on page76.
l "Create Metadata" below
l "Embed/Extract PlanetPress Workflow Metadata" on page562
l "Metadata Fields Management" on page563
l "Metadata File Management" on page566
l "Metadata Filter" on page567
l "Metadata Level Creation" on page569
l "Metadata Sequencer" on page571
l "Metadata Sorter" on page572
l "Metadata to PDI" on page574
l "Metadata-Based N-Up" on page575
Create Metadata
Creates all the Metadata that is either the information about a data file, or the result of the
merging between a data file and a PlanetPress Design document.
For more information about Metadata see: "Metadata" on page76.
This task is put into effect in the following example processes.
Page 560

l "Example: Daily sales report from PDF files" on page288
l Basic Functional Capture Workflow
l Capture Web Manager Workflow
Note that Capture can only be used with PlanetPress Suite.
Input
A data file in any supported emulation (see "About data emulation" on page61).
Processing
If the Do not use a document (passthrough) option is used, the Metadata will contain a
single Job, Group and Document level, as many data page levels as there are data pages
(pages in a PDF, levels in XML, rows in a CSV, etc) in the file, and one page level per data
page.
Note
In PlanetPress Design, this step is equivalent to a &metamode variable value of 1.
If a data file and PlanetPress Design document are selected, the Metadata is generated by
merging the data file and document and retrieving only the Metadata generated by this merge.
The Metadata levels will reflect those defined in the document, including separation for Group
and Document, Metadata fields, etc. Note that:
l In PDF emulation, the size and orientation attributes for each page are set in the
Metadata. In all other emulations, those attributes remain blank.
l In XML emulation, the Metadata file is always created as if the user had specified the
"Second Level" parameter in PlanetPress Design.
Output
The original data file is output, along with the newly generated Metadata file. Job Info variables
are not changed.
Page 561

Task properties
General Tab
l
Documents: Select the Do not use a document (passthrough) option to create
Metadata based on the data file alone.
Alternatively, as a PlanetPress Suite user you can select a specific PlanetPress Design
document to be merged with the data file. Only the Metadata generated by this merge will
be retrieved.
l
Add job information to the document (only if a document was selected): Select to
prompt PlanetPress Workflow to add the available Job Information elements in the header
of the generated file.
Miscellaneous Tab
The Miscellaneous tab is common to all tasks.
Check the option Use as step description to display the text next to the icon of the plugin in
the Process area.
Embed/Extract PlanetPress Workflow Metadata
Embed the current PlanetPress Workflow Metadata inside the current data file in a PDF
emulation. It can also extract PlanetPress Workflow Metadata from the current data file and
make the extracted file the new current Metadata file.
For more information about Metadata see: "Metadata" on page76.
Input
A PDF File, either with no Metadata and along with Metadata that presumably corresponds to
the PDF file, or a PDF file with embedded Metadata.
Processing
If the Embed option is used, the Metadata information is embedded directly into the PDF File as
binary data. This does not change the way the PDF is viewed by any PDF viewer.
Page 562

If the Extract option is used, Metadata present inside of the PDF file is extracted from it. If no
Metadata is embedded, the task generates an error: W3976.
Output
The PDF file with embedded Metadata (the Metadata is not deleted from the PDF File on
extraction, so this task will always output a PDF with embedded Metadata).
Task properties
General Tab
l
Extract Metadata into PDF job file: the Metadata is extracted from the current data file
(which is assumed to be a PDF file in which Metadata has been previously embedded),
and it becomes the current Metadata from this point on, overwriting any current Metadata
file that may already be set.
l
Embed Metadata from PDF job file: the current Metadata file is inserted in the current
data file, which is assumed to be a PDF file. If the original PDF is PDF/X or PDF/A
compliant, the resulting PDF file will also be compliant.
Miscellaneous Tab
The Miscellaneous tab is common to all tasks.
Check the option Use as step description to display the text next to the icon of the plugin in
the Process area.
Metadata Fields Management
The Metadata Fields Management task can be used to add new fields into your Metadata,
either for every element or through conditions.
For more information about Metadata see "Metadata" on page76.
Note
This task will automatically loop through the Metadata and repeat its action for each of
your Metadata's datapages. This task should not be placed after a Metadata Sequencer.
Page 563

Input
Any data file with accompanying Metadata.
Processing
Fields are added, removed, modified, etc, according to the actions defined in the task
properties. If the field is present in a level that repeats (for example, the data page level), this
task loops so that the action may take place on each of the occurrences of that level.
Updating all nodes
For a given Metadata Field Management action, all nodes of a given level might be updated
with a New Field value. To accommodate this, all Metadata/data selection functions accept a
wildcard parameter "?", indicating the function operates on all nodes (not just one) of a given
level. See: "Data selections" on page55.
Limitations
l The name of the Metadata field to add must adhere to these syntax rules: start with a
letter, followed by zero or more letters, numbers, underscore or dash. The name is not
case-sensitive.
l
Metadata Fields Management actions on the page level are not possible since the entire
task execution is based on the data page node.
l
The task raises an error if the selected Metadata Fields Management action is Sum and
if one of the field values is not numeric. The task supports approximately 15 digits of
precision in a range from 2.23 x 10
-308
to 1.79 x 10
308
.
Output
The original data file is outputted, along with the modified Metadata.
Task properties
General Tab
l
Action: Select the type of Metadata Field Management action to perform. Five action
types are available:
Page 564

l
Add/Replace: Create a new Metadata field. If the name already exists, the value is
overwritten with the new one.
l
Duplicate: Create a new Metadata field. If the field already exists, a new instance is
created.
l
Append: Append the new value at the end of the current one. If no field with that
name exists, a new one is created.
l
Sum: Calculate the sum of all values found in all fields of a given name, at a given
level. The resulting number is formatted by default with the dot decimal separator.
l
Delete: Delete the Metadata field if it exists and disable the Field information
column's Field value option.
l
Field Information: Specify the Metadata node level, field name and field value of the
specified action.
l
Level: Choose between Job, Group, Document, Datapage. The task will loop
through each selected node of the chosen Metadata level.
l
Job: Apply the action on the specified field at the Job level.
l
Group: Apply the action on the specified field at the Group level.
l
Document: Apply the action on the specified field at the Document level.
l
Data page: Apply the action on the specified field at the Data page level.
l
Field Name: Enter the Metadata field name on which the task will operate.
l
Field Value: Enter the Metadata field value. Note that if the chosen action is Delete,
this parameter is disabled. For other action types, in order to set the field value, click
the [...] button. This button opens the Data Selector, which allows to specify a data
selection as the field's value.
Note that when adding a Metadata field, if you perform a multi-line data selection on
a PDF region, only the first line of that region will be set to the Metadata field.
l
Decimal Separator: Set the decimal separator for the Sum option. 3 possible
modes are offered:
l
Auto-detect: Interpret automatically the value. This option is ideal for
documents using mixed decimal separators. Note that the auto-detect option
encountering the value 1,000 (with a comma separator), interprets it as a
thousand while interpreting 1.000 (with a dot separator), as one.
l
.: Treat every value with the dot (".") decimal separator. Commas (",") are
treated as thousand separator.
Page 565

l
,: Treat every value with the comma (",") decimal separator. Dots (".") are
treated as thousand separator.
l
Rule: Define criteria for the Metadata Field Management action execution. The condition
must be TRUE for the action to execute. To set up conditions, the Rule Interface is
displayed, allowing to edit the condition for the given action. See the "Rule Interface" on
page874 page for more details.
Miscellaneous Tab
The Miscellaneous tab is common to all tasks.
Check the option Use as step description to display the text next to the icon of the plugin in
the Process area.
Metadata File Management
The Metadata File Management action task is used to execute actions on Metadata files. This
task does not modify the data, Job Info variables, other variables or any other part of your
process.
For more information about Metadata see "Metadata" on page76.
Input
This task takes any file as input and does not modify it.
Process
This task does not execute any change to the process, its files or variables. It only executes the
selected action on Metadata.
Output
This task outputs the exact same data that was given to it. Its Metadata will either be missing
(Delete Metadata), Changed (Load Metadata) or the same (Save Metadata).
Page 566

Properties
l
Chose an action group
l
Load metadata file: Loads an external Metadata file that was previously saved.
This can be useful in Error processes if you have previously saved the Metadata to
file (ErrorBin outputs do not transfer Metadata).
l
Save the current metadata file: Saves the current Metadata to a specified location.
Useful as a backup or for use in Error processes.
l
Delete the current metadata file: Removes the active Metadata from the process.
Useful when using a secondary input task that does not automatically regenerates
Metadata. No Metadata will be available until another task generates it.
l
Metadata Folder: Use Browse to find the location of the folder where to save the files or
enter a path using variables. Not active when the Delete action is chosen.
l
Metadata Filename: Enter a static or variable name for the Metadata file to load. Not
active when the Delete action is chosen.
Miscellaneous Tab
The Miscellaneous tab is common to all tasks.
Check the option Use as step description to display the text next to the icon of the plugin in
the Process area.
Metadata Filter
The Metadata Filter task allows specifying the Level (Group, Document and Datapage) on
which to perform the action and under which condition. At least one level must have the
condition set. The action will be performed sequentially beginning with the rule on the Group
level, Document level and Data page level. The selection is performed on the node only.
For more information about Metadata see "Metadata" on page76.
Input
Any data file with accompanying Metadata.
Page 567

Processing
Any Metadata that does not correspond to the rules set forth by the filter are removed from the
active Metadata. Note that the 'removed' Metadata is still present in the file, but is unselected:
they are disabled and ignored on all tasks that use Metadata afterward (except the Metadata
Sorter task).
Output
The original data file is output, along with the modified Metadata.
Task properties
General Tab
l
Filter levels: Rules for deselecting nodes at the Group, Document or Data page level.
Note that currently unselected nodes are ignored.
l
Group: Select the Metadata Group nodes (the nodes only) based on the specified
rule(s).
l
Document: Select the Metadata Document nodes (the nodes only) based on the
specified rule(s).
l
Datapage: Select the Metadata Datapage nodes (the nodes only) based on the
specified rule(s).
l
Rules: Define according to which criteria the action must to be performed. The condition
must be TRUE to execute the action. All nodes on a specific level with false condition
become unselected. The task effectively both selects and deselects nodes based on the
condition. To set up conditions, the Rule Interface is displayed, allowing to edit the
condition for the given action. See the "Rule Interface" on page874 page for more details.
l
Select all Metadata nodes: Check to reset the Selection status of all nodes before
performing the filtering, effectively selecting all metadata nodes. This basically undoes
the work of any previous Metadata Filter or Metadata Sequencer, so be careful when
using this option.
Miscellaneous Tab
The Miscellaneous tab is common to all tasks.
Page 568

Check the option Use as step description to display the text next to the icon of the plugin in
the Process area.
Special Considerations
l The task CANNOT re-select unselected nodes if the condition is false for those nodes.
l Filter rules cannot be based on the following metadata attributes: SelectedIndexInJob,
SelectedIndexInGroup, SelectedIndexInDocument and SelectedIndex.
Metadata Level Creation
The Metadata Level Creation task conditionally creates new Metadata groups or documents.
This task is only functional if Metadata already exists for the current job.
For more information about Metadata see "Metadata" on page76.
The task enables users to merge data pages into Documents and/or merge Documents into
Groups, based on conditions. Unselected Data pages are ignored, but are moved with other
Data pages if the action is applied to the current parent node.
Using the wildcard parameter "?"
Since all metadata data pages, and possibly all physical data pages, are treated by the task at
run-time in order to evaluate the condition at each level, it is necessary to dynamically define
metadata as well as data selections to check all occurrences instead of a fixed one.
This is done using the wildcard parameter "?". When a question mark is used as a parameter in
a data or metadata function, the function operates on all nodes (not just one) of a given level.
Used in a rule, it indicates that a dynamic update of the current data page or level is required
before evaluating the condition.
For examples of how to use the wildcard parameter, see "Data selections" on page55.
Example of a process with the Metadata Level Creation task
Given a document input (created with Metadata), this task can be used to regroup the PDF
pages of the received print stream in logical (Metadata) documents, based on the keyword
“Page 1 of” printed on the pages, and then treat each newly created document individually in
the rest of the process
The process begins with the following tasks:
Page 569

1. WinQueue Input: Intercepts a printed data file sent to a Windows printer queue.
2. Metadata Level Creation: Begins a new document node when “Page 1 of” is found on a
data page.
l Action: Document
l Delimiter: Begins when
l Rule: (@(?,1,1,1,9,KeepCase,NoTrim) IS EQUAL TO Page 1 of)
3. Metadata Sequencer: Splits the data file on each Metadata document node level.
With this example, before the Metadata Level Creation task, the Metadata structure contains
one group containing one document (containing multiple data pages). After the Metadata Level
Creation task, the Metadata structure contains one group containing multiple documents.
Input
Any data file with accompanying Metadata.
Processing
The Metadata file is split on the selected level.
Output
The original data file is output, along with the modified Metadata.
Task properties
General Tab
l
Document: Create a new Document level. Note: Attributes and Fields are deleted for all
new Document levels created as well as existing Groups.
l
Group: Create a new Group level.
Note
Attributes and Fields are deleted for all new Group levels created.
Page 570

ll Delimiter defines if the Condition parameter is triggering the beginning or the end of a
Group or Document. If the delimiter option is set to None, the action is not performed.
l Rules enable the user to define on which criteria the action must to be performed. The
condition must be TRUE to execute the action. If the condition is not met at least once, the
rule is not applied. To set up conditions, the Rule Interface is displayed, allowing to edit
the condition for the given action. See the "Rule Interface" on page874 page for more
details.
Miscellaneous Tab
The Miscellaneous tab is common to all tasks.
Check the option Use as step description to display the text next to the icon of the plugin in
the Process area.
Metadata Sequencer
Although the Metadata Sequencer acts as a splitter, the data file itself remains untouched, as
neither the data nor the Metadata are actually being split through this task. With each
sequence, the entire data file still gets carried from one task to another. Metadata records are
simply selected/deselected, which has the same effect.
For more information about Metadata see "Metadata" on page76.
Note
When using a PlanetPress Design document as input, the PDF Splitter will do the job
quicker than the Metadata Sequencer task. However, when using a PDF as input, the
Metadata Sequencer might perform better. For more information and some test results,
see this How-to: Performance testing grounds.
Input
Any data file with accompanying Metadata.
Processing
A loop is established and the Metadata is separated into chunks, as defined in the rules set
forth in the task properties.
Page 571

Output
The original data file is output once per chunk, along with this chunk's metadata. Note that all
the Metadata is in each of the sequence, but anything not part of the sequence is disabled and
is ignored by all tasks using Metadata afterwards.
Task properties
General Tab
l
Metadata level: Select the Metadata level to process.
l
Sequencing is based on
l
The following number of occurrences of the level: Determine a sequence based
on the number of instances found for the Metadata level currently processed. For
example, if the Metadata level is set to Group, and this value is set to 3, each
sequence contains 3 groups (except, possibly, the last one, depending on the
number of groups left in the last sequence). The next loop starts with the next group
after this sequence.
l
The following number of sequences in the job: Divides the Metadata into a set
number of sequences and equally distributes the number of levels between the
sequences. For example, it the Metadata level is set to Document, and this value is
set to 5, a 100 document job file will be divided into 5 sequences of 20 documents
each.
l
The following rule: Determine if a new sequence starts or if the current one ends.
For each Metadata level, the current value of the specified Metadata attribute/field is
compared with the one in memory. If they are different, either a new sequence starts
or the current sequence is ended. The next sequence starts with the next Metadata
level being processed. For details see the "Rule Interface" on page874.
Metadata Sorter
The Metadata Sorter action task allows Metadata to be sorted sequentially on three different
levels, alphabetically or numerically. It also allows sorting in ascending and descending order.
For more information about Metadata see "Metadata" on page76.
Input
Any data file with accompanying Metadata.
Page 572

Processing
The order of the Metadata is changed in accordance with the rules set forth in the task's
properties.
The Metadata Sorter task works on all nodes, regardless of their selected state.
Output
The original data file is output, along with the modified Metadata.
General Tab
l
Group: Sorts the Metadata by group.
l
Document: Sorts the Metadata by document.
l
Data page: Sorts the Metadata by data page.
For each parameter, three columns are available: Sort By, Then by, Then by (again). This lets
you sort your document level in three different orders sequentially. Sorts are always done from
left to right, top to bottom, giving you a total of 9 sorting possibilities.
When you click on either of the sort boxes, a small pop-up displays the following options:
l
Sort by: The drop down displays a list of available fields and attributes in that level,
letting you select on which to sort. The field or attributes must be present for every
instance of the level you are searching on, or the task raises an error.
l
Order: Choose Ascending (orders like a,b,c, or 1,2,3) or Descending (orders like 3,2,1
or c,b,a) order. If the Numeric sorting option is not checked, numbers are sorted like this:
"1, 10, 11, 12, 2, 3, 4, 5, 6, 7, 8, 9".
l
Numeric Sorting: Check to sort numerically instead of alphabetically (only supports
whole numbers. Currency with thousands separator and decimal points will not work). If
any non-numeric value is found in the field or attribute, in any instance of the level, the
task raises an error.
Miscellaneous Tab
The Miscellaneous tab is common to all tasks.
Page 573

Check the option Use as step description to display the text next to the icon of the plugin in
the Process area.
Metadata to PDI
The Metadata to PDI task takes the active metadata and generates a PDI using the information
in that metadata. It is generally used in conjunction with a PDF data file and is used to generate
the PDI file which is used by PlanetPress Search when building, refreshing or rebuilding its
database.
For more information about Metadata see "Metadata" on page76.
Input
This task can use any data file, as long as it is accompanied by metadata. This metadata may
have been directly generated or could be extracted from a PDF using the Embed and Extract
PlanetPress Workflow Metadata task.
Processing
The metadata is read and PDF indexes are located. These indexes are defined in the
PlanetPress Design document as data selections, in which the Archive / Email / Fax properties
define the data as an index with a name.
When all the indexes are collected, a PDI file is generated with those indexes.
Output
The output is the same as the input, no modification is done to either the data file or the
metadata. However, a PDI file is generated and saved in the location specified in the task.
Task properties
General Tab
l
Archive Folder: Specifies where the PDI file should be saved. This should be the same
location as the PDF file that the PDI refers to.
l
Filename: The file name for the PDI. This name should correspond exactly with the name
of the PDF that the PDI file refers to.
Page 574

l
Index Group:
l
PDI: Only generate a PDI file.
l
PDI and XML: Generate both the PDI and an XML equivalent (not used by
PlanetPress Search).
Miscellaneous Tab
The Miscellaneous tab is common to all tasks.
Check the option Use as step description to display the text next to the icon of the plugin in
the Process area.
Metadata-Based N-Up
The Metadata-based N-Up action task works in conjunction with the PlanetPress Design tool's
N-Up functionality. It allows to specify how many virtual pages will appear on each physical
page of the PlanetPress Design template to be used with the current data file. The task
rearranges the Metadata accordingly, which greatly facilitates the set up of the N-Up
functionality in the design tool, especially when the solution includes duplex printing with
variable data on both sides.
The PlanetPress Design document needs to be properly set up with the N-Up object and
proper virtual pages in order to correctly use this task:
l All PlanetPress Design document templates must use the N-Up object on both the front
and the back pages of the duplex document.
l Each instance of the N-Up object must have the “change data page with each repeat”
option checked.
l The total number of repeats on each page (vertical X horizontal) must correspond to the
number specified in the Number of virtual pages per physical page option..
l The Alignment setting of each n-up object must be set according to the device’s
duplicating capabilities (long-edge or short edge binding).
Tip
To print a Connect template with an N-Up print layout you need an Output Creation
Preset with the correct production options. See "OL Connect print jobs" on page111.
Page 575

Also see Output Creation Preset and Print Options in Connect's Online Help.
Input
Any data file with accompanying Metadata.
Processing
The Metadata is re-arranged and/or duplicated in order to correspond to the options set forth in
this task's properties.
Output
The original data file is output, along with the modified Metadata.
Task properties
General Tab
l
Number of virtual pages that appear on each physical page: This is equivalent to the
N in N-Up. This number should be equal to the total number of virtual pages in your
PlanetPress Design document. For example, a 2 horizontal x 3 vertical is 6-up, so this
number should be 6.
l
Number of data pages that make up a single duplex virtual document: Either 1 if your
document is duplex (has a front and back), whether the back has variable data or not, or 2
if your document is simplex or the data is already properly duplicated so the front and
back already match.
Miscellaneous Tab
The Miscellaneous tab is common to all tasks.
Check the option Use as step description to display the text next to the icon of the plugin in
the Process area.
Page 576
OL Connect Send
Connect Send allows for PostScript files to be received over the internet from any Windows
Desktop application. It is in fact an application with two components. The first is a Windows
printer driver while the other is a group of Workflow plugins (Job Processor, Get Job Data and
Get Data). These two components work together indiscriminately, each needing the other to
function.
Connect Send can be used in unlicensed mode and licensed mode.
The Unlicensed mode (default) allows users to push documents to Connect Send. They will
receive a pop-up message in the Notification Area confirming whether the job was received or
not.
The Licensed mode causes the Connect Send Printer Driver to request a web page that will
be displayed in the user’s browser in order to allow them to enter job specific information. The
information from this web page can be used to tell Workflow what to do next.
Workflow processes in Connect Send
For help on the configuration of Workflow processes in a Connect Send solution, see
"Workflow processes in a Connect Send solution" on page298.
OL Connect Send tasks
l "Get Data" below
l "Get Job Data" on page582
l "Job Processor" on page586
Get Data
The Get Data plugin allows OL Connect Send users (admins, accounting personnel, print
masters ...) to get information about all jobs received with OL Connect Send on a dedicated
machine. It allows queries of the OL Connect Send Database to be made for the production of
reports.
All job info that could be retrieved will be written to a temporary results file that is then passed
on as the new Workflow job file. It can be used right after the Get Job data plugin in the same
Workflow configuration. It could for example be saved using a Send to Folder plugin.
Page 577

Note
The Get Data plugin gets data from the OL Connect Send database which means it only
works when Connect is in LICENSED mode.
Properties
General Tab
Filter options
Filters are required for:
l Start and end date (down to minutes)
l Domain(s)
l User(s)
l Machine name(s)
Except for start and end dates, it is possible to pass a list of multiple search criteria, separated
with semicolons, containing:
l Workflow variables
l Job variables
l Names.
Tip
No spaces are allowed around the listed names, respectively before or after a semicolon.
Operators
l Searches are case-insensitive.
l
Multiple entries in one filter field are combined with: OR.
l
Entries in different filter fields are combined with: AND.
Page 578

Example 1
A valid user name search string, entered in the Filter Users field, would be:
%\{global.User};helen;%1;george napier
This would look for all entries, where the user name is either:
l
as currently stored in the global Workflow variable User
l "helen"
l as stored in the job variable number 1
l equals "george napier" (case insensitive).
These search criteria are combined with OR.
Example 2
The domain name entered in the Filter Domains field is objmtl.objectiflune.com and the user
name entered in the Filter Users field is rentel.
If search criteria are entered in multiple input fields, all of them are combined with AND.
Therefore the result will only contain all the print job information for objmtl.objectiflune.com
where the user name is rentel.
Date and Time Definitions
Both date and time entries must be notated in UTC format. During runtime the dates are
checked and if any other date/time notation is used, a Workflow error log entry is created.
UTC notation is described here: https://www.cl.cam.ac.uk/~mgk25/iso-time.html.
Valid date/time entries:
2016-07-12 It is possible to only define a date without a time.
2016-%m-%d Standard Workflow variables for year, month and day are allowed.
2016-07-12 11:00 From and To dates may also have a time indicator (24 hour notation,
separator from the date is a space character, separator between hour
Page 579

and minute is a colon)
It is possible to define the same date for From Date/Time as for To Date/Time. However,
entering the same info (without time information) would lead to getting no entries.
Results
For each job that matches the search criteria, the following information will be put into the
resulting data file:
l Job UID
l Date/Time stamp
l Number of Copies
l Number of pages
l User name
l Original file name
l Original file size
l Domain (workgroup) name
l Domain / Workgroup Indicator
l Machine name
l Machine GUID.
Results File Format
The following result file formats are selectable:
l XML
l JSON
l CSV (Separator = semicolon (0x3B), string indicator = quote (0x22)).
Note
This file is not automatically saved to disk. The retrieved job info is written to a temporary
results file that will be passed on as the new Workflow job file. To save the results file,
use a Send to Folder plugin and configure that appropriately.
Page 580

Returned information
For each job received by the OL Connect Send Job Processor plugin the following values will
be available.
l
Job UID: This is the 10 (ten) character long Unique Job Identifier string.
l
Status ID: The status ID shows in which stage the job currently is:
0 = undefined; 1 = idle; 2 = transfer; 3 = chunk; 4 = concatenate; 5 = unzip; 6 = done.
A value of 6 indicates a fully processed job. Any value between 2 and 5 (inclusive) means
that the job is still in progress. For a small job, some statuses may be skipped.
l
Date/Time stamp: This is the time when the matching job was initially created in the
database. It is stored in UTC format plus time zone indicator inside the database. It will
differ from the time stamp logged by the OL Connect Send Printer Driver as well as by the
OL Connect Send Job Processor.
Note
The Printer Driver machine time stamp in the Printer Driver log may significantly
differ from this value.
l
Number of Copies: This is the value set by the OL Connect Send Printer Driver for the
number of copies (intended number of copies required for the print job). Some
applications do not use the general print job information to define the number of copies. In
such (rare) cases, the Number of Copies sent in the job can differ from what the user
entered in the print dialog. For example: "IrfanView" does not use the regular Copies
indicator, but instead sends the same job as many times as indicated by Copies in its
print dialog.
l
Number of pages: This is the number of pages for one copy of the print job. This value is
calculated by the Windows spooler, when processing the printing order. Please be aware
that some applications do an implicit reformatting of jobs if the intended paper size does
not match the paper size as selected in the print dialog. This may lead to the fact that the
number of pages, as calculated by the spooler and reported by OL Connect Send, can
differ from that value as shown to the user in the application itself.
l
User name: This is the Windows user name of the user who started the application to
produce the print job. It is not - in all cases - the user name of the user who is currently
logged into the system.
Page 581

l
Original file name: This is the "file name" as sent from the application to the Windows
spooling system. It is taken from the name as it arrives in the spooler. Some applications
add info to the name (like Notepad++) while others don’t (like Adobe Reader). OL
Connect Send can only use what it gets from the spooler. It does not interact with the
applications itself.
l
Original file size: The size of the print job - NOT the size of the document file.
l
Domain (workgroup) name: The name of the domain or workgroup the printing user
belongs to. This is not necessarily the name of the domain the machine itself belongs to.
For explanations about domains, domain names, users, user names, user domains,
logged on users vs. application running users, machine names etc. please refer to the
respective Windows help pages or ask your system administrator.
l
Domain / Workgroup Indicator: Indicates whether the field "Domain (workgroup) name"
is a domain name or a workgroup name. The possible values are 0 (false) for a
workgroup, or 1 (true) for a domain.
l
Machine name: The name of the machine the OL Connect Send Printer Driver is running
on as retrieved by the respective Windows API.
l
Machine GUID: The unique machine ID of the machine on which the job was produced. It
can be used as an additional identification mark to validate the origin of the job.
Miscellaneous Tab
The Miscellaneous tab is common to all tasks.
Check the option Use as step description to display the text next to the icon of the plugin in
the Process area.
Get Job Data
Creating an interactive process for incoming print jobs using OL Connect Send requires that
the relevant information about the respective job is available and can be used in Workflow. Job
Information retrieval is made easy with the Get Job Data plugin.
The plugin appears in the Plug-in Bar of Workflow under OL Connect Send.
Typically, it is used in the OL Connect Send interaction process, just after the initial HTTP
Server Input plugin.
The Get Job Data plugin gets all relevant information for the dedicated print job using the
Unique Job ID. Whenever an OL Connect Send Printer Driver is sending a print job to the
Page 582

OL Connect Send Job Processor plugin, it creates a unique ID string composed of 10 upper-
and lowercase letters and digits e.g. “ri0zZdluLp”. This Unique Job ID is used in any
communication between the Printer Driver and the plugin and is the leading identification
element for this particular job. All job related information is stored in the underlying database
and linked together by this Unique Job ID.
Note
The Get Job Data plugin gets data from the OL Connect Send database which means it
only works when Connect is in LICENSED mode.
Properties
General tab
Three different settings affect the general behavior of the plugin:
l
Where to get the Print Job ID.
l When to continue with the next step.
l Where to store the job information details.
Select Job ID Source
The plugin can be used in a generic way. Whenever information about a specific print job is
required, it can be retrieved as long as the related job ID is known. However, the plugin has
been implemented in a way that it can also be used very easily in the OL Connect Send
interaction process. It can get the related job ID from the incoming data of the HTTP Server
Input plugin.
l
Read from HTTP Input data: When this option is selected, the plugin analyzes the
incoming data and if it can find the Job ID at the expected location, it uses it for further
processing.
l
Read from Variable: When selecting this option, any existing Workflow variable can be
chosen via the drop-down field. In this case, the plugin reads the Job ID from that
variable.
Page 583

Select Returning Type
Depending on this setting the plugin gets status information about the job before it has arrived
or it gets information after the job has been completely received.
l
Immediately: By choosing this option, the Get Job Data plugin will return as quickly as it
can, providing it can find a matching Job ID in the database. It is important to know that it
will wait until any information about the job is available. If no matching Job ID is found, the
plugin will wait for 5 seconds and then raise an error, which can be acted upon via the On
Error tab settings.
When selecting this option, the Status ID information has to be checked. A Status ID
value of 6 indicates a fully processed job. Any value between 2 and 5 (inclusive) means
that the job is still in progress.
l
When Job is Processed: When this option is selected, the plugin will query the
database until the Status ID value is 1 or 6. If the status does not become 1 or 6 within the
time defined via the Timeout (sec) input field, the plugin will raise an error.
Select Output Type
l
XML Data to Workflow: This will result in an XML file containing all job related data and
becoming the new Workflow job file. In this case, the incoming data file of the HTTP
Server Input plugin is overwritten and lost.
l
Write to Variables: This allows print job information to be stored in Workflow variables by
using a simple drop-down list. In this case, the HTTP Server Input data will be kept as
Workflow job file. If the same Workflow variable is assigned more than once, the plugin
will give a warning and will not close until the issue is fixed.
Returned information
For each job received by the OL Connect Send Job Processor plugin the following values will
be available.
l
Job UID: This is the 10 (ten) character long Unique Job Identifier string.
l
Status ID: The status ID shows in which stage the job currently is:
0 = undefined; 1 = idle; 2 = transfer; 3 = chunk; 4 = concatenate; 5 = unzip; 6 = done.
A value of 6 indicates a fully processed job. Any value between 2 and 5 (inclusive) means
that the job is still in progress. For a small job, some statuses may be skipped.
Page 584

l
Date/Time stamp: This is the time when the matching job was initially created in the
database. It is stored in UTC format plus time zone indicator inside the database. It will
differ from the time stamp logged by the OL Connect Send Printer Driver as well as by the
OL Connect Send Job Processor.
Note
The Printer Driver machine time stamp in the Printer Driver log may significantly
differ from this value.
l
Number of Copies: This is the value set by the OL Connect Send Printer Driver for the
number of copies (intended number of copies required for the print job). Some
applications do not use the general print job information to define the number of copies. In
such (rare) cases, the Number of Copies sent in the job can differ from what the user
entered in the print dialog. For example: "IrfanView" does not use the regular Copies
indicator, but instead sends the same job as many times as indicated by Copies in its
print dialog.
l
Number of pages: This is the number of pages for one copy of the print job. This value is
calculated by the Windows spooler, when processing the printing order. Please be aware
that some applications do an implicit reformatting of jobs if the intended paper size does
not match the paper size as selected in the print dialog. This may lead to the fact that the
number of pages, as calculated by the spooler and reported by OL Connect Send, can
differ from that value as shown to the user in the application itself.
l
User name: This is the Windows user name of the user who started the application to
produce the print job. It is not - in all cases - the user name of the user who is currently
logged into the system.
l
Original file name: This is the "file name" as sent from the application to the Windows
spooling system. It is taken from the name as it arrives in the spooler. Some applications
add info to the name (like Notepad++) while others don’t (like Adobe Reader). OL
Connect Send can only use what it gets from the spooler. It does not interact with the
applications itself.
l
Original file size: The size of the print job - NOT the size of the document file.
l
Domain (workgroup) name: The name of the domain or workgroup the printing user
belongs to. This is not necessarily the name of the domain the machine itself belongs to.
For explanations about domains, domain names, users, user names, user domains,
Page 585

logged on users vs. application running users, machine names etc. please refer to the
respective Windows help pages or ask your system administrator.
l
Domain / Workgroup Indicator: Indicates whether the field "Domain (workgroup) name"
is a domain name or a workgroup name. The possible values are 0 (false) for a
workgroup, or 1 (true) for a domain.
l
Machine name: The name of the machine the OL Connect Send Printer Driver is running
on as retrieved by the respective Windows API.
l
Machine GUID: The unique machine ID of the machine on which the job was produced. It
can be used as an additional identification mark to validate the origin of the job.
Miscellaneous Tab
The Miscellaneous tab is common to all tasks.
Check the option Use as step description to display the text next to the icon of the plugin in
the Process area.
Job Processor
The Job Processor plugin is an output plugin that appears in the Plug-in Bar of Workflow
under OL Connect Send.
Input
The Job Processor plugin must be added to a Workflow job transfer process that starts with
an HTTP Server Input. The Job Processor plugin is the only other task in that process.
The action name of the HTTP Input task must match the last part of the URL for print job
submission, set in the OL Connect Send Printer Driver installer. By default this is olcs_transfer.
After the job is processed, the HTTP Server Input returns a reply from the Job Processor
plugin back to the OLCS Printer Driver in order to notify the user that the job has been
received successfully (or failed if an error occurred).
Note
It is strongly recommended that a single job transfer process for all OL Connect Send
Printer Drivers is created, using the domain or machine’s or user information to divert to
any follow-up processes.
This single transfer process can be set to "Self Replicating", so that parallelization is
Page 586

possible.
Processing
The Job Processor plugin receives a compressed PostScript file sent by the OL Connect Send
Printer Driver and communicates with the Printer Driver to ensure that all data has been
received correctly. If the Printer Driver has split the job into multiple chunks, the plugin
combines the chunks into one PostScript file.
License mode
Each incoming print job is checked against the license to determine if it can be handled in
licensed mode or in unlicensed mode.
If OL Connect Send is unlicensed, the plugin stores the incoming job in the target folder using
the specified file name, but it does not save any information in the database. The end user will
receive a message in the Notification Area (also called "system tray") confirming the unlicensed
status, and the printer driver will not request another web page.
In licensed mode, the plugin will store all relevant information about each job in the OL
Connect Send database. This database is a HSQLDB and is installed automatically.
Subsequent Workflow processes can use the information in the database for additional
processing (see "Get Job Data" on page582).
Whether OL Connect Send is licensed can be seen on the General tab of the properties dialog.
Timeout
During a job transfer from the OL Connect Send Printer Driver to Workflow, a timeout could
occur (indicated by a log entry like “ERROR: sendBinaryContents: Could not open request.
Reason: 12002”). In this case, the timeout for the HTTP service in Workflow needs to be
increased. It is recommended to use a value of more than 10 minutes (>600 seconds).
Additionally, the timeout in the browser on the client side should be enhanced. Please see the
help pages for your browser about how to do this.
Security
In order to provide security when printing over the internet, OL Connect Send includes several
protective features.
Page 587

HTTPS Communication
The OL Connect Send Printer Driver can be set to use HTTPS for any job transfer. To do this,
Workflow must also be set to use HTTPS.
Job Origin
Each print job will include unique information about the machine it has been sent from. This
unique machine ID is calculated with a proven method and will be transferred, encrypted and
enhanced. The enhancement will result in a different encrypted machine ID per print job, so that
spoofing can be detected. On the server side, if spoofing is detected a respective message will
be created.
Users can set up Workflow processes and filters to accept only specific jobs from known
machine IDs, thus enhancing security.
Database connection
The Job Processor plugin works with a database to store all relevant job information. This
database is a HyperSQL Database (HSQLDB, see https://en.wikipedia.org/wiki/HSQL_
Database_Engine). It is installed as a service with the name OL Connect Send DBServer (the
internal service name is OLCSServer).
Communication between the plugin and the database occurs using port 9001 (the default port
for HSQLDB). However, there may be situations where this port is already blocked by another
application and may need to be changed.
Several database settings can be modified by creating an ini file. This file must be named
“OLCSSvc.ini” and stored in the same folder as the executable OLCSSvc.exe, located under
“%CommonProgramFiles(x86)%\Objectif Lune\<Workflow Name>\Plugins\CPD”.
By adding the entry “DBPort = <new port number>” under [HSQLDBSETTINGS] and then
restarting the service, the communication port is changed.
Note that Workflow has to be restarted after such a modification.
Output
The plugin stores the incoming print job in the target folder with the file name specified in the
plugin.
If no extension is defined by the user for the file name, the default “.ps” extension is added
automatically, as the incoming print jobs are PostScript files.
Page 588

Metadata
In addition to the print job, the plugin creates a metadata file with basic information. The values
originate from the client machine.
In unlicensed mode, the user name, machine name and domain/workgroup name will not be
available through the metadata.
Properties
General tab
l
Data Output
l
Output Folder: Enter the target folder for the incoming print jobs.
l
Output File Name: Enter the file name for the incoming print jobs.
Note
If no extension is defined by the user for the file name, the default “.ps” extension is
added automatically, as the incoming print jobs are PostScript files.
Workflow variables
Variables can and should be used to create dynamic file and folder names for each print
job. This enables separating licensed and unlicensed jobs and/or storing the files by
domain, machine and even user name.
To facilitate using job related information for the creation of the target folder and file
name/s, the Job Processor plugin maps job relevant information to the standard Workflow
variables (%1 to %8). The following mappings apply:
Information Workflow
Variable
When licensed When unlicensed
Job ID %1 Job ID Job ID
License status
for this job
%2 "Licensed" "Unlicensed"
Page 589

Information Workflow
Variable
When licensed When unlicensed
Username
1
%3 The user name "na"
IP Address
1
%4 The IP address The IP address
No. of Pages
1
%5 Number of pages of
the job
Number of pages of
the job
No. of Copies
1
%6 Number of copies set
by the user
Number of copies set
by the user
Domain Name
1
%7 The Domain Name "na"
Machine Name
1
%8 The Machine Name "na"
1) These values originate from the Printer Driver machine.
l
Plug-in Information
l
License: Shows whether a license for OL Connect Send could be found. If not, OL
Connect Send will be running in unlicensed (default) mode.
l
Protocol version: Here the plugin shows which protocol version is used. The OL
Connect Send components communicate with each other by using a well-defined
and versioned protocol. As long as these components use the same protocol
version, the job transfer will work even if the plugins themselves are changed.
The protocol version used by the Printer Driver can be found in the third part of the
version number of the Printer Driver (i.e. in version number 1.2.5.98-17, the “5”
indicates protocol version 1.5, omitting the leading 1).
Any OL Connect Send Printer Driver can communicate with any plugin, as long as
this third version number part is identical.
Miscellaneous Tab
The Miscellaneous tab is common to all tasks.
Check the option Use as step description to display the text next to the icon of the plugin in
the Process area.
Page 590

OL Connect tasks
OL Connect tasks are available in PlanetPress Workflow 8.0 and up. They are used
specifically to communicate with the Server component of PlanetPress Connect or PReS
Connect (using TLS 1.2) and for such purposes as creating record sets, generating contents
and generating output.
For more information about the Workflow processes in which these tasks are used, see the
Connect Online Help.
l "All In One" below
l "Create Preview PDF" on page612
l "Create Email Content" on page600
l "Create Job" on page605
l "Create Output" on page608
l "Create PDF/VT" on page611
l "Create Print Content" on page617
l "Create Web Content" on page621
l "Download EML Messages" on page627
l "Execute Data Mapping" on page629
l "File Store - Delete File" on page634
l "File Store - Download File" on page635
l "File Store - Upload File" on page637
l "Mark Connect Sets for Deletion" on page638
l "Merge Jobs" on page640
l "Render Email Content" on page643
l "Retrieve Items" on page647
l "Set Properties" on page652
l "Update Data Records" on page653
All In One
The All In One task extracts data from the job file, merges the data with a Connect Designer
template, and creates print output. (See also: "OL Connect print jobs" on page111.)
Page 591

This task is a combination of the 4 different OL Connect tasks that are normally used in
conjunction to generate Print output: "Execute Data Mapping" on page629, "Create Print
Content" on page617, "Create Job" on page605, and "Create Output" on page608.
Combining them in a single task makes creating Print content easier and faster, as the task is
optimized for this specific purpose. It exchanges less data with the server than the separate
plugins do and it has multi-threading support: it can produce the data set and content items in
parallel.
The task is build with 4 tabs that represent the main steps of the creation of a Print Output: Data
Mapping, Content Creation, Job Creation and Output Creation.
This task can be added as an Action task (see "Action tasks" on page379) or as an Output task
(see "Output tasks" on page655). Adding it as an Action task enables the process or branch to
continue after this task. An Output task is always located at the end of a process or branch.
Note
When added as an Output task, the All In One plugin works asynchronously to the
Workflow process.
Task properties
Data Mapper Tab
The Data Mapper step generates a Record Set from a specific source: data mapping on the
appropriate source (Current Data File, Database or PDF/VT data file), Retrieving items from the
Connect Database (filter setting) or uses the current job Metadata. The resulting Record Set is
given to the Content Creation part of the task. In order to optimize the process, blocks of 100
records are sent sequentially to the Content Creation in parallel, instead of waiting for the
whole record set to be created.
l
Source: Indicates the source of the Record Set Metadata:
l
Data Mapping Configuration: Executes data mapping on the appropriate source.
Select the appropriate data mapping configuration in the list:
l
"None": Select to execute default, basic data mapping on the input PDV/VT
file.
Page 592

l
"%o": Select to use a dynamic data mapping configuration name. Click on %o
to change the expression that determines the name of the data mapping
configuration to use. Right-click it to open the contextual menu that allows to
select variables, data and lookup functions (see "Data selections" on
page55).
l
Configuration Names: Select the appropriate data mapping configuration.
Adding configurations is done through the Send to Workflow option in the
DataMapper Module.
Click the Open data model of selected configuration button to view the data
model attached to the configuration in the Data Mapper module, to verify that
the right one is used. Only works for configurations listed (will not work for
"None" or "Dynamic" options).
l
No storing or post-processing of the data records (faster): This option
prevents data from being written to the database. Instead, records are
streamed directly into the Content Creation process for immediate merging.
Turning this feature on can improve data mapping performance significantly,
as well as the time required for the cleanup process.
This option is unchecked by default.
Note
Since with this setting the data is not written to the database, it isn't
possible to use a Job Creation Preset (see the Job Creation tab, below).
There is also no way to do post-processing on the extracted data after
the All In One operation has completed. Any post-processors defined in
the data mapping configuration will be disabled.
l
Runtime Parameters: Runtime parameters pass information from the
Workflow process to the data mapping configuration (see Properties and
runtime parameters in the Online Help of OL Connect).
Initially, the value of runtime parameters that are defined in the selected data
mapping configuration is set to that of a local variable or else a global variable
if there exists a variable with the same name. If no such variable exists, the
value will be an empty string.
To change the source of the value for any runtime parameter, right-click to
open the contextual menu that allows to select variables, data and lookup
Page 593

functions (see "Data selections" on page55).
If the data mapping configuration name is dynamic, you must enter the name
(or select a variable that contains the name) and set the value of all the
runtime parameters that may occur in the data mapping configuration.
If a runtime parameter is defined in a data mapper configuration, but not set in
the task properties, an error will be raised.
Note
Backslashes (\) and double quotes (") in a JSON string must be escaped
with a backslash (\\, \") if the JSON string is passed via a global, local, or
Job Info variable.
If the JSON is entered directly in the runtime parameter field, the plugin
adds the necessary backslashes.
Note
Runtime parameter value settings are not preserved when switching to a
different data mapping configuration and back, for example to reload a
modified data mapping configuration. This issue is fixed in PlanetPress
Workflow 2022.1.
l
Filter: Retrieves records from the Connect Database. This is identical to using the
"Retrieve Items" on page647 task.
l
Filter type: Determines at which level to retrieve the records:
l
Record: Retrieves one or more Records, whether or not they are part of
a Record Set. Output similar to the "Execute Data Mapping" on
page629 task.
l
Record Set: Retrieves one or more Record Sets, including all their
records. Output similar to the "Execute Data Mapping" on page629 task.
l
Filter:
l
Add a condition: Click to add a new condition line. This adds the line to
the current condition level, by default with an AND operator.
Page 594

l
Switch conditions: Click to swap two conditions on the same level, or
two groups of conditions.
l
Delete the selected condition: Click to delete the currently selected
conditions in the list.
l
Clear the rule: Click to delete all rules in the list. Note: This cannot be
undone.
l
Import a rule: Click to open the Browse dialog and load a Rules file.
This will load its rules into the list.
l
Export the rule: Click to open a Save dialog and save the Rules file to
disk.
l
Rule Viewer: Displays a text-based view of the condition using operators and
parentheses.
l
Sort contents: Defines how records are sorted.
l
Sort items based on: Displays the current sorting method. To modify
the sorting method, click on the [...] button at the right of the box to open
the "Sort Parameters" on page600 dialog.
l
Metadata: Uses existing Metadata, generally the output of a "Execute Data
Mapping" on page629 or a "Retrieve Items" on page647 task set to retrieve
Records or Record Sets. This source has no options as it expects valid Metadata.
l
PDF/VT with Content Creation: Expects a PDF/VT file as an input and executes
basic data mapping on the file. This is the same as using the passthrough option in
the "Execute Data Mapping" on page629 task. Content Items are created
automatically. When this source is selected, the Content Creation tab is disabled.
Note
Once the All In One plugin has been executed with this option selected, any
task that attempts to access records in the database will fail.
Content Creation Tab
The Content Creation step generates Content Items either by merging a Record Set with a
Template, or by processing a PDF/VT file into individual content items.
Page 595

l
Template: Select the appropriate template or option to execute it:
l
"None": Select to skip Content Creation completely.
l
"%o": Select to use a dynamic template name. Click on %o to change the
expression that determines the name of the template to use.
l
Template Names: Select the appropriate template name from the list. Adding
templates is done from the Send to Workflow option in the Designer Module.
l
Runtime Parameters: The runtime parameters defined in the selected template are
displayed and their values can be set here. (See Runtime parameters in the Online Help
of OL Connect.)
Right-click the field to open the contextual menu that allows to select variables, data and
lookup functions (see "Data selections" on page55).
If the template name is dynamic, you must enter the name (or select a variable that
contains the name) and set the value of all runtime parameters that may occur in the
template.
If a runtime parameter is defined in a template, but not set in the task properties, an error
will be raised. Note that it is not possible to change a parameter's type here; that can only
be set in the template itself.
At runtime, Workflow passes the parameter values as strings, and the type defined in the
template will be used to try and parse the input parameter value. In order to make this
work: Boolean values need to be entered as either “true” or “false”. (When the comparison
actually occurs, it will be a full Boolean comparison. Thus it can compare this runtime
parameter with Boolean data values that are stored as 0/1 in data fields.) Numeric string
values need to be parseable as a number (either a whole integer or decimal value). Dates
should be in an ISO8601 compatible format (e.g. 2019-10-15) or use the current Windows
Locale date settings options. The latter is not recommended as it requires all computers in
the cluster have the same locale data format.
Note
Runtime parameter value settings are not preserved when switching to a different
template and back, for example to reload a modified template. This issue is fixed in
PlanetPress Workflow 2022.1.
l
Preview: Displays a preview of the output generated by the Print context of the selected
Template. Not available for the PDF/VT or dynamic template names.
Page 596

By default the entire Print context is printed. Printing selected Print sections can only be
achieved with a Control Script in the template (see Control Scripts in the Designer Help).
Job Creation Tab
The Job Creation step prepares a series of print content items for output generation. A Job is
not actual contents but simply a collection of content items ready to be printed.
Note
You can only use a Job Creation Preset if the option "No saving or post-processing of the
data records (faster)" is disabled in the Data Mapper tab.
l
Job Preset file: Select which Job Preset to use to generate the job.
l
Default: The IDs in the Metadata are used instead of a job preset file.
l
None: Select this option to prevent the execution of Job Creation and Output
Creation. In this case you also have to select 'None' on the Output Creation tab as
well.
l
"%o": Select to use a dynamic preset name. Click on %o to change the expression
that determines the name of the preset to use. The preset name must be available in
the list below.
l
Preset Names: Select the appropriate Job Preset file. Listed are the Job Presets
that are present in the Connect Resources (see "Connect resources" on page41).
l
Runtime Parameters: The Runtime Parameters defined in the selected Job Creation
Preset are displayed and their values can be edited here. Right-click the field to open the
contextual menu that allows to select variables, data and lookup functions (see "Data
selections" on page55).
Note that it is not possible to change a parameter's type here; that can only be set in the
Job Creation Preset itself.
At runtime, Workflow passes the parameter values as strings, and the type defined in the
Job Creation Preset will be used to try and parse the input parameter value. In order to
make this work:
o
Boolean values need to be entered as either “true” or “false”. (When the comparison
actually occurs, it will be a full Boolean comparison. Thus it can compare this
runtime parameter with Boolean data values that are stored as 0/1 in data fields.)
Page 597

o
Numeric string values need to be parseable as a number (either a whole integer or
decimal value).
o
Dates should be in an ISO8601 compatible format (e.g. 2019-10-15) or use the
current Windows Locale date settings options.The latter is not recommended as it
requires all computers in the cluster have the same locale data format.
The order of the parameters doesn't affect the way they are handled at runtime.
Note
Backslashes (\) and double quotes (") in a JSON string must be escaped with a
backslash (\\, \") if the JSON string is passed via a global, local, or Job Info variable.
If the JSON is entered directly in the runtime parameter field, the plugin adds the
necessary backslashes.
Note
Runtime parameter value settings are not preserved when switching to a different
Job Creation Preset and back, for example to reload a modified Job Creation
Preset. This issue is fixed in PlanetPress Workflow 2022.1.
Output Creation Tab
The Output Creation step generates the output for the current job, using the selected Output
Creation Preset. Note that the Job Creation task normally necessary when using the individual
tasks is implicitly executed before output creation.
l
Output Preset: Select the appropriate Output Creation Preset to use:
l
"None": Select to prevent the execution of Output Creation.
l
"%o": Select to use a dynamic Output Preset name. Click on %o to change the
expression that determines the name of the Preset to use.
l
Preset Name: Select the appropriate Output Preset to create output with. Listed are
the Output Presets that are present in the Connect Resources (see "Connect
resources" on page41).
l
Output Management group:
Page 598

l
As defined by Output Preset: Select to send the output of the job to the location
set in the Print Preset (file, printer, etc).
l
Through Workflow: Select to replace the current job file with the output produced
by the server. Every option in the Output Preset is still used, except for the output
location.
Note that when the output is separated, the current job file is not replaced with the
actual output files but with a CSV file that lists the paths to the outputted files (e.g.
“C:\Users\Administrator\Connect\filestore\3836.2859982401376467470\template_
0001.pdf,C:\Users\Administrator\Connect\filestore\3836.2859982401376467470\te
mplate_0002.pdf,…”).
l
Wait for completion: Check this option to make Workflow wait for confirmation that the
output creation task was processed, either successfully or unsuccessfully. Otherwise
Workflow will only wait for the confirmation that the job was submitted correctly to the
Output Engine.
When Output Management is set to "Through Workflow", Workflow always waits for
completion of the output creation task.
OL Connect Proxy Tab
This tab is common to all OL Connect tasks and defines where to process the jobs sent through
these tasks. When these fields are empty, they use the defaults set in the "OL Connect
preferences" on page787.
Note
Defaults are not used unless the configuration is sent to the Workflow service.
l
OL Connect Proxy Address: Enter the machine name or IP Address where the OL
Connect Server resides.
l
Port: Enter the port to use to communicate with the OL Connect Server. Default: 9340
l
User name: Enter the user name expected by the OL Connect Server.
l
Password: Enter the password expected by the OL Connect Server for the above user
name.
Miscellaneous Tab
The Miscellaneous tab is common to all tasks.
Page 599

Check the option Use as step description to display the text next to the icon of the plugin in
the Process area.
Sort Parameters
The Sort Parameters define how to sort the entities retrieved from the Connect Database using
either the "Retrieve Items" on page647 task, or the Filter source in the "All In One" on
page591's Data Mapper task.
l
Sort items based on: Lists the different sorts to apply to the entities.
l
Name: Click and enter the name for the Value or the Property to sort on.
l
Type: Select whether the Name option refers to a Property or a Value within the
entity.
l
Order: Select how to sort, either Ascending or Descending alphabetical order.
l
Add: Click to add a new line to the sort list.
l
Remove: Click to remove the currently selected line in the sort list.
l
Move Up: Click to move the currently selected line up one position in the sort list.
l
Move Down: Click to move the currently selected line down one position in the sort list.
l
Validate Names: Click to check each line in the sort list against the currently active
Metadata. Metadata must be loaded in "The Data Selector" on page857 or through the
use of the Debugging feature (see "Debugging your PlanetPress Workflow process" on
page107).
Create Email Content
The Create Email Content task generates a set of email content items from a template's Email
Context, which are then sent directly to the recipient set in each record.
Tip
Drag-and-drop a template from the Connect resources in the Configuration Components
pane on a process to add this task or one of the other OL Connect tasks that create
content from a template: a "Create Preview PDF" on page612 task, a "Create Print
Content" on page617 task, or a "Create Web Content" on page621 task.
Page 600

Input
This task must receive either Metadata containing information regarding a valid Record Set, or
JSON data.
Metadata
The "Execute Data Mapping" on page629 task and the "Retrieve Items" on page647 task
output metadata containing information regarding a Record Set.
JSON
The Create Email Content task supports two types of JSON:
l A JSON object or an array of JSON objects representing records. If a value in a record
object is a string, it is considered to be a field value. If a value in a record object is a
JSON object, it is considered to be a nested table with detail records. For examples, see
"JSON string examples" on page93.
l A JSON Record Data List (see the REST API Cookbook and "JSON Record Data List
example" on page94). When the "Execute Data Mapping" on page629 or "Retrieve
Items" on page647 task is set to output Records in JSON, it outputs this kind of JSON
data.
If the input is JSON, the task performs a REST call to the
/rest/serverengine/workflow/contentcreation/email/{templateId} endpoint on the Connect Server.
For more information see the REST API Cookbook.
Processing
This task loops through each record in a Record Set or through each JSON object in an array.
For each record or JSON object, an HTML Email is generated using that record's or object's
data. The output generated is then sent via an SMTP server with the email address set by the
template.
Note
Content creation may be aborted by a script in a Connect template that raises a fatal
error. This triggers the On Error tab of the Content Creation task. See Designer Script
API.
Page 601

Note
The number of log messages for any non-fatal errors is limited to 100. Non-fatal errors are
errors related to one record that will not stop the processing of all records. For example,
when the recipient’s email address in a record is invalid, that record produces a non-fatal
error; subsequent records will still be processed.
Output
Within the Workflow process, the output to this task is only modified metadata indicating that the
task is complete. It is the Server component that outputs the emails themselves and sends them
to each recipient.
Note
If sending email is not included in the license, the emails will be sent to the sender
instead of to the intended recipients.
Properties
General Tab
l
Template
l
"%o": Select to use a dynamic template name. Click on %o to change the
expression that determines the name of the template to use.
l
Template Names: Select the appropriate template. Adding template is done
through the Send to Workflow option in the Designer Module.
l
Section: Enter the section name that will generate output. Only one section can be
output. If no section is defined or if the section name is invalid, the default section will be
output.
l
Data Source (see "Input" on the previous page):
l
Metadata:
l
Update Records from Metadata: If the process metadata has been modified
by any of the "Metadata tasks" on page560, check this option to update the
records in the Connect database with the metadata and use the updated
Page 602

records. Otherwise, only the ID of the current job is sent, and the unchanged
records are used.
l
JSON:
l
JSON String: a JSON object or an array of JSON objects representing
records (see "JSON string examples" on page93) or a JSON Record Data
List (see the REST API Cookbook and "JSON Record Data List example" on
page94).
This option requires that keys in the JSON data have matching field names in
the data model of the template. When they have, the JSON values are passed
to the template and the personalization scripts of the template will have
access to the values through the record's data fields. (See the Designer help:
Adding Variable Data.)
Warning
The JSON format is not validated by the plugin; it is passed as is to the
server.
l
Runtime Parameters: The runtime parameters defined in the selected template are
displayed and their values can be set here. (See Runtime parameters in the Online Help
of OL Connect.)
Right-click the field to open the contextual menu that allows to select variables, data and
lookup functions (see "Data selections" on page55).
If the template name is dynamic, you must enter the name (or select a variable that
contains the name) and set the value of all runtime parameters that may occur in the
template.
If a runtime parameter is defined in a template, but not set in the task properties, an error
will be raised. Note that it is not possible to change a parameter's type here; that can only
be set in the template itself.
At runtime, Workflow passes the parameter values as strings, and the type defined in the
template will be used to try and parse the input parameter value. In order to make this
work: Boolean values need to be entered as either “true” or “false”. (When the comparison
actually occurs, it will be a full Boolean comparison. Thus it can compare this runtime
parameter with Boolean data values that are stored as 0/1 in data fields.) Numeric string
values need to be parseable as a number (either a whole integer or decimal value). Dates
should be in an ISO8601 compatible format (e.g. 2019-10-15) or use the current Windows
Locale date settings options. The latter is not recommended as it requires all computers in
Page 603

the cluster have the same locale data format.
Note
Runtime parameter value settings are not preserved when switching to a different
template and back, for example to reload a modified template. This issue is fixed in
PlanetPress Workflow 2022.1.
Email Info tab
l
Sender Address: Enter the email address that appears in the "From" field of the email.
Alternatively you may enter the sender's name and email address in the following format:
John Smith <johnsemail@hisserver.com>. It depends on the email client which
information gets displayed: the sender's name or email address, or both.
l
Mail host: Enter the address of the SMTP server through which emails should be routed.
The address can include a port number. This information should be available from your IT
staff.
l
Send emails to sender (test mode): Check to ignore the email address from each record
and send all emails to the address entered in the Sender Address field instead.
l
Precedence to template address: If the sender's address is given in the template, that
address gets precedence over the one specified here.
l
Use encryption (TLS): Check to connect to the SMTP server using TLS 1.0 (Transport
Layer Security, also called "SSL").
l
Use Authentication group: Check to enable authentication to the SMTP server.
l
User name: Enter a user name that has permission to send email through the
SMTP server.
l
Password: Enter the password for the above user name.
l
Attachments:
l
Print Context as PDF document: Check to generate the Print context in the
template as a PDF and send it with the email as an attachment.
l
Web Content as HTML page: Check to generate the active Web section in the
template as an HTML page and send it with the email as an attachment
l
Test SMTP settings: Validates the format of the sender's address and mail host and tries
to send a test email. This won't work when the option Start TLS is checked.
Page 604

OL Connect Proxy Tab
This tab is common to all OL Connect tasks and defines where to process the jobs sent through
these tasks. When these fields are empty, they use the defaults set in the "OL Connect
preferences" on page787.
Note
Defaults are not used unless the configuration is sent to the Workflow service.
l
OL Connect Proxy Address: Enter the machine name or IP Address where the OL
Connect Server resides.
l
Port: Enter the port to use to communicate with the OL Connect Server. Default: 9340
l
User name: Enter the user name expected by the OL Connect Server.
l
Password: Enter the password expected by the OL Connect Server for the above user
name.
Miscellaneous Tab
The Miscellaneous tab is common to all tasks.
Check the option Use as step description to display the text next to the icon of the plugin in
the Process area.
Create Job
The Create Job action task prepares a series of print content items for output generation. A Job
is not actual contents but simply a collection of content items ready to be printed.
See also: "About printing" on page111.
Tip
Drag-and-drop a Job Creation Preset from the Connect resources in the Configuration
Components pane on a process to add this task.
Page 605

For information about Job Creation Presets, see Job Creation Preset in Connect's Online
Help.
Input
The task expects to have a valid Print Content Set, output from the "Create Print Content" on
page617 task, or the result of the "Retrieve Items" on page647 task set to retrieve either
Content Items or a Content Set.
Note
The result of a Retrieve Items task cannot be used with a Job Creation Preset. Use the
IDs in the metadata instead (see the Properties below).
Processing
The task prepares the content items or content sets for printing, tagging them as printable. Only
the content items that are part of the job will generate output.
Output
The task outputs a Print Job ready to be sent to the "Create Output" on page608 task for
printing.
Task properties
General Tab
l
Job Preset file: Select which Job Preset to use to generate the job. To be used in this
dialog, a preset must have been sent to PlanetPress Workflow using the Package File
function in PlanetPress Connect.
l
Default: The IDs in the Metadata are used instead of a job preset file. Select this
option if the Print Content Set is the result of the "Retrieve Items" on page647 task.
l
"%o": Select to use a dynamic preset name. Click on %o to change the expression
that determines the name of the preset to use. The preset name must be available in
the Connect Resources (see "Connect resources" on page41).
Page 606

l
Preset Names: Select the appropriate preset to generate output. Listed are the Job
Presets that are present in the Connect Resources (see "Connect resources" on
page41).
l
Unselect unused Content Items in metadata: When this option is checked, only
Content Items that were actually included in the Job are set to "selected" in the Metadata
(see "Metadata" on page76).
l
Runtime Parameters: The Runtime Parameters defined in the selected Job Creation
Preset are displayed and their values can be edited here. Right-click the field to open the
contextual menu that allows to select variables, data and lookup functions (see "Data
selections" on page55).
Note that it is not possible to change a parameter's type here; that can only be set in the
Job Creation Preset itself.
At runtime, Workflow passes the parameter values as strings, and the type defined in the
Job Creation Preset will be used to try and parse the input parameter value. In order to
make this work:
o
Boolean values need to be entered as either “true” or “false”. (When the comparison
actually occurs, it will be a full Boolean comparison. Thus it can compare this
runtime parameter with Boolean data values that are stored as 0/1 in data fields.)
o
Numeric string values need to be parseable as a number (either a whole integer or
decimal value).
o
Dates should be in an ISO8601 compatible format (e.g. 2019-10-15) or use the
current Windows Locale date settings options.The latter is not recommended as it
requires all computers in the cluster have the same locale data format.
The order of the parameters doesn't affect the way they are handled at runtime.
Note
Backslashes (\) and double quotes (") in a JSON string must be escaped with a
backslash (\\, \") if the JSON string is passed via a global, local, or Job Info variable.
If the JSON is entered directly in the runtime parameter field, the plugin adds the
necessary backslashes.
Note
Runtime parameter value settings are not preserved when switching to a different Job
Page 607

Creation Preset and back, for example to reload a modified Job Creation Preset. This
issue is fixed in PlanetPress Workflow 2022.1.
OL Connect Proxy Tab
This tab is common to all OL Connect tasks and defines where to process the jobs sent through
these tasks. When these fields are empty, they use the defaults set in the "OL Connect
preferences" on page787.
Note
Defaults are not used unless the configuration is sent to the Workflow service.
l
OL Connect Proxy Address: Enter the machine name or IP Address where the OL
Connect Server resides.
l
Port: Enter the port to use to communicate with the OL Connect Server. Default: 9340
l
User name: Enter the user name expected by the OL Connect Server.
l
Password: Enter the password expected by the OL Connect Server for the above user
name.
Miscellaneous Tab
The Miscellaneous tab is common to all tasks.
Check the option Use as step description to display the text next to the icon of the plugin in
the Process area.
Create Output
The Create Output task generates Print output in a format specified by a Connect Print Preset
and sends this output to the appropriate target location.
See also: "About printing" on page111.
Page 608

This task can be added as an Action task (see "Action tasks" on page379) or as an Output task
(see "Output tasks" on page655). Adding it as an Action task enables the process or branch to
continue after this task. An Output task is always located at the end of a process or branch.
Note
When added as an Output task, the Create Output plugin works asynchronously to the
Workflow process.
Tip
Drag-and-drop an Output Creation Preset from the "Connect resources" on page41 in
the Configuration Components pane on a process to add this task .
For more information about Output Creation Preset files see Output Creation Preset in
Connect's Online Help.
Input
The task requires a valid Job Metadata file, normally output from a "Create Job" on page605 or
"Merge Jobs" on page640 task.
Processing
The job is sent to the OL Connect Server for processing.
Output
Depending on the options set, either a simple metadata file with information about processing
is returned, or the actual output file created by the server.
Properties
The Create Output task properties are as follows:
Page 609

General Tab
l
Output Preset file: Select which Output Preset to use to generate the output. To be used
in this dialog, a preset must have been sent to PlanetPress Workflow using the Package
File function in PlanetPress Connect.
l
"%o": Select to use a dynamic preset name. Click on %o to change the expression
that determines the name of the preset to use. The preset name must be available in
the list below.
l
Preset Names: Select the appropriate preset to generate output.
l
Output Management group:
l
As defined by Output Preset: Select to send the output of the job to the location
set in the Print Preset (file, printer, etc).
l
Through Workflow: Select to replace the current job file with the output produced
by the server. Every option in the Output Preset is still used, except for the output
location.
Note that when the output is separated, the current job file is not replaced with the
actual output files but with a CSV file that lists the paths to the outputted files (e.g.
“C:\Users\Administrator\Connect\filestore\3836.2859982401376467470\template_
0001.pdf,C:\Users\Administrator\Connect\filestore\3836.2859982401376467470\te
mplate_0002.pdf,…”).
l
Wait for completion: Check this option to make Workflow wait for confirmation that the
output creation task was processed, either successfully or unsuccessfully. Otherwise
Workflow will only wait for the confirmation that the job was submitted correctly to the
Output Engine.
When Output Management is set to "Through Workflow", Workflow always waits for
completion of the output creation task.
OL Connect Proxy Tab
This tab is common to all OL Connect tasks and defines where to process the jobs sent through
these tasks. When these fields are empty, they use the defaults set in the "OL Connect
preferences" on page787.
Note
Defaults are not used unless the configuration is sent to the Workflow service.
Page 610

l
OL Connect Proxy Address: Enter the machine name or IP Address where the OL
Connect Server resides.
l
Port: Enter the port to use to communicate with the OL Connect Server. Default: 9340
l
User name: Enter the user name expected by the OL Connect Server.
l
Password: Enter the password expected by the OL Connect Server for the above user
name.
Miscellaneous Tab
The Miscellaneous tab is common to all tasks.
Check the option Use as step description to display the text next to the icon of the plugin in
the Process area.
Create PDF/VT
The Create PDF/VT, similar to the "Create PDF" on page397 task, creates PDF/VT files from a
PlanetPress Suite Document (created with PlanetPress Design). This PDF/VT is compatible
with the "Create Print Content" on page617 task directly without the use of a Connect
Template (PDF/VT mode).
Input
Any data file supported by the selected PlanetPress Document.
Processing
The input data file is merged with the selected PlanetPress Document.
Output
The output is a PDF/VT with default quality settings. The metadata embedded within the
PDF/VT is the one generated by the PlanetPress Document.
Properties
Note that the Connect Proxy tab is not present in the Create PDF/VT Action task properties,
as this task does not communicate with the OL Connect Server.
Page 611

General Tab
l
Documents: Select a specific PlanetPress Design document if you want all the jobs to be
generated with that document.
l
Recipient Node: Use the drop-down to select which level of the metadata is used as the
"Recipient" node. The Recipient node defines each Record in the output when used with
the "Create Print Content" on page617 task.
l
Add job information to document: Check to add the 9 Job Info variables to the PDF/VT
metadata at the root level.
Miscellaneous Tab
The Miscellaneous tab is common to all tasks.
Check the option Use as step description to display the text next to the icon of the plugin in
the Process area.
Create Preview PDF
The Create Preview PDF plugin generates a PDF preview for a single record as fast as
possible. This preview is typically used for previews embedded in web pages.
The plugin retrieves the resulting PDF from the file store and makes it available to the process
as the job data file. The job file name extension is .pdf.
This file could be written to a publicly accessible location (for example the _iRes folder) so that
the path could be served back to the browser, allowing the web page to embed the PDF data
for online viewing.
To make the rendering process as fast as possible, the generated PDF isn't optimized for print
production purposes.
Note
Content creation may be aborted by a script in a Connect template that raises a fatal
error. This triggers the On Error tab of the Content Creation task. See Designer Script
API.
Page 612

Tip
Drag-and-drop a template from the Connect resources in the Configuration Components
pane on a process to add this task or one of the other OL Connect tasks that create
content from a template: a "Create Email Content" on page600 task, a "Create Print
Content" on page617 task, or a "Create Web Content" on page621 task.
Properties
Datamapper tab
The Create Preview PDF plugin gets one record from the source selected on the Datamapper
tab. This record is then merged with the template (selected on the Content Creation tab) to
create a preview PDF.
The Datamapper tab can have one of the following source options:
l
Data mapping configuration sets the data source to a data mapping configuration.
l
%o: Select this to use a dynamic data mapping configuration name. Click on %o to
change the expression that determines the name of the data mapping configuration
to use.
l
Alternatively, select a configuration name. Adding configurations to this list is done
through the Send to Workflow option in the Designer module.
Click the Open data model of selected configuration button to view the data
model attached to the chosen configuration in the DataMapper module, to verify that
the right one is used.
l
No storing or post-processing of the data records (faster): This option prevents
data from being written to the database. Instead, records are streamed directly into
the Content Creation process for immediate merging. Turning this feature on can
improve data mapping performance significantly, as well as the time required for the
cleanup process. However, since the data is not written to the database, there is no
way to do post-processing on the extracted data. Any post-processors defined in the
data mapping configuration will be disabled.
This option is unchecked by default.
Page 613

Note
When the data mapping configuration provides multiple records, the preview
is created based on the first record.
Note
The Create Preview PDF plugin cannot pass runtime parameters to a data mapping
configuration. Instead it uses the default values set up in the Preprocessor of the
data mapping configuration.
To work around this issue, insert an Execute Data Mapping task (which does allow
to specify runtime parameters) immediately before the Create Preview PDF plugin;
configure it to output JSON, and use the JSON string option in the Create Preview
PDF plugin.
Other possibilities are to use the "All In One" on page591 task, or to include the
variables in the data file and let the data mapping configuration extract them.
l
JSON string sets the data source to a JSON string (see "Working with JSON" on
page92). A text area is shown allowing the user to enter the JSON string.
The JSON string may contain local and global variables, Job Infos and data selections
(see "JSON string examples" on page93).
A single variable can be used, assuming that the respective variable contains a JSON
string.
In case the JSON string is not a valid JSON object, the plugin will error out with an explicit
message.
Note
This option requires that keys in the JSON string have matching field names in the
data model of the template. When they have, the JSON values are passed to the
template and the personalization scripts of the template will have access to the
values through the record's data fields. (See the Designer help: Adding Variable
Data).
Page 614

l
Metadata uses existing metadata, generally the output of a Create Record Set or a
Retrieve Items task set to retrieve a record.
Update fields with metadata: when this option is selected, the plugin will update fields in
the Connect database based on the metadata content. This is only useful if the Workflow
process has modified the metadata and the corresponding fields should be updated in the
database before creating the preview PDF.
Note
The Metadata option requires that entries in the metadata have matching field
names in the data model of the template. When they have, the values are passed to
the template and the personalization scripts of the template will have access to the
values through the record's data fields. (See the Designer help: Adding Variable
Data).
Content Creation tab
The Create Preview PDF plugin creates a preview PDF from a template selected on the
Content Creation tab, using the record that results from the data source selected on the
Datamapper tab. The record is then merged with the template to create a preview PDF.
Select the appropriate template or option:
l
%o: Select to use a dynamic template name. Click on %o to change the expression that
determines the name of the template to use.
l
A template name: Select the appropriate template name from the list. Adding templates
to this list is done from the Send to Workflow option in the Designer module.
A preview will be displayed of the output generated by the Print context of the selected
template. (Not available for a dynamic template name).
If on the Datamapper tab, the source has been set to Metadata or JSON, the following option is
also available.
Runtime Parameters: The runtime parameters defined in the selected template are
displayed and their values can be set here. (See Runtime parameters in the Online Help
of OL Connect.)
Right-click the field to open the contextual menu that allows to select variables, data and
Page 615

lookup functions (see "Data selections" on page55).
If the template name is dynamic, you must enter the name (or select a variable that
contains the name) and set the value of all runtime parameters that may occur in the
template.
If a runtime parameter is defined in a template, but not set in the task properties, an error
will be raised.
Note that it is not possible to change a parameter's type here; that can only be set in the
template itself.
At runtime, Workflow passes the parameter values as strings, and the type defined in the
template will be used to try and parse the input parameter value. In order to make this
work:
o
Boolean values need to be entered as either “true” or “false”. (When the comparison
actually occurs, it will be a full Boolean comparison. Thus it can compare this
runtime parameter with Boolean data values that are stored as 0/1 in data fields.)
o
Numeric string values need to be parseable as a number (either a whole integer or
decimal value).
o
Dates should be in an ISO8601 compatible format (e.g. 2019-10-15) or use the
current Windows Locale date settings options. The latter is not recommended as it
requires all computers in the cluster have the same locale data format.
Note
Backslashes (\) and double quotes (") in a JSON string must be escaped with a
backslash (\\, \") if the JSON string is passed via a global, local, or Job Info variable.
If the JSON is entered directly in the runtime parameter field, the plugin adds the
necessary backslashes.
Note
It is not currently possible to specify Runtime parameters on the Content Creation tab if,
on the Datamapper tab, the source has been set to "Data mapping configuration". There
is, however, an easy workaround: insert an Execute Data Mapping task immediately
before the Create Preview PDF task, configure it to output either Metadata or JSON and
adjust the settings on the Datamapper tab of the Create Preview PDF task accordingly.
The Content Creation tab then allows to specify Runtime parameters for the selected
Page 616

template.
OL Connect Proxy Tab
l
Server Connect Settings
l
Connect Proxy Address: Enter the machine name or IP Address where the OL
Connect Server resides.
l
Port: Enter the port to use to communicate with the OL Connect Server. Default:
9340.
l
User name: Enter the user name expected by the OL Connect Server.
l
Password: Enter the password expected by the OL Connect Server for the above
user name.
Miscellaneous Tab
The Miscellaneous tab is common to all tasks.
Check the option Use as step description to display the text next to the icon of the plugin in
the Process area.
Create Print Content
The Create Print Content task generates a set of printable content items from a template's
Print Context, and saves those content items in the database until output creation is requested.
This task also accepts a PDF/VT file as input (see "Create PDF/VT" on page611), allowing the
task to be used without a Connect Template.
Tip
Drag-and-drop a template from the Connect resources in the Configuration Components
pane on a process to add this task or one of the other OL Connect tasks that create
content from a template: a "Create Email Content" on page600 task, a "Create Preview
PDF" on page612 task, or a "Create Web Content" on page621 task.
Page 617

Input
This task can receive either Metadata containing information regarding a valid Record Set, or
JSON data, or a PDF/VT File (see "Create PDF/VT" on page611).
Metadata
The "Execute Data Mapping" on page629 task and the "Retrieve Items" on page647 task
output Metadata containing information regarding a Record Set.
JSON
The Create Print Content task supports two types of JSON:
l A JSON object or an array of JSON objects representing records. If a value in a record
object is a string, it is considered to be a field value. If a value in a record object is a
JSON object, it is considered to be a nested table with detail records. For examples, see
"JSON string examples" on page93.
l A JSON Record Data List (see the REST API Cookbook and "JSON Record Data List
example" on page94). When the "Execute Data Mapping" on page629 or "Retrieve
Items" on page647 task is set to output Records in JSON, it outputs this kind of JSON
data.
If the input is JSON, the task performs a REST call to the
/rest/serverengine/workflow/contentcreation/{templateId} endpoint on the Connect
Server. For more information see the REST API Cookbook.
Note
When JSON data is used as input, the "Create Job" on page605 plugin (the next task in
a print process) cannot use a Job Creation Preset. The Create Print Content task doesn't
create a record set based on the provided data, like the "Execute Data Mapping" on
page629 task does. Job Creation Presets need such a record set to group, sort and filter
items.
Processing
In the case of a record set or a JSON object/array and template, this task loops through each
record (or object) in the set (or array). For each record or JSON object, one or more pages are
Page 618
generated using the record's data and these pages are saved as a content item in the
database.
In the case of a PDF/VT file, content items are created based on the structure of the PDF/VT
metadata and content items are stored using the data for each of those metadata records.
By default, the entire Print Context is used to create print content items. Individual Print sections
can be selected dynamically via a Control Script. (For more information see the Designer Help.)
Note
Content creation may be aborted by a script in a Connect template that raises a fatal
error. This triggers the On Error tab of the Content Creation task. See Designer Script
API.
Output
The output of this task is modified Metadata (see "Note: Metadata in OL Connect jobs" on
page78) with information about the job processing and each created content item. No content
item is actually output from the task, they are only saved in the OL Connect Database.
Properties
General Tab
l
Template File:
l
"None" File name: Select to accept a PDF/VT file as an input and automatically
create content items based on the PDF/VT.
l
"%o": Select to use a dynamic template name. Click on %o to change the
expression that determines the name of the template to use.
l
Template Names: Select the appropriate template. Adding a template to the
resources is done through the Send to Workflow option in the Designer Module.
l
Data Source (see "Input" on the previous page):
l
Metadata:
l
Update Records from Metadata: If the process metadata has been modified
by any of the "Metadata tasks" on page560, check this option to update the
records in the Connect database with the metadata and use the updated
Page 619

records. Otherwise, only the ID of the current job is sent, and the unchanged
records are used.
l
JSON:
l
JSON String: A JSON object or an array of JSON objects representing
records or a JSON Record Data List (see: "Types of JSON in Workflow" on
page93).
This option requires that keys in the JSON data have matching field names in
the data model of the template. When they have, the JSON values are passed
to the template and the personalization scripts of the template will have
access to the values through the record's data fields. (See the Designer help:
Adding Variable Data.)
Warning
The JSON format is not validated by the plugin; it is passed as is to the
server.
l
Runtime Parameters: The runtime parameters defined in the selected template are
displayed and their values can be set here. (See Runtime parameters in the Online Help
of OL Connect.)
Right-click the field to open the contextual menu that allows to select variables, data and
lookup functions (see "Data selections" on page55).
If the template name is dynamic, you must enter the name (or select a variable that
contains the name) and set the value of all runtime parameters that may occur in the
template.
If a runtime parameter is defined in a template, but not set in the task properties, an error
will be raised. Note that it is not possible to change a parameter's type here; that can only
be set in the template itself.
At runtime, Workflow passes the parameter values as strings, and the type defined in the
template will be used to try and parse the input parameter value. In order to make this
work: Boolean values need to be entered as either “true” or “false”. (When the comparison
actually occurs, it will be a full Boolean comparison. Thus it can compare this runtime
parameter with Boolean data values that are stored as 0/1 in data fields.) Numeric string
values need to be parseable as a number (either a whole integer or decimal value). Dates
should be in an ISO8601 compatible format (e.g. 2019-10-15) or use the current Windows
Locale date settings options. The latter is not recommended as it requires all computers in
the cluster have the same locale data format.
Page 620

Note
Runtime parameter value settings are not preserved when switching to a different
template and back, for example to reload a modified template. This issue is fixed in
PlanetPress Workflow 2022.1.
OL Connect Proxy Tab
This tab is common to all OL Connect tasks and defines where to process the jobs sent through
these tasks. When these fields are empty, they use the defaults set in the "OL Connect
preferences" on page787.
Note
Defaults are not used unless the configuration is sent to the Workflow service.
l
OL Connect Proxy Address: Enter the machine name or IP Address where the OL
Connect Server resides.
l
Port: Enter the port to use to communicate with the OL Connect Server. Default: 9340
l
User name: Enter the user name expected by the OL Connect Server.
l
Password: Enter the password expected by the OL Connect Server for the above user
name.
Miscellaneous Tab
The Miscellaneous tab is common to all tasks.
Check the option Use as step description to display the text next to the icon of the plugin in
the Process area.
Create Web Content
The Create Web Content task generates the output of the Web Context of a specified template
for a single record and returns the HTML code to PlanetPress Workflow for further processing
and return to the requester. Generally, this task is placed within an "HTTP Server workflow" on
page279.
Page 621

This task can be added as an Action task (see "Action tasks" on page379) or as an Output task
(see "Output tasks" on page655). Adding it as an Action task enables the process or branch to
continue after this task. An Output task is always located at the end of a process or branch.
Tip
Drag-and-drop a template from the Connect resources in the Configuration Components
pane on a process to add this task or one of the other OL Connect tasks that create
content from a template: a "Create Email Content" on page600 task, a "Create Preview
PDF" on page612 task, or a "Create Web Content" on the previous page task.
Input
This task must receive either a valid Record ID or a JSON object.
Record ID
A valid Record ID can be retrieved from various data sources. By default, when the Record ID
input option is selected, the metadata is used as input. The "Execute Data Mapping" on
page629 task and the "Retrieve Items" on page647 task output metadata containing
information regarding records.
JSON
The Create Web Content task supports two types of JSON:
l A JSON object or an array of JSON objects representing records. If a value in a record
object is a string, it is considered to be a field value. If a value in a record object is a
JSON object, it is considered to be a nested table with detail records. For examples, see
"JSON string examples" on page93.
l A JSON Record Data List (see the REST API Cookbook and "JSON Record Data List
example" on page94). When the "Execute Data Mapping" on page629 or "Retrieve
Items" on page647 task is set to output Records in JSON, it outputs this kind of JSON
data.
If the input is JSON data, the task makes a call to the REST workflow/contentcreation/html/
{templateId} endpoint on the Connect Server. For more information see the REST API
Cookbook.
Page 622

Note that only the first JSON object is processed, as the endpoint generates HTML output for a
single record.
Processing
For a single record, this task generates the output for the Web Context of the specified template.
Any external resources such as images, CSS style sheets or JavaScript files, are also
produced and put aside on the OL Connect Server component.
Note
Content creation may be aborted by a script in a Connect template that raises a fatal
error. This triggers the On Error tab of the Content Creation task. See Designer Script
API.
Output
The task outputs HTML code as a job file. Within this HTML code, references to external
resources point to the local OL Connect Server and are served to the requester directly when
the HTML file is opened in a browser.
Properties
General Tab
l
Template File:
l
"%o": Select to use a dynamic template name. Click on %o to change the
expression that determines the name of the template to use.
l
Template Names: Select the appropriate template. Adding template is done
through the Send to Workflow option in the Designer Module.
l
Section: Enter the section name that will generate output. Only one section can be
output. If no section is defined or if the section name is invalid, the default section will be
output.
Page 623

l
Data Source (see "Input" on page622):
l
Record ID:
l
Enter a valid Record ID, or 0 to provide no data. The record must be valid for
the template used. By default, the record ID is pre-filled with the first record in
the metadata. Right-click the field to access other data selection methods (see
"Data selections" on page55).
l
Update Records from Metadata: If the process's Metadata has been
modified by any of the "Metadata tasks" on page560, check this option to
update the records in the Connect database with the Metadata and use the
updated records.
l
JSON:
l
JSON String: A JSON object or an array of JSON objects representing
records (see "JSON string examples" on page93) or a JSON Record Data
List (see the REST API Cookbook and "JSON Record Data List example" on
page94).
This option requires that keys in the JSON data have matching field names in
the data model of the template. When they have, the JSON values are passed
to the template and the personalization scripts of the template will have
access to the values through the record's data fields. (See the Designer help:
Adding Variable Data.)
Warning
The JSON format is not validated by the plugin; it is passed as is to the
server.
Note
Only the first record or JSON object is processed, since this task can
only generate HTML output for a single record.
l
Embed all resources: Check this option to download the resources and embed them in
the HTML file.
Page 624

l
Do not alter HTML: Check this option to prevent that the Create Web Content task
modifies the HTML. It is recommended to use this option if the template's resources are all
hosted outside of the template (for instance, on a CMS repository).
Note
By default, the Create Web Content task inserts a <base> meta tag in the generated
HTML, specifying a default URL and target for all links on the web page. By
pointing to the Connect Server the job was sent to, the <base> tag enables the
HTTP server to retrieve the resources that were saved with the Designer template.
Since the <base> tag corrupts local anchors - links to another location in the same
web page -, the task also replaces the HREF attribute of local anchors with
JavaScript code. With this modification, local anchors will work; however, relative
URLs with hashtags still won't work.
Modifying the HTML this way isn't useful when all resources are either embedded in
the HTML file, or hosted outside of the template. So when the "Embed all
resources" or "Do not alter HTML" options (or both) are checked, the <base> tag
isn't added and local anchors aren't modified.
l
Runtime Parameters: The runtime parameters defined in the selected template are
displayed and their values can be set here. (See Runtime parameters in the Online Help
of OL Connect.)
Right-click the field to open the contextual menu that allows to select variables, data and
lookup functions (see "Data selections" on page55).
If the template name is dynamic, you must enter the name (or select a variable that
contains the name) and set the value of all runtime parameters that may occur in the
template.
If a runtime parameter is defined in a template, but not set in the task properties, an error
will be raised. Note that it is not possible to change a parameter's type here; that can only
be set in the template itself.
At runtime, Workflow passes the parameter values as strings, and the type defined in the
template will be used to try and parse the input parameter value. In order to make this
work: Boolean values need to be entered as either “true” or “false”. (When the comparison
actually occurs, it will be a full Boolean comparison. Thus it can compare this runtime
parameter with Boolean data values that are stored as 0/1 in data fields.) Numeric string
values need to be parseable as a number (either a whole integer or decimal value). Dates
should be in an ISO8601 compatible format (e.g. 2019-10-15) or use the current Windows
Page 625

Locale date settings options. The latter is not recommended as it requires all computers in
the cluster have the same locale data format.
Note
Runtime parameter value settings are not preserved when switching to a different
template and back, for example to reload a modified template. This issue is fixed in
PlanetPress Workflow 2022.1.
OL Connect Proxy Tab
This tab is common to all OL Connect tasks and defines where to process the jobs sent through
these tasks. When these fields are empty, they use the defaults set in the "OL Connect
preferences" on page787.
Note
Defaults are not used unless the configuration is sent to the Workflow service.
l
OL Connect Proxy Address: Enter the machine name or IP Address where the OL
Connect Server resides.
l
Port: Enter the port to use to communicate with the OL Connect Server. Default: 9340
l
User name: Enter the user name expected by the OL Connect Server.
l
Password: Enter the password expected by the OL Connect Server for the above user
name.
Miscellaneous Tab
The Miscellaneous tab is common to all tasks.
Check the option Use as step description to display the text next to the icon of the plugin in
the Process area.
Page 626

Download EML Messages
The Download EML Messages task downloads one EML file from the Connect File Store.
Saving EML messages in the File Store is an option in the "Render Email Content" on
page643 task. EML files can be stored in an ERP/ECM system for archiving purposes.
Use the "Metadata Sequencer" on page571 plugin, followed by the Download EML Messages
plugin and the "Send to Folder" on page440 plugin, to download multiple EMLfiles and save
them to disk.
As an alternative to the Download EML Messages task you could use the "File Store -
Download File" on page635 task to download an EML file from the File Store. In that case you
need the folder ID and EML file name found in the output of the "Render Email Content" on
page643 task. This information can be retrieved from the Metadata using the following data
selection methods:
GetMeta(_vger_prop_folder[0], 10, Job.Group[0].Document[0])
GetMeta(_vger_prop_eml[0], 10, Job.Group[0].Document[0]).
The "Mailjet" on page709 and "SendGrid" on page713 plugins offer the possibility to add extra
attachments to a rendered email message via Workflow. Note that any such attachments will
not be part of the EML file produced by the Render Email Content task.
Note
With PlanetPress Workflow version 2020.1, using the Download EML Messages task
requires the version 2020.1 "Mailjet" on page709 and "SendGrid" on page713 plugins .
They are available for download on the Resource Center (help.objectiflune.com).
Tip
Double-click an .eml to open it in your email client.
Input
This task must receive either Metadata or JSON Job Data containing information regarding a
pre-rendered email message that has been saved in EML format in the File Store.
Page 627

Storing EML messages in the File Store is an option in "Render Email Content" on page643
task. That task outputs information about the email messages that it pre-rendered either in the
current Metadata or in the form of a JSON structure.
The Download EML Messages task expects UTF-8 encoded JSON job data files.
Note
Make sure that other components in the Workflow configuration working on the job data
handle UTF-8 encoded files correctly.
Processing
The plugin communicates with the Connect Server to retrieve the EML file that was stored in
the Connect File Store by the "Render Email Content" on page643.
Output
The task outputs the EML file as the Job File. The Metadata are unchanged.
Properties
General Tab
l
Data Source (see "Input" on the previous page):
l
Metadata: Metadata containing information about an email message. The "Render
Email Content" on page643 task can output information about the email message
(s) that it pre-rendered in the current Metadata. Use the "Metadata Sequencer" on
page571 plugin to loop over the items in the Metadata and feed them to the
Download EML Messages plugin.
l
JSON: A JSON object representing an email message. For an example of such an
object, see the "Render Email Content" on page643 task. That task can output a
JSON object (or an array of JSON objects) containing information about email
messages.
Page 628

Note
Information about the Connect Server (host, user name etc.) is taken from the Workflow
Preferences (see "OL Connect preferences" on page787).
Advanced Properties
To get access to the following properties tabs, right-click the plugin in the process and select
Advanced Properties.
Miscellaneous Tab
The Miscellaneous tab is common to all tasks.
Check the option Use as step description to display the text next to the icon of the plugin in
the Process area.
Execute Data Mapping
The Execute Data Mapping action task generates a record set by executing a data mapping
configuration on a data source. It can also automatically create a record set from a PDF/VT file
without using a data mapping configuration.
If the input is paginated, this task can create a Print Content Set as well, making it possible to
bypass the Job Creation task in a print process if there is no need to merge the data with a
template.
Tip
Drag-and-drop a data mapping configuration from the Connect resources in the
Configuration Components pane on a process to add this task.
Input
Optional. Both main options can refer to external files, but either one can be the active data file
using %F. By default the Data Source is set to use the active data file as input.
Page 629

Note
To open a Microsoft Access database, you have to use the Load External File task just
before the Execute Data Mapping task.
Processing
The task executes the selected data mapping configuration on the appropriate data source, or
converts the PDF/VT into a Record Set directly.
If the input is paginated, this task can create a Print Content Set as well.
If the data mapping configuration expects a database data source, the Data Source option is
ignored and the database is accessed instead. If a PDF/VT file is used, the data mapping
configuration option is optional - if one is present, it must be able to read the PDF/VT.
Output
The output to this task is twofold. On the OL Connect Server side, a Record Set containing
multiple records is created and saved.
On PlanetPress Workflow's side, Metadata is returned with information about each record set
(see "Note: Metadata in OL Connect jobs" on page78). Alternatively, you can either get an
XML file or JSON file containing the full Record Set structure, or skip storing the Record Set on
the OL Connect Server and run the operation in Validation mode; the validation results are
returned via the Metadata.
Properties
General Tab
l
Data Mapping Configuration: Executes data mapping on the appropriate source. Select
the appropriate data mapping configuration in the list:
l
"None": Select to execute default, basic data mapping on the input PDF/VT file.
l
"%o": Select to use a dynamic data mapping configuration name. Click on %o to
change the expression that determines the name of the data mapping configuration
to use. Right-click it to open the contextual menu that allows to select variables,
Page 630

data and lookup functions (see "Data selections" on page55).
l
Configuration Names: Select the appropriate data mapping configuration. Adding
configurations is done through the Send to Workflow option in the DataMapper
Module.
Click the Open data model of selected configuration button to view the data
model attached to the configuration in the Data Mapper module, to verify that the
correct one is used. Only works for configurations listed (will not work for "None" or
"Dynamic" options).
l
Output Type group:
l
Metadata - IDs only: Select to only output the Record and Job IDs in the Metadata.
This does not permit sorting and filtering, but it enhances performance since only
minimal data is exchanged between the OL Connect Server and PlanetPress
Workflow.
l
Metadata: Select to output the full Record table (no Details table) as Metadata in the
task. It is then possible to sort and filter the Metadata using the regular Metadata
tools, as long as the Update Records from Metadata option is used in further tasks
to use the modified Metadata.
l
XML: Select to output an XML structure containing the full Record Set including all
detail tables. This option cannot be used with other OL Connect tasks.
l
JSON: Select to output a JSON Record Data List (see the REST API Cookbook and
"JSON Record Data List example" on page94). The file contains the full Record Set
including all detail tables and boundary information, which can then be processed
in a "Run Script" on page482 task.
l
None (validate only): Select to run the operation in Validation mode and output the
validation results in the Metadata. No data is extracted or stored in the Connect
Database.
The task performs a validation REST call and stores the returned JSON object in a
validationresult entry on the Group[0] level of the Metadata. (For the structure of
the JSON object, see the REST API Cookbook: JSON Data Mapping Validation
Result.) The JSON's result and recordcount fields are also stored at the Group[0]
level. Each Document node contains the following fields:
l index: The position of the record in the job. This value is 1-based. Note that
this is not a record ID, since the record is never stored in the database.
l error: The error message, or an empty string when no errors have been
reported for this record.
Page 631

Document nodes with an error are selected, while those without an error are
unselected, to make looping through all errors easy.
By default, if the validation cannot be performed the task fails and logs an error, but
if the Generate error when validation cannot be performed checkbox is unticked,
the task will log a warning and it will generate metadata with a single group
containing a single document, with the error message "DataMapper could not
process the input file".
Tip
To determine if there were any errors in a job and handle it accordingly, you
can use a Condition that checks if
GetMeta(SelectedCount[0], 11, Job.Group[0])
is greater than 0, immediately after the task (see "Conditions" on page138).
l
Runtime Parameters: Runtime parameters pass information from the Workflow process
to the data mapping configuration (see Properties and runtime parameters in the Online
Help of OL Connect).
Initially, the value of runtime parameters that are defined in the selected data mapping
configuration is set to that of a local variable or else a global variable if there exists a
variable with the same name. If no such variable exists, the value will be an empty string.
To change the source of the value for any runtime parameter, right-click to open the
contextual menu that allows to select variables, data and lookup functions (see "Data
selections" on page55).
If the data mapping configuration name is dynamic, you must enter the name (or select a
variable that contains the name) and set the value of all the runtime parameters that may
occur in the data mapping configuration.
If a runtime parameter is defined in a data mapper configuration, but not set in the task
properties, an error will be raised.
Note
Backslashes (\) and double quotes (") in a JSON string must be escaped with a
backslash (\\, \") if the JSON string is passed via a global, local, or Job Info variable.
If the JSON is entered directly in the runtime parameter field, the plugin adds the
Page 632

necessary backslashes.
Note
Runtime parameter value settings are not preserved when switching to a different
data mapping configuration and back, for example to reload a modified data
mapping configuration. This issue is fixed in PlanetPress Workflow 2022.1.
l
Bypass content creation: Check this option to make the task create a Print Content Set
as well a Record Set, so that in a print process, content creation - normally performed by
the Create Print Content task - can be skipped if there is no need to merge the extracted
data with a template.
l
Duplex: Whether the page sheet is duplex.
l
Tumble: Whether to duplex pages as in a calendar. For this to work, the duplex
option must be checked as well.
Note
The Bypass content creation option only works if the input is paginated.
Set the Output type to Metadata if the Content Creation task is omitted and the
output is to be used by the Job Creation task later on in the print process.
OL Connect Proxy Tab
This tab is common to all OL Connect tasks and defines where to process the jobs sent through
these tasks. When these fields are empty, they use the defaults set in the "OL Connect
preferences" on page787.
Note
Defaults are not used unless the configuration is sent to the Workflow service.
Page 633

l
OL Connect Proxy Address: Enter the machine name or IP Address where the OL
Connect Server resides.
l
Port: Enter the port to use to communicate with the OL Connect Server. Default: 9340
l
User name: Enter the user name expected by the OL Connect Server.
l
Password: Enter the password expected by the OL Connect Server for the above user
name.
Miscellaneous Tab
The Miscellaneous tab is common to all tasks.
Check the option Use as step description to display the text next to the icon of the plugin in
the Process area.
File Store - Delete File
The File Store - Delete File task deletes a file from the OL Connect File Store, using either a
file name or File Store ID.
Input
The task requires either the name of the file in the OL Connect File Store or its File Store ID.
The name of a file is chosen and its File Store ID is returned when uploading it with the "File
Store - Upload File" on page637 task.
Processing
The task requests removal of the file by performing a call to the
/rest/serverengine/filestore/delete/{fileId} REST endpoint; see File Store Service:
Delete File in the REST API Cookbook.
Output
This task has no impact on the current Job File.
Page 634

Task properties
General Tab
l
File name/ID: The name or the ID of the file to delete.
OL Connect Proxy Tab
This tab is common to all OL Connect tasks and defines where to process the jobs sent through
these tasks. When these fields are empty, they use the defaults set in the "OL Connect
preferences" on page787.
Note
Defaults are not used unless the configuration is sent to the Workflow service.
l
OL Connect Proxy Address: Enter the machine name or IP Address where the OL
Connect Server resides.
l
Port: Enter the port to use to communicate with the OL Connect Server. Default: 9340
l
User name: Enter the user name expected by the OL Connect Server.
l
Password: Enter the password expected by the OL Connect Server for the above user
name.
Miscellaneous Tab
The Miscellaneous tab is common to all tasks.
Check the option Use as step description to display the text next to the icon of the plugin in
the Process area.
File Store - Download File
The File Store - Download File task downloads a file from the OL Connect File Store, using
either a file name or File Store ID.
Input
The task requires either the name of the file in the OL Connect File Store or its File Store ID.
Page 635

Processing
The task tries to download the requested file from the OL Connect File Store by performing a
call to the /rest/serverengine/filestore/file/{fileId} REST endpoint; see File Store
Service: Download File in the REST API Cookbook.
Output
The downloaded file becomes the current job file and retains the file name that it had in the OL
Connect File Store.
Task properties
General Tab
l
Filename or File Store ID: Enter the name of the file in the OL Connect File Store or its
File Store ID. A File Store ID refers to a file or folder in the File Store.
OL Connect Proxy Tab
This tab is common to all OL Connect tasks and defines where to process the jobs sent through
these tasks. When these fields are empty, they use the defaults set in the "OL Connect
preferences" on page787.
Note
Defaults are not used unless the configuration is sent to the Workflow service.
l
OL Connect Proxy Address: Enter the machine name or IP Address where the OL
Connect Server resides.
l
Port: Enter the port to use to communicate with the OL Connect Server. Default: 9340
l
User name: Enter the user name expected by the OL Connect Server.
l
Password: Enter the password expected by the OL Connect Server for the above user
name.
Miscellaneous Tab
The Miscellaneous tab is common to all tasks.
Page 636

Check the option Use as step description to display the text next to the icon of the plugin in
the Process area.
File Store - Upload File
The File Store - Upload File task uploads the current Job File to the OL Connect File Store.
Input
The task always takes the current Job File as input file. If you want to upload an external file,
first use the "Load External File" on page422 plugin to load that file as the Job File.
Processing
The task tries to upload the current job file to the OL Connect File Store by making a call to the
/rest/serverengine/filestore/DataFile REST endpoint; see File Store Service: Upload File
in the REST API Cookbook.
Output
When a file is uploaded to the Connect File Store, it is automatically assigned a File Store ID.
The task stores the returned File Store ID in the specified variable.
This task does not modify the Job File.
Task properties
General Tab
l
Filename: Enter the file name or a JobInfo, local or global variable that contains the file
name, to use when saving the file in the OL Connect File Store. The default is %f, the
name of the job file. Right-click the field to select another variable. When you specify %o
as the file name, the file in the OL Connect File Store will have the same name as the
original file.
l
Save File Store ID in variable: Select the variable in which to store the File Store ID that
is returned after a file has been successfully uploaded to the File Store. This ID can be
used to download or delete the file from the OL Connect File Store.
l
Mark as permanent: When this option is checked, the file will never be removed
automatically by Connect's Clean-Up Service. Non-permanent files may be removed if
there are no remaining references to them in the Connect Database. (See: Clean-Up
Service preferences.)
Page 637

OL Connect Proxy Tab
This tab is common to all OL Connect tasks and defines where to process the jobs sent through
these tasks. When these fields are empty, they use the defaults set in the "OL Connect
preferences" on page787.
Note
Defaults are not used unless the configuration is sent to the Workflow service.
l
OL Connect Proxy Address: Enter the machine name or IP Address where the OL
Connect Server resides.
l
Port: Enter the port to use to communicate with the OL Connect Server. Default: 9340
l
User name: Enter the user name expected by the OL Connect Server.
l
Password: Enter the password expected by the OL Connect Server for the above user
name.
Miscellaneous Tab
The Miscellaneous tab is common to all tasks.
Check the option Use as step description to display the text next to the icon of the plugin in
the Process area.
Mark Connect Sets for Deletion
The Mark Connect Sets for Deletion task indicates that an item in the Connect Database
should be deleted the next time the Database Cleanup runs. This means that whatever item is
set for deletion will no longer be available from the database.
Input
The task requires a valid Metadata file containing items for deletion, including Job Sets,
Content Sets and Data Sets. These can be created by the "Execute Data Mapping" on
page629, "Create Print Content" on page617 and "Create Job" on page605 tasks. Job Sets,
Content Sets and Data Sets are also valid when obtained using the "Retrieve Items" on
page647 task.
Page 638

Processing
All sets currently active in the Metadata are set for deletion.
Output
The same Metadata that is input.
Task properties
General Tab
l
Set types to mark for deletion based on metadata content:
l
Job Set: Tag any Job set created by the "Create Job" on page605 task or the
"Retrieve Items" on page647 task set to retrieve Job Sets.
l
Content Set: Tag any Content set created by the "Create Print Content" on
page617 task or the "Retrieve Items" on page647 task set to retrieve Content Sets.
l
Record Set: Tag any Record set created by the "Execute Data Mapping" on
page629 task or the "Retrieve Items" on page647 task set to retrieve Record Sets.
OL Connect Proxy Tab
This tab is common to all OL Connect tasks and defines where to process the jobs sent through
these tasks. When these fields are empty, they use the defaults set in the "OL Connect
preferences" on page787.
Note
Defaults are not used unless the configuration is sent to the Workflow service.
l
OL Connect Proxy Address: Enter the machine name or IP Address where the OL
Connect Server resides.
l
Port: Enter the port to use to communicate with the OL Connect Server. Default: 9340
l
User name: Enter the user name expected by the OL Connect Server.
l
Password: Enter the password expected by the OL Connect Server for the above user
name.
Page 639

Miscellaneous Tab
The Miscellaneous tab is common to all tasks.
Check the option Use as step description to display the text next to the icon of the plugin in
the Process area.
Merge Jobs
The Merge Jobs Action task merges an external Metadata file containing an OL Connect Job
with the current Job File.
Input
The task must receive a Metadata Job File, which is output from the "Create Job" on page605
task. The selected Metadata file must also be the output of a Create Job task.
Processing
The current Metadata Job File is merged with the selected external Metadata file.
Output
The task outputs a merged Metadata Job File which can be used in the "Create Output" on
page608 task.
Task properties
General Tab
l
Metadata file: Enter the full path to a valid Metadata file containing an OL Connect Job, or
use the Browse button to browse to a valid location.
Miscellaneous Tab
The Miscellaneous tab is common to all tasks.
Check the option Use as step description to display the text next to the icon of the plugin in
the Process area.
Page 640

PDF to Bitmap
The PDF to Bitmap plugin converts PDF pages to bitmaps.
Input
The job file. This must be a PDF file.
Processing
The PDF to Bitmap plugin converts PDF pages to bitmaps, optionally scaling them.
Invalid pages or ranges generate an error; in this case, no bitmap is produced.
If the specified output folder doesn't exist, it will be created. If the folder cannot be created, an
"Error creating directory" message is logged.
If the plugin can't connect to the OL Connect Server it will return an error message.
Note
As of OL Connect version 2020.2 the PDF to Bitmap plugin requires the OL Connect
Server to produce output.
This could cause problems when running older configurations. To cure such issues, set
the Connect Server connection settings within Workflow (see "OL Connect preferences"
on page787).
Output
This task outputs the PDF file it received with no modification.
Properties
The General tab has the following options:
l
Output format: The output format can be either PNG or JPG.
l
Resolution: Specify the resolution of the bitmaps (pixels per inch). The minimum is 12,
the maximum is 1200. For example, with the minimum of 12, a PDF page that is 8,5 inch
Page 641

wide is converted into a bitmap of 102 pixels wide, which could be used as a thumbnail
on a web page.
l
Page range: An asterisk (*) means: convert all pages. It can be replaced with a
combination of the following, comma-separated values:
l a single page number
l a range of pages: n1-[n2]. If n2 is not specified, the range extends to the end of the
file. Any value specified after the next comma is ignored.
Example: 1, 7-10, 13, 15- means the task will convert pages 1, 7, 8, 9, 10, 13, and 15 until
the end of the file.
l
Output folder and file name: Specify where the bitmaps are saved; %t%O means: save
the bitmaps to the current temporary folder, using the PDF's original file name. If no
extension is specified, the selected output format is used to add the extension
automatically. When multiple pages are saved, the index of each page is appended to the
output file name (e.g. mybitmap1.jpg, mybitmap2,jpg, etc.).
If the specified output folder doesn't exist, it will be created. If the folder cannot be created,
an "Error creating directory" message is logged.
OL Connect Proxy Tab
l
Server Connect Settings
l
Connect Proxy Address: Enter the machine name or IP Address where the OL
Connect Server resides.
l
Port: Enter the port to use to communicate with the OL Connect Server. Default:
9340.
l
User name: Enter the user name expected by the OL Connect Server.
l
Password: Enter the password expected by the OL Connect Server for the above
user name.
Miscellaneous Tab
The Miscellaneous tab is common to all tasks.
Check the option Use as step description to display the text next to the icon of the plugin in
the Process area.
Page 642

Render Email Content
The Render Email Content task pre-renders emails from a template's Email Context and
stores them in the File Store, along with their attachments.
Note
The Render Email Content task works only if PlanetPress Workflow is licensed for
sending emails. It is not available for users with Demo, Test or Reseller licenses.
Note
For the Render Email Content task in PlanetPress Workflow 2020.1 and higher to
function correctly with the SendGrid and Mailjet plugins, the version 2020.1 of those
plugins is required. They are available for download on the Resource Center
(help.objectiflune.com).
Input
This task must receive either Metadata containing information regarding a valid Record Set, or
JSON data.
Metadata
The "Execute Data Mapping" on page629 task and the "Retrieve Items" on page647 task
output Metadata containing information regarding a Record Set.
Note
The plugin takes the entire Metadata file as its input, even when it is placed after a
"Metadata Sequencer" on page571 task.
JSON
The Render Email Content task supports two types of JSON:
Page 643

l A JSON object or an array of JSON objects representing records. If a value in a record
object is a string, it is considered to be a field value. If a value in a record object is a
JSON object, it is considered to be a nested table with detail records. For examples, see
"JSON string examples" on page93.
l A JSON Record Data List (see the REST API Cookbook and "JSON Record Data List
example" on page94). When the "Execute Data Mapping" on page629 or "Retrieve
Items" on page647 task is set to output Records in JSON, it outputs this kind of JSON
data.
If the input is JSON, the task performs a REST call to the
/rest/serverengine/workflow/contentcreation/email/{templateId} endpoint on the Connect Server.
For more information see the REST API Cookbook.
The Render Email Content task expects UTF-8 encoded JSON job data files.
Note
Make sure that other components in the Workflow configuration working on the job data
handle UTF-8 encoded files correctly.
Processing
This task loops through each record in a Record Set or through each JSON object in an array.
For each record or JSON object, the task generates an HTML email using that record's or
object's data.
When an email address is invalid, no email content will be created. Instead, an error is reported
for the record with an invalid email address.
Note
Content creation may be aborted by a script in a Connect template that raises a fatal
error. This triggers the On Error tab of the Content Creation task. See Designer Script
API.
Page 644

Note
The number of log messages for any non-fatal errors is limited to 100. Non-fatal errors are
errors related to one record that will not stop the processing of all records.
Output
The output of this task is twofold.
On the OL Connect Server's side, pre-rendered email messages are saved in the OL Connect
File Store along with their attachments (and, optionally, also in EML format).
On Workflow's side, information about the pre-rendered email messages becomes available to
the process via the current Metadata or via a JSON data structure that replaces the active Job
File.
Here is an example of the JSON structure. In this case there's only one email message in the
Content Set.
{"messages":
[
{"attachments":[
{"name":"att0307c655-e14e-4400-8f90-
365032648aed.png","disposition":"inline"},
{"name":"myPDF.pdf","disposition":"attachment"},
],
"subject":"Take action now",
"to":"recipient@gmail.com",
"from":"sender@yourdomain.com",
"folder":8768,
"eml":"c5f97db0-45ca-4f1d-be4d-473d000c92bd.eml",
"body":"07decd87-d03c-4969-bc2a-7527cc594878.html",
"text":"7a4e5217-0103-487f-a4f8-77d37d0c1087.txt"}
],
"contentSet":8769}
For any non-fatal errors that occur, the data record index and error message will be added to an
errors key at the same level as the messages and contentSet keys. The number of non-fatal
errors that can be logged is limited to 100.
Page 645

Properties
General Tab
l
Template: Click the Browse button to select a template from the resources (see "Connect
resources" on page41), or enter a dynamic template name. Right-click the field to open
the contextual menu that allows to select variables, data and lookup functions (see "Data
selections" on page55).
Note that it is mandatory to specify the sender (the "from" field) in the template. Otherwise,
the email service provider will return an error through Workflow.
l
Section: Enter the section name that will generate output. Right-click the field to open the
contextual menu that allows to select variables, data and lookup functions (see "Data
selections" on page55).
Only one section can be output. If no section is defined, an error will be thrown.
l
Data Source (see "Input" on page643):
l
Metadata: The Metadata must contain information regarding a valid Record Set, or
JSON data. This can be the output of the "Execute Data Mapping" on page629 task
or "Retrieve Items" on the facing page task.
l
JSON String: a JSON object or an array of JSON objects representing records (see
"JSON string examples" on page93) or a JSON Record Data List (see the REST
API Cookbook and "JSON Record Data List example" on page94).
This option requires that keys in the JSON data have matching field names in the
data model of the template. When they have, the JSON values are passed to the
template; the personalization scripts of the template will have access to the values
through the record's data fields. (See the Designer help: Adding Variable Data.)
Warning
The JSON format is not validated by the plugin; it is passed as is to the server.
l
Output Method (see "Output" on the previous page): Select how to output information
about the emails that were created, including the email addresses (to, from, etc.), subject,
and the names of the folder, HTML file, attachments, (optional) plain text email file (see
Email output settings in the Email context and sections) and EML file (see below).
Page 646

l
Metadata: Write the information to the current Metadata.
l
JSON Data in Job Data File: Return the information in a JSON structure that
replaces the current Job File. This allows you to manipulate the output in a "Run
Script" on page482 task before sending it to an Email Service Provider (ESP).
l
Additional Output:
l
Render messages in EML format: Creates an EML file containing the HTML
email, its attachments and (optionally) the text version of the email, and saves it in
the File Store. EML files can be used for archiving. You could use the "Download
EML Messages" on page627 plugin to download them from the File Store.
Alternatively you could use the "File Store - Download File" on page635 task; in
that case you will need the folder ID and EML file name found in the output of the
"Render Email Content" on page643 plugin.
Note
Information about the Connect Server (host, user name etc.) is taken from the Workflow
Preferences (see "OL Connect preferences" on page787).
Advanced Properties
To get access to the following properties tabs, right-click the plugin in the process and select
Advanced Properties.
Miscellaneous Tab
The Miscellaneous tab is common to all tasks.
Check the option Use as step description to display the text next to the icon of the plugin in
the Process area.
Retrieve Items
The Retrieve Items Action task locates and extracts items from the OL Connect Database so
they can be used with further tasks. The items are retrieved using a set of conditions working
together. Since this task can retrieve items at any level, it can be used to generate Metadata
(see "Metadata" on page76) or JSON data used in multiple tasks.
Page 647

Input
The task requires no input file, but any input information such as Metadata, Job Info variables, a
data file or a JSON array can be used to specify which items to retrieve.
Processing
The task requests the items on the OL Connect Server using the conditions set in the task
properties. Only the condition information and the returned Metadata or JSON are exchanged.
Note that the order in which the requested items are returned cannot be guaranteed.
Output
The task outputs Metadata that is equivalent to the output of the appropriate task that would
normally create the items, or a JSON Record Data List (see the REST API Cookbook and
"JSON Record Data List example" on page94).
Note
The result of a Retrieve Items task can be used with the "Create Job" on page605 task if
it is a Content Item or Content Set, but it cannot be used in combination with a Job Preset.
Note
Content Creation tasks accept Metadata as well as JSON data as input.
Task properties
General Tab
l
Entity to retrieve: Use the drop-down to select which items to retrieve.
l
Record: Retrieves one or more Records, whether or not they are part of a Record
Set. Output similar to the "Execute Data Mapping" on page629 task.
l
Record Set: Retrieves one or more Record Sets, including all their records. Output
similar to the "Execute Data Mapping" on page629 task.
Page 648

l
Content Item: Retrieves one or more Content Items, whether or not they are part of
a Content Set. Output similar to the "Create Print Content" on page617 or "Create
Web Content" on page621 tasks.
l
Content Set: Retrieves one or more Content Sets, including all their content items.
Output similar to the "Create Print Content" on page617 task.
l
Job: Retrieves one or more Jobs, including all their content items ready to be
printed. Output similar to the "Create Job" on page605 task.
l
Job Set: Retrieves one or more Job Sets, including all their content items ready to
be printed. Output similar to the "Create Job" on page605 task.
l
Optimized: This option, available when the Entity to retrieve is a Record or a Record set,
allows to retrieve a greater number of records and handle large JSON files without
memory issues. Note that no duplicates are returned and that the order of the records
returned is always ascending, rather than the order in which they were requested.
l
Retrieve by:
l
Condition: Select entities based on one or more conditions, the value of a metadata
field for example.
l
ID: Depending on the option selected under Entity to retrieve this is a Record ID,
Record Set ID, Content Item ID, Content Set ID, Job ID or Job Set ID.
IDs can be entered directly; when entering multiple IDs, put each on a new line.
Alternatively, they can be passed via variables (see "Variable task properties" on
page303), or as a JSON array, e.g. [6001,6002,6003]. A JSON array may
contain variables, e.g. [%1, 75001].
l
Conditions:
l
Add a condition: Click to add a new condition line. This adds the line to the current
condition level, by default with an AND operator.
l
Switch conditions: Click to swap two conditions on the same level, or two groups
of conditions.
l
Delete the selected condition: Click to delete the currently selected conditions in
the list.
l
Clear the rule: Click to delete all rules in the list. Note: This cannot be undone.
l
Import a rule: Click to open the Browse dialog and load a Rules file. This will load
its rules into the list.
l
Export the rule: Click to open a Save dialog and save the Rules file to disk.
Page 649

l
Rule Viewer: Displays a text-based view of the condition using operators and
parentheses.
l
Output Type group:
l
Metadata - IDs only: Select to only output minimal metadata containing the entity
IDs.
l
Metadata: Select to output IDs as well as record details in the metadata, useful for
further sorting and filtering of the metadata.
l
JSON: Select to output a JSON Record Data List (see "Output" on page648).
Commingling/Batching Tab
Commingling is a method by which Print Content Items are merged together to create mail
pieces going to each recipient. For instance, retrieving a letter, an invoice and a notice within
the same mail piece, which presumably could be added within the same envelope. Batching is
the same principle when all the Print Content Items are generated using the same Template
file. This tab is only available if the Content Item option is selected in the General tab's Entity
to retrieve drop-down. To modify any of the following options, click in the Parameters box and
then click the [...] button that appears.
l
Document contents: Defines the Document ("Mail Piece") level and how they are built.
l
Pick items based on: Use the [...] to open the "Pick Parameters" on the facing
page dialog and define how to pick which items will be placed in each document.
Content items picked using this method will be part of the same mail piece.
l
Sort items based on: Use the [...] to open the "Sort Parameters" on page600
dialog and define how Content Items are sorted within the mail piece.
l
Group contents: Define the Group level (for example, a Mail Route), or how to group
mail pieces together in groups.
l
Pick items based on: Use the [...] to open the "Pick Parameters" on the facing
page dialog and define how to pick which documents will be placed in each
Document group. groups are often used to separate mail routes, provinces, or
cities.
l
Sort items based on: Use the [...] to open the "Sort Parameters" on page600
dialog and define how documents are sorted within the group, for example by Zip
Code.
Page 650

OL Connect Proxy Tab
This tab is common to all OL Connect tasks and defines where to process the jobs sent through
these tasks. When these fields are empty, they use the defaults set in the "OL Connect
preferences" on page787.
Note
Defaults are not used unless the configuration is sent to the Workflow service.
l
OL Connect Proxy Address: Enter the machine name or IP Address where the OL
Connect Server resides.
l
Port: Enter the port to use to communicate with the OL Connect Server. Default: 9340
l
User name: Enter the user name expected by the OL Connect Server.
l
Password: Enter the password expected by the OL Connect Server for the above user
name.
Miscellaneous Tab
The Miscellaneous tab is common to all tasks.
Check the option Use as step description to display the text next to the icon of the plugin in
the Process area.
Pick Parameters
The Pick Parameters define how to pick entities retrieved from the Connect Database using the
"Retrieve Items" on page647 task and place them together in Documents or Groups. Items are
picked using either Properties or Values.
l
Name: Enter the name of the Property or Value that will be used to pick items.
l
Type: Use the drop-down to select whether the name refers to a Property or a Value.
l
Add: Click to add a new line to the list.
l
Remove: Click to remove the currently selected line in the list.
l
Move Up: Click to move the currently selected line up one position in the list.
l
Move Down: Click to move the currently selected line down one position in the list.
Page 651

l
Validate Names: Click to check the each of line in the list against the currently active
Metadata (see "Metadata" on page76). Metadata must be loaded in "The Data Selector"
on page857 or through the use of the Debugging feature.
Set Properties
The Set Properties Action task defines properties for entities saved in the OL Connect
Database (Records, Content, and Jobs). These properties are applied to the entities and can
then be used to retrieve them using the "Retrieve Items" on page647 task.
Input
The task must receive Metadata that contains appropriate entities, generally from the "Execute
Data Mapping" on page629, "Create Print Content" on page617, "Create Web Content" on
page621 or the "Create Job" on page605 tasks.
Processing
The task sets the chosen properties to all entities present in the Metadata. These properties are
added to the entities on the OL Connect Server. Note that the properties are calculated only
once, and are applied identically to all entities. If each entity should have different properties
(such as record-level properties), the Metadata should be split using the "Metadata Sequencer"
on page571 task first.
Output
The task outputs Metadata that is identical to the input Metadata. Only the entries on the OL
Connect Server side change.
Task properties
General Tab
l
Entity: Use the drop-down to select the entity type of which to set the properties. This task
does not auto-detect entities, and so the appropriate selection must be made: Record,
Record Set, Content Item, Content Set, Job
l
Properties: Add all the properties to be added
l
Name: The name of the property.
l
Value: The value to apply to the property.
Page 652

l
Add entry: Click to add another line to the Properties list.
l
Remove entry: Click to delete the currently selected line in the Properties list.
l
Move entry up: Click to move the currently selected line up in the Properties list.
l
Move entry down: Click to move the currently selected line down in the Properties list.
OL Connect Proxy Tab
This tab is common to all OL Connect tasks and defines where to process the jobs sent through
these tasks. When these fields are empty, they use the defaults set in the "OL Connect
preferences" on page787.
Note
Defaults are not used unless the configuration is sent to the Workflow service.
l
OL Connect Proxy Address: Enter the machine name or IP Address where the OL
Connect Server resides.
l
Port: Enter the port to use to communicate with the OL Connect Server. Default: 9340
l
User name: Enter the user name expected by the OL Connect Server.
l
Password: Enter the password expected by the OL Connect Server for the above user
name.
Miscellaneous Tab
The Miscellaneous tab is common to all tasks.
Check the option Use as step description to display the text next to the icon of the plugin in
the Process area.
Update Data Records
The Update Data Records action task updates records in the OL Connect Database using
values from the current Metadata or from JSON.
Each of the OLConnect Content Creation tasks can do the same, if the Update Records from
Metadata option is enabled for that task.
The Update Data Records task can be useful when data needs to be updated multiple times
Page 653

before actually generating content, for instance when Postal Address Cleansing and Sorting is
a two-pass process.
Input
The current Job File is not used by this task. In order to update values in the Connect database,
the task requires that the current Metadata contains record IDs, or that the given JSON contains
a JSON Record Data List (see: "Types of JSON in Workflow" on page93).
Processing
The records, of which the IDs are found in the source data, are updated either from the
Metadata or from JSON.
Output
The Job File is not changed by this task.
Task properties
General Tab
l
Update Source: Select the data source from which the records in the Connect database
will be updated.
l
Metadata: Select this option to use the current content of the Metadata.
l
JSON: Enter a JSON string, or a variable containing JSON. (See "Variable task
properties" on page303.) The task expects a JSON Record Data List; see: "Types
of JSON in Workflow" on page93.
OL Connect Proxy Tab
This tab is common to all OL Connect tasks and defines where to process the jobs sent through
these tasks. When these fields are empty, they use the defaults set in the "OL Connect
preferences" on page787.
Note
Defaults are not used unless the configuration is sent to the Workflow service.
Page 654

l
OL Connect Proxy Address: Enter the machine name or IP Address where the OL
Connect Server resides.
l
Port: Enter the port to use to communicate with the OL Connect Server. Default: 9340
l
User name: Enter the user name expected by the OL Connect Server.
l
Password: Enter the password expected by the OL Connect Server for the above user
name.
Miscellaneous Tab
The Miscellaneous tab is common to all tasks.
Check the option Use as step description to display the text next to the icon of the plugin in
the Process area.
Output tasks
Output tasks are exits from PlanetPress Workflow processes. They can be used to send data to
specific devices, such as printers, applications, such as email software, or locations, such as
folders. A single process can include multiple branches, each one terminated by an Output
task, and so a single process may generate output via a variety of Output tasks.
Typically, whenever a PlanetPress Workflow Output task sends output to an output device,
application or location, it considers its job finished. When it sends data to a printer, for example,
it does not wait for the document to have finished printing to consider its job done. In the same
fashion, an Email Output task is completed once PlanetPress Workflow has sent its message to
the email software, not when the email has actually been sent from the software. And in the
case of a PlanetPress Image Output task, PlanetPress Workflow considers its job done once it
has sent its request to PlanetPress Image, not once PlanetPress Image has finished
generating the actual image file.
Other tasks available in PlanetPress Workflow can also be used to generate output, such as
Digital Action, Create VDX and PrintForm Action tasks. Unlike Output tasks, Action tasks are
only considered completed once the output file has been generated. In the case of a Digital
Action Action task, for example, PlanetPress Workflow will consider the task completed only
once the image file has actually been created. This means that no other task from the same
process can be performed in the meantime. For more information on those tasks, refer to
"Action tasks" on page379.
Page 655

Send to Folder tasks, which are considered as Action and Output tasks, are documented in the
current chapter.
Available Output tasks
l "Delete" below
l End Subprocess, see: "Go Sub" on page479
l "PlanetPress Fax" on page512
l "FTP Output" on the facing page
l "Microsoft 365 Email Output" on page659
l "Microsoft 365 OneDrive Output" on page662
l "PlanetPress Image" on page514
l "Print using a Windows driver" on page669
l "Printer Queue Output" on page671
l "Secure Email Output" on page674
l "Send Email" on page677
l "Send to Folder" on page681
l "SOAP Client plugin" on page666
The SFTP Output task also appears in the Output category when it is installed. (It isn't installed
by default.)
Delete
Delete output tasks simply delete the job files they receive. They are often used after conditions
to get rid of those files that did not meet the requirements of the condition.
This task is put into effect in the following example processes:
l HTTP PDF Invoice Request
l HTTP Brochure Request
Note that Capture can only be used with PlanetPress Suite.
Input
Any data file, with optional metadata.
Page 656

Processing
The data file is either deleted directly or sent to the Windows Recycle Bin.
Task properties
General tab
l
Move to recycle bin: Select to send the deleted files to the Windows recycle bin. When
this option is not selected, files are deleted permanently.
Miscellaneous Tab
The Miscellaneous tab is common to all tasks.
Check the option Use as step description to display the text next to the icon of the plugin in
the Process area.
FTP Output
FTP Output tasks send job files to other computers using the FTP protocol. It is similar to the
Sent To Folder output task but sends to an FTP connection instead of a local drive.
The following describes the properties specific to FTP Output tasks. Note that some FTP
settings used for all FTP Output tasks are available via the PlanetPress Workflow user options
(see "FTP Output Service preferences" on page810).
Input
Any data file.
Processing
The file is sent to the FTP Server and location defined in the task properties.
Page 657

Task properties
General Tab
l
FTP Server: Enter the IP address or host name of the FTP server.
l
Port number: Set the plugin to use a specific port number.
l
Use FTP Client default port number: Use the value as specified in the
Preferences (port 21 is the default value).
l
FTP Port: Enter the specific port number to use when Use FTP Client default port
number is unchecked. Enter a value between 1 and 9999. Note: There is no
validation to ensure the port is available. It is the user's responsibility to ensure the
selected port is available and not being monitored by another application or
PlanetPress Workflow task.
l
User name: Enter an FTP server user name.
l
Password: Enter a password associated with the FTP server user name entered above.
l
Directory: Enter the directory to which the job files are to be uploaded. If you leave this
box empty, the job files are sent to the root directory of the FTP server.
l
File name: Enter the name under which the output job file will be saved. Consider using a
dynamic name, since if you use a static name every new file will overwrite the previous
one.
l
Connection mode group
l
Active: Select to prompt PlanetPress Workflow to use the active mode when
sending files to the FTP server.
l
Passive: Select to prompt PlanetPress Workflow to use the passive mode when
sending files to the FTP server.
Miscellaneous Tab
The Miscellaneous tab is common to all tasks.
Check the option Use as step description to display the text next to the icon of the plugin in
the Process area.
Page 658

Microsoft 365 Email Output
The Microsoft 365 Email Output task can send emails on behalf of any user in an
organization's Microsoft 365 accounts, without having to specify that user's credentials. This
way privacy is maintained while allowing a process to send email messages and attachments
on behalf of any user. The task communicates through HTTPS. However, the real protection
scheme (like certificates) is configured in Azure Active Directory by the IT administrators.
Note that this task doesn't merge data records with a PlanetPress Connect template, like the
"Create Email Content" on page600 task does.
This task uses the Microsoft Graph API.
For this task to function correctly, Workflow needs to be granted application permissions for
Microsoft Graph in the organization’s Azure instance.
It needs read access to the Users category (User.Read.All) so that the task can identify the
users in the organization.
In addition, to send emails on any user’s behalf, the Mail.Send permission is required.
For more information on setting application permissions for Microsoft Graph, see
https://docs.microsoft.com/en-us/graph/auth-v2-service.
Input
Any data file.
Processing
The task uses the Microsoft Graph API to access accounts in the organization (subject to that
organization's IT policies).
While an email is always sent by this task (or at least attempted to be sent), the contents of the
email and presence of attachments depends on the selected options.
Once the contents of the email and attachments are determined, the email (including any
attachments) is sent directly to the selected mail server.
Note that the Windows instance's language setting may affect the output of this plugin. For
example, a Workflow setup configured on a Windows-1252 machine will not be able to write
Japanese strings. It won't affect the contents of attachments, since they are loaded as binary
streams.
Page 659

Note
The MS Graph REST API is limited to a certain number of requests within a certain
period of time. This is called throttling. When throttling comes into play, the plugin
receives HTTP response 429. The plugin will log the error and retry, but it exits with an
error after 15 unsuccessful attempts.
Output
This task doesn't have any output other than the email that is sent to the recipient(s).
Task properties
General Tab
Nearly all of the fields on this tab are variable property fields, which means the values may
change with each job at run-time. You can use any combination of text, variables and data
selections; see "Variable task properties" on page303.
Message information
Note
When specifying multiple recipients for the To, CC and BCC fields, separate the e-mail
addresses with semi-colons (;).
l
To: Enter the email address(es) of the recipient(s).
l
Cc: Specify addresses to which a copy of the generated emails are to be sent.
l
Bcc: Specify discreet addresses (other recipients will not be able to see these addresses)
to which a copy of the generated emails are to be sent.
l
Subject: Enter the subject of the email. Note that if you use a data selection in this field,
you must be sure that the data that will be selected at run-time will not contain any
parentheses, as this would cause the task to fail. If you suspect that the data may contain
parentheses, you should use a Run Script action task (see "Run Script" on page482)
with a Strip() function to strip them out.
l
Message: Enter the content of the email message. This may be text or HTML based.
Note that since this is a variable property field, its content is parsed at run-time. If HTML
Page 660

code is entered or pasted in this box, percent (%) and slash (/) HTML characters must be
doubled, otherwise they will be disregarded.
Note
Different email clients have different support for various features, especially with
HTML emails (see HTML Email challenges in the PlanetPress Connect Online
Help). In most cases, if you want to send your email as an HTML message, your
very first line should start with <html> or <!doctype html>. It should not be any other
character.
PlanetPress Connect has a tool to design HTML email templates: the Designer. To
generate email output from a template you would use the "Create Email Content"
on page600 task.
Also note that it is currently not possible to send both an HTML and plain-text
version of your message with the Microsoft 365 Email Output task.
Attachments
Use this tab to specify what files to attach to the e-mail.
l
Attach input job file: Select to attach the current job file to the email that the task sends.
l
Rename to: Check this option to rename the job file before attaching it to the email, and
enter a name.
l
File: Select additional or more additional files to include as attachments. Enter the file
name, or use the Browse button to navigate and select the file. To add the file to the list of
files to attach, click the Add file to Attach list button (the downward pointing arrow).
l
List of files to attach: Lists the files that will be attached to the email. Selecting the
Attach output file(s) option adds these files at the top of the list. Any other file that may
have been added using the File box (above) is also listed here.
To remove a file from the list, select it, then right-click and select Remove from the list.
Connection
l
Application ID: Enter the application ID provided by Azure for this specific application.
This value is static and cannot contain variables.
Page 661

l
Application Password: Enter the client secret (key) for the Azure app. This value is static
and cannot contain variables.
l
Tenant ID: Enter the Tenant ID as specified in Azure. This value is static and cannot
contain variables.
l
User ID: This is the user's ID or email address. This value is dynamic and may include
variables.
Advanced properties
To get access to the following properties tabs, right-click the plugin in the process and select
Advanced Properties.
Miscellaneous Tab
The Miscellaneous tab is common to all tasks.
Check the option Use as step description to display the text next to the icon of the plugin in
the Process area.
Microsoft 365 OneDrive Output
Microsoft 365 OneDrive Output tasks allows to send files to any of the organization's
Microsoft 365 OneDrive accounts.
This task uses the Microsoft Graph API.
For this task to function correctly, Workflow needs to be granted application permissions for
Microsoft Graph in the organization’s Azure instance.
It needs read access to the Users category (User.Read.All) so that the task can identify the
users in the organization.
In addition, the Files.ReadWrite.All permission is required.
For more information on setting application permissions for Microsoft Graph, see
https://docs.microsoft.com/en-us/graph/auth-v2-service.
Input
Any data file.
Page 662

Processing and output
The task uses the Microsoft Graph API to access OneDrive folders in the organization (subject
to that organization's IT policies).
The file is saved in the location specified, as the file name specified.
When a communication error occurs while uploading a file to OneDrive, some temporary "~."
files may remain on the server; however, these files will eventually be cleaned up
automatically.
Note
The MS Graph REST API is limited to a certain number of requests within a certain
period of time. This is called throttling. When throttling comes into play, the plugin
receives HTTP response 429. The plugin will log the error and retry, but it exits with an
error after 15 unsuccessful attempts.
Task properties
General Tab
General
l
Folder: Enter the path of the folder to which the files are to be saved. You can use any
combination of text, variables and data selections; see "Variable task properties" on
page303.
l
File name: Enter the name of the output file generated by this task. To prevent new files
from overwriting existing ones, consider using variable names. You can use any
combination of text, variables and data selections; see "Variable task properties" on
page303.
Connection
l
Application ID: Enter the application ID provided by Azure for this specific application.
This value is static and cannot contain variables.
l
Application Password: Enter the client secret (key) for the Azure app. This value is static
and cannot contain variables.
Page 663

l
Tenant ID: Enter the Tenant ID as specified in Azure. This value is static and cannot
contain variables.
l
User ID: This is the OneDrive user's ID. This value is dynamic. You can use any
combination of text, variables and data selections; see "Variable task properties" on
page303.
Advanced properties
To get access to the following properties tabs, right-click the plugin in the process and select
Advanced Properties.
Miscellaneous Tab
The Miscellaneous tab is common to all tasks.
Check the option Use as step description to display the text next to the icon of the plugin in
the Process area.
SFTP Output
The SFTP Output task sends job files to other computers using a secured FTP protocol. It is
similar to the Send to Folder output task but sends to an FTP connection instead of a local
drive.
The "SFTP Input" on page368 and SFTP Output tasks are part of a separate installer and are
not included in the Workflow installer. The SFTP plugin installer can be downloaded from the
Resource Center, under 'Plugins' in PlanetPress Connect.
Input
Any data file.
Processing
The file is sent to the secure FTP Server and location defined in the task's properties. If the
folder in which the file should be placed doesn't exist, it will be created.
Page 664

Task properties
General Tab
l
Server Settings group
l
FTP Server: Enter the IP address or host name of the FTP server.
l
User name: Enter the name of a user account on the FTP server.
l
Password: If the account named in the User name box is password protected, enter
the password here.
l
Parse password: Checkbox to determine if the password should be parsed or
used as a literal string. This option is checked by default (parsed) for
backwards comparability with SFTPI/O plugin versions earlier than 1.3.
l
Protocol group
l
SFTP: Select if the FTP server uses SFTP (SSH).
l
FTPS: Select if the FTP server uses FTPS (SSL/TSL)
l
Port Number Group
l
Use default port: Check to use the default port used by the protocol selected
above.
l
Port number: Set to use a specific port number. Note: There is no validation to
ensure the port is available. It is the user's responsibility to ensure the selected port
is available and not being monitored by another application or another Workflow
task.
l
File Options group
l
Directory: Enter the directory to which the job files are to be uploaded. If you leave
this box empty, the job files are sent to the root directory of the FTP server.
l
File name: Enter the name under which the output job file will be saved. Consider
using a dynamic name, since if you use a static name every new file will overwrite
the previous one.
Security Tab
This tab defines the certificates used to connect to the secured FTP servers.
Page 665

l
Accept all certificates: Check this option to automatically accept the certificates returned
by the FTP server. Otherwise, in order for a connection to work, you have to establish a
connection first and then accept a certificate from the List of known servers up to the
Approved server list.
l
Approved Server list: Displays a list of servers that were approved for connection:
l
Server: The name of the server the certificate belongs to.
l
Fingerprint: The RSA fingerprint of the server.
l
Remove: Click to remove the server from the approved list.
l
List of known servers: Displays a list of servers that were connected to, whether they
are approved or not.
l
Server: The name of the server the certificate belongs to.
l
Fingerprint: The RSA fingerprint of the server.
l
Approve: Click to add the server to the list of approved servers.
l
Refresh: Click to refresh the list of known servers
Miscellaneous Tab
The Miscellaneous tab is common to all tasks.
Check the option Use as step description to display the text next to the icon of the plugin in
the Process area.
SOAP Client plugin
SOAP Client plugin tasks can be used as Input, Output and Action tasks, although their basic
function is to generate output. SOAP (Simple Object Access Protocol) is a light protocol that
defines a standard XML format used to communicate among systems across different
architectures, languages, and operating systems.
A SOAP request is an XML-based Remote Procedure Call (RPC) sent using the HTTP
transport protocol. The payload of the SOAP packet is an XML document that specifies the call
being made and the parameters being passed.
Web services, a SOAP class of applications, expose their services via the Internet in a manner
that lets other applications access them, as well as use and combine them as required.
Page 666

In order to access and successfully use Web services, client applications must know how to get
them, what operations they support, what parameters they expect, as well as what they return.
SOAP servers make this information available via WSDL (Web Service Description Language)
files.
To configure a given SOAP Client plugin task in the PlanetPress Workflow Configuration
program, you must first get its WSDL file (note that you cannot download the WSDL file over an
HTTPS connection, so you should use an HTTP connection to get the file and then switch back
to a secure connection). This lets you know which services the SOAP server provides, as well
as each service’s methods and name spaces.
If firewalls control communication between the SOAP client and the Web servers, they must be
configured so as not to block client-server communication.
In the case of "string" type data, SOAP Client plugin tasks normalize all line endings to a
single line feed character.
Timeout
By default the SoapClient plugin waits 100 seconds before returning an error if it doesn't get a
response. To change the time the Soap Client plugin should wait, a Timeout registry key can
be set in:
HKEY_LOCAL_MACHINE\SOFTWARE\WOW6432Node\Objectif
Lune\PlanetSuite\PlanetWatch\TimeoutVal (DWORD)
The value can be set to anything, in seconds. To wait indefinitely for a response, -1 can be
used. However, this could cause the process to hang if the Soap Server never responds nor
closes the connection.
Task properties
General Tab
l
WSDL address: Enter the URL address of the WSDL file, or choose a previously
selected address from the drop-down list.
Page 667

Note
The WSDL Address of a PlanetPress Workflow SOAP server is the following:
http://127.0.0.1:8080/wsdl/isoapact (assuming you are on the same machine
and did not change the default HTTP port).
l
Get: Click to get the WSDL file from the SOAP server and populate the Service box
below.
l
Service: Choose an available Web service from this drop-down list to populate the
Method box below. You may also enter the service name directly if the WSDL file cannot
be found.
l
Method: Choose an available method from this drop-down list. This populates the
Namespace box below. You may also enter the method name directly.
The following three options are only available in the Legacy SOAP Client plugin:
l
Namespace: You may choose an available namespace to prevent ambiguity between
identically named elements or attributes. You may also enter a namespace directly.
l
Resolve: Click to apply the options you chose above and to display the arguments of the
chosen method in the Arguments box below.
l
As script: Click to apply the options you chose above and to display information on the
chosen Web service in JavaScript format in a script viewer. You should use this option if
the Web service is too complex to be interpreted correctly by the SOAP Client plugin.
l
Name: Displays the name of the arguments associated with the selected method. Note
that you may also manually enter new arguments, change or delete existing ones, as well
as change their order if needed.
l
Type: Displays the argument type.
l
Value: Lets you enter fixed or variable values. To exchange variable information between
the Web service and PlanetPress Workflow, you must use job information variables %1 to
%9 or variable %c (which contains the entire job file). Note that return values (arguments
which are used to return information to the SOAP Client) are displayed in bold font.
l
Namespace: Displays the namespace of the arguments associated with the selected
method.
Page 668

l
Use returned raw SOAP packet as new data file: Check to use the complete SOAP
packet (including the passed parameters) instead of the parameters only. This option
overrides any return value set to %c in the Arguments box. You should use this option
when the SOAP Client plugin is not able to fully support the syntax of the response.
Advanced Tab
l
Domain: Enter the domain for the authentication on the SOAP server. The Domain is
optional even when authentication is used.
l
Username: Enter the user name for the authentication, if required.
l
Password: Enter the password for the above user name.
l
Allow invalid security certificate: Check to ignore SSL certificates that are invalid.
Miscellaneous Tab
The Miscellaneous tab is common to all tasks.
Check the option Use as step description to display the text next to the icon of the plugin in
the Process area.
Print using a Windows driver
Printing Using a Windows Driver Output tasks task lets you send a job to a local or network
printer, using its own drivers. The printer does not need to be a PostScript printer.
Since the printer driver itself is not necessarily PostScript, Workflow cannot optimize the print
file, so this task will always generate a larger and slower print job. However, this Output task
can work with non-PostScript printers such as HP PCL printers.
The Print Using a Windows Driver Output task requires a PlanetPress Workflow license,
otherwise this plugin will cause a watermark.
Note
This type of output task does not support PDF transparency and duo-tone features, so
you should not use it with PlanetPress Design documents that use those features.
Page 669

Input
This task can accept either a data file with a correct emulation (see "About data emulation" on
page61), which is then merged to a PlanetPress Design document, or a PDF file which is to be
printed natively.
Processing
Either the data file is merged with the document if one is selected, or the PDF File is printed
natively through the PlanetPress Printer driver (which prints the same as if one were to open
the PDF in a PDF reader and print it).
Task properties
General Tab
l
Printer queue: Select the queues to which you want to send the output. Note that this is a
variable property box, so you can use various schemes to use printer queue names that
change with each job at run-time.
l
Properties: Click to change the current printer queue properties. Note that PlanetPress
Workflow generates the job file and hands it over with the available print options to the
Windows print driver, which takes the relay for the actual printing part, so there is no way
for your PlanetPress Workflow Tool to ensure that all the settings you make will be
applied to the printed document.
l
Job name: Enter the job’s file name. By default, the variable %f (Job File Name) is used.
You may use a different variable, but you may not use a data selection. This information
may be used for the printer’s banner page.
l
Job owner name: Enter the job owner name. You may use a PlanetPress Workflow
variable.
Note
This option is not functional when natively printing PDFs (without a PlanetPress
Design document).
l
Documents: Select a specific PlanetPress Design document if you want all the jobs to be
printed with that document.
Page 670

l
Natively print PDF file: This special option can be used if your job file is a PDF.
The job will .
l
Add job information to the document: Select to prompt your PlanetPress Workflow to
add the available job information elements in the header of the file that will be sent to the
selected printer queues.
Metadata
If no metadata file is found, the from / to page settings from the job and the printer's properties
from the task configuration are used, with the job's settings overriding those of the printer where
applicable. If a Metadata file is found, it is used to indicate which pages are printed and in
which order. Any other Metadata is ignored.
Note
Known issue: If a data file with Metadata is resubmitted to such a process, the from/to
page values set by the user in the Resubmit interface are ignored.
Miscellaneous Tab
The Miscellaneous tab is common to all tasks.
Check the option Use as step description to display the text next to the icon of the plugin in
the Process area.
Printer Queue Output
The Printer Queue Output task dispatches jobs to selected PlanetPress Workflow Printer
Queues (see "PlanetPress Workflow printer queues" on page113). Note that you must have
created at least one Printer Queue in PlanetPress Workflow before you can add your first
Printer Queue Output task.
You can select multiple Printer Queues in a Printer Queue Output task and choose exactly how
your jobs will be dispatched to the selected printers.
The task can create print output as well, by merging the data file with a PlanetPress Design
document (see "PlanetPress Design documents" on page45). This requires at least one
PlanetPress Design document to be associated with a Workflow printer queue (see
"Associating PlanetPress Design documents and PlanetPress printer queues" on page121).
This also requires printer licenses, unless you have the “Optimized Output” add-on in your
Page 671

Connect license, which grants you the equivalent of PlanetPress Production in Connect
Workflow. (Even then, “printer-centric” output requires a printer license.)
For more information about printing see "About printing" on page111.
Input
Any data file.
Processing and output
If the data file is in a valid emulation (see "About data emulation" on page61) and a
PlanetPress Design document is selected, the data file and document are merged to produce a
PostScript output. The output may be an Optimized PostScript Stream or a Printer Centric
stream (data file + trigger).
If no document was selected, the job file is sent as-is to the selected Printer Queue.
Whether the queue will properly output depends on the capabilities of the queue and its target.
For example, sending a JPG job file to an FTP or Send to Folder printer queue will simply
place the file in the destination. Sending this same file to an LPR or Windows queue will
produce no output as these queues expect valid PostScript.
Task properties
General Tab
l
Queues: Select the queues to which you want to send the output (see "PlanetPress
Workflow printer queues" on page113).
l
Documents: Select None if you want the job file to be printed as is.
Select a specific PlanetPress Design document (see "PlanetPress Design documents"
on page45) if you want all the jobs to be printed with that document. To use a document
chosen at run-time for each job, enter a dynamic document name using a combination of
text, variables and data selections. To enable the dynamic document name box, click
inside it. To disable it, press Enter. Note that in the later case, you must be certain that the
documents that will be chosen at run-time will in fact be available locally or at all the
selected printer. Note that PlanetPress Workflow will not specify a given document
version number, so the latest version will be used by default. To specify a given document
version number, you can use an Add Document action task instead of a Printer Queue
Output task, and then use an Add / Remove Text Action task to add a version number in
Page 672

the document trigger (for more information, refer to the Control Versions of a Document
section of the PlanetPress Design User Guide).
Note
It is not possible to select a Connect template with this task. It is however possible
to send Print output produced by an OL Connect task to a Workflow Printer Queue
(see "PlanetPress Workflow printer queues" on page113). In the All in One task or
the Create Output task, on the Output Creation tab, select the Output Management
Through Workflow option. The Print output file returned to the Workflow process
will become the new job file. In the Printer Queue Output task, on the General tab,
under Documents, select None to send the job file to the Workflow Printer Queue
as-is. See also: "About printing" on page111.
Advanced Tab
l
Copies: Enter the number of copies to be printed outputs. Since this is a variable property
box, you may enter a fixed value or use a data selection. Note that load balancing options
have an impact on how copies are printed as well as on the total number of printed
copies.
l
Load balancing group (Options from this group are only valid if multiple Workflow printer
queues were selected.)
l
No balancing: No load balancing means that all the selected Workflow printer
queues get everything.
l
Split job: Split job means that jobs will be split according to the criteria set in the
Page delimiter group (see below) and that an equal share of the job file will be sent
to each one of the selected Workflow printer queues. For a hundred page job, for
example, if two queues were selected, each one will get 50 pages.
l
Queue balancing: Queue balancing means that jobs will be split according to the
criteria set in the Page delimiter group (see below) and that a share of the job file
corresponding to each printer’s capacity (as set in the PlanetPress Workflow Printer
Queue Options dialog box—See "Print using a Windows driver" on page669) will
be sent to each one of the selected Workflow printer queues. If two queues were
selected, the first one sending jobs to a printer that prints 500 pages a minute, and
the second one sending jobs to a smaller printer printing 50 pages a minute, the first
queue will receive roughly ten times more pages than the second one.
Page 673

l
Round robin: Round robin means that complete jobs will be sent in turn to each
one of the selected Workflow printer queues. For example, Queue_1 will get the first
job, Queue_2 will get the second job, and so forth.
l
Page delimiter group: These options are enabled when you choose Split job or Queue
balancing load balancing options. They are used to determine how each job is to be split
before being sent to the Workflow printer queues.
l
Form feed: Cuts the job file at every form feed character.
l
Lines per page: Cuts the job file after the specified number of lines.
l
Keyword: Cuts the job file after each occurrence of the specified keyword (string of
characters).
l
Custom Trigger: Enter the code of the trigger that will be sent with the data to the
selected Workflow printer queues. Note that this box is only enabled if None was selected
in the General tab.
l
Add job information to the document: Includes the current "Job Info variables" on
page717 to the job output. This option is only available if a document was selected in the
General tab.
l
Use job name as Title: Uses the Job Name set in the Workflow printer queue's General
tab, as the job's title, set as %%Title in the PostScript's job.
Miscellaneous Tab
The Miscellaneous tab is common to all tasks.
Check the option Use as step description to display the text next to the icon of the plugin in
the Process area.
Secure Email Output
The Secure Email Output task sends SMTP email messages with SSL (2.0, 2.3 or 3.0) or TLS
(1.0, 1.1 or 1.2) encryption.
Note that this plugin cannot be used on a Windows instance that uses a multi-byte language
(e.g. Japanese, Chinese). The workaround is to either use a different Windows language or use
the standard Email Input/Output plugins.
Also note that this task doesn't merge data records with a PlanetPress Connect template, like
the "Create Email Content" on page600 task does.
Page 674

Input
Any data file.
Processing
While an email is always sent by this task (or at least attempted to be sent), the contents of the
email and presence of attachments depends on the selected options.
Once the contents of the email and attachments are determined, the email (including any
attachments) is sent directly to the selected mail server.
Output
This task doesn't have any output other than the email that is sent to the recipient(s).
Task properties
Recipients Tab
The fields on this tab are variable property fields, which means the values may change with
each job at run-time. You can use any combination of text, variables and data selections; see
"Variable task properties" on page303.
Note
When specifying multiple recipients for the To, CC and BCC fields, separate the e-mail
addresses with semi-colons (;).
l
To: Enter the email address(es) of the recipient(s).
l
Cc: Specify addresses to which a copy of the generated emails are to be sent.
l
Bcc: Specify discreet addresses (other recipients will not be able to see these addresses)
to which a copy of the generated emails are to be sent.
l
Subject: Enter the subject of the email. Note that if you use a data selection in this field,
you must be sure that the data that will be selected at run-time will not contain any
parentheses, as this would cause the task to fail. If you suspect that the data may contain
parentheses, you should use a Run Script action task (see "Run Script" on page482)
with a Strip() function to strip them out.
Page 675

l
Message: Enter the content of the email message. This may be text or HTML based.
Note that since this is a variable property field, its content is parsed at run-time. If HTML
code is entered or pasted in this box, percent (%) and slash (/) HTML characters must be
doubled, otherwise they will be disregarded.
Note
Different email clients have different support for various features, especially with
HTML emails (see HTML Email challenges in the PlanetPress Connect Online
Help). In most cases, if you want to send your email as an HTML message, your
very first line should start with <html> or <!doctype html>. It should not be any other
character.
PlanetPress Connect has a tool to design HTML email templates: the Designer. To
generate email output from a template you would use the "Create Email Content"
on page600 task.
Also note that it is currently not possible to send both an HTML and plain-text
version of your message.
Attachments Tab
Use this tab to specify what files to attach to the e-mail.
l
Attach input job file: Select to attach the current job file to the email that the task sends.
l
Rename to: Check this option to rename the job file before attaching it to the email, and
enter a name. You may use text, variables and data selections (see "Variable task
properties" on page303).
l
File: Select additional or more additional files to include as attachments. You may enter
the file name directly and use text, variables and data selections (see "Variable task
properties" on page303). You may also use the Browse button to navigate and select the
file. To add the file to the list of files to attach, click the Add file to Attach list button (the
downward pointing arrow).
l
List of files to attach: Lists the files that will be attached to the email. Selecting the
Attach output file(s) option adds these files at the top of the list. Any other file that may
have been added using the File box (above) is also listed here.
To remove a file from the list, select it, then right-click and select Remove from the list.
Page 676

Login Tab
The fields on this tab are variable property fields, which means the values may change with
each job at run-time. You can use any combination of text, variables and data selections; see
"Variable task properties" on page303.
l
Enter the sender's name, organization (optional), and email address, and the reply
address (optional). This information will be visible to the recipient of the email.
l
Enter the address of the outgoing mail server (SMTP), and the port and encryption
method (SSL 2.0, 2.3, 3.0 or TLS 1.0, 1.1, 1.2) that will be used. Note that hovering the
mouse over the Port field will show a list of the most common ports used.
The timeout value specifies (in seconds) after how long the plugin drops the connection
and fails with a "Read time out" error if the server didn't reply anything. Defaults to 30
seconds.
l
Enter the account credentials: the account name on the mail server, and the password
required to unlock the selected account.
l
Select the level of priority and sensitivity. The default value is Normal.
Miscellaneous Tab
The Miscellaneous tab is common to all tasks.
Check the option Use as step description to display the text next to the icon of the plugin in
the Process area.
Send Email
The Send Email output task sends the data files it receives via email.
Note
In some combinations of Microsoft Outlook and Windows versions, it is not possible for
Outlook to be opened while PlanetPress Workflow is running, so emails are not sent out
automatically. To correct this, make sure to log on to Windows on the PlanetPress
Workflow server using the same login that PlanetPress Workflow is using, and open
Outlook before starting the PlanetPress Workflow services. You could also use a startup
process to start Outlook before the rest of the services.
Page 677

Example
This task is put into effect in the following example process:
l Capture Post Processing Workflow
Note that Capture is only available to PlanetPress Suite users.
Input
Any data file.
Processing
While an email is always sent by this task (or at least attempted to be sent), the contents of the
file and presence of attachments depends on the selected option. Refer to the property
descriptions below to know what each option does.
Once the contents of the file and attachments are determined, the email (including attachments)
is either sent directly to the selected SMTP server, or is deposited in the "Outbox" folder of the
local Microsoft Outlook account.
Task properties
Recipients Tab
l
To: Enter the email address(es) of the recipient(s). Remember this is a variable property
box and you can therefore use various schemes to use email addresses that change with
each job at run-time. You can use any combination of text, variables and data selections;
see "Variable task properties" on page303.
l
Cc: Specify addresses to which a copy of the generated emails are to be sent.
l
Bcc: Specify discreet addresses (other recipients will not be able to see these addresses)
to which a copy of the generated emails are to be sent.
l
Subject: Enter the subject of the emails generated by PlanetPress Image for this task.
Note that if you use a data selection in this box, you must be sure that the data that will be
selected at run-time will not contain any parentheses, as this would cause the task to fail.
If you suspect that the data may contain parentheses, you should use a Run Script action
task (see "Run Script" on page482) with a Strip() function to strip them out.
Page 678

l
Message: Enter the content of the email message. This is a variable property box, so the
text may be personalized using variables and data selections. Note that since this is a
variable property box, its content is parsed at run-time. If HTML code is entered or pasted
in this box, percent (%) and backslash (/) HTML characters must be doubled otherwise
they will be disregarded.
Note
Different email clients have different support for various features, especially with HTML
emails. In most cases, if you want to send your email as an HTML message, your very
first line should start with <html> or <!doctype html>. It should not be any other character).
Also note that it is not currently possible to send both an HTML and plain-text version of
your message.
Attachments Tab
Use this tab to add the files received by this task (plus any other file that you may choose to
attach) to the emails sent by PlanetPress.
l
Attach input job files: Select to attach the file received by this task to the emails it will
generate. If this option is not selected, the recipients will not receive any data file.
l
File: Select additional files to include as attachments. You may enter the file name directly
and use text, variables and data selections. You may also use the Browse button to
navigate and select the file. To add the file to the list displayed in the Attach box, you must
the click the downward pointing arrow button.
l
Attach: Lists the files that will be attached to the messages sent from PlanetPress
Workflow for this task. Selecting the Attach output file(s) option adds these files at the top
of the list. Any other file that may have been added using the File box (above) is also
listed here.
l
Zip mode: Select how you want the files checked in the Attach box to be zipped. Select
Zip individually to have PlanetPress Workflow create a zip file for each file. Select
Archive and Zip if you prefer to have one zip file that contains all the attached files.
l
Zip file name: Enter the name of the one zip file that will be created if the Archive and Zip
option was selected in the Attach box (this box is otherwise not enabled).
Page 679

l
Password protect Zip file(s): Select to force recipients to use a password to open the
attached zip files. Note that users will be required to use this password open each one of
the generated zip files.
l
Password: Enter the zip file password.
Login Tab
l
Use Microsoft Outlook: Select to use Microsoft Outlook to send emails (and
attachments). The host computer must be running Outlook, and PlanetPress must have
access to Outlook. Emails generated by PlanetPress Workflow appear in the outbox
before being sent by Outlook whenever it is set to send emails.
l
Use SMTP mail: Select to use Simple Mail Transfer Protocol (SMTP) to send the emails
(and attachments). To use SMTP you must enter information in the Name, Email Address
and Outgoing Mail (SMTP) boxes below.
l
Name: Enter the sender’s name that will be used in emails sent by PlanetPress Workflow
for this task.
l
Organization: Enter the organization name that will be used in emails sent by
PlanetPress Workflow for this task (this is optional).
l
Email address: Enter the sender’s email address that will be used in emails sent by
PlanetPress Workflow for this task.
l
Reply address: Enter the reply address that will be used in emails sent by PlanetPress
Workflow for this task (this is optional).
l
Outgoing mail (SMTP): Enter the IP address of the mail server PlanetPress Workflow is
to use to send emails via SMTP.
l
Port: Specify the outgoing SMTP Port if it is different from the default port (25).
l
Server requires authentication: Select if the outgoing server mentioned above requires
authentication. To use authentication you must enter information in the Account name and
Password boxes below.
l
Account name: Enter the name of the account that PlanetPress Workflow is to use to
send emails via the mail server.
l
Password: Enter the password associated with the account name entered above.
Miscellaneous Tab
The Miscellaneous tab is common to all tasks.
Page 680

Check the option Use as step description to display the text next to the icon of the plugin in
the Process area.
Send to Folder
Send to Folder Output tasks send the files they receive to a local folder. They perform the
same function as Send to Folder Action tasks, with the only difference being that in this case,
PlanetPress Workflow will not wait for the task to be completed before going on to the next task
in the configuration.
Input
Any data file.
Processing and output
The file is saved in the location specified, as the file name specified.
Task properties
General Tab
l
Folder: Enter the path of the folder to which the files are to be saved.
l
File name: Enter the name of the output files generated by this task. To prevent each new
file from overwriting the previous one, you should use variable names. You can use any
combination of text, variables and data selections; see "Variable task properties" on
page303.
l
Concatenate files: If this option is selected, when PlanetPress Workflow tries to save the
job file under an existing name, it appends the content of the new job file to that of the
existing file, instead of overwriting it.
In the case of a PDF, this will act like the "Merge PDF Files" on page341 input task,
merging the PDF logically.
l
Separator string: This option is used to add a separator string between the content of
each file when the Concatenate files option is selected.
Miscellaneous Tab
The Miscellaneous tab is common to all tasks.
Page 681

Check the option Use as step description to display the text next to the icon of the plugin in
the Process area.
Document Management tasks
A Document Management task is a connector to a Document Services, ECM or Document
Management system outside of PlanetPress Workflow itself.
A few Document Management tasks are included with the installation of Workflow:
l "Input from SharePoint" on page703
l "Output to SharePoint" on page706
The following plugins are not initially installed with Workflow but they are available for
download on the Resource Center (help.objectiflune.com). Once installed, they appear in the
Document Management category.
l "Connection tab" on page684
l "Connection tab" on page689
l "Advanced properties" on page699
l "Advanced properties" on page702
l Therefore2Way (The manual for this plug-in is provided with the plugin's installer and is
not available under the Workflow Help.)
DocuWare
DocuWare is an Enterprise Content Management (ECM) system that is widely used in industry.
It provides mechanism for storing, versioning and sharing files across an organization. See
https://start.docuware.com/ for more details about DocuWare.
The Workflow DocuWare solution is based on two plugins:
l The "Connection tab" on page684 plugin for downloading files from DocuWare server.
l The "Connection tab" on page689 plugin for uploading files to DocuWare server.
These plugins are not initially installed with Workflow. available for download on the Resource
Center (help.objectiflune.com). After downloading the .PPK files, you will then need to import
them into Workflow yourself.
See . See Importing a plugin.
Page 682

Once installed, the DocuWare plugins will appear in the Document Management category in
the Plug-In Bar.
Note
To be able to use this plugin you need a working DocuWare user account with
appropriate permissions.
Plugin legal notices and acknowledgments
Copyright © 2020 Objectif Lune Incorporated. All rights reserved.
DocuWare Download
The DocuWare Download plugin Downloads files of any file type from a dedicated DocuWare
CRM system.
Installation
This plugin is not installed with Workflow, but it is available for free download from the
Resource Center (help.objectiflune.com).
After downloading the .PPK file, you will then need to import it into Workflow yourself. See .
See Importing a plugin.
Once imported, the DocuWare Download plugin will appear in the Uncategorized category
within the Plug-In Bar.
To be able to use this plugin you need a working DocuWare installation and user account with
appropriate permissions.
Input
The input of this plugin can be a file of any type.
Processing
After establishing a connection with the DocuWare system, the plugin will try to download the
specified file from the selected File Cabinet. The plugin won't modify the downloading file in
Page 683
any way.
If any issue is detected during a file download, the log messages and the related file and its
index values will be stored.
Warning
The plugin is not designed to be run in multi-threaded, multi-process or auto-replicate
environments.
It has not been designed for parallellization in regards to internal resource usage, file and
data access, or logged-on users.
Output
The output of this task - the Job File - is either the downloaded file, or the document index data
in XML or JSON format.
In the latter case, the JSON/XML file includes the path to the file on the DocuWare Server. The
response that the plugin gets from the DocuWare Server is then stored in a variable (if
specified).
Task properties
Connection tab
The Connection tab fields set the connection parameters. You can use static text and/or
Workflow variables, data and lookup functions.
Right-clicking a field opens the contextual menu that allows to add variables, data and lookup
functions (see "Data selections" on page55), where available.
DocuWare Server
Enter the DocuWare Host address. For example https://mycompany.docuware.cloud
Organization
Enter registered Organization name. For example MyCompany
Page 684

Platform
Enter the DocuWare platform. For example docuware/platform
Username
Enter the DocuWare login Username.
Password
Enter the password associated with the selected DocuWare login Username.
Use the password Hide/Show button to either display or obscure the password.
Clicking this option will display the password.
Clicking this option will obscure the displayed password.
Note
When the password is set via a variable, it is important to know that the password might
be visible. It is the user's responsibility to protect the passwords in such cases.
Test Connection
This button tests the connection details entered in the Connections tab. If a successful
connection is made, then Connection Success will appear as the current status.
When a successful connection is made, the Cabinet and Index data for this login will be
downloaded and stored locally. This allows configuring the Docuware Download plugin in
Workflow configurations offline as well as online, without requiring a constant live connection.
As different users can have different permissions (such as access to different Cabinets) this
information is tied to both the host and username. If either the user or server is changed, then a
new Test Connection will be required to re-populate the Cabinets and fields for that new
connection.
Once a Test Connection has been established and the cabinet and file information obtained,
the plugin will open upon the Download tab when the plugin is next opened.
If the Test Connection fails, information about the reasons for failure will be displayed in the
status area, if the plugin can determine the reasons for the failure.
Page 685

Download tab
The Download tab provides the controls for defining the file to be Downloaded, included
related index values. The plugin window is expandable, which helps to display all the
information at once when field names are quite long.
Note
You can use static text and/or Workflow variables, data and lookup functions in all of the
fields on this tab. Right-clicking in the field opens the contextual menu that allows adding
variables, data and lookup functions (see "Data selections" on page55).
l
Download section.
In order to download a file the plugin needs to know from which File Cabinet it must be
downloaded.
l
File Cabinet: If the Test Connection was run successfully, the plugin will have a list
of available File Cabinets, extracted from the DocuWare server. Select a File
Cabinet from the drop-down list .
Alternatively, you can enter the File Cabinet entry directly.
If the File Cabinet specified in the text box does not exist at runtime, the plugin will
replace it with the first File Cabinet name on the previously extracted Cabinet list.
The File Cabinet entry is case-sensitive.
l
Retrieve By ID / Retrieve By Search selection:Choose between these two document
selection options.
Depending upon the selection made, one of the two options will become available:
l
ID section becomes active if Retrieve By ID was chosen.
Enter the Document ID directly in the Document ID entry box.
l
Search section becomes active if Retrieve By Search was chosen.
It will download a document from the DocuWare server, based upon the following
criteria:
l
Field. Enter the Field to search on.
This can be entered directly as static text, or you could use the Field picker (
) to open a drop-down list that is populated with all the available fields,
Page 686

and then select the desired field from there.
Note
The drop-down list display can be customized by entering a search
string in the entry field atop the Field Picker box. This restricts the listed
fields to just those containing the search string.
l
Value. Add the value to apply.
You can add or remove search criteria using the following options:
You can populate the table with all the available Index Field options at any
time by selecting the Add missing fields ( )button. If selected initially this
will add all the available fields to the table. If selected after some fields had
already been added via the field picker button ( ), it will add any missing
fields to the end of the Index data table.
You can Add ( ) or Remove ( ) individual entries, as well as move them up
( ) or down ( )within the table.
At any point you can verify the accuracy of the selected Index options by
selecting the Validate ( )button. Index entries that are duplicated appear in
orange text, and index entries that do not match available options appear in
red.
Note
If more than one document is found based upon the selected search criteria,
the download will fail.
l
Response section.
Select which result you wish stored, and which Workflow variable is to be used to store
the result.
Page 687

l
Store file name in variable: Stores the name of the downloaded file in a variable.
l
Store response in variable: Stores the success/failure response in a variable.
l
Save document index data to Job as XML/JSON: Outputs the document index
data to the Job File as XML or JSON (according to the selected option) and stores
the status information in a variable. The downloaded document itself is stored in the
Connect File Store. The XML/JSON output file includes a URL to the document so
that it can be downloaded separately.
In the Response variable field you can enter the Workflow variable in which the file
name or status information should be stored. (Right-click and select Variables > Local
variables > yourvariable.)
This is optional. If the variable exists, it will be used.
The DocuWare plugin searches for the variable by name and sets the selected response
into the variable.
So using dwresponse as the variable name would mean that DocuWare Download
searches for the local variable of that name.
Plugin legal notices and acknowledgments
Copyright © 2020 Objectif Lune Incorporated. All rights reserved.
DocuWare Upload
The DocuWare Upload plugin uploads a single file of any file type to a dedicated DocuWare
CRM system with related index information.
DocuWare is organized in so called "File Cabinets", where each cabinet can have its own,
specific set of index fields. This plugin allows defining of the target File Cabinet and respective
index values.
Installation
This plugin is not installed with Workflow, but it is available for free download from the
Resource Center (help.objectiflune.com).
After downloading the .PPK file, you will then need to import it into Workflow yourself. See .
See Importing a plugin.
Once imported, the DocuWare Upload plugin will appear in the Document Management
category within the Plug-In Bar.
Page 688

To be able to use this plugin you need a working DocuWare installation and user account with
appropriate permissions.
Input
The input of this plugin can be a file of any type.
Processing
After establishing a connection with the DocuWare system, the plugin will try to upload the
specified file (either the Job File, or an external file) with the given index values to the selected
File Cabinet. The plugin won't modify the uploading file in any way.
If any issue is detected during a file upload, the log messages and the related file and its index
values will be stored.
The Docuware Upload plugin is designed to work offline as well as online. Once a Test
Connection has been established, the Cabinet and Index data will be downloaded and stored
locally. This allows authoring of Workflow configurations without requiring a constant live
connection.
Warning
The plugin is not designed to be run in multi-threaded, multi-process or auto-replicate
environments.
It has not been designed for parallellization in regards to internal resource usage, file and
data access, or logged-on users.
Output
The output of this task is the unchanged Job File.
Task properties
Connection tab
The Connection tab fields set the connection parameters. You can use static text and/or
Workflow variables, data and lookup functions.
Page 689

Right-clicking a field opens the contextual menu that allows to add variables, data and lookup
functions (see "Data selections" on page55), where available.
DocuWare Server
Enter the DocuWare Host address. For example https://mycompany.docuware.cloud
Organization
Enter registered Organization name. For example MyCompany
Platform
Enter the DocuWare platform. For example docuware/platform
Username
Enter the DocuWare login Username.
Password
Enter the password associated with the selected DocuWare login Username.
Use the password Hide/Show button to either display or obscure the password.
Clicking this option will display the password.
Clicking this option will obscure the displayed password.
Note
When the password is set via a variable, it is important to know that the password might
be visible. It is the user's responsibility to protect the passwords in such cases.
Test Connection
This button tests the connection details entered in the Connections tab. If a successful
connection is made, then Connection Success will appear as the current status.
When a successful connection is made a listing of all the available cabinets and fields for that
login will be downloaded and stored locally, for use in the Upload tab. Once a connection has
Page 690

been established and the cabinet and file information obtained, the plugin will open upon the
Upload tab when next plugin is next opened.
As different users can have different permissions (such as access to different cabinets) this
information is tied to both the host and username. If either the user or server is changed, then a
new Test Connection will be required to re-populate the cabinets and fields for that new
connection.
If the Test Connection fails, information about the reasons for failure will be displayed in the
status area, if the plugin can determine the reasons for the failure.
Upload tab
The Upload tab provides the controls for defining the file to be uploaded, included related
index values. The plugin window is expandable, which helps to display all the information at
once when field names are quite long.
File to upload
This frame holds all the elements on the file which is to be uploaded to DocuWare.
The plugin can upload either the incoming Job file, or a file from the file system (External file).
Select either:
1.
Job file: Select this option to upload the current Workflow Job file (the equivalent of using
%F).
2.
External file: Select this option to upload a file from the file system. Selecting this option
activates the file selection input field.
To select a file click the Browse button ( ) to browse for a file, or right-click within the
input field to open the context menu which allows the selection of variables, data and
lookup functions (see "Data selections" on page55). Note that the plugin will not verify
the validity of the file name, if it were not browsed for.
If no upload file has been specified, DocuWare will take the name of the uploaded file as
the document name. If the Workflow Job File is to be uploaded, it is highly recommended
renaming the file, as otherwise the Workflow temporary file name will become the
document name.
Page 691

l
File type: Enter the type of file, from the list contained in the drop down box. Select Auto-
detect if unsure of the file type, and the plugin will then set the content-type based upon
the file extension.
The File type entry is directly editable so your can enter your own file type, should it be
missing from the list.
Destination
In order to upload a file the plugin needs to know to which File Cabinet it must be directed to.
The details for this are all contained in this Destination frame.
l
File Cabinet: You can select a File Cabinet from the drop-down list if the Test Connection
was run successfully. The plugin will have a list of available File Cabinets, extracted from
the DocuWare server.
Alternatively, you can enter the File Cabinet entry directly. You may also use variables,
data and lookup functions. Right-clicking within the field opens the contextual menu. See
"Data selections" on page55, to assist with this.
If the File Cabinet specified in the text box does not exist at run time, the plugin will
replace it with the first File Cabinet name on the previously extracted Cabinet list.
The File Cabinet entry is case-sensitive.
Note
Each cabinet has a default document name, which is configured in the DocuWare
preferences.
The current document name will be highlighted in the read only Document name
field screen entry, whenever a new Cabinet is selected.
l
Create a new document / Update existing document selection:Choose between these
two options.
Each does as the name suggests.
l
Create a new document will load the document as a new document to the
DocuWare server.
This document will be named based upon the document name field (as seen
Page 692

highlighted in the Document name field screen entry).
l
Update existing document will add to an existing document of the same name on
the DocuWare server, based upon the following criteria:
l
Search Field. Enter the Field to search on.
This can be entered directly as static text, or you could use the Field picker (
) to launch a Field selection pick list that is populated with all the available
fields, and them select the desired field from there.
Note
The pick list display can be customized by entering a search string in
the entry field atop the Field Picker box. This restricts the listed fields to
just those containing the search string.
l
Value. Add the value to apply.
You can use static text and/or Workflow variables, data and lookup functions.
Right-clicking in the field opens the contextual menu that allows adding
variables, data and lookup functions (see "Data selections" on page55).
Note
If more than one document is found based upon the selected search criteria,
the update will fail.
Index Data
Select whatever Index fields you want to add via this index table.
You can populate the table with all the available Index Field options at any time by
selecting the Add missing fields ( )button. If selected initially this will add all the
available fields to the table. If selected after some fields had already been added via
the field picker button ( ), it will add any missing fields to the end of the Index
data table.
You can Add (
Page 693

) or Remove ( ) individual entries, as well as move them up ( ) or down (
)within the table.
At any point you can verify the accuracy of the selected Index options by selecting
the Validate ( )button. Index entries that are duplicated appear in orange text, and
index entries that do not match available options appear in red.
Note
The Document name field entry will appear in italics in the table.
All index values must be entered in a unified format. This means as follows:
l
Strings: String values will be uploaded to Docuware "as-is", without modifications.
Strings are Unicode-aware, so that non-ASCII characters can be entered as well, like
Chinese, Japanese, etc..
l
Numeric values: Numeric values must be entered using only digits 0-9, a preceding - or
+ sign and the dot as decimal separator. Any other characters are prohibited and using
them will lead to an error. The plugin will convert the value internally to match the
respective numerical format as defined inside DocuWare.
l
Date values Any date values must be entered in unified UTC format. Generally allowed
formats are:
l yyyy-mm-dd
l yyyy-mm-dd HH:MM:SS
l
Yes/No, True/False, 0/1 values: Such values may be entered as either "Yes", "1", "True"
or "No", "0", "False". Any other value will raise an error.
Also note that index names are case-sensitive.
Note
Page 694

Fields with empty values will not be saved when the OKbutton is pressed.
Response
Specify an optional Workflow variable that is used to store the result.
The DocuWare plugin searches for the variable by name and sets the JSON response into the
variable.
So using dwresponse as the variable name would mean that DocuWare Upload searches for
the local variable of that name.
Plugin legal notices and acknowledgments
Copyright © 2020 Objectif Lune Incorporated. All rights reserved.
M-Files
M-Files is an Enterprise Content Management (ECM) system that is widely used in industry. It
provides a metadata driven mechanism for storing, versioning and sharing files across an
organization. See https://www.m-files.com for more detail about M-Files.
The Workflow M-Files solution is based on two plugins:
l The "Advanced properties" on page699 plugin for downloading files from an M-Files
server.
l The "Advanced properties" on page702 plugin for uploading files to an M-Files server.
These plugins are not initially installed with Workflow. available for download on the Resource
Center (help.objectiflune.com). After downloading the .PPK files, you will then need to import
them into Workflow yourself.
See . See Importing a plugin.
Once installed, the M-Files plugins will appear in the Document Management category in the
Plug-In Bar.
Page 695

Note
To be able to use this plugin you need a working M-Files installation and a user account
with appropriate permissions.
Plugin legal notices and acknowledgments
Copyright © 2019 Objectif Lune Incorporated. All rights reserved.
M-Files Download
The M-Files Upload plugin downloads a single file from an M-Files system (see "M-Files" on
the previous page).
This Action plugin is not initially installed with Workflow. It is available for download on the
Resource Center (help.objectiflune.com).
After downloading the .PPK file, you have to import it into Workflow;see see Importing a plugin.
Once installed, the plugin will appear in the Document Management category in the Plug-In
Bar.
To be able to use this plugin you need a working M-Files installation and a user account with
appropriate permissions.
Input
The input of this plugin can be any file, since it isn't used by the plugin.
Processing
The M-Files Download plugin starts by sending a login request to the M-Files Server. Once the
connection is established, it tries to download a copy of the specified file from the Vault that it is
connected to.
If the search for files results in multiple files being found, then only the first file is downloaded.
The downloaded file is not removed from the M-Files Server.
The plugin saves either the file name or the response that it gets from the M-Files Server in a
specified variable.
Page 696

Output
The output of this task - the Job File - is either the downloaded file, or the document index data
in XML or JSON format. In the latter case, the JSON/XML file includes a path to the file so it can
be downloaded separately. The response that the plugin gets from the M-Files Server is then
stored in a variable (if specified).
Task properties
All of the task's General properties are dynamic. This means that you can use any combination
of text, variables and data selections of which the value will be determined whenever the
process runs (see Variable task properties).
Connection Tab
The plugin needs your M-Files Server's credentials and a Vault name in order to start
communicating with the M-Files erver.
l
M-Files Server: Enter the address of the M-Files Server (e.g.
https://mycloud.sample.com/m-files).
l
Vault:Enter the name of the desired Vault. This is required.
l
Username, Password:Enter the user name and password that the plugin can use to
send a login request to the M-Files Server.
l
Test Connection: Click this button to establish a connection with the M-Files Server and
retrieve the Document Classes of the selected Vault. This information is used on the
Download tab.
Download Tab
l
Source:
l
Class: Document Classes are defined (per Vault) on the M-Files server. Select the
Class of the document to download from the drop-down list.
l Select whether to retrieve a document by ID or to search for a document by property.
l
Retrieve by ID:
l
Document ID:Specify the Document ID.
l
Version (optional):Specify the version of the document (at the root level
of the Vault). If the version is not given, the latest version of the
document will be retrieved.
Page 697

l
FileID (optional):If the file ID is not given, the first file - the root document
- will be retrieved.
l
Retrieve by search: This section allows the retrieval of files by searching for
specific properties (Definition entries). Enter the properties under Index data.
l
Field:The property to search for. Enter a property, or click the button
between the Field and Value columns to select one of the properties
defined for this particular Document Class in the Metadata Structure of
the Vault on the M-Files server.
l
Value:The value to search for.
Use the Index data buttons to:
l
, Add and removeproperties.
l
, Change the order of the properties by moving them up or down.
This is for convenience only; to the M-Files Server, this order is not
important.
l
Validate properties and check for duplicates. Any properties that
have already been defined higher up in the list are displayed in orange.
Any properties that are not defined in the Metadata Structure for the
selected Document Class are displayed in red.
Note that values arenotvalidated.
l
Add missing properties. Any properties that are defined in the
Metadata Structure for the selected Document Class, but not specified in
the Index data, are added to the Index data.
l
Response: Select whether to store the file name, response or document index
data that the plugin gets from the M-Files server in a variable, and specify the name
of the variable to use.
l
Response: Select which result you wish stored, and which Workflow variable is to
be used to store the result.
l
Store file name in variable: Stores the name of the downloaded file in a
variable.
l
Store response in variable: Stores the success/failure response in a
variable.
Page 698

l
Save document index data to Job as XML/JSON: Outputs the document
index data to the Job File as XML or JSON (according to the selected
option)andstores the status information in a variable (if it exists). The
downloaded document itself is stored in the Connect File Store. The
XML/JSON output file includes a URL to the document so that it can be
downloaded separately.
In the Response variable field you can enter the Workflow variable in which the file
name or status information should be stored. (Right-click and select Variables >
Local variables > yourvariable.)
This is optional. If the variable exists, it will be used.
The M-Files plugin searches for the variable by name and sets the selected
response into the variable.
So using var_response as the variable name would mean that M-Files Download
searches for the local variable of that name.
Advanced properties
To get access to the following properties tabs, right-click the plugin in the process and select
Advanced Properties.
Miscellaneous Tab
The Miscellaneous tab is common to all tasks.
Check the option Use as step description to display the text next to the icon of the plugin in
the Process area.
M-Files Upload
The M-Files Upload plugin uploads a single file to an M-Files system (see "M-Files" on
page695).
This Action plugin is not initially installed with Workflow. It is available for download on the
(help.objectiflune.com).
After downloading the .PPK file, you have to import it into Workflow; see Importing a plugin.
Once installed, the plugin will appear in the Document Management category in the Plug-In
Bar.
Page 699

Note
To be able to use this plugin you need a working M-Files installation and a user account
with appropriate permissions.
The M-Files Upload plugin is designed to be configured offline as well as online. Once a Test
Connection has been established, the Vaults and properties data will be downloaded and
stored locally. This allows authoring of Workflow configurations without requiring a constant
live connection.
Input
The input of this plugin can be any file.
Processing
The M-Files Upload plugin starts by sending a login request to the M-Files Server. Once the
connection is established, it tries to upload the specified file to the M-Files Server, either as a
new document or as the new version of an existing document. The plugin saves the
(JSON)response that it gets from the M-Files Server in the specified variable.
Output
The output of this plugin is the unchanged Job File.
Task properties
All of the task's General properties are dynamic. This means that you can use any combination
of text, variables and data selections. The value of variables and data selections will be
determined whenever the process runs (see Variable task properties).
Connection Tab
The plugin needs your M-Files Server's credentials and a Vault name in order to start
communicating with the M-Files Server.
l
M-Files Server: Enter the address of the M-Files Server (e.g.
https://mycloud.sample.com/m-files).
l
Vault:Enter the name of the desired Vault. This is required. The uploaded file will be
stored in this Vault.
Page 700

l
Username, Password:Enter the user name and password that the plugin can use to
send a login request to the M-Files Server. The user should have the appropriate rights.
l
Test Connection: Click this button to establish a connection with the M-Files Server and
retrieve the Document Classes of the selected Vault. This information is used on the
Upload tab.
Upload Tab
l
File to upload:
l
Job file:Click this option to upload the current Job File (see "Job file" on page53).
l
External file: Click this option to upload an external file. Specify a full file name.
l
File type: Select the file type of the file to upload. The default is Auto-detect, in
which case the file extension is used to determine the file type.
l
Destination:
l
Class: Document Classes are defined (per Vault) on the M-Files server. Select the
desired Class from the drop-down list.
l Select whether to create a new document or update an existing one.
l
Create new document: In Create mode, a new document with a single file is
created at the root level of the Vault.
l
Update existing document: In this mode, the file is added as the new version
of an existing document (at the root level of the Vault) and its properties may
be changed. To find the existing document, the plugin needs the following
data:
l
Search Field: Select a property of the existing document. Properties are
defined in the Metadata Structure of the respective Vault on the M-Files
server.
l
Value to be searched: Enter the value of the given property. Note that
this should uniquely identify the document. When multiple documents
are found, this will result in an error.
l
Index data: Specify properties that must be set in M-Files as metadata for the uploaded
file. Any existing values will be replaced with the given value.
l
Field:Enter a property, or click the button between the Field and Value columns to
select one of the properties defined for this particular Document Class in the
Page 701

Metadata Structure of the Vault on the M-Files server.
l
Value: The (new) value of the property.
Note
The plugin will fail if a required property is missing from the Index data, or if the
Index data contains a property that does not exist for the chosen Class.
Use the Index data buttons to:
l
Add and remove properties.
l
Change the order of the properties by moving them up or down. This is for
convenience only; to the M-Files Server, this order is not important.
l
Validate properties and check for duplicates. Any properties that have already
been defined higher up in the list are displayed in orange. Any properties that are
not defined in the Metadata Structure for the selected Document Class are
displayed in red.
Note that values are not validated.
l
Add missing properties. Any properties that are defined in the Metadata Structure
for the selected Document Class, but not specified in the Index data, are added to
the Index data.
l
Response:
l
Store response in a variable (optional):Specify a variable if you want the plugin to
store the JSON response that it gets from the M-Files server.
Advanced properties
To get access to the following properties tabs, right-click the plugin in the process and select
Advanced Properties.
Miscellaneous Tab
The Miscellaneous tab is common to all tasks.
Check the option Use as step description to display the text next to the icon of the plugin in
the Process area.
Page 702

Input from SharePoint
The Input from SharePoint task can be used to retrieve files from a SharePoint server on your
network, filtering on your template fields and creating Metadata to use in your process.
When the Input from SharePoint task runs, it first lists all of the files to download then runs the
process once for each file in the list. If any new files are added during the process, they will not
be touched until the next time the process is scheduled.
This task works with many of the available SharePoint servers:
l Microsoft SharePoint 2007
l Microsoft SharePoint 2010
l Windows SharePoint Services 3.0 SP2
l SharePoint Foundation 2010
l SharePoint 2013
It may work but has not been certified with other SharePoint server versions.
Licensing
This plugin requires the OL Connect Workflow Imaging license.
Workflow Imaging is an add-on license bundle for OL Connect Workflow that includes the
Image and Fax plugins; see "About PlanetPress Image" on page759 and "About PlanetPress
Fax" on page758.
Without a valid Imaging license, the plugin will fail with an error. In the trial version, the plugin
will work.
Input
Any data file present on a SharePoint document store, even those not compatible with
PlanetPress Workflow emulations, and the properties of these files.
Processing
The task connects to the selected Document store and retrieves a copy of files according to the
specified rules. The files may be deleted or marked as checked out depending on the options
Page 703

selected, otherwise they are untouched.
Output
The output to this task is a series of individual files, one after the other.
Task properties
General Tab
Note
For this tab to work, you must have entered your SharePoint Connection information in
the Connection Tab.
l
SharePoint Site: The name of the SharePoint site from where you want to retrieve
documents. You can click on the Refresh button to display a list of sites on your
SharePoint server.
l
Document Library: The document library where you want to retrieve the files. You can
click on the Refresh button to display a list of libraries on the SharePoint site selected
previously.
l
Folder: The folder in the document library where your files are located. You can click the
Browse button to display your folder structure. In the Browse Folders dialog, click on the
folder you want to use and click OK.
l
Input Rule: Lets you define rules to filter incoming files on certain variables, for example
the file name, size, etc. Clicking the ... button brings up the "Rule Interface" on page874.
l
Download files from sub-directories also: Check to also look into subdirectories of the
specified Folder.
l
Do not download checked out documents: If the document is set as "Checked Out" in
SharePoint, it will be ignored.
l
Action Group
l
Download the document: Simply download the document and do not modify it in
SharePoint.
Page 704

l
Download the document and mark it as checked out in SharePoint: Download
the document and mark it as Checked Out in SharePoint. This is useful for
preventing files to be downloaded more than once.
l
Download the document and delete it from SharePoint: Download the document
and delete it from the SharePoint server.
Connection Tab
l
Server Name: The name of the SharePoint server. This can either be a server name (e.g.
http://SharePoint2003 ) or an IP address (e.g. http://192.168.1.123 ). Both http:// and
https:// (secure) connections are accepted.
l
Domain: The active directory domain for the logon credentials. This is not necessary if
the SharePoint server is not part of a domain.
l
User Name: A valid user name that has access to the SharePoint site and is able to read
and write to document libraries.
l
Password: The correct password for the user name.
"Other" Tab
l
Job Information group
l
Information elements: Indicates what Job Info variables are automatically created
by the input task.
l
Add lines before first data page: Using the arrows keys you can add any job
information directly at the beginning of your data file.
l
Backup input files: Check this to save a copy of each data file that is captured by your
input. These files are saved in the PlanetPress Workflow Tools working folders under
the "Backup" folder.
To navigate quickly to the Workflow working folders, press the keyboard shortcut
CTRL+ALT+Shift+F4 from within the Workflow configuration tool.
The number of days to keep backups of jobs processed by input tasks is set per process;
see "Process properties" on page869.
l
Backup filename: Enter the file name that you wish the input data file backup to be saved
under.
l
Delete Existing Metadata: Check to remove any Metadata from memory. This option is
disabled on initial input tasks, and is checked by default on secondary input tasks.
Page 705

Job Information definitions
l
%1 - Source file name: Contains the name of the current captured file.
l
%2 - Directory: Contains the name of the SharePoint director from which the current file
was captured.
Output to SharePoint
The Output to SharePoint action task can be used to send files to an existing Microsoft
SharePoint server.
Example Workflow process
This task is put into effect in the following use cases and example processes:
l Capture Post Processing Workflow
Note that Capture is only available with PlanetPress Suite.
Licensing
This plugin requires the OL Connect Workflow Imaging license.
Workflow Imaging is an add-on license bundle for OL Connect Workflow that includes the
Image and Fax plugins; see "About PlanetPress Image" on page759 and "About PlanetPress
Fax" on page758.
Without a valid Imaging license, the plugin will fail with an error. In the trial version, the plugin
will work.
Input
Any data file, with optional Metadata.
Processing
The task connects to the selected Document store and uploads the current data file. If the file
already exists, it will be overwritten and, if this option is selected, marked as "checked in". The
information accompanying the file (the SharePoint Metadata) is either updated or created.
Page 706

Output
The output of this task is the original data file.
Task properties
General Tab
l
SharePoint Site: The name of the SharePoint site where you want to send the files. You
can click on the Refresh button to display a list of sites on your SharePoint server.
l
Document Library: The document library where you want to send the files. You can click
on the Refresh button to display a list of libraries on the SharePoint site selected
previously.
l
Folder: The folder location in the document library where your files will be sent. You can
click the Browse button to display your folder structure. In the Browse Folders dialog,
click on the folder you want to use and click OK.
l
Force folder creation: If the folder does not exist, it will be created.
l
Error if the file name exists: Task will generate an error if the file name is already there.
l
Mark the document as checked in: Sets the "Checked in" property of the document on
the SharePoint server.
l
Configure Fields: Opens the Configure SharePoint Metadata Fields dialog.
Configure SharePoint Metadata Fields dialog
This dialog lets you setup the information you want to assign to the SharePoint Metadata
information. It contains one line for each field present in the SharePoint document library.
l
Field Name: Name of the field as set in SharePoint Document Library.
l
Field Information: The information to enter in the SharePoint Document's Metadata for
this field.
l
Use PDF/A: Check to use the information contained within an PDF. This PDF must have
been created with PlanetPress Image and contain an Index field (data selection) of which
the name corresponds exactly to the Field Name in the SharePoint Document Library. If
this option is checked, the Field Information will change to "Use PlanetPress Index
(PDF/A)".
Page 707

l
Field Type: The type of field as set in the SharePoint Document Library. The following
SharePoint field types are supported by the SharePoint output task:
l
Single line of text: This type may contain a string of any type of characters. This is
the most flexible type of field. Use this type when you are not sure if the constraints
of the other types of fields will be appropriate.
l
Multiple line of text: This type may contain multiple lines of text.
l
Choice: This type contains the menu to choose from.
l
Number: This type may contain a number (1, 1.0, 100). The decimal separator is “.”
in the plugin.
l
Currency: This type contains the currency ($…).
l
Date/Time: Date/Time fields contain a date and time
l
Yes/No: Yes/No (menu to choose from). If passing a variable, has to be either "Yes"
or "No".
l
Hyperlink or Picture: This type contains an html hyperlink or picture.
Note
Document libraries using the Content Type system in SharePoint 2007 and higher (as
well as Windows SharePoint Services 3.0 and higher) are supported in PlanetPress
Workflow 7.4 and higher only.
Connection Tab
l
Server Name: The name of the SharePoint server. This can either be a server name (e.g.
http://SharePoint2003 ) or an IP address (e.g. http://192.168.1.123 ). Both http:// and
https:// (secure) connections are accepted.
l
Domain: The active directory domain for the log-on credentials. This is not necessary if
the SharePoint server is not part of a domain.
l
User Name: A valid user name that has access to the SharePoint site and is able to read
and write to document libraries.
l
Password: The correct password for the user name.
Miscellaneous Tab
The Miscellaneous tab is common to all tasks.
Page 708

Check the option Use as step description to display the text next to the icon of the plugin in
the Process area.
Email Services
Email Services tasks send emails to an Email Service Provider (ESP) using the ESP's Web
API.
These OL Connect tasks are not initially installed with Workflow but they are available for
download on the Resource Center (help.objectiflune.com).
After downloading a .PKK file, you have to import it into Workflow; see "Importing a plugin" on
page885.
Once installed, these tasks will appear in the Email Services category.
l "Mailjet" below
l "SendGrid" on page713
Note
In order to use one of these tasks, you will need to have an account that allows you to
send email through the respective Email Service Provider.
Mailjet
Note
l The Mailjet plugin is not installed by default. It is available for download on the
Resource Center (help.objectiflune.com). Make sure that the version number of
Workflow and the plugin are the same, to avoid compatibility issues. Version
2021.1.0 is backwards compatible with Workflow down to version 2020.1.
l In order to use HTTPS it is essential to upgrade the plugin to the 2021.1.0 version,
available for download on the Resource Center (help.objectiflune.com).
l To be able to send email using the Mailjet plugin, you need a Mailjet account, API
key and Secret API key.
The Mailjet plugin allows you to:
Page 709

l Specify the emails' campaign name. Each e-mail going through Mailjet is attached to a
campaign, which enables you to track a campaign's performance and analyze the results.
l Add headers specifying specific handling instructions for your email. You could set an
existing header like the Sensitivity or X-priority header (see
https://tools.ietf.org/html/rfc1327), or create a custom header.
Installing the plugin
First unzip the contents of the ZIP file and then install using the wizard. Click Yes to replace
any previously installed version of the plugin.
1. Open the Workflow Configuration tool .
2. In the Plug-In Bar, click on the two black arrows with the black triangle underneath, at the
bottom right area of the window pane.
3.
In the popup menu, select “Import Plug-in” and select the PluginFileName file.
4. If an older version of the plugin is already installed, a warning will be shown, asking if you
want to overwrite the existing file. Click OK. In this case you must restart Workflow to
allow proper reloading of the plugin. If you do not restart Workflow, the plugin will not
function correctly. All existing instances of the plugin in Workflow processes must also be
replaced by the new version.
You can now find the M-Files in the PluginCategory category of the Plug-In Bar.
Note
No third party system resources are incorporated directly into this OL product. This means
that while the plugin was tested against the associated third party systems when initially
released, they may behave differently with later versions of that system. Use at your own
risk.
Should you encounter any issues, please contact your local Objectif Lune Support team
and we will do our best to help.
Testing the plugin
To test the plugin, drag it from the Plug-In Bar into a process. The plugin configuration dialog
will open and show the index property page. If that works, the plugin is installed correctly and
ready for use.
Page 710

Note
Further help can be found by pressing F1 or the Help button in Connect Workflow from
the “M-Files” dialog or by searching for “M-Files” in the Workflow product documentation
at help.objectiflune.com
Input
Extra attachments
To specify an extra attachment, you have to use the key/value pair "disposition":"attachment".
To let the plugin know where it can find the attachment, you can either provide a full path
("url"), for example:
[{"url":"file:///C:/Terms-and-Conditions.pdf","disposition":"attachment"}]
or
[{"url":"http://www.example.com/image.png","disposition":"attachment"}]
or a Connect File Store ID ("fileid"), for example:
[{"fileid":100034, "disposition":"attachment"}]
Optionally, you may provide a name ("name") to override the name that the plugin creates for
an extra attachment.
Examples:
[{"fileid":100034,"name":"example.pdf","disposition":"attachment"}]
[{"url":"file:///C:/Terms-and-
Conditions.pdf","name":"terms.pdf","disposition":"attachment"}]
All attachments should be combined in one array:
[{"url":"file:///C:/Terms-and-
Conditions.pdf","disposition":"attachment","name":"Terms.pdf"},{"name":"Take action
Mandie.pdf","disposition":"attachment"}]
The order of the key/value pairs is not important.
Processing
The plugin communicates with the Connect Server to retrieve each email message's body, any
attachments and the plain text version (if available) from the File Store, using the folder ID and
file names specified in the output of the Render Email Content task.
Page 711

It then transforms the files into email messages as specified by Mailjet and sends the emails via
the Mailjet Web API.
Output
This task does not make any changes to the Metadata or the Job File.
Properties
General Tab
l
Mailjet API:
l
API Key and Secret Key: The API Key and Secret Key are both generated
automatically when you create your Mailjet account. The plugin needs to provide
them in order to authenticate its request to Mailjet's Email API endpoint.
l
Data Source (see "Input" on the previous page):
l
Custom Campaign: Each e-mail going through Mailjet is attached to a campaign.
Specify the campaign name here. If the campaign doesn't already exist it will be
automatically created in the Mailjet system. When sending email through Mailjet's
Web API it is allowed to send multiple emails with the same campaign name to the
same contacts.
l
Headers (optional): A JSON object containing one or more key/value pairs of
header names and the value to substitute for them:. For example:
{"Sensitivity":"Company-Confidential","X-Priority":"1"}
If they contain Unicode characters, you must ensure that these are properly
encoded.
Custom header names normally start with "x-": {"x-my-header":"my-
value"}.
l
Debug settings:
l
Send all messages to the Test Address: When this option is checked, Mailjet will
only send the emails to the given Test Address. This allows you to review the result
and to test ESP specific options like open rates and click through statistics.
l
Log email messages: Check this option to get a copy of each message in the
Messages window of Workflow. You can use this to verify that the messages match
the format required by the ESP.
Page 712

Advanced properties
To get access to the following properties tabs, right-click the plugin in the process and select
Advanced Properties.
Miscellaneous Tab
The Miscellaneous tab is common to all tasks.
Check the option Use as step description to display the text next to the icon of the plugin in
the Process area.
SendGrid
Note
l The SendGrid plugin is not installed by default. It is available for download on the
Resource Center (help.objectiflune.com). Make sure that the version number of
Workflow and the plugin are the same, to avoid compatibility issues. Version
2021.1.0 is backwards compatible with Workflow down to version 2020.1.
l In order to use HTTPS it is essential to upgrade the plugin to the 2021.1.0 version,
available for download on the Resource Center (help.objectiflune.com).
l To be able to send email using the SendGrid plugin, you need a SendGrid account
and API key.
The SendGrid plugin allows you to:
l Tag the emails with category names, which help organize your email analytics (see About
categories).
l Set a time at which the emails should be sent (see Scheduling parameters).
l Add custom headers specifying specific handling instructions for your email. (To get an
idea of what these could be used for, see SendGrid's blog post about email headers).
Input
Extra attachments
To specify an extra attachment, you have to use the key/value pair "disposition":"attachment".
Page 713

To let the plugin know where it can find the attachment, you can either provide a full path
("url"), for example:
[{"url":"file:///C:/Terms-and-Conditions.pdf","disposition":"attachment"}]
or
[{"url":"http://www.example.com/image.png","disposition":"attachment"}]
or a Connect File Store ID ("fileid"), for example:
[{"fileid":100034, "disposition":"attachment"}]
Optionally, you may provide a name ("name") to override the name that the plugin creates for
an extra attachment.
Examples:
[{"fileid":100034,"name":"example.pdf","disposition":"attachment"}]
[{"url":"file:///C:/Terms-and-
Conditions.pdf","name":"terms.pdf","disposition":"attachment"}]
All attachments should be combined in one array:
[{"url":"file:///C:/Terms-and-
Conditions.pdf","disposition":"attachment","name":"Terms.pdf"},{"name":"Take action
Mandie.pdf","disposition":"attachment"}]
The order of the key/value pairs is not important.
Processing
The plugin communicates with the Connect Server to retrieve each email message's body, any
attachments and the plain text version (if available) from the File Store, using the folder ID and
file names specified in the output of the Render Email Content task.
It then transforms the files into email messages as specified by SendGrid and sends the emails
via the SendGrid v3 Web API.
Output
This task does not make any changes to the Metadata or the Job File.
Page 714

Properties
General Tab
l
SendGrid API:
l
API Key: Enter your API key, retrieved from SendGrid. It will be used for
authentication with the SendGrid v3 Web API. A valid key is required to send email
messages.
l
Data Source (see "Input" on page713):
l
Categories (optional): Enter a single category name (e.g. invoice) or an array of
category names (e.g. ["invoice","brand1"]) for the messages. The maximum length
of each category name is 255 characters. You can specify up to 10 categories per
request. See About categories.
l
Send At (optional): Enter a UNIX timestamp specifying when you want your email
to be sent from SendGrid. This can be left empty if you want the email to be sent at
the time of your API request.
l
Headers (optional): A JSON object containing key/value pairs of header names and
the value to substitute for them. Example: {"x-my-header":"my-value"}.
If they contain Unicode characters, you must ensure that these are properly
encoded.
Custom header names normally start with "x-".
The following headers are reserved and cannot be used as custom header: x-sg-
id, x-sg-eid, received, dkim-signature, Content-Type, Content-
Transfer-Encoding, To, From, Subject, Reply-To, CC, BCC.
l
Debug settings:
l
Send all messages to the Test Address: When this option is checked, SendGrid
will only send the emails to the given Test Address. This allows you to review the
result and to test ESP specific options like open rates and click through statistics.
l
Log email messages: Check this option to get a copy of each message in the
Messages window of Workflow. You can use this to verify that the messages match
the format required by the ESP.
Advanced properties
To get access to the following properties tabs, right-click the plugin in the process and select
Advanced Properties.
Page 715

Miscellaneous Tab
The Miscellaneous tab is common to all tasks.
Check the option Use as step description to display the text next to the icon of the plugin in
the Process area.
Unknown tasks
An Unknown task is a task location that is not linked to any existing known task. Unknown
tasks can have multiple causes:
l Cutting an input or output task will replace it with an Unknown task. See "Cutting, copying
and pasting tasks and branches" on page886.
l Creating a new branch will create an Unknown output task in that branch. See "Adding
tasks" on page301.
l Using Branch From Here... will create an Unknown output task below that branch. See
"Adding tasks" on page301.
l Opening a configuration that contains additional plugins that are not installed on that
system will cause these plugins to be replaced by Unknown tasks. Installing the
additional plugins and re-opening the configuration will restore the plugins and their
properties.
l
Opening a configuration that contains plugins only available in PlanetPress Workflow
(such as Create PDF) from a PlanetPress Watch installation will cause these plugins to
be replaced by Unknown tasks. Opening the configuration in a PlanetPress Production or
Office installation or upgrading PlanetPress Watch to PlanetPress Workflow and re-
opening the configuration will restore the plugins and their properties.
About variables
A variable is basically a keyword that points to specific location in your computer's memory.
This location contains data that you decide to place in it, by assigning that data to the variable
name.
There are four types of variables that can be used in PlanetPress Workflow:
Page 716

l
Global variables are available to all processes and tasks within the configuration, and
any modification made to them affects all tasks and configurations. For more information
see "Global variables" on page725.
l
Local variables are specific to an instance of a process. That is to say, when a process
changes the information in a local variable, it changes it only for that process and only for
that specific instance of the process. For more information see "Local variables" on
page724.
l
Job Infos are also specific to an instance of a process, however their use is different. Just
after an initial or secondary input task, Job Infos contain information about the job file
itself. They are generally used to gather information from the input task, or to transfer
information to a Connect template or PlanetPress Design document. For more information
see "Job Info variables" below.
l
System variables are standard variables, created and managed directly by PlanetPress
Workflow. These variables are read-only and cannot be modified. They provide
information about the job, process, and PlanetPress Workflow environment. For more
information see "System variables" on page719.
All the variables in PlanetPress Workflow are considered strings, even if the information itself
can be a number. There are no other types of variables (such as arrays, floating point numerical
values or booleans) in PlanetPress Workflow.
Job Info variables
Job Infos contain information on any job file that comes out of the initial input task or any
secondary input tasks. There are only 9 Job Infos available numbered from 1 to 9. They can be
accessed directly anywhere where variable properties are accepted, by using the number of the
variable preceded by a percent sign, for example, %2 or %9.
Not all available Job Infos will actually be used by input tasks. The number of Job Infos as well
as their definition can be seen in the Other tab of any input task.
The value of a Job Info can also be set:
l Via the Set Job Info and Variable action task. See "Set Job Infos and Variables" on
page441.
l Via a Script task. See the chapter "Using Scripts" on page141.
Page 717

Note
l While the initial Job Infos are created by the input task, they can be overwritten by
the Set Job Info and Variables Action task, by a Script, or by any secondary input
task in the process. Whenever you use a job info in your process, make sure it
contains the value that you want, and not one that has been overwritten by another
task.
l Job infos are limited in quantity and are slowly being deprecated when transferring
data to your documents. You should probably consider using "Metadata" on
page76, or local variables (see "Local variables" on page724).
Using Job Infos in a Connect template
Workflow variables can be passed to a Connect template via a data mapping configuration.
Data mapping configurations are created with the DataMapper module (inside Connect
Designer). They contain a data model and instructions on how to extract data from a job file and
are used by the All in One task and the Execute Data Mapping task.
Job Infos are passed to the task so the trick is to transfer the value of the Job Info to a field in the
data model. To do that, simply add a property-based field to the Data Model and select a Job
Info from the list of properties; see Adding a property-based field.
Note that Job Infos don't change whilst the task executes. Consequently, the value of the field
that contains the Job Info will be the same in each of the records in the resulting record set.
Using Job Infos in a PlanetPress Design document
Job Infos are transmitted, unless otherwise configured, directly to any PlanetPress Design
document used within a process and can be directly accessed by that document, so they can
be used to transfer complementary information to a document that is not contained within the
data file.
Job Infos sent to the document are global to that document, meaning the values do not change
between data files. This means that if your data file contains multiple data pages for different
clients, your Job Infos cannot be used to send information to the document.
Page 718

Tip
You can also access global and local variables from your document using the
ExpandString() function. For more information, please see the PlanetPress Design User
Guide.
System variables
System variables are standard variables, created and managed directly by PlanetPress
Workflow. These variables are read-only and cannot be modified. They provide information
about the job, process, and PlanetPress Workflow environment.
Available system variables
Variable
Name Example value when interpreted
%a Job file last
modified date.
Format:
YYYY/MM/DD
2020/08/16
%c
Content of the
job file in its
original format
n/a
%F
Job file path
and name
C:\Program Files\PlanetPress Workflow 7\PlanetPress
Watch\Spool\job1D80328.dat
%f
Job file name
including the
file extension
job1D80328.dat
%z
Job file size in
bytes
34134
%o
Original file
name
invoice_june2nd.txt
Page 719

Variable
Name Example value when interpreted
%O
Original file
name without
extension
invoice_june2nd
%y
Current year 2010
%m
Current month
(numeric)
06
%M
Current month
(text)
June
%L
Current month
(short text)
JUN
%d
Current day
(numeric)
16
%D
Current day
(text)
Monday
%l
Current day
(short text)
MON
%h
Current hour 18
%n
Current minute 03
%r Run mode (0:
runtime,
1:debug)
0
%s
Current second 41
%v Current 24
Page 720

Variable
Name Example value when interpreted
millisecond
%u
Unique 13-char
string (will be
different every
time it is used)
0ZIS4CW8U47VI00
%U
Unique 36-
character string
consisting of
32
alphanumeric,
lower case
characters and
four hyphens.
Format:
xxxxxxxx-xxxx-
xxxx-xxxx-
xxxxxxxxxxxx
(8-4-4-4-12
characters).
123e4567-e89b-12d3-a456-426655440000
%t
Current
temporary
folder
C:\Documents and Settings\All Users\Application
Data\Objectif Lune\PlanetPress Workflow 7\PlanetPress
Watch\Spool\6.tmp\
%e
Current
Metadata file
name
job00ZAIZ2C4FXON16CE6C566.dat.meta
%E
Current
Metadata path
and file name
C:\Documents and Settings\All Users\Application
Data\Objectif Lune\PlanetPress Workflow 7\PlanetPress
Watch\Spool\5.tmp\job00ZAIZ2C4FXON16CE6C566.dat.
meta
Page 721
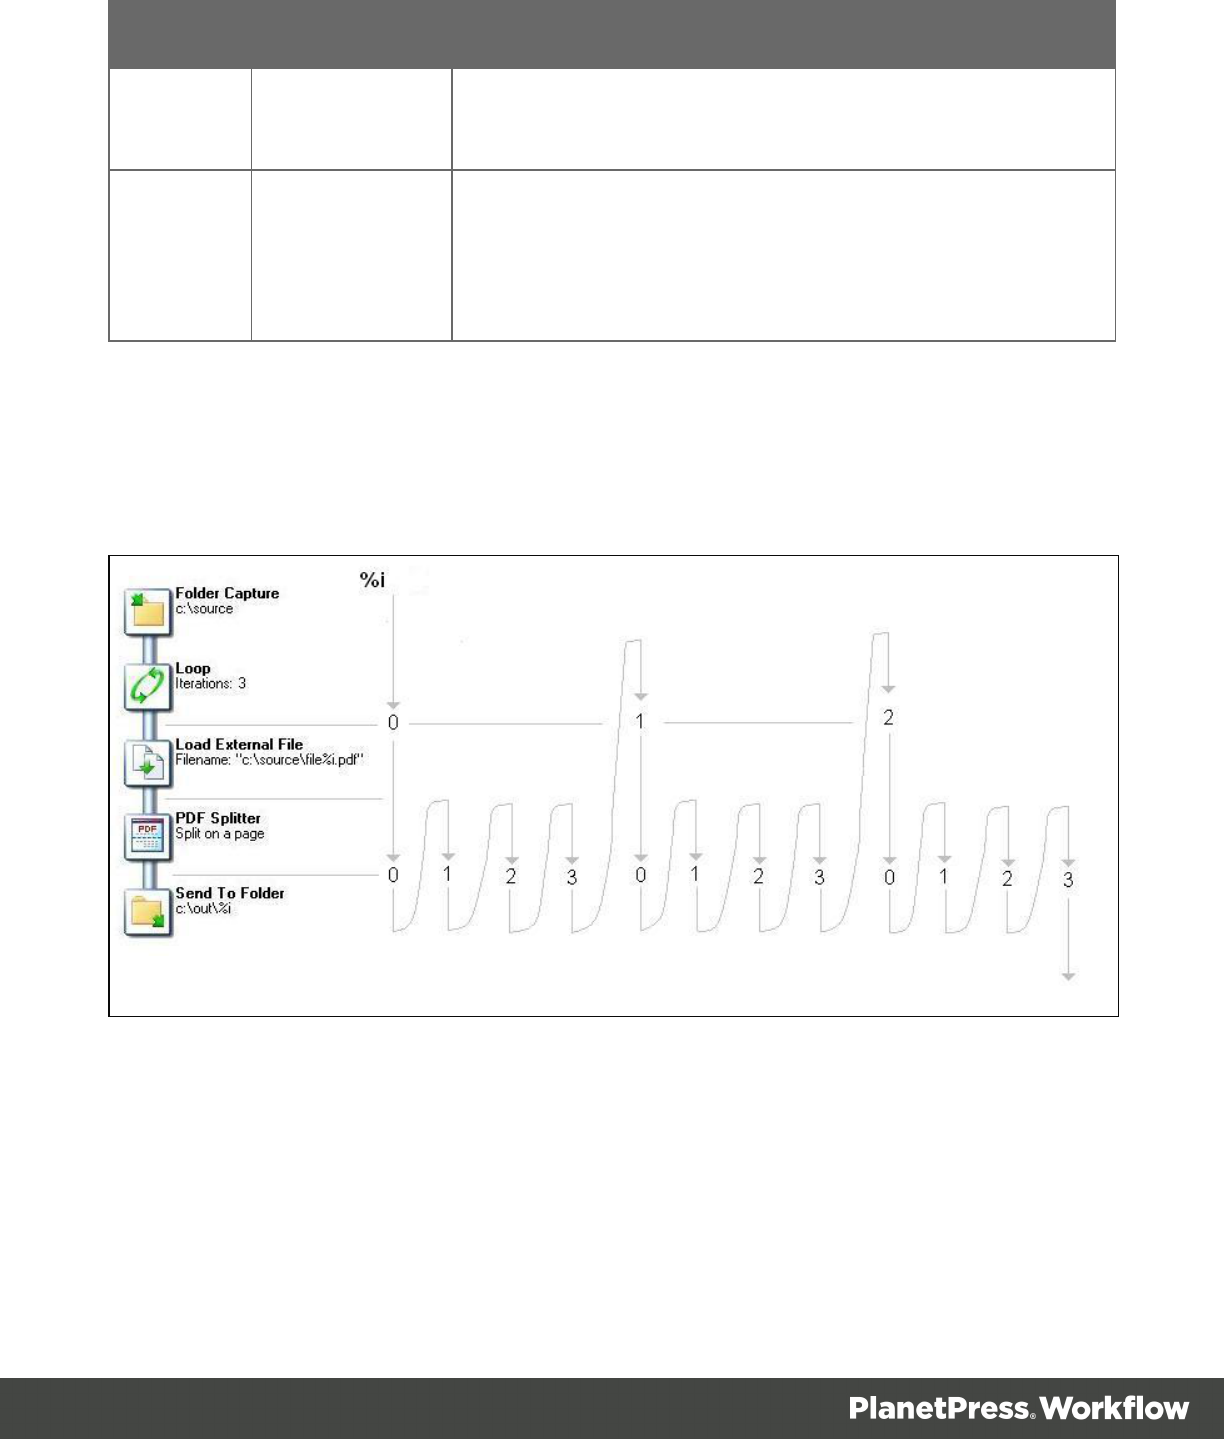
Variable
Name Example value when interpreted
%w Current
process name
My Process
%i Current Loop
iteration index
(always the
innermost loop)
2
The %i Loop Count variable
The value of the %i variable is equivalent to the current iteration of loops inside of a process. It
always contains the value of the innermost loop, and only certain tasks trigger the counter to
start. The below image shows an example process and the value of %i during this process:
Initial input tasks do not modify the value of %i. However, the following tasks do trigger the
variable:
l Barcode scan
l Capture Field Processor
Page 722

l All Splitters (Including the Metadata Sequencer)
l Get Capture Document
l Loop
l Capture PGC Splitter
l PrintShop Mail
Error handling variables
The error handling variables are read only and are filled by the On Error mechanism.
They can be accessed anywhere, but they only appear in the contextual menu of a task
property field when the current process is an error-handling process (that starts with the Error
Bin Input task). See also: "Variable task properties" on page727.
Variable Name
%{error.process} Name of the process where the error was triggered.
%{error.tasktype} The type of task that triggered the error
%{error.taskname} The name of the task that triggered the error
%{error.taskindex} The position of the task in the process
%{error.errormsg} The error message, as entered in the OnError tab of the task.
This is the same message as appears in PlanetPress Workflow Log
file.
%{error.errorid} The error ID, as entered in the OnError tab of the task.
This is the same ID that appears in the Windows Event Viewer.
%{error.errorlog} A string containing the logged error message(s) from a task. Multiple
error messages are delimited by a "|" (vertical bar) character.
Page 723

Local variables
Local variables are set at the level of a process and are not shared with any other process or
instance of that process. Local variables can be used anywhere where a variable is accepted
by using its name, surrounded by curly brackets and preceded by a percent sign, for example: %
{myLocalVariable}.
When the process ends, the local variable forgets whatever value was given to it by the process
and goes back to its default value. Local variables are generally used to keep information that
is useful for the process itself but not to any other process or instance of the process. For
example, you could store the current order ID for the process, a name, or an email. You can
have as many local variables as you want in any given process.
Adding a local variable
To add a local variable:
1. Select the process where you want to add the variable.
2. Now you can use one of two methods:
l
Click on the Home tab of the PlanetPress Workflow Ribbon, then click Local
Variable in the Variables group.
l
Right-click on the process in the Configuration Components area, then click on
Insert Local Variable.
Deleting a variable
l
Right-click on the variable name in the Configuration Components pane and click Delete.
Note
Deleting a variable does not delete any reference to it. In both the case where a script
refers to a variable and it is renamed, and the case of deleting a variable, any task or
script that refers to it will cease to function and will generate an error.
Page 724

Renaming a variable
l Right-click on the variable name in the Configuration Components pane.
l
Click Rename.
l
Type in the new name of the variable, then press Enter on your keyboard.
Note
While renaming a variable will correctly rename all references to it in task properties or
wherever else it is used in a task, it will not change the references in any script within a
Run Script task.
Setting a variable value within a process
You can set the value of a variable within your process in two ways:
l
Use the Set Job Info and Variable action task. See "Set Job Infos and Variables" on
page441.
l
You can use Scripts. See the chapter "Using Scripts" on page141.
Tip
Variables may be used as variable properties in Task Properties (see "Variable task
properties" on page727).
Global variables
Global variables are set at the level of the configuration file and are shared between all
processes and tasks.
To refer to a global variable, for example in a variable task property (see: "About Tasks" on
page300), use its name preceded by "global." and surrounded by curly brackets, for example: %
{global.myGlobalVariable}.
Global variables are generally used to keep information that applies to multiple locations but
needs to be changed easily. For example, a lot of users use them to set a server's IP, a printer
Page 725

name, or folder location that is used by multiple processes. This is useful when moving the
configuration file to another installation of the Workflow tools where this information is different,
or to quickly modify specific information if something changes on the server. You can have as
many global variables as you want in any given configuration.
Adding a global variable
To add a global variable from the Configuration Components pane:
1.
Right-Click on Global Variables.
2.
Click Insert, then Insert Global Variable.
The new variable will appear as GlobalVar or GlobalVarX (the name is automatically
incremented).
To add a global variable from the Ribbon:
1.
Click on the Home tab of the PlanetPress Workflow Ribbon:
2.
Click Global Variable in the Variables group.
The new variable will appear as GlobalVar or GlobalVarX (the name is automatically
incremented).
To set the value of a global variable from the Configuration Components pane:
1.
Double-click on the global variable in the Configuration Components pane. (Right-
clicking then clicking Properties also works.)
2. Enter the new value for your global variable.
3.
Click OK to save the new value.
Deleting a variable
l
Right-click on the variable name in the Configuration Components pane and click Delete.
Note
Deleting a variable does not delete any reference to it. In both the case where a script
refers to a variable and it is renamed, and the case of deleting a variable, any task or
script that refers to it will cease to function and will generate an error.
Page 726

Renaming a variable
l Right-click on the variable name in the Configuration Components pane.
l
Click Rename.
l
Type in the new name of the variable, then press Enter on your keyboard.
Note
While renaming a variable will correctly rename all references to it in task properties or
wherever else it is used in a task, it will not change the references in any script within a
Run Script task.
Setting a variable value within a process
You can set the value of a variable within your process in two ways:
l
Use the Set Job Info and Variable action task. See "Set Job Infos and Variables" on
page441.
l
You can use Scripts. See the chapter "Using Scripts" on page141.
Tip
Variables may be used as variable properties in Task Properties (see "Variable task
properties" below).
Variable task properties
When you edit tasks, you may notice that some of the properties that you can modify have a red
(or more precisely, a maroon) title. This means that the property can be dynamically determined
whenever your process runs, that is to say it will not remain static. This can be extremely useful
when, for example, you want to determine how many copies you will print out depending on
your data, or what document will be used in the printout depending on the department it came
from.
Variable properties may include:
Page 727

l Static data.
l System variables. See "System variables" on page719.
l Local and Global Variables. See "Local variables" on page724.
l Job Infos. See "Job Info variables" on page717.
l Data and Metadata Selections. See "Data selections" on page55.
l Printer Control Characters. See "Shared printer queue properties" on page114. These
are normally only used in printer outputs.
Variable properties can also be used in these special locations:
l In the Set Job Infos and Variables Action Task. See "Set Job Infos and Variables" on
page441.
l In Scripts. See the chapter on "Using Scripts" on page141.
l In the Create File Input Task. See "Create File" on page312.
l Within a PlanetPress Design Document, using the ExpandString() function. See the
PlanetPress Design User Guide and PlanetPress Talk Reference Guide.
Variable properties can also be mixed, meaning you can combine, within a single variable
property box, any number and order of variable types. You can, for example, do the following for
an output file name: %O_@(1,1,1,30, KeepCase,Trim)_%y-%m-%d.txt. This would translate in
the original file name, followed by part of the first line of a text data file, then the current date.
Inserting variables in task properties
In any variable properties box, you may use the contextual (right-click) menu to add variables
and control characters, as well as to get data and make data selections. The lower part of the
contextual menu is divided into 4 items that provide variable properties:
l
Variables
l
System: Contains standard system variables, see "System variables" on page719.
l
Job Info: Contains Job Info variables from %1 to %9
l
Local Variables: Contains a list of local variables in this process. If no local
variables exist, this item is disabled.
l
Global Variables: Contains a list of global variables in this configuration. If no
global variables exist, this item is disabled.
l
Control Characters: Contains a list of control characters that can be used in printers.
Page 728

l
Get Data Value: Brings up the Data Selector, retrieves the value you select and places it
in the variable properties box. This information becomes static and does not change
between each datapage and job file.
l
Get Data Location: Brings up the Data Selector and records your selection. The data
selection is dynamic, meaning it will get the data located in the area you choose, every
time a new data file passes through it. This is indicated by a data selection (see "Data
selections" on page55).
l
Get Metadata Value: Brings up the Data Selector with only the Metadata tab visible and
lets you select the value (contents) of a Metadata attribute or field. The result is static and
does not change between jobs.
l
Get Metadata Location: Brings up the Data Selector with only the Metadata tab visible
and lets you select the location of the data. The result is variable and changes between
jobs.
l
Get Repository Value: Brings up the "Data Repository Manager" on page854 dialog to
select the value (contents) of a specific key. The result of the lookup is static.
l
Get Repository Location: Brings up the Data Repository Manager dialog to select the
location of the key to lookup every time this task is executed.
You can quickly identify variable information that is already present in your variable properties
as such:
l
A percentage sign identifies system variables, as well as standard and custom job info
variables — %f, for example.
l
A backslash indicates a control character — \004, for example.
l
An at sign (@) indicates a data selection for emulations other than database — @
(1,1,1,1,17,KeepCase,Trim), for example.
l
Field indicates a data selection for a database emulation — field(1,0,0,'Billing_
Email',KeepCase,NoTrim), for example.
l
The lookup() function indicates a lookup in the "Data Repository Manager" on page854.
Workflow add-ons
Here's a list of add-ons that can be used with Workflow:
Page 729

l
Capture (only compatible with PlanetPress Suite): a set of tools that enable output and
input for interaction with an Anoto Digital Pen. See "PlanetPress Capture" below.
l
Capture OnTheGo (only compatible with OL Connect): a mobile app to capture and send
data. See Capture OnTheGo.
l
DocuWare. See "DocuWare" on page682.
l
Fax. See "About PlanetPress Fax" on page758.
l
Image. See "About PlanetPress Image" on page759.
l
M-Files. See "M-Files" on page695.
l
OL Connect Send. See "OL Connect Send" on page760.
l
ZUGFeRD. See "ZUGFeRD" on page761.
PlanetPress Capture
Note
PlanetPress Capture is only available in version 7.2 and higher of PlanetPress Suite
Production. It is not available in older versions, nor is it available in the Office and Watch
versions of PlanetPress Suite.
PlanetPress Capture is not compatible with OL Connect Designer templates.
PlanetPress Capture is a set of tools available in PlanetPress Workflow that enable output and
input for interaction with an Anoto Digital Pen. Anoto Digital Pens are electronic devices
containing a camera, processor, memory and communication capabilities and they can
recognize their location on any paper where a special Anoto pattern is printed.
For more information on building and using PlanetPress Capture processes, please see
"PlanetPress Capture Workflow" on page289.
"Anoto" and the Anoto logotype are trademarks owned by Anoto AB.
PLANETPRESS CAPTURE is based on Anoto Digital Pen and Paper Technology,
which is covered by over 200 patents worldwide, including but not limited to
US6663008, US7172131, US7248250, US7281668, JP3872498, JP3842283,
CN1595440, SE517445, RU2256225, and AU773011.
Page 730

PlanetPress Capture Glossary
This topic describes the specific terms used in the PlanetPress Capture set of tools within
PlanetPress Workflow.
Anoto Digital Pen
A digital pen compatible with the Anoto system. These pens contain a camera, processor and
memory chip which record each stroke of the pen on a printed Anoto Pattern, and are able to
send this information back to PlanetPress Workflow. This document specifically refers to the
Anoto DP-201 Digital Pen, not other equipment has been tested.
Anoto Functionality Statement
Statement ('Paper featuring Anoto functionnality') that is automatically placed on the page when
a PlanetPress Capture field is present. The statement can also include the Trace Code
Anoto Pattern
A series of dots placed in a pattern that is unique to each page where the pattern is printed. The
Anoto Digital Pen identifies this pattern and its location on the page. PlanetPress Capture
contains 20,000 patterns (8 in demo mode, See "PlanetPress Capture License Management"
on page786) which can be used to generate documents.
Capture Condition
PlanetPress Workflow task that is used for post-processing of documents after they have been
processed by the Capture Fields Processor. Conditions can be made on the document status
or the presence (or absence) of ink on any of the Capture Fields on the document.
Capture-Ready Document
A PlanetPress Connect document (*.pp7) that contains at least one Capture Field on at least
one page.
Capture Document Manager
A tool that lets a user search through the available documents in the Capture Database. The
documents can be search through a few different criteria and can be displayed as PDF files,
individually or as a group. Documents can also be closed or deleted from this interface.
Page 731

Capture Field
The PlanetPress Connect object that acts as a placeholder for the Anoto Pattern. The pattern is
only applied when using the Capture Field Generator in Workflow.
Client/Server Architecture
A multi-server setup where more then one PlanetPress Workflow server are connected as
clients to a single PlanetPress Workflow server which has a Capture Database. In this
architecture, the Server contains the licenses for the pens, however the Client contains the
database of documents and patterns. The Clients communicate with the server to authenticate
pens. This architecture is only provided to simplify pen licensing for users with a large number
of pens.
Closed Document
A document still within the PlanetPress Capture Database of which all the required fields have
been filled by the Capture Field Processor from a PGC. A closed document will only remain in
the database until it is retrieved with the Get Capture Document task, after which it is deleted.
Contamination
The act of writing on a "wrong" document, aka one that has a Pattern Sequence different that
the one for which it was produced.. This can happen in architectures with more than one
sequence being used such as when a pen is docked in the wrong location or if two pens are
swapped.
ICR (Intelligent Character Recognition)
Recognizing text that has been hand-written with the Anoto Digital Pen. This feature is currently
not implemented in PlanetPress Capture, but will be in the (near) future.
Ink Data
The pen stroke information contained within the PGC file. This is the actual data applied to the
document (lines, signatures, text, etc).
Open Document
A document in the Capture Database that does not yet have any ink data on it, or of which not
all mandatory fields (or final field) have ink present on them. Such a document is waiting for a
Page 732

new PGC file to complete it so it can be closed.
Pattern ID
The ID of the Anoto pattern. Represents the pattern on the page. Can be used to retrace the
document to which the pattern belong.
Pattern Sequence
Pattern Sequences enable the multiplication of the number of available pattern by adding an
extra identification to the document. A Pattern Sequence is also attributed to each Anoto Digital
Pen, such as an incoming PGC file will contain the Pattern, on which the Pattern Sequence is
added from the pen database. The pattern and pattern sequence refer to a specific document in
the database. Signing a document with a pen of which the Pattern Sequence does not match
that of the document causes Contamination, which can cause errors or ink to be placed on the
wrong document.
Pen ID
The serial number of the Anoto Digital Pen. It is registered in the PlanetPress Capture
database and is present in each PGC file.
PGC File
Pen Generated Coordinates; PGC File containing all ink processed while the pen was
undocked along with the Pen ID. It is possible that a single document requires multiple PGC,
just as it is possible that a single PGC have multiple documents.
Pidget
Type of PlanetPress Capture object. Page element used to give instructions to the Anoto pen,
as opposed to recording ink.
PlanetPress Capture Database
A database containing the list of patterns, sequences, registered pens and documents. The
Capture Database can be used by a single server, or by multiple servers in a Client/Server
architecture.
Page 733

Session
The time spent by the pen between events that trigger a new session. Generally a session
refers to any ink in a single page containing a Capture Pattern. A session can contain ink from
multiple fields in any order. A new session starts whenever a PGC is sent for processing (which
erases the data from the pen).
General considerations
Here are some general considerations in regards to PlanetPress Capture, its environment, the
hardware and the software that interacts with it. Please review these considerations carefully as
they may impact PlanetPress Capture and its functionality.
Warning
PlanetPress Capture Fields cannot simply be inserted into an existing document as-is
and expected to work properly, efficiently or consistently. In order to design a document
with Capture Fields, you must review and understand the Critical PlanetPress Capture
Implementation Restrictions.
Database considerations (ODBC)
Note
On 64-bit operating systems, the ODBC Data Sources created by the Data Source
(ODBC) icon in the Administrative Tools will not appear here, as PlanetPress Suite is 32-
bit and cannot access the 64-bit data sources. In order to create an ODBC connection
visible by PlanetPress, you will need to access the 32-bit version of the ODBC manager,
available in C:\Windows\SysWOW64\odbcad32.exe .
The following considerations should be kept in mind while working with ODBC Databases in
PlanetPress Suite.
l
All databases
l
User Rights: During normal operation, Read/Write to tables should be sufficient.
However, during the initial setup, the Create/Drop tables rights is necessary.
Page 734

l Minimum 100MB of database size is required as a minimum, but the space
requirement depends on the implementation. The more active documents in the
database, the more space is used - note that this progression is rather linear.
l Regular database maintenance is required, such as database compacting, is
required by a system administrator.
l It is recommended to create an IT process that backs up the database regularly.
l The recommended ideal setup is a dedicated SQL Server PC, accessed by
PlanetPress Workflow through an ODBC connection on the local network.
l
Microsoft Access
l
Database file (mdb) must be local to the PlanetPress Workflow computer. It cannot
be located on a network drive or another server.
l Total database size is limited to 4GB of data.
l Total size of a single table is 2GB.
l May be unstable in large implementations.
l
MySQL
l Database can be in any location, but performance will depend on the speed of the
connection between PlanetPress and the MySQL server.
l MySQL's performance has been slower than SQL Server and SQL Server Express
during our tests.
l By default, MySQL is configured not to allow any SQL request larger than 16 megs.
l In the event where 2 requests are made simultaneously on the same record, MySQL
will queue one of the requests and execute it once the first one is done. In extremely
rare cases this may cause a timeout on very large requests.
l
MSSQL (Microsoft SQL Server)
l All versions of the SQL Server are supported, including all Express versions.
l Database can be in any location, but performance will depend on the speed of the
connection between PlanetPress Production and the SQL server.
l In the event where 2 requests are made simultaneously on the same record, SQL
Server will drop the most complex request. Resubmitting the PGC for processing
should resolve this issue. This, however, should happen only rarely.
l When configuring the ODBC connection, your must use the Microsoft version of the
driver, and not the Native SQL version of the driver. This is due to a technical
Page 735

limitation of the native driver that interferes with the PlanetPress Suite database
requests.
Specifically for PlanetPress Capture, these considerations mean the following:
l
In Microsoft Access, the total size of stored document cannot be larger than 2GB and
this database will be very unstable in implementation with more than a few thousand
pattern sequences being used simultaneously. It is only suggested for small
implementation with less than 10 pens, or for demos.
l
In MySQL, the 16 megs packet size limit can be an issue if the PDFs created by Capture
are larger than this size; An error saying "MySQL Server has gone away" would appear in
this case. This can be fixed by configuring the max_allowed_packet setting in the MySQL
Configuration (Reference).
l
Also in MySQL, if a timeout occurs on simultaneous record access, resubmitting the PGC
for processing should resolve the issue.
l
In SQL Server, if one of your requests is dropped because of simultaneous accesses,
resubmitting the PGC should resolve the issue.
Security Considerations
PlanetPress Capture introduces new and efficient methods for digitally capturing the contents
of ink laded out on physical paper. However, because of its nature, some end users may voice
concerns about security and privacy. Are signatures secure? Could their transmission be
intercepted? How can the contents of the Anoto digital pen be protected from malicious users?
Before addressing these concerns, it must be pointed out that these security issues are not
introduced by this new technology. In fact, they are essentially the same concerns that arise
with plain pen and paper: if the signed document can be scanned, then any markings on the
page can be extracted and reused by anyone with even limited technical skills. In addition, the
signed document has, by definition, a longer life span than the temporary storage location of the
digital pen. Consequently, it is still the most vulnerable piece of the workflow and as such, it
should be the first objective of any security effort.
In other words, as long as the physical piece of paper bearing markings is accessible to
malicious users, no amount of security protocols can protect the signed contents. It is only after
the paper trail has been secured that the security and privacy issues specific to PlanetPress
Capture should be addressed.
Page 736

Because PlanetPress Capture relies on external data and communication and because it may
be used to process sensitive and legal information, it is important to understand the security
implications of any PlanetPress Capture implementation. Most of the security concerns
regarding Capture are external to it. This means the security that is implemented both on your
network and physical premises are critical to the security of your PlanetPress Workflow
implementation.
Here are a few notable points with the security of PlanetPress Capture on a network:
l PGC Files, while not written in plain text, are not encrypted and are readable through
either PlanetPress Workflow (even a server that did not generate the document
associated with it), or through third-party applications using the Anoto SDK. This means if
someone gains access to your PGC storage folder, they may be able to read the
signatures, checkmarks and other information contained in it and reproduce them on a
document of their choice. It is always better to secure this folder properly. You could also
use third-party encryption software to secure the files, and decrypt them as necessary for
reprocessing.
l
The transfer between the Anoto penDirector and PlanetPress Workflow is not encrypted
due to a limitation of penDirector which does not support SSL connections. This means
someone located anywhere between penDirector and PlanetPress Workflow could use
software such as a packet sniffer to retrieve its parts and recreate the PGC files. This may
be resolvable by create a secure VPN tunnel for each location where penDirector is
installed instead of going through regular remote HTTP server.
l
The PlanetPress Capture database, since it can be external to PlanetPress Workflow
such as on a MySQL server, will be dependent on your own database security.
l The Anoto Digital Pens, since they may contain critical information, are just like physical
sheets of signed paper and must be kept secured. This is best done through training
employees handling the pens to be aware of its value and contents and act accordingly.
This means that the security of the pen is just as important as the security of any existing
physical documents you may handle at the moment.
l The same rules apply to PDF files as with PGC files, especially when they contain a
signature from the pen. If you are already securing digital scanned copies of signed
documents, the PDFs should be secured in similar ways.
However, remember that as with most security concerns, in order to be a “threat”, someone
would have to have a high level or working knowledge of either the Anoto SDK (which is not
easily obtainable) or PlanetPress Workflow and PlanetPress Capture. In some situations this
may be enough (security through obscurity) but we always recommend having the same level
Page 737

of security for Capture files and documents as you would the rest of your sensitive information.
In most cases, the procedures in place are enough for this purpose.
20,000 Patterns
When reading or learning about PlanetPress Capture, you may have seen a number pop up
here and there: "20,000 Patterns". In order to better understand what this number means and
what it entails for you, the user, this document will first present an overview of a typical
PlanetPress Capture implementation and then explain how the 20,000 patterns limitation can
be circumvented in some cases. We will also touch upon the potential pitfalls of these
workarounds as they are used.
The Numbers
First and foremost, the 20,000 patterns is a fixed number - PlanetPress can only generate
20,000 unique patterns as this is the number of patterns that we license through Anoto.
The 20,000 patterns are, however, not all available when generating documents. There are 8
"demo" patterns that are used to generate documents when PlanetPress Capture is in demo
mode (no license activated), and react the same way that the bulk of the 20,000 patterns.
Another single pattern is used to register pens in the database, and one last single pattern is
used when printing a "Preview" from PlanetPress Design. So in reality, the number of available
patterns for document generation is 19990, but for simplicity's sake this FAQ uses the round
number "20,000".
In a typical PlanetPress Capture implementation, a process in PlanetPress Workflow generates
output (generally, this output is directly printed) and, at the same time, will "lock" one pattern for
each page that it generates, if that page contains a pattern. PlanetPress Workflow also stores a
copy of each document in the Capture Database, in PDF format.
While a document is printed, and while this printed document has not received any ink or
signature, the document is deemed "open", the pattern it uses remains locked in the database
and cannot be re-used. Then, when someone writes on the document and sends the pen data
to PlanetPress Workflow (through a docking station or through Bluetooth), if the required
conditions have been met, the document will be "closed", its pattern released and available to
be used immediately.
An open document can also be called a "live" document, in the sense that it is only active
between the time where it is printed and the time where ink from the Anoto Digital Pen is
Page 738

processed and the document is closed. This duration is called "time to live" or "TTL", and it is
the second very important number: how long is the pattern actually needed.
The third important number is based on your actual output needs. In other words, how many
documents do you intend to print on a regular basis that will contain a pattern?
These three numbers, together, represent an easy way to determine if the 20,000 patterns are
actually enough for you. Basically, if you generate X documents within a specific time frame but
N of these documents are closed through regular process (writing on them with a pen and
docking it) during that period, does the difference between both ever reach 20,000?
Example
Say you print 19,000 pages containing a pattern, every day. You may think you'll "run out of
patterns" after a single day. But if 18,900 of these documents are being written to and
processed within the day, at the end of the day you only have a 100 page difference, possibly
due to mistakes, lost pages, or errors during processing. In this specific example, you would run
out of patterns only after 10 days, assuming the numbers remained completely static. Since
there are easy ways to deal with these remainders (a simple automated process that, once a
day, closes any document that is older than 48 hours, for example), a correct implementation
like this one would be perfectly functional and not be affected by the 20,000 page limit.
Remember however that this means that 19,000 physical sheets of paper are printed every day,
and those 19,000 documents are written on using one or more Anoto Digital Pens, which are
then processed back into the system.
The example above actually uses numbers that are much higher than our typical PlanetPress
Capture user. That is to say, a vast majority of our users will never have to worry about reaching
the pattern limitation, unless their implementation is missing important parts, such as the
"cleanup" process. But this also means a smaller minority of our users may require more than
20,000 patterns, so let's deal with this now.
Extending
There are actually 2 ways of dealing with extending the number of patterns using the currently
available tools, each with its own advantages and disadvantages.
Using separate PlanetPress Workflow servers and licenses.
In a scenario where there are multiple locations that use PlanetPress Capture and where
neither pen nor paper has any risk of being moved from one location to another, the easiest (but
Page 739

costlier) solution is to have a separate installation of PlanetPress Workflow in each location.
Each installation would be responsible for its own documents and pens. The limitation here is
that it would not be directly possible to send a page with an existing pattern to another location
(either via email in PDF or via courier), sign it there and send it back - this would cause errors
that would be hard to prevent and correct. In this scenario however, it's possible to centralize
the activation of pen licenses to one server, while keeping the pattern generation systems
separate.
Using Pattern Sequences
In the event where a single location generates all the patterns and this output *can* be split into
multiple logical zones, Pattern Sequences can be used. A Pattern Sequence is basically a
"tag" that is added after the pattern's identification (Pattern ID). When a Pattern Sequence is
used, each Pattern Sequence can re-use each of the 20,000 available patterns. "Zones", in this
case, could refer to a specific region within a city, or a whole city or a province, whatever fits
your needs.
Pattern Sequences can be handled in 2 different ways: by attaching a Pattern Sequence to a
specific pen, or by attaching it to a specific PlanetPress Workflow process. Here is an example
for each cases, using a typical situation of a shipping company that uses PlanetPress Capture
to simplify the archiving of the client's signature on a "Confirmation of Reception" slip.
l
Pen-Based Sequences: In this case, each pen is attributed a specific pattern sequence.
When documents are printed, they are set to attribute a pattern sequence to each
document in relation to which pen it will be signed on. For example, the shipping
company may have decided to print each "route" using the route number as a pattern
sequence, and each pen is tagged (with a label) as being for use with a specific pattern
sequence also. Each morning, as drivers are attributed a route, they pick up the correct
pen and stack of paper that belong to their route before leaving.
Note
It's very important to note here that the Anoto Digital Pen has absolutely no concept of
Pattern Sequences. When "attributing" a sequence to a pen, this is fully on the
PlanetPress Workflow side, in the Capture Database. This means that if a pen is
mislabeled or someone picks up the wrong pen, this pen has absolutely no way to know
that it is writing on the wrong paper. more about this in the Contamination section below.
Page 740

l
Process-Based Sequences: In this case, while documents are still printed and their
route number attributed to their pattern sequence, the pens do not have this distinction.
However, the docking station where the pens are placed at the end of the day are set to
send the pen's data to a specific process which will only handle processing for that
specific route number. In this case, one physical computer (and, presumably, printer) is
used for each route, and the driver must dock the pen in the proper docking station which
corresponds to his router number, at the end of the day.
As you may have figured out by now, we are still not actually printing more than 20,000
patterns. The only distinction here is that we are re-using patterns in separate "zones" (or, well,
sequences) and as long as pens and pages using capture patterns are not exchanged between
these zones, they act independently with their own 20,000 pattern limitation.
Note
The mobile phone application, "PlanetPress Mobile", which uses Bluetooth
communication to receive pen data and transmit it to PlanetPress Workflow, can still be
used with both pattern sequence methods, as it is the equivalent of a docking station on
the web. PlanetPress Mobile was added to PlanetPress Capture in version 7.4.
Contamination
The single but critical danger with any implementation that deals with PlanetPress Capture is
"Contamination". Basically, contamination happens when an Anoto Digital Pen writes on a
"wrong" document or is docked in the wrong location. This can happen any number of ways
and in different situations, and can have devastating effects in some of those cases so please
pay special attention to this section.
First, contamination is not limited to implementations that extend their patterns through
methods 1) and 2) above. Any time that a pen writes on a "wrong" document, it is considered
contamination. A simple example in a basic implementation would be to print a document with
a pattern on it, put this paper aside (or lose it on a desk somewhere) and forget about it.
Assuming proper processes were put in place, this document would eventually be closed by a
manual or automatic procedure. However, the physical document with the pattern still exists
even if it is closed in regards to the PlanetPress Capture database. Contamination would
happen if a new document is printed with the same pattern, but somehow the "old" document
re-surfaces and someone writes ink on it and docks the pen. When this happens, neither the
pen nor PlanetPress Workflow can understand that the data does not belong on that document
and will happily update the "current" document, possibly closing it. Because the "old" document
Page 741

relates (presumably) to a different client, this means the "current" document has invalid
information.
This can be prevented through simple methods such as printing a date on each sheet and
ensuring that users never sign a document that is older than a certain time, for example 48
hours. These sheets should simply be destroyed.
Second, contamination can happen in method 1) above if a pen or paper is moved from one
location to another. Similarly to the previous contamination example, if there exists a document
in the Capture Database where the "wrong" data is processed, it will update a document where
it does not belong. Again, neither the pen nor PlanetPress Workflow have any idea that this
causes an error until it's too late.
Third, contamination (the most common one) can happen if pattern sequences get mixed up, if
pens or paper gets swapped between users, etc. For example, again using a shipping
company (with example 2-A), if two of the drivers were to meet for a coffee and exchange their
pens inadvertently (we hope, anyways), the pens would be signing the "wrong" documents all
day and, when docked, would update the wrong documents in the database.
In all of these cases, the errors often do not appear when the wrong document is updated - it
actually occurs when the "right" data is processed. This happens precisely because the Pen
and Production have no idea that the wrong data is received and will generally close the
document after that "wrong" data has been processed - this often works with no error. However,
when the "right" data is processed, then it tries to update a document that has already been
closed by the "wrong" data, and thus fails.
Safeguards
There are certain safeguards against contamination:
l PlanetPress Capture checks for pattern size and placement. If the data contains ink for a
specific pattern but the ink location does not correspond to the Capture Fields of the
document it's updating, it will fail.
l Errors can be set to stop and revert the whole current batch. If a single error occurs during
the pen data processing, it is possible for this processing to be stopped and all changes
the Capture Database reverted. In implementations where the pen signs high number of
documents, this can especially be an easy way to do this, as chances are the data will not
match in at least one case.
Page 742

Conclusion
l
PlanetPress Workflow can only generate 20,000 unique patterns
l One pattern is used (locked) for each page containing a pattern.
l Processing the ink data from a pen and closing the document releases the pattern
l Most implementations will not need more than 20,000 patterns
l When necessary, patterns can be extended using multiple servers or Pattern Sequences
(as long as these are used in separate physical locations).
l It is extremely critical that contamination be avoided at all costs.
l Whenever possible, always avoid using pattern sequences unless it is absolutely
necessary to do so.
Anoto penDirector
The Anoto penDirector is a software driver provided as a download by Objectif Lune Inc. The
penDirector creates a bridge between the Anoto Digital Pen and a PlanetPress Capture
workflow in PlanetPress Workflow.
In order to use penDirector, it needs to be downloaded from the Objectif Lune website, on this
page. This software must be installed after PlanetPress Workflow. The setup will install a pre-
configured version of penDirector which can be immediately used with PlanetPress Capture.
The communication between penDirector and PlanetPress Workflow is either through a folder
transfer or HTTP Post communication.
To configure this communication:
1. Open penDirector setup by right-clicking on its icon in the Windows System Tray, and
selecting penDispatcher.
2. Double-click on the PlanetPress Capture entry.
3. Change the PGC Storage folder or PGC POST URL settings to your liking.
4. Click OK, then OK again.
The PGC POST URL should correspond to your server name or IP, Port and the HTTP Action
task of your HTTP Input, if that is what you are using.
Example: http://127.0.0.1:8080/ProcessPGC
Page 743

Bluetooth Connectivity
The Anoto penDirector program can also connect directly to the pen via wireless Bluetooth and
receive PGC files directly through the Bluetooth link, without needing to dock the pen.
To pair penDirector with an Anoto Digital Pen:
1. Make sure that a Bluetooth dongle is present and enabled on the computer where
penDirector is installed.
2.
Note down the PIN of the Anoto Digital Pen, by docking the pen and going in the Pen
settings tab of penDirector and looking at the Pen access group at the bottom of the
dialog. The default PIN is 0000.
3. Undock the pen, or remove its protective cap if it is not docked. Make sure the power light
on the pen is turned on and green in color.
4.
Go in the Bluetooth tab of penDirector and click on Add Pen.
5.
Click on Search while the cap is off on the pen.
6.
When the pen is found, click on it and then click Add.
7. When asked for the PIN, enter the one noted above.
8.
Click OK to save the settings.
The settings for Bluetooth PGC handling are separate from the ones used when docking.
Through Bluetooth, only a single storage and PGC Post URL location can be set for all PGCs.
Warning
Because the Bluetooth configuration only handles a single route, it is not possible to use
the Design preview patter, or the special registration pattern, using Bluetooth
connectivity. To use the preview Pattern in PlanetPress Design or use the special
registration pattern, the pen's docking station must be used.
To specify where to send the PGC files received through Bluetooth:
1. Open penDirector.
2. Go to the Bluetooth tab
3. Click on the paired pen that you want to configure
Page 744

4. Specify a PGC Storage folder
5. Check the PGC POST URL option
6. Enter the URL of your PGC handling process in the box
7. Click OK to save.
PlanetPress Mobile Application
The PlanetPress Mobile application can be installed on some mobile phones and enable fast
and direct connectivity between the Anoto Digital Pen and PlanetPress Workflow. The
connectivity between the pen and the mobile phone is done through Bluetooth, while the
connectivity between the mobile phone and PlanetPress Workflow is through the currently
active data plan (either wifi or the cell phone company's data plan, such as 3G).
PlanetPress Capture Implementation Restrictions
This document describes the limitations of the Anoto Digital Pen & Paper Technology,
especially in regards to using it within a PlanetPress Workflow implementation. Note that these
limitations apply to any Anoto technology implementation and not just our own.
Printer limitations
Any document printed with Capture Fields (aka Anoto Patterns) must be sent through a Laser
printer. Bubble jet printers are not supported and will most likely cause reading errors with
Anoto Digital Pens. Thermal printers will not work either due to the low quality printout and the
absence of actual blank ink on the paper.
Black ink close to patterns
Because the Anoto Pen & Paper technology relies on infrared to read pure-black dots on the
paper, it is imperative that no other black ink interfere with this reading. Though it is possible to
print Capture documents on a black & white laser printer as long as there is no other ink on top
of, or close to, the patterns, this is not recommended. A color laser printer should be used, and
any elements placed close to, or on top of, the Capture Patterns should be printed in color.
Black ink can be simulated using composite colors, but should never be pure black.
Page 745

Paper quality
The PlanetPress Capture technology, when generating the Anoto Pattern, already accounts for
ink dispersion on laser printers and on general-use laser paper. Therefore, using paper that is
not of the same quality (for example, one where the dispersion rate is much higher) or the same
type (reflective paper) may not permit the pen's camera to read the pattern properly.
Pattern sizes
The absolute minimum required for an Anoto Digital Pen to read the pattern and know it's
position on the page is 7mm (1/4"). Any pattern smaller than this will not be readable. However,
at 7mm width and height, the pen can only recognize a single dot within that pattern, at the top
of the field.
Page 746

This is because the pen's camera (which captures the position of the pen) is located under the
pen tip and must fully see the pattern. The following image illustrates how the pen reads its
position:
Page 747

Knowing this, the best practice when creating fields is that they have, at the very least, a 7mm
margin on each size of the actual area you want to capture from. For example, an effective
30mm wide pattern will actually be 44mm wide using these margins. The margin should be for
both the vertical size and the horizontal size.
Distance between patterns
In implementations where a lot of patterns need to be close together (a questionnaire, multiple
choice question, checkmarks, etc) it is important to understand the risk of then pen writing
across multiple fields on the paper. People using the pen may, for example, make a very broad
checkmark which would bleed over to the next field. This can cause PlanetPress Capture to
detect the ink as being present, and thus trigger whatever that field does.
Page 748

PlanetPress Capture ICR
The term "ICR", which means "Intelligent Character Recognition" is an evolution on the
popularly-known "OCR", which is "Optical Character Recognition". The difference between the
two is easily explained: While OCR can only recognize characters using the finished shape (for
example, in scanned documents and pictures), ICR relies on much more data which is provided
by the Anoto Digital Pen: the path that the pen takes, the exact timing of this path, start and stop
points, etc. This extra information boosts the recognition rates of characters by a wide margin.
It's important to note that both OCR and ICR are relatively loose terms - that is to say, they can
have different specific meanings depending on the technology used, but in their general sense
mean the same thing. When using the term ICR, we use the above definition for convenience.
Note
The PlanetPress Capture ICR engine is only available with PlanetPress Workflow
version 7.5 and higher.
An ICR Workflow
The ICR engine in PlanetPress Workflow is used in conjunction with PlanetPress Capture,
translating the ink from the Anoto Digital Pen into separate characters, or text, that is readable
by the suite. Multiple components are required in order for the ICR to work:
Page 749

l In PlanetPress Design, a Capture Field Object must be added and the Perform ICR
option must be activated (See the Capture Field page in the PlanetPress Design User
Guide). This must be either a Multi-Area Field or a Text Field.
l The Capture Fields Processor must have the Perform ICR Recognition option checked,
and language needs to be selected.
l Once the ICR data is available, do something with it. This is done by reading the ICR data
that is available in the metadata generated by the Get Capture Document task.
l The metadata is also readable by the Capture Condition task, including the captured text
and the reliability of this text.
The Workflow as such is the following:
l A Capture field is setup for ICR in a PlanetPress Design document.
l
The document is sent to PlanetPress Production
l The Capture Field Generator is used to produce one or more print-outs using this
document.
l The physical sheets are written on using an Anoto Digital Pen
l
The pen is docked and the data is sent to PlanetPress Production
l The pen data goes through the Capture Field Processor, where the Capture Field ink is
sent through the ICR engine.
l
The captured ICR data is retrieved with the document using the Get Capture Document
task.
l
Conditions are applied if necessary with the Capture Condition task.
Warning
ICR, just like OCR, has its limitations. Please refer to the PlanetPress Capture ICR Best
Practices page for more information.
Terminology and Definitions
In regards to our ICR technology specifically, the following terminology applies:
l
ICR: "Intelligent Character Recognition", or the engine that will read the pen data and
attempt to recognize the text written using the pen itself. The ICR engine uses the path of
Page 750

the pen, its movement speed as well as the overall shape of each character to determine
which character was written.
l
ICR Value: The alpha, numeric or alphanumeric value that was determined by the ICR
engine.
l
ICR Confidence: A percentage value that the ICR engine gives to any specific value,
when comparing the pen data with it's character database.
l
ICR Resemblance: A percentage value that defines how closely the value resembles the
"average" character shape. Both the Confidence and Resemblance can be used together
to make an informed decision on the contents received by ICR.
PlanetPress Capture ICR Best Practices
From Workflow 7.5 onwards, PlanetPress Capture supports Intelligent Character Recognition
(ICR). However, this technology comes with certain limitations. A successful integration of ICR
within a business requires the application of best practices by all parties involved: Form
designer, Workflow designer and User.
Here we present a list of recommended best practices. Each of these guidelines aim at
maximizing the likelihood that the characters are recognized; and minimize the risk of errors
due to an incorrect analysis.
You will find the following information, when applicable, for each best practice:
l
Target: The targeted audience. There are 3 possibilities: Form designer, Workflow
designer and User.
l
What: A brief description of the best practice. This could include an explanation of the
concepts that are addressed.
l
Why: A brief explanation of the reasoning behind the relevance of this guideline.
l
How: How to apply this best practice.
This section describes a list of the best practices to implement. They are listed in no particular
order of importance. Pay attention to the targeted audience to know if this rule applies to you.
Page 751

Using the Most Restrictive Mask
l
Target: Form designer.
l
What: In the Capture Options tab of a Capture object, the mask type indicates the type of
character to be recognized. There are 3 possible selections: numeric, alphabet and
alphanumeric. The alphabetic mask type allows you to select the letter case.
The following guidelines are applicable when configuring a PlanetPress Capture object
that utilizes ICR:
l The collected data is expected to be a number, therefore the numeric mask type must be
selected, or
l The collected data is expected to be a letter, therefore the alphabet mask type must be
selected,
l
If upper case letters are expected, select Upper case in the Case option menu. The
captured characters would be immediately converted to capital letter i.e. the ICR engine
will recognize a lower case a but will display it in upper case.
l
If lower case letters are expected, select Lower case in the Case option menu. Same as
for upper case letters, the captured characters would be converted to lower case and
displayed as such.
l If proper names or nouns are expected (i.e. only the first letter must be a capital letter),
select Capitalization in the Case option menu. Only the first letter would be converted to
a capital letter.
l
If no specific format is expected, select None in the Case option menu. The letters will be
interpreted as written, no conversion will be done i.e. characters in lower case will be
displayed as such.
l The collected data is expected to be a combination of numbers and letters, therefore the
alphanumeric mask type must be selected.
Why: Reducing the number of expected characters increases the probability that the correct
one is matched. This allows us to avoid that the letter l (a lowercase L) is not recognized as the
numeric value 1 (one) and vice versa. Or, if the mask type is identified as alphanumeric, there’s
a possibility that the letter a is recognized as 2; since Capture will also interpret how the
movement was traced.
Page 752

How: Use the following options from the Capture options tab under Mask Type and Case
option to filter the expected data.
The following diagram illustrates the available mask types. It is recommended to select the
mask type that is the closest to the desired result. An alphanumeric field should be used as a
last resort.
Page 753

Guidelines for Capture-Ready Fields
l
Target: Form designer
l
What: Only one character per Capture field can be recognized. When expecting multiple
characters making up a word or phrase, you must make sure that the user only writes one
character per field. In order to do so, you must make sure that the fields are big enough
and have enough space between each one. The best practice is to make sure that there
is a boundary surrounding the field where ink marks are to be written.
Why: To avoid any ink marks that would spill over from one field to another. If both fields A and
B are to close in proximity and the ink marks from field A spill over to field B, then the marks
captured on field B would be considered as being part of a character written on field B. For
example, if a number spills over and is written over two fields like numbers 9, 1 or 7; then the
bottom tip of these numbers could be considered as number 1 in the second field. (Refer to the
example below)
Page 754

How: Make sure there’s enough space between each field. You must re-design the document if
that’s the case. There’s no minimum value that is required as the distance between 2 fields,
except for the 7mm border that is required in order for the Anoto digital pen to recognize the
pattern being used.
Writing in a Legible Way
l
Target: User.
l
What: It is important to write in a legible way i.e. applying yourself by writing well defined
numbers and letter that are easily interpreted.
Warning
You must write on a flat and smooth surface i.e. a delivery person should use a clipboard.
Why: Some numbers can create some confusion, like numbers 7 and 1. 7 can be interpreted as
a 1 and vice versa. The letter i, where the dot on top is a circle, can possibly cause a conflict
because the dot can be considered as an o.
How:
Page 755

l Write an additional line under the number 1.
l Write an additional line across the number 7.
l The ICR functionality of PlanetPress Capture cannot recognize dotted letters where there
are circles instead of dots (like i , j). This would be analyzed as an i AND o. Therefore,
dots should be as such and not circles.
l In French, the ç is somewhat sensitive. You must apply yourself and draw the letter
carefully. In most cases, it is recognized, but attention must be paid.
l Number 8 is also sensitive. It is recommended that the number is traced as one
movement instead of drawing 2 circles on top of each other.
Selecting the Correct Language When Using the Capture Field Processor Task
l
Target: Workflow designer.
l
What: It is crucial that the correct language is selected when using the ICR recognition
option. This will affect how the captured data is interpreted.
Why: The available filters to interpret the ink marks done with the Anoto digital pen, allow you
to select the engine language to be used. Doing so will give you results that are the closest
match to the captured data. Multiple cultural characters can be interpreted with ICR once the
correct language is selected such as û, à, é, etc.
How: This option is available from the Capture Fields Processor task.
Page 756

Possibility of Interpretation Error in an Automated Process
l
Target: Workflow designer
l
What: We cannot be 100% sure that a character would be recognized by PlanetPress
Capture as it should. Therefore, the analysis of a value interpreted with ICR should only
occur if the level of confidence is superior to a determined level.
Page 757

Why: An automated process can treat the characters incorrectly due to an incorrect
interpretation of a value. This occurrence should be minimized as much as possible.
How: Allow for a special process (possibly manual handling) in the case the automated
process didn’t reach a high confidence level in its analysis of the ink marks. Use the plugin
Capture condition that includes the ICRContent option. This can be configured to be a true
condition if the confidence level is greater than a certain value.
Capture OnTheGo (COTG)
Capture OnTheGo (COTG)is a mobile app to capture and send data. A COTG solution creates
e-forms that you can download to your mobile device (iOS, Android or Windows 10). You can
then add text, pictures, annotations, numbers, dates, signatures, etc., as well as validate the
forms, whether online or offline.Next, you can send the collected information back to your office
via the internet.
COTG also lets you distribute and manage PDF documents, such as guides or disclaimers.
Capture OnTheGo is only compatible with OL Connect.
For more information on building and using PlanetPress Capture OnTheGo processes, please
see Capture OnTheGo user guide.
About PlanetPress Fax
PlanetPress Fax is a service that can be used to output data and documents via a faxing
software, such as Windows Fax (available with Windows 2000, XP, and Microsoft Windows
Server™ 2003) or Symantec WinFax PRO, as well as via a faxing server, such as Captaris
RightFax. Note that it is these applications that do the actual faxing.
l
Windows 2000: PlanetPress Fax Output tasks set to use Windows Fax under Windows
2000 may fail when no one is logged on to the system running PlanetPress Fax.
l
Windows XP: Windows Fax may not work properly after the Windows XP Service Pack 2
(SP2) has been installed (refer to Microsoft Customer service for more information on this
issue). Also note that Windows Fax may take as much as three times more time to send
faxes under Windows XP.
PlanetPress Fax can be installed on any computer on your network and process all requests
coming from tasks performed by PlanetPress Workflow on other workstations. You may choose
Page 758

to run it on every computer where PlanetPress Workflow is running, but you may also choose to
run it on computers more or less dedicated to PlanetPress Fax.
Since the faxing program must always be running and ready to receive requests from
PlanetPress Workflow, it should be included in the Windows Startup group.
PlanetPress Fax can associate a different fax number with each page it sends via the faxing
software. For this to happen, two things are required: each record must have a fax number
specified in the job file and that fax number must be tagged as such in PlanetPress Design (in
the PlanetPress Design User Guide, refer to the section documenting Data Selections, which
includes explanations on the available PlanetPress Fax options). When the data and the
document are merged, the fax number associated with each record becomes available to
PlanetPress Fax that can then pass it on to the faxing software.
Note
Because of technical limitations, the minimum time required to generate a PlanetPress
Fax document is approximately 10 times longer on Windows 2000 than on Windows
XP/2003.
About PlanetPress Image
PlanetPress Image is a multi-threaded service that can generate image files in PDF, JPEG and
TIFF format. As PlanetPress Workflow and PlanetPress Image are compliant with AutoStore,
DocAccel and KYOcapture, these formats can also be used.
The generated files can be archived and, depending on whether you use a PlanetPress Image
Output task or a Digital Action task, sent via email. Note that you can use PlanetPress Search,
another program included in PlanetPress Workflow, to search through archived PDF files.
Note
All raster images, such as GIFs or JPEGs, generated by PlanetPress Image are portrait
oriented.
Page 759

PlanetPress Image can be installed on any computer on your network and can process
requests coming from tasks performed by PlanetPress Workflow on other workstations. You
may choose to run it on every computer where PlanetPress Workflow is running, but you may
also choose to run it on computers more or less dedicated to PlanetPress Image. Note that in
the case of Digital Action tasks, PlanetPress Workflow and the PlanetPress Image service
must be running on the same computer.
Note
The minimum time required to generate a PlanetPress Image document is approximately
10 times longer on Windows 2000 than on Windows XP/2003.
Preferences
In addition to the job-specific PlanetPress Image properties that you configure in the task’s
Properties dialog box, there are configurable options common to all PlanetPress Image
Outputs processed by a given computer; see "PlanetPress Image preferences" on page811.
Note that those options are specific to each PlanetPress Image installation and that they are
immediately applied.
OL Connect Send
Connect Send allows for PostScript files to be received over the internet from any Windows
Desktop application. It is in fact an application with two components. The first is a Windows
printer driver while the other is a group of Workflow plugins (Job Processor, Get Job Data and
Get Data). These two components work together indiscriminately, each needing the other to
function.
Connect Send can be used in unlicensed mode and licensed mode.
The Unlicensed mode (default) allows users to push documents to Connect Send. They will
receive a pop-up message in the Notification Area confirming whether the job was received or
not.
The Licensed mode causes the Connect Send Printer Driver to request a web page that will
be displayed in the user’s browser in order to allow them to enter job specific information. The
information from this web page can be used to tell Workflow what to do next.
Page 760

Workflow processes in Connect Send
For help on the configuration of Workflow processes in a Connect Send solution, see
"Workflow processes in a Connect Send solution" on page298.
OL Connect Send tasks
l "Get Data" on page577
l "Get Job Data" on page582
l "Job Processor" on page586
ZUGFeRD
The ZUGFeRD plugin provides a way to enrich German PDF invoices with data specific to the
invoice. This is done by embedding the data in a standardized XML format within the PDF
itself.
ZUGFeRD is an acronym for Zentraler User Guide des Forums elektronische Rechnungen
Deutschland. In English this translates to Central User Guidelines of the Forum for Electronic
Billing in Germany.
The ZUGFeRD standard describes three different levels of embedded information. The
“BASIC” profile is the lowest level, and is the level supported by the Workflow plugin. It holds
structured data which is enough to cater for most requirements of the Federal Ministries and
industries (such as the software and taxation sectors) participating in the standard.
For more information, please see the ZUGFeRD website: https://www.ferd-
net.de/zugferd/definition/index.html.
Licensing
The ZUGFeRD plugin is bound to the Connect Workflow Imaging license.
Workflow Imaging is an add-on license bundle for Connect Workflow that includes the Image
and Fax plugins.
Without a valid Imaging license, the plugin will create a valid ZUGFeRD PDF file at design time
and in debug mode, but will not apply ZUGFeRD data to the PDF in runtime/production mode.
An unlicensed plugin will simply pass through any incoming PDF files untouched.
Page 761

Plugin language
The plugin is only available in German, as its application is only really relevant to documents
created for the German market.
Plugin usage
For help on how to use the ZUGFeRD plugin, see "ZUGFeRD plugin" on page530.
Plugin Legal Notices and Acknowledgments
Copyright © 2022, Objectif Lune Inc. All rights reserved.
The ZUGFeRD name and logo are protected under copyright and used with permission of the
Arbeitsgemeinschaft für wirtschaftliche Verwaltung e.V. in Germany.
The Objectif Lune Inc. ZUGFeRD plugin uses the following third party component: Intarsys
ZUGFeRD Toolkit
About related programs and services
Services are programs that run in the background and automatically perform tasks that often do
not require any user interaction. With the exception of the PlanetPress Workflow Configuration
tool, all the programs used by PlanetPress Workflow are run as service applications.
PlanetPress Workflow can thus use them as required without the need for any user interaction.
Although you can manually start and stop any service running on your computer, most of the
basic services used by the system are started and stopped automatically. In the case of
PlanetPress Workflow and their related services, you typically use a command included in your
PlanetPress Workflow Configuration program to start and stop most services. Opening and
closing your PlanetPress Workflow Configuration program has no effect on these services.
The PlanetPress Workflow Service Console, included in the PlanetPress Workflow Tools
ribbon, can be used to monitor, start and stop PlanetPress Workflow services (see "Users and
configurations" on page765 and The PlanetPress Workflow Service Console).
Services must use an account to be granted the permission to use the system’s resources and
objects. This information is included in the service's configuration and most services use the
Local System Account, which is granted access to all the system’s resources. All input and
output services used by PlanetPress Workflow run under the same account. For more
Page 762

information on services and system permissions, refer to Windows documentation. For more
information on how to configure the account used by the services, see "Workflow Services" on
page767.
Available Input services
Input services are used to pull in data files. The input services used by PlanetPress Workflow
are:
l
LPD (Line Printer Daemon) Input service: Inputs data sent from an LPR client. The
LPD/LPR printing protocol is a common way to send print jobs that, in turn, use the
TCP/IP protocol to communicate through the network.
l
PrintShop Mail Web Capture service: Monitors print requests from a PrintShop Web
server.
l
Serial Input service: Monitors a single serial port for incoming data. Note that all Serial
input tasks use the same serial port (set in the user options of the PlanetPress Workflow
Configuration program).
l
Telnet Input service: Monitors multiple telnet ports for incoming data. Note that each
Telnet input task has its own telnet port number (set in each task).
l
HTTP/SOAP Server service: Monitors web pages and web sites as well as SOAP
servers.
Available Output services
Output services are used to output jobs. The output services used by PlanetPress Workflow
are:
l
FTP Output service: Places output jobs on a server via the FTP protocol.
l
LPR (Line Printer Requester) Output service: Sends jobs to an LPD server or LPD
compatible printers. The LPD/LPR printing protocol is a common way to send print jobs
that, in turn, use the TCP/IP protocol to communicate through the network.
l
PlanetPress Image: Outputs jobs as PDF files or in a variety of image formats. You can
also use PlanetPress Image to archive and/or email the files it creates. You can use
PlanetPress Search to search the PDF files PlanetPress Image creates. You can install
multiple instances of the PlanetPress Image service on your network, and have
PlanetPress Workflow send jobs to one or more of these instances. Each instance of
Page 763
PlanetPress Image can generate PDFs or images and dispatch them from the host on
which it runs. See "About PlanetPress Image" on page759.
l
PlanetPress Fax: Outputs jobs as faxes. You use PlanetPress Fax as an interface to
WinFax PRO or Windows Fax, to send faxes you create from documents. You can install
multiple instances of the PlanetPress Fax service on your network, and have PlanetPress
Workflow send jobs to one or more of these instances. Each instance of PlanetPress Fax
can generate faxes and dispatch them from the host on which it runs, using a local faxing
program, such as WinFax PRO, Captaris RightFax or Windows Fax. See "About
PlanetPress Fax" on page758.
l
PrintShop Mail: Used to generate documents using PrintShop Mail databases and
documents. Communicate with it through the PrintShop Mail and PrintShop Mail 7
Connector Tasks. See "PrintShop Mail" on page527.
l
Laserfiche: Used as a repository for electronic documents. Communicate with it through
the Laserfiche Repository Output Task. See "Laserfiche Repository Output" on page497.
l
PlanetPress Capture: Used to generate and process files using Anoto patterns.
Communicate with it through the PlanetPress Capture tasks such as the Anoto Ink
Processor and the Anoto Pattern plugins.
Start and stop PlanetPress Workflow Service
As with most Windows services, PlanetPress Workflow can be started and stopped
automatically when a Windows session is opened and closed. The other option is to start, stop
or pause PlanetPress Workflow manually using the PlanetPress Workflow Configuration
program.
Note
The current PlanetPress Workflow status is always displayed in the lower-right corner of
the PlanetPress Workflow Configuration program window.
Click Tools in the PlanetPress Workflow Ribbon.
Then, in the Services Status group:
l
Click Start Service to start the service. A progress bar is displayed while your
PlanetPress Workflow is being started.
Page 764

l
Click Stop Service to stop the service.
When you stop or pause PlanetPress Workflow, it immediately stops bringing new files
into its processes, but it keeps on performing tasks until all the files which are currently
under process have been completely processed.
l
Click Pause to pause the service. The PlanetPress Workflow service temporarily stops
performing jobs.
Note
If you send a new configuration when PlanetPress Workflow is paused, it will
continue using the old configuration when you resume processing until you stop
and restart it. See also: "Saving and sending a Workflow Configuration" on
page37.
l
Click Resume to resume the service after pausing it. The PlanetPress Workflow Tool
service starts performing jobs again.
Users and configurations
When a user opens a session on a computer, they typically need to log in. When they do so, a
session is opened and customized for them on that computer (certain drive letters and network
shortcuts may be mapped, local and network printers may be made available, etc.).
Furthermore, local and network rights may be granted to them: the right to get documents from -
and to put documents in - local or network folders, for example, or the right to print on such or
such printer.
Local and network rights
Programs, such as PlanetPress Workflow and all their services, must identify themselves in
order to be granted permission to perform operations on the computer on which they run as well
as on other computers accessible via a network connection. On a given workstation, you can
configure your PlanetPress Workflow to use either the local system account or any specific user
account (see "Workflow Services" on page767). When you do this, you grant the PlanetPress
Workflow and all its services the same rights associated with the selected account. It is
important to note that PlanetPress Workflow and its services require administrator rights to run
on any given computer and that they must therefore be associated with an account that has
such rights.
Page 765

When you are running the PlanetPress Workflow Configuration program on a workstation, if it is
associated with an account that is different from your account, the following icon is displayed in
the lower right corner of the PlanetPress Workflow Configuration program: . This is to draw
your attention to the fact that your PlanetPress Workflow may have rights that differ from your
rights, and that this application and its services may therefore not be able to perform some of
the actions you can perform when you create or edit a given configuration.
The simplest thing to ensure that rights are the same across your whole network is to create an
administrator network account especially for PlanetPress Workflow Tools. This will ensure that
the PlanetPress Workflow and all its services have the same rights on all computers and that it
is therefore able to perform all the actions defined it needs to on every computer on your
network. A less permissive solution is to create an administrator local account for PlanetPress
Workflow and to replicate it on each computer where PlanetPress Workflow and its services are
likely to perform operations, such as get files, store files, or run applications and perform
operations.
Local settings
Different users may create different printer queues. Let us say you have a big HP printer in your
office. User A creates a printer queue on his system called “Big HP” for that printer, and user B
creates one called “My printer” for the same printer. A configuration created on user A’s system
and then used on user B’s system would generate errors trying to print to the “Big HP” printer
queue.
Different users may also map network drives differently. Let us say this time that you have a
server in your office. User A maps that server’s main drive using drive letter “y:” while user B
maps it using drive letter “z:” A configuration created on one system and then used on the other
would both get and save the wrong files from the wrong drives. Note that such situations may
be avoided by using the Universal Naming Convention option.
User specificity
PlanetPress Workflow configurations are not user specific as such. If you make sure that all the
user accounts have adequate network rights, that printer queues are defined the same way on
all systems, and that all network drives are mapped using the same drive letters (or that the
UNC option is selected in the network options), then you should have no problems running
configurations on different systems using different user accounts.
Page 766

Workflow Services
To be able to run and to have access to local files as well as to files available on other
computers in your network, PlanetPress Workflow applications and services must identify
themselves using a local or network account.
The first time you start the PlanetPress Workflow Configuration program, the application
automatically asks you to choose an account (see below).
You can also manually start this procedure from the PlanetPress Workflow Tools by following
this procedure: click on the Tools tab in PlanetPress Workflow Ribbon, then click Configure
Services.
Set the PlanetPress Workflow applications permissions as required:
l
Local System account: Select to run all the PlanetPress Workflow Services (including
PlanetPress Workflow, PlanetPress Fax, and PlanetPress Image) under the Local
System account. The Local System account is distinct from the Administrator account. It
requires no user name or password, and its privileges may exceed those of the user
currently logged in. Running under this account rather than a user account prevents
problems that may arise if the user lacks a permission the service requires. If a
configuration relies on any resources mapped to a particular user, such as mapped
network drives or shared printers, they are unavailable. It is recommended that you create
a configuration for a particular user. Clear the Local System account checkbox to run all
the PlanetPress Workflow Services under the account you specify. Use the options that
become available when you clear Local System account to enter the account
information—you must enter a valid user name and password to use Microsoft Outlook as
your email client for Email input and Send email output tasks.
l
This Account: Provide a domain, user name and password to use instead of the Local
System Account.
l
Browse: Opens the default Windows dialog for selecting users/groups/etc. from a
domain.
l
User: Enter the name of the user account.
l
Password: Enter the password for the user account you specified in the user name
box.
l
Confirm password: Enter the password you entered in the Password box.
Page 767

l
Services start automatically: Select to start the required PlanetPress Workflow
automatically.
PlanetPress Workflow applies the user account information to all the services (PlanetPress
Workflow, PlanetPress Fax, PlanetPress Image, LPD input, Serial input, Telnet input, FTP
output, LPR output, and PlanetPress Messenger), that run on this computer.
The PlanetPress Workflow Configuration program does not test user names and passwords,
but merely associates them with the services that require them. If you enter a bad user name or
password, these services will be denied access to the selected account.
The account you choose will be used by PlanetPress Workflow and all its services, as well as
by PlanetPress Fax and PlanetPress Image. If you install PlanetPress Fax or PlanetPress
Image on the same computer after performing this procedure, you will have to perform it once
again, so as to choose the same account for all the installed applications.
Page 768

Preferences
PlanetPress Workflow Configuration program lets you configure a variety of options, from how
the application itself looks or behaves, to plugin specific options.
Most of PlanetPress Workflow preferences are located in the PlanetPress Workflow
Preferences window, accessible through the Preferences button in the PlanetPress Workflow
button, or the key combination Ctrl+Alt+P. Those preferences are:
l Appearance:
l "General appearance preferences" on the next page
l "Object Inspector appearance preferences" on page771
l "Configuration Components pane appearance preferences" on page772
l Behavior:
l "Default configuration behavior preferences" on page773
l "Notification Messages behavior preferences" on page774
l "Sample Data behavior preferences" on page777
l "Network behavior preferences" on page777
l "PlanetPress Capture preferences" on page778
l "OL Connect preferences" on page787
l "PDF text extraction tolerance factors" on page789
l Plug-in:
l "General and logging preferences" on page791
l "Messenger plugin preferences" on page792
l "HTTP Server Input plugin preferences 1" on page793
l "HTTP Server Input plugin preferences 2" on page797
l "LPD Input plugin preferences" on page799
l "NodeJS Server Input plugin preferences 1" on page800
l "NodeJS Server Input plugin preferences 2" on page802
l "NodeJS Server Input plugin preferences 3" on page803
l "Serial Input plugin preferences" on page805
l "SMTP Input" on page372
Page 769

l "Telnet Input plugin preferences" on page806
l "PlanetPress Fax plugin preferences" on page807
l "FTP Output Service preferences" on page810
l "PlanetPress Image preferences" on page811
l "LPR Output preferences" on page814
l "PrintShop Web Connect Service preferences" on page816
Note
Preferences are saved automatically and applied immediately.
Other preferences and settings
l
The PlanetPress Workflow Services dialog lets you select the account that PlanetPress
Workflow Service uses to communicate on the server and the network. See "Workflow
Services" on page767.
l
You can change the appearance of the Run Script and XSLT Editor through the Editor
Options dialog.
General appearance preferences
Ribbon Color Scheme
l
Blue: Sets the general interface color scheme to a blue color.
l
Silver: Sets the general interface color scheme to a silver (gray) color.
l
Black: Sets the general interface color scheme to a black (coal) color.
Colors
l
Variable properties: Select a color for the labels identifying variable property boxes.
l
Debug: Select the color applied to the PlanetPress Workflow Process area background
when in debug mode.
Page 770

l
Highlighted tasks and branches: Select the background color for highlighted tasks and
branches in the Process Area’s invisible grid.
l
Disabled tasks and branches: Select the background color for disabled tasks and
branches in the Process Area’s invisible grid.
Inactive process
l
Color: Select the color to use to identify inactive processes in the Configuration
Components pane.
l
Bold: Select to use a bold font to display inactive processes.
l
Underline: Select to use an underlined font to display inactive processes.
l
Italic: Select to use an italic font to display inactive processes.
l
Strikethrough: Select to use a strikethrough font to display inactive processes.
Object Inspector appearance preferences
Colors
This window lets you set the color of individual Object Inspector elements. To change the color
of a given element, select it in the list box above and then choose a color from the drop-down
list below.
Options
l
Vertical line 3D: Select to display the vertical line between property names and their
values using a 3-dimensional effect.
l
Use groups: Select to organize the display of properties into groups. Clear the selection
to display properties in alphabetical order. When the Object Inspector displays properties
in groups, it displays an expand/collapse button to the left of the name of the group for
expanding or collapsing the group.
l
Sunken active property: Select to use a recessed effect to display the currently selected
property.
l
Border active property: Select to display a border around the currently selected
property.
l
Show lines: Select to display lines between elements.
l
Line style: Select a style for the lines.
Page 771

l
Reset to default button: Click to reset all the Object Inspector options to their default
values.
Configuration Components pane
appearance preferences
Colors
This window lets you set the color of individual Configuration Components pane elements.
To change the color of a given element, select it in the list box above and then choose a color
from the drop-down list below.
Options
l
Line Style: Select the style (dotted or solid) of the line that connects the different objects
in the Configuration Components pane.
l
Selection rectangle: Select whether your selection rectangle (used to select multiple
objects by dragging a rectangle around multiple objects) will be displayed as a dotted line
rectangle, or a blended rectangle (normally a blue rectangle with darker blue border).
l
Button Style: Select whether to show the expansion links as either an arrow (points right
for a closed tree, down for an open tree) or a square (shows a minus symbol for an open
tree, plus symbol for a closed tree).
l
Show Tree Lines: Check to choose whether or not to display the lines that connect the
different objects in the Configuration Components pane.
l
Show Grid Lines: Check to choose whether or not to display grid lines between each
object in the Configuration Components pane.
l
Hot track: Check to choose whether or not to display the object in the Configuration
Components pane under the mouse cursor as being underlined.
l
Reset To Defaults button: Click to reset all the Configuration Components pane
appearance options to their default values.
Page 772

Default configuration behavior preferences
l
Use default configuration: Check to use default input and output tasks when you create
a new process. If this group is not selected, each new process you will add will begin and
end with unknown tasks.
l
Default input task: Select an input task to use as the default input task when you
add a new process. Click the Configure button located to the right of this box to set
the properties of the selected input task.
l
Default output task: Select an output task to use as the default output task when
you add a new process. Click the Configure button located to the right of this box to
set the properties of the selected output task.
l
Default output task for conditions/branches: Select an output task to use as the
default output task when you add a new branch or condition. Click the Configure
button located to the right of this box to set the properties of the selected output task.
l
Open the current configuration on startup: When this option is selected the Workflow
Configuration tool automatically starts with the configuration that was last sent to the
server. Otherwise no configuration will be opened at the start.
l
Enable Undo/Redo functionality: Select this option to enable or disable the Undo
functionality. Disabling the Undo/Redo functionality frees up a lot of memory and may
thus speed up your system. The maximum number of steps performed is set in the box
below.
l
Auto Save every: Select to enable the Auto Save functionality. The auto save delay is
set in the box below (in minutes).
l
Enable printer information validation when opening a Watch configuration file: If one
of the processes in the configuration file contains a Print using a Windows printer driver
plugin, the printer information (printer name, driver size and version) will be checked and
the update process will be performed as required.
l
Default scripting language: Specify which scripting language the Run Script plugin
expects by default. This preference is saved in the registry, not in a configuration file.
Page 773

Note
l
The JScript engine is Microsoft’s JScript 5.8, which is the equivalent of
JavaScript 1.5 (ECMA-262 3rd edition + ECMA-327 (ES-CP) + JSON).
Enhanced JScript allows the use of more recent JavaScript syntax. Many
methods - basic methods like Date.now(), String.trim(), btoa
()/atob() and more advanced methods like Array.forEach() - are
added to the JScript engine via the polyfill.js library.
l While JavaScript and VBScript are natively available on Windows operating
systems, Python and Perl require third-party tools to be functional. For Perl,
ActivePerl can be installed. For Python ActivePython (version 2.7.13 ) can be
installed.
Notification Messages behavior
preferences
Notification Messages behavior preferences control the display of certain messages and
prompts within PlanetPress Workflow.
Preferences
l
User mismatch: Select to have PlanetPress Workflow display a prompt when a different
user opens the application.
l
Task deletion: Select to prompt for confirmation when deleting a task.
l
Document deletion: Select to have PlanetPress Workflow prompt for confirmation when
deleting a document.
l
Prompt on Document deletion when service is running:
l
Group of documents deletion: Select to have PlanetPress Workflow prompt for
confirmation when deleting a group of documents from the Configuration Components
pane.
l
Empty group deletion: Select to have PlanetPress Workflow prompt for confirmation to
delete a group when you remove the last of its member objects. If you clear this option,
groups are automatically deleted when their last members are removed.
Page 774

l
Invalid name: Select to have PlanetPress Workflow warn you when you try to rename an
object in the Configuration Components incorrectly. Names can include letters, numbers,
and underscores; the first character of a name cannot be a number.
l
Printer queues update: Select to have PlanetPress Workflow prompt you when adding a
document to a group under the Documents category in the Configuration Components
pane. You are only prompted if the group of documents is assigned to one or more printer
queues. PlanetPress Workflow can add the new document to all assigned groups under
the Printer Queues category automatically.
l
Configuration save with wrong user: Select to have PlanetPress Workflow prompt for
confirmation when you are saving a configuration while logged onto the computer as a
user other than the one associated with the PlanetPress Workflow service.
l
Configuration save: Select to have PlanetPress Workflow prompt to save the current
configuration when exiting the software or before opening another configuration file.
l
Configuration send: Select to have PlanetPress Workflow prompt to send the current
configuration to run in the PlanetPress Workflow service when exiting software or before
opening another configuration file.
l
Nothing to configure: Select to have PlanetPress Workflow notify you when you try to
set properties for a task that does not have any properties. For example, the Error Bin
input has no properties because it only inputs jobs sent to it through On Error properties of
tasks in other processes. When you attempt to edit its properties, it displays the "nothing
to configure" message when this option is selected.
l
No registry: Select to have PlanetPress Workflow notify you if it cannot find an install
location in the registry. In such cases, the path of the currently running software
executable is used as the install path.
l
PlanetPress Watch 3 documents and job commands transfer: Select to have
PlanetPress Workflow display a prompt when you import a configuration from
PlanetPress Watch 3 that allows you to transfer documents and job commands.
l
Plugin not found: Select to have PlanetPress Workflow display a prompt when you
import a configuration, and one or more of the plugins used in the configuration are not
found on the computer running the software.
l
Prompt on configuration overwrite: Select to have PlanetPress Workflow prompt for
confirmation when a configuration is about to overwrite a file with the same name.
l
Prompt on no active process to send: Select to have PlanetPress Workflow prompt for
confirmation when attempting to send a configuration although no processes are active.
Page 775

l
Prompt on overwrite of a document: Select to have PlanetPress Workflow prompt for
confirmation when a document that is being imported using File | Import Document is
about to overwrite an existing document.
l
Prompt on Document overwrite when service is running: Select to have PlanetPress
Workflow prompt for confirmation when a document that is being imported using File |
Import Document is about to overwrite an existing document. The only difference between
this option and the previous one is that this option will warn the user that the document
about to be overwritten may currently be used by the PlanetPress Watch service.
l
Prompt on Importing a non PlanetPress Document: Select to have PlanetPress
Workflow prompt for confirmation when a document that is not a valid PlanetPress
Connect document is about to be imported. This may occur if a non-PlanetPress Connect
document will inadvertently have a PPX or PSI file extension.
l
Prompt on Resetting Document Attributes: Select to have PlanetPress Workflow
prompt for confirmation when importing a hidden or read-only document using the File |
Import document command. By confirming the import, you allow PlanetPress Workflowto
reset the document’s attributes to ’Visible’ and ’Read and Write’.
l
Prompt on Document Instance Deletion:
l
Prompt on Emulation Change: Select to have PlanetPress Workflow prompt when the
default process emulation is being changed. The last emulation selected when
debugging a process is the one the process begins with.
l
Prompt on Form Refresh: Select to have PlanetPress Workflow prompt for confirmation
when recompiling the PostScript (PSx) version of a PlanetPress Connect Document.
Refreshing PlanetPress Connect Documents that are currently in use can lead to
unexpected results.
l
Prompt on Saving with Unknown Task: Select to have PlanetPress Workflow prompt
for confirmation when saving a configuration file or sending the configuration to the
PlanetPress Watch service, when any process contains "Unknown tasks" on page716. If
an Unknown Task is present, such as when a process was created with a PlanetPress
Workflow license that is not the same as the current one, the settings for this task will be
lost when saving or sending to the service.
l
Display Generic Splitter Found Message: Select to have PlanetPress Workflow prompt
when a Generic Splitter task is found in any of the configuration's processes. The
Generic Splitter task is maintained because of its historical purpose but should no longer
be used since it can almost always be replaced by more specialized and efficient
splitters.
Page 776

l
Warn on Component Rename: Select to have PlanetPress Workflow prompt for action
when configuration components, such as processes, are imported from an external
configuration file. Imported components can overwrite existing components, or be
renamed automatically with unique names.
Sample Data behavior preferences
Sample Data behavior preferences control the way theData Selectordisplays the sample data
file.
Preferences
l
Select Font button: Click to access the Font dialog box to select the font in which the
Data Selector displays the sample data file.
l
Default text editor: Contains the complete path and name of the executable file of the
application used as the default text editor. For Windows Notepad, only the executable
name (Notepad.exe) is required.
l
Browse button: Click the Browse button to navigate to your executable instead of typing
the path and executable name, then click OK.
Network behavior preferences
Network behavior preferences let you configure NetWare® Login user options, so that
PlanetPress Workflow can access your Novell® NetWare network. The following procedure
also lets you choose the Universal Naming Convention (UNC), which removes inconsistencies
when accessing paths on Novell and other networks.
Preferences
l
NetWare Login: Check to enable the options PlanetPress Workflow requires to access
NetWare resources. When you select this option, you must enter values in the Username
and Password fields, and in the NDS options group (these properties are optional) below
to properly log in to NetWare.
l
Username: Enter your NetWare user name. This is the user the PlanetPress
Workflow service uses to log in to NetWare at run-time. The service accesses
Page 777

resources as configured for this user.
l
Password: Enter the NetWare password corresponding to the user name you
entered in the previous text box.
l
Tree: Enter the NetWare Directory Services (NDS) tree where the user resides. This
is the user you entered in the user name text box. Click Trees to navigate to the
desired tree. You must enter a value for the Tree text box.
l
Context: Enter the context on the NDS tree where the user you enter in the user
name text box resides.
l
Server: Enter the server where the NDS tree you entered in the Tree text box
resides. You do not have to specify a server if there is only a single configured
server on your network. Click Servers to navigate to the desired server on which the
NDS tree containing the user resides.
Expand folder paths in UNC (Universal Naming Convention) format: Select to expand all
paths used in the configuration to UNC. This converts map drives such as “f:\, to absolute paths
referenced from a server in the format “\\server-name\shared-resource-pathname”. When you
select this option, the next time you configure a task after editing properties and clicking OK in
its properties dialog box, entered paths are expanded to UNC format.
Note
You can leave the Context box empty if there is a single root context on your NDS tree, if
you can perform a context-free log in, or if you enter a server name in the Server box.
PlanetPress Workflow and PlanetPress Image use the same security context when
connected to a NetWare server and they each use one connection. Also note that using
erroneous Tree or Context information may cause PlanetPress Workflow and its services
to crash.
PlanetPress Capture preferences
PlanetPress Capture behavior settings lets you change the PlanetPress Capture options
relative to your Workflow server. This is where you set up your server and database and where
you manage pens, documents and licenses.
Page 778

The available PlanetPress Capture user options are:
l
Mode: Choose between Server and Client mode. Client and Server mode are used for
multi-server architectures. See PlanetPress Capture Server/Client.
l
Port: Select the port used to connect two servers together. The default value is 5864.
l
Document and Pattern Database group
l
Status: Displays the status of the database.
l
Use ODBC Database: Check to ignore the default location for the Microsoft Access
database (MDB) and use an ODBC connection to your own database location
instead.
l
ODBC Settings: Click to open the "PlanetPress Capture ODBC Settings" on
page782 dialog.
l
Test Connection: Click to verify the connection to the ODBC Database.
l
Reset Database: Click to reset the database to its original status.
l
Manage Documents...: Click to open the " PlanetPress Document Manager" on the
next page.
l
Pen Database group
l
Register pens on first use: Check if you want any new pen that sends a PGC to be
added to the pen database. Newly registered pens will not have any Pattern
Sequence or owner information.
l
Manage Pens...: Click to open the "PlanetPress Capture Pen Management Tool"
on page784 dialog.
l
License Manager...: Click to open the "PlanetPress Capture License Management"
on page786 dialog.
PlanetPress Capture Server/Client
PlanetPress Capture can be set to be either in Server or Client mode from the PlanetPress
Capture User Options.
In Server mode, all pen licenses are stored locally. Other clients can connect to this server to
validate pens. This allows all pen licenses to be managed locally.
In client mode, no pen license information is stored locally. All pens are therefore validated
against the server specified in the Host address field displayed when the Client option is
Page 779

selected. Note that this validation occurs for every ink file (i.e. PGC file) the local system
processes, which may cause a slight delay for the operation depending on the connection
speed and latency between the two systems.
Note
The Server/Client mode is only used for managing pen licenses and has no impact on
the Capture Database itself. The database can be stored locally or remotely, regardless
of the Server/Client mode specified.
PlanetPress Document Manager
The PlanetPress Capture Document Manager dialog is used to manage all the documents
present in the PlanetPress Capture database that are currently open.
Options and Controls
Documents Lookup Group
ll
Filter by: Select what information you want to look for in the documents database.
l
Document ID: Search using the Document ID, a unique and automatic identifier
attributed to each document by the Capture Field Generator task.
l
Document Title: Search in document title as specified in the Capture Field
Generator task.
l
Production date (YYYY-DD-MM): Search using the date at which the document
was generated using the Capture Field Generator task.
l
Pen user (by description): Search using the description field in the Pen Database.
l
Pen user (by serial number): Search using the pen's serial number in the Pen
Database.
l
Pattern Sequence: Search using the Pattern Sequence in the Document
Database.
l
Template Name: The name of the document, corresponding to the name entered in
the PlanetPress Design document properties.
l
Pattern ID: Search using the pattern's identification number. This can be printed on
each document next to the Anoto Statement (see PlanetPress Design User Guide).
Page 780

l
Content Status: Search using the status of the document, whether it is Open,
Closed, Complete, Partial or in Error.
l
Operator: Select how to do the comparison
l
Equal: The mask and database information are exactly the same.
l
Not equal: The mask and database information are different.
l
Less than: If the mask and database information are both numbers, the mask will
be a smaller number.
l
Greater than: If the mask and database information are both numbers, the mask will
be a larger number.
l
Less than or equal to: If the mask and database information are both numbers, the
mask will either be smaller or equal to the database information.
l
Greater than or equal to: If the mask and database information are both numbers,
the mask will either be larger or equal to the database information.
l
Contains: The mask is contained within the database information, at any location
within the information.
l
Does not contain: The mask is not contained within the database information.
l
Mask: Enter the text or number to compare with the database information.
l
Search: Click to start the search.
Manage Documents Group
ll
Document list: Displays the results from the search in 3 columns:
l
Document Title: Displays the title of the document as specified in the Capture
Field Generator task
l
Production date: Displays the date and time on which the document was added to
the Capture Database.
l
More info: A variable column that displays additional information about the search
results, such as the Pen ID or Pattern ID.
l
Select all: Click to select all the documents in the list.
l
Select none: Click to deselect all of the documents in the list.
l
View documents: Click to view all the documents along with any ink already present on
them. Each PDF is opened, in sequence, in the "PDF Viewer.
Page 781

l
Close documents: Click to close the document and release the pattern it uses.
Warning
This will prevent the document to be further updated, may cause errors when
docking any pen that signed the printed version of the document. This cannot be
undone.
PlanetPress Capture ODBC Settings
This dialog is used to set up the connection to a PlanetPress Capture Database through an
ODBC connection.
To access this dialog, See "PlanetPress Capture preferences" on page778.
Settings
l
Name: Click to displays and choose from a drop-down of each DSN (Data Source Name)
available on the system, along with it's source (User DSN or System DSN) and the driver
it uses (database type).
Page 782

l
Type: Click to display a drop-down of supported database types. This must correspond to
the database type of the DSN chosen in the previous option.
l
user name: If the database is secured with a user name and password, enter the user
name here.
l
Password: If the database is secured with a user name and password, enter the
password here.
Note
In order for the database connection to be functional, you must ensure that the database
Type correspond exactly to the one used by the DSN, and is part of the supported
database types.
Database considerations (ODBC)
Note
On 64-bit operating systems, the ODBC Data Sources created by the Data Source
(ODBC) icon in the Administrative Tools will not appear here, as PlanetPress Suite is 32-
bit and cannot access the 64-bit data sources. In order to create an ODBC connection
visible by PlanetPress, you will need to access the 32-bit version of the ODBC manager,
available in C:\Windows\SysWOW64\odbcad32.exe .
The following considerations should be kept in mind while working with ODBC Databases in
PlanetPress Suite.
l
All databases
l
User Rights: During normal operation, Read/Write to tables should be sufficient.
However, during the initial setup, the Create/Drop tables rights is necessary.
l Minimum 100MB of database size is required as a minimum, but the space
requirement depends on the implementation. The more active documents in the
database, the more space is used - note that this progression is rather linear.
l Regular database maintenance is required, such as database compacting, is
required by a system administrator.
Page 783

l It is recommended to create an IT process that backs up the database regularly.
l The recommended ideal setup is a dedicated SQL Server PC, accessed by
PlanetPress Workflow through an ODBC connection on the local network.
l
Microsoft Access
l
Database file (mdb) must be local to the PlanetPress Workflow computer. It cannot
be located on a network drive or another server.
l Total database size is limited to 4GB of data.
l Total size of a single table is 2GB.
l May be unstable in large implementations.
l
MySQL
l Database can be in any location, but performance will depend on the speed of the
connection between PlanetPress and the MySQL server.
l MySQL's performance has been slower than SQL Server and SQL Server Express
during our tests.
l By default, MySQL is configured not to allow any SQL request larger than 16 megs.
l In the event where 2 requests are made simultaneously on the same record, MySQL
will queue one of the requests and execute it once the first one is done. In extremely
rare cases this may cause a timeout on very large requests.
l
MSSQL (Microsoft SQL Server)
l All versions of the SQL Server are supported, including all Express versions.
l Database can be in any location, but performance will depend on the speed of the
connection between PlanetPress Production and the SQL server.
l In the event where 2 requests are made simultaneously on the same record, SQL
Server will drop the most complex request. Resubmitting the PGC for processing
should resolve this issue. This, however, should happen only rarely.
l When configuring the ODBC connection, your must use the Microsoft version of the
driver, and not the Native SQL version of the driver. This is due to a technical
limitation of the native driver that interferes with the PlanetPress Suite database
requests.
PlanetPress Capture Pen Management Tool
The Pen Management Tool screen is used to manage the pens that are registered in the
PlanetPress Capture Database. The number of Anoto Digital Pens you may register on this
Page 784

screen depends on the licenses available within your PlanetPress Capture License.
Options and Controls
Top Toolbar
ll
Read PGC File: Click to display a File Open dialog. Browse to an existing PGC file, and
open it. PlanetPress Capture will read the serial number from the PGC file and register
the pen.
l
Print Pen Activation File: Click to print a page containing a special pattern. Any pen that
writes on this pattern and is then docked will be registered in the database.
l
Save Pen Data into Database: Once all your pens are entered in this window, click to
save the list of pens in the database.
Pen Data List: Displays a list of registered pens and those pens you just added.
ll
Pen ID: The serial number of pen, as written on the Anoto Digital Pen. You can double-
click this area to edit the Pen ID if necessary.
l
Pattern Sequence: The pattern sequence the pen is assigned to. You can double-click
this area and edit the pattern sequence as required.
l
User ID: The name of the user assigned to this pen. You can double-click this area to edit
the user ID. This can also be custom information.
Bottom Toolbar
ll
Button: Click to add a new line in the Pen Data List, then edit the information on this
new line.
l
Button: Place a checkmark on the line of any pen you wish to remove from the
database, then click this button.
l
Search in column Pen ID: Enter a search term for a Pen ID, then click the Search button.
The Pen Data List will highlight any pen containing your search term.
To register a new pen manually
1.
Click on the icon
2. Enter the Pen ID (located on the pen after the word "Serial: ")
Page 785

3. If necessary, enter an optional pattern sequence and User ID (identifier of who will use
the pen).
To register a pen using the registration pattern
1.
Click on the Print pen activation file button in the top toolbar of this dialog.
2.
Use the Windows Print dialog to print to the desired printer.
3. Write or make a line on the printed pattern.
4. Dock the pen in its cradle.
5.
Click on the Read PGC File button in the top toolbar of this dialog.
6. If necessary, enter an optional pattern sequence and User ID for each pen.
Multiple pens can be registered at once simply by writing on the registration pattern and then
docking each pen before clicking the Read PGC File button.
If the pen that is being registered already exists in the pen database, the Replace User ID
(Description) dialog appears, with the following options:
l
Pen ID: Displays the Pen ID (serial number) to identify the pen
l
Old desc.: Displays the content of the User ID field for the pen as it is now.
l
New desc.: Type the new description to identify the pen
l
Replace: Click to save the modification to the description
l
No Change: Click to save the registration without modifying the description.
l
Modify: Click to enable edits in the Old desc. field. The current information can then be
modified. After modifications, click Apply to save the changes and exit the dialog.
l
Cancel: Click to cancel any modifications to the pen registration.
PlanetPress Capture License Management
The PlanetPress Capture License Management window is used to manage the pen pack
available in the installation of PlanetPress Capture. Each Pen Pack contains a limited number
of pens that can be registered in the Capture Database. When the number of pens have been
reached, new pens can no longer be registered.
Page 786

If no pen pack is available, PlanetPress Capture functions in Demo Mode. In Demo mode, only
one (1) pen can be registered in the pen management window. Also, the "Capture Fields
Generator" on page543 will be unable to produce more than 8 documents with a pattern
instead of the full 20,000 patterns.
Technical
To add a pen pack, PlanetPress must be activated using a PlanetPress Production
license. if PlanetPress Production is in trial mode, no pen pack can be added because
the Pen Pack uses the serial number.
Options and Controls
PlanetPress Capture Pen Licenses Group
ll
Import License...: Click to open the Import License dialog. Browse to a PPLIC
(PlanetPress License) file on your computer and open it to import the license. The PPLIC
overwrites your current license, however it may contain more than one Pen Pack (your
previous one and one you just purchased) and will display them individually.
l
License List: Displays the licenses that have been added to this system.
l
Pen License: The identification of the Pen Pack.
l
Quantity Of Pens: The number of pens that can be registered with this pack.
PlanetPress Production Group
ll
Server Type: The type of server installed, normally PlanetPress Production Server.
l
Total pens: The total number of available pens on this server, each Pen Pack being
added together.
OL Connect preferences
These options control some of the features in the "OL Connect tasks" on page591. This is valid
both for PlanetPress® Connect and PReS® Connect.
Page 787

Warning
OL Connect User Options are not applied immediately. In order for these changes to be
applied, the Workflow Configuration must be submitted to the Workflow Service.
Otherwise, these options will not be accounted for in Debug mode.
The available OL Connect user options define the default behavior of OL Connect tasks' OL
Connect Proxy tab. These values are used unless they are overwritten in a task's properties:
l
Server Connect Settings: OL Connect tasks communicate with the OL Connect Server
using TLS 1.2.
l
Connect Proxy Address: Enter the machine name or IP Address where the OL
Connect Server resides.
l
Port: Enter the port to use to communicate with the OL Connect Server.Default:
9340
l
User name: Enter the user name expected by the OL Connect Server.
l
Password: Enter the password expected by the OL Connect Server for the above
user name.
l
Timeout in seconds: Set the timeout period in seconds.
l
Protocol: Set the protocol (HTTP/HTTPS) used to communicate with the Connect
Server.
When HTTPS is selected, the TLS 1.2 encryption protocol is used in order to secure
the data being transferred between the two servers. When this protocol is selected,
Port is set to 443, the default port for this protocol.
l
Email Creation Settings
l
Mail Host: Enter the default SMTP Server host or IP Address.
l
Sender address: Enter the default email address used as the sender (FROM)
address.
l
User name: Enter the default user name for the SMTP Server if it requires it.
l
Password: Enter the password for the above user name.
Page 788

PDF text extraction tolerance factors
When extracting text from a PDF (for example, through a data selection), a lot more happens in
the background than what can be seen on the surface. Reading a PDF file for text will generally
return text fragments, separated by a certain amount of space. Sometimes the text will be
shifted up or down, spacing will be different, etc. In some cases, every letter is considered to be
a different fragment.
Text formatting features such as kerning, bold, exponential, etc, may cause these fragments to
be considered as separate even if, to the naked eye, they obviously belong together.
The PDF Text Extraction Tolerance Factors is used to modify the behavior of data selections
made from PDF data files from within PlanetPress Workflow. Each factor available in this
window will determine if two fragments of text in the PDF should be part of the same data
selection or not.
Warning
The default values are generally correct for the greatest majority of PDF data files. Only
change these values if you understand what they are for.
Delta Width
Defines the tolerance for the distance between two text fragments, either positive (space
between fragments) or negative (kerning text where letters overlap). When this value is at 0, the
two fragments will need to be exactly one beside the other with no space or overlap between
them.
When this value is at 1, a very large space or overlap will be accepted. This may case "false
positives" and separate words and text blocks may be considered as a single word if the value
is too high.
Accepted values range from 0 to 1. The default value is 0.3, recommended values are between
0.05 and 0.30.
Page 789

Delta Height
Defines the tolerance for the height and position difference between two target fragments. The
higher the number, the more difference between the fragment's height (the tallest font
character's height) will be accepted and the more vertical distance between fragments are
accepted. Exponents, for example, are higher and lower.
When this value is 0, no vertical shift is accepted between two fragments. When the value is 1,
the second text fragment can be shifted by as much as the height of the first fragment.
Accepted values range from 0 to 1. The default value is 0.15, recommended values are
between 0.00 and 0.50.
Font Delta Height
Defines the tolerance for the difference in average height of fonts in the two target fragments.
The higher the number, the more difference in average font heights will be accepted. The
average font height is bigger in text written in uppercase than text written in lowercase.
At 0, the font size must be exactly the same between two fragments. At 1, a greater variance in
font size is accepted.
Accepted values range from 0 to 1. The default value is 0.65, recommended values are
between 0.60 and 1.00.
Gap
Defines how spaces between two fragments are processed. If the space between two
fragments is too small, the text extraction will sometimes eliminate that space and count the two
fragments as a single word. To resolve this, the Gap setting can be changed. The lower this
value, the higher the chance of a space being added between two characters. A value too low
may add spaces where they do not belong.
Accepted values range from 0 to 0.5. The default value is 0.3, recommended values are
between 0.25 and 0.40.
Page 790

General and logging preferences
General plugin preferences control the level of detail added to the PlanetPress Workflow log
file. Since log files cover 24 hours of operation, choosing to log every task performed by
PlanetPress Workflow may result in the creation of excessively large files.
Changing the plugin preferences also affects the logs displayed in the PlanetPress Workflow
Service Console.
Note
Each individual process has the option to produce 'minimal logs' (see "Process
properties" on page869). This means the process will only log its Start time and the End
time (along with the Time Spent), if no error was encountered during execution of the
process.
l
Log level group
l
Startup and shutdown: Select to only track when the PlanetPress Workflow
service is started and stopped.
l
Task failure: Select to only track when tasks in the processes running in a
PlanetPress Workflow configuration fail.
l
Task success and failure with details: Select to track when the tasks in processes
running in PlanetPress Workflow succeed and fail, with details. Details can include
why tasks fail and how successful tasks are executed.
l
All events with details: Select to log everything that happens in PlanetPress
Workflow. This includes when it starts and stops, the success and failure of tasks,
and details on the success and failure of tasks.
l
Add time stamp to all processes events: Adds a time stamp to each log entry for a
process event.
l
Delete log files after: Select how many days log files are kept before being deleted.
l
Maximum numbers of replicated processes: Set the maximum number of times a
process may be replicated.
Page 791

Note
The index number of a task is logged immediately after the time stamp, between square
brackets. For example:
INFO : 00:00:21.534 [0015] Plugin Create File completed successfully - 12:00:21 AM
(elapsed time: 00:00:00:001)
The index number corresponds to the row number of the task in the Process Area (see
"The Process area" on page885).
Tip
The proper RegEx to parse a log entry should be:
^([A-Z]{4}[A-Z\s]):\s(\d\d:\d\d:\d\d\.\d{3})\s\[(\d{4})\]\s(.+)
Messenger plugin preferences
Apart from enabling communication between the various parts of PlanetPress Workflow, the
PlanetPress Workflow Messenger also manages local instances of the PlanetPress Workflow
Alambic.
The Messenger service uses the SSL 2.3 protocol.
Preferences
l
PlanetPress Alambic options group
l
Let me set up how many instances to run: Select this option if you want to limit
the number of instances of the Alambic that PlanetPress Workflow can run. Then
enter the number of instances, a value ranging from 1 to 32, in the box below. When
this option is not selected, PlanetPress Workflow starts a minimum of three
instances and a maximum of eight, based on the number of CPUs available on the
server. Note that this does affects self-replicating processes. Self-replicating
processes will create threads in PlanetPress Workflow service, while Alambic
Page 792

threads are under the PlanetPress Messenger service.
l
Close inactive instances after: If you want the PlanetPress Workflow Messenger
to close inactive instances of the Alambic after a given number of minutes, enter a
value in this box. Enter a value of ”0” if you do not want the Messenger to terminate
idle instances of the Alambic.
l
Logging options group
l
Delete log files after: Enter the number of days after which to delete the Messenger
service logs. Each log covers a 24-hour period and is kept in the Log folder, which
is located in the installation folder.
l
Verbose log: Select this option if you want the log to contain a maximum amount of
information.
HTTP Server Input plugin preferences 1
The first set of HTTP Server Input plugin preferences controls the server protocol aspects of
the PlanetPress Workflow HTTP Server Input tasks. This is where you enable and configure
secure communication for the HTTP Server.
To open the Preferences dialog, click the PlanetPress Workflow button and then the
Preferences button, or use the key combination Ctrl+Alt+P. The HTTP Server Input 1 plugin
preferences can be found under Plug-in.
Preferences
l
Port: Select the port to use. The default port is 8080, the official HTTP alternate port, so
as not to interfere with the standard HTTP port (80). To block any regular HTTP traffic (for
example if only using HTTPS connections) the port can be set to 0.
Note that it is possible to use both the NodeJS Server and the standard HTTP Server
simultaneously, provided that they are not set to listen to the same port. See "NodeJS
Server Input plugin preferences 1" on page800.
l
Time out: Set the timeout period in seconds. The default value is 120 seconds.
l
Enable server for SSL requests: Check this option to enable secure data exchange
over the Web. This enables the boxes below and lets you specify your secure
communication settings.
Page 793

Note
The Root certificate, Certificate and Key files must be in the PEM format (ASCII
base64 encoded). Files in DER format, the binary encoded version of the PEM
format, cannot be used to configure Workflow, although they may have the same file
extension (e.g. .crt, .cer). Please check the format of your files, using a tool like:
https://www.httpcs.com/en/ssl-converter.
l
Root certificate: Enter the absolute path to the public key certificate identifying the
root certificate authority. The file generally has a .crt extension and is obtained from
a Certificate Provider such as Thawte or Verisign. If the Root Certificate and
Certificate file are identical, this is considered a self-signed certificate, which is
considered unsecured by most browsers.
l
Certificate: Enter the absolute path to the public key certificate identifying the
certified server. The file generally has a .crt extension and is provided by a
certificate provider, or through the use of certificate generators such as openssl or
makecert.com.
l
Key: Enter the absolute path to the Private Key file. This file generally has a .key
extension.
l
Password: Enter the password (or passkey) for the Private Key file. The maximum
length of this password is 64 characters.
This password is encrypted within PlanetPress Workflow server and is not saved in
plain text.
l
Encryption protocol: Choose your cryptographic protocol (SSL or TSL). This is
determined by the software that generated the keys. The service uses SSL 2.3 or
TLS 1.0.
Note
When SSL is enabled and a user sends a query prefixed with https://, then this
specific communication will be sent through port 443, which cannot be changed in
Workflow. However, http:// requests will still be received on the port specified in
http server preferences.
Page 794

Note
SSL is used to accept secured, encrypted requests from web clients and requires a
certificate delivered by an approved authority. When a website is secured by an
SSL certificate, "https" appears in the URL.
For more information on SSL and how to purchase a certificate, see for example
Q10694 on SSL.com.
l
Disable SOAP Server: Check to disable all SOAP Server functionality.
l
Verbose log: Select to enable to keep a verbose log. Note that a communication log is
generated whether or not this option is selected. If you use a secure connection, the log
will contain extra information.
l PHP Arrays: This option defines how incoming POST requests with arrays are
processed.
l
None: No special processing is applied.
l
Use PHP-like Arrays: When the name of form inputs contains two pairs of square
brackets, the data are interpreted as an array. The result is a single XML node
(named after the value between the first pair of square brackets) with each part of
the array as children. See: "PHP arrays example" on the next page.
l
Use enhanced PHP-like Arrays: Like the previous option, but in this case, the
value between the first pair of square brackets is expected to consist of two parts,
separated by an underscore (e.g. row_0). The first part is considered to be the
element's name. All content after the first underscore (preferably an integer) will be
used as index, which is given as an attribute of the element (e.g. <row _idx=0>; also
see "PHP arrays example" on the next page).
This option makes it much easier to select all elements on the same level in a data
mapping configuration, and to convert the XML to a JSON object.
l
Omit attachments as CData node in the XML envelope: By default, the request XML
has a CDATA node that contains the raw input data, effectively doubling the size of the
incoming XML file, which due to technical restrictions cannot be larger than 400 MB. This
option allows for much larger (non-binary) attachments by removing them from the XML
data file. Generally attachments are both saved on disk and included as a CDATA node
within the XML envelope. This option removes them from the envelope, but they remain
accessible through their direct path.
Page 795

Note
Incoming binary files (sent through file upload in a form) can never be larger than
400 MB.
PHP arrays example
This example shows how incoming HTML is converted to XML with the two different
PHP-like Arrays options.
Incoming HTML
<input type="hidden" name="user_account"
value="email@example.com">
<input type="text" name="name" value="Peter Parker">
<input type="text" name="company" value="Objectif Lune">
<input type="number" name="pinElm1[pin_0][left]" value="122">
<input type="text" name="pinElm1[pin_0][top]" value="253">
<input type="text" name="pinElm1[pin_0][type]" value="dent">
<input type="text" name="pinElm1[pin_1][left]" value="361">
<input type="text" name="pinElm1[pin_1][top]" value="341">
<input type="text" name="pinElm1[pin_1][type]" value="dent">
Resulting XML Structure with PHP-like arrays
<values count="4">
<user_account>email@example.com</user_account>
<name>Peter Parker</name>
<company>Objectif Lune</company>
<pinElm1>
<pin_0>
<left>122</left>
<top>253</top>
<type>dent</type>
</pin_0>
<pin_1>
<left>361</left>
<top>341</top>
Page 796

<type>dent</type>
</pin_1>
</pinElm1>
</values>
Resulting XML structure with Enhanced PHP-like arrays
<values count="4">
<user_account>email@example.com</user_account>
<name>Peter Parker</name>
<company>Objectif Lune</company>
<pinElm1>
<pin _idx=0>
<left>122</left>
<top>253</top>
<type>dent</type>
</pin>
<pin _idx=1>
<left>361</left>
<top>341</top>
<type>dent</type>
</pin>
</pinElm1>
</values>
HTTP Server Input plugin preferences 2
The second set of HTTP Server Input plugin preferences is used to enable serving static HTTP
resources, as part of an HTTP Server workflow. These resources are referred to within the
HTML response file and do not pass through a process to get served so the process is very
quick. Static resources are especially useful for additional formatting of HTML files such as JS
(JavaScript) scripts, CSS files and images, since they are not dynamic and generally shared
between multiple dynamic files.
l
Serve HTTP resource: Check to activate static resource serving.
l
Resource action name: Enter a name that will be simulated as a folder in your
HTTP structure. For example, if you enter images in this box, you would refer to any
files in this folder as href="images/file.ext" .
Page 797

l
Resource folder: Type the path of the folder where your resources are located, or
click the Browse button and choose the folder in the browse dialog.
Note
Subfolders are accepted in the structure, so if your resource folder contains a folder
called faces, you could refer to a file in this folder as
href="images/faces/johnsmith.jpg".
l
Capture OnTheGo group
l
Authentication Key: Enter the authentication key for the COTG repository. This key
can be found in the Settings section of the COTG Web Administration Panel.
l
Cross-Origin Resource Sharing (CORS)
l
Allowed Origins: Enter an origin (everything in a URL before the path, e.g.
http://www.example.com). The Workflow server will add this value to the Access-
Control-Allow-Origin header, which signals to the browser that it is allowed
to make the request. This enables cross-origin resource requests, such as AJAX
requests.
The default setting "*" is a wildcard that allows all cross-origin resource requests.
l
Form Data Encoding: Specifies how form data, which was sent to the web server,
should be interpreted.
Even though it is strongly recommended to use the <meta charset="utf-8"/> element in
web pages, some might use another encoding or not have the element at all, affecting the
character set used by the browser to send the parameters and file names.
l
System language: Sets the encoding attribute in the request XML file to the system
codepage (e.g. Windows-1252).
l
UTF-8: Causes all parameters as well as file names from the request to be
interpreted as a UTF-8 text stream.
With this option enabled, POST attachment file names will be randomized on disk to
avoid misinterpretation. If the original file name is needed, it can be found in the
original attribute of the file tag in the request XML.
Page 798

Note
If form data are submitted from HTML files that are made with the OLConnect
software, you can expect them to be UTF-8 encoded.
Warning
Don't use any non-ASCII characters in Workflow's working directories path (in
the V8WorkingDirectory registry key). Combined with the UTF-8 Form
Data Encoding setting, this might make it impossible for Workflow to retrieve
files from that path, depending on the actual path name and the system locale.
LPD Input plugin preferences
LPD input plugin preferences control certain functions of the PlanetPress Workflow LPD Server
service, which in turn has an impact on LDP input tasks performed by PlanetPress Workflow
on a given computer. The LPD Server service receives jobs using TCP/IP from LPD servers.
For information on the preferences set in individual LDP input tasks, refer to LPD Input Task
Properties.
Preferences
l
Protocol options group
l
Log all Winsock and network messages: Select to have PlanetPress Workflow
keep a log of all Winsock and other network messages that occur through the LPD
service. These are messages related to jobs being sent from other systems through
LPR, and being received by PlanetPress Workflow via LPD. Since these messages
can accumulate, you have the option of not logging them. Log files are kept in the
Log folder, which is located in the PlanetPress Workflow installation folder. They
are named lpddate.log, where date is the current date in the yyyymmdd numerical
format. Note that changing this option also affects the log displayed in the
PlanetPress Workflow Service Console.
Page 799

l
No source port range restriction: Select to remove any restrictions on the port of
the LPR client computer that PlanetPress Workflow accepts data files from. Clear to
have PlanetPress Workflow only accept data files sent from ports ranging between
721 and 731 on the LPR client computer.
l
Strict RFC 1179 control file: Select to disable control file extensions the LPD
service implements for some flavors of UNIX and LPR. This enforces the basic Line
Printer Daemon protocol.
l
Enable BSD compatibility mode: Select to have the LPD service emulate a BSD
UNIX server. Although RFC 1179 is supposed to describe the BSD LPD/LPR
protocol, and the LPD input in PlanetPress Workflow is RFC1179-compliant, there
are some incompatibilities between the RFC and the BSD implementation. This
option compensates for some of these incompatibilities. If you are not sure about the
source of your output, clear this option.
l
LDP settings group
l
Time-out (sec): Set the time in seconds the process waits for the transfer of bytes in
the data file before ending the transfer of this file. The default value for the Time-out
property is 7200 seconds (2 hours). On a time-out, partially received data files are
not passed to the rest of the process; the LPD input resets and is ready to receive
further data files. Log messages include the time-out duration.
NodeJS Server Input plugin preferences 1
The first set of NodeJS Server Input plugin preferences controls the server protocol aspects of
the PlanetPress Workflow NodeJS Server Input tasks. This is where you enable and
configure secure communication for the NodeJS Server.
Click the PlanetPress Workflow button and then the Preferences button, to open the
Preferences dialog. The NodeJS Server Input 1 preferences page can be found under Plug-
in.
Note
Workflow's NodeJS and ppNode folders can be found in %PROGRAMFILES%\Objectif
Lune\.
Page 800

l
Port: Select the port to use. The task's default port is 9090. Port numbers > 9999 are
possible.
Note that it is possible to use both the NodeJS Server and the standard HTTP Server
simultaneously, provided that they are not set to listen to the same port. See "HTTP
Server Input plugin preferences 1" on page793.
l
Time out: Set the timeout period in seconds. The default value is 120 seconds.
l
Enable server for HTTPS requests: Check this option to accept secured, encrypted
requests from web clients. The encryption protocol is TLS.
Note
HTTPS requires two certificates: a Root Certificate and an accompanying
Certificate. These are obtained from a Certificate Provider such as Thawte or
Verisign, or through the use of certificate generators such as openSSL. When the
Root Certificate and Certificate file are identical, this is called a
self-signed
certificate
, which is considered unsecured by most browsers.
l
Forward all HTTP traffic to HTTPS: When the server is enabled for HTTPS
requests it doesn't listen on the port specified for HTTP anymore. However, you can
enable this option to forward all HTTP traffic to HTTPS.
Note that this option does not affect proxies. All routes set as proxy in Workflow will
be forwarded to the target specified in the proxy list (see "NodeJS Server Input
plugin preferences 2" on the next page).
l
HTTPS Port: Select the port to use. The task's default HTTPS port is 8443, so as not to
interfere with the standard HTTPS port (443). Port numbers > 9999 are possible.
l
Root certificate: Enter the absolute path to the Root Certificate, or click the Browse
button and select the file in the Browse dialog. The file generally ends with a .crt
extension.
l
Certificate: Enter the absolute path to the site Certificate, or click the Browse button and
select the file in the Browse dialog. The file generally ends with a .crt extension.
l
Key: Enter the absolute path to the Private Key File. This file generally ends with a .key
extension.
l
Password: Enter the password (or passkey) for the Private Key File.
Page 801

l
Verbose log: Select to enable to keep a verbose log. Note that a communication log is
generated whether or not this option is selected. If you use a secure connection, the log
will contain extra information.
l
Disable SOAP Server: Check to disable all SOAP Server functionality.
NodeJS Server Input plugin preferences 2
The second set of NodeJS Server Input plugin preferences is used to enable serving static
HTTP resources, as part of a NodeJS Server workflow. These resources are referred to within
the HTML response file and do not pass through a process to get served so the process is very
quick. Static resources are especially useful for additional formatting of HTML files such as JS
(JavaScript) scripts, CSS files and images, since they are not dynamic and generally shared
between multiple dynamic files.
l
Static HTTP resources:
l
Mount point: Specify a path name that should refer to a directory in the currently
accessible file system, for example: /img. Different mount points can point to the
same directory. Use the buttons below the list to add or delete mount points and to
change the order of the mount points in the list.
l
Directory: Type the path of the local folder where the resources for the mount point
on the left are located, or click the [...] button and choose the folder in the browse
dialog.
l
Proxy List: The proxy list is used to setup end points for redirecting requests to another
server.
l
Mount point: Specify a path name for which requests should be redirected to
another site, for example: /myrest. Different mount points can point to the same
remote site. Use the buttons below the list to add or delete mount points and to
change the order of the mount points in the list.
l
Remote site: Type the address of the server to which the request should be
redirected.
Page 802

Note
The 'Forward all HTTP traffic to HTTPS' option (see "NodeJS Server Input
plugin preferences 1" on page800) does not affect proxies. All routes set as
proxy in Workflow will be forwarded to the target specified in the proxy list.
l
Cross-Origin Resource Sharing (CORS)
l
Allowed Origins: Enter an origin (everything in a URL before the path, e.g.
http://www.example.com). The Workflow server will add this value to the
Access-Control-Allow-Origin
header, which signals to the browser that it is allowed to make the request. This
enables cross-origin resource requests, such as AJAX requests.
The default setting "*" is a wildcard that allows all cross-origin resource requests.
NodeJS Server Input plugin preferences 3
The third HTTP Server Input plugin preferences page provides an authentication mechanism
for ActiveDirectory by LDAP.
The LDAP port is 389.
l
Enable authentication: Check to enable authentication for ActiveDirectory via LDAP.
Any process that starts with a NodeJS input task will then require the user to authenticate
before it can run. Until the user has been successfully authenticated, the Workflow
process is never triggered. After a certain number of failed attempts, the NodeJS server
will lock out the user for a certain length of time, to discourage denial of service attacks.
l
ActiveDirectory Server: Enter the address of the ActiveDirectory Server.
l
Domain: Enter the domain for authentication.
Note
In the address of the server and in the domain name the following characters should not
be used: , + $@ # < > ' ; | {} ~ [] * " :
Page 803

Tip
If you don’t know what your LDAP server and domain names are, you can usually obtain
them by opening a CMD window and typing the following:
l For the domain name: echo %USERDOMAIN%
l For the LDAP Server name: echo %logonserver%
Testing the server
l
To test the server address and domain, enter a username and password and click the
Test server button.
Note
The user name and password aren't part of the plugin preferences. Users will have to
provide their credentials themselves and will be presented with an HTML page for that
purpose.
Changing the Log in page
You can change the look and feel of the login window if you are familiar with the EJS
templating syntax.
Explaining this syntax falls outside the scope of this documentation, but there are plenty of
tutorials available online.
The two files that you need are located here: C:\Program Files (x86)\Objectif
Lune\ppnode\src\html
Be careful; errors in these files can lead to unpredictable behavior!
Setting the duration of the authentication
When a user has logged in, that user's authentication is valid for the duration of the session.
There is no option in the Workflow Preferences that allows you to set a different behavior for the
duration of the authentication. However, you can manually edit the file named: C:\Program
Page 804

Files (x86)\Objectif Lune\ppnode\src\constants\default.js.
Look for the line exports.DEFAULT_SESSION_TTL = 0; and change the value to the number of
milliseconds that you want the authentication to last.
Note that editing any other value in this file may result in unpredictable behavior.
Serial Input plugin preferences
Serial input plugin preferences control certain functions of the PlanetPress Serial Capture
service, which in turn has a direct impact on all Serial input tasks performed by PlanetPress
Workflow on a given computer.
Preferences
l
Serial settings group
l
Serial port: Select the port of the computer where the Serial input is connected to
(COM1 through COM8).
l
Baud rate: Select the baud rate of the Serial input. The baud rate is the number of
bits transferred per second. The transferred bits include the start bit, the data bits,
the parity bit (if defined), and the stop bits.
l
Data bits: Select the number of data bits defining the incoming data file on this
serial port. The data bits transferred through a serial port represent the data content.
This excludes the start, parity, and stop bits: these are bits defining the beginning
and end of each unit of transferred data, as well as error detection provided by the
parity bit. The majority of serial ports use between five and eight data bits. Binary
data is typically transmitted as eight bits. Text-based data is transmitted as seven
bits or eight bits. If the data is based on the ASCII character set, a minimum of seven
bits is required. If an eighth bit is used, it must have a value of 0. If the data is based
on the extended ASCII character set, eight bits must be used.
l
Parity: Select the type of parity used for error detection. The parity transfers through
the serial connection as a single bit. It is used to verify that each set of data bits
transfers correctly. It is then stripped away before the data file passes through the
rest of the PlanetPress Workflow process. Select None to ignore all parity bits; no
error detection occurs.
l
Stop bits: Since most serial ports operate asynchronously, the transmitted byte
must be identified by start and stop bits. The start bit indicates when the data byte is
about to begin and the stop bit(s) indicates when the data byte was transferred. The
Page 805

start bit is always 0 to mark the beginning of the byte, but the stop bit can be a single
1, or two bits each with a value of 1.
l
Time-out: Set the time in seconds the PlanetPress Workflow process waits for the
transfer of bytes in the data file before ending the transfer of this file. On a time-out,
partially received data files are not passed to the rest of the process; the Serial input
resets, ready to receive further data files.
l
Job delimiters: Enter the strings that tell PlanetPress Workflow the data file being
retrieved through the Serial input is complete. Each line in the Job delimiters text box is a
different delimiter. You can enter as many delimiters as you want, one per line. The three
default delimiters that appear are three of the most commonly recognized end of a file
delimiters.
l
Log (verbose): Select to keep a log of errors and other information related to the Serial
input. Since these messages can accumulate, you have the option of not logging them.
Telnet Input plugin preferences
The Telnet input plugin preferences control the log of the PlanetPress Workflow Telnet Capture
service. Since PlanetPress Workflow lets you monitor multiple Telnet inputs simultaneously,
the port setting for all Telnet input tasks cannot be set in the Preferences.
Preferences
l
Log all Winsock and network messages (very verbose): Select to have PlanetPress
Workflow keep a log of all Winsock and other network messages that occur from the
Telnet input. These messages are related to files sent from other systems using a telnet
connection. Since these messages can accumulate, you have the option of not logging
them.
l
Use Job Delimiters: Check this option if your Telnet input is a single stream that can
contain multiple jobs. The box lets you enter one or more possible delimiters (separated
by a line return), either a direct string (such as %%EOJOB) or an ASCII character (\001).
For a list of ASCII characters, see http://www.asciitable.com/.
Page 806

PlanetPress Fax plugin preferences
PlanetPress Workflow Fax plugin preferences control certain functions of the PlanetPress Fax
service, which in turn has a direct impact on all PlanetPress Workflow Fax output tasks
performed on a given computer. Bear in mind that PlanetPress Workflow Fax output tasks
included in a given PlanetPress Workflow configuration can be performed by a PlanetPress
Fax installation running on a different computer, typically one that runs only PlanetPress Fax
and the faxing application that actually sends the fax. When you change the user options on a
given computer, only that computer is affected. So you should consider changing the
PlanetPress Fax user options on the computer that actually performs the PlanetPress Workflow
Fax output tasks.
The changes you make to the PlanetPress Workflow Fax plugin preferences are stored in the
PlanetPress Fax configuration file. They will be applied when PlanetPress Fax is started.
Preferences
l
Delete log after: Enter the number of days after which to delete the PlanetPress Fax
service log. Each log covers a 24-hour period and is kept in the Log folder, which is
located in the PlanetPress Workflow installation folder (on the computer that actually
performs the PlanetPress Fax output tasks).
l
Fax service: Select the faxing program to which PlanetPress Fax sends its documents for
faxing. Each faxing program has its own options and changing this option also changes
the options below to reflect the following:
l
WinFax Pro
ll
Dialing format: Select how you want PlanetPress Fax to read the fax number
in the data selection and send it to WinFax PRO. The dialing format you select
here must be identical to the one you set in WinFax PRO; a discrepancy
between the two may result in WinFax PRO dialing incorrect fax numbers.
Select Default to have PlanetPress Fax set the dial prefix, long distance prefix,
area code, and fax number according to the content of the data selection, and
send the result to WinFax PRO. WinFax PRO sets the dial prefix, long
distance, prefix, and area code, and fax number to the ones it receives from
PlanetPress Fax. If any of the values it receives from PlanetPress Fax are
empty, it uses its own default values. For example, if the data selection did not
contain a dialing prefix, WinFax PRO uses its default dialing prefix. Select
Page 807

Dial as entered to limit PlanetPress Fax to removing any spaces or
parentheses that appear in the data selection, and sending the result to
WinFax PRO. WinFax PRO dials the result exactly as it receives it from
PlanetPress Fax.
Note
WinFax Pro scales fax pages with the following minimum settings:
- Raster width: 1728 dpi
- Raster height: 2158 dpi
- Raster resolution: 196 dpi
l
Windows Fax Service
l
Report Failures: Select to have PlanetPress Fax generate a report whenever
the maximum number of retries for a single fax is exceeded. The error
generated by the Windows Fax Service is also logged in the report. Note that
when PlanetPress Fax is unable to send a fax because an empty fax number
is used as the only recipient for a document, a failure will not be reported but
an error will be logged.
l
Report Successes: Select to have PlanetPress Fax generate a report
whenever one of the faxes in the PlanetPress Fax Job reaches its destination
successfully or at least as far as the Windows Fax service is concerned.
l
Folder: Enter or select the location of the report file. PlanetPress Fax
generates report file names automatically with the file name extension PFX.
The report file is copied to the specified Report folder only after all fax
transmissions in a PlanetPress Fax job are completed or have exceeded the
maximum number of retries. This folder can then be used as an input for a
PlanetPress Workflow process for monitoring the status of PlanetPress Fax
jobs. The postscript (PS) file for the job is also copied with the report file and
can be printed, sent by e-mail, or archived as specified by the PlanetPress
Workflow process.
l
Expand folder paths in UNC (Universal Naming Conventions) format:
Select to have PlanetPress Fax use complete network server path names
(\\servername\sharename\path\filename). This naming convention works well
with Windows operating systems, Novell NetWare, and other operating
Page 808

systems when using a local naming system (such as the DOS naming system
in Windows) would result in “File not found” error messages.
l
Dialing options button: Click to set the appropriate options as required. Since
these options are specific to the faxing program, refer to the faxing program’s
documentation for more information.
l
OpenText RightFax
l
Report Failures: Select to have PlanetPress Fax generate a report whenever
the maximum number of retries for a single fax is exceeded. The error
generated by the Windows Fax Service is also logged in the report. Note that
when PlanetPress Fax is unable to send a fax because an empty fax number
is used as the only recipient for a document, a failure will not be reported but
an error will be logged.
l
Report Successes: Select to have PlanetPress Fax generate a report
whenever one of the faxes in the PlanetPress Fax Job reaches its destination
successfully or at least as far as the Windows Fax service is concerned.
l
Folder: Enter or select the location of the report file. PlanetPress Fax
generates report file names automatically with the file name extension PFX.
The report file is copied to the specified Report folder only after all fax
transmissions in a PlanetPress Fax job are completed or have exceeded the
maximum number of retries. This folder can then be used as an input for a
PlanetPress Workflow process for monitoring the status of PlanetPress Fax
jobs. The postscript (PS) file for the job is also copied with the report file and
can be printed, sent by e-mail, or archived as specified by the PlanetPress
Workflow process.
l
Expand folder paths in UNC (Universal Naming Conventions) format:
Select to have PlanetPress Fax use complete network server path names
(\\servername\sharename\path\filename). This naming convention works well
with Windows operating systems, Novell NetWare, and other operating
systems when using a local naming system (such as the DOS naming system
in Windows) would result in “File not found” error messages.
l
Dialing options button: Click to set the appropriate options as required. Since
these options are specific to the faxing program, refer to the faxing program’s
documentation for more information.
Page 809

OpenText RightFax options
l
RightFax Printer: Select a RightFax printer. A RightFax printer is a fax driver that makes
it possible to send faxes automatically. This printer will output faxes without prompting the
user for fax addressing information. For more information, refer to OpenText RightFax
documentation.
l
Activation: Click to enter activation codes for the PlanetPress Image service installed on
the same computer as PlanetPress Workflow. If you have already activated the
PlanetPress Image service from its Control Panel applet, this is reflected when you open
the Activation dialog box by clicking this button.
l
Check for updates: Click to access the Objectif Lune website to search for updates to
PlanetPress Image. You are guided through the updating process with the PlanetPress
Workflow Update Service wizard.
l
About: Click to display an About dialog box for PlanetPress Fax. This dialog box
contains information such as the version number, whether the software is activated or the
number of days remaining in the trial.
l
Select Language: Click to select a different interface language for the PlanetPress Fax
Configuration applet. Note that this button is not displayed if you edit the PlanetPress Fax
options directly (not via PlanetPress Workflow Configuration program).
FTP Output Service preferences
FTP output user options control certain functions of the FTP Client service, which in turn has a
direct impact on all FTP output tasks performed by PlanetPress Workflow on a given computer.
Options
l
Protocol Options Group
l
Log all Winsock and network messages: Select to have PlanetPress Workflow
keep a log of all Winsock and other network messages that occur through the FTP
output. These messages are related to jobs sent from PlanetPress Workflow to a
server via an FTP output, which in turn uses the FTP output service. Log files are
kept in the Log folder, which is located in the PlanetPress Workflow installation
folder. They are named ftpdate.log, where date is the current date in yyyymmdd
numerical format. Note that changing this option also affects the log displayed in the
Page 810

PlanetPress Workflow Service Console.
l
Interval: Select the interval (in seconds) at which the FTP service is to dispatch jobs
from the ftpPut folder to the FTP sites.
l
Back up job on error: Select to move the job file to a local folder ftpPut\error if an
error occurs while sending a job via the FTP output. This folder is relative to your
install folder.
l
FTP Port: Select the port number that you want PlanetPress Workflow to use for all
FTP output tasks. The recommended port is 21 (the default setting).
PlanetPress Image preferences
PlanetPress Image user options control certain functions of the PlanetPress Image service,
which in turn has a direct impact on all PlanetPress Image Output tasks performed on a given
computer. These include error and logging options, PlanetPress Search database options, as
well as networking and email options.
Bear in mind that Image Output tasks included in a given PlanetPress Workflow configuration
can be performed by a PlanetPress Image installation running on a different computer, typically
one that runs only PlanetPress Image. When you change the user options on a given computer,
only that computer is affected. So you should change the Image user options on the computer
that actually performs the Image Output tasks.
The changes you make to the PlanetPress Image user options are stored in the PlanetPress
Image configuration file (ppimage.cfg). They will be applied when PlanetPress Image is started.
The available PlanetPress Image user options are separated in four different sections.
PlanetPress Image 1 or logging tab
l
Administrator’s address(es): Enter one or more system administrator email addresses
to which error and other messages related to the creation of PDFs/images by PlanetPress
Image are sent. Separate multiple email addresses with semi-colons (;).
l
Send to the administrator group
l
Daily log: Select to send an email to the administrator every day at midnight
(according to the local system clock) reporting the daily activity of PlanetPress
Page 811

Image. The log is sent to all addresses you enter in the Administrator’s address(es)
text box.
l
Error log: Select to send an email that includes the current error log to the
administrator when an error occurs. The error log is sent to all addresses you enter
in the Administrator’s address(es) text box.
l
Error file: When enabled, sends an e-mail with an attachment of the offending file
when an error occurs in the PlanetPress Image output task. Additionally, a backup
of the job is created in the Error folder, which is located in the PlanetPress Workflow
installation folder.
l
Name or address not resolved: Select to send an email to the administrator when a
name or address in the document selected to be used in PlanetPress Image cannot be
resolved.
l
Delete log after: Enter the number of days to wait before deleting the log of the generated
PlanetPress Image output. Each log file covers a single 24-hour period and is kept in the
Log folder, which is located in the PlanetPress Workflow installation folder. This log may
be on the local computer running PlanetPress Workflow or on another computer on your
network.
l
Activation: Click to enter activation codes for the PlanetPress Image service installed on
the same computer as PlanetPress Workflow. If you have already activated the
PlanetPress Image service from its Control Panel applet, this is reflected when you open
the Activation dialog box by clicking this button.
l
Check for updates: Click to access the Objectif Lune website to search for updates to
PlanetPress Image. You are guided through the updating process with the PlanetPress
Workflow Update Service wizard.
l
About: Click to display an About dialog box for PlanetPress Image. This dialog box
contains information such as the version number, whether the software is activated or the
number of days remaining in the trial.
l
Select Language: Click to select a different interface language for the PlanetPress Image
Configuration applet. Note that this button is not displayed if you edit the PlanetPress
Image options directly (not via PlanetPress Workflow Configuration program).
PlanetPress Image 2 or database tab
Add PDF to PlanetPress Search database group: Select to populate a PlanetPress Search
database using the documents created by PlanetPress Image and to activate the related
Page 812

options. Refer to the PlanetPress Search User Guide for more information on this PlanetPress
Workflow software.
l
Database type: Select the type of the database in which you want to create a table
(Access, or SQL Server).
l
Connection time-out: Enter the time, in seconds, that the connection to the database is
maintained while no action is taking place before the connection is severed.
l
Database directory: Enter the path of the directory in which the Access database is
located, or use the Browse button to navigate to, and select, the directory. This option is
available only when you select Access database in the Database type box.
l
Data source name: Enter the name of the computer on which the database runs. This
option is available only when you select SQL Server database or Oracle database in the
Database type box.
l
Use default database: Select to use the default database associated with your user
profile on that SQL Server or Oracle database. Clear to enter the name of the database in
the box that appears.
l
Use Windows NT Integrated security: Select to use your Windows user name and
password to log onto the SQL database.
l
User ID: Enter the user id required to access the database to which you are adding new
PDI files from the generated PDF files. If you are using an SQL database, enter the login
name you chose when you configured the SQL database (refer to the “Using
PlanetPressSearch with an SQL Server Database” section of the PlanetPress Search
User Guide).
l
Password: Enter the password required to access the database.
l
Test Connection: Click to verify that PlanetPressImage can connect to the specified
database.
l
Enforce global table creation: Select this option, as it ensures that all database users
are granted access to the database. This option is available only when you select SQL
database in the Database type box.
PlanetPress Image 3 or network tab
The options in this section are identical to the ones in the Network User Options section.
However, they determine how PlanetPress Image will interact with your Novell NetWare
system, not the PlanetPress Workflow Service.
Page 813

PlanetPress Image 4 or login tab
l
Use Microsoft Outlook: Select to use Microsoft Outlook on the host computer running
PlanetPress Image to send the error messages to the administrators. The host computer
must be running Outlook, and PlanetPress Workflow must have access to Outlook.
Outgoing emails appear in the outbox of Outlook, and is sent whenever Outlook is set to
send email.
l
Use SMTP mail group: Check to activate this group’s options and to use Simple Mail
Transfer Protocol (SMTP) to send the error messages to the administrators. Note that if
you select this option, you will be required to enter information in the Name, Email
address and Outgoing mail (SMTP) boxes.
l
Name: Enter the name of the user sending the error messages to the administrators.
l
Organization: Enter the name of the organization of the user sending the error
messages to the administrators.
l
Email address: Enter the email address of the user sending the error messages to
the administrators.
l
Reply address: Enter the reply address that recipients use to reply to the error
messages.
l
Outgoing mail (SMTP): Enter the IP address of the server that PlanetPress
Workflow uses to send the emails via SMTP.
l
Server requires authentication: Select if the outgoing server used to send the
emails via SMTP requires authentication. Note that if you select this option, you will
be required to enter information in the Account name and Password boxes below.
l
Account name: Enter the account name of the user on the server to be able to
send emails via SMTP. You must select Server requires authentication to
enable this field.
l
Password: Enter the password corresponding to the Account name of the
user on the server to be able to send email via SMTP. You must select Server
requires authentication to enable this field.
LPR Output preferences
LPR output user options control certain functions of the LPR Client service, which in turn has a
direct impact on all LPR output tasks performed by PlanetPress Workflow on a given
computer.
Page 814

Options
l
Protocol options group
l
Log all Winsock and network messages: Select to have PlanetPress Workflow
keep a log of all Winsock and other network messages that occur through the LPR
output. These messages are related to jobs being sent from PlanetPress Workflow
to an LPD or LPD-compatible printer. Logs are kept in a Log folder relative to your
install folder. They are named lprdate.log, where date is the current date in
yyyymmdd numerical format. Note that changing this option also affects the log
displayed in the PlanetPress Workflow Service Console.
l
Print banner pages between jobs: Select to print banner pages between each job
processed and output from the LPR output. The banner page includes details of the
job being printed, including the job file name and the user name on the host
computer running the LPR output client.
l
No source port range restriction: Select to remove any restrictions on the port
PlanetPress Workflow uses to send the job file via the LPR/LPD protocol. Clear to
restrict the port used to send the job to one in the range between 721 and 731.
l Print up to: Select the maximum number of files that can be simultaneously sent to
print by the LPR output service.
l
Error handling group
l
Max. retry period: Select the maximum time period, in hours, within which
PlanetPress Workflow attempts to dispatch the job using the LPR output before
giving up. Note that entering a maximum retry period of 0 hours disables retries
altogether.
l
Retry interval: Select the interval, in seconds, at which time PlanetPress Workflow
attempts to dispatch the job using the LPR output. This takes place only within the
Max. retry period, after which the attempt ends.
l
Keep a backup when error occurs: Select to move the job file to a local folder
relative to your install folder called pplpr\error in the case of an error.
l LPR settings group
l
Time-out: Set the time in seconds the PlanetPress Workflow process waits when it
sends jobs using the LPR protocol. The default value for the Time-out property is
7200 seconds (2 hours). On a time-out, partially sent data files are not passed to the
rest of the process; the LPR output resets and is ready to send further data files. Log
messages include the time-out duration.
Page 815

l
Polling interval (seconds): Select the period of time—the default is 4 seconds—for
which PlanetPress Workflow is to wait when it finishes dispatching jobs to the LPR
printer queues before polling the LPR output folder again.
PrintShop Web Connect Service
preferences
PrintShop Web Connect service preferences control the credentials to log into the PrintShop
Web server.
The available preferences are as follows:
l
User name: Enter the user name of a valid PrintShop Web user, mostly operators.
l
Password: Enter the password associated with the user name on the PrintShop Web
server.
Note
It is also mandatory to send your configuration to your PlanetPress Workflow service
since the PrintShop Web credentials are included in the *.cfg file (See "Sending a
configuration" on page38), which is updated every time the configuration is sent to the
service via the Send Configuration button.
Editor Options
The Script Editor is used to edit scripts used in Run Script tasks and the XSLT Editor is used
to edit scripts used in Open XSLT action tasks (see "Using Scripts" on page141 and "The
Script Editor and XSLT Editor" on page143).
There are a number of options for the editors, which you can set via the menu: Tools >
Options, in the editor. Most of the options listed below are valid for both editors. Those options
which are only valid for a specific editor are identified as such.
Page 816

l
Editor
l
Auto indent mode: Select to automatically position the insertion pointer under the
first non-blank character of the preceding line when you press ENTER.
l
Insert mode: Select to use Insert mode and clear to use Overwrite mode. In Insert
mode, when you enter text, existing text shifts to accommodate it. In Overwrite
mode, text you enter overwrites existing text. You can also press INSERT to toggle
between the two modes.
l
Use tab character: Select to use the tab character instead of spaces to represent
tabs in the program file. Clear to use spaces to represent tabs. You must clear the
Smart tab option to use this option.
l
Smart tab: Select to use smart tabs. A smart tab advances with reference to the
preceding line. It advances to align with the first non-blank character it encounters
on the preceding line, from its current position forward. You must clear the Use tab
character option to use Smart tabs.
l
Optimal fill: Select to optimize the indent of every auto-indented line by minimizing
the number of space and/or tab characters it uses. You must select both Auto indent
mode and use tab character to use this option.
l
Backspace unindents: Select to move the insertion pointer to the previous
indentation level when you press BACKSPACE. This is useful when you enter a
block of code such as a for loop; you enter the for statement, advance one
indentation level to enter the body of the for loop, then press BACKSPACE to enter
the end for statement. You must select Auto indent mode to use this option.
l
Cursor through tabs: Select to move one by one through the spaces of tabs using
the left or right arrow keys. Clear to have the arrow keys treat the tab as a single
character. You must select Use tab character to use this option.
l
Group undo: Select to set the undo feature of the Editor to undo the last group of
editing commands entered. An editing command is defined as a mouse click, a
press on ENTER, or a press on any other key. A group of editing commands is a
sequence of a single type of editing command. Clear to set the undo feature to undo
only the last command entered.
l
Cursor beyond EOF: Select to make it possible to position the pointer beyond the
end of the program file. Clear to prevent this. If you clear Insert mode and select
Cursor beyond EOF, you can only overwrite the existing lines of the program; you
cannot add lines to it.
Page 817

l
Cursor beyond EOL: Select to make it possible to position the pointer beyond the
end of the line. Clear to prevent this.
l
Keep trailing blanks: Select to preserve any blank spaces occurring at the end of a
line. Clear to remove those blank spaces.
l
Persistent blocks: Select to have any text you enter immediately after selecting a
block of code appended to that block of code as part of the selection. When you
select this option, you can also use the arrow keys to move within the code without
affecting the selected code. You must select the Enable selection option to use the
Persistent blocks option.
l
Overwrite blocks: Select to have any text you enter immediately after selecting a
block of code replace that block of code. You must clear Persistent blocks and
select Enable selection for this option to have an effect.
l
Enable selection: Select to permit the creation of selections in the Code area. If
selected, you can create a selection by clicking and dragging the pointer over a
portion of code, or by double-clicking to highlight the word or line under the pointer
(the Double click line option determines whether a word or line highlights). You may
also press Ctrl + A to select all text. You can cut, copy, paste, and print selections.
l
Enable dragging: Select to permit dragging and dropping a selection to reposition
it in the code. This option works only if you also select Enable selection.
l
Enable search highlight: Select to highlight the search term match found in the
code when you perform a search. Clear to prevent the highlighting. In both cases,
the pointer appears after the last character of the search term match.
l
Double click line: Select to highlight the complete line of code when you double-
click that line. Clear to highlight only the word under the pointer.
l
Find text at cursor: Use to set the behavior of the Find dialog box. Select to
automatically copy the word under the pointer into the Text to find box when you
open the Find dialog box. Clear to prevent the copy. If no previous search terms
appear in the Text to find drop-down list, the Editor performs the copy regardless of
whether this option is selected or cleared.
l
Block indent: Enter the number of spaces to jump for each block indent. The
default is 2 and the maximum is 16. The Block indent typically should agree with the
tab stops in the Tab stops option. Perform a block indent by selecting a region of
code and pressing CTRL+SHIFT+I (to indent the code to the right) or
CTRL+SHIFT+U (to move the code to the left).
Page 818

l
Tab stops: Use to set the number of spaces to advance when you enter a tab
character or to set a series of tab stops. Enter a single integer to set the number of
spaces to advance with each tab. Enter a sequence of two or more integers, each
separated by a space, to specify tab stops. The sequence must be in ascending
order. Tab stops are measured in number of space characters. For example, a value
of 20 places the tab stop at the 20th space character. You can also use the drop-
down list to select a previously entered value.
l
Display
l
Display Options Group
l
Editor font: Use to select the font the Editor uses to display the program code.
Select the Use monospace fonts only option to restrict the fonts available to
fixed width fonts. A preview of the selected font, at the selected Size, appears
in the Sample box.
l
Size: Use to select the font size the Editor uses to display the program code. A
preview of the selected font, at the selected size, appears in the Sample box.
l
Use monospace fonts only: Select to display only fixed width fonts in the
Editor font drop-down list. Every character in a fixed width font occupies the
same amount of space.
l
Sample: Displays a preview of the font selected in the Editor font option, at the
size selected in the Size option.
l
Margin and Gutter Group
l
Right margin: Select to display a vertical gray bar as a right margin indicator.
Use the Right margin position drop-down list to set the position of this
indicator. This indicator is an on-screen visual reference only. It does not print,
and does not enforce word wrap on lines that exceed the number of characters
set for it. It can be useful to indicate the right margin of the printed page,
making it easy to determine whether a line of code extends beyond the
printable area of the page.
l
Right margin position: Enter the position of the right margin indicator, in
number of characters, relative to the left margin. For example, if you enter 80,
the distance from the left margin to the right margin indicator is 80 characters.
Use the drop-down list to select a previously-entered margin position.
l
Gutter: Select to have the Editor display a gutter between the Commands and
Code areas. Use the Gutter width option to set the width of the gutter. Select
the Line numbers on gutter option to display line numbers in this area.
Page 819

l
Gutter width: Enter the width, in pixels, of the gutter. Use the drop-down list to
select a previously-entered gutter width.
l
Line numbers on page: Select to display code line numbers at the left edge
of the Code area. If you clear both this and the Line numbers on gutter option,
no line numbers appear alongside the lines of code.
l
Line numbers on gutter: Select to display code line numbers in the gutter
between the Commands and Code areas. Selecting this option has effect only
if you selected the Gutter option. If you clear both this and the Line numbers on
gutter option, no line numbers appear alongside the lines of code.
l
Color
l
Mapping: Select a mapping for the content of the script in the script editor—the
mapping is used as well when the script appears in the text box of the Run Script
Actions Properties dialog. Each mapping (Default, Classic, Ocean, Twilight)
includes pre-set color values and attributes for each script element as listed in the
Elements list box. After selecting a mapping, you can edit individual elements to
change their pre-sets by selecting them in the Element list box and editing their
values.
l
Element list box: Select a script element in the Element list box, then edit the
background and foreground color with which it is displayed, and/or its formatting
attributes. Each element recognized for each scripting language, for example, a
URL in a JavaScript script, is displayed with the properties you set.
l
Foreground: Select the color that the element highlighted in the Element list box is
displayed with in the Script Editor.
l
Background: Select the background color that the element highlighted in the
Element list box is displayed with in the Script Editor. The color is used to highlight
the element as if it was selected with the cursor.
l
Attributes Group
l
Bold: Select to bold the element highlighted in the Element list box when it is
displayed in the Script Editor.
l
Italic: Select to italicize the element highlighted in the Element list box when it
is displayed in the Script Editor.
l
Underline: Select to underline the element highlighted in the Element list box
when it is displayed in the Script Editor.
Page 820

The user interface
This chapter centers on the PlanetPress Workflow Configuration program, which you use to
create and edit your configurations.
The basic user interface elements are as follows:
l "PlanetPress Workflow Button" on page831.
l " The Quick Access Toolbar" on page893. This toolbar is customizable.
l The ribbon tabs; see "The PlanetPress Workflow Ribbon" on page894.
l "The Process area" on page885
l "Configuration Components pane" on page832.
l The dockable panels including "The Plug-in Bar" on page883, " The Object Inspector
pane" on page881 and "The Debug Information pane" on page879.
l " The Message Area Pane" on page880.
l
The status bar. This displays your current software version and status of the PlanetPress
Service.
You can customize the appearance of the PlanetPress Workflow Configuration programs to
your needs. See "Customizing the Workspace" on the next page.
Page 821

Customizing the Workspace
You can combine and attach the Configuration Components pane, Messages area and
Object Inspector into a single secondary window that can be docked to and undocked from
the main PlanetPress Workflow Configuration program window.
Combining and attaching areas can facilitate the management of your screen real estate. It lets
you reposition multiple areas in a single operation.
Note
Since the Process area must remain in the main PlanetPress Workflow Tools
Configuration Program window, it cannot be combined and attached in this fashion.
Dock and undock areas of the Program Window
The Configuration Components pane, the Object Inspector, and the Messages area can be
displayed in windows that are attached to the Program window (docked position) or that float
Page 822

above it (undocked position). You dock a window when you attach it to the Program window,
and you undock it when you detach it from the Program window.
The Configuration Components pane, the Object Inspector and the Messages area can
each be displayed inside its own window, whether docked or undocked, but they can also be
displayed attached or combined inside the same window.
l When separate areas are displayed simultaneously, they appear in different sections of
the Program window.
l When attached areas are displayed simultaneously, they appear side-by-side or above
one another inside sub-windows.
l When combined areas are displayed simultaneously, they overlap one another inside the
same window. Tabs let you switch from one area to the other.
To undock an area of the Program window, do one of the following:
l Click either a title bar (separate or attached areas) or a tab (combined areas) displaying
the name of the Configuration Components pane, the Object Inspector or the
Messages area and move the mouse pointer so as to drag the area away from its docked
position. As you drag, a rectangle is displayed to show the landing position. Release the
mouse button when the rectangle is in a floating position (not attached to the Program
window).
l Double-click either a title bar (separate or attached areas) or a tab (combined areas)
displaying the name of the Configuration Components pane, the Object Inspector or
the Messages area. The area will jump from a docked to an undocked position and vice-
versa.
To dock an area of the Program window, do one of the following:
l Click either a title bar (separate or attached areas) or a tab (combined areas) displaying
the name of the Configuration Components pane, the Object Inspector or the
Messages area and move the mouse pointer so as to drag the area away from its current
undocked position. As you drag, a rectangle is displayed to show the landing position.
Release the mouse button when the rectangle is in a docked position (attached to the
Program window).
l Double-click either a title bar (separate or attached areas) or a tab (combined areas)
displaying the name of the Configuration Components pane, the Object Inspector or
Page 823

the Messages area. The area will jump from an undocked to a docked position and vice-
versa.
Show or hide areas of the program window
You can choose to hide or display any of the customizable areas in PlanetPress Workflow
program. Hidden areas will still contain the same information but will not be visible.
To show or hide a Program window area:
1.
In the PlanetPress Workflow Ribbon, click the View tab.
2.
From the Show/Hide group, click on any area name to hide or display it.
A "highlighted" (orange) button means the area is displayed somewhere on your screen(s). A
dim (blue) button means the area is hidden.
Note
The Process Area is always visible and cannot be hidden.
Combine and attach areas
The Configuration Components pane, the Object Inspector, and the Messages area can be
attached or combined to one another and share the same space. However they are displayed,
you can always drag, dock, or undock any area as desired. You can also switch among areas
when they are combined, as well as maximize or minimize areas when they are attached. For
more information, refer to "Customizing the Workspace" on page822.
The following procedures will show a number of things you can do to change the way
information is displayed by PlanetPress Workflow Configuration program.
Combining areas
Click either a title bar (separate or attached areas) or a tab (combined areas) displaying the
name of the Configuration Components pane, the Object Inspector or the Messages area and
move the mouse pointer. As you drag, a rectangle is displayed to show the landing position.
Drag the rectangle directly over another area and release the mouse button when the shape of
Page 824

a tab appears at the bottom of the rectangle.
Switching between combined areas
At the bottom of the combined area, click the tab of the area you want to bring to the top. If all
the tabs are not displayed, use the left and right arrows to navigate between them.
Image: The left and right arrows let you show hidden tabs.
Reordering tabs in a combined area
At the bottom of the combined area, click the tab of the area you want to move, drag it to the left
or right and drop it at the desired position.
Image: Dragging a combined area to new position.
Page 825

Taking an area out of a combined area
To take an area out of a combined area, do one of the following:
l Click the tab displaying the name of the area you want to take out and move the mouse
pointer so as to drag the area away from the combined area. As you drag, a rectangle is
displayed to show the landing position. Release the mouse button when the rectangle is
away from the combined area.
l Double-click the tab of the area you want to take out of the combined area. The area will
jump outside of the combined area.
Attaching areas
Note
You can attach an area to a group of combined areas, as well as change combined areas
into attached areas. When attaching previously combined areas, you may find it easier to
do it in two steps: begin by taking the area out of the combined area and then try
attaching it.
To attach areas:
1. Click either a title bar (separate areas) or a tab (combined areas) displaying the name of
the Configuration Components pane, the Object Inspector or the Messages area and
move the mouse pointer. As you drag, a rectangle is displayed to show the landing
position.
2. Drag around to the edges of another area and release the mouse button when the
rectangle appears to the left or right, or above or below the other area. The rectangle
should not display a tab at its bottom, otherwise the areas will not be attached but rather
combined.
3. Resize each part of the new group as desired.
Page 826

Image: Attaching an area to a group of combined areas. The rectangle showing the
landing position is not tabbed and the area will therefore be moved next to the combined
area.
Maximize or restore attached areas
To maximize or restore attached areas, do one of the following.
l To maximize a vertically attached area, click the upward pointing arrow on its title bar.
l To restore a vertically attached area, click the downward pointing arrow on its title bar.
l To maximize a horizontally attached area, click the left pointing arrow on its title bar.
l To restore a horizontally attached area, click the right pointing arrow on its title bar.
Page 827

Image:
A) Click to maximize this area.
B) Click to restore this currently maximized area.
Page 828

Image:
C) Click to maximize this area.
D) Click to restore this currently maximized area.
Taking an attached area out of a group
To take an attached area out of a group, do one of the following:
l Click the title bar displaying the name of the attached area you want to take out and move
the mouse pointer so as to drag the area away from the group. As you drag, a rectangle is
displayed to show the landing position. Release the mouse button when the rectangle is
away from the group.
l Double-click the title bar of the area you want to take out. The area will jump outside of
the group.
Resize the program window areas
You can adjust the layout of the program window by resizing one of the program window areas,
including combined areas (see "Combine and attach areas" on page824).
Page 829

To resize a program window area:
1. Move the pointer to an edge of the area that you want to resize, to display the resize
pointer.
2. Then click and drag to resize the area.
Change the Interface language
PlanetPress Workflow can be used in multiple languages, and the list of available languages
grows as we translate the software. The first time you use PlanetPress Workflow, it starts in the
language used for the installation.
To change the language used by the PlanetPress Workflow Configuration program:
1.
Click the PlanetPress Workflow button, then click Select Language.
The Select Language dialog box appears. This box lists all the languages that can be
used by PlanetPress Workflow as well as the Use System Default Locale check box.
2. Select the desired language.
3.
Use System Default Locale: Select to mirror your language settings, as defined in the
Regional and Language Options of the Windows Control Panel. This option is typically
used to enter and process information in non-European languages. It is only enabled
when English is selected as the program language.
4. Click OK.
You may change this setting as often as you like, but you need to restart the application every
time you do so.
Note
If you plan to enter and process information in non-European languages, you should
know that PlanetPress Workflow uses codepages when storing and retrieving information
(a codepage is a mapping used to convert back and forth the letters and numbers used by
humans to the numeric characters used by computers). By default, codepage 1252 is
used for Latin languages (good for Afrikaans, Basque, Catalan, Danish, Dutch, English,
Faroese, Finnish, French, Galician, German, Icelandic, Indonesian, Italian, Malay,
Norwegian, Portuguese, Spanish, Swahili and Swedish) and codepage 932 is used for
Page 830

Japanese.
PlanetPress Workflow Button
The PlanetPress Workflow button provides access to the File menu options.
Options
l
New: Closes the configuration that is currently opened and creates a new configuration,
with a single example process and no printer queues. See "Creating a new configuration"
on page35.
l
Open: Displays the dialog to open an existing configuration file.
l
Save: Saves the current configuration. If the file is new and has not yet been saved, or if
the configuration is the loaded directly from the service, the Save As dialog is displayed
instead. See "Saving and sending a Workflow Configuration" on page37.
l
Save As: Saves the current configuration under a new name. It does not overwrite any
existing configuration file, unless an existing file is selected and overwritten manually by
the user.
l
Import:
l
Configuration Components: Displays the Import Processes dialog, letting you
import processes and other components from other existing configuration files. See
"Importing processes" on page130.
l
PlanetPress Document: Displays the dialog to import a PlanetPress Connect
Document to be added to the list in the components area.
l
PrintShop Mail Document: Displays the dialog to import a PrintShop Mail
Document to be added to the list in the components area.
l
Connect Content: Displays the dialog to import Connect files including templates,
data mapping configurations, presets and packages.
l
Send Configuration: Sends the current configuration to the PlanetPress Watch service.
See "Saving and sending a Workflow Configuration" on page37.
Page 831

l
Close: Closes the configuration that is currently opened and creates a new configuration,
with a single example process and no printer queues. Closing the current configuration is
the same as creating a new one.
l
Recent Documents: Displays a list of the 9 most recently opened configuration files.
Click on any of them to open it.
l
Select Language: Click to display the language selection dialog, which changes
PlanetPress Workflow interface language. See " Change the Interface language" on
page830.
l
Preferences: Displays the Options dialog. See "Preferences" on page769.
l
Exit: Closes PlanetPress Workflow. See " Exit PlanetPress Workflow Configuration
program" on page39.
When using the New, Open, Close, Recent Documents and Exit menu options, if your current
configuration has not been saved after modifications, a dialog will open asking if you want to
save, not save, or cancel the action and return to the current configuration.
Configuration Components pane
The Configuration Components pane displays processes, subprocesses, variables, resource
files and printer queues. It also lets you add any of these components using the right-click
menu.
Components Area Sections
l
Processes: Displays a list of processes in your configuration (see: "About processes and
subprocesses" on page126). Right-click on a process to access a drop-down menu that
offers these choices:
l
Insert Process: Inserts a new process with a default input and output task.
l
Insert Startup Process: Inserts a new process as a Startup Process (see "About
processes and subprocesses" on page126).
l Insert Self Replicating Process: Inserts a regular process that is set to be self-
replicating.
l
Insert Local Variable: Inserts a new local variable (see: "Local variables" on
page724).
Page 832

l
Cut, Copy, Paste: Controls the clipboard.
l
Delete: Deletes the process from the configuration.
l
Rename: Renames the process.
l
Active: Triggers whether the process is active (runs in service mode) or inactive
(does not run in service mode). Inactive processes never trigger their input task or
any other tasks.
l
Startup: Triggers whether the process is a startup process (runs before any other
process).
l
Group, Ungroup: Triggers grouping functionality.
l
Properties...: Displays the process' properties, for scheduling and error handling.
l
Subprocesses: Displays a list of subprocesses in your configuration (see: "About
processes and subprocesses" on page126). Right-click on a subprocess to access a
drop-down menu that offers these choices:
l
Insert Subprocess: Inserts a new subprocess with a default input and output task.
l
Insert Local Variable: Inserts a new local variable (see: "Local variables" on
page724).
l
Cut, Copy, Paste: Controls the clipboard.
l
Delete: Deletes the subprocess from the configuration.
l
Rename: Renames the subprocess.
l
Group, Ungroup: Triggers grouping functionality.
l
Properties...: Displays the process's properties for error handling.
l
Global Variables: Displays a list of variables that are shared between all your processes
(see: "Global variables" on page725). Right-click on a Global Variable to access a drop-
down menu that offers these choices:
l
Insert Global Variable: Creates a new global variable
l
Cut, Copy, Paste: Controls the clipboard.
l
Delete: Deletes the global variable from the configuration.
l
Rename: Renames the global variable.
l
Reset: Resets the global variable to its default value. Useful if one of your process
is modifying the global variable's value and you want to return it to its original
default value.
Page 833

l
Group, Ungroup: Triggers grouping functionality.
l
Properties...: Displays the properties, which lets you set a default value for the
global variable.
l
Connect Resources: Displays a list of PlanetPress Connect resources that can be used
in processes (see: "Connect resources" on page41). Different resources are divided into
subfolders:
l
Data Mapping Configurations: Displays a list of data mapping configurations used
with the Execute Data Mapping task. For each data mapping configuration in the
list, the following two items appear within them:
l
Data Model: Displays the data model used in the data mapping configuration.
Double-click on the data model to view it in your default XML viewer
(generally, Internet Explorer).
l
Sample Data File(s): Displays a list of sample files that are included in the
data mapping configuration. Double-click on a file to use it as a sample data
file for the active process.
l
Document Templates: Displays a list of templates that can be used in content
creation tasks: "Create Email Content" on page600, "Create Web Content" on
page621 and "Create Print Content" on page617.
l
Job Presets: Displays a list of Job Presets that can be used in the "Create Job" on
page605 task.
l
Output Presets: Displays a list of Output Presets that can be used in the "Create
Output" on page608 task.
l
PPS/PSM Documents: Displays a list of PlanetPress Suite Design and PrintShop Mail
(Suite) documents that have been imported into PlanetPress Workflow (see "PlanetPress
Design documents" on page45 and "PrintShop Mail documents" on page51). Right-click
on the section or on a document to access a drop-down menu that offers these choices:
l
Insert Resident Document: Inserts a new Resident Document, which is a
placeholder for a PlanetPress Design document that resides exclusively on the
printer.
l
Cut, Copy, Paste: Controls the clipboard.
l
Delete: Deletes the document from the configuration, as well as the Workflow Tools
Working Folders.
l
Refresh: Regenerates a PostScript Cache from the original document's PTK file.
Page 834

l
Group, Ungroup: Triggers grouping functionality.
l
Properties...: Displays the properties, which lets you see the form information and
select its default printing behaviors.
l
Printer Queues: Displays a list of printer queues in your configuration (see: "PlanetPress
Workflow printer queues" on page113). Right-click on a printer queue to access a drop-
down menu that offers these choices:
l
Insert Printer Queue: Creates a new printer queue in your configuration.
l
Replace Printer Queue By: Replaces the currently selected printer queue with a
new one.
l
Cut, Copy, Paste: Controls the clipboard.
l
Delete: Deletes the printer queue from the configuration.
l
Rename: Renames the printer queue.
l
Group, Ungroup: Triggers grouping functionality.
l
PS Test Page: Prints a test page in PostScript format. Useful for validating whether
the printer supports PostScript.
l
Text Test Page: Prints a text-only test page on the printer.
l
Properties...: Displays the printer queue properties.
Note
Deleting a component that is currently used by a process will cause this process to stop
working and trigger an error, until the task that causes the error is removed, or changed to
point to another existing component.
PlanetPress Design document properties
To view the properties of a PlanetPress Design document (see "PlanetPress Design
documents" on page45), do one of the following:
l Click any document to display its properties in the Object Inspector.
l
Double-click any document to display its properties in the PlanetPress Design
Document Options dialog box.
Page 835

PlanetPress Workflow Configuration programs let you view a number of the properties
associated with the PlanetPress Design documents you use, but most of those properties are
set in PlanetPress Design and cannot be edited using PlanetPress Workflow Configuration
program.
The Document name of printer-resident documents can be changed using PlanetPress
Workflow Configuration program simply because it is initially set using that program.
The properties available via the Printer Settings tab define how documents are printed. They
are also set using PlanetPress Workflow Configuration program and are retained when
documents are assigned to printer queues. They can be edited by selecting documents within
the PPD/PSM Documents category, which changes the document’s default printer settings, or
within the Printer Queues category, which changes the document properties on the selected
queue.
Document properties options
Identification Tab
The information here is read-only and gives you information on the document.
l
Document: The file name of the document, as entered in PlanetPress Design. This is the
name of the file saved in PlanetPress Design, or the name you give it when you add a
printer-resident document in your PlanetPress Workflow Configuration. It may have a PTK
extension (if it has been sent to PlanetPress Workflow from PlanetPress Design), or a PS
extension (if it is printer-resident).
l
Version: The version of PlanetPress Workflow in which the document was originally
created. Printer-resident documents are identified as such.
l
Document name: The name of the document as entered in PlanetPress Design. You can
enter a name for printer-resident document here; the name does not have to match the
name given it in PlanetPress Design. Since this property is used in the trigger to identify
the document when PlanetPress Workflow sends a job to be merged on a printer, the
document name must exactly match the name of the document installed on the printer.
l
Description: The description of the document as entered in PlanetPress Design.
l
Last modified: The date and time the document was last uploaded to PlanetPress
Workflow.
Page 836

Printer Settings Tab
l
Trigger Type: Select whether you want a normal trigger configuration to be used, or a
custom trigger that you manually enter.
l
Custom Trigger Box (appears only when Custom Trigger is selected in Trigger type):
Lets you enter the exact trigger you want to use. This trigger must absolutely be in
standard postscript language.
l
Run mode group
l
Printer centric: Select to send the document along with the trigger and data to the
component that generates fax documents.
l
Optimized PostScript Stream: Select to merge the selected document with the
data received by this task before sending it to the component that generates fax
documents. Some PlanetPress Design features, such as the Time and Date
PlanetPress Talk functions, require that this option be selected.
l
Document location group (enabled only when using Printer-Centric mode)
l
PlanetPress Workflow-based: Select if the PlanetPress Design document is in
PlanetPress Workflow. This option should be selected if your document is updated
often and you are sending it to the Workflow Tools instead of the printer directly.
l
On printer hard disk: Select if the PlanetPress Design document is on the printer's
hard drive.
l
In printer flash memory: Select if the PlanetPress Design document is on the
printer's flash memory.
l
RAM: Select if the PlanetPress Design document is on the printer's RAM (Random
Access Memory).
l
Document Update group (enabled only when using printer-centric mode and the
document is on the printer)
l
Automatically update: PlanetPress Workflow will send a new version of the
document to the printer automatically if the document has been changed since it
was last used. If unchecked, you will have to manually update the document on the
printer from the Update Instances button or by sending the document to the printer
from PlanetPress Design.
l
Confirm Update: Check if you want a confirmation page to be printed stating the
document has been updated, when it happens. This options is disabled if
Automatically update is not selected.
Page 837

l
Update Instances: Clicking this button brings up a dialog box that lets you
manually update any document on any printer.
l
Printer-Specific folder: This option lets you enter a manual location where the
documents should reside in the printer's memory. This option is only available if the
document is Printer Centric, and the Document location is either On printer hard disk
or In printer flash memory.
Moving and copying configuration components
Moving configuration components in the Configuration Components pane is very easy and
can either be done with the mouse (drag & drop), the Ribbon menus (clipboard buttons) or the
keyboard (clipboard keyboard shortcuts).
If you wish to change the order in which objects appear in a category or group of the
Configuration Components pane, refer to "Reordering objects in the Configuration Components
pane" on page841.
Mouse cursor
As you drag a configuration component, your mouse cursor will change to indicate the action
you are performing, as well as whether the location where the cursor is can accept the
configuration component you are dragging. If you try to drag a configuration component in a
location that is not accepted, the cursor changes to a "prohibited" icon. If you are moving a
configuration component to a valid location, the mouse cursor displays the normal cursor along
with a small dotted box. If you are copying a configuration component to a valid location, the
mouse cursor displays the normal cursor along with a small dotted box and a plus (+) sign.
Normal mouse pointer
Move mouse pointer
Copy mouse pointer
Prohibited mouse pointer
Page 838

Moving Configuration Components
You can move components in the Configuration Components pane in a number of ways; see
below.
Note that moving a configuration component does not change the order in which the
components are used. However they can affect your process if, for example, you move a local
variable from one process to another and the local variable is still used in the first process.
Dropping documents onto printer queues does not move the documents, but rather assigns
them to these queues (see "PlanetPress Workflow printer queues" on page113).
Using Drag & Drop
l Click on the component and hold the mouse button.
l Move the component to the location where you want to drop it.
l Let go of the mouse button.
When dragging configuration components, a horizontal line appears where the component will
be dropped (if the location is valid). At the end of this line will be small "dents". If these dents
are on top of the line, the component will be placed at the same level (group) as the component
before it. If the dents are at the bottom, the component will be placed at the same level (group)
as the component after it.
If you move an object in the Configuration Components pane on top of a group, the group
name turns maroon (in the default color scheme) to indicate the object will be moved in the
group after all the existing objects currently in that group.
Using the clipboard buttons
l Click on the component you want to move.
l
Go to the Home tab of the ribbon.
l
Click the Cut button in the Clipboard group.
l Click on the new location where you want the component.
l
Click the Paste button in the Clipboard group.
Page 839

Using the contextual menu
l Right-click on the component you want to move.
l
Click on Cut in the contextual menu.
l Right-click on the new location where you want the component.
l
Click on Paste in the contextual menu.
Using the keyboard shortcuts
l Click on the component you want to move.
l Do CTRL+X (cut) on your keyboard.
l Click on the new location where you want the component.
l Do CTRL+V (paste) on your keyboard.
Copying components
You can make a copy of any component in the Configuration Components pane, except
resource files (of which you can only have one copy). Copying components is done using the
same methods as moving them, with the following differences:
l To copy components using the clipboard buttons and contextual menu, replace Cut by
Copy. Otherwise the methods are the same.
l
To copy components using the keyboard shortcuts, replace CTRL+X by CTRL+C.
Otherwise the method is the same.
Note
You can also copy multiple components by selecting more than one then using the
methods described above. However, you can only select multiple components from
within the same folder. You cannot, for example, select a subprocess along with a
process and move them together. Also, you cannot select multiple components if they are
not in the same group or if one is in a group and the other is not.
Page 840

Renaming objects in the Configuration Components Pane
You can rename processes, groups, and printer queues in the Configuration Components
pane. Resource files cannot be renamed or modified using PlanetPress Workflow. You can, on
the other hand, change the name of printer-resident PlanetPress Design documents.
Note
Names cannot begin with a number. They can only contain the following ASCII
characters: underscore, upper and lower case letters of the alphabet, all digits 0 through
9. If you enter an invalid name, you will be prompted to correct it (unless if the
corresponding option has been turned off).
To rename a process, printer queue or group in the Configuration Components pane:
1.
In the Configuration Components pane, right-click the name of an object or group and
choose Rename from the pop-up menu. The name of the object or group is highlighted
and ready to be edited.
2.
Type the new name over the existing name and press the Enter key.
To rename a PlanetPress Design printer-resident document:
1.
In the PPD/PSM Documents section of the Configuration Components pane, double-
click a printer-resident document. The PlanetPress Design Document Options dialog
box is opened.
2.
In the Document name box, enter the new document name and click OK.
Reordering objects in the Configuration Components pane
There are multiple ways you can reorder objects in the Configuration Components pane.
Commands available from the right-click menu let you reorder selected objects, as well as
alphabetically reorder objects listed directly under a category or appearing within a group. You
can also use the clipboard controls and drag & drop methods described in "Moving and
copying configuration components" on page838 to copy and move objects and tasks.
To reorder selected objects in the Configuration Components pane:
Page 841

1. Click an object or group.
2.
In the PlanetPress Workflow Ribbon, go to the View tab. Then click Order in the Arrange
group, and select one of the following:
l
Move up to move the item one step up in the category or group. If the item is already
the top object in the category or group, this command has no effect.
l
Move down to move the item one step down in the category or group. If the item is
already the bottom object in the category or group, this command has no effect.
l
Move to the top to move the item to the top of the category or group. If the item is
already the top object in the category or group, this command has no effect.
l
Move to the bottom to move the item to the bottom of the category or group. If the
item is already the bottom object in the category or group, this command has no
effect.
To alphabetically reorder objects in the Configuration Components pane:
l Click either a category (Processes, Global Variables, Connect Resources, PPD/PSM
Documents, or Printer Queues) or a group
l
In the PlanetPress Workflow Ribbon, go to the View tab.
l
In the Arrange group, select Sort by Name.
Grouping Configuration Components
Groups help you organize processes, documents, and printer queues. For example, you may
create the Invoices, Checks and Reports groups in the Processes section and associate
individual processes with each one of these groups. Each group may contain subgroups.
Items or processes, and groups, can only be grouped within their own category. Thus you can
only group processes with other processes, resource documents with other resource
documents, and printer queues with other printer queues. In the resource documents category,
you can only group documents with others of the same version and type. For example, you can
only group documents from PlanetPress Design (files with a PTK extension) with other PTK
files, not with printer-resident documents.
You can also use groups to quickly assign multiple PlanetPress Design documents to multiple
printer queues. By dragging a group of documents to a printer queue, you assign all the
documents in the group to that queue.
Page 842

Tip
Groups can be copied and moved using the Clipboard and Drag & Drop; see "Moving
and copying configuration components" on page838.
Grouping objects
To add a group in the Configuration Components pane:
l
Select one or more processes and/or groups in the same group and choose View >
Group.
l
Right-click one or more selected processes and/or groups and select Group from the
contextual menu.
l
Select one or more processes or groups in the same group and press CTRL+G.
The selected items will be moved to a new (sub)group.
When you've clicked on a group, all processes therein are moved to a new subgroup.
Objects are added to an existing group via drag-and-drop. The objects are added as the last
objects in the group.
Ungrouping objects
To remove a group in the Configuration Components pane, but keep its contents:
l
Select the group and choose View > Ungroup.
l
Right-click on the group and select Ungroup from the contextual menu.
l
Select the group and press CTRL+U.
The contents of the group will move one level up.
To remove objects from a group, without removing the group itself, select the object or objects
and use one of the methods above or drag-and-drop.
If a group becomes empty, you are prompted to confirm the deletion of the group.
Page 843

Expanding and collapsing categories and groups in the
Configuration Components pane
You can expand and collapse the Processes, Global Variables, PPD/PSM Documents and
Printers Queues categories, and groups, in the Configuration Components pane.
To do this, click the Expand / Collapse button to the left of the item.
Deleting something from the Configuration Components
pane
To delete a process, document, or printer queue:
l
Click a process, document, or printer queue, then press the Delete key.
In the case of processes and printer queues, the object is deleted. If there is only one process in
the configuration, you cannot delete it; there must be at least one process in the configuration. If
you delete the last configured process, a process with two Unknown tasks remains.
In the case of documents, you are first prompted to confirm the deletion. You can turn off this
prompt in the Notification Messages User Options.
To delete a group of processes, documents, or printer queues:
l
Click a process group, documents group, or printer queue group, then press the Delete
key.
In the case of process groups and printer queue groups, the group and all its members are
deleted. In the case of documents, you are first prompted to confirm the deletion of each
member of the group. You can turn off this prompt in the Notification Messages User Options.
Note
To disable the confirmation notification that you get when you delete something from the
Configuration Components pane, you can check Always delete without asking in the
notification.
To enable a notification again, go to Preferences > Behavior > Notification Messages
Page 844

and check the desired Prompt on (...) deletion options.
Dialogs
Dialogs are either accessible from the preferences or from different parts of PlanetPress
Workflow.
Access Manager
The Access Manager controls what rights are granted to other machines (clients and servers)
on the same network. It grants access to functions such as sending documents and jobs to the
server.
To open the Access Manager:
1.
Open PlanetPress Workflow.
2.
In the Ribbon, go in Tools > Managers > Access Manager.
The Access Manager dialog box is displayed. It lists all IP addresses and IP ranges that have
PlanetPress Connect modules installed in the same network.
Page 845

Messenger access
Manually adding new entries to the list
To grant access to the Messenger service you can manually add new entries to the list:
l Open the Access Manager.
l
Make sure you are in the Messenger tab.
l
In the IP address box, enter the IP address of the remote machine.
l
Click on the button.
l Add the necessary permissions.
l Click OK.
l Restart the Messenger service.
Page 846

Note
The format of the IP address must be one of the following:
l
127.0.0.1: The local computer. Typically this IP should have all the accesses
checked.
l
255.255.255.255: Everyone on the same subnet. This is equivalent to hard-coding
the current subnet, such as 192.168.1.255 or 10.0.0.255.
l
192.168.0.42: A single IP address. This can be any valid address on the same
subnet.
l
10.0.255.255: Any IP in the 10.0.X.X range.
Automatically detecting machines on the network and adding them
To detect machines on the network automatically, and give them access to the Messenger
service:
1. Make sure the machine you want to detect is turned on and the Messenger service is
started.
2.
Click on the Refresh button under the list.
3. Add the necessary permissions to the detected machines.
4. Click OK.
5. Restart the Messenger service.
Removing an entry from the list
To remove an entry from the list:
1. Remove all checkmarks from the entry.
2. Click OK.
3. Restart the Messenger service.
Page 847

Warning
The following considerations are to be understood when using the Access Manager to
configure IP limitations:
l Each permission type (column) is evaluated from top to bottom (column per column)
in the order in which they are visible in the Access Manager window. This means
that wide ranges should always be at the top to increase performance. For example,
if you accept HTTP connections from any IP, the first entry should be
255.255.255.255 with the Allow checkmark in the HTTP Input box. PlanetPress
does not continue processing after it has found an "Allow" checkmark. There is no
concept of "Deny", meaning if any "Allow" permission is given, there is no way to
later remove it for certain IP addresses or IP ranges.
l The configuration of the Access Manager is saved in a file on the hard drive which
can be edited manually. See Access Manager hosts.allow File.
l HTTP, FTP and SOAP communication is not limited to the local subnet on any
version where these plugins appear.
l Any change to the Access Manager requires a restart of the Messenger server
which can be done in "The PlanetPress Workflow Service Console" on page898.
Modifying permissions
Permissions are given simply by adding and removing options in the permission grid. Access to
the services installed on this computer is granted or denied by checking the corresponding
boxes next to the listed IP ranges. For each IP range, the following information is displayed:
l
Host name: The name of those computers on which PlanetPress Workflow software are
currently installed or which have been manually added.
l
IP address: The IP address or IP address range to give permission to.
l
Permissions
l
HTTP Input: Grants access to send HTTP Requests to this server.
l
LPD Input: Grants access to send LPD Queue jobs to this server.
l
Send Job: Grants access to the selected computer or server to send jobs to
PlanetPress Fax and PlanetPress Image installed on this server.
Page 848

l
Send Document: Grants access to the remote computer to send new or updated
Connect files (templates, data mapping configurations, print presets), or
PlanetPress Design Documents, to this server.
l
Send Config:Grants access to the remote computer to overwrite the configuration
on the local PlanetPress Workflow service
Note
In order for the changes made here to be effective, you will need to restart the
PlanetPress Messenger service. This can be done via the PlanetPress Workflow Service
Console.
SOAP Access
The SOAP tab of the Access Manager controls access from SOAP clients to local processes
and SOAP processes. Each user name entered in this dialog can have access to one or more
processes.
Page 849

Adding a new SOAP user
To add a new SOAP user:
1.
Click on the button.
2.
Enter the following information under the Username column for the new entry that was
created:
l
User name: An alphanumerical user name for the user.
l
Password: A password to protect the user. Note that the password will always
revert to ******** (8 stars) when clicking outside of this box - that is normal and is
meant to protect the length of the password as much as its contents.
l
Administrator: Choose the permission type
l
User: Can access none, some, or all of the processes, selected individually in
the Permissions section.
Page 850

l
Admin: Has access to all processes and features. When this option is
selected, the Permissions section is grayed out an all options are selected in
it.
l
Disabled: Has access to nothing. The result is the same as not having this
user defined at all, but has the advantage that a disabled user can be
reactivated with a simple click.
3. Define the permissions for the user (see below).
4.
Click OK to save the changes.
Defining or changing permissions
The Permissions section of the SOAP tab displays all of the processes that are available in
the live configuration (the one that the PlanetPress service uses). To change or define the
permissions for a SOAP user:
1.
In the top Username section, click on the user name of which to modify permissions.
2. Place a checkmark in each process that the user should have access to.
3.
Check Monitoring(read) to give permission to the GetProcessList and
GetProcessTaskList actions for SOAP.
4.
Monitoring(write) is currently not implemented.
5.
Click OK to save the changes.
Note
In order for the changes made here to be effective, you will need to restart the
PlanetPress Messenger service. This can be done via the PlanetPress Workflow Service
Console.
Activate a printer
The Activate a Printer dialog lists the existing activated printers on the system and lets you
add new activations.
Page 851

Note
Activating a printer is required when you have a PlanetPress Suite Printer License,
unless you have the “Optimized Output” add-on in your Connect license, which grants
you the equivalent of PlanetPress Production in Connect Workflow. Note that even then,
“printer-centric” output requires a printer license.
Printer activations are normally given to you by the activations department electronically,
including a file that will automatically add all your printers in this dialog.
To display the Activate a Printer dialog, click the Printer Activation button from the Help
menu.
The printer list displays the following information
l
License Number: Reference number of the activation, linked to your customer account.
l
Magic Number: The magic number generated by the printer. If the magic number is
incorrect, your jobs will output with a watermark on that printer.
l
Activation Code: The activation code generated by your license number and magic
number. If the activation code is incorrect, your jobs will output with a watermark on that
printer.
l
Printer Name (Optional): Name and/or model of the printer.
l
Comments (Optional): Comments about the printer.
The following buttons are available in this dialog:
l
Add: Brings up the Printer Activation dialog. This dialog lets you enter the information
for the printer (see previous section), then click OK to save the new activation.
l
Delete: Removes the currently selected activation from the list.
l
Web Activation: Click to access the online activation manager on our website.
l
OK: Save changes and exit.
l
Cancel: Exit without saving changes.
Page 852

You can also double-click on any existing activation to edit it.
Advanced SQL Statement Dialog
The Advanced SQL Statement dialog is available by clicking the Edit SQL button from the
Database Query action task. You can enter a custom SQL query in this dialog, using the
language supported by the database you select in the Database Query action task.
The dialog is separated in two parts:
l
The left part displays the available tables in your database. Click the Show Tables button
to display them.
l The right part displays a default SQL statement which you can modify at your leisure.
l The bottom part displays the following options:
l
Alternate syntax: Select to prevent automatically enclosing the names of any
database tables and fields that appear in the SQL query in square brackets when it
exits the Advanced SQL Statement dialog box. The alternate syntax may be
required for some database types.
l
Client-side Cursor: When this option is enabled, the complete result set is
downloaded before processing starts, and changing records is done by
PlanetPress. This is generally faster for queries returning a small number of results ;
otherwise the start of the record processing can be delayed since the whole record
set must be downloaded.
Note
MySQL, using ODBC 5.0, must be set to use a client-side cursor.
Microsoft Access will always work better when using a Server-Side cursor.
l
Expect record set: Check if you are expecting a result from the database after
executing the SQL query. If the query is expecting a record set in return and does
not return one, the task will trigger an error.
l
Test SQL button: Verify the SQL statement's validity.
Page 853

Data Repository Manager
The Data Repository Manager is an interface that manages the PlanetPress Workflow "Data
Repository" on page96. This feature, introduced in version 8.5, is a persistent data store used
to save any sort of textual data in a table format.
Accessing the Data Repository Manager
To access the Data Repository Manager:
l
Open PlanetPress Workflow
l
Go to the Tools tab.
l
Click the Data Repository Manager button in the Managers group.
Warning
Any change made within the Data Repository Manager is Immediate, and Irreversible.
Deleting data from this interface may impact running processes if such processes access
the data saved in the repository. This includes clearing a group, or clearing the repository.
Toolbar buttons
l
Group section
l
Add Group: Click to create a new group. Enter the group name and click OK.
Three keys will be added to the group automatically: ID, DateC and DateM . These
keys cannot be removed or edited.
l ID is a unique number that identifies a key set in the Data repository.
l DateC is the creation date of the key set.
l DateM is the date at which the key set was last modified.
l
Delete Group: Click to delete the currently selected group. Warning: This action
cannot be undone.
l
Key section
l
Add Key: Click to add a key to the currently selected group. Enter a key name and
click OK. If adding a key to a group with existing data, the key will be empty for all
Page 854

existing key groups.
l
Delete Key: Click to remove the currently selected key in the group. This will
remove the key and all the data for this key in each existing key set. Warning: This
action cannot be undone.
l
Key Set section
l
Add Key Set: Click to add a new key set to the currently selected group. Displays a
dialog with all the keys in the group, asking for a value for each of the keys. Enter
the values then click OK. The key set will display in the right part of the repository
manager.
l
Delete Key Set: Click to delete the currently selected key set in the Group.
Warning: This action cannot be undone.
l
Update section
l
Edit Key Set: Click to edit the currently selected key set. Opens a dialog which
each key and their value, which can be edited. Double-clicking a row has the same
effect as clicking the Edit Key Set button.
l
Refresh: Click to load any changes made to the repository since it was last opened
or refreshed.
l
Management section
l
Check Repository: Click to verify the integrity of the database, as well as reclaim
any disk space from
l
Clear Group Data: Click to delete all the key sets in the currently selected group,
leaving the key definitions intact. Warning: This action cannot be undone.
l
Clear All Data: Click to delete every key set of every group in the Repository.
Warning: This action deletes all your data and cannot be undone.
l
Clear Repository: Click to delete every group in the repository, including all their
data. Warning: This action deletes all your data and cannot be undone.
l
Show/Hide System Keys: Click to show or hide the ID, DateC (creation date) and DateM
(modification date) keys. The creation date and modification date fields both contain a full
time stamp in the form of YYYY-MM-DDThh:mm:ss.sZ, where
l YYYY = four-digit year
l MM = two-digit month (01=January, etc.)
l DD = two-digit day of month (01 through 31)
Page 855

l T = literal constant separating date from time
l hh = two digits of hour (00 through 23) (am/pm NOT allowed)
l mm = two digits of minute (00 through 59)
l ss = two digits of second (00 through 59)
l s = one or more digits representing a decimal fraction of a second
l Z = literal constant representing the UTC time zone designator.
Repository structure pane
This section of the Data Repository display a tree view of all groups in the data repository as
well as all the keys under each of those groups.
l
To add, delete or edit a group, use the contextual menu (right-click).
l
To expand a group and edit its keys, click the + or double-click on the group .
l
To rename a key, select it and then press F2.
Key Sets pane
This section of the Data Repository displays the current key sets in the group. Each horizontal
row is a key set, and each vertical row is a key defined in the group.
l
To add, edit or delete a value in a key set, double-click on the field, or select it and press
F2. The Edit Key Set dialog will appear. Use the arrow buttons to browse through the
keys in the key set.
l
To delete a key set, press the Del key.
l
To add a key set, press Insert. The Add Key Set dialog will appear. Use the arrow
buttons to browse through the keys in the key set and add values to them. This dialog has
a button at the bottom to add another key set.
Navigating with the keyboard
Though of course the mouse is the easiest way to navigate through the Data Repository, the
keyboard can be used as well.
l
Press Tab to switch between the Repository Structure, Group Key Sets, Lookup
Function Syntax and the Close and Help buttons.
l
Press CTRL+N to add a new key within the selected group.
Page 856

l
Press Ctrl+G to add a new group.
l
Press Insert to add a key set. The Add Key Set dialog will appear, allowing you to create
a new key set.
l
Press F2 to rename a group or a key on the Repository Structure pane.
l
Press Delete to remove a group or key from the Repository, or a key set from the Key
Sets pane.
Tip
You can look up these shortcuts by right-clicking the item you want to interact with, and
looking at the contextual menu.
The Data Selector
The Data Selector is the tool you use to choose your sample data and Metadata files, to select
the appropriate emulation, to make data selections, and to stabilize your data.
For more information about sample data, Metadata and emulation types, see the chapter "About
data" on page51.
To open the Data Selector:
l
Choose Debug > Select, on the menu.
l Right-click a task property that may contain variables (recognizable by the color of its field
label, which is maroon by default) and choose one of the Get Data ... or Get Metadata ...
options.
l
Debug your configuration and step through it until the option Debug > View Metadata
gets enabled. This happens when the Metadata file has been created by a task in the
process.
The Data Selector does two things:
l It uses the current emulation (either the emulation chosen when the sample data file was
selected, or the one chosen in the last Change Emulation action task appearing above
the current task) to format the data.
l It displays the formatted data to let you make selections easily using the mouse pointer.
It is divided in two tabs: Data and Metadata.
Page 857

The Data Selector is essentially the same as the one used in PlanetPress Design.
The File Viewer is like a Data Selector without any data related options, such as emulation
settings. It is displayed when doing a data selection from the Generic Splitter task (see
"Generic Splitter" on page459) with the Use Emulation option unchecked. The only data
formatting codes to which the File Viewer responds are line breaks.
Data tab
The Data tab contains the Data Options, which let you select your emulation, and the Selector
Options, which let you personalize the data selector's display options (see "Data Selector
display preferences" on page861).
The Data Selector uses the emulation (either the emulation chosen when the sample data file
was selected, or the one chosen in the last Change Emulation action task appearing above
Page 858

the current task) to format the data. It displays the formatted data to let you make selections
easily using the mouse pointer.
Depending on the chosen emulation and data file, the options in the Data Selector, the Sample
data file section and the Data pane itself may change to accommodate your choice. The Line
Printer, Ascii, Channel Skip and User-Defined emulations will display the default options (see
"About data emulation" on page61) and a grid-like display of each character on each line. The
following emulations however, will be slightly different.
Database Emulation
The Database emulation exchanges the Browse button for the Database Emulation
Configuration button , which displays the Database Emulation Configuration (see "Database
emulation" on page67).
Once a database has been opened and query entered (see "Choosing a database sample file"
on page74), the Data pane displays the results of the SQL Query in a grid format, which each
line representing a single returned row from the database. Each column represents a field
returned by the query, with its field name as a row header.
PDF Emulation
l
If you use a PDF emulation, the Data pane displays the data as you would see it in any
PDF reader.
l A new zoom drop-down list is displayed to let you set the zoom in percentage or fit the
PDF to the window or the width of the window.
l A new status bar, displaying the (Left, Top) and (Right, Bottom) coordinate pairs, is shown
under the Data pane.
XML Emulation
l XML data is represented in a tree structure which corresponds to the data in the XML file.
Each node of the XML can be expanded to see the nodes under it. See "XML Emulation"
on page71.
Metadata tab
The Metadata tab allows to load a Metadata file and make a selection from it.
Page 859

The Sample metadata filename is the path to the Metadata file describing the current sample
data file. Buttons on the right can be used to load Metadata from a file or to save the current
Metadata to a file.
Tip
To get a sample of the Metadata file, debug your process and step through it until the
option Debug > View Metadata gets enabled. This happens when Metadata have been
created by a task in the process. Open the Metadata viewer and save the Metadata file to
use it as a sample file. Click the Open a meta data file button to open the sample in the
Metadata selector.
PlanetPress Design documents (unlike Connect Designer templates) are built to contain
Metadata. PlanetPress Design users may therefore generate a Metadata file for their active
sample data file, using a PlanetPress Design document: click the Create meta data file button.
The Generated PressTalk Expression shows the expression to retrieve the currently selected
attribute or field. Metadata are retrieved with the GetMeta() function (see "Metadata selections"
on page59). This expression is editable, which allows you to customize the string returned by
the Metadata selector.
Tip
The wildcard parameter '?' indicates that the function operates on all nodes (not just one)
of a given level; see "Wild card parameter "?"" on page56.
The Enable search on multiple levels option is available when a Metadata is selected under
Production information or User defined information. If it is not selected, the option flag includes
NoCascade (+2). For an explanation of option flags in the GetMeta() function, see "Option
flags" on page60.
Metadata level is a tree view allowing users to select the Metadata level from which to display
or select Metadata elements.
Page 860

The Production information list displays all Metadata fields describing the current Metadata
level, as selected in the Metadata Level tree view, for the current data page, as selected in the
Data page box.
The User defined information lists all Metadata fields defined by the user on the current
Metadata level.
Note
Not all of the options in the Metadata Selector in PlanetPress Design 7 are available in
the user interface of PlanetPress Workflow . However, when these settings are made in
PlanetPress Design 7, they will function as expected in PlanetPress Workflow2021.2.
The File Viewer
The File Viewer is like a Data Selector without any data related options, such as emulation
settings. It is displayed when doing a data selection from the Generic Splitter task (see
"Generic Splitter" on page459) with the Use Emulation option unchecked. The only data
formatting codes to which the File Viewer responds are line breaks.
For more information on the data selector, see "The Data Selector" on page857.
Data Selector display preferences
The Data Selector Preferences are accessible through the Selector Options tab in the Data
tab of the Data Selector. It controls how text-based data files (such as Line Printer, ASCII and
Channel Skip) are displayed in the data selector.
Page 861

Content and appearance of the Data Pane
To adjust the content and appearance of the Data pane for all emulations except XML and
PDF:
1.
In the Data Selector, click the Selector Options tab.
2.
Change the options that modify the appearance and behavior of the Data pane:
l
View size: Use to adjust the size of each cell in the Data Pane, and the amount of
visible data that is visible.
l
Show used cells: Select this to display in green all cells that contain data. When
you select this option, and your document uses any emulation other than database,
you use either the All pages or Pages to analyze option to specify the number of
data pages to which you want to apply the Show used cells option.
Page 862

l
All pages: Select to apply the Show used cells option to all pages in the sample
data file. This option is not available in database emulation.
l
Pages to analyze: Use this box to limit the number of data pages to which
PlanetPress Workflow applies the Show used cells option. Enter the number of
pages to which you want PlanetPress Workflow to apply the option, or use the spin
buttons to adjust the value. This option is not available in database emulation.
l
Show selected cells: Select this to display in gray all cells that your document
currently references.
l
Highlight data: Select to have the Data Selector highlight only those cells (or fields)
that contain data from the sample data file.
l
Show position hint: Select to have PlanetPress Workflow display information
about the current mouse position in the Data Pane, under and to the right of the
pointer as you move it in the Data Pane. If the mouse is over a current data
selection, or is dragging to create a data selection, PlanetPress Workflow displays
the line and column numbers that define the selection, or, in the case of a database
emulation, the positions within the record set of the first and last records in the
selection. If the mouse is not over a data selection, PlanetPress Workflow displays
the line and column coordinates of the current mouse position), or, in the case of a
database emulation, the position of the record within the record set.
3. If necessary, adjust the font the Data Selector uses to display data in the Data Panel for
all emulations except XML and PDF.
4.
Click OK.
Color of used cells
To select the color the Show used cells option will use:
l
Click on the Select Color button .
Font
To set the font the Data Selector uses for all emulations except XML and PDF:
1.
In the Data Selector, click the Selector Options tab.
2.
Click Select Font.
3.
In the Font dialog box, set the font you want PlanetPress Workflow to use to display the
sample data file in the Data Pane.
Page 863

l
Font: Select the font you want to use to display the sample data file in the Data
Pane.
l
Font style: Select a weight for the font.
l
Size: Select the point size for the font.
l
Sample: Displays a preview of the font selected in the Font box.
l
Script: Select the system-level encoding table you want to use for the font selected
in the Font box. The encoding tables available here are those available on the
system on which you are running PlanetPress Workflow, and are distinct from those
available when you create a style. While you can edit the encoding table a style
uses, you cannot edit the system-level encoding table. If you see discrepancies
between the glyphs that represent your sample data file in the Data Pane and those
that appear in the data selections on the document page, the source of the
discrepancy may be the encoding tables.
4.
Click OK.
PDF Viewer
The PDF Viewer, introduced in PlanetPress Tools 7.3 in some areas and expanded for use
throughout the configuration tool, displays any PDF used in the configuration or process.
Because this PDF viewer is integrated with the suite, it is not necessary to have any third-party
tools such as Adobe Acrobat installed on the operating system.
Technical
The PDF Viewer is not currently standalone and cannot be used to display PDFs outside
of PlanetPress Workflow.
Page 864

The PDF Viewer
To open the PDF Viewer: In the Documents section of the Configuration Components pane,
expand a document present in the list. Then, right-click on the document's Preview, and click
Open in PDF Viewer.
Page 865

The PDF Viewer is accessible through one of the following methods:
l
In the Documents section of the Configuration Components pane, expand a document
present in the list. Then, right-click on the document's Preview, and click Open in PDF
Viewer.
l
Click View as PDF in the Debug toolbar. This will show the current data file in the viewer
(assuming it is a PDF). If the viewer is opened during debugging, the current state of the
PDF will be displayed (instead of the original data file).
l
In the PlanetPress Capture Document Manager dialog, select at least one document
from the database and click on View Documents.
The top area of the PDF Viewer displays the PDF, while the bottom area contains a few
controls:
l
Open: Click to browse for a PDF to open in the PDF Viewer. Note that this will not
change the data file used in the process.
l
Save: Click to browse for a location and name to save the currently active PDF in the
viewer.
l
Right Arrow: Click to view the next page of the PDF.
l
Left Arrow: Click to view the previous page of the PDF.
l
Page Selection: Type a page number and hit Enter on your keyboard to jump to that
page.
l
Zoom: Click to view a drop-down list of pre-set zoom percentage, or automatic zoom fit
options. Or, type in a zoom percentage and hig Enter on your keyboard to set the zoom
level. Note that you can also use CTRL+Scroll Wheel (on your mouse) to zoom in and
out, SHIFT+Scroll Wheel to scroll left and right, and Scroll Wheel to scroll up and down.
Printer utilities
Printer Utilities are options for customers using "PlanetPress Design documents" on page45.
These commands were made for PostScript printers, so the printer on which they are used
needs to be able to interpret PostScript.
To get to these options, open the Tools ribbon and click Printer Utilities.
Set Printer’s Advanced Options
This allows to set some of the PostScript printer’s options from Workflow.
Page 866

l
Printer Password: If the printer requires a password, enter it here.
l
Max form cache: Set the size, in bytes, of the PostScript printer form cache. This sets the
cache size for all documents that execute on the printer. You base the setting for this
option on the number of images in your documents, their sizes, and how frequently each
image repeats in a document.
l
Manual Feed Time-Out: Enter the maximum amount of time, in seconds, you want the
printer to wait for paper from a manual feed before terminating the current job.
l
Wait Time-Out: Enter the maximum amount of time, in seconds, you want the printer to
wait for input before terminating the current job.
l
Do Sys/Start: Select to have the printer execute its Sys/Start file at boot time.
l
Print PostScript Errors: If the printer encounters a PostScript error during execution of a
job, it terminates the job. Select this option to have the printer print an error page that
reports the offending PostScript command and the status of the print stack. This can be
useful in debugging a document.
l
Force postscript mode: Check to force the printer to expect, and print, in PostScript
mode. This is useful if the printer supports multiple printing languages.
Delete Files from Printer’s File System
The Delete Files from Printer’s File System option allows to send a command to the printer
so that it deletes a file contained on its hard drive, RAM or Flash drive. It is possible to delete
multiple files by pressing enter at the file path just entered. A confirmation page will be printed
out after the command is sent. The syntax is the following:
Path syntax: Deletes a file:
%<DISKNAME>%<DOC_OR_FILE_NAME>
On the hard disk. If the printer has more than
one hard disk, you must specify the one on
which the document or file you want to delete
resides. For example:
%sales%sale_flyer
deletes the document or file “sale_flyer” on the
hard disk named “sales”.
%FLASH%<DOC_OR_FILE_NAME>
In Flash memory. For example:
%flash%tax_bill
deletes the document or file “tax_bill” from the
flash memory of the printer.
<DOC_OR_FILE_NAME>
On a printer that has either only Flash memory
or only a single hard disk.
Page 867

Print Status Page
The Print Status Page option sends a command to print information to the selected printer(s),
notably:
l The serial number and the full version number of the copy of Workflow making the
request.
l Printer information (printer name, firmware version, etc.).
l Information on the current job (paper type, paper tray used, etc.).
l Information on the installed devices (printer hard disk, flash drive, etc.).
l Memory size information.
l Input and output tray information (all trays and their settings on the printer).
l Paper handling and finishing information.
l System settings (various internal info on the printer).
A Status Page is required when a PlanetPress Suite printer license needs to be "reactivated",
for example after a change of printer or printer hardware.
Email the Status Page(s) and Reactivation Request form to activations@ca.objectiflune.com
and you will receive a .pac file in return, with which you can reactivate your printer(s).
Print Intelligent Form Listing
It is possible to send "PlanetPress Design documents" on page45 to a printer's hard drive to be
executed there in pure PostScript for efficient printing. This can be done through the Workflow
plugin "Download to Printer" on page418.
The Print Intelligent Forms Listing option prints out the list of any such PlanetPress Design
documents on the printer, and their location (hard drive, RAM or Flash memory). The
information contained in the Notes box of the PlanetPress Design interface for that document
will also be displayed.
Print File Listing
The Print File Listing command makes the selected printer(s) print out a list of all files
contained on its hard drive, RAM of Flash memory, of any file type (images, text, PlanetPress
Forms, etc).
Page 868

Send to File
If the Send to File option is checked, a prompt for each of the selected Printer Utilities options
will appear in Workflow so the PostScript commands can be saved to disk. This makes it
possible to send the commands to the printer at another time and independent from Workflow.
Process properties
To have access to the properties of a process or subprocess:
l
Right-click on the process in the Configuration Components pane.
l
Select Properties.
You can also double-click on the process to show its options.
Note
Subprocesses do not have the General tab which is only used for scheduling, but they do
have the Information tab.
Options
General tab
l
Active: Select to make the process active. Clear to prevent this process from running
when you send the configuration to PlanetPress Workflow.
l
Startup: Select to make this process a startup process (see: "Startup processes" on
page128). This option is not available for self-replicating processes and error processes.
The order in which the Startup processes are arranged in the Configuration Components
pane determines, from top to bottom, the order in which the Startup processes are
executed when the Workflow Service launches. To change the order you may drag and
drop them (see "Moving and copying configuration components" on page838).
l
Self Replicating: Check this if you want the process to replicate itself in the background
when multiple input files are received simultaneously. When this is checked, the input
task polls its source once, determines the number of files to process, then replicates itself
up to the maximum allowed and treats the files simultaneously. The initial process runs
Page 869

again once it has completed itself and replicates again as necessary, until all files have
been processed.
l
Max percentage of threading (%): Determines how many processes you may have
running at the same time. This is a percentage of the maximum number of threads
specified in the "Messenger plugin preferences" on page792. For example if the
maximum number of threads is 10 and you specify 50% here, a maximum of 5 replications
will occur (the original process + 4 copies).
l
As soon as possible: Select to have the process run continuously. Clear to enable the
Time Grid to fine-tune the schedule of the process.
Tip
Non-startup processes starting with the HTTP Server Input, NodeJS Server Input,
LPD Input or SMTP Input task will run trigger-based if they are set to run As soon
as possible with a Polling interval of 0. This reduces CPU usage.
l
Day(s) to keep backup: Indicate the number of days to keep backups of jobs processed
by input tasks. Note that backups will only be kept for those input tasks that have the
Keep backup file option selected and that they are required to resubmit input files.
l
Polling interval: Enter the frequency (in seconds) at which the process should verify if
there are new jobs to process. The polling interval also applies to scheduled tasks that
only run on certain times. For example, if your process polls every 30 seconds on a task
that's only scheduled to run one hour per week, it will capture the input 120 times during
that period.
Note
The polling interval is ignored when multiple files are present in the input and will
be used only when there are no longer any files to process.
l
Month: Select the month of the year when the process should be run or select All months
to have the process run all year long. This option is disabled when "As soon as possible"
is checked.
Page 870

l
Week of month / by date: Select the desired option for the time grid. Note that any
selection you make in this box will be interpreted based on the selection made in the
Month box. If you chose All months in the Month box and Last in the Week of month / by
date box, then the process will run on the last week of every month. If you chose January
in the Month box and First in the Week of month / by date box, then the process will run
only on the first week of January.
l Select Date to display dates on the grid’s top ruler.
l Select any of the other options to display days on the top ruler.
l Select All weeks to have the process run every week.
l Select First, Second, Third or Fourth to have the process run on the first, second,
third or fourth week.
l Select Last to have the process run only on the last week.
l
Time division: Select the duration of each daily segment in the time grid. If you select
00:15, each segment will represent only 15 minutes and each day will be made up of 96
blocks (4 blocks per hour times 24 hours). If you select 24:00, each segment will
represent an entire day.
l
Poll once per activity period: Select to perform this process’ initial input task no more
than once for each set of contiguous blocks (blocks that are on the top of one another).
Choosing this option overrides the polling interval option. By default since the Time Grid
blocks are divided by hours, this option will make your polling happen once every hour.
l
Minimal logs: With this option enabled, the process will only log its Start time and the
End time (along with the Time Spent), if no error was encountered during execution of the
process. In case of an error, the entire process information is logged.
The Time Grid
The PlanetPress Workflow Process Options dialog box includes a time grid that lets you set
exactly when you want a process to poll. The grid is composed of blocks that represent time
periods on a given day. To activate the Time Grid, the "As soon as possible" option must be
unchecked.
In the Time Grid, a blue block will indicate that the process is active within that time block.
White blocks mean the process will not poll.
Note that when multiple files are present in the input, these may continue to be processed after
the period set in the time grid. The "Folder Listing" on page323 plugin in combination with a
"Time of Day Condition" on page489 could be used to prevent further processing of those files.
Page 871

l Click on any block to select / deselect it.
l Click and drag from one block to another to toggle all blocks between the two.
l Shift-click on any block to toggle all blocks from the top-left corner of the grid to the block
you click.
Page 872

l To select all of the time segments for a given day or date, click the day or date on the top
grid ruler. To deselect all of the time segments for a given day or date, CTRL+click the
day or date on the top grid ruler.
l To select all the days or dates for a given time segment, click the time segment on the left
grid ruler. To deselect all the days or dates for a given time segment, CTRL+click the time
segment on the left grid ruler.
l
To select the entire grid, use the Select All button located below the grid. To deselect the
entire grid, use the Clear All button located below the grid.
Note
"Toggle" means turn on when it's off and vice versa, when selecting multiple blocks in
one command. This means if you select a certain number of blocks in the Time Grid and
then use the shift+click or drag method, blocks that are on will turn off.
Warning
Changes made to the system time can have adverse effects on the processes managed
by PlanetPress Workflow. When changing from daylight saving time to standard time, for
example, if PlanetPress Workflow starts a given process at 2:00 AM, and if the system
time is then taken back to 1:00AM, the application will start a new instance of the same
process when the system time reaches 2:00 AM for a second time. So, when you
manually change the system time, be aware that it may have an effect on PlanetPress
Workflow and its processes. And for those cases when you know the system time will
change automatically, you may consider creating special schedules.
Information tab
The Information tab lets you enter information that is not critical to your process but may help
others (or yourself in the future) to understand what the process does. It offers two boxes:
l
Description: A one-line box to give a title or short description to your process.
l
Comments: A multi-line box to give more detailed information, for example the file format
expected, explanation of the system in general.
Page 873

On Error Tab
A process’s On Error tab specifies the default values for error handling of all of the tasks in that
process.
When a task has its own error handling settings, those settings overwrite the process's default
error handling settings. The Set All Tasks button resets the On Error properties of all the tasks
included in the current process to the On Error properties of the process itself.
All other options in the On Error tab of the Process Properties dialog are the same as in the On
Error tab in the Task Properties dialogs; see "Using the On Error tab" on page100.
Rule Interface
The Rule Interface can be opened from the Rule column of the following tasks:
l "Metadata Fields Management" on page563
l "Metadata Filter" on page567
l "Metadata Level Creation" on page569
l "Metadata Sequencer" on page571
l "Input from SharePoint" on page703
Conditions are expressed using the following syntax:
<EXPRESSION 1> <OPERATOR> <EXPRESSION 2>
The <EXPRESSION 1> and <EXPRESSION 2> options represent the values for comparison. The
interface displays clickable links as the following:
l First link: click to set the first expression.
l Second link: click to choose the operator from a popup menu.
l Third link: click to set the second expression.
Operators
The Operator options are listed below.
l IS EQUAL TO
l IS NOT EQUAL TO
l IS EQUAL TO OR GREATER THAN (>=)
Page 874
l IS EQUAL TO OR LESS THAN (<=)
l IS CONTAINED IN
l IS NOT CONTAINED IN
l CONTAINS
l IS GREATER THAN
l IS LOWER THAN
l STARTS WITH
l ENDS WITH
l VALUE CHANGED
Note
When "VALUE CHANGED" is selected in the condition, the second parsed field is not
considered.
Expressions
The first expression <EXPRESSION 1> can either be a custom list or a parsable edit field. The
second expression <EXPRESSION 2> is always a parsable edit field.
When you click a link to set an expression, an input field appears below that link. Right-clicking
this field opens a popup menu that gives access to variables, the Data Selector (see "Data
selections" on page55) and the Data Repository Manager (see "Data Repository Manager" on
page854).
Wildcard parameter
Expressions may contain metadata/data selection functions (see "Data selections" on
page55). These functions accept a wild card parameter "?", indicating the function operates on
all nodes (not just one) of a given level.
Examples
l In a PDF emulation, the format of a selected region could be:
region(?,0.59375,2.21875,1.85416,2.51041,KeepCase,NoTrim)
In this case “?” represents the current physical data page processed by the task.
Page 875

l The following rule:
(GetMeta(SelectedIndexInDocument[0], 11, Job.Group[?].Document
[?].Datapage[?]) Equal 0
loops through all datapages in a job, comparing their index in the document to a value.
Index/Count values
When using Index/Count values in a rule, please note that these values are zero-based: the
first element in any collection has an index of 0 and the last element's index corresponds to the
collection's length minus 1. For example, the following rule checks all Datapages to see if it is
the first in its containing Document:
(GetMeta(SelectedIndexInDocument[0], 11, Job.Group[?].Document[?].Datapage[?]) Equal
0)
Adding Conditions and Sub Conditions
The Rule Interface is used to add/remove conditions or sub conditions. The available options
are:
l
Add Condition: Create a new condition at the selected level, using a standard logical
operator (AND, OR).
l
Add Sub condition: Indent the selected condition by one level and create a new
condition at this level, linked with the selected condition by a standard logical operator
(AND, OR). The purpose of using sub conditions is to explicitly arrange the order on
which conditions are evaluated and the way they are nested together.
l
Delete Condition: Delete the selected condition.
Example
As an example, consider the following conditional expression, where A, B, C and D are
conditions of the form <EXPRESSION 1><OPERATOR><EXPRESSION 2>:
A and (B or C) and D
Such a conditional expression can be expressed by means of sub conditions in the following
way:
1. Define condition A.
2. Select condition A and choose Add Condition. Specify the logical operator AND.
Page 876

3. Define condition B.
4. Select condition B and choose Add Sub Condition. This will indent condition B and allow
to define the condition C. Specify the logical operator OR.
5. Define condition C.
6. Right click on the first AND operator (the one right after condition A) and choose Add
Condition. Specify the logical operator AND. This will create a condition at the same level
as A.
7. Define condition D.
The resulting conditional expression will be indented like this:
A
AND
B
OR
C
AND
D
Task Properties dialog
Any task you add to your PlanetPress Workflow process must be configured using its
Properties dialog. It appears as soon as you add a task to a process, or when you double-click
on a task.
Each task's Properties dialog will give you the options to configure that specific, individual task.
Properties of one task do not directly affect the properties of another task, however there are
some software preferences that may affect tasks in one way or another (see "Preferences" on
page769).
Each task has its own set of tabs available, though some tabs are common to most tasks.
Page 877

l
Most tasks have the General tab which lets you configure the main task properties for that
specific task.
l
All tasks except for the InputErrorBin, Run Script, Open XLST and Comment tasks
have an On Error tab that lets you manage errors generated by the task. For a description
of the options that it contains, see "Using the On Error tab" on page100.
The error management system (the On error tab and the Error Bin Input task), however,
is only triggered when there is an error within the task functionality - that is, a plugin error.
These kinds of errors are triggered if the plugin cannot communicate with a service,
another task, if the plugin crashes, etc.
l
All initial Input tasks have the Other tab which lists Job Infos (see "Job Info variables" on
page717) and lets you back up the job file (see "Job file" on page53).
l
The Comments tab is common to all tasks. It contains a text area (Task comments) that
lets you write comments about the task. These comments are saved when the dialog is
closed with the OK button, and are displayed in "The Task Comments Pane" on
page898.
For more information about both common properties and properties that are specific to a certain
task, see "Task properties" on page302.
Update document
The Update Document dialog lets you update PlanetPress Design documents on your printers
where those documents are used in printer-centric mode. It displays the following information in
the list of installed printer documents:
l
Printer Queue: Displays in which printer queue the document is present.
l
Printer Group: If available, displays in which printer group the document is located.
l
Document: Displays the name of the document.
l
Location: Displays the location (printer or Workflow) of the document.
Select any document in the list (use CTRL+Click or SHIFT+Click to select multiple document or
use the Select All button) and click OK to update these documents.
To add any document to this list, you need to assign them to a printer queue. See "Associating
PlanetPress Design documents and PlanetPress printer queues" on page121.
Page 878

Virtual Drive Manager
When you use the "Send Images to Printer" on page438 Action task in a given process, you
have the option of, at the same time, sending the images to the virtual drive (a local storage
folder used by PlanetPress Suite applications) of any computer included in your network. You
need to do this, for instance, if you plan to run PlanetPress Suite documents that contain
dynamic images on those computers (using the Optimized PostScript Stream option). You can
then use the Virtual Drive Manager to see the images that were downloaded to your computer
as well as to delete them from your virtual drive.
To add images to the virtual drive, use either of the following methods:
l Send a single resource file to the printer: see "Download to Printer" on page418.
l Send one or more images to the printer: see "Send Images to Printer" on page438.
l Use PlanetPress Design: see the PlanetPress Design User Guide.
To delete images from your virtual drive:
1.
In the PlanetPress Workflow Ribbon, go to the Tools tab, then click on Virtual Drive
Manager.
The Virtual Drive Manager dialog box is displayed. It lists all the images currently stored
in your computer’s virtual drive.
2. Select the images you want to delete.
3.
Press the Delete key.
The Debug Information pane
The Debug Information pane displays the current values of variables and other information
useful in debugging processes (see "Debugging and error handling" on page99). It is divided
in 4 sections:
l
Job Information: Displays the Job Info variables, as well as the job's file name, size, last
edit date and presence of metadata (see "Job Info variables" on page717).
l
Local Variables: Displays all the variables local to this process (see "Local variables" on
page724).
Page 879

l
Global Variables: Displays all the variables global to this configuration (see "Local
variables" on page724).
l
Evaluate Expression: Lets you enter a custom expression and displays its value at run-
time.
You can use the Evaluate Expression section to see the result of any combination of variable
properties (see "Variable task properties" on page727). To add a new expression, simply right-
click in the window and select Add Expression.
Click in the box on the left to edit the expression and add any variable properties or static text
you want, and click outside of the box to save it. Once saved, the Value column displays the
expression's result.
The contextual (right-click) menu displays the following items when at least one expression is
present:
l
Copy Value (only when right-clicking an existing expression): Places the resulting value
of the expression in your clipboard.
l
Revalue all: Refreshes the value of all the expressions.
l
Add Expression: Creates a new expression.
l
Delete Expression (only when right-clicking an existing expression): Remove the
selected expression.
l
Clear Expression List: Removes all expressions.
Warning
Deleting an expression or clearing the expression list cannot be undone!
The Message Area Pane
The Messages area is used in Debug mode to indicate the status of your PlanetPress
Workflow process as the sample data file is processed and used to generate output. When your
PlanetPress Workflow runs in Debug mode, the Messages area displays useful processing and
error information.
Page 880

Messages are displayed in different colors (debug levels) in the Message area.
l
Messages in Red are critical and are normally critical errors in the plugin.
l
Messages in Orange are warnings.
l
Messages in Gray are job info and variable changes.
l
Messages in Black are debug information and processing information.
There are various actions you can execute in the Message area. Here they are:
l Click any line to select it.
l
While a line is selected, press Delete on your keyboard or right-click on the line and
select Delete to delete the line.
l
While a line is selected, press CTRL+X on your keyboard or right-click on the line and
select Cut to place the line in the clipboard.
l
Press CTRL+C on your keyboard or right-click on the line and select Copy to place a
copy of the line in the clipboard.
l
Press CTRL+A on your keyboard or right-click on any line and select Select All to select
all the lines in the Message Area.
l
Right-click anywhere in the Message Area and select Clear Messages to clear the
contents of the Message Area.
l
Right-click anywhere in the Message Area and select Save to File to display a dialog
box that lets you save a copy of the Message Area content to a text file.
The Message Area will only display information while running in Debug mode. It does not
display information from other running services, and will not display the log of any process
running in a live configuration (submitted to PlanetPress Workflow Service).
To learn more about debugging a process, refer to "Debugging and error handling" on page99.
The Object Inspector pane
The Object Inspector pane displays the properties of the object selected in the Configuration
Components pane (not the Process area, however). You can edit some of these properties
directly from the Object Inspector, simply by clicking on the property.
Page 881

The Object Inspector also displays information about the Job File while it is being processed in
Debug mode. Seeing how files change as they travel down a process can provide valuable
debugging information. You can even change some of the job information from the Object
Inspector (such as Job Infos) while debugging.
Editing properties
To edit properties of processes, documents, and printers in the Object Inspector:
1.
In the Configuration Components pane, select a process, a document (either a
document in the Connect Resources or PPS/PSM Documents, or a document assigned to
a printer queue) or a printer queue. The selected object’s properties appear in the Object
Inspector.
Note
When you select a group (folder), no information is displayed in the Object
Inspector, because what is really selected is the group heading and not the items
included in the group.
2. In the Object Inspector, click an editable property.
3. Depending on the values that can be entered for the selected property, edit the value by
typing one or by selecting a new one from the drop-down list.
Note
If you select multiple objects in the Configuration Components window, some properties
that are shared between those objects can be changed in the Object Inspector. Changing
a property changes it for all the selected objects.
The Plug-in Bar
PlanetPress Workflow offers a constantly increasing number of plugins, while always allowing
third party plugins to be installed and set up to be used by PlanetPress Workflow. The
Page 882
PlanetPress Workflow Plug-in Bar lists all plugins available in PlanetPress Workflow, and is
divided into categories, which users can customize at will.
Most of the PlanetPress plugins are installed by default, but other plugins may be added.
Because the plugins are always expected to execute some sort of task, they are always
referred to, in this documentation, as tasks, except in the specific case of importing a new
plugin or customizing the Plug-in Bar.
Categories
The default categories list plugins according to what type of task they achieve. When first
starting your PlanetPress Workflow program, the following categories are used:
l Inputs; see "Input tasks" on page309.
l Actions; see "Action tasks" on page379.
l Data splitters; see "Data splitters" on page452.
l Process logic; see "Process logic tasks" on page472.
l Connectors; see "Connector tasks" on page491.
l PlanetPress Capture; see "PlanetPress Capture" on page730.
l Metadata related; see "Metadata tasks" on page560.
l OL Connect Send; see "OL Connect Send" on page760.
l OL Connect; see "OL Connect tasks" on page591.
l Document Management; see "Document Management tasks" on page682.
l Outputs; see "Output tasks" on page655.
Note
An Uncategorized category is dynamically created if your PlanetPress Workflow finds
any plugin that would not be part of the existing Plug-in Bar. User-defined plugins and
third party application plugins fall into such a category.
Page 883

Settings and customization
The Plug-in Bar can be customized according to your needs and the plugins you most
frequently used.
You can use the horizontal dark blue bar separating the plugin area and the list of categories to
change how many plugin categories are displayed as the full-width bar with the title, and how
much are displayed as icon only. Move the bar up to display more full-width categories, or
down to display them more as icons.
Furthermore, the Plug-in Bar can be customized using the popup indicator control ( ).
Customizing the Plug-in Bar is mostly used for third party or legacy plugins.
Using the contextual menu displayed by the popup indicator, you can:
l Insert, delete and rename custom categories.
l Move categories up or down.
l Import plugins, such as connectors, third party or legacy plugins.
l Move plugins from one custom category to another (that you cannot move default plugins
from the default categories, you can only copy them)
l Copy plugins from one custom category to another by holding the CTRL key.
l
Delete plugins from any custom category by using the Delete key. Note that custom
plugins cannot be deleted this way. They will reappear after closing and opening the
Workflow tool. For information on removal of custom plugins see "Deleting a custom
plugin" on the facing page.
l
Revert to the default Plug-in Bar by selecting Reset to default. Custom plugins will
remain as installed.
Importing a plugin
1.
Click on the popup control ( ).
2.
Click on Import Plugin.
3. Browse to the location of the plugin DLL file or PPK file.
4. Select the desired file type: .DLLor .PPK.
5.
Select the file and click on Open.
Page 884

Plugins downloaded from the Resource Center will be placed in the appropriate category in the
Plug-In Bar. The M-Files plugins, for example, will appear in the Document Management
category.
Third-party plugins appear in the Uncategorized category.
Deleting a custom plugin
To permanently delete a custom plugin from the Plug-In Bar, you have to manually delete the
DLL file from the following location: C:\Program Files (x86)\Common Files\Objectif
Lune\PlanetPress Workflow 8\Plugins.
Note that the name of the DLL file doesn't always match the name given to the custom plugin in
the Workflow tool.
The Process area
The Process area, which is always available and visible, holds all the tasks, branches,
conditions and comments that make up the selected process (see "About processes and
subprocesses" on page126 and "About Tasks" on page300).
The Process area is built like an invisible grid divided by rows (horizontal) and columns
(vertical). When adding a new Action task, a new row is added. When adding a Branch or
Condition, a new column appears (unless there is already a column at that level).
The first task of any process, also called the initial input task, always appears in the first box in
the upper left corner. When you create a new process, this first task is always followed by the
default Output task in the following box.
The Process area is where you edit a process by:
l "Adding tasks" on page301
l "Adding a branch or condition" on page139
l "Cutting, copying and pasting tasks and branches" below
l "Disabling tasks and branches" on page888
l "Editing a task" on page302
l "Moving a task or branch using drag-and-drop" on page889
l "Replacing tasks, conditions or branches" on page891
l "Removing tasks or branches" on page890
In the Process area you can also:
Page 885

l "Undo a command" on page893
l "Redo a command" on page890
l "Highlight a task or branch" on page888
l "Collapse and expand branches and conditions" on page892
l "Resize the rows and columns of the Process area" on page892
l "Zoom in or out within the Process Area" on page893
Cutting, copying and pasting tasks and branches
Using cut and paste, and copy and paste, you can move as well as duplicate tasks and
branches within a given process as well as between different processes and subprocesses.
To cut and paste tasks or branches:
1.
In PlanetPress Workflow Process area, select the task or branch you want to cut and
paste.
2.
From the Home tab in the Ribbon, choose Cut (or right-click and select Cut from the
drop-down menu). When you cut a Task or Branch, it disappears from the Process Area
but is kept in your clipboard until it is pasted somewhere else.
3. To paste the task or branch to a different process, select that process.
4. Select the task or branch crossing above which you want the task or branch to be pasted.
5.
From the Home tab in the Ribbon, choose Paste (or right-click and select Paste from the
drop-down menu).
To copy and paste tasks or branches:
1.
In PlanetPress Workflow Process area, select the task or branch you want to copy and
paste.
2.
From the Home tab in the Ribbon, choose Copy (or right-click and select Copy from the
drop-down menu).
3. To paste the task or branch to a different process, select that process.
4. Select the task or branch crossing above which you want the task or branch to be pasted.
5.
From the Home tab in the Ribbon, choose Paste (or right-click and select Paste from the
drop-down menu).
A few notes:
Page 886
l
When you cut an Input or Output task, it is replaced with an Unknown Task, that you will
need to replace with another task for the process to be functional.
l If you cut one task or branch, then cut another one, the first one is lost and replaced by the
second. Remember however that you can always undo the command to retrieve it (see
"Undo a command" on page893).
l Tasks and branches will always appear on top of (in other words, before) the task or
branch where you paste it. The only exceptions are Input and Output tasks which can only
be pasted on top of an Unknown Task.
Copying the Properties of a task or branch
Instead of pasting the actual task or branch, you can simply paste the properties of the task or
branch. To do this:
1.
Copy or Cut a task or branch of which you want to have the properties.
2. Select the task or branch where you want to paste the properties
3.
From the Home tab in the Ribbon, choose Paste Properties (or right-click and select
Paste Properties from the drop-down menu).
Note
You can only paste the properties of an Input task on the initial Input task of your process.
Similarly you can only paste the properties of an Output task on another Output task.
Also, you cannot paste the properties of a task on a branch and vice versa.
Copying the On Error Properties of a task or branch
Instead of pasting all properties, you can paste only the properties of the On Error tab of any
task or branch on another one:
1.
Copy or cut a task or branch from which you want the On Error properties.
2.
Select the task or branch where you want to paste the On Error properties.
3.
From the Home tab in the Ribbon, choose Paste On Error (or right-click and select Paste
On Error from the drop-down menu).
Page 887

Highlight a task or branch
The Highlight command lets you toggle the background color of selected tasks and branches.
There are several ways to highlight a Process area square.
l Right-click it and select Highlight from the contextual menu.
l
Double-click it, open the Miscellaneous tab and select the Highlight option.
l
Select a square, open the View ribbon and select Highlight from the Navigate group.
To remove the highlight, repeat the procedure.
Selecting a highlight color
The default highlight color may be changed via the PlanetPress Workflow Configuration
preferences (see "Colors" on page770).
A custom highlight color can be defined per task: open the task's properties (double-click) and
select or define a color under Highlight color on the Miscellaneous tab.
To revert the custom highlight color to the default color, open the Miscellaneous tab again, turn
the Highlight option off and close the dialog with the OK button; then turn highlighting back on.
Turning highlighting on and off via the task's contextual menu doesn't change the highlight
color.
Disabling tasks and branches
PlanetPress Workflow lets you ignore individual tasks, branches or conditions.
l When a task is disabled, it is not executed when the process is run in Debug mode (see
"Debugging your PlanetPress Workflow process" on page107) or by the PlanetPress
Workflow Service.
l When a branch is disabled, the whole branch including the tasks inside that branch is
ignored and not executed. In the case of conditional branches, this means that the tasks
appearing on the True side are not executed.
A task, branch or condition that was previously disabled out can be re-enabled at any time.
To disable or enable a task or branch:
Page 888

1.
In the PlanetPress Workflow Process area, click the icon of a task or branch.
2.
From the Debug tab in the Ribbon, click Ignore. If the task or branch was enabled, it is
now disabled, and vice versa.
Moving a task or branch using drag-and-drop
When you want to move a given task or branch, the simplest way is to use drag-and-drop.
Using the mouse, you can drag and drop tasks and branches only within a given process. To
move tasks and branches between different processes, see "Cutting, copying and pasting tasks
and branches" on page886.
Replacing Unknown tasks
When you move a task or branch using drag-and-drop, it typically moves from its original
location to a position immediately preceding the target onto which you dropped it. But if you
drop an Input task over an Unknown input task, the moved task will replace the unknown task.
The same will happen if you drag an Output task over an Unknown output task.
Note
It is impossible to drag-and-drop any task over a configured initial Input or Output task.
Moving a task or branch using drag-and-drop
To move a task or branch using drag and drop:
1.
In the PlanetPress Workflow Process area, click the icon of the task or branch you want
to move.
2. While holding down the mouse button, drag the icon task or branch over another task or
branch.
3. Release the mouse button to drop the dragged item. The dropped task or branch is
moved above the item over which it was dropped.
When you move a branch, all its tasks are also moved. When you move a conditional branch,
all the tasks appearing on the True side of the condition are also moved.
Page 889

Duplicating a task or branch
To duplicate a task or branch, the same method as for moving them applies but with a slight
difference:
1.
In PlanetPress Workflow Process area, click the icon of the task or branch you want to
duplicate.
2.
While holding down the mouse button, press and hold down the CTRL key and drag the
icon task or branch over another task or branch.
3.
Release the mouse button to drop the dragged item and release the CTRL key. The
dropped task or branch is copied above the item over which it was dropped.
Redo a command
The Redo command can be used to redo commands that were just undone using the Undo
command. For example, if you used the Undo command three times in a row and immediately
thereafter decided to redo those commands, you could use the Redo command three times in a
row to redo those commands. Note that all commands in PlanetPress Workflow Configuration
can be redone.
To redo a command:
l
From the Quick Access Toolbar, choose Redo.
Removing tasks or branches
To remove any task or branch (except Input and Output tasks), use one of the following
methods:
l
Click on the task or branch you want to delete, go to the Home tab of PlanetPress
Workflow Ribbon and click on the Delete button in the Clipboard group.
l
Click on the task or branch you want to delete, and press the Delete (or "Del") key on your
keyboard.
l
Right-click on the task or branch you want to delete, and select Delete from the menu.
When you remove a branch, all the tasks located in that branch are also deleted. When you
delete a task, only that task is deleted.
Page 890

Note
You cannot use the Delete option to remove an input or output task, but you can right-
click on them and click Cut instead. This replaces the task with an Unknown task (see
"Unknown tasks" on page716).
To delete the path below a branch crossing (instead of the path to the right of the branch):
l Press Shift+CTRL+Delete.
l
From the right-click menu, choose Edit | Delete| Delete Below the Branch.
Replacing tasks, conditions or branches
You can replace existing tasks either by dropping a new task on it, or by pasting another task
over it.
To replace an existing task with a new task, see "Adding tasks" on page301.
To replace an existing task with another existing task or its properties, see "Cutting, copying
and pasting tasks and branches" on page886.
Note
You cannot replace a task by a branch or a condition. Trying to paste or drop a branch or
condition over a task will insert it before the task instead. The contrary is also true, you
cannot replace a branch or condition with a task.
Warning
When you replace a task, you lose all the properties you set in this task.
Resize the rows and columns of the Process area
The rows and columns of PlanetPress Workflow Process area in which tasks are located can
be resized to better visualize the organization of your process.
Page 891

To resize rows and columns of the PlanetPress Workflow Tools Process area:
1.
In the PlanetPress Workflow Tools Process area, place your cursor over the separator
line dividing each section of row or column rulers.
2. When the cursor changes appearance, click and drag up or down to resize rows, or left or
right to resize columns.
A dashed line appears as you drag indicating the new separation. The row or column, with all
its tasks, moves accordingly.
Collapse and expand branches and conditions
A Branch or Condition can be temporarily hidden by collapsing it. This gives a better view on
other parts of the process. It doesn't disable the Branch or Condition.
A collapsed Branch or Condition can be expanded at any time. When expanding any branch,
all its sub-branches will be expanded as well automatically.
To collapse or expand a Branch or Condition, in the Process Area:
l
Double-click the right corner of the line of the Branch or Condition.
l
Right-click the icon of the Branch or Condition or the right corner of its line, and select
Collapse or Expand.
l Select the icon of the Branch or Condition or the right corner of its line. Then you can
either:
l
From the View tab in the Ribbon select Collapse or Expand.
l
Press the + key on the numeric keypad to expand the Branch or Condition, or the -
key to collapse it.
To collapse or expand all Branches and Conditions:
l
Right-click the icon of a Branch or Condition or the right corner of its line, and select
Collapse all or Expand all.
l
From the View tab in the Ribbon, select Collapse all or Expand all.
Page 892

Undo a command
The Undo command lets you undo most commands performed with the PlanetPress Workflow
Configuration program.
To undo a command:
l
From the Quick Access Toolbar, choose Undo.
Zoom in or out within the Process Area
You can do a zoom out in the PlanetPress Workflow Process area to see more tasks at the
same time. In zoom out mode, you can perform the exact same functions as in normal view
mode.
To zoom in or out on the PlanetPress Workflow Process Area:
1.
Click on the View tab of the Ribbon.
2.
Click on Zoom Out in the Navigate group to zoom out, and Zoom In to zoom in.
The Quick Access Toolbar
The PlanetPress Workflow Quick Access Toolbar is displayed, by default, on the right side of
the PlanetPress Workflow Button and provides one-click shortcuts to commonly used functions
and features. You can add as many buttons as you want to the Quick Access Toolbar and
remove them at will.
Adding buttons
To add a new button to the Quick Access Toolbar:
1. Locate the button you want to add in one of the tabs of the Ribbon.
2. Right-click on the button.
3.
Select Add to Quick Access toolbar.
Page 893

Note
The Quick Access Toolbar buttons cannot be moved or reordered. If you wish to reorder
them, you will need to remove all the buttons and re-add them in the desired order.
Removing buttons
To remove a button from the Quick Access Toolbar:
1. Locate the button you want to remove in the Quick Access Toolbar.
2. Right-click on the button.
3.
Select Remove From Quick Access toolbar.
Moving the toolbar
To move the Quick Access Toolbar below or above the Ribbon:
1. Right-click on the Quick Access Toolbar, or click on the downwards arrow at the rightmost
end of the Quick Access Toolbar.
2.
Click on Show Quick Access Toolbar Below the Ribbon or Show Quick Access
Toolbar Above the Ribbon, depending on where you want it.
The PlanetPress Workflow Ribbon
The PlanetPress Workflow Ribbon centralizes commands, organizing them into a set of Tabs,
each tab containing groups of controls. Each tab on the Ribbon displays the commands that are
most relevant to a given feature set. The built-in Ribbon and Quick Access Toolbar contain
commands that are frequently used and convenient to keep close at hand. You can minimize
the Ribbon, and choose the position of the Quick Access Toolbar, as well as the commands it
displays.
l You can minimize the Ribbon by right-clicking on it and selecting Minimize the Ribbon.
l You can also customize the Ribbon's color scheme in the Preferences window.
Page 894

The PlanetPress Workflow Ribbon has five tabs: the Home tab, the View tab, the Debug tab,
the Tools tab and the Help tab. Each one of these tabs contains a series of groups, each group
holding a number of controls.
l
The Home tab includes the Clipboard, Processes, Variables, (PPS) Documents and
Printer Queues groups.
l
The Clipboard group contains the typical Windows-based editing controls: Cut,
Copy, Paste, Select All, Delete.
l
The Processes group contains controls allowing to insert new processes of any
type as well as controls to converts, activate or branches processes (see "About
processes and subprocesses" on page126).
l
The Variables group contains two controls to insert either Global variables
available throughout the entire configuration, or Local variables available to the
current process only (see "About variables" on page716).
l
The Documents group contains the controls used to insert, refresh, update or
delete PlanetPress Design documents and document instances (see "PlanetPress
Design documents" on page45).
l
The Printer Queues group contains controls to set up printer queues of any type, as
well as replace any existing queues (see "PlanetPress Workflow printer queues" on
page113).
l
The View tab includes the Arrange, Navigate and Show/Hide groups.
l
The Arrange group contains the Group/Ungroup, Sort by Name and Order
controls, allowing to reorder objects in the Configuration Components pane. It
also includes the Undo/Redo controls, as well as a Rename control, to modify a
given component's name.
l
The Navigate group contains a Processes control to select any existing process of
the currently loaded configuration, as well as a Highlight control to mark a given
node, a Zoom Out for a quick overview of the currently selected process, a Go to
Child/Go to Parent to move around a given process logical nodes (branches or
conditions) and a Collapse/Expand, Collapse All and Expand all to collapse or
expand branches and conditions in a process.
l
The Show/Hide group contains four controls to display or hide any of the four
panes; the Configuration Components pane, the Object Inspector pane, the
Message pane, the Debug Info pane and the Plug-in Bar.
Page 895

l
The Debug tab includes the Data, Debug and Debug Messages groups.
l
The Data group allows to associate a sample data file to the currently selected
process, as well as update or replace it, and display it in its text/PDF or
Hexadecimal format.
l
The Debug group contains the debugger's controls, allowing to execute a process
step by step, skipping over or ignoring certain tasks, as well as setting up
breakpoints and resetting variables values. This group also includes the Send
Configuration button, necessary to push the current configuration to the
PlanetPress Workflow service.
l
The Debug Messages group contains two controls to either clear or save the
contents of the Messages pane.
l
The Tools tab includes the Managers, Services and Test Page groups.
l The Managers group:
l
The Install PostScript Font control allows to install a PostScript font into your
PlanetPress Workflow installation. This feature is specific to PlanetPress
Suite.
l
The Virtual Drive Manager control loads the "Virtual Drive Manager" on
page879. This feature is specific to PlanetPress Suite.
l
The Access Manager control loads the "Access Manager" on page845,
allowing to grant/remove permissions to hosts.
l
The Check for updates control, used to update the current PlanetPress
Workflow version.
l
The Launch Upgrade Wizard control, used when migrating from a previous
PlanetPress Workflow version.
l
The Services group:
l
The Services Status control allows to start, pause and stop PlanetPress
Workflow service.
l
The Configure Services control loads the PlanetPress Workflow Services
dialog to configure the user account PlanetPress Workflow should use.
l
The Service Console button opens the "The PlanetPress Workflow Service
Console" on the next page, allowing to monitor real-time information on the
configuration execution.
Page 896

l
The PlanetPress Capture group contains:
l
The Document Manager button opens the " PlanetPress Document
Manager" on page780.
l
The Pen Manager button opens the "PlanetPress Capture Pen Management
Tool" on page784.
l
The Test Page group:
l
The PS Test Page control allows to print a Status Page for the selected
printer queue. Note that if no printer queue is selected in the Configuration
Components pane, the control is disabled.
l
The Text Test Page control allows to print a raw text test page for the selected
printer queue. If no printer queue is selected in the Configuration
Components pane, the control is disabled.
l
The Help tab includes the Help, Activation and License groups.
l
The Help group contains the User Guide, the Reference Guide and the About
controls, used to access online documentation and version information.
l
The Activation group contains the Software Activation and Printer Activation
controls, used to enter activation codes for either the software (all users) or a given
device (PlanetPress Suite users)
l
The License group contains a link to the "PlanetPress Capture License
Management" on page786.
The Task Comments Pane
The Task Comments pane displays comments relevant to the currently selected items, such
as the contents of the Comments tab of any task in the currently selected process.
The Task Comments pane cannot be used to edit the comments themselves - only to see
them. to edit the comments, the properties of the task must be opened, and the comments
changed in the Comments tab.
Page 897

The PlanetPress Workflow Service Console
The PlanetPress Workflow Service Console is a centralized service console and log viewer in
one. You can use it to individually start and stop PlanetPress Workflow services, as well as to
view current and past log files for each service.
Note
The Service Console has changed greatly since version 7.4. If you are still using an older
version of PlanetPress, please see the user manual for your version instead.
Controlling Services
The left part of the PlanetPress Workflow Service Console displays a list of the PlanetPress
Workflow services and is used to control these services.
To start a stopped service:
1. Right-click on the service.
2.
Click on Start.
3. Look in the Log window on the right to see the service starting.
To stop a service that is running:
1. Right-click on the running service.
2.
Click on Stop.
If the service is currently processing a file (if a process is running, output is being
generated, job being received, etc), the service will wait for this action to complete before
stopping.
To pause a service temporarily:
1. Right-click on the running service.
2.
Click on Active to remove the checkmark.
If the service was currently processing a file, the service will wait for this action to
Page 898

complete before pausing. Once paused, the service is still "started" but will wait until it is
activated again before processing jobs. This is very useful if you want to receive jobs from
external services (such as with the LPD Server) but not process them right away.
To kill (force quit) a service:
1. Right-click on the running service.
2.
Click on Kill.
3.
Click OK to confirm on the warning.
If the service is currently processing a file, execution will stop and the action will not
complete. If the action was partially completed (for example writing a large file), the partial
action is not undone. As this may lead to corrupted or incomplete files, it is strongly
advised not to kill a service unless it is absolutely necessary to do so.
Viewing log files
The second major role of the Service Console is to view and browse log files. The Service
Console can both view existing log files, or monitor the log file for the current day and update
the view in real time.
When a service is selected on the left pane, its log file (if any exists for the current day) is
displayed. The log displays in a tree fashion. The log itself is the root, and each session (the
time between the start and stop of a service) is listed. Under each session, each time a process
runs, a new branch is created and it can be expanded to see each action within that process.
The log viewer for the current day is always live, meaning it updates automatically as the log
file is updated by the appropriate service.
Viewing older log files
To open an existing, older log file:
1.
In the File menu, click on Open.
2. Browse to the location of the log file you want to open
3.
Click on the log file and click Open.
The log file is added, by name, at the end of the list of PlanetPress Workflow services.
Clicking on it opens the log file in the viewer. Right-clicking on the file brings a menu from
which the log file can be refreshed, or removed from the list.
Page 899

The log viewer for existing log files does not refresh automatically since log files for older days
do not generally change. The display of the sessions, processes and tasks is the same.
Note
The log viewer as described here was introduced in version 7.4 of PlanetPress Workflow.
Though it should be able to open log files from older versions of PlanetPress Workflow,
the results are not guaranteed. Some log files may not display properly in this view.
Searching through the active log file
When a log file is active in the log viewer, it can be searched by going in the Search menu,
then clicking Find. After entering a search term and selecting the options (Match case and
Direction), clicking Find Next will display the first result for the search term.
When a search is started, using F3 on the keyboard or clicking Search then Search again will
find and highlight the next available result.
Page 900


Legal Notices and Acknowledgments
Warning: PlanetPress Workflow is protected by copyright law and international treaties.
Unauthorized reproduction or distribution of this program, via any means, in part or in whole,
may be prosecuted to the full extent of the law.
The license agreements for the associated open source third party components can be found in
the following installation folder: C:\Program Files\Objectif Lune\OL Connect\Legal Notices
This application uses the following third party components:
l
Adobe PDF Library which is either a registered trademark or trademark of Adobe
Systems Incorporated in the United States and\or other countries.
l
Adobe XMP Core Copyright © 1999 - 2010, Adobe Systems Incorporated. All rights
reserved.
l
c3p0 which is licensed under the terms of the Lesser General Public License
(LGPL)Version 2.1. The source code can be obtained from the following location:
https://github.com/swaldman/c3p0
l
Eclipse Gemini Blueprint which is distributed under the terms of the Apache Software
License Version 2.0. This product includes sub-components with separate copyright
notices and license terms.
l
Eclipse Persistence Services Project (EclipseLink), Copyright © 2007, Eclipse
Foundation, Inc. and its licensors. All rights reserved. This is distributed under the terms
of the Eclipse Public License Version 1.0 and Eclipse Distribution License Version 1.0.
l
Fugue Icons by Yusuke Kamiyamane which are distributed under the terms of the
Creative Commons Attribution 3.0 License.
l
Gecko which is distributed under the terms of the Mozilla Public License (MPL)Version
2.0. Information on obtaining Gecko can be found on the following page:
https://wiki.mozilla.org/Gecko:Getting_Started
NOTE:This library has been modified for Connect. To obtain copies of the modified
library please contact your local Objective Lune Support team.
l
Glassfish Java Mail which is licensed under the terms of the Common Development and
Distribution License (CDDL) Version 1.0. Information on how to download the Glassfish
source can be obtained from here:
https://wikis.oracle.com/display/GlassFish/Java+EE+7+Maven+Coordinates
Page 902

l
Hamcrest Matchers Copyright © 2000-2006, www.hamcrest.org. All rights reserved.
l
HyperSQL, Copyright © 2001-2010, The HSQL Development Group. All rights reserved.
l
IcoMoon. Connect uses unmodified icons from IcoMoon (https://icomoon.io/#icons-
icomoon) which have been made available under the Creative Commons By 4.0 license
(https://creativecommons.org/licenses/by/4.0).
l
ICU4J 4.4.2 Copyright © 1995-2013 International Business Machines Corporation and
others. All rights reserved.
l
J2V8 which is distributed under the terms of the Eclipse Public License (EPL) Version
1.0. The source code for J2V8 can be obtained from the following location:
https://github.com/eclipsesource/j2v8
l
Jacob Java Com Bridge which is licensed under the terms of the GNU Lesser General
Public License (LGPL)Version 2. The source code for this can be obtained from the
following location: http://sourceforge.net/projects/jacob-project/files/jacob-project/
l
JavaSysMon Copyright © 2009 ThoughtWorks, Inc. All rights reserved.
l
JavaX Mail which is distributed under the terms of the Common Development and
Distribution License (CDDL) Version 1.1. The source code for this can be obtained from
the following location: https://java.net/projects/javamail/downloads/directory/source
l
Java XmlHttpRequest which is licensed under the terms of the GNU Lesser General
Public License Version (LGPL)2.1. The source code for this can be obtained from the
following location: https://github.com/objectifluneCA/java-XmlHttpRequest
l
Jersey which is distributed under the terms of the Common Development and Distribution
License (CDDL) Version 1.1. Information on how to obtain the source code can be found
at the following location: http://repo1.maven.org/maven2/org/glassfish/jersey/jersey-bom
l
jersey-json-1.13 which is licensed under the terms of the Common Development and
Distribution License (CDDL) Version 1.1. Information on how to obtain the source code
can be found at the following location:
http://mvnrepository.com/artifact/com.sun.jersey/jersey-json/1.13-b01
l
Jersey Multipart which is distributed under the terms of the Common Development and
Distribution License (CDDL) Version 1.1. Information on how to obtain the source code
can be found at the following location:
http://repo1.maven.org/maven2/org/glassfish/jersey/jersey-bom
l
JNA Version 3.5.1 which is distributed under the terms of the GNU Lesser General
Public License Version (LGPL)2.1. The source code for this can be obtained from the
following location: https://github.com/twall/jna/releases
Page 903

l
Logback which is distributed under the terms of the Eclipse Public License
(EPL)Version 1.0. The source code for Logback can be obtained from the following
location: https://logback.qos.ch/download.html
l
Mchange Commons Java which is licensed under the terms of the Lesser General
Public License (LGPL)Version 2.1. The source code can be obtained from the following
location: https://mvnrepository.com/artifact/com.mchange/mchange-commons-java
l
Objectweb ASM, Copyright © 2000-2011 INRIA, France Telecom. All rights reserved.
l
Polyfills which is licensed under the Unlicense license. The source code can be
obtained from the following location: https://github.com/inexorabletash/polyfill.
l
RapidJSON which is distributed under an MITlicense.
l
Relique CSV Driver which is licensed under the terms of the Lesser General Public
License (LGPL)Version 2.1. The source code can be obtained from the following
location: https://sourceforge.net/p/csvjdbc/code/ci/csvjdbc-1.0.31/tree/
l
Rhino 1.7R4 and 1.7.7.1 which are licensed under the terms of the Mozilla Public
License (MPL)Version 2.0. The source code for these can be obtained from the following
location: https://developer.mozilla.org/en-US/docs/Mozilla/Projects/Rhino/Download_
Rhino
l
Saxon which is distributed under the terms of the Mozilla Public License (MPL) Version
2.0. The source code for this can be obtained from the following location:
http://sourceforge.net/projects/saxon/files/Saxon-HE/9.6/
l
Servlet API developed by Sun as part of the Glassfish project and licensed under the
terms of the Common Development and Distribution License (CDDL) Version 1.0.
Information on how to download the Glassfish source (as part of Java EE platform) can be
obtained from here:
https://wikis.oracle.com/display/GlassFish/Java+EE+7+Maven+Coordinates
l
Simple Logging Facade for Java (SLF4J) Copyright © 2004-2017 QOS.ch. All rights
reserved.
l
Spring Framework which is distributed under the terms of the Apache Software License
Version 2.0. This product includes sub-components with separate copyright notices and
license terms.
l
StAX Utilities Copyright © 2007, StAX Utilities Project. All rights reserved.
l
Stax2 API Copyright 2010-2018 FasterXML.com.
Page 904

l
Tern which is distributed under the terms of the Eclipse Public License (EPL)Version 1.0.
The source code for tern can be obtained from the following location:
https://github.com/angelozerr/tern.java
l
Web Services Description Language for Java which is distributed under the terms of
the Common Public License v 1.0. The source code for this can be obtained from the
following location: http://wsdl4j.cvs.sourceforge.net/viewvc/wsdl4j/
l
WinSCP which is used by the SFTP input/output plugins and is distributed under both the
GNU General Public License (GPL)version 3, and the Mozilla Public License
(MPL)Version 2.0.
For more information on WinSCP, see https://winscp.net/eng/docs/introduction.
l
XULRunner which is distributed under the terms of the Mozilla Public License Version
2.0. The source code for this can be obtained from the following location:
http://ftp.mozilla.org/pub/mozilla.org/xulrunner/releases/latest/source/
l
zziplib which is licensed under the terms of the Mozilla Public License (MPL)Version 1.1.
The source code for this can be obtained from the following location:
http://sourceforge.net/projects/zziplib/files/zziplib13/
l
7-Zip SFX which is licensed under the terms of the GNU Lesser General Public License
(LGPL)Version 2.1. The source code for this can be obtained from the following location:
https://github.com/chrislake/7zsfxmm
Portions of certain libraries included in this application which are distributed under the terms of
the Mozilla Public License have been modified. To obtain copies of the modified libraries
please contact your local Objective Lune Support team.
This application also uses the following components which are distributed under the terms of
the Apache Software License Version 2.0:
l Apache ActiveMQ
l Apache Batik
l Apache Commons Beanutils
l Apache Commons CLI
l Apache Commons Codec
l Apache Commons Collections
l Apache Commons DBCP
l Apache Commons Digester
l Apache Commons Imaging
Page 905

l Apache Commons IO
l Apache Commons JCSCore
l Apache Commons Lang
l Apache Commons Logging
l Apache Commons Pool
l Apache Commons Text
l Apache Commons Validator
l Apache Derby
l Apache Felix and dependencies
l Apache Geronimo
l Apache HttpClient Mime
l Apache POI
l Apache ServiceMix
l Apache Xerces2 Java Parser
l Apache XML Graphics
l Apache XML Beans
l Barcode4j
l Google Collections
l Google GSON
l Hibernate Validator
l Jackson JSON processor
l Jetty
l Liquibase
l LMAX Disruptor
l Objenesis
l OpenCSV
l OPS4J Pax Web
l org.json.simple
l Quartz Scheduler
l Snakeyaml
l SNMP4J
Page 906

l Spring Dynamic Modules
l UCanAccess
l Woodstox
Eclipse Technology:
This Software includes unmodified Eclipse redistributables, which are available at
www.eclipse.org. The Eclipse redistributables are distributed under the terms of the Eclipse
Public License - v 1.0 that can be found at https://www.eclipse.org/legal/epl-v10.html.
VSS Java FreeMarker:
This product includes software developed by the Visigoth Software Society
(http://www.visigoths.org/).
This includes the following subcomponents that are licensed by the Apache Software
Foundation under the Apache License, Version 2.0:
l freemarker/ext/jsp/web-app_2_2.dtd
l freemarker/ext/jsp/web-app_2_3.dtd
l freemarker/ext/jsp/web-app_2_4.xsd
l freemarker/ext/jsp/web-app_2_5.xsd
l freemarker/ext/jsp/web-jsptaglibrary_1_1.dtd
l freemarker/ext/jsp/web-jsptaglibrary_1_2.dtd
l freemarker/ext/jsp/web-jsptaglibrary_2_0.xsd
l freemarker/ext/jsp/web-jsptaglibrary_2_1.xsd
Java SE framework and platform:
This application uses the Java SE framework and platform which is distributed under the terms
of the Oracle Binary Code License Agreement for the Java SE Platform Products and Java FX.
Copyright 2013, Oracle America ,Inc. All rights reserved.
Use is subject to license terms. ORACLE and JAVA trademarks and all ORACLE- and JAVA-
related trademarks, service marks, logos and other brand designations are trademarks or
registered trademarks of Oracle in the U.S. and other countries.
Use of the Commercial Features for any commercial or production purpose requires a separate
Page 907

license from Oracle. “Commercial Features” means those features identified Table 1-1
(Commercial Features In Java SE Product Editions) of the Java SE documentation accessible
at http://www.oracle.com/technetwork/java/javase/documentation/index.html.
Further Components:
l
This product includes software developed by the JDOM Project (http://www.jdom.org/).
l
Portions of this software are copyright © 2010 The FreeType Project (www.freetype.org).
All rights reserved.
l
This product includes software developed by JSON.org
(http://www.json.org/java/index.html).
Copyright Information
Copyright © 1994-2022 Objectif Lune Inc. All Rights Reserved.
No part of this publication may be reproduced, transmitted, transcribed, stored in a retrieval
system, or translated into any other language or computer language in whole or in part, in any
form or by any means, whether it be electronic, mechanical, magnetic, optical, manual or
otherwise, without prior written consent of Objectif Lune Inc.
Objectif Lune Inc.disclaims all warranties as to this software, whether expressed or implied,
including without limitation any implied warranties of merchantability, fitness for a particular
purpose, functionality, data integrity or protection.
PlanetPress, PReS and PrintShop Mail are registered trademarks of Objectif Lune Inc.
Click to download the EULA as PDF
Page 908
