

2
Cisco Expressway Certificate Creation and Use Deployment Guide

Contents
Preface 4
Change History 4
Introduction 5
PKI Introduction 5
Overview of Certificate Use on the Expressway 5
Certificate Generation Overview 6
Generating a Certificate Signing Request (CSR) 6
Creating a CSR Using Expressway 7
Server Certificate Requirements for Unified Communications 8
Cisco Unified Communications Manager Certificates 8
Expressway Certificates 8
Authorizing a Request and Generating a Certificate Using Microsoft Certification Authority 10
Loading Certificates and Keys Onto Expressway 12
Loading a Server Certificate and Private Key Onto Expressway 13
Managing the Trusted CA Certificate List 13
Managing Certificate Revocation Lists (CRLs) 14
Certificate Revocation Sources 14
Configuring Revocation Checking for SIP TLS Connections 15
Appendix 1: Troubleshooting 17
SIPTLS Negotiation Failures on Neighbor and Traversal Zones 17
Subject Alternative Name Fields Longer than 999 Characters 17
Certificates with Key Length of 8192 Bits 17
Service Failures when Using Mobile and Remote Access 17
Issues with SSH Failures and Unsupported OIDs 17
Appendix 2: Certificate Generation Using OpenSSL Only 19
Creating a Certificate Request Using OpenSSL 19
Operating as a Certificate Authority Using OpenSSL 21
Creating Self-Signed Certificates Using OpenSSL 23
Appendix 3: Converting a DER Certificate File to PEM Format 25
Appendix 4: Decoding Certificates 29
Appendix 5: Enable ADCSto Issue "Client and Server" Certificates 31
Cisco Legal Information 35
Cisco Trademark 35
3
Cisco Expressway Certificate Creation and Use Deployment Guide

Preface
Change History
Date Change Reason
September
2017
Clarification of certificates in clusters. Documentation
issue
December
2016
MRAcertificate requirements clarified. X8.9 release
June 2016 Updated. X8.8 release
November
2015
New template applied. Republished for X8.7.
July 2015 Updated for X8.6.
April 2015 Update for X8.5.2. Changes to CRLinformation, CSRgeneration page defaults, 999
character limit on SANs.
January
2015
Update for X8.5.1. Introduced an option on the user interface to select the Digest
algorithm . The default is set to SHA-256 (hash algorithm).
December
2014
Re-issued for X8.5. Notes inserted over 2050 date management, and unsupported
OIDs. Changed instructions in Appendix 2 "Creating a certificate request using
OpenSSL".
July 2014 Re-issued for X8.2. Recommended options changed for server certificate in Unified
Communications deployments.
June 2014 Republished for X8.2. Enhanced the server certificate requirements for Unified
Communications deployments.
December
2013
Initial release.
Table 1 Deployment Guide Change History
4
Cisco Expressway Certificate Creation and Use Deployment Guide
Preface

Introduction
This deployment guide provides instructions on how to create X.509 cryptographic certificates for use with the Cisco
Expressway (Expressway), and how to load them into Expressway.
PKI Introduction
Public Key Infrastructure (PKI) provides the mechanisms through which communications can be secured (encrypted
and integrity protected) and identities can be verified. Underlying PKI is:
■ A public/private key pair: a public key is used to encrypt data sent to a server, but only the private key (kept
secret by the server) can be used to decrypt it.
■ Signatures of data: data can be “signed” by a server, by using a combination of a cryptographic hash of the
data and the server’s private key. A client can verify the signature by using the server’s public key and verifying
the same hash. This ensures the data has been sent from the expected server, and has not been tampered
with.
■ Certificates: a certificate is a wrapper around a public key, and provides information about the owner of the
key. This metadata is provided in X.509 format, and typically includes the server name and contact details for
the owner.
■ A certificate chain: a certificate can be signed by a Certificate Authority (CA) using its own private key. In
turn, therefore, a certificate can be verified as being signed by a CA by checking the signature against the
CA’s certificate (public key). Web browsers and other clients have a list of CA certificates that they trust, and
can thus verify the certificates of individual servers.
Transport Layer Security (TLS) is the standard mechanism for securing a TCP connection between hosts on a TCP/IP
network. For example, secure HTTP (HTTPS) uses TLS to encrypt and verify traffic. To establish a TLS connection:
1. An initial TCP connection is made, and the client sends its capabilities (including cipher suites) and a random
number.
2. The sever responds with its choice of those capabilities, another random number, and its certificate.
3. The client verifies that the server certificate was issued (signed) by a CA that it trusts, and has not been
revoked.
4. The client sends a “pre-master secret”, encrypted with the server’s public key.
5. This pre-master secret, combined with the exchanged random numbers (to prevent replay attacks), is used to
generate a “master secret”, with which the remaining communications of this TLS session are encrypted
between the client and server.
The following sections describe how these PKI components can be used with the Expressway.
Overview of Certificate Use on the Expressway
Expressway needs certificates for:
■ Secure HTTP with TLS (HTTPS) connectivity
■ TLS connectivity for SIP signaling, endpoints and neighbor zones
■ Connections to other systems such as Unified CM, Cisco TMS, LDAP servers and syslog servers
It uses its list of trusted Certificate Authority (CA) certificates and associated certificate revocation lists (CRLs) to
validate other devices connecting to it.
It uses the Server Certificate and the Private key to provide a signed certificate to provide evidence that the
Expressway is the device it says it is. This can be used with neighboring devices such as Microsoft Lync or Unified
CM, as well as administrators using the web interface.
5
Cisco Expressway Certificate Creation and Use Deployment Guide
Introduction

A certificate identifies the Expressway. It contains names by which it is known and to which traffic is routed. If the
Expressway is known by multiple names for these purposes, such as if it is part of a cluster, this must be represented
in the X.509 subject data, according to the guidance of RFC5922. The certificate must contain the FQDN of both the
Expressway itself and of the cluster. The following lists show what must be included in the X.509 subject, depending
on the deployment model chosen.
If the Expressway is not clustered:
■ Subject Common Name = FQDN of Expressway
■ Subject Alternate Names = leave blank*
If the Expressway is clustered, with individual certificates per Expressway:
■ Subject Common Name = FQDN of cluster
■ Subject Alternate Name = FQDN of Expressway peer, FQDN of cluster*
Certificate Generation Overview
X.509 certificates may be supplied from a third party, or may be generated by a certificate generator such as
OpenSSL or a tool available in applications such as Microsoft Certification Authority. Third-party certificates supplied
by recognized certificate authorities are recommended, although Expressway deployments in controlled or test
environments can use internally generated certificates.
Certificate generation is usually a 3-stage process:
■ Stage 1: generate a private key
■ Stage 2: create a certificate request
■ Stage 3: authorize and create the certificate
This document presents alternative methods of generating the root certificate, client/server certificate for the
Expressway, and private key:
■ Generating a Certificate Signing Request (CSR), page 6 describes how to use the Expressway itself to
generate the private key and certificate request.
■ Appendix 2: Certificate Generation Using OpenSSL Only, page 19 documents the OpenSSL-only process,
which could be used with a third party or internally managed CA.
For mutual TLS authentication the ExpresswayServer certificate must be capable of being used as a Client
certificate as well, thus allowing the Expressway to authenticate as a client device to a neighboring server (see
Appendix 5: Enable ADCSto Issue "Client and Server" Certificates, page 31).
Important:
■ * Some deployments rely on SANs to implement TLS connections to other Cisco or third-party infrastructure.
Read the documentation for your deployment before ordering your certificate.
■ Wildcard certificates manage multiple subdomains and the services names they support, they can be less
secure than SAN (Subject Alternate Name) certificates. Expressway does not support wildcard certificates.
■ Changes are being introduced to the way that dates are handled from 2050, and certificates that have expiry
dates beyond that can cause operational issues.
Generating a Certificate Signing Request (CSR)
A CSR contains the identity information about the owner of a private key. It can be passed to a third-party or internal
certification authority for generating a signed certificate, or it can be used in conjunction with an application such as
Microsoft Certification Authority or OpenSSL.
6
Cisco Expressway Certificate Creation and Use Deployment Guide
Generating a Certificate Signing Request (CSR)

Creating a CSR Using Expressway
The Expressway can generate server certificate signing requests. This removes the need to use an external
mechanism to generate and obtain certificate requests.
To generate a CSR:
1. Go to Maintenance > Security certificates > Server certificate.
2. Click Generate CSR to go to the Generate CSR page.
3. Enter the required properties for the certificate.
— See Server Certificates and Clustered Systems, page 7 if your Expressway is part of a cluster.
— See Server Certificate Requirements for Unified Communications, page 8 if this Expressway is part of a
Unified Communications solution.
— The certificate request includes automatically the public key that will be used in the certificate, and the
client and server authentication Enhanced Key Usage (EKU) extension.
4. Click Generate CSR. The system will produce a signing request and an associated private key.
The private key is stored securely on the Expressway and cannot be viewed or downloaded. You must never
disclose your private key, not even to the certificate authority.
5. You are returned to the Server certificate page. From here you can:
— Download the request to your local file system so that it can be sent to a certificate authority. You are
prompted to save the file (the exact wording depends on your browser).
— View the current request (click Show (decoded) to view it in a human-readable form, or click Show (PEM
file) to view the file in its raw format).
Note:
■ Only one signing request can be in progress at any one time. This is because the Expressway has to keep track
of the private key file associated with the current request. To discard the current request and start a new
request, click Discard CSR.
■ From version X8.5.1 the user interface provides an option to set the Digest algorithm. The default is set to
SHA-256, with options to change to SHA-1, SHA-384, or SHA-512.
You must now authorize the request and generate a signed PEM certificate file. You can pass it to a third-party or
internal certification authority, or use it in conjunction with an application such as Microsoft Certification Authority
(see Authorizing a Request and Generating a Certificate Using Microsoft Certification Authority, page 10) or OpenSSL
(see Operating as a Certificate Authority Using OpenSSL, page 21).
When the signed server certificate is received back from the certificate authority, it must be uploaded to the
Expressway as described in Loading Certificates and Keys Onto Expressway, page 12.
Server Certificates and Clustered Systems
When a CSR is generated, a single request and private key combination is generated for that peer only.
If you have a cluster of Expressways, you must generate a separate signing request on each peer. Those requests
must then be sent to the certificate authority and the returned server certificates uploaded to each relevant peer.
You must ensure that the correct server certificate is uploaded to the appropriate peer, otherwise the stored private
key on each peer will not correspond to the uploaded certificate.
7
Cisco Expressway Certificate Creation and Use Deployment Guide
Generating a Certificate Signing Request (CSR)

Server Certificate Requirements for Unified Communications
Cisco Unified Communications Manager Certificates
The two Cisco Unified Communications Manager certificates that are significant for Mobile and Remote Access are
the CallManager certificate and the tomcat certificate. These are automatically installed on the Cisco Unified
Communications Manager and by default they are self-signed and have the same common name (CN).
We recommend using CA-signed certificates for best end-to-end security between external endpoints and internal
endpoints. However, if you do use self-signed certificates, the two certificates must have different common names.
This is because the Expressway does not allow two self-signed certificates with the same CN. If the CallManager and
tomcat self-signed certs have the same CN in the Expressway's trusted CAlist, then it can only trust one of them.
This means that either secure HTTPor secure SIP, between Expressway-C and Cisco Unified Communications
Manager, will fail.
Also, when generating tomcat certificate signing requests for any products within the Cisco Collaboration Systems
Release 10.5.2, you need to be aware of CSCus47235. You need to work around this issue to ensure that the
FQDNsof the nodes are in the certificates as Subject Alternative Names. The Expressway X8.5.3 Release Notes have
the details of the workarounds.
Expressway Certificates
The Expressway certificate signing request (CSR) tool prompts for and incorporates the relevant subject alternative
name (SAN) entries as appropriate for the Unified Communications features that are supported on that Expressway.
The following table shows which CSR alternative name elements apply to which Unified Communications features:
Add these items as subject alternative names When generating a CSR for these purposes
Mobile and
Remote
Access
Jabber Guest
XMPP
Federation
Business
to
Business
Calls
Unified CM registrations domains
(despite their name, these have more in common with
service discovery domains than with Unified CM SIP
registration domains)
Required on
Expressway-
E only
—
—
—
XMPP federation domains
— —
Required on
Expressway-
E only
—
IM and Presence chat node aliases
(federated group chat)
— —
Required
—
Unified CM phone security profile names Required on
Expressway-
C only
— — —
(Clustered systems only) Expressway cluster name Required on
Expressway-
C only
Required on
Expressway-
C only
Required on
Expressway-
C only
Note:
■ You may need to produce a new server certificate for the Expressway-C if chat node aliases are added or
renamed. Or when IM and Presence nodes are added or renamed, or new TLS phone security profiles are
added.
8
Cisco Expressway Certificate Creation and Use Deployment Guide
Server Certificate Requirements for Unified Communications

■ You must produce a new Expressway-E certificate if new chat node aliases are added to the system, or if the
Unified CM or XMPP federation domains are modified.
■ You must restart the Expressway for any new uploaded server certificate to take effect.
More details about the individual feature requirements per Expressway-C / Expressway-E are described below.
Expressway-C server certificate requirements
The Expressway-C server certificate needs to include the following elements in its list of subject alternate names:
■ Unified CM phone security profile names: the names of the Phone Security Profiles in Unified CM that are
configured for encrypted TLS and are used for devices requiring remote access. Use the FQDNformat and
separate multiple entries with commas.
Having the secure phone profiles as alternative names means that Unified CM can communicate via TLS with
the Expressway-C when it is forwarding messages from devices that use those profiles.
■ IM and Presence chat node aliases (federated group chat): the Chat Node Aliases (e.g.
chatroom1.example.com) that are configured on the IM and Presence servers. These are required only for
Unified Communications XMPP federation deployments that intend to support group chat over TLS with
federated contacts.
The Expressway-C automatically includes the chat node aliases in the CSR, providing it has discovered a set
of IM&P servers.
We recommend that you use DNSformat for the chat node aliases when generating the CSR. You must
include the same chat node aliases in the Expressway-E server certificate's alternative names.
Figure 1 Entering subject alternative names for security profiles and chat node aliases on the
Expressway-C's CSRgenerator
Expressway-E server certificate requirements
The Expressway-E server certificate needs to include the following elements in its list of subject alternative names
(SAN):
■ Unified CM registrations domains: all of the domains which are configured on the Expressway-C for Unified
CM registrations. Required for secure communications between endpoint devices and Expressway-E.
The Unified CM registration domains used in the Expressway configuration and Expressway-E certificate, are
used by Mobile and Remote Access clients to lookup the _collab-edge DNS SRV record during service
discovery. They enable MRA registrations on Unified CM, and are primarily for service discovery.
These service discovery domains may or may not match the SIP registration domains. It depends on the
deployment, and they don't have to match. One example is a deployment that uses a .local or similar private
domain with Unified CM on the internal network, and public domain names for the Expressway-E FQDN and
service discovery. In this case, you need to include the public domain names in the Expressway-E certificate
as SANs. There is no need to include the private domain names used on Unified CM. You only need to list the
edge domain as a SAN.
Select the DNS format and manually specify the required FQDNs. Separate the FQDNs by commas if you need
multiple domains. You may select CollabEdgeDNS format instead, which simply adds the prefix collab-edge.
to the domain that you enter. This format is recommended if you do not want to include your top level domain
as a SAN (see example in following screenshot).
9
Cisco Expressway Certificate Creation and Use Deployment Guide
Server Certificate Requirements for Unified Communications

■ XMPP federation domains: the domains used for point-to-point XMPP federation. These are configured on
the IM&P servers and should also be configured on the Expressway-C as domains for XMPP federation.
Select the DNSformat and manually specify the required FQDNs. Separate the FQDNs by commas if you need
multiple domains. Do not use the XMPPAddress format as it may not be supported by your CA, and may be
discontinued in future versions of the Expressway software.
■ IM and Presence chat node aliases (federated group chat): the same set of Chat Node Aliases as entered
on the Expressway-C's certificate. They are only required for voice and presence deployments which will
support group chat over TLS with federated contacts.
Note that you can copy the list of chat node aliases from the equivalent Generate CSR page on the
Expressway-C.
Figure 2 Entering subject alternative names for Unified CMregistration domains, XMPPfederation
domains, and chat node aliases, on the Expressway-E's CSRgenerator
See Cisco Expressway Certificate Creation and Use Deployment Guide on the Expressway configuration guides page.
Authorizing a Request and Generating a Certificate Using Microsoft
Certification Authority
This section describes how to authorize a certificate request and generate a PEM certificate file using Microsoft
Certification Authority.
Note:The CAcomponent of Microsoft Active Directory Certificate Services (ADCS) must be able to issue a certificate
that can be used for authentication of the Expressway as client or server.
ADCSin Windows Server 2008 Standard R2 (and later) can issue these types of certificates, if you create a
certificate template for them. Earlier versions of Windows Server Standard Edition are not suitable.
1. Copy the certificate request file (for example, certcsr.der if generated via OpenSSL) to a location, such as the
desktop, on the server where the Microsoft Certification Authority application is installed.
10
Cisco Expressway Certificate Creation and Use Deployment Guide
Authorizing a Request and Generating a Certificate Using Microsoft Certification Authority
2. Submit the certificate request from a command prompt:
— To generate a certificate with Server Authentication and Client Authentication, which is required if you
want to configure a neighbor or traversal zone with mutual authentication (TLS verify mode), type:
certreq -submit -attrib “CertificateTemplate:Webclientandserver”
C:\Users\<user>\Desktop\certcsr.der
See Appendix 5: Enable ADCSto Issue "Client and Server" Certificates, page 31 for details about how to
set up the Webclientandserver certificate template.
— To generate a certificate with Server Authentication only, type:
certreq -submit -attrib “CertificateTemplate:WebServer” C:\Users\<user>\Desktop\certcsr.der
This triggers the Certification Authority window to open:
Note that the command must be run as the administrator user.
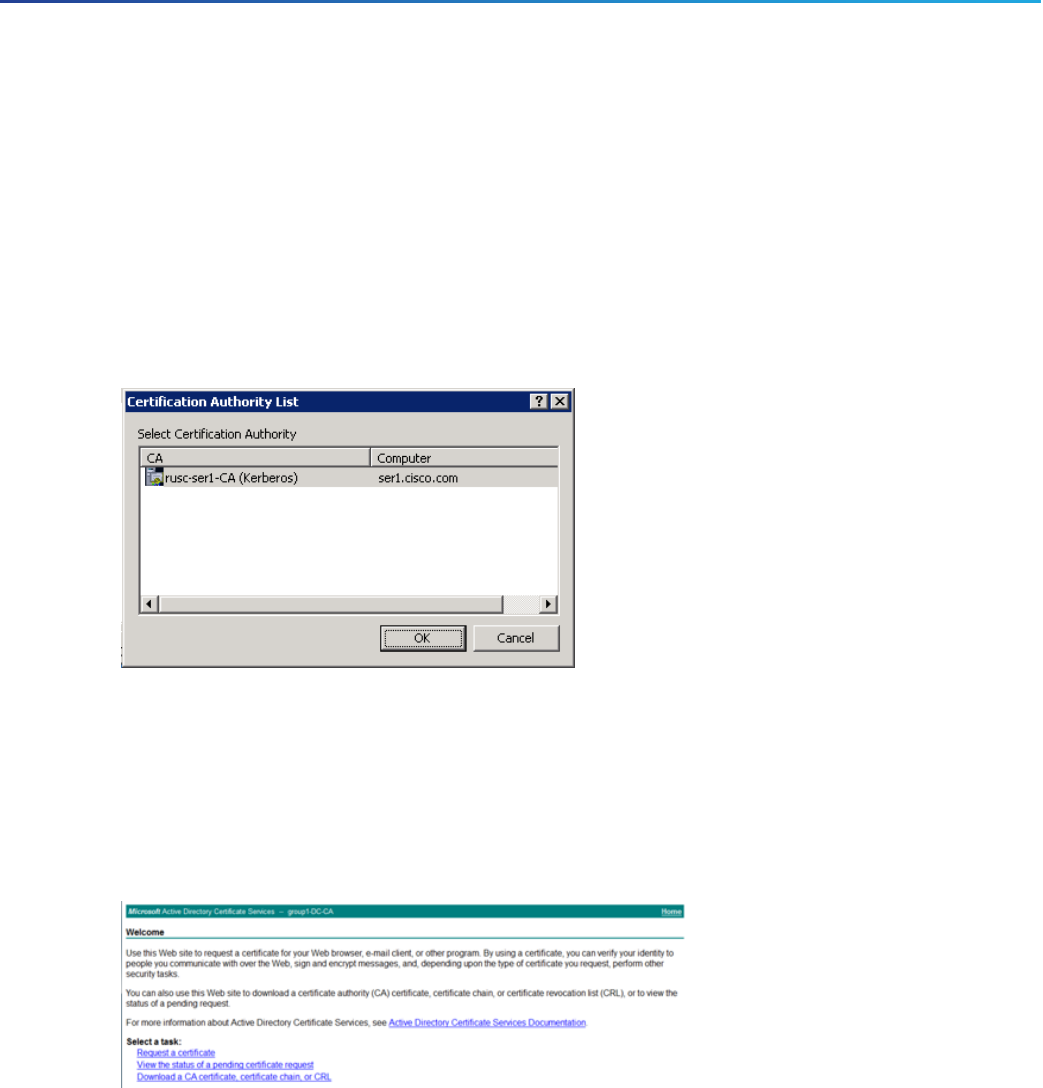
3. Select the Certification Authority to use (typically only one is offered) and click OK.
4. When requested, save the certificate (browse to the required folder if the default Libraries > Documents
folder is not to be used) calling it server.cer for example.
5. Rename server.cer to server.pem for use with the Expressway.
Get the Microsoft CA certificate
1. In your web browser, go to <IP or URL of the Microsoft Certificate Server>/certsrv and log in.
11
Cisco Expressway Certificate Creation and Use Deployment Guide
Authorizing a Request and Generating a Certificate Using Microsoft Certification Authority

2. Select Download a CA certificate, certificate chain or CRL.
3. Select Base 64.
4. Select Download CA certificate.
5. Choose Save File and click OK.
6. Rename certnew.cer to certnew.pem.
Files server.pem and certnew.pem are now available.
Go to the Loading Certificates and Keys Onto Expressway, page 12 section in this document and upload server.pem
and certnew.pem to Expressway.
Loading Certificates and Keys Onto Expressway
The Expressway uses standard X.509 certificates. The certificate information must be supplied to the Expressway in
PEM format. Typically 3 elements are loaded:
■ The server certificate (which is generated by the certificate authority, identifying the ID of the certificate
holder, and should be able to act as both a client and server certificate).
■ The private key (used to sign data sent to the client, and decrypt data sent from the client, encrypted with the
public key in the server certificate). This must only be kept on the Expressway and backed up in a safe place –
security of the TLS communications relies upon this being kept secret.
■ A list of certificates of trusted certificate authorities.
Note: New installations of Expressway software (from X8.1 onwards) ship with a temporary trusted CA, and a server
certificate issued by that temporary CA. We strongly recommend that you replace the server certificate with one
generated by a trusted certificate authority, and that you install CA certificates for the authorities that you trust.
12
Cisco Expressway Certificate Creation and Use Deployment Guide
Loading Certificates and Keys Onto Expressway

Loading a Server Certificate and Private Key Onto Expressway
The Expressway’s server certificate is used to identify the Expressway when it communicates with client systems
using TLS encryption, and with web browsers over HTTPS.
To upload a server certificate:
1. Go to Maintenance > Security certificates > Server certificate.
2. Use the Browse button in the Upload new certificate section to select and upload the server certificate PEM
file.
3. If you used an external system to generate the Certificate Signing Request(CSR) you must also upload the
server private key PEM file that was used to encrypt the server certificate. (The private key file will have been
automatically generated and stored earlier if the Expressway was used to produce the CSR for this server
certificate.)
— The server private key PEMfile must not be password protected.
— You cannot upload a server private key if a certificate signing request is in progress.
4. Click Upload server certificate data.
Managing the Trusted CA Certificate List
The Trusted CA certificate page (Maintenance > Security certificates > Trusted CA certificate) allows you to
manage the list of certificates for the Certificate Authorities (CAs) trusted by this Expressway. When a TLS
connection to Expressway mandates certificate verification, the certificate presented to the Expressway must be
signed by a trusted CA in this list and there must be a full chain of trust (intermediate CAs) to the root CA.
■ To upload a new file containing one or more CA certificates, Browse to the required PEM file and click
Append CA certificate. This will append any new certificates to the existing list of CA certificates. If you are
replacing existing certificates for a particular issuer and subject, you have to manually delete the previous
certificates.
■ To replace all of the currently uploaded CA certificates with the system's original list of trusted CA certificates,
click Reset to default CA certificate.
■ To view the entire list of currently uploaded trusted CA certificates, click Show all (decoded) to view it in a
human-readable form, or click Show all (PEM file) to view the file in its raw format.
■ To view an individual trusted CA certificate, click on View (decoded) in the row for the specific CA certificate.
■ To delete one or more CA certificates, tick the box(es) next to the relevant CA certificate(s) and click Delete.
13
Cisco Expressway Certificate Creation and Use Deployment Guide
Loading Certificates and Keys Onto Expressway

Managing Certificate Revocation Lists (CRLs)
Certificate revocation list (CRL) files are used by the Expressway to validate certificates presented by client browsers
and external systems that communicate with the Expressway over TLS/HTTPS. A CRL identifies those certificates
that have been revoked and can no longer be used to communicate with the Expressway.
We recommend that you upload CRL data for the CAs that sign TLS/HTTPS client and server certificates. When
enabled, CRL checking is applied for every CA in the chain of trust.
Certificate Revocation Sources
The Expressway can obtain certificate revocation information from multiple sources:
■ automatic downloads of CRL data from CRL distribution points
■ through OCSP (Online Certificate Status Protocol) responder URIs in the certificate to be checked (SIP TLS
only)
■ manual upload of CRL data
■ CRL data embedded within the Expressway's Trusted CA certificate file
The following limitations and usage guidelines apply:
■ when establishing SIP TLS connections, the CRL data sources are subject to the Certificate revocation
checking settings on the SIP configuration page.
■ automatically downloaded CRL files override any manually loaded CRL files (except for when verifying SIPTLS
connections, when both manually uploaded or automatically downloaded CRL data may be used).
■ when validating certificates presented by external policy servers, the Expressway uses manually loaded CRLs
only.
■ when validating TLS connections with an LDAP server for remote login account authentication, the
Expressway only uses CRL data that has been embedded into the Trusted CA certificate (Tools > Security
certificates > Trusted CA certificate).
For LDAPconnections, Expressway does not download the CRL from Certificate Distribution Point URLs in the
server or issuing CA certificates; it also does not use the manual or automatic update settings on the CRL
management page.
Automatic CRL Updates
We recommend that you configure the Expressway to perform automatic CRL updates. This ensures that the latest
CRLs are available for certificate validation.
To configure the Expressway to use automatic CRL updates:
1. Go to Maintenance > Security certificates > CRL management.
2. Set Automatic CRL updates to Enabled.
14
Cisco Expressway Certificate Creation and Use Deployment Guide
Managing Certificate Revocation Lists (CRLs)

3. Enter the set of HTTP(S) distribution points from where the Expressway can obtain CRL files.
Note:
— you must specify each distribution point on a new line
— only HTTP(S) distribution points are supported; if HTTPS is used, the distribution point server itself must
have a valid certificate
— PEM and DER encoded CRL files are supported
— the distribution point may point directly to a CRL file or to ZIP and GZIP archives containing multiple CRL
files
— the file extensions in the URL or on any files unpacked from a downloaded archive do not matter as the
Expressway will determine the underlying file type for itself; however, typical URLs could be in the format:
• http://example.com/crl.pem
• http://example.com/crl.der
• http://example.com/ca.crl
• https://example.com/allcrls.zip
• https://example.com/allcrls.gz
4. Enter the Daily update time (in UTC). This is the approximate time of day when the Expressway will attempt to
update its CRLs from the distribution points.
5. Click Save.
Manual CRL Updates
You can upload CRL files manually to the Expressway. Certificates presented by external policy servers can only be
validated against manually loaded CRLs.
To upload a CRL file:
1. Go to Maintenance > Security certificates > CRL management.
2. Click Browse and select the required file from your file system. It must be in PEM encoded format.
3. Click Upload CRL file.
This uploads the selected file and replaces any previously uploaded CRL file.
Click Remove revocation list if you want to remove the manually uploaded file from the Expressway.
If a certificate authority's CRL expires, all certificates issued by that CA will be treated as revoked.
Online Certificate Status Protocol (OCSP)
The Expressway can establish a connection with an OCSP responder to query the status of a particular
certificate.The Expressway determines the OCSP responder to use from the responder URI listed in the certificate
being verified. The OCSP responder sends a status of 'good', 'revoked' or 'unknown' for the certificate.
The benefit of OCSP is that there is no need to download an entire revocation list. OCSPis supported for SIPTLS
connections only. See below for information on how to enable OCSP.
Outbound communication from the Expressway-E is required for the connection to the OCSPresponder. Check the
port number of the OCSPresponder you are using (typically this is port 80 or 443) and ensure that outbound
communication is allowed to that port from the Expressway-E.
Configuring Revocation Checking for SIP TLS Connections
You must also configure how certificate revocation checking is managed for SIPTLS connections.
15
Cisco Expressway Certificate Creation and Use Deployment Guide
Managing Certificate Revocation Lists (CRLs)

1. Go to Configuration > SIP.
2. Scroll down to the Certificate revocation checking section and configure the settings accordingly:
Field Description Usage tips
Certificate
revocation
checking
mode
Controls whether revocation checking is performed for
certificates exchanged during SIP TLS connection
establishment.
We recommend that revocation
checking is enabled.
Use OCSP Controls whether the Online Certificate Status Protocol
(OCSP) may be used to perform certificate revocation
checking.
To use OCSP, the X.509
certificate to be checked must
contain an OCSP responder URI.
Use CRLs Controls whether Certificate Revocation Lists (CRLs)
are used to perform certificate revocation checking.
CRLs can be used if the
certificate does not support
OCSP.
Allow CRL
downloads
from CDPs
Controls whether the download of CRLs from the CDP
URIs contained in X.509 certificates is allowed.
Fallback
behavior
Controls the revocation checking behavior if the
revocation status cannot be established, for example if
the revocation source cannot be contacted.
Treat as revoked: treat the certificate as revoked (and
thus do not allow the TLS connection).
Treat as not revoked: treat the certificate as not
revoked.
Default: Treat as not revoked
Treat as not revoked ensures that
your system continues to operate
in a normal manner if the
revocation source cannot be
contacted, however it does
potentially mean that revoked
certificates will be accepted.
16
Cisco Expressway Certificate Creation and Use Deployment Guide
Managing Certificate Revocation Lists (CRLs)

Appendix 1: Troubleshooting
SIPTLS Negotiation Failures on Neighbor and Traversal Zones
If TLS verify mode is enabled, the neighbor system's FQDN or IP address, as specified in the Peer address field of
the zone’s configuration, is used to verify against the certificate holder’s name contained within the X.509 certificate
presented by that system. (The name has to be contained in either the Subject Common Name or the Subject
Alternative Name attributes of the certificate.) The certificate itself must also be valid and signed by a trusted
certificate authority.
Therefore when certificates have been generated with peer or cluster FQDNs, ensure that the zone's Peer address
fields are configured with FQDNs rather than IPaddresses.
Subject Alternative Name Fields Longer than 999 Characters
If a secure traversal zone or Unified Communications zone fails to come up because of a TLSnegotiation error, check
the certificate for a long SANfield.
The Expressway does not parse SANs beyond 999 characters. So, if there are many alternative names on the
certificate, the Expressway-E's FQDNmay be outside of the portion that is read by the Expressway-C.
To avoid or workaround this issue, you need to make sure that any SANs that Expressway needs to trust are fully
within the first 999 characters of the subjectAltName.
Certificates with Key Length of 8192 Bits
SIP TLS zones may fail to become active if certificates with a key length of 8192 bits are used. We recommend using
certificates with a key length of 4096 bits.
Service Failures when Using Mobile and Remote Access
Unified Communications mobile and remote access services can fail due to certificate errors if you have uploaded a
private key file that does not contain a trailing newline character.
Ensure that the private key file contains a trailing newline character.
Issues with SSH Failures and Unsupported OIDs
If you experience unknown ssh failures such as ssh tunnels failing to establish, please verify there are no unknown
OIDs in the certificate. This can be done by checking that there are no undecoded numerical entries in the CN of the
Issuer & Subject fields (from the GUI: Maintenance -> Security Certificates -> Server Certificate -> Show(decoded)
or from the console: 'openssl x509 –text –noout –in /tandberg/persistent/certs/server.pem’)
Invalid
subject=CN=blahdeblah,OU=IT
Security,O=BigBang,L=Washington,ST=District of
Columbia,C=US,1.3.6.1.4.1.6449.1.2.1.5.1 = #060C2B06010401B2310102010501
Valid
subject=CN=blahdeblah,OU=IT
Security,O=BigBang,L=Washington,ST=District of
Columbia,C=US,jurisdictionOfIncorporationLocalityName=Dover
Cisco Systems, Inc. www.cisco.com
17

For instance, currently, the only supported Extended Validation OIDs are:
■ 1.3.6.1.4.1.311.60.2.1.1 jurisdictionOfIncorporationLocalityName
■ 1.3.6.1.4.1.311.60.2.1.2 jurisdictionOfIncorporationStateOrProvinceName
■ 1.3.6.1.4.1.311.60.2.1.3 jurisdictionOfIncorporationCountryName.
18
Cisco Expressway Certificate Creation and Use Deployment Guide
Appendix 1: Troubleshooting

Appendix 2: Certificate Generation Using OpenSSL Only
This section describes the process for generating a private key and certificate request for the Expressway using
OpenSSL. This is a generic process that relies only on the free OpenSSL package and not on any other software. It is
appropriate when certificates are required for interfacing with neighboring devices for test purposes, and for providing
output to interact with Certificate Authorities.
The output for the certificate request generation process can be given to a Certificate Authority which may be internal
or external to the organization, and which can be used to produce the X.509 certificates required by the Expressway
to authenticate itself with neighboring devices.
This section also briefly describes how OpenSSL could be used to manage a private Certificate Authority, but does
not intend to be comprehensive. Various components of these processes can be used when interfacing with third
party CAs.
OpenSSL and Mac OS X or Linux
OpenSSL is already installed on Mac OS X, and is usually installed on Linux.
OpenSSL and Windows
If you do not have OpenSSL already installed, this is available as a free download from
http://www.openssl.org/related/binaries.html.
Choose the relevant 32 bit or 64 bit OpenSSL - the ‘Light’ version is all that is needed.
If you receive a warning while installing OpenSSL that C++ files cannot be found, load the “Visual C++
Redistributables” also available on this site and then re-load the OpenSSL software.
Creating a Certificate Request Using OpenSSL
This process creates a private key and certificate request for the server that can then be validated by a CA. This could
be a CA that has been created and managed locally, or a third-party CA.
Note:
■ This method to create a CSR should only be used if you have a good knowledge of working with OpenSSL as
there is a potential for entering incorrect commands (especially with numerous SANentries). Missing relevant
SAN entries would require recreating the certificate at a later date.
■ From version X8.5.1 the user interface provides an option to set the Digest algorithm. The default is set to
SHA-256, with options to change to SHA-1, SHA-384, or SHA-512.
To generate the CSR from the command line with OpenSSL use these instructions:
1. SSH to the Expressway and log in as root.
2. Make a new directory to do the work in - mkdir /tmp/certtemp
3. Move in to this directory - cd /tmp/certtemp
4. Copy the Open SSL configuration file we use for CSR to this directory, as we need to edit it (Note: Keep the
dot at the end) - cp /etc/openssl/csrreq.cnf .
5. Open the file for editing – vi csrreq.cnf
6. Find the line “default_md = sha1” and edit it so that it reads “default_md = sha256”
7. Uncomment the line “# req_extensions = v3_req” by removing the # at the start of it
8. Make sure that the line “extendedKeyUsage=serverAuth, clientAuth” is present within the section [v3_req].
Cisco Systems, Inc. www.cisco.com
19

9. Find the line “subjectAltName = ${ENV::CSR_ALT_NAME}” and replace it such that it lists what you want in the
Subject Alternative Names in the certificate e.g. “subjectAltName =
DNS:peer1vcs.example.com,DNS:peer2vcs.example.com,DNS:ClusterFQDN.example.com”. Make sure you add all
the additional relevant entries. For MRA this may comprise:
a. Expressway E: DNS:<CM domain name>, DNS:<XMPP federation domain>, DNS:<federation chat alias 1>,
DNS:<federation chat alias 2>, etc.
b. Expressway C: DNS:<secure profile name 1>, DNS:<secure profile name 2>, etc.
10. Now save the file and exit.
11. Run the following OpenSSL command to generate a new CSR and Private key for the VCS “openssl req -
nodes -newkey rsa:4096 -keyout privatekey.pem -out myrequest.csr -config csrreq.cnf” changing the
rsa:nnnn if required. (nnnn = keylength, recommended number is 4096).
12. The console displays output similar to the following example, where you are required to enter information. You
do not need to populate all of them, but some fields are required:
— Country
— State and province
— Locality name
— Organization name
— Common name
— Email address - optional, can leave blank
— A challenge password - optional, can leave blank
— An optional company name - optional, can leave blank
Generating a 4096 bit RSA private key
............++
..................................................++
writing new private key to 'privatekey.pem'
-----
You are about to be asked to enter information that will be incorporated into your certificate
request.
What you are about to enter is what is called a Distinguished Name or a DN.
There are quite a few fields but you can leave some blank
For some fields there will be a default value,
If you enter '.', the field will be left blank.
-----
Country Name (2 letter code) [AU]:GB
State or Province Name (full name) [Some-State]:Berkshire
Locality Name (eg, city) []:Reading
Organization Name (eg, company) [Internet Widgits Pty Ltd]:Cisco
Organizational Unit Name (eg, section) []:CIBU
Common Name (eg, YOUR name) []:exp01.example.com
Email Address []:
When you have completed the fields, you will have two new files, myrequest.csr and privatekey.pem.
13. (Optional) If you want to validate the DNS entries have been entered correctly into the request, the
myrequest.csr file can be decoded using the command: openssl req –text –noout –in myrequest.csr
14. Submit the CSR to your chosen Certificate Authority, who will provide the public certificate.
20
Cisco Expressway Certificate Creation and Use Deployment Guide
Appendix 2: Certificate Generation Using OpenSSL Only

15. Upload the public certificate to the VCS via the Maintenance > Security certificates > Server certificate
webpage, “Select the server certificate file” entry box.
16. Upload the privatekey.pem to the VCS via the Maintenance > Security certificates > Server certificate
webpage, “Select the server private key file” entry box.
The privatekey.pem should be kept safe.
Operating as a Certificate Authority Using OpenSSL
A major deployment is likely to make use of a third-party certificate authority, or already have one internal to an
organization’s IT department. However, you can use OpenSSL to manage certificates in a private certificate authority
as outlined below.
If you have already configured OpenSSL to act as a CA, go to section Creating a Signed Certificate Using OpenSSL,
page 22.
Configuring OpenSSL to Act as a CA
OpenSSL is powerful software, and when operating as a CA, requires a number of directories and databases to be
configured for tracking issued certificates.
The list of directories and files can be found in the openssl configuration file under the section [ CA_default ]. By
default, the files/directories required to be created are:
■ A demoCA directory in the current directory, with 3 subdirectories certs, newcerts and private.
■ An empty file called index.txt in the demoCA directory.
■ A file called serial in the demoCA directory, storing a 2-digit number, such as “10”.
For example, use the commands:
mkdir demoCA
cd demoCA
mkdir certs
mkdir newcerts
mkdir private
touch index.txt
echo 10 > serial
Creating a Certificate Authority Using OpenSSL
This process creates a private key and certificate of a Certificate Authority (CA), which can then be used to validate
other certificates. Note that this will not be trusted by devices outside of those on which it is explicitly installed.
From a command prompt:
1. Ensure that you are in the demoCA directory.
2. For Windows: copy openssl.cfg from the directory where OpenSSL is installed to the demoCA directory and
rename it as openssl_local.cfg.
For Mac OS X: copy /System/Library/OpenSSL/openssl.cnf to the demoCA directory and rename it as
openssl_local.cfg.
21
Cisco Expressway Certificate Creation and Use Deployment Guide
Appendix 2: Certificate Generation Using OpenSSL Only

3. Use a text editor to edit the openssl_local.cfg file that was created by the above copy command. Make the
following modifications to the [CA_default] section:
a. Ensure that the linecopy_extensions = copydoes not have a # at the beginning of the line. Delete the # if
it is there. If the line remains commented out, it will strip attributes in the CSR and the SSL Server and SSL
Client attributes will not appear in the certificate.
b. Changepolicy = policy_matchtopolicy = policy_anything
c. Changedir = ./demoCAtodir = .
d. Optionally, changedefault_days = 365(1 year validity of the generated certificate) todefault_days =
3650(10 years, or choose another suitable value).
e. Save the file.
4. Generate a private key for the CA by running the following command:
openssl genrsa -aes256 -out private/cakey.pem 4096
This will prompt for a password with which to encrypt the private key: choose a strong password and record it
in a safe place. The cakey.pem file will be used to create the CA certificate and to sign other certificates and
must also be kept secure.
5. Generate the CA certificate by running the following command.
For Windows: openssl req -new -x509 –days 3650 -key private/cakey.pem -config openssl_local.cfg -sha1
-extensions v3_ca -out cacert.pem
For OS X: openssl req -new -x509 –days 3650 -key private/cakey.pem -config openssl_local.cfg -sha1 -
extensions v3_ca -out cacert.pem
6. Enter a passphrase for the key, and then enter the data requested, including:
— Country
— State or province
— Locality name
— Organization name
— Organizational unit
— Common name – this is typically the name of a contact person for this CA
— Email address – optional, can leave blank
After entering the requested data, the operation completes and the certificate authority certificate cacert.pem is now
available.
Creating a Signed Certificate Using OpenSSL
This process signs the server certificate with the generated CA key, using the previously generated certificate
request.
From a command prompt:
1. Ensure that you are in the demoCA directory.
2. Ensure that the certificate request file (certcsr.pem) is available:
— If the certificate request was created using the Expressway (recommended process):
Copy the file downloaded from the Expressway into the demoCA directory and rename it as certcsr.pem.
— If the certificate request was created using OpenSSL:
Copy the previously generated certificate request into the demoCA directory and then covert it to PEM
format by running the following command:
openssl req -in certcsr.der -inform DER -out certcsr.pem -outform PEM
22
Cisco Expressway Certificate Creation and Use Deployment Guide
Appendix 2: Certificate Generation Using OpenSSL Only

3. Generate a signed server certificate by running the following command:
openssl ca -config openssl_local.cfg -cert cacert.pem -keyfile private/cakey.pem -in certcsr.pem -out
certs/server.pem -md sha1
If you receive a "failed to update database TXT_DB error number 2" error message, you can remove the
contents of the index.txt file and then rerun the command.
4. You will be prompted to enter the password for the CA’s private key.
The signed certificate for the server is now available as demoCA/certs/server.pem.
Creating Self-Signed Certificates Using OpenSSL
We do not recommend creating self-signed certificates. They will not work in Unified Communications deployments.
Instead you should create a Certificate Authority using OpenSSL as described above.
23
Cisco Expressway Certificate Creation and Use Deployment Guide
Appendix 2: Certificate Generation Using OpenSSL Only

24
Cisco Expressway Certificate Creation and Use Deployment Guide

Appendix 3: Converting a DER Certificate File to PEM Format
A private key, root (CA) certificate and the server / client certificate can be generated using third-party tools (or
purchased from a certificate authority), and may be generated as PEM (required format, extension .pem) or DER
(extension .cer) format files.
Certificates must be in PEM format for use on the Expressway. Conversion from DER to PEM format can be done in
one of two ways, either using OpenSSL or Windows, as documented in the following sections.
Converting a DER certificate file to a PEM file using OpenSSL
To convert from DER to PEM format, on a system running openssl, execute the command:
openssl x509 -in <filename>.cer -inform DER -out <filename>.pem -outform PEM
Converting a DER certificate file to a PEM file using Microsoft Windows
To convert from DER to PEM format using Microsoft Windows:
1. Double click on the DER file to convert (this will likely have a ‘.cer’ extension).
Cisco Systems, Inc. www.cisco.com
25

2. Select the Details tab.
3. Click Copy to File…
4. On the Welcome page, click Next.
26
Cisco Expressway Certificate Creation and Use Deployment Guide
Appendix 3: Converting a DER Certificate File to PEM Format

5. Select Base-64 encoded X.509 (.CER) and click Next.
6. Click Browse and select required destination for file (e.g. server.pem) and then click Next.
7. Click Finish.
8. Change the filename from server.pem.cer to server.pem.
9. This will be used in the Loading Certificates and Keys Onto Expressway, page 12 section of this document.
27
Cisco Expressway Certificate Creation and Use Deployment Guide
Appendix 3: Converting a DER Certificate File to PEM Format

28
Cisco Expressway Certificate Creation and Use Deployment Guide

Appendix 4: Decoding Certificates
This section describes some methods for decoding and viewing the content of certificates.
OpenSSL
A PEM file (e.g. cert.pem) can be decoded by the following command:
openssl x509 -text -in cert.pem
A DER file (e.g. cert.cer) can be decoded by the following command:
openssl x509 -text –inform DER -in cert.cer
Firefox
The certificate in use for a website being visited can be viewed in Firefox by clicking on the security information
button on the address bar, and then clicking More Information followed by View Certificate.
Internet Explorer
The certificate in use for a website being visited can be viewed in Internet Explorer by clicking the lock icon to the
right of the address bar. A Website Identification dialog will appear. Click the View Certificates link at the bottom.
Cisco Systems, Inc. www.cisco.com
29

30
Cisco Expressway Certificate Creation and Use Deployment Guide

Appendix 5: Enable ADCSto Issue "Client and Server" Certificates
Note:The CAcomponent of Microsoft Active Directory Certificate Services (ADCS) must be able to issue a certificate
that can be used for authentication of the Expressway as client or server.
ADCSin Windows Server 2008 Standard R2 (and later) can issue these types of certificates, if you create a
certificate template for them. Earlier versions of Windows Server Standard Edition are not suitable.
The default "Web Server" certificate template in ADCS creates a certificate for Server Authentication. The server
certificate for the Expressway also needs Client Authentication if you want to configure a neighbor or traversal zone
with mutual authentication (where TLS verify mode is enabled).
To set up a certificate template with both Server and Client authentication:
1. In Windows, launch Server Manager (Start > Administrative Tools > Server Manager).
(Server Manager is a feature included with server editions of Windows.)
2. Expand the Server Manager navigation tree to Roles > Active Directory Certificate Services > Certificate
Templates (<domain>).
3. Right-click on Web Server and select Duplicate Template.
4. Select Windows Server 2003 Enterprise and click OK.
Cisco Systems, Inc. www.cisco.com
31

5. On the General tab, enter the Template display name and Template name, for example Web client and
server and Webclientandserver.
6. On the Extensions tab, select Application Policies and click Edit.
32
Cisco Expressway Certificate Creation and Use Deployment Guide
Appendix 5: Enable ADCSto Issue "Client and Server" Certificates

7. Add Client Authentication to the set of application policies:
a. Click Add.
b. Select Client Authentication and click OK.
c. Click OK.
8. Click OK to complete the addition of the new template.
33
Cisco Expressway Certificate Creation and Use Deployment Guide
Appendix 5: Enable ADCSto Issue "Client and Server" Certificates

9. Add the new template to the Certificate Authority:
a. Go to Roles > Active Directory Certificate Services ><your certificate authority>.
b. Right-click on Certificate Templates and select New > Certificate Template to Issue.
c. Select your new Web client and server template and click OK.
The new Web client and server template can now be used when submitting a certificate request to that Microsoft
Certification Authority.
34
Cisco Expressway Certificate Creation and Use Deployment Guide
Appendix 5: Enable ADCSto Issue "Client and Server" Certificates

Cisco Legal Information
THE SPECIFICATIONS AND INFORMATION REGARDING THE PRODUCTS IN THIS MANUAL ARE SUBJECT TO CHANGE
WITHOUT NOTICE. ALL STATEMENTS, INFORMATION, AND RECOMMENDATIONS IN THIS MANUAL ARE BELIEVED
TO BE ACCURATE BUT ARE PRESENTED WITHOUT WARRANTY OF ANY KIND, EXPRESS OR IMPLIED. USERS MUST
TAKE FULL RESPONSIBILITY FOR THEIR APPLICATION OF ANY PRODUCTS.
THE SOFTWARE LICENSE AND LIMITED WARRANTY FOR THE ACCOMPANYING PRODUCT ARE SET FORTH IN THE
INFORMATION PACKET THAT SHIPPED WITH THE PRODUCT AND ARE INCORPORATED HEREIN BY THIS
REFERENCE. IF YOU ARE UNABLE TO LOCATE THE SOFTWARE LICENSE OR LIMITED WARRANTY, CONTACT YOUR
CISCO REPRESENTATIVE FOR A COPY.
The Cisco implementation of TCP header compression is an adaptation of a program developed by the University of
California, Berkeley (UCB) as part of UCB’s public domain version of the UNIX operating system. All rights reserved.
Copyright © 1981, Regents of the University of California.
NOTWITHSTANDING ANY OTHER WARRANTY HEREIN, ALL DOCUMENT FILES AND SOFTWARE OF THESE
SUPPLIERS ARE PROVIDED “AS IS” WITH ALL FAULTS. CISCO AND THE ABOVE-NAMED SUPPLIERS DISCLAIM ALL
WARRANTIES, EXPRESSED OR IMPLIED, INCLUDING, WITHOUT LIMITATION, THOSE OF MERCHANTABILITY,
FITNESS FOR A PARTICULAR PURPOSE AND NONINFRINGEMENT OR ARISING FROM A COURSE OF DEALING,
USAGE, OR TRADE PRACTICE.
IN NO EVENT SHALL CISCO OR ITS SUPPLIERS BE LIABLE FOR ANY INDIRECT, SPECIAL, CONSEQUENTIAL, OR
INCIDENTAL DAMAGES, INCLUDING, WITHOUT LIMITATION, LOST PROFITS OR LOSS OR DAMAGE TO DATA
ARISING OUT OF THE USE OR INABILITY TO USE THIS MANUAL, EVEN IF CISCO OR ITS SUPPLIERS HAVE BEEN
ADVISED OF THE POSSIBILITY OF SUCH DAMAGES.
Any Internet Protocol (IP) addresses and phone numbers used in this document are not intended to be actual
addresses and phone numbers. Any examples, command display output, network topology diagrams, and other
figures included in the document are shown for illustrative purposes only. Any use of actual IP addresses or phone
numbers in illustrative content is unintentional and coincidental.
All printed copies and duplicate soft copies are considered un-Controlled copies and the original on-line version
should be referred to for latest version.
Cisco has more than 200 offices worldwide. Addresses, phone numbers, and fax numbers are listed on the Cisco
website at www.cisco.com/go/offices.
© 2016 Cisco Systems, Inc. All rights reserved.
Cisco Trademark
Cisco and the Cisco logo are trademarks or registered trademarks of Cisco and/or its affiliates in the U.S. and other
countries. To view a list of Cisco trademarks, go to this URL: www.cisco.com/go/trademarks. Third-party trademarks
mentioned are the property of their respective owners. The use of the word partner does not imply a partnership
relationship between Cisco and any other company. (1110R)
Cisco Systems, Inc. www.cisco.com
35

36
Cisco Expressway Certificate Creation and Use Deployment Guide
